


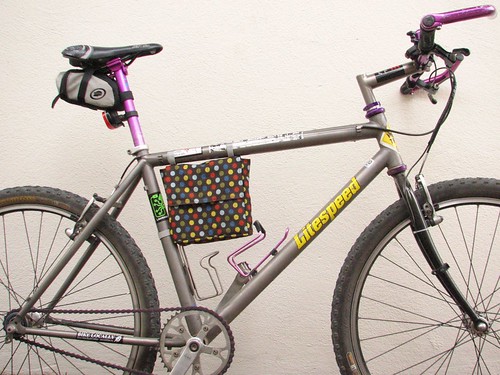
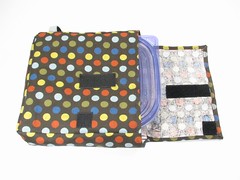
You’re headed somewhere on your bike and you want to bring your lunch along. Maybe you’re commuting or just headed to the park. Backpacks get warm, so you’d rather not wear one, and you don’t have a rack on your bike to pack your lunch on. Here’s a solution: a bike frame lunch bag you can make that will perfectly hold a box of leftovers or a sandwich. This one is designed for a standard “entree” sized plastic container, which is reasonably waterproof and acts as a structural integrity field for your sandwich.

The bag is made from three pieces of fabric: an 8″ x 8″ square, an 8″ x 13″ rectangle, and a 3″ x 22″ strip. Canvas (shown here) is a nice material to use, but any sturdy fabric like oilcloth or vinyl would work as well. Seam allowances are 1/2″ throughout, so the finished dimensions are about 7″ x 7″ x 2″. You can adapt the pattern to fit your preferred leftover box or sandwich bread. Also needed is velcro, but more on that later.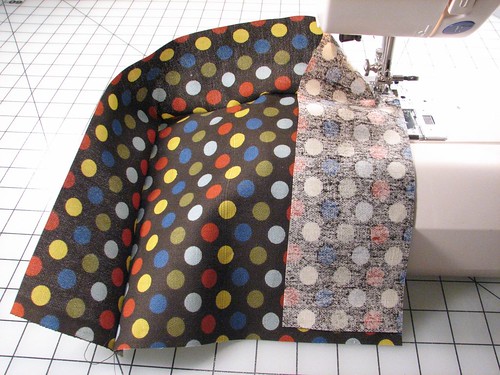
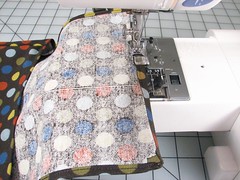
The first step is to sew the strip around the outside of the front of the bag. Put your sewing machine needle down and pivot at the corners to turn the strip and the square in the next direction.
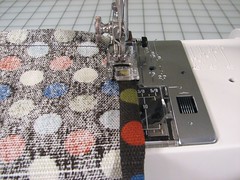
Fold over 1/4″ and 1/4″ again across the top of the front and the top of the sides of the bag to form a rolled hem and sew it down. This canvas held a finger crease well, which made the rolled hem fairly easy.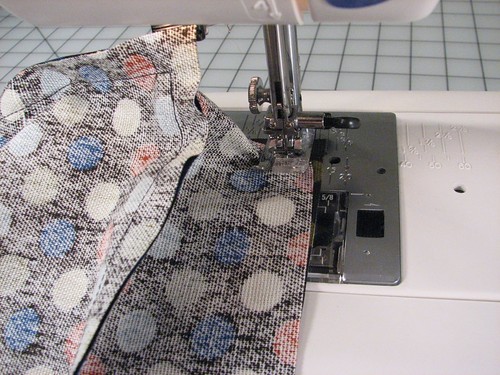
Sew the back on, rotating at the corners again.
Next, hem your flap. If you fold in the tips of the corners before rolling the sides, you can form a neat point.
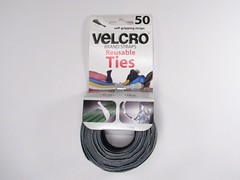

It’s velcro time! Velcro cable ties can be found at hardware and electronic stores and are the perfect thing for mounting the bag to the bike. They have an ultra-thin profile and are extremely easy to sew to. The loop side is soft like felt and the hook side feels remarkably smooth, but when stuck back onto itself, it holds extremely well. They’re thin enough not to interfere with the cabling on your bicycle.
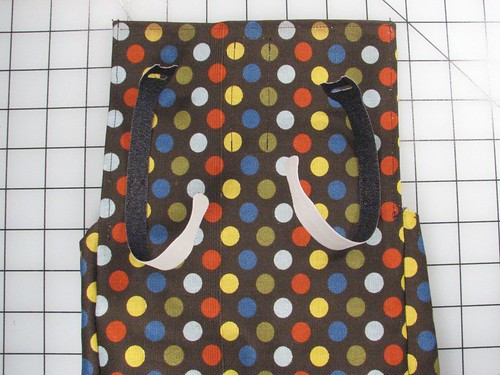
Sew two straps to the top of the flap to use for connecting to the top tube of your bike.
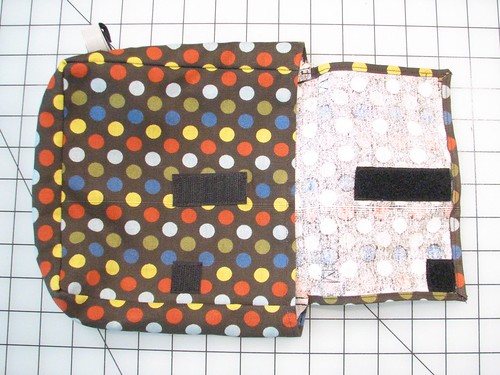
Sew one more strap to the bottom of one of the sides to connect to the seat tube. You can see the rectangles of stitches where the top ones are sewn on here. Also sew some additional velcro (conventional velcro will work fine) onto the front and flap to keep the flap closed. You won’t figure this out until you get going fast, but you’ll want that extra little bit on the side of the flap that points to the front of the bicycle to keep it from flapping as you zoom along.
Slide your lunch in, strap the bag on and you’re ready to go!

That’s some nice use of evil polka-dot fabric, right there.
Now, if the made one for the meals ready to eat with the heater pack in it thaat would be great! Hot meals to go…I guess it could be easily modified.
<br>
Jamil
<br>
Jamil’s favorite site of the day is:<a href="http:\\corkscrewtradingcompany.com"> – Corkscrew Trading Company – </a>Stories of a Powerball winner who sails the Caribbean and hosts wild beach parties.
I took the idea of heating the bag *see above post* and modified it using a slightly larger design and stitching pockets to the inside for those little gel ice packs. Admitadly it can only last so long, or get so hot, but at least it keeps it hotter longer. Still working on a design for heating it up.
This is such an ace idea.
And cute too. :)
Found this via aroundthesunblog.com.
Awesome!
Would hold all sorts of stuff you might want to bring along on a bike ride but not want to stuff in a backpack.
Thanks for the easy, brilliant pattern!
jeneraldisarray in PDX
. . . Too bad my female mountain bike frame has a drop bar. No lunch for me. :-(
You could have the bag sit on top of the bar – just put the velcro on the bottom of the bag instead of on the flap. I think you’d have to have a rigid box in it or line it with a rigid material, but it could work!
I’ve been looking for a bike bag to fit under the top tube, but it never occurred to me to make one! BTW, is that your Lightspeed? Nice! jan (http://www.snippetygibbet.blogspot.com)
You mean the one with the Evil Mad Scientist, Laughing Squid and Flaming Lotus Girls stickers? (You can’t see the Don’t Fear Art, OBRE and got robots? stickers from this side.) Um, yeah, it’s mine. I guess I need to label it better so you can tell more easily.
This can also be made for people who use walkers!
awesome idea! i love to sew and my boyfriend loves to bike, christmas present!
If you add a piece of cardboard on the bottom of the inside it makes the bag a little more structurally sound. Otherwise this project was pretty easy and a really good idea. Thanks!
Wow! This weekend my husband and I were brainstorming how to add a bag of some sort to my mother-in-law’s wheelchair. Here it is! Thank you!
What a great tutorial… . Thanks!
What a great idea for bikers. My boss does triathalons. What a great gift for him. Thanks, I whipped it up in no time. I added a pocket to the inside and put a sandwich rubermaide holder inside.
This is great. I’m posting about it at Dollar Store Crafts tomorrow (http://dollarstorecrafts.com/2010/01/bicycle-lunch-bag/)
What a great idea!!
I also added this to my site today, http://www.cheepideas.com and you can grab an "I’ve been featured" badge if you’d like.
Thanks for the great idea!!
you could use a thermal insulated lining like that of a oven mitt….that would keep meals warmer
We posted a link to this awesome tutorial at WeAllSew.com, and now we’d also like to share your project photo along with the link for our readers. If you’d rather that we didn’t also use your photo, please let me know – thanks! -Erika erikalynn [at] onemain [dot] com
Try putting it on the handel bars
that’s what i’m gonna do!
Regarding heating up the lunch: How about those foot and hand warmers hunters/hikers use?