


The conic sections are the four classic geometric curves that can occur at the intersection between a cone and a plane: the circle, ellipse, parabola, and hyperbola.
The scone is a classic single-serving quick bread that is often served with breakfast or tea.
And, at the intersection of the two, we present something entirely new, delightfully educational, and remarkably tasty: Sconic Sections.

In what follows, we’ll show you how to bake cone-shaped scones, to slice them into plane geometric curves, and to highlight those curves by selective application of toppings. We’ll also discuss some of the methods that didn’t work so well, as we refined our methods for making these.
Onwards, towards parabolic preserves and hyperbolic Nutella!
Constructing your Cones
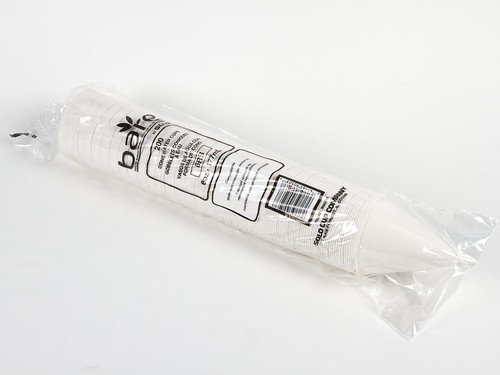
The key to this recipe is creating cone-shaped scones, and the method is to use conical water cooler cups as baking wrappers. We got this idea from the Partiologist, who used them for snow cone cupcakes. These ones are by Solo and they’re available at restaurant supply stores. Since they haven’t been treated with a non-stick coating, she also suggested spraying them with a bit of non-stick cooking oil. You will also need mason jars to steady the cones while they bake, or one of several substitutes that we’ll discuss later.
We tried simply rolling the dough into a free standing cone and baking it like you would normally do with a scone. However, the shape distorted and tore during baking, in the way that scones normally split when they rise. If cone-shaped muffin tins were available, those would probably be a great solution. Although we will use the paper cups in our recipe, it may also be possible to use Silicone Snow Cone Cups if they are rated for baking temperatures.
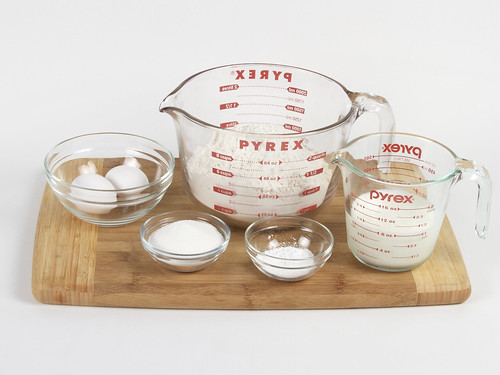
The first step is to make scone dough. You can use any standard scone recipe— or use ours based on a recipe from Paul Hollywood’s 100 Great Breads. Preheat the oven to 425° F. Mix the following ingredients in a bowl:
- 4 cups flour
- 1/3 cup sugar
- 4 1/2 teaspons baking powder
- 2 eggs, beaten
- 3/4 stick of butter, softened
- 1 cup milk
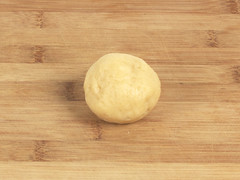

Pull off a golf-ball sized piece of dough and roll it into a smooth ball. Roll the ball into a steep point. You want it to be a sharper angle than the walls of the paper cone, so that the point will make it as far into the cone as possible.
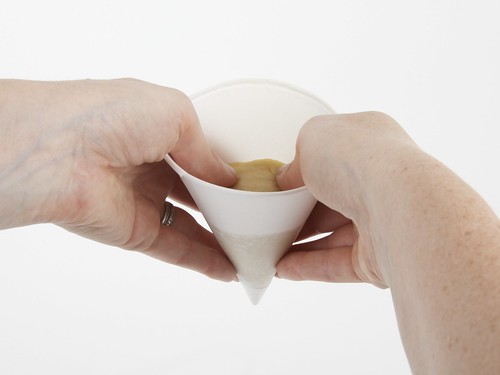
Spray the inside of the cone with the non-stick cooking spray. Press the dough into the paper cone until the top surface is flat. The dough should come about half-way up a six ounce cone.
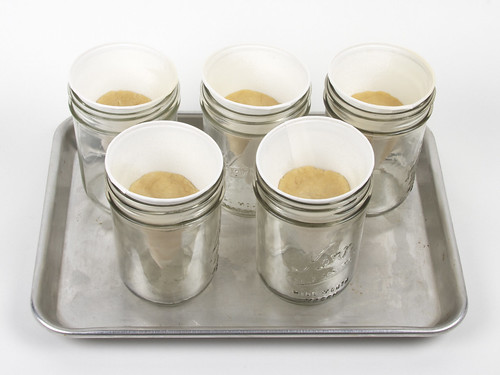
Place the cone in a wide mouth pint canning jar to hold it upright during baking. Putting the jars on a baking sheet makes putting them in the oven much easier.
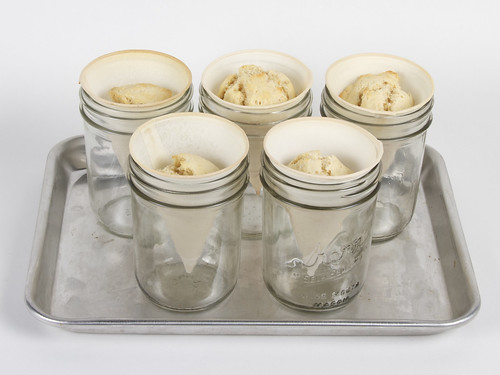
Bake for about 17 minutes— until the tops just begin to brown. The scones should be domed on top when they’re done, and the paper may be browned as well.
Allow the scones to fully cool, and remember the first rule of laboratory work: hot glass looks exactly the same as cold glass.
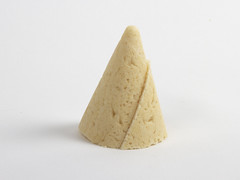
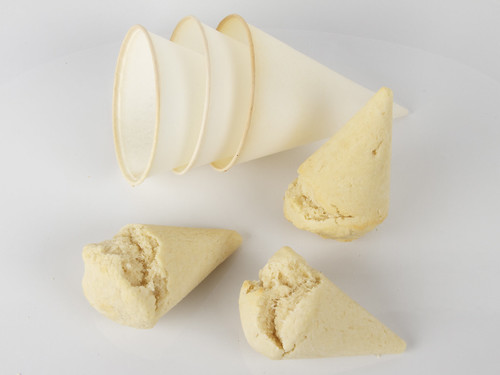
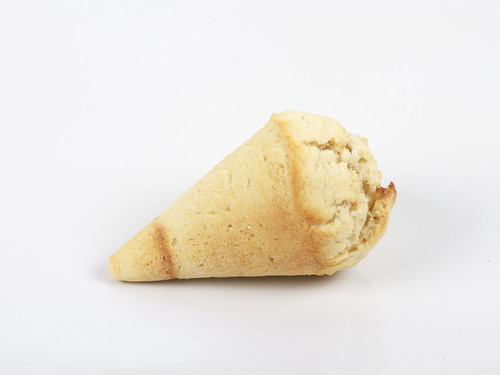
The scones should slide easily out of the paper cones leaving an ice cream cone shaped scone with a smooth cone and rough bulbous base.
Aside: do you need the non-stick spray?
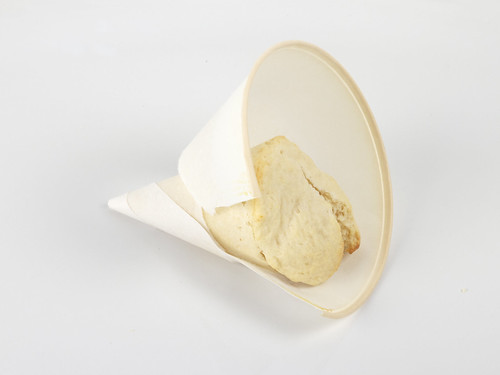
We wondered how necessary the non-stick spray actually was. When cooked without the spray, the paper cone had to be peeled off of the scone, similar to what you get with a cupcake wrapper. Peeling it off left an uneven surface texture instead of a smooth cone shape. The point of the cone usually broke off in the process as well. The spray also made it easier to press the dough into the cone, so it was an all-around win.
Aside: Why mason jars?
When baking conical things, there are many possible methods for holding the cone upright. We tried using a jalapeno grill rack. We found that it left a dark ring where the metal of the rack transferred more heat to the scone, browning it selectively there. Bakers of snow-cone cupcakes have also reported using tin cans, muffin tins filled with dried beans, wire ice cream cone holders, and even a dedicated ice cream cone cupcake baking rack (available on amazon). We found that the wide mouth pint jar was the perfect height and diameter to hold the lip of the cone. The glass insulates the scones as well, decreasing the amount of browning, especially at the narrow tip. It gave a very even surface appearance to the cone. If you used the smaller four ounce cones, you should be able to use regular canning jars instead of wide mouth for holding them during baking.
Aside: Why not just flip it over?
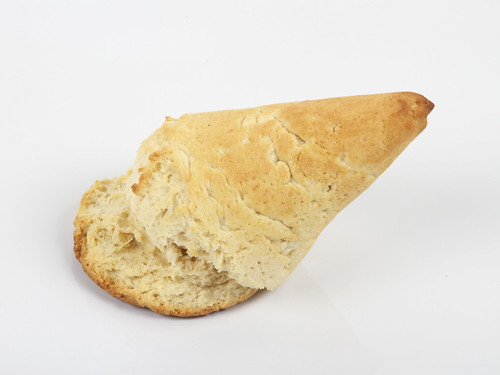
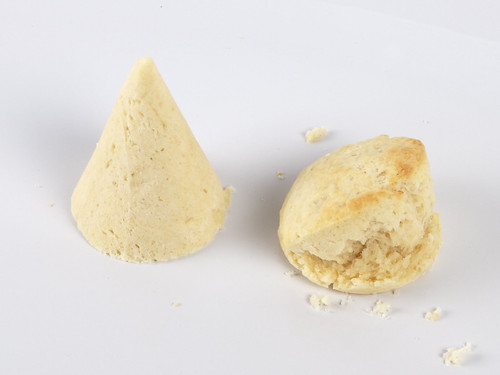
We tried filling the entire paper cone with dough and baking it upside down. This led to needing a much longer baking time and created a more browned surface. Note that the narrow part of the scone is much, much darker. The scone also rose significantly, but not straight, leading to the splatted ice cream cone shape above, somewhat reminiscent of a clown cone.
Aside: Can we defeat the bulbous end?
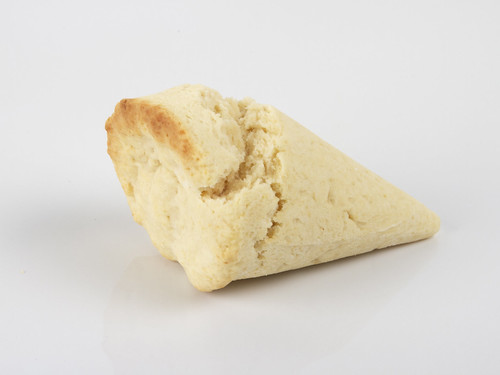
Since the smaller scones baked upright in jars were coming out with a domed top, we wondered if pushing the dough up the edge of the cone to form an indentation prior to baking would counteract that, leading to a larger cone to work with. It turned out that the thin sections around the edge cooked more quickly, and as the rest of the scone expanded, the more cooked ring split off at an angle. It didn’t provide any more smooth cone volume in the final product, so reshaping the top was not worth the effort.
Final aside: Eggwashing & browned bottoms
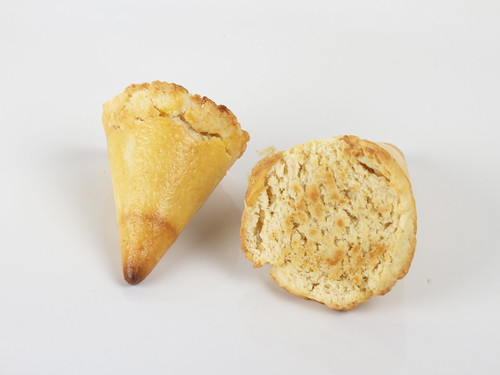
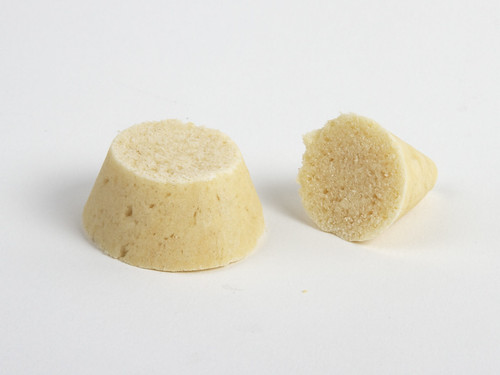
We like eggwashed scones, so we also tried out a glazed finish, which turned out very well on some of our trial subjects. After baking, slice the dome off of the scone, then place on a baking pan lined with parchment and brush with beaten egg. Return to the 425° F oven for a few minutes. The circular base will get nice and toasty, and the surface of the cone will have a glossy sheen.
(The dark ring one quarter of the way up on the left-hand scone is from baking this one in the jalapeno grill rack.)
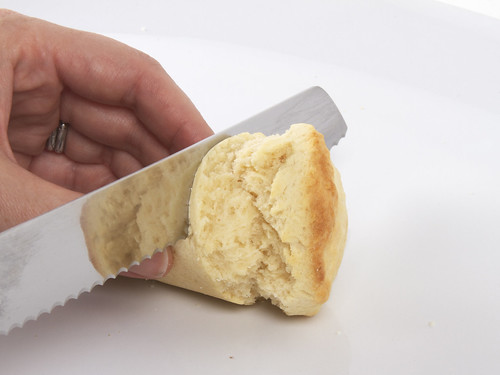
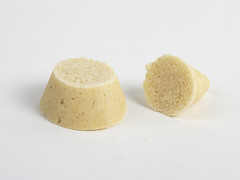
Now that we’ve figured out the best way to get a uniform cone baked, the next step is to cut the bulbous dome off of all of our scone cones with a bread knife. Take great care to cut exactly horizontally through the cone so as to leave a circular base.
Now we have two parts: a nearly perfect cone (for sectioning) and a nearly perfect scone (for eating). The domed scone tops aren’t useful for geometry, but still taste just as good.
Pro-tip: microwave your scones for about 10 seconds prior to serving to restore an oven-fresh temperature and texture.

Sectioning the scones
Now that your scone cones are ready, it’s time to section them.
A circle is the most obvious cut— in fact, you’ve already done it when taking off the top. Slice parallel to the base.

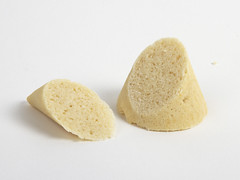
The ellipse is cut at a steeper angle, but still forms a closed curve.

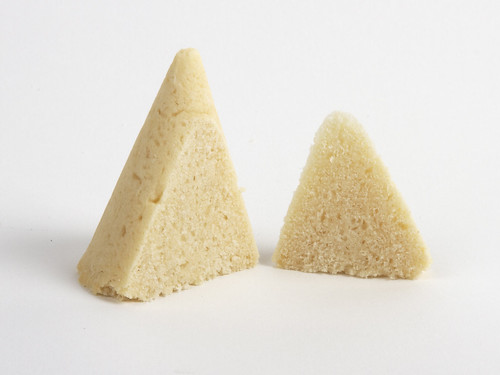
The parabola is cut parallel to the edge of the cone. When the larger portion of the parabolically cut cone is lying down, the cut surface will be parallel to the plate.

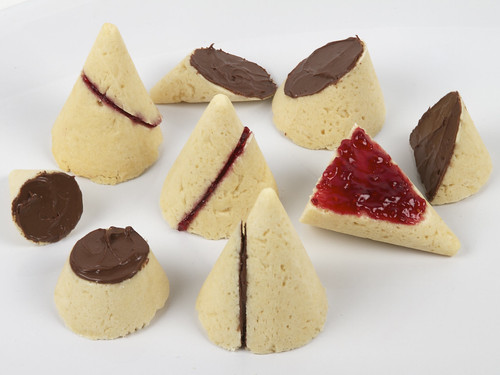
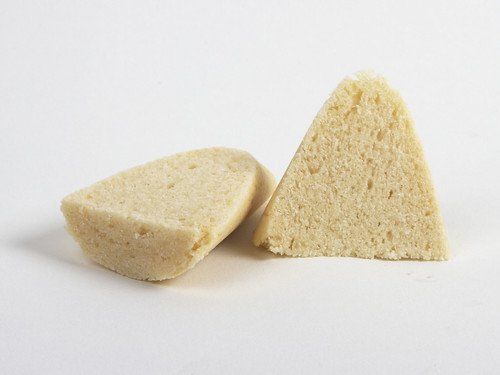
The easiest (and most iconic) hyperbola is cut vertically. Once the pieces are moved apart, you can see the outline of the hyperbola clearly.
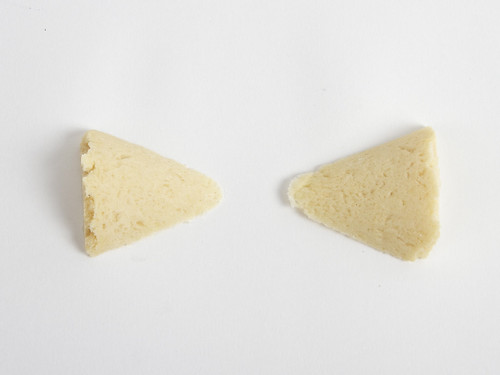
There are really two parts to a hyperbola, where a plane intersects a double cone. To illustrate this, cut identical sections from two cones and arrange them so that their asymptotes coincide.
Highlighting the curves

To highlight the shapes even further, you can color in the cut surfaces with your favorite scone topping. Here, raspberry preserves show off a hyperbolic cut.
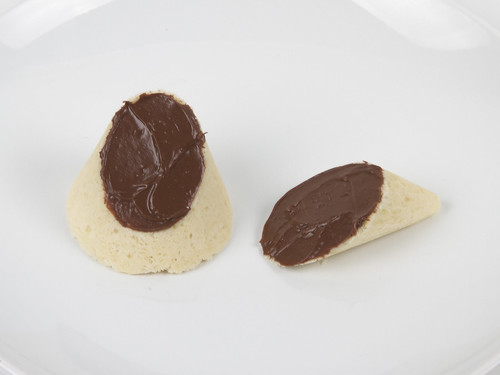
Nutella is another tasty choice, if a bit eccentric.

You can make a complete set of all four sconic sections: circle, ellipse, parabola and hyperbola. The jam shows off the edges of the sections as clearly as a textbook diagram.
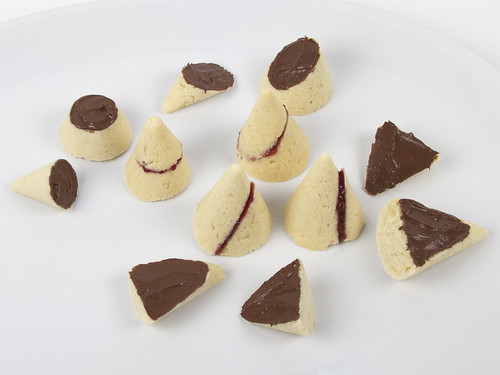
Suggested serving size: one set of four pieces. Serve in an open or closed geometry.
If you liked this project you may also enjoy:

Fantastic, edible mathematics :)
Just on Sunday I found out about a book by Albrecht Dürer from 1525 (http://commons.wikimedia.org/wiki/Category:Underweysung_der_Messung) that also has a bit about the conic sections from Page 34 on.
Beautiful; thank you!
I cannot express how this delights me. Not only do I love to cook, but I can finally feel like math is doing some real good in my life. I did OK up to calculus, and then everything went to Hell in a handbasket – so I ended up as a linguist instead of a doctor.
sin q
—— very much!
cos q
Love this! We are so doing this when my son gets to conic sections in school!
Wow. This is going to make for a great tea party. I will have to be sure to invite you.
I wish my math teacher would have taken the time to explain this to the class in this way. It would have taken all but 10 minutes. Instead she chose to bombard us with formulas which I struggled to remember how to apply without having the slightest idea of what I was doing, or even why would someone call an ellipsis a conic. I just couldn’t see it.
It’s only several years later that I finally understood.
I am the one teaching now, and I will never forget this particular teacher, and these miserable times. Your sconics are a perfect example of what can be done to help teach complex matters in a fun way. Thank you!
Awesome! I just read about this on NPR and had to check it out. I will definitely be doing this project with my son!! Mmm. Scones.
Can’t wait to explore the rest of your site!!!
love this idea – I’ve got huge ones of folded, curved poster board, but my students always love hands-on ( I do food chemistry in another course. )
I totally cheated, and just bought scone mix, then baked it in ice cream cones. It was still possible to make sconic sections, but not nearly as nice as your results. Thank you for the idea!