Category Archives: Play with your food

Halloween Project Archive

Array of Halloween Projects

This year’s Halloween may be a little different from years past. But maybe you’re doing a Zoom costume contest? Want some spooky snacks? Or want to get in the mood with seasonal decor? Is it not Halloween for you if there isn’t pumpkin carving? Head over to the Halloween Project Archives for inspiration and ideas.

Halloween is one of our favorite holidays, and … we’ve organized dozens of our Halloween projects into categories: costumespumpkinsdecor and food.

Lemon Plum Jam Revisited

Jars of jam

It has been a great season for plums, so I’ve updated the lemon plum jam recipe that I’ve been gradually refining over the years. The new basic recipe is below along with other tips I’ve gathered.

Ingredients:

  • 8 cups cut up pieces of plums, pits removed, skins left on, fresh or frozen
  • 3 lemons, (optionally peeled) cut into small pieces, seeds removed
  • juice from 3 more lemons
  • 6 cups sugar

Lemon and plum pieces in a pot

Procedure:

Put the plums, lemon pieces and lemon juice in a sauce pot and cook, stirring occasionally, until the fruit starts to soften. At this point, you can use a potato masher to crush the fruit pieces for a more even consistency.

Holding potato masher above fruit cooking in pot

Add sugar and cook, stirring regularly, until it thickens. You can test the consistency for doneness by putting a spoonful in a cold dish in the fridge for a few minutes. After chilling, it’s ready if it holds its shape a bit when you move a spoon or finger through it. You can also follow your favorite canning procedure for longer term storage. Makes about 4-5 pints.

Tips and techniques:

For cutting up the fruit, I like to put a small cutting board inside a baking sheet. This catches the juice much better than any cutting board with a moat that I’ve ever used. It makes cleanup much easier, and you can pour the juice from the baking sheet into the cooking pot.

Most jam recipes call for approximately equal quantities of sugar and fruit. I prefer my jam a little more tart, so I’ve revised down the sugar.

I’ve stopped adding water to my preserves. It cooks a little faster without as much liquid, and there’s enough liquid in the lemon juice to get it started cooking even if the fruit isn’t covered.

I also often leave the lemon peel out for the preserves I make (other than marmalade). The peel gives it a stronger lemon flavor, but keeps the jam from gelling as well. If you want a thicker consistency that gels a little earlier, you can leave the peel out. If you want zingier lemon flavor, leave the peel on and cook a little longer.

During fruit season, I try to preserve as much as I can by making jams and chutneys, but I usually run out of time and end up cutting up the last of the crop and freezing it. Using frozen fruit for jams seems to work just as well as fresh. I measure out 8 cups and store it in a one gallon freezer bag. Then it’s ready to pull out start a batch of jam. I also recently revised my Plum Chutney recipe, and it starts with 8 cups of fruit as well.

Halloween Project Archive

Array of Halloween Projects

Looking for inspiration for your Halloween projects? Need ideas for snacks, costumes or decor? Not sure what to do with your pumpkins this year? Head over to the Halloween Project Archives for a list of our projects over the years.

Halloween is one of our favorite holidays, and … we’ve organized dozens of our Halloween projects into categories: costumespumpkinsdecor and food.

Spicy Plum Chutney

Jars of chutney

I’ve been using my Plum Chutney recipe for years and enjoying every batch. Our own plum tree is now mature and producing lots of wonderful fruit each year, so I have had many opportunities to reproduce and refine my recipe. Here’s my new spicier recipe, with notes below on ingredient changes and other tips I’ve learned over the years.

Ingredients:

  • 8 cups cut up pieces of plums, pits removed, skins left on, fresh or frozen
  • 3 lemons, (optionally peeled) cut into small pieces, seeds removed
  • juice from 3 more lemons
  • 1/4 cup fresh ginger, peeled and grated (a microplane works great) or cut into matchsticks
  • 2 Tbsp cumin seeds
  • 2 sticks of cinnamon
  • 1 tsp cayenne pepper
  • 1 tsp garam masala
  • 1/4 tsp salt
  • 4 cups sugar (granulated or brown)

Throw everything except the sugar in a sauce pot and cook, stirring occasionally, until the fruit starts to soften. Add sugar and cook, stirring regularly, until it thickens to a consistency you like. You can test the consistency by putting a spoonful in a cold dish in the fridge for a few minutes. Remove cinnamon sticks after cooking. You can also follow your favorite canning procedure for longer term storage. Makes about 3-4 pints.

Fruit and spices in pot

We’ve tended toward more flavor intensity in our cooking over time, and I’ve settled on a version with twice as much spice as before. Sometimes I’ll cut the some or all of the ginger into matchsticks instead of grating it, which results in little bursts of ginger flavor when you’re eating the chutney. If you like that, by all means, use matchsticks! For a more even flavor or consistency, stick to using the microplane. I added a small amount of salt, which makes all of the flavors shine just a little bit more.

I’ve stopped adding water to my preserves. It cooks a little faster without as much liquid, and there’s enough liquid in the lemon juice to get it started cooking even if the fruit isn’t covered. I’ve also started removing the lemon peel for most of the preserves I make other than marmalade. The peel gives it a stronger lemon flavor, and keeps the pectin in the pith from gelling from as well. If you want a thicker consistency, you can leave the peel out. If you want zingier lemon flavor, leave it on.

Using potato masher to crush fruit pieces

One other consistency related tip: if I want a less chunky consistency, I use a potato masher to crush the fruit pieces early in the cooking. During fruit season, I try to preserve as much as I can by making jams and chutneys, but I usually run out of time and end up cutting up the last of the crop and freezing it. Using frozen fruit for jams seems to work just as well as fresh. The other thing I usually run out of is sugar, because I often forget how much it takes to make preserves, so I started using brown and granulated interchangeably in the chutney. I even used palm sugar once! Which sugar you use doesn’t seem to affect the flavor significantly, so use whichever you have on hand.

Astronomy Cookies

Galaxy, globular cluster and nebula cookies

We love any excuse to create science themed food, and we had a blast brainstorming our contribution to “Astro-Gastro” contest at the annual member meeting at the Fremont Peak Observatory. We settled on some of the things we love to show visitors to the observatory: Galaxies, globular clusters, and nebulas.

Cinnamon Pinwheel Galaxy

Cinnamon Pinwheel Galaxies are inspired by palmiers. They are made with puff pastry that is coated in cinnamon sugar and rolled up, sliced and baked. The recipe is identical to palmiers except that you first fold the pastry over itself a little further than halfway, and then roll up from the folded edge to create the spiral pattern that shows when you slice them.

Globular Cluster Cookie

Chocolate Globular Clusters start with the same chocolate graham crackers we used for our Edible Asteroids project.

We iced them with a chocolate icing derived from a recipe for Black And White cookies from Baking Illustrated. Melt 2 oz unsweetened chocolate in double boiler. Bring 2 Tbsp light caro syrup and 3.5 Tbsp water to a boil in small saucepan. Remove from heat and stir in 2.5 cups powdered sugar and 1/4 tsp vanilla. Stir icing into chocolate in the double boiler. You may need to reheat the chocolate icing in the double boiler to keep it at a good consistency for spreading.

Immediately after spreading the icing on a cookie, very slightly moisten the top of the icing with water. You can either dip a finger in a dish of water and smooth a bit over the surface of the icing or use a water mister to give it a very light spritz. The water on the surface will make it sticky enough for the sprinkles to adhere to. Drop small white non pareil sprinkles over the center of the cookie. We used a small funnel held over center of the cookie, to create a dense cluster in the middle, and fewer and fewer as you reach the edges.

Meringue nebulas

For the Meringue Nebulae, we divided a batch of meringue into two, and colored half of it with black food coloring. The other half we split again and colored with red and blue respectively, stopping before it was fully mixed in to allow for some color variation. We spread the blue meringue along one side of a piping bag, and red along the other. Then we filled the middle with the grey. We piped the mixture out with a #12 icing tip in a wavy, uneven fashion. Using two different sizes of non pareil sprinkles made it look like there were stars of different brightness in our nebulae.

Meringue Nebula closeup

Other astronomers brought moon rock smores, almond asteroid cookies, and an Orion constellation cake. We’re tickled that the Cinnamon Pinwheel Galaxy won the contest against such fun competition.

Coffee tools

Not long ago, I posted about roasting coffee. As a follow up, I’d like to share about the various coffee tools we use. I talked about some of these tools when I was a guest on Kevin Kelly’s Cool Tools podcast. We’ve learned about some of them from other Cool Tools posts and a variety of other sources, including Sweet Maria’s. I’ve included links for items I have sources for, but some items are relatively generic or from brick and mortar shops. I’ve sorted them into Roasting, Espresso, Home, and Travel sections below.

Note that these are not necessarily recommendations for everyone: they are what work for us. We have a pretty committed relationship with our coffee, and we understand that each coffee lover will have their own preferences and methods. Just because we do it one way doesn’t mean that we think the way you are doing it is wrong. Feel free to share your favorite tools in the comments!

—Roasting—

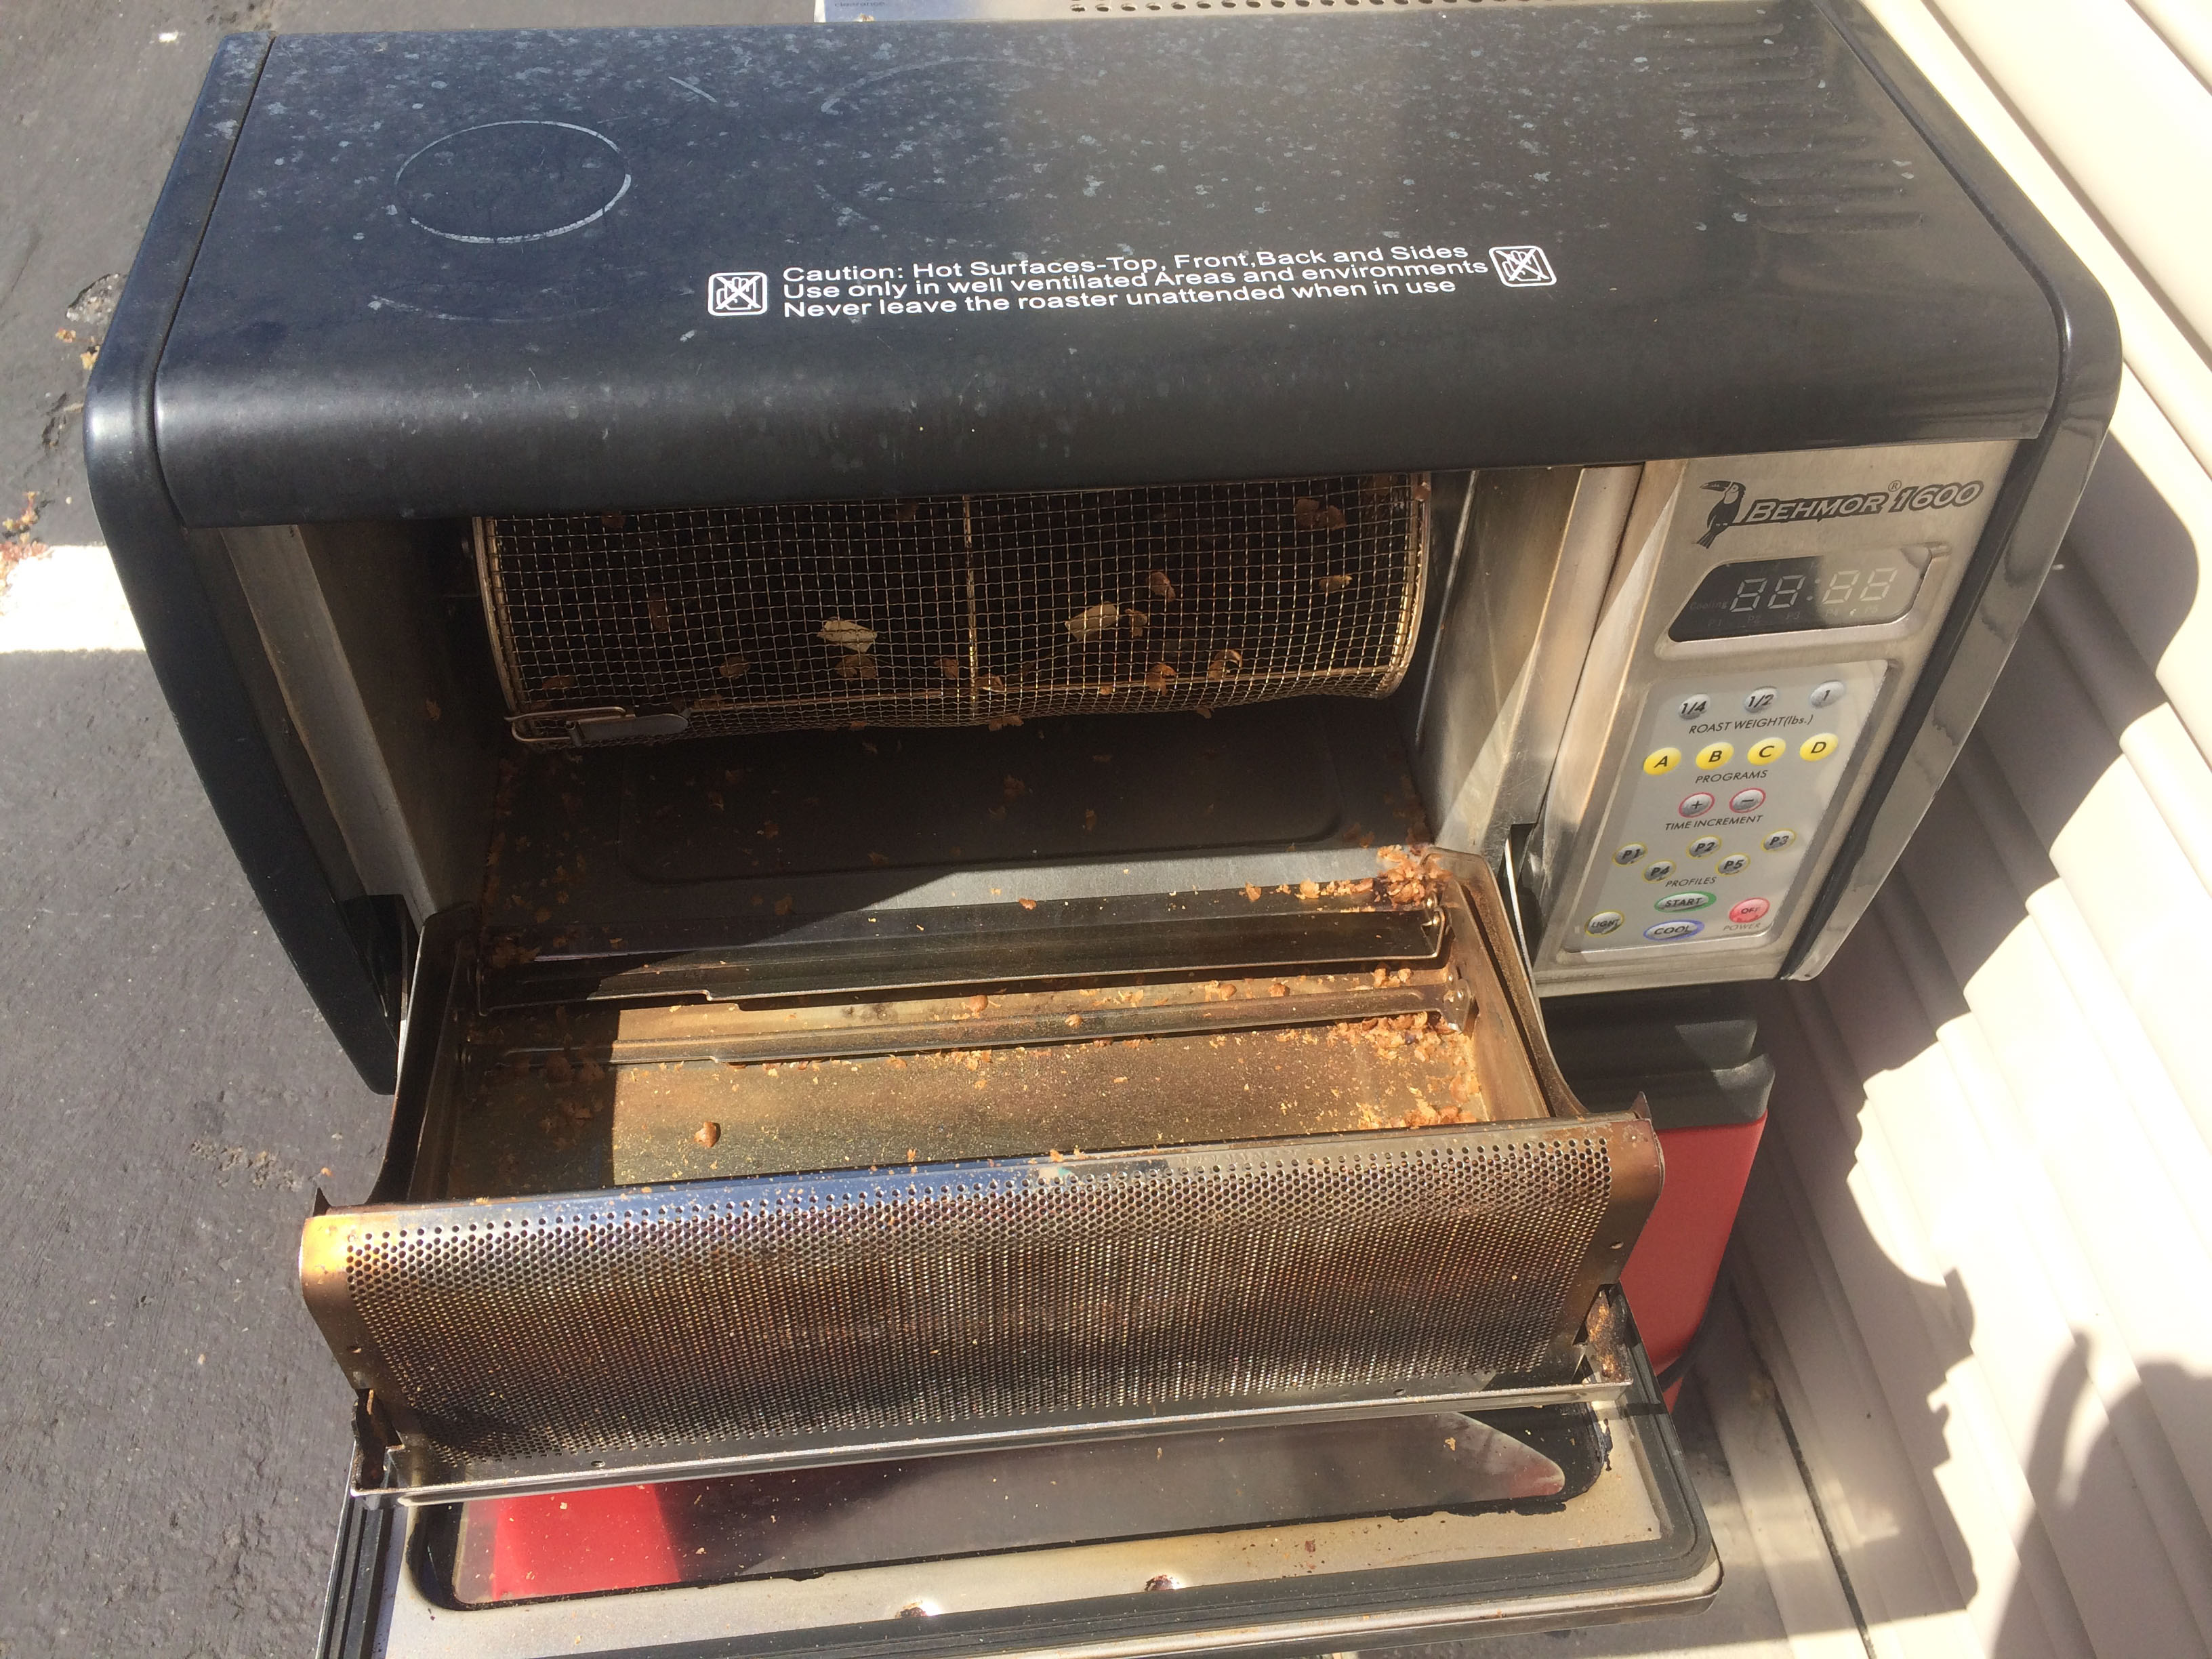
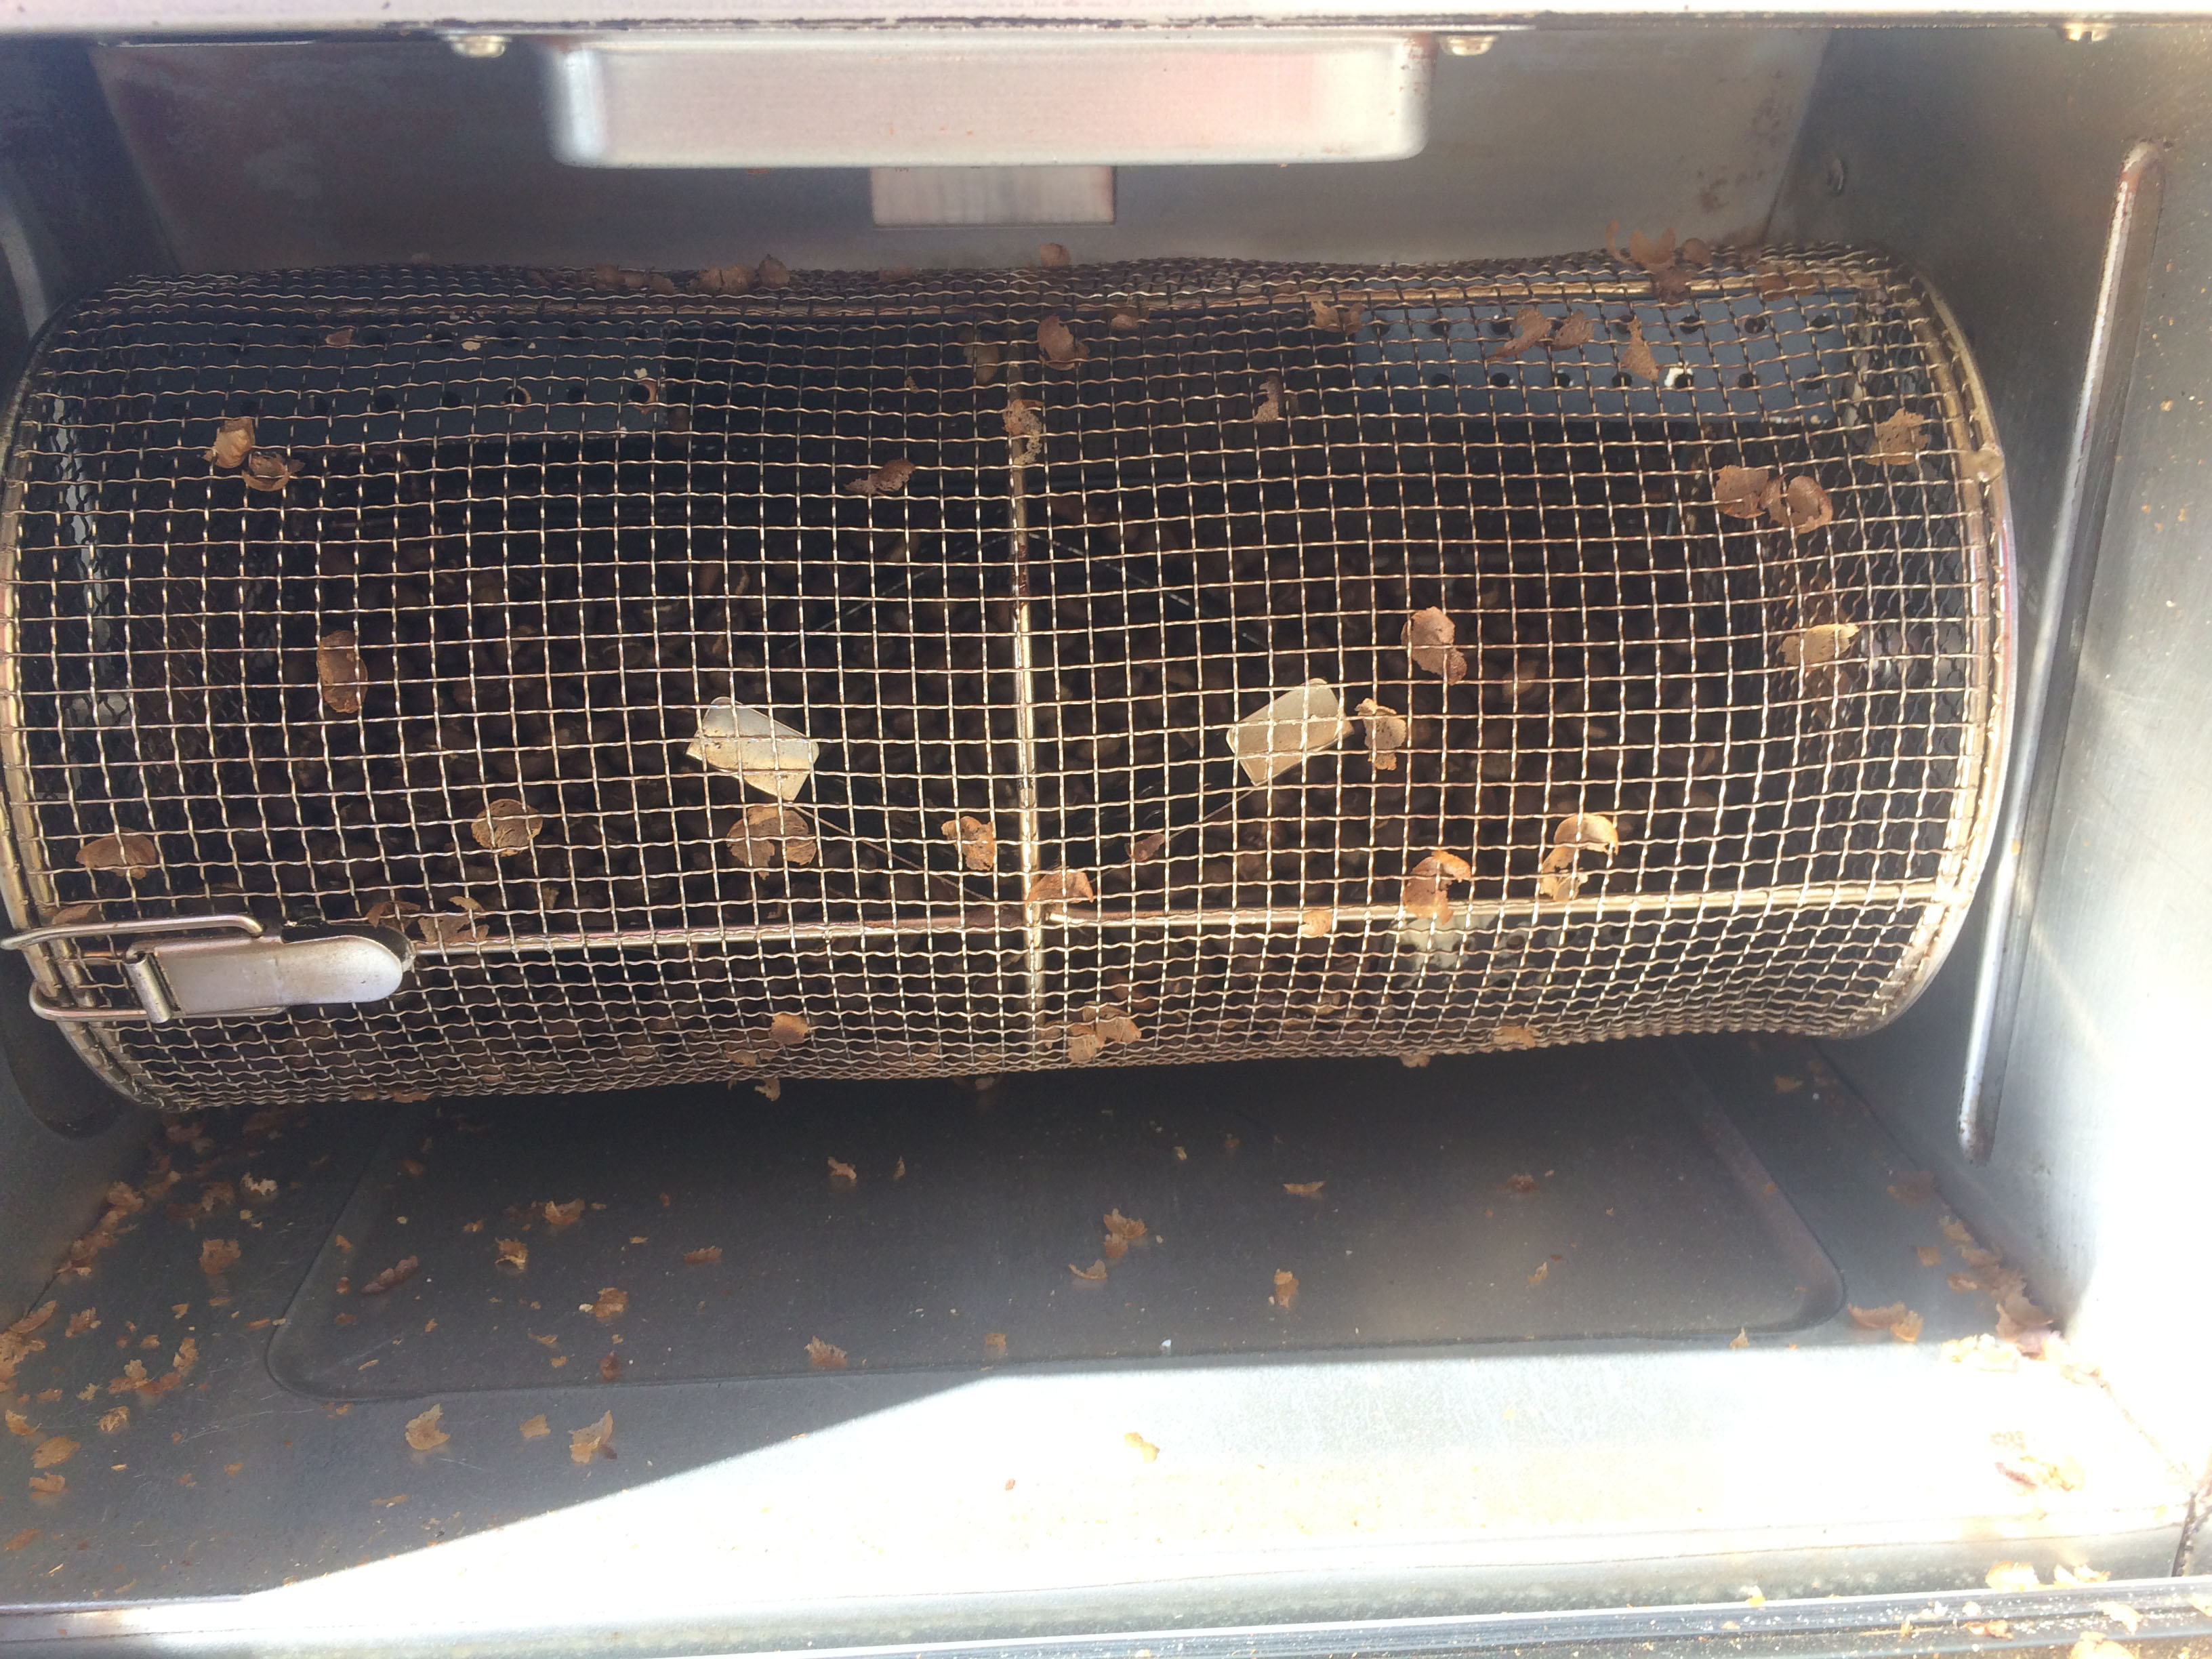
The Behmor 1600 roaster: this model is no longer in production, but continues to work well for us. You can get the newer version from Sweet Maria’s.

Wooden handled natural bristle pastry/basting brush: this is basically just a broom. After blowing the chaff out of the roaster, I sweep the interior walls and the surfaces of the chaff tray to remove remaining dust. You can get these from any cooking store or restaurant supply.

Quart sized plastic canisters: these are from Smart & Final, but could be obtained at any restaurant supply store. I use them for weighing green beans and storing roasted beans. They seal well and you can see what’s inside. I have two to make it easy to roast a new batch when I still have some in the previous canister.

Five gallon food service bucket: again from a restaurant supply shop. It holds about 25 pounds of green coffee beans, which is much more manageable than the 50 pound bag our coffee arrives in. The rest of the 50 pound bag gets sealed up and stored until the bucket is ready to be refilled. It seals well and has a nice handle for ease of moving it around.

Stool: lifts the roaster far enough off of the ground to make cleanup easy after roasting finishes, and I don’t have to bend over as far to pick up the roaster to carry it back inside when I’m done roasting.

—Espresso—

Quick Mill Silvano Espresso Machine: PID control, separate steam and coffee boiler, beautiful stainless exterior, generously deep drip tray. It has a lot of excellent features for the price. Fits four full-sized mugs on top for warming. Switching from a low end home espresso machine to this was like switching from a point and shoot camera to a DSLR.

Rancilio Rocky Doserless Burr Grinder: one of the most important tools for espresso is the grinder. If you don’t get an even grind, it will be nearly impossible to make good espresso. Available from Sweet Maria’s and Chris’ Coffee.

Small cup and measuring spoon: the Rocky grinder is known for dispensing clumpy grounds. To combat this we grind into a cup and then scoop it out into the portafilter basket, which lets us break up the clumps.

Stainless portafilter: most portafilters are made of chrome plated brass and the plating can wear down over time. Stainless portafilters are easy to clean and you never run the risk of exposing your espresso to the lead in the brass. The handle of ours is tilted downward slightly, which means the basket is conveniently nearly level when the portafilter is resting on the spouts and handle.

Coffee distributor/leveler: we saw an OCD branded one of these in use at our favorite coffee shop and wanted one immediately. It evenly spreads the grounds across the top of your basket when you spin it. Such a beautiful design. The OCD price tag was a bit steep, so we went off-brand and got one that was much less expensive and is still very effective.

Tamper: ours has a nice handle and good heft.

Tamping mat: we have a very small counter for our setup, so this one works really well. It props up the portafilter while you fill it, gives you a solid surface for tapping to settle the grounds as well as for tamping.

Bottomless portafilter: a bottomless portafilter is useful for learning better espresso technique, but can make a ridiculous mess if your grounds aren’t perfectly distributed or tamped. I got one and used it consistently for a while, but now use the stainless portafilter all the time. I keep my backflushing basket in my bottomless portafilter so that it is easy to do my routine cleaning and backflushing of the espresso machine. The bottomless has a lower profile than ones with spouts and fits neatly in the utensils drawer below the espresso machine.

Steaming pitcher: we have a medium sized steaming pitcher. It works well for us since we don’t have much counter space and because we are usually only making coffee for one or two people.

Dishrags: I keep a stack of dishrags handy for wiping down the steam wand.

Cafelat knockbox: this one is easy to clean, sturdy and doesn’t slide around. It’s also easy to empty.

—Home—

Bodum French press: we drink cappuccinos during the week, but on the weekend, we use a French press for coffee at home. It’s reliable, low cost, and makes really good coffee.

Glass stirring rod: rather than use a metal spoon which might scratch the glass of the French press, or a wooden spoon, which can be unpleasant to clean, we use a glass stirrer. We have some candy striped ones from the post-holiday sale section of Williams-Sonoma, and we have some intended for chemistry lab use that aren’t as decorative but are just as useful. In addition to an initial stir, it’s helpful to fluidize the grounds before you press the coffee.

Capresso grinder: French press coffee isn’t as demanding on the grinder as espresso is. The Capresso is a much lower cost (and lighter weight) burr grinder, and it works fine for this job. Coffee grounds sometimes get caught behind the drawer, which gradually works its way out from the vibration of the grinder. So long as you clean it out regularly, it doesn’t cause a problem.

Electric kettle: you can get very fancy ones with different heat settings for that precise just below boiling temperature that is perfect for French press. Or you can get a simple one like ours.

—Travel—

Aeropress: we don’t often travel where there isn’t coffee, but for things like camping, we still need coffee. The aeropress can be tedious for making more than one cup, but the cleanup is easy, and other than a way to heat water, you don’t need anything else. If we know we’ll have electricity, we’ll bring along our electric kettle.

Plastic bags: A zipper bag is convenient for storing the filter rounds so they don’t get wet. I also bring along an extra zipper bag for ejecting the Aeropress puck into after brewing, especially if we’re camping and there aren’t nearby trash facilities.

Vacuum sealer: I pre-grind, measure and vacuum seal our coffee grounds when we travel. This keeps the grounds fresh, tidy, and compact for packing, as well as convenient for brewing.

Travel mugs: We have some Aladdin brand stainless steel vacuum insulated mugs that we’ve had for approximately forever. The plastic lid screws into the metal mug firmly and prevents spills. They keep warm for a very long time. They have a wide enough top to hold the Aeropress. They are also narrow enough to fit into almost any cup holder, including the ones in our Prius that are inline rather than side by side. A bonus is that one has a pattern of raised bumps and the other has gently recessed striped swirl pattern so even if you are driving and don’t want to look down, you can tell that you’re picking up the correct mug.

Coffee Roasting for Fun

When we first started roasting coffee, we used the air popcorn popper method. We learned about it from Sweet Maria’s, which in addition to selling green coffee beans, has a wealth of resources for home coffee roasters. We gradually refined our method, even making a DIY coffee bean cooler. We also tried out a lot of different types of beans, buying samplers from Sweet Maria’s and making notes on which flavor profiles we enjoyed. Eventually we outgrew the batch size limitations of the popper method and we purchased what is the gold standard of home coffee roasting: a Behmor 1600.

The Behmor can roast up to a pound of coffee at a time, and does so reliably without fuss. Newer models are programmable, but this one has a few preset roasting profiles. I use the default one pound setting and normally roast about 0.9 pounds of coffee at a time. The canister I use for coffee weighs about 0.2 pounds, so when I put it on the scale (it’s handy having a shipping scale nearby) I aim for 1.1 pounds. This smaller quantity roasts a little faster than a full pound would, and I have a wider time window to stop the roast when it gets to the stage I like.

The green coffee beans (which smell grassy, a bit like fresh hay) go in the roasting cage which gets put into the motor socket so that it can be rotated to toss the beans around for even roasting. After putting in the chaff catching tray, I start the roasting process.

The chaff is the papery membrane around the bean that comes off during the roasting process. Roasting creates quite a bit of smoke, and even though the Behmor has a smoke-suppression afterburner to reduce the amount of smoke, I prefer to roast outside.

Roasting takes about 20 minutes and the cooling cycle takes another 12 minutes. Because this is basically a toaster oven and fire hazard, it should be monitored during the roast. I take advantage of this half an hour in the sun to call my dad or catch up with friends. It’s an enforced break in my usual routine when I get to listen to the local birds and enjoy the changes in the sky through the seasons. When the roaster is done, I pull out the chaff tray and it’s quite a mess.

Most of the chaff is collected in the tray, but there’s some still mixed in with the beans, and it gets pretty much everywhere when you bring the roasting cage out. This is another good reason to roast outside. The chaff will just blow away in the breeze and joins the leaf litter below the shrubs that line our little parking lot.

I shake the roasting cage repeatedly until the amount of chaff dwindles, and then I can put the roasted beans into the canister for storage until I need need them.

There’s still chaff in the roaster in spite of the chaff catching tray. I blow it out of the roaster and sweep it out with a small clean basting brush.

Once the roaster is cleared of chaff I put it away for the next time.

The coffee loses a lot of its moisture during the roasting process, and reduces in weight by about 10% or so. It also increases in volume.

We have two to three people drinking coffee and use about two to three pounds of coffee a week. The flavor of roasted coffee starts to deteriorate about six or seven days after roasting. Since I’m roasting as needed two to three times a week, it never gets past about four days old.

As our coffee bean usage increased, we started buying our coffee 20 pounds at a time, but eventually realized that even that was seeming to be a little frequent. We had settled on the flavor profiles we enjoyed most, so we started purchasing 50 pound bags from Sweet Maria’s wholesale site, the Coffee Shrub. Green coffee has a long shelf life when stored well, so this means we don’t have to think about it very often. When you buy for several months at a time, you need to be confident that you will be happy with it. When we first got started, we didn’t know what we liked well enough to commit to purchasing at that scale, but we’re pretty set in our ways now.

Occasionally someone will really enjoy a cup of coffee I make for them and will say that I should start a coffee shop. It’s a well-intended sentiment, and I take it as a compliment. However, starting a coffee roasting business or coffee shop would take away many of the things that I love about coffee roasting. I only roast the kind of beans that we like, and I only roast as much as we need. And I get to use roasting as an excuse to take a break from my other responsibilities and enjoy being outside in our beautiful weather here.

I still enjoy trying other coffees. I love going to my favorite coffee shops and having someone else make me coffee. I love trying new coffee shops. And I get a lot of satisfaction from the coffee that I roast, grind, and brew myself.

If you’re interested in home roasting, I highly recommend Sweet Maria’s resources. In addition to working with farmers around the world to source beans equitably, they share their deep knowledge freely. They have articles, tutorials, and videos. They hold workshops at their warehouse in Oakland, and will be presenting at Maker Faire as they often have in the past.

Math foods for Pi Day

There are a great many ways to celebrate Pi Day, and food is one of our favorites. While pie is obviously appropriate for Pi Day, there are so many other fun ways to explore math and science through cooking. Here are some of our food projects that can be great ways to explore math concepts on Pi Day:

Happy Pi Day!

Lemon Ginger Marmalade

It is lemon season here yet again! Given the quantity of fruit my Meyer lemon tree produces, I have many opportunities to remake my marmalade recipes with little adjustments and changes. This time, I added ginger. Quite a bit of ginger. This jam has a bright cheerful flavor with a bit of zing to it which is perfect for the rainy weather we’ve been having.

Ingredients:

  • 8 cups (Meyer) lemon pieces
  • 1 cup lemon juice
  • 1 cup water
  • 3 Tbsp grated ginger
  • 2/3 cup ginger matchsticks
  • 6 cups sugar

First cut up the lemons into small pieces and remove any obvious seeds. After juicing lemons, we’ve found that straining it through a julep strainer holds back the seeds but allows most of the pulp through.

Our favorite tool for grating ginger is a fine microplane. For making matchsticks, a mandoline slicer makes short work of it.

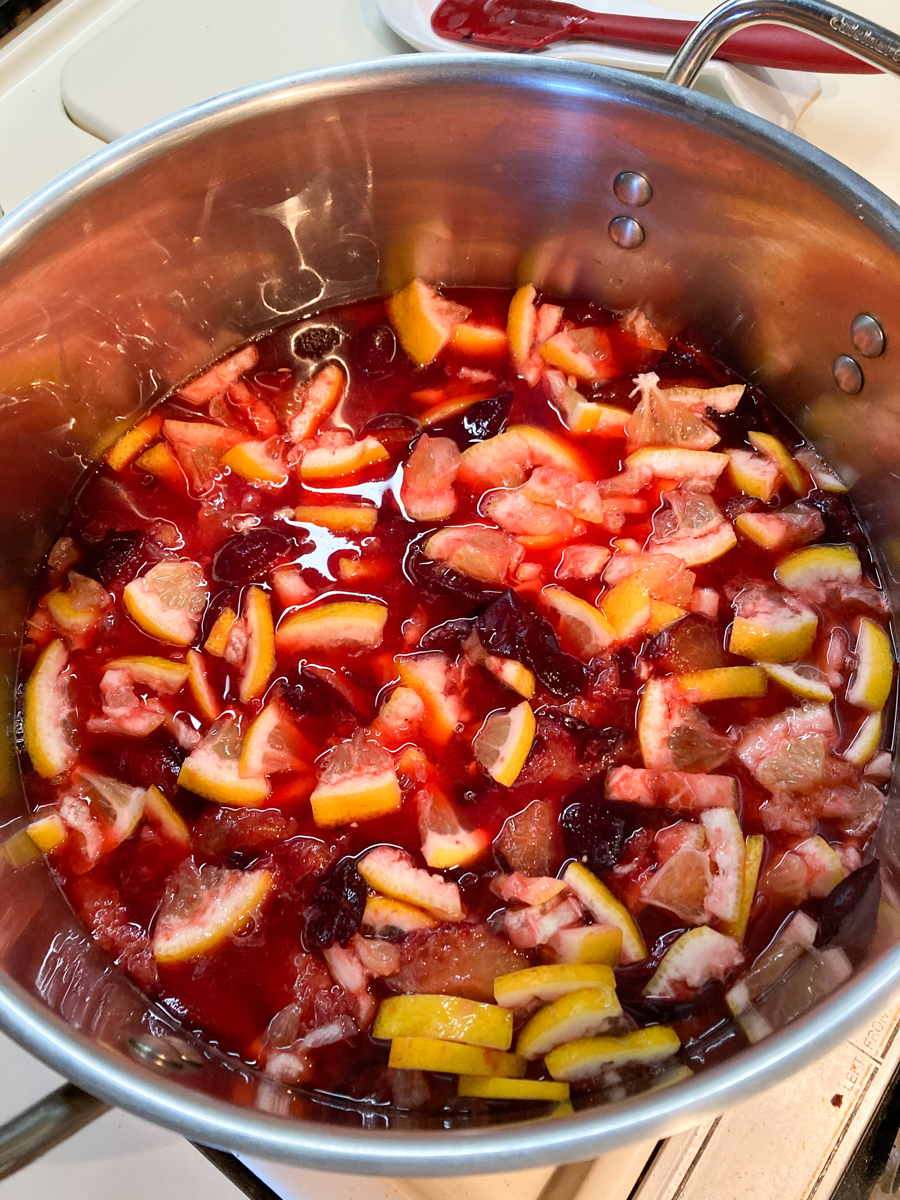
Put the lemon pieces, lemon juice, water, grated ginger, and ginger matchsticks in a pot and simmer until the lemons start to soften. Add the sugar. Stir regularly and cook to the desired consistency. To test consistency, put a spoonful on a plate in the fridge. If it’s too runny after cooling for a few minutes, keep simmering and test again after a few minutes.

Makes about four pints. If you want to can it for longer storage, Ball has a nice introduction to canning on their website.


Other fruit preserves from the Play with your food archives: