


We’ve talked previously about making simple LED pumpkins with candle flicker LEDs. Lately we’ve been playing with making better looking flames by using multiple independent flickering LEDs with different colors and lens styles. It makes a spectacular difference: it goes from something that looks like, well, a flickering LED to something that really looks like there might be a flame in there.

The end result is pretty neat: A compact battery powered “flameless flame” that looks great in a pumpkin, luminaria, or as a stage prop. The interplay of the different LED types and colors gives an ever-changing and shifting flame display.
Other than the candle flickering LEDs, the parts are commonly available. We’ve also bundled them together in the Solderless Flickery Flame Kit.
Components:
- Battery Holder (2×AA with switch)
- Mini-breadboard
- 6 × candle flicker LEDs (2 red diffused, 2 yellow diffused, and 2 yellow clear lens)
- 6 × 68 ohm resistor
- 2 × wire jumper
- White paper bag (optional)
Also needed:
- 2 × AA Batteries (not optional)
- Wire clippers, cutting pliers, or “beater” scissors (optional)
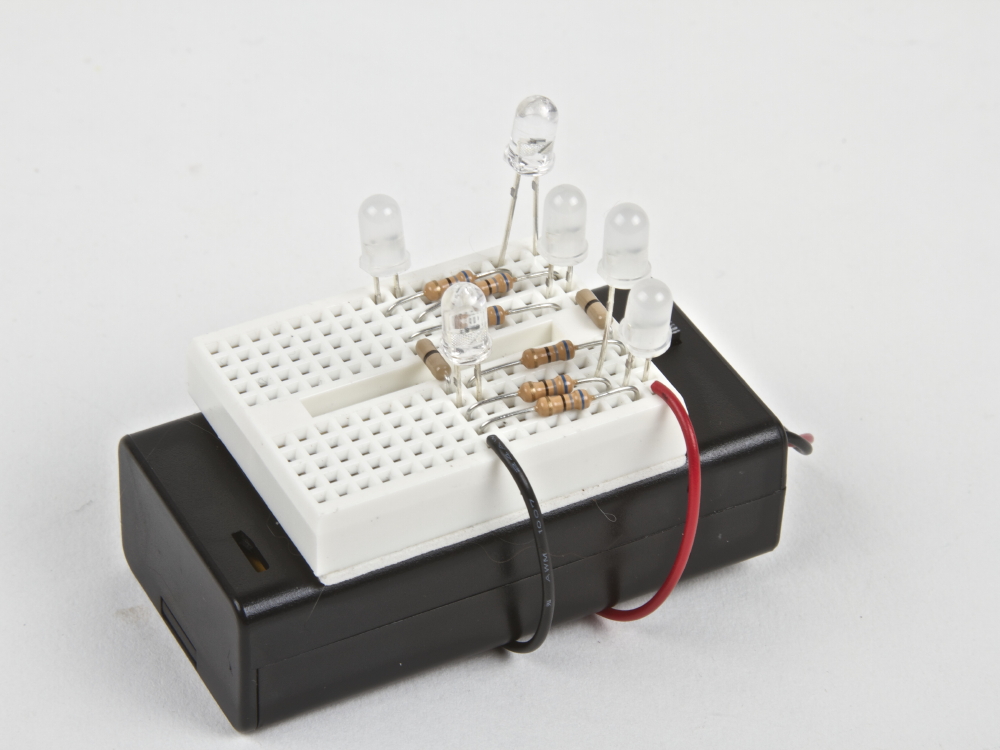
Hook up the battery holder to the breadboard several rows apart to give enough room to install the resistors and LEDs. Optional: peel off the backing on breadboard and adhere it to the battery holder. Connect each LED with its own 68 ohm resistor. (Use the “in parallel” method from this article.) The extra jumpers are included to help bridge across the center gap in the breadboard.
Trimming the resistor leads will keep the breadboard tidy, and help prevent short circuits. Trimming the LED leads to varying heights will help distribute the light in different ways.

The white paper bag included with the kit can be used for creating a traditional luminaria or for making a ghostly halloween decoration.

You can find more Halloween decor projects in our Halloween Project Archive.
How long do the lights flicker with fresh batteries?
Average current consumption is estimated to yield up to 18 nights at 4 hours per night, or 3 days of total life, if left on continuously. Brightness will gradually taper off as the batteries wear out. With common AA rechargeables (NiMH), absolute capacity is a bit lower, but so is current consumption.
Smaller resistors can be substituted in if higher brightness is desired, and larger resistors can be substituted if longer battery life is desired. Running with only half the LEDs lit would also double battery life.
I built a campfire this summer, and was quite happy with how realistically it flickered. It wasn’t solderless, however.
https://www.youtube.com/watch?v=04EthQsleDI
https://github.com/lewisd32/CampFire
It uses an Arduino, Adafruit neopixel 60 led strip, a buck converter to take 12V down to 5V, and ran off a car battery.
So, I’m curious – the red and yellow flickering LEDs have fairly similar forward voltages – but what if you wanted to combine them with a warm white version? In the article on the basics of picking resistors for LEDs, the comment “And we haven’t even gotten to things like putting LEDs of different values in circuits together!” – and as far as I can find, that issue’s never been addressed. I’m presuming there needs to be a difference in resistance based on the difference in forward voltage of the LEDs, but I’ve never seen that made explicit anywhere.
In my case, I’m interested in doing something like this very small, putting the LEDs in parallel across a lithium coin cell.
The biggest issue is that 3 V is only marginal for driving white and warm white LEDs. For a version of this with white and warm white LEDs, we would change the battery pack to 3xAA. Then, so long as all of the LEDs are still wired in parallel, it’s just a matter of using a different resistor value for the different LED colors. For white, perhaps 47 ohms, and for yellow, perhaps 150 ohms.
Wow, that much of a difference… interesting. I suppose I should just get a variety of resistors and experiment myself.
I do realize that a single coin cell is marginal for white LEDs – if brightness is a significant factor. In my case, I’m used to using them for trail marker lights on a camping trip over a long weekend where having the lights operate for at least 96 hours without being attended to was much more important than maximum brightness. (I didn’t want to have to go around changing batteries, as I’m sure you can understand.) I adapted the “throwie” concept to use more re-usable parts – instead of tape and a magnet, I use bingo chips as insulators and a mini binder clip to hold the whole thing together. That goes in a 1.5″x2″ zip bag, and the whole thing gets push-pinned to the trees. Although the bingo chips are a little brittle and don’t last forever and the plastic bags sometimes get covered with pine pitch and need to be disposed of – the only part that really can’t be reused from year to year is the CR2032 coin cell.
All that said – the idea I’m looking at is creating lights for the picnic tables that would operate along similar principles – perhaps with a larger CR2450 coin cell, as it would be driving multiple LEDs. I’m looking into light diffusers and such, but I thought light more in the warm white to yellow area would be more in keeping with what people are used to than the pure white LEDs I use in the markers, and the candle-flicker feature will add a lot to the effect.
I’ve had really good luck doing almost exactly this with white and red LEDs, which is what I had around at the moment. I ran then all off 5v from a divalino (to do the flickering) plugged into a wall wort.