


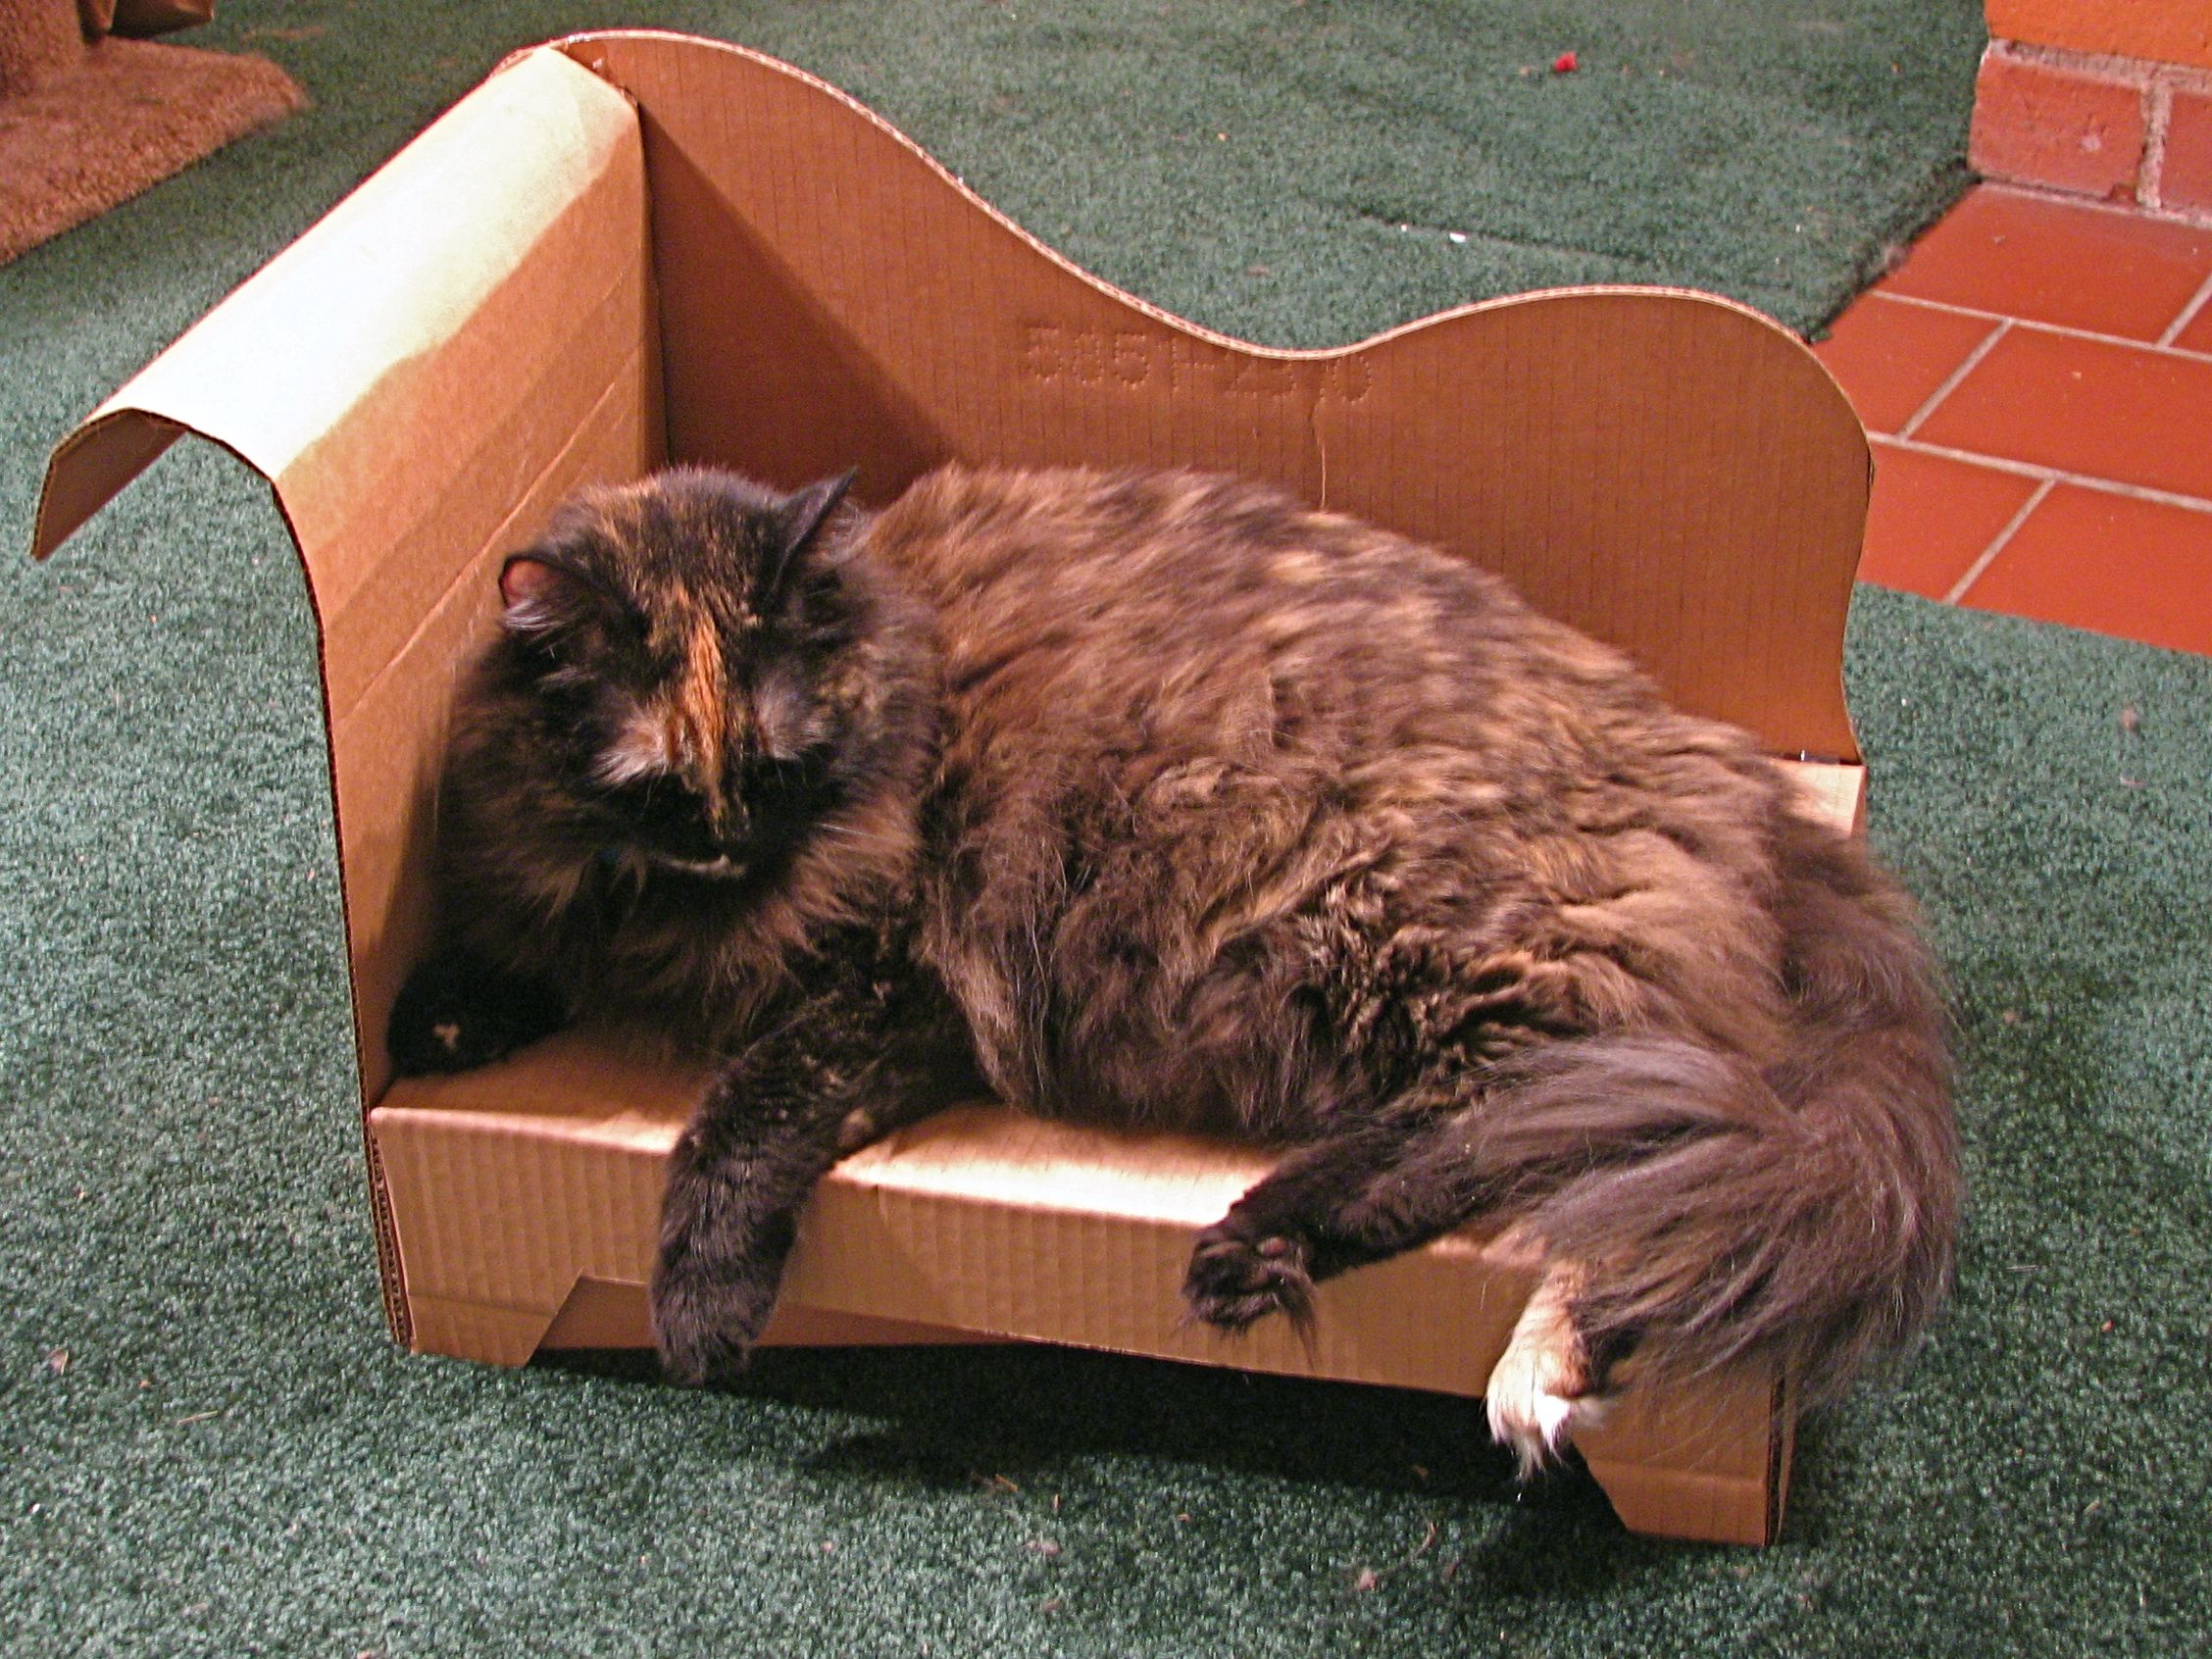
Although we don’t claim to understand it, a cat that has installed itself in a cardboard box is a happy cat. You can exploit this mysterious fact to make a your own simple corrugated cardboard cat bed like this one, designed as a kitty-sized chaise lounge. Since it’s just cardboard, it’s also easy to modify this basic design to suit your own (or your cat’s) taste.
There are already a bunch of high-end cardboard cat bed setups out there (example 1,
examples 2-4), as well as other designs and even chaise lounges. So why bother? We are again motivated by the fact that cats like cardboard boxes.
This chaise lounge is arguably a big step up from a plain old cardboard box, while remaining much simpler to build (and much much less expensive) than those other cardboard examples.
To do this project, you’ll need (surprise!) some big sheets of cardboard, a hot glue gun, markers, scissors and/or a hobby knife, and a cutting mat or other surface where you can safely cut.
You might want to start by downloading the 2-page PDF pattern:

The pattern has two pages. The first page has an actual size drawing of the foot of the cat bed, and a corresponding “tab” that will keep it in place. The second page has drawings of all of the parts at 25% scale, mainly for reference. If you happen to have a ginormous printer, you are welcome to print out the second page (at 400% scale) and trace the drawings directly onto the cardboard for a head start. (Or if you’re making it for your dollhouse, scale down!)
For the rest of us, we’ll start by printing out the first page and cutting out a traceable pattern the size of the foot and the size of the tab.
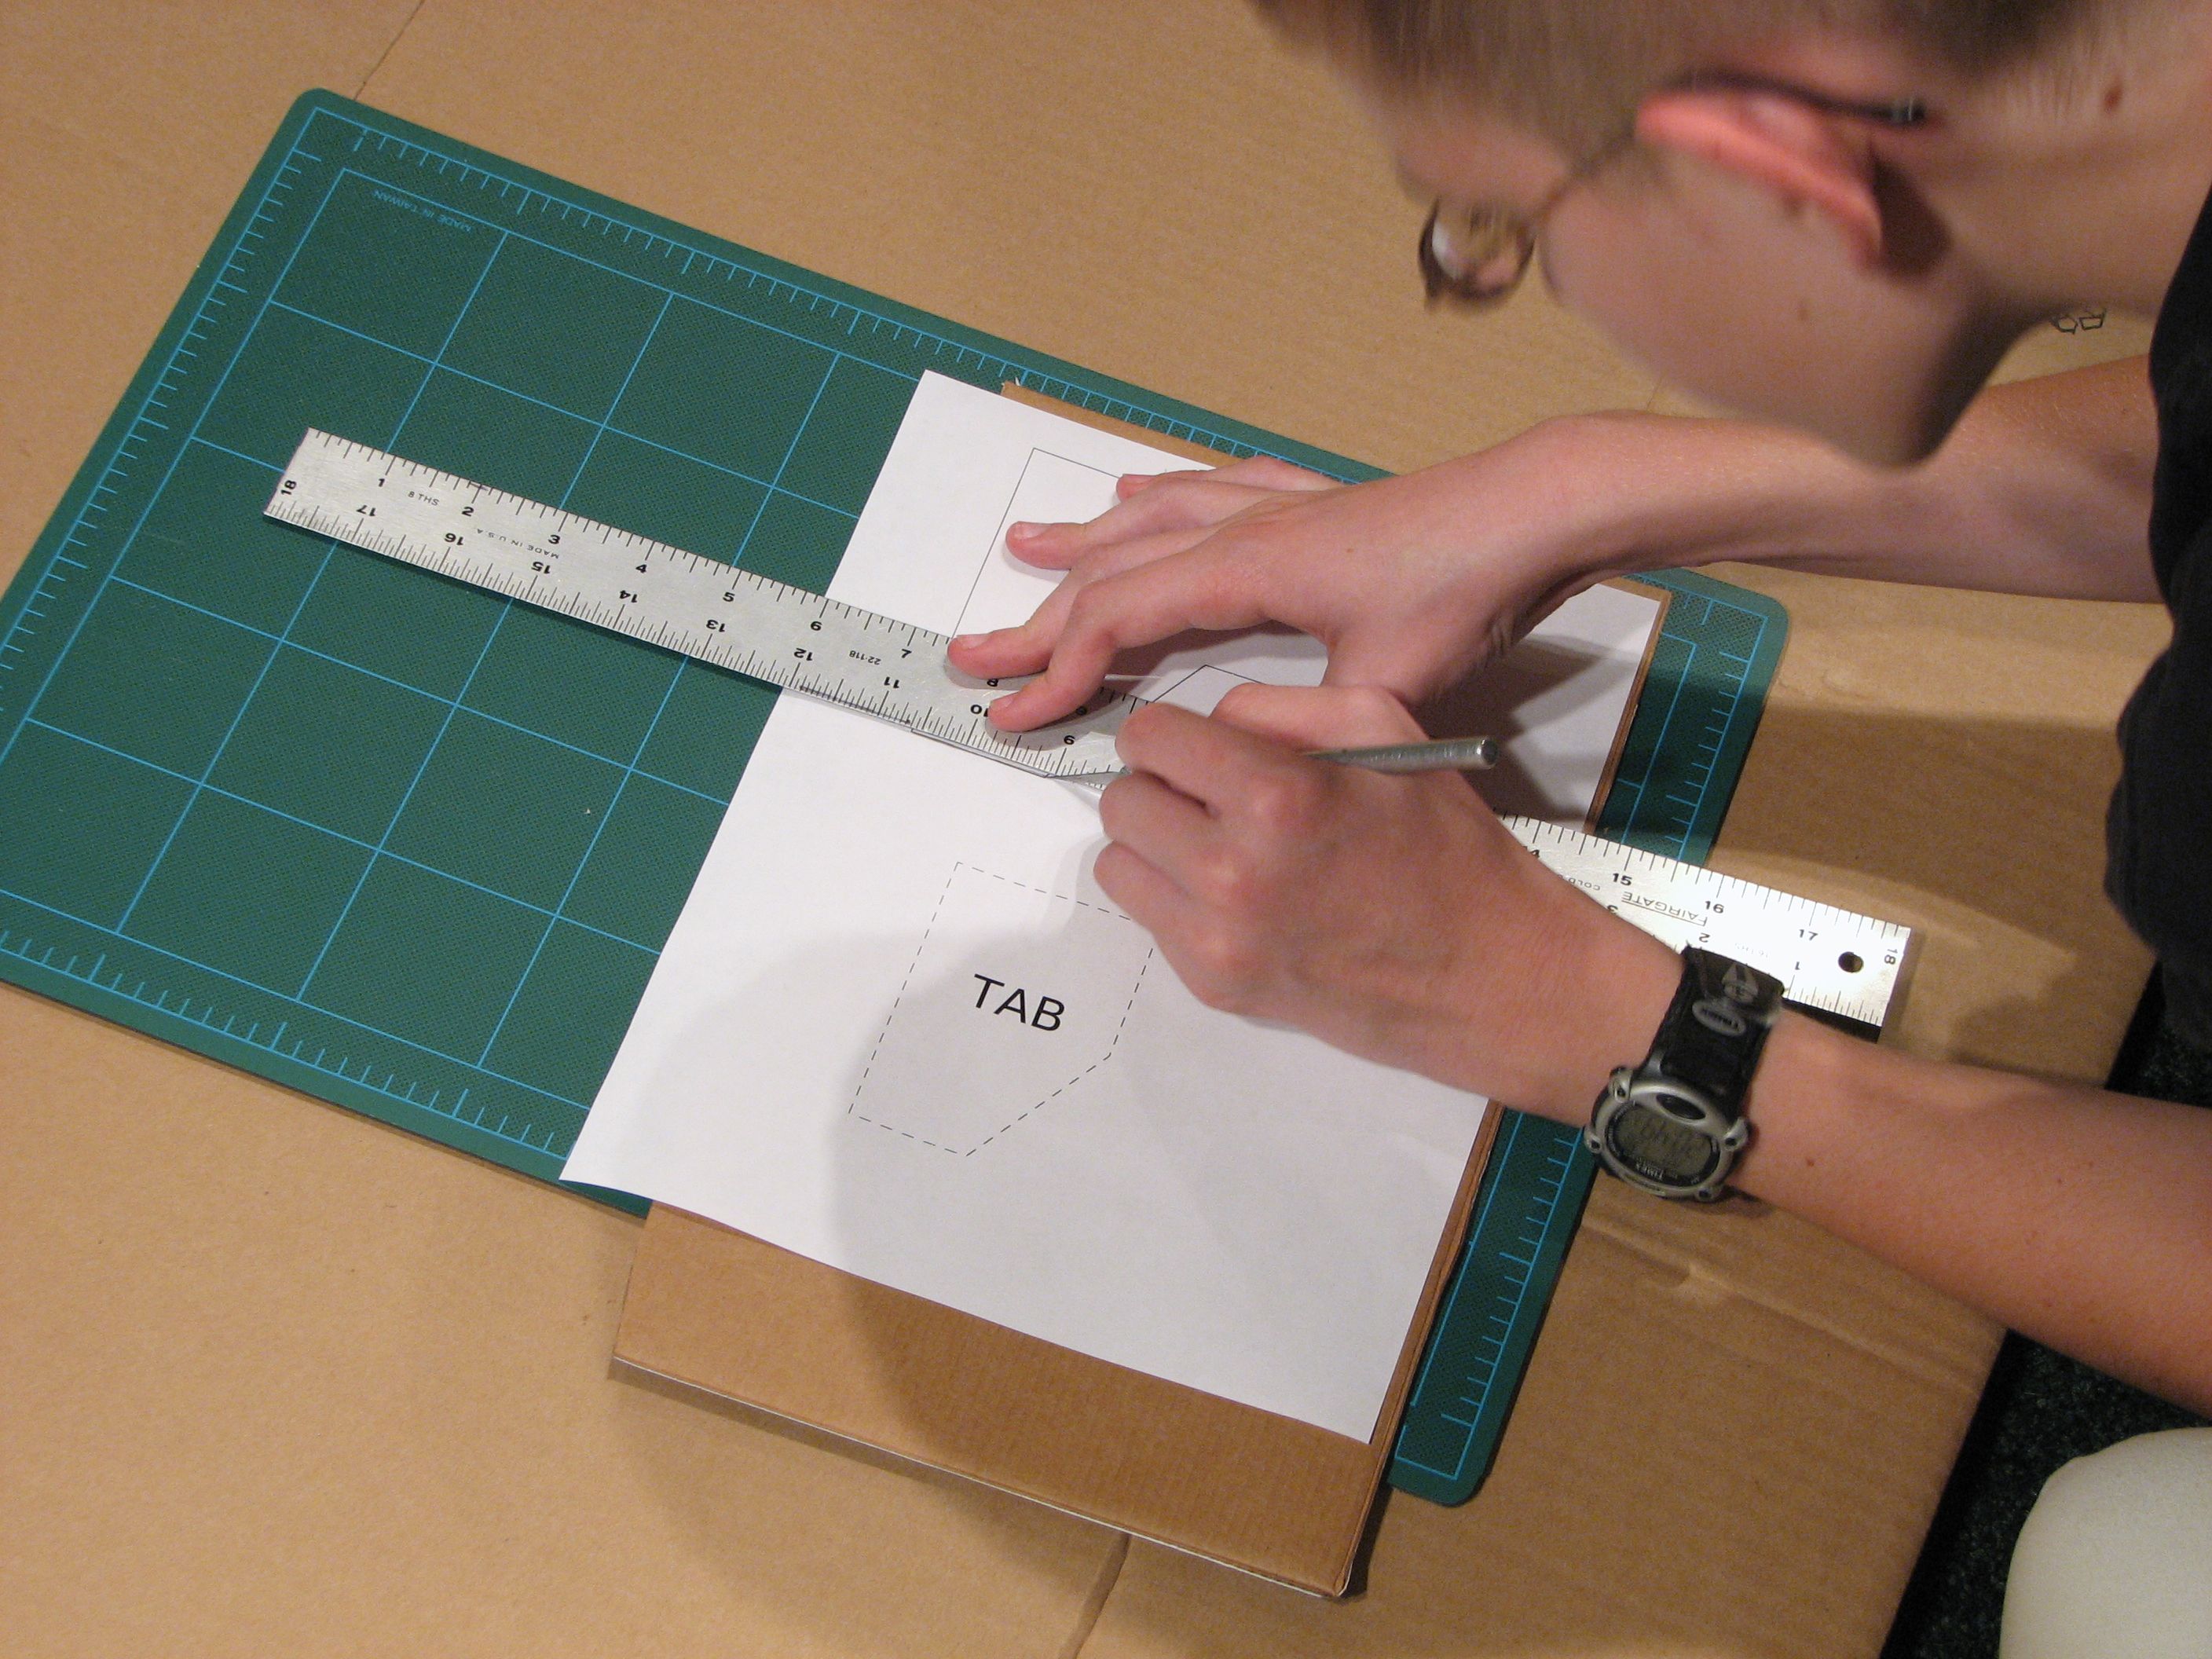
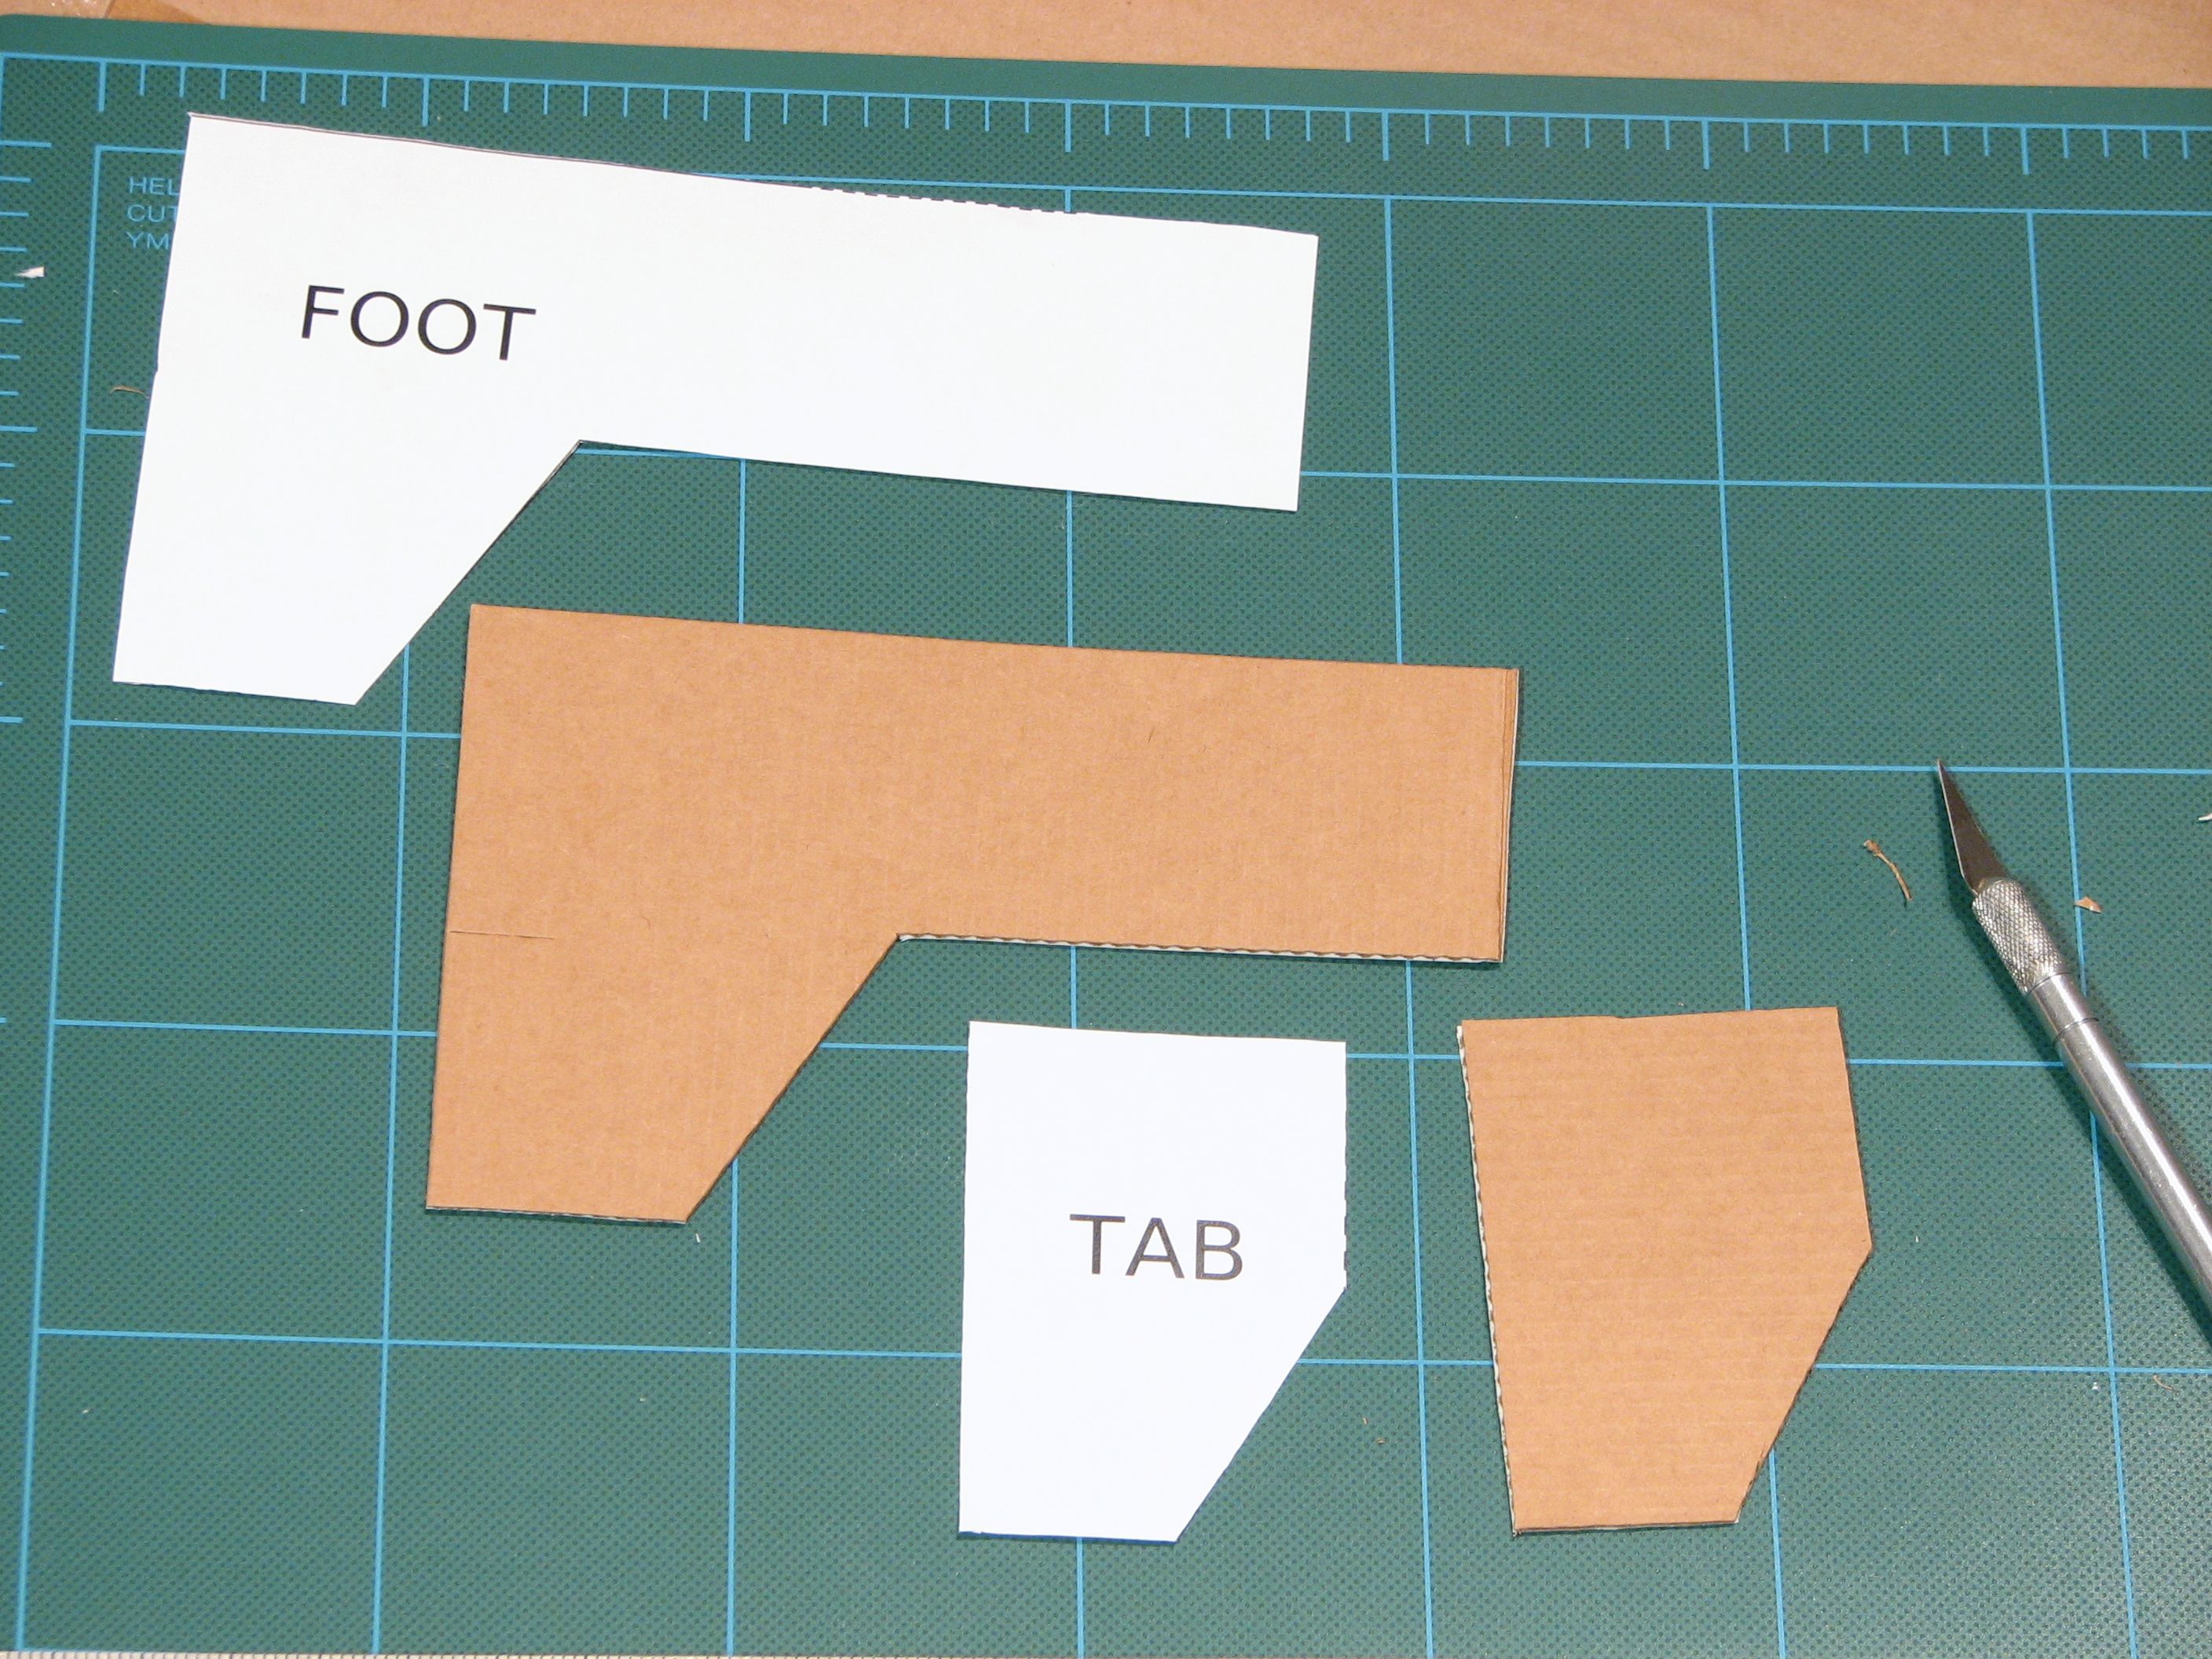
To make a more durable pattern for the foot, you can also trace the pattern directly onto cardboard to cut out a cardboard foot template (and one for the tab too).
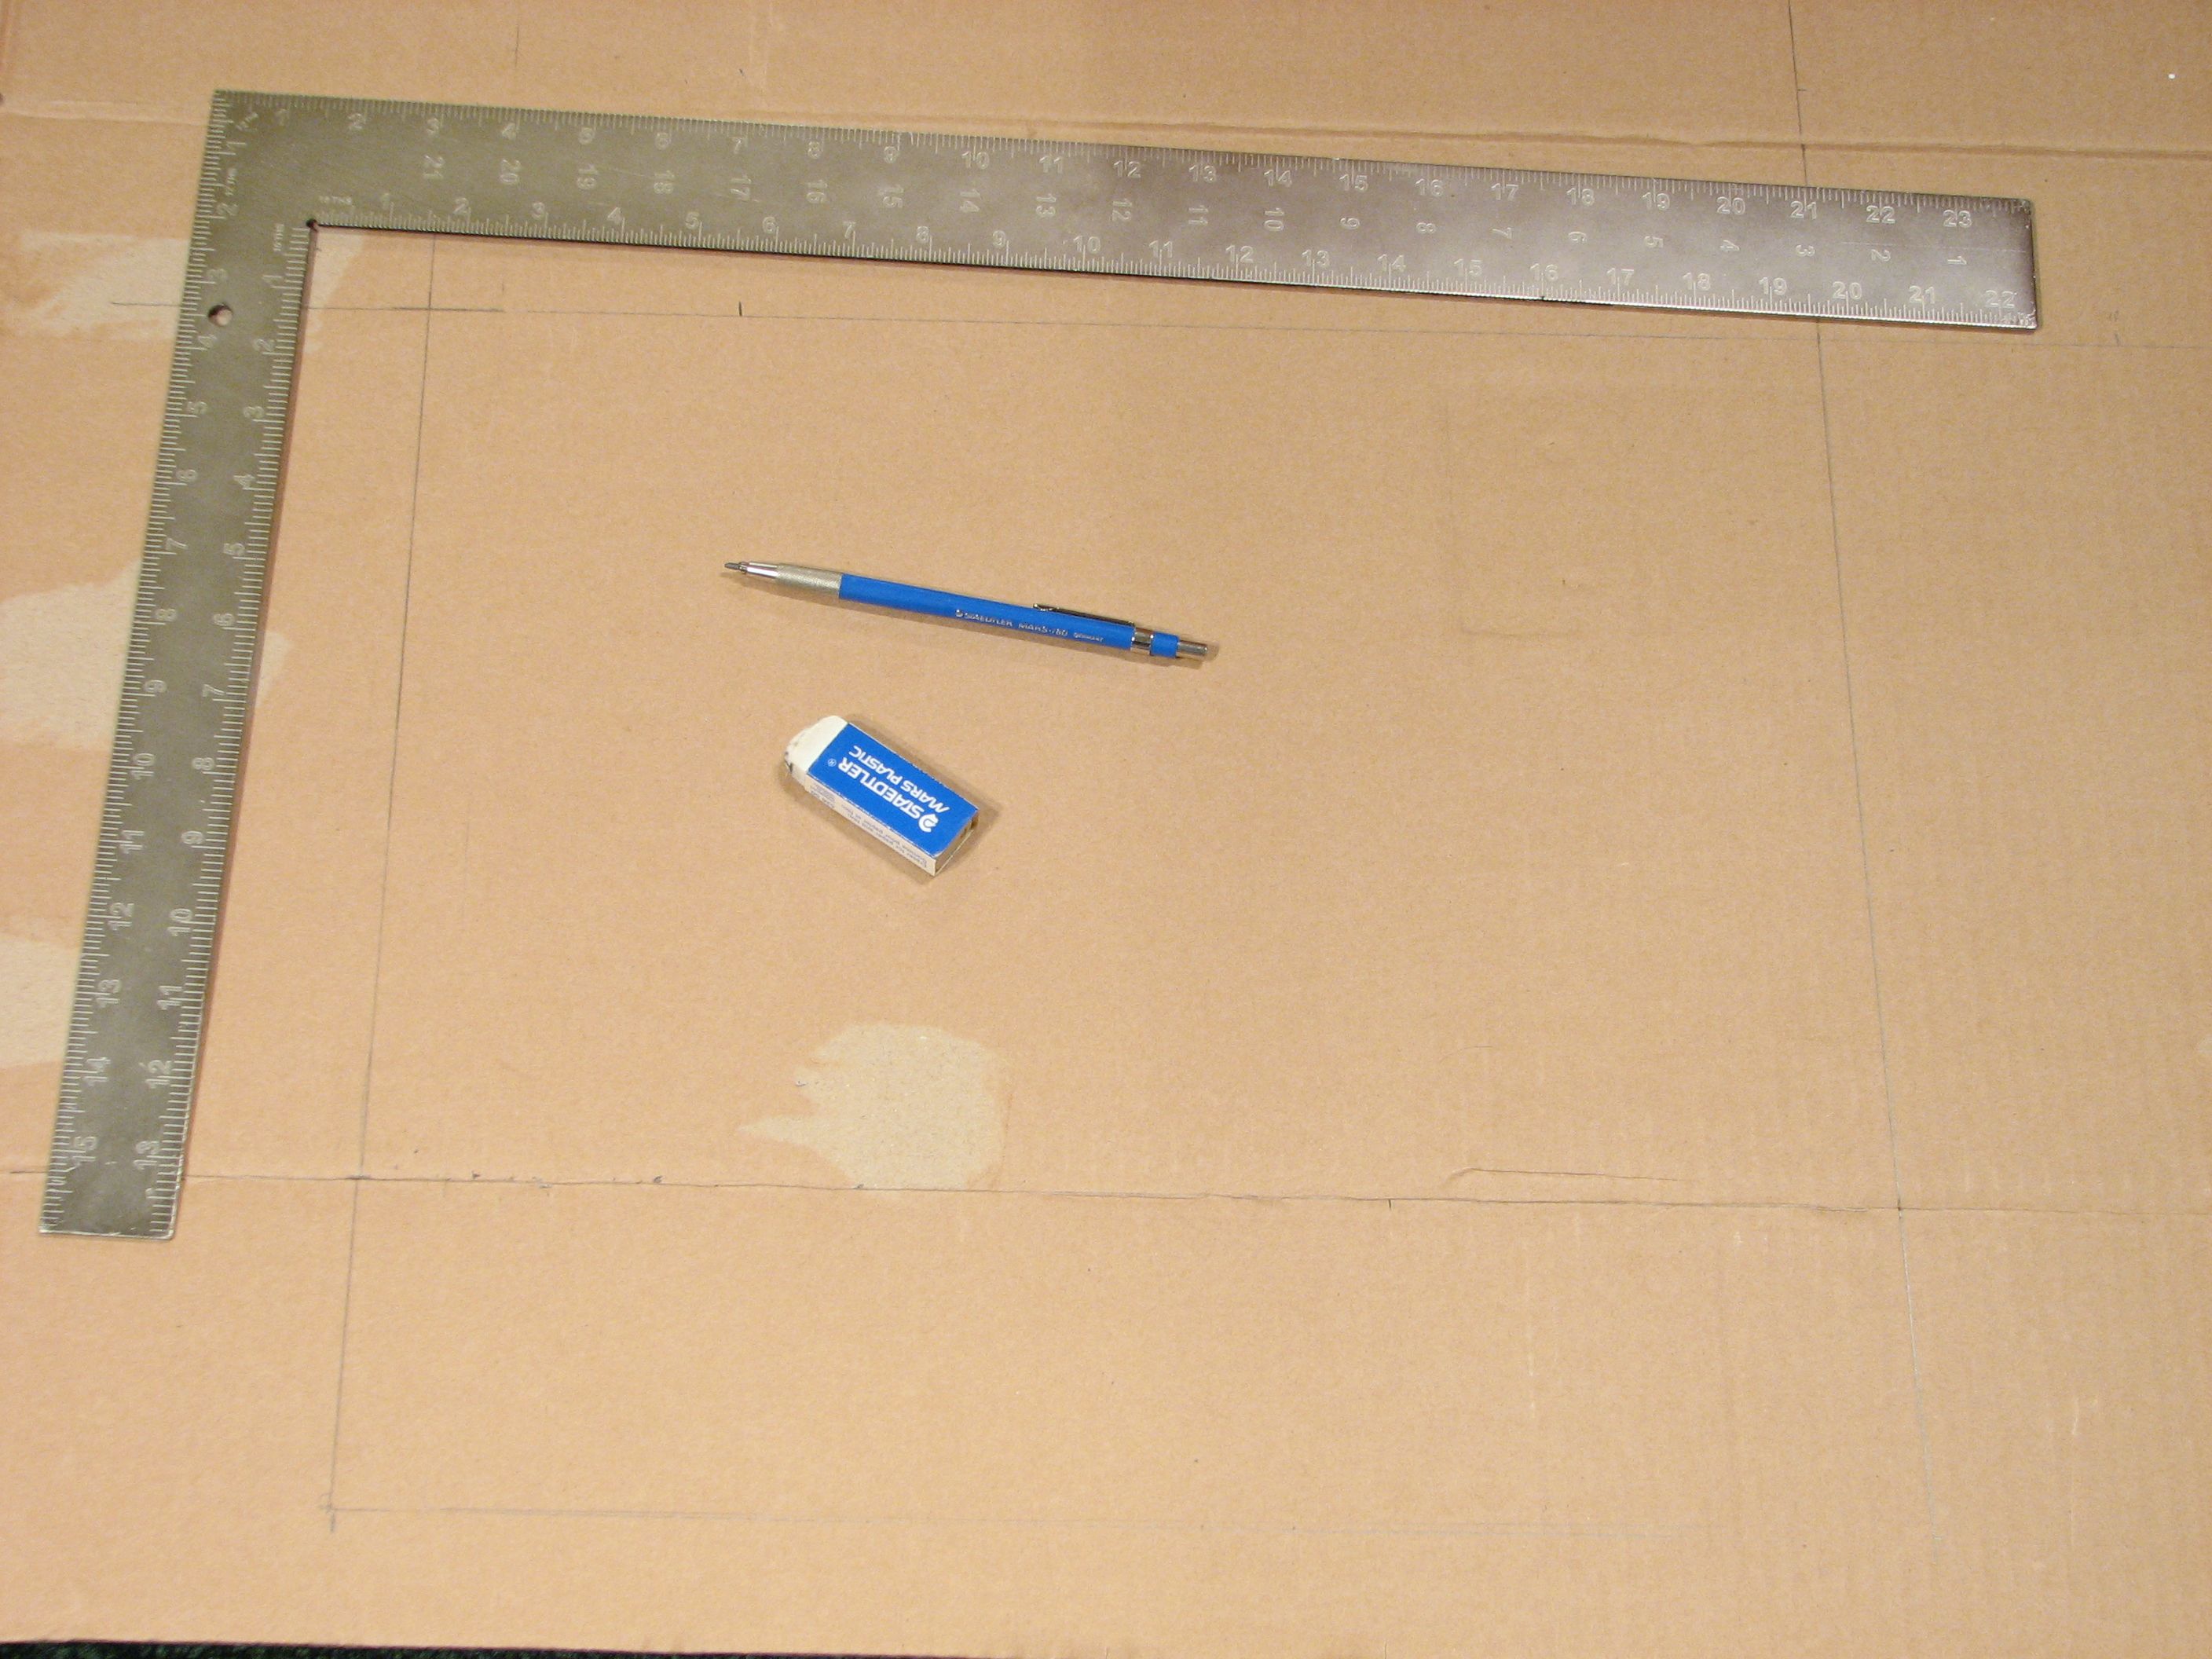
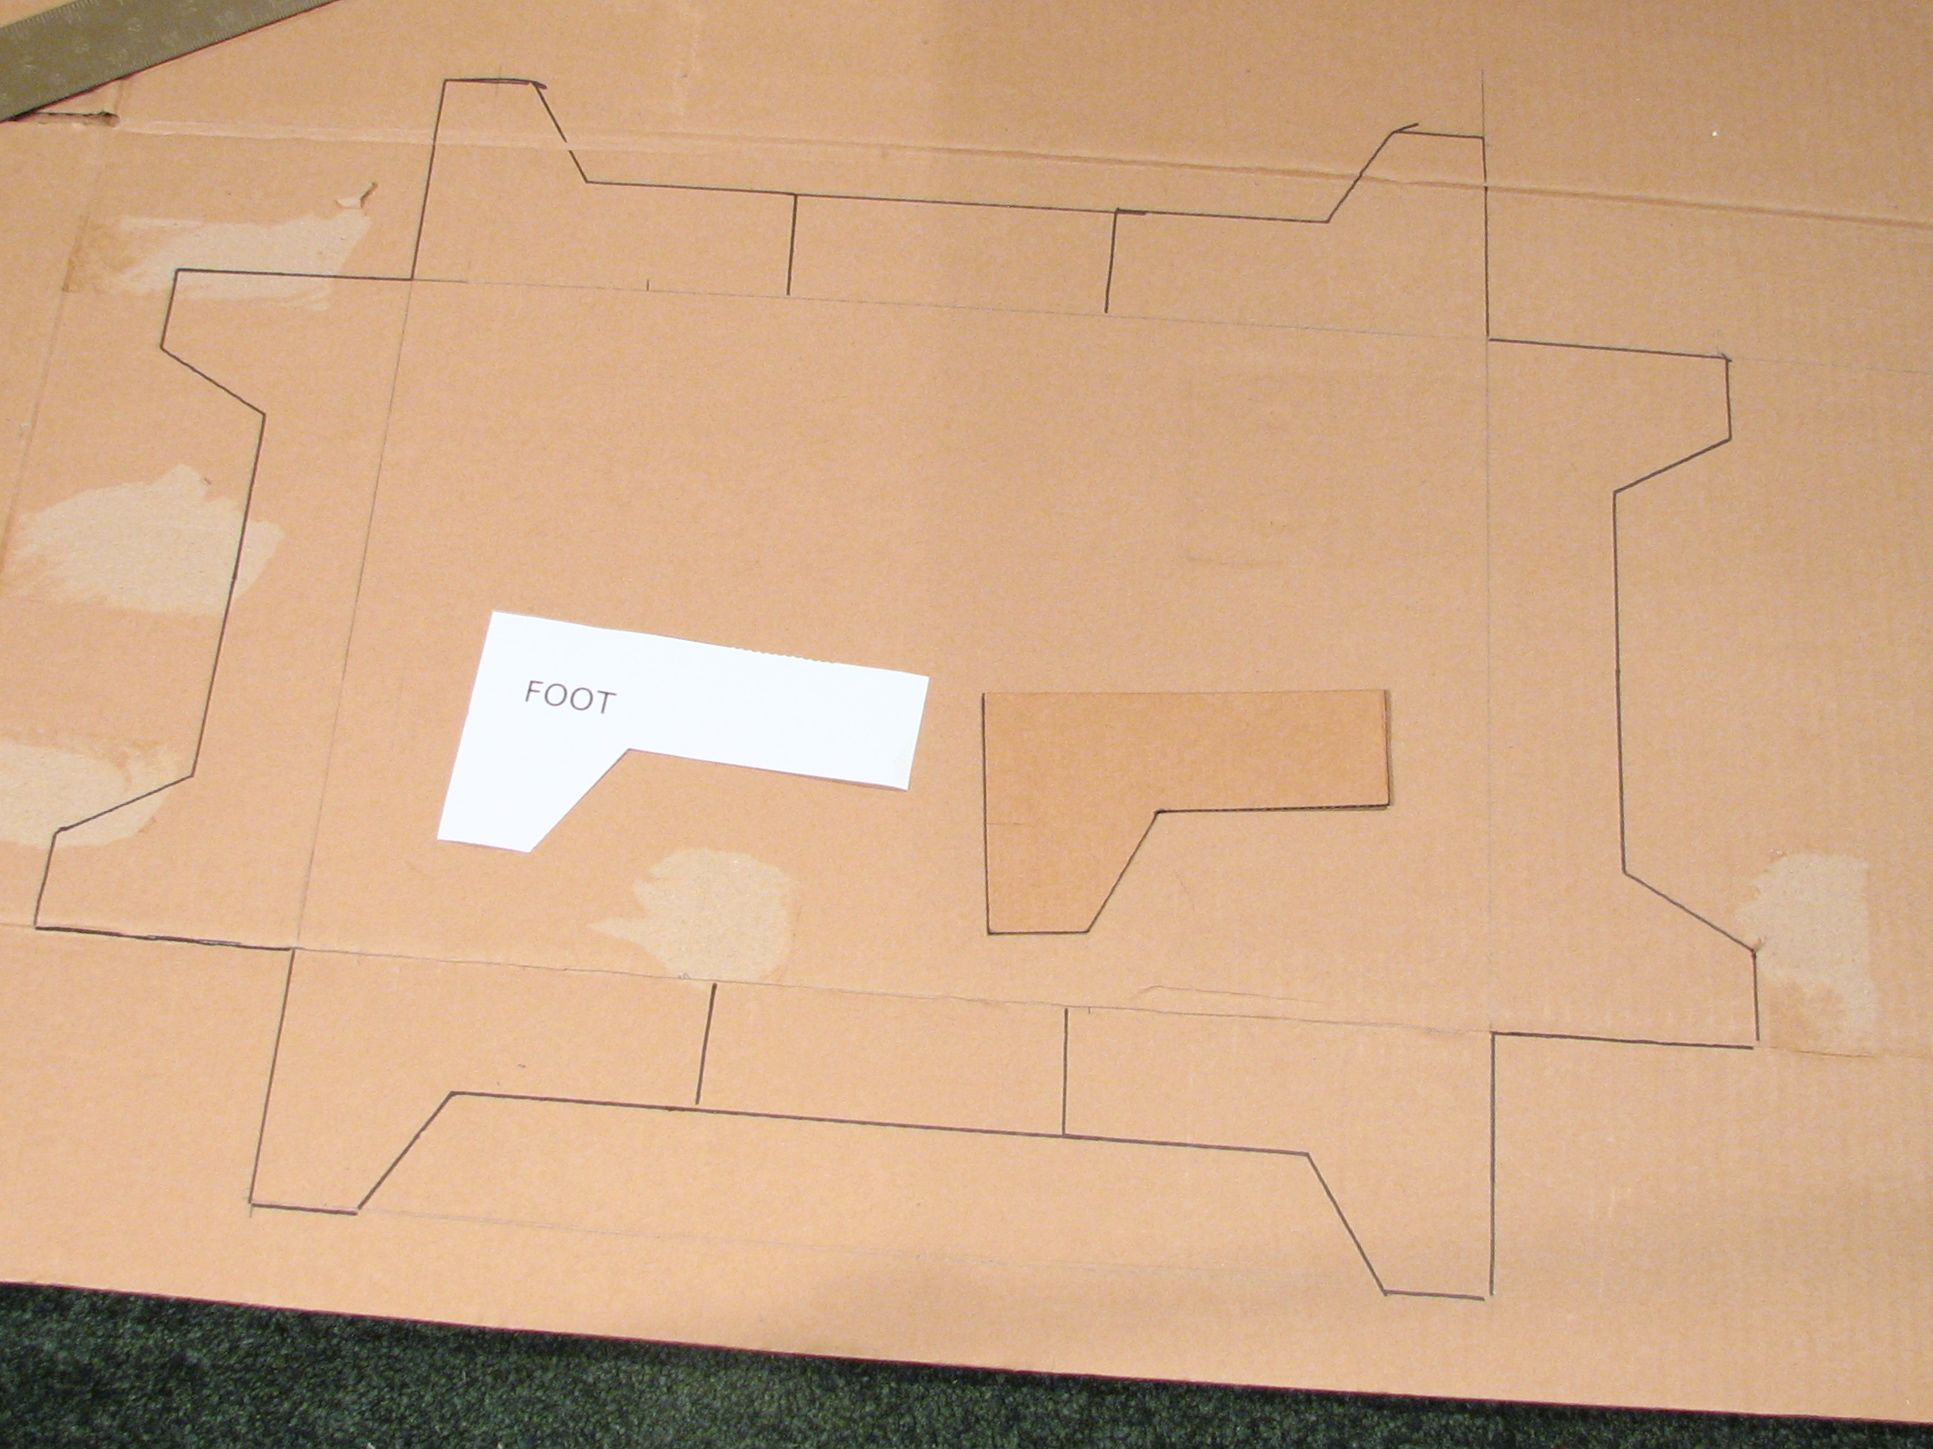
For the base you’ll need a sheet of cardboard at least 20×26″. (Folks outside the US: 1″ = 1 inch, which is defined as exactly 2.54 cm.) Begin by drawing a rectangle 12×18″ in the center of the sheet. Try to make the corners right angles. :)
Next, use the foot pattern, eight times, to trace where the feet will go on the outside of your rectangle. Connect the lines between the two feet on the long side to make one continuous foot/side panel.
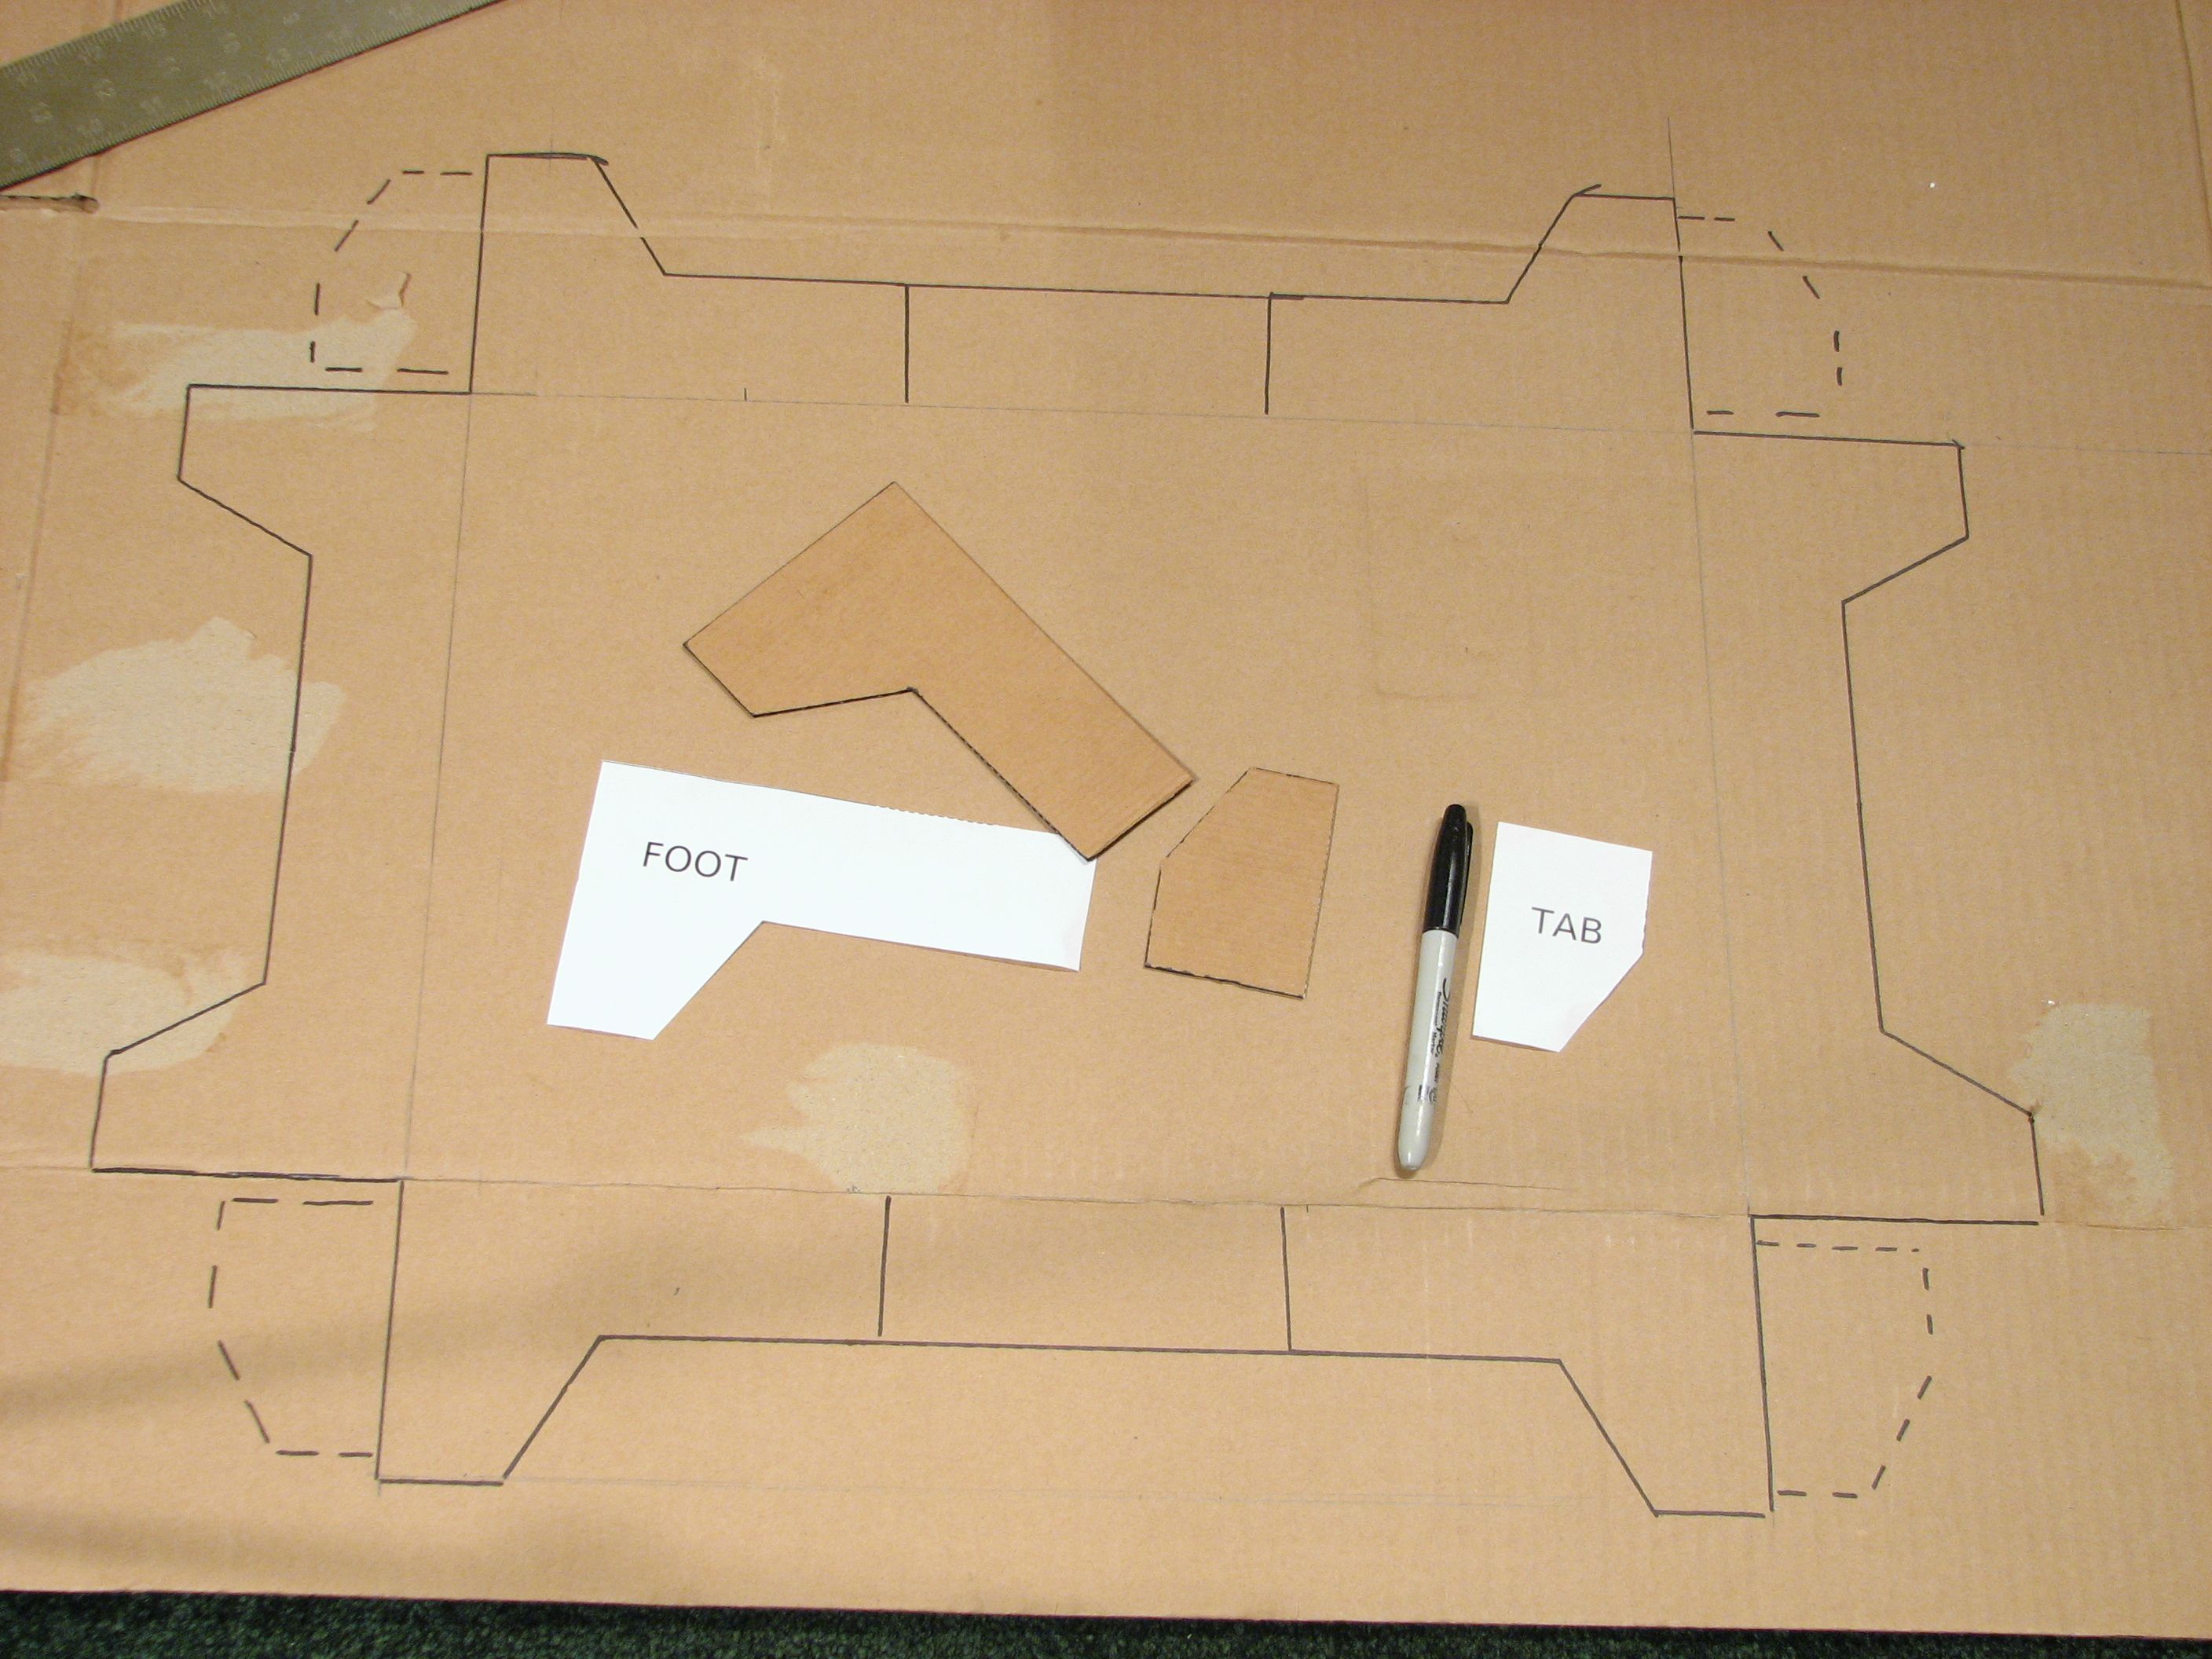
Next, add the tabs. Trace the tab pattern in four places as shown (the dashed lines): stuck to the middle part of the four feet on the long sides of the base.
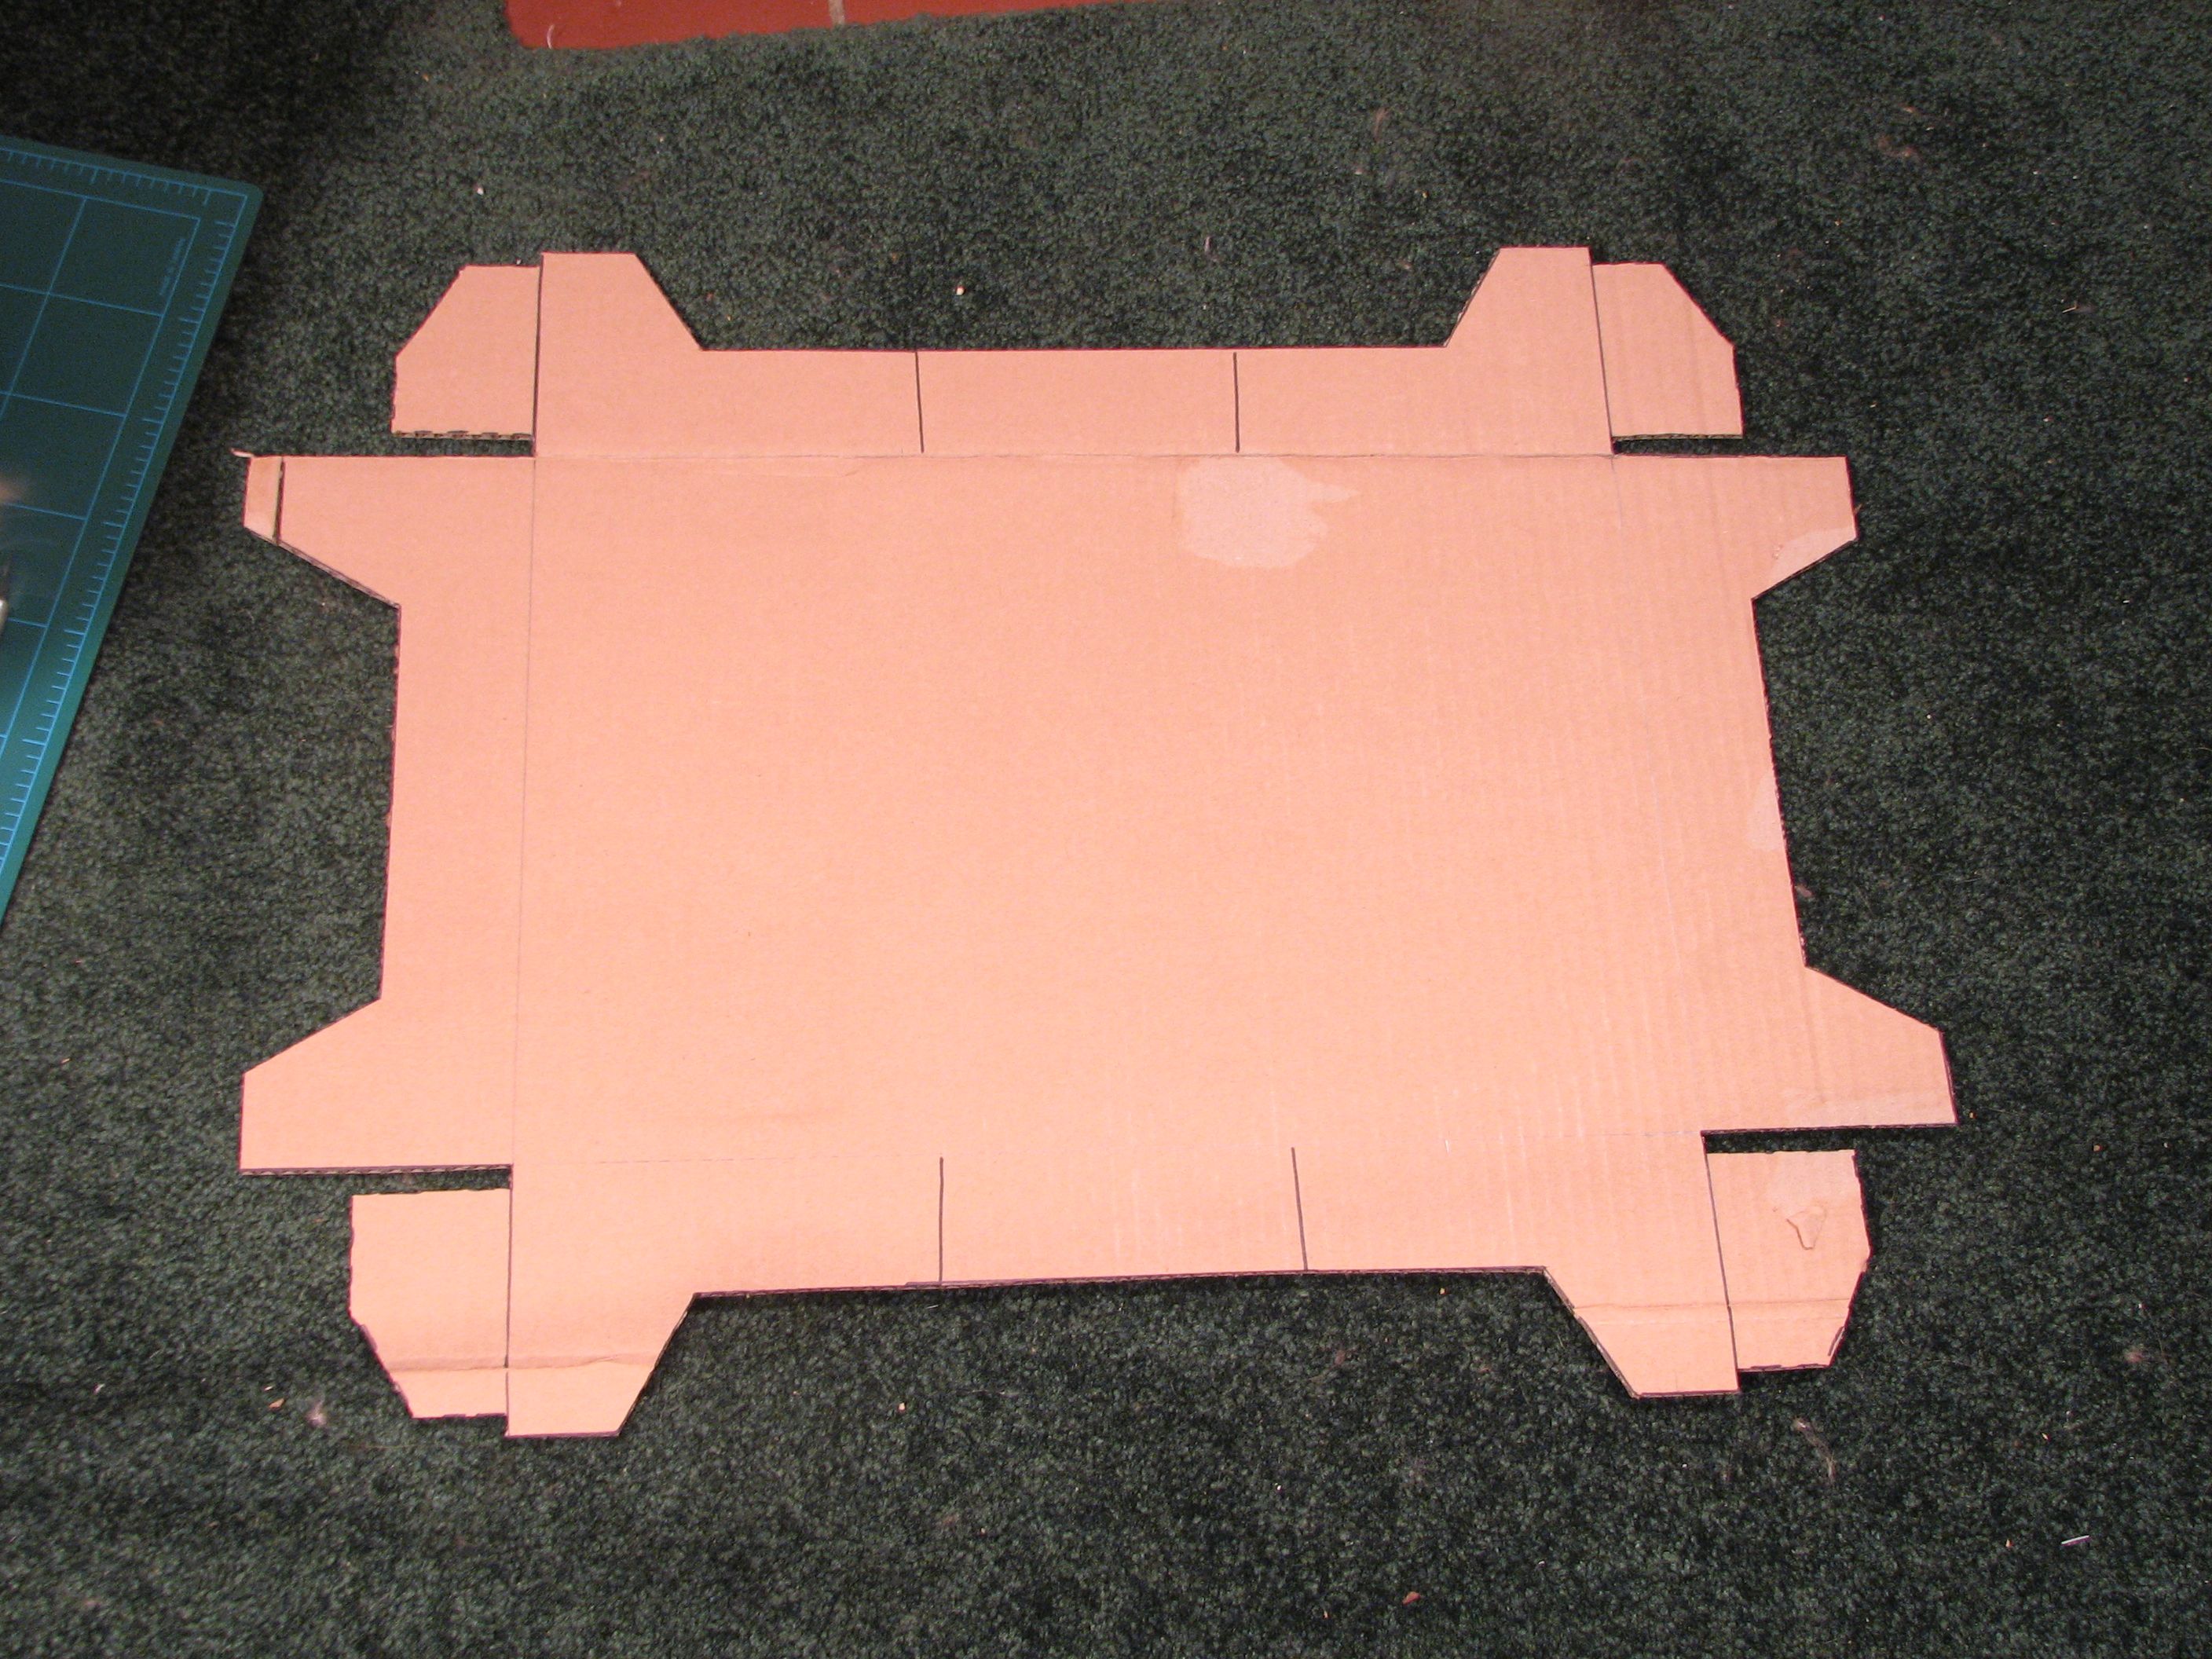
… And cut it out.
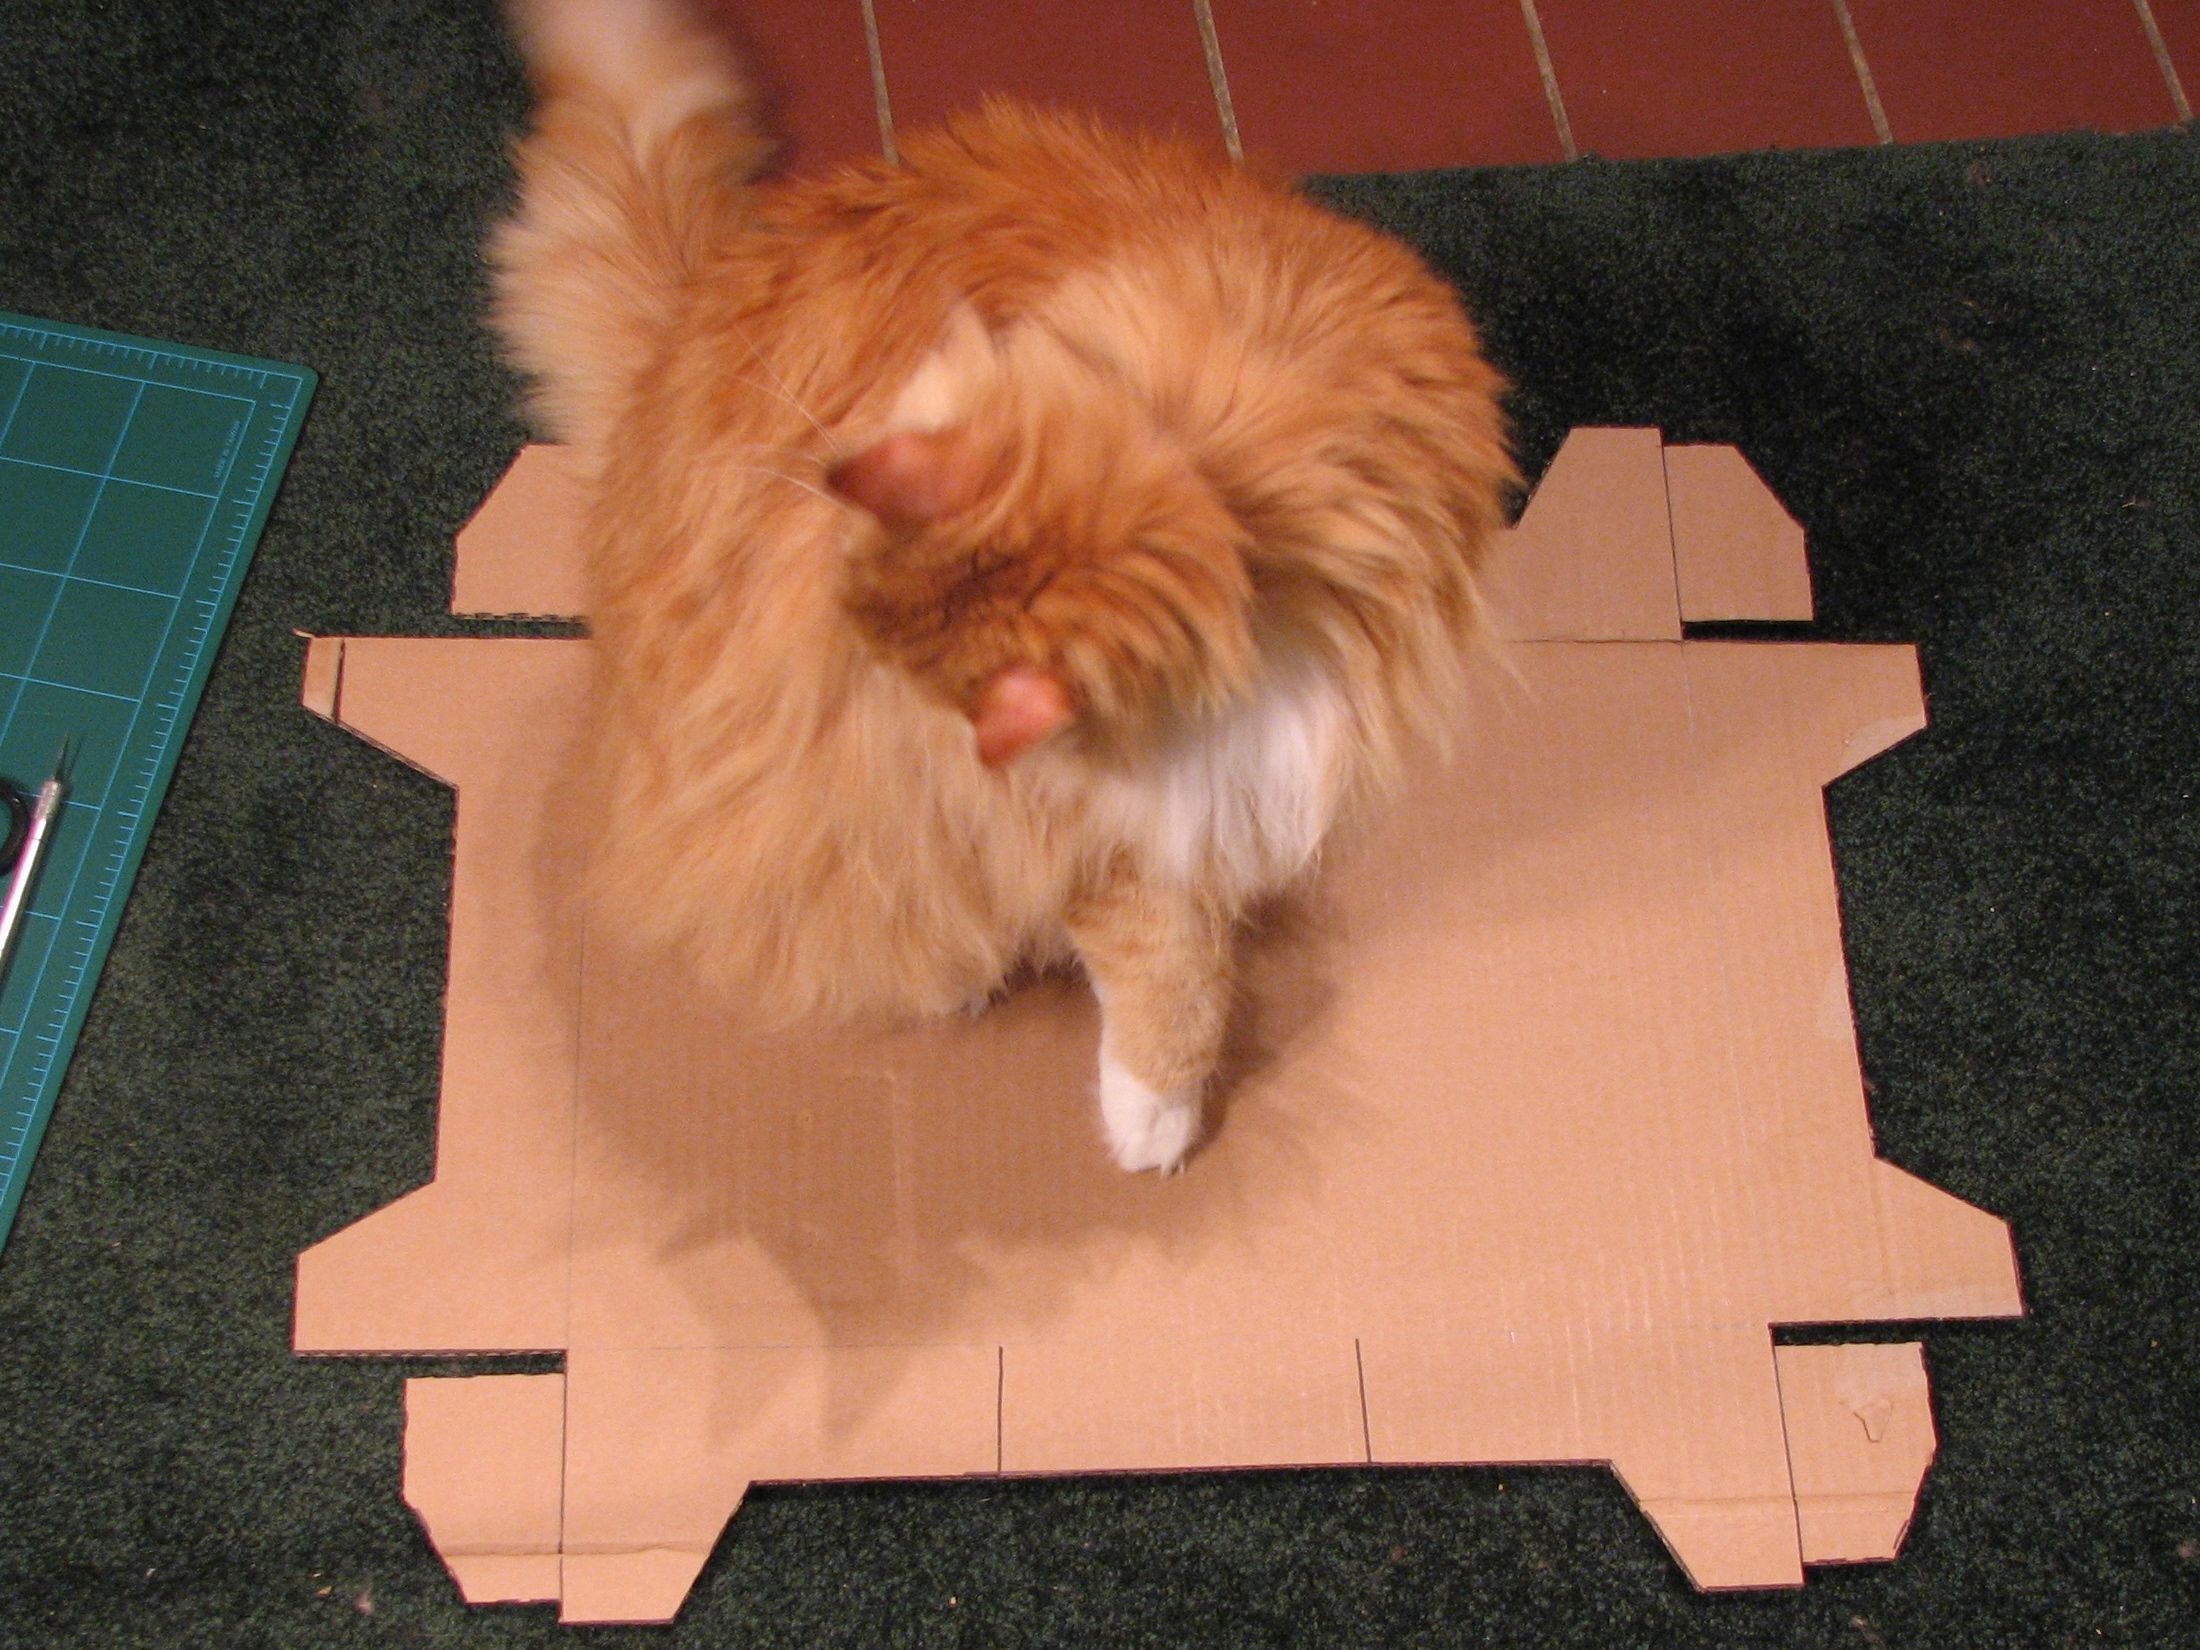
Caution: Be careful not to stall at this stage of the construction, or your clients may start to get impatient.
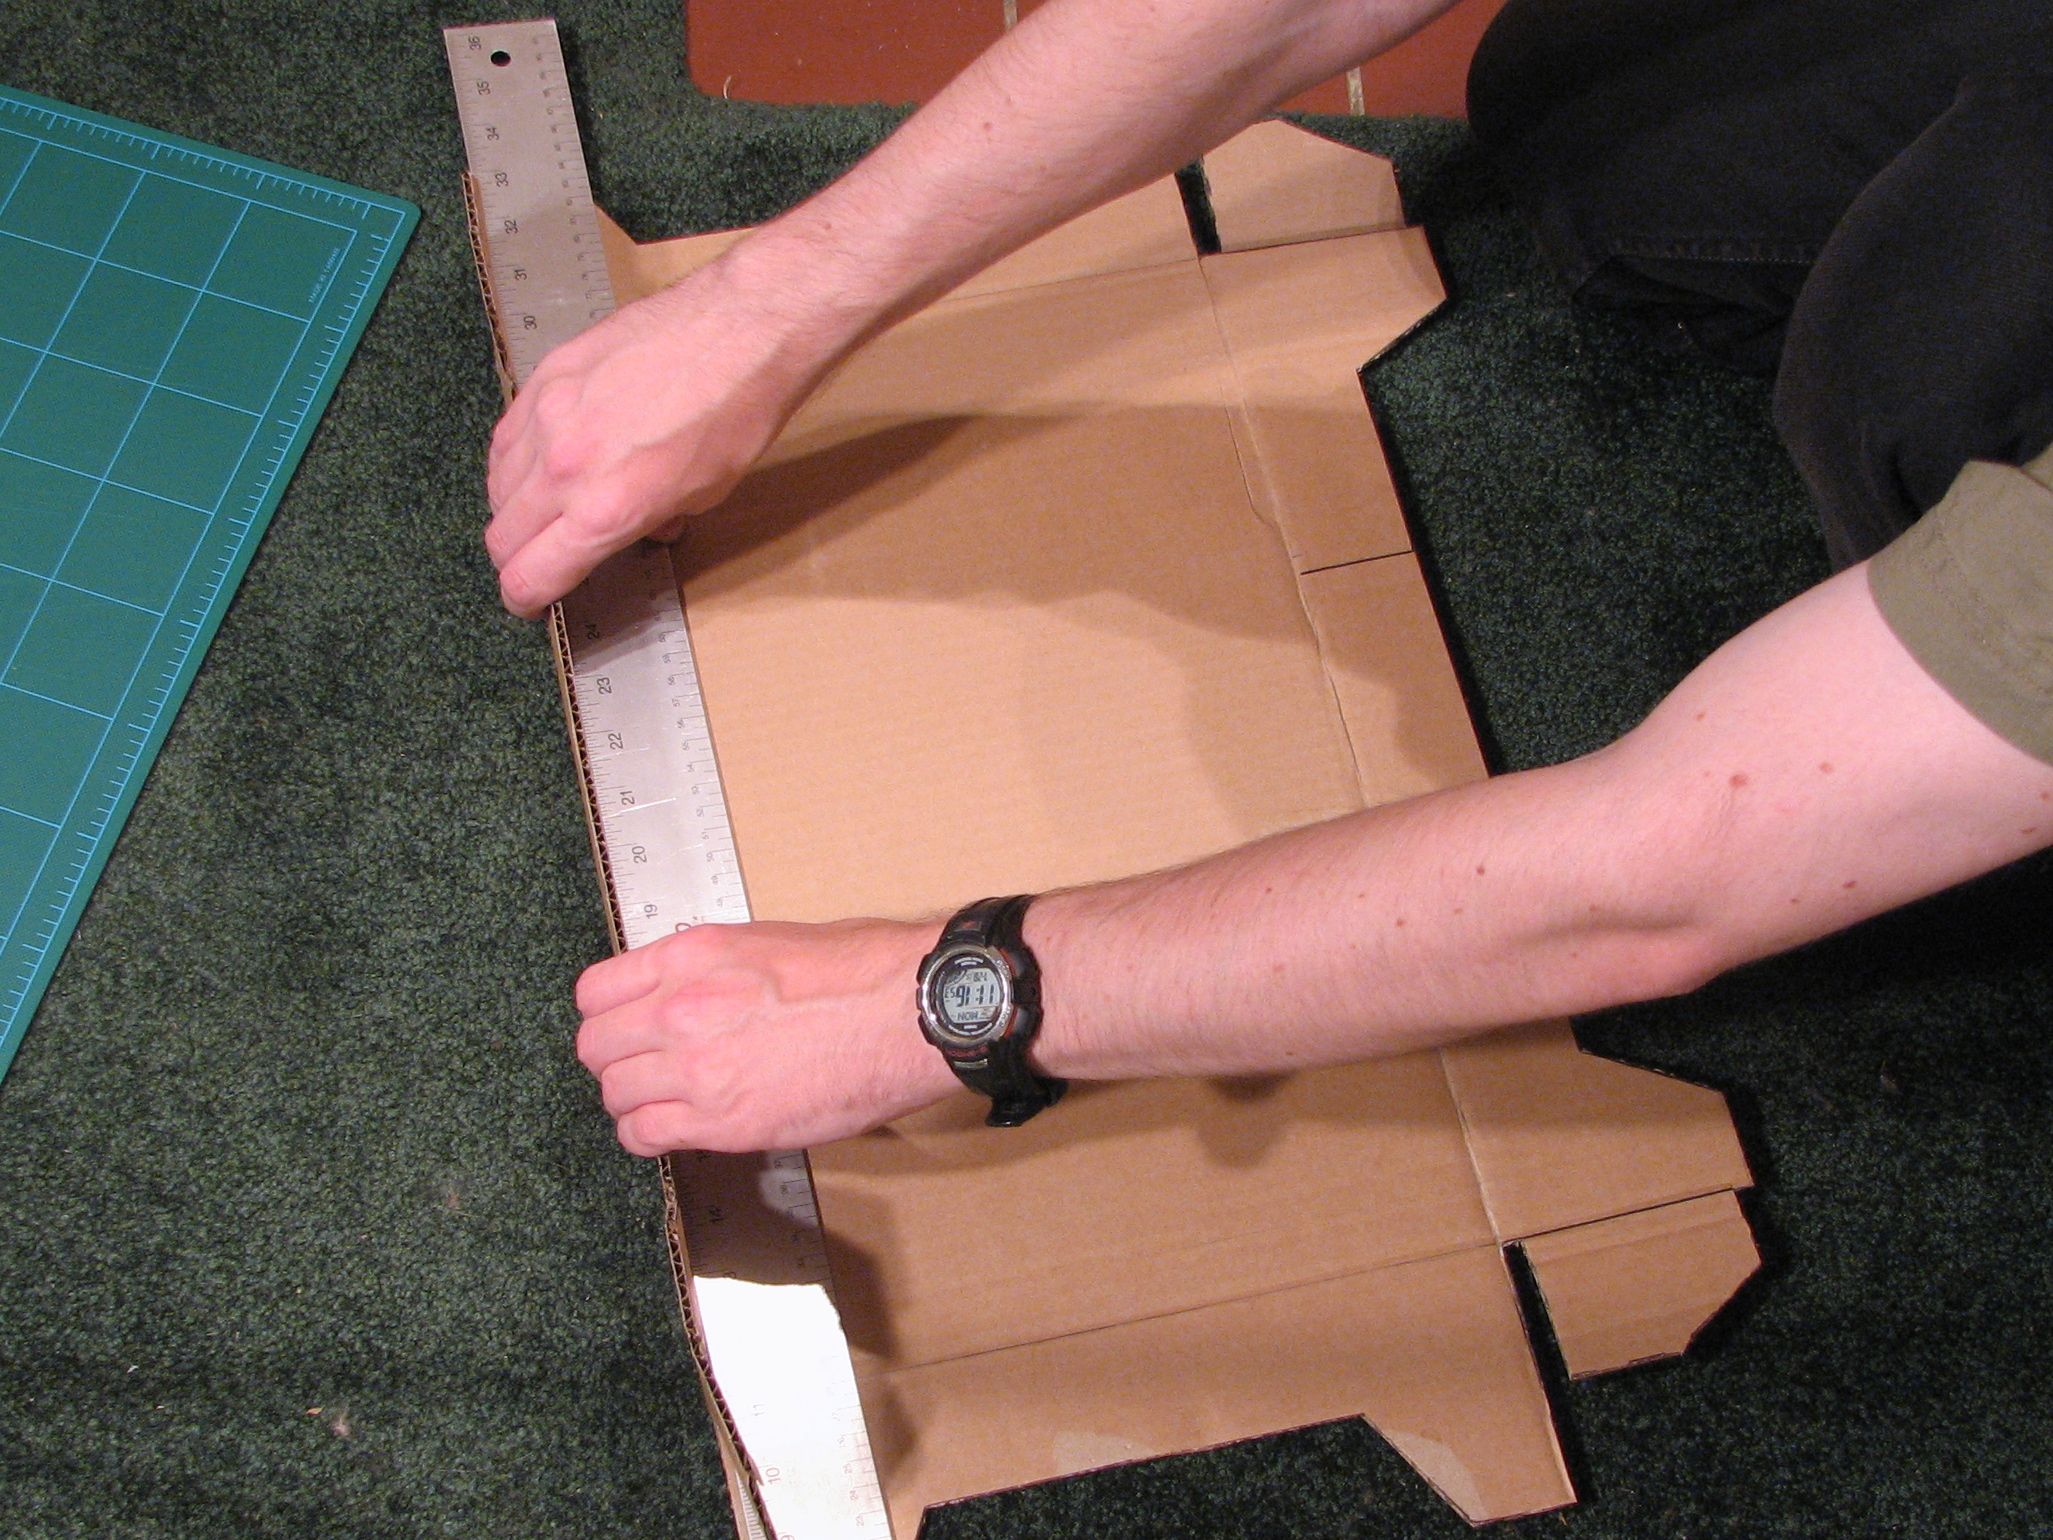
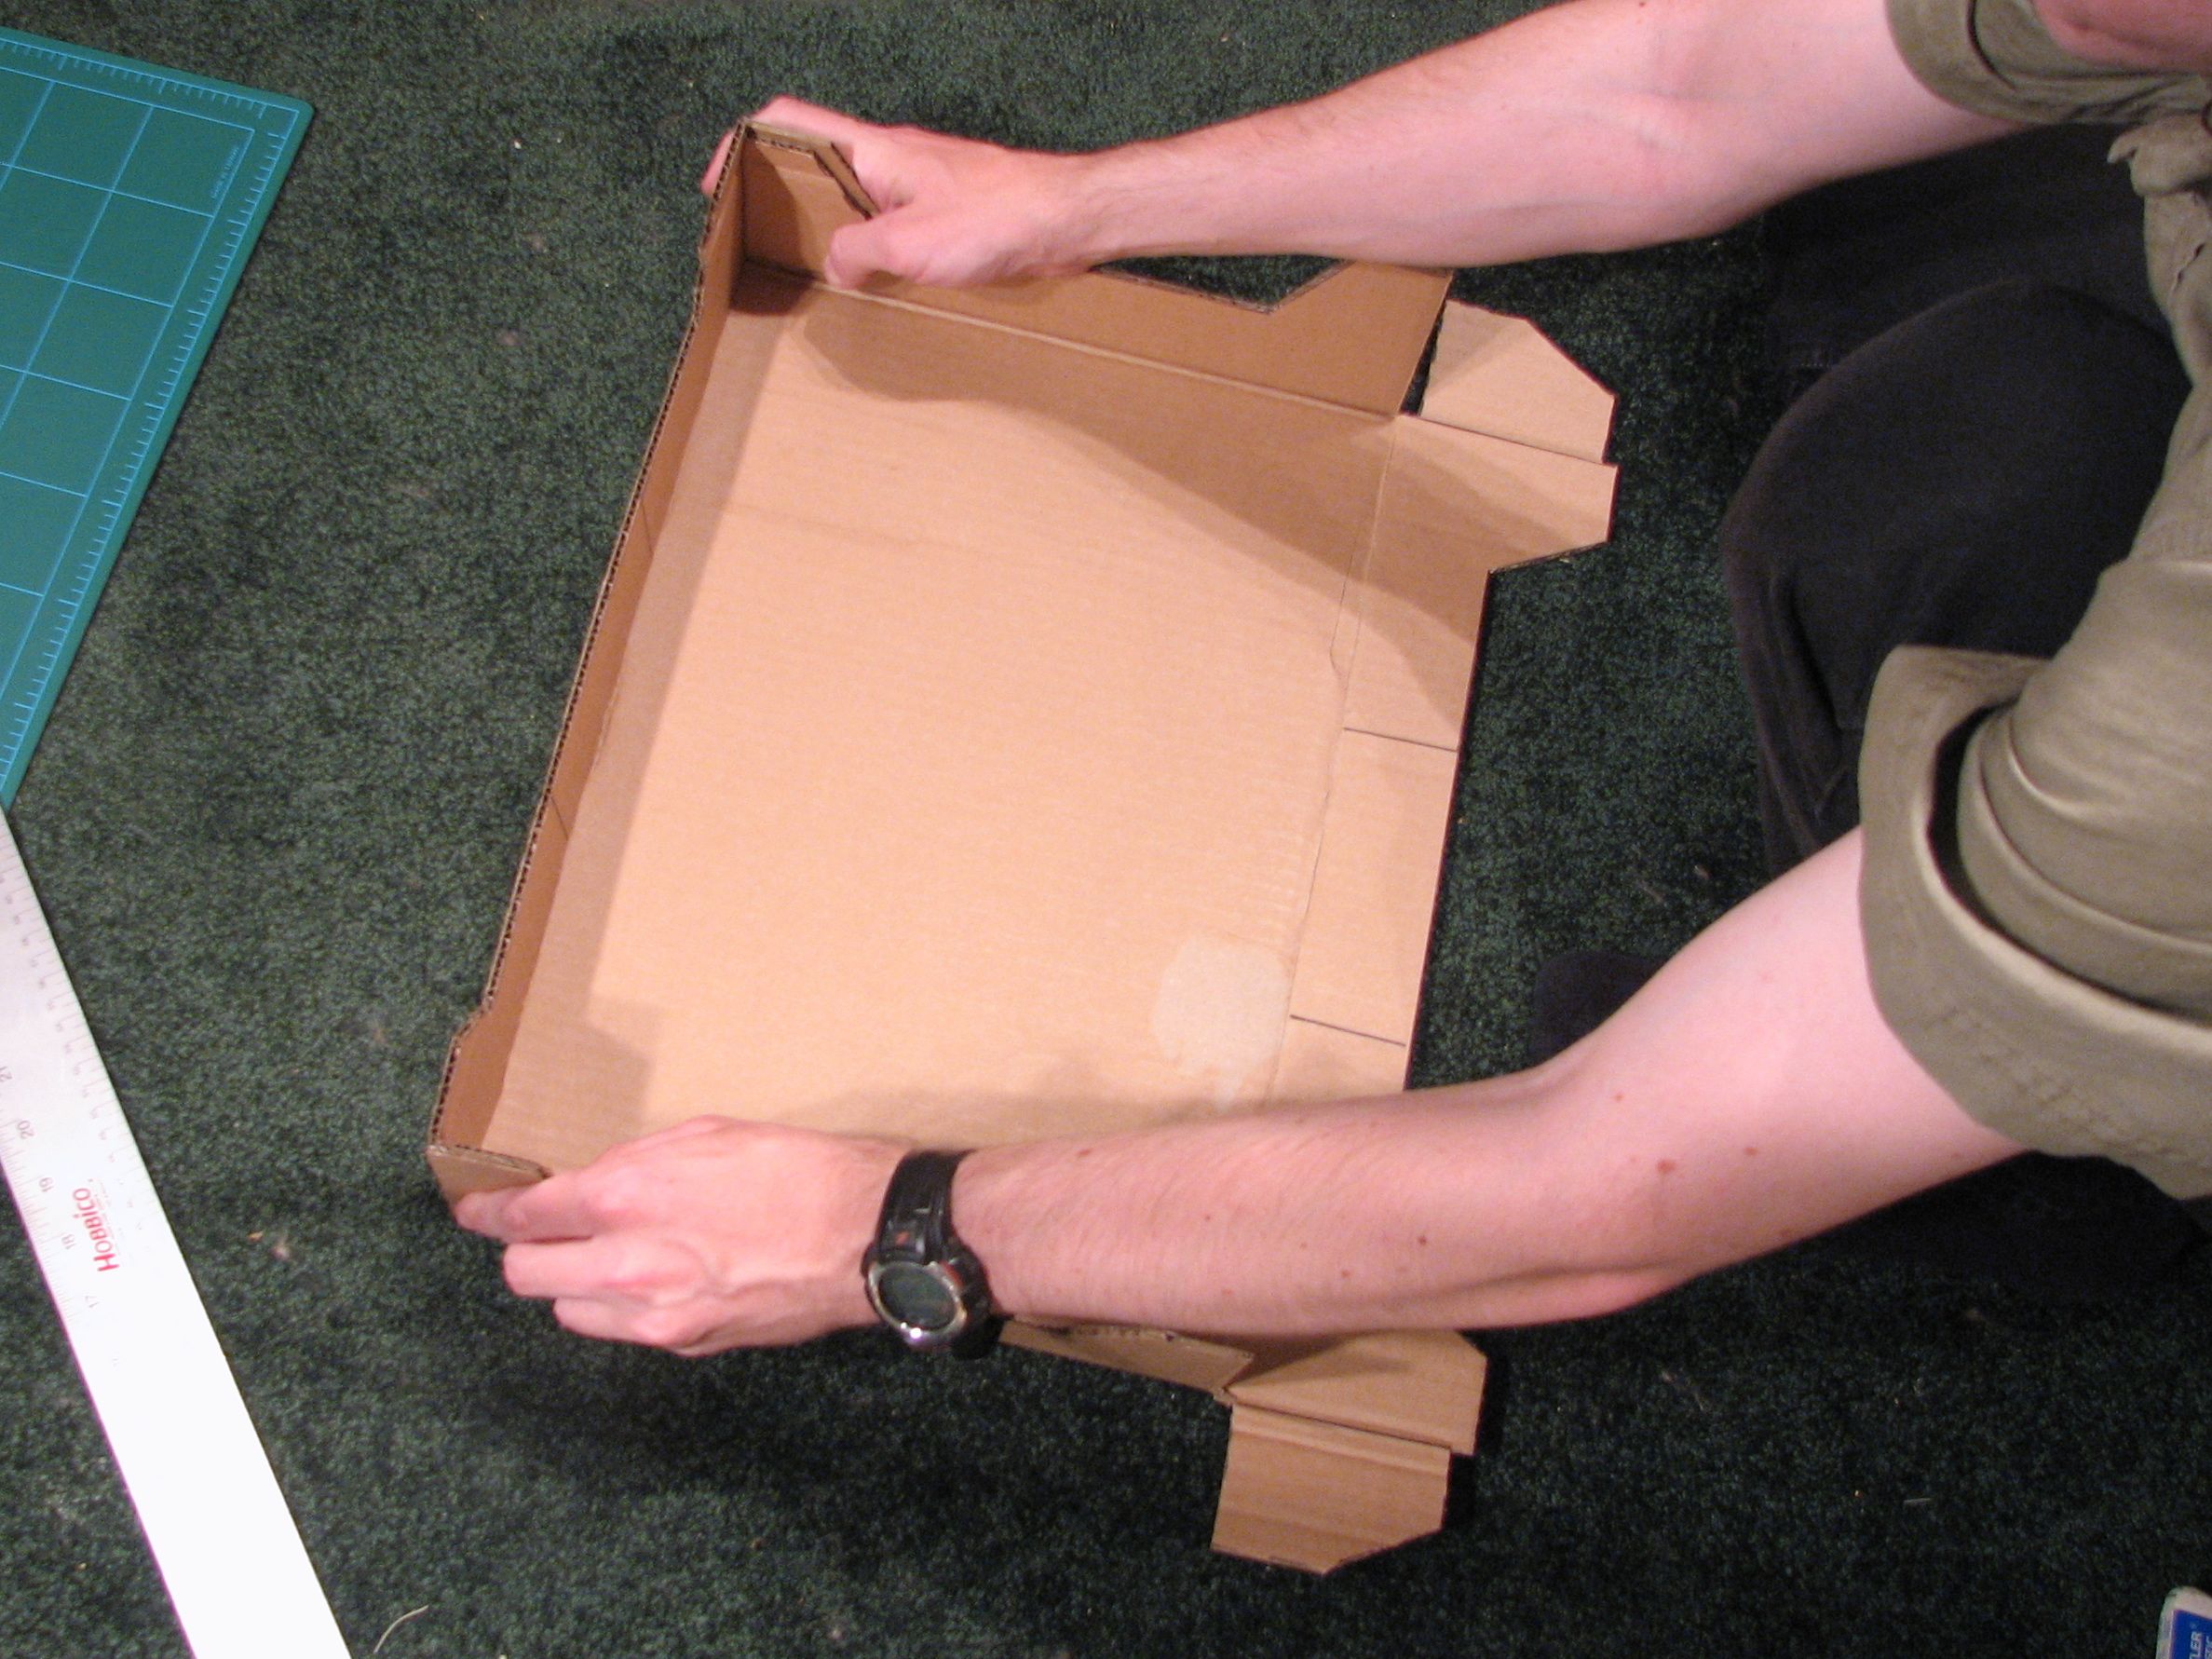
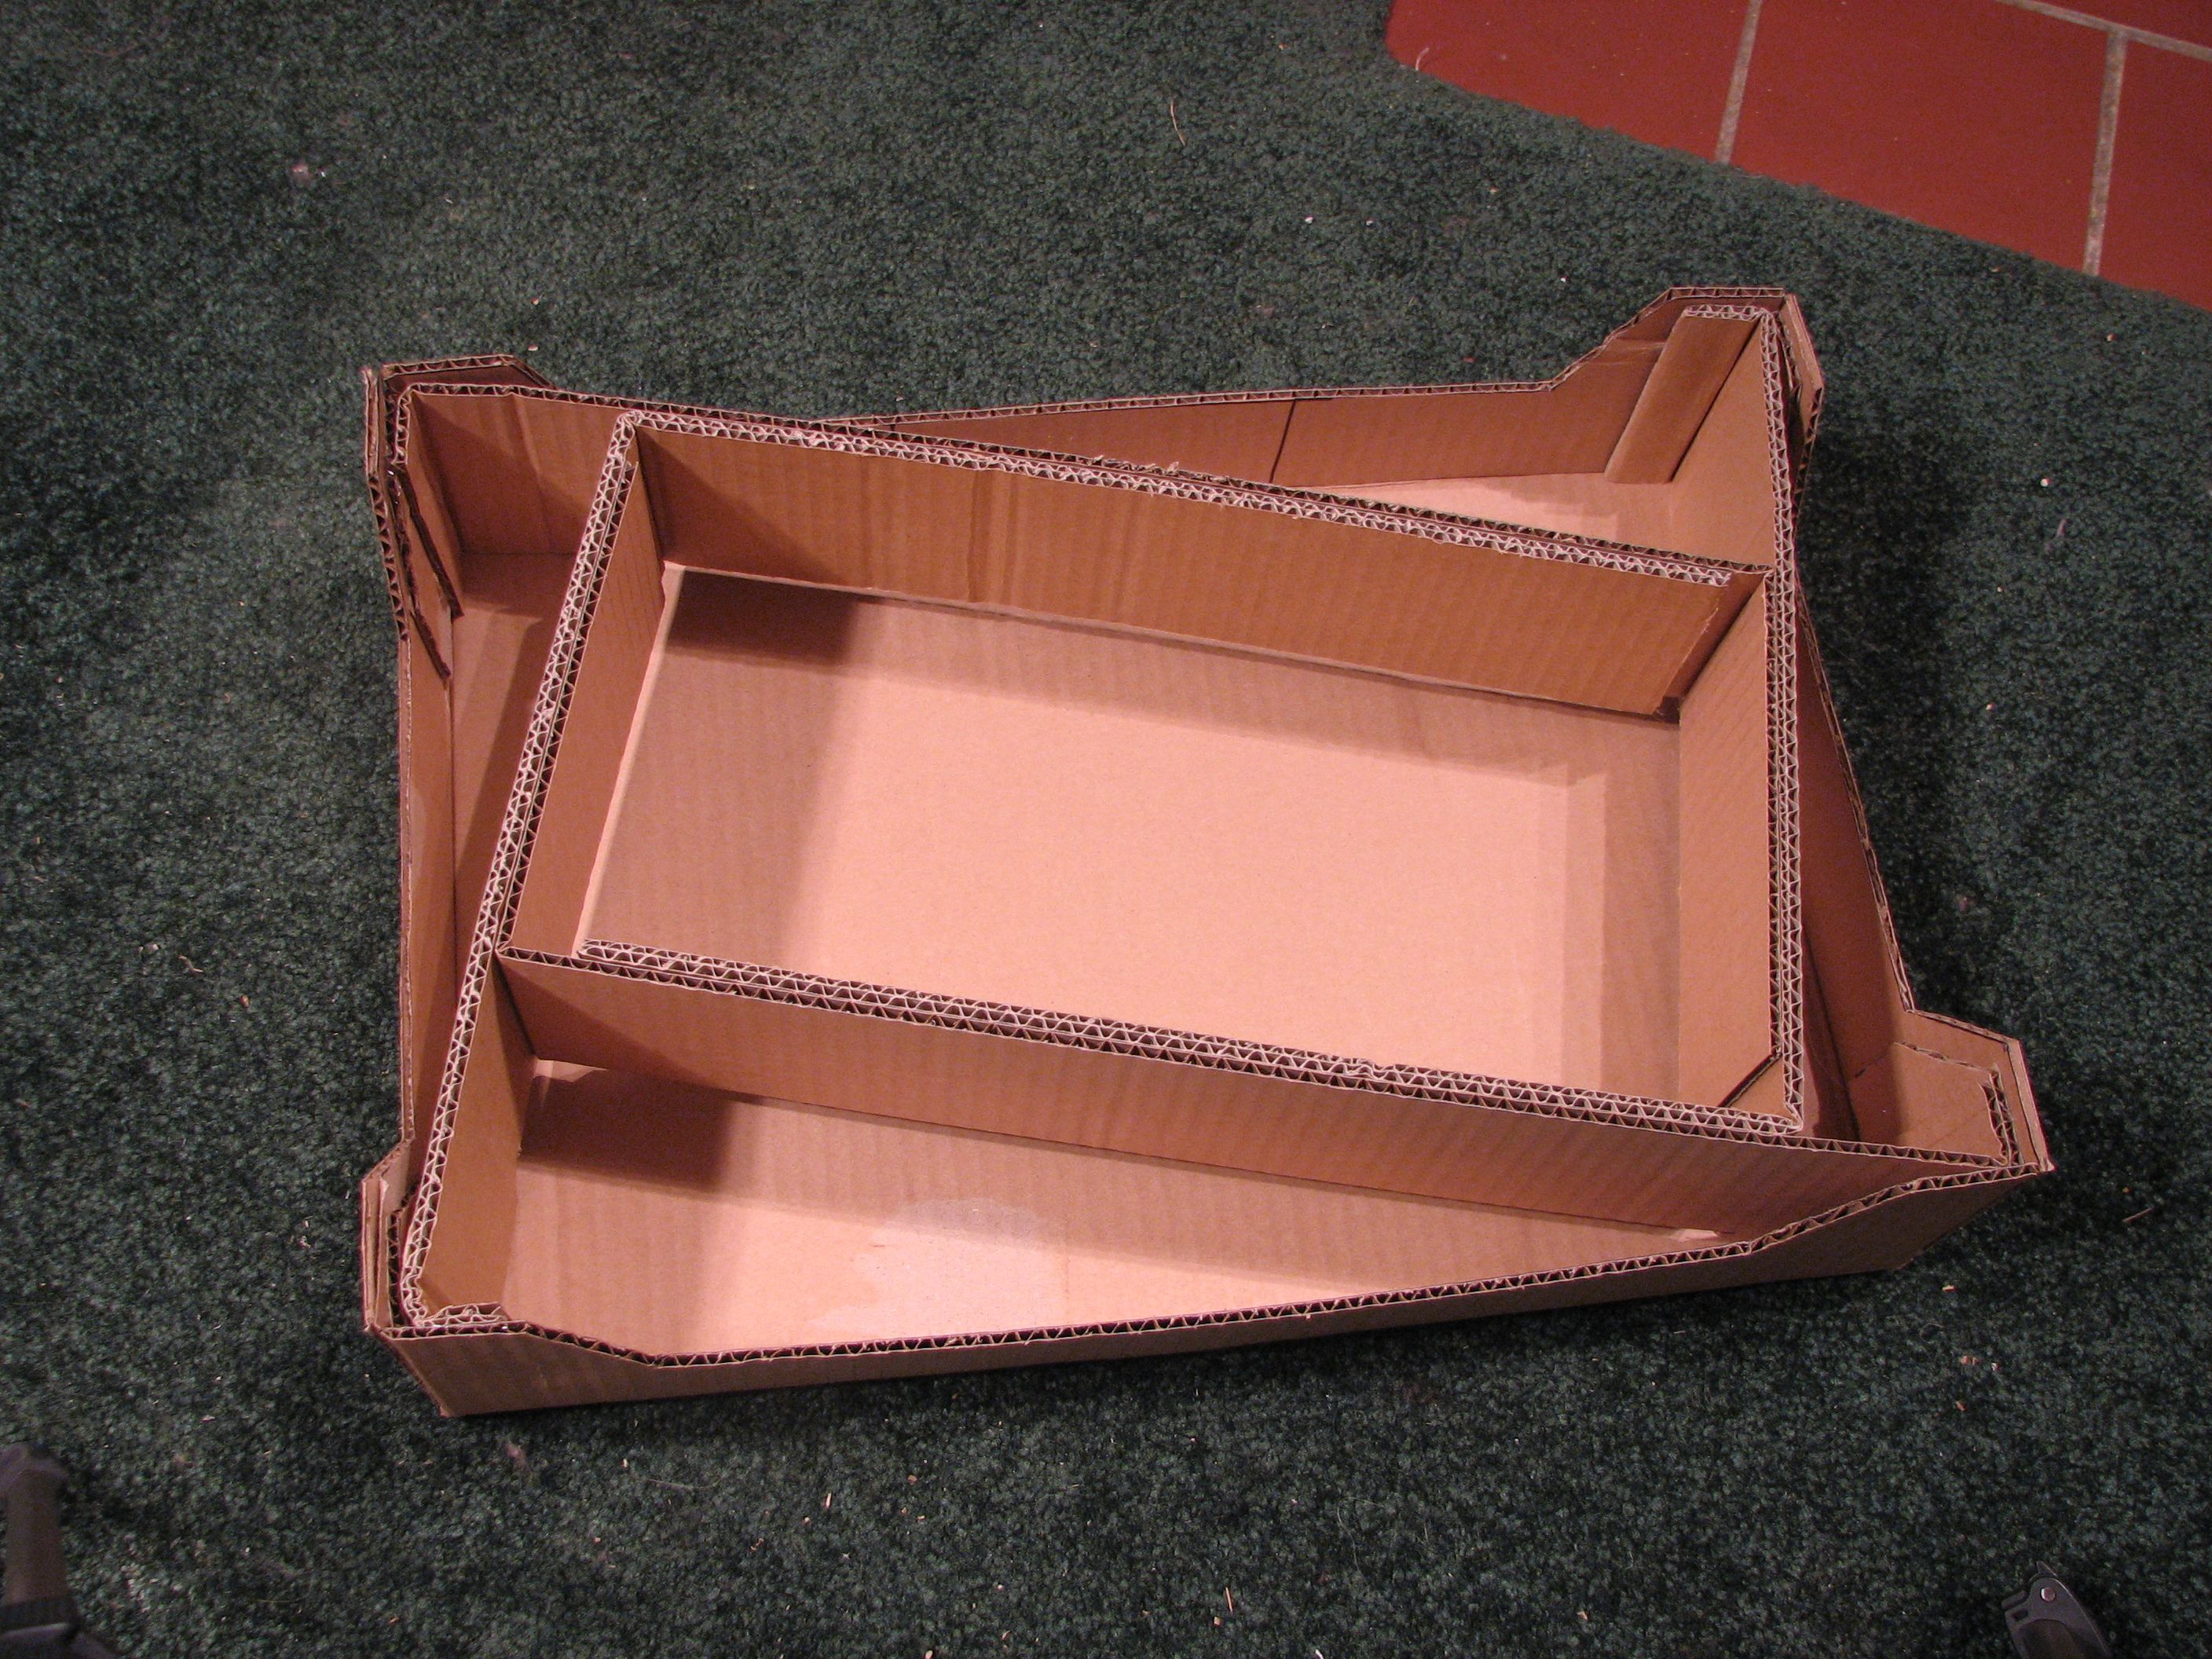
Use a straightedge to bend the cardboard at the lines and see how it fits together. The tabs should fit neatly underneath the feet on the short sides.
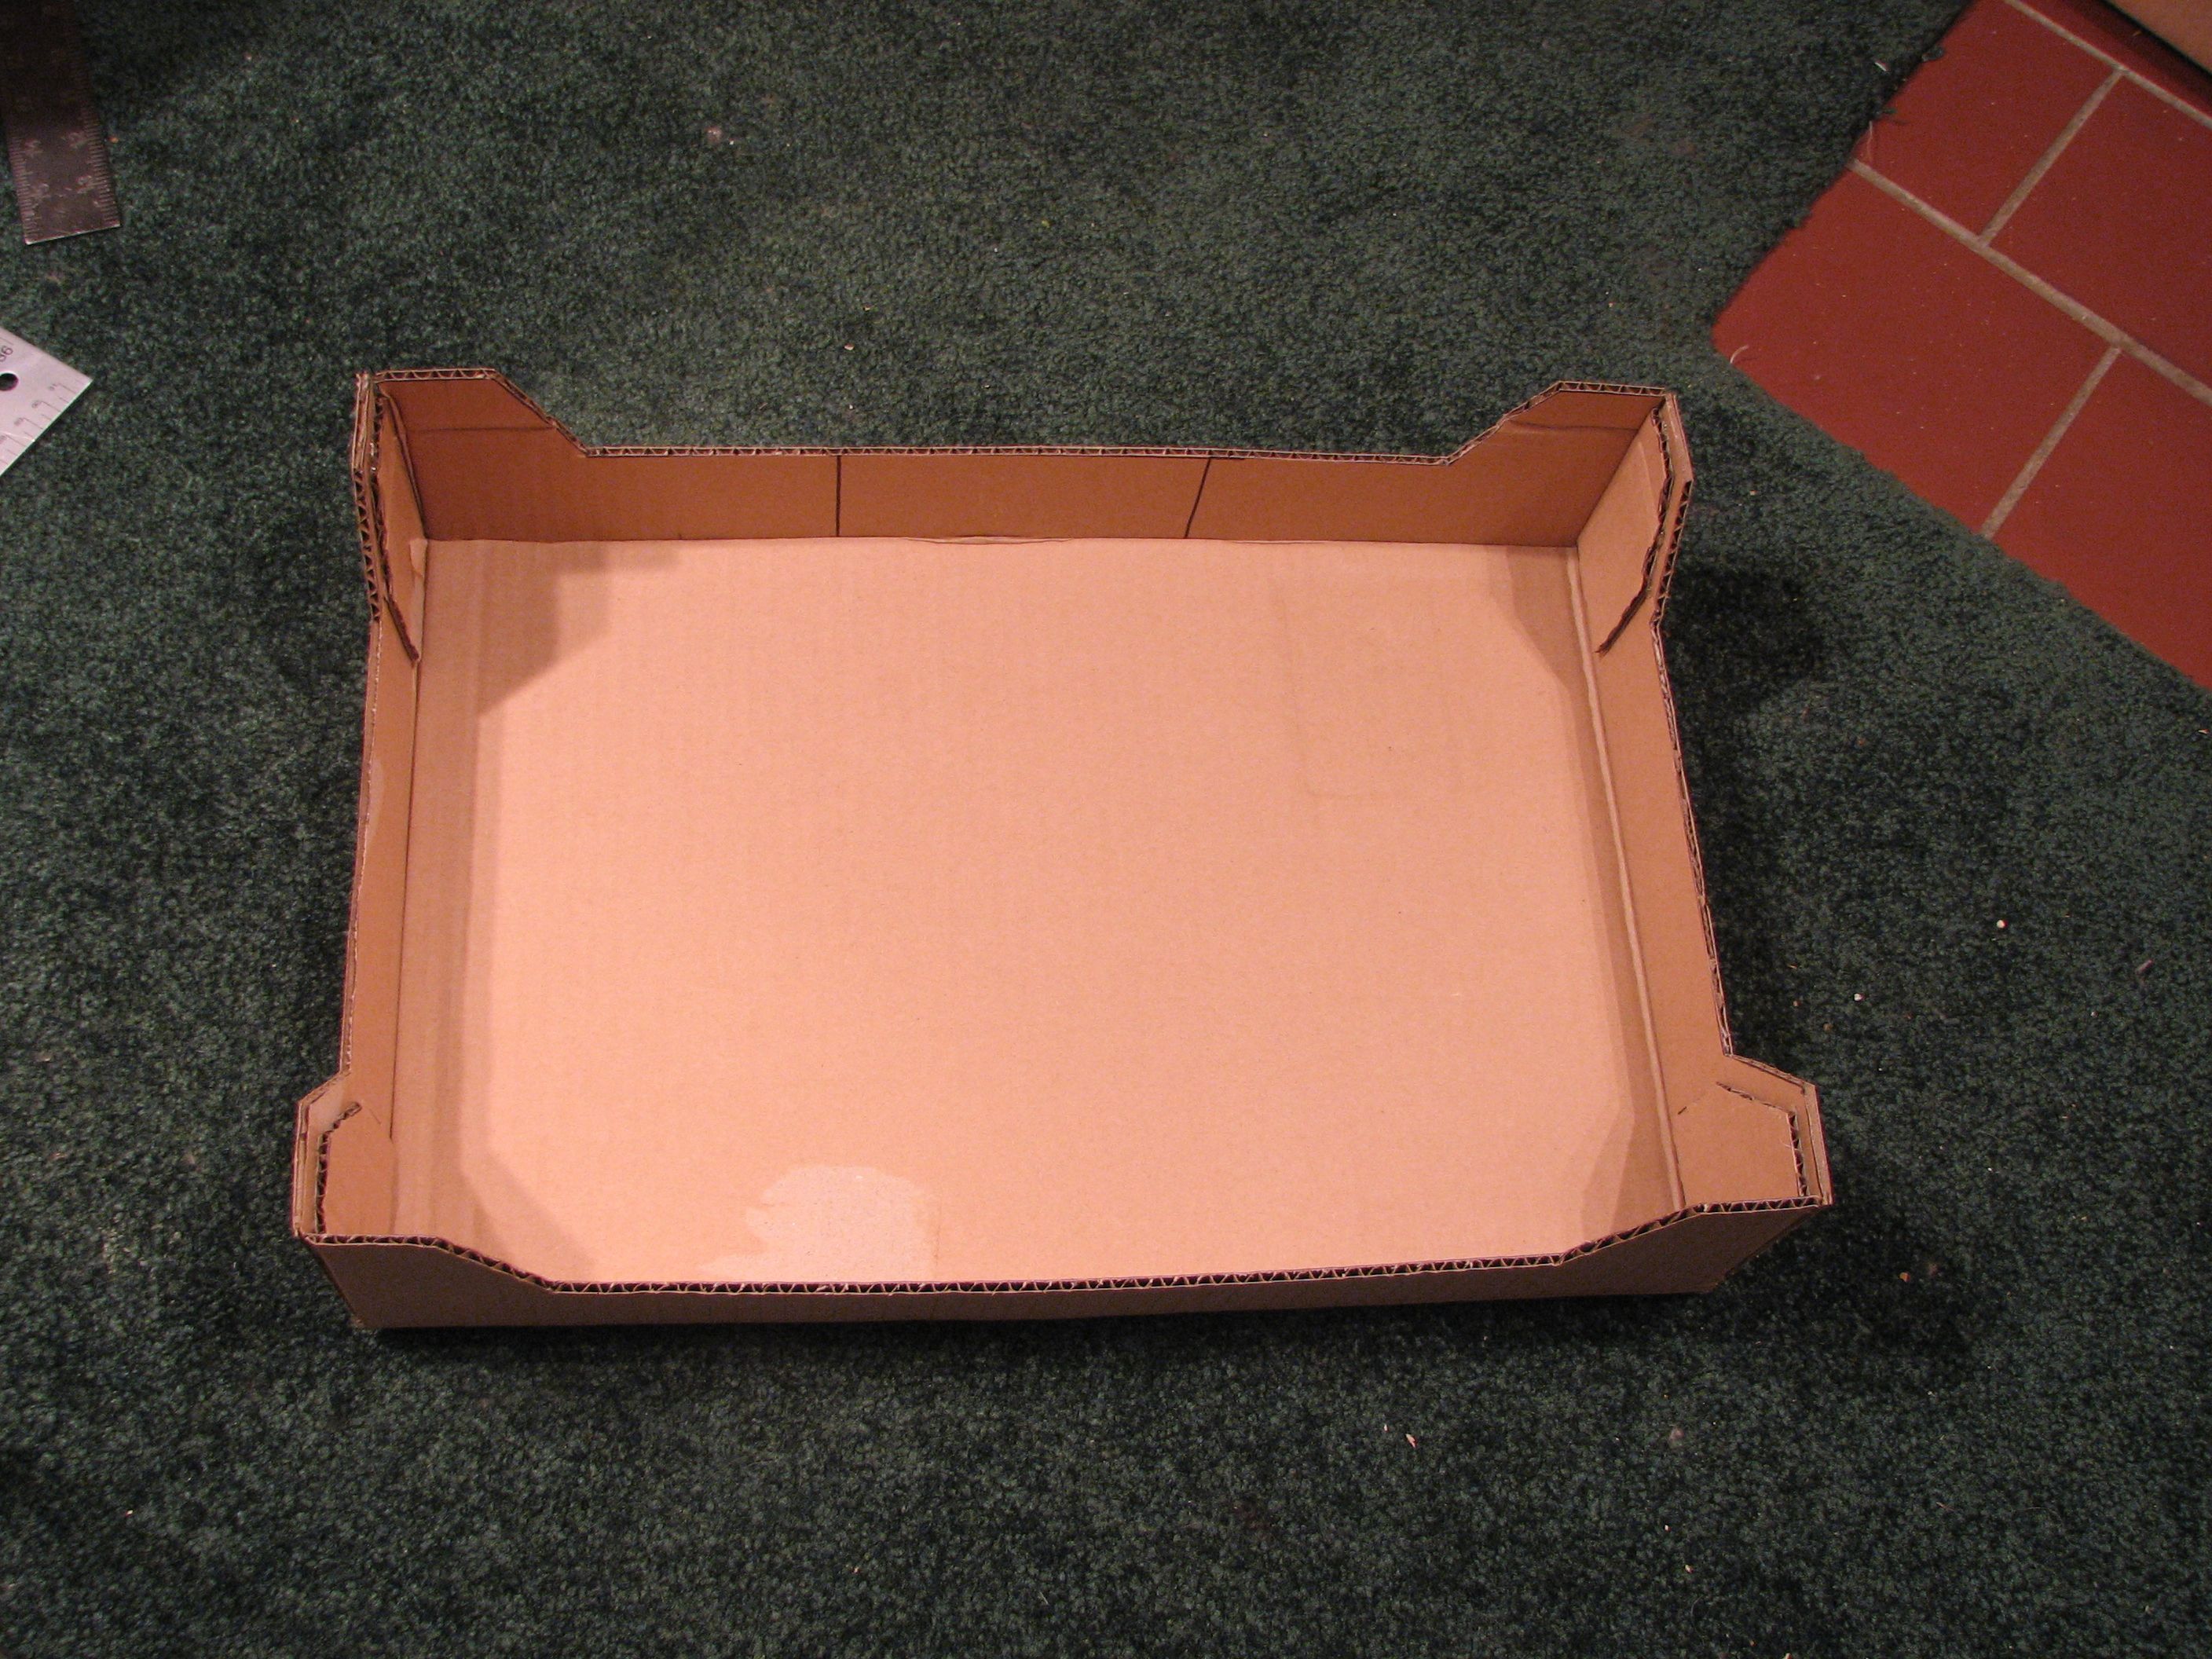
One corner at a time, apply hot glue to the tabs and use them to attach the two feet together. Be sure that you make a clean right-angle joint here so that the finished base is nice and strong.
If your cardboard is weak or your cat is heavy, the base may not yet be strong enough. Our design includes an optional bottom brace that can make the base much stiffer and stronger.
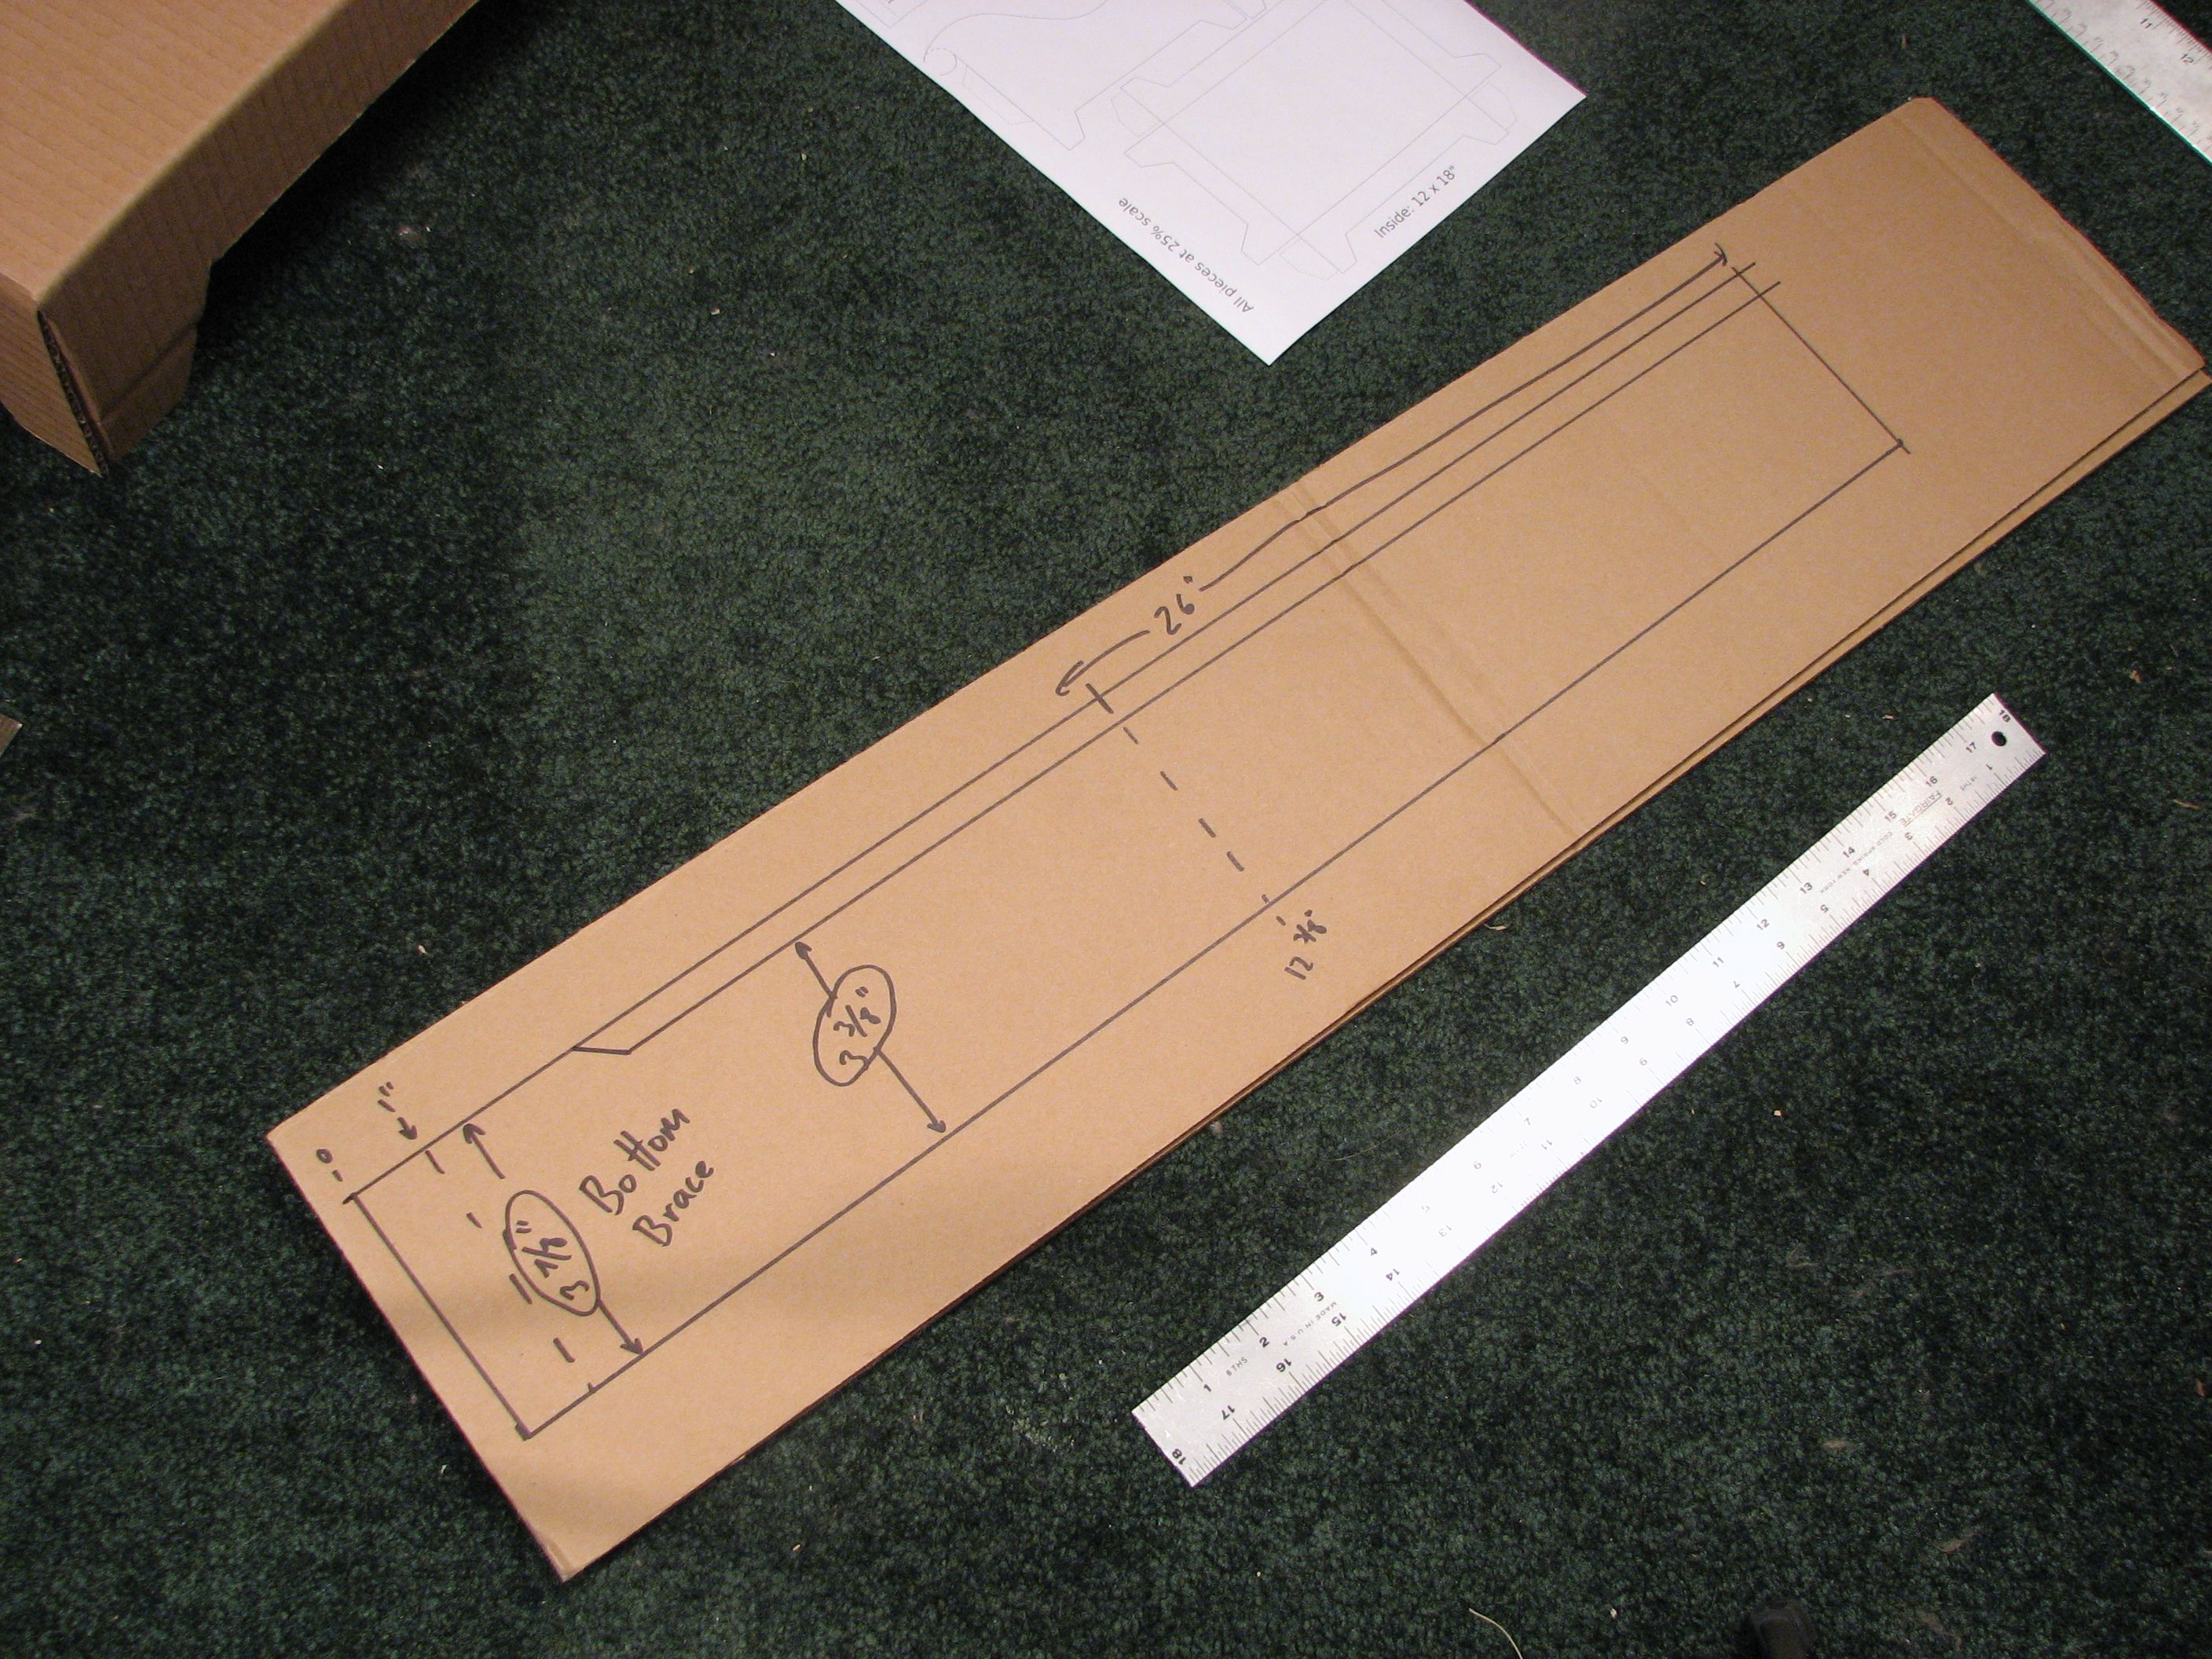
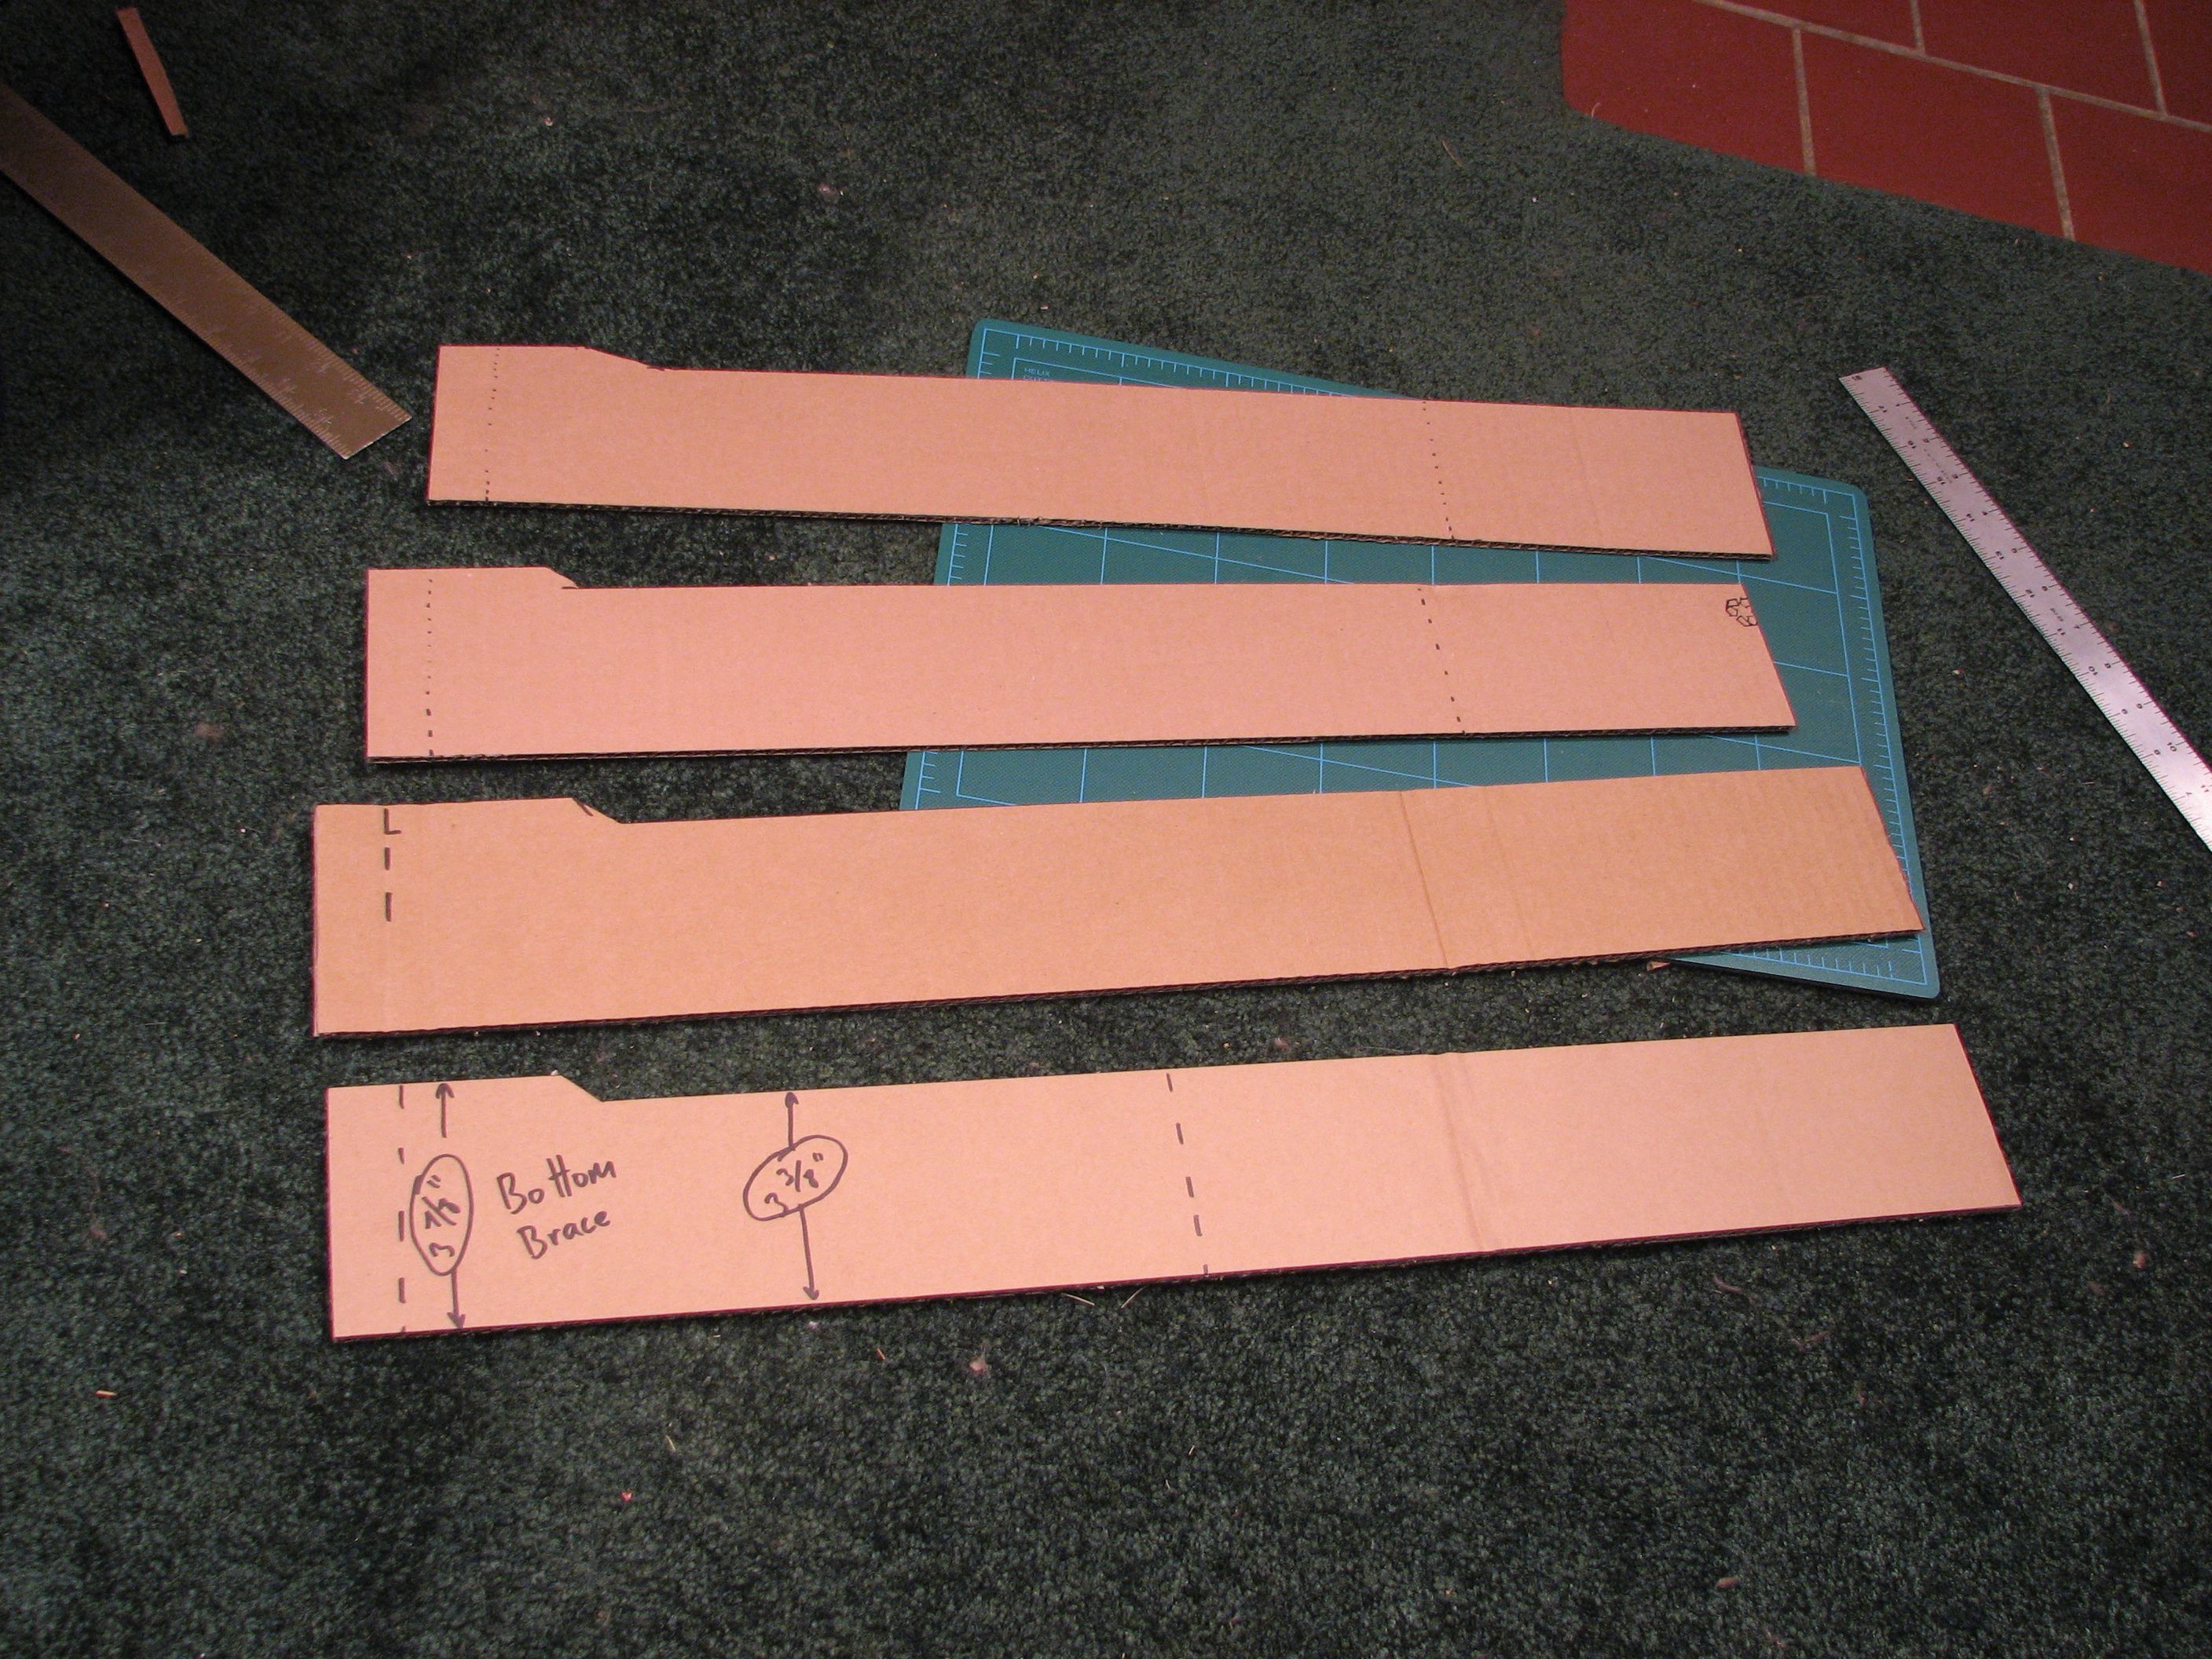
The brace consists of two pieces each of two shapes of cardboard. Each piece is essentially a long rectangle with two folds. (See the PDF pattern for dimensions) The first fold is a 1″ flap that glues to the inside corner of the box. The second fold helps to form an inner rectangle shape, where each piece has a large area where it can be glued to the next one. The shapes are not actually rectangles– they are only full height at the edges. Towards the center, the braces can optionally have less height (sinking by 1/4″ – 1/2″) so that the top cardboard surface can gradually stretch and deform to make a nice concave surface for the cats.
If possible cut out these braces with the grain of the cardboard (the corrugation) pointing perpendicular to the long direction.
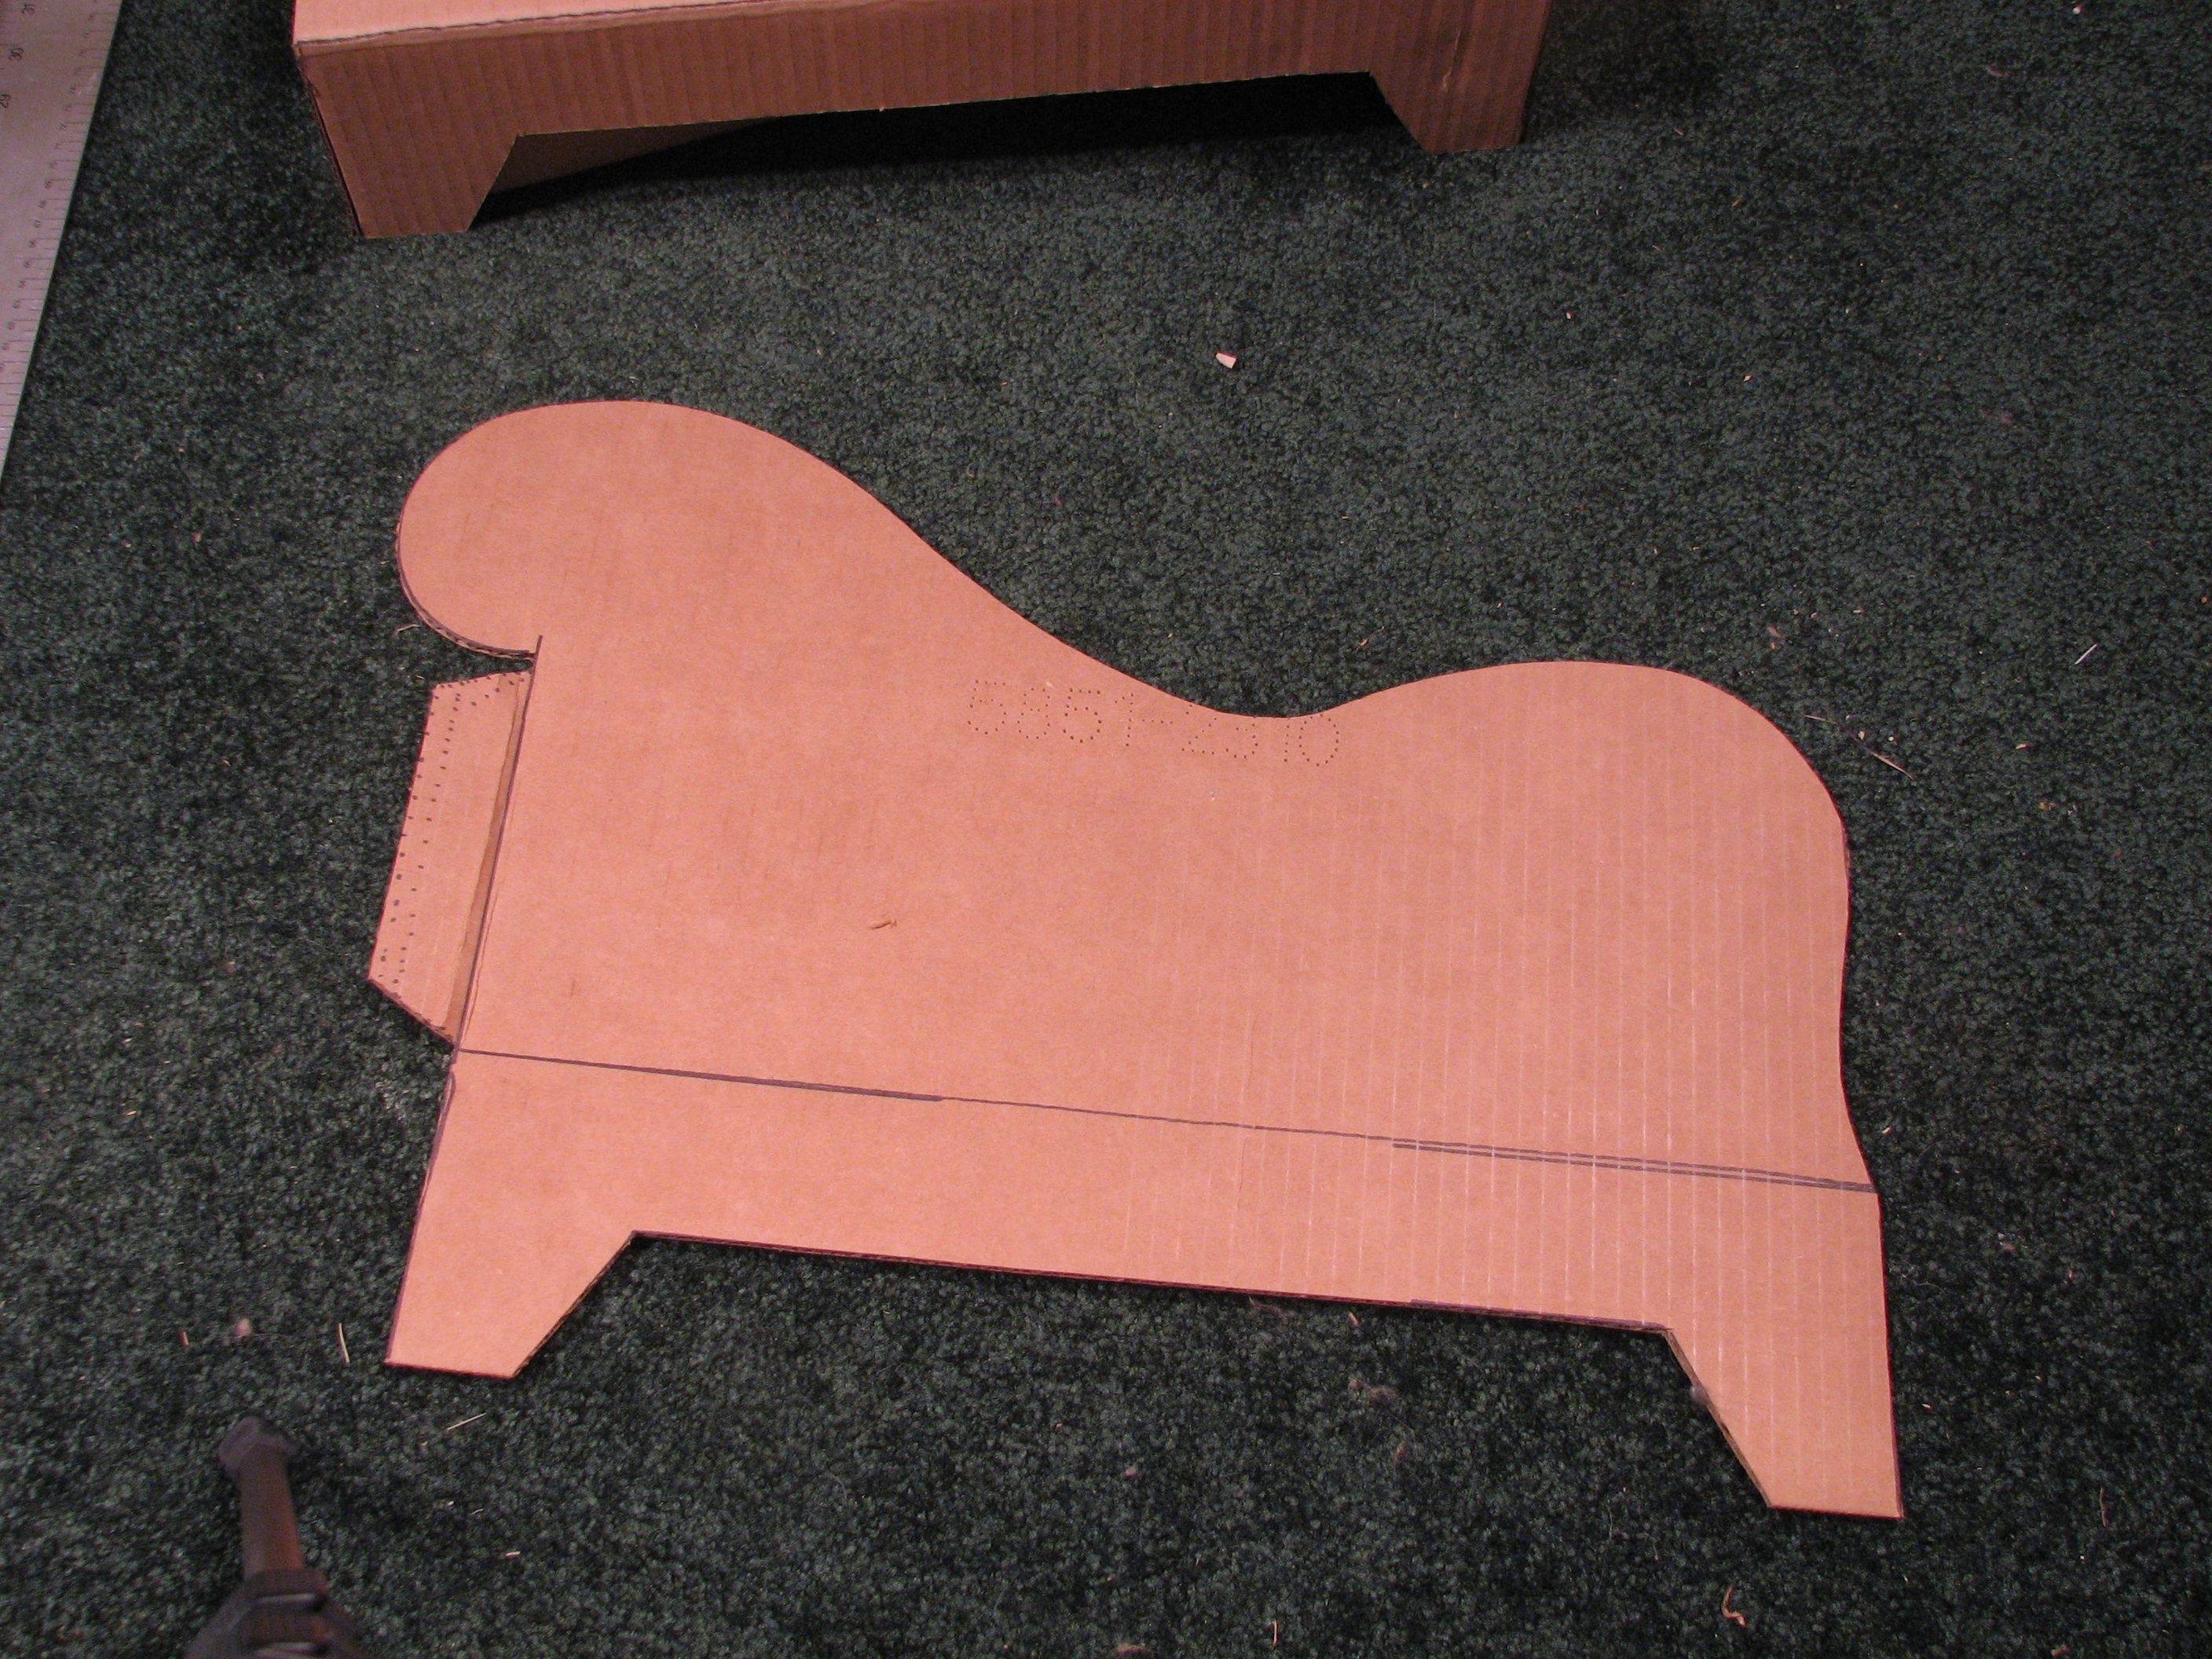
You can start the back panel by tracing the long side of the base onto a sheet of cardboard and improvising from there. This is your chance to be very creative with the design. (There are certainly a lot of designs to draw inspiration from!)
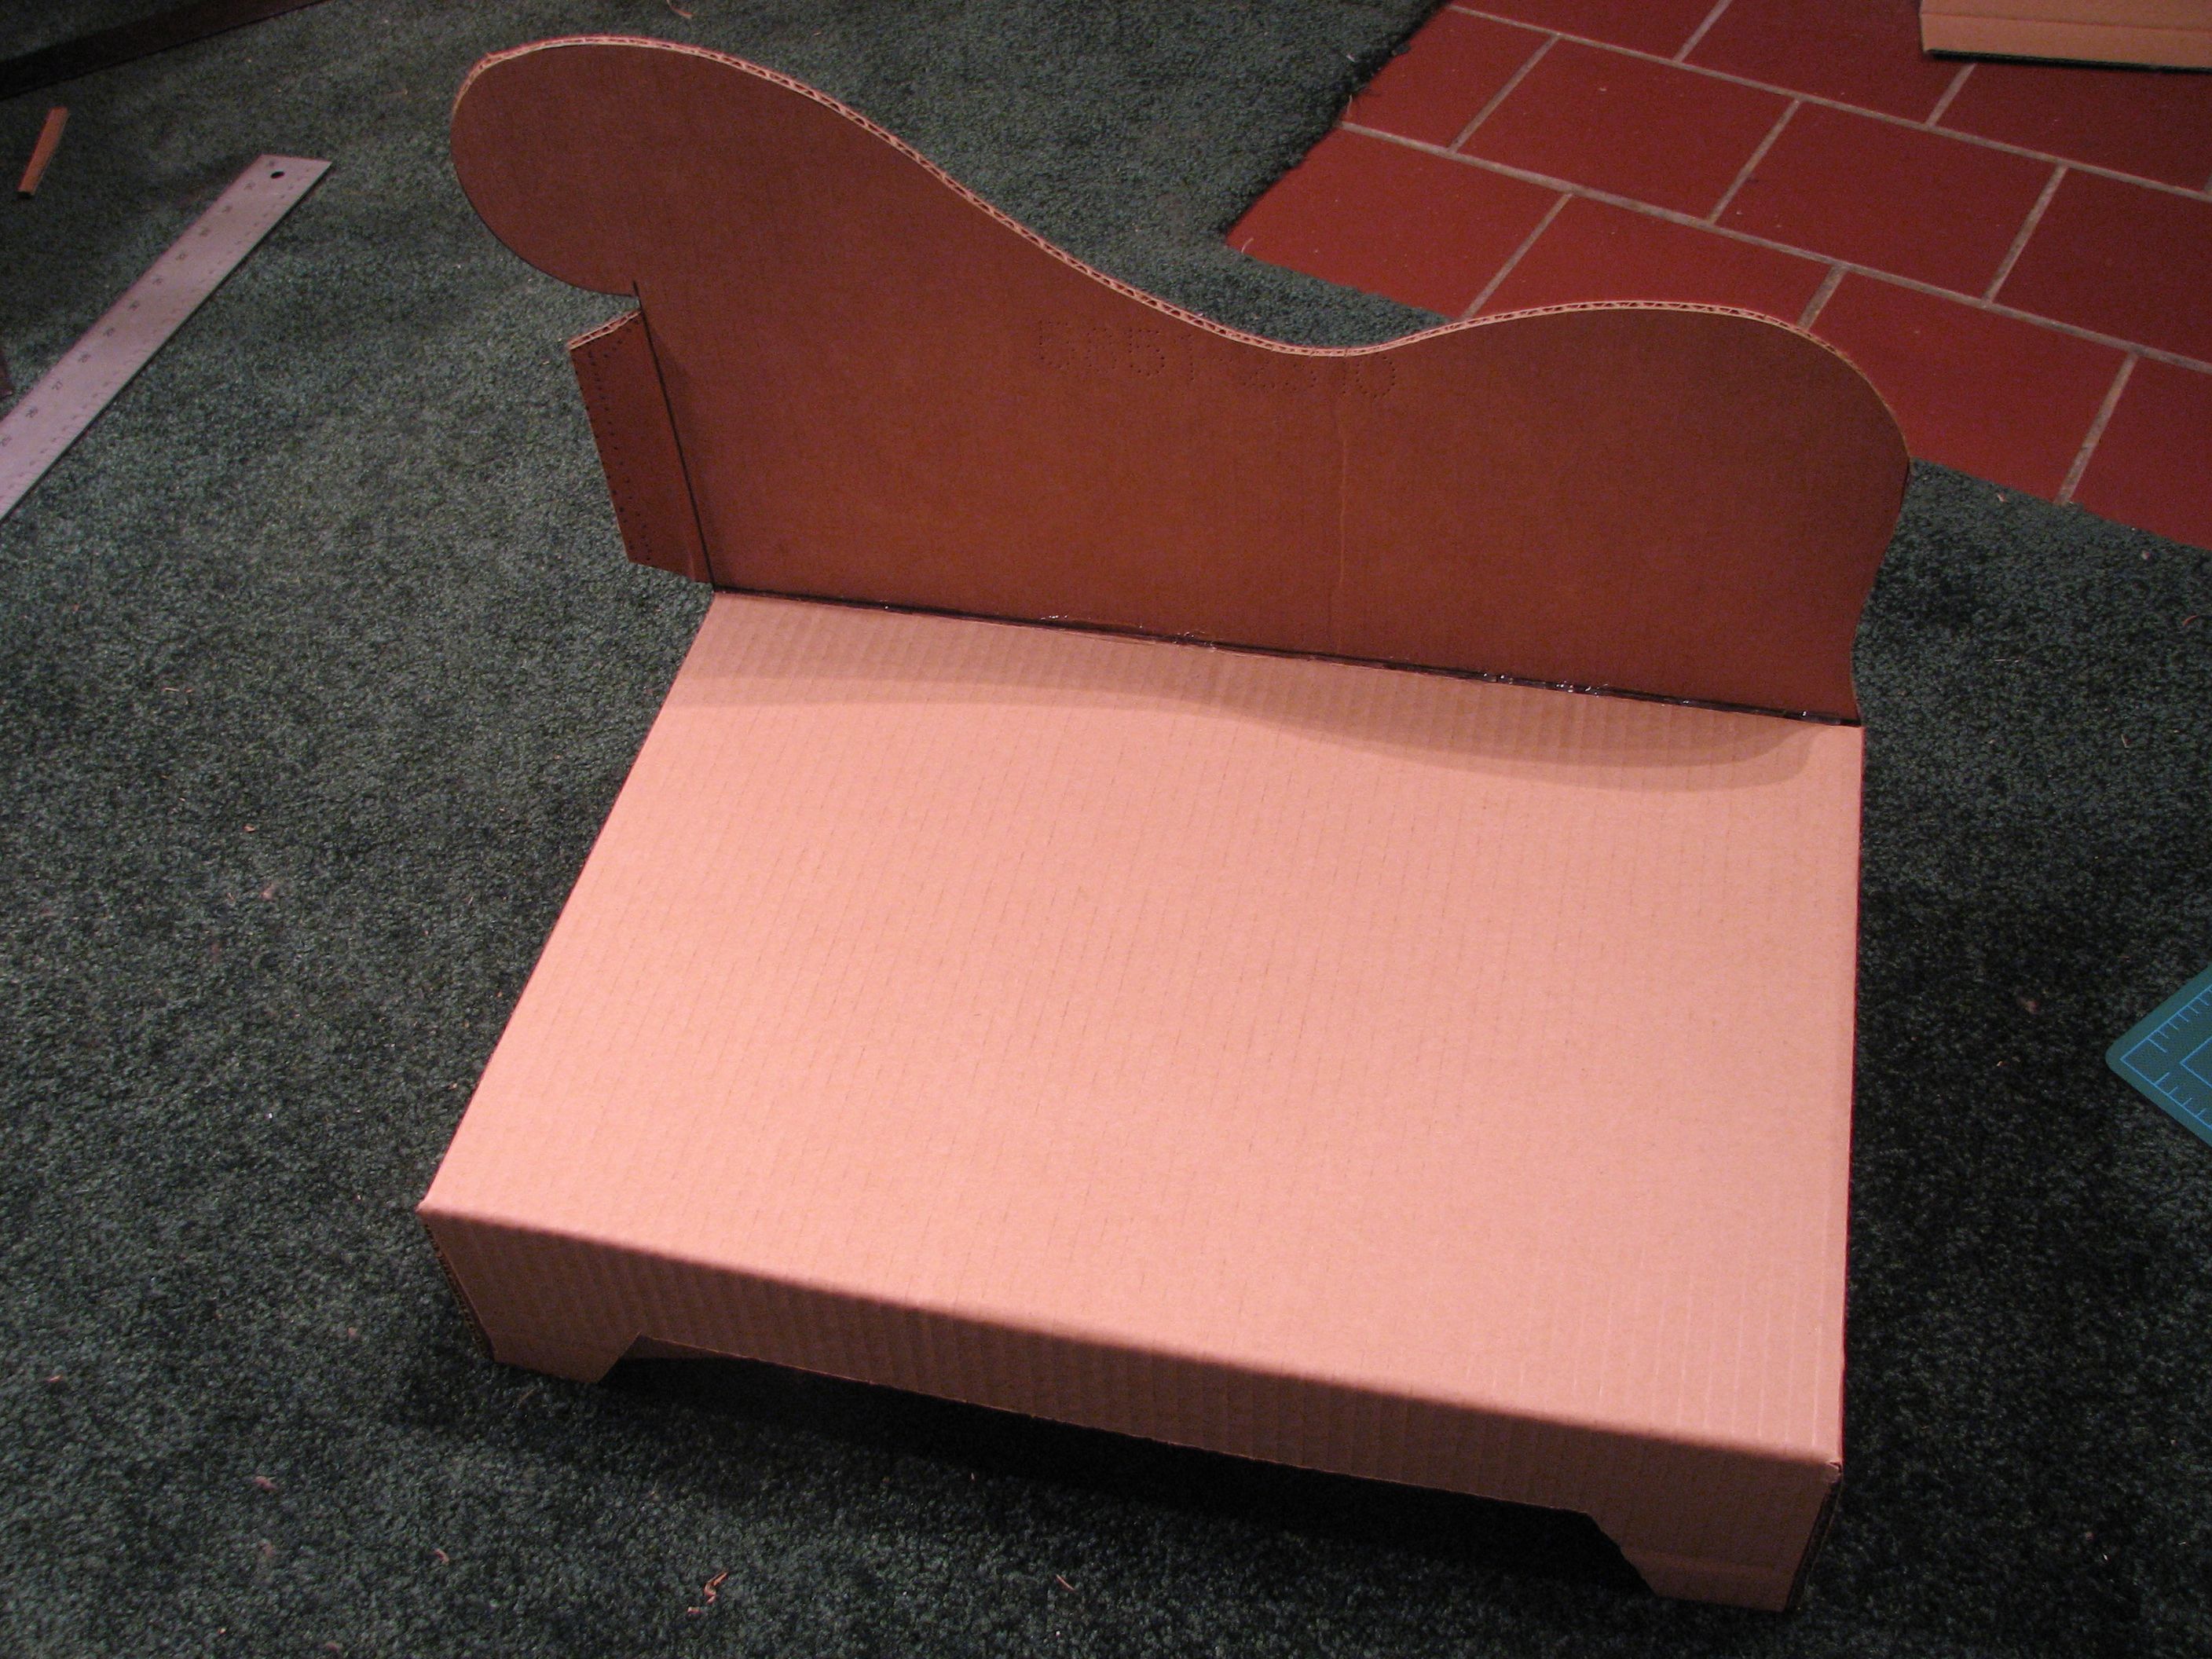
After tracing where it meets the base, we just freehand drew the rest with a marker and added a flap on the left hand side to attach to the headboard. Again, we used the hot glue to attach bottom part of this panel to the base.

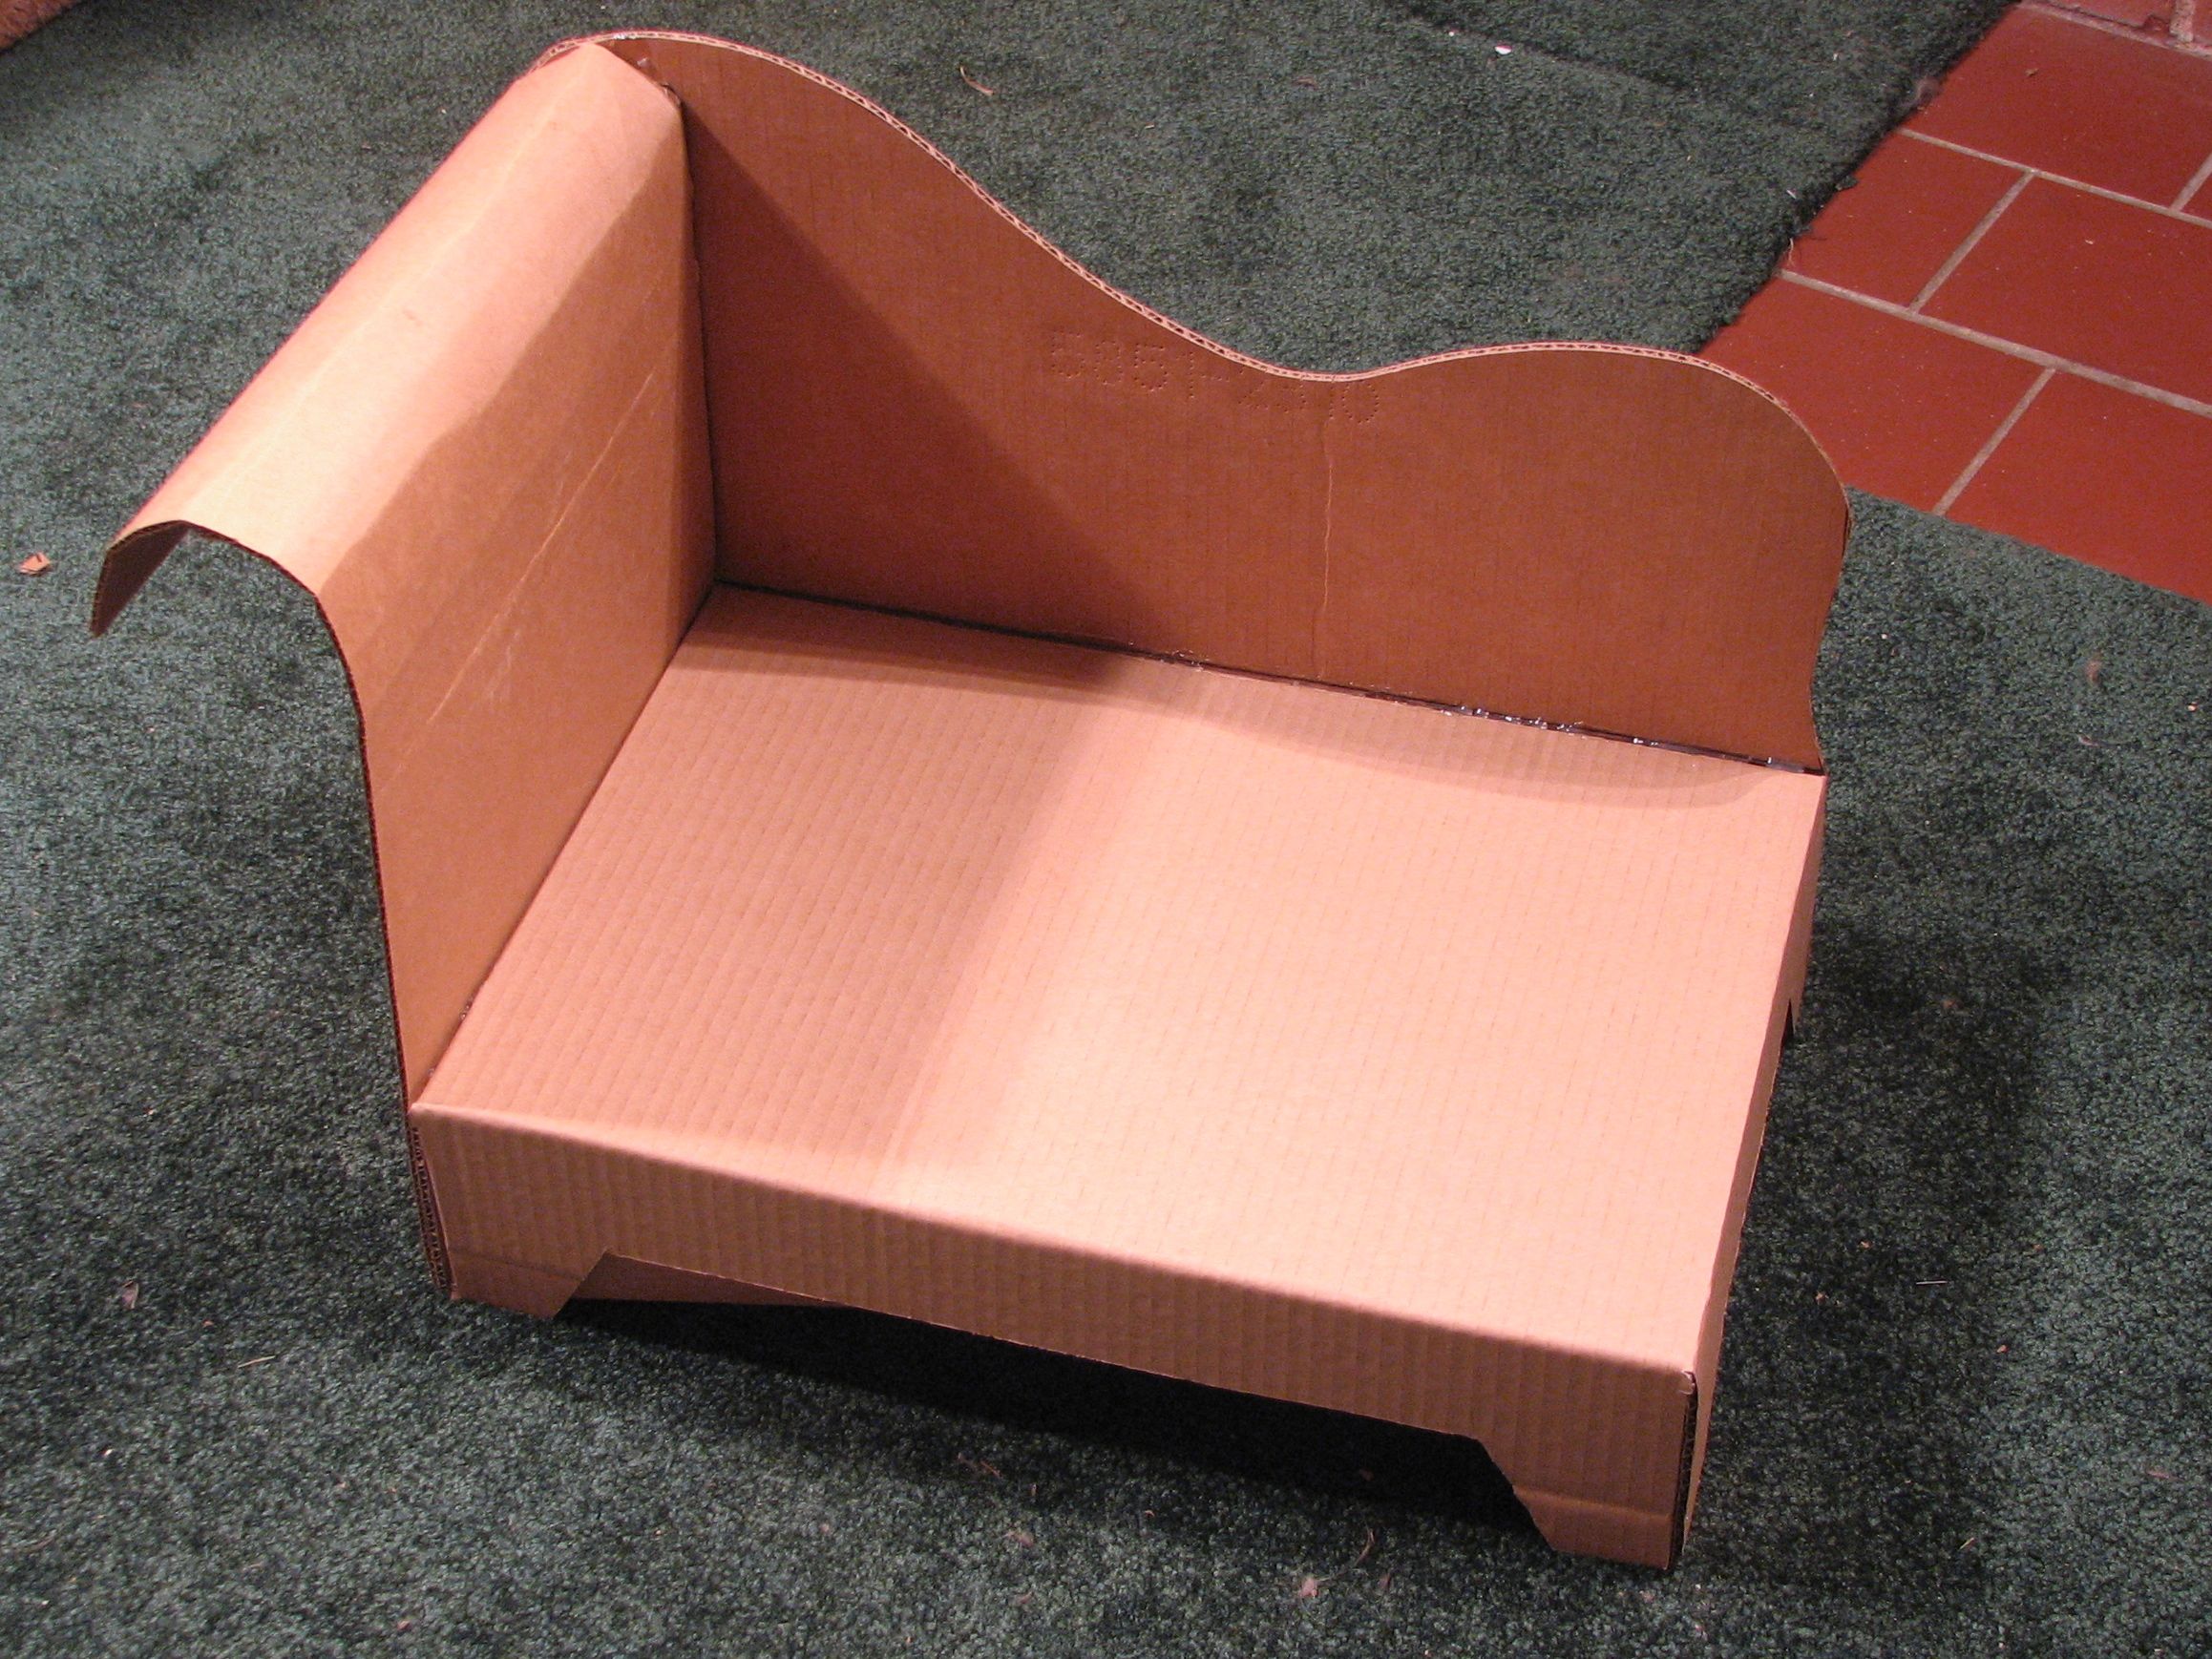
The headboard is also a good place to improvise. Start by tracing the narrow side of the base onto a new sheet of cardboard. For ours, we crinkled the top of the
cardboard so we could make it curve, and added several tabs to the side so that it could be glued to the matching curved part of the back panel.
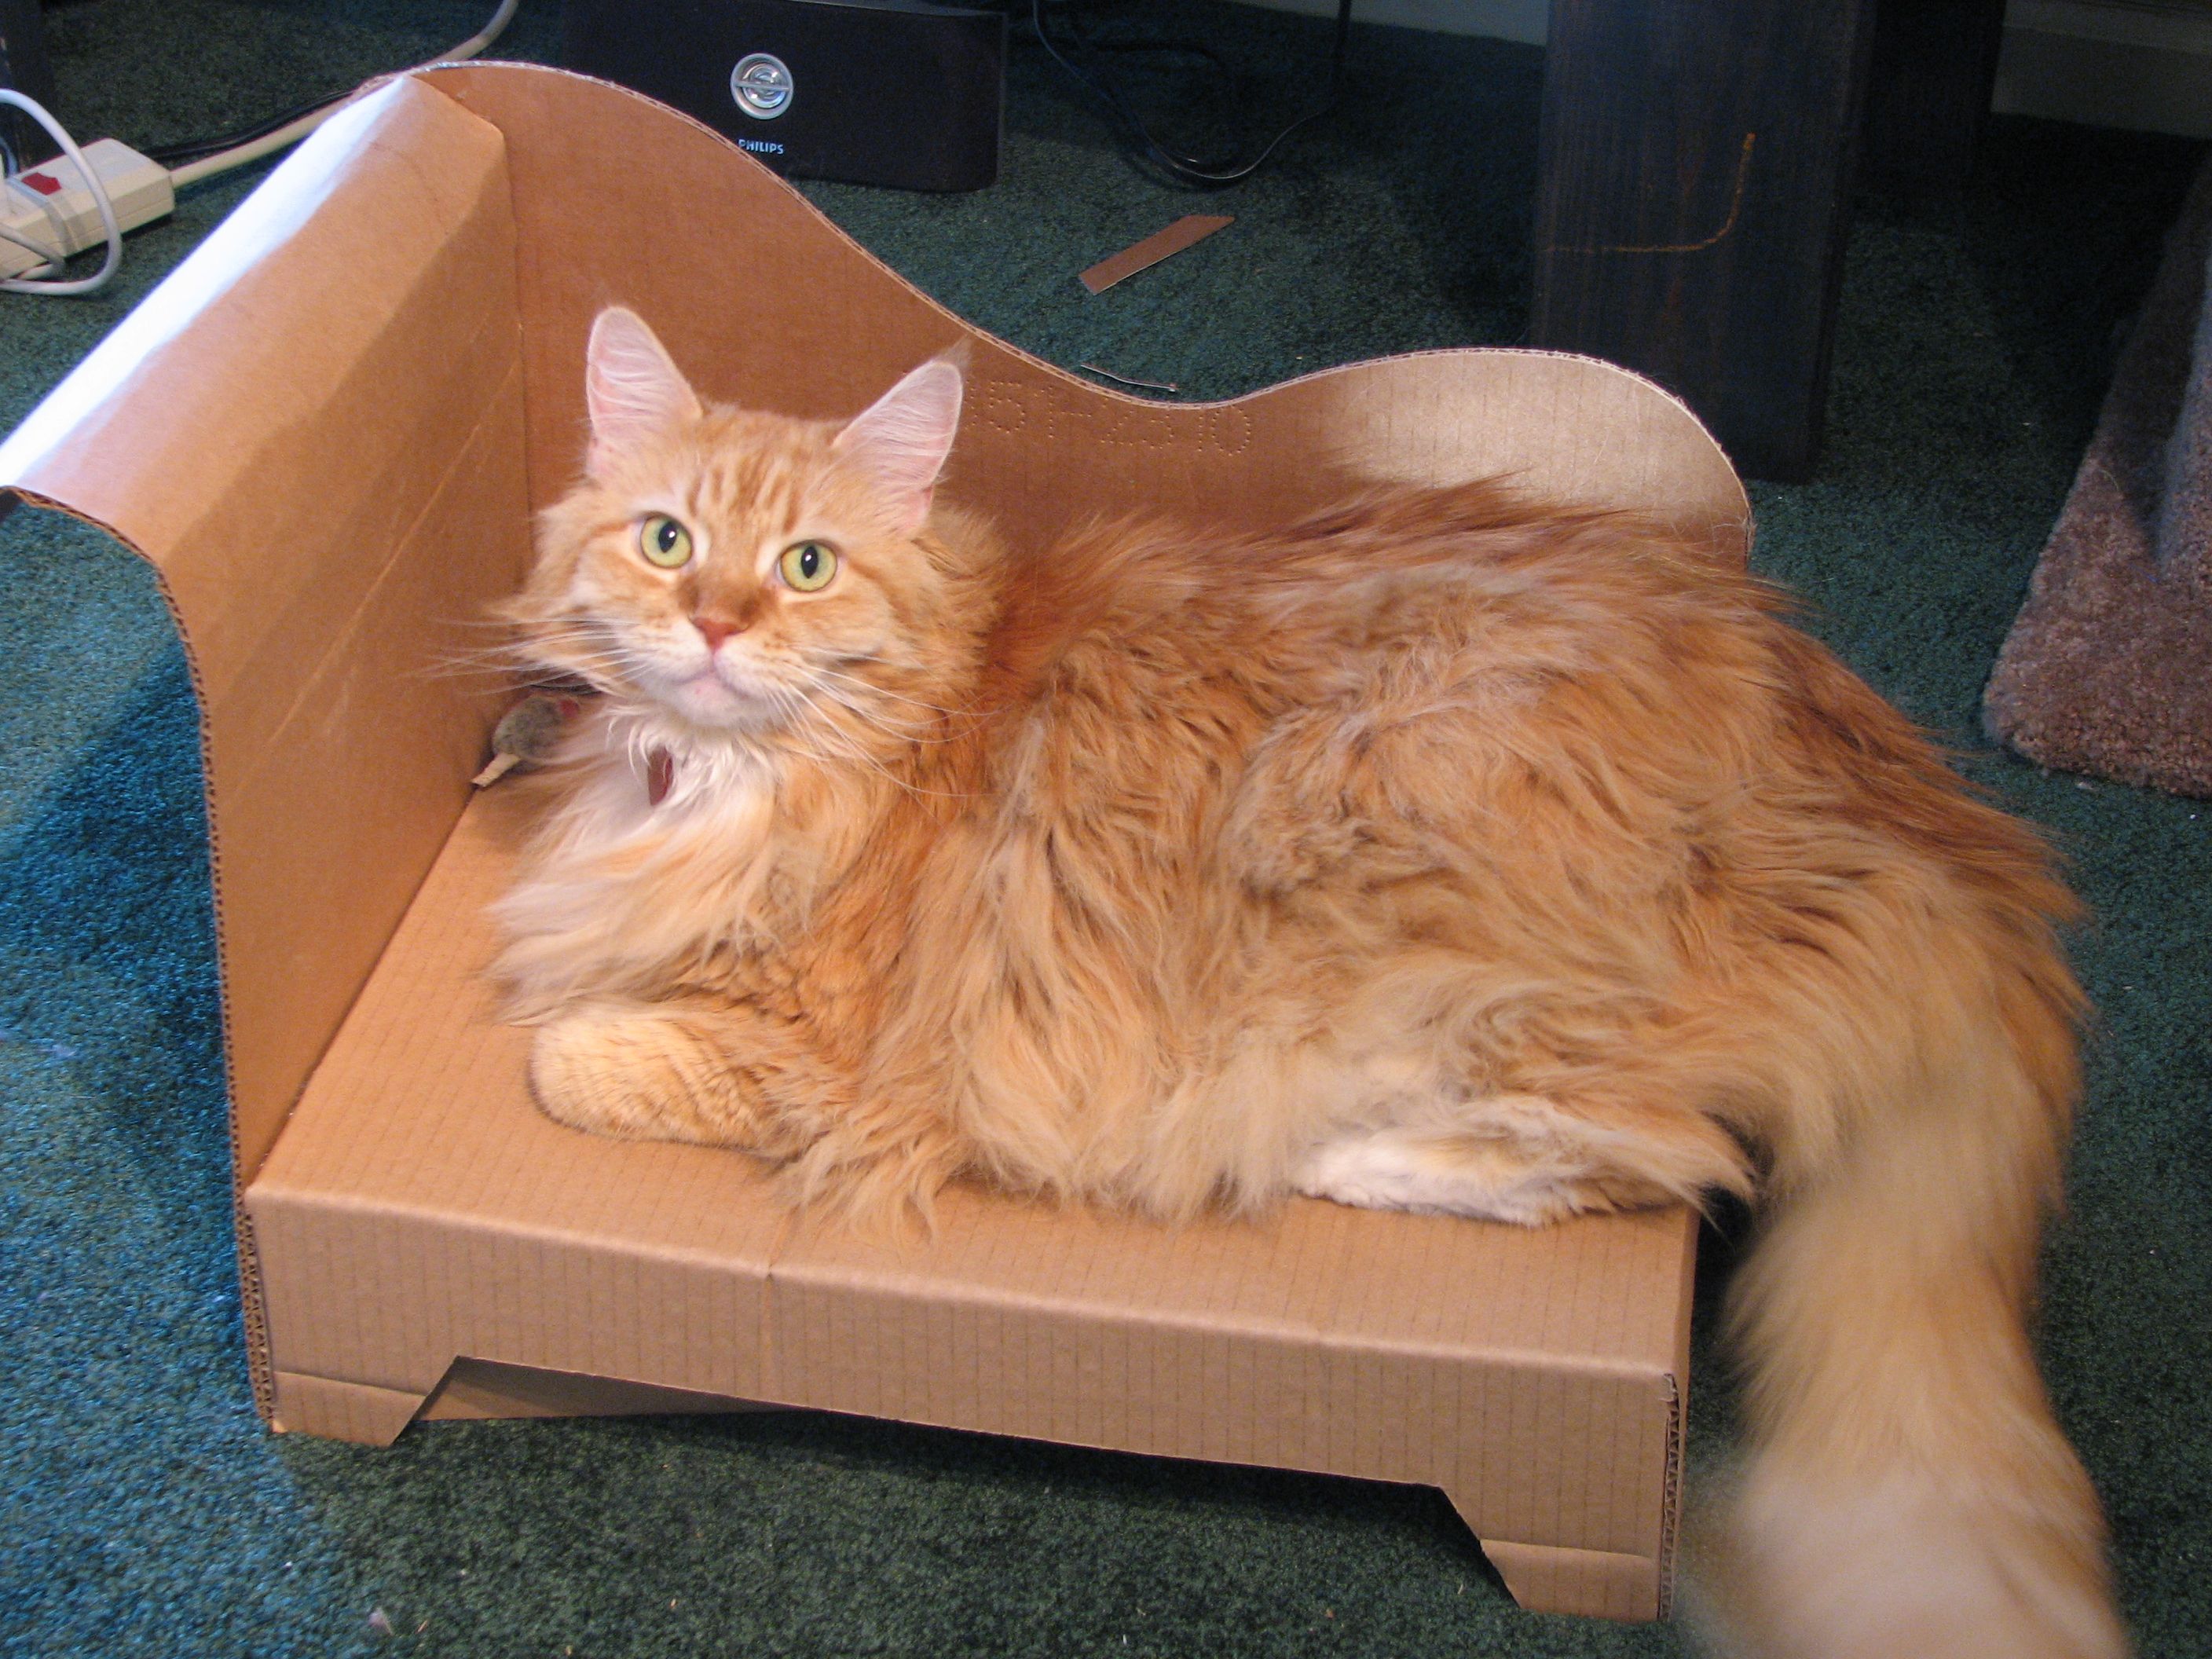
Garnish with catnip and you’re done!
Serves one cat (at a time).
This is great! Now I know what to do with those of my moving boxes that won’t be worth keeping in tact. My cat will love it. =]
Just finished mine. Only had a small box, so mine is 80% the size of yours, but I think I have smaller cats too. Would love to see some other type furniture too. Thanks for the idea.
I have during the past four months spent countless research hours and a small fortune acquiring baby and doll furniture for my pet’s use, and also some state of the art actual pet furniture. Maybe I could justify it. Let’s just say it’s been fun.
My point here is that you have, seemingly spontaneously, created something useful which is far more beautiful than anything commercially available.
Bravo!
super cool project. i think the original name for this type of furniture is "chaise longue," and since cats are known to think of themselves as vastly superior to any other living species (or is the tail in the air thing simply a ruse?), i think that the original french term suits the project better than the common vulgar term "chaise lounge." imho
we could take the whole experience one more geek level up by renaiming it "cha(t)ise longue" (chat being the french word for cat, in which the t is not pronounced) or simply "chat longue" or "chat-Z longue" (as in the lay-Z-boy recliner chair).
What breed are the cats?
The dark brown one is absolutely gorgeous.
Regards/JS
JellyBean (the orange one) is a Maine Coon cat. Harley (tortoiseshell) is 100% American Alley cat.
I absolutely love the name of your Maine Coone. I’ve never seen another cat named Jellybean! :D
They appear to be Maine Coons … best kitties in the world! I have two myself. The dark one is a tortoiseshell, and the other an orange tabby. Maine Coons come in almost all colors and coat patterns. They are large, sturdy cats … female average 13 – 15 pounds and males can easily get to be over 20. They have thick, soft coat with a smooth overcoat and fluffy undercoat. They often have long ear-tufts, and long fur between their toes. In the winter, they grow long thick ruffs around the neck which lends a very regal appearance to these magnificent kitties. They have very sweet personalities, love to be petted and many are quite affectionate. But they tend not to be very cuddly, preferring to just be somewhere near their human. They will bond very closely to one member of the family, usually the one who give the most scratching and food, and will follow them around the house to remain at their side.
I have just informed my boyfriend that he is going to make a couple of these lounges for my cats! The incentive is that they might not insist on sleeping on the bed in between us if they have their own beds! Ha!
Yo might wanna check your spelling- it’s a Chaise Longue (that’s French for long chair), not Chaise Lounge… Otherwise, an excellent and useful article, if I got on with cats better.
No, you might want to check *your* spelling. "Lounge" actually is the preferred spelling in North America, where we are located.
—
Windell H. Oskay
drwho(at)evilmadscientist.com
http://www.evilmadscientist.com/
Here’s our implementation!
Love the site, I need to find time to try more of your projects :-)
what do ya do if ur cats bigger than the box and what if u cant get that size cardboard?
Looks great, but man you put a lot of effort into something that could’ve been made much more simply. Layouts and patterns? Forget it!
I made one! But because my cat is a total princess, and I was looking for a slightly bigger project, I made a cushion for it too. http://www.flickr.com/photos/caitlinburke/3263884957/
this wouldnt last even half of a day cuz my cat is an evil machine of destruction…. :(
Our cats are evil too. :)
—
Windell H. Oskay
drwho(at)evilmadscientist.com
http://www.evilmadscientist.com/
Not mine. Mine is a pretty pretty princess who wuvs his cat chaise even more now that I’ve tossed a pink tutu on it :D
http://farm4.static.flickr.com/3471/3289624088_824739166d.jpg
( http://www.flickr.com/photos/caitlinburke/tags/lotusbun/ )
What we need is an electric brush for the Persian longhair type cat. I had a tortoise colored Maine Coon named Cleo who liked the comb at first but lost patience with it. I envision something like a shoe polisher with a somewhat soft brush on either side that she could just rub against to comb herself with. The natty stuff that comes out from under the pretty outer coat would make dandy mohair yarn. I’ve still got scratches to show what happens if you get too busy with trying to straighten out the tail. Al the Engineer
I have a cat named Pixie who looks almost identical to your Harley (I suppose she’s female since they almost always are?). I think she’s a Maine Coon, although there’s no way to tell without papers. She’s got a long, fluffy tail, the ruff around her neck, "pantaloons" on her hind legs, and the fur on her belly/underside is much longer/thicker than the fur on her top. She doesn’t really have ear tufts, per se, but she has the long hair on the bottom of the paws (they call them "snowshoes"), which makes for great sliding when chasing varmints across hardwood floors! She loves to slide and run into walls. HA. She is also very affectionate but not a "lap cat," although she will jump into my lap when she wants attention (usually when I’m on computer). She’s not the brightest cat, has trouble opening doors, but she’s quicker than she looks, especially chasing things low to the ground. Not much of a jumper.
And her fur is incredibly soft and silky. It feels like liquid silk.
I am so making this. One of my guys is fanatical for cardboard. He will either lie on it 24/7 or tear it to pieces.
I made a cat bed like yours once, but it had a backpack in the bottom ( my cat loves laying on backpacks)
I made one for my kittens too!
sphotos.ak.fbcdn.net/hphotos-ak-ash2/hs047.ash2/35693_133655146661476_100000509757601_301991_7628898_n.jpg
That’s Bowie
sphotos.ak.fbcdn.net/hphotos-ak-snc4/hs107.snc4/35693_133655133328144_100000509757601_301990_5401692_n.jpg
That’s Little Girl on it.. she usually lays on it, but I haven’t taken a picture.
I would very much like to make one of these!
the pdf for the pattern template seems to be missing. Please would it be possible to repost it?
Thank you!
Checked just now– seems to download just fine.
Windell H. Oskay
drwho(at)evilmadscientist.com
http://www.evilmadscientist.com/
Thank you :o) Got it! >^••^<
Made a bed for my cat, attached it to the window sill, made a pillow for it and he loves lying in it when the sun shines thru the window