


Sure, that iPad’s fun. But doesn’t your arm get tired propping up one and a half pounds after an hour or two?
Yes, one thing that the iPad is definitely missing is angle. A laptop has an adjustable screen, and you can just set it on your lap for couchborne surfing. Just set the iPad on your lap and… well… it’s sits there taunting you, pointing at the ceiling.
You can try sitting cross-legged like Steve Jobs, angle your knees with the help of the coffee table, or give up and shell out for a tabletop dock.
No, it’s not the end of the world. But shouldn’t fun new toys just be… fun?
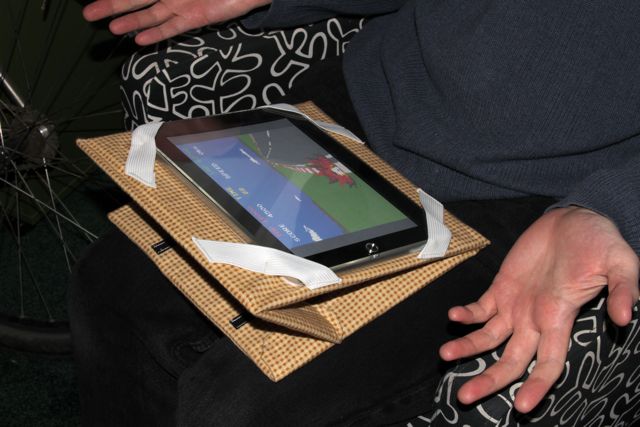
So here is our solution: a DIY adjustable-angle iPad stand for your lap. Inexpensive, cozy, and light. Designed for both portrait and landscape use, and ready to fold up for transport and storage. With a stand, you can use your ‘Pad with zero, one, or two hands, and sit how you darn well please.
Our iPad lap stand is made out of flannel and velcro, with rigidity provided by a masonite endoskeleton plus some fat elastic bands to hold your preciousssss in place.
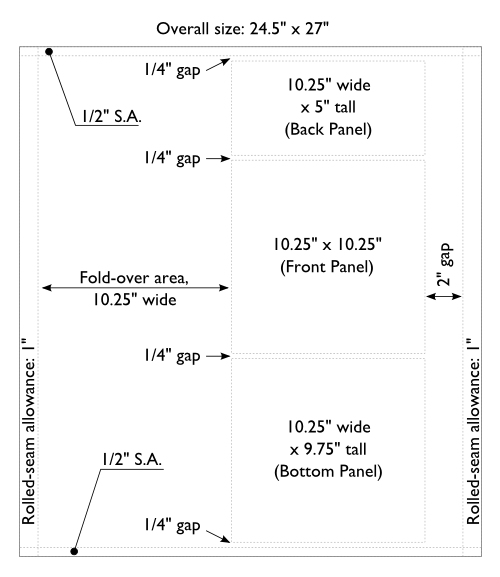
To get started, the first thing that you’ll need is a piece of fabric at least 24.5 x 27 inches. We used flannel, because it’s super cozy sitting there on your lap. And cozy is good for something that spends more time on your lap than a narcoleptic kitten.
The pattern, sketched out above, shows the three main segments of the stand– the iPad holding Front Panel, the back (vertical) panel, and the bottom (base) panel. It also shows the part of the fabric that’s bent over to cover the reverse sides of those panels, as well as the seam allowances.
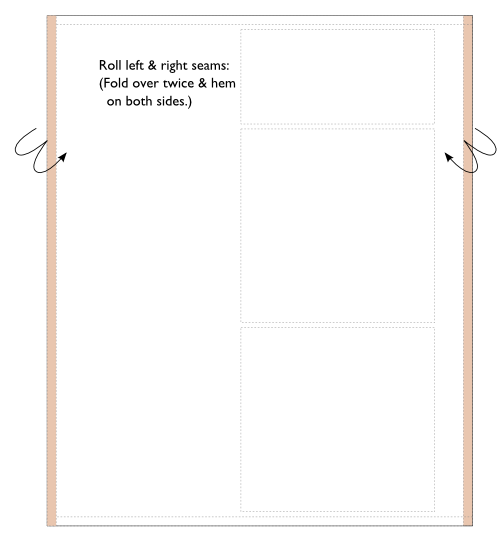
The first step in building it is to fold over the edges on the left and right sides and sew them down.
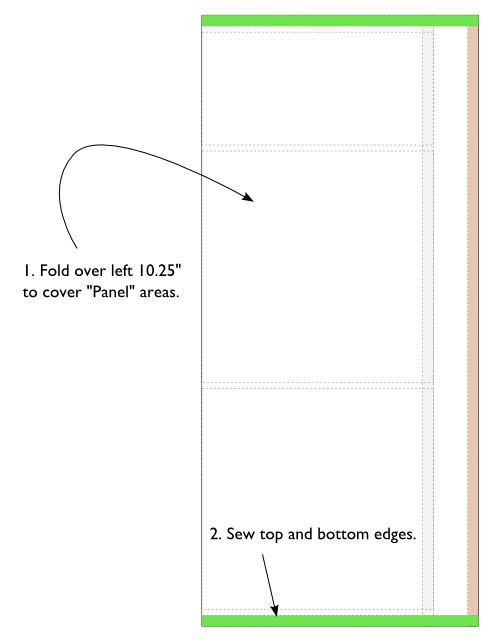
Next, you fold the left half over the area where the panels will be, and sew that down on the top and bottom edges. The stand is a hollow pocket in shape at the moment– we’re constructing a big pocket in the middle of the stand, where the masonite endoskeleton will reside.
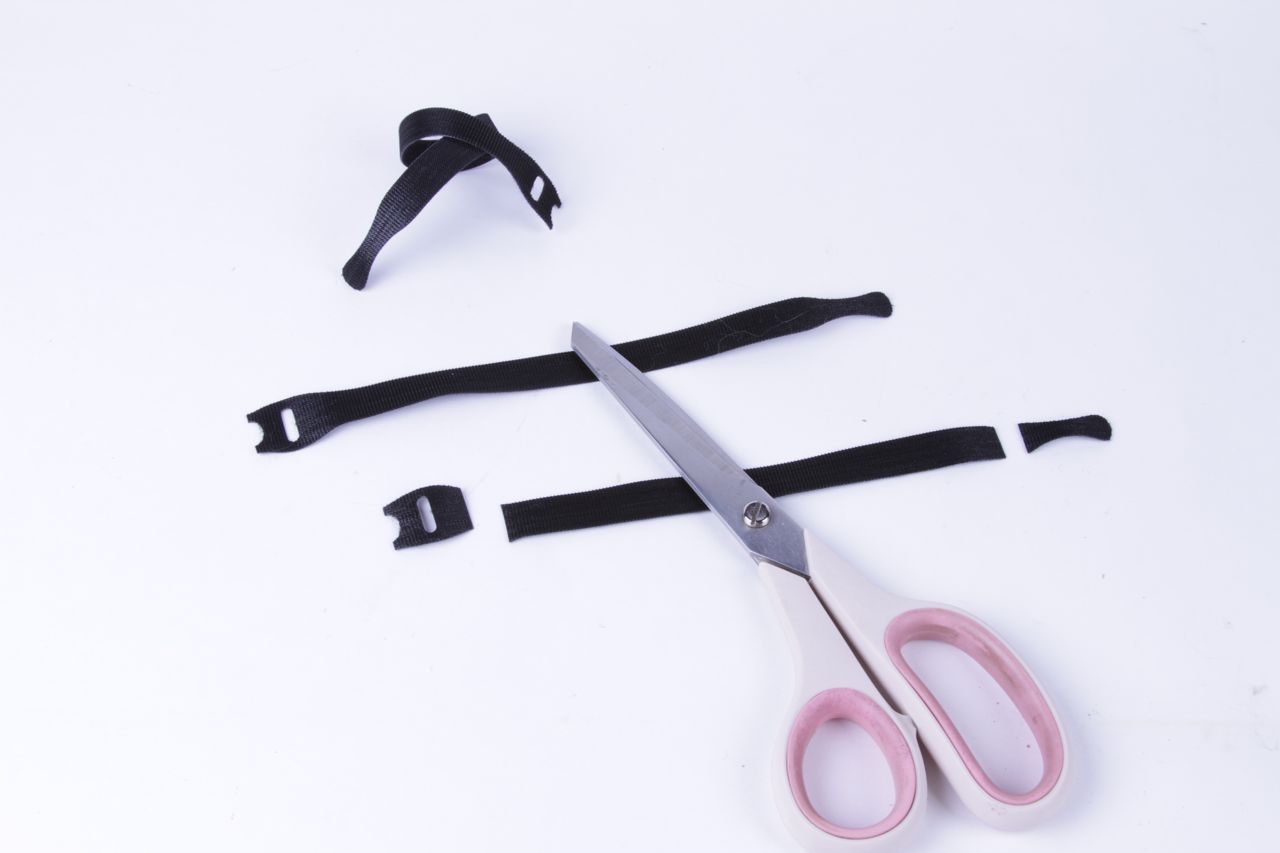
In the next step, we’ll need some velcro. The type of velcro that we’re using is the low-profile “cable tie” velcro– which is actually good for most light-duty velcro applications. (We had more to say about it in this article.)
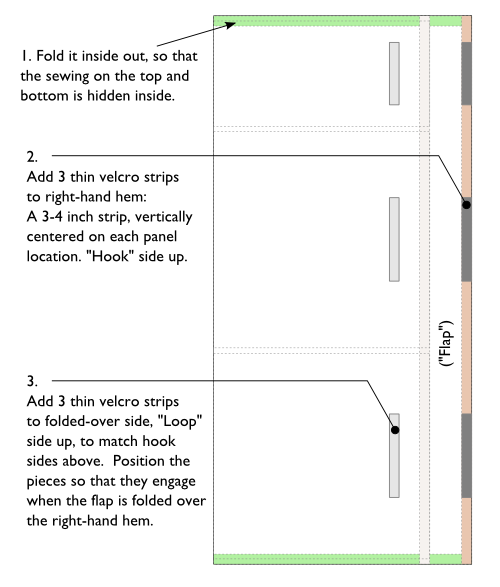
Having sewn the top and bottom sides of the pocket, we now turn that inside out so that all the rough seams are safely hidden insde. We also add the velcro bits that allow this pocket to be held shut, once we add the masonite.
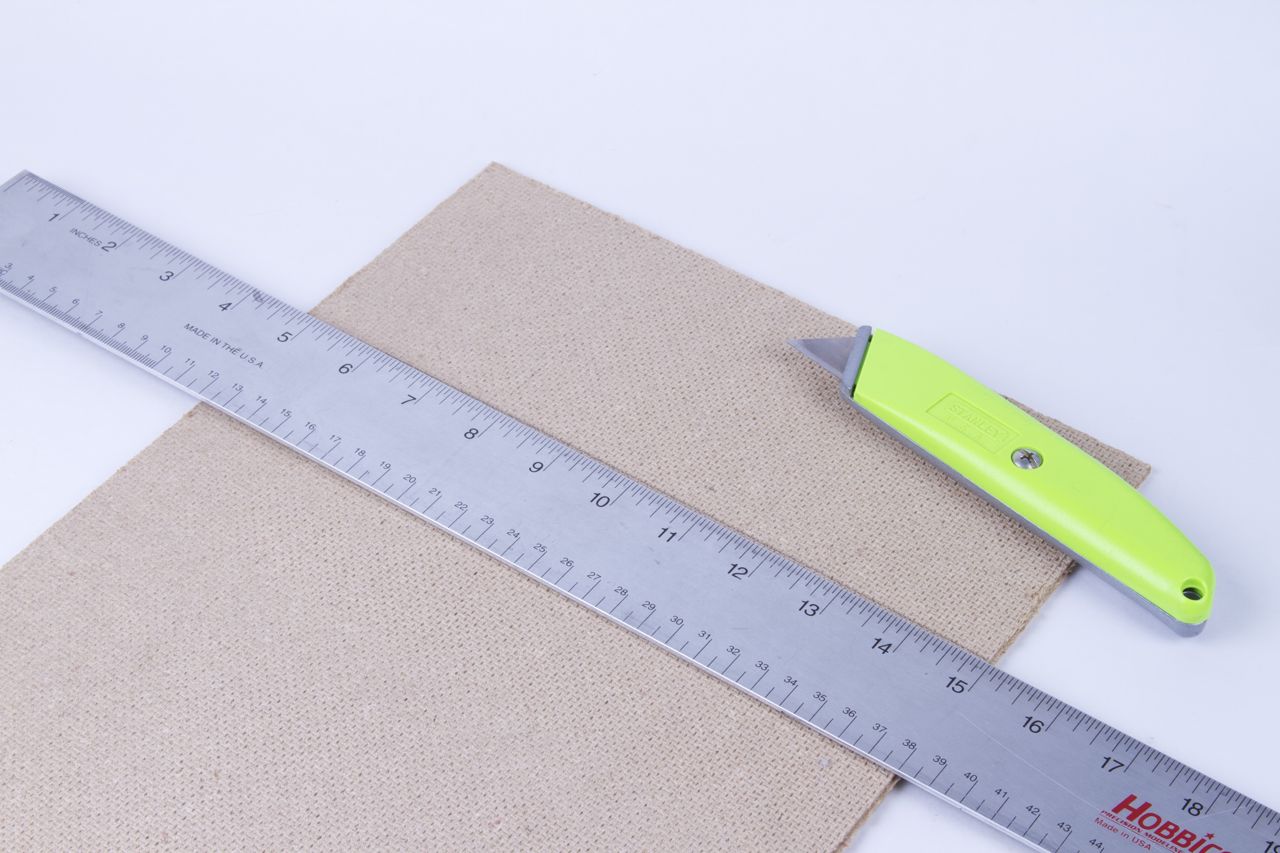
The masonite is the standard medium-stiffness fiberboard, about 1/8″ thick, the kind you find at the hardware store. You can score it with a utility knife and ruler, and then snap it to size. It’s strong enough to do the job but not overly rigid.
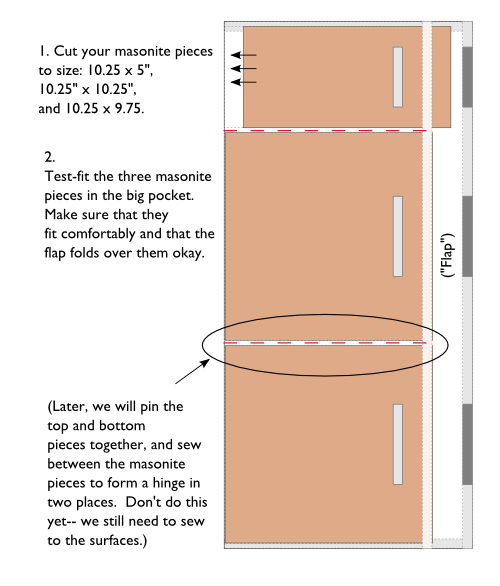
The masonite pieces provide rigidity to the three panels, and need to be cut out the the same sizes as the three panels. You’ll want to make sure that they fit before proceeding.
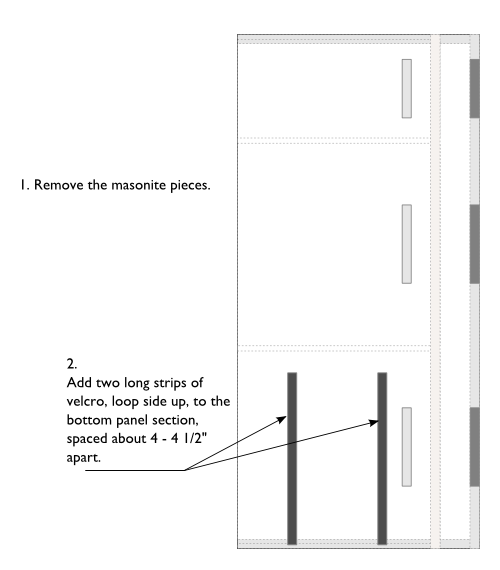
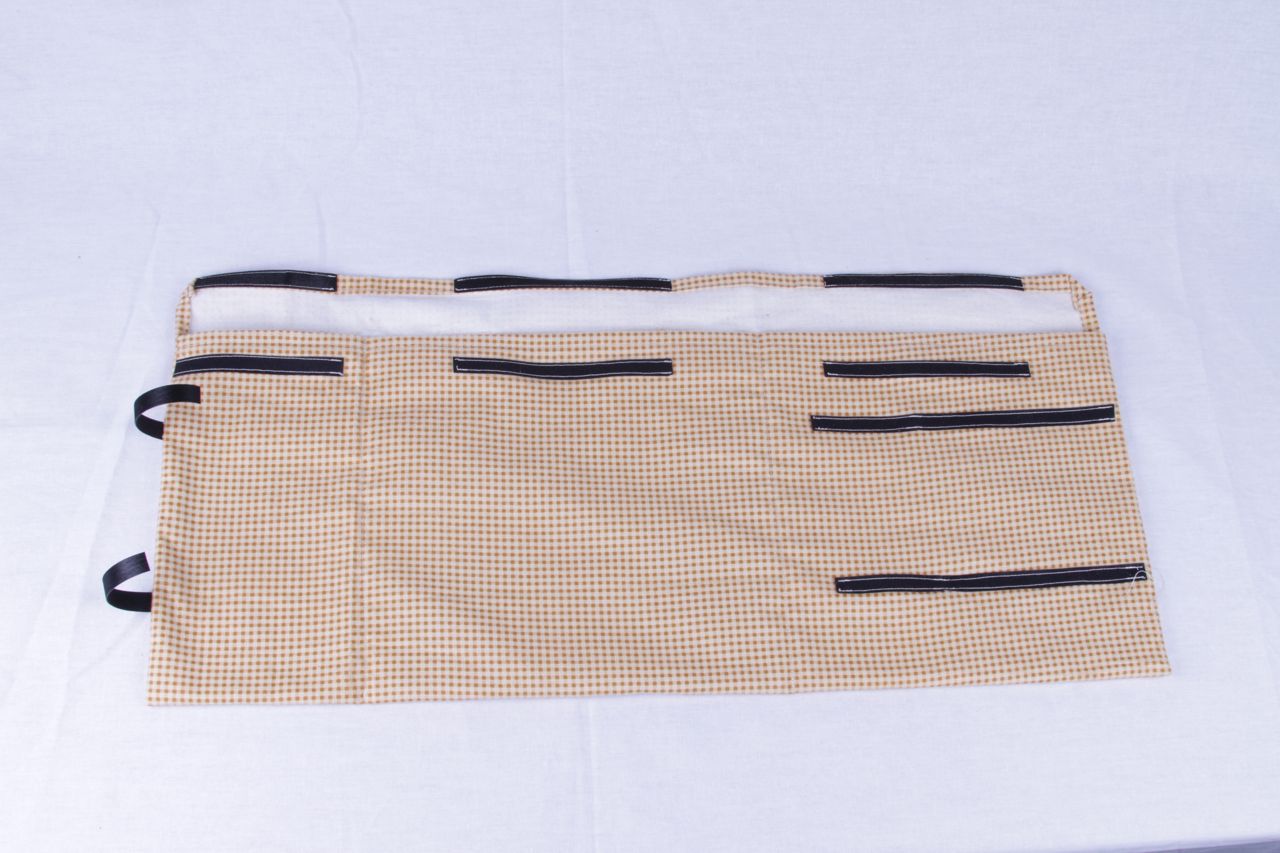
Next, two strips of velcro that are used to hold the stand upright.
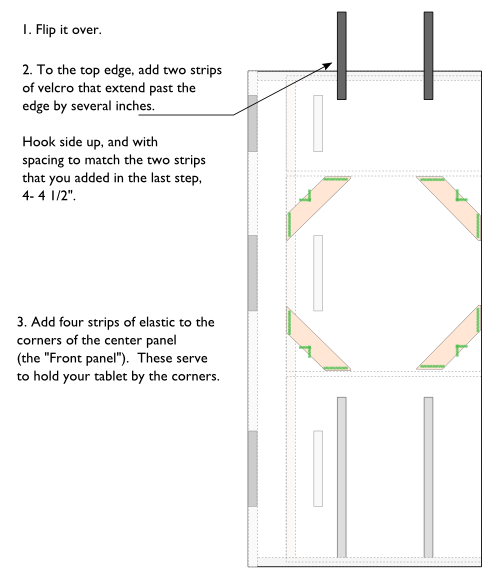
Those two sewn-down strips of velcro connect to two loose straps of velcro that extend from the other end of the stand.
Also, at this stage, you add four loops of wide elastic that are used to hold down the corners of the iPad– more detail about that part in a moment.
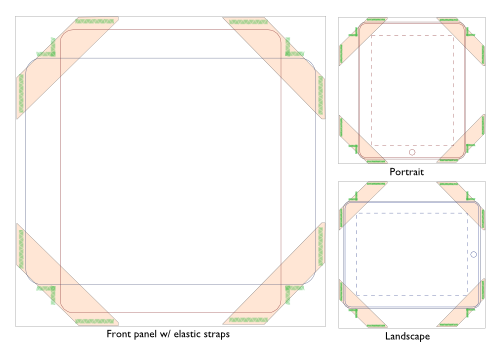
The front panel is designed to hold the iPad by its corners– not obstructing the touchscreen nor the button –in either portrait or landscape (vertical or horizontal) orientations. This is illustrated here, with the iPad outline shown both ways and then stacked. The careful stitching of the elastic straps– shown in green– allows it to be mounted either way.
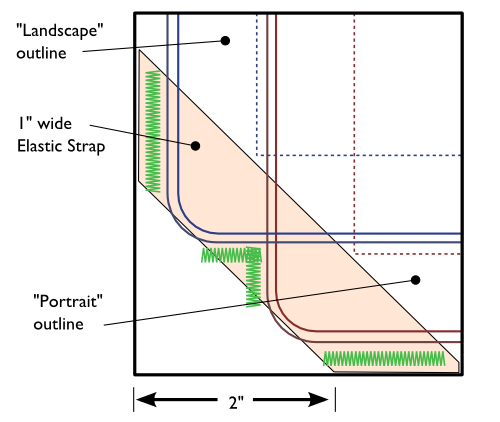
This template (drawn to scale) shows you exactly where to put those stitches at each corner.
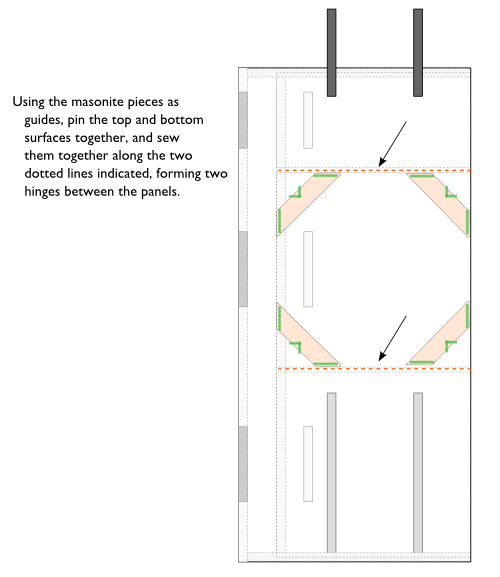
Then finally, you put the masonite bones back in and use them as a guide for the hinges. There isn’t much slop in the design, so when you put in a row if stitches between the panels, it turns into a reasonably sturdy hinge.
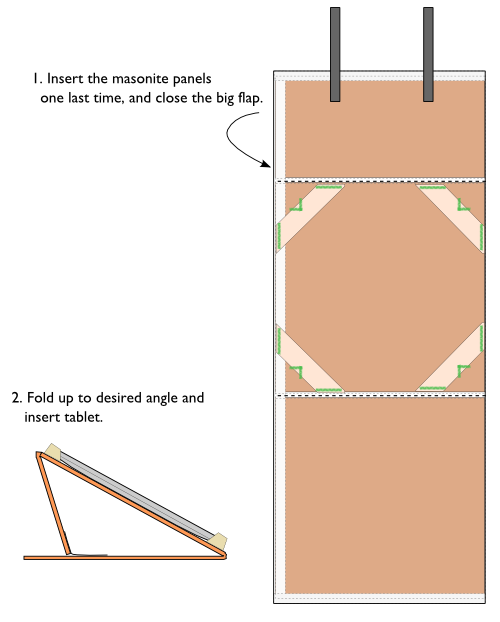
At this point, it’s just a matter of using it. Put it all together, close the flap, fold it up, and get to work, er, play as the case may be.
Here’s the back side, showing the flap where the masonite pieces can be inserted. (That also means that you can take them out for cleaning.)
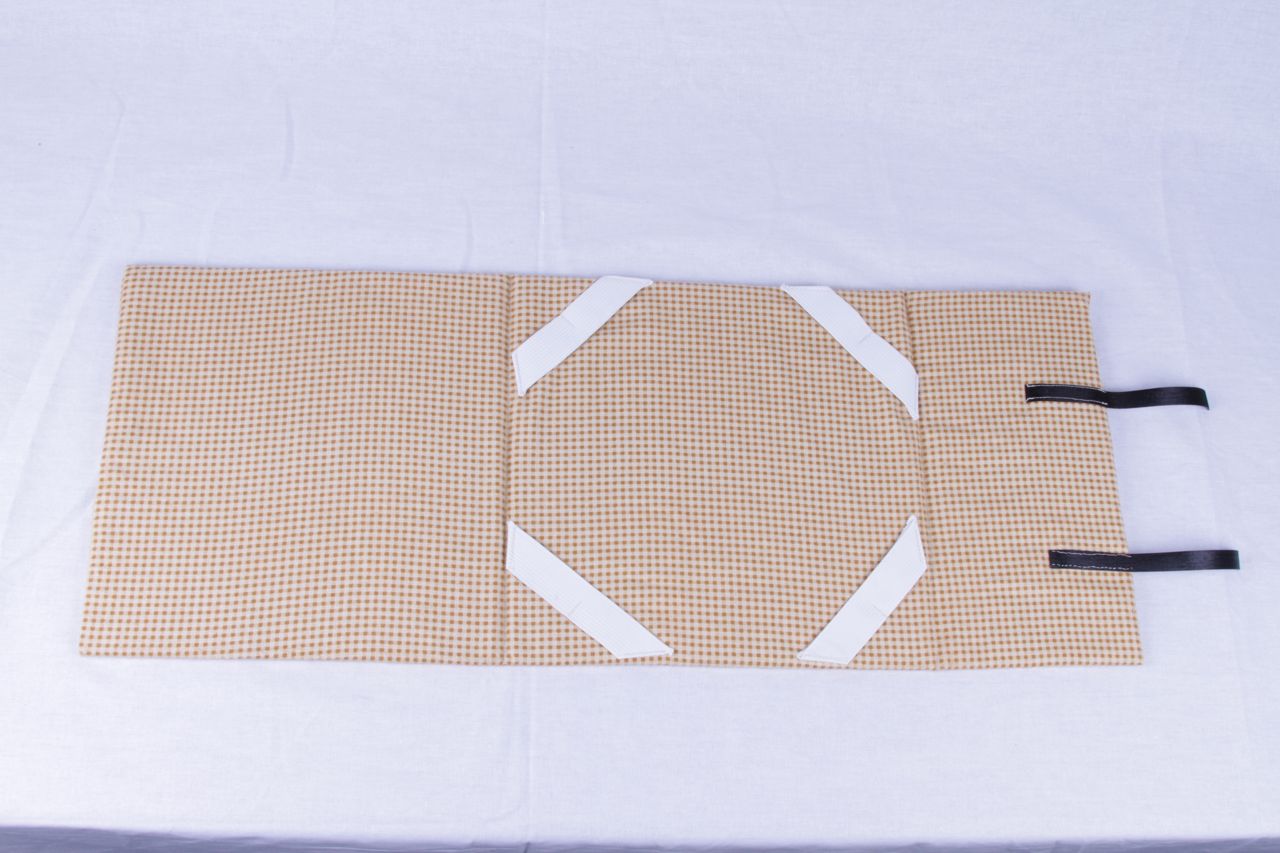
Here you can see the elastic straps.

Shallow angle…

And, full height. If you don’t like the range of angles in the design, it’s pretty straightforward to build another, with a different value (instead of 5 inches) for the back panel, to give different heights.
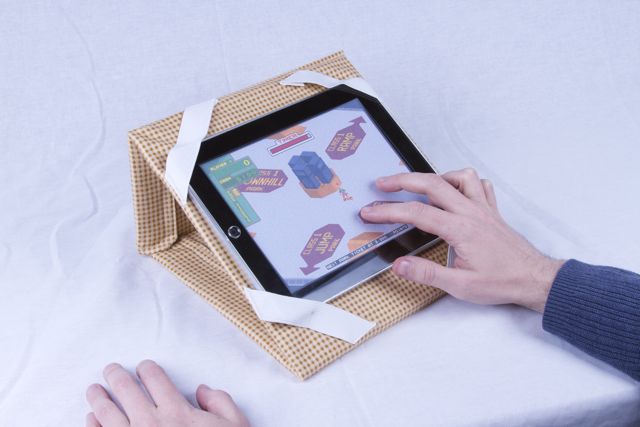
Works for tabletop use, too!
Sweet! No hands!

Dude you got an iPad!
How about using a 3-ring binder with a 3-inch spine? Then you could adjust the angle by inserting different thicknesses of stuff into the open end. That’s actually what I thought you’d done when I saw the first photo. Your solution is classier, but 19 steps worth of diagrams and photos to make an angled stand does seem a little like overkill.
How about one of those trapper keepers from the 80’s with giant velcro closures? Ought to work pretty well with very few modifications. Except that it will look like a trapper keeper from the 80’s.
If your to lazy to make your own case like i am hahha
the ZooGue Smart Case is fully adjustable and looks nice
They should have designed the iPad as a two part hinged device. The device would rest on the bottom half which would have a hardware keyboard and the top half would house the display which could then be angled using the hinge. When not in use, the two half could be folded together, protecting both the keyboard and screen.
Art Dahm • My Peggy 2.0 Web Page • http://www.mindlessdiversions.com/peggy2/
well, that, is a laptop. I hope you posted that with irony in mind
Great thought and very DIY, but I can’t see Captain Picard using one of these. Is there a way to make this more sleek and future-evocative?
That really drives right to the heart of the issue, doesn’t it?
The sad truth is that on Star Trek, nobody sits on the couch websurfing for hours.
Future iPads will be thinner and lighter… until then, you could always build one out of brushed aluminum. ;)
Windell H. Oskay
drwho(at)evilmadscientist.com
http://www.evilmadscientist.com/
simple but great.
for an even less expensive route, stiff cardboard (maybe two layers glued together) would probably work where the better masonite is used in this idea. It would also make the stand lighter.
I got the iPad Mini instead. Fits in my pocket when not in use, fits in the palm of my hand when in use, and is just as functional and usable as the full-sized one.
Nice!
It struck me that the stand could also be redesigned to double as a carrying bag for the iPad – something with enough rigidity and padding in case you want to throw it into your backpack, and a handle or strap in case you want to carry it around by itself.
You could make the back section fold over the screen to protect it in transit, with a couple of strips of velcro at the bottom to secure it.
Or you can buy the iPad case, which doubles as a lapstand:
http://store.apple.com/us/product/MC361ZM/A
No, not really. If we had meant to recreate the Apple one, we would have done so.
The Apple one is more of a tabletop "lectern" stand. Ours is a lap stand with adjustable angles, and a larger angle. Just as importantly, the Apple stand only works as an angled stand in landscape mode– ours works at the same angles in either orientation.
Windell H. Oskay
drwho(at)evilmadscientist.com
http://www.evilmadscientist.com/
Just buy a laptop that you can angle the screen. Simples.
Here is one I designed and made from wood
wooden iPad stand