


Often times when people get started in electronics, they want to blink LEDs. This is this a great idea, and we really like blinking LEDs, so we’re happy to help. In the last year or two there’s also a growing chorus of people that want to drive high powered LEDs. That’s not always as easy, but it can be done.
Now by the time that you start talking about blinking the high power LEDs– you shouldn’t be surprised if people start whipping out the heavy artillery: 555 timer chips, transistors, boost converters, microcontrollers, solid state relays, and/or dedicated LED driver chips. While each of those does have its place, sometimes it’s nice to have a simpler and much less expensive alternative.
Here we describe what is possibly the simplest and cheapest circuit for driving and blinking high-power LEDs. The secret ingredient? Our good old friend the blinking incandescent light bulb.

Here’s the “big” idea: put the LED that you want to drive in series with a blinking light bulb. Simple? Check. Cheap? Check.
A blinking light bulb has a bimetallic strip inside that, when it gets hot enough, disconnects the circuit until it cools down. When the circuit first turns on, the light bulb and LED turn on. As the light bulb warms up, the strip bends, turning off both the bulb and LED. When the strip cools enough for the strip to snap back, the process repeats and the LED blinks. The basic circuit is scalable, if you use a high-enough power LED and light bulb– blinking bulbs like this are available in a variety of different sizes.
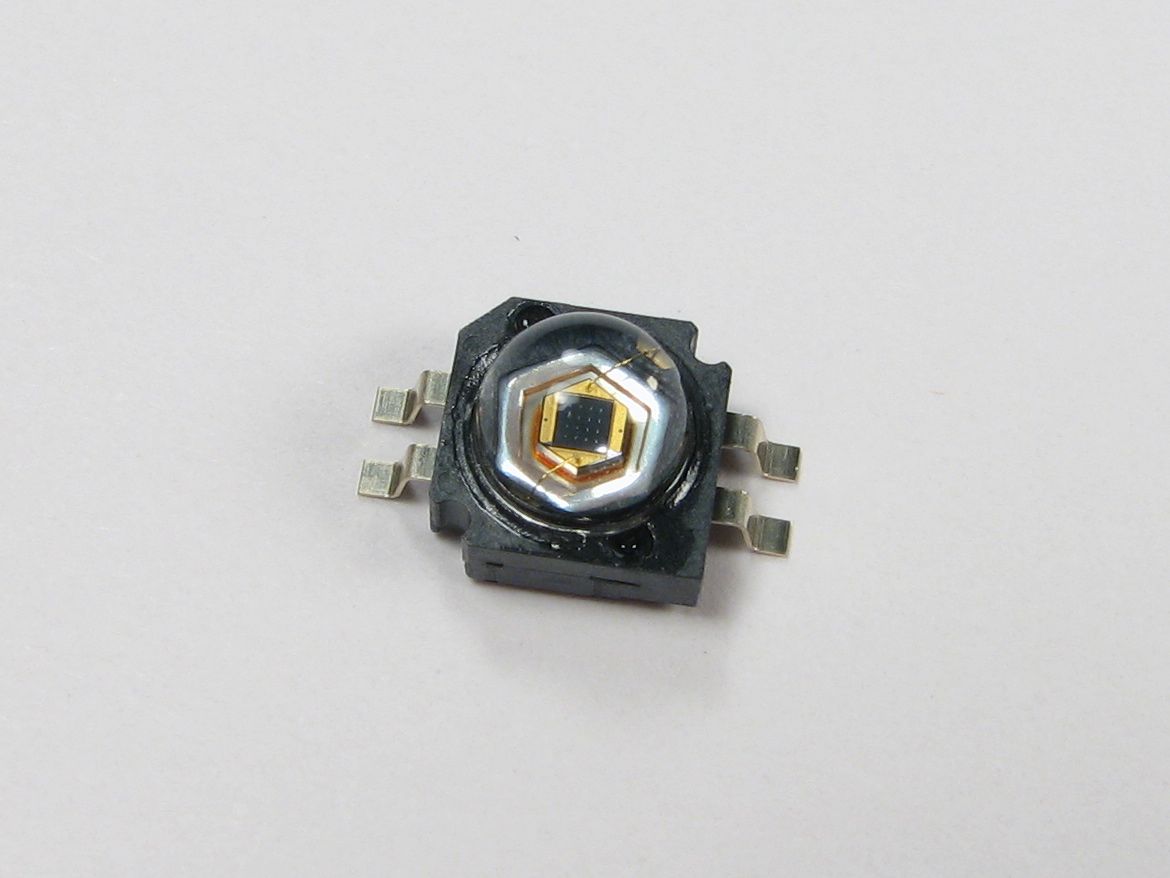
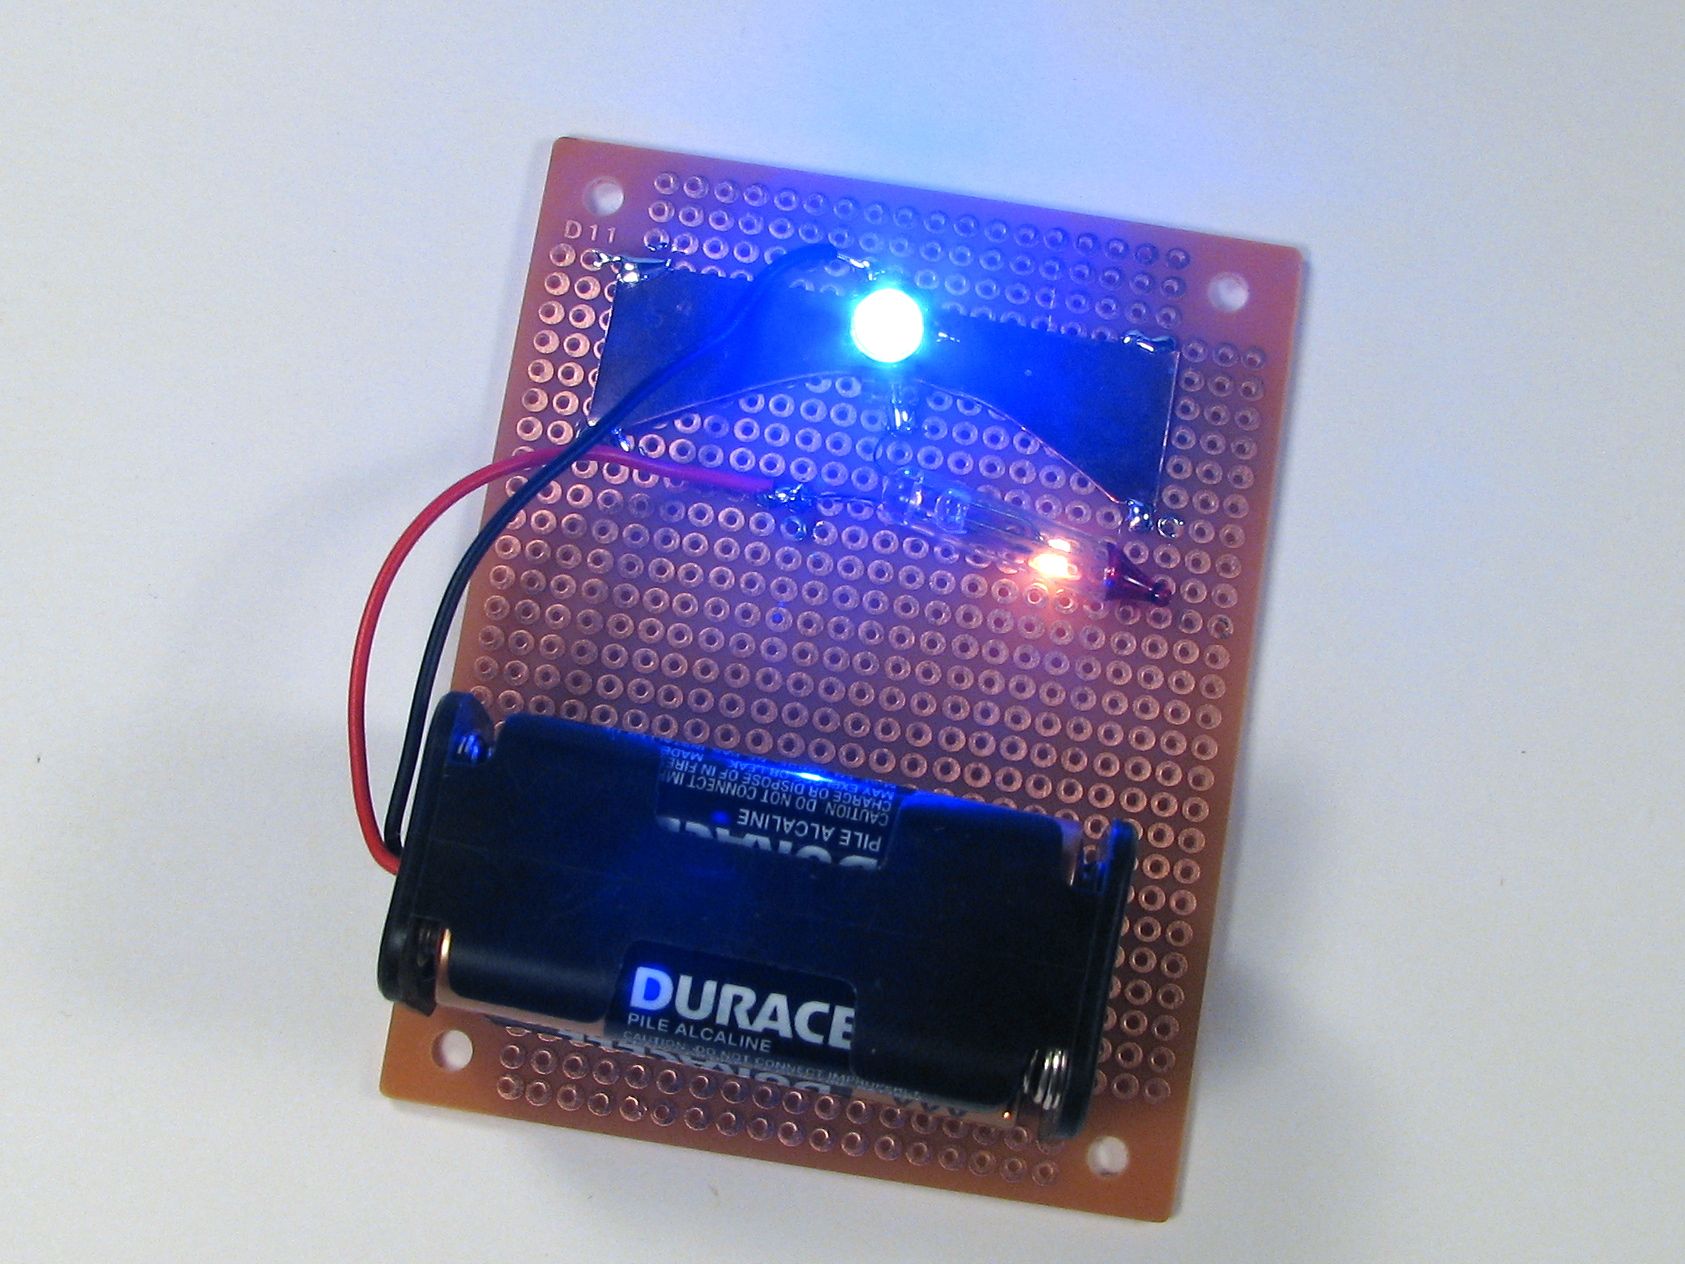
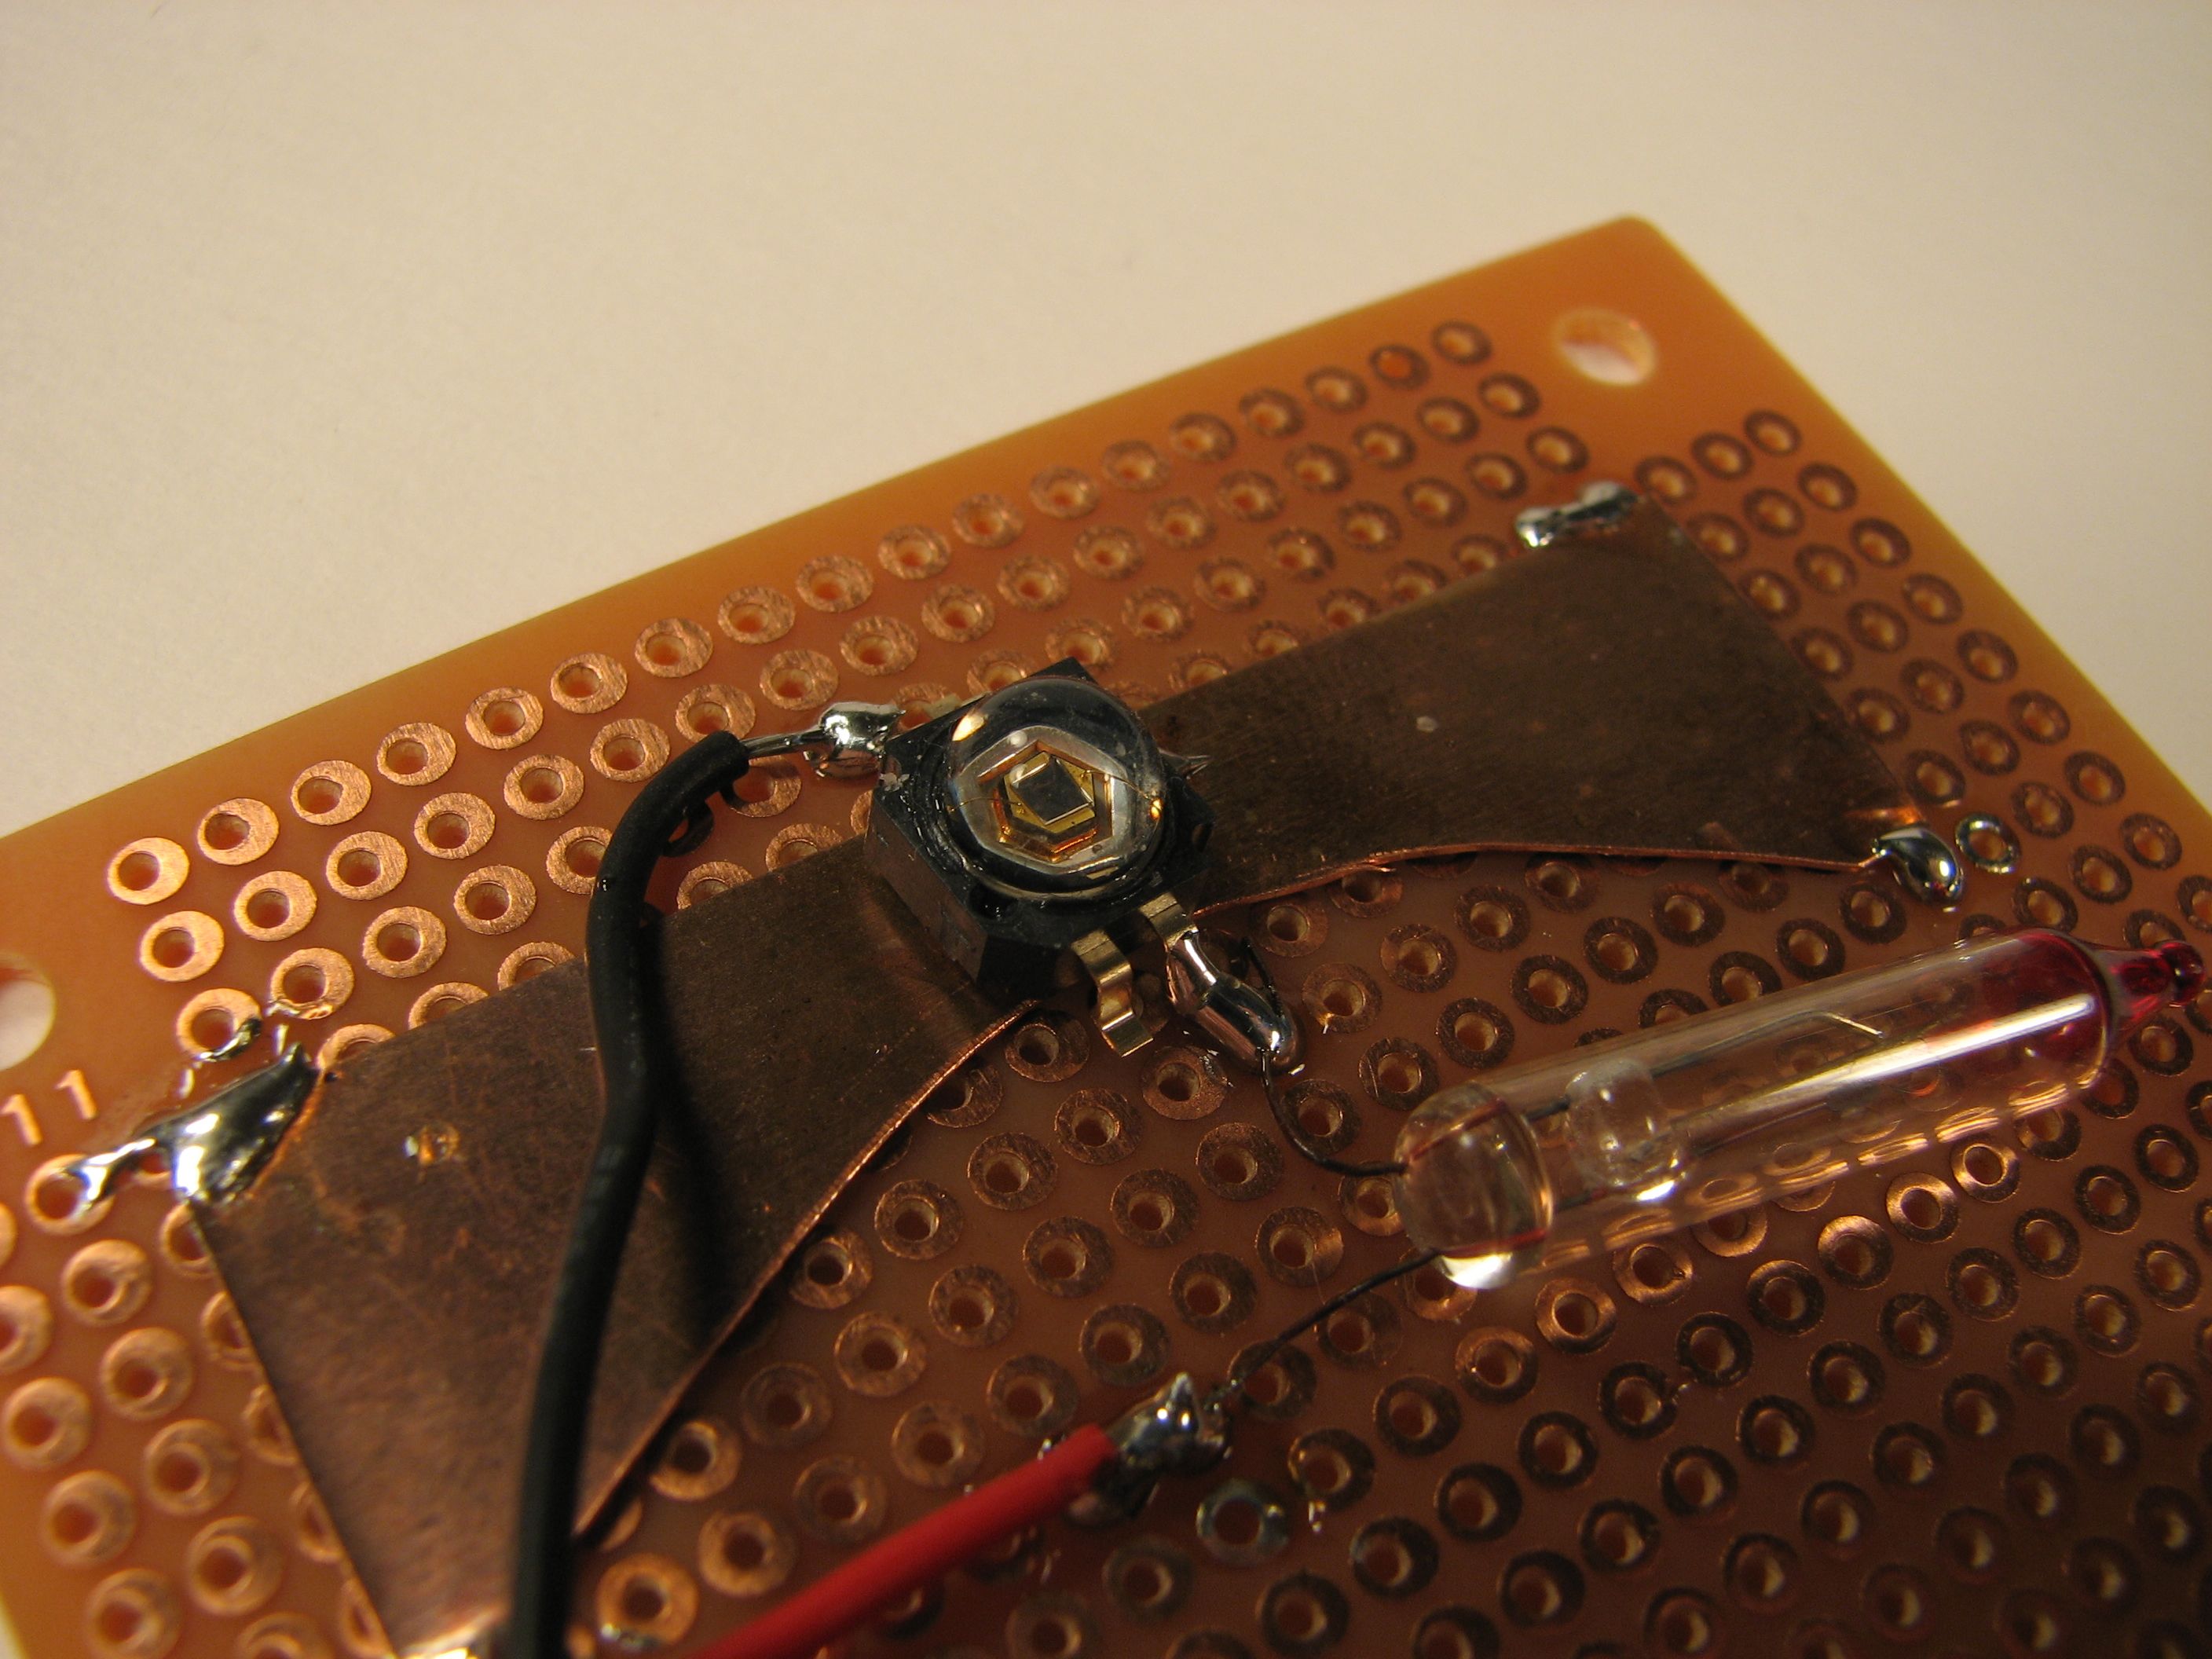
For our implementation and demonstration, we have a whopper of an LED: it’s a 5 W class Luxeon K2, in “royal blue” (455 nm), type LXK2-PR14-R00, with a typical radiometric power of 575mW @ 1A, and rated up to 1.5 A. These currently cost about $5 each in small quantities.
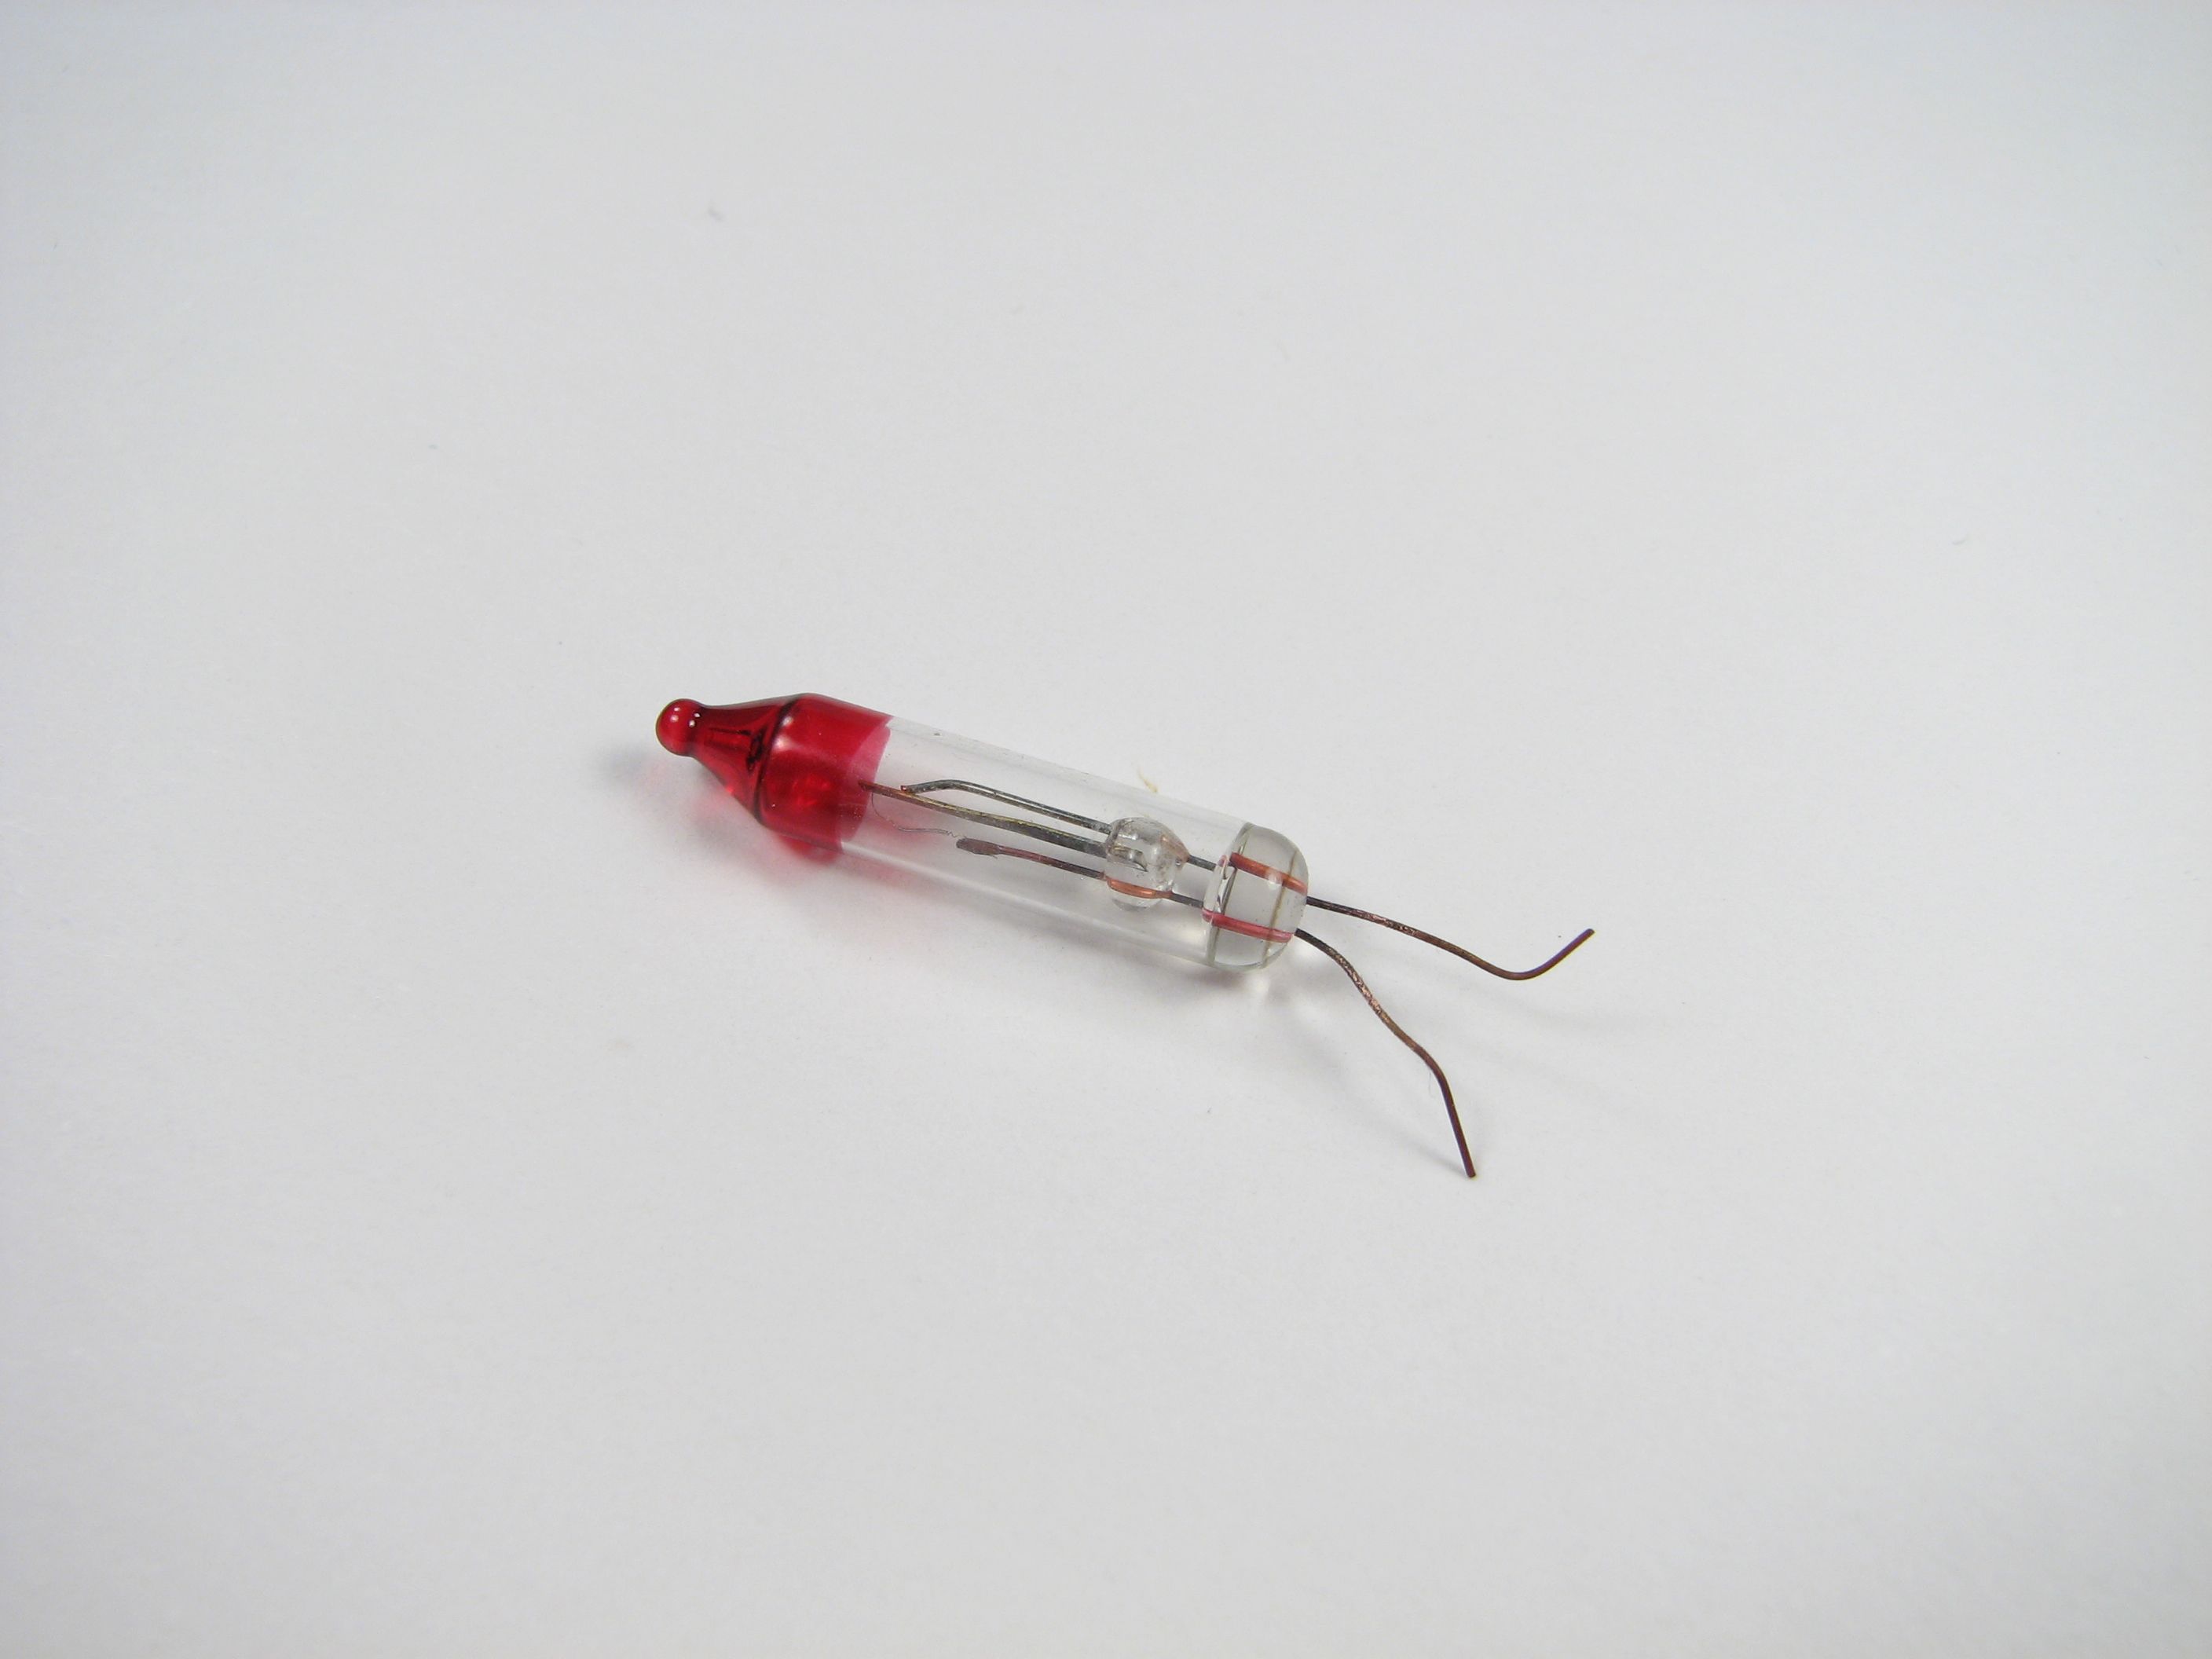
Our blinking bulb is a spare from a set of christmas lights. Estimated cost: $0.15. It’s designed to run with about 3V and 100-200 mA, so that sets the scale for how hard we’ll be able to drive an LED with this particular bulb. This is a fine way to run a 1W scale LED (or a bigger LED at up to 1 W), but if we really wanted to drive that K2 up to its full brightness we’d need (1) a very large heat sink for the LED and (2) a bigger blinking light bulb, maybe one of the 7W candelabra types.
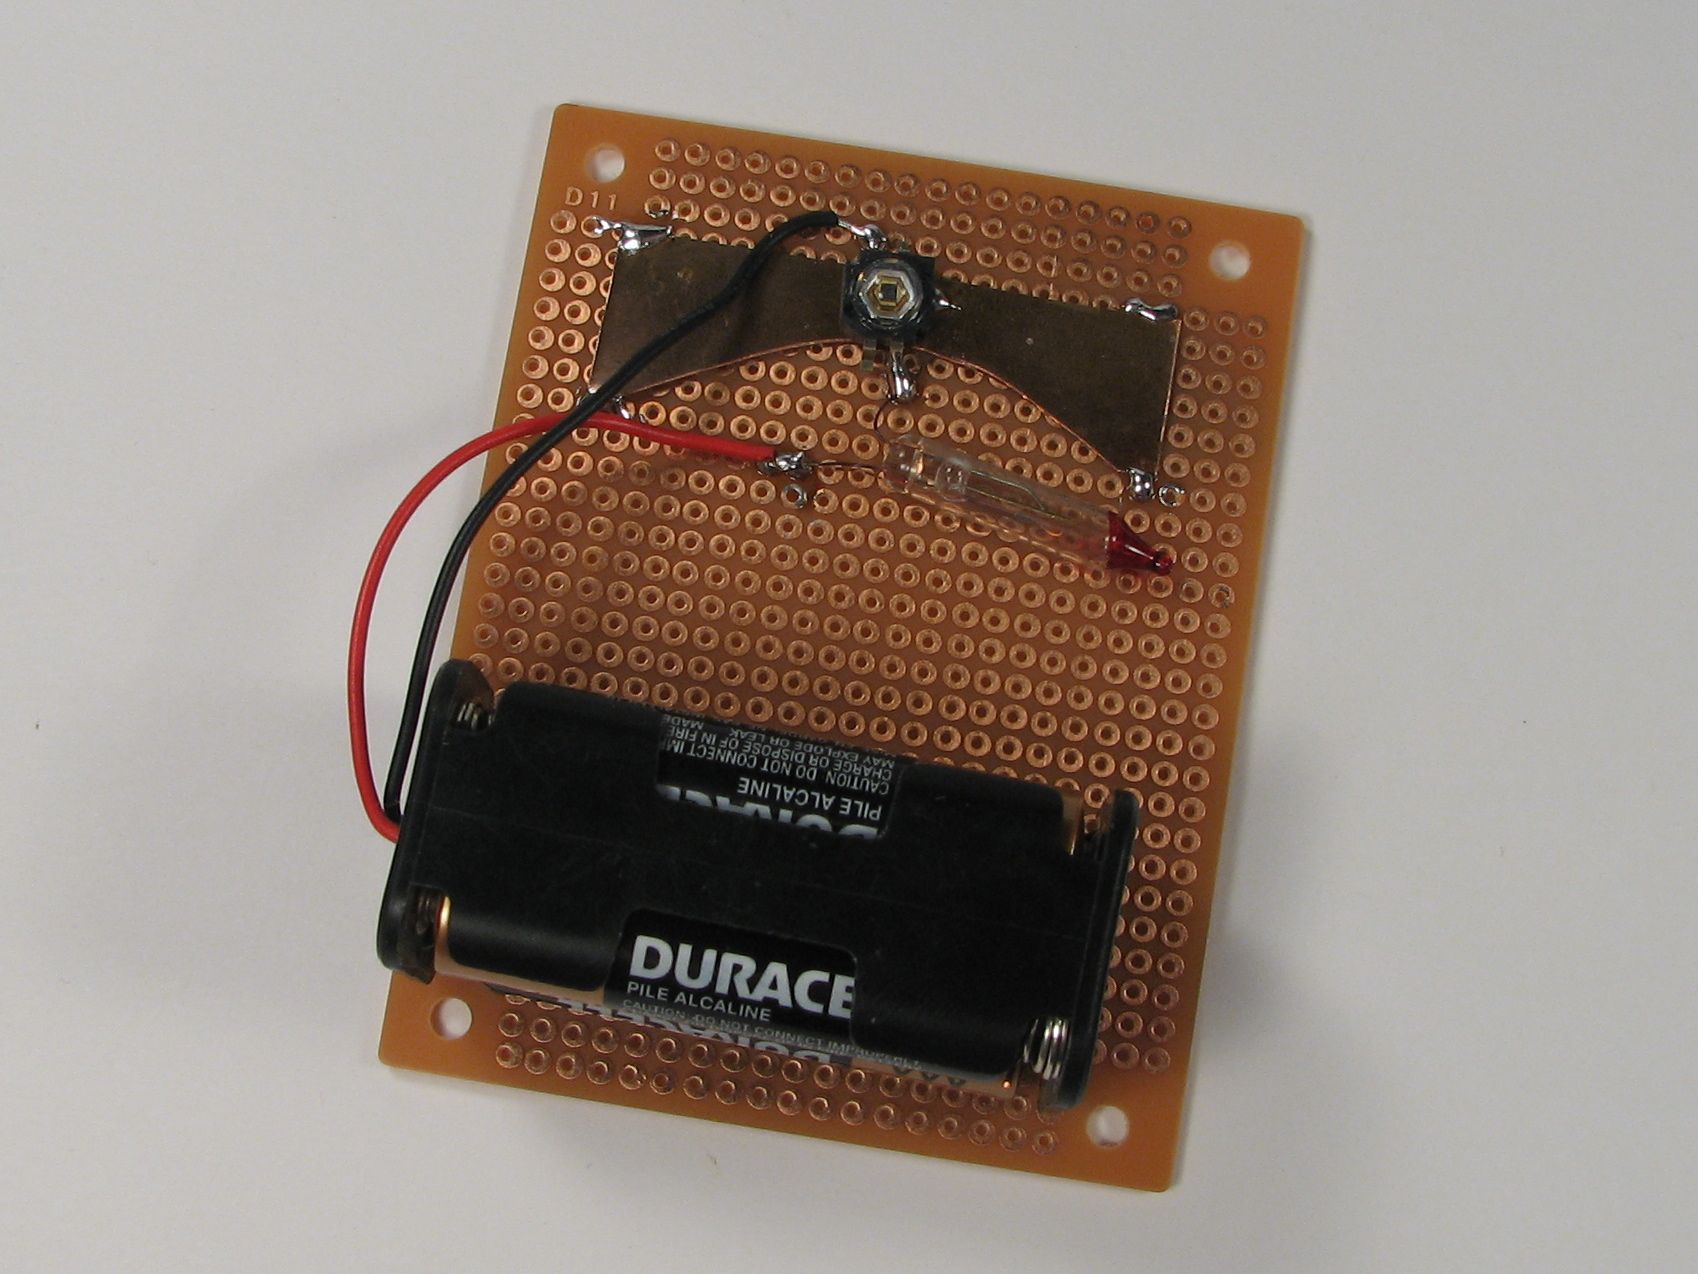
For our voltage source we went tiny and used four AAA batteries, for a 6 V pack. This gives a output current in the range of between 150 and 250 mA, depending on battery freshness and bulb resistance (which is not a constant). Typical AAA alkaline batteries typically have a capacity near 1100 mAh, so at 200 mA and 50% duty cycle, one might expect my little battery pack to blink pleasantly for about 10 hours. Be sure to consult with Ohm to make sure that you don’t walk into any traps, and keep a multimeter handy to measure the actual currents and voltages that you’re working with.
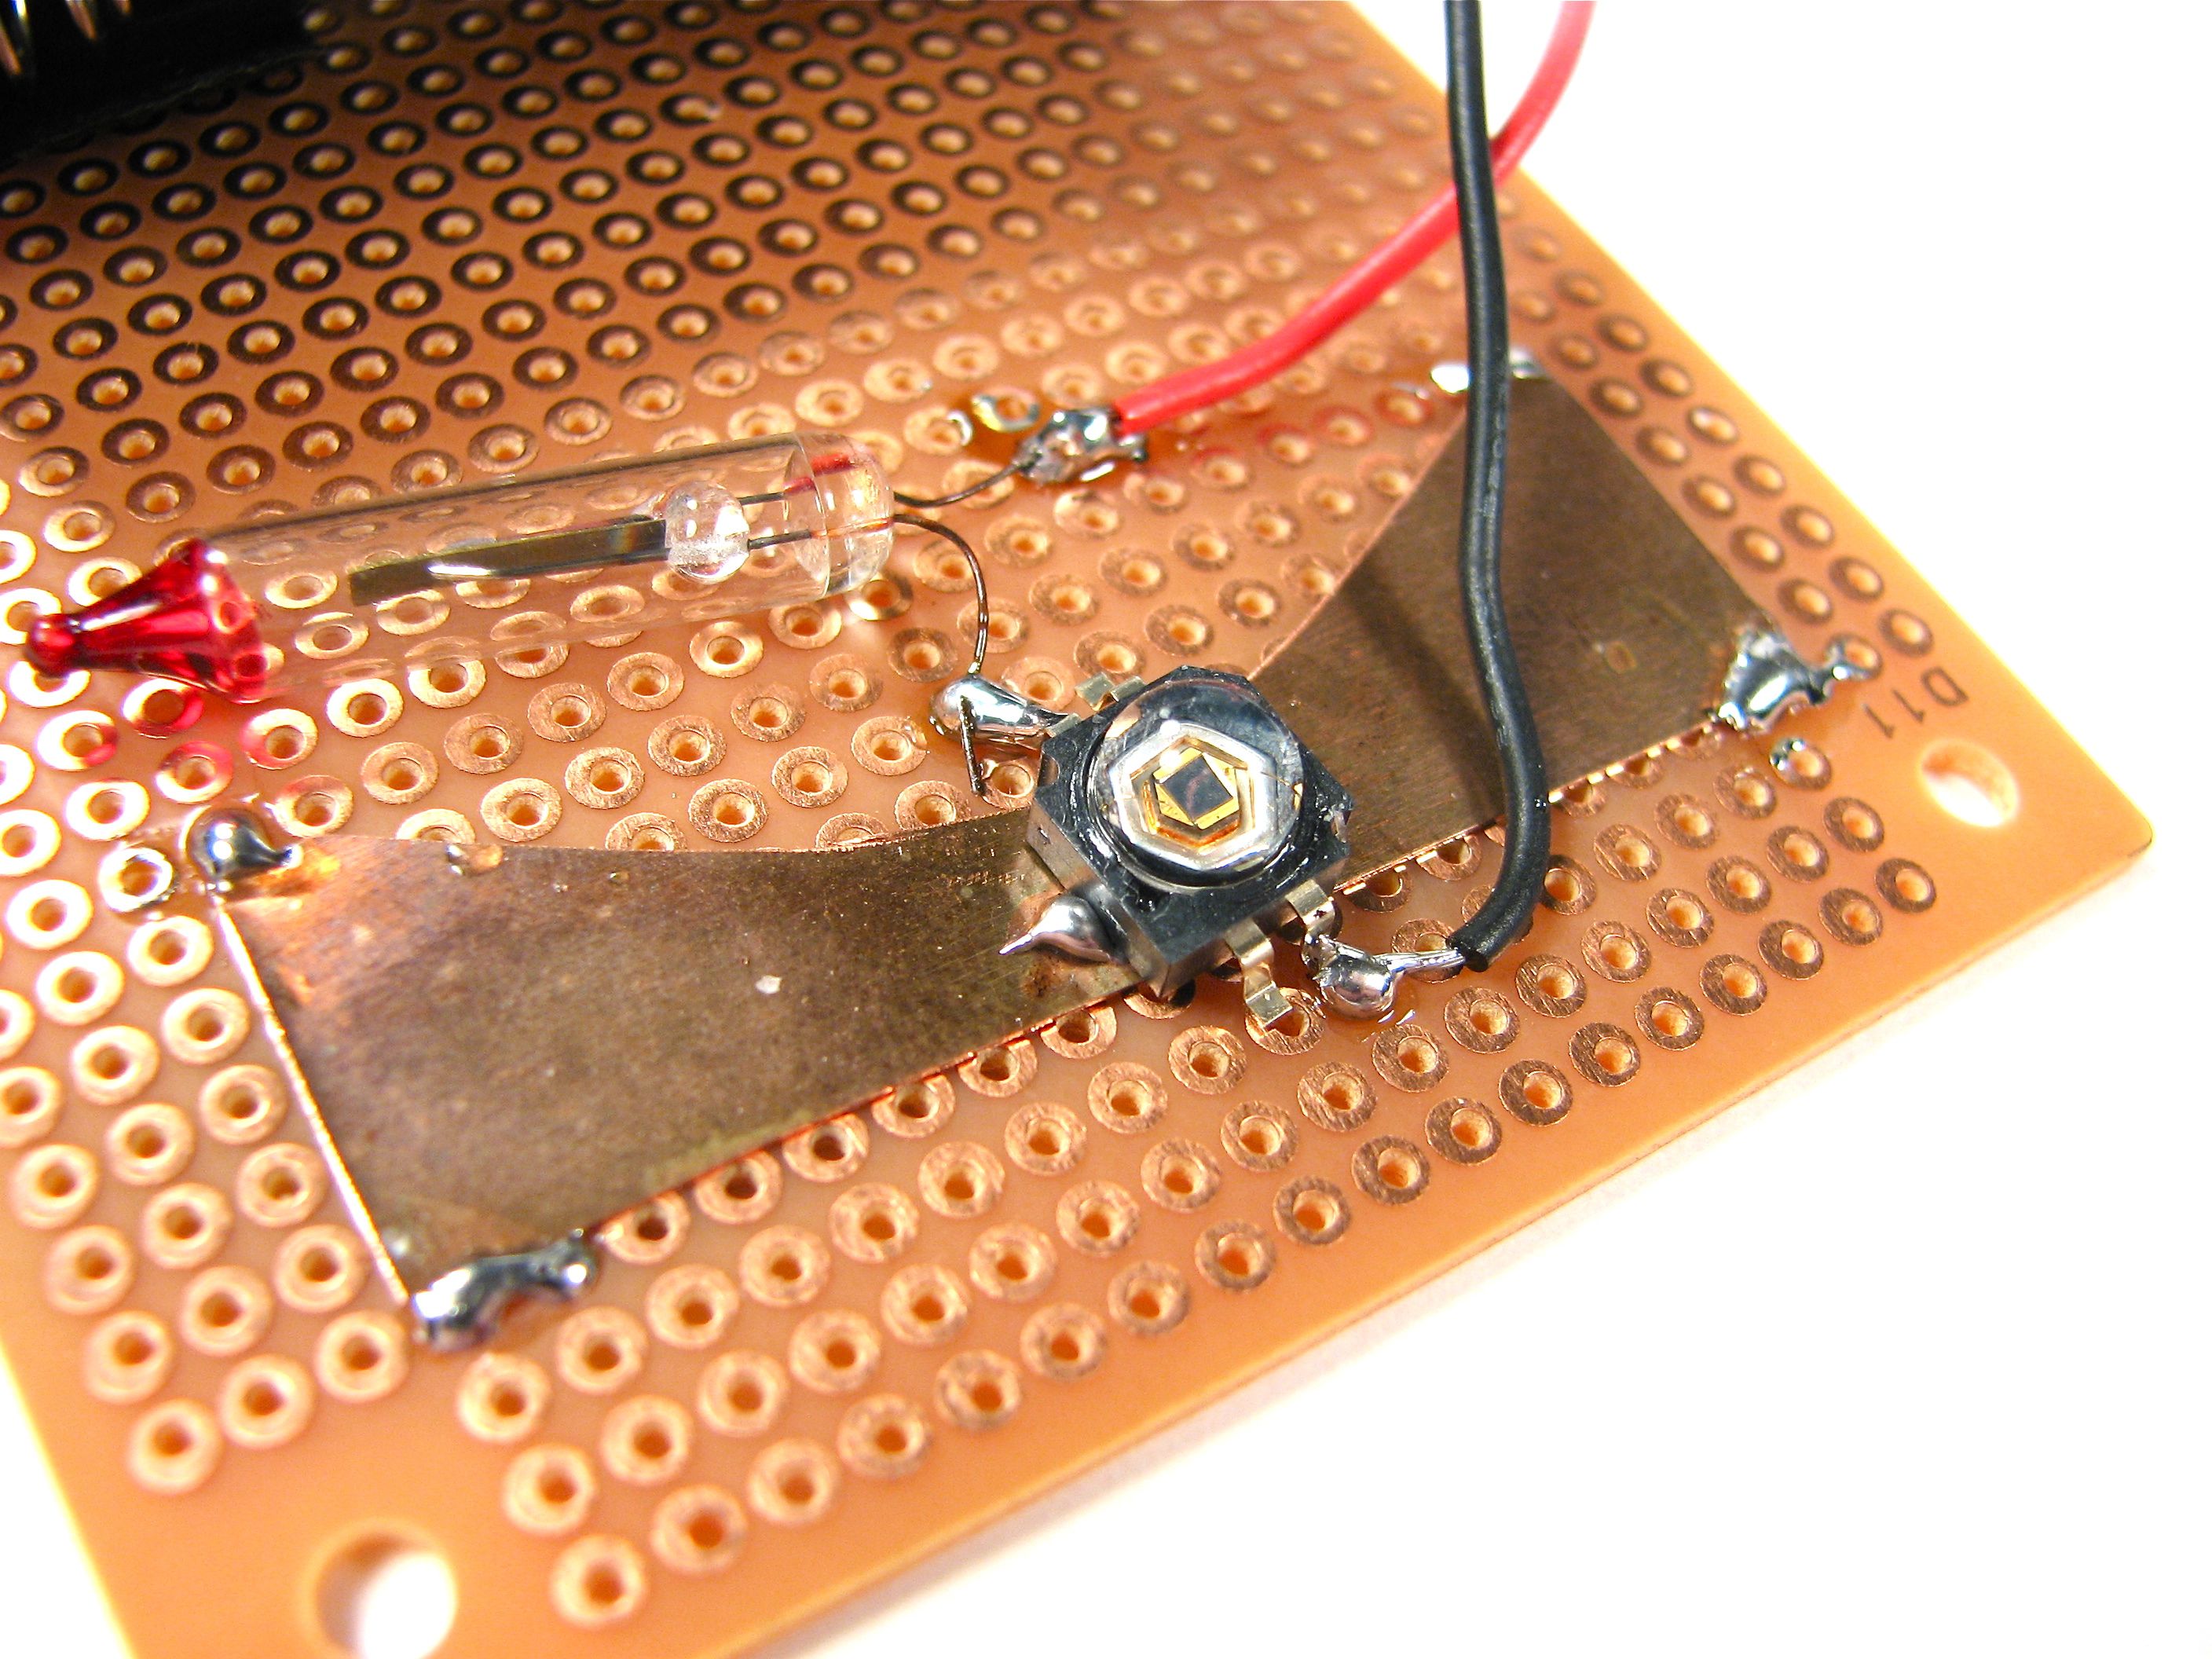
To try it out, we built up the circuit on a piece of perfboard. I soldered the back side of the LED to a 10 mil copper strip to act as a heat sink. The light bulb was not very interested in being soldered but eventually complied. After soldering all two components, it’s ready to try out. So how does it work? Pretty well, actually.

Also, check out a video of it operating on YouTube (or embedded here):
But this is crazy inefficient!
Well, yes and no. The light bulb, when it’s on, basically acts as a low-ohm high-power resistor– it’s no worse than any other low-ohm high-power resistor in a LED driver circuit to limit the current. Like other incandescent light bulbs, it’s an efficient resistor that happens to give off a tiny fraction of its energy as visible light. That said, no this isn’t exactly a high-performance circuit. Most folks working with high-powered LEDs would prefer to use constant-current “switching” drive circuits that operate near 85-90% efficiency, rather than the 60% that we achieve here by driving a 3.6 V LED with a 6 V source and a load resistor in between. However, this circuit *is* easy to construct from common materials, very inexpensive, scalable, and easy to understand. And it blinks.
But this is crazy anachronistic!
Well… can’t argue with that.
Don’t forget, though, that the resistance of an incandescent light bulb varies significantly between cold resistance and hot resistance. When you first switch one on, the filament is cold, and the resistance is moderately low. After the filament has come up to temperature, the resistance has increased significantly. Thus, the amount of light produced by the LED may start off fairly high, and drop as the filament of the incandescent bulb warms up (well, before the bimetallic switch opens, at which point, it goes to zero).
Also, note that the increasing resistance with temperature only applies to Tungsten (or other metal) filamented light bulbs. Carbon filament bulbs work the other way, with the cold resistance significantly higher than the hot resistance.
Dave
Yes indeed. We did point out that bulb resistance is not a constant; that’s one of the reasons that you should keep an eye (and multimeter) on this project until you really understand what’s happening as it warms up.
—
Windell H. Oskay
drwho(at)evilmadscientist.com
http://www.evilmadscientist.com/
I have two worries. First, my experience with christmas light "blink" bulbs is that they aren’t very reliable. Second, don’t they usually include some sort of "fail on" capability that causes the bulb to still conduct if the filament burns out (so as to keep most of the string of lights still illuminated, and make it easier to find the dead bulb.) My impression is that this "fail on" capability has lower resistance than the filament; no big deal in a string of 50 lights when the voltage per light goes up 2%, but perhaps not at all good for your LED…
The reliability will be as bad as a light bulb. However, bulbs do last "pretty well" if you respect their design power limits. Our little example wouldn’t work at all if we ran it with 1.5 A (ZZZAP!) but a bigger bulb might be okay with it. We’re running the LED *way* below its maximum out of respect for the life of the dear light bulb. (Also remember that this is the cheap way; some compromises are accepatble.)
As for the "fail closed" mode, this type of bulb does not have it– it could not work if it did. If you follow the link above to the howstuffworks page, they explain quite clearly: "Obviously, these bulbs don’t have a shunt (if they did, the rest of the strand would not blink), so when the blinker bulb burns out, the rest of the strand will not light until the blinker bulb is replaced." So there you have it. :)
—
Windell H. Oskay
drwho(at)evilmadscientist.com
http://www.evilmadscientist.com/
You guys rock, always finding new (well to me at least) uses for everyday items like the Christmas light blinky bulbs.
Other than that, I just wanted to point out that the text after "Be sure to consult with Ohm " turns green when you put your cursor over it, and red when you click it (just like a link). Even if it was unintentional, it was fun to play around with.
Thanks, and thanks for pointing out our HTML error! I’ve fixed the bleeding link that you found. :)
—
Windell H. Oskay
drwho(at)evilmadscientist.com
http://www.evilmadscientist.com/
Its not a high-voltage circuit, but still I found it very interesting since it worked with other transistors as well:.
http://www.cappels.org/dproj/simplest_LED_flasher/Simplest_LED_Flasher_Circuit.html
Well the obvious next step is to implement an entire Christmas tree blinking string with a bunch of these 5W behemoths. (Hopefully at less than $5 each.) Twenty of these on a string ought to make quite an outdoor display.
Is it possible to blink more than one LED light? Ex: Red Yellow Green Blue all with one battery?