


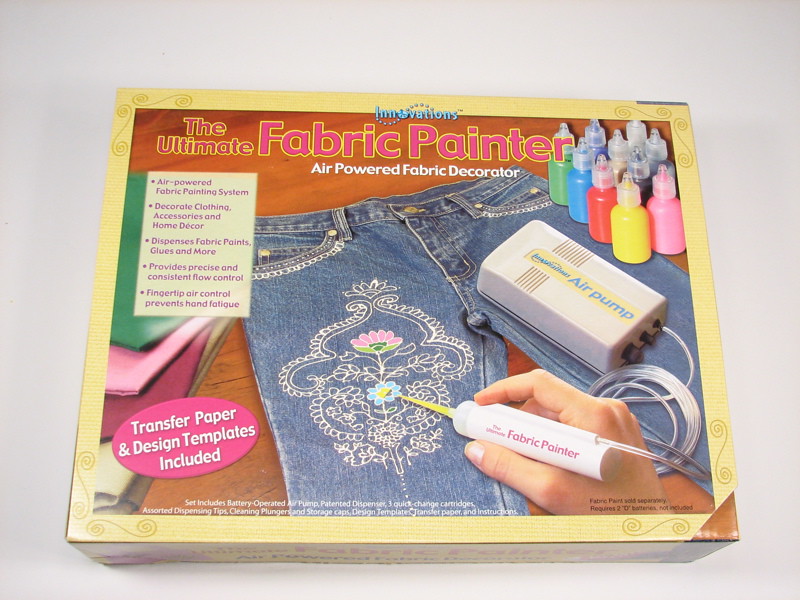
Fused deposition machines are an interesting class of rapid prototyping and art robots, capable of extruding paint onto a canvas or extruding to build up complex, three-dimensional objects one layer at a time. Naturally, one of the challenging parts of designing machines like these is designing and building a system for dispensing the printing medium. So, imagine how surprised we were when we were walking through the aisles of our local Michaels craft store and saw a pre-built extruder on the shelf for $20!
Naturally, we picked one up because an extruder head might make a nice accessory for our own three dimensional printer.
So, what is it? It’s an inexpensive kit that can be used for developing your 2D or 3D printer extruder with an air-powered delivery system. For the price you can get a small air pump, tubing, syringes, tips, and dispenser. The components are simple and easily hackable, and it looks like a good set of tools for starting to build a simple extruder head for an art bot of some sort.
Quite mysteriously, this kit is not actually advertised as an arbitrary material extruder kit, but rather as “the ultimate fabric painter.” This is very strange because not only does the kit not include any fabric paint, but it’s not obvious that there’s any advantage whatsoever to painting fabric with this method. (Actually, if the picture on the front of the box is any indication, there may even be disadvantages!)
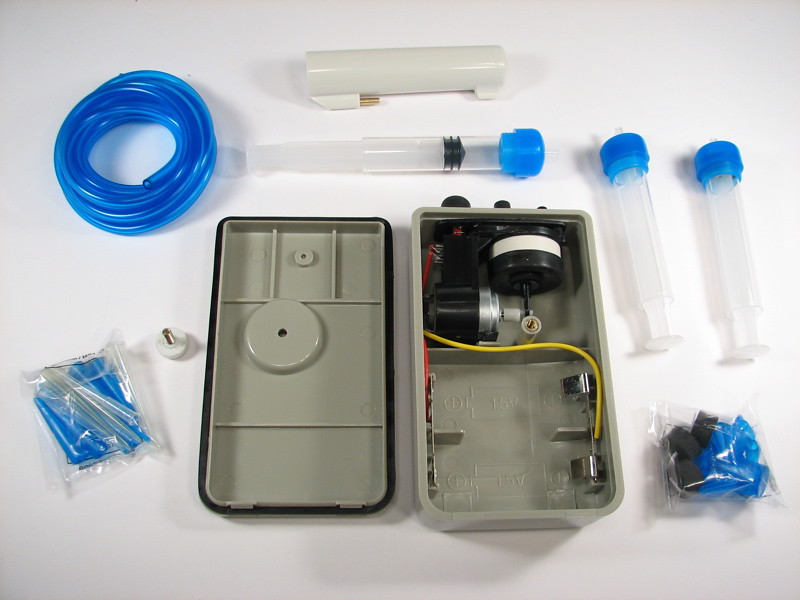
The pump uses two ‘D’ cell batteries, which means there is plenty of room to put in a small 3V power supply. There is even a small screw hole in the case that could be used for feeding wires in. You can add a little relay or transistor to control your airflow and you’re in business.
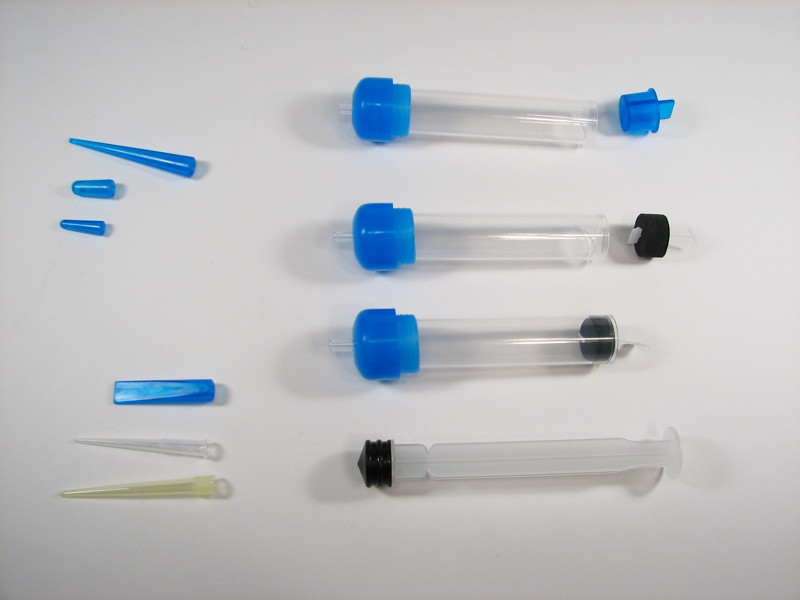
The kit has several foam stoppers with a hole to admit air to the syringes when they are in the applicator. There are also rubber stoppers and various tips and caps.
 The instruction booklet is generally terrible (throw it out and substitute common sense), but the box does suggest that the kit can be used for things other than paint, including glue.
While you could probably get most of the parts for about the same amount of money, the applicator is not readily available and it is awfully nice that it is all together in one kit.
And what the heck does “contents may vary” mean?
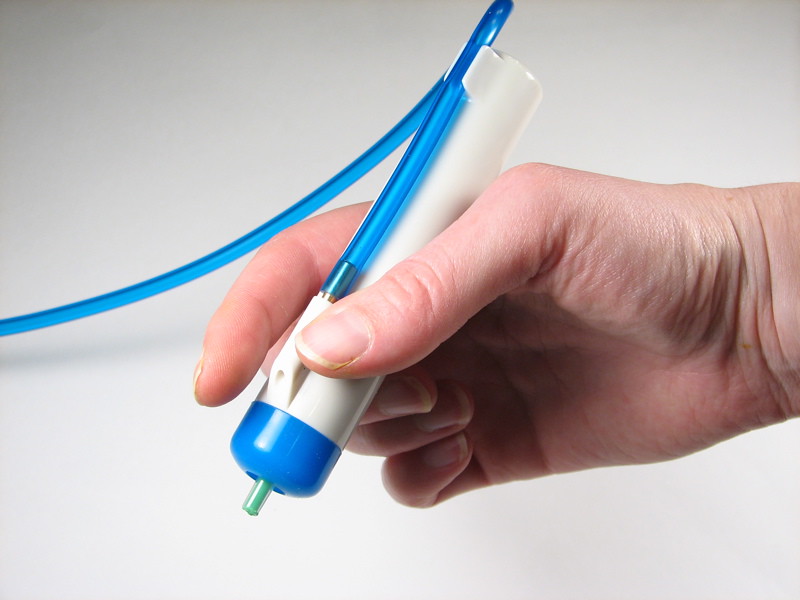 The applicator works with a finger valve. When the finger valve is open, the paint doesn’t flow.
For use in your robot, plug the hole permanently with silicone and pulse the pump power instead.
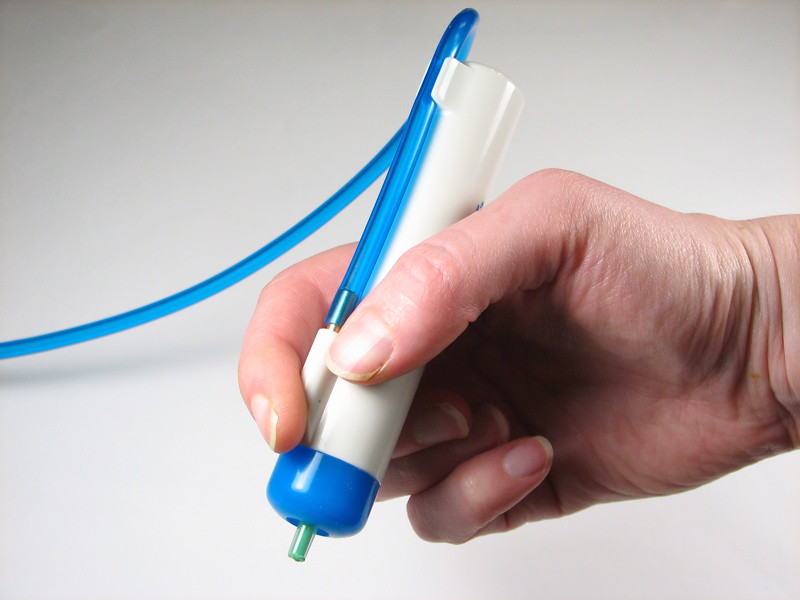
When your finger covers the hole, the paint flows.
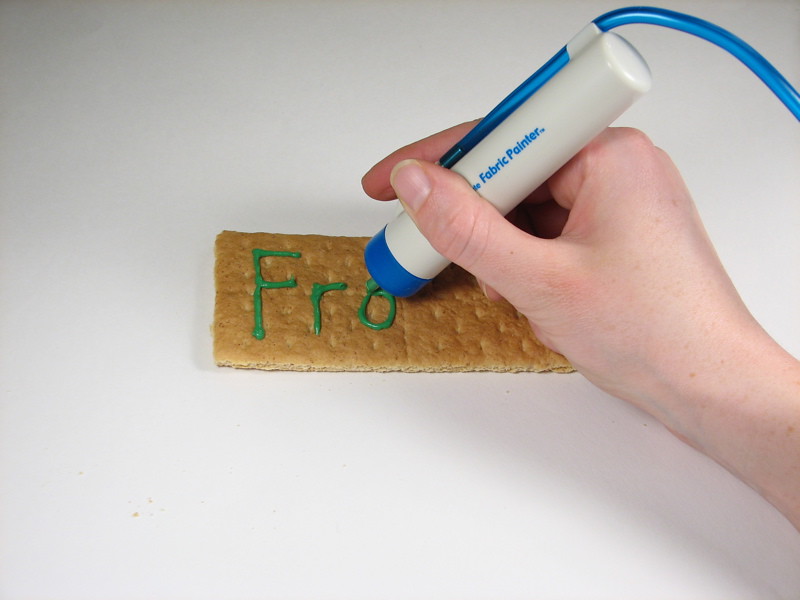
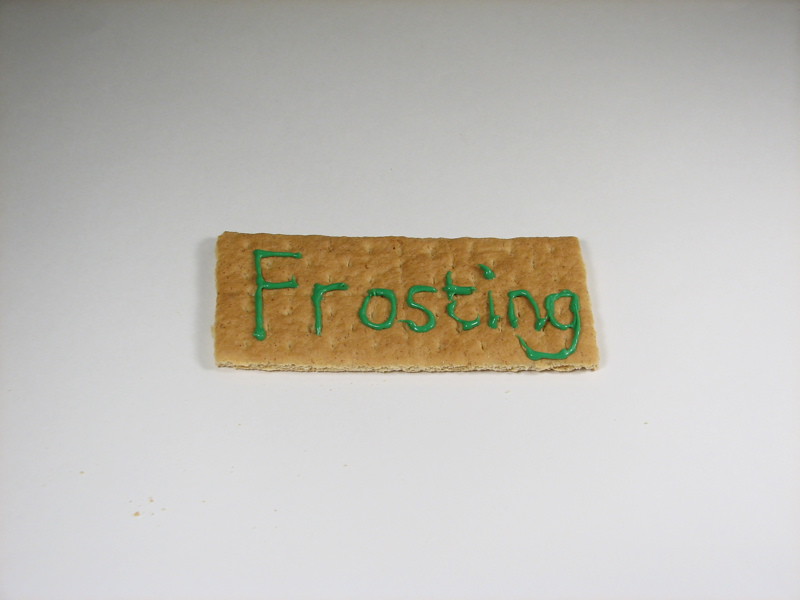
Just to show some potential for this machine, we tried it out with frosting, and it worked reasonably well. (Even the reprap folks seem to be interested in sculpting frosting.)
Finding the right rate to move the tip at is tricky, but once you program your robot to do it for you, you won’t have to worry about the shortcomings of human beings.
Update: We tried swapping out the rather weak pump that was included with a $10 (still inexpensive) aquarium pump and had good results. The tubing fit nicely and the air pressure increased significantly.
This is a terrific find. An air powered, finger-controlled microdispenser for glue or solder paste, at a disposable price. Throw away the cheesy pump and hook it to your lab air.
Very nice find.
Pulsing the power supply will create significant lag when you want to stop the flow, as the pressure in the line will have to dissipate. Retrofitting the existing control with some sort of solenoid valve would offer better control and simplify the programming on an automated device, though it would be very easy to spend more on a solenoid valve than you did on the extruder.
I think the ultimate best use for this device would be to take it apart and see exactly how everything works, and see if there are any clever bits. Then build a new one with lessons learned that will run on the aforementioned shop air.
That’s an excellent point, and one that we hadn’t considered. Indeed, if precision matters at all, it will be much better to interrupt the air line than to turn off the power to the pump.
Rather than using a true solenoid valve, a good and inexpensive solution might be to use a DIY pinch valve like this one based on a servo motor. It could be made with a cheap miniature servo motor and operated as a release valve, opening a channel to quickly depressurize the extruder end when needed. Maybe we’ll have to do that when we try to build our own 3D artbot!
—
Windell H. Oskay
drwho(at)evilmadscientist.com
http://www.evilmadscientist.com/
Aquarium pump… perfect. That’s just what Adrian Bowyer’s support material extruder prototype needs to get rid of that big recycled plastic soda pop bottle.
The parts list here could be purchased all for less than the initial $20 that you invested.
Syringes of various sizes are available at your local drug store. They also have tips ranging from extremely small to just up over 1/32 of an inch. Possibly bigger, if you order online.
Tubing is available at any aquarium/pet store. Also hobby stores have silicon tubing, which is chemical resistant and very pliable.
The aquarium pump you already solved. Much higher pressure, as well as long-term reliability.
It’s a great idea, but at the same time the parts were already readily available from various sources.
I’m not saying this isn’t a good starting point–but at the same time, you make it out to be that this is the only solution. I will have an instructable online sometime in the next couple of weeks on how to make an extremely accurate extruder from two syringes, and an aquarium pump.
Thanks for pointing out all the sources for the materials. The one thing that is not readily available is the finger valve adapter for the syringes.
It must be said that it is nice that it all comes in a kit that keeps you from having to shop in multiple locations. Additionally, shopping at a drug store for syringes and tips may be intimidating for some folks. Shopping at a Michaels (while annoying in its own way) may be more comfortable for some just getting started on their artbots and other projects. In that case, the higher cost is balanced by increased accessibility.
Cutting a small hole in one side of the tube leading to the syringe will achieve the same effect that the holder has, as that is essentially what it is.
As I said, I have an instructable coming up that will show all of this laid out for easy reading.
Three years later…
It was published, here.
Windell H. Oskay
drwho(at)evilmadscientist.com
http://www.evilmadscientist.com/
Okay, this thing is no longer available, apparently. I have been looking far and wide for it. (That is how I found this site and post.) There is a version of it that is about $200, which I would LOVE to have, but it is not in the budget. Are there any instructions on how to make one? It seems that it would be very simple for Anonymous, and I can follow directions like nobody’s business! I intend to use it for icing. I already have various syringes, tubing, and an aquarium pump and a large one for my airbrush. I could figure it out if I had one to take apart, but it is not to be :-( I will check back daily.
Hello!
The components look in core like medicinical supplies to me.
Normally a syringe with a piston with a rubber tip as in the fotos is inserted in a special device, sysinge pump, that is rather some precise linear drive, used in medicinical intesive care units as delivering drugs with adjustable flow rate intraveneous or feeding premature born infants with milk.
In Germany its called Perfusor (by the brand name by b. braun http://en.wikipedia.org/wiki/B._Braun_Melsungen ).
You can get those syringes for a few EUR each from every pharmacy, online rather cheaper.
Even the plastic needles, called flexüle (plastic "needle") in germany, are quite available in different diameters.
(German, but still, e.g. medizinfuchs.de search for : perfusor )
The interesting part is combining those things together e.g. with some magnetic or vibrational (ultasonic? ->heats and mixes as well) driven insertion in the needle tip to do some stirring and shaking, perhaps even using it as the volume flow determining part. (Rotating movement for stirring, up-down movement for delivering volume flow. Perhaps using a simple drill with some small motor as stirr and pump mechanism. )
The only thing I think to be difficult is high-temperature applications where the sealing will weaken due to softening of the plastic syringes.
When I would use air pressure, it offered a sealing-less design, enabling me to use metal plumbing material combined with the stainless steel part of needles as a tip. The shorter, the less prone to clogging. Who has tried high-temperature resistant glues?
Greetings!
Fes Moa