


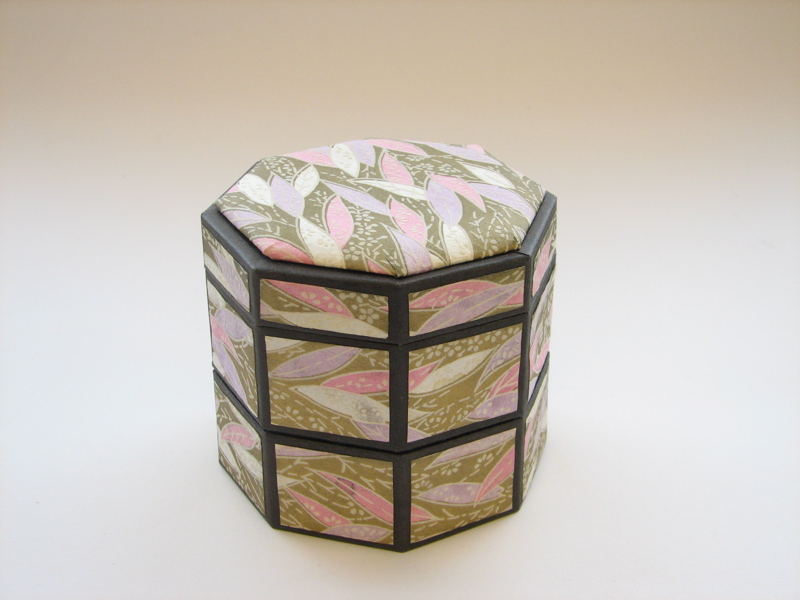
The inspiration for this week’s project comes from the Japanese stacking octagonal box kit shown above. We previously used a similar technique to demonstrate a business card box with traditional elegance. We now present a surreal modern makeover for Japanese papercraft boxes by using (recycling) paperboard packaging.
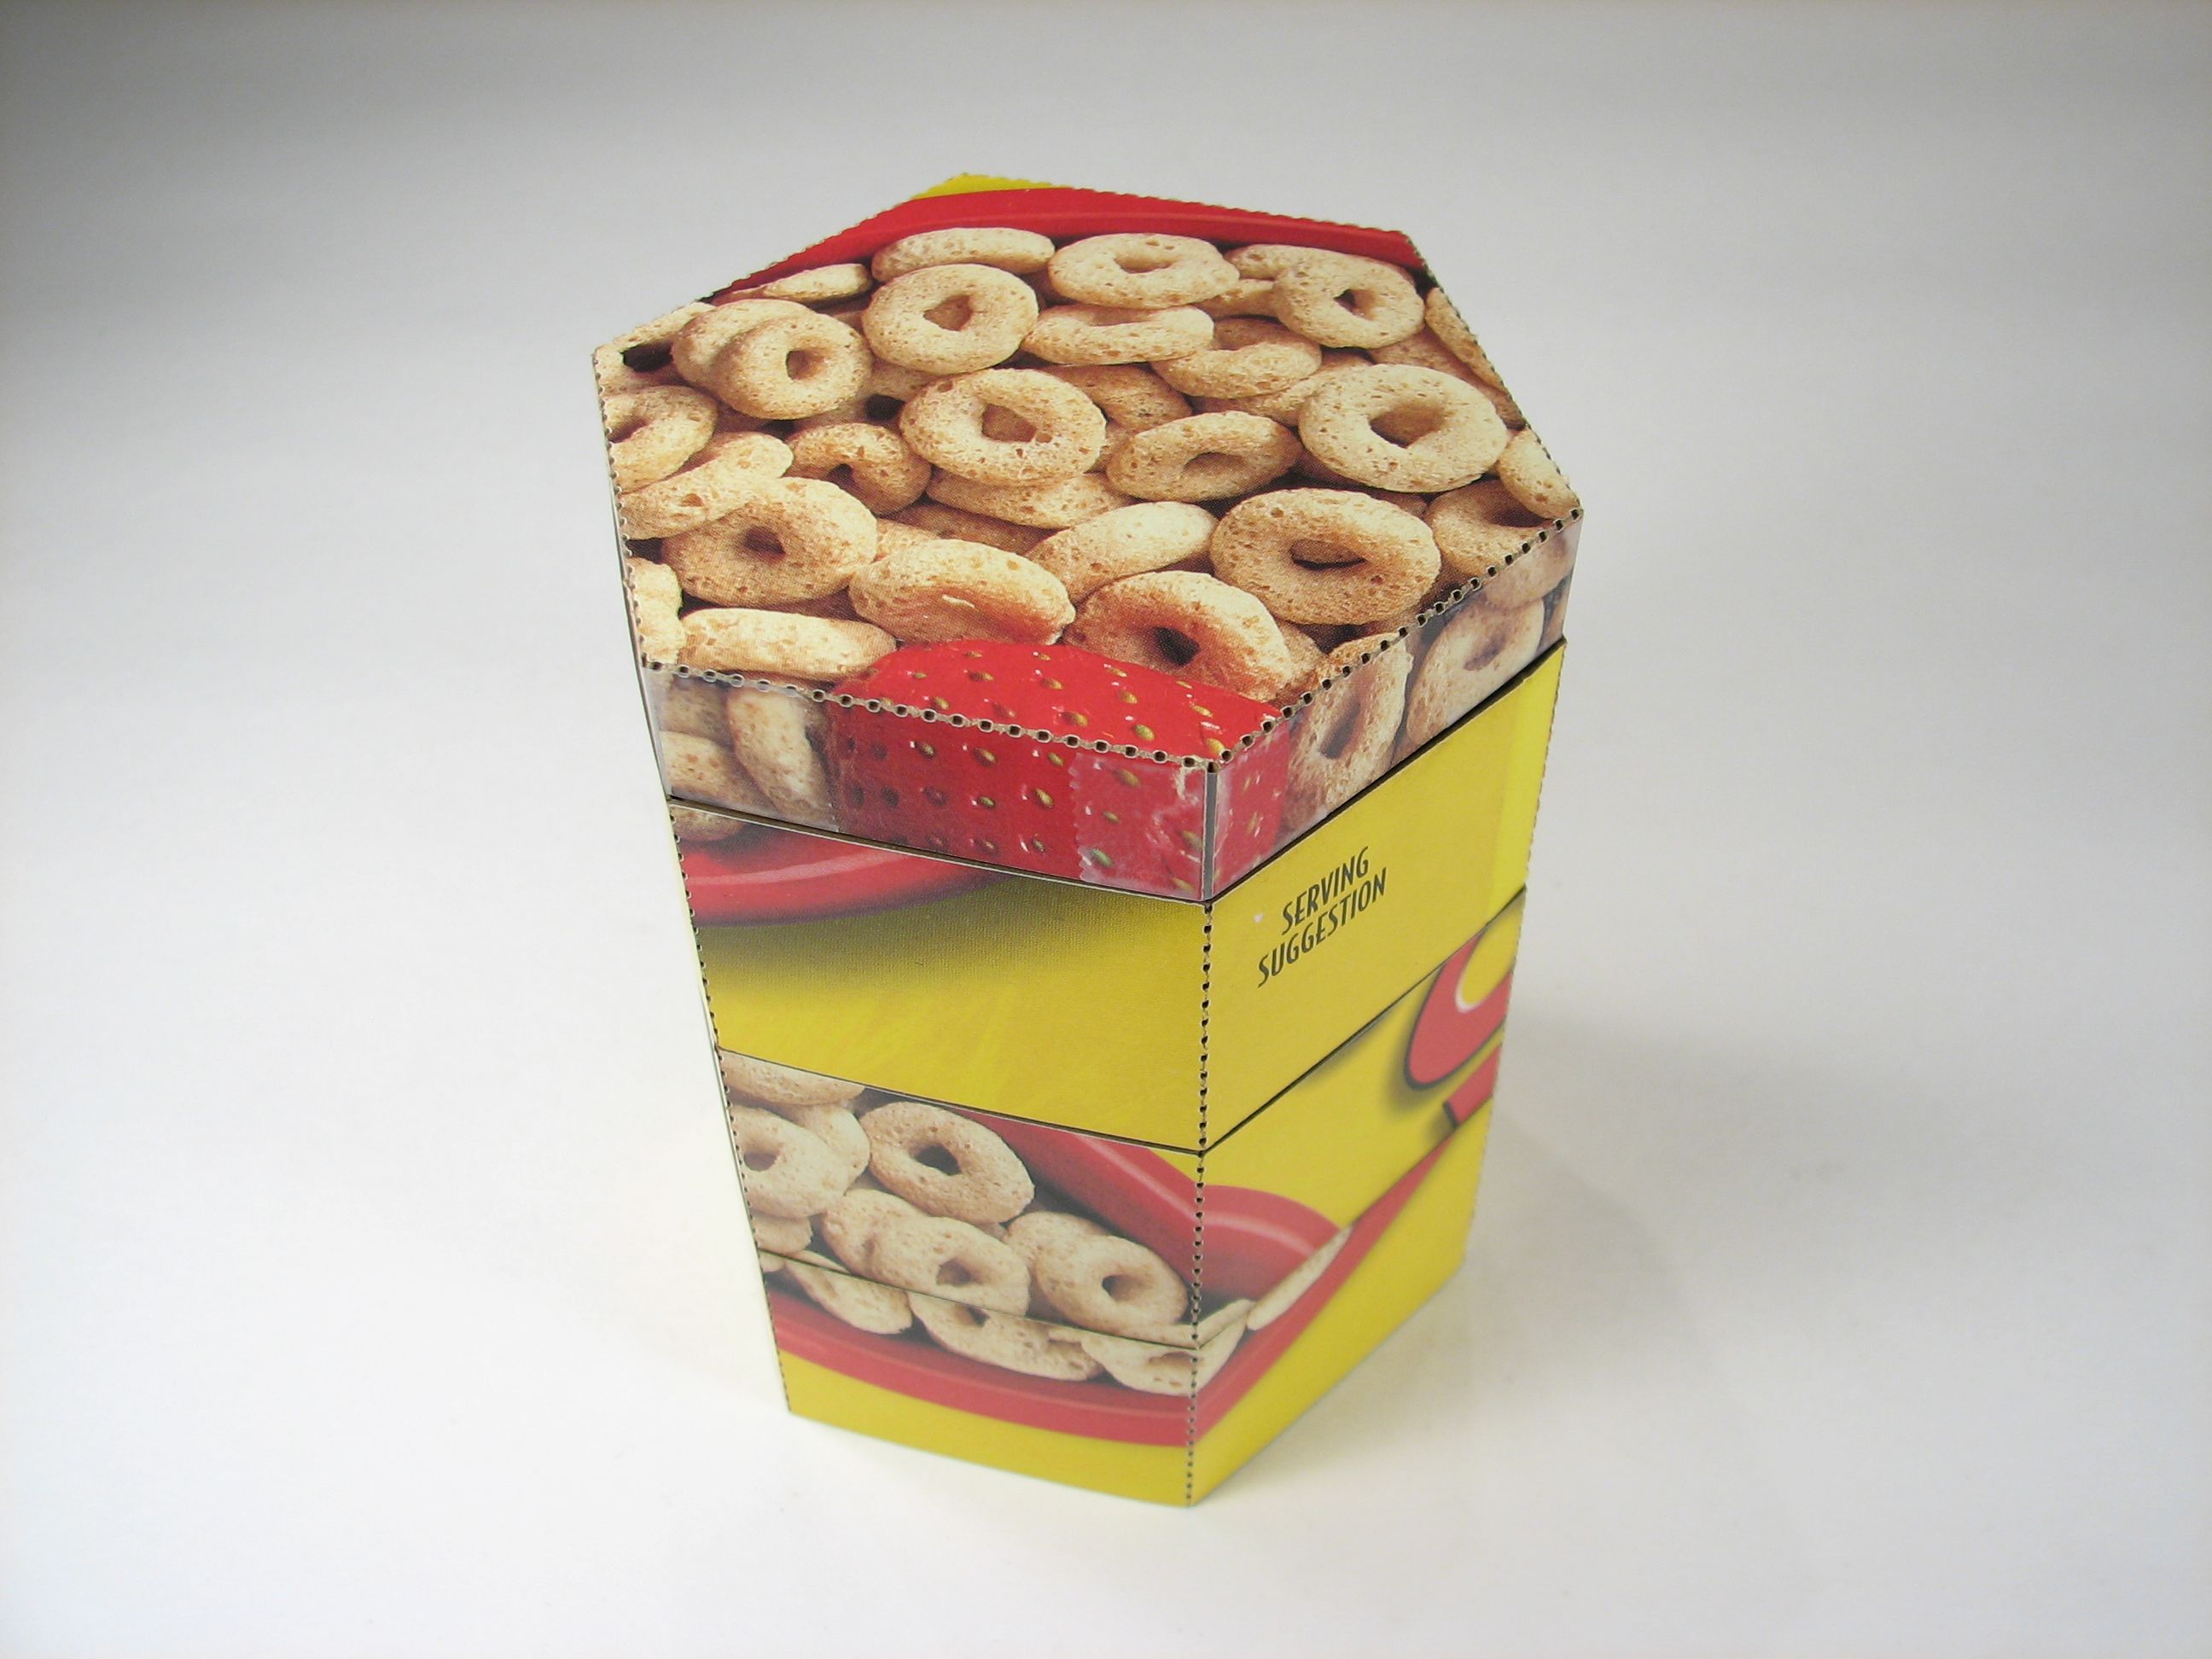
We follow the same basic construction techniques, but simplify it by eliminating the paper coverings and decorations. In their place, we use paperboard from cereal, cracker and cookie packaging. These cheerful boxes are easier and less expensive to make and have a surreal quality to them.
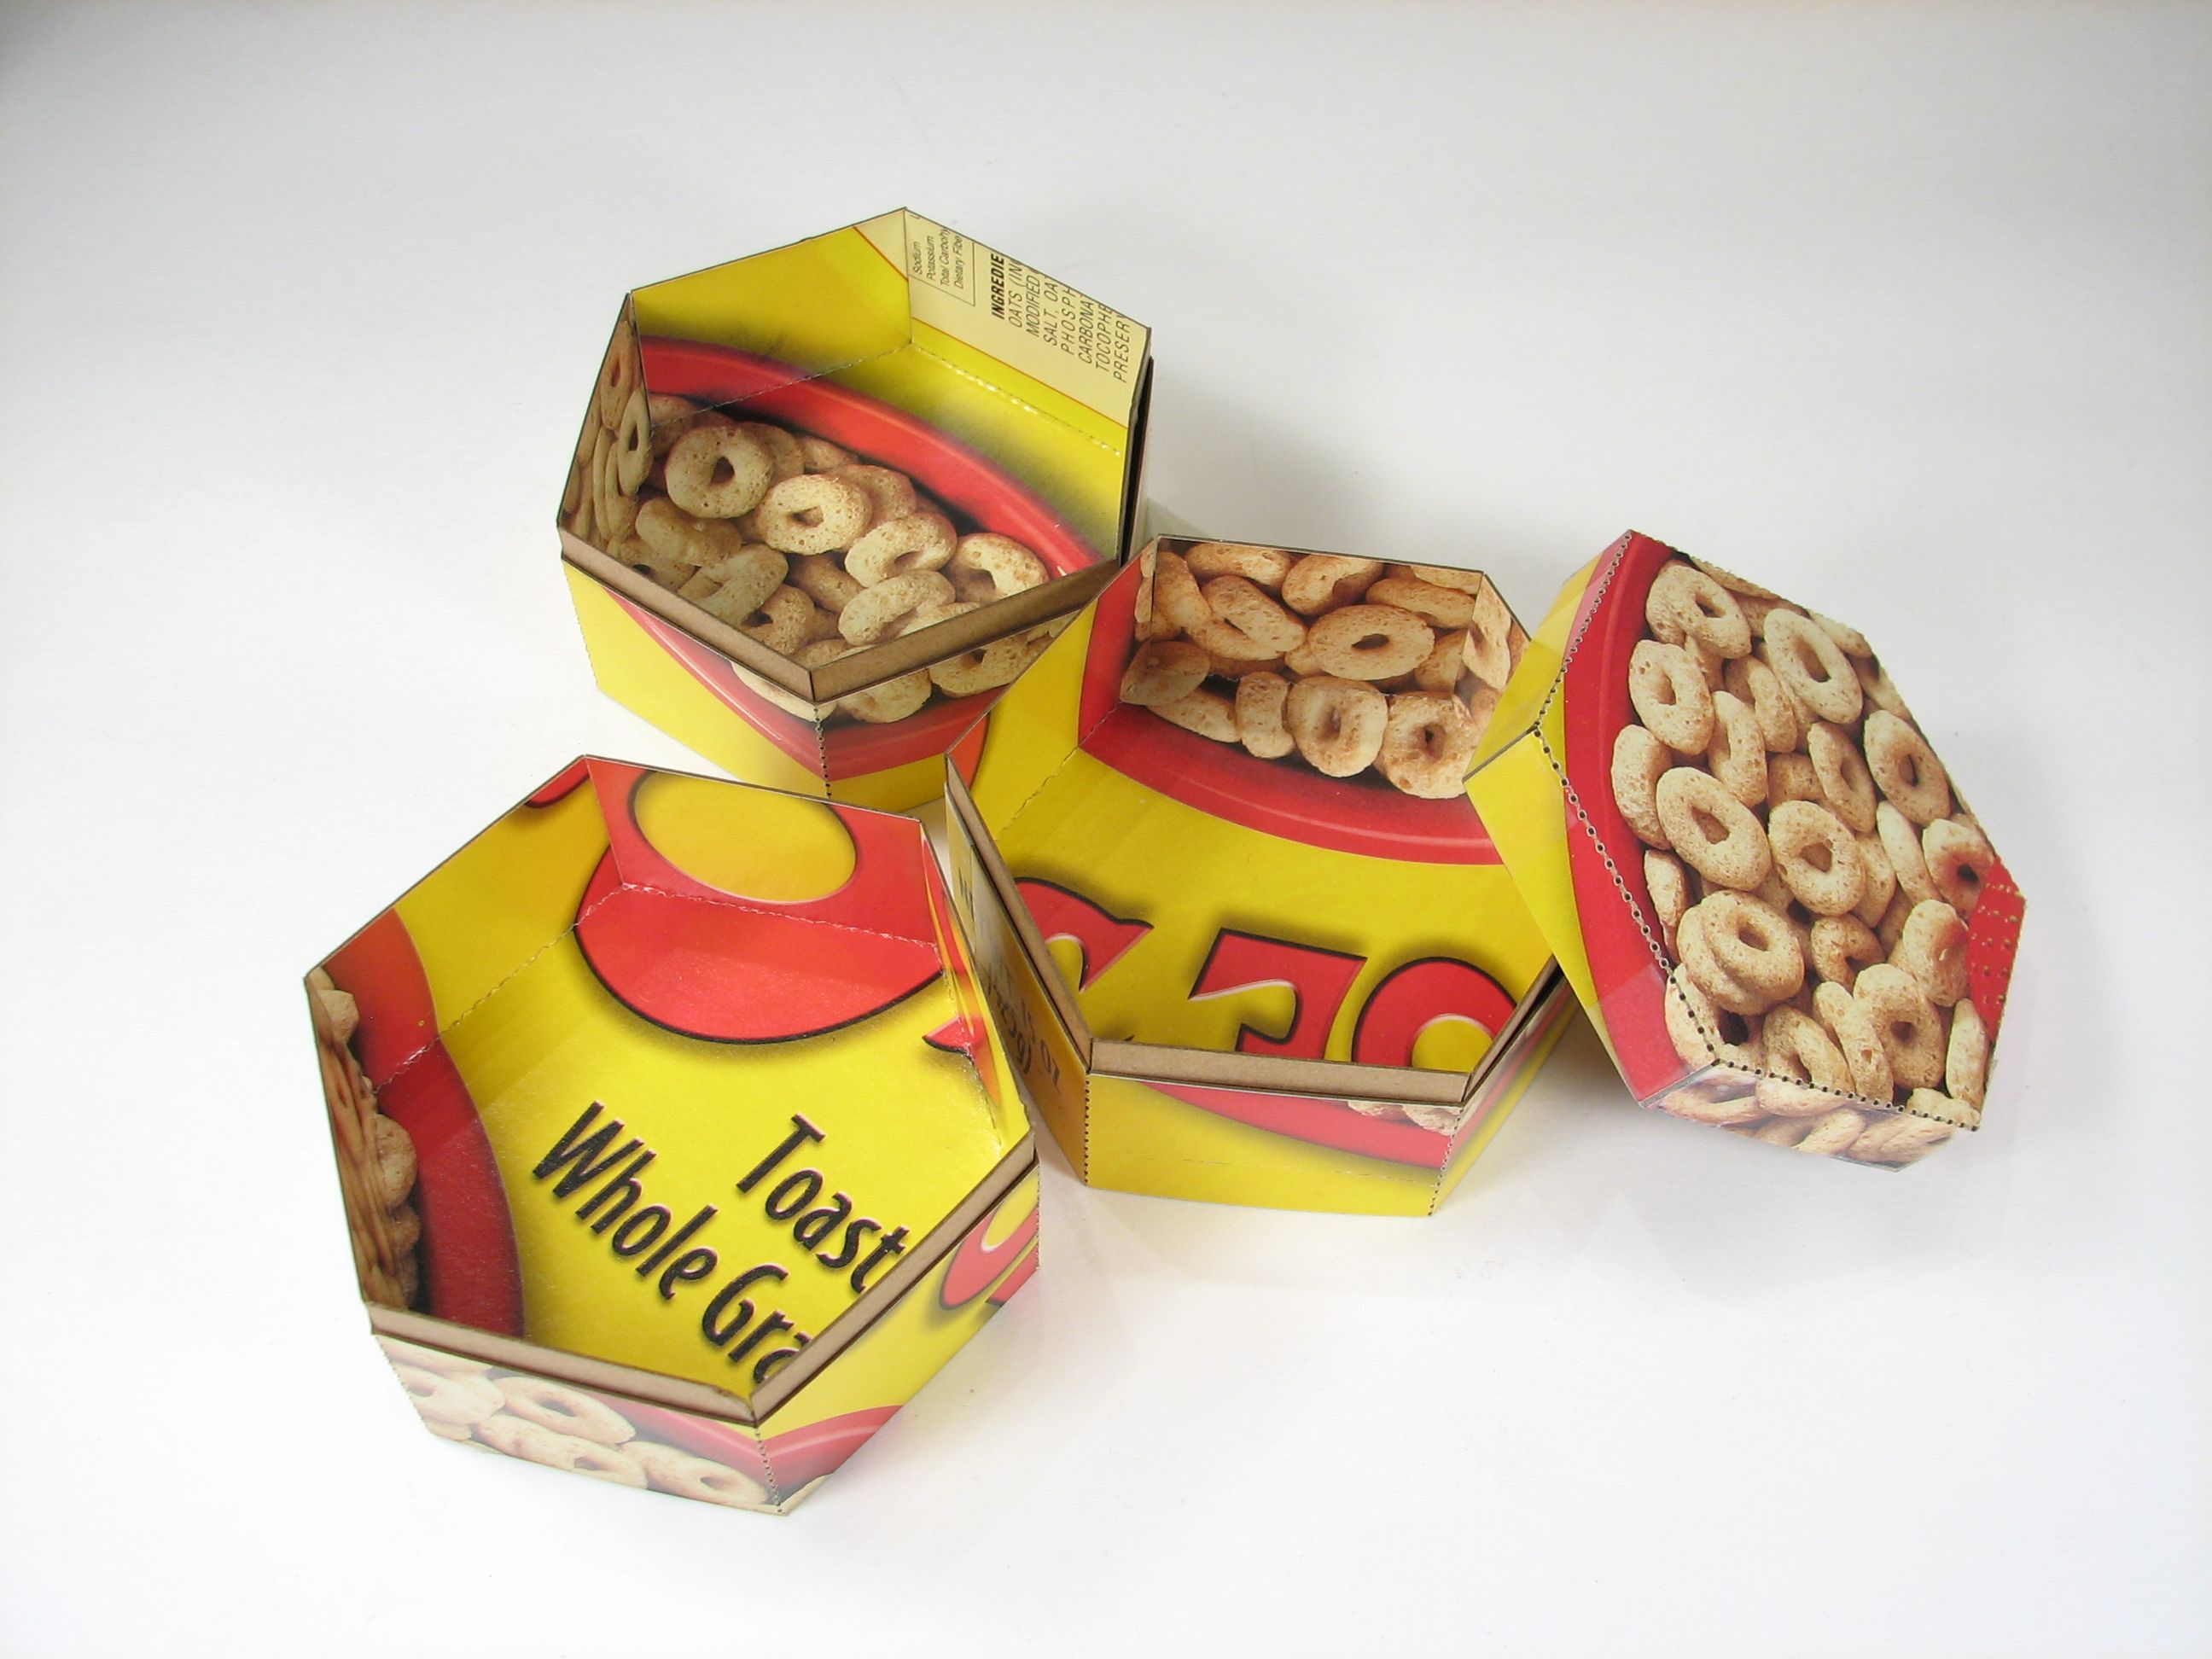
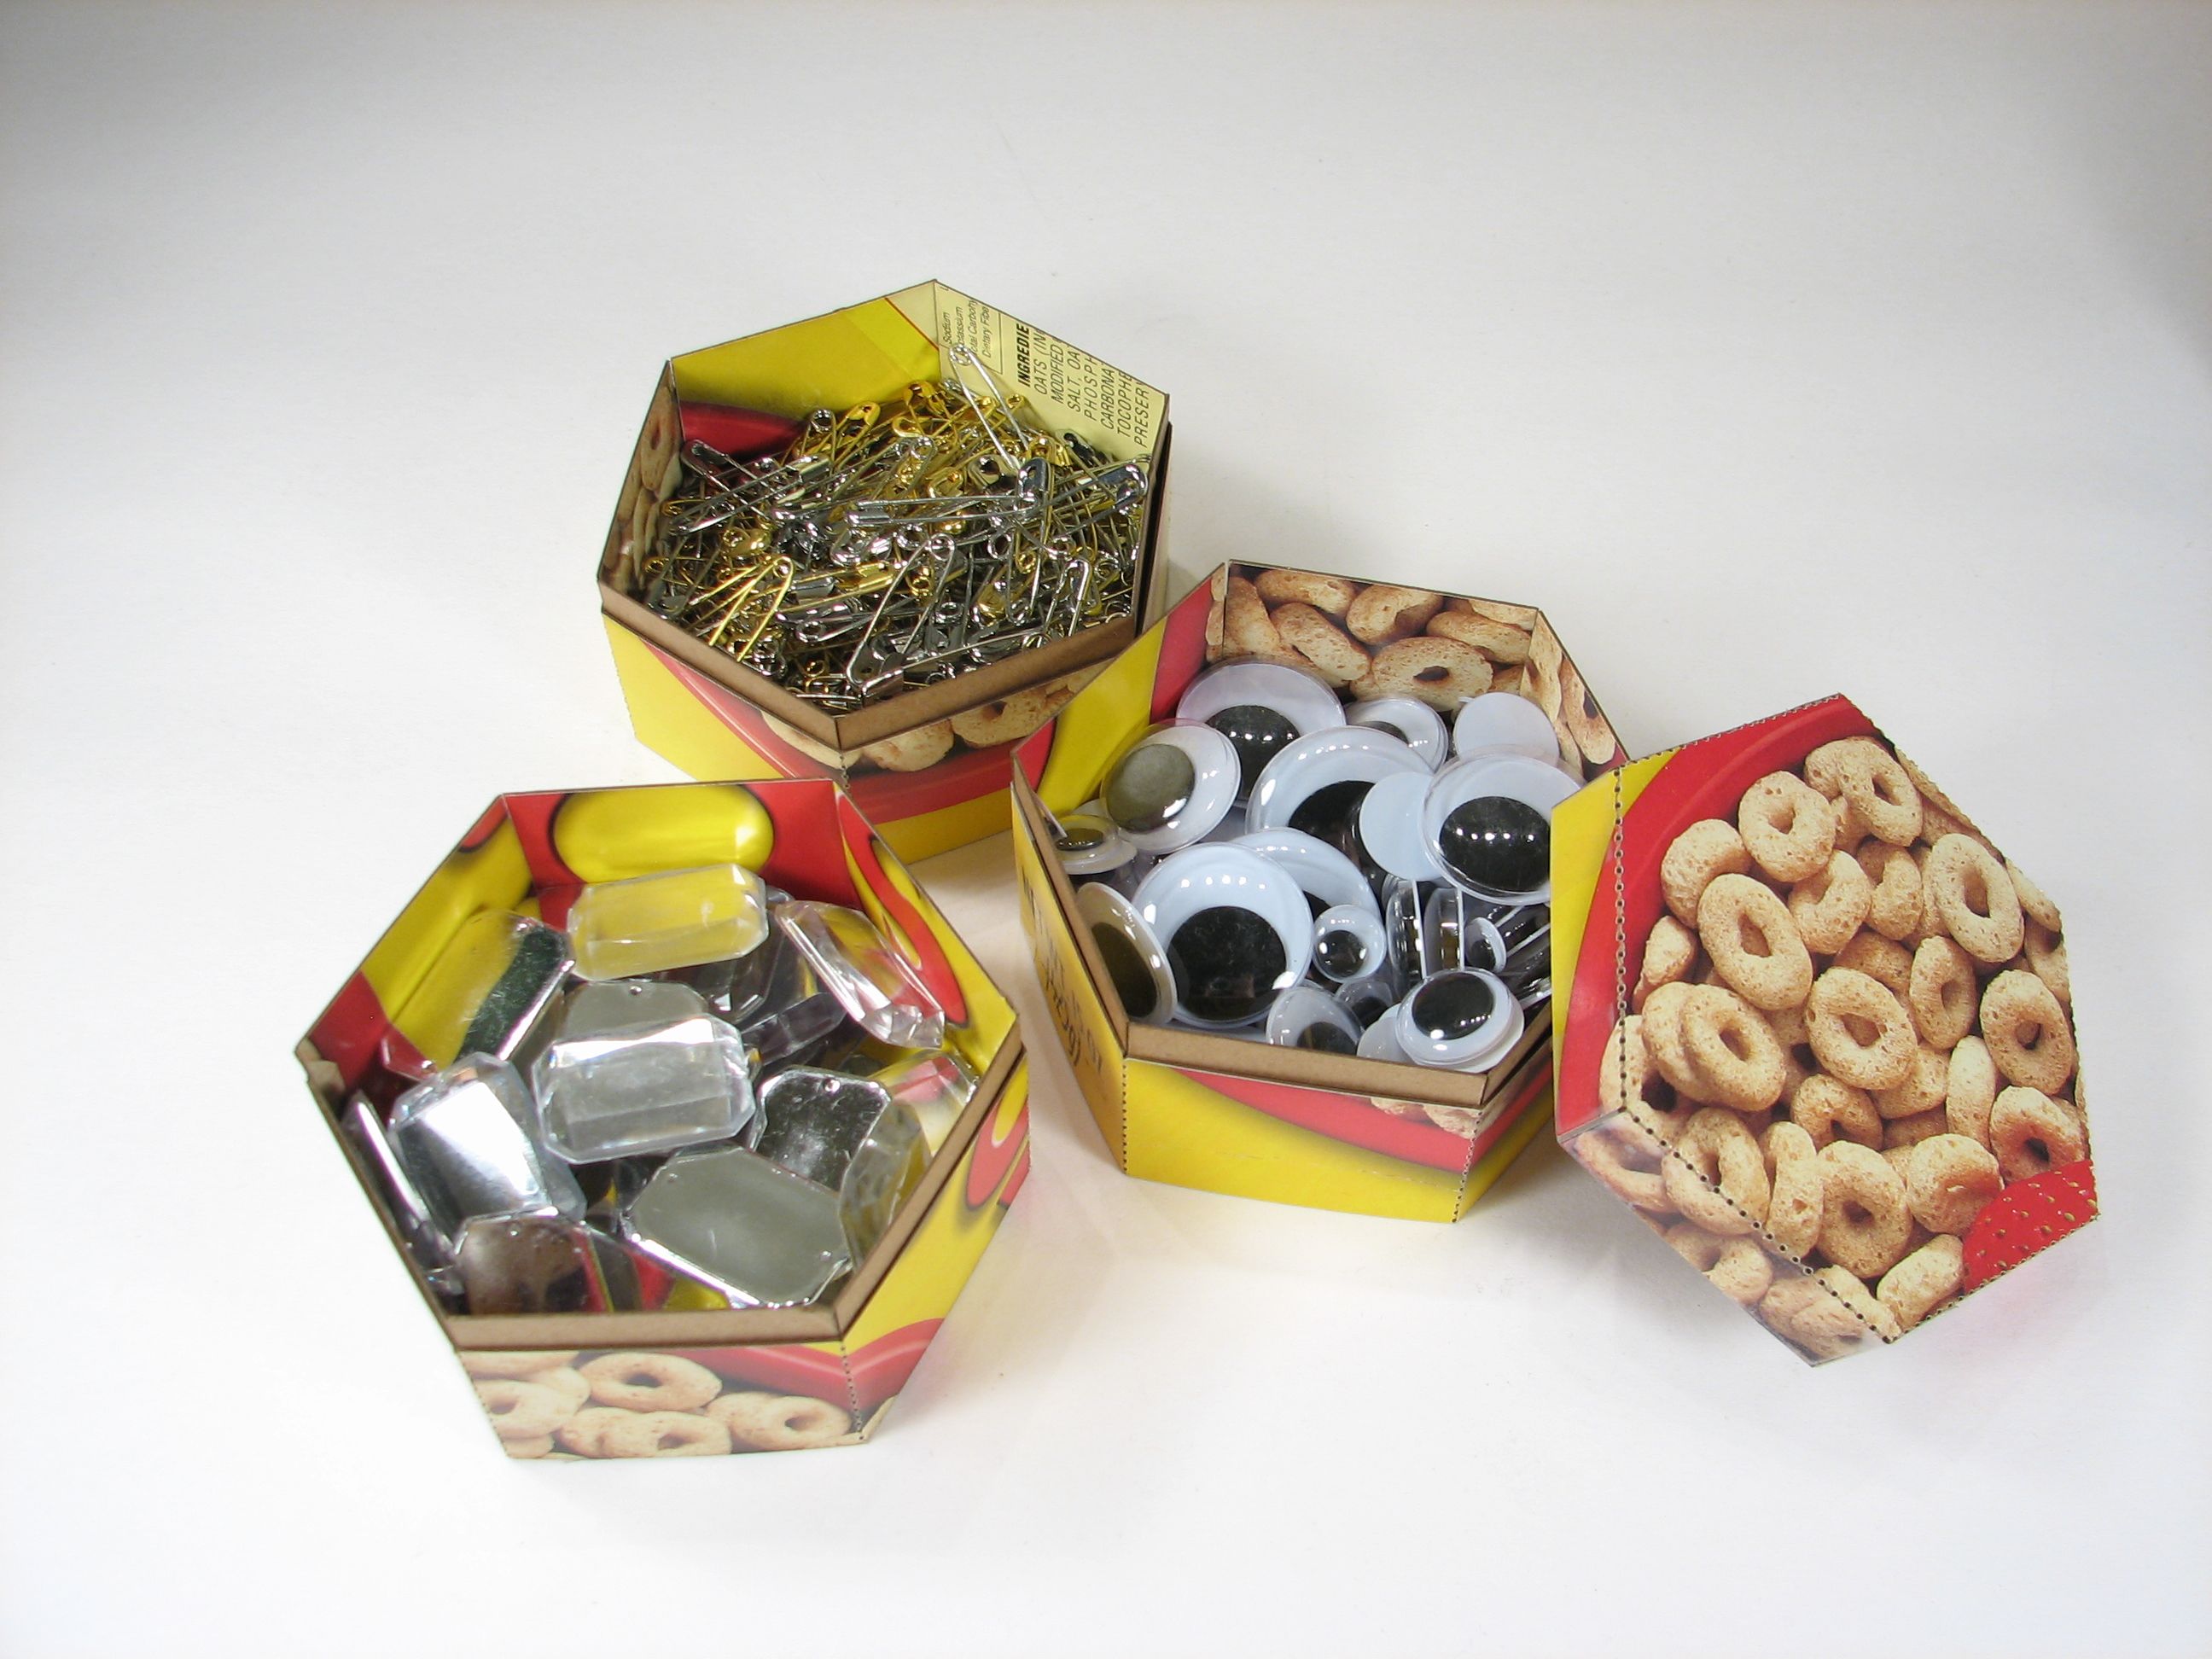
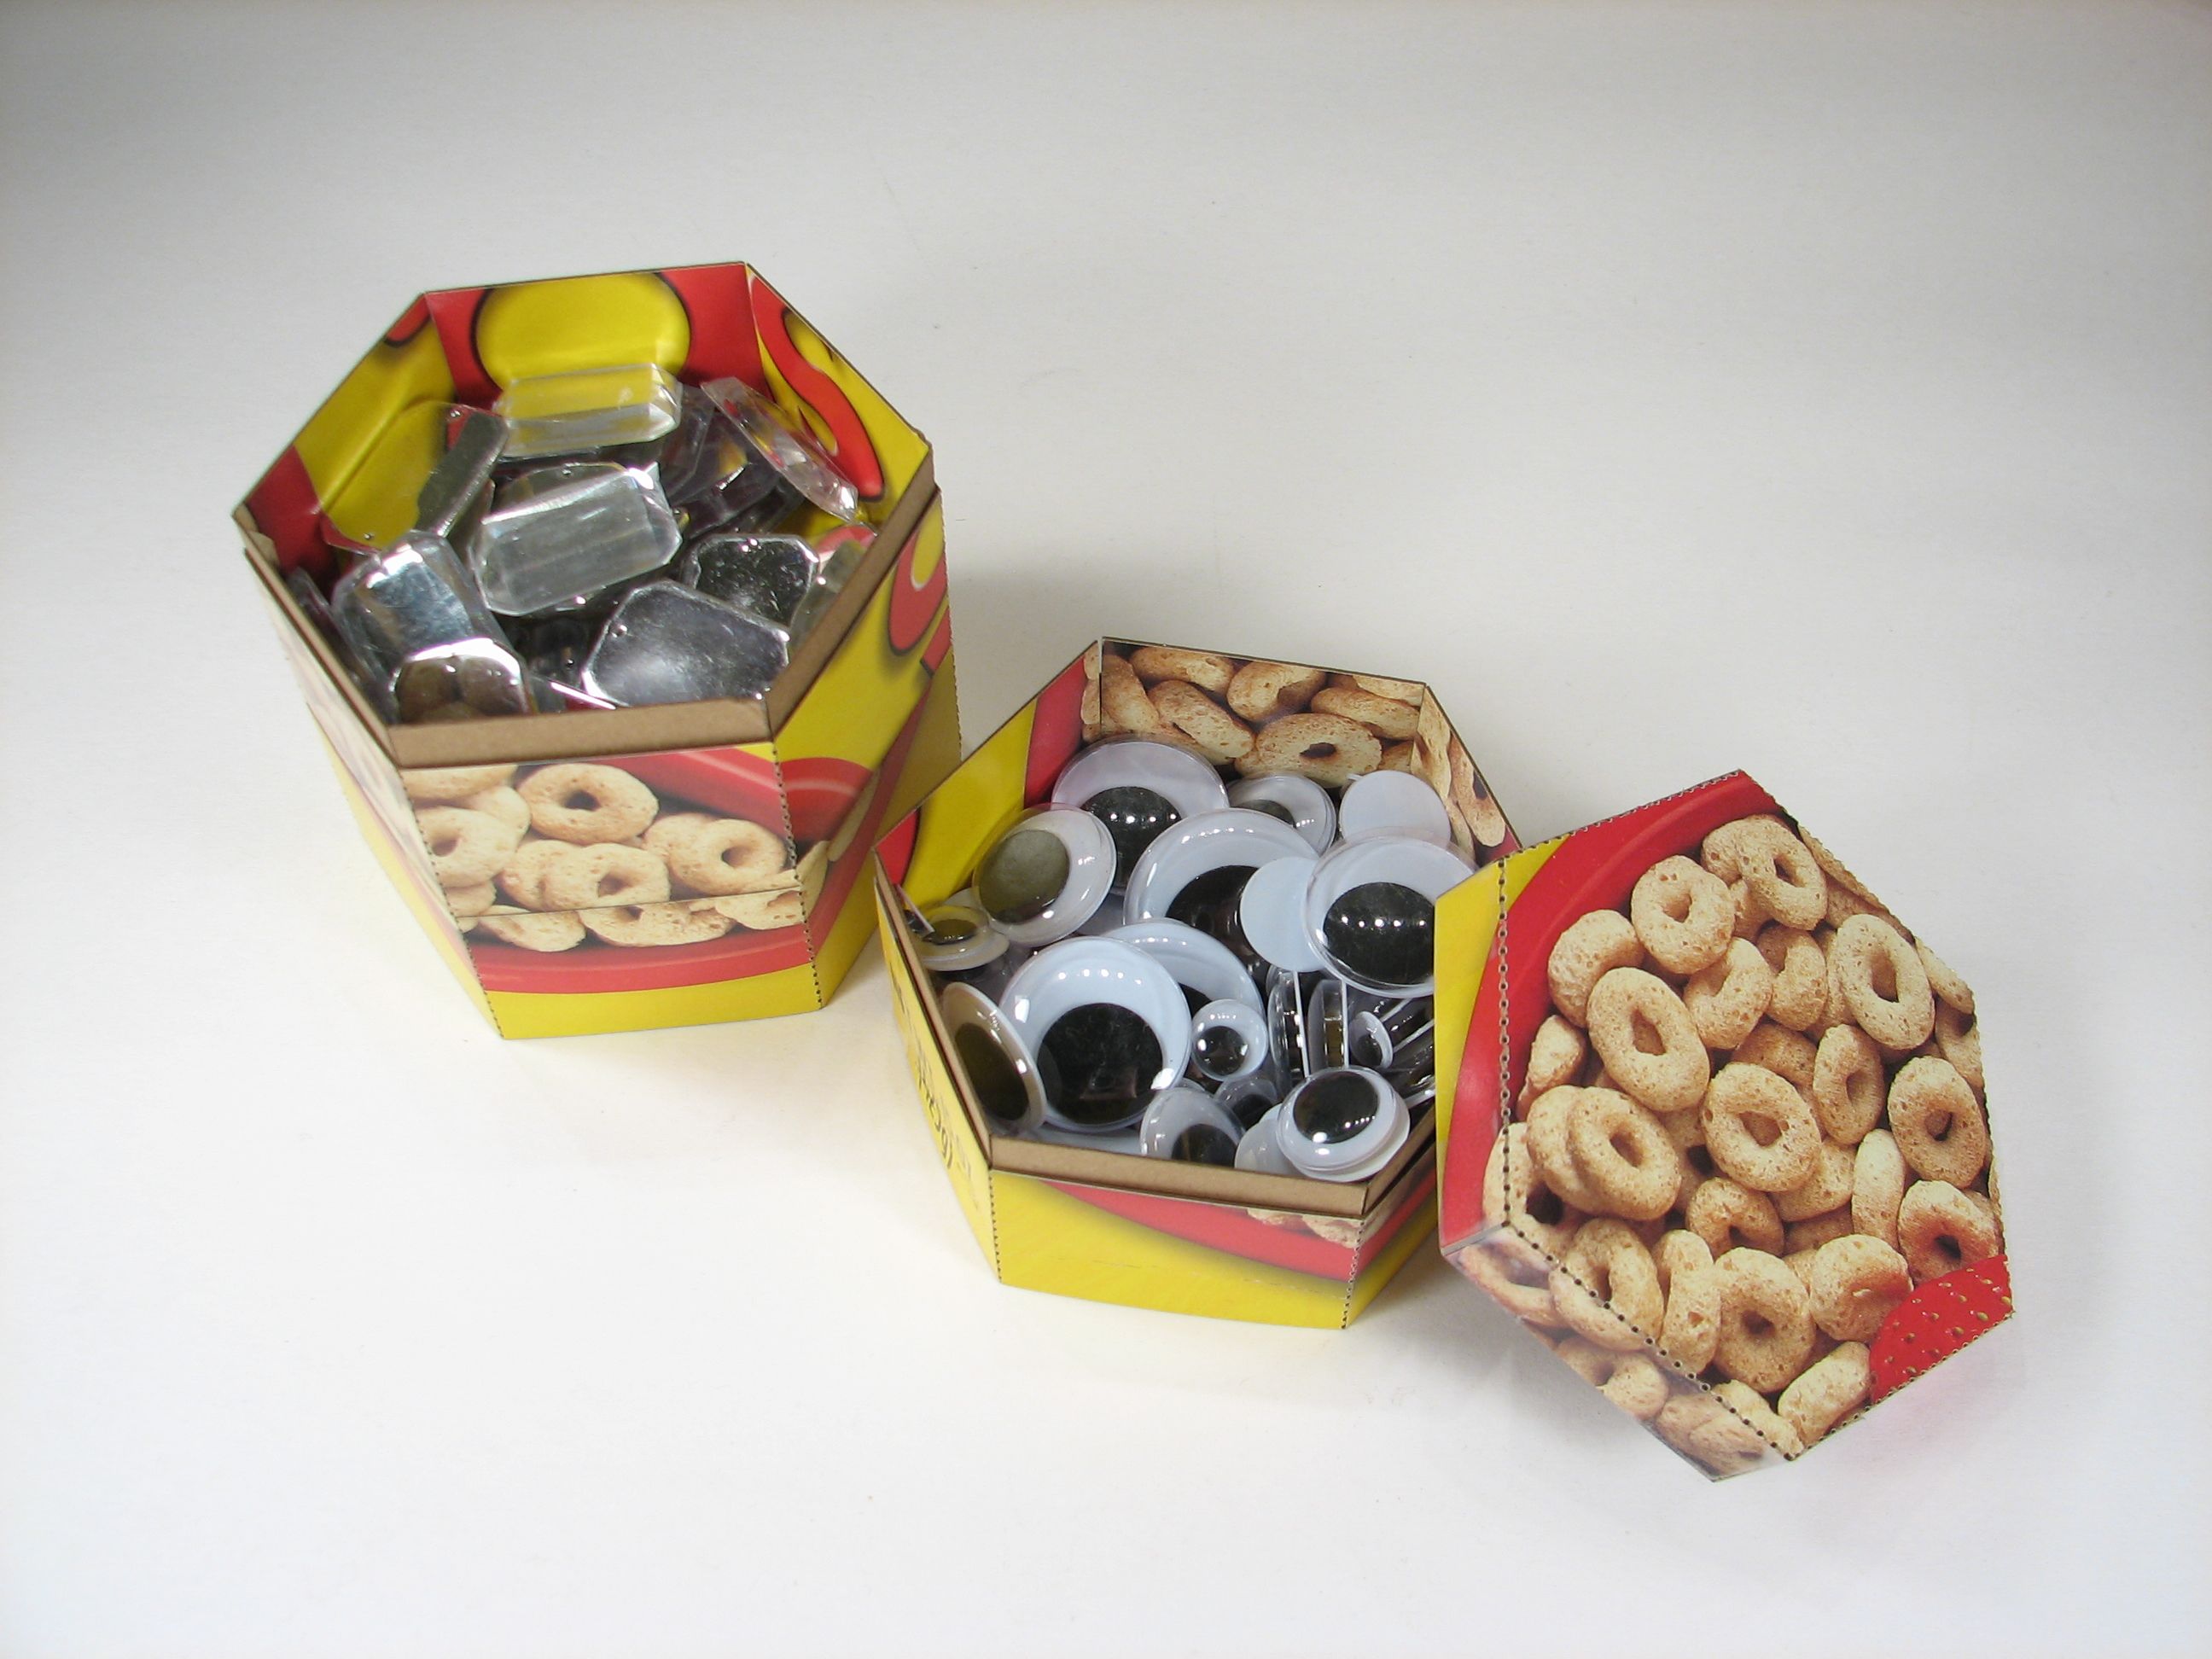

They are great for storage, gift giving, and decorative use. We’re currently storing safety pins, jewel beads and googly eyes (not edible ones) in them.
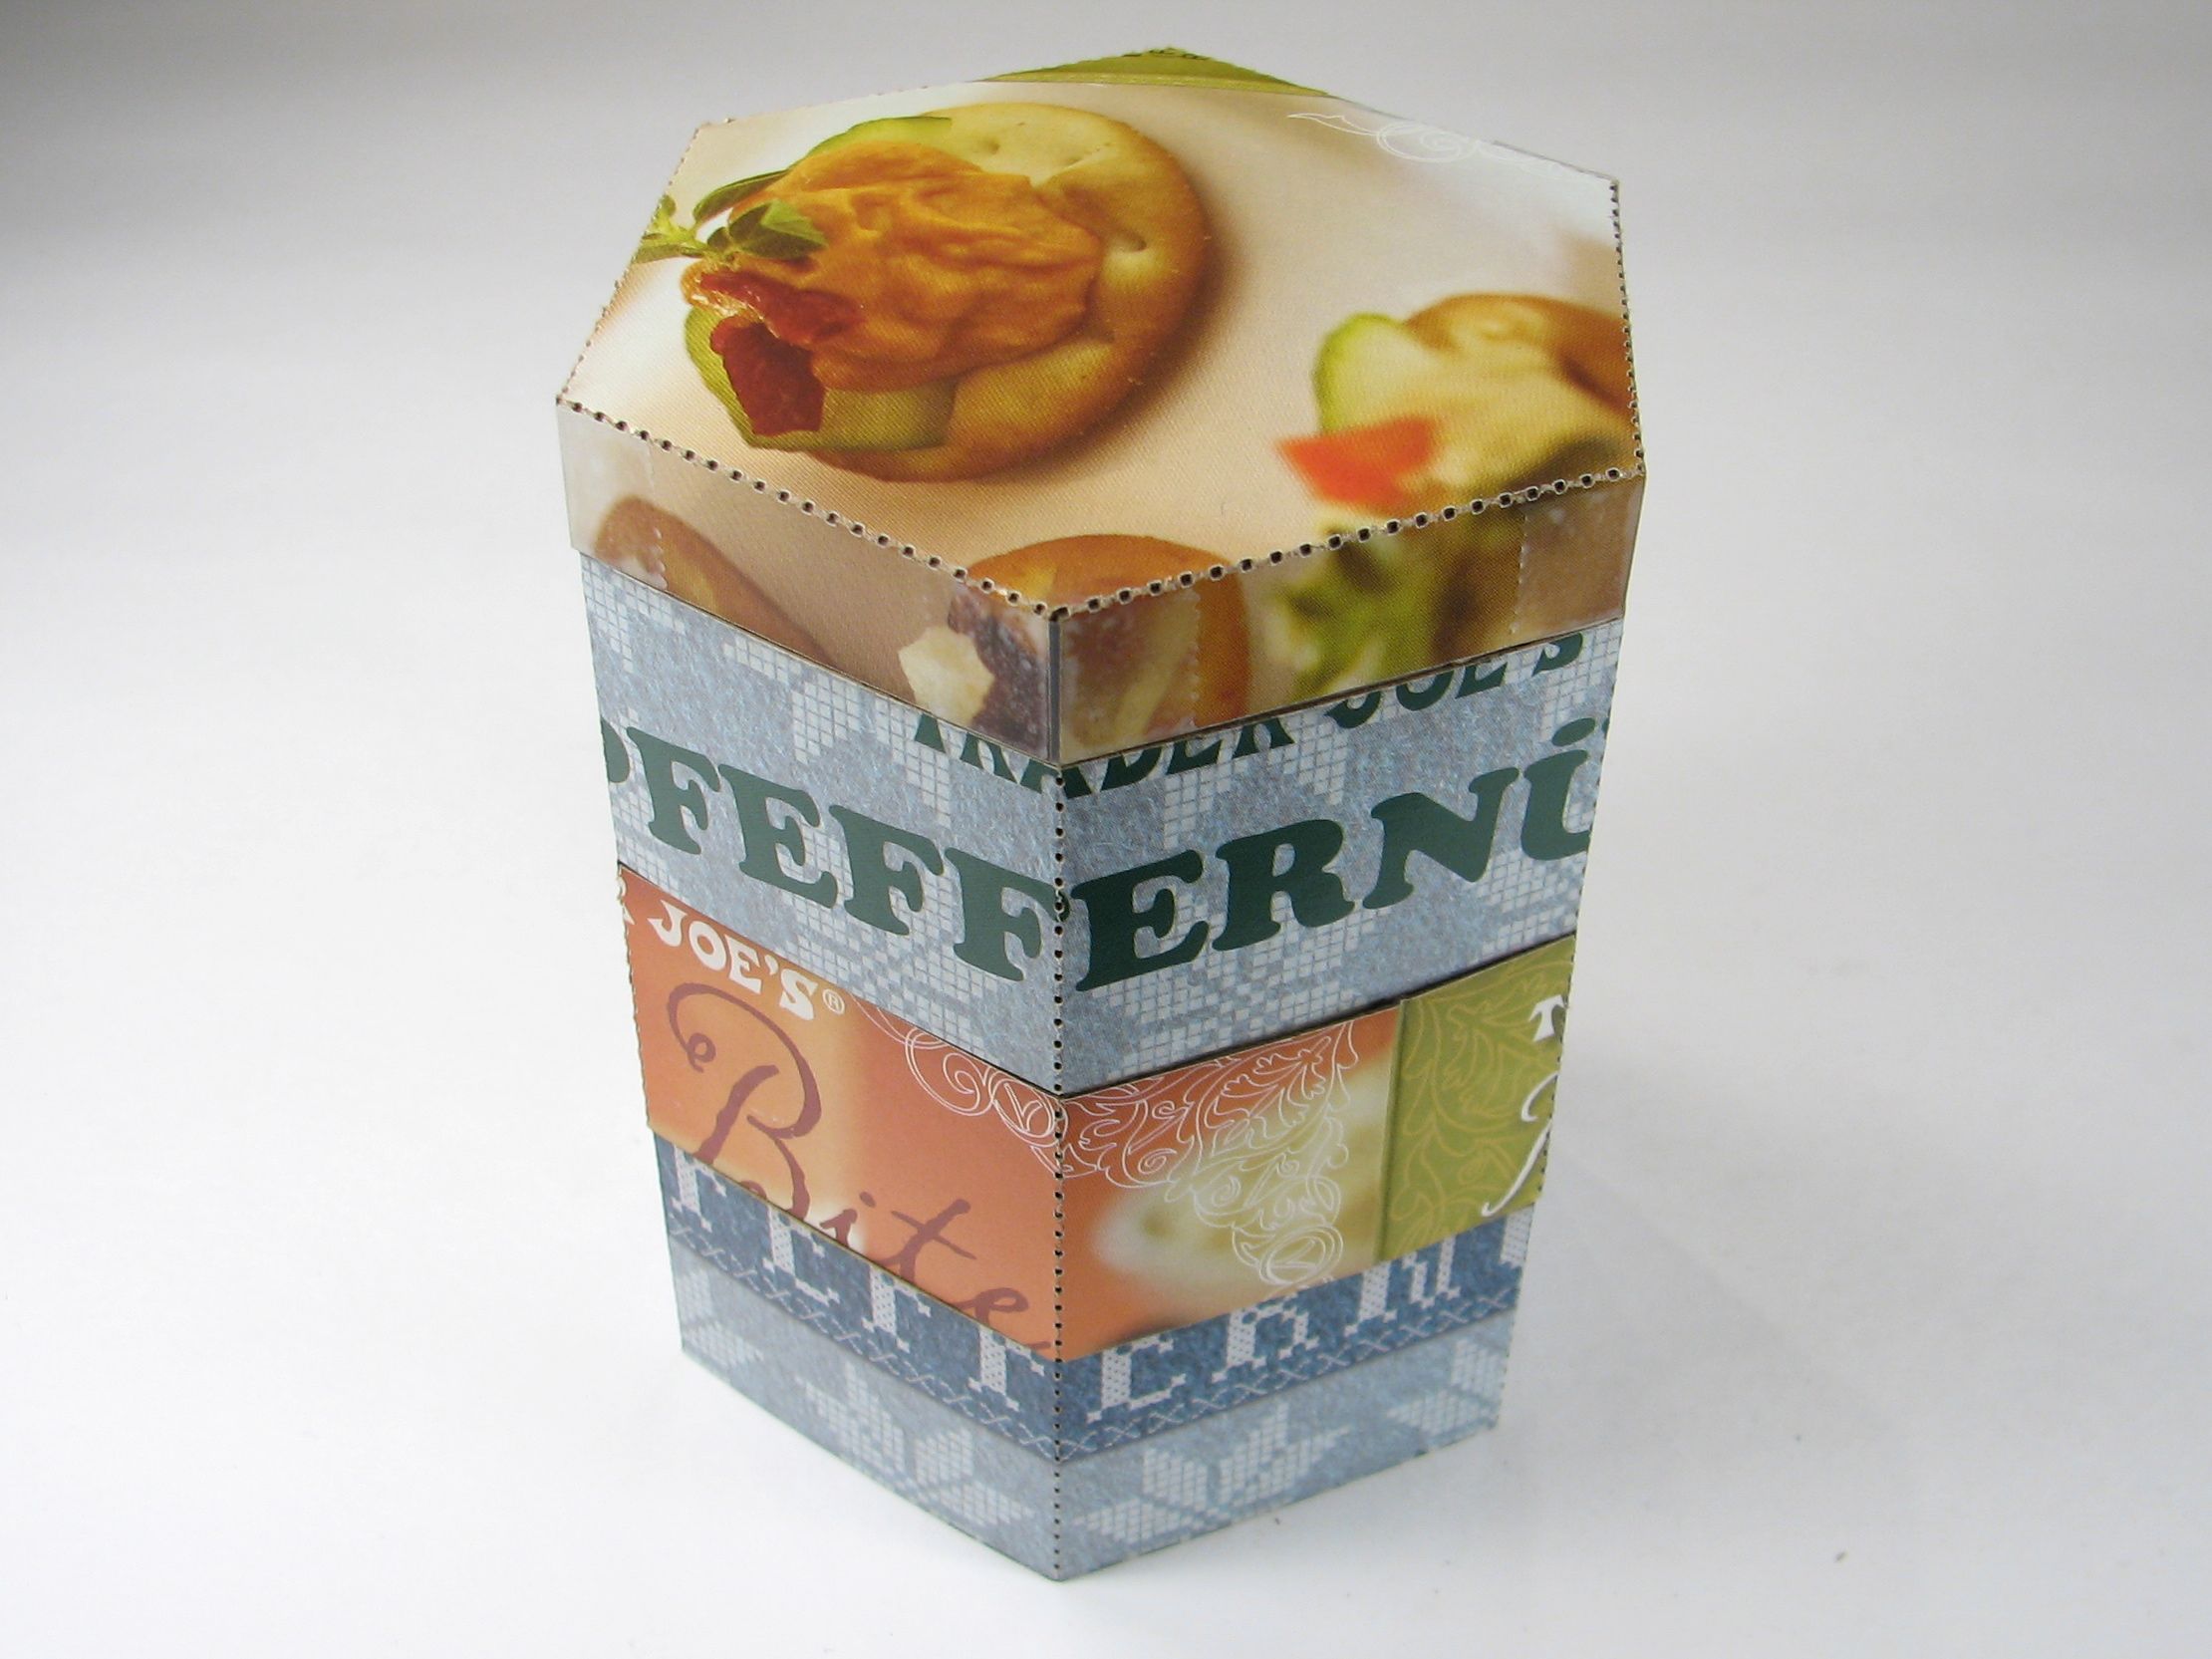
The abstraction created from taking the package out of its context can be wonderfully fun. Multiple packages can be used together to create a wild collage of modern advertising with different shapes, colors and fonts. The pfeffernusse box on its own looked like it belonged in December, but combined with the box of pita chips it took on a completely different character.
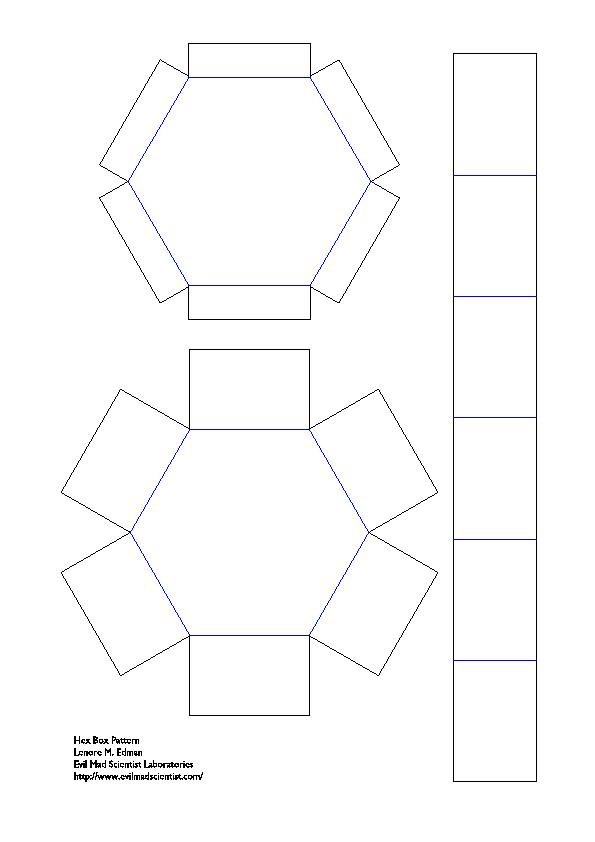
To get started, download the pattern here (18K pdf). There are three parts to the pattern: the lid, which has smaller rectangular flaps; the interior box, which has a slightly smaller central hexagon, but taller rectangular flaps; and the exterior box frame. The frame is a strip that wraps around the interior box to keep the box walls held in and to give the lid something to rest on. For each set of boxes you make, you’ll only need one lid, but you can use as many pairs of boxes and frames as you like.
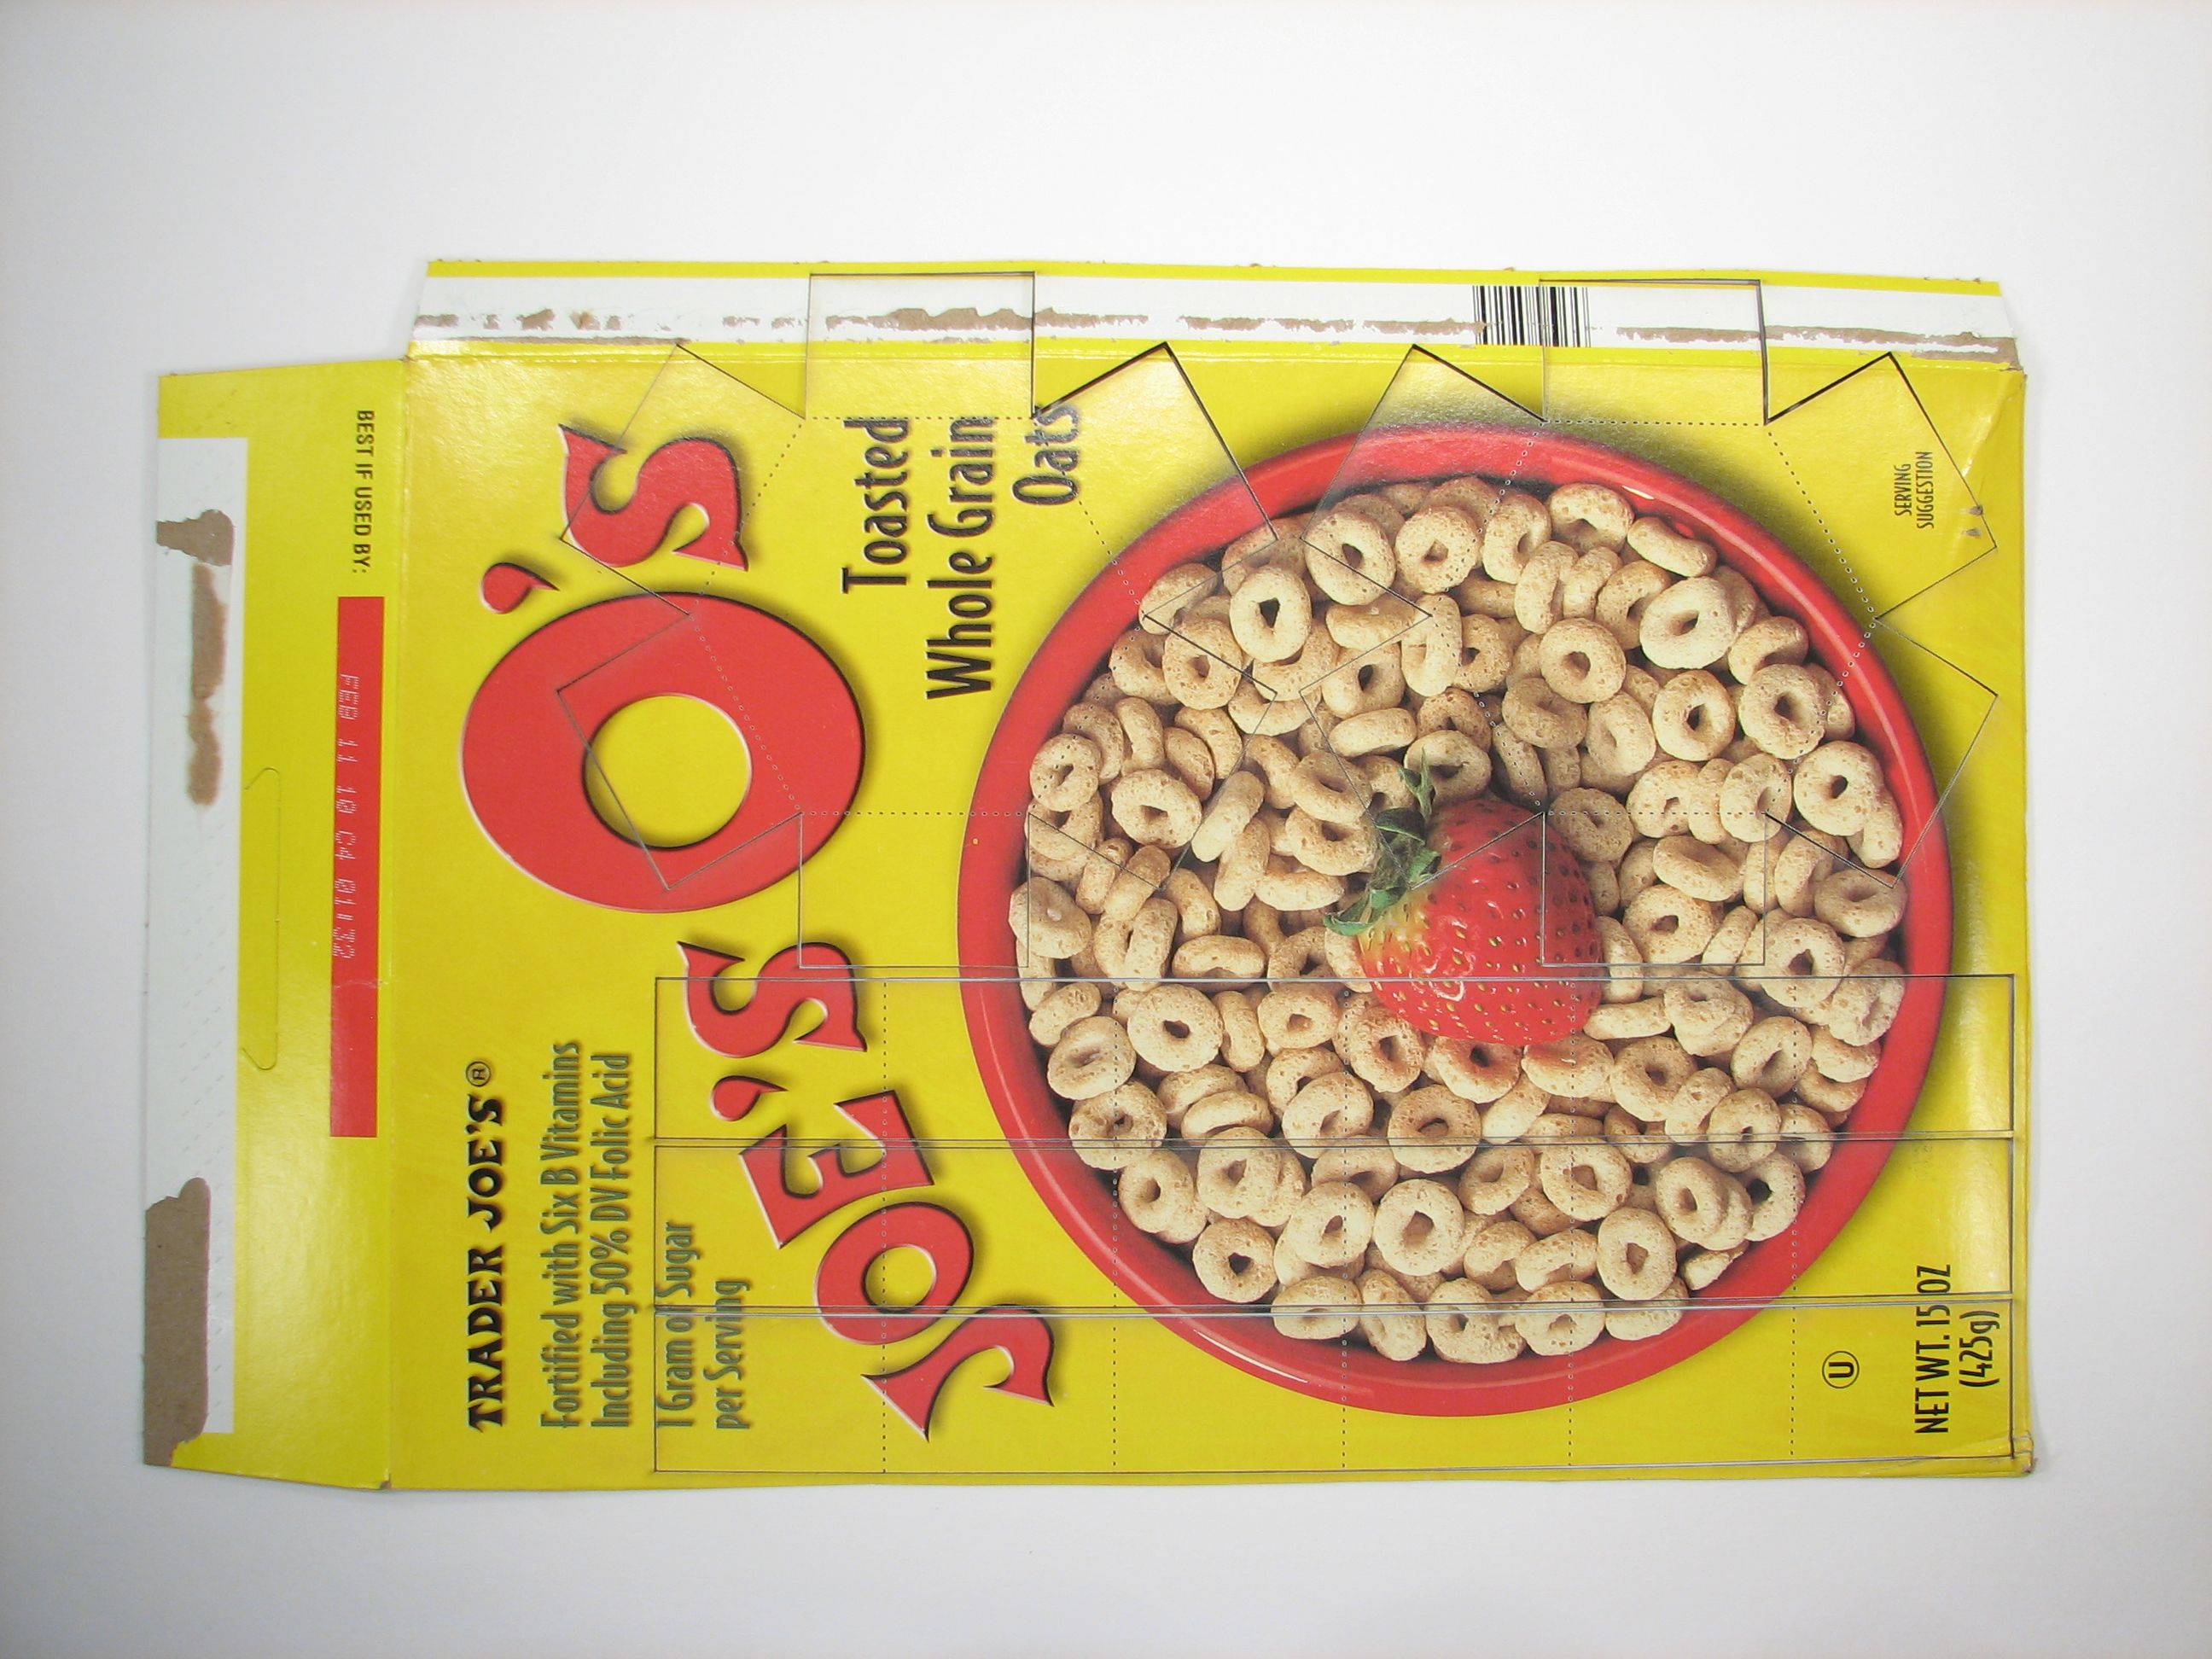
This is an ideal project for a laser cutter, but can also be made by printing out the pattern and tracing or gluing it onto your material to cut with a hobby knife. The perforator highlighted on the Make blog would be handy, but scoring with a knife could work as well.
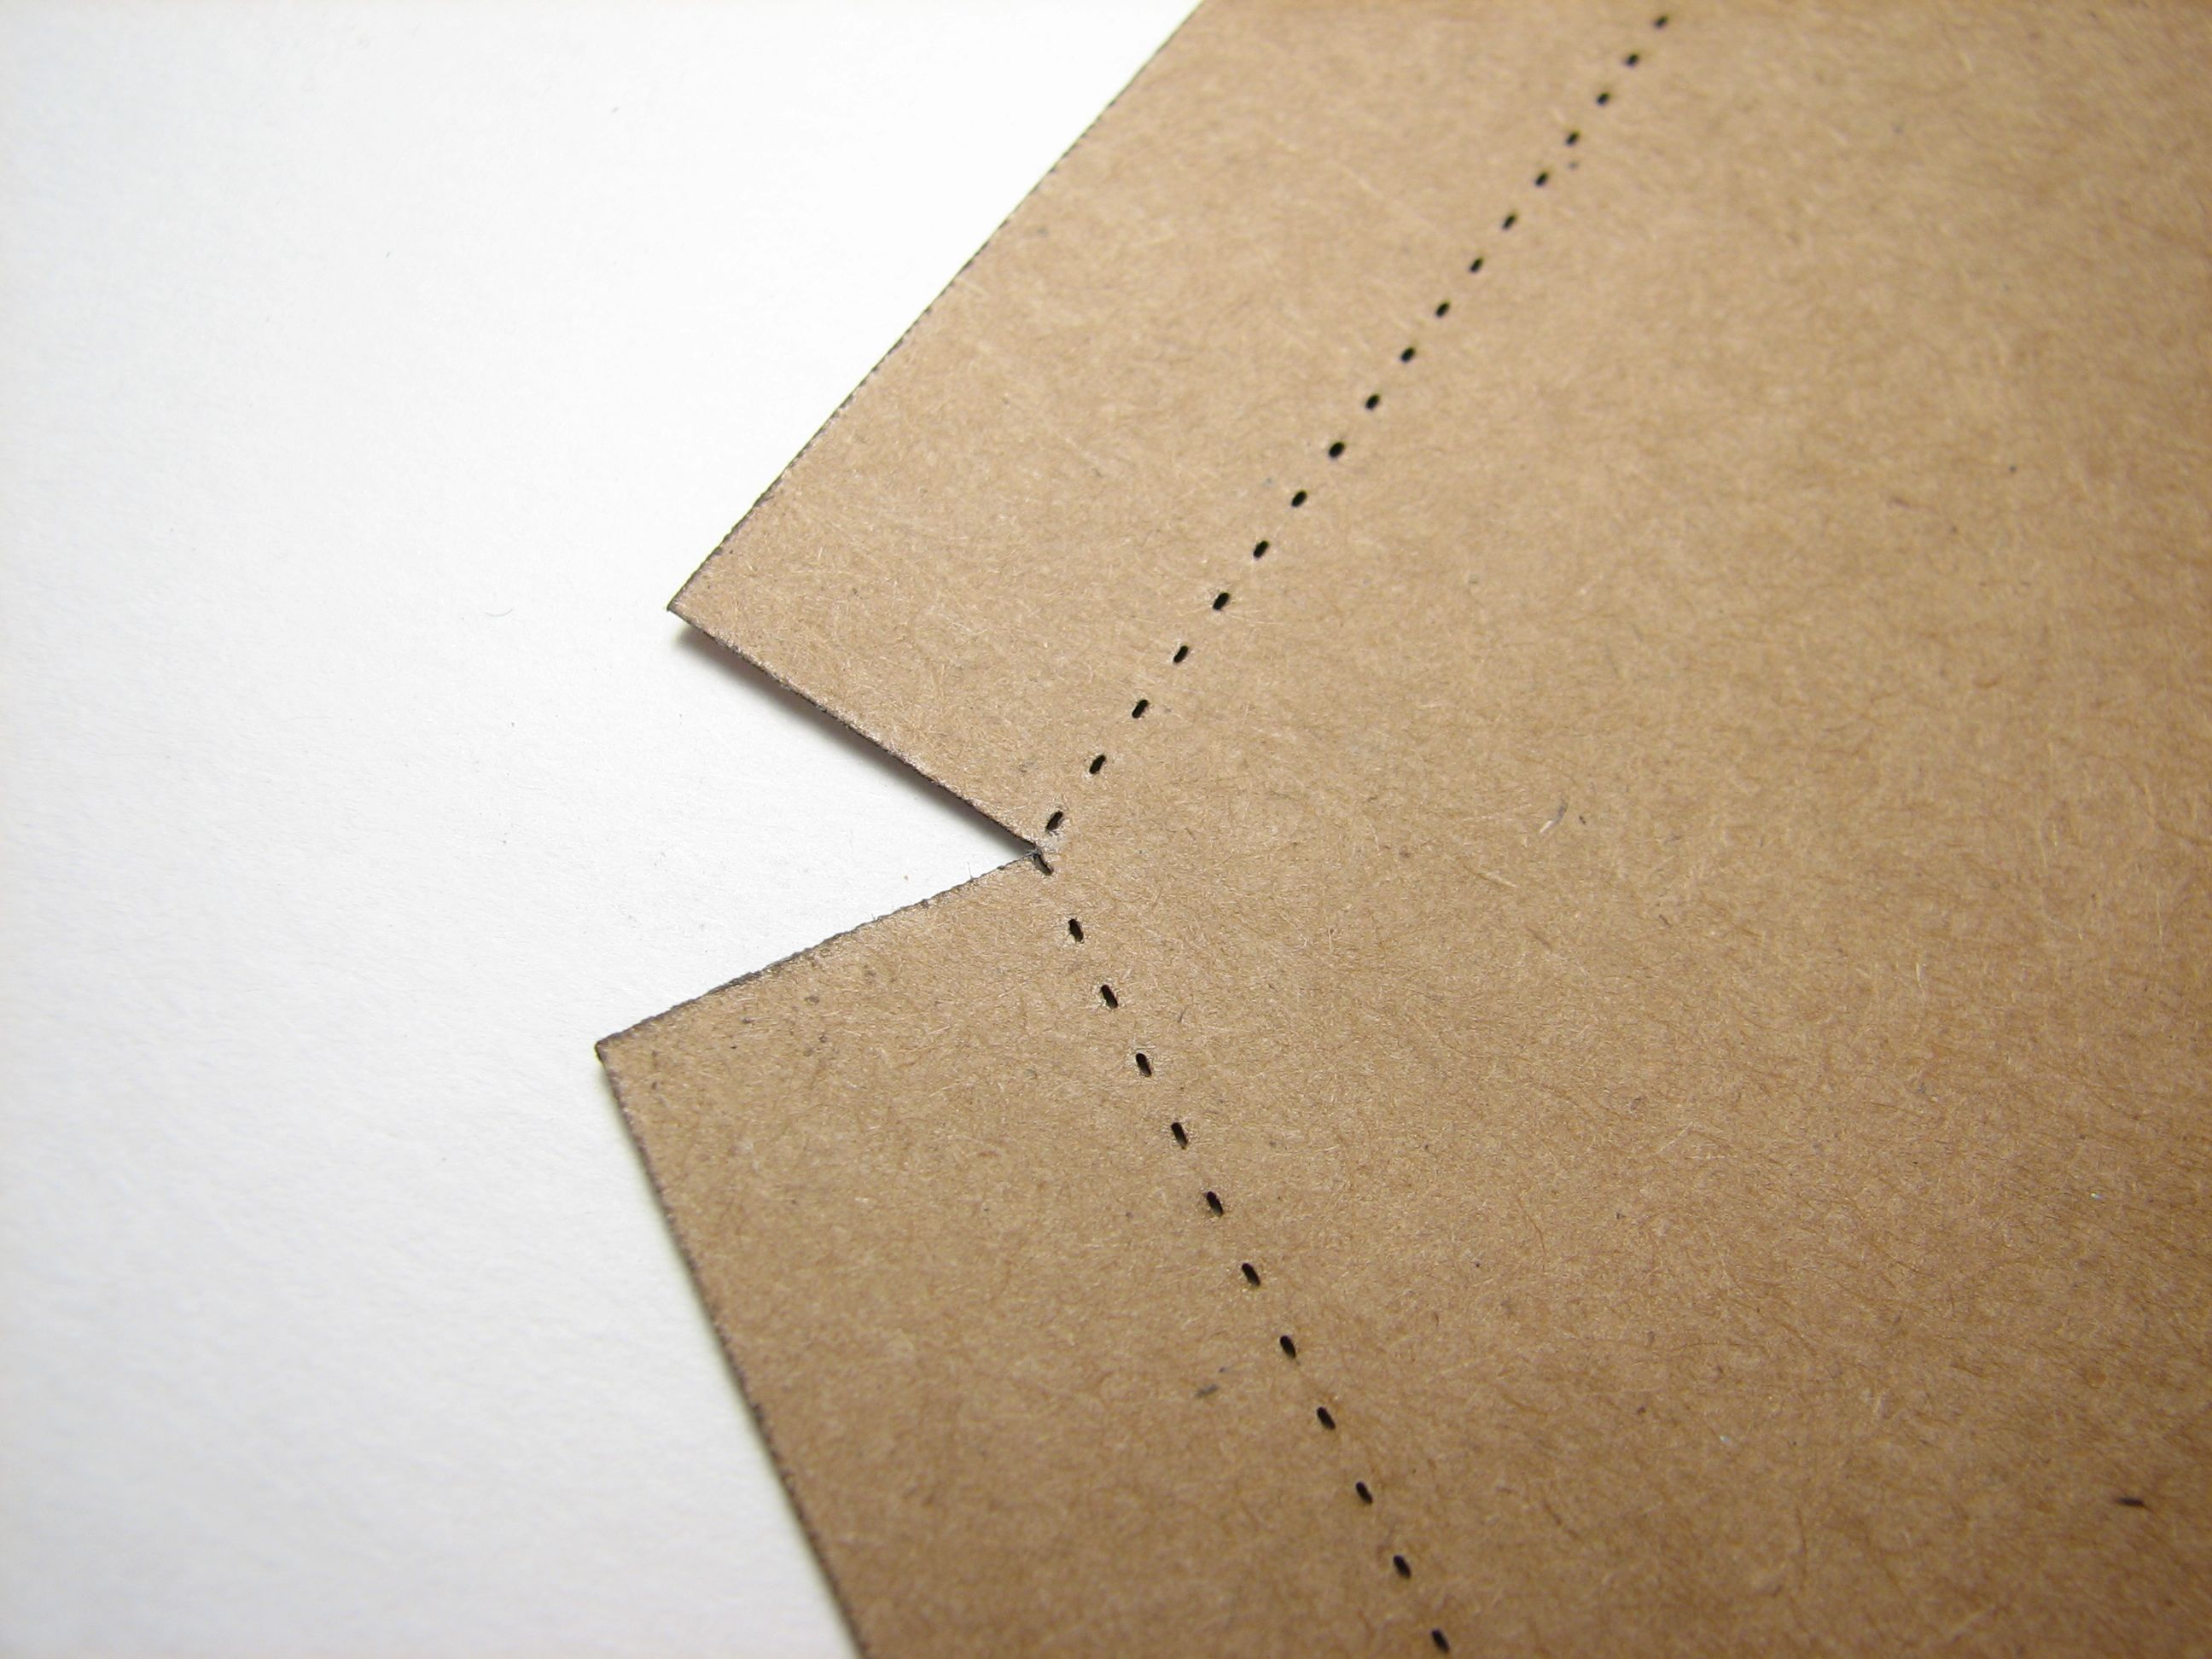
Each of the pieces is perforated along the folds, which are drawn in blue in the pdf pattern. If using a laser, a 20 dpi line seems to work well for perforating paperboard for folding.

The interior box can be folded with the print facing either in or out. Tape the corners on the outside to help it keep its shape.
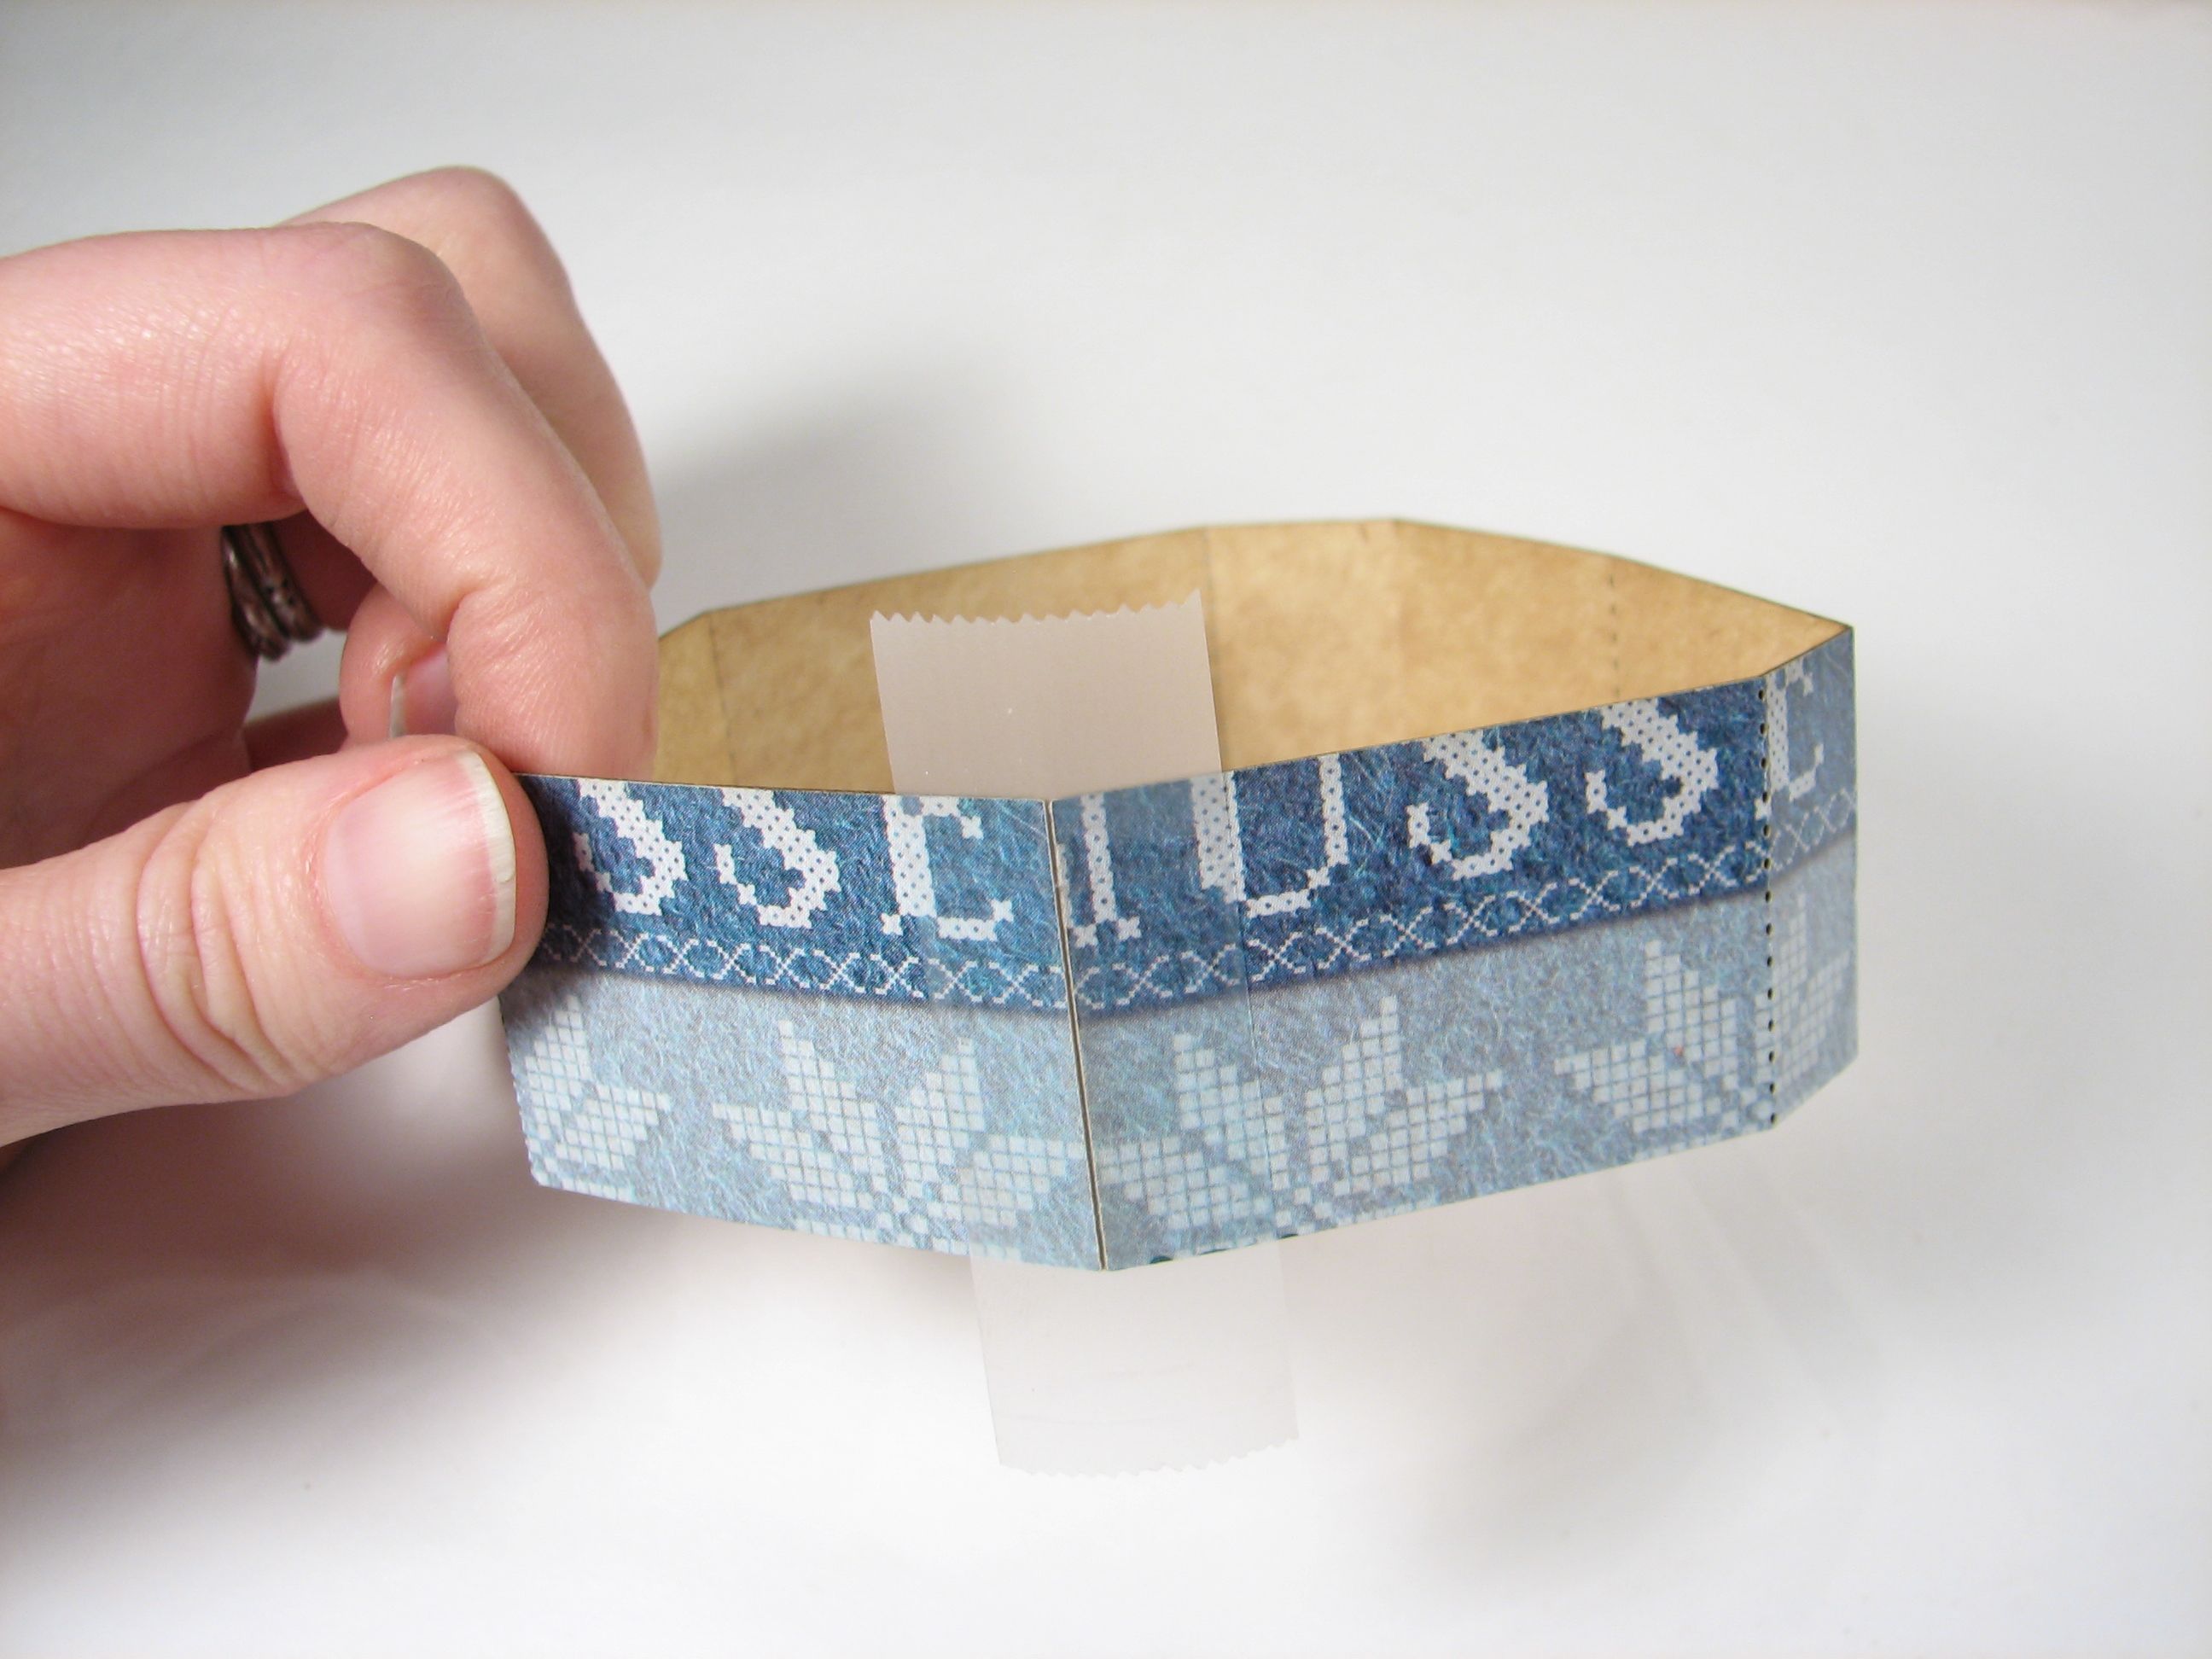
Invisible tape is used in this project as it does not detract from the packaging, but other kinds of tape could be used as well. Standard cellophane tape tends to be stronger than invisible tape, and can be more inconspicuous because of its clarity. Decorative foil tape or colored electrical tape could be used to advantage, or even colored dot stickers might be fun for sealing up the box corners.
Tape the two ends of the frame together with a long strip of tape, and then fold the tape over to the inside.
The lid corners can be taped with a short piece of tape that is then folded inwards.
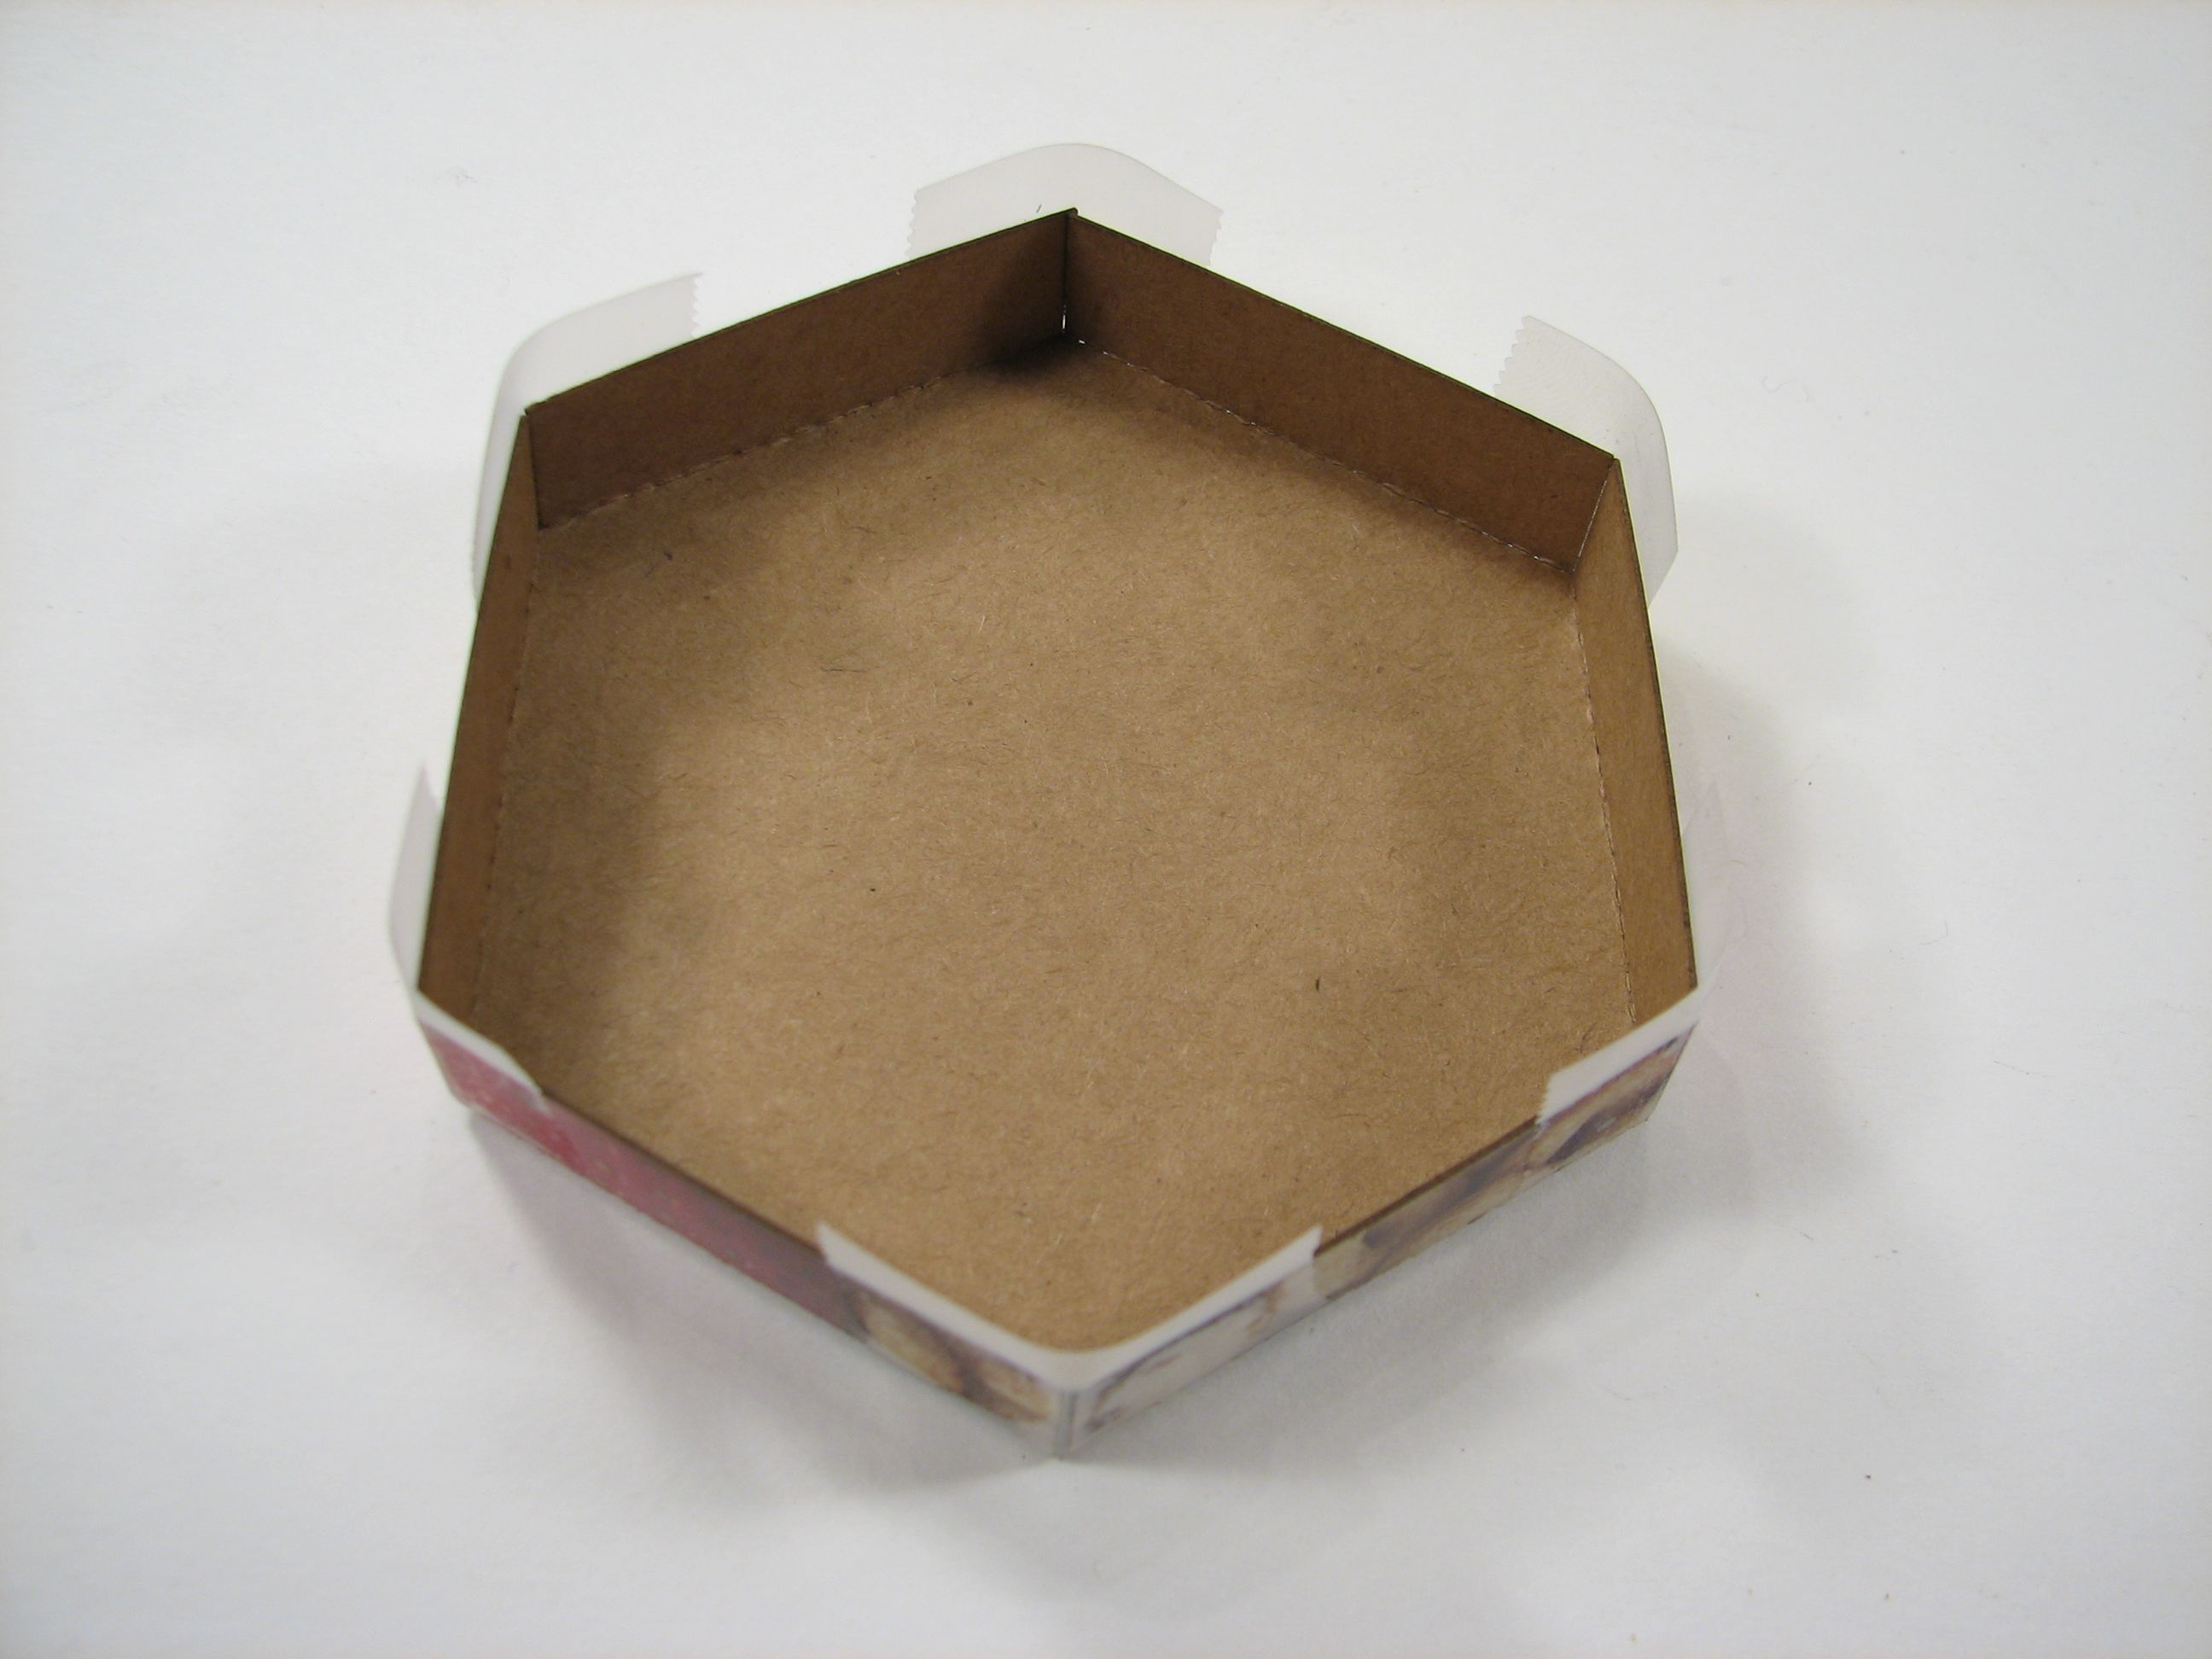
Slide the inner box into the frame until you have just as much lip as you want. This will need to be consistent among all of the boxes so that they stack neatly. Once you’ve done one, slide the next one on top to get the right spacing. Tape the frame to the bottom of the inner box to keep it from sliding. Glue could be used here as well.
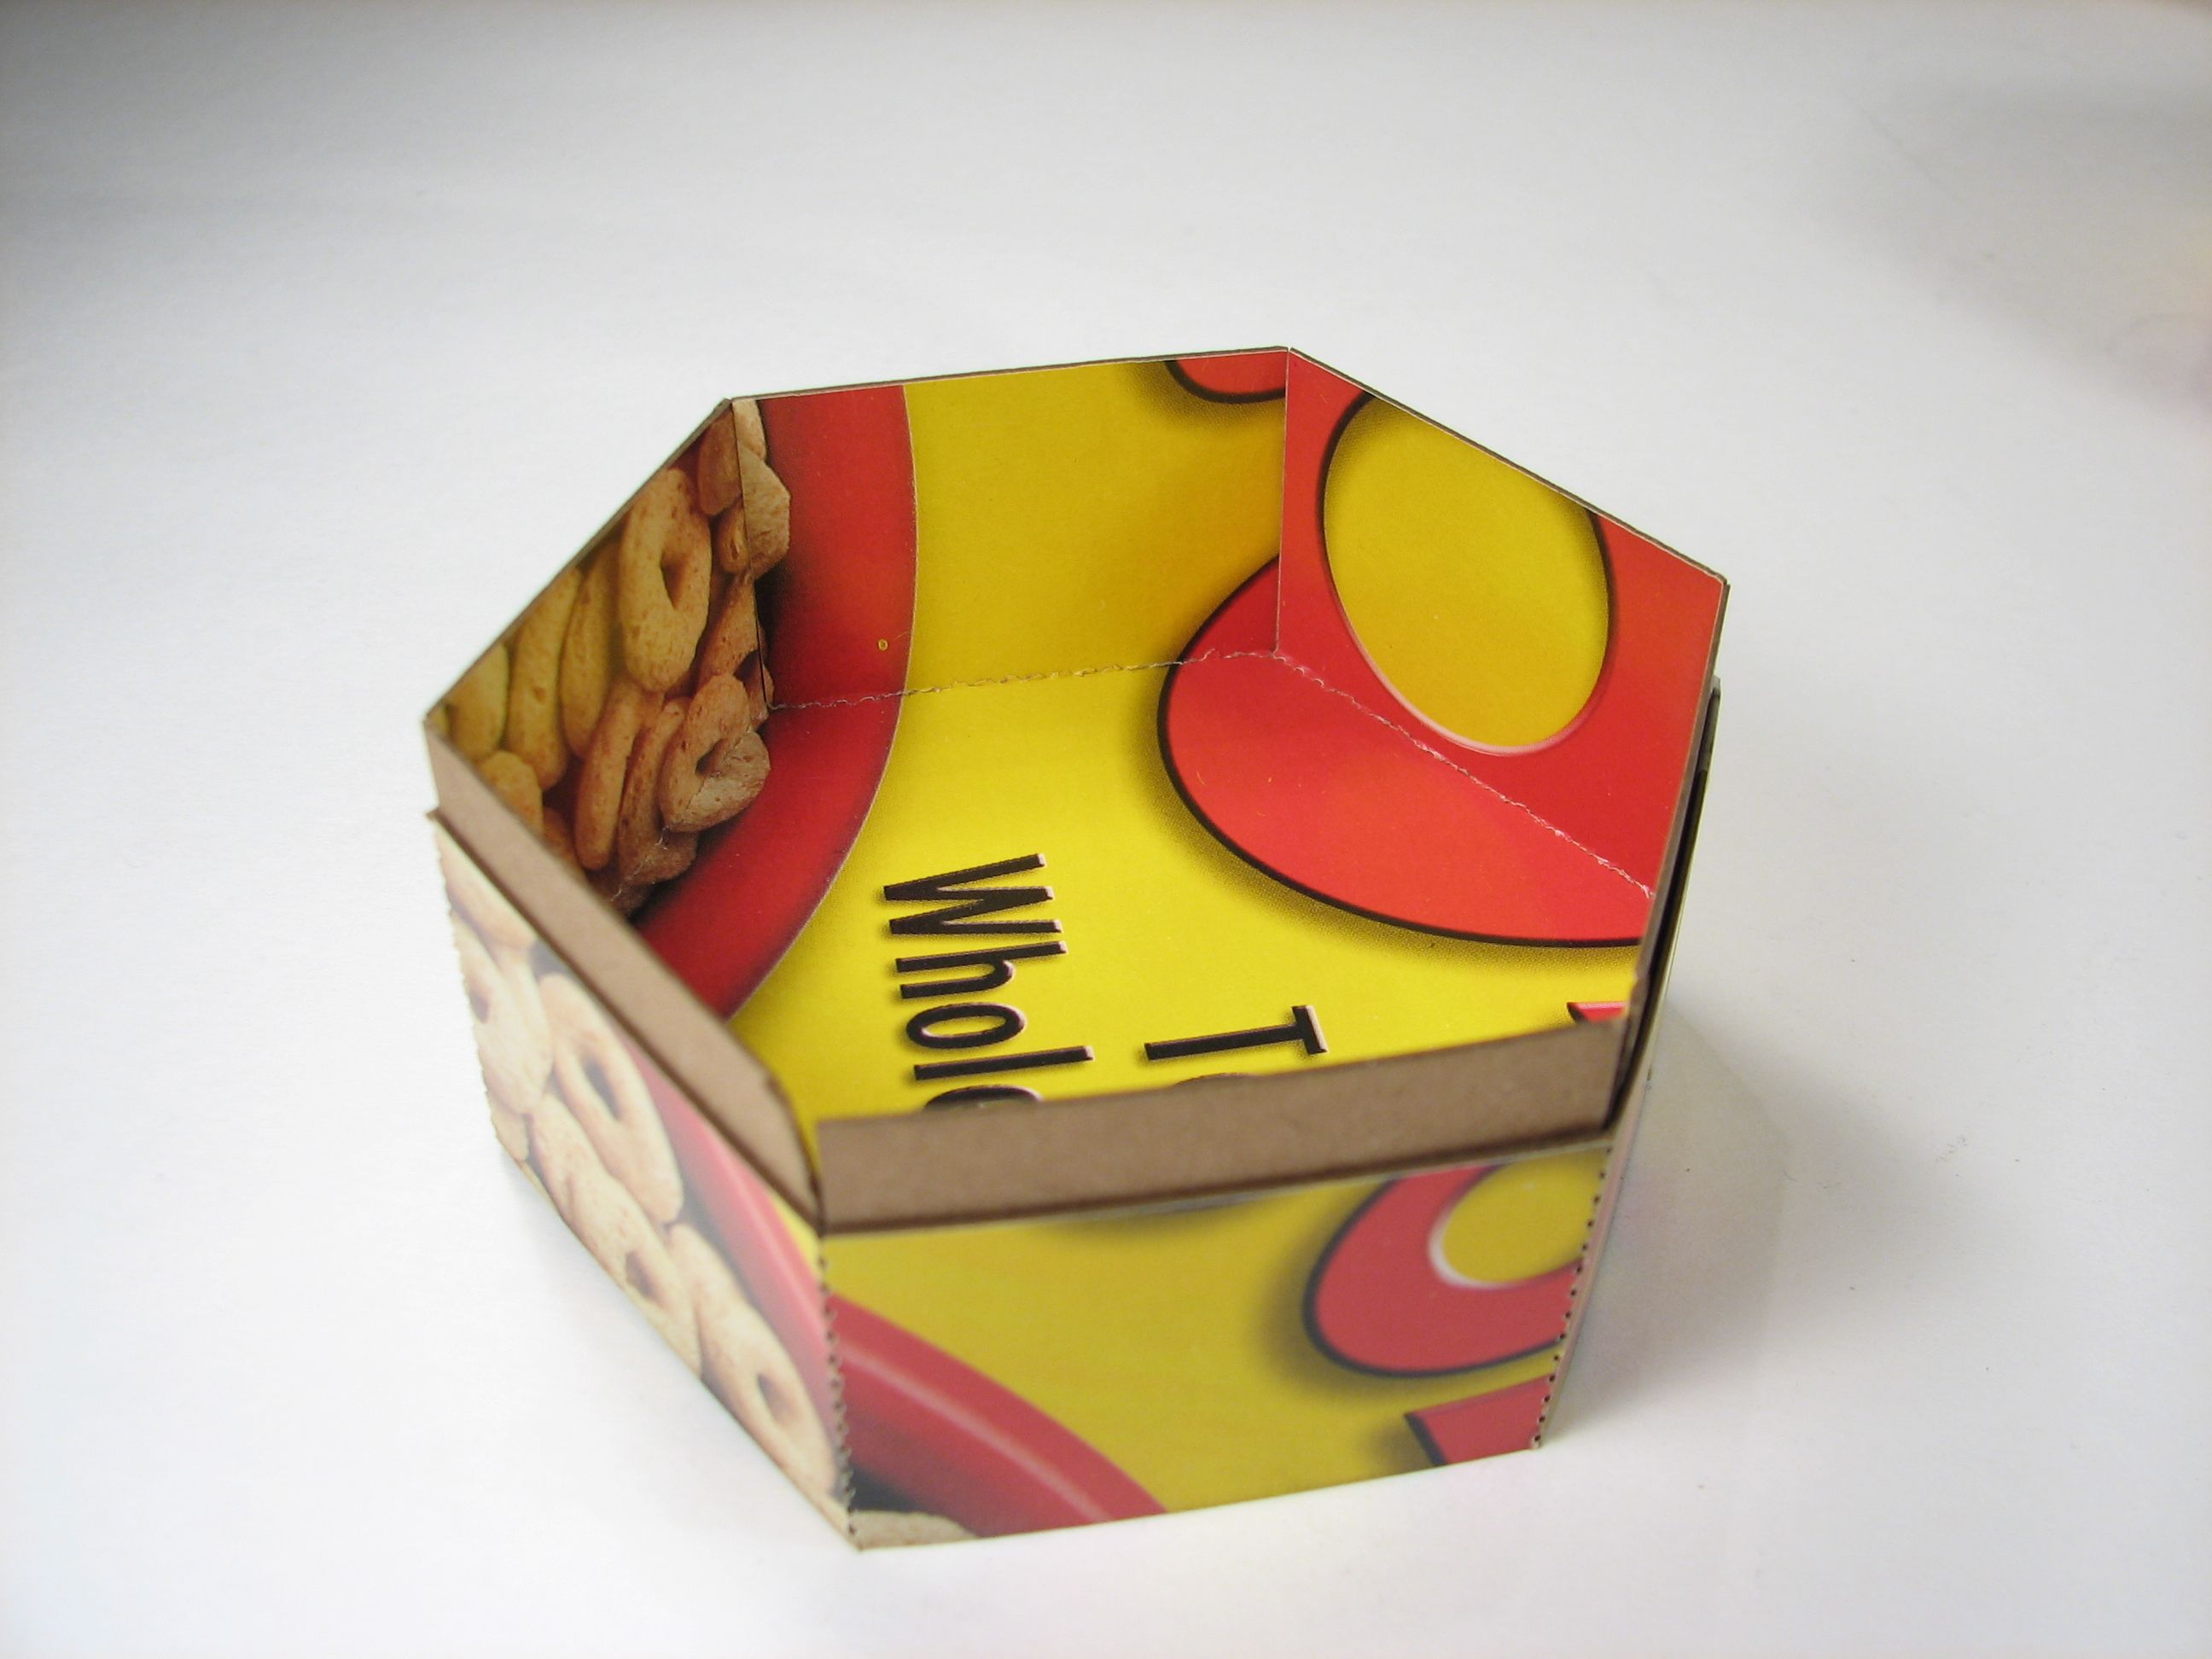
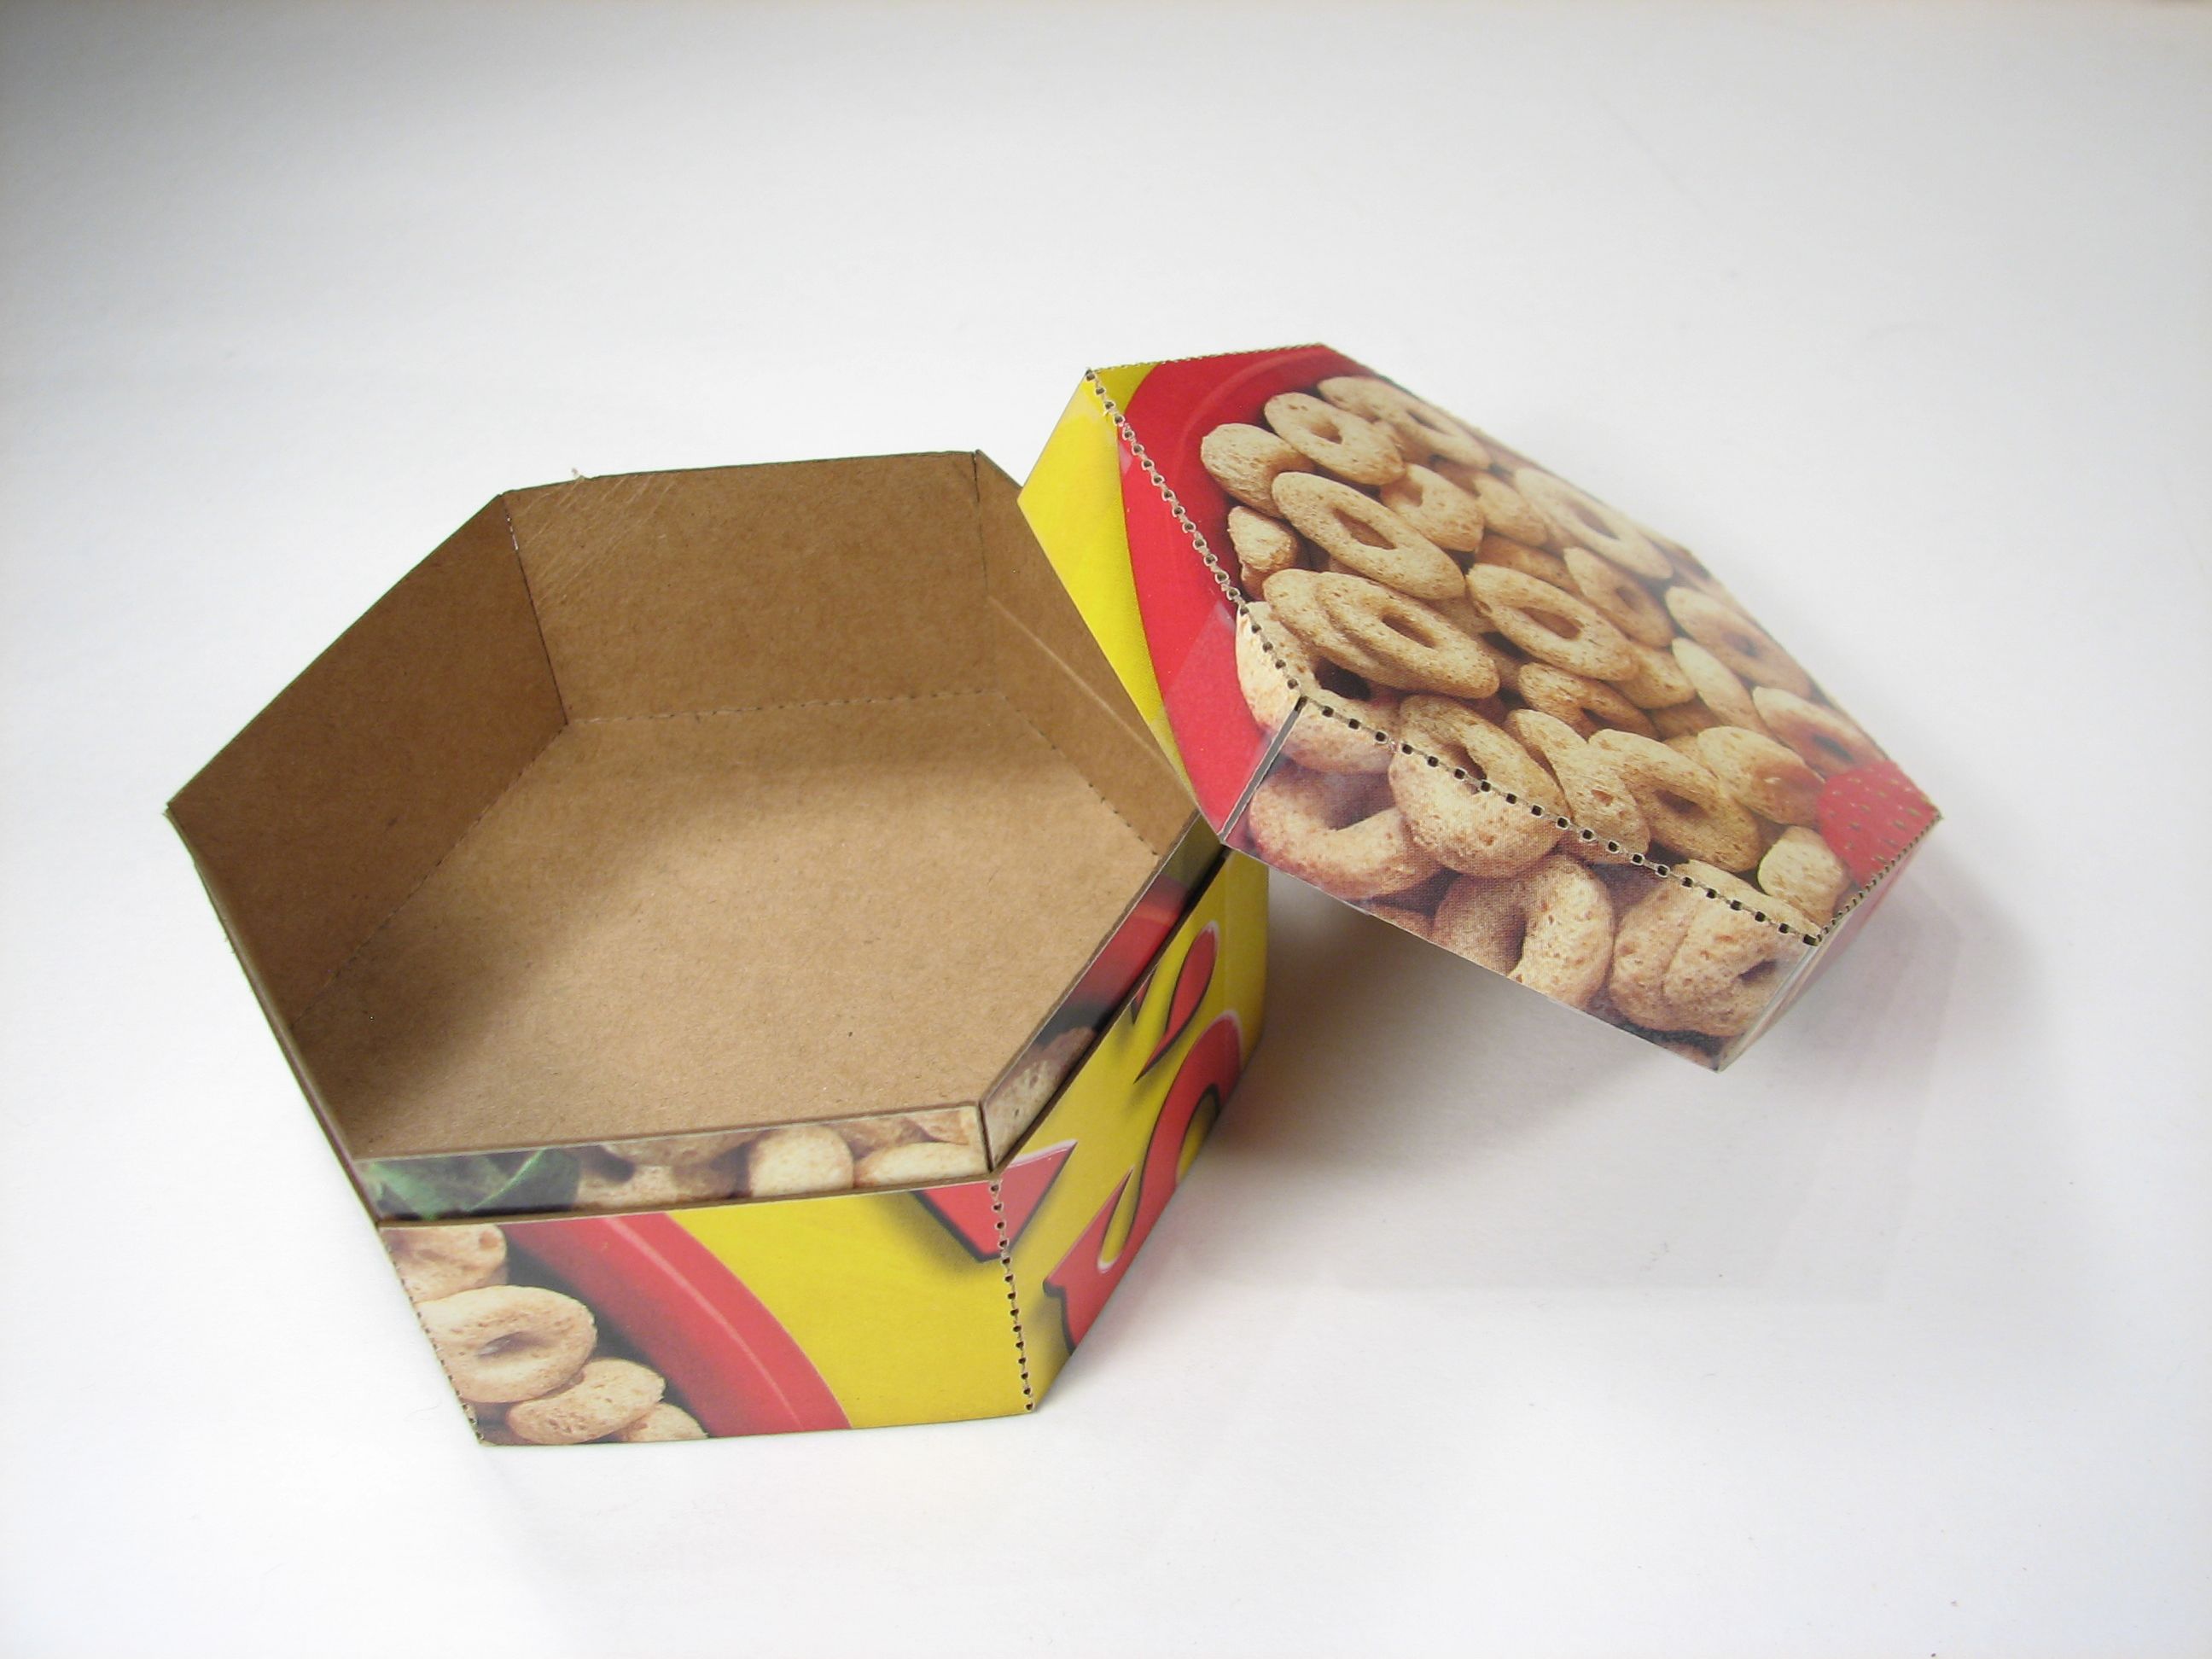
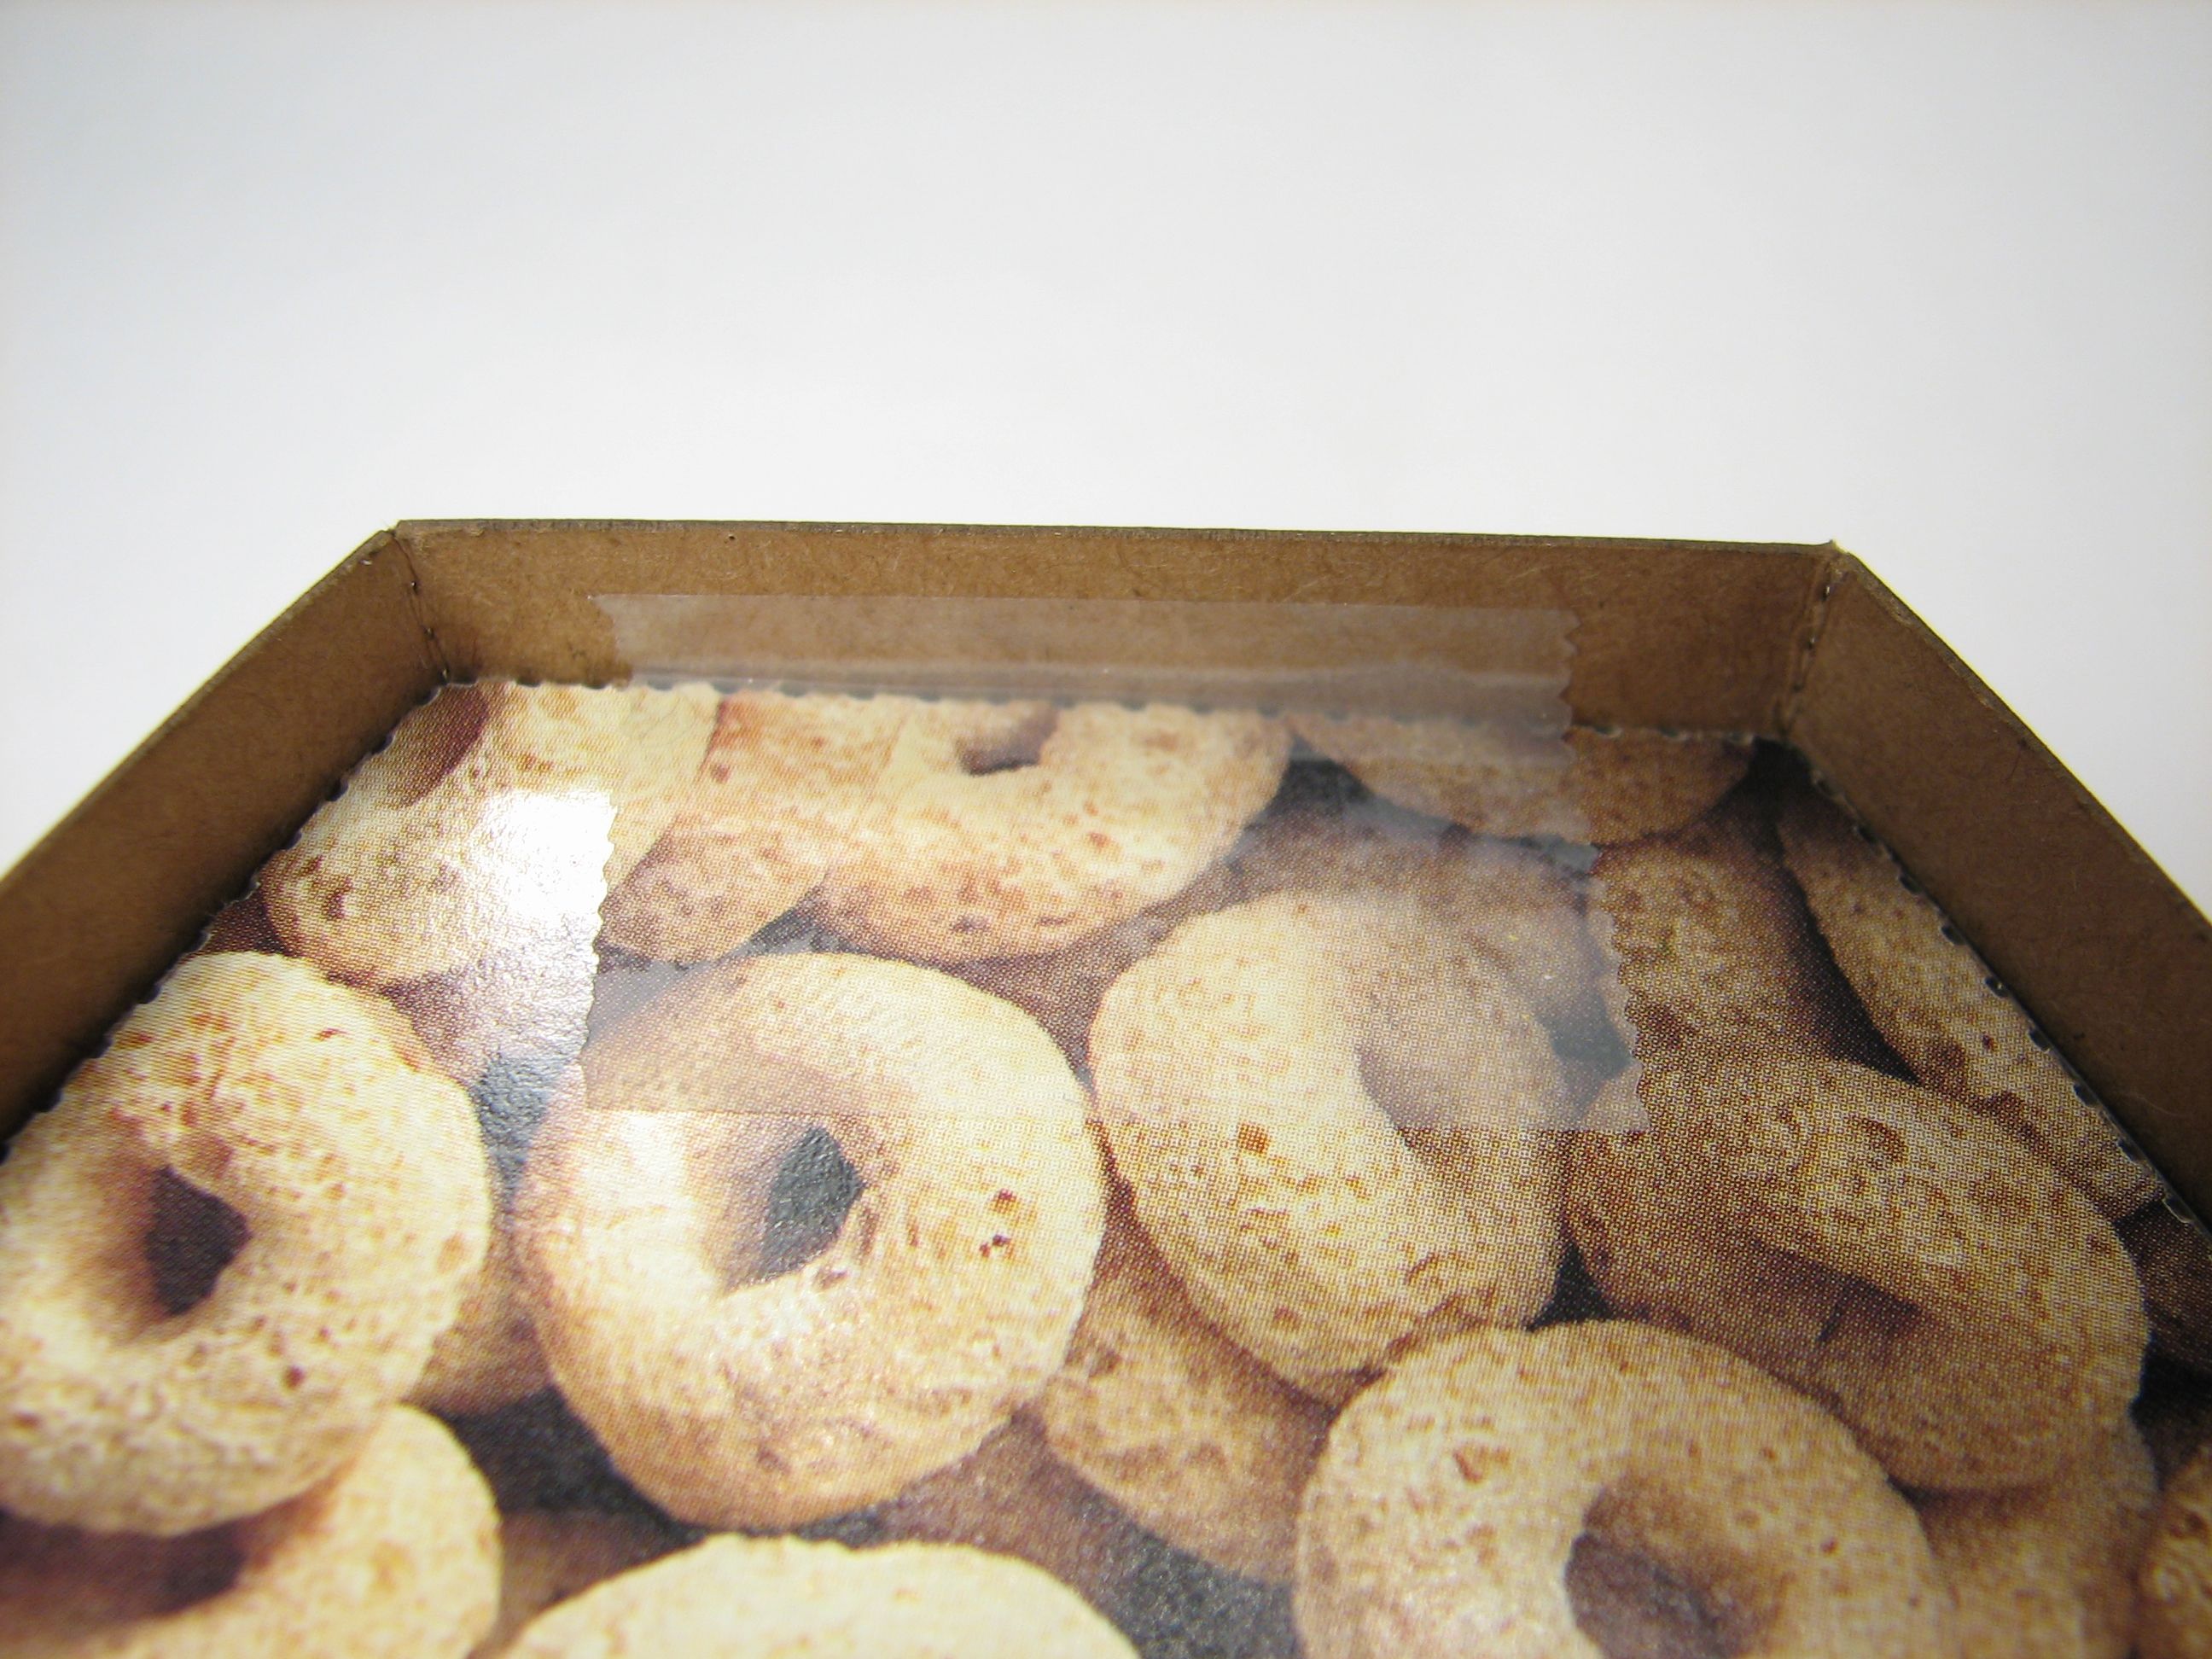
Here are examples of boxes with the printing on the inside and outside of the inner box. The printing on the inside gives it incredible visual pop, but if you’re using these to store smallish parts, you might want a uniform background to see them against.
You can, of course, use this pattern and go back to the traditional construction technique we showed with the business card box, covering the boards with tissue paper and pasting on decorative paper panels.
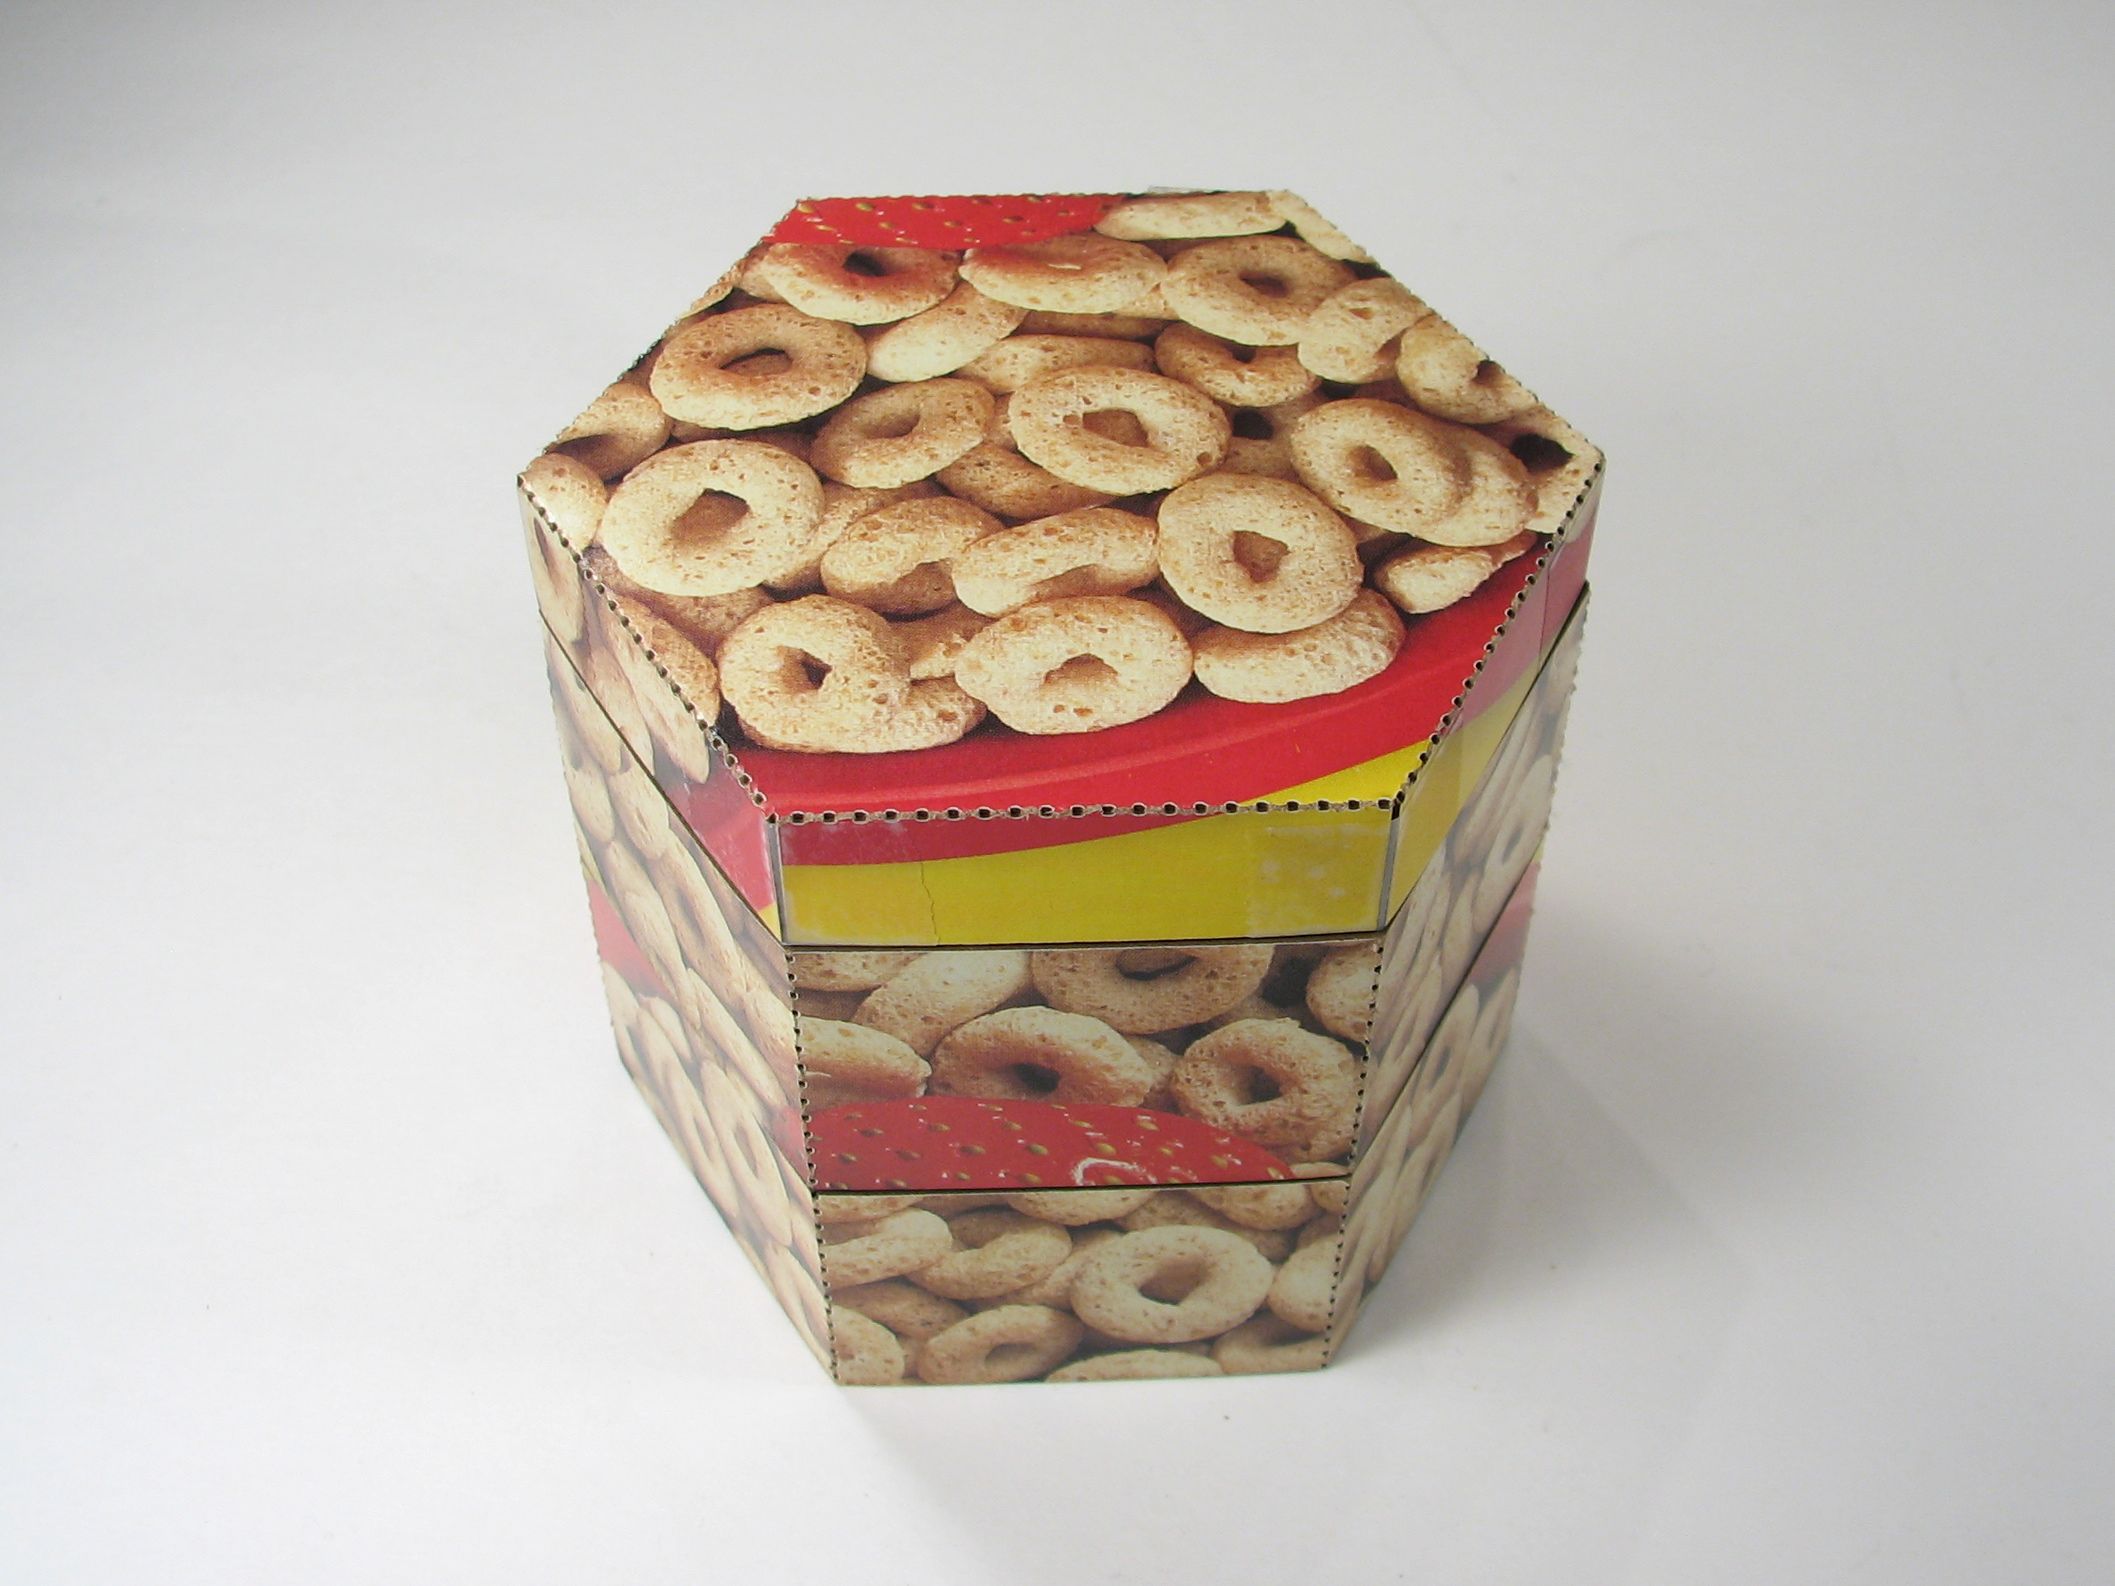
Now you’re ready to stack your boxes. And put things in them!
So, readers, here’s your challenge: come up with the most outlandish packaging for your boxes. The mix and match possibilities are endless!

cereal – surreal
I see what you did there.
And these boxes are oh so cheery!
I really like the pattern on the interior and if it were also on the exterior of the inner lip (if that’s what it’s called – in any case, I mean the one around the top edge of each box). So I might try extending that edge and folding it over.
Go ahead. Stock up on those anti-static cardboard boxes and make stackable electronic component containers. Different shapes for different part types. Triangles for transistors and three-terminal regulators. Squares for LEDs. Pentagons for mil-spec parts. Hexagons for hex inverters and drivers of all families. Octagons for Chinese imported electronics…
Better yet, build them with integrated electronics, reed or hall switches, and magenets, so that they do something different depending on how you permute the sides… Blinky lights, of course!
Great eco-friendly storage option.
Fold lines can also be created by using a non-sharp narrow "edge", leaves just a little more material behind in the fold, for that little bit of extra strength. The cardboard CAD/CAM set-up I’ve seen used a 3 mm ball in a fitting to make fold lines.
Using a laser cutter will consume way too much energy to consider this an "eco-friendly" alternative craft.
Cutting out the pieces with good old elbow grease is better for you AND the environment (wink)!!!
Ooooo… stackable boxes! This is a lot more eco-friendly than the rubbermaid stackable drawers I had planned to buy to help reorganize materials in my classroom. I am going to enlarge this and make them using cardboard from the recycling dumpster, and then store art supplies and craft materials in them.
HAHA, Dennis!
Just thought I should let you know, I have popped a link to your page here http://sewsaysyou.blogspot.com/2011/04/organise-all-those-bits-and-pieces-for.html
At my blog, cos I made some of these babys, and they rocked my freaking socks! And because i believe in giving credit where credit is due…
Now I just have to get my hands on one of your egg-bots and my socks will be moshing across my freshly mopped floors!