


Kits for Japanese boxes like these are often given in Japan as gifts to foreign vistors. Here in the states, you can sometimes find the kits in stationery stores starting at about $6, for example here and here.
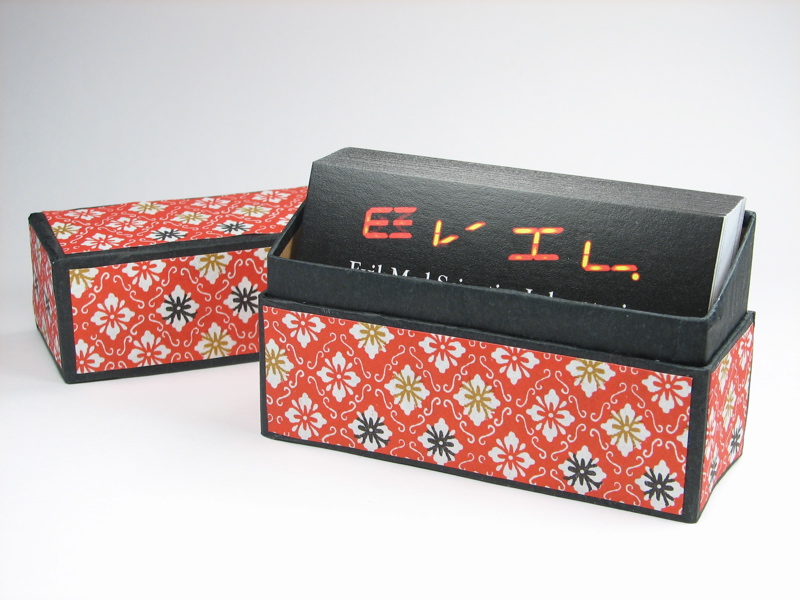
Alternately, you can make one yourself– no kit required. You can use paper, paperboard and tissue you probably already have on hand to make a box that will be the shape you want, not one of the three or four readily available designs. These instructions will take you through the steps of making a business card display box, but the techniques are general and can be used for any shape that you like.
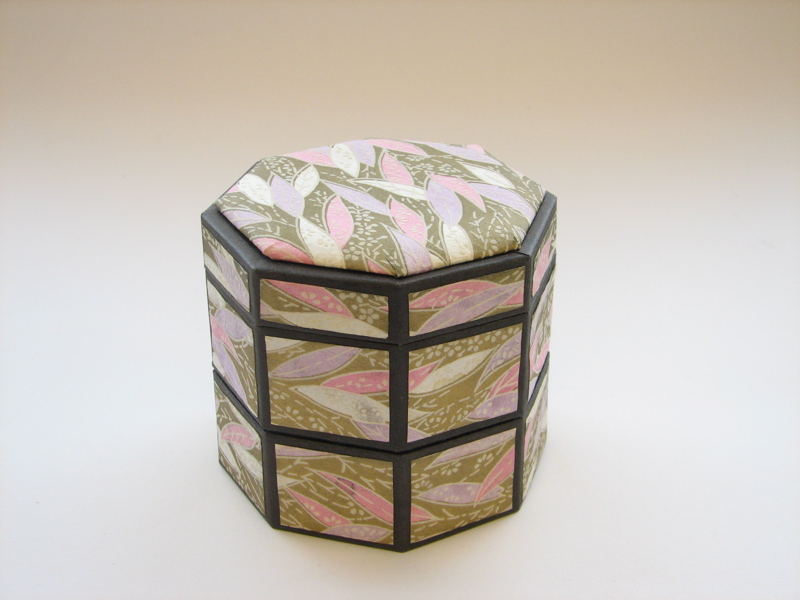
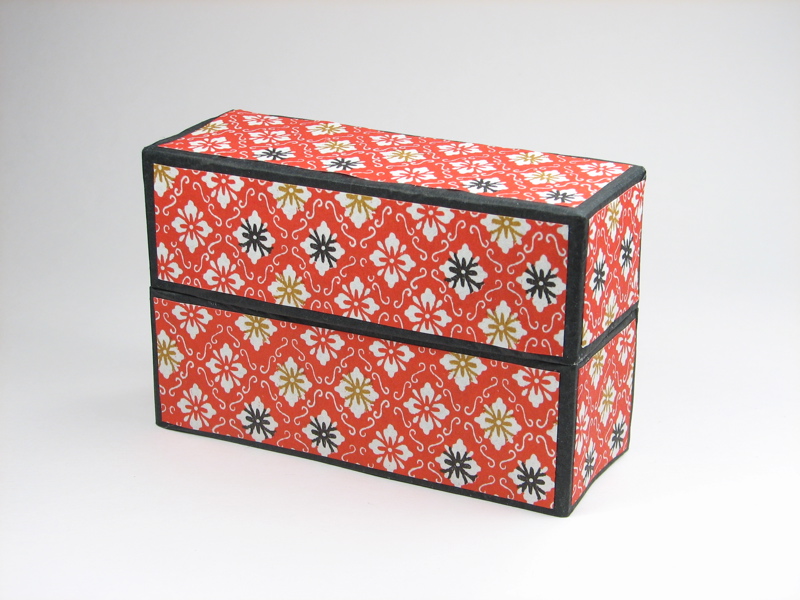
I’ve made a few boxes from kits before. They were very intuitive and elegant, like this pair of stacking boxes with a matching lid. Minor imperfections don’t show, which is nice in a project with such a small investment of time.

Materials needed: black tissue paper, decorative paper (such as Japanese washi), paperboard, tape and glue. Essential tools: scissors and ruler. Helpful tools: rotary cutter, hobby knife, cutting mat, quilting ruler, and letter opener or bone folder (for burnishing and scoring). Not shown but also helpful: clothes pins, assorted paper clips or other small clamps.
The first step is to plan and cut out the structural elements. I’ve designed a template of the shapes used for this business card display box, which you can download here (46 kB PDF File).
Naturally, if you’re designing a different shape of box, you’ll want to lay out a different set of shapes at this stage.

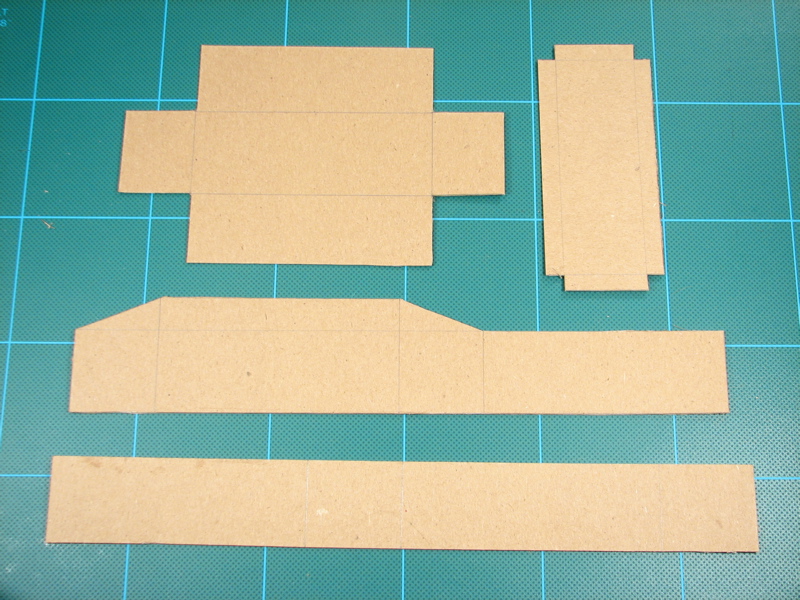
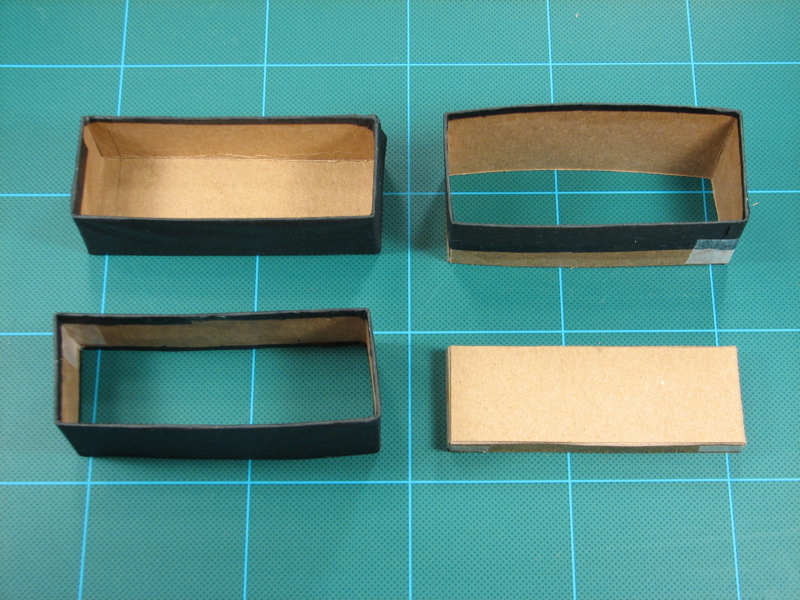
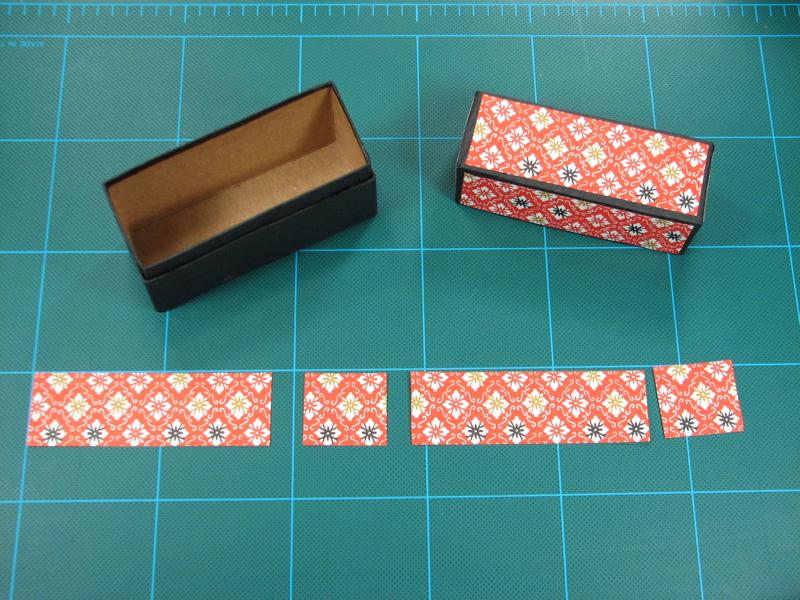
This box has a reinforced bottom which keeps the rectangle neatly squared, and an insert which the lid fits over. Cut the shapes out of paperboard and score them about halfway through where the folds will be. Not scoring evenly can lead to slightly crooked folds.
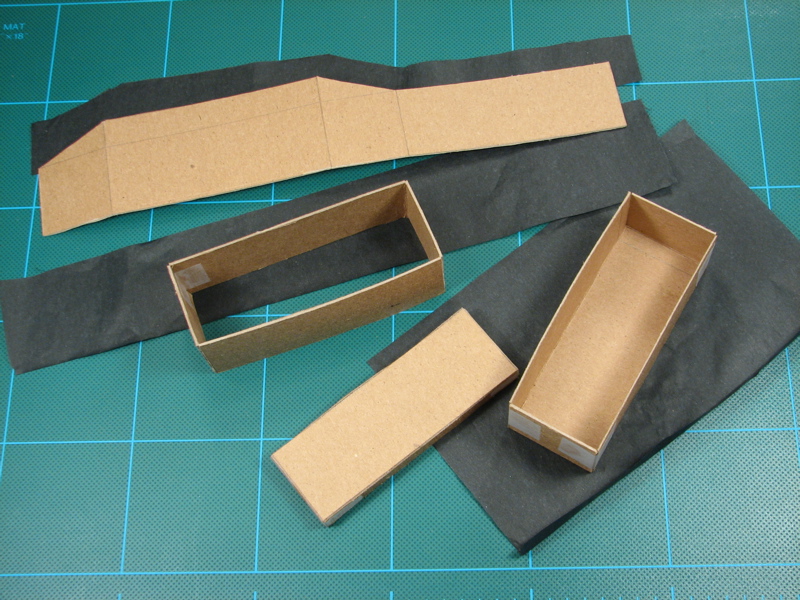
Next, cut your tissue paper to shape. This is easiest to do while your paperboard is still flat. The lid can be wrapped much like a present, so you will need a piece slightly larger than the paperboard laid out flat. The outer piece of the base will need to be completely lined, requiring a strip that is again, slightly larger than the paperboard. The inner piece of the base only needs to be lined about halfway down.
Tack your paperboard pieces together with tape, and then wrap with tissue paper. Tack the tissue down with tape in a location that will be covered by the decorative paper or by another layer of paperboard. Fold the tissue neatly over the corners (you can use a letter opener to press it into the creases). Loosen the tissue paper enough to smear a thin layer of glue under the edge on the inside of the box, then smooth the tissue paper back down onto the glue. I used my finger to apply the glue, but you can use a cotton swab, toothpick, or whatever is handy.
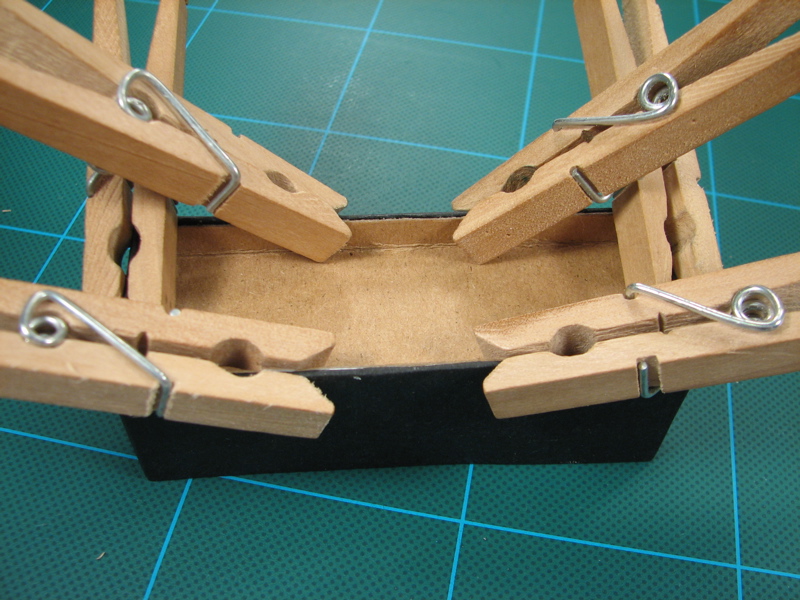
Put a bead of glue around the bottom edge of the outer base piece and insert the reinforcing base piece. Clamp together and allow to dry.
Also put a bead of glue around the upper edge of the outer base piece and insert the base liner. Clamp, and allow to dry.
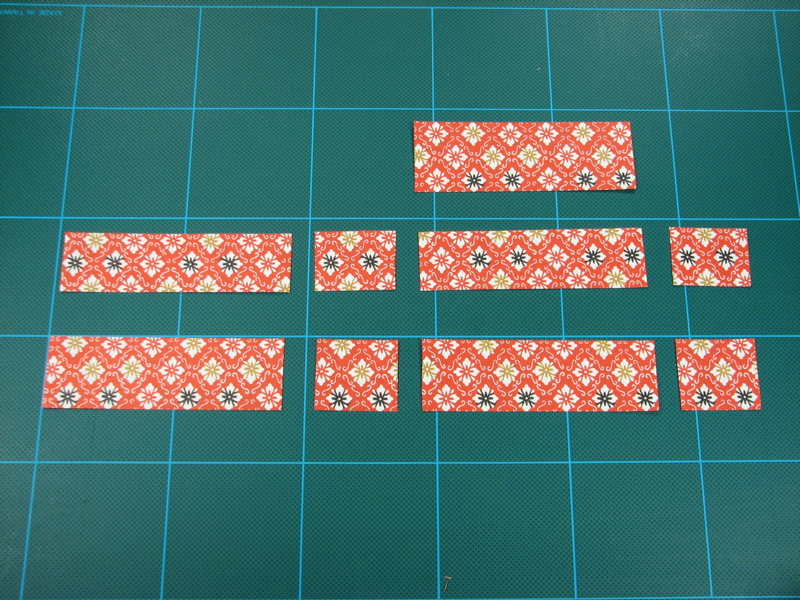
While you’re waiting for all that glue to dry, you can cut out your paper. Each piece should be slightly smaller than the facet it will be placed on. In this case, the border is about 1/16″.
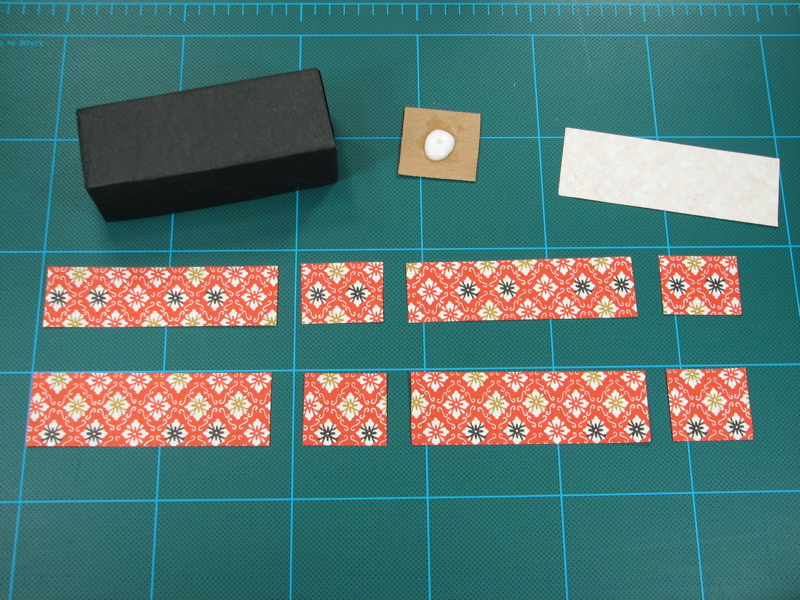
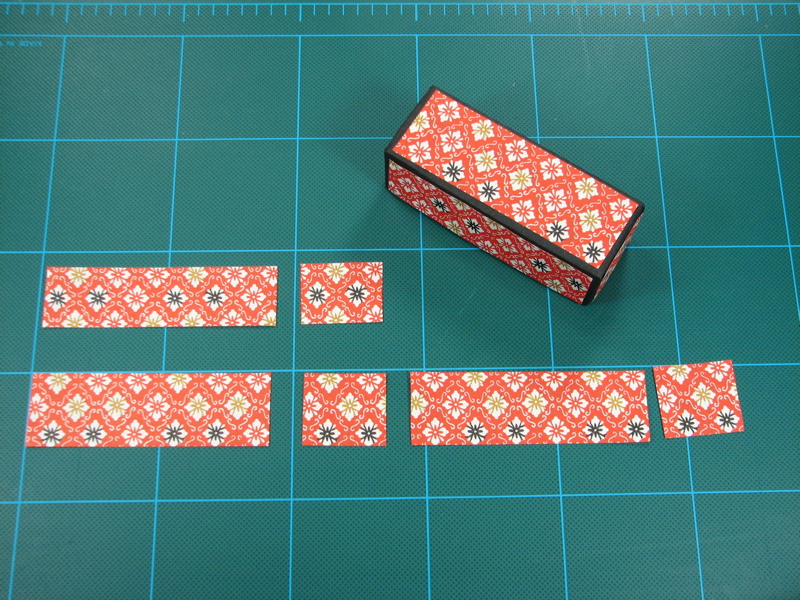
Put out a blob of glue on your palette (or a scrap of paperboard) and spread it evenly and all the way to the edges on your first piece. Place it on the matching facet of the box. Repeat until all facets are finished.
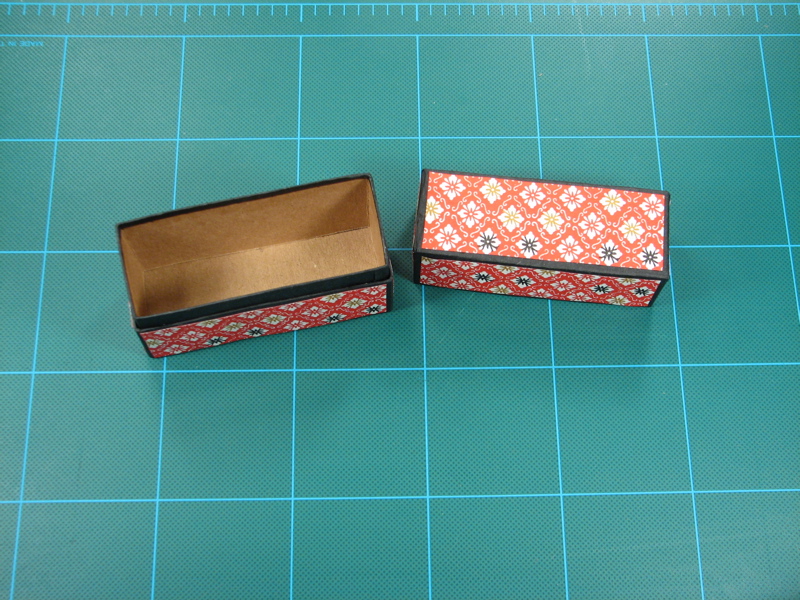
That’s it, congratulations, you’ve made a classy little paper box!
You can now sit back and admire it, or put it to work holding something, or give it away as a gift, or start all over again with a new box design and a new color of paper.
The box is beautiful and the instructions look very straight forward. I am going to make one tonight! Thank you for sharing this design.
KMS
Thank you for the instructions and inspiration! It took me about an hour to make a very pretty box for some sandpaper blocks, covered with some very nice Japanese paper I had. The finished box was a lot sturdier than I’d feared, given it is partially held together with tissue paper.
A friend who does a lot of bookbinding told me to try using black muslin instead of tissue, and gluing that down all over, for a really sturdy box.
–Oceaneer
I’m glad it worked well for you. I was surprised the first time I made one of the kits at how sturdy it was, especially since it was put together with just tape and glue. If you take any pictures, I’d love to see them – you can add them to the flickr pool if you want.
Thanks for the tip about muslin!
Lenore,
I made another box, this one out of wood with fabric and paper, sized to fit in my car dashboard and hold CDs. I posted two photos to the EMS photo pool. Thanks again for the inspiration!
–Oceaneer
I finally photographed the Washi Box for sandpaper. See:
http://www.flickr.com/photos/oceaneer99/1821926155/
Awesome! I like the red background.
If you liked that then try my group. We have thousands of paper things to do.
http://groups.yahoo.com/group/Paper_Models/
Owner/Moderator………..Helives!
Daiso, the Japanese dollar store, has these kits. I’ve made a couple of them. I used origami paper instead of the paper the packet provided. There are a couple of stores in Seattle, Vancouver, BC and a couple in Northern Cali that I know of.
You can get kits for similar boxes at a lot of Japanese stores. The fun thing is that you don’t actually need a kit.