


We made a laser-cut plywood mount to hold the sugar-heating hot air gun for the 3D printer, and it turned out to be a neato project on its own; check out our cool little laser-cut parts!
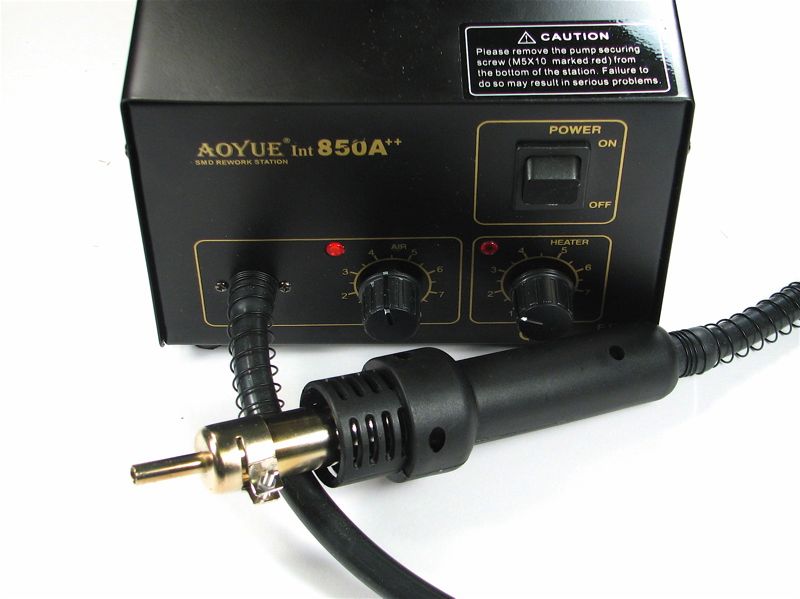 This hot-air rework station is part of our 3D sugar printer; it’s the part that melts the sugar to perform the fabrication.
In this photo, you can see the original umbilical cable for the station, which was large and somewhat inflexible, and certainly limited in length. We needed a longer, more flexible cable bundle.
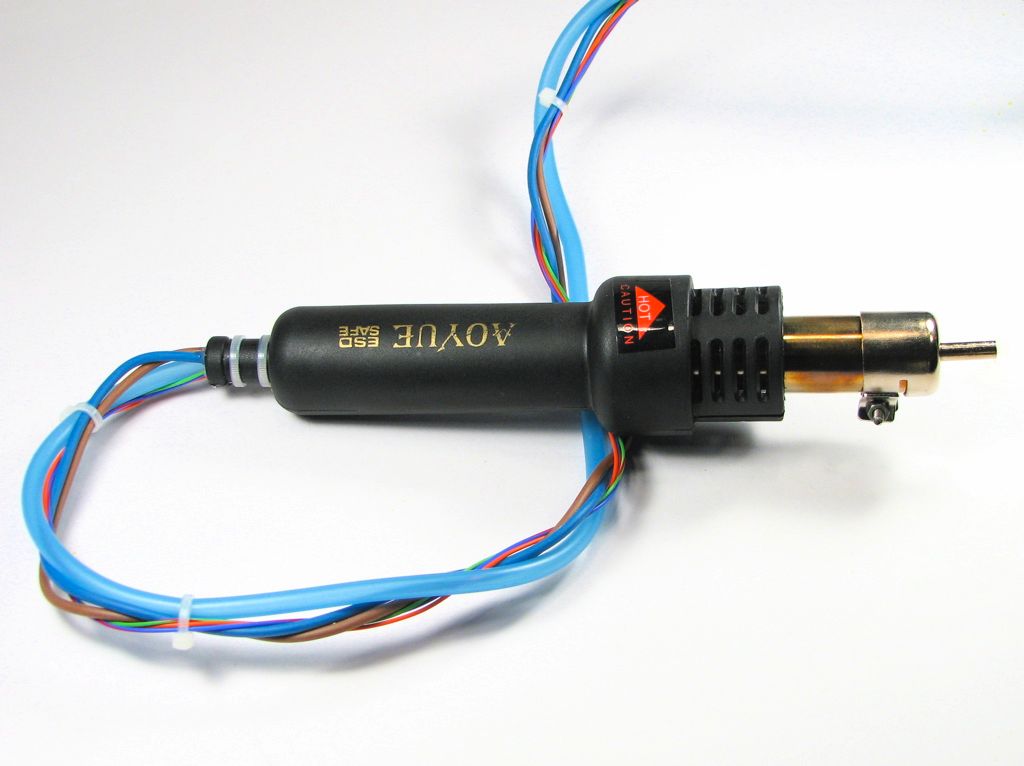
So, I took it apart and made a new, longer umbilical. The original cable was an interesting hybrid– a bunch of skinny wires running down a big fat tube. The outside tube itself carried the air for the head, right over all of the wires inside.
When I remade it, for the sake of flexibility, I used some silicone aquarium tubing and a number of thin stranded wires for the cable. The new one works well, but I wish that I had made it an extra six inches or so longer. Typical.
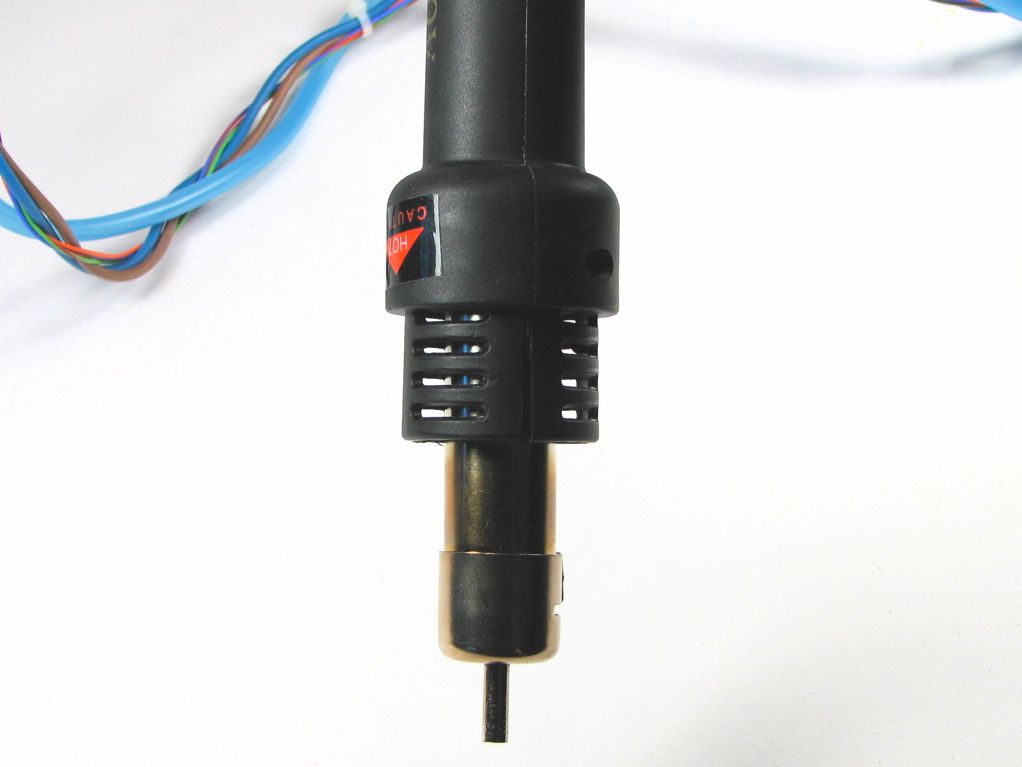
Okay, so we’ve extended the cord, but we still need to mount the hot air gun to the carriage of the 3D printer. In order that we can hold it fairly close to the business end, we need to grab it by the lowest piece of plastic, which has the ventilation holes in it. No matter what, it’s a bit of a tricky mounting job.
The mount has to hold it an inch or so away from a vertical surface, be light in weight, not be made of plastics– which tend to soften at not-that-hot temperature, and be quite rigid.
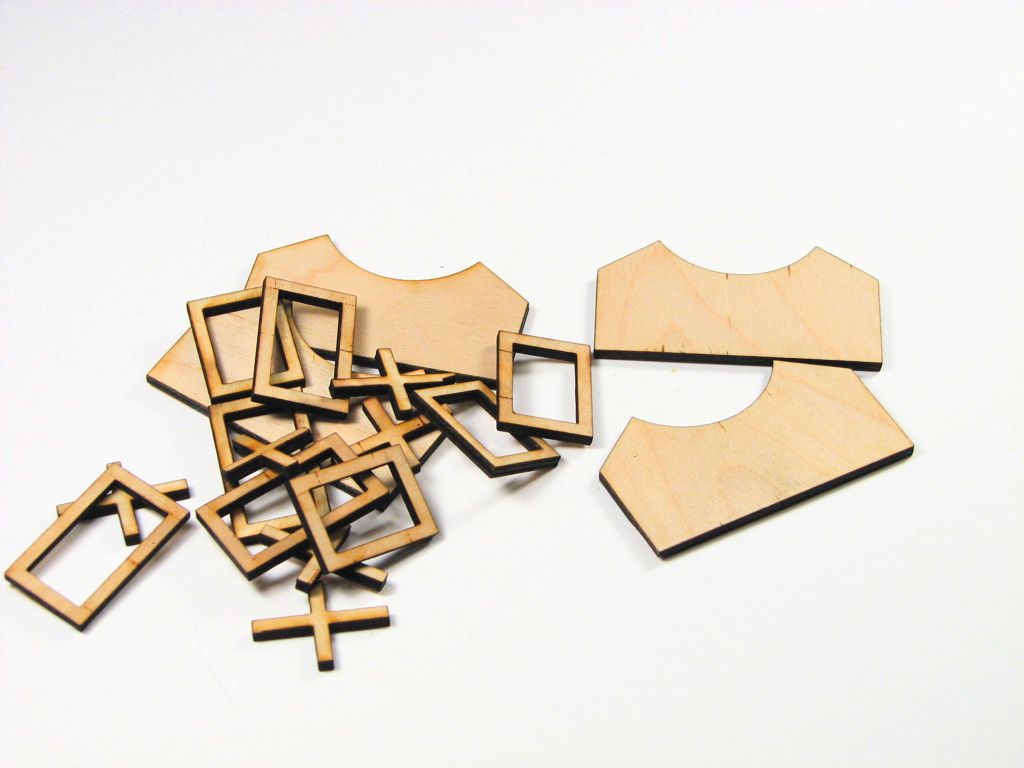
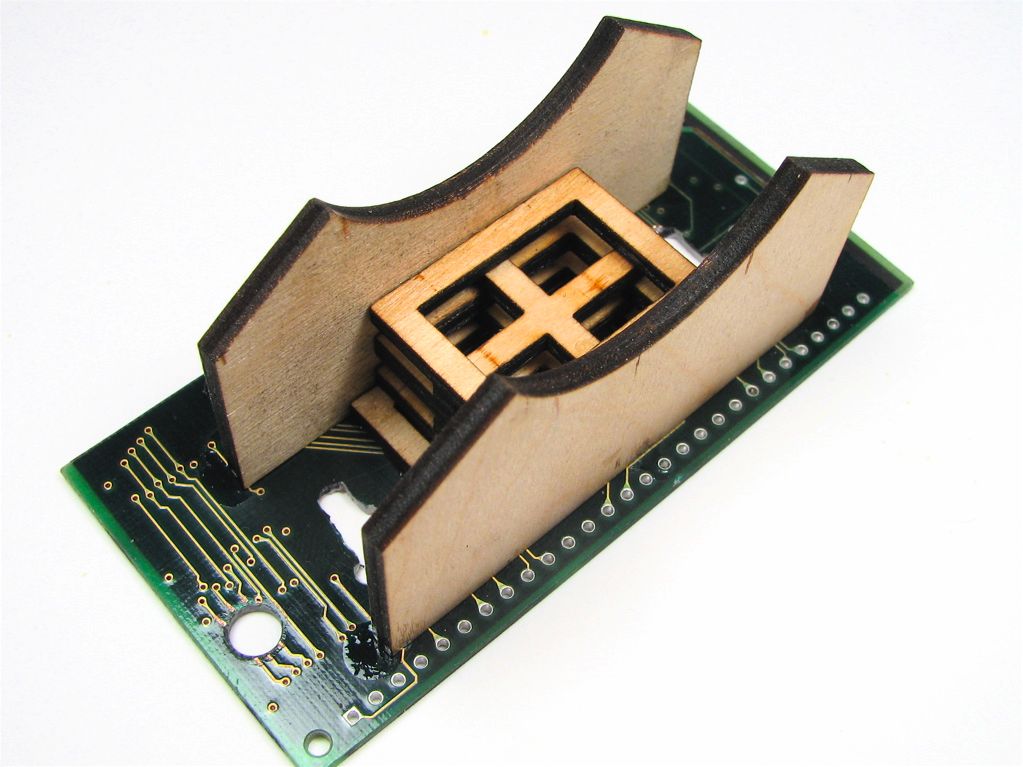
There are three shapes: The suspension-bridge shaped cradle pieces, the “plus” shaped pieces, and the little rectangles. I made more pieces than I needed… just in case. These are made out of thin plywood, and I cut them a 25 W laser cutter at TechShop.
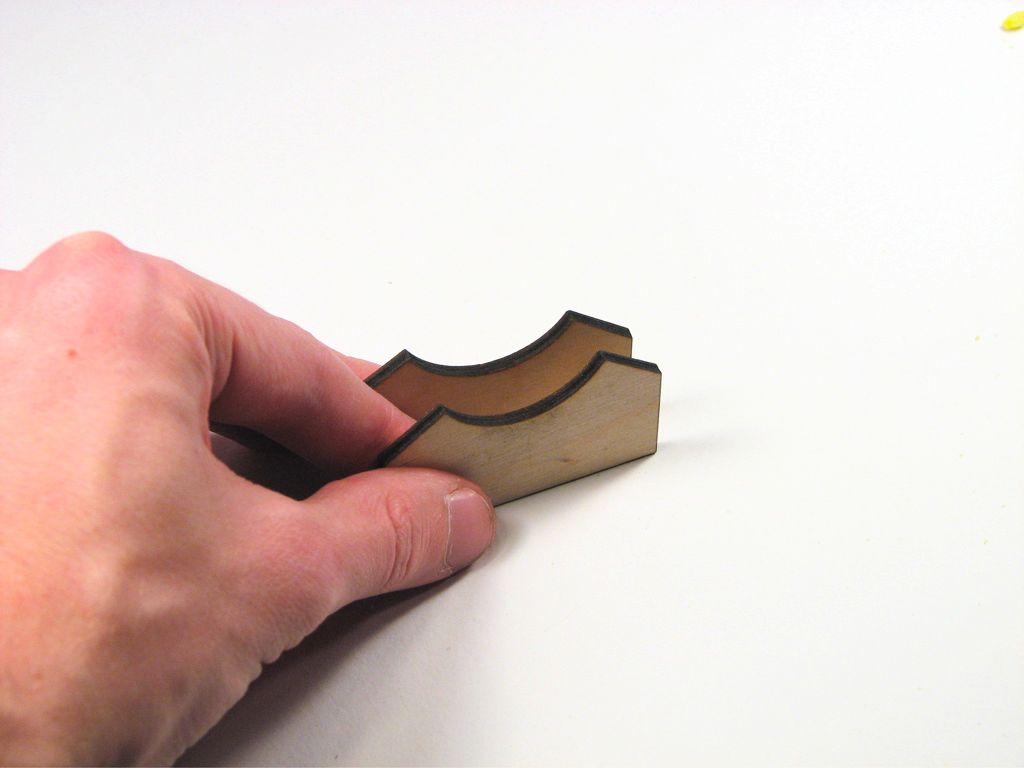
First of all, these are the two “cradle” pieces. These have a curve in them that matches the radius of the hot air gun at the point that we want to hold it. Two of them together can locate the hot air gun in space. However even together, the two cradle pieces on their own have no strength, and can’t support anything. So, we need to add a rigid spacer between them.
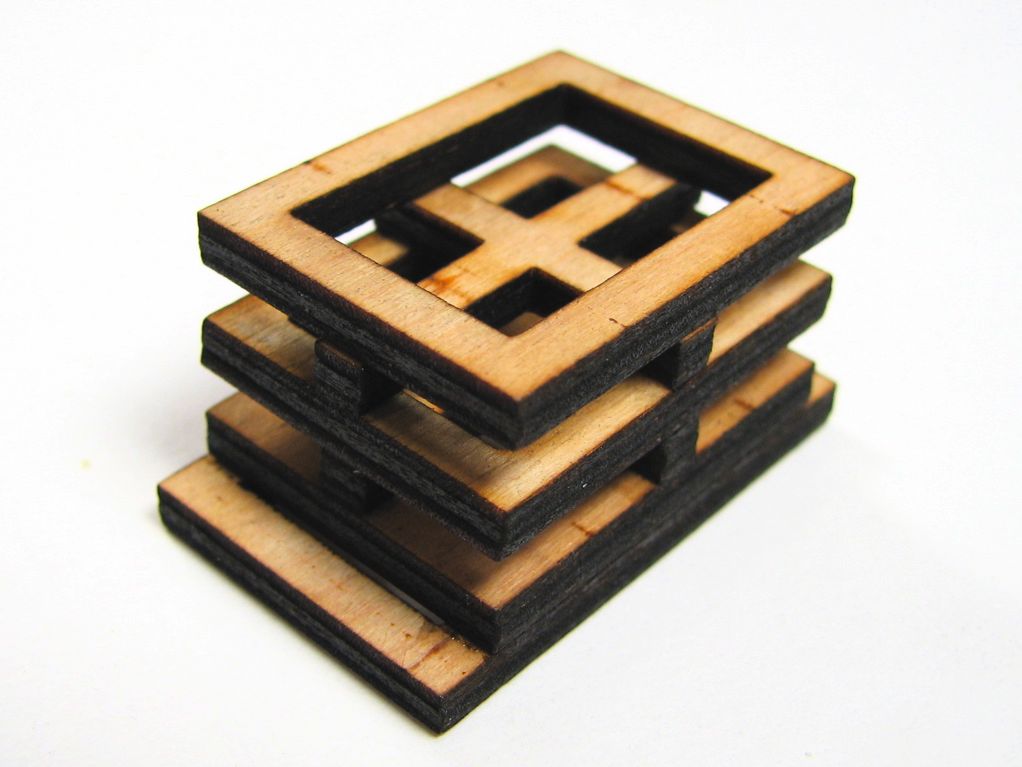
Undoubtedly one of the coolest things that I made last week. The thin plywood cuts *very nicely* with the laser cutter. The two smaller shapes add together to make this strong and light spacer stack.
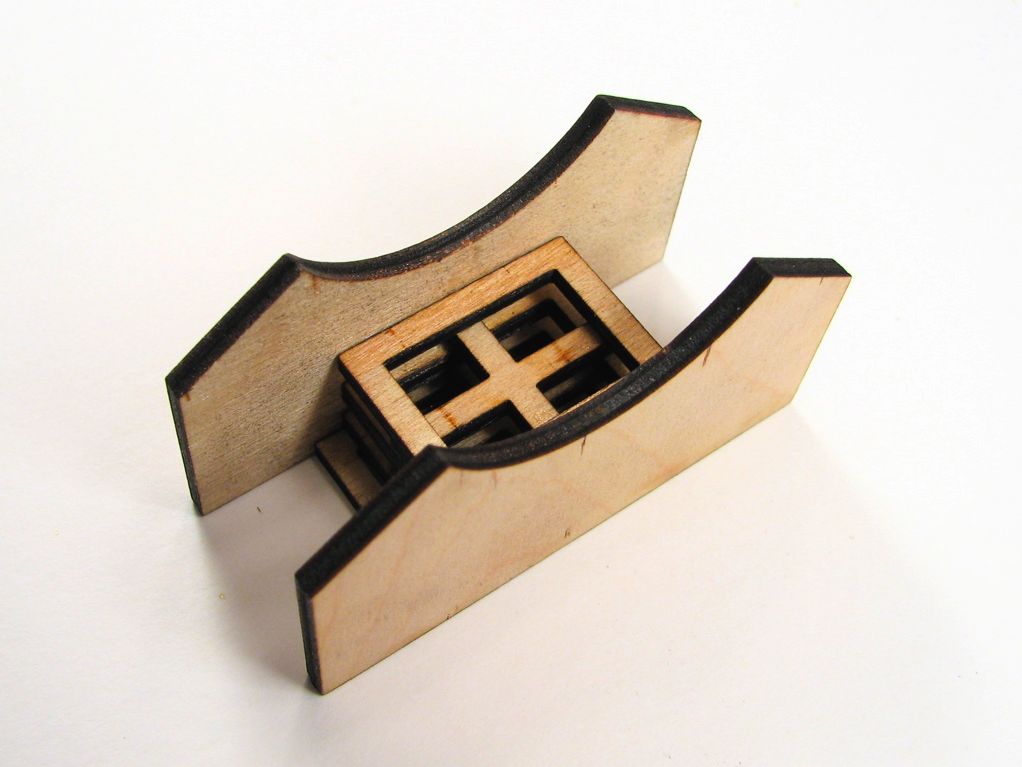
Here’s the completed spacer stack, spacing apart the two cradle pieces. After aligning it like so, I used a few drops of superglue to keep things in place.
The completed mount fits perfectly on the hot air gun, spanning the entire part where we want to grab it, but not blocking any ventilation holes. And it’s quite strong and light.
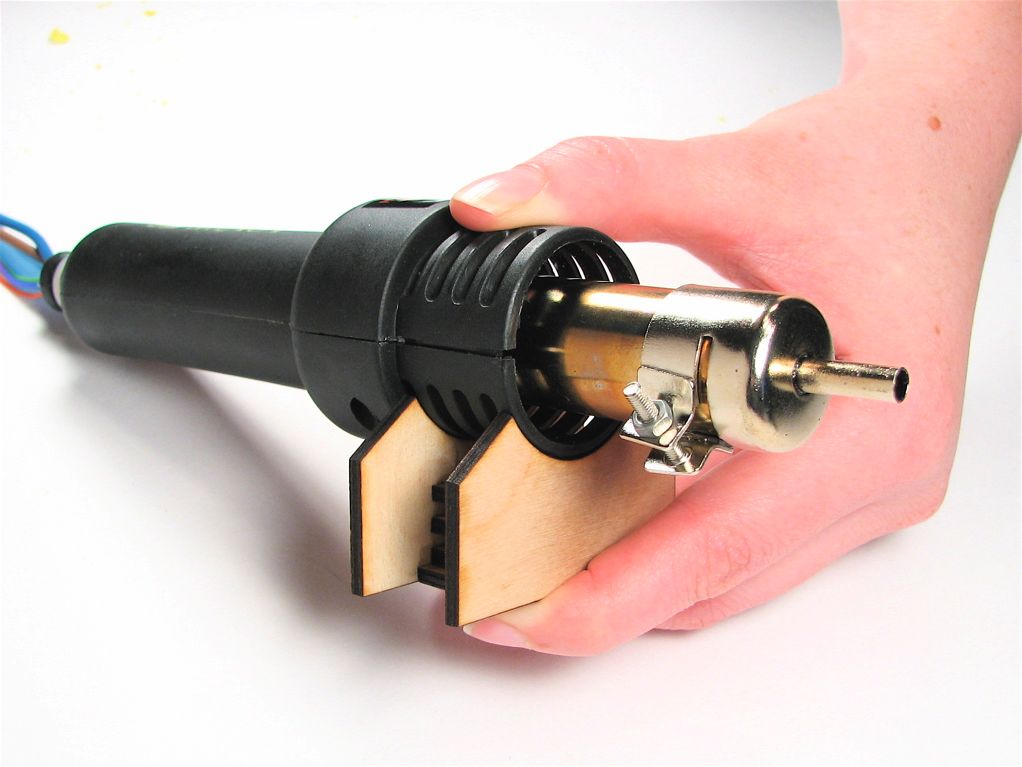
Here’s an alternate view, showing the completed mount. Notice that a thumb is still necessary to hold the heat gun to the cradle; a role that will shortly be taken over by a hose clamp.
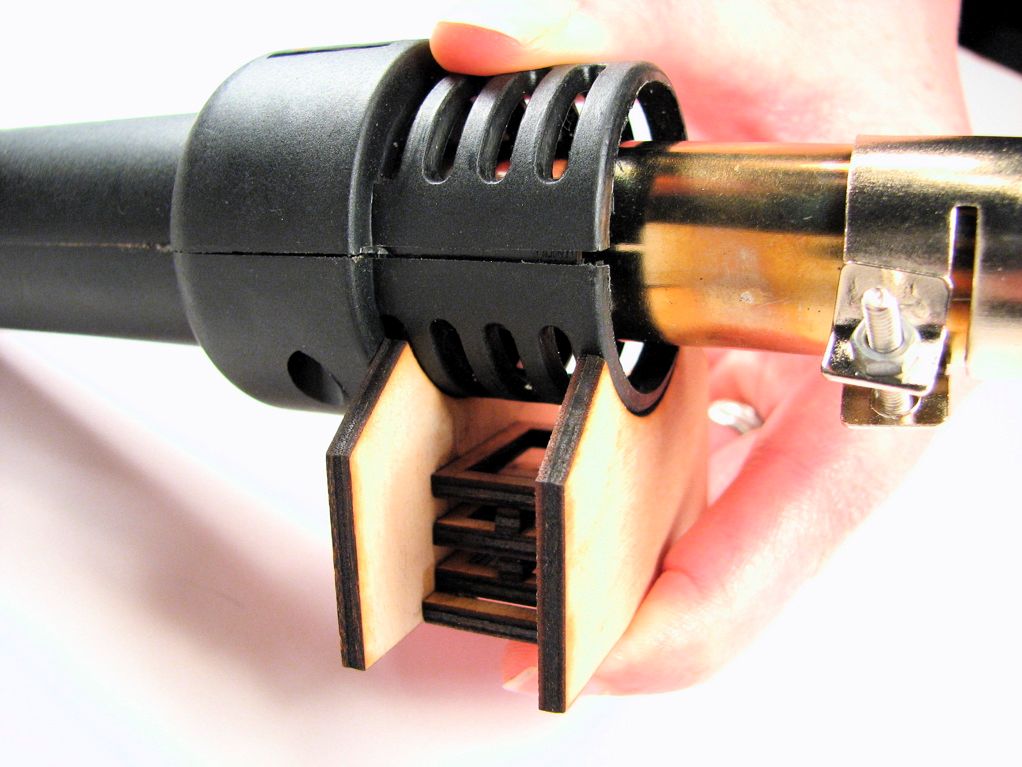
Here is the finished mount, glued down to a piece of PCB, which is the front panel of the printer carriage. I also put slots in the PCB for a hose clamp or cable tie to hold the heat gun in place.
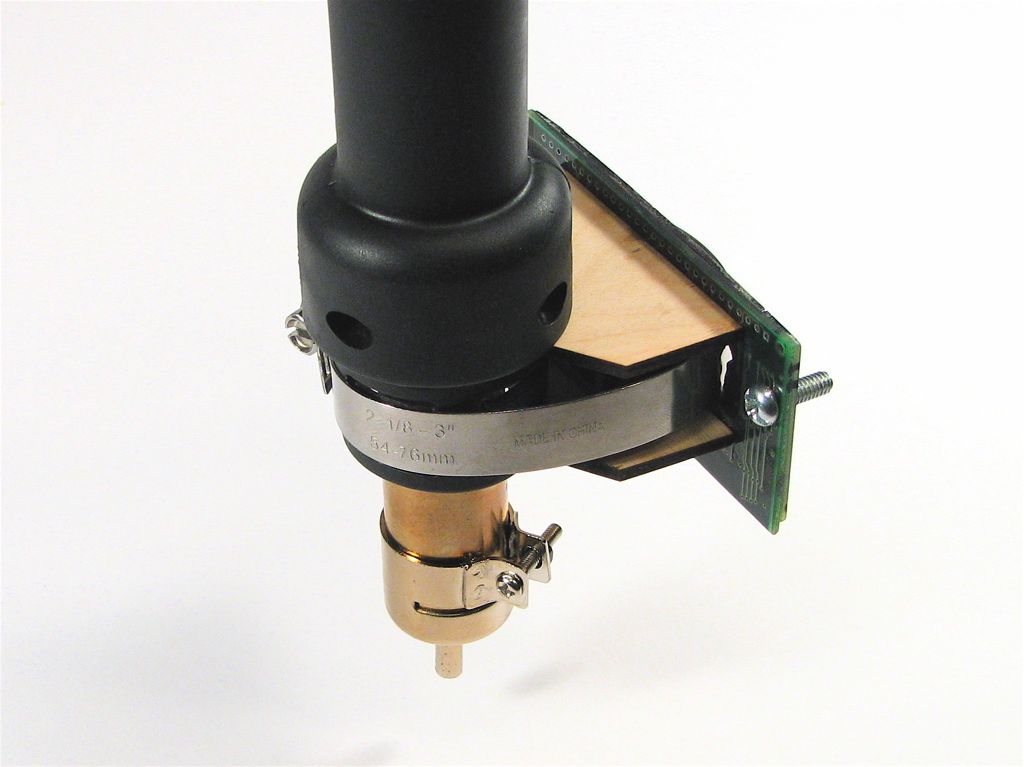
The completed mount nicely cradles the hot air gun, but it does not hold it down. Initially, I thought that this hose clamp would be needed, but it turns out to be total overkill– a simple cable tie does the job just fine.
Now… what should we do next? ;)

you are my hero!
i am sure you will be winning a nobel prize for your advancements in toasting sciene.
monkey
http://www.himonkey.net
Thanks, Monkey!
When they announce the Nobel Prize in the field of Playing With Food, we expect to be in the running. =D
—
Windell H. Oskay
drwho(at)evilmadscientist.com
http://www.evilmadscientist.com/