


It’s like one of those online “LED resistance calculator” thingies, except that you can fold it up and put it in your wallet.
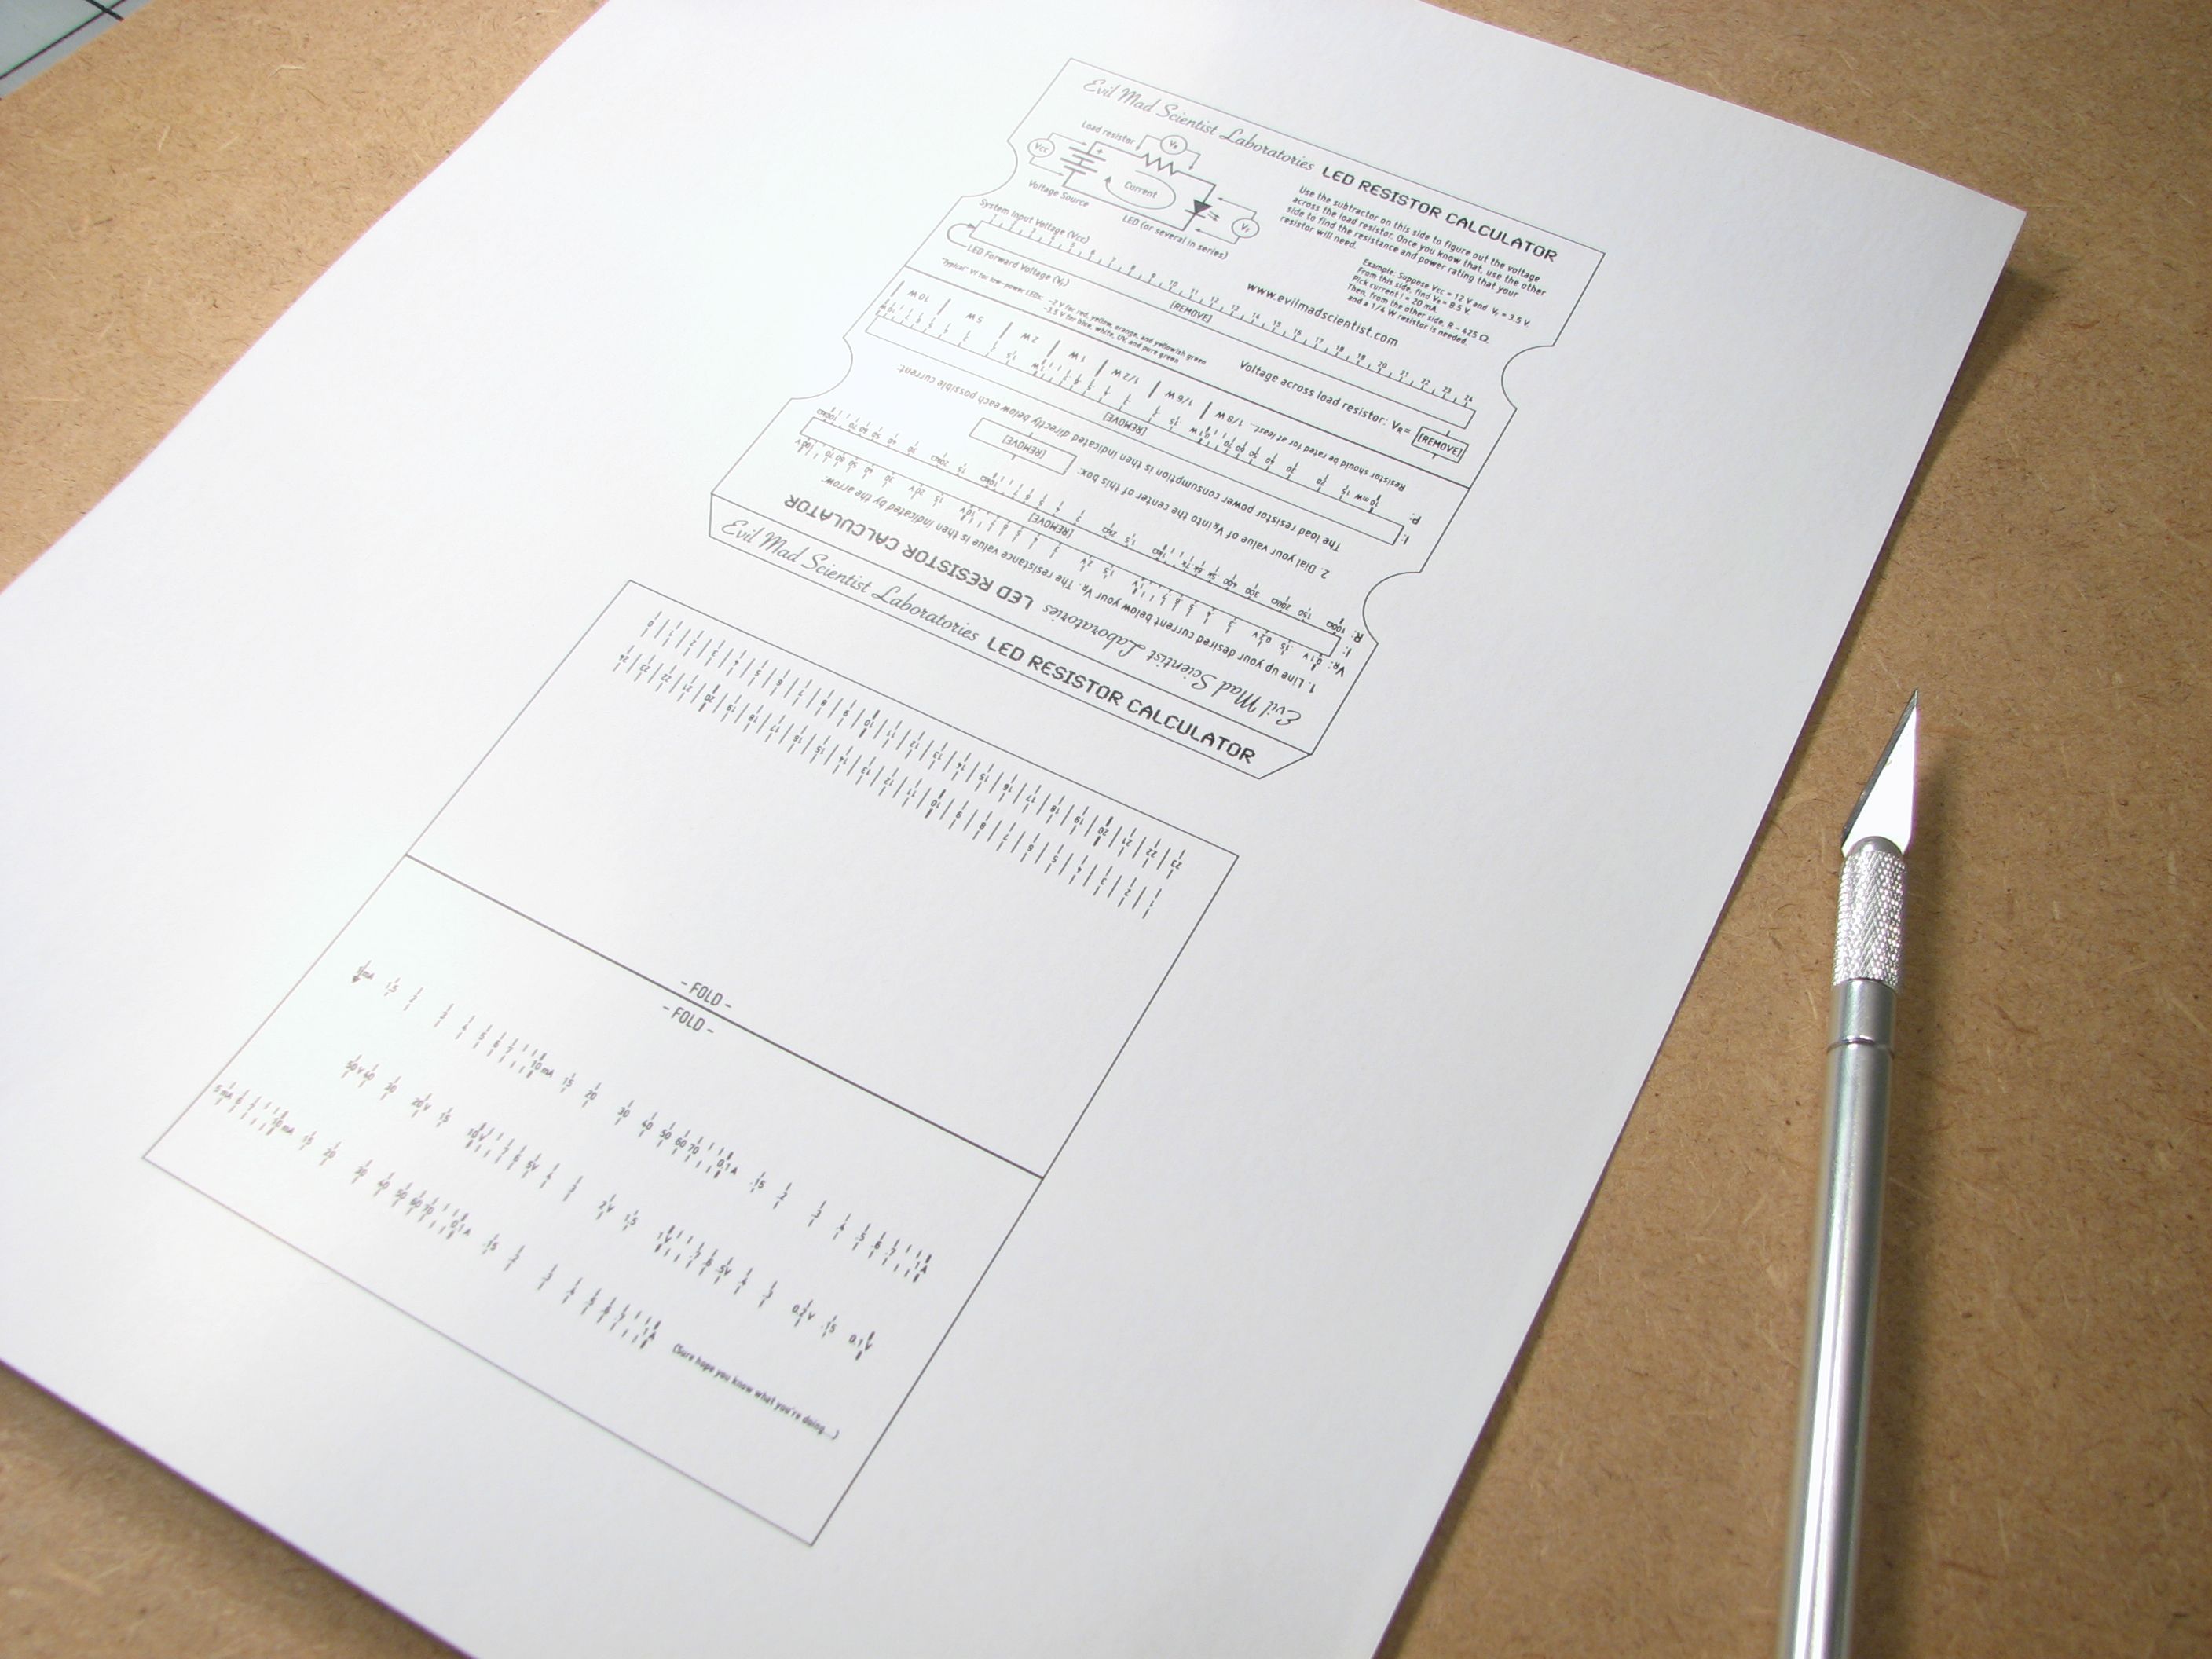
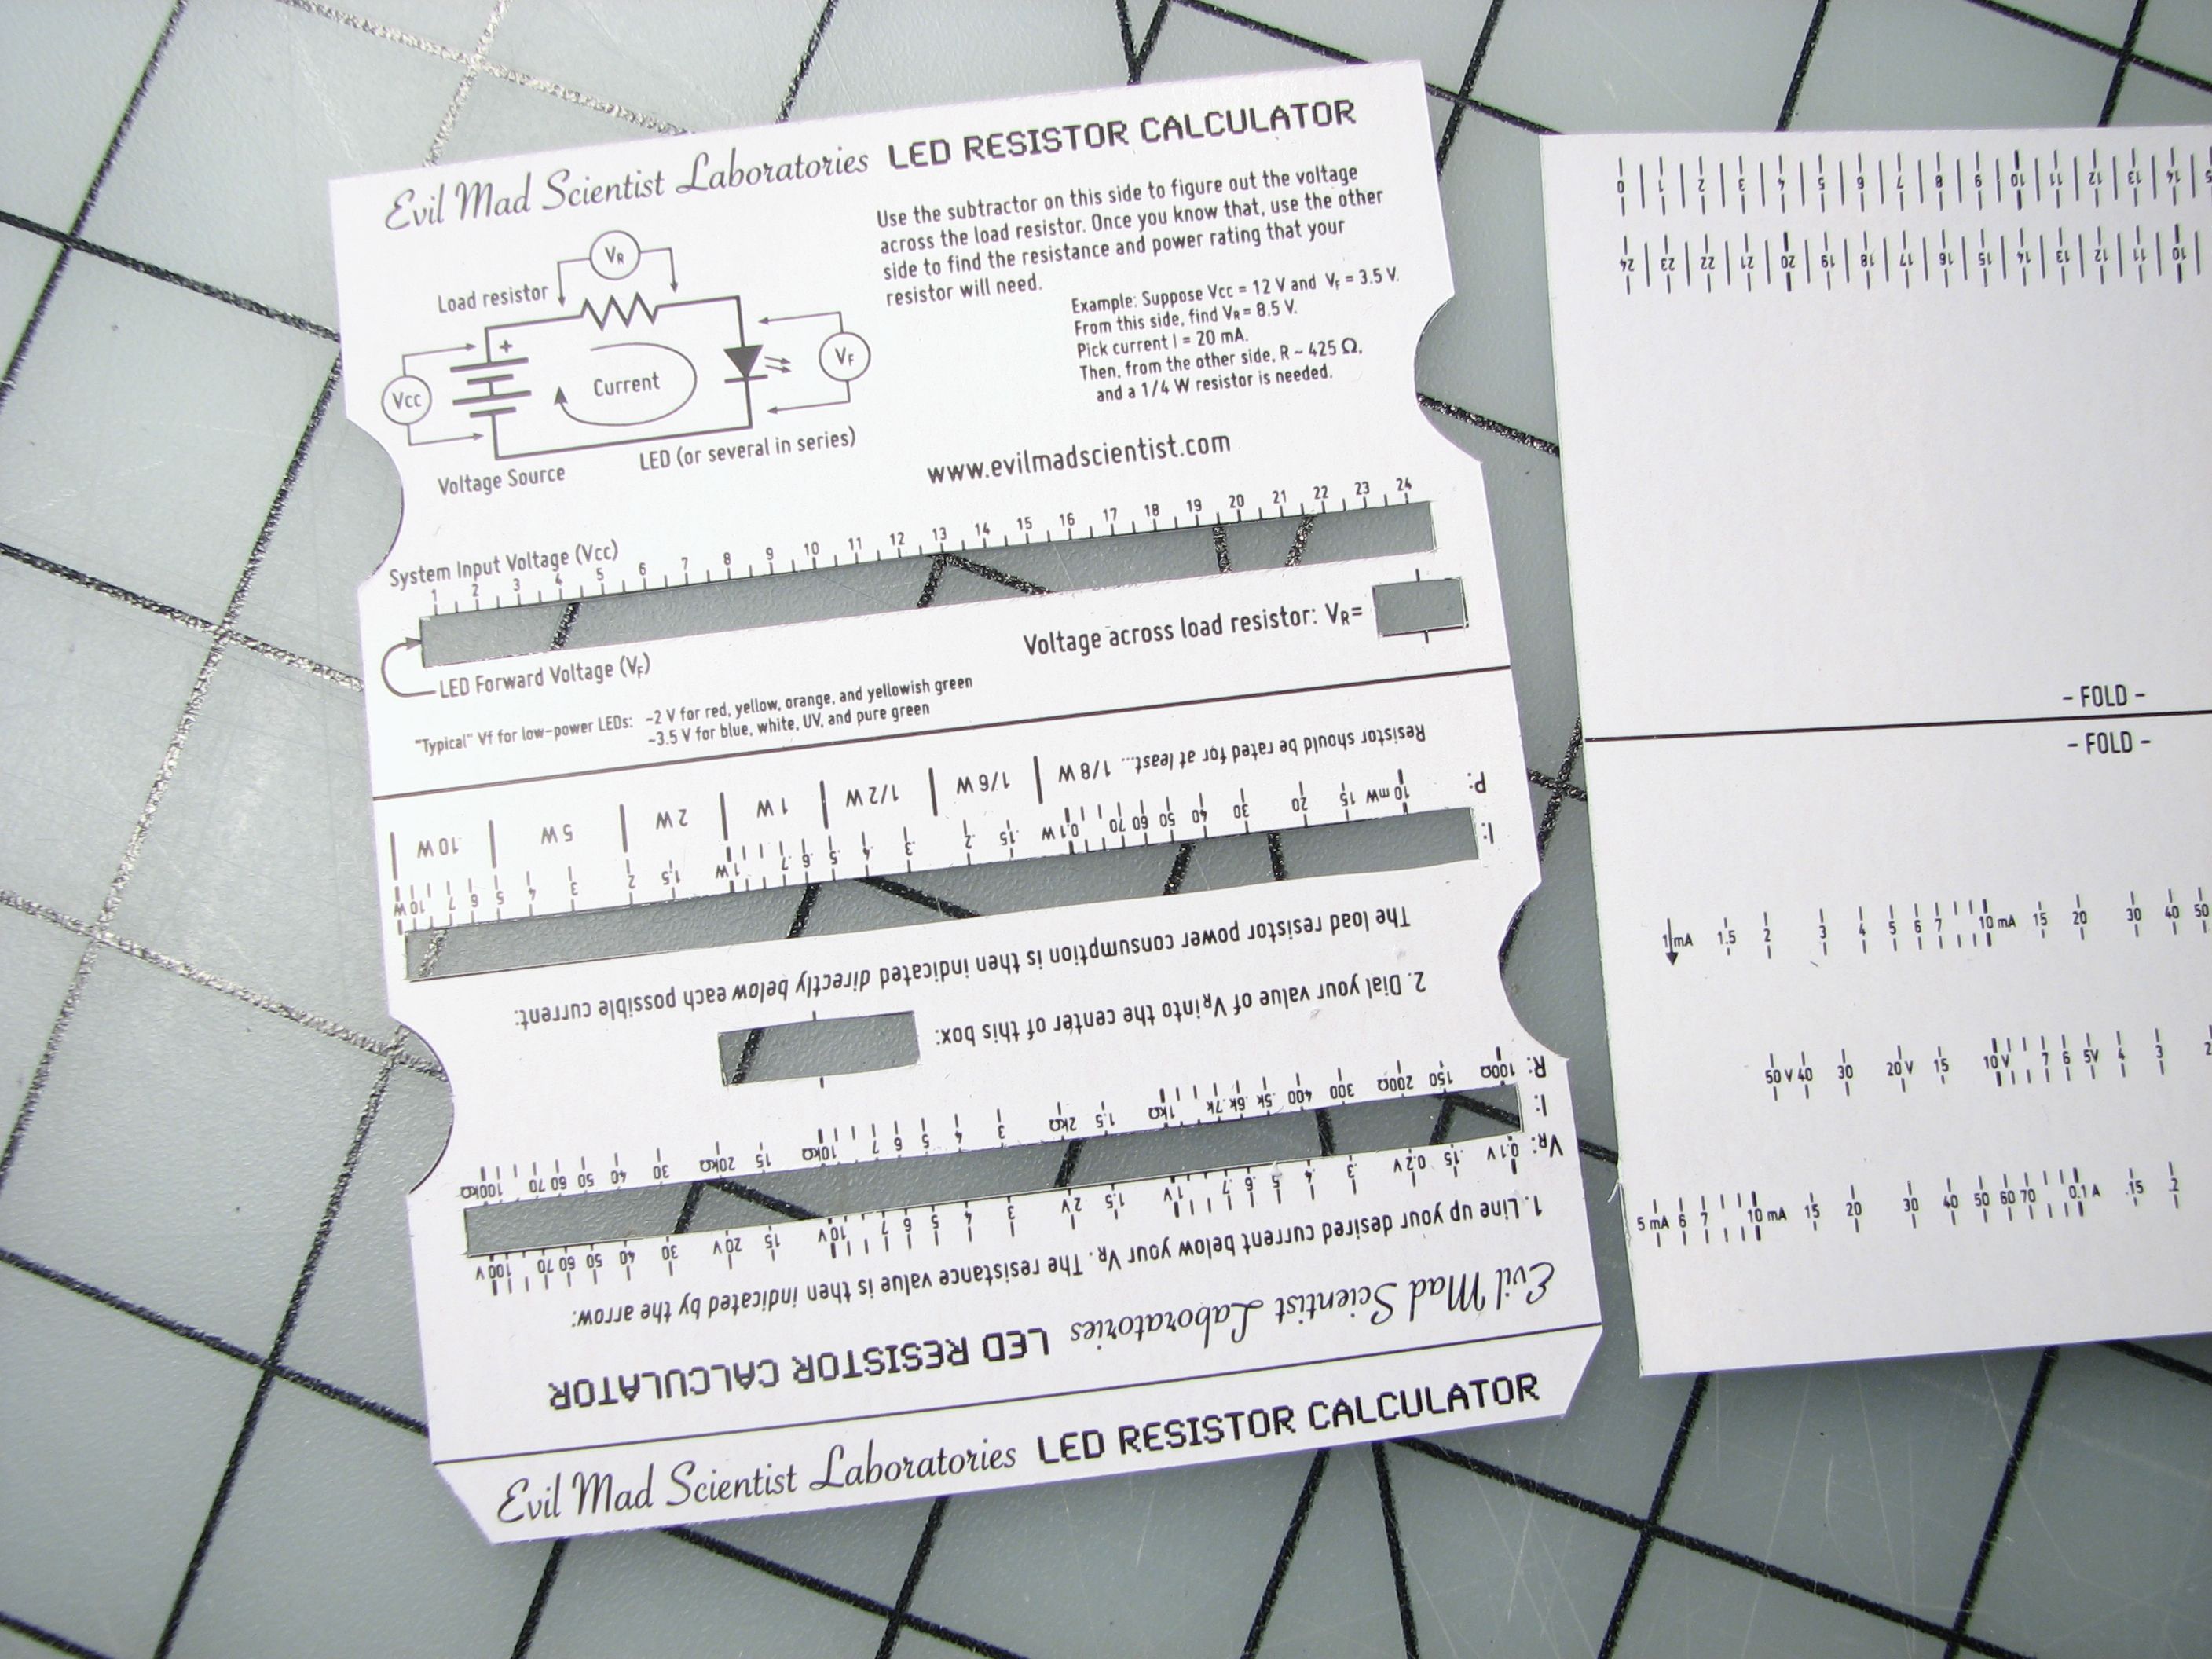
Begin by downloading the pattern here(512 kB PDF File). Print it in high quality mode on a laser printer, preferably on medium-weight “presentation” paper. For it to end up at the original size (that of a business card, 3.5 x 2″), you may need to disable automatic scaling on your printer.
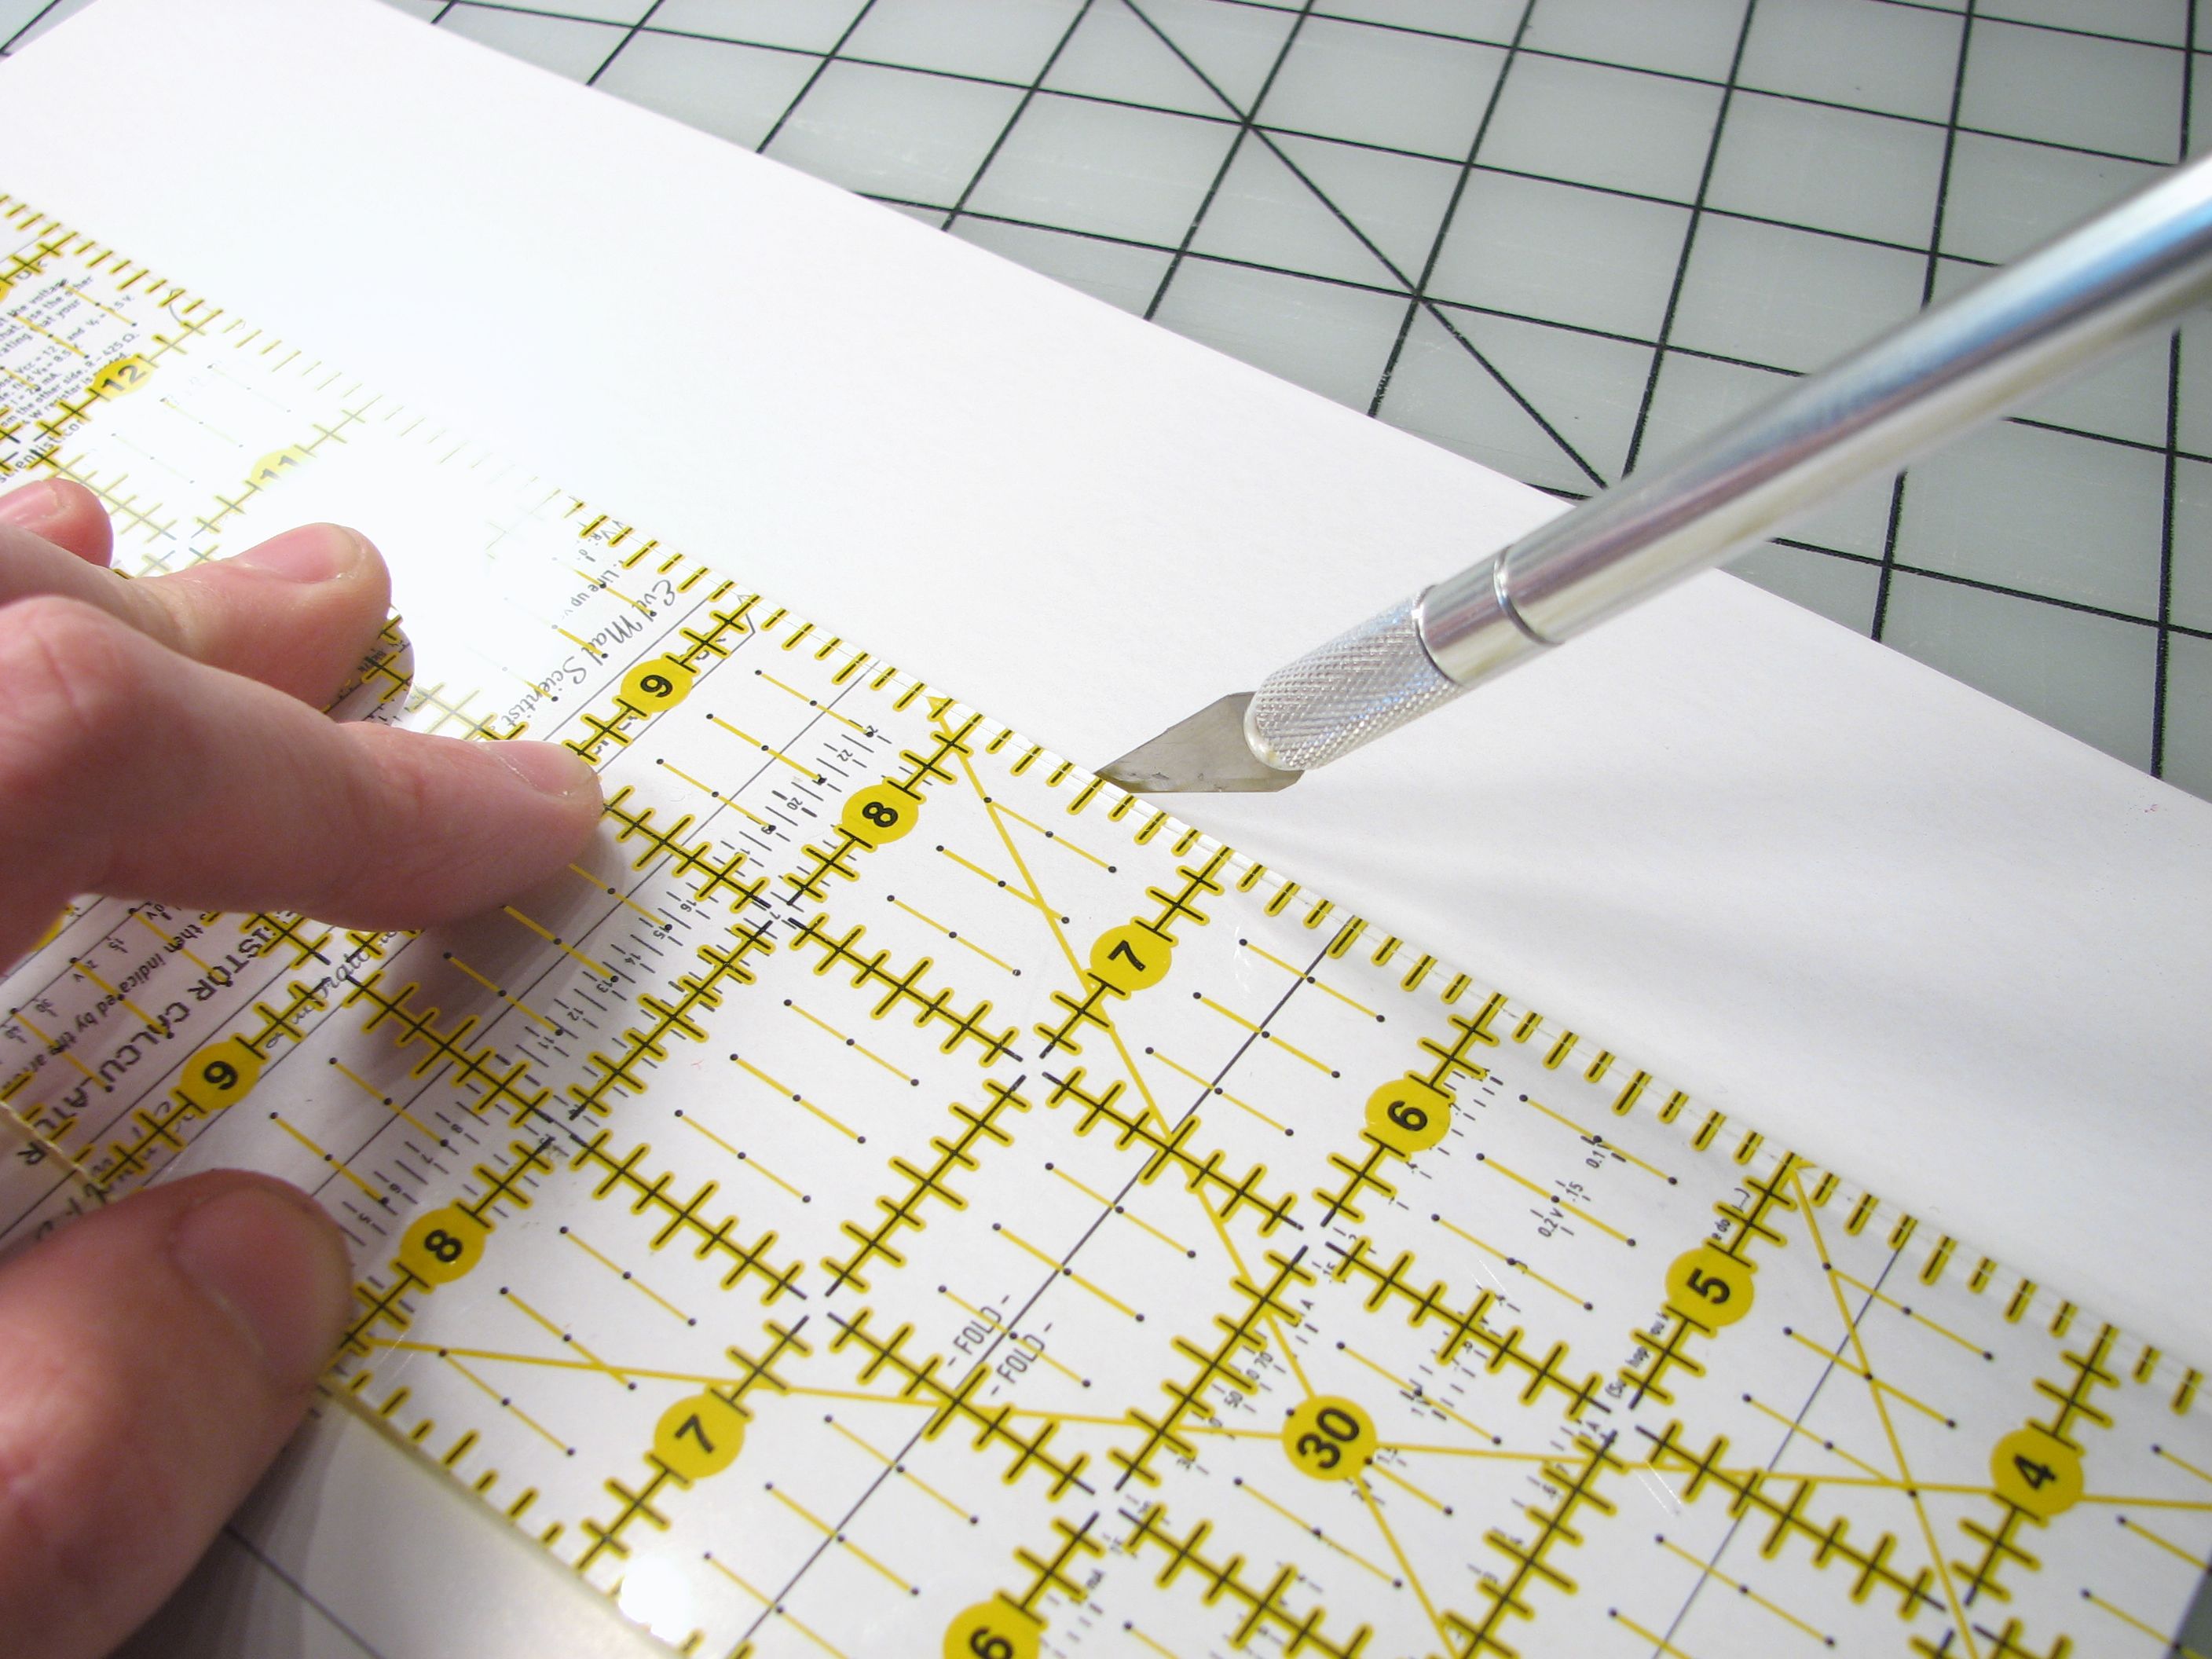
Next, cut out the pattern with scissors or a hobby knife, following the outline of both pieces. A straight edge may come in handy.
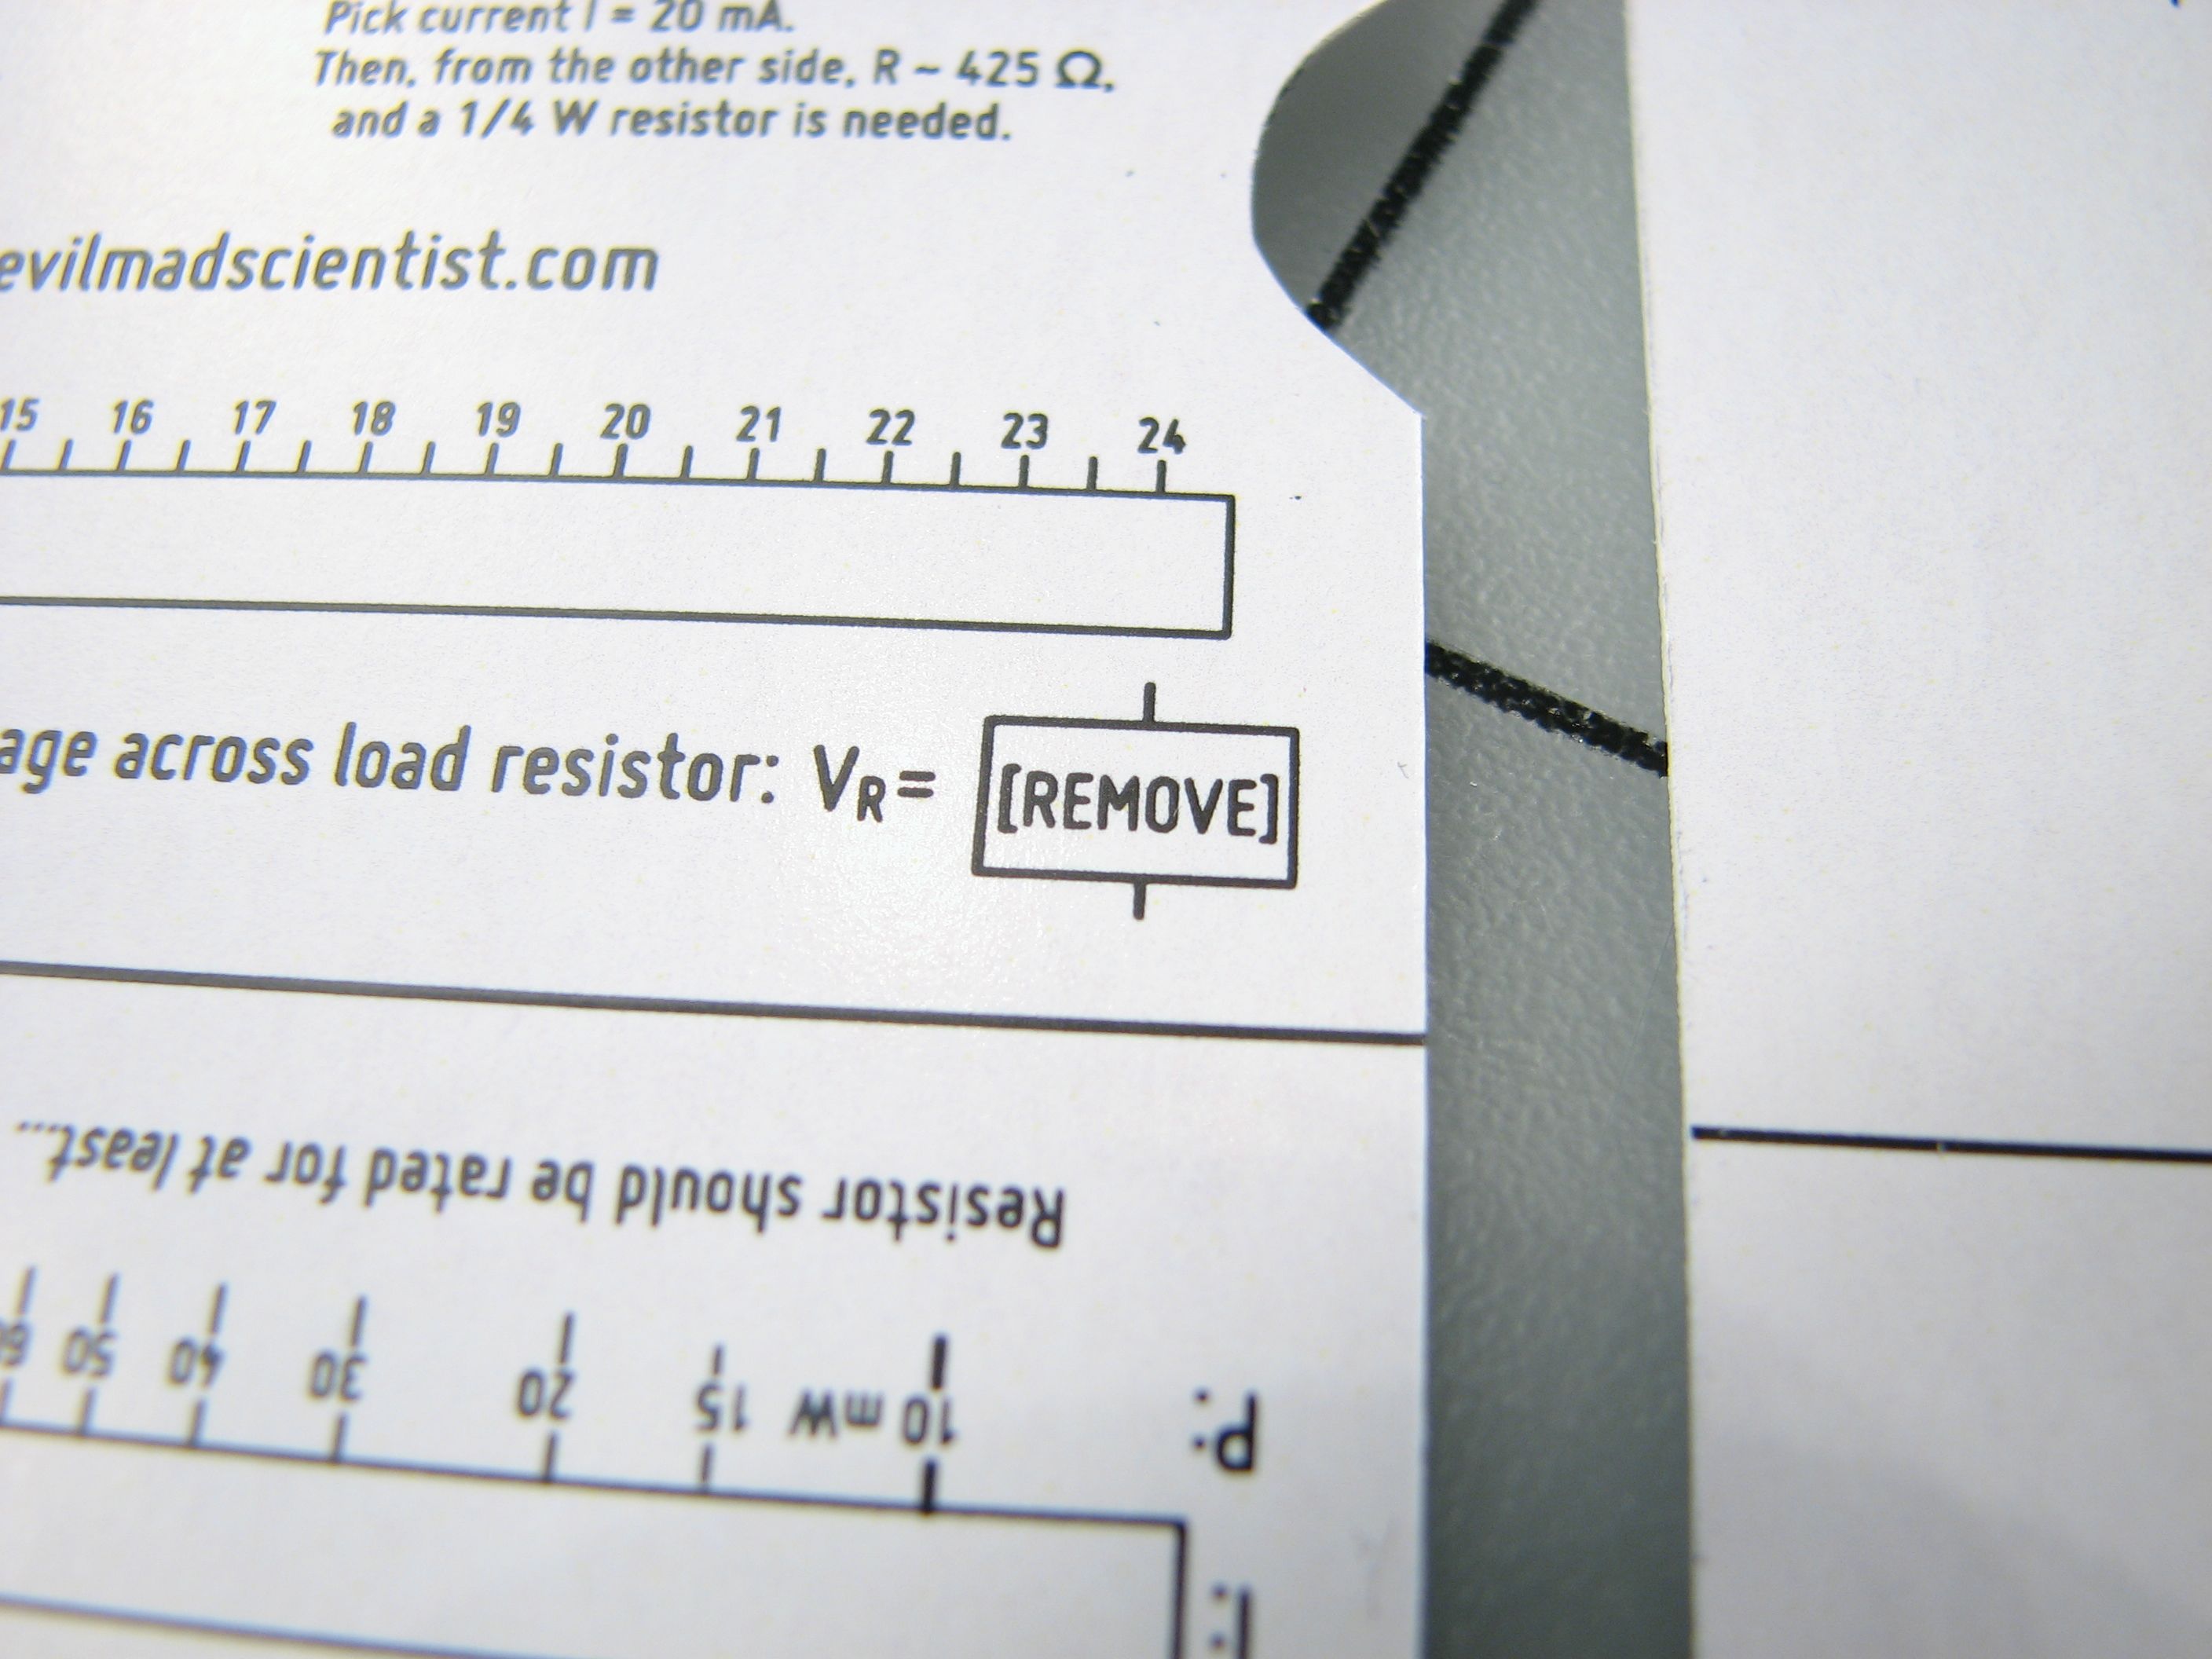
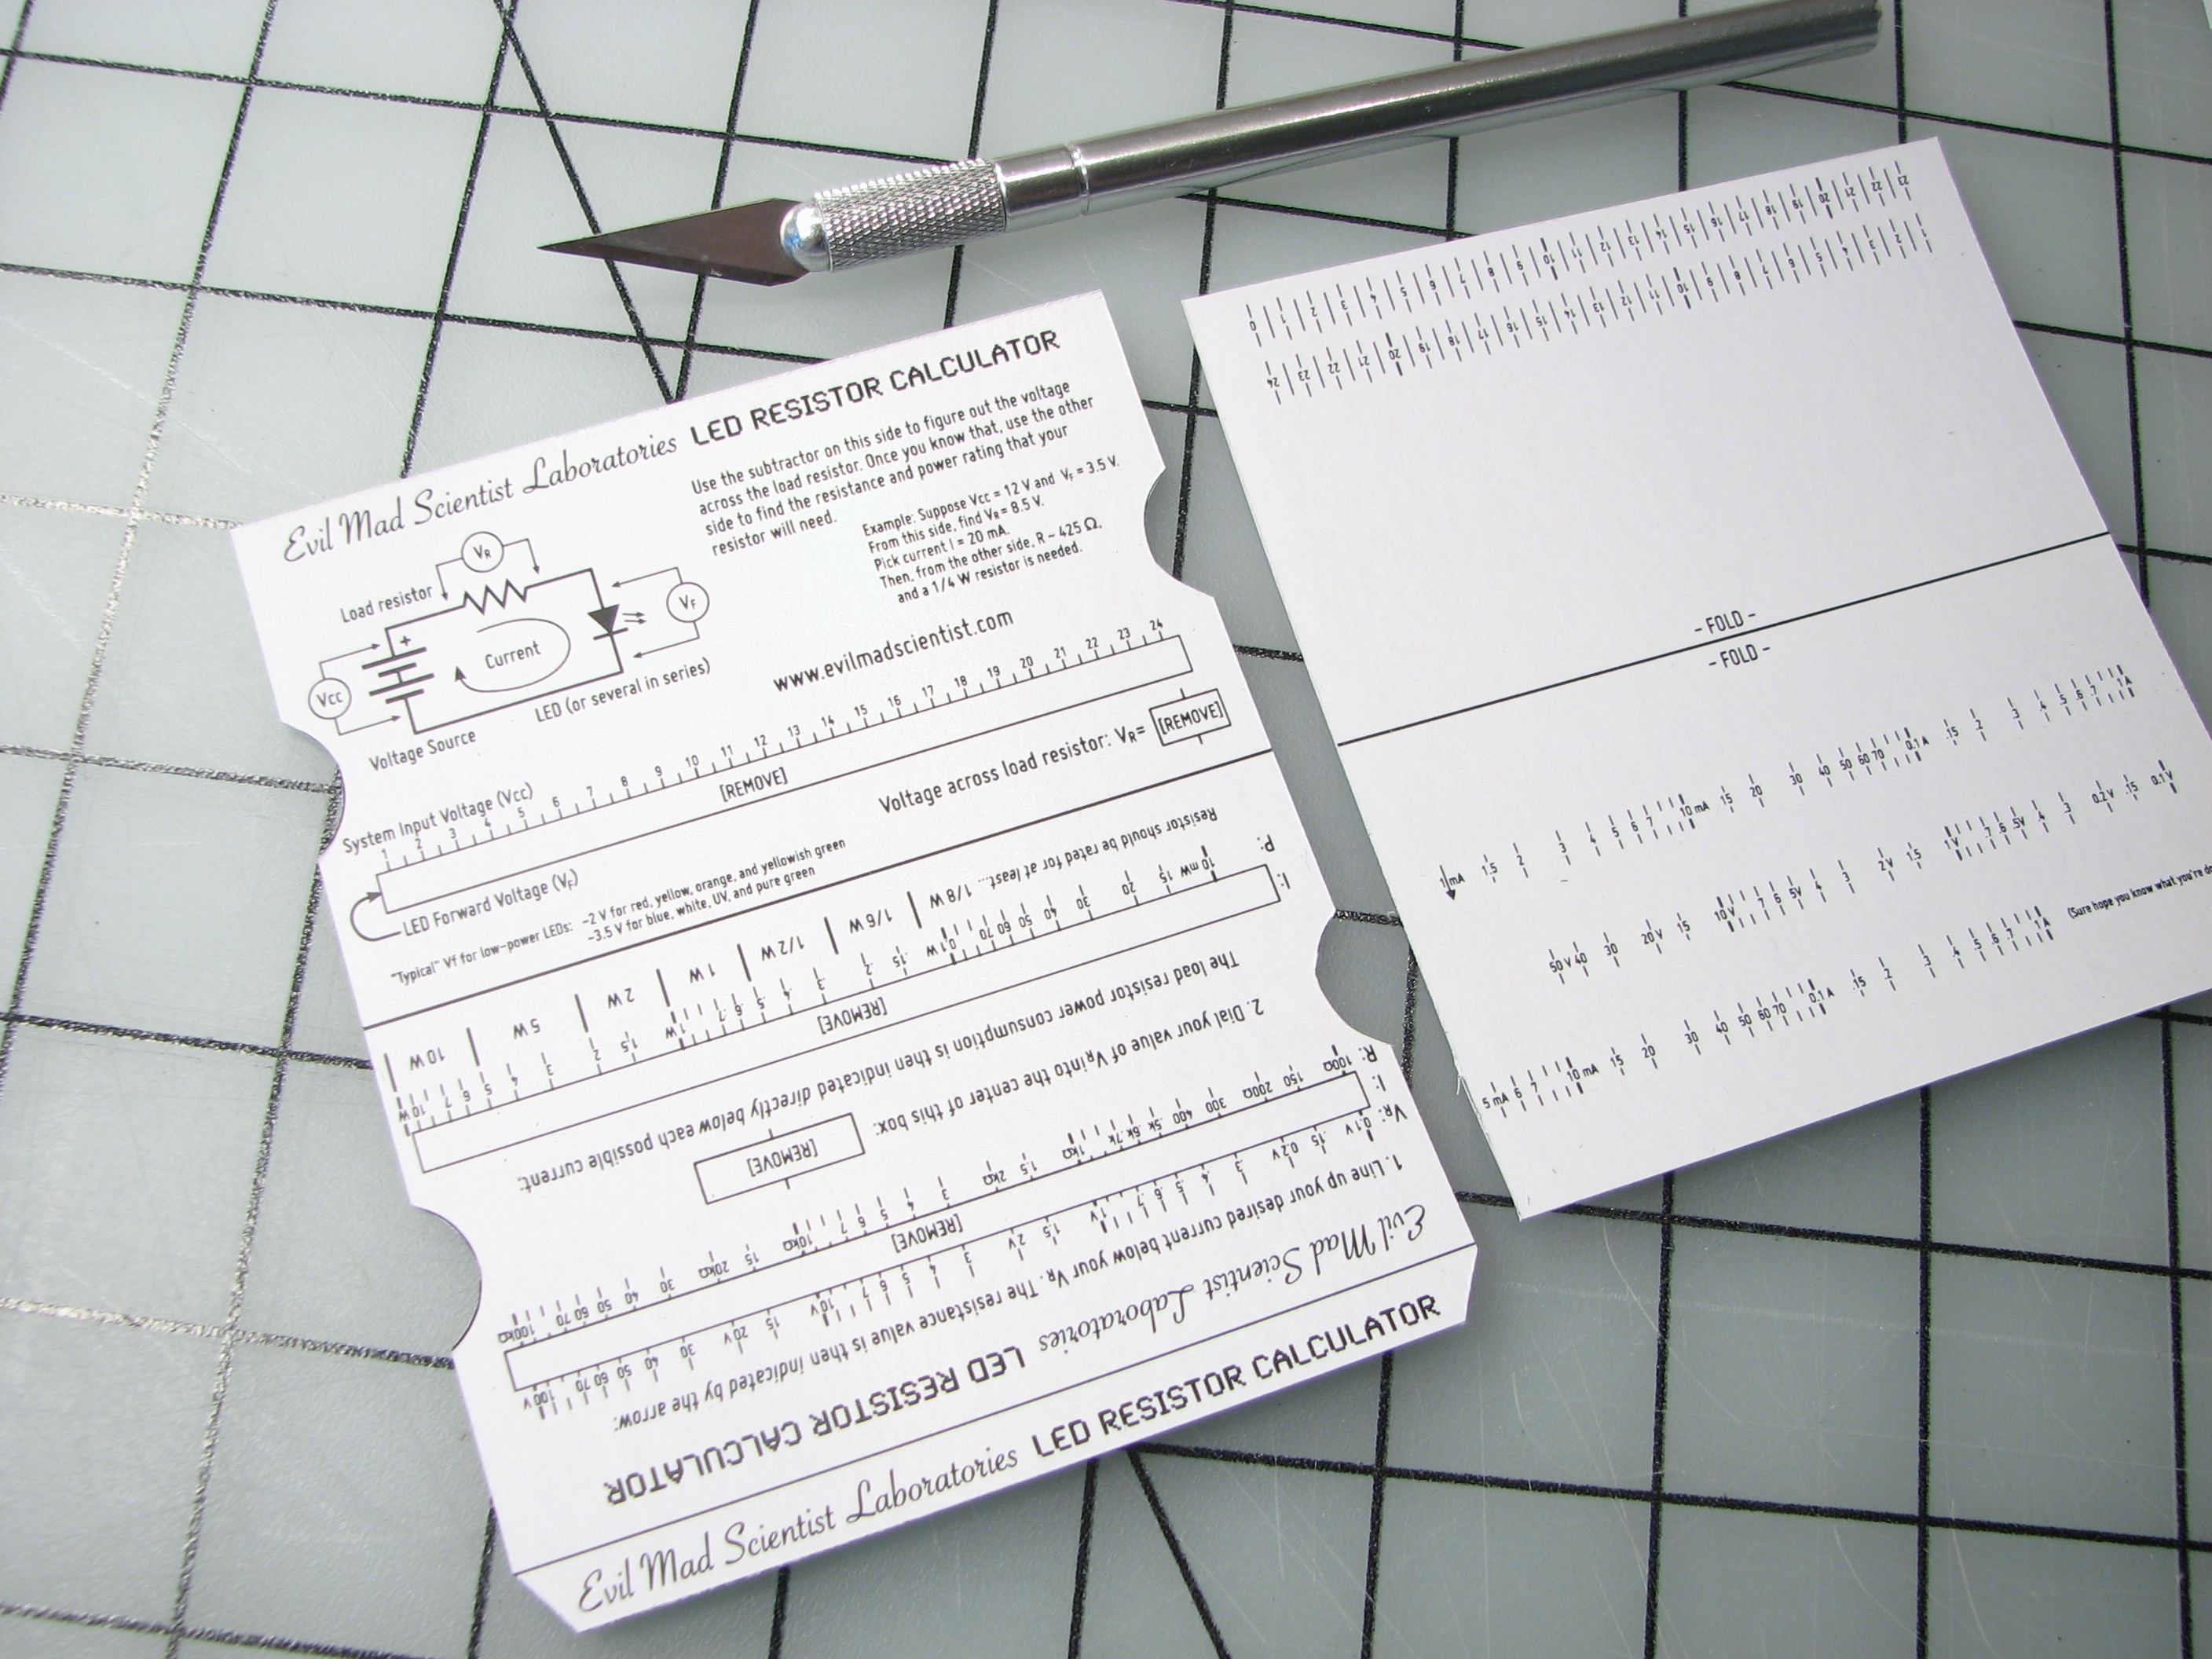
There are also five boxes on the larger piece labeled “[REMOVE]” that should be, well, removed.
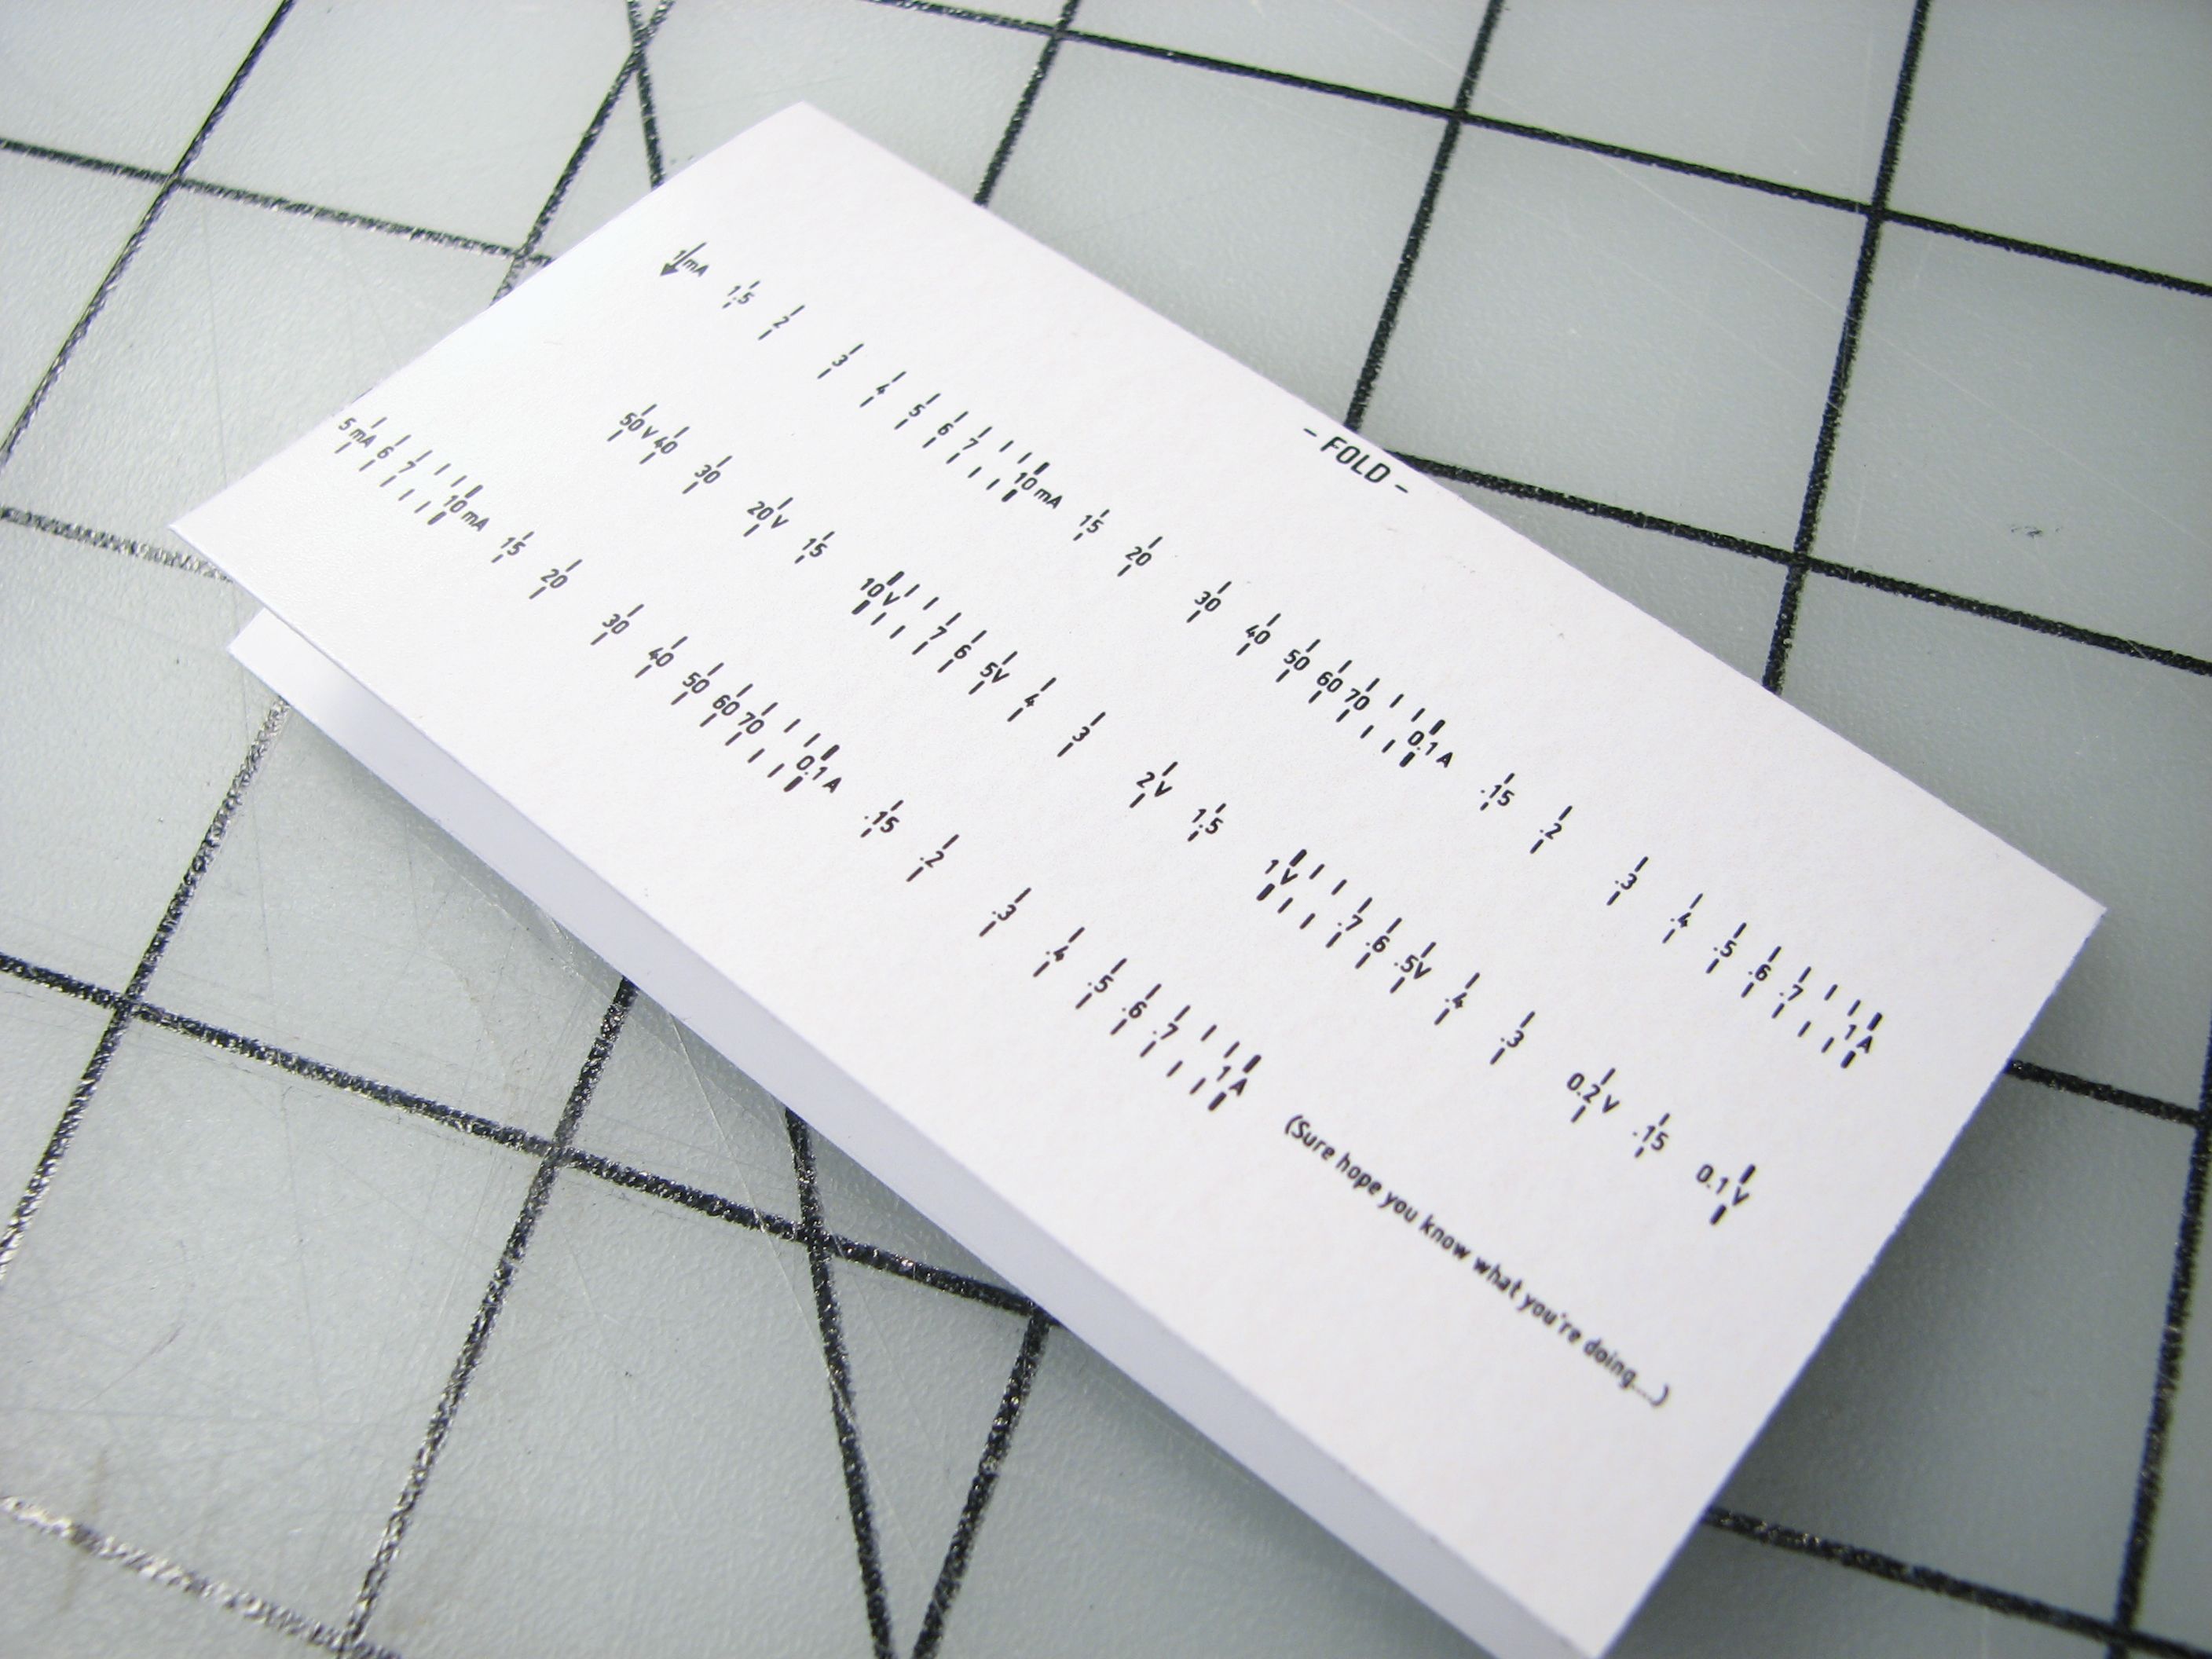
There are two crease lines on the large piece (the housing), and one on the smaller piece (the slider). Use a straight edge to assist with starting the folds. Firmly crease the fold on the slider, but leave the housing folds flexible for the moment.
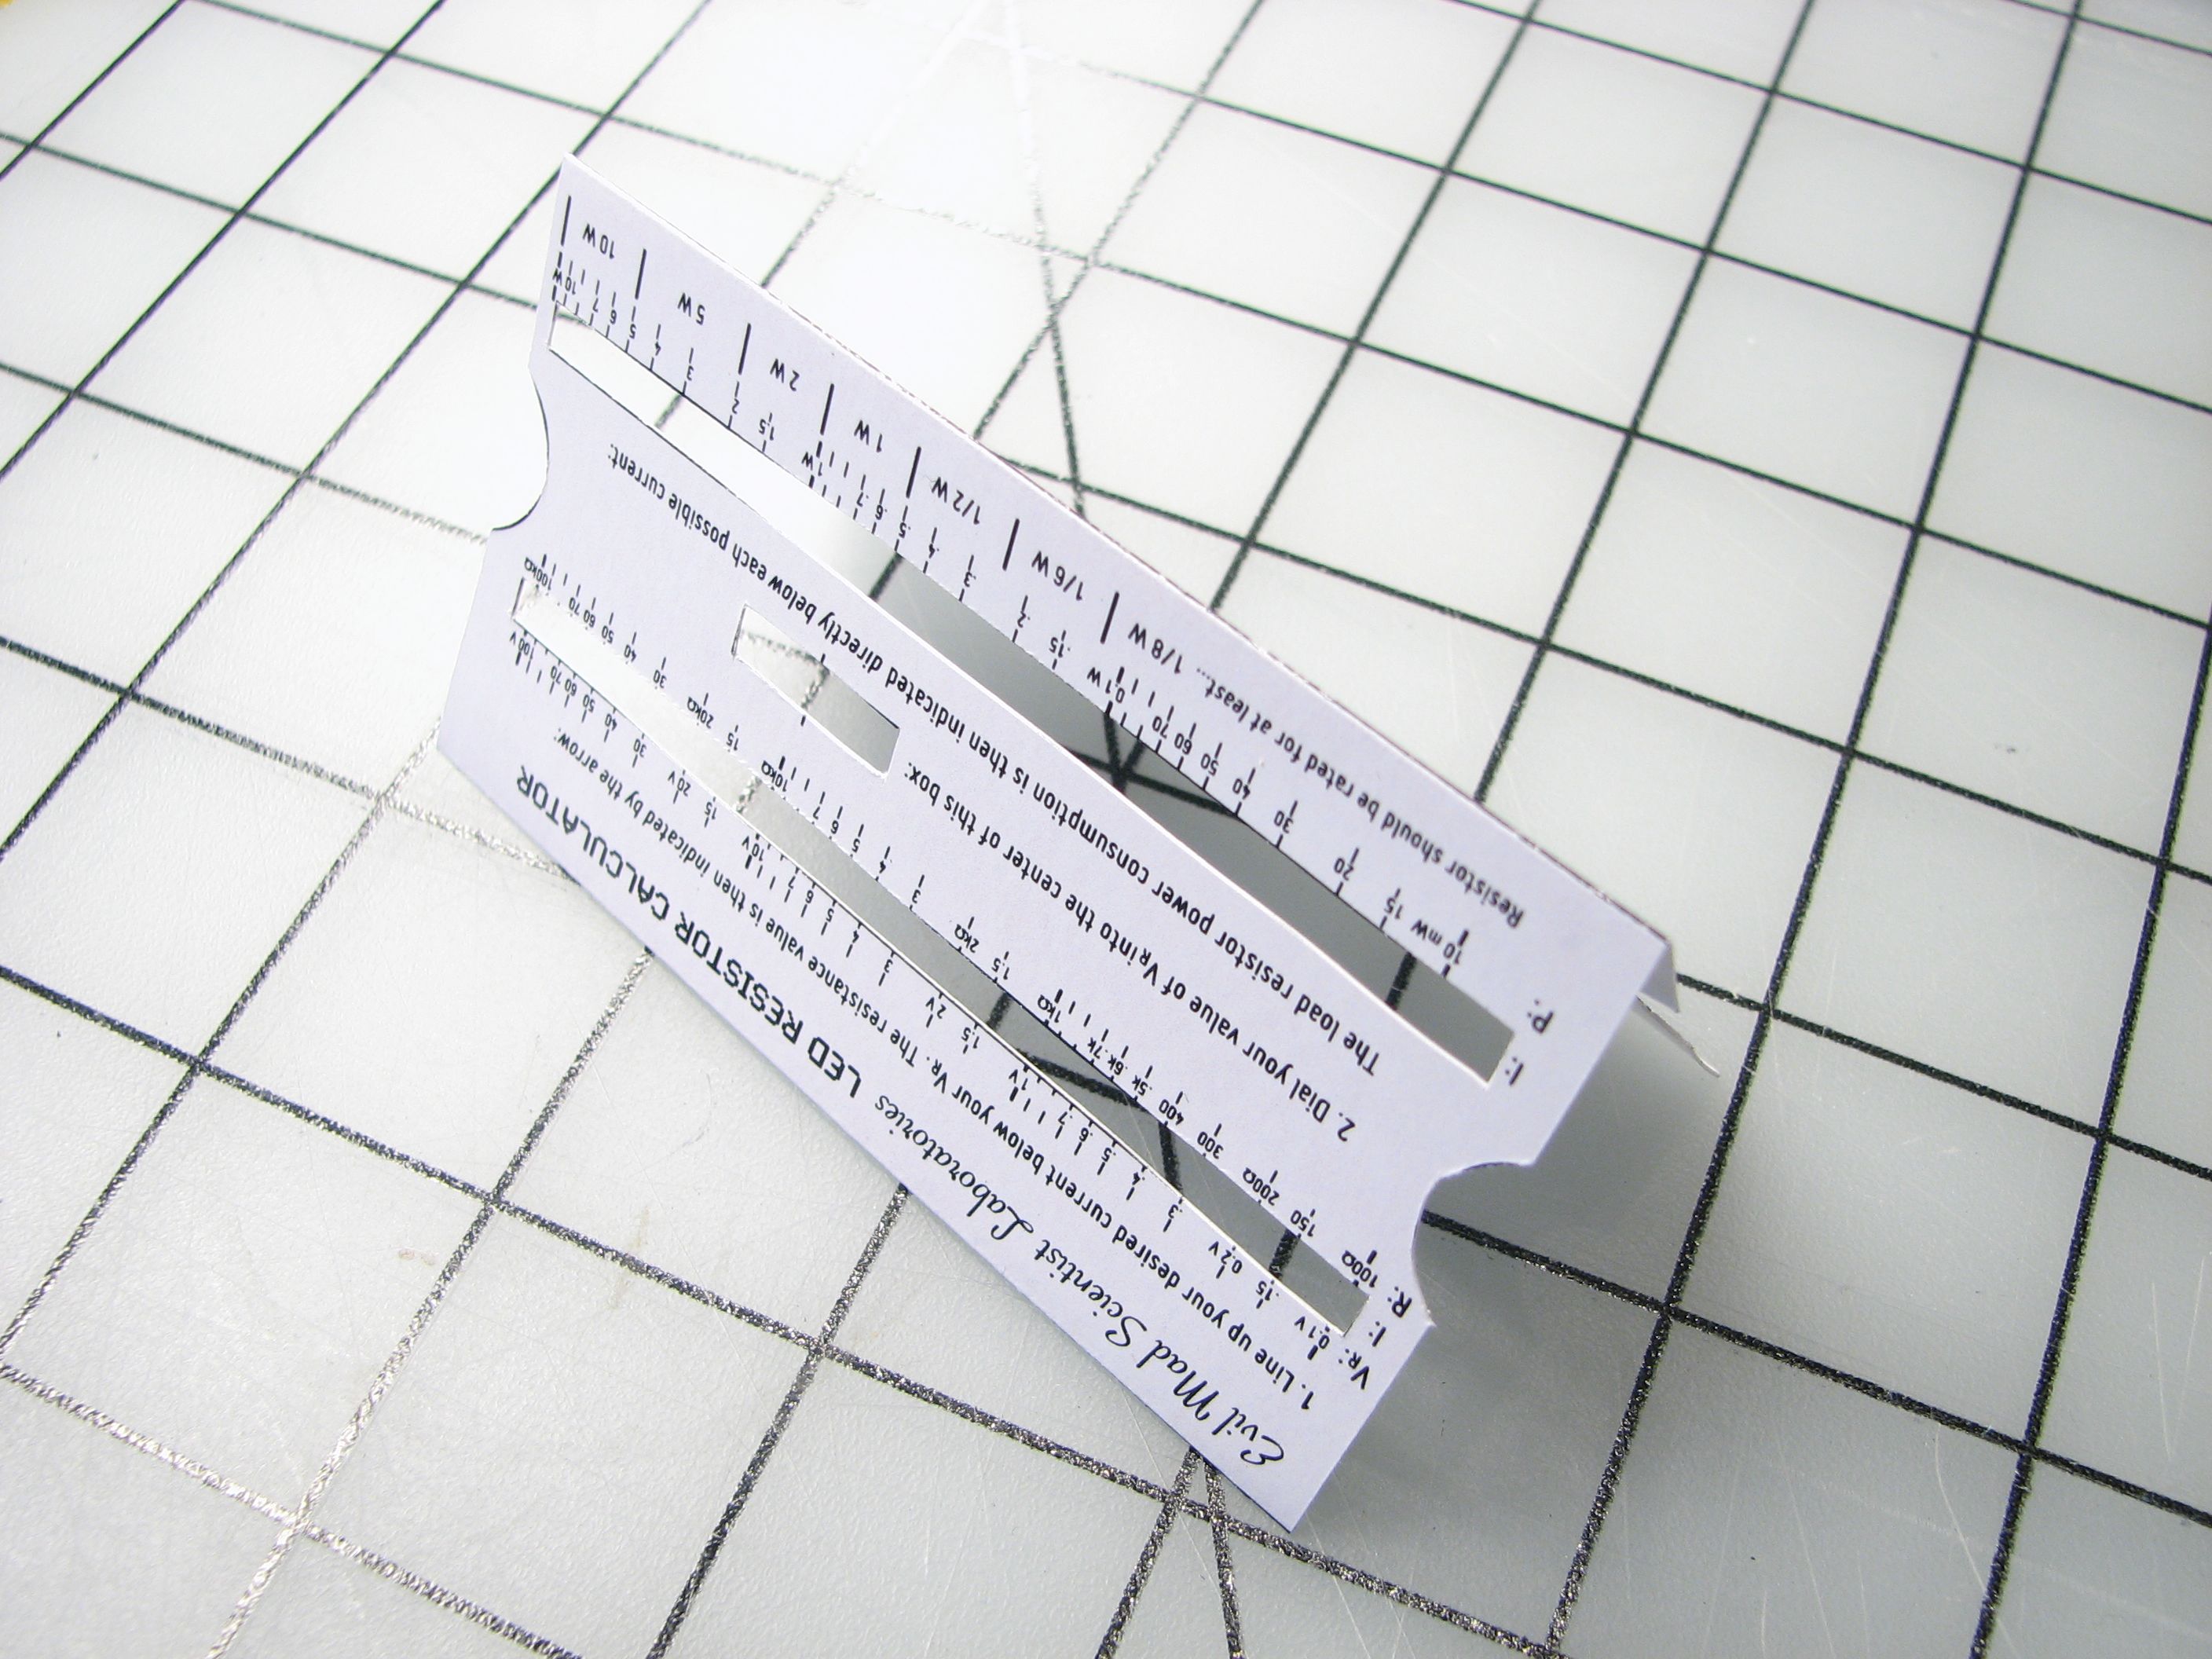
The housing piece has a fold-over flap at the top, as shown here. Insert the slider into the housing, fold the flap over, and then firmly crease both folds of the housing. The flap can be held down by a single piece of tape (or glue if you’re ambitious).
How to use it
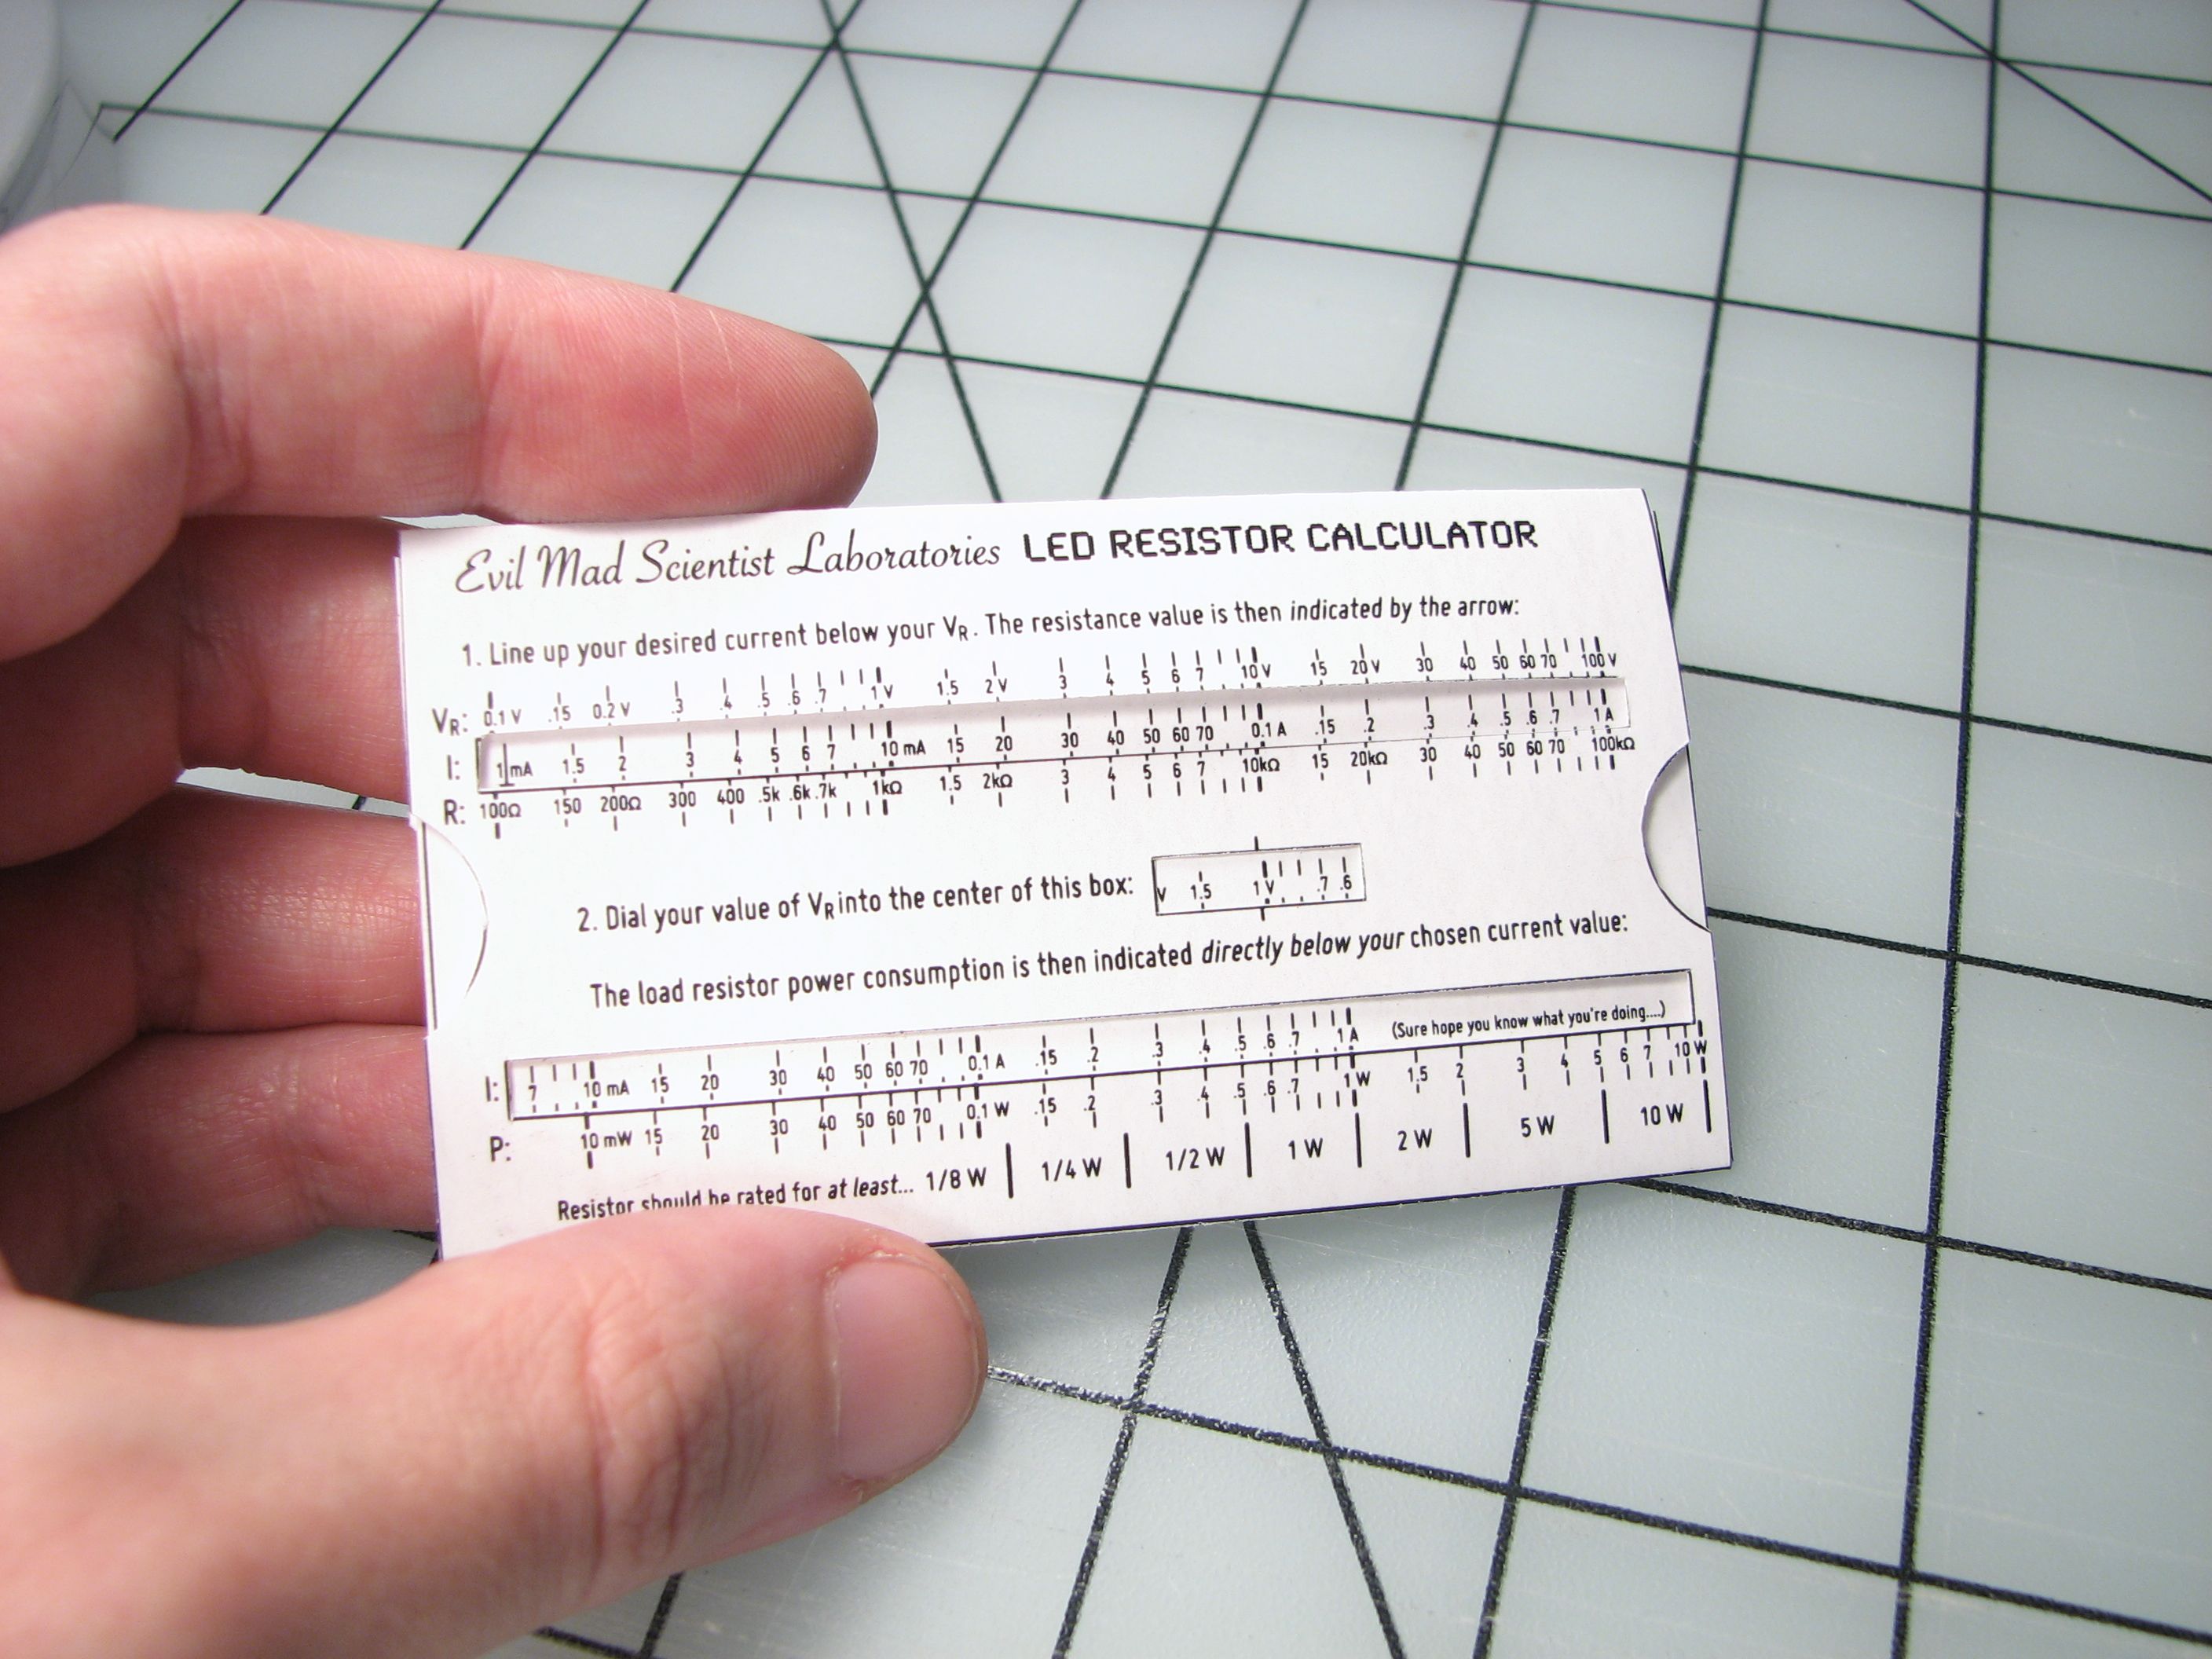
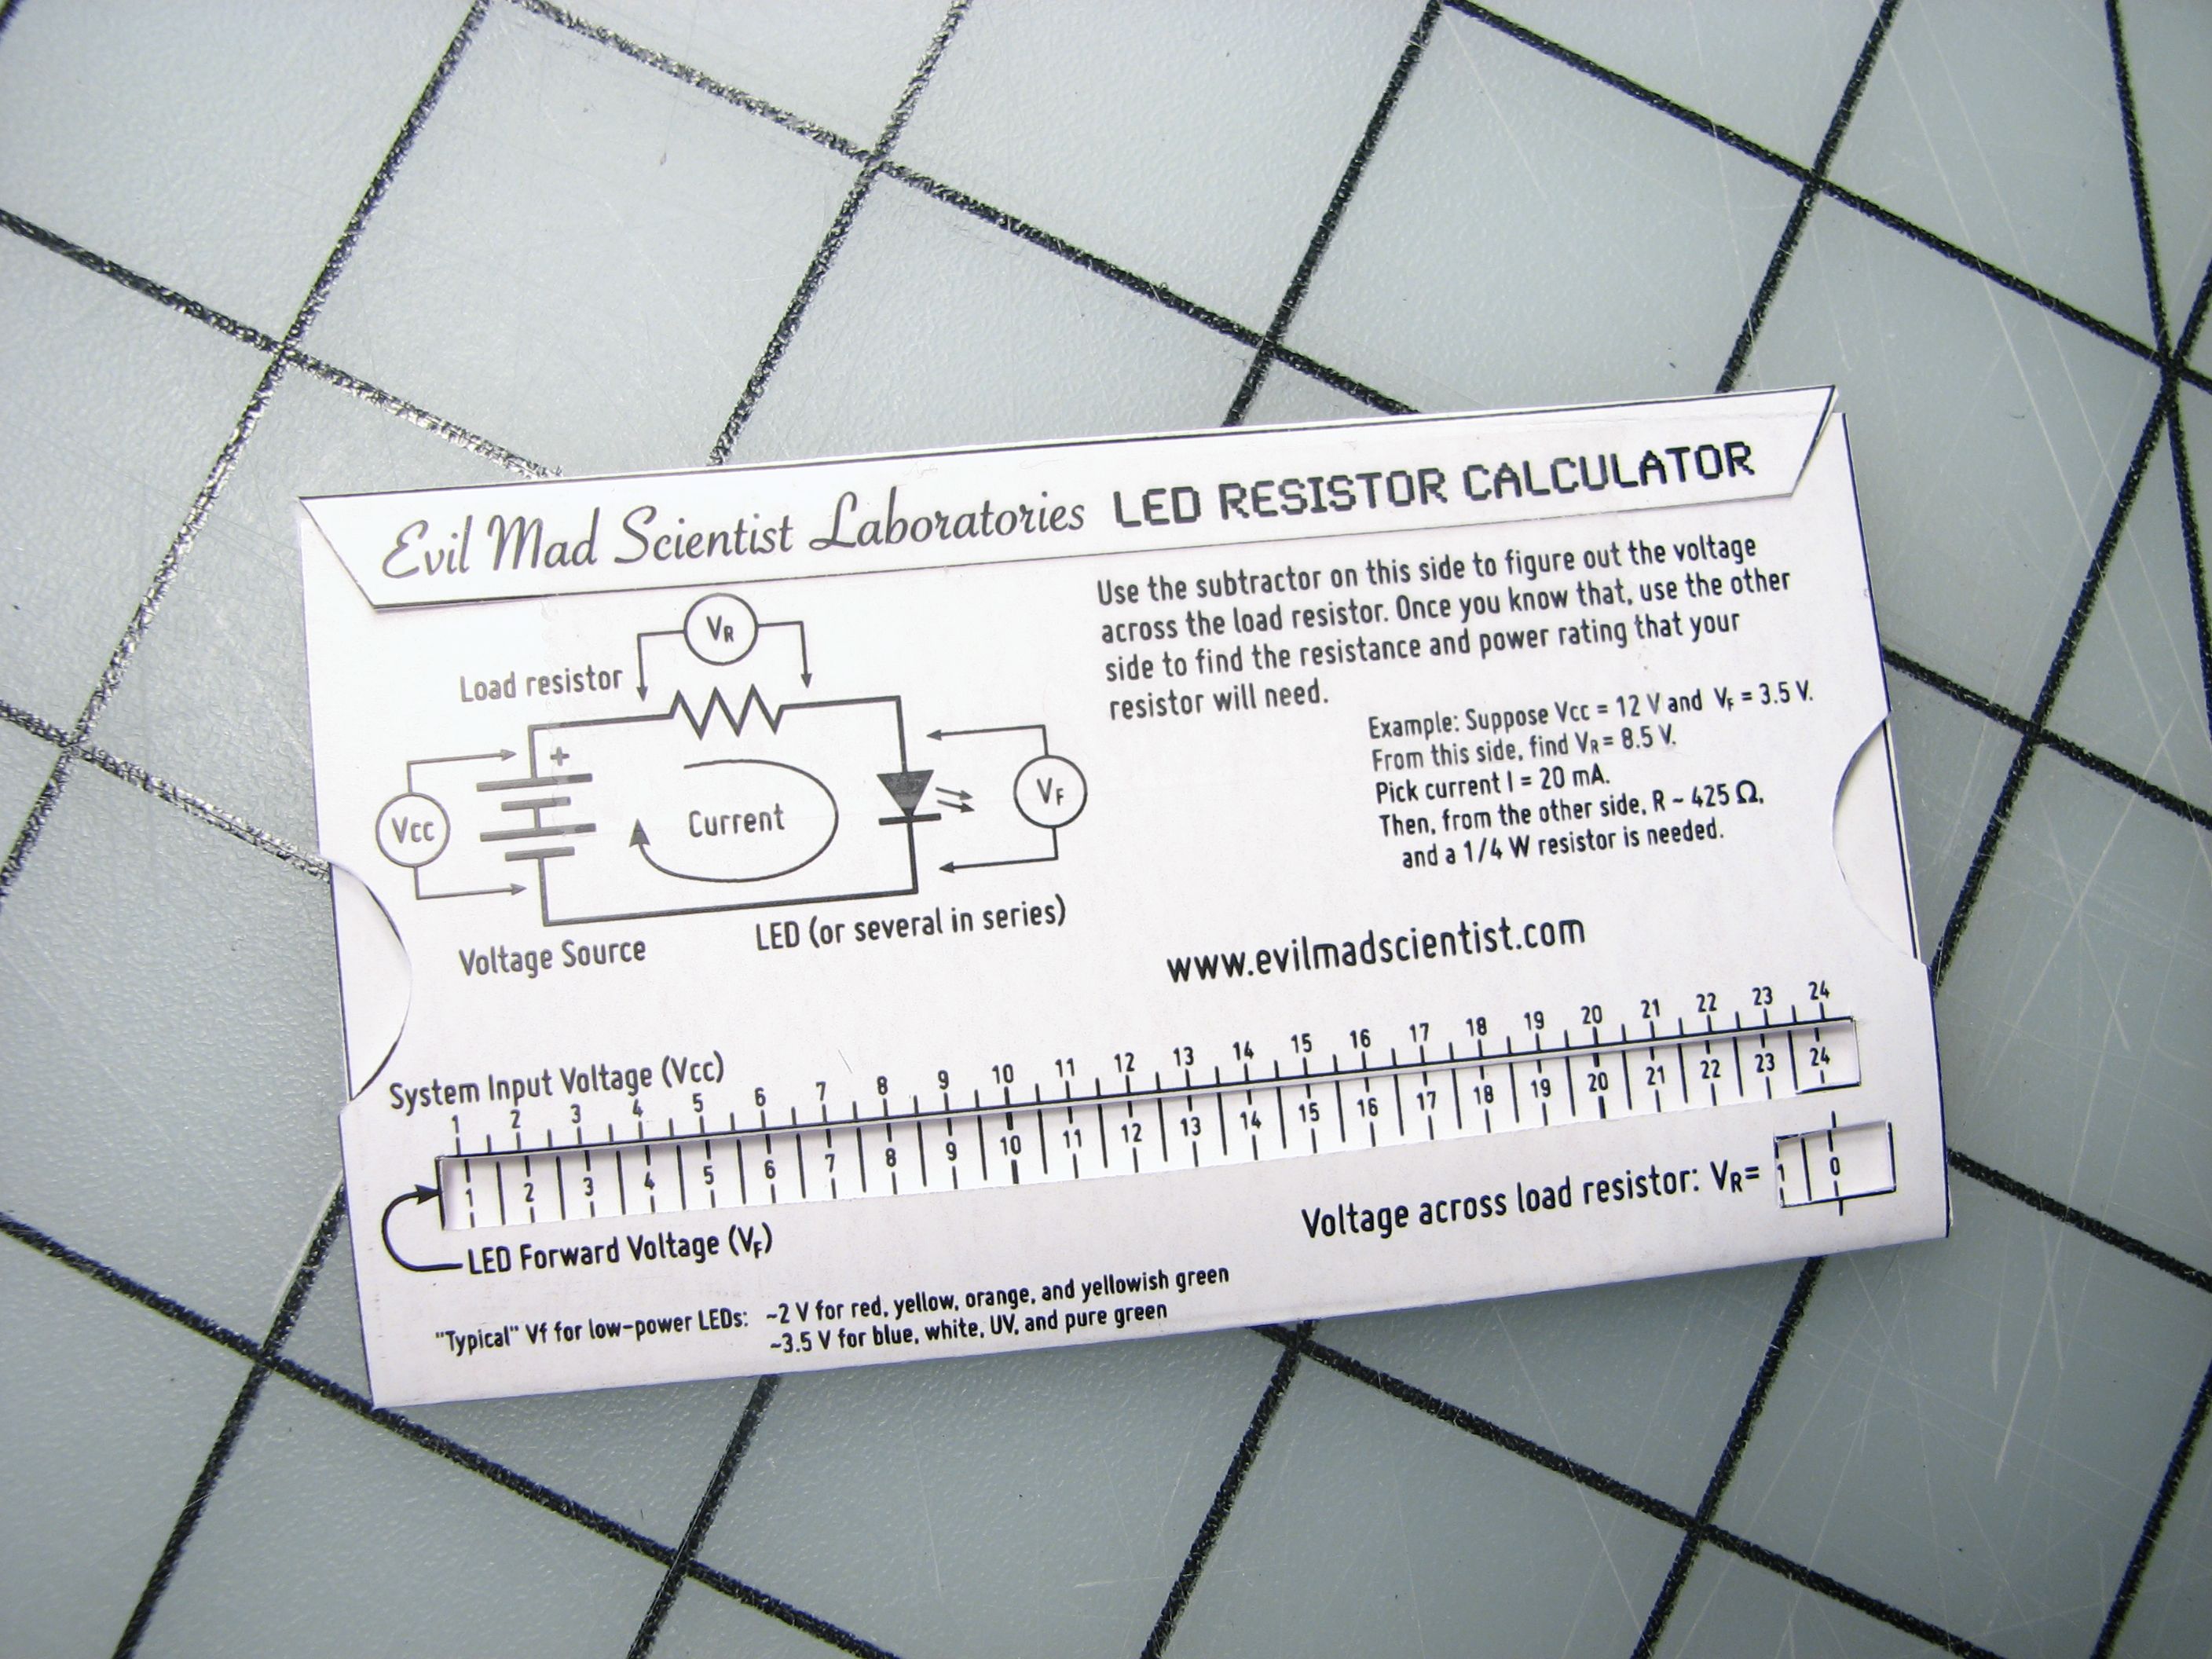
Now that construction is complete, let’s walk through how to use it. Our model circuit is shown in the circuit diagram on the calculator:
We assume that the system voltage (Vcc) is known. We further assume that you know the characteristics of the LED: what current you want to operate at, and the forward voltage (Vf) of the LED when operated at that current. Once you have those numbers, the calculator can help you figure out what value and size resistor are needed.
Let’s work through a full example. Suppose that we want to run a red LED from a 9 V battery. Then Vcc = 9 V, and our red LED wants to run at 20 mA, and has forward voltage Vf = 2 V. Given that, let’s figure out what resistor should be chosen.
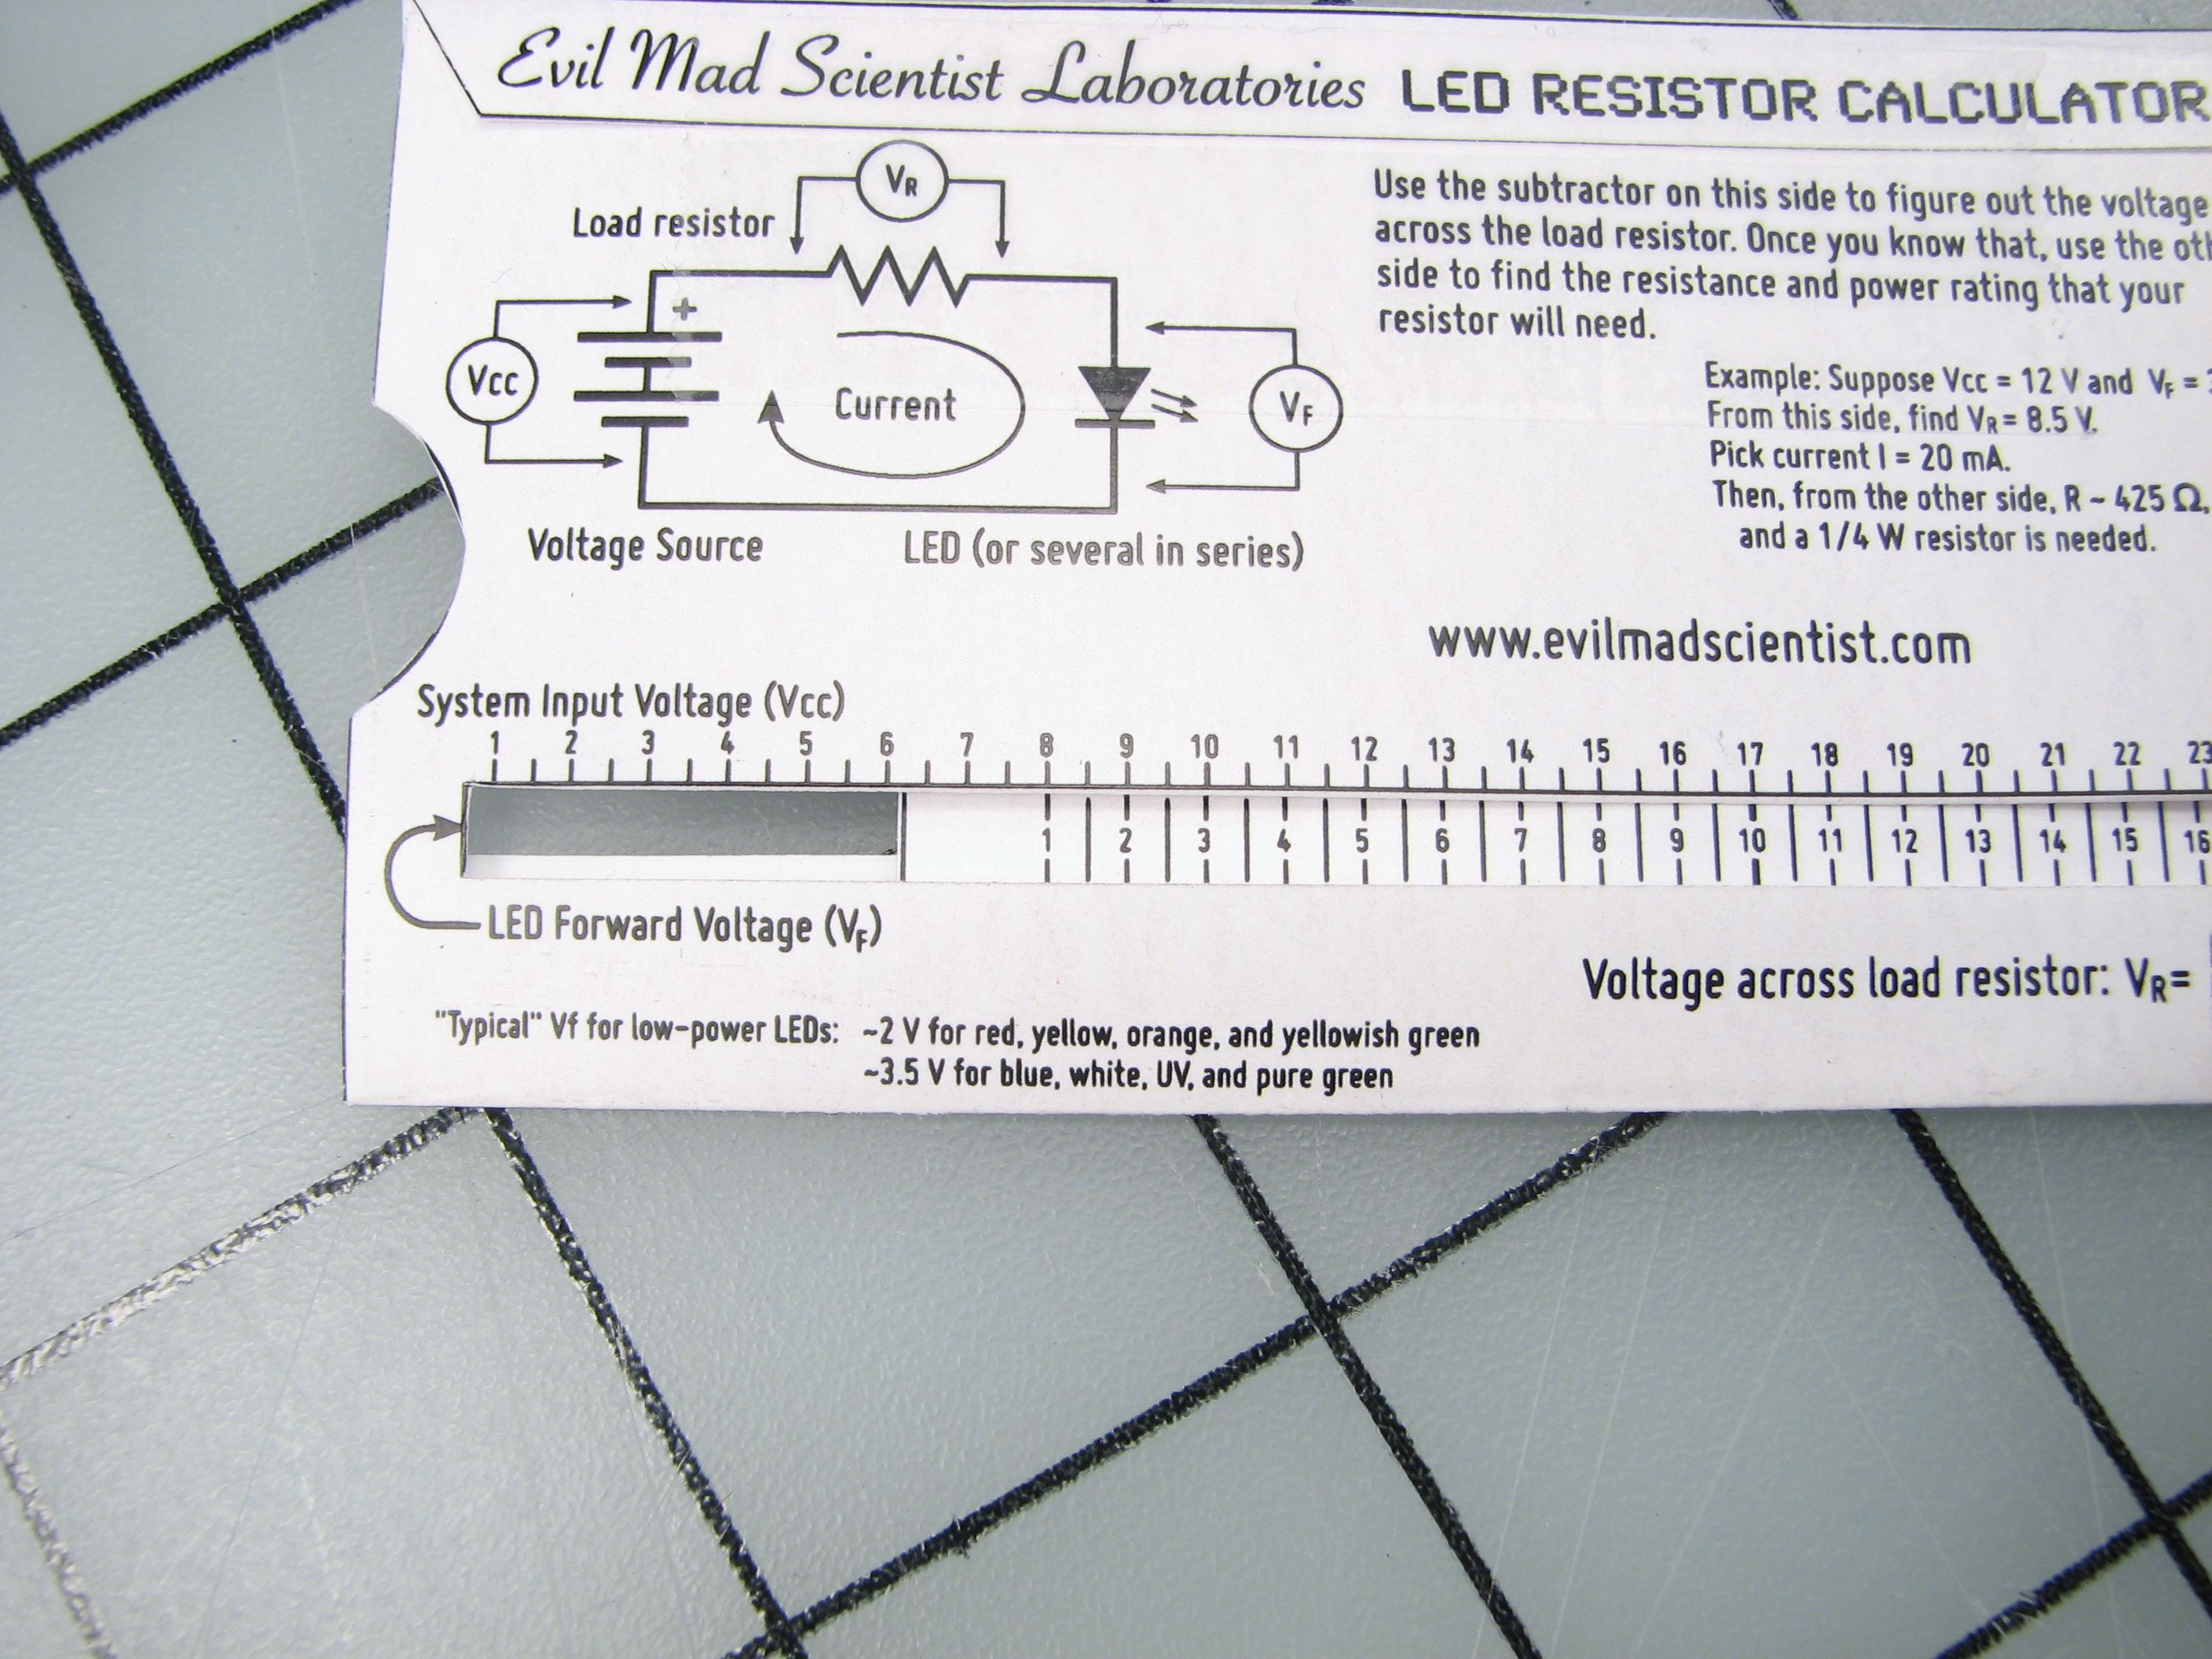
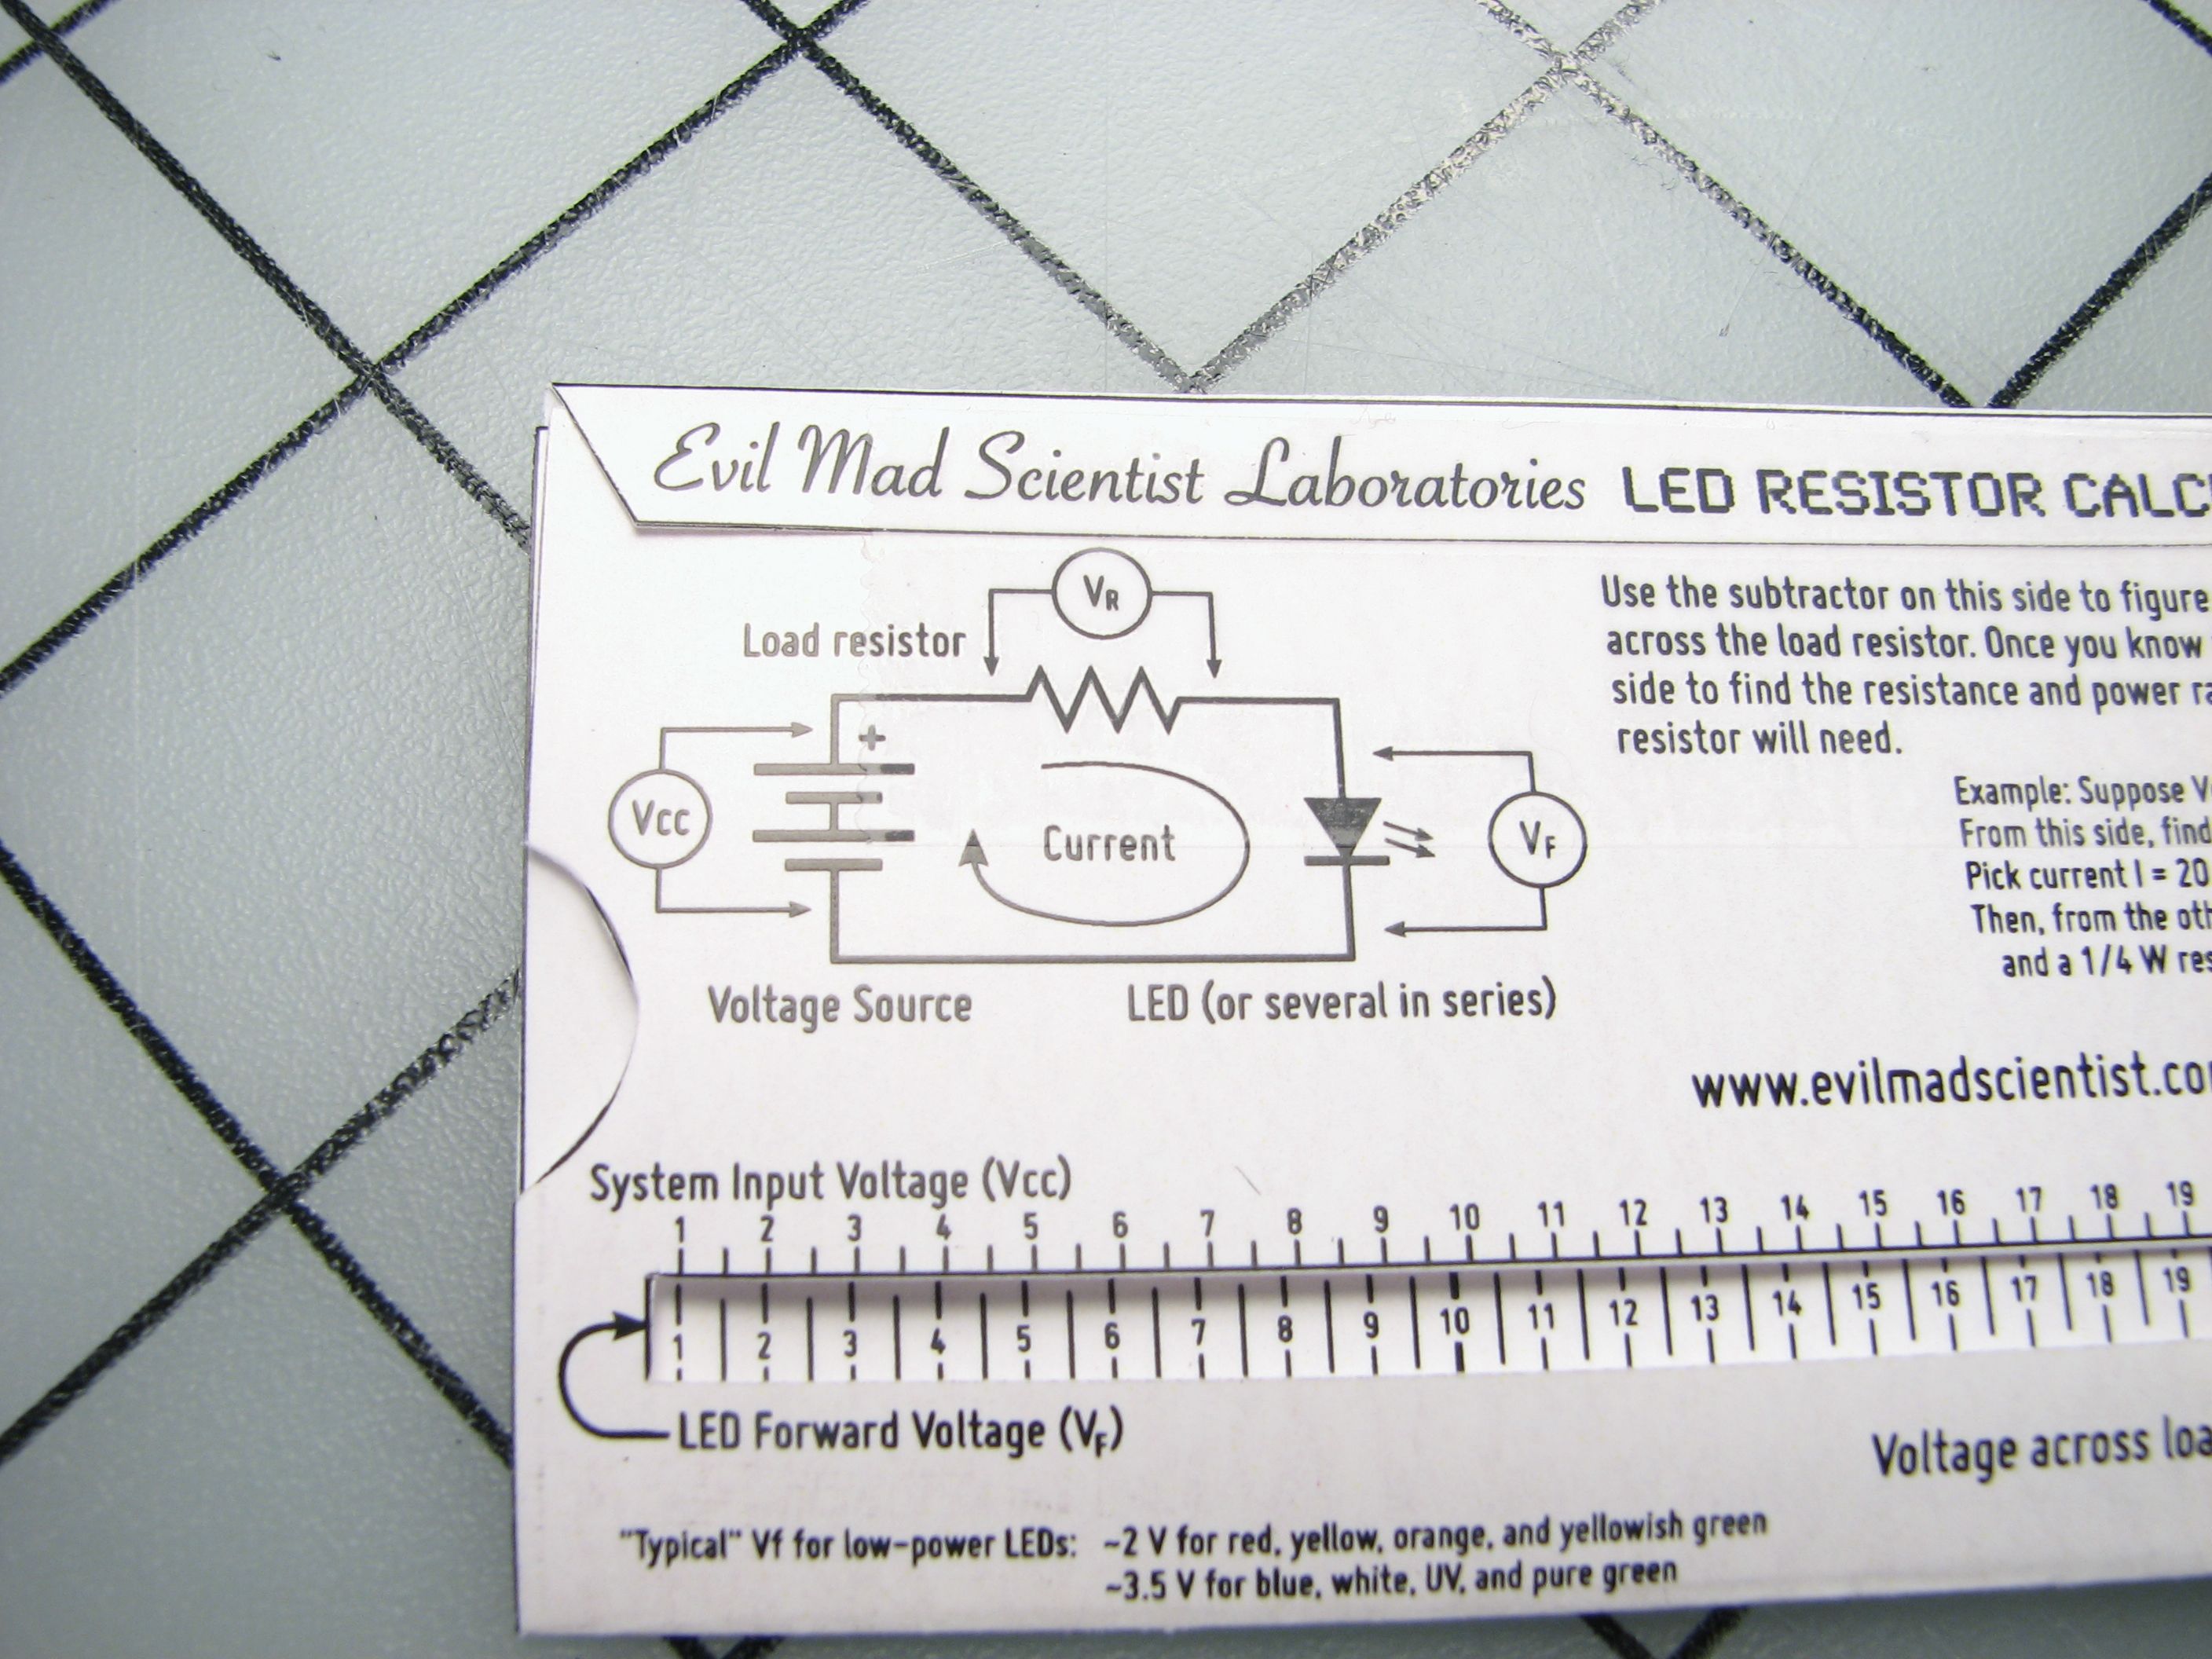
The first thing that we need to calculate is the voltage “Vr” across the resistor. To do this, line up your forward voltage (Vf = 2 V) directly beneath your system voltage, Vcc = 9 V.
(If you’ve already done this calculation in your head, you can skip right ahead to the part where we flip it over.)
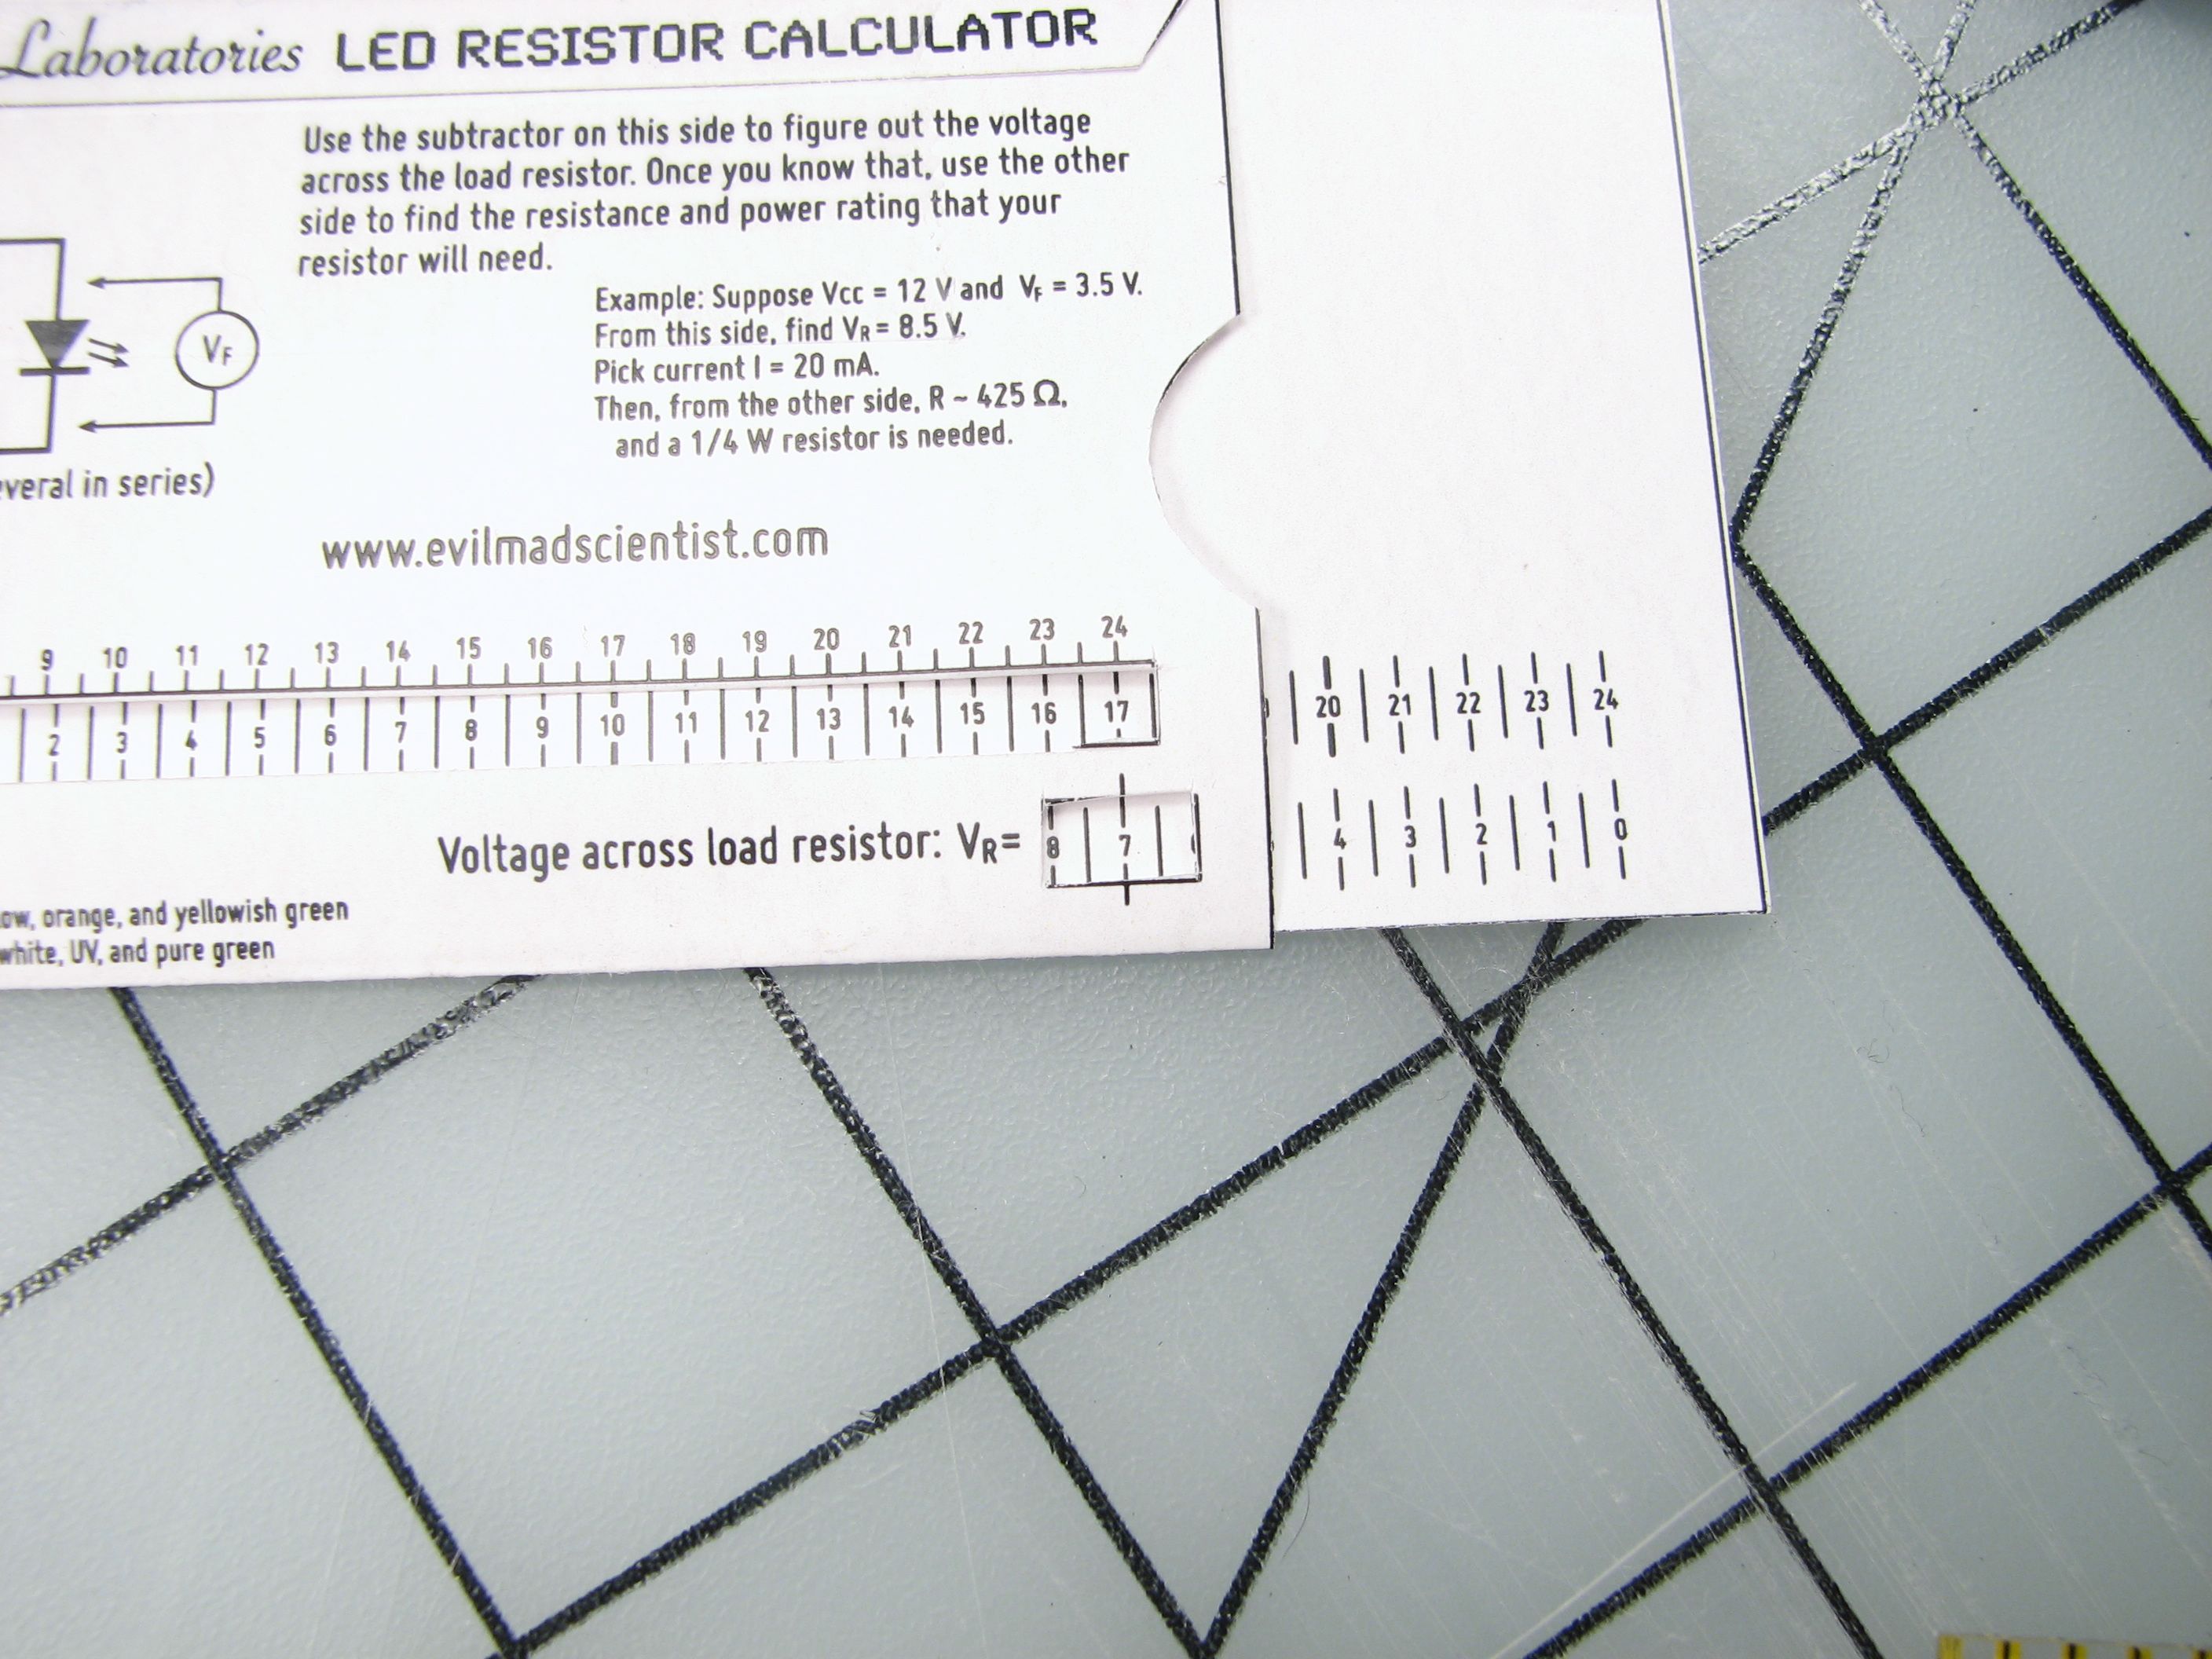
The voltage Vr across the resistor then appears in the lower right hand box for you to read out: 7 V.
Next, we flip the calculator over.
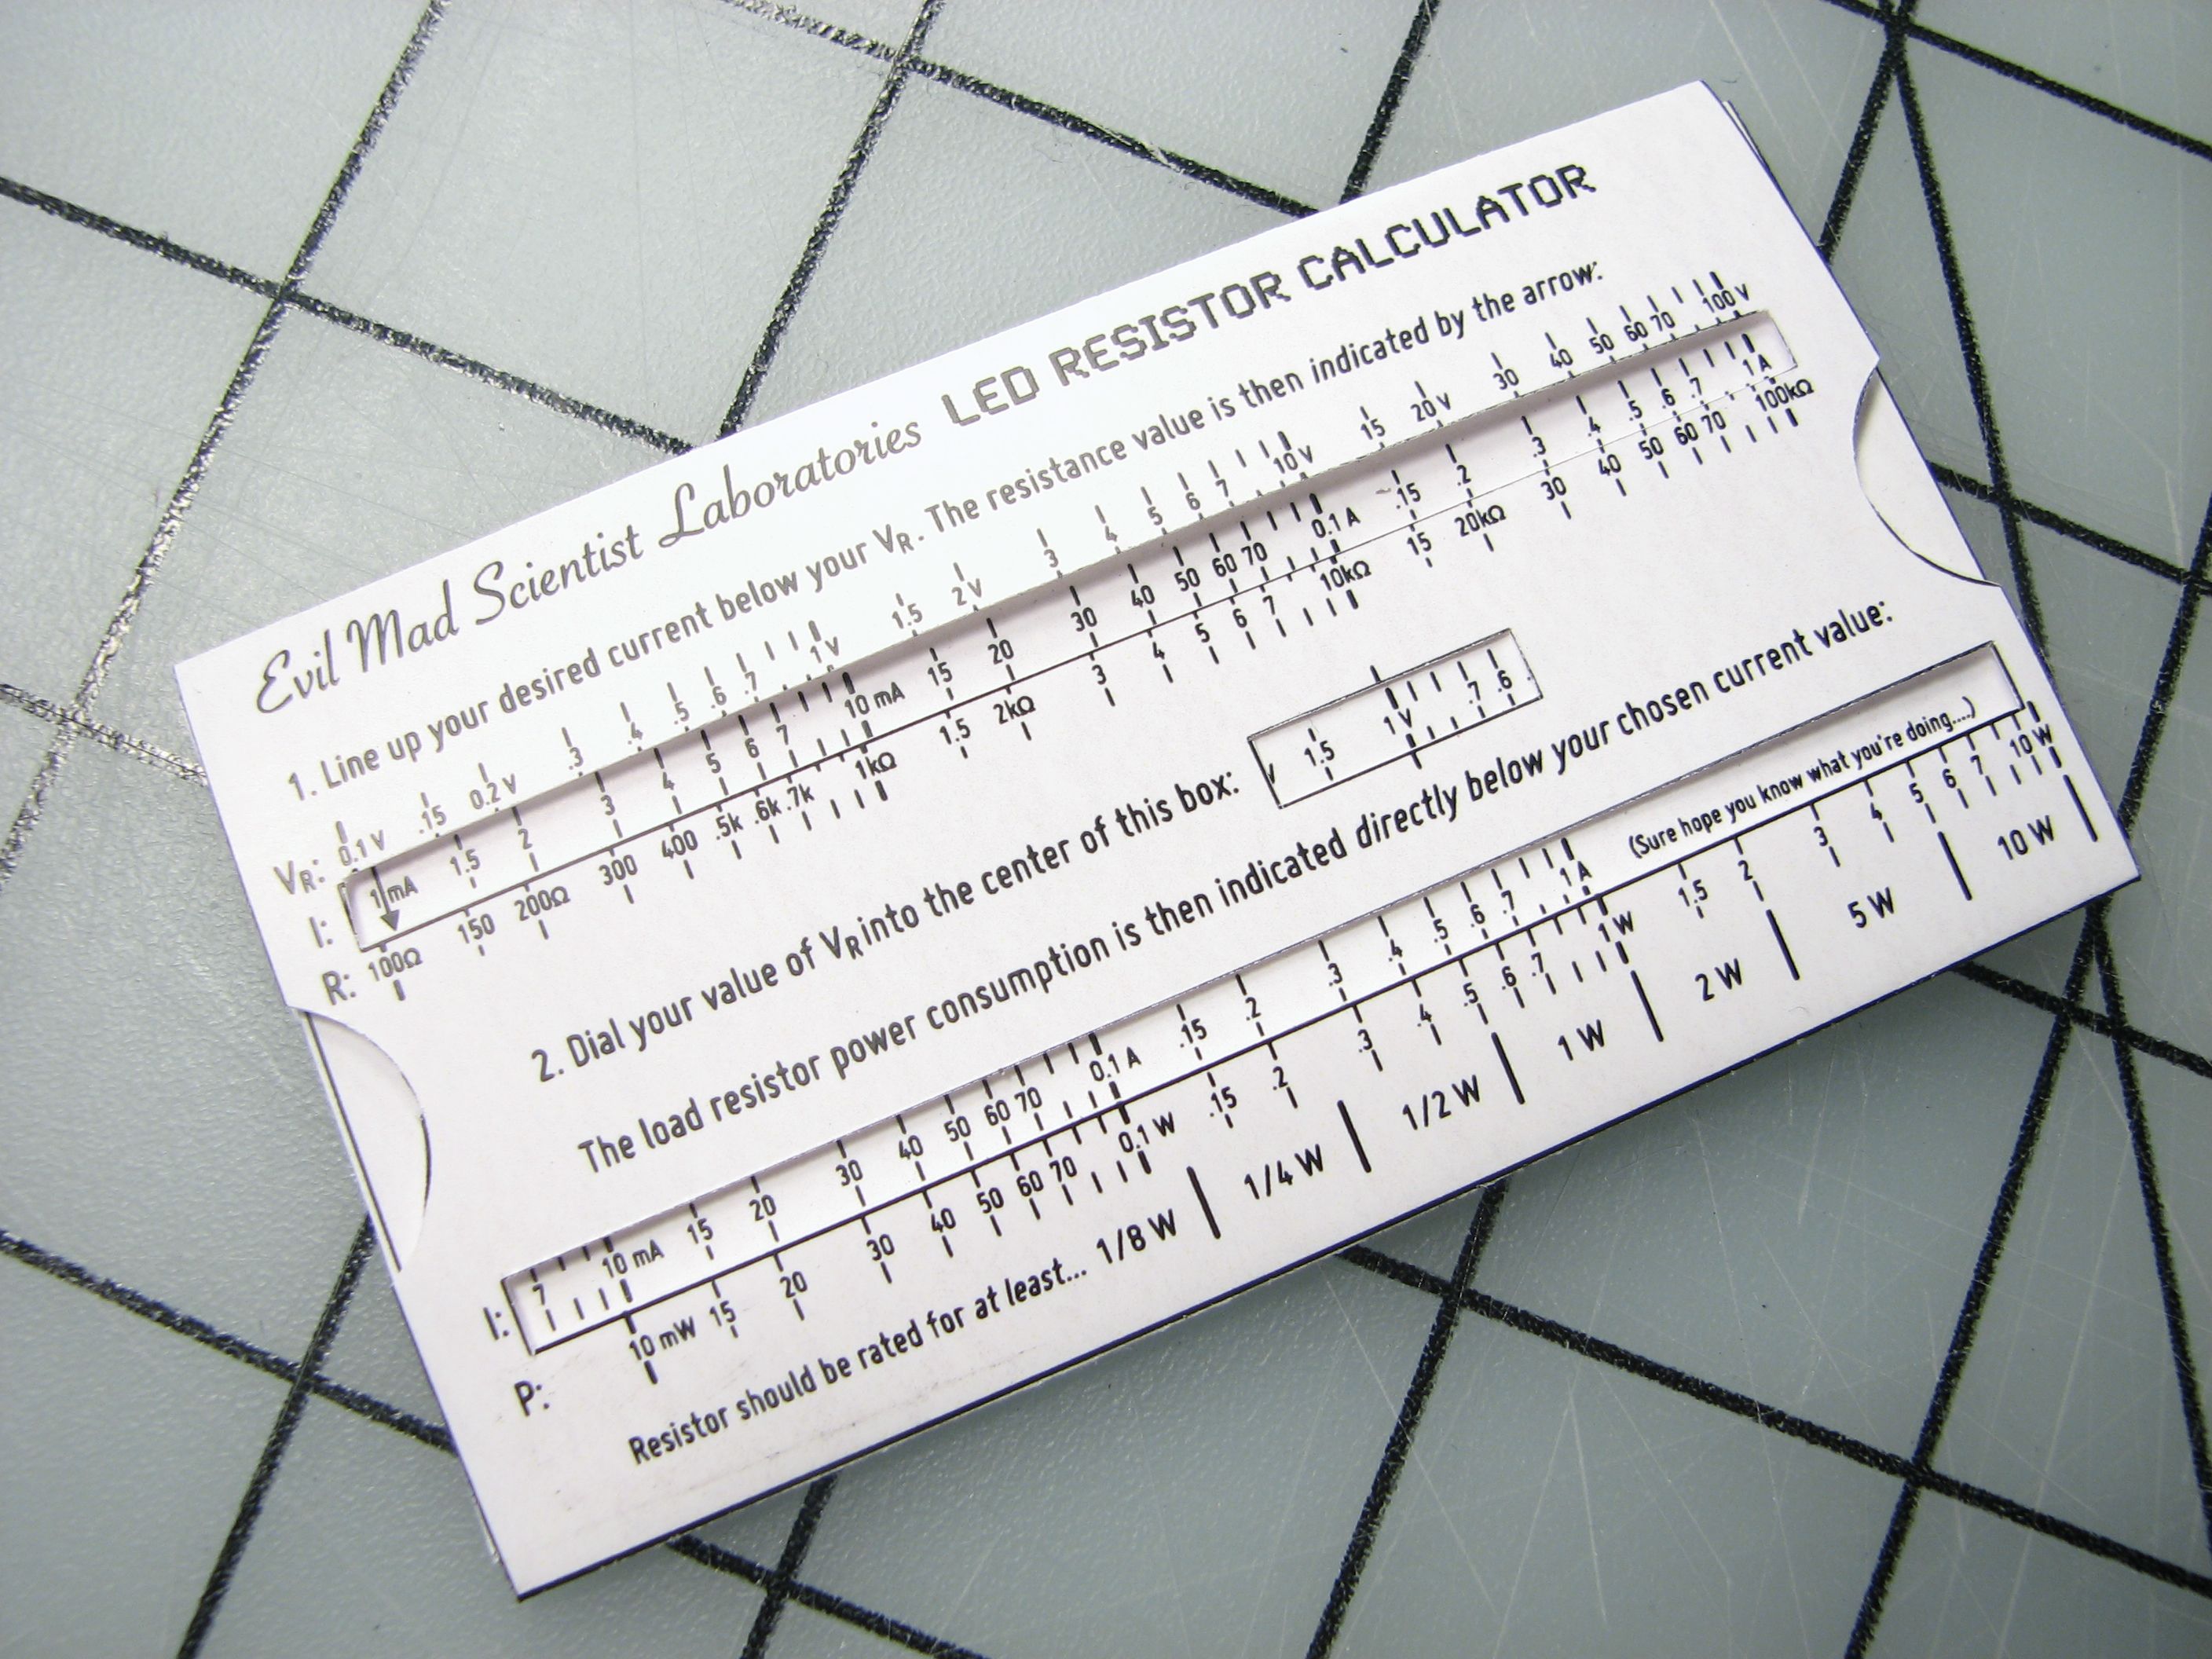
Our next step is to find the resistor value. To do this, we’ll move the slider to line up our desired current (I = 20 mA, in this case) beneath our resistor voltage (Vr = 7 V):
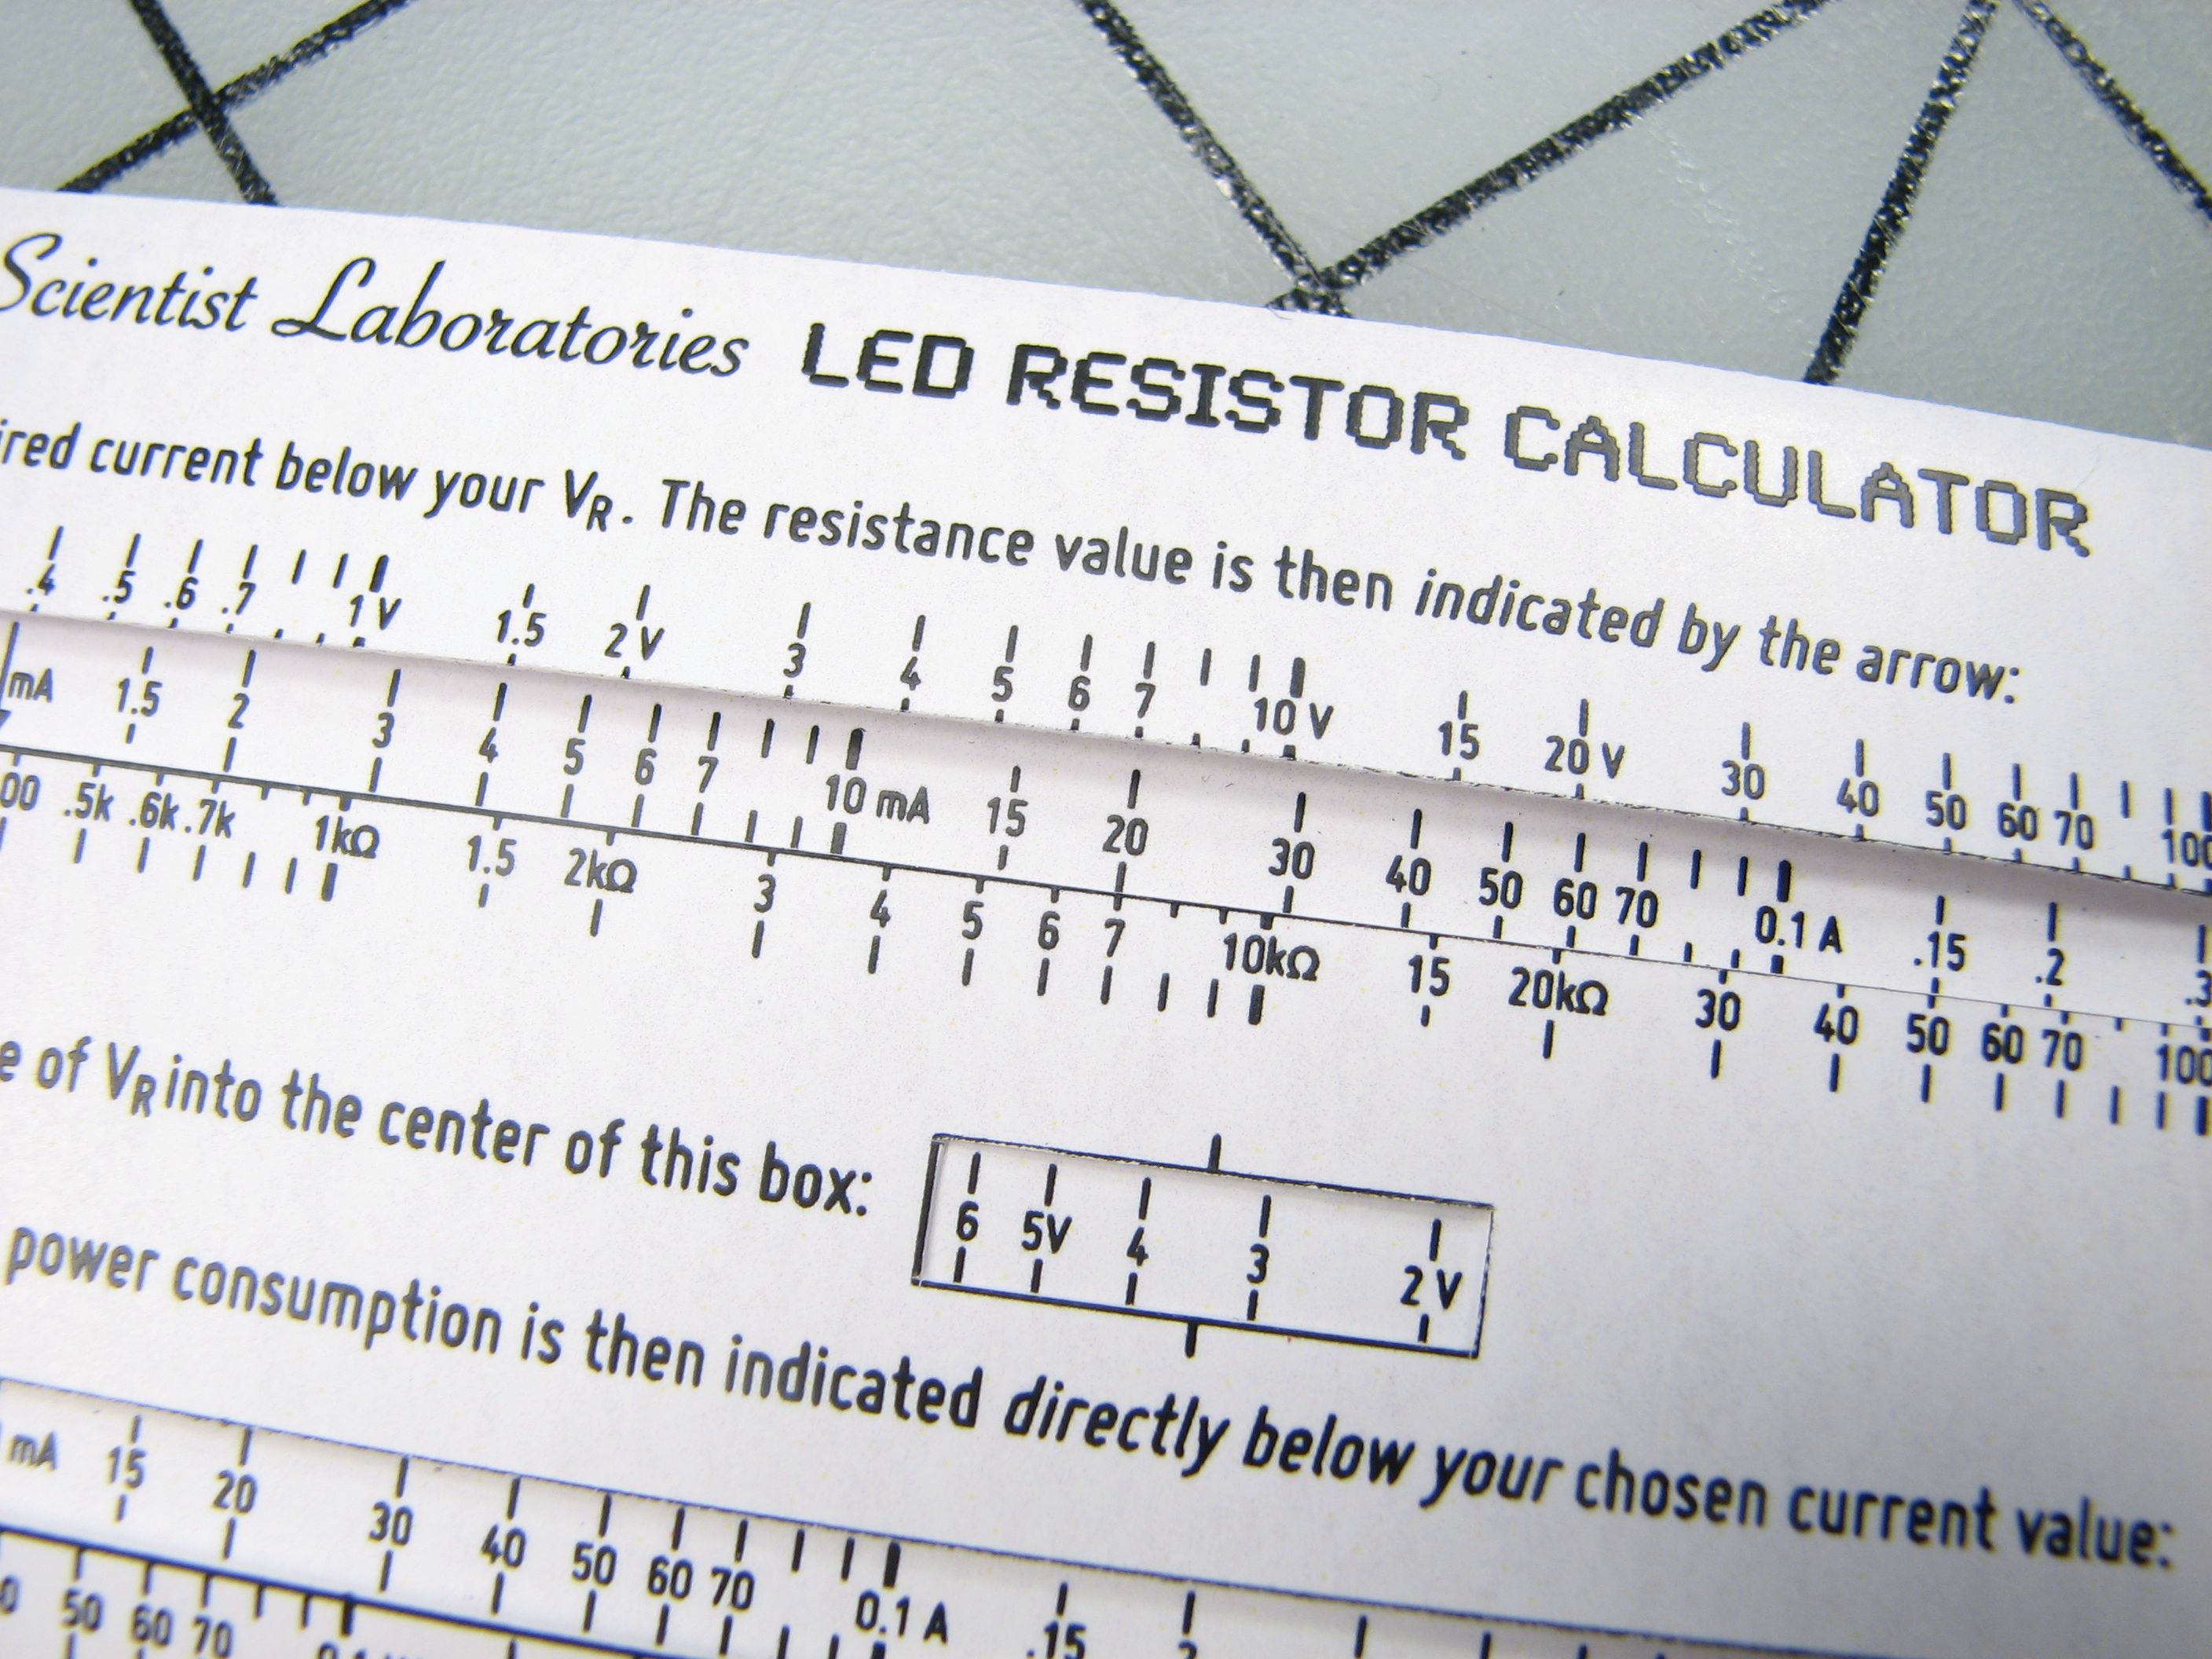
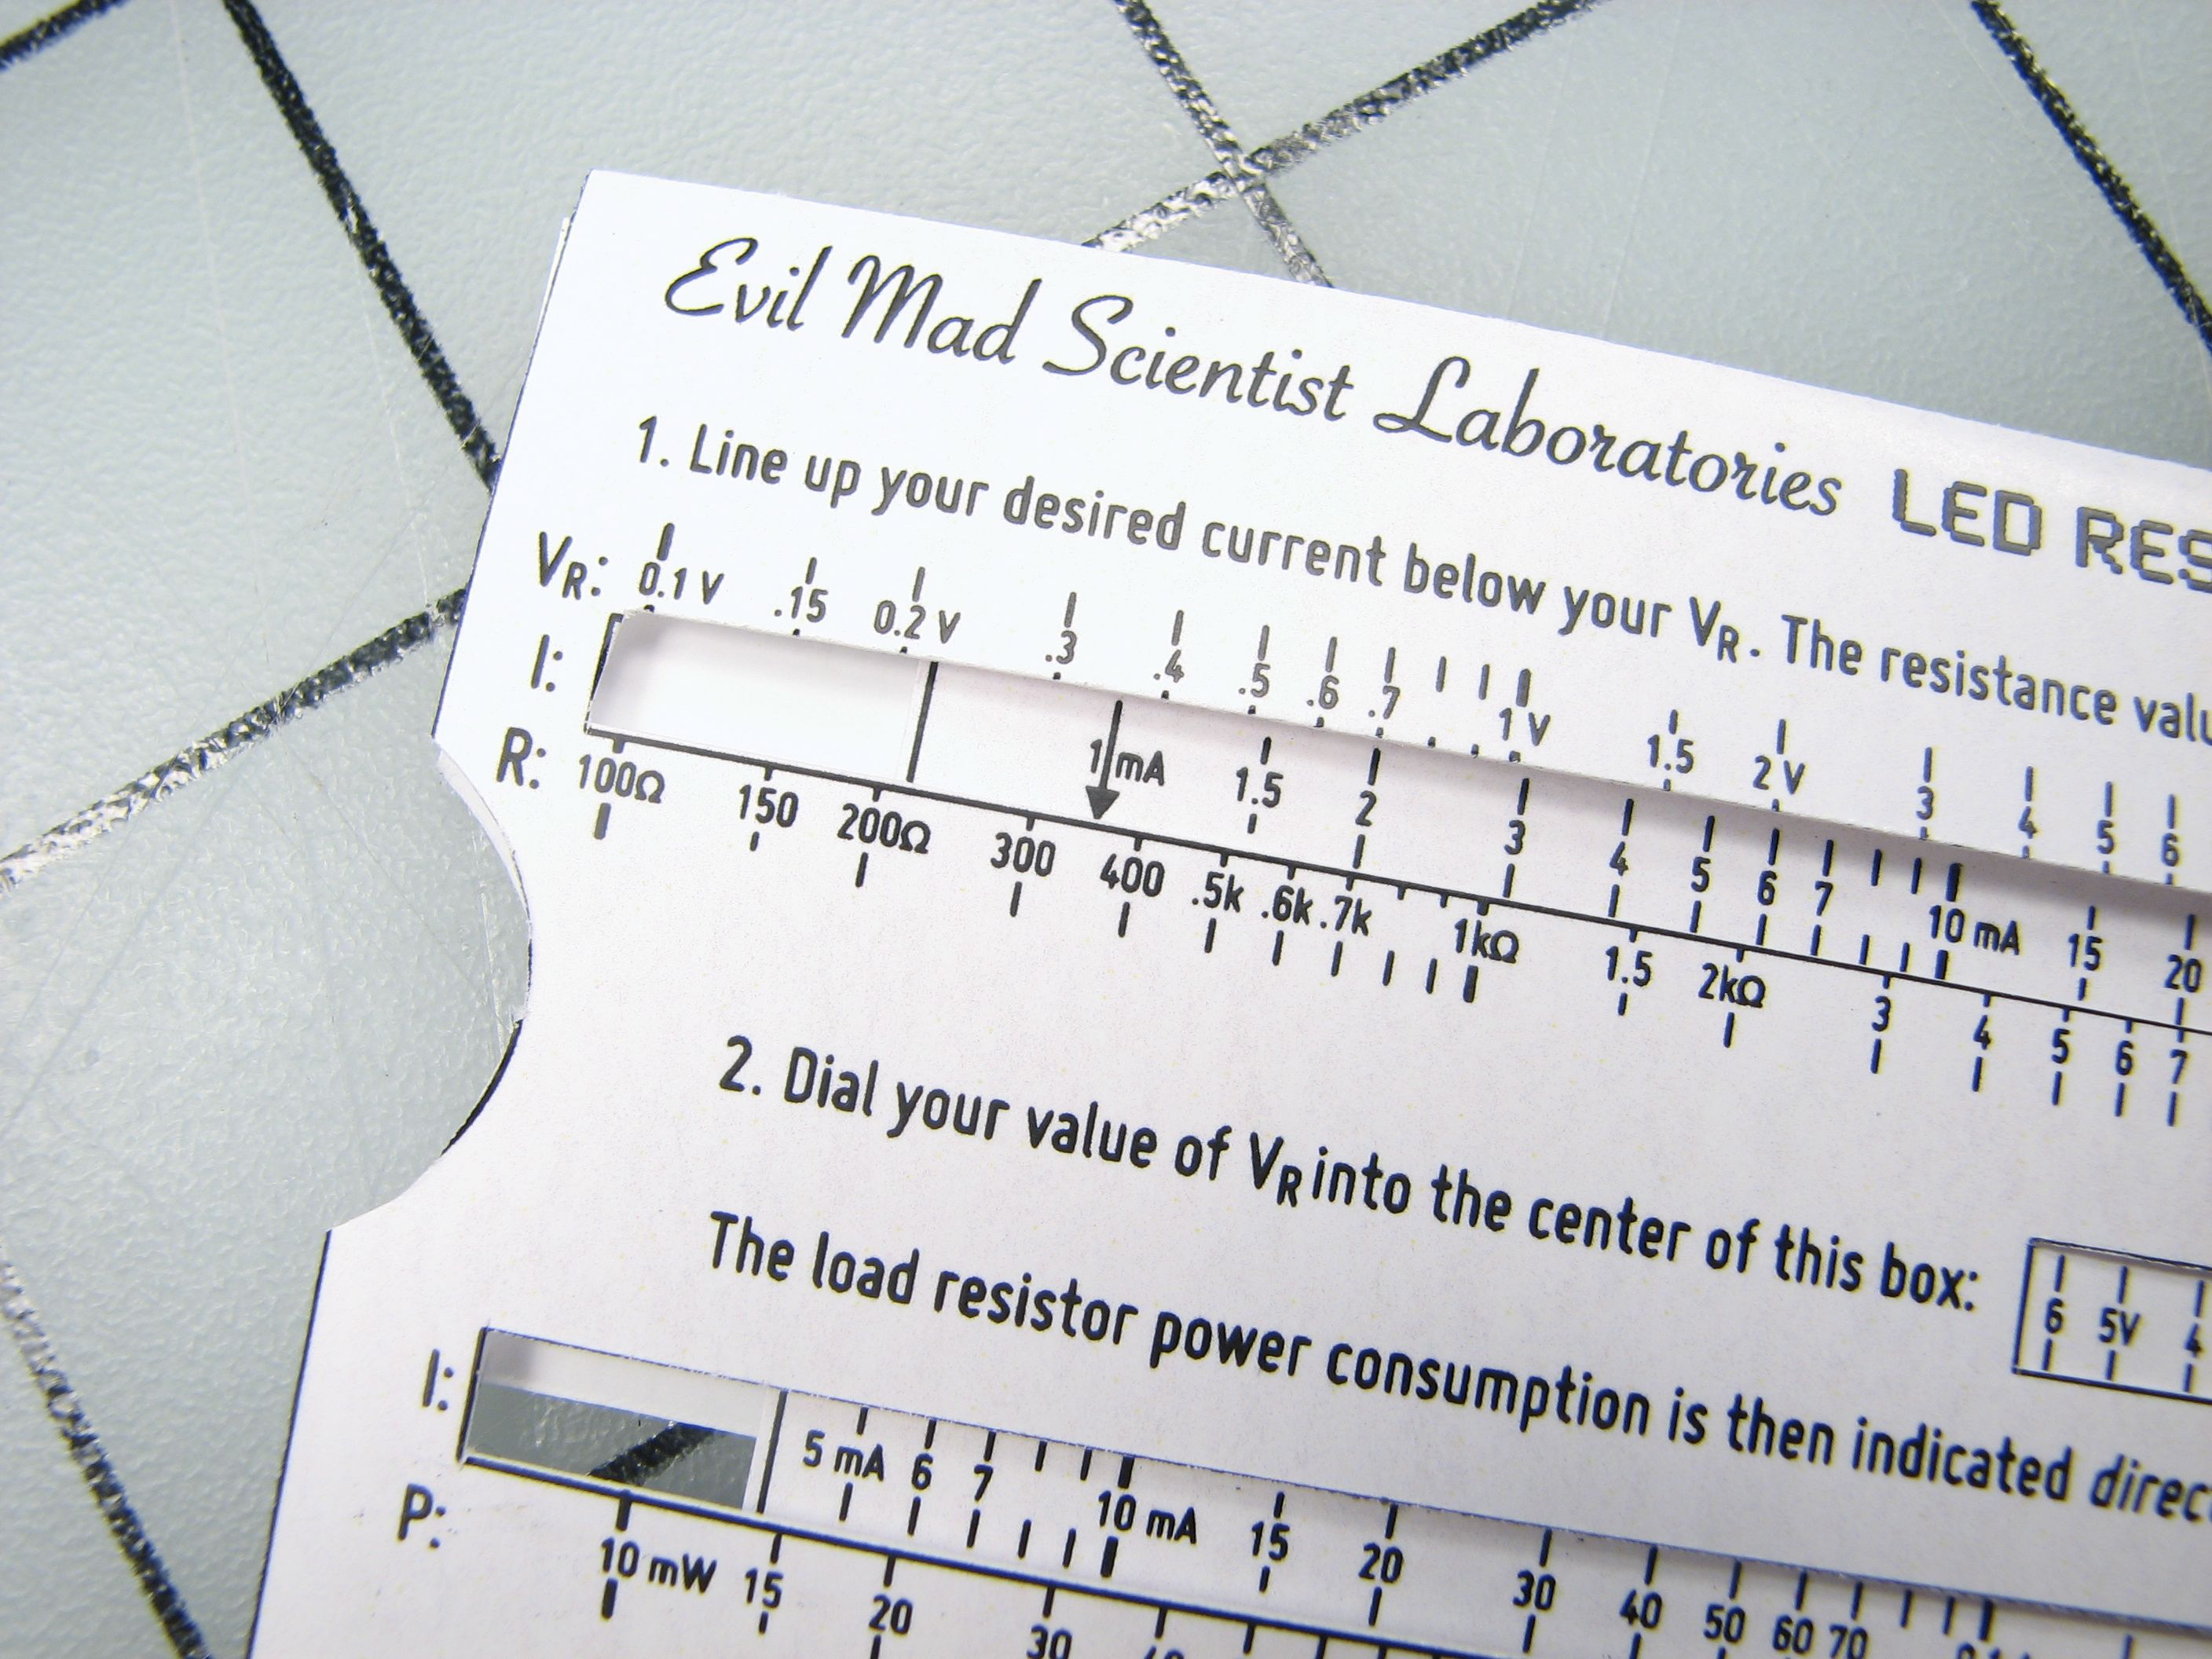
Once that’s lined up, the resistor value is indicated by the arrow on the left side of the sliding scale, in this case about 350 ohms.
That’s half of what we need to know to pick out the resistor. We also need to know the power that is dissipated by the resistor, to make sure that we pick a resistor big enough to handle the load. That calculation is done in the lower half of this side of the calculator:
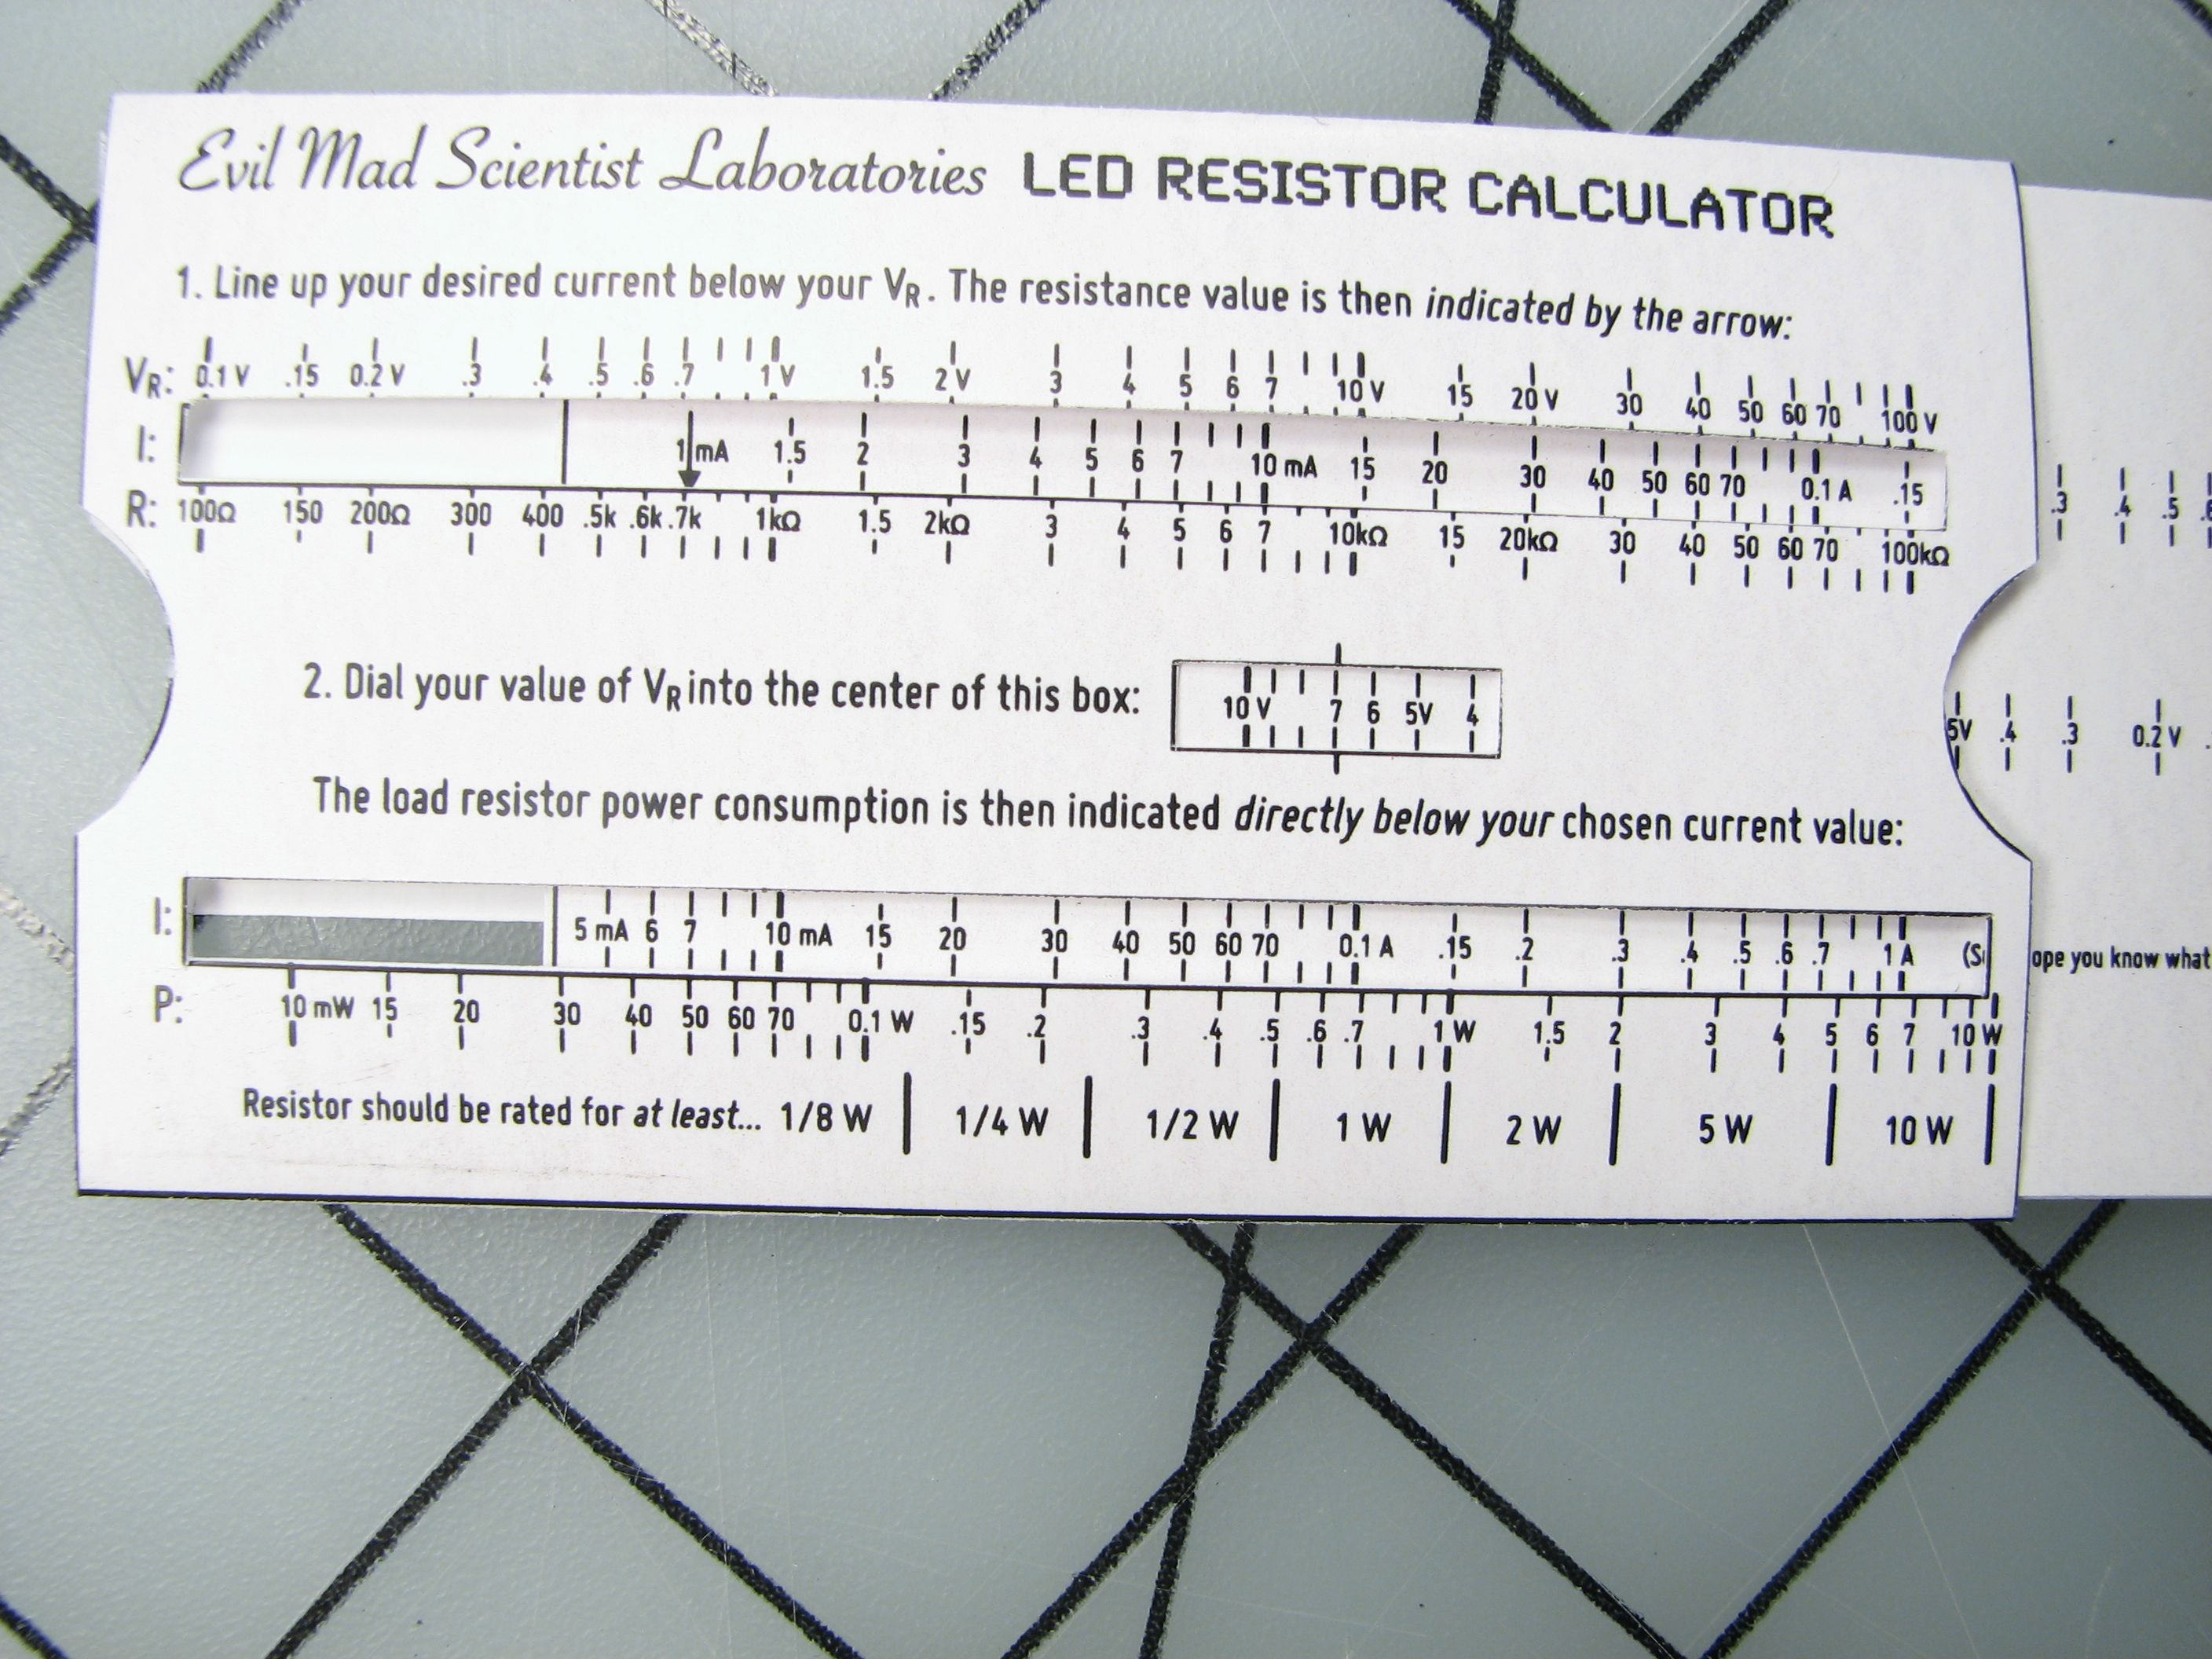
First, we need to dial the resistor voltage (Vr = 7 V) into the center of the little box:
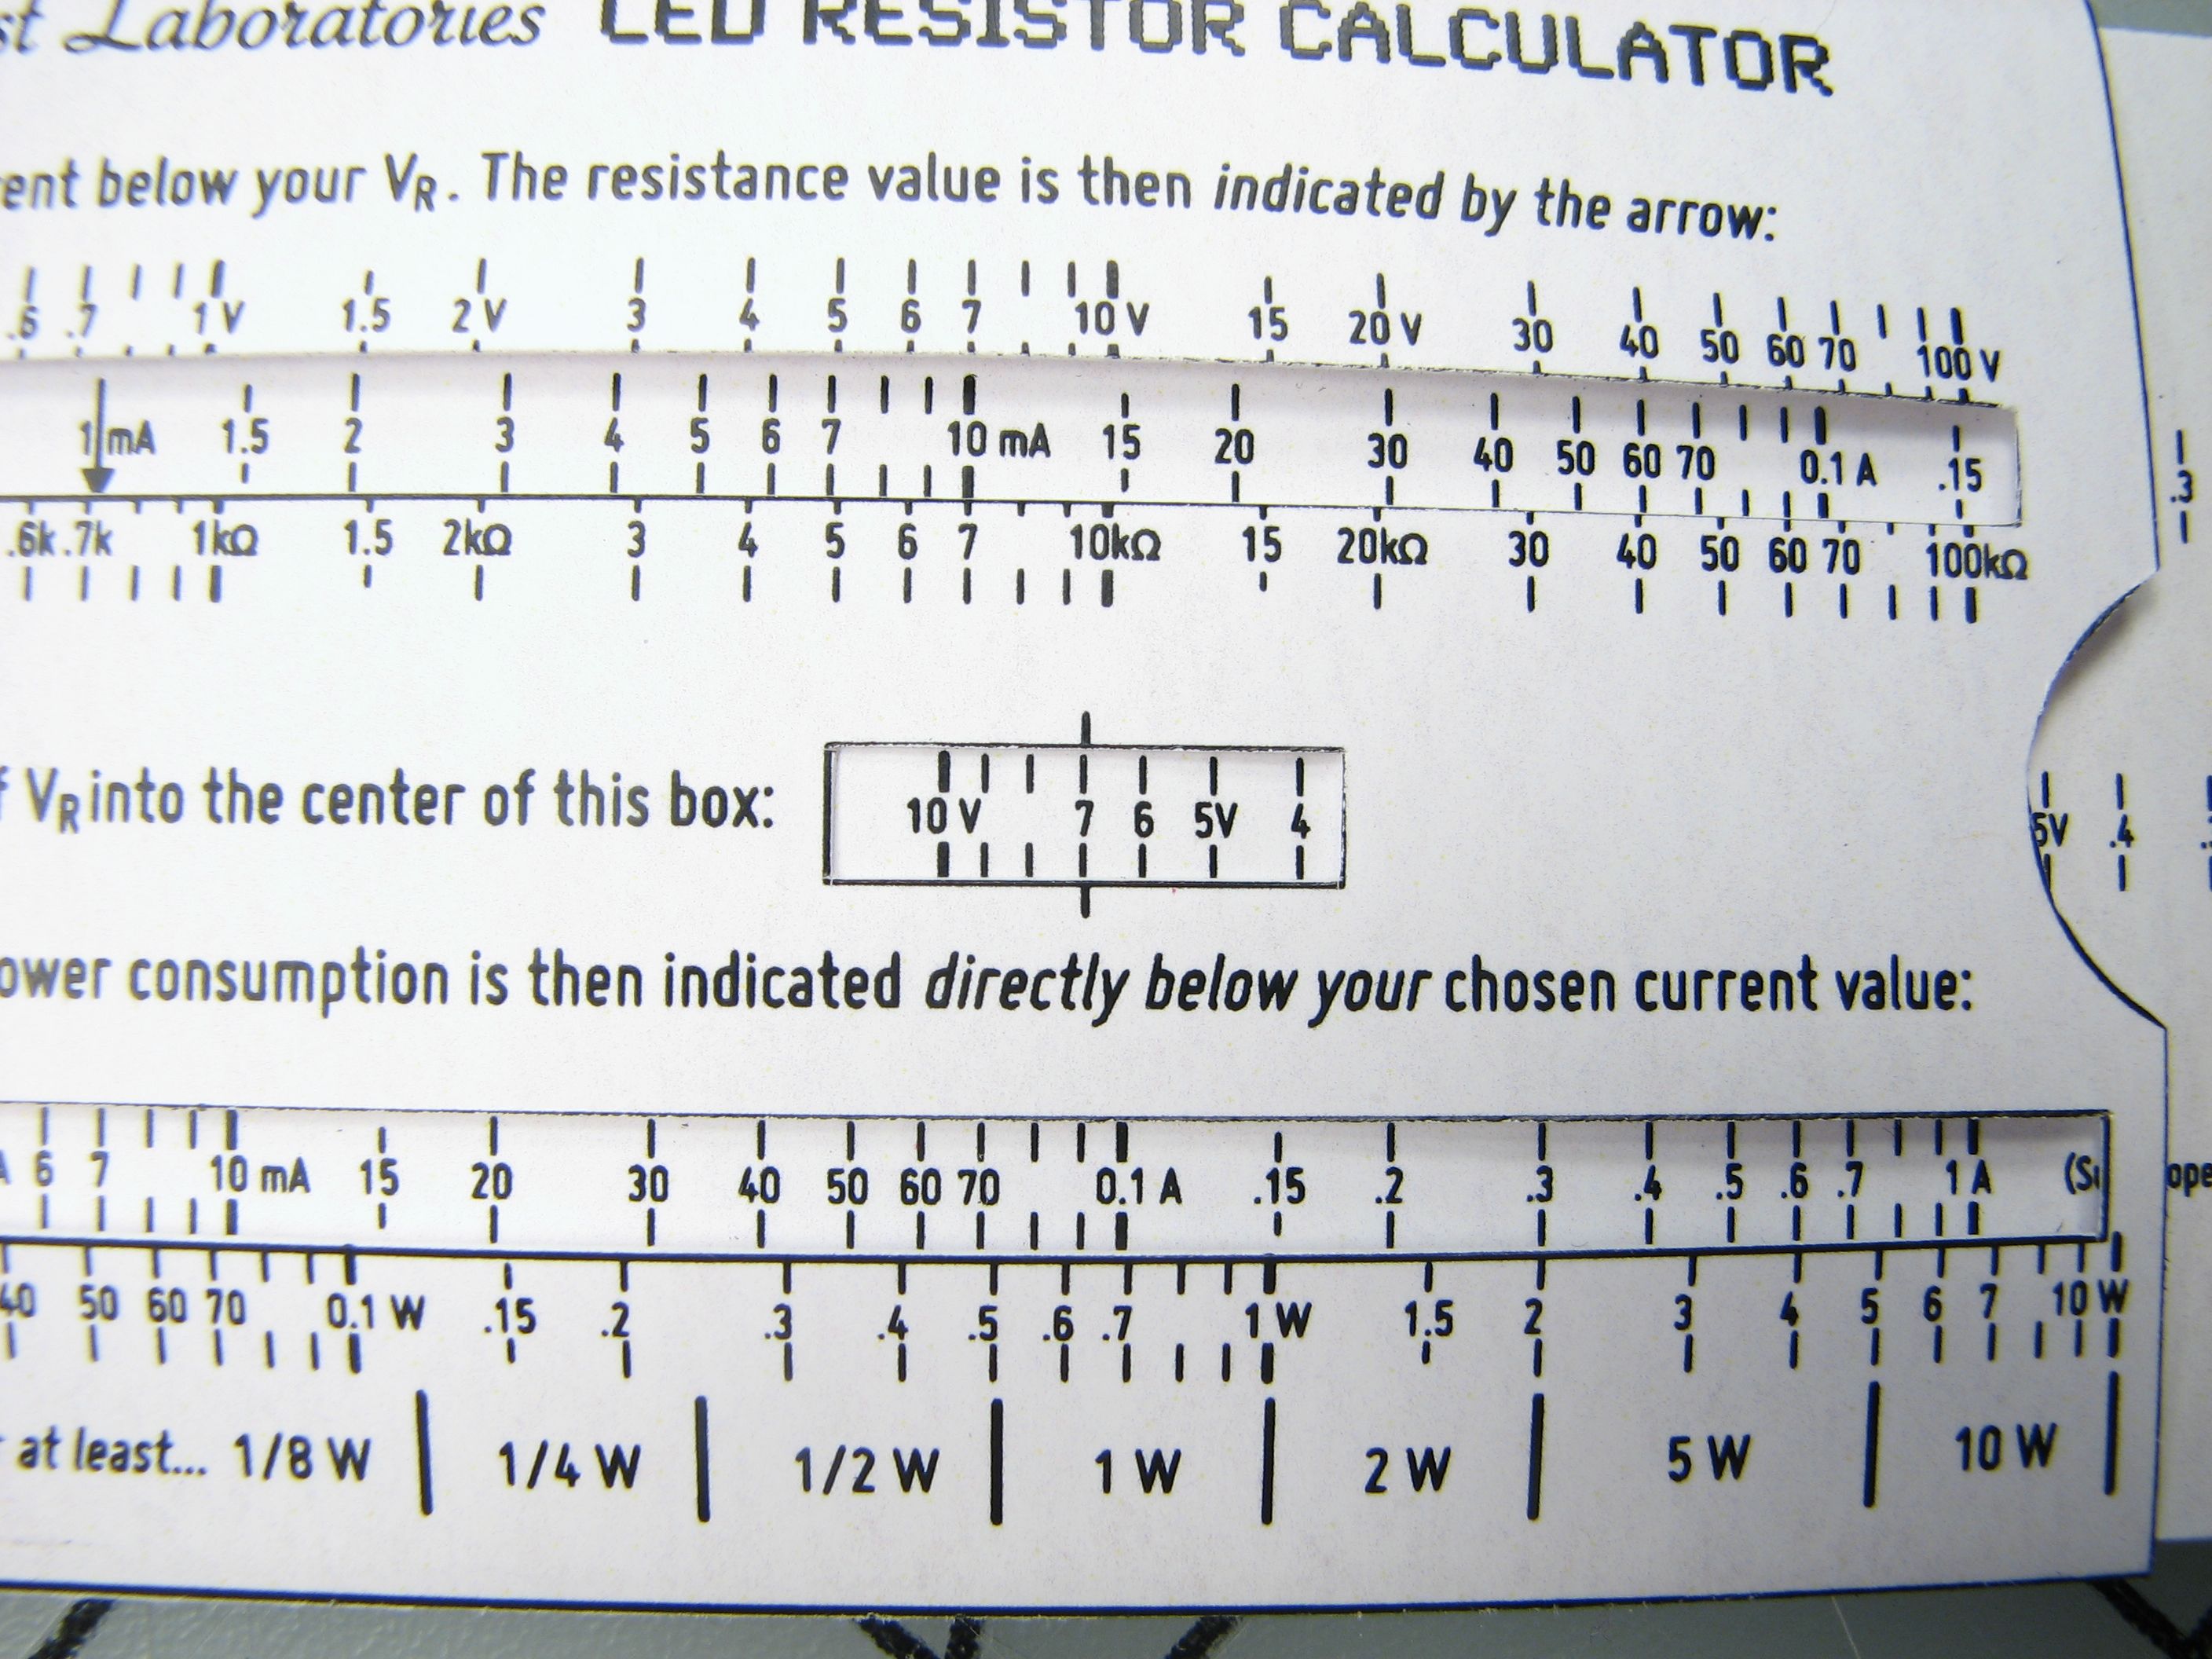
Once that’s lined up, the power dissipated by the load resistor is indicated directly below the chosen current value (20 mA, in our case):
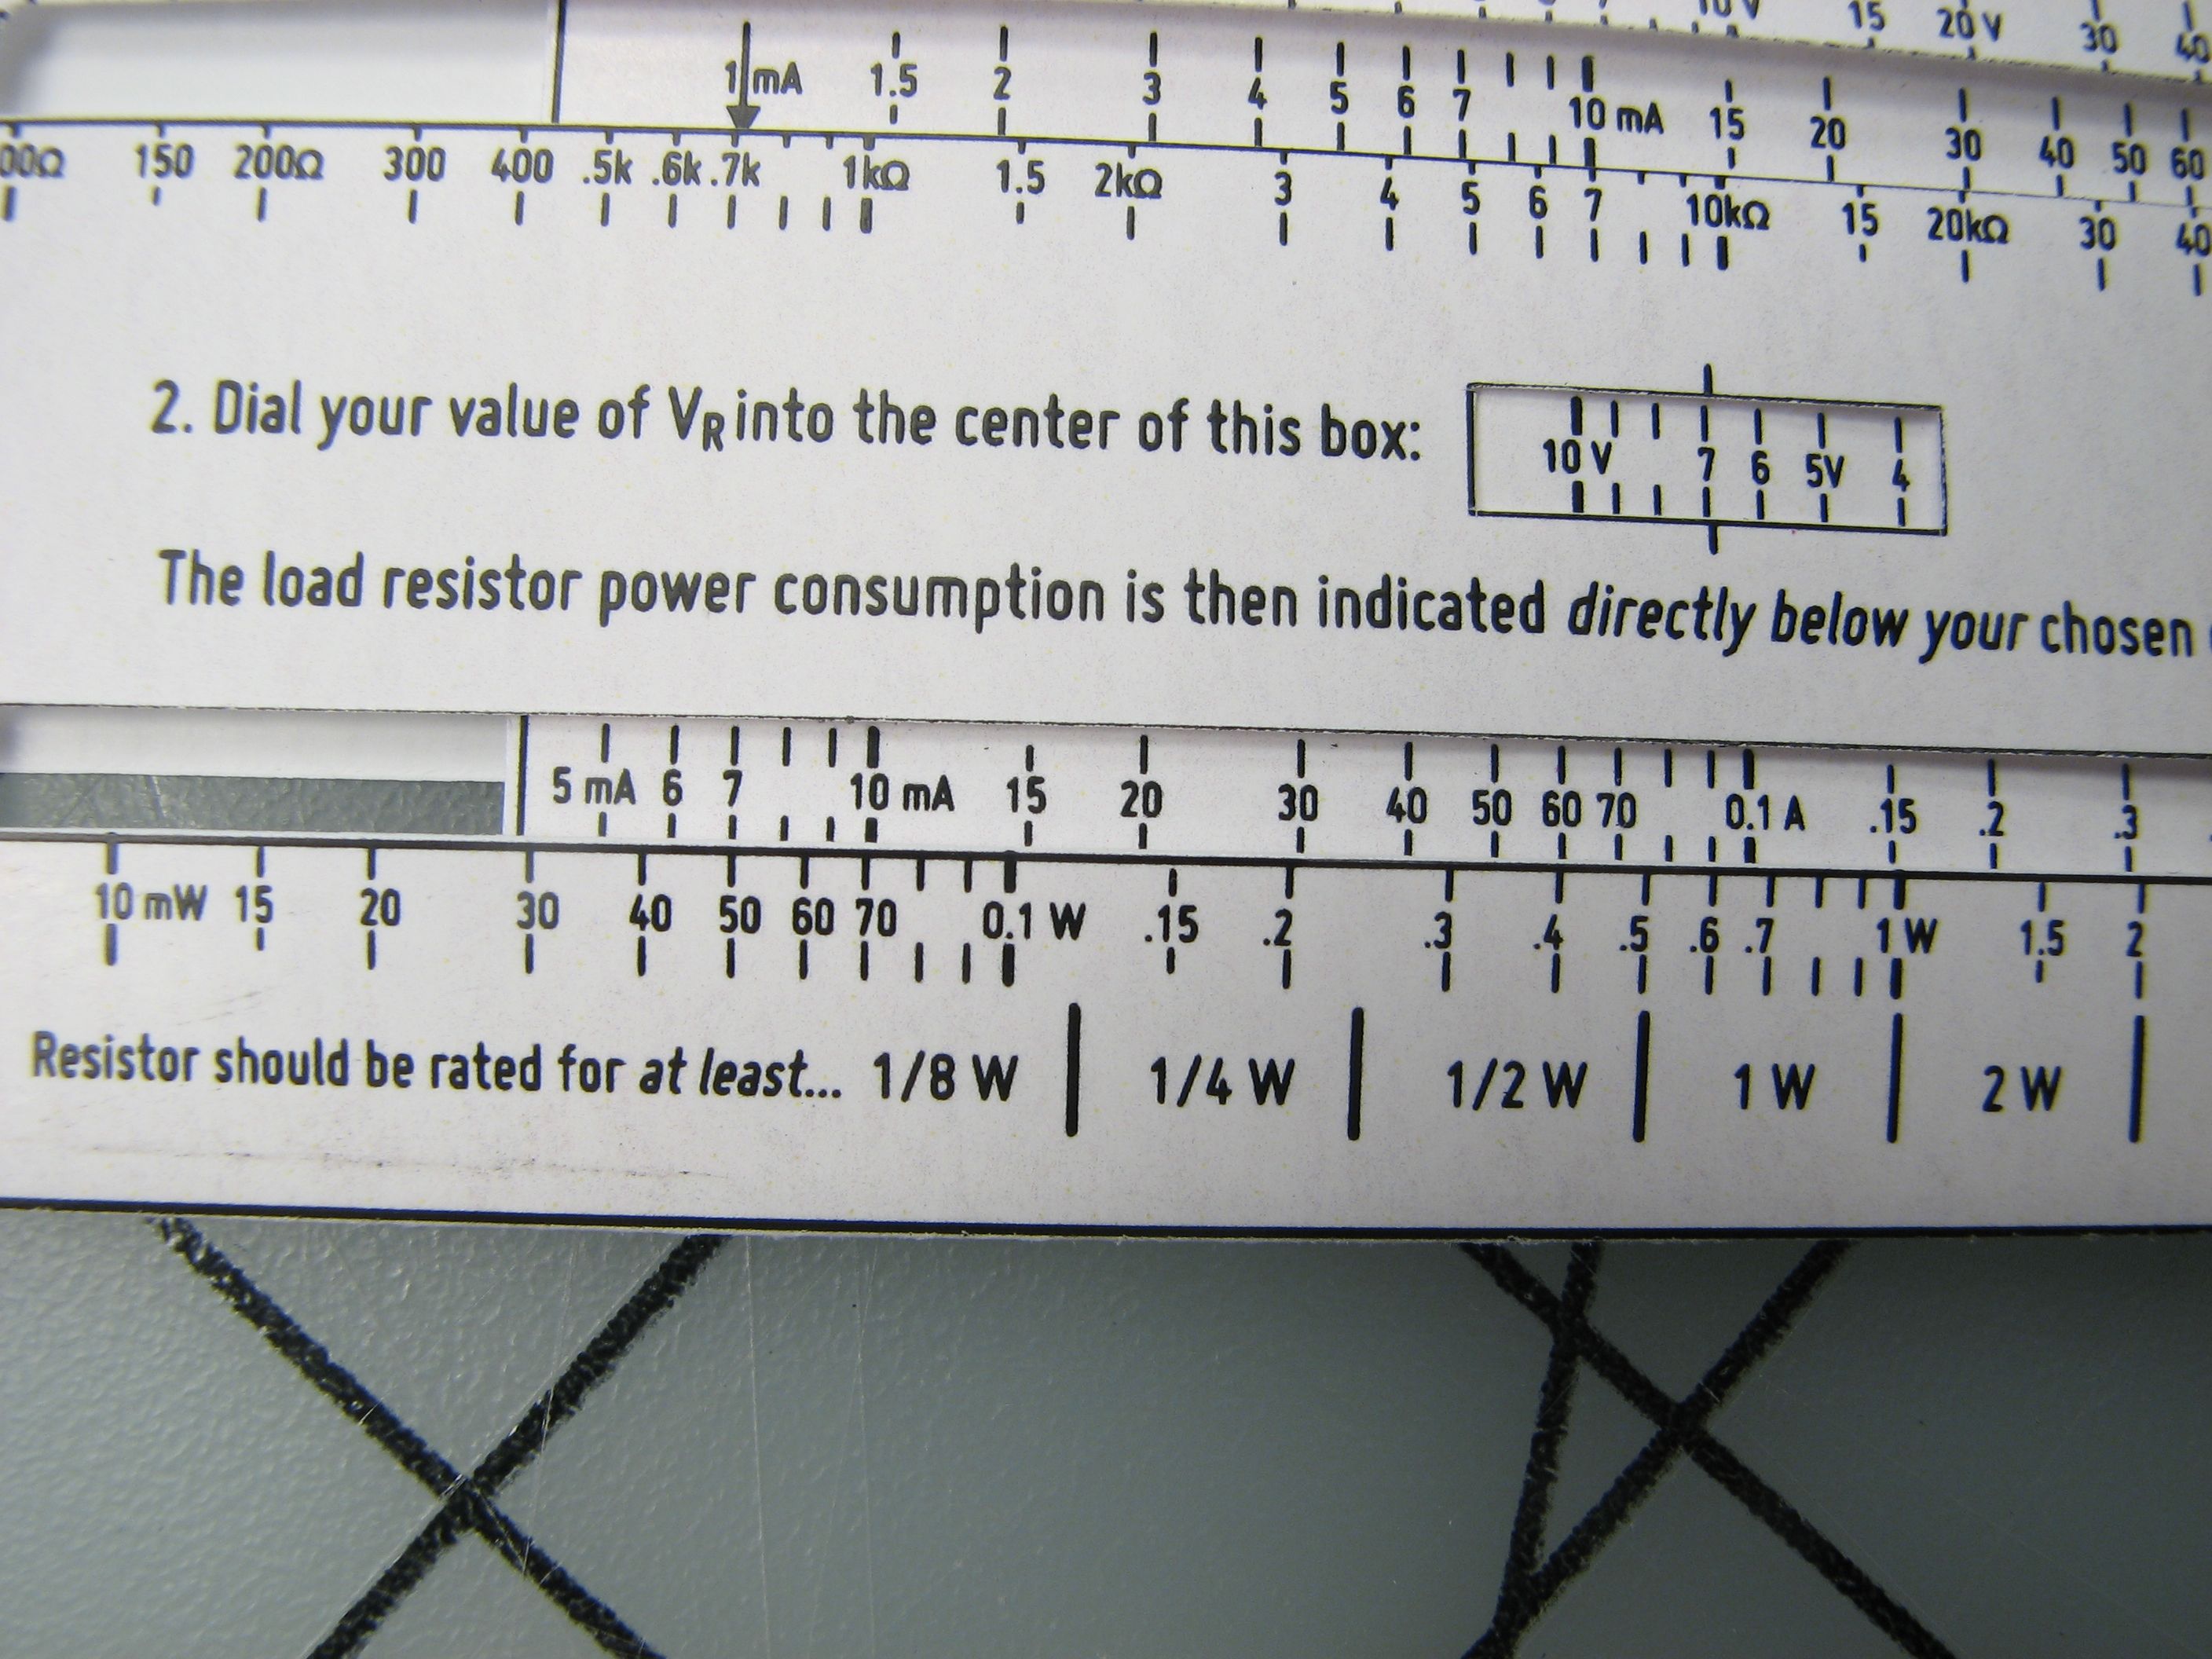
Directly below 20 mA, the power dissipation is roughly 140 mW, so we should pick a 350 ohm, 1/4 W (or larger) resistor. Woo!
If you liked this project, you may also like our South Indian Restaurant Menu Decoder Ring, which you can find here, or possibly to make your own 1952 Fraction-of-an-inch Adding Machine here.

Cute!
I think you should be able to eliminate the Vr calculation, by using two sliders inside the frame: First line up Vcc with Vf on the first slider, then line up the second slider with the first slider to select the resistor and calculate the power consumption.
Overall, I think LED calculators become a lot more useful when you have a problem along the lines of "I’d like to light 13 20mA,2V LEDs using a 9V battery – how many parallel circuits of how many LEDs in series, and with what resistor each?" But that would be a job for a more Rube Goldberg slide rule…
We looked at it, but the main reason not to combine the operations is horizontal space. If you slide out the full width of the slider on the first operation, then the second operation has to start at that point– and things start to get constrained fast.
Some of the online calculators do handle parallel operation. But (1) that operation is less common and (2) it’s fast and easy to split any number of LEDs into paralleled series sets. Since this tool works for the series part, at very most you’d need to use this calculator *twice* to manage any series-parallel combination.
—
Windell H. Oskay
drwho(at)evilmadscientist.com
http://www.evilmadscientist.com/
Hm – I guess you could slide the second slider to the left, compared to the first. That way the second would never stick out any further than the first. And as long as you make the scale on the first one small enough, there should always be enough useful overlap between the two sliders.
I think this is great, I found this via the Make arduino robotics pdf and hadn’t needed it before but out of the blue I was asked what resistor was needed for a project, I whip out my handy dandy slide rule and am the hero of the day :-) thank you Evil Mad Scientist’s