


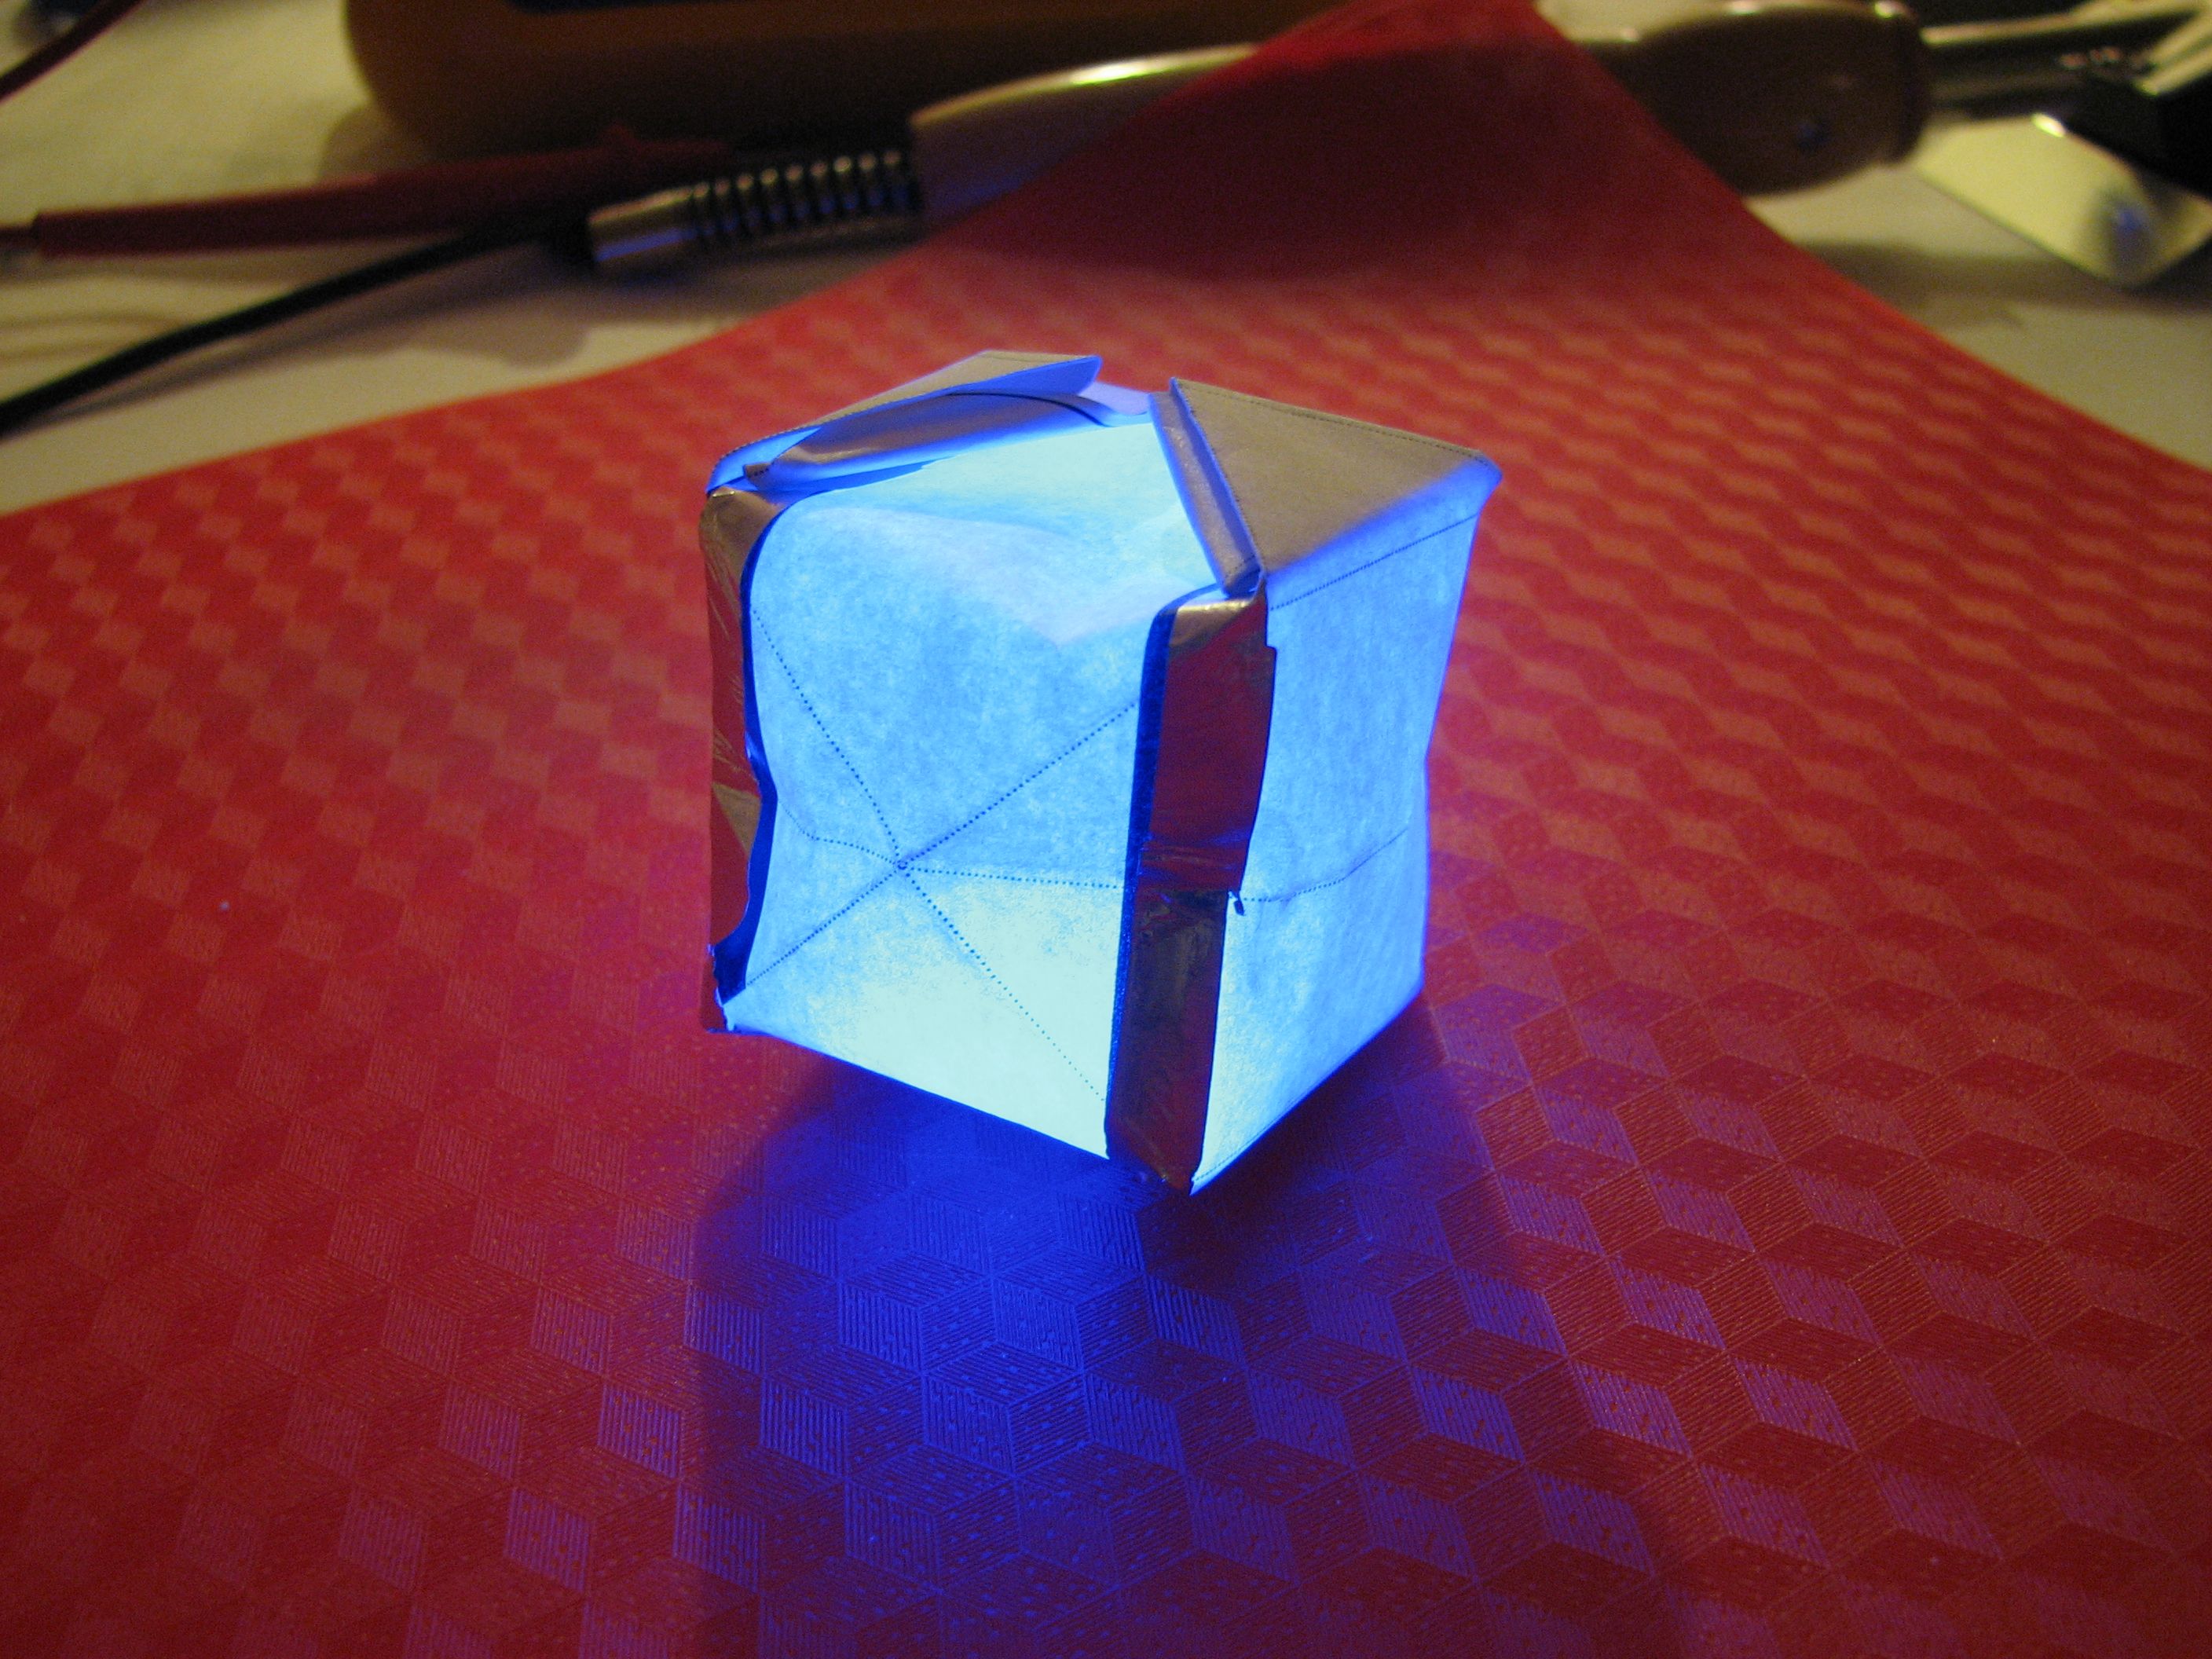
This little LED-lit cube is much more than just a paper lantern: It’s a translucent and flexible thin-film electronic circuit that hooks up a battery to an LED, limber enough to be folded into an origami box. And the coolest thing about circuits like these? You can make them at home.
In what follows, we combine basic electronics (an LED Throwie) and papercraft (a traditional origami balloon) to make what might be called an “LED Foldie.” The circuitry consists of aluminum foil traces, ironed onto adhesive paper such as freezer paper, photo mounting paper, or even a laser printed pattern. Something constructed this way can then be folded so fit an LED and battery to complete the circuit.
Besides the throwies themselves, this was inspired in part by the beautiful LED Floaties [via Make].
The first step in designing a three-dimensional circuit like this is to see where the parts go. After that we will unfold the model, draw circuit paths between the points that we want to connect, and go from there.
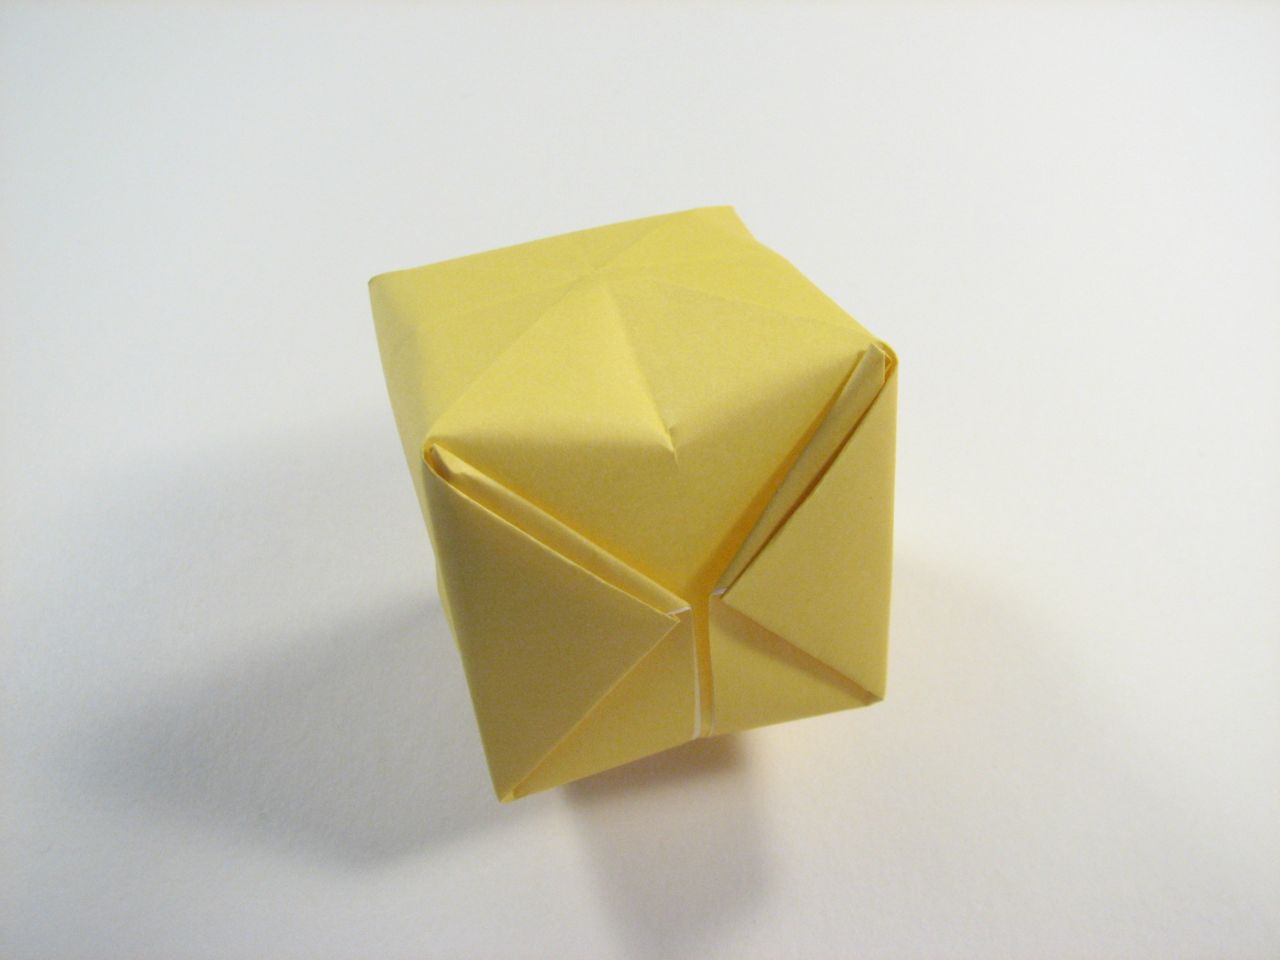
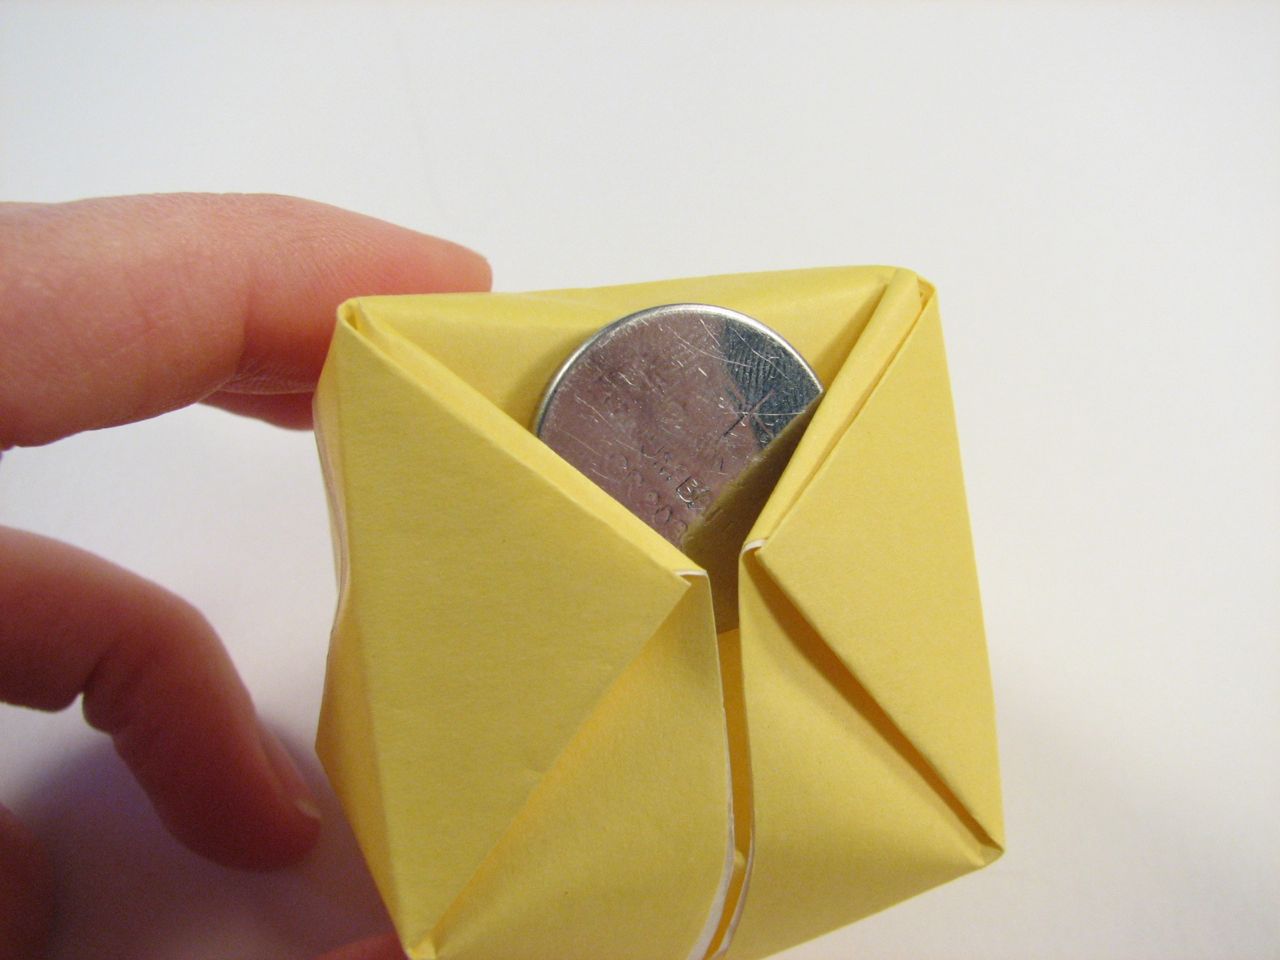
To get started, we first folded an origami balloon, and then inserted the components where we wanted them. The balloon has a convenient pocket on the side for a lithium coin cell, and a single hole that allows you to point an LED into the interior of the balloon. (And you can follow along with balloon folding in this flickr photo set.)
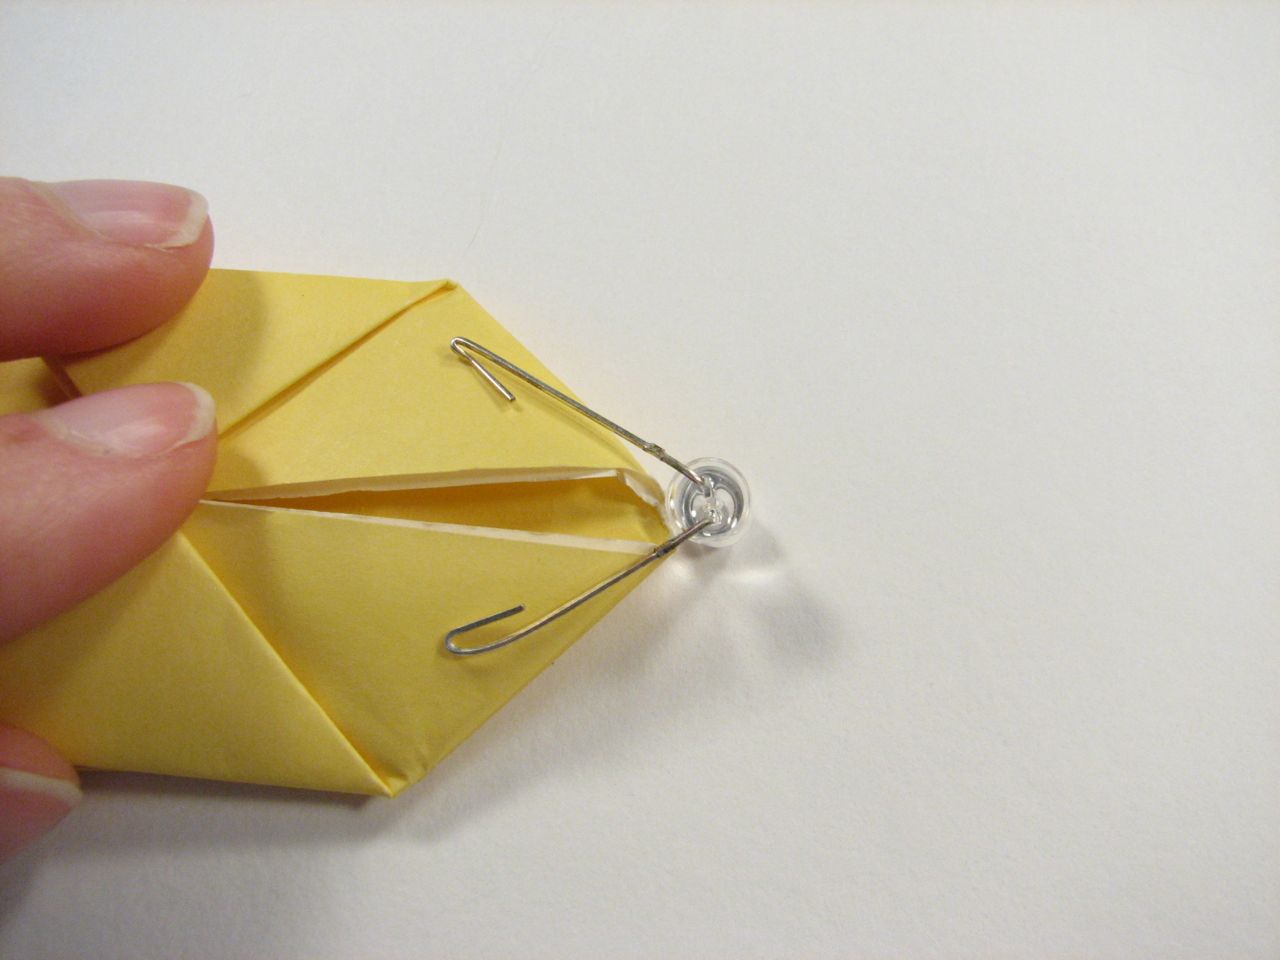
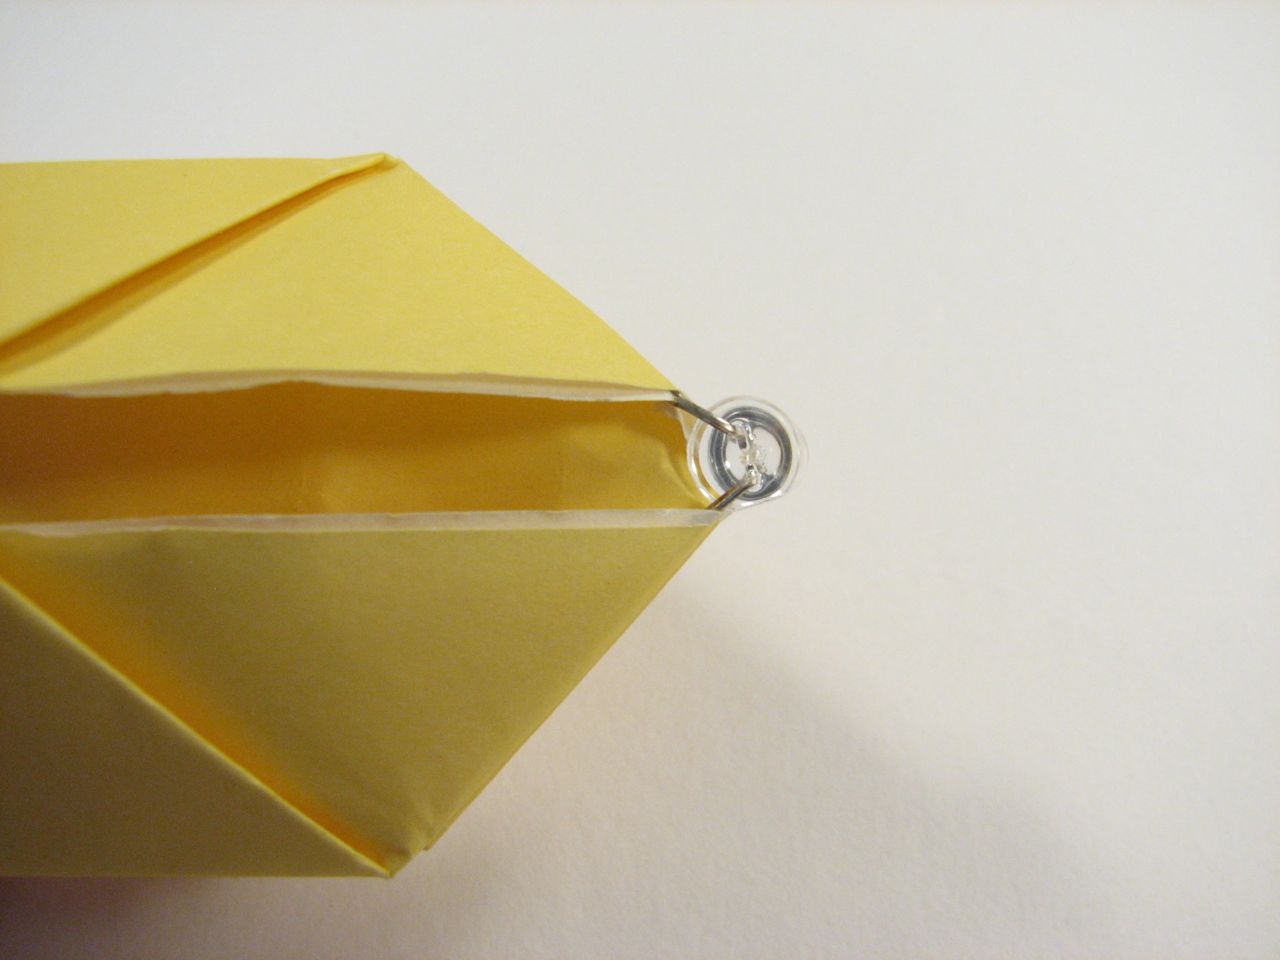
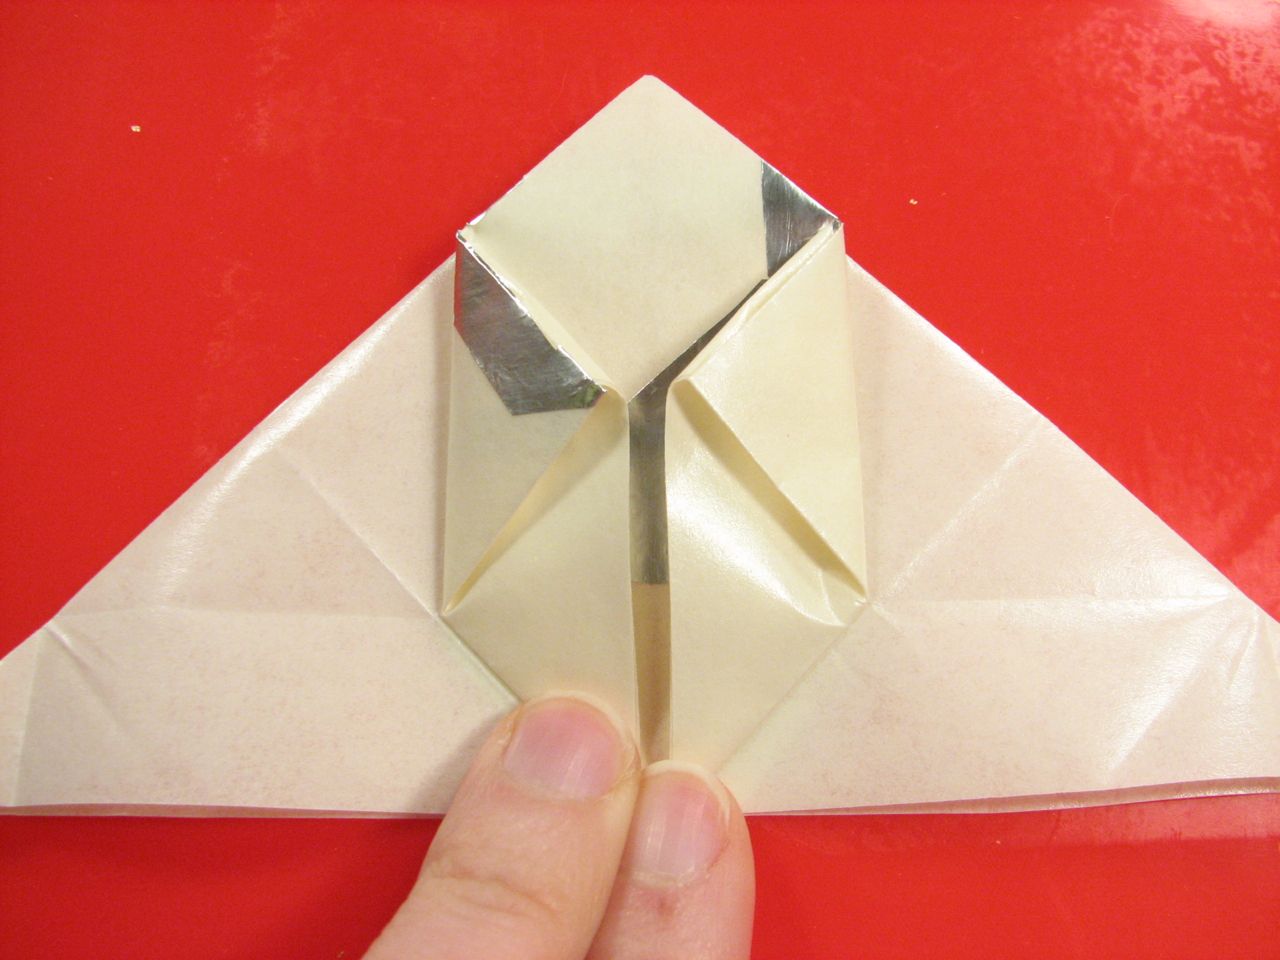
We knew we wanted the LED to go into the hole in the bottom of the balloon, so we tucked the leads into the folds on the side opposite the battery.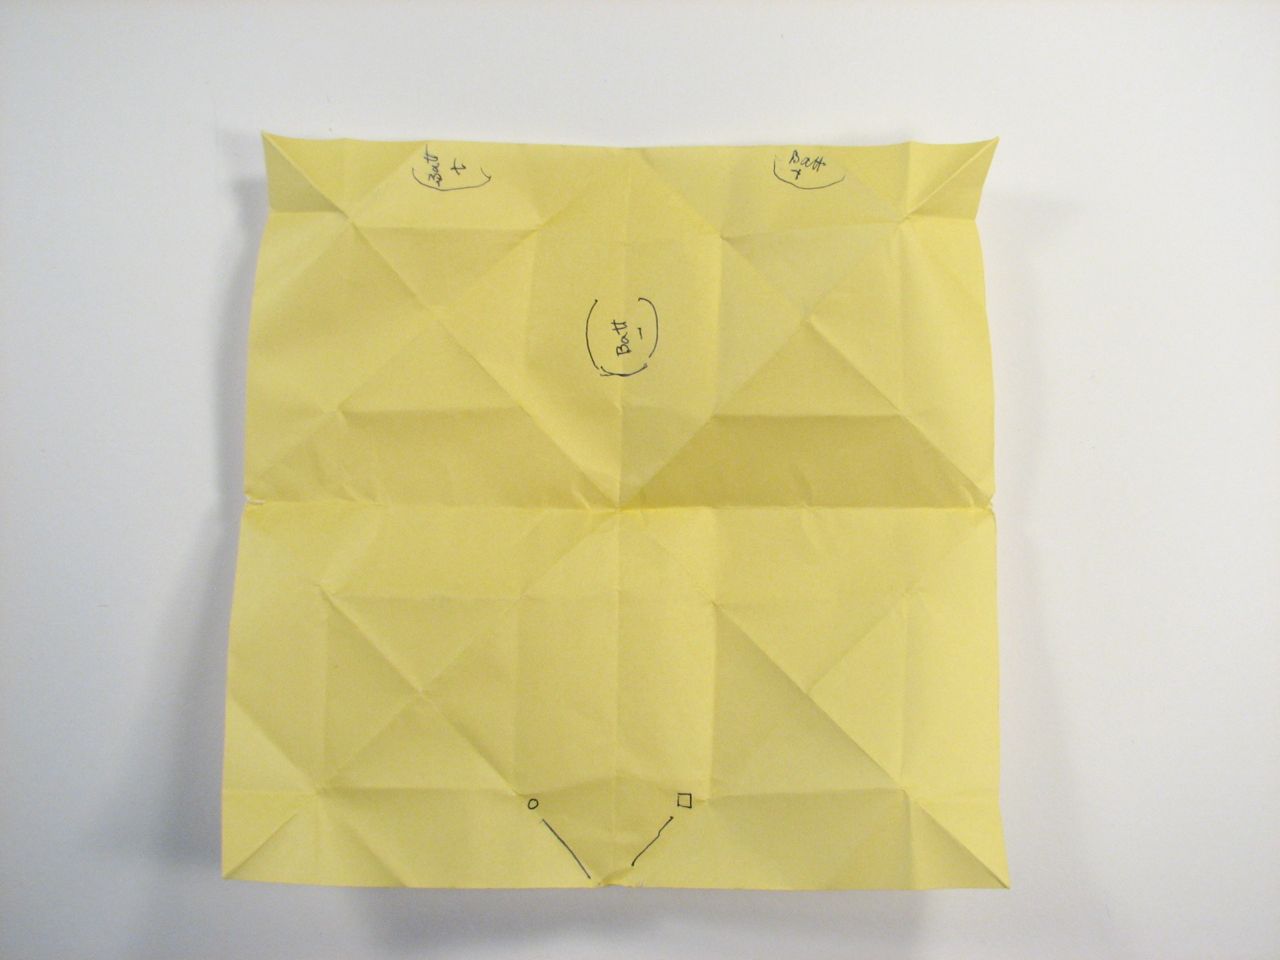
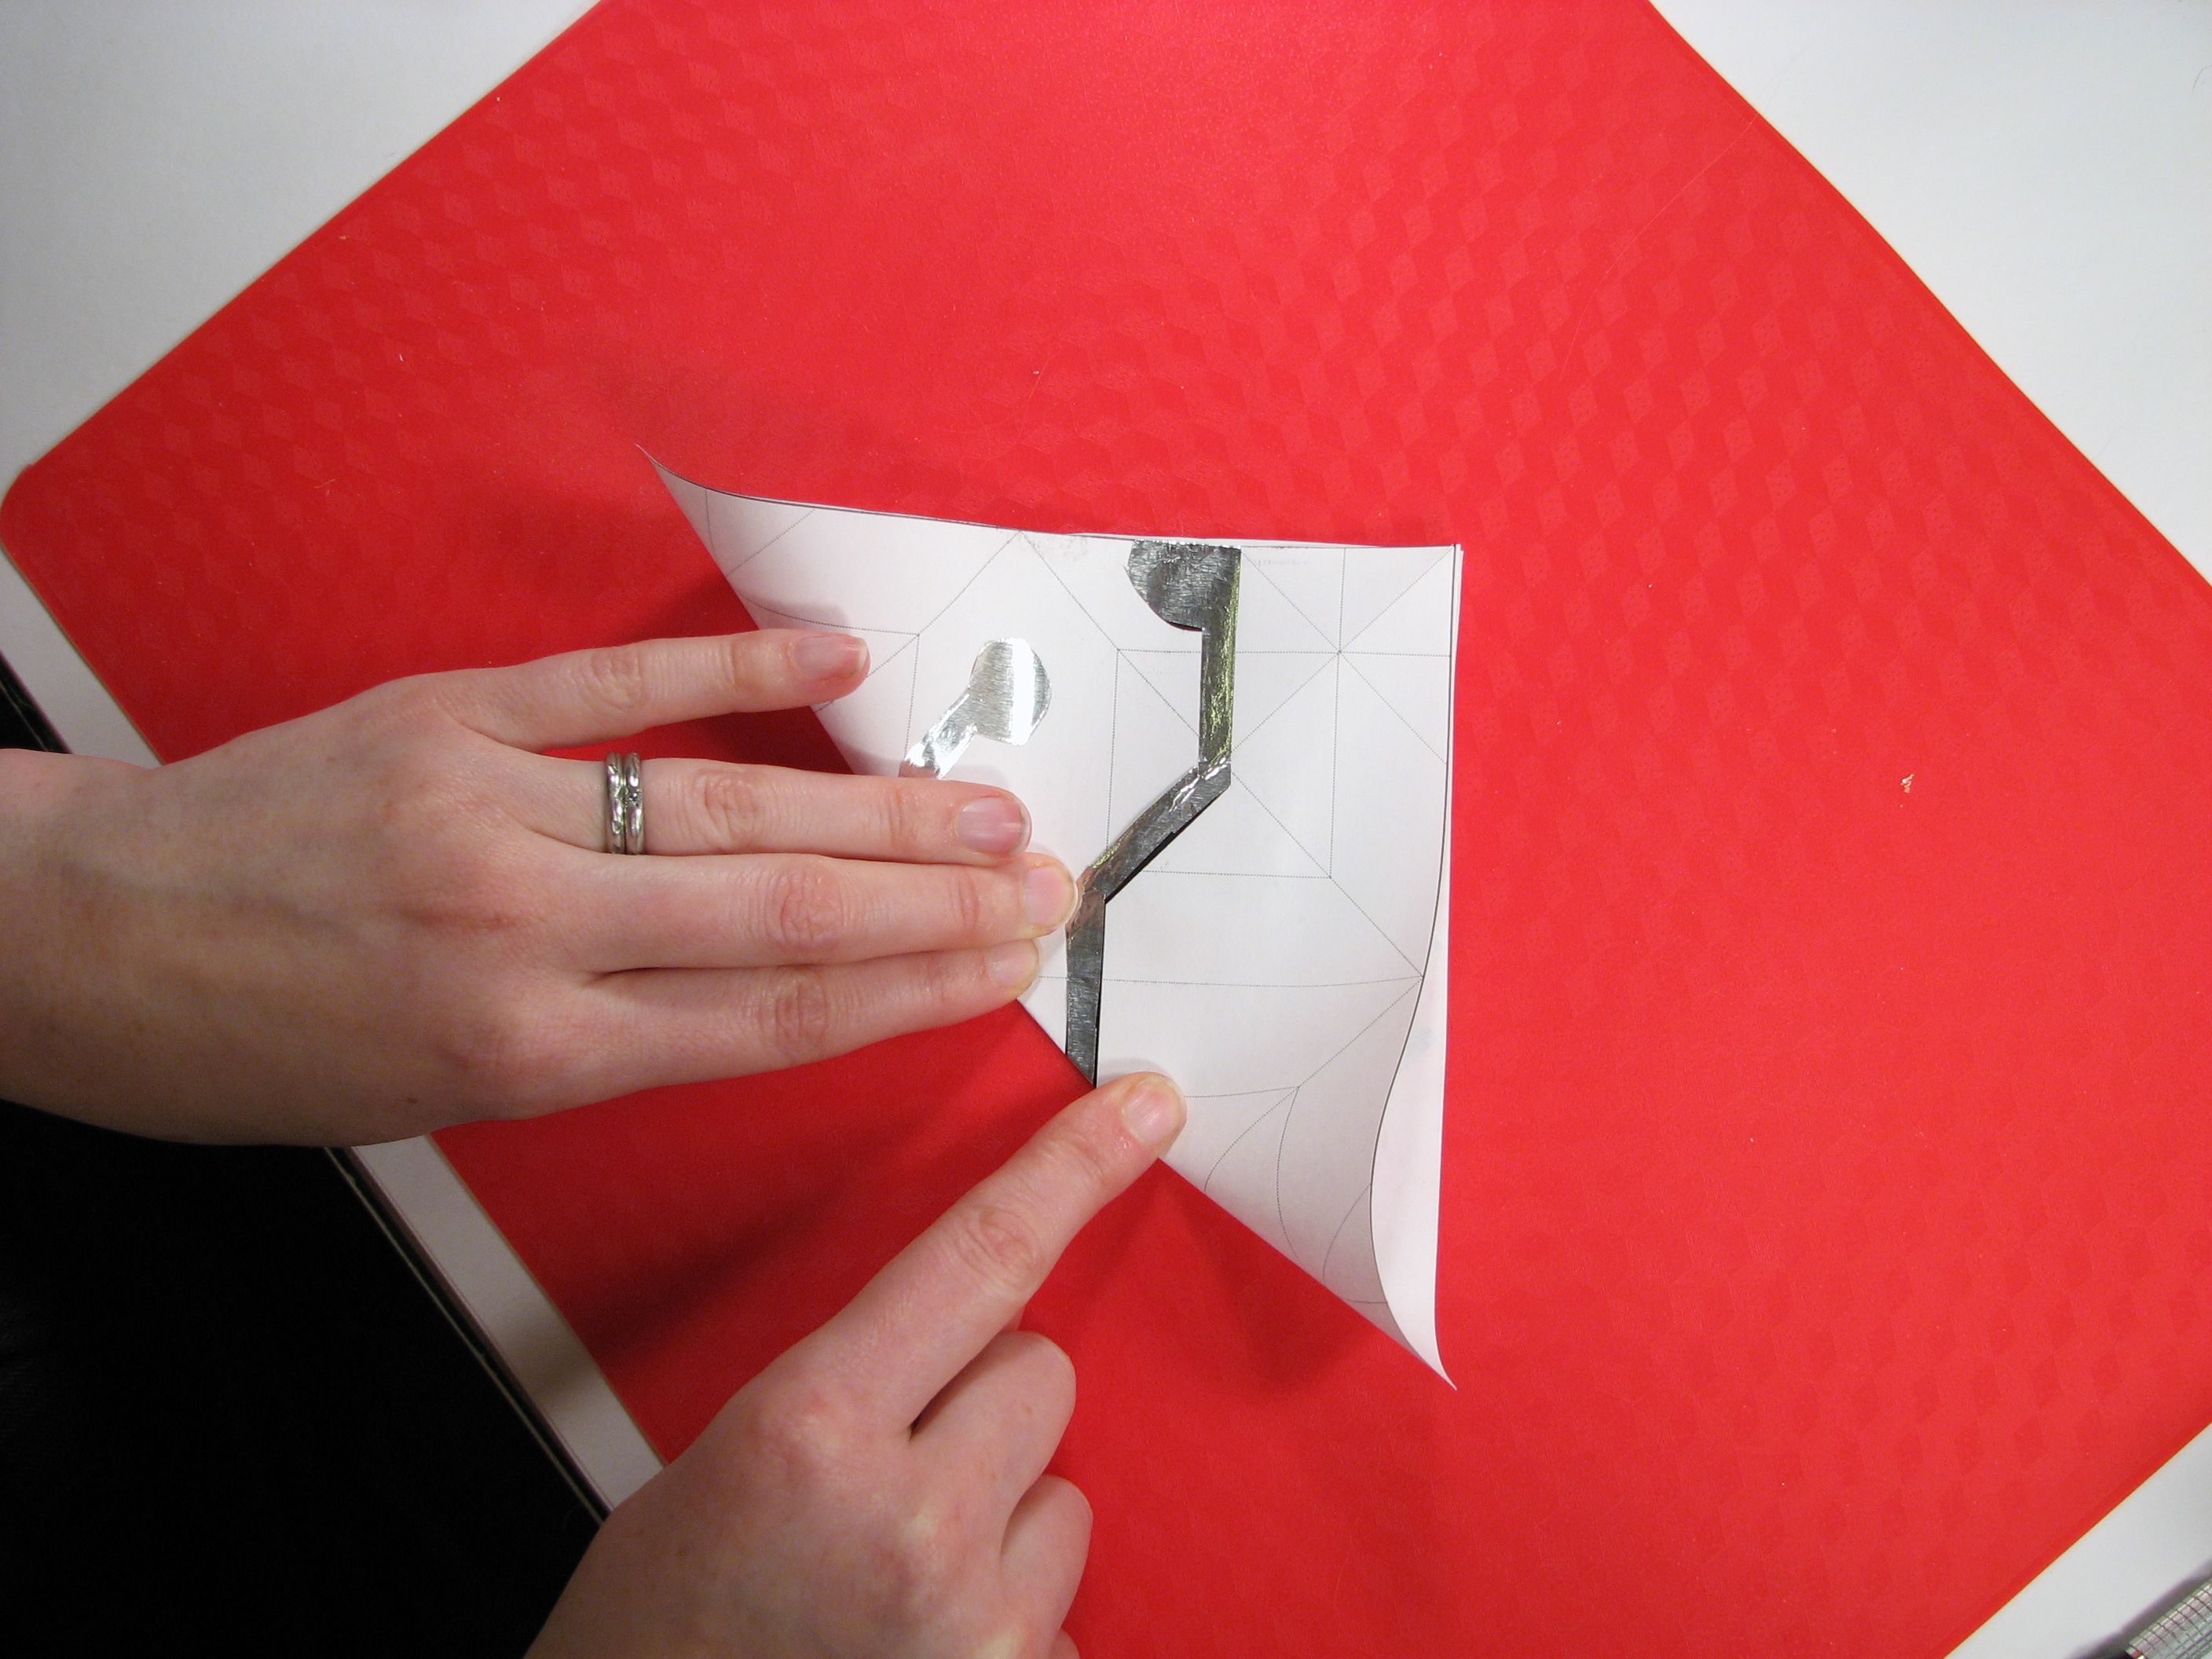
We marked up the locations of the battery and LED terminals on the origami balloon– while still folded– and then unfolded our “circuit board.” At this point, we have the component locations marked, but no lines drawn between them.
The next step is to add those circuitry lines (circuit board wires, or traces) between the battery and LED. One thing to keep in mind for interfacing papercraft to electronics: it’s helpful if the circuit traces fold over the leads for the LED in order to maintain good contact.
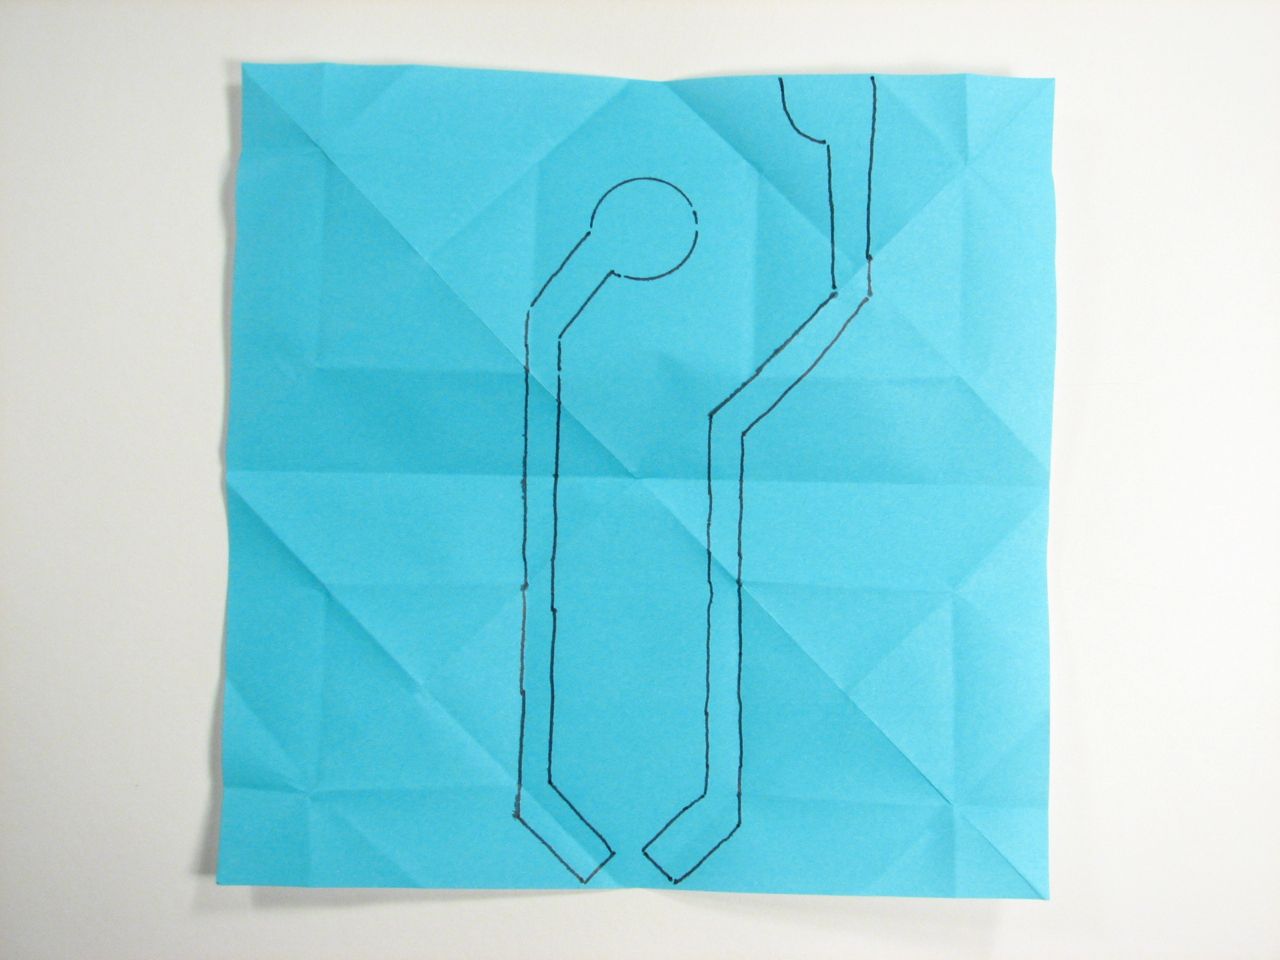
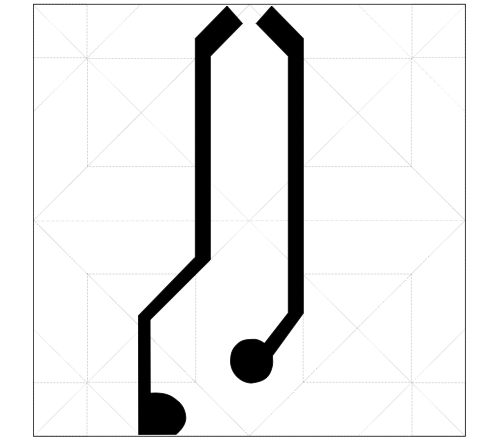
After connecting the dots (so to speak) we have the resulting layout of our circuit. (See PDF below as well.) Pretty simple here– only two wires! The two round pads contact the two sides of the battery, and the two angled pads contact the two leads of the LED.
The next step is to actually fabricate our circuit board. We’ve actually found two slightly different techniques that work well, so we’ll show you both. First is the “Freezer paper” method (which also works with sheets of dry mount adhesive), where you laminate foil traces to the plastic-coated paper. Second is the “Direct Toner” method, where you print out a circuit diagram on a laser printer and laminate the foil to the printed toner.
(Both of these methods of fabricating paper circuitry can be applied in all kinds of other arenas besides origami. Our origami balloon example provides a good demonstration of the techniques!)
METHOD I: The “Freezer paper” method
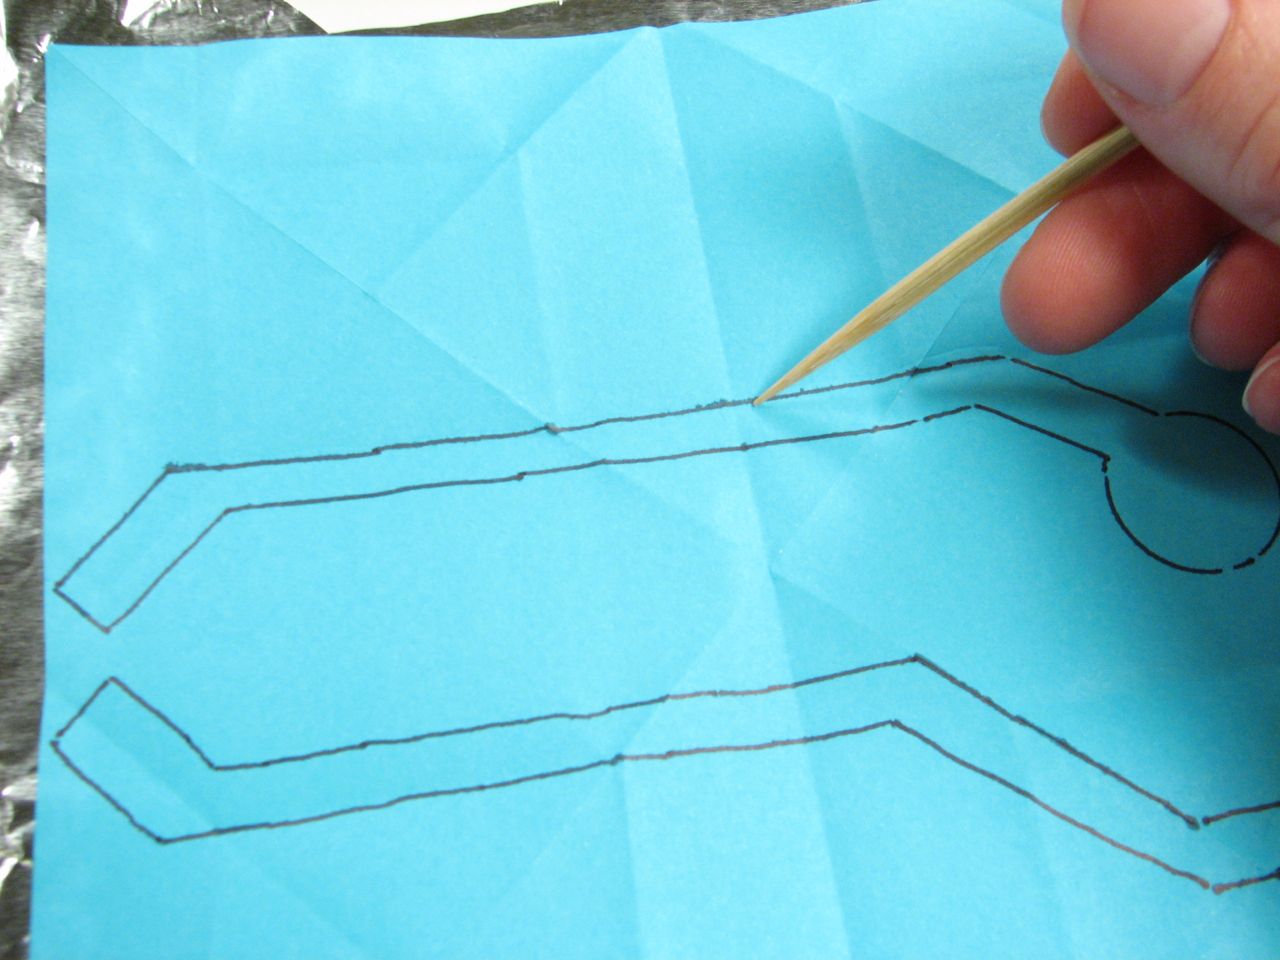
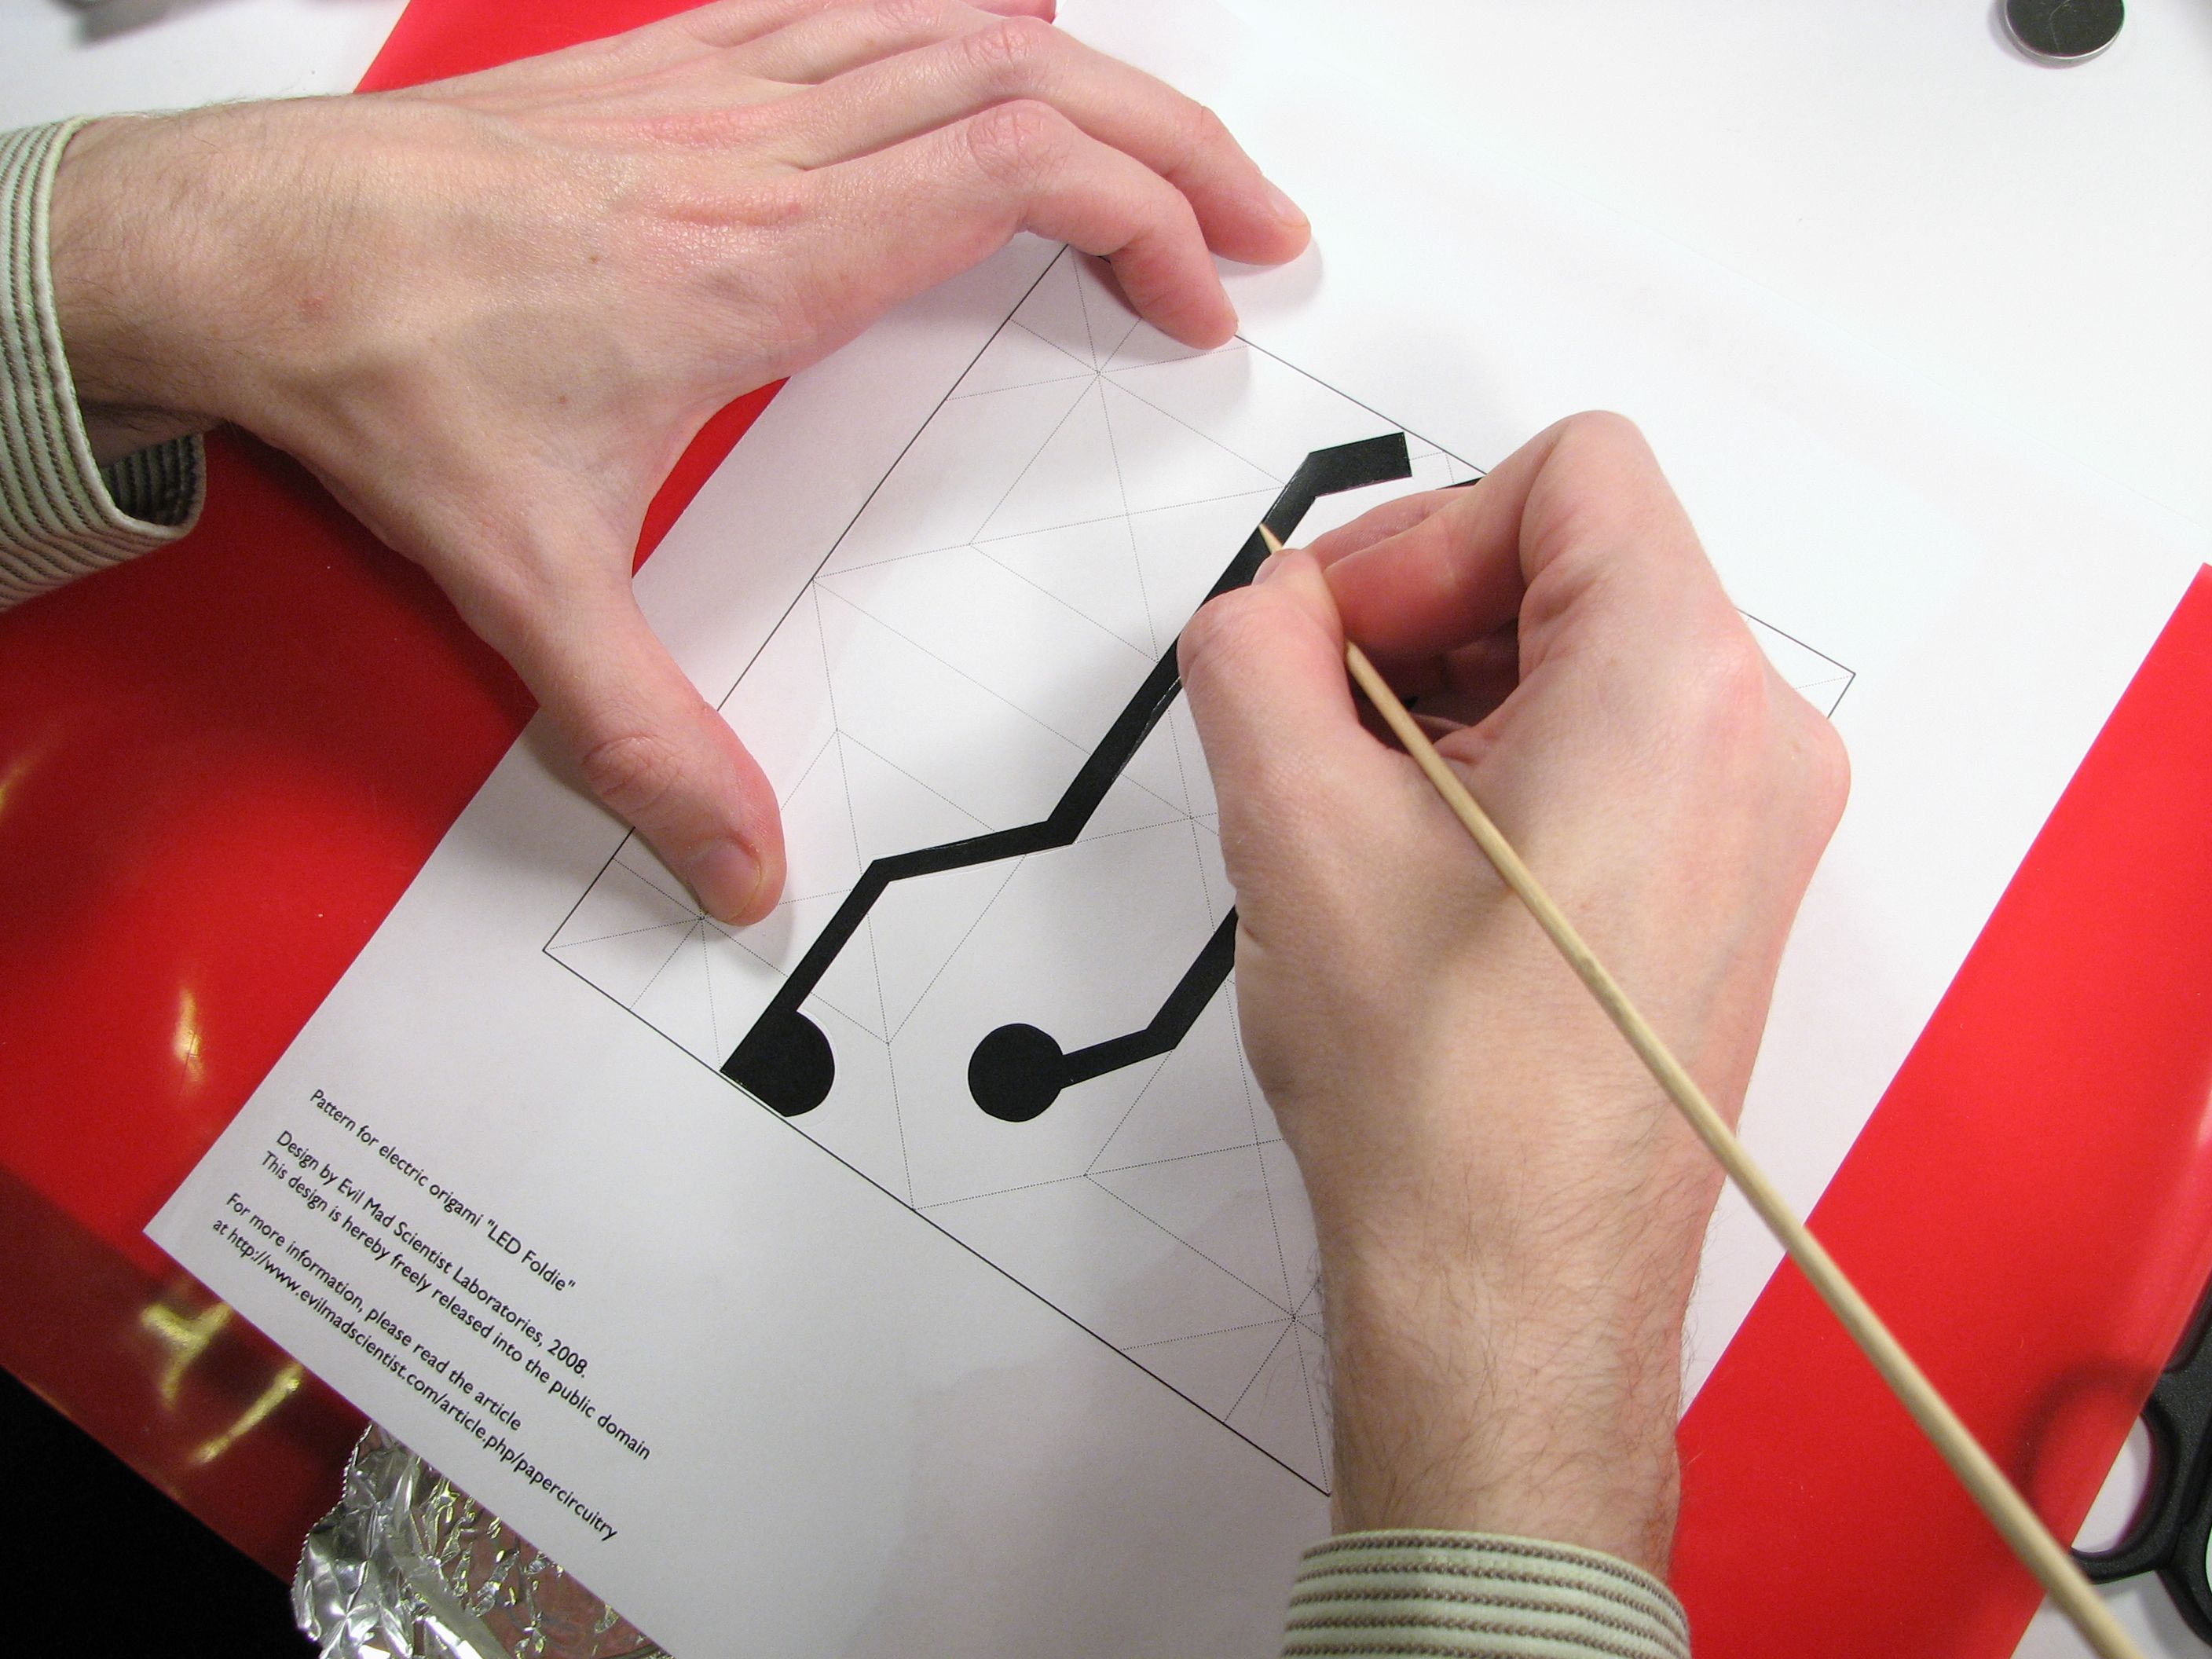
Lay the circuit layout diagram over a piece of aluminum foil and trace over it with a stylus (a wooden skewer or blunt toothpick works well) to make an indented outline.
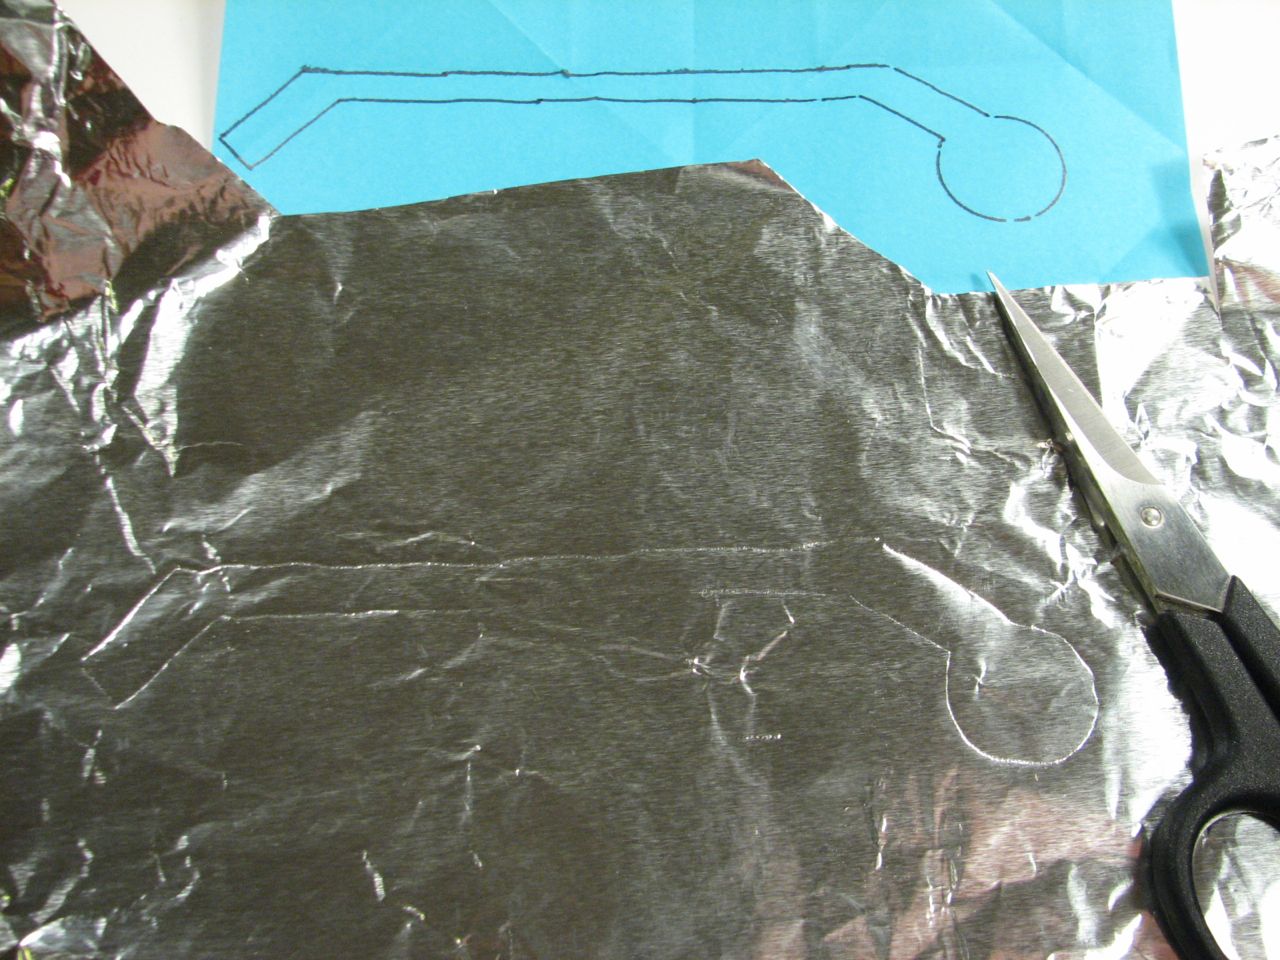
Next, cut out your traced pattern. Scissors work well, of course. Be careful not to tear the foil!
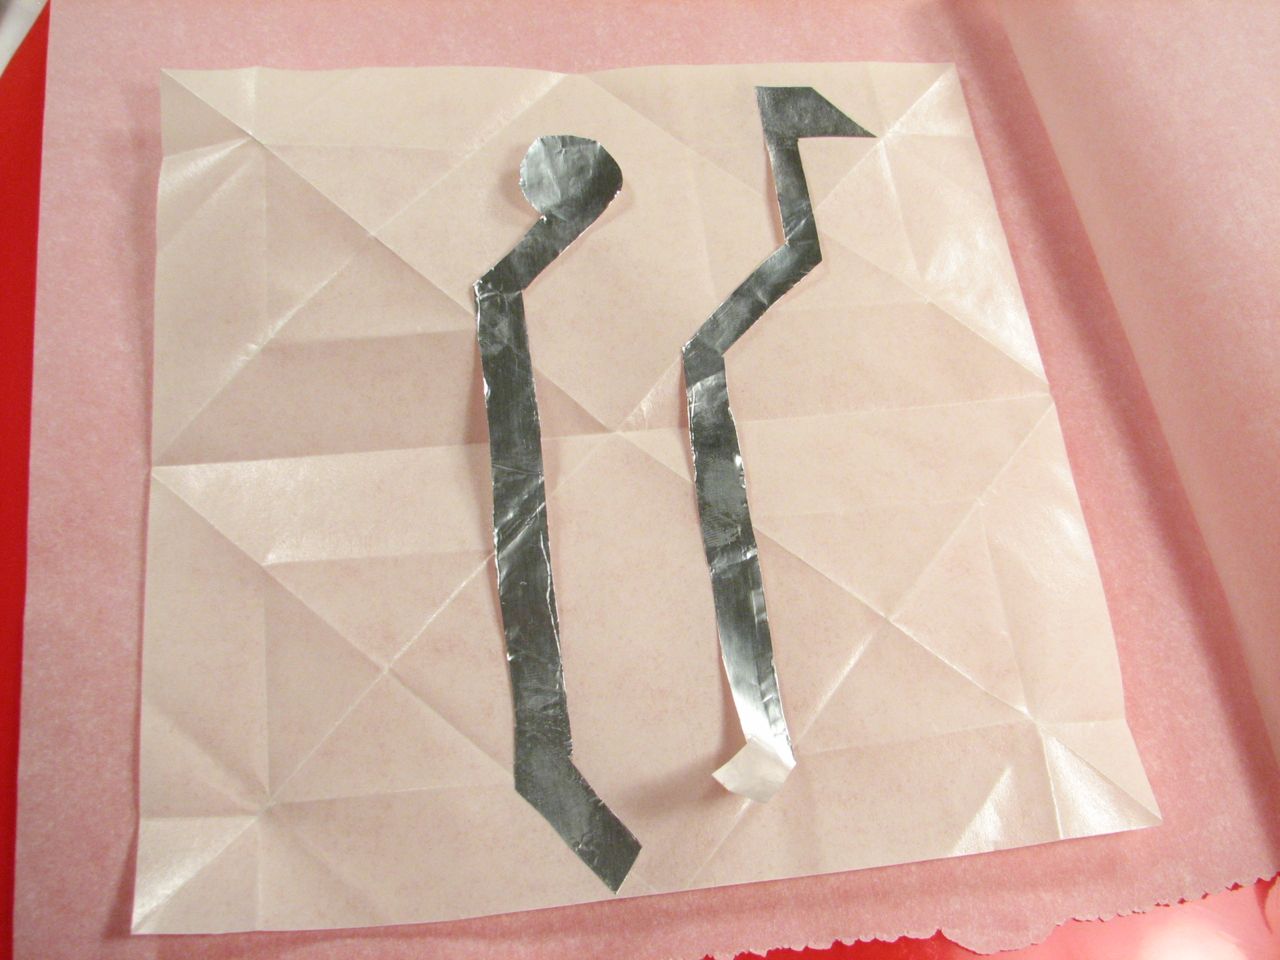

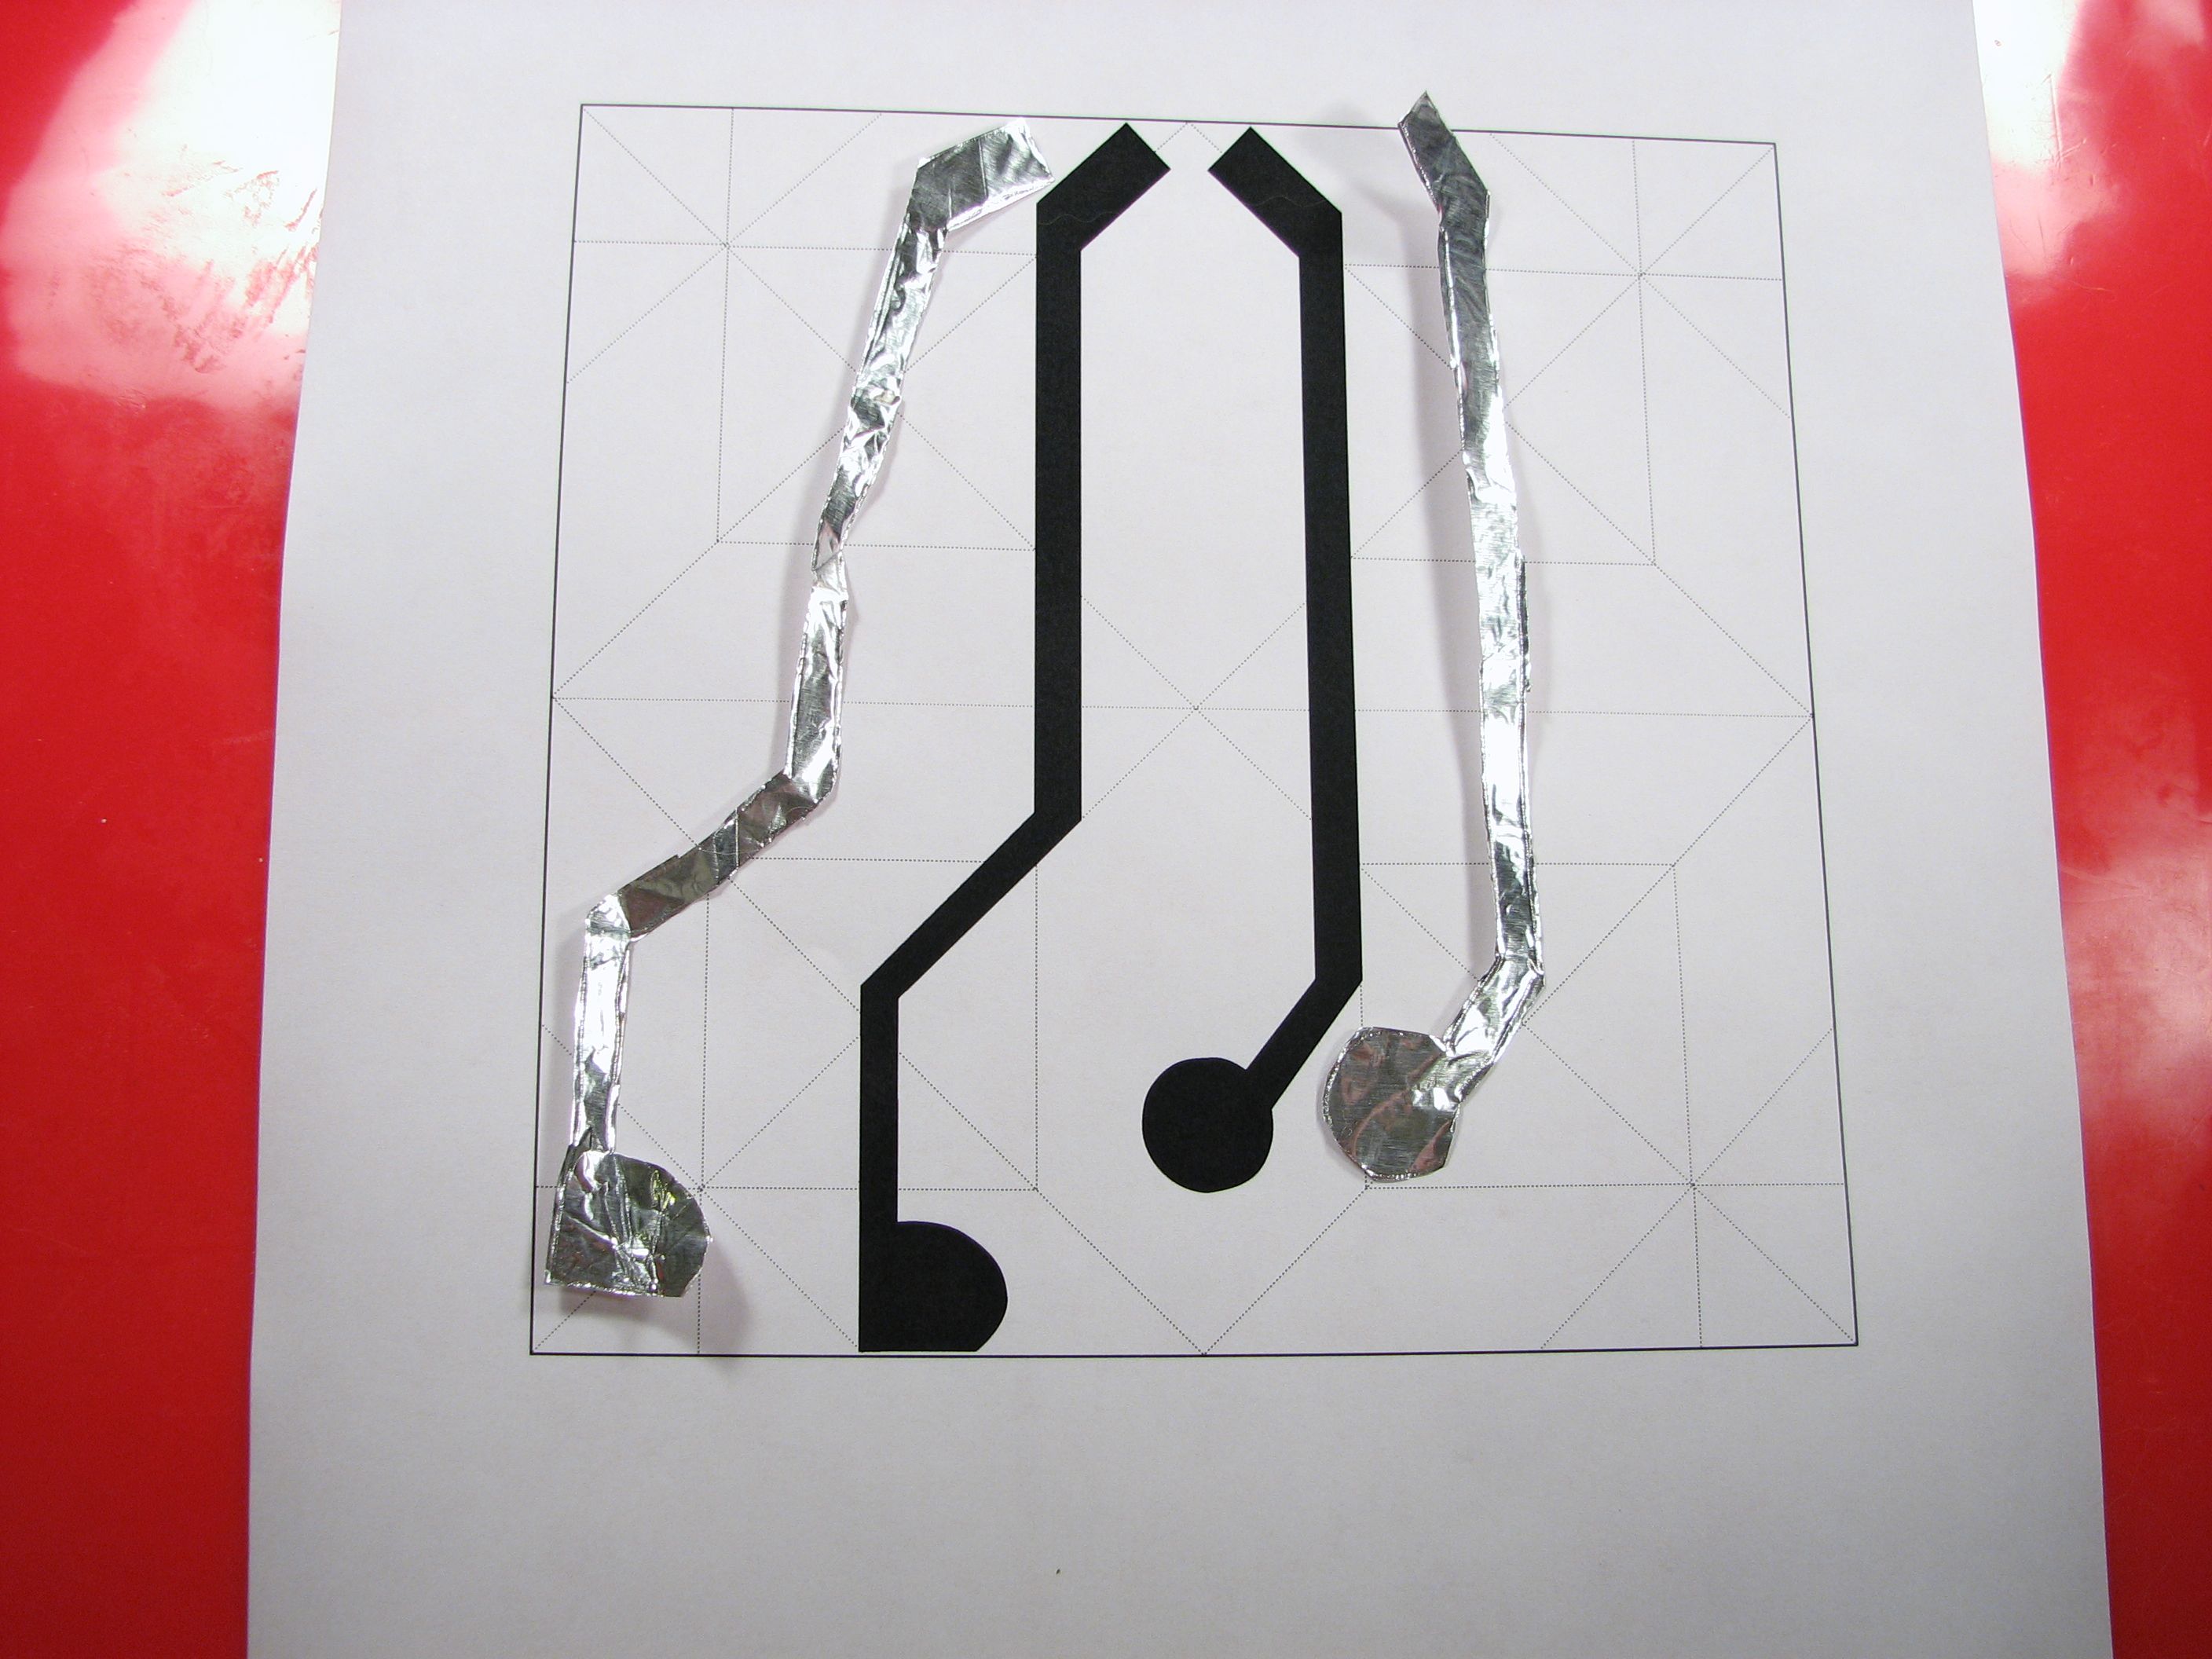
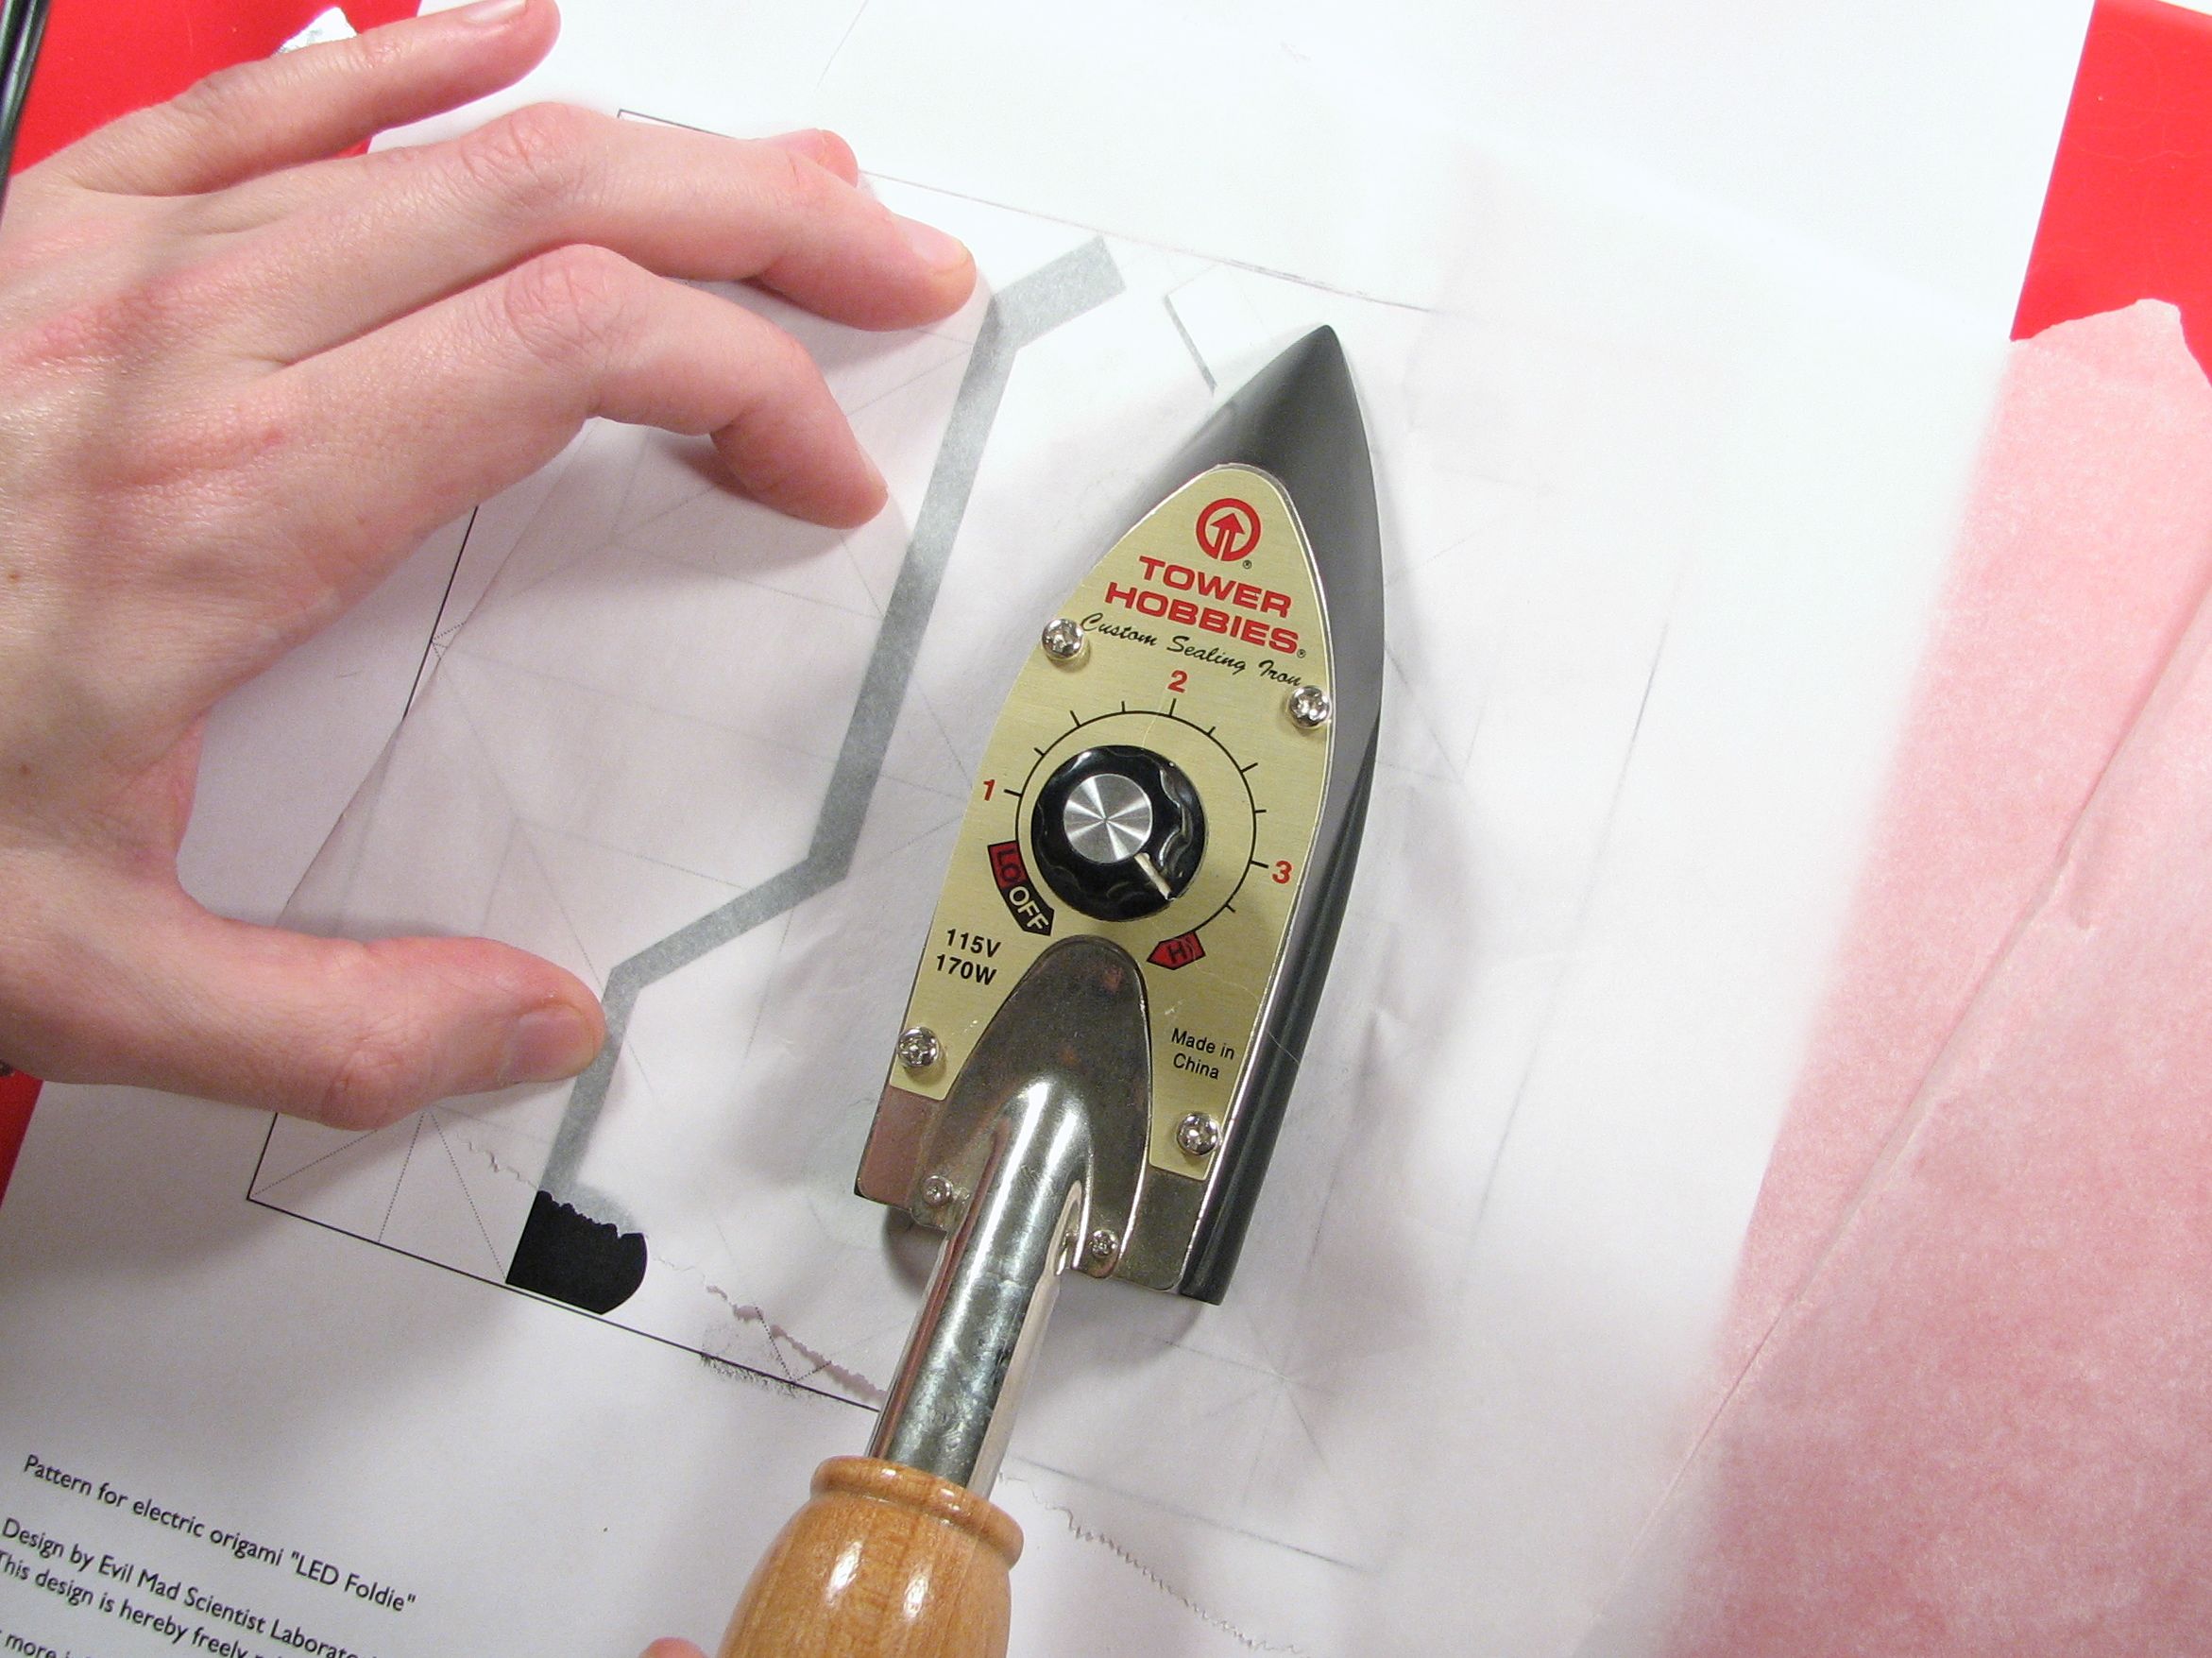
Prefolding your paper and comparing to your circuit layout will show you where to lay the aluminum foil pieces out on your paper. Then, use an iron to laminate the foil to the paper.
What kind of paper? The easiest (but slightly obscure) choice is “dry mount adhesive,” which is tissue paper infused with high-quality hot-melt glue. You can get sheets or rolls of it from art supply places for use in mounting artwork and photography. Much more common and equally workable is freezer paper. Freezer paper is a common plastic-coated paper that you can get on rolls at the grocery store– look in the section with the aluminum foil. (Place foil on the shiny side of the freezer paper).
We used a small hobby iron to fuse the foil to our different papers, but a regular iron works just as well. The dry mount adhesive did not require much heat, while the freezer paper needed the iron to be on high– that plastic has to melt. We folded a larger sheet of parchment paper over the whole circuit during ironing in order to keep the adhesives from sticking to the iron and other surfaces.
We also experimented with waxed paper, which was not sticky enough for the aluminum foil. We even tried ironing copper leaf onto waxed paper, and though it adhered well, it was too fragile and the traces broke upon folding. It would probably work reasonably well in an application where folding isn’t required: It was absolutely beautiful and completely unreliable for origami.
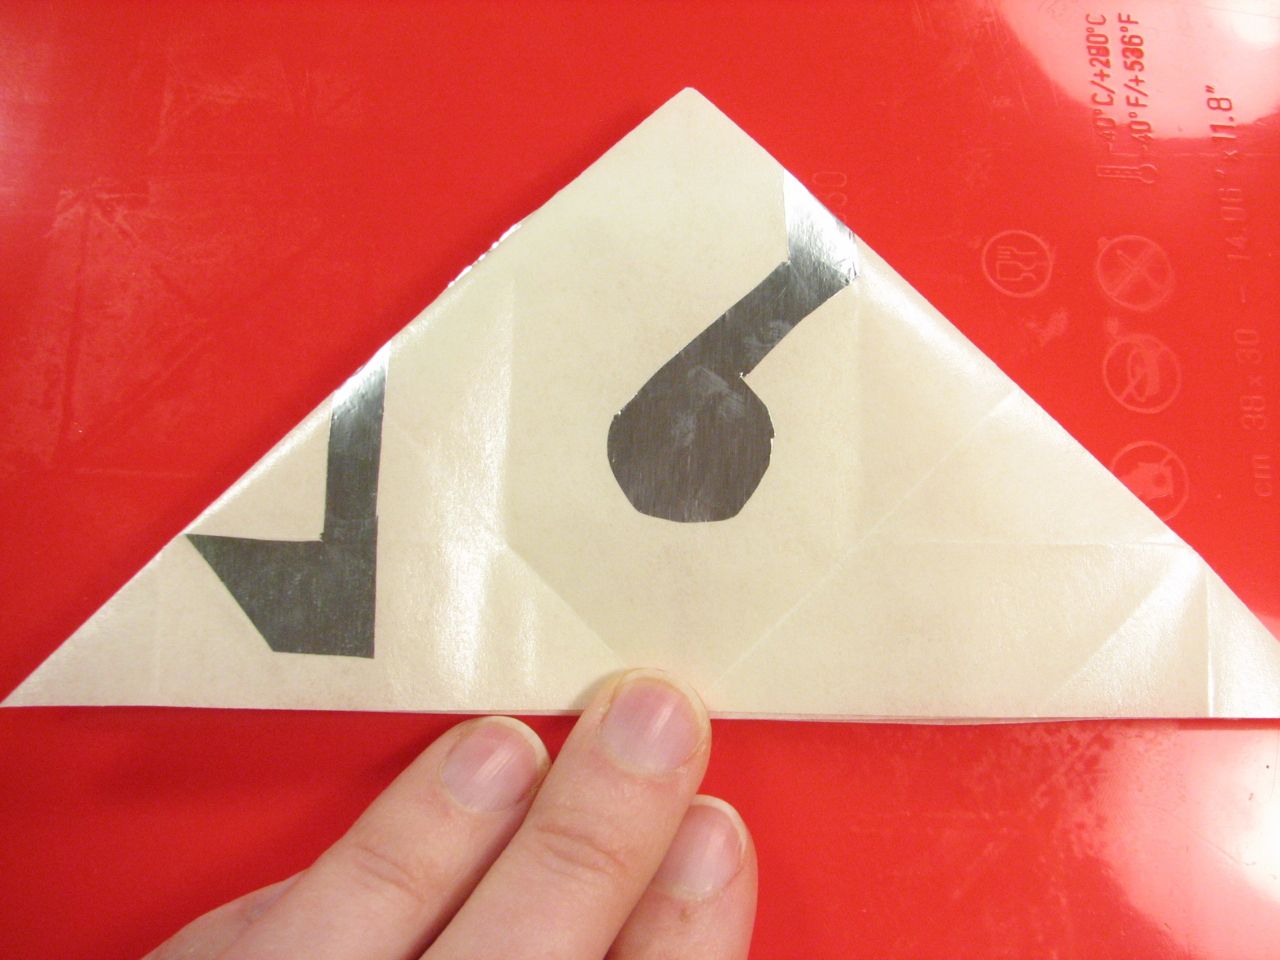
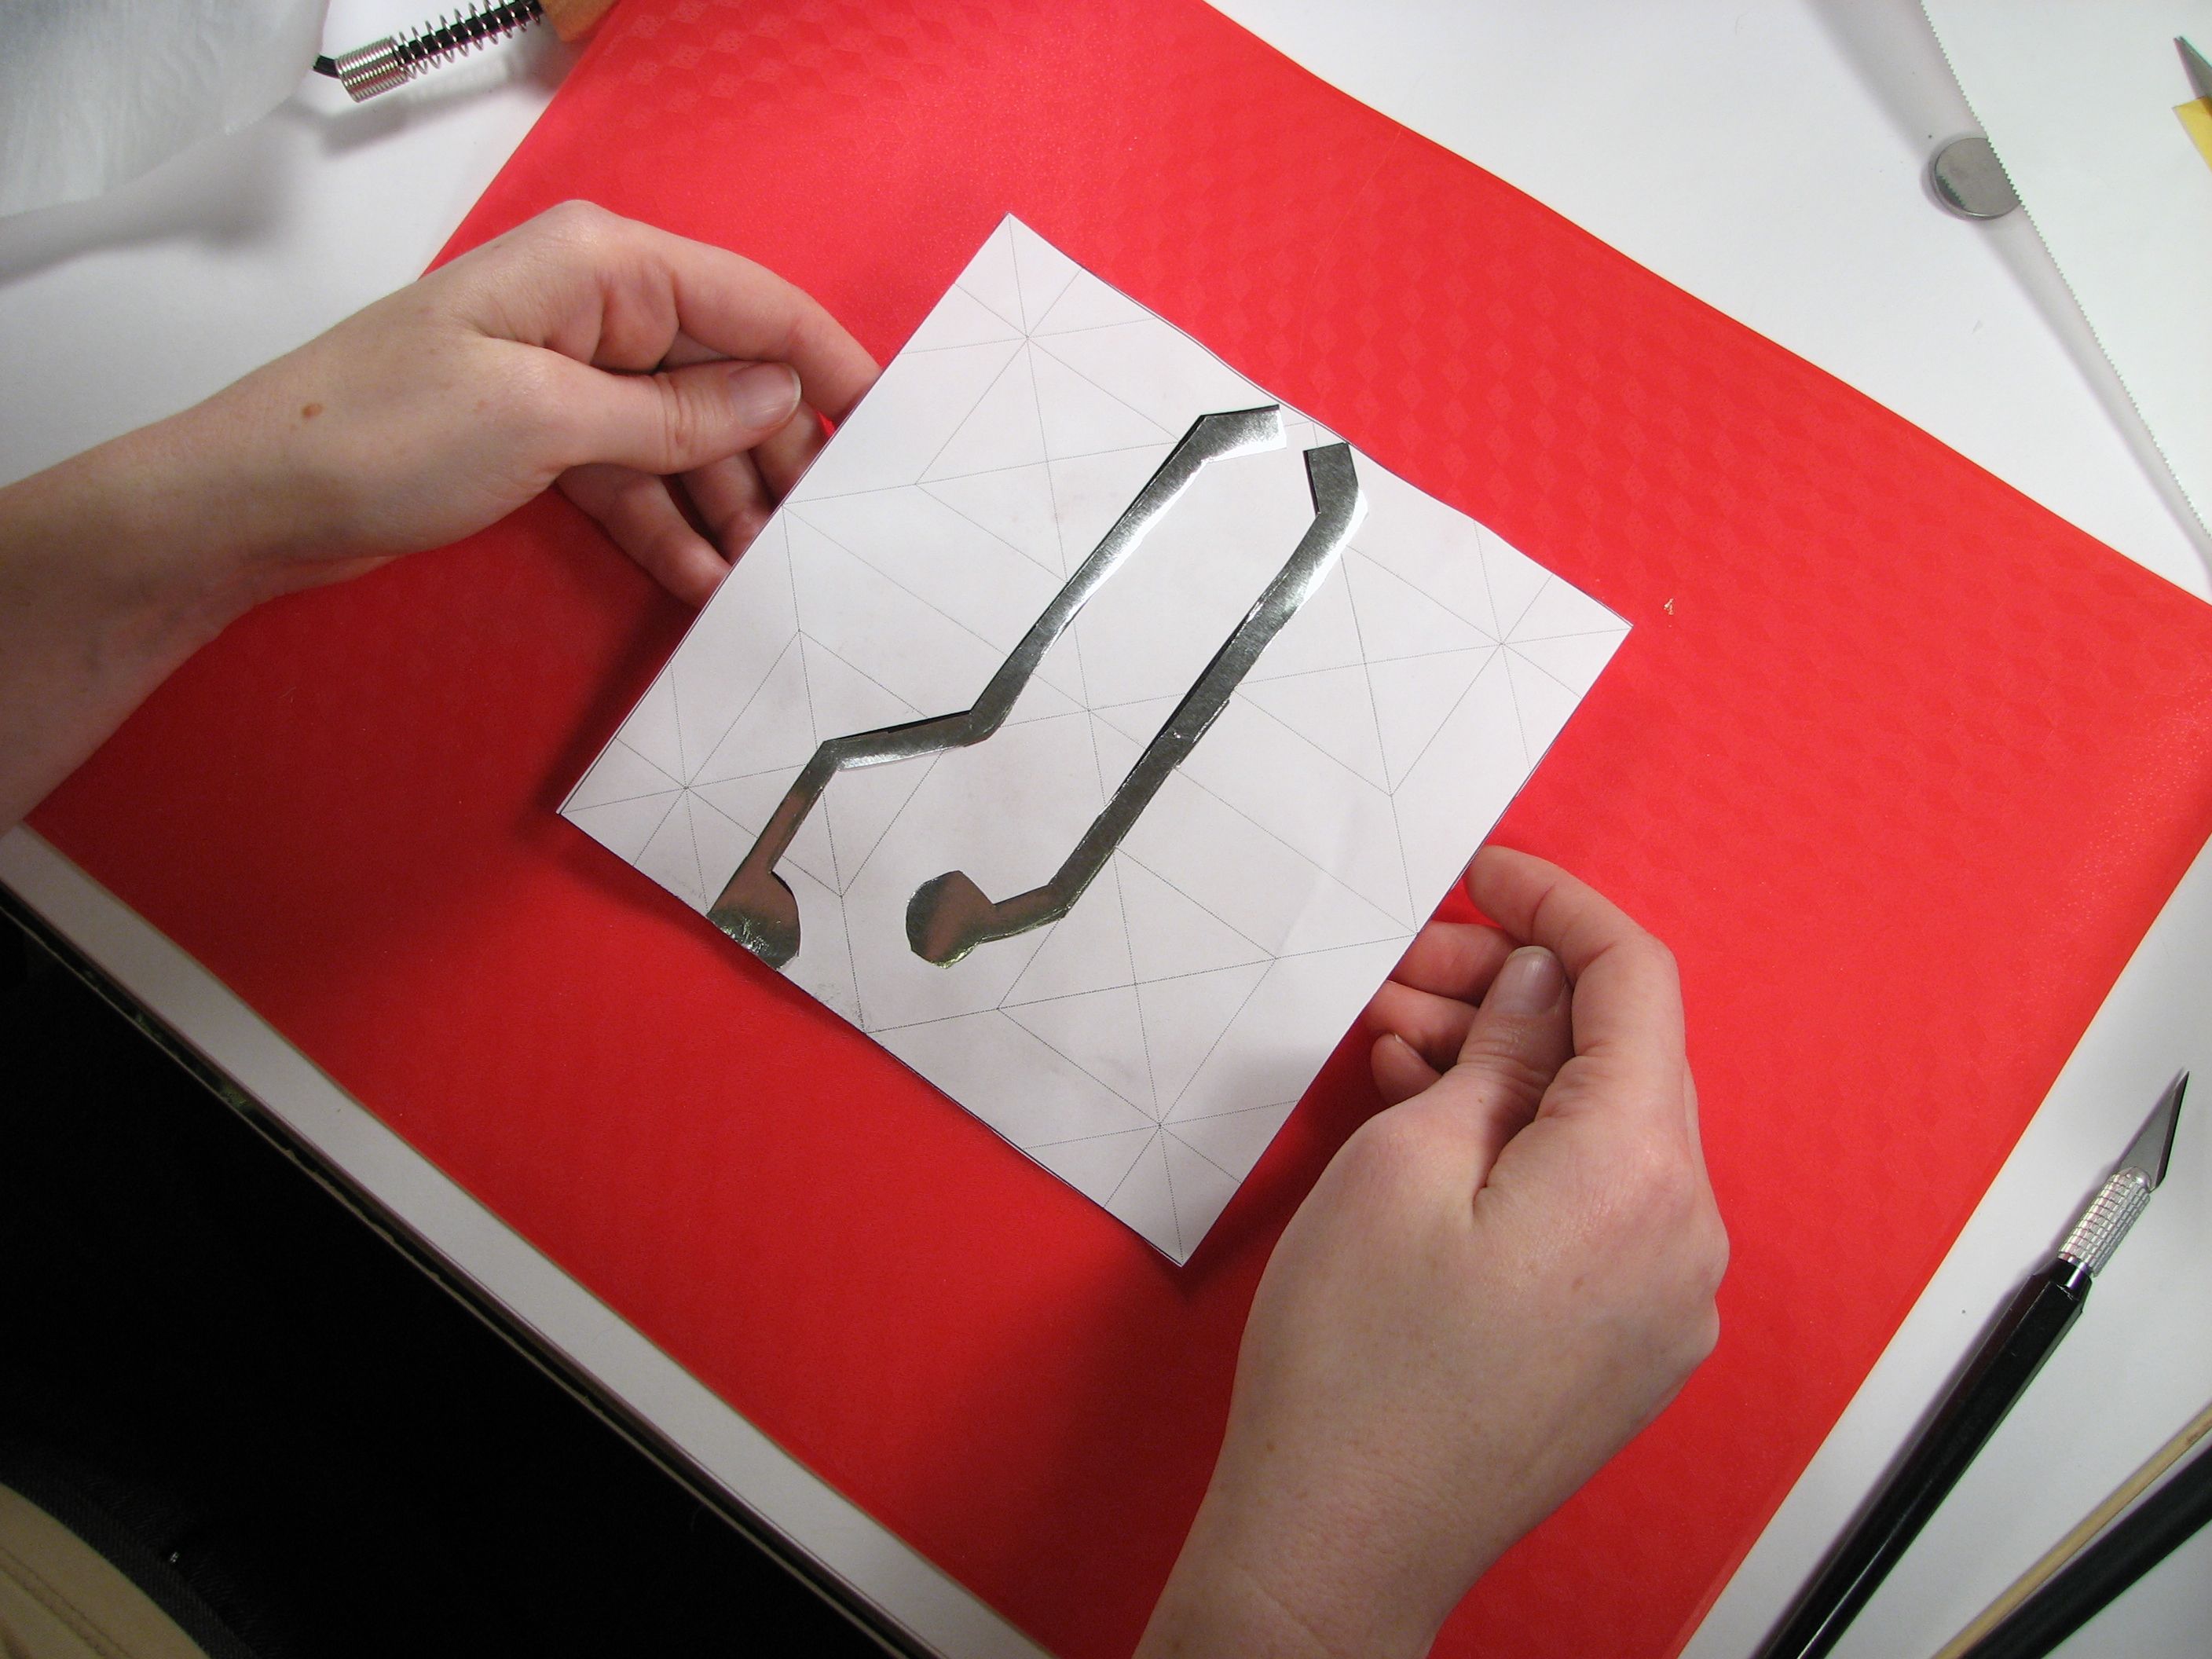
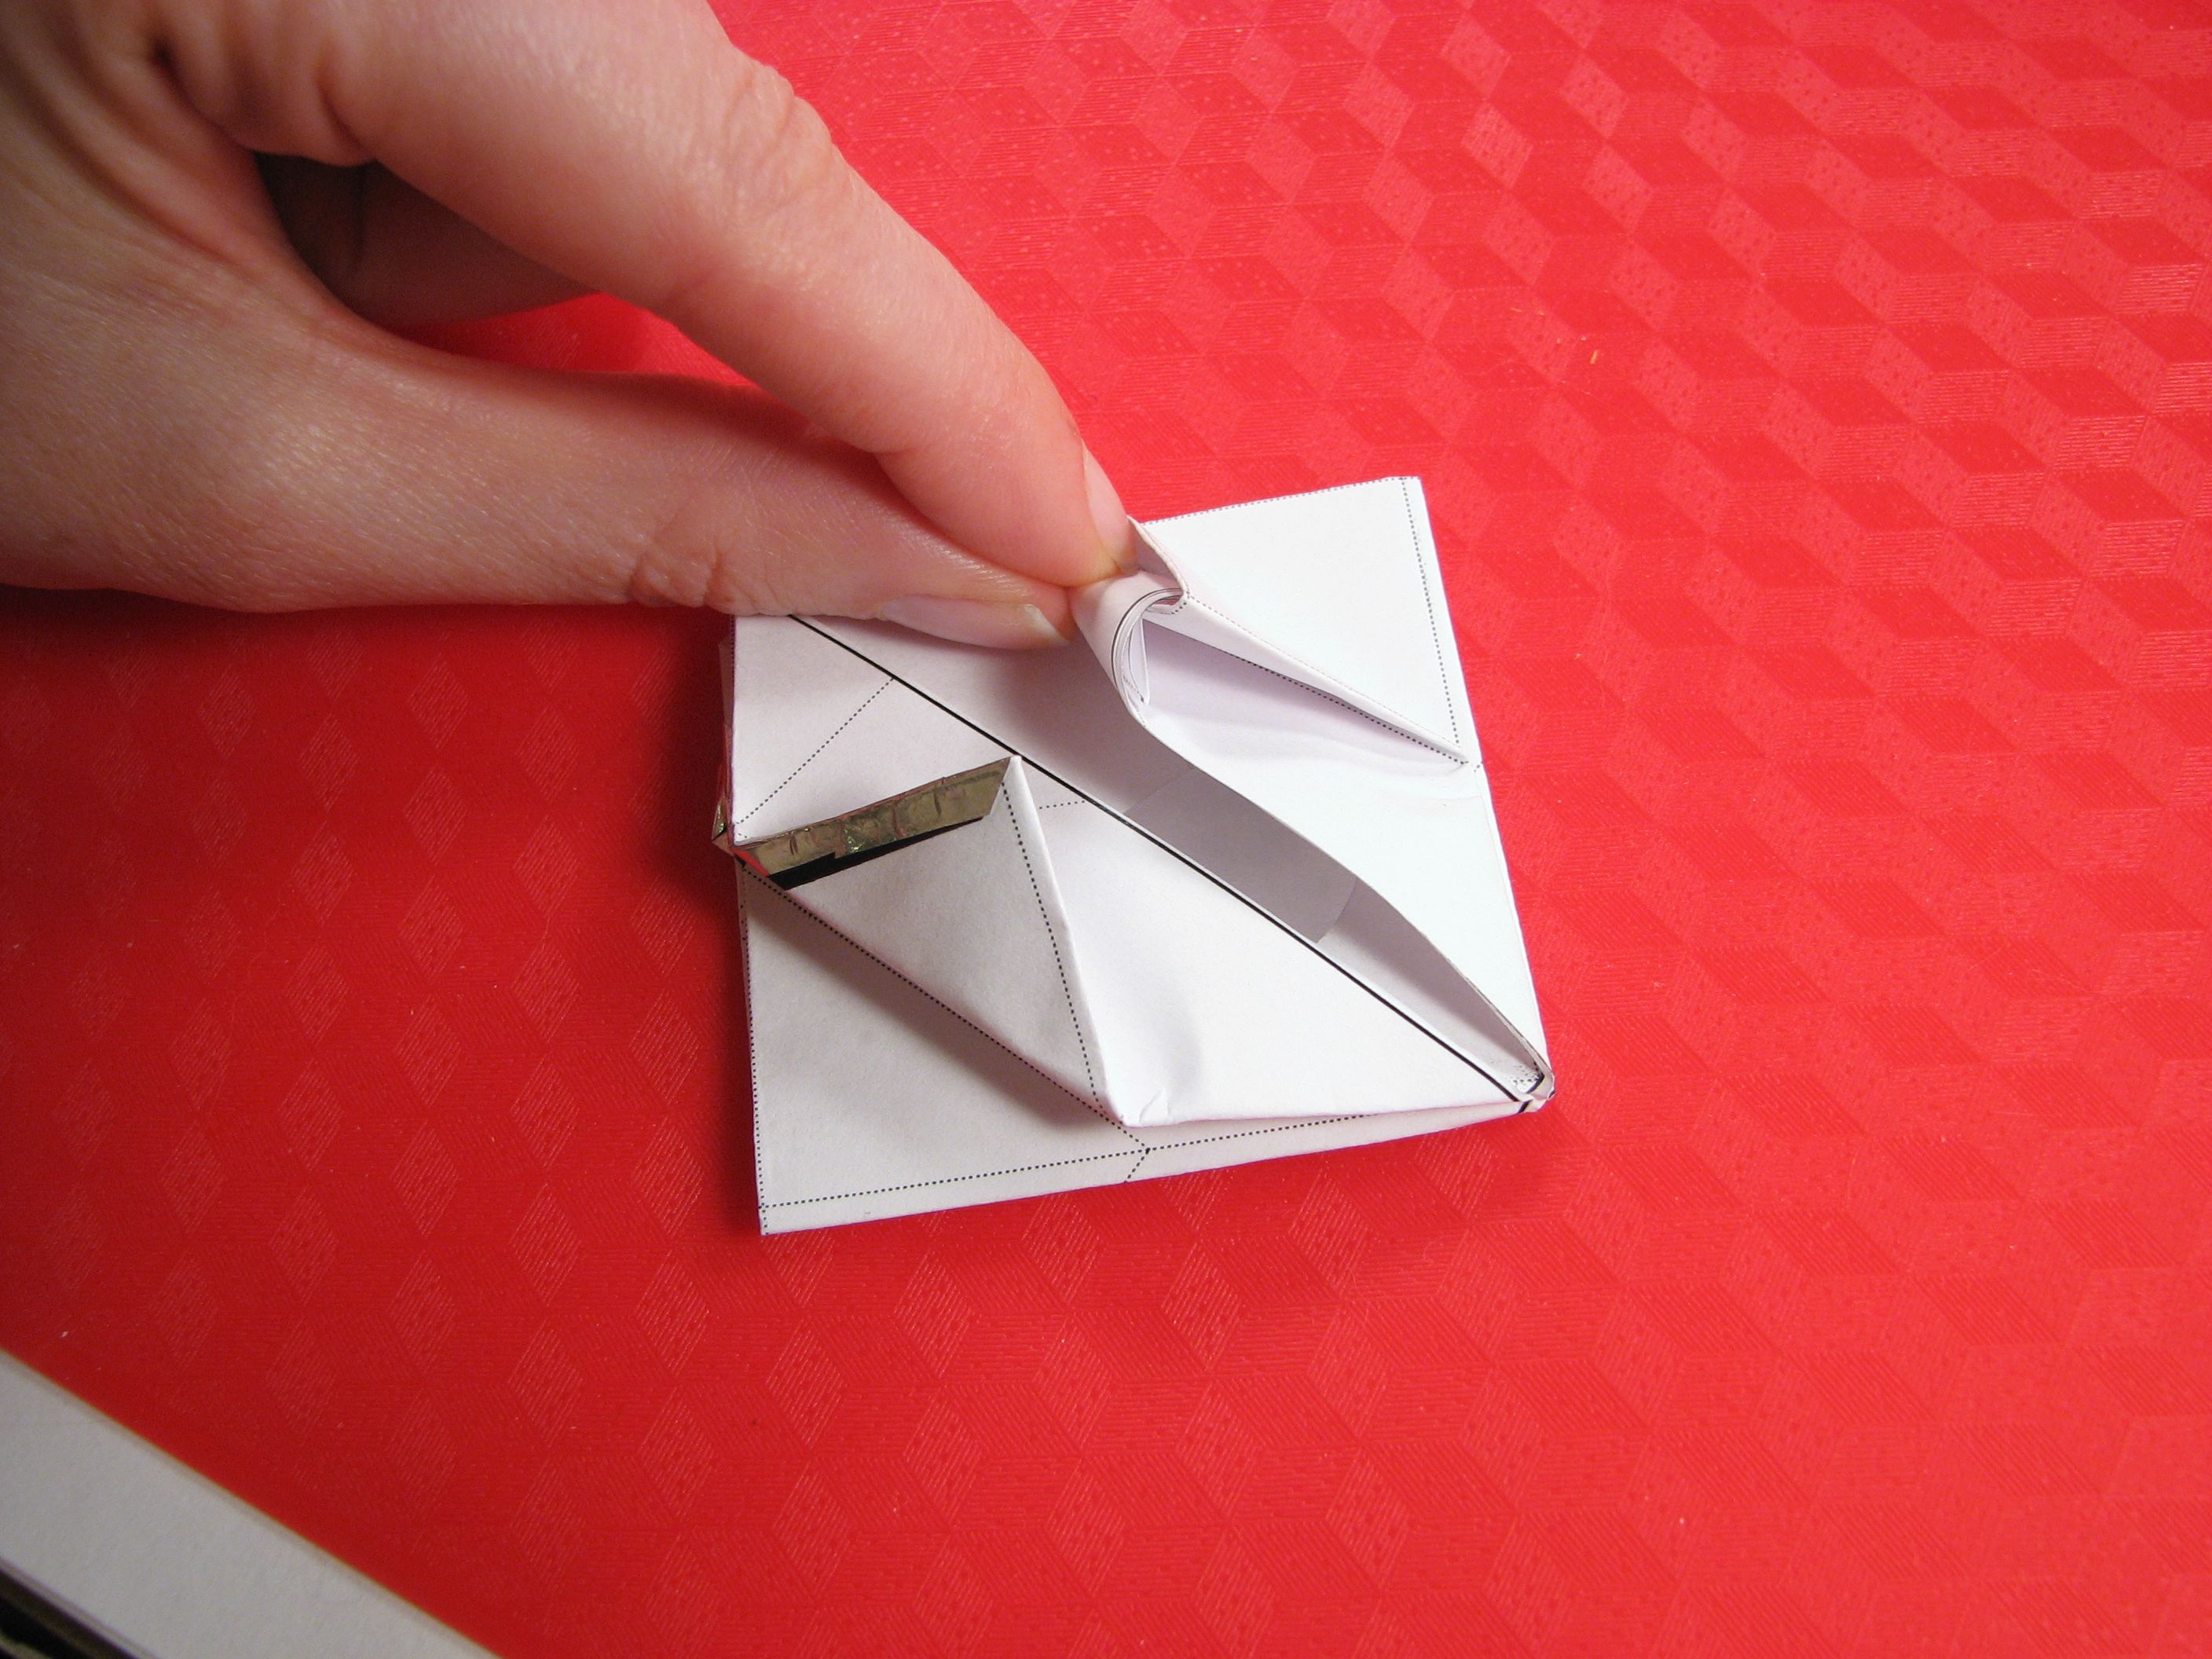
Once the foil is adhered to the paper, it is time to refold it.
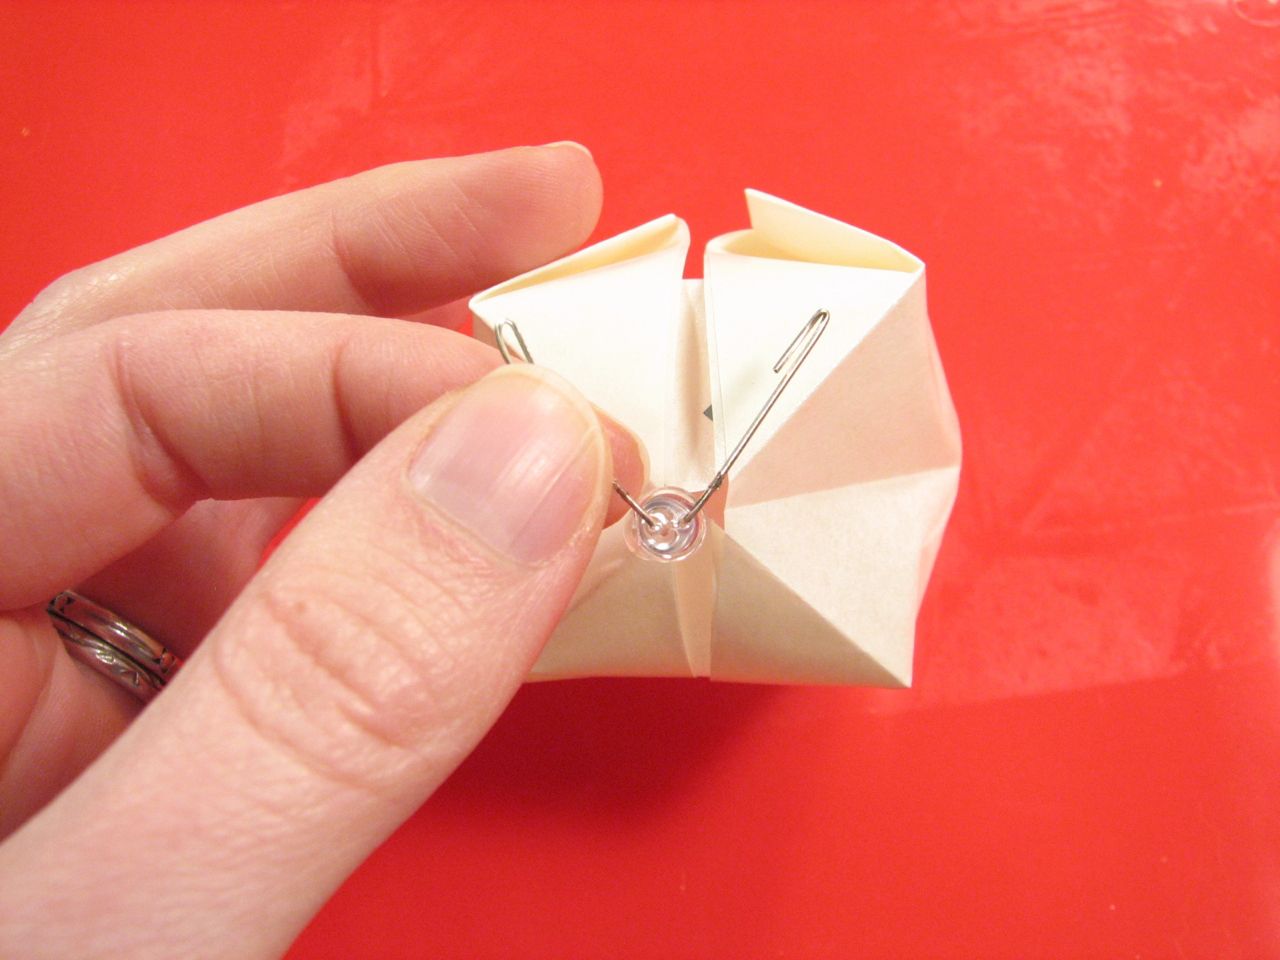
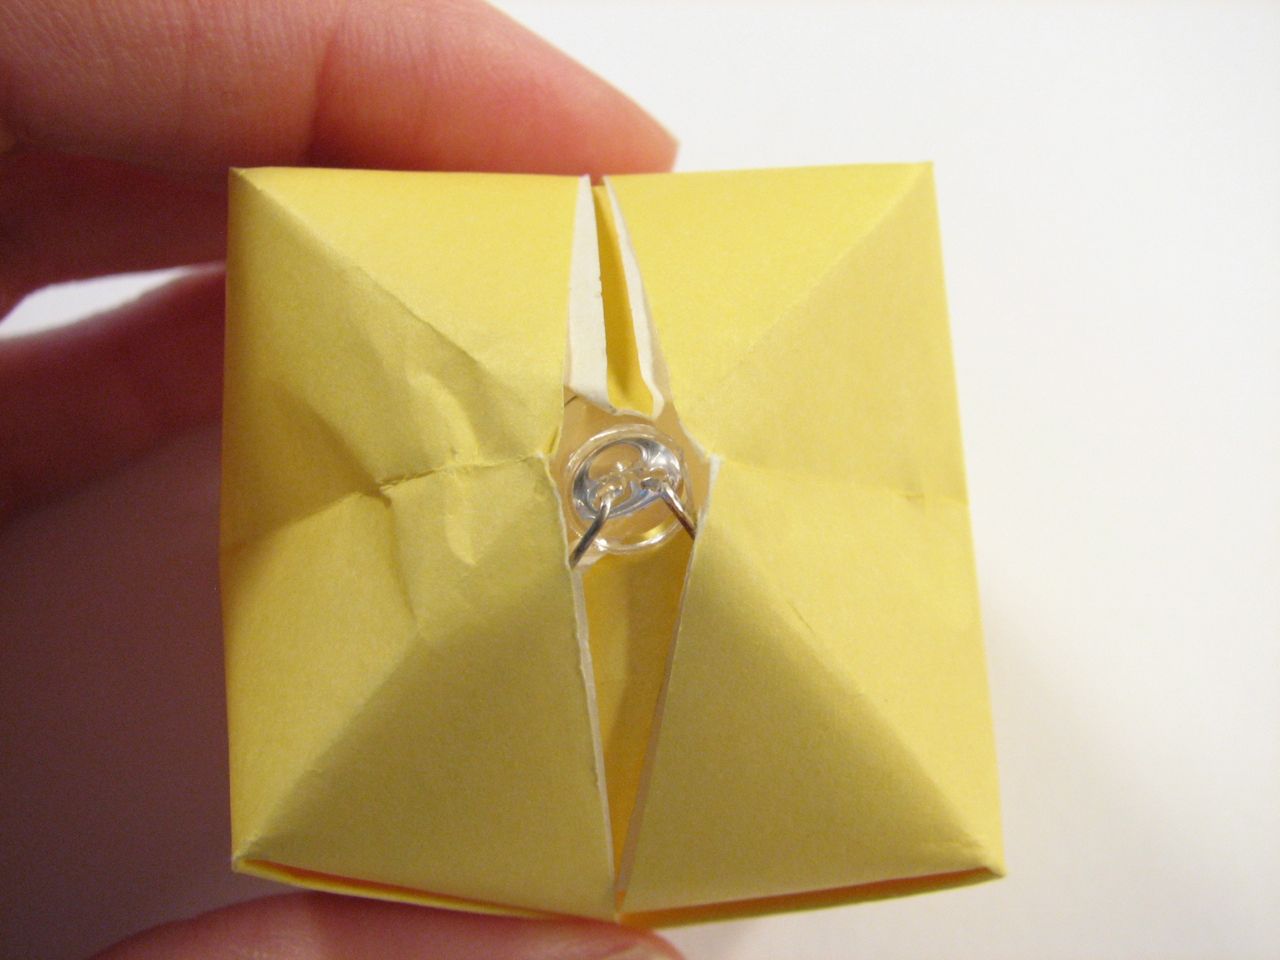
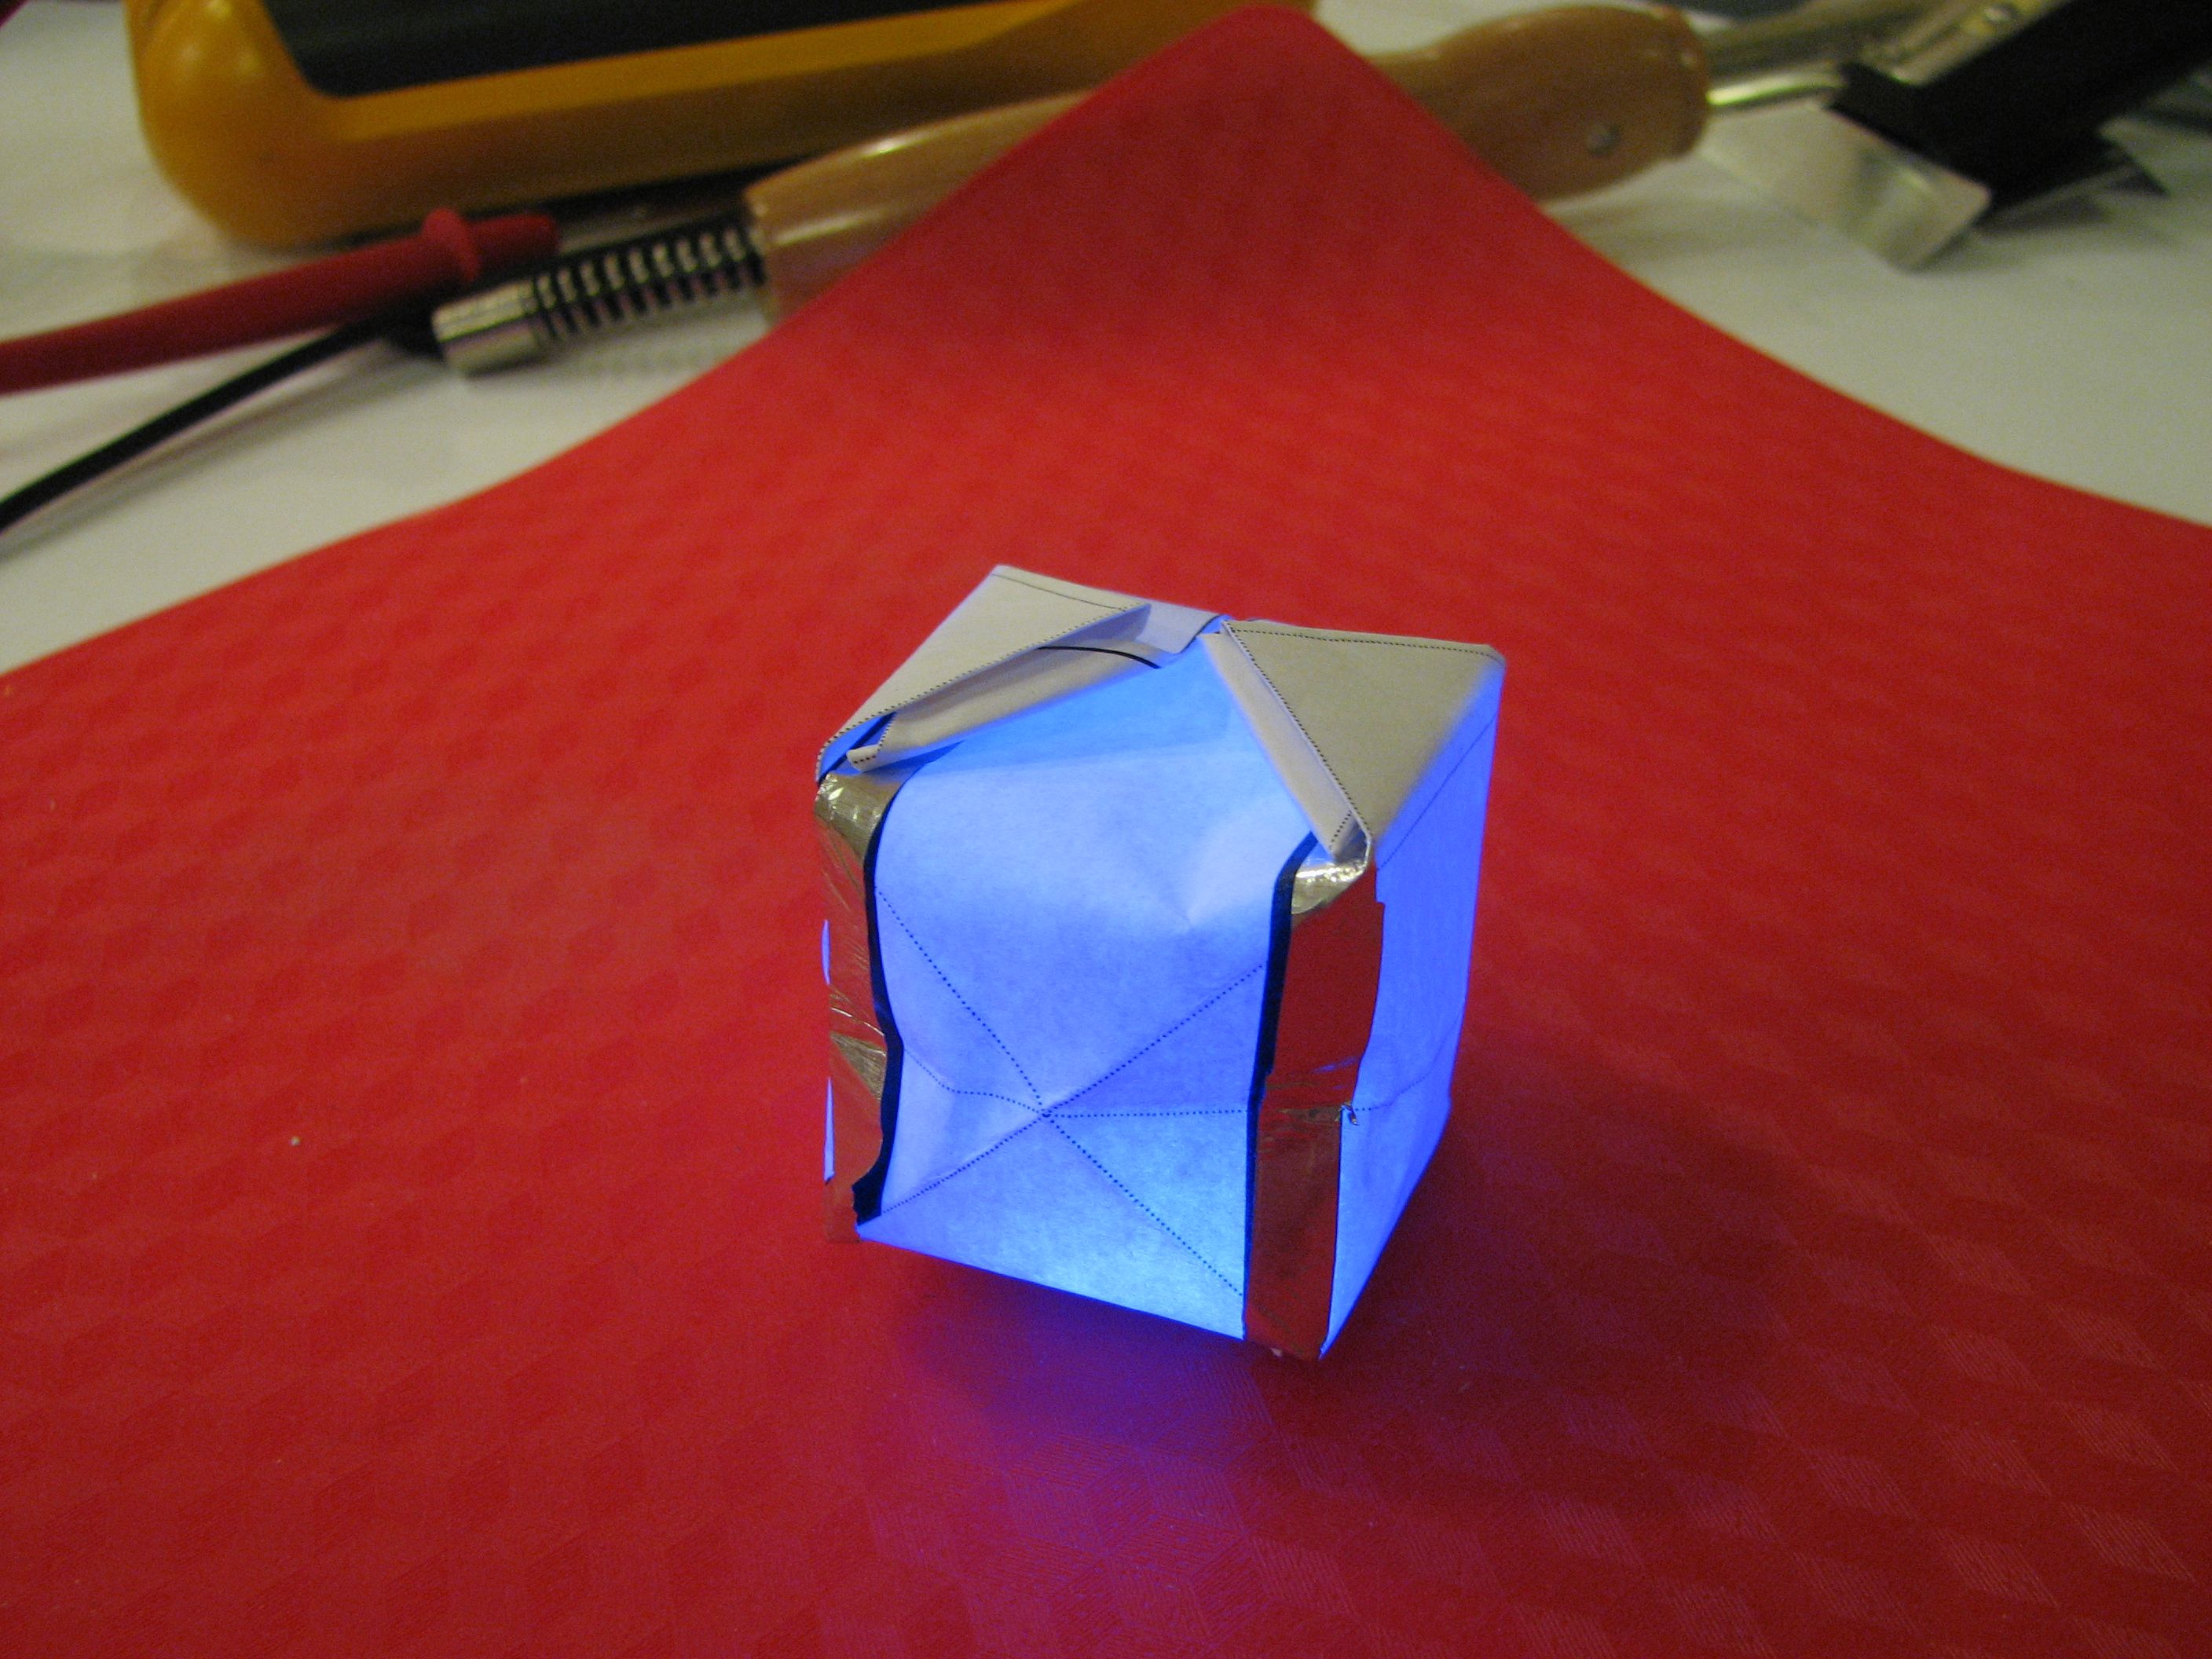
Insert the components, and it lights up.
If it doesn’t light up, try turning your battery around. If it still doesn’t light up, make sure your LED leads are contacting the traces.
Hint for this circuit: You won’t hurt the LED by plugging it in backwards to that little battery, so this is a better method than actually trying to keep track of the polarity.

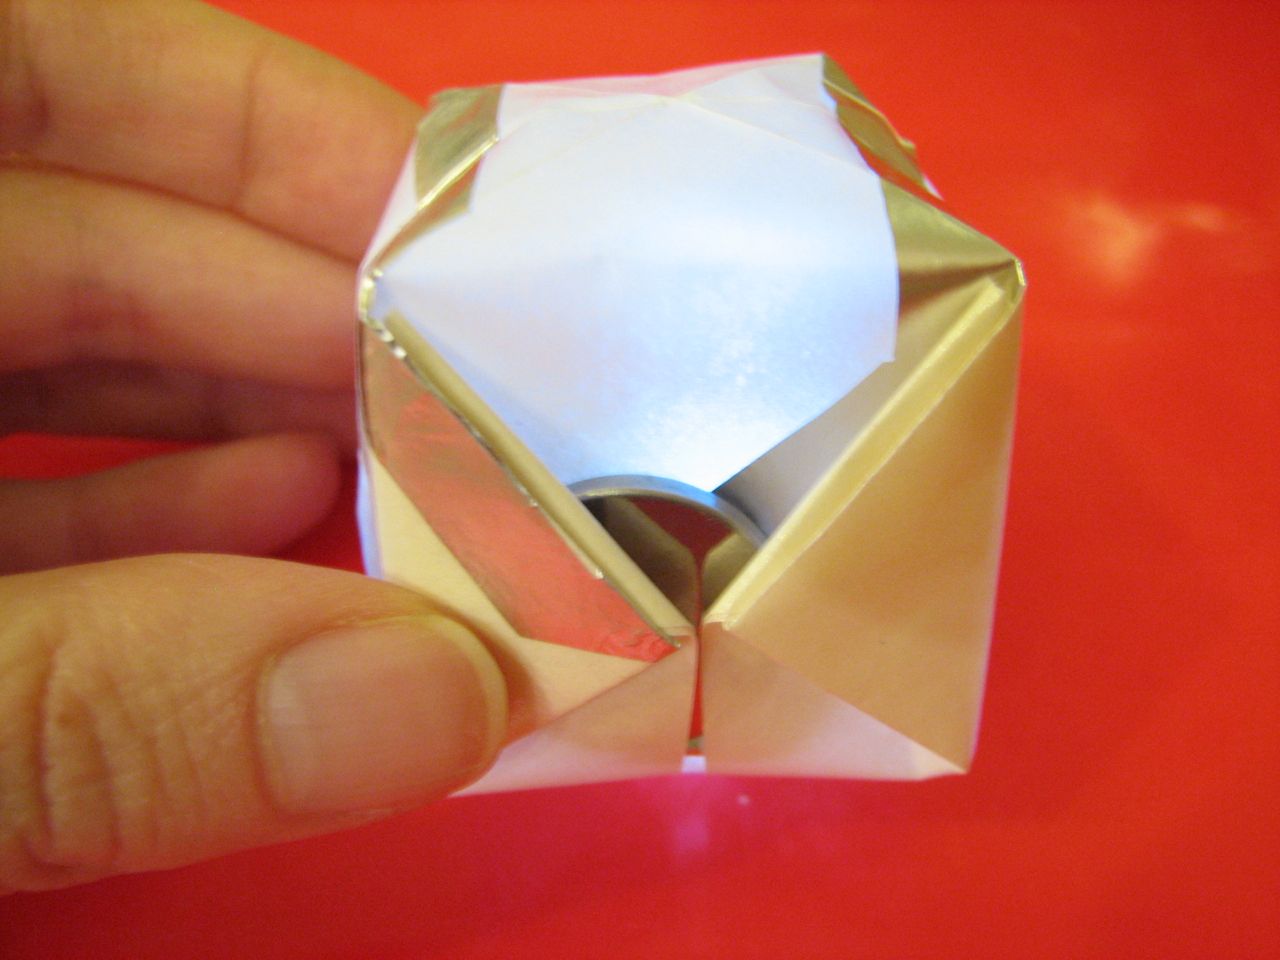
The LED Foldie naturally wants to sit on the heaviest part, the battery, with the LED projecting into the side of the balloon. The weight of the battery helps keep the circuit connected.
METHOD II: The “Direct Toner” method
Our last breakthrough came when we created a pdf pattern to print out. We realized that you could fuse the foil directly to the toner from a laser printer. You can print out the pattern (laser printers only: no inkjet!) and iron your foil pieces directly to the paper.
Caveat: while the foil sticks well to the toner, it isn’t quite strong enough that you can just iron on a giant sheet of foil and have it only stick where there’s toner, so you still need to cut out the foil shapes, at least roughly.
After printing out the pattern, place it over your aluminum foil, trace the outlines, and cut out the foil pieces.
Place your foil carefully over the pattern, and iron very well, very hot. Be sure to cover your work with parchment paper or you will get toner on your iron.
When your foil is stuck to the toner, cut out the square and get ready to fold.
 Fold gently so as to disturb the traces as little as possible. They may come loose in areas with multiple folds, but should stay on enough for assembly.
Inflate, add battery and LED, and admire the glow. As before, if you have trouble, try turning your battery around and making sure that the leads of the LED are making contact with the foil.
And there it is: a bridge between papercraft and electronics, or perhaps between etch-at-home printed circuit boards and high-end flex PCBs. We think that there’s some potential here.
Your turn! What kinds of origami can you light up? As always, we’d love to see your project pictures in the Evil Mad Science Auxiliary.
Here’s a schematic for one I’m trying to put together.. its so simple… Mine is alot rougher, but its for making a crane with wingtips. Circigami Crane Enjoy all!
Here’s an even easier way to stick traces to paper: Just head out to your local stained glass supply shop. There you’ll find adhesive-backed copper foil in a dozen different widths. Normally it’s used to cover the edges of stained glass pieces so they can be soldered together. However, it works just as well at conducting electricity, and it solders easily!
Conductive tape has been around forever for making circuits, as are also conductive pens and ink. This approach is a third option, which we think has its own merits.
—
Windell H. Oskay
drwho(at)evilmadscientist.com
http://www.evilmadscientist.com/
Excellent idea! Like it.
How about using a conductive silver pen to fill in the traces?
It my have the bonus of adding a little series resistance too.
Hi,
I have done this type of experiment when in was 13! The difference is you have used Aluminium Foil and I had used Strings of Lead, I also have come up with an Origami Table Lamp Model with this LED and wires… Strange Ha, I will reconstruct both the models and post the pics on http://www.Origamian.com very soon! as soon as my office works are finished….
You could also use aluminium foil tape (used for duct work normally), it comes in different widths. Should be available from most hardware shops.
http://www.3m.com/Product/information/Aluminum-Foil-Tape.html
http://www.vikingtapes.co.uk/3M_Products/3M_Single_Sided_Tapes/3M_Aluminimum_Foil_Tapes/3m_aluminimum_foil_tape.htm
I forgot to mention you can’t overlap the tape to create a circuit, the adhesive is an insulator. However you can use normal aluminium foil as a bridge.
Why not just fold the balloon with regular paper, and put a led+battery inside, you get a much cleaner look.
I’m working on an art installation of light up origami [link:]http://www.nightof1000cranes.blogspot.com
Inspired by your lamp my 6 year old son and I made an origami bird with a light-up eye
Do I need to put in a resistor to this circuit?
No, you don’t need a resistor. If you use a blue or white LED, the voltage is correct, and the internal resistance of the battery is sufficient to keep the current low enough. In addition, the foil traces add some resistance as well. You can read more detailed analysis of the circuit in this article:
http://www.evilmadscientist.com/article.php/throw