


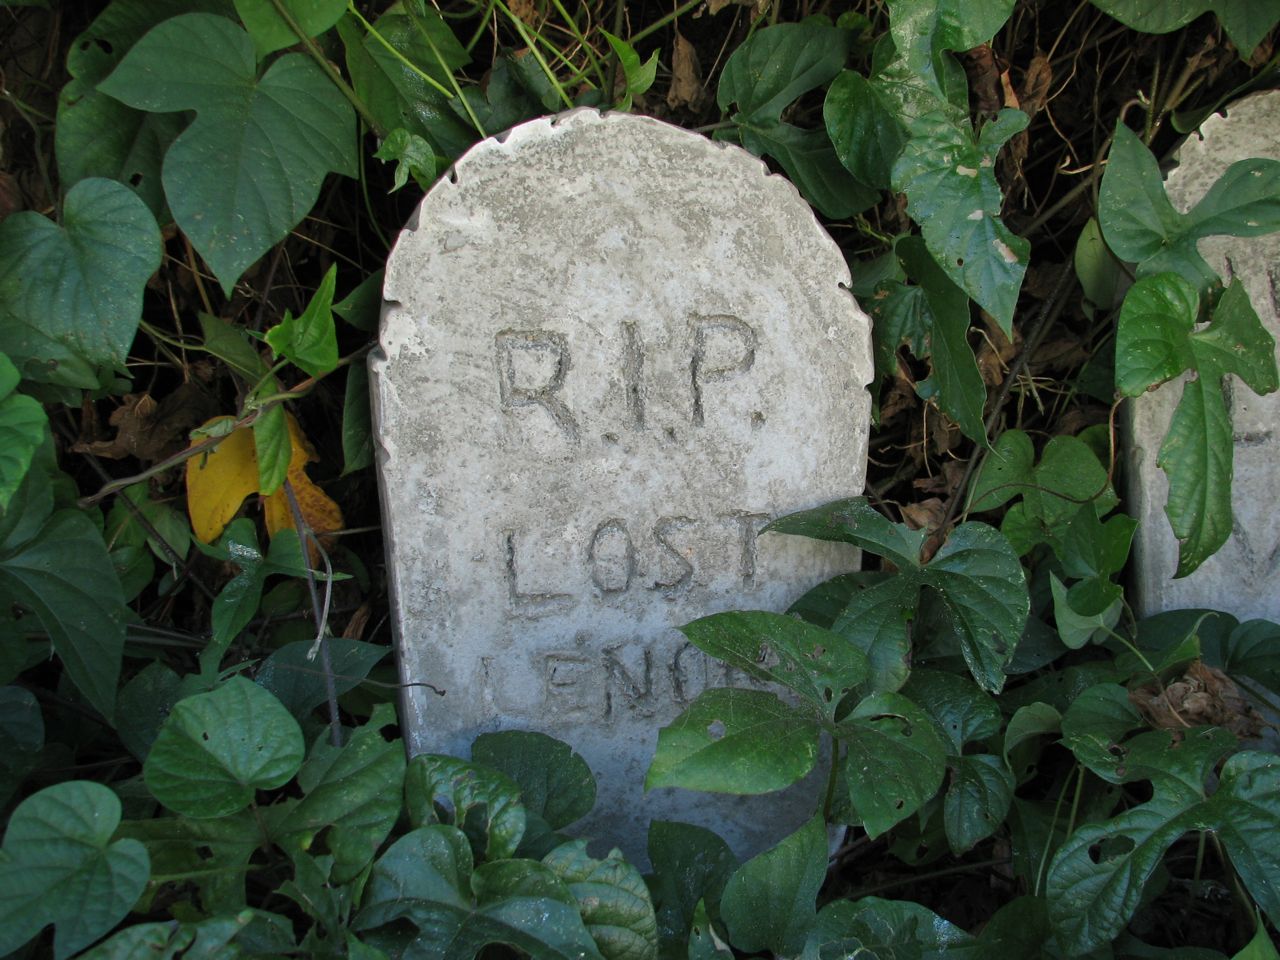
Here is how to make your own cast concrete tombstones. These are easy, inexpensive, impressive and tough Halloween props, ready to spook in 24 hours.
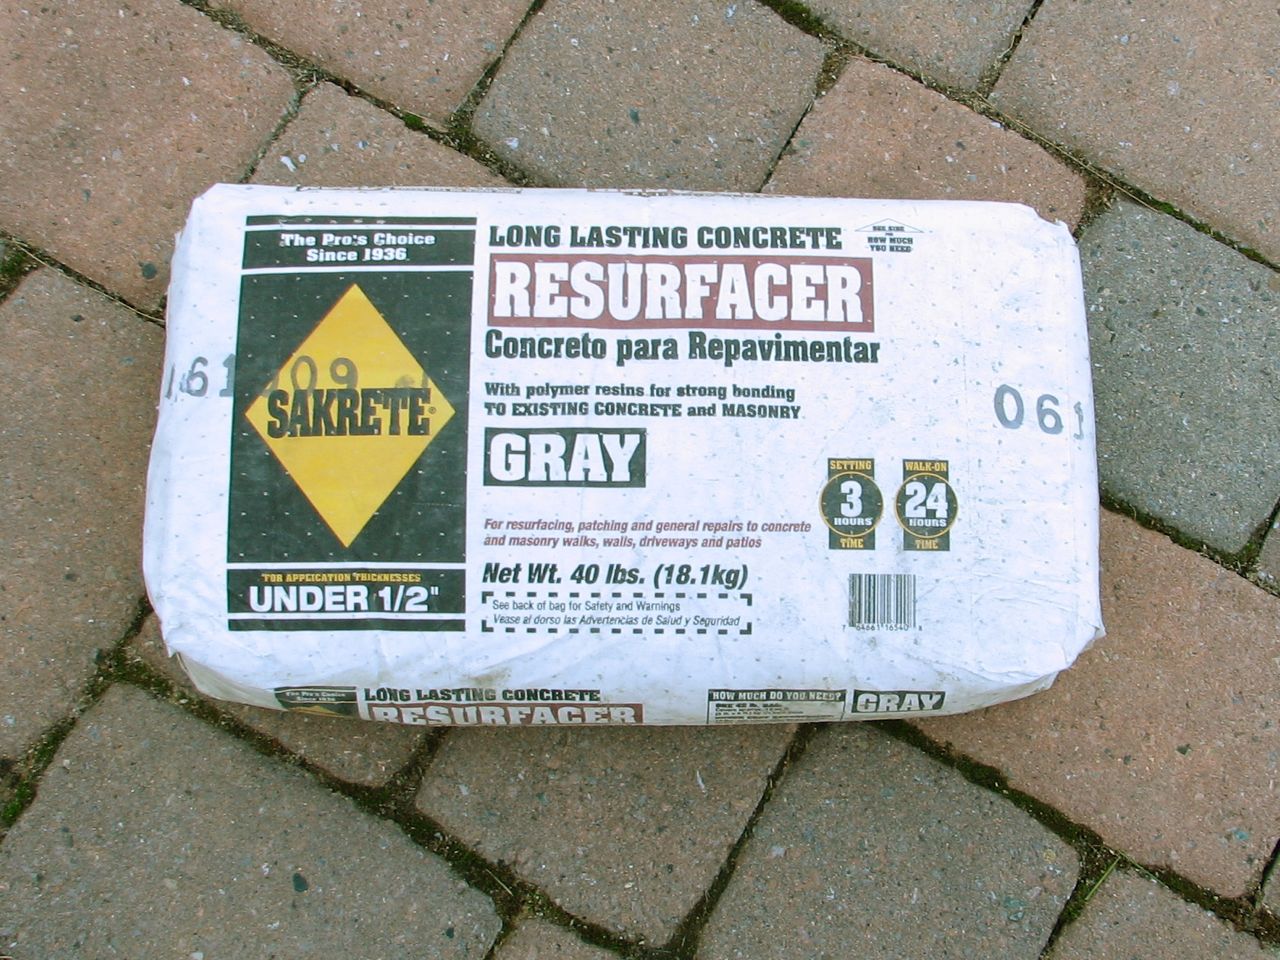
Home improvement stores sell any number of different concrete mixes, and picking a suitable right one is the first step in the project. We recommend “resurfacing” concrete because doesn’t have any large rocks in it (in contrast to structural concrete). It mixes easily and forms a smooth surface. More importantly, when you carve into it, you won’t run into any of those rocks that aren’t there.
While it is tempting to get quick setting cements, they actually tend to set very quickly, and won’t leave much of a carving window. Regular concretes and cements are much more forgiving, allowing time to carve your inscription.
Besides concrete, you’ll also need a bucket and stick for mixing some of it, cardboard, tape, a heavy duty trashbag, a sandbox (or a reasonable facsimile thereof), and a cutting utensil. Rubber gloves are a good idea, too.
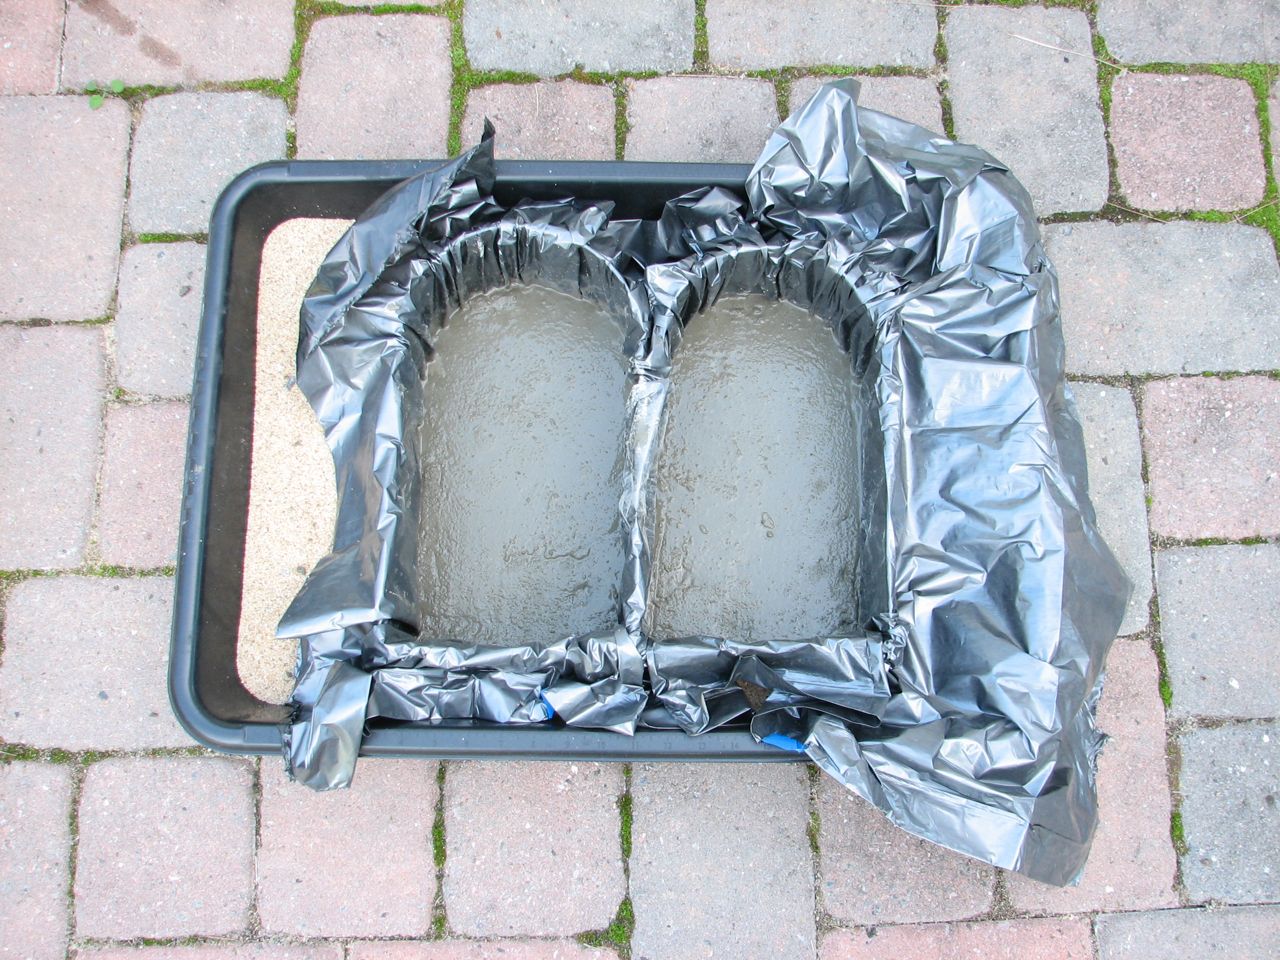
To create the basic tombstone shape, we’ll make a cement form out of cardboard lined with plastic that is supported– against the weight of the concrete –by sand from the outside. If you have a sandbox handy, you could start with that, and embed your cardboard form in the sand.
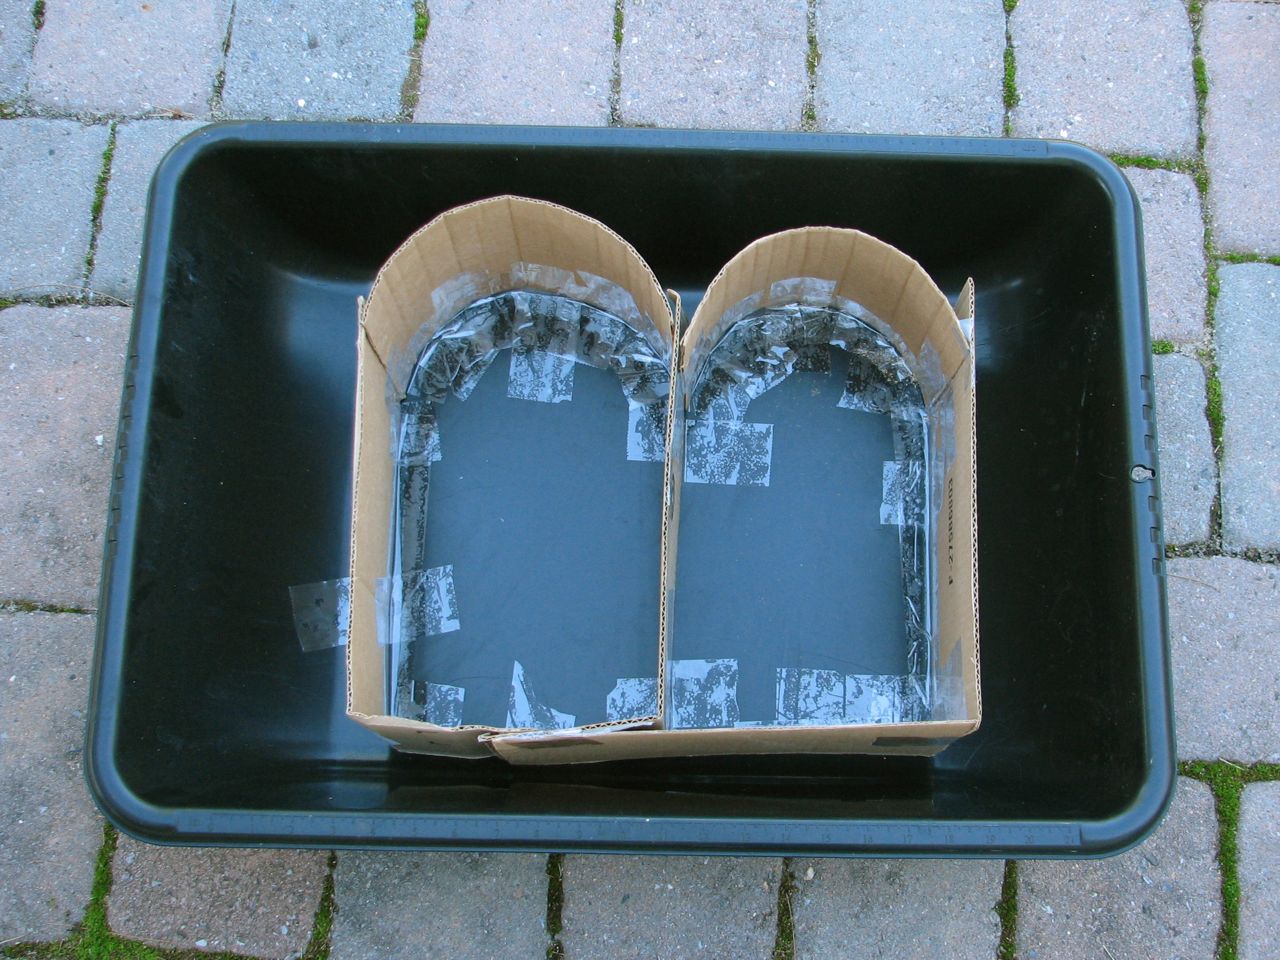
If you don’t have a sandbox, you can use a wide shallow bucket or a wooden box to support the sand around the form. For the curved top of the tombstone, cut the cardboard strips so the corrugation can be used to bend them into an arc. Tape the basic form shape together, and if you’re using a plastic bucket, tape the edges down to keep the sand from leaking under.
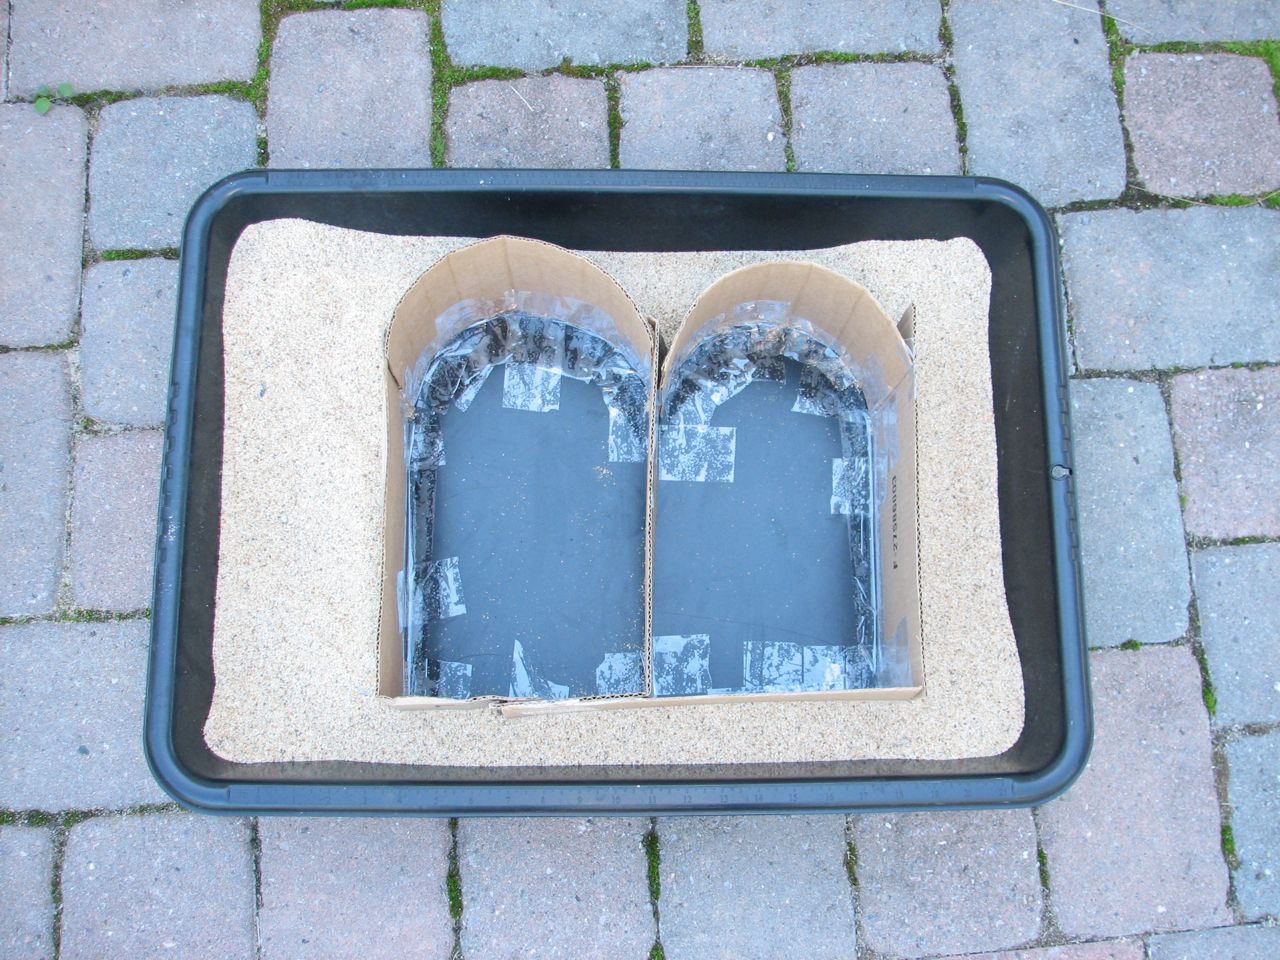
Add the sand around the edges of the form.
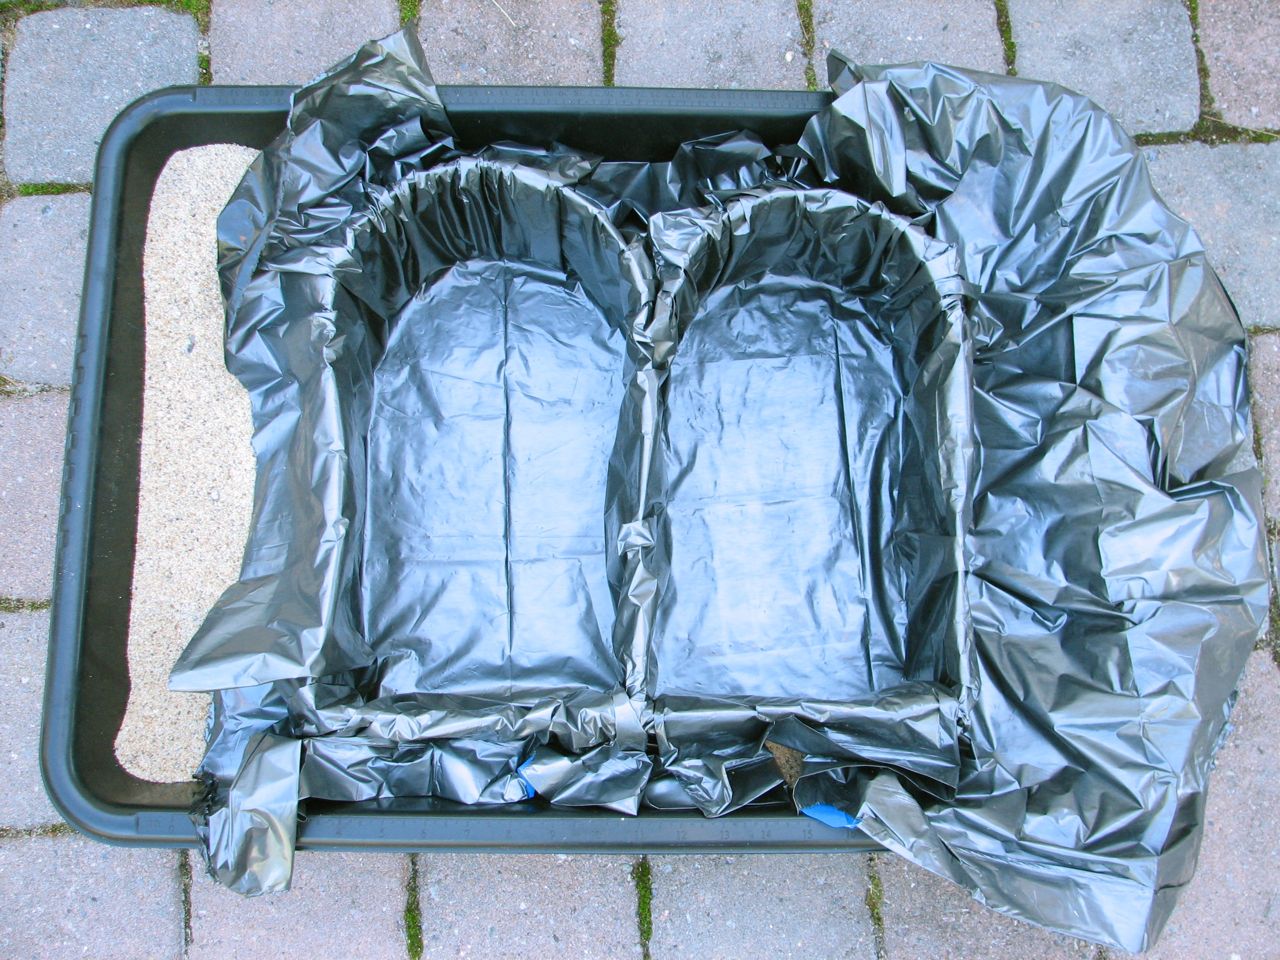
Split a heavy duty trash bag open to form a plastic sheet and line the form with the plastic. If you want a more decrepit look with cracks around the top of tombstone, leave the wrinkles in the plastic. If you’d rather have smooth top, tape the wrinkles down.
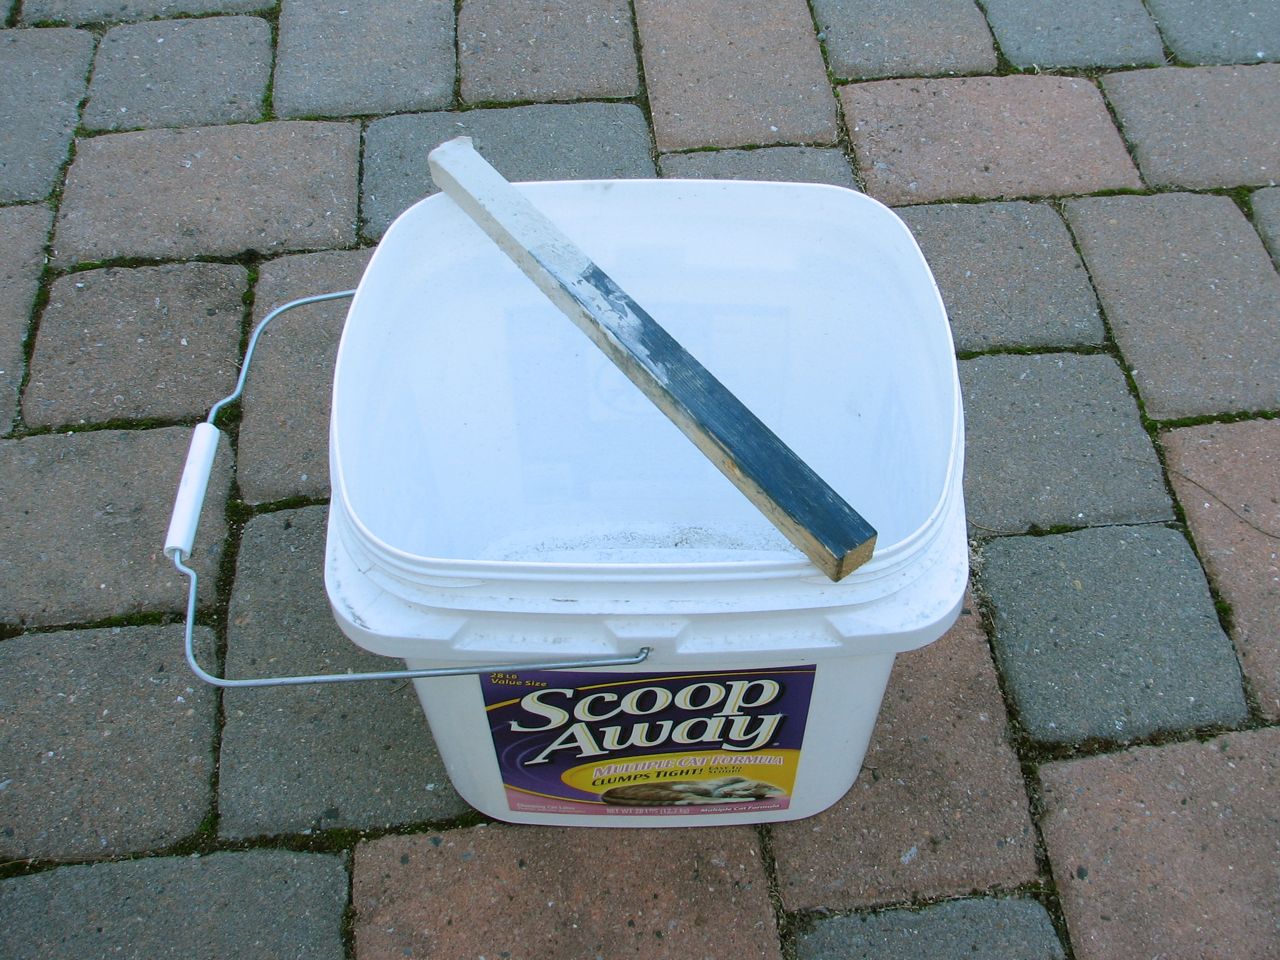
Follow the mixing instructions on your concrete. You’ll need a bucket and something to mix it with.
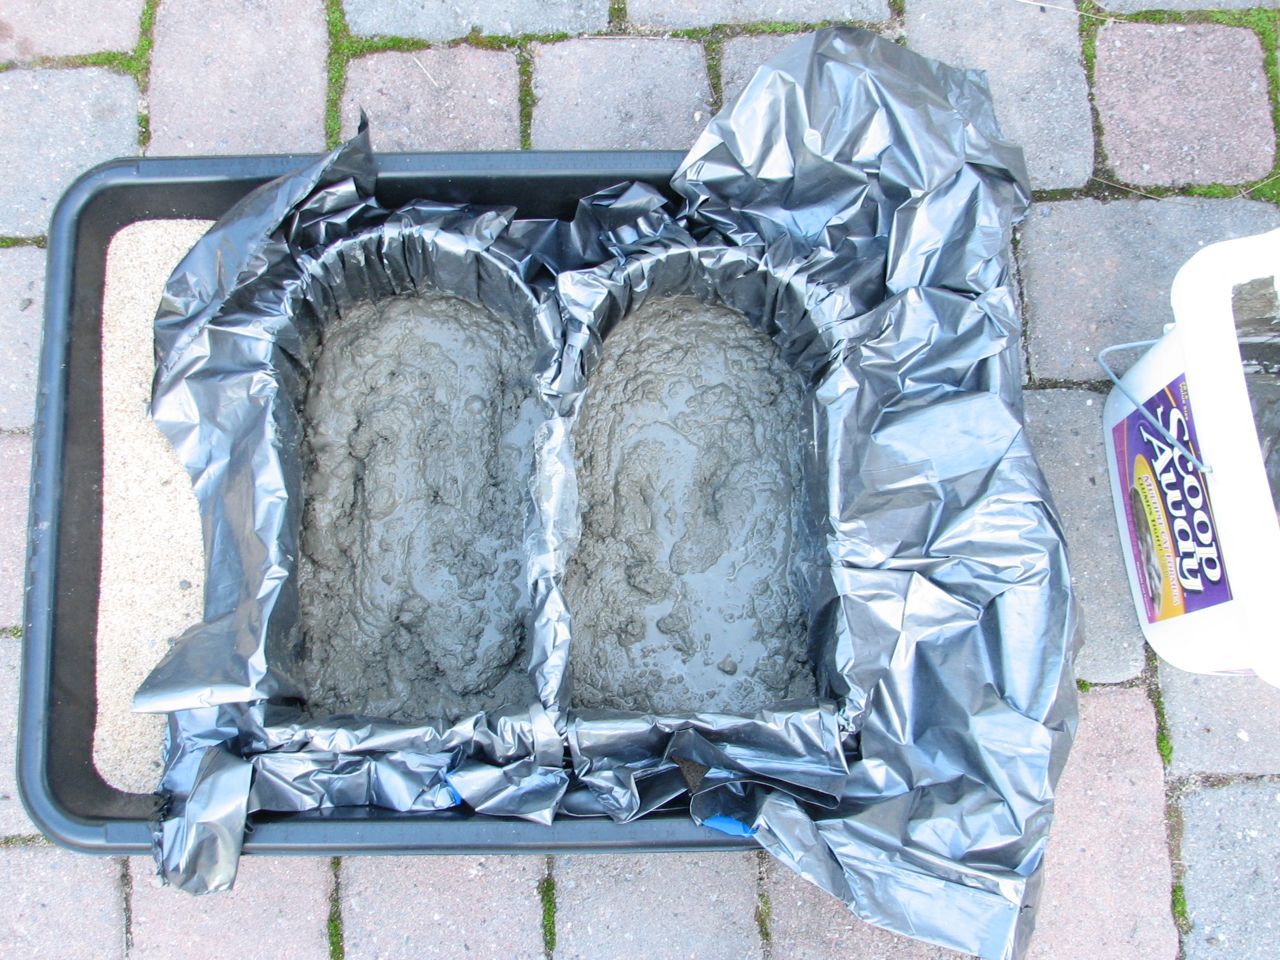
After thorough mixing, pour the concrete into your forms.
Stirring the concrete in the forms can help to smooth it out. You can also use a cement trowel or putty knife to smooth it out. Once it is mostly smooth (if it is in a bucket) you can lift the edge of the bucket and drop it down to help settle the concrete.
Let the concrete set up, checking on it every half hour or so. For a wetter mixture, you might have to wait a little longer to carve, but you may get more indistinct lettering that will look more weathered. Typical setting time is roughly 3 hours, and it should be hardened enough to remove from the mold after 24 hours.
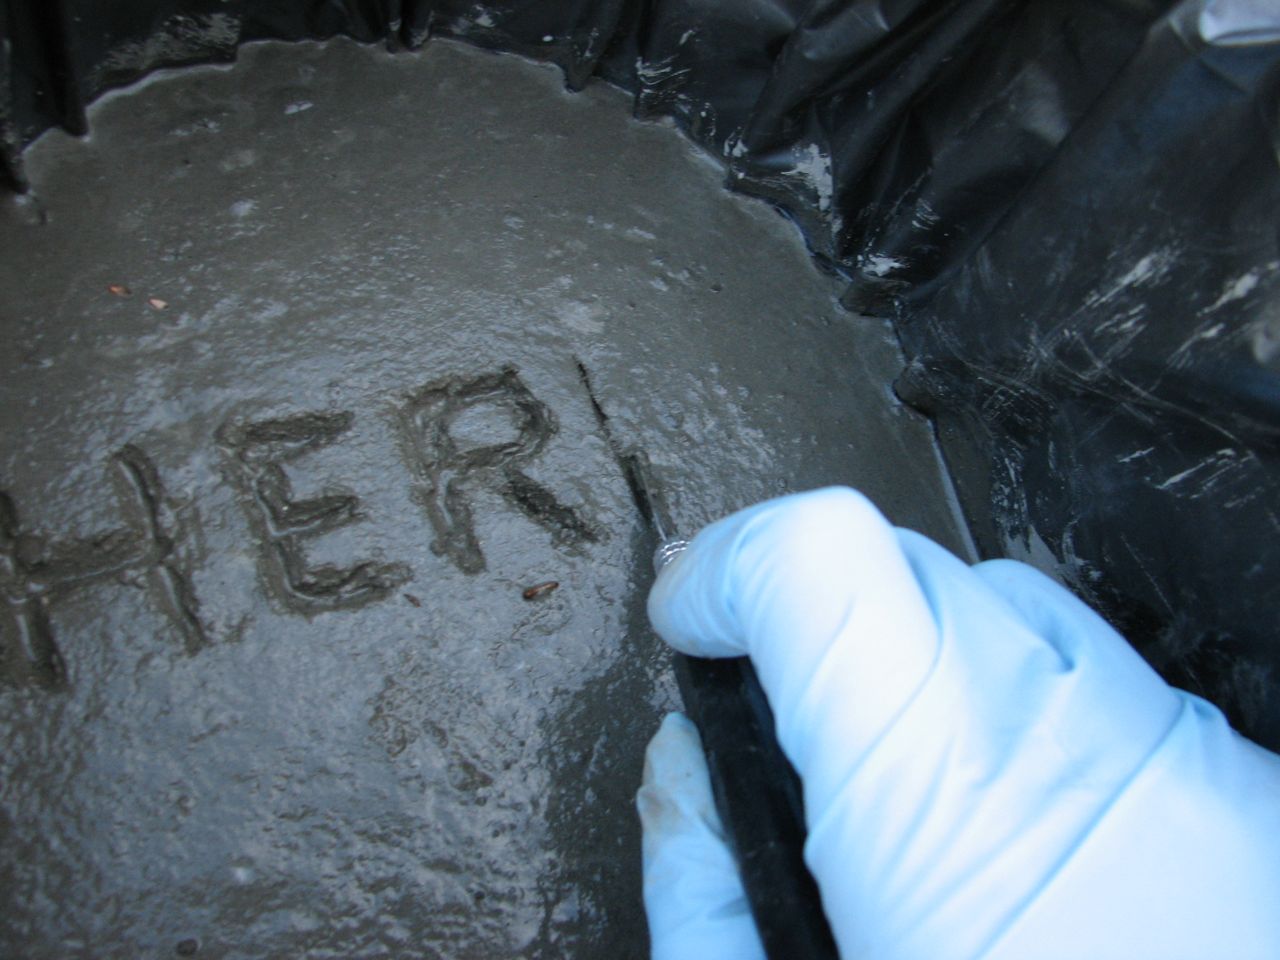
When it is just hard enough, approaching the consistency of wet pottery clay, it is time to start the inscription. Just about any cutting tool will work–hobby knives are nice because the blade is disposable, but something like an old vegetable peeler/corer might be nice since you can make a curved indentation and lift out the excess material at the same time. If you have a “V” shaped carving tool, that could work well for chiseled letters, but the same effect can be emulated with a little patience and a hobby knife.
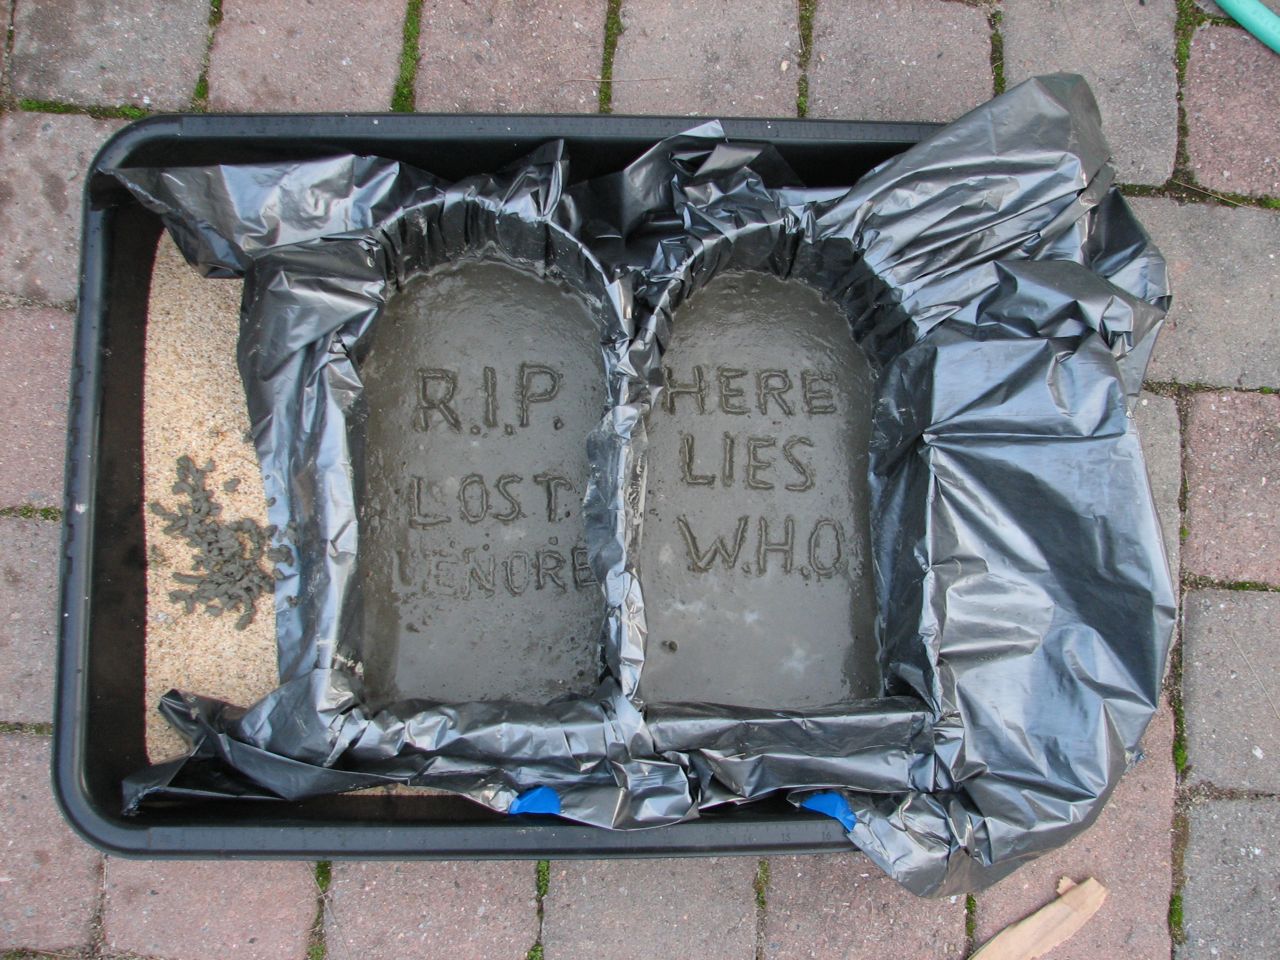
Once you’re done inscribing, let it sit overnight until set.
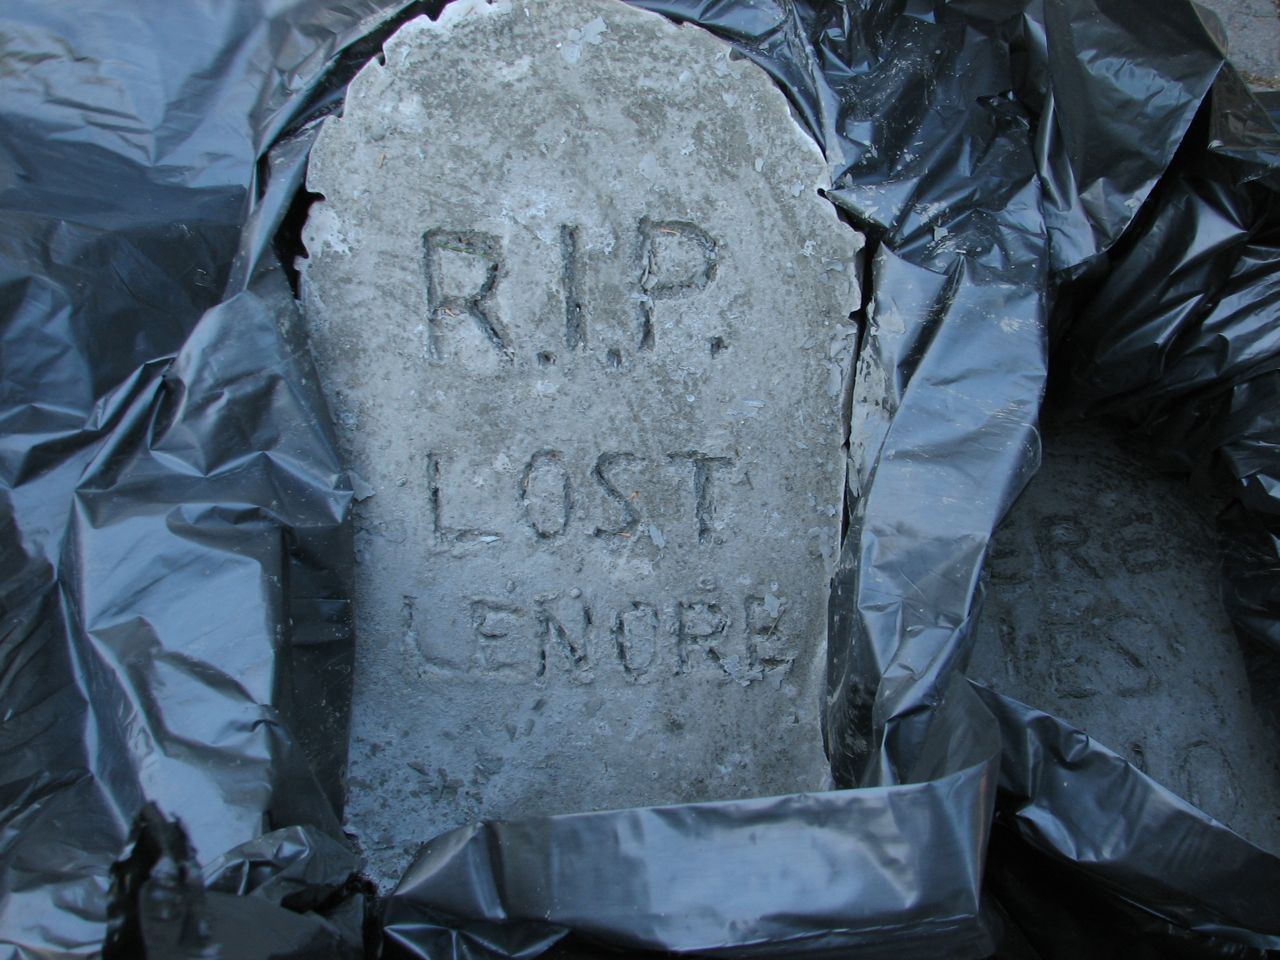
Once it has hardened, lift it out of the form with the plastic, and then peel the plastic off of the back. You can brush any loose concrete off with with a soft brush. If you want more even coloring, you can brush on thinned paint. You can even rub dirt (yes, dirt) onto the tombstones for a more aged look.
Install your tombstones in a strategic location.
You can find more Halloween decor projects in our Halloween Project Archive.
Thinking of the carbon footprint, you could also use plaster to cast the tombstones. It’s not as weather durable, but it’s much easier to recycle.
Recycle? Just wait long enough and your heirs can make use of it for real.
Or you could, you know, use them the next year…
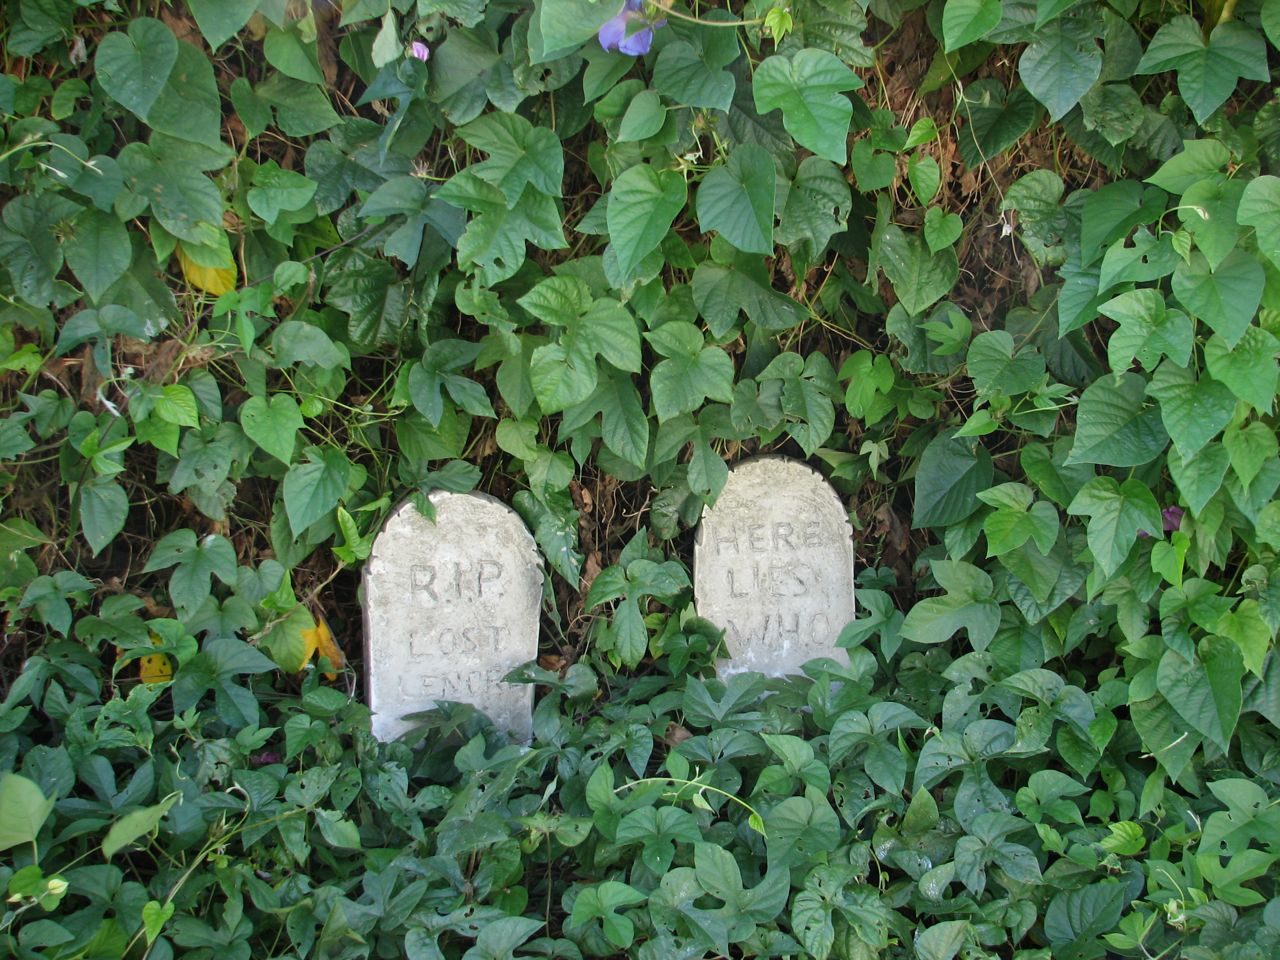
Yes indeed– these really do last well. Third set we’ve made. :)
—
Windell H. Oskay
drwho(at)evilmadscientist.com
http://www.evilmadscientist.com/
As concrete ages, it will remove CO2 from the atmosphere with a net neutral carbon footprint.
What the heck has carbon footprint got to do with this and whats different about plaster ? It is less energy expensive to make concrete than it is to make plaster size for size. there is likely only 20% cement powder and mostly aggregate left over from other processes.
Put your head on instead of spouting this tripe
Here’s a better ‘green idea’. Get some fake moss from a hobby store and hot glue it on the tombstone. It looked great on the styrofoam ones we had last year.
Wow, these are fabulous! This would be so much fun to do with a group of friends. Thanks so much for sharing the process, I’ll be linking.
You can also use Mortar Mix, as it’s aggregate is sand. It wouldn’t hurt, either, to cut a bit of wire fence or chicken wire to put in the concrete. As they taught us in engineering school, concrete without steel is worthless!
If there’s no load, like here, you *can* get away with it. ;)
—
Windell H. Oskay
drwho(at)evilmadscientist.com
http://www.evilmadscientist.com/
It never hurts to over-engineer for safety.
(Now that would be a good inscription for a half-split tombstone that still holds together by a few visible bits of rebar in the middle.)
They should teach about lasting effects of steel in concrete at engineering school, especially the effects of weathering.
Yeah, nothing the Romans built without rebar survived . . .
As these little headstones age and break, pieces of wire sticking out will not make them look too good.
Umm..the pantheon in unreinforced concrete, and it has survived just fine.
The Pantheon is made out of Granite, not concrete. In other words, natural rock. Much stronger, but impossible to put rebar in.
Actually apparently the dome is unreinforced concrete per Wikipedia. I’m in agreement that the steel is a good idea….and I had previously thought that the Pantheon was all granite too…but I guess not.
Makes sense actually….that would be kinda tricky to carve out of rock.
"The building is circular with a portico of three ranks of huge granite Corinthian columns (eight in the first rank and two groups of four behind) under a pediment opening into the rotunda, under a coffered, concrete dome, with a central opening (oculus) to the sky. Almost two thousand years after it was built, the Pantheon’s dome is still the world’s largest unreinforced concrete dome."
http://en.wikipedia.org/wiki/Pantheon,_Rome
Nice idea; gonna try this next year
Using children’s molded plastic play-letters to stamp in your inscription would create a more realistic effect.
And if you make them solidly enough, you can use them for garden-path stones between Halloweens!
Lettering kits for garden stepping stones are widely available. Irregardless, these rock.