


Once a bike tube needs its (n+1)th repair, where nis the number of times you’re willing to fix it, you can slice up what remains, and end up with a semi-infinite stash of cool looking rubber bands.
Useful? Yup. Cheap? You bet. Quick? Yes, to the point of being trivial.
On the other hand, not only is this a fun way to recycle, but using these is the office supplies equivalent of the secret biker’s handshake– only other bikers will even notice what you’re using.
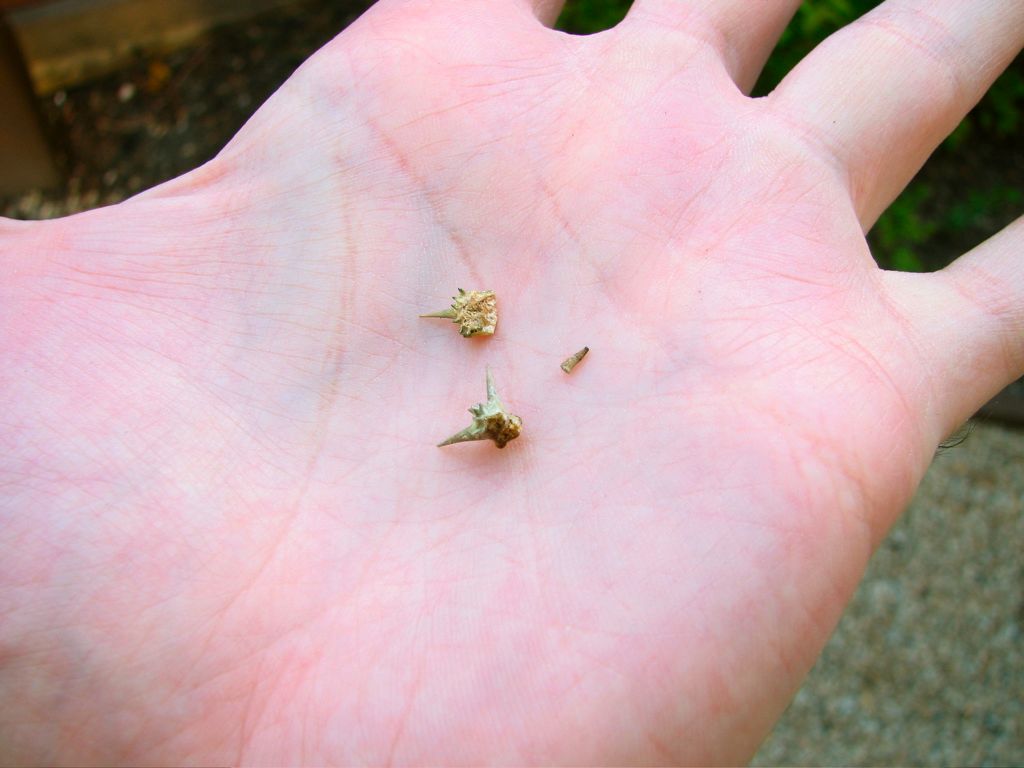
If you ride a bike, you probably know this drill. Out comes the tube, and out of the tire come the shards of glass, screws and nails, or in this case, the goat head thorns. I had three of them this time.
(I’m not generally in favor of extinction, but do we really need this particular species?)
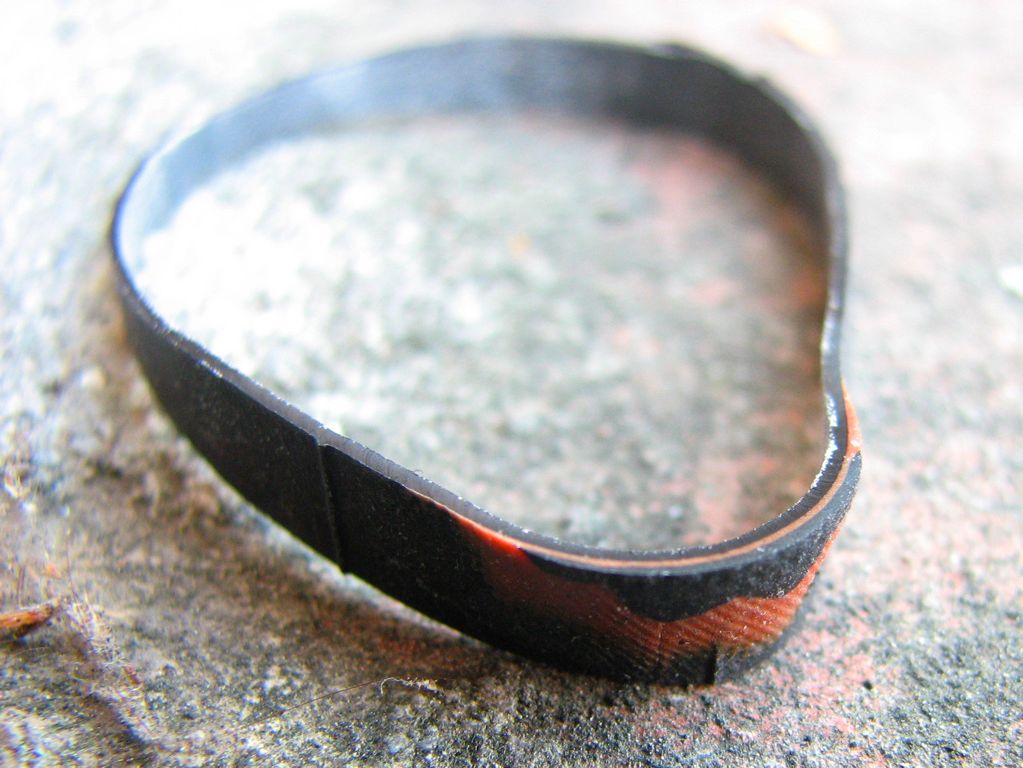
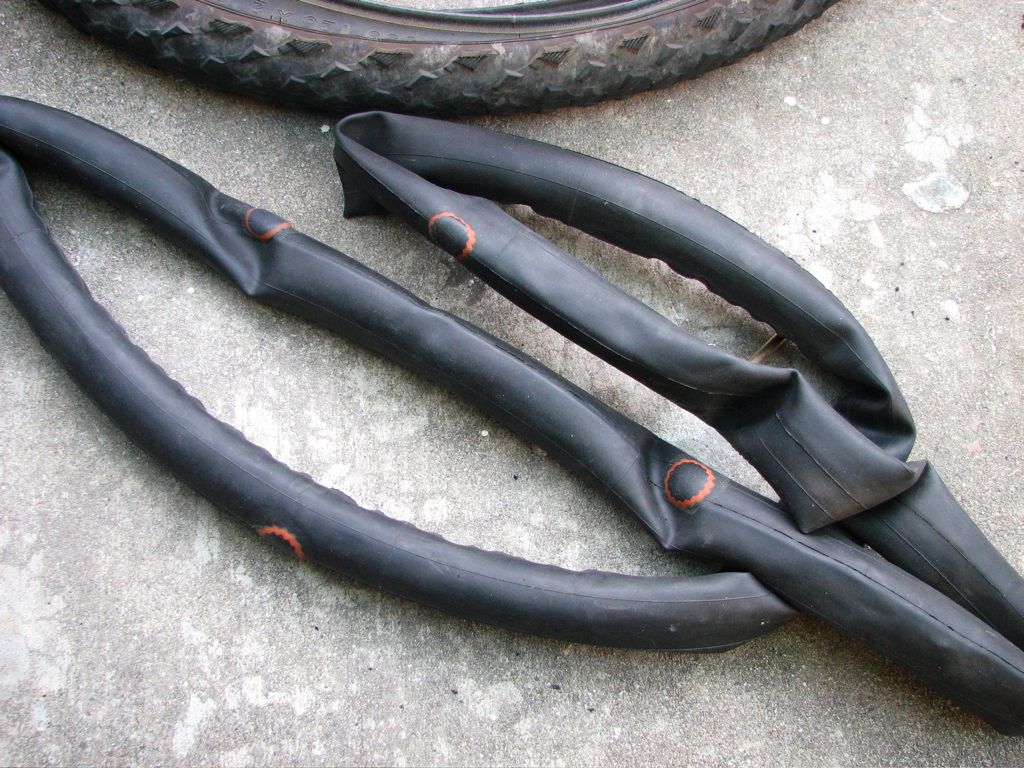
Cut the tube into a set of rings with a pair of big sharp scissors. You can use the whole tube except the valve stem and any areas with big gashes through them. One tube makes an awful lot of rubber bands.
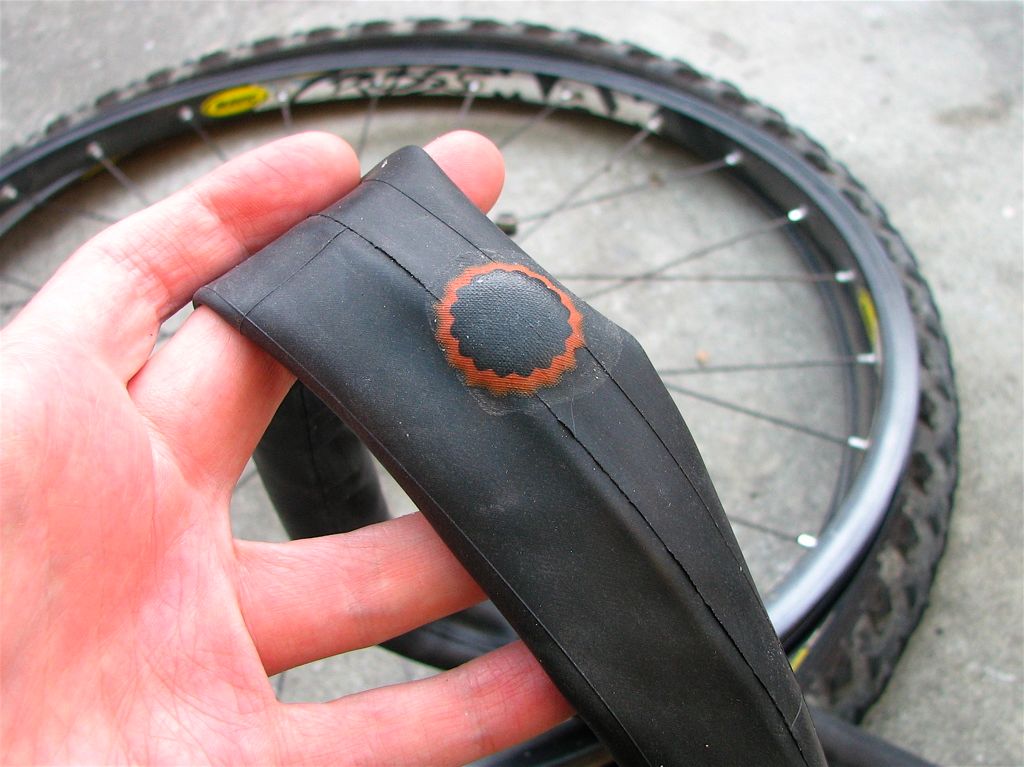
Try to find the interesting parts– check out how cool the cross section through the patch above looks!
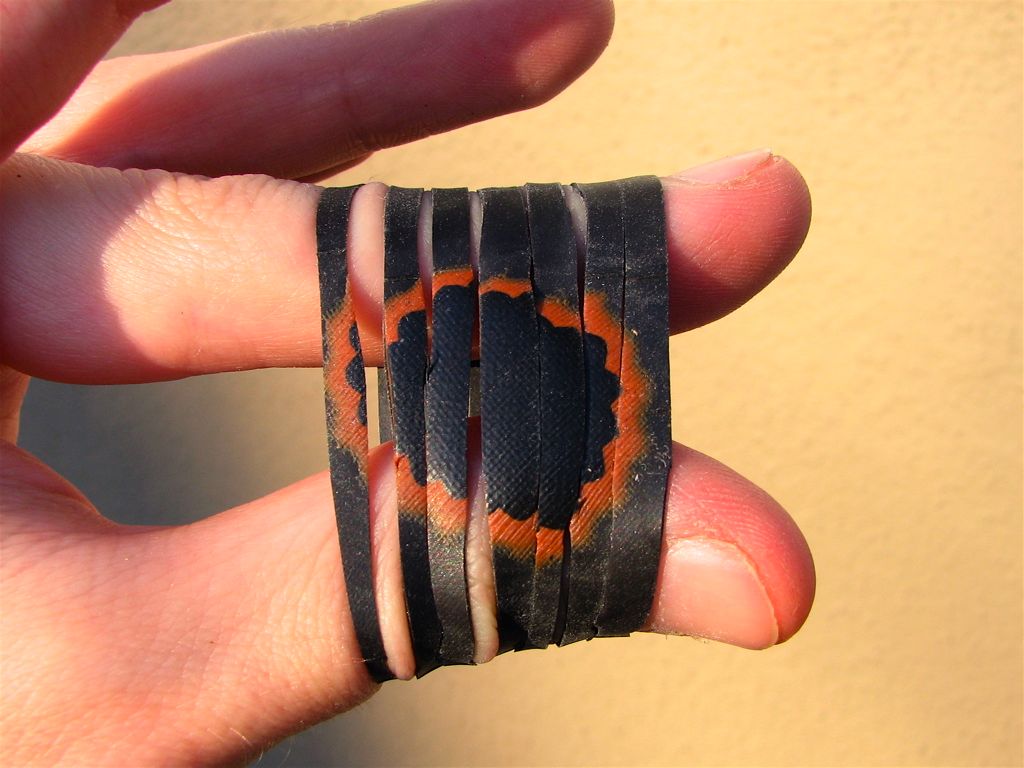
If you cut apart the area around a patch (or other interesting feature) as a unit, you can reassemble the set of bands into a coherent structure, here just on my fingertips. You may end up with talc on your fingers this way, since the tubes are often dusted inside. If your tubes are dusty, it’s probably best to give them a quick wipe with soap and/or water.
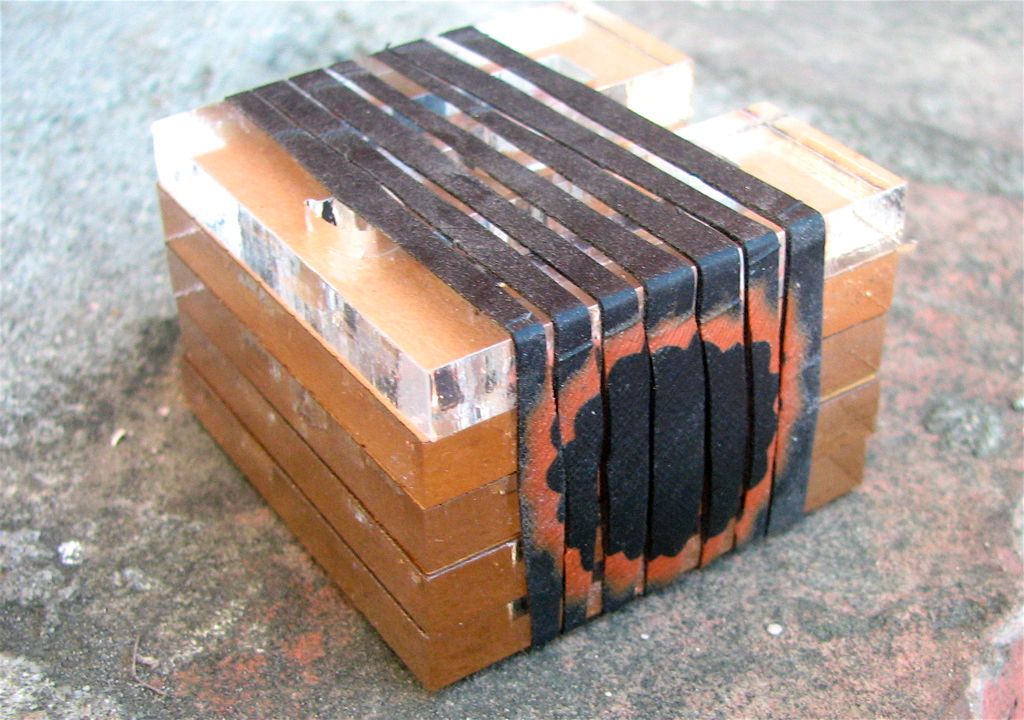
If you really want to show off, keep the bands in their original order when you use them. This set of bands is being used to hold a stack of acrylic parts together.
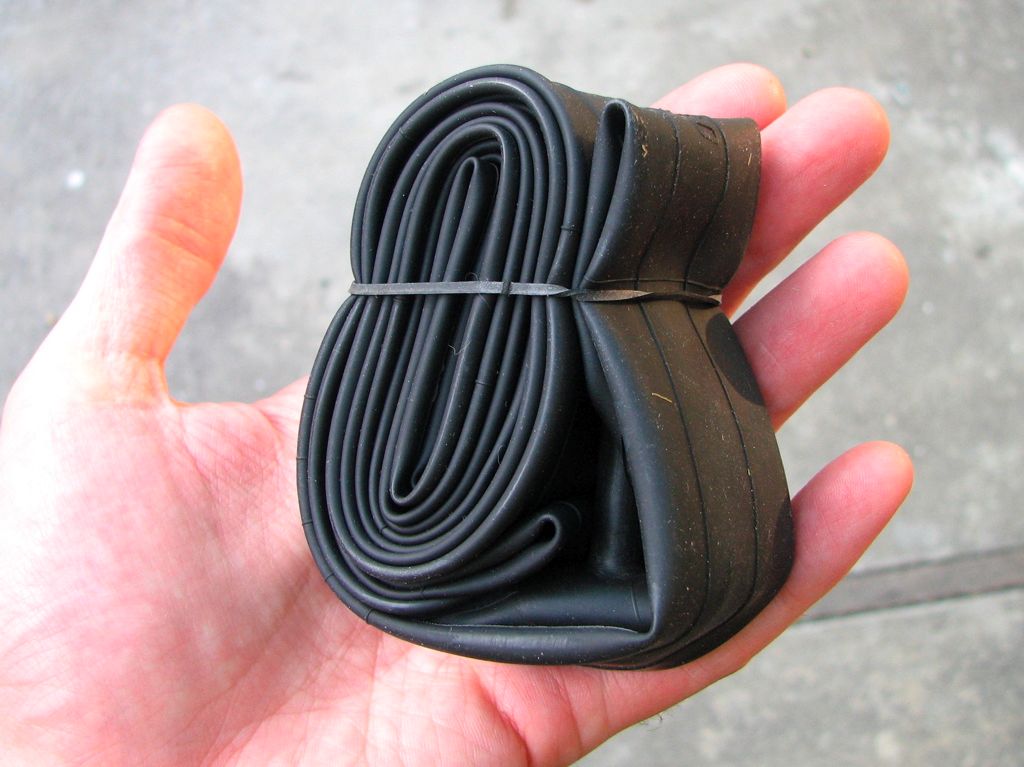
As a final note, we find it amusing that some people are already using bike-tube rubber bands and have been for ages. Whenever you get a new tube, it’s held together by little black rubber bands. I’ve always thought that this was a clever way to recycle at the factory. But, you can do it at home too!
Goat head thorns? Ha! You haven’t seen anything yet until you’ve seen a Honey Locust tree with it’s thorns:
http://en.wikipedia.org/wiki/Honey_locust
Those things are long and hard enough that they’ll go right through a leather boot (I know!), and they can even puncture a multi-ply tractor tire!
But, neat idea on the bands. That should also work with motorcycle tubes, too. And, of course, it’d work for tractor tubes (although you’d end up with some pretty huge rubber bands!).
Dave
Whoa. I think I punctured two tubes *just looking* at the photo.
—
Windell H. Oskay
drwho(at)evilmadscientist.com
http://www.evilmadscientist.com/
There was a time, just after the dinosaurs died out, that car and truck tires had inner tubes. Those would be cut into giant rubber bands. Our rubber band guns started with a length of 2×4. The rubber band rifle used two pieces of truck inner tube knotted together. That would leave a welt.
Those were the days when surviving childhood actually meant something.
Fred
I finally understand this graph. Apparently, they should have included inner tube usage on it as well.
—
Windell H. Oskay
drwho(at)evilmadscientist.com
http://www.evilmadscientist.com/
What explains the increasing coherence of the data on that graph? Is this simply a function of approaching a limit of zero?
I think that what you’re seeing is the effect of plotting on a semi-log scale. A 1% variation towards the bottom of the scale looks a whole not smaller than a 1% variation towards the top of the scale. That’s necessary to show that some kids (a few percent) *did* make it way back when. I wonder how far back you have to extrapolate until the infant mortality was 100%?
Seriously, though, it’s quite interesting that it’s only been since the early part of last century that a given kid had a better than even chance of making it.
—
Windell H. Oskay
drwho(at)evilmadscientist.com
http://www.evilmadscientist.com/
But the inset graph appears to be on a linear scale and shows the same effect.
Hmm. Hadn’t really noticed the inset. :P
Looks like the fraction on the right side just refers to a parameter of that plot, not the absolute fraction kids dying. Sure enough, the variation looks pretty different on the other scale as well. Maybe due to variations in winter harshness, food supply, and diseases? I dunno.
—
Windell H. Oskay
drwho(at)evilmadscientist.com
http://www.evilmadscientist.com/
I can’t believe I never noticed that the rubber band around the tube was actually made from one – I had one right here on my desk, and sure enough, it’s a piece of tube…
I feel your pain – our ride got killed by a flat just the other day (thus the band on my desk.) I’m so lazy these days, though, that I’m at n = 0. I had a ten pack of tubes sitting around and I just grabbed a new one.
If you need to induce some welts, you could always cut the bike tube the other way.
You mean to make a few rubber bands with 26" diameter? I like the idea.
—
Windell H. Oskay
drwho(at)evilmadscientist.com
http://www.evilmadscientist.com/
I use old bike tubes in a simiilar way: Cut the tube on either side of the valve so you have a long rubber hose. Cut centimeter-wide strips, the length of the tube. Use the strips as stretchy clamps while glueing odd-shaped items together, wherever a regular clamp cannot be used, due the lack of parallel sides.
I used to fish for lobster off the south of Ireland. We used to use these to close the claws on the suckers. Nothing better or cheaper but I got carpel tunnel from cutting thousands of them. You would put the Lobster on your lap, facing AWAY from you, then put your right hand fore arm on the right hand claw, then get the lobster to clamp shut the left hand pincer, then put the tube on with a double or treble hitch. Then repeat with the right
Diarmuid
If you cut the tube at an angle you can get longer bands, although too much angle and you get a couple of weak spots at the tips.
How did you resist the temptation to cut it spirally?
We already have lots of rubber bands that are too long to do anything useful with; we needed short ones.
On the other hand, I see your point– you could get one very, very long rubber band out by slicing it into a spiral. You would have to carefully cut around (1) the valve stem and (2) the existing and unpatched holes, otherwise your rubber band would end up with some weak spots and a metal thingy.
—
Windell H. Oskay
drwho(at)evilmadscientist.com
http://www.evilmadscientist.com/
When we were kids, we payed the extra money for heavy duty tires and tubes. We would go everywhere with our bikes and didn’t have problems with flats. I know it might make things heaver but we only had one speed bikes and it was more important to have something to take us where we wanted to go. In Arizona we had what we called bull heads (most likely goat heads) and native rock surfaces that we would ride over often.