


Here is how you can put together your own extra-snazzy wine charms out of electronic components. They look great, are easy to make, cost next to nothing, and make great conversation pieces. For an added bonus, you can solder them in place, making them semi-permanent yet easily removable.
Wine charms can add a bit of interesting flair to your wine, martini, and margarita glasses. They can be something fun to look at, play with, and (yes) keep track of which one is yours.
Like all the others that you’re likely to come across in a big-box store, the sets that we have used were made (badly, in China) of low-grade cast metal and cost about $2 each. Not to say that certain of these don’t have their appeal, but it still strikes me as wrong in a couple of different ways.
First, there’s the terrible irony of using such cheaply made trinkets to decorate nice wine glasses, doubly ironic since you’re most likely to be using wine charms– and serving the good stuff– when guests are over. Secondly, since wine charms are such a good idea, to use the mass-produced ones is to waste an opportunity for art.
Situations like this are, of course, where the D-I-Y community really begins to shine. You can read detailed instructions about how to make beaded wine charms at Not Martha, or learn how to make charms out of crocheted wire, or go for the simple and classic version instead.
Here, we’re making wine charms out of electronic components. It’s an easy five-minute project with elegant results. Let’s get started!
The first step is (naturally) to acquire a set of components that you might use.
We went to our local electronics store and wandered the aisles, picking out one each of interesting components that we came across, trying to primarily pick out things that cost less than fifteen cents each. We spent a little more on a couple of the inductors, and a little less on most of the resistors. In any case, the average cost per wine glass is around $0.10 – $0.15.
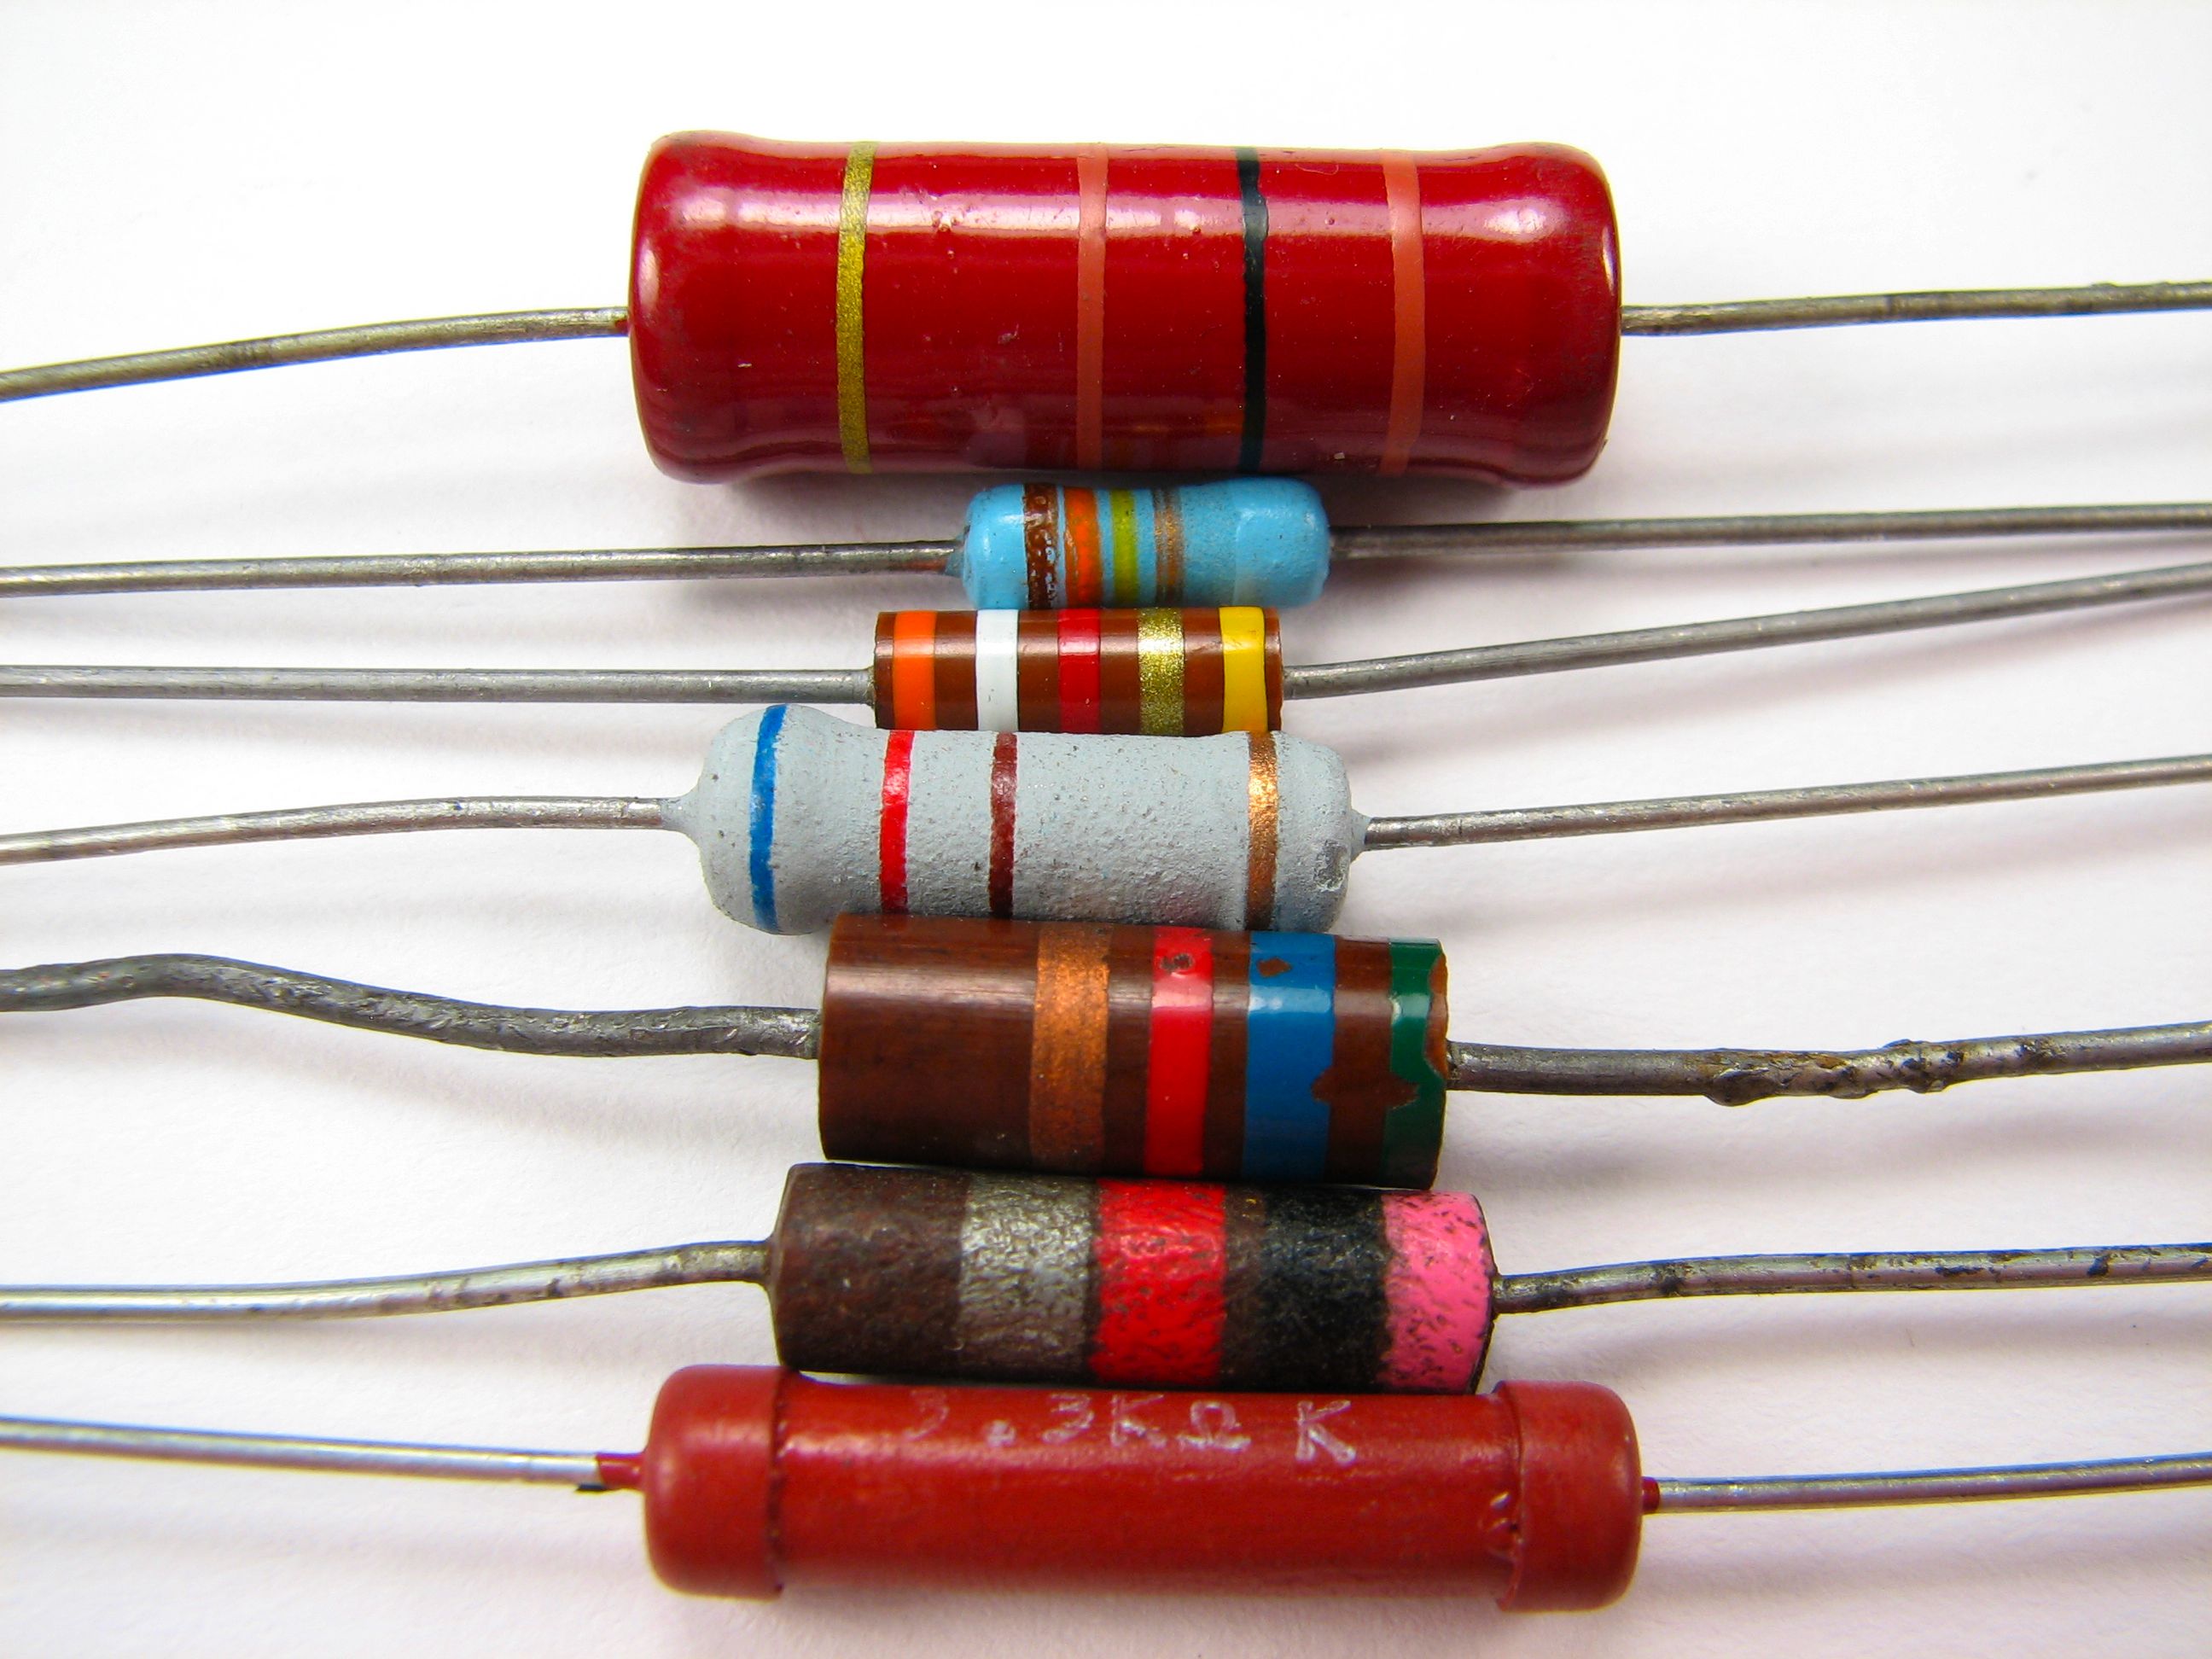
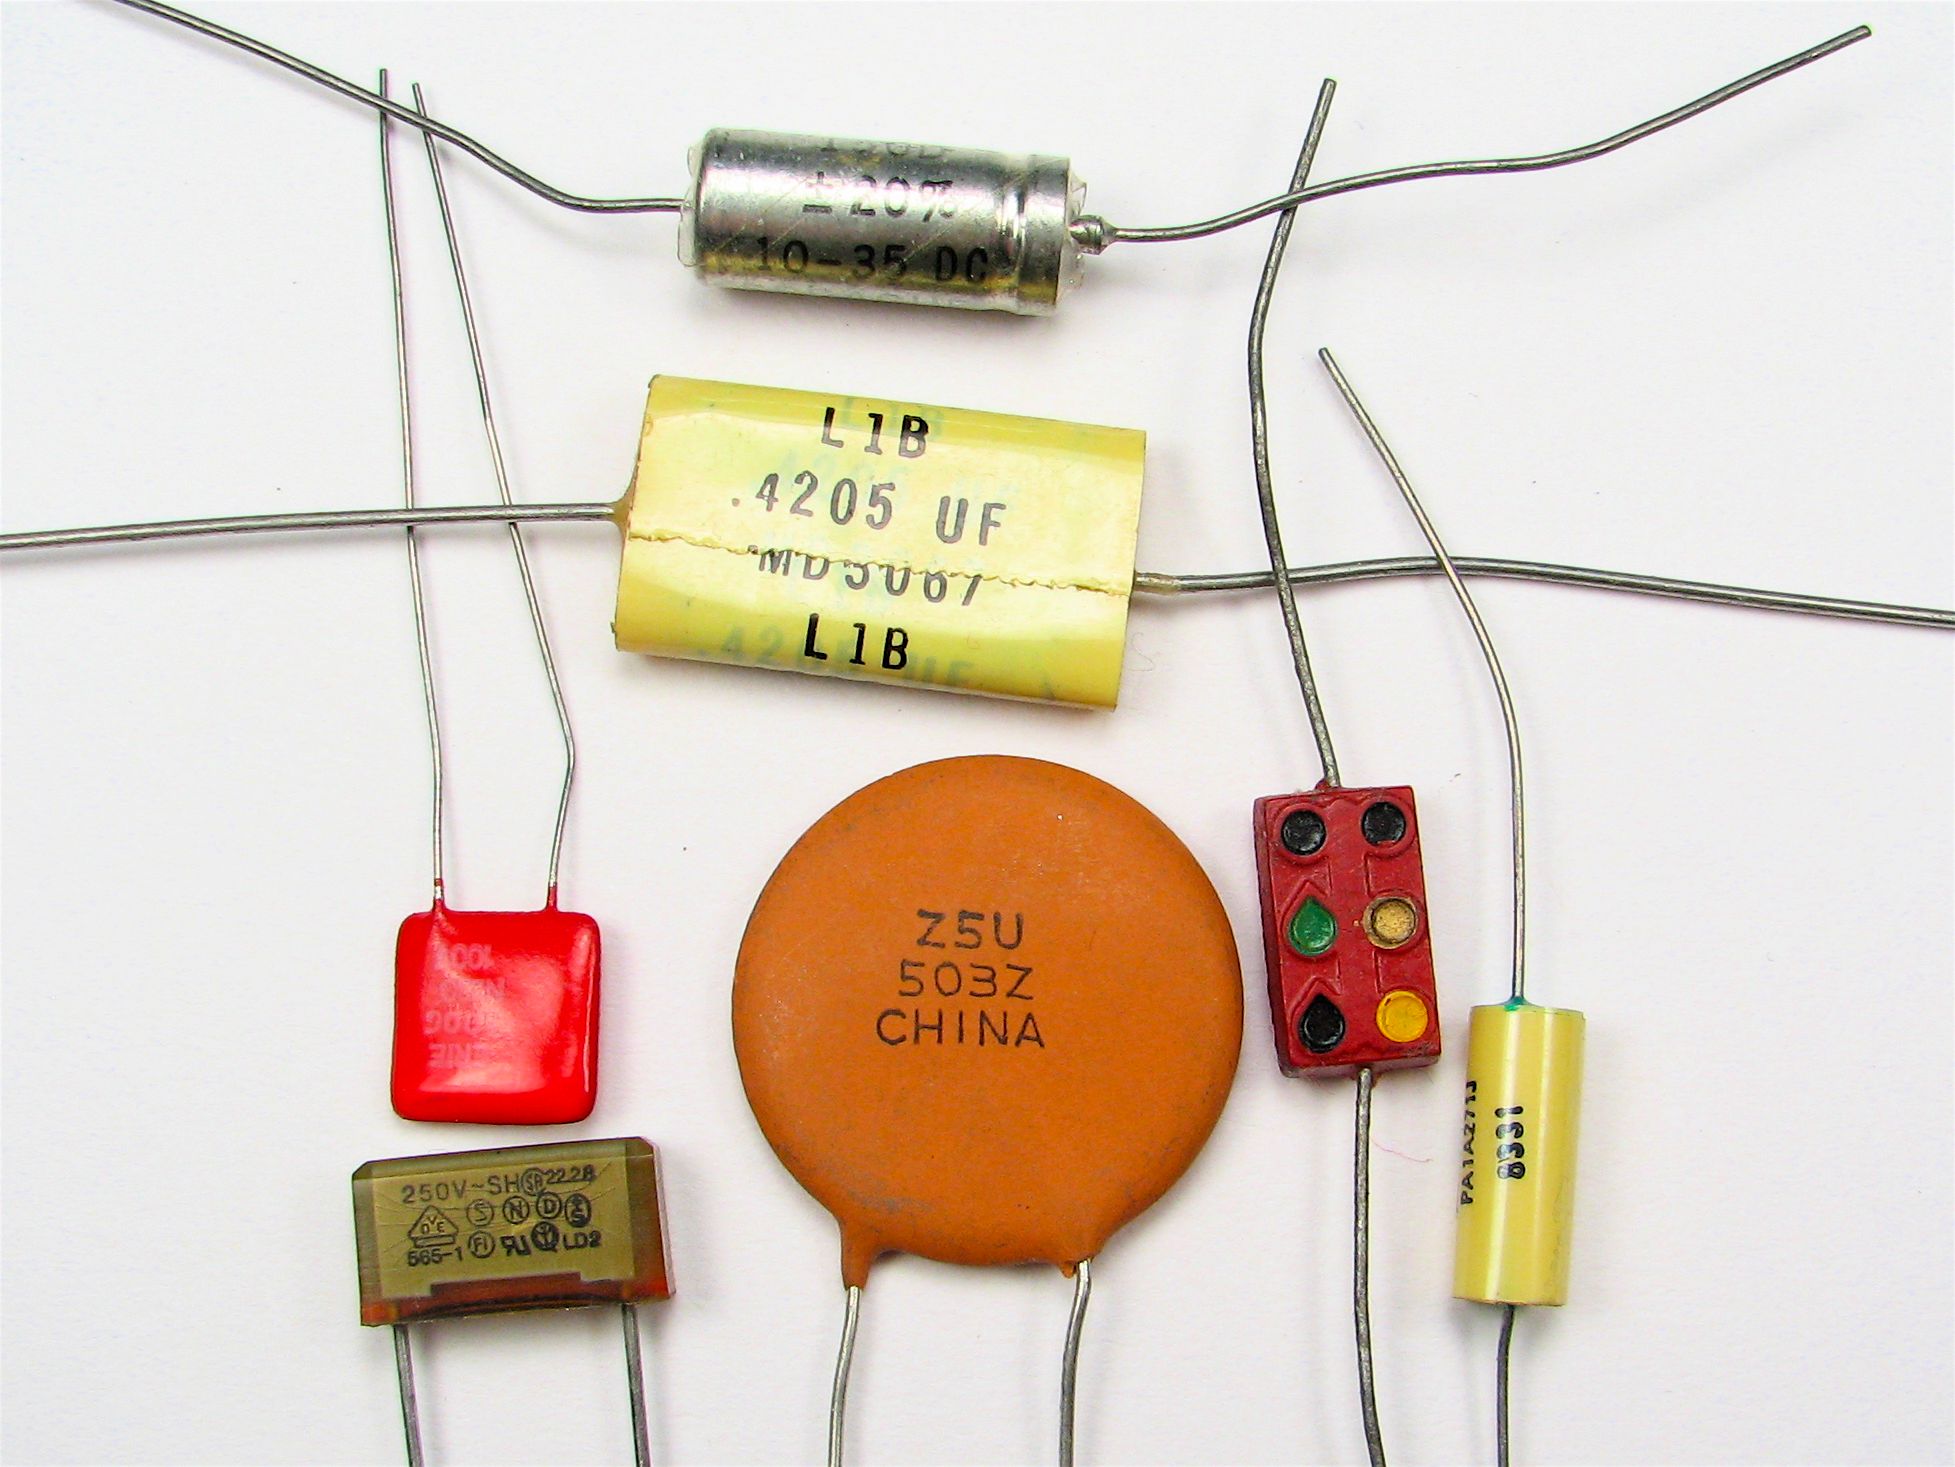
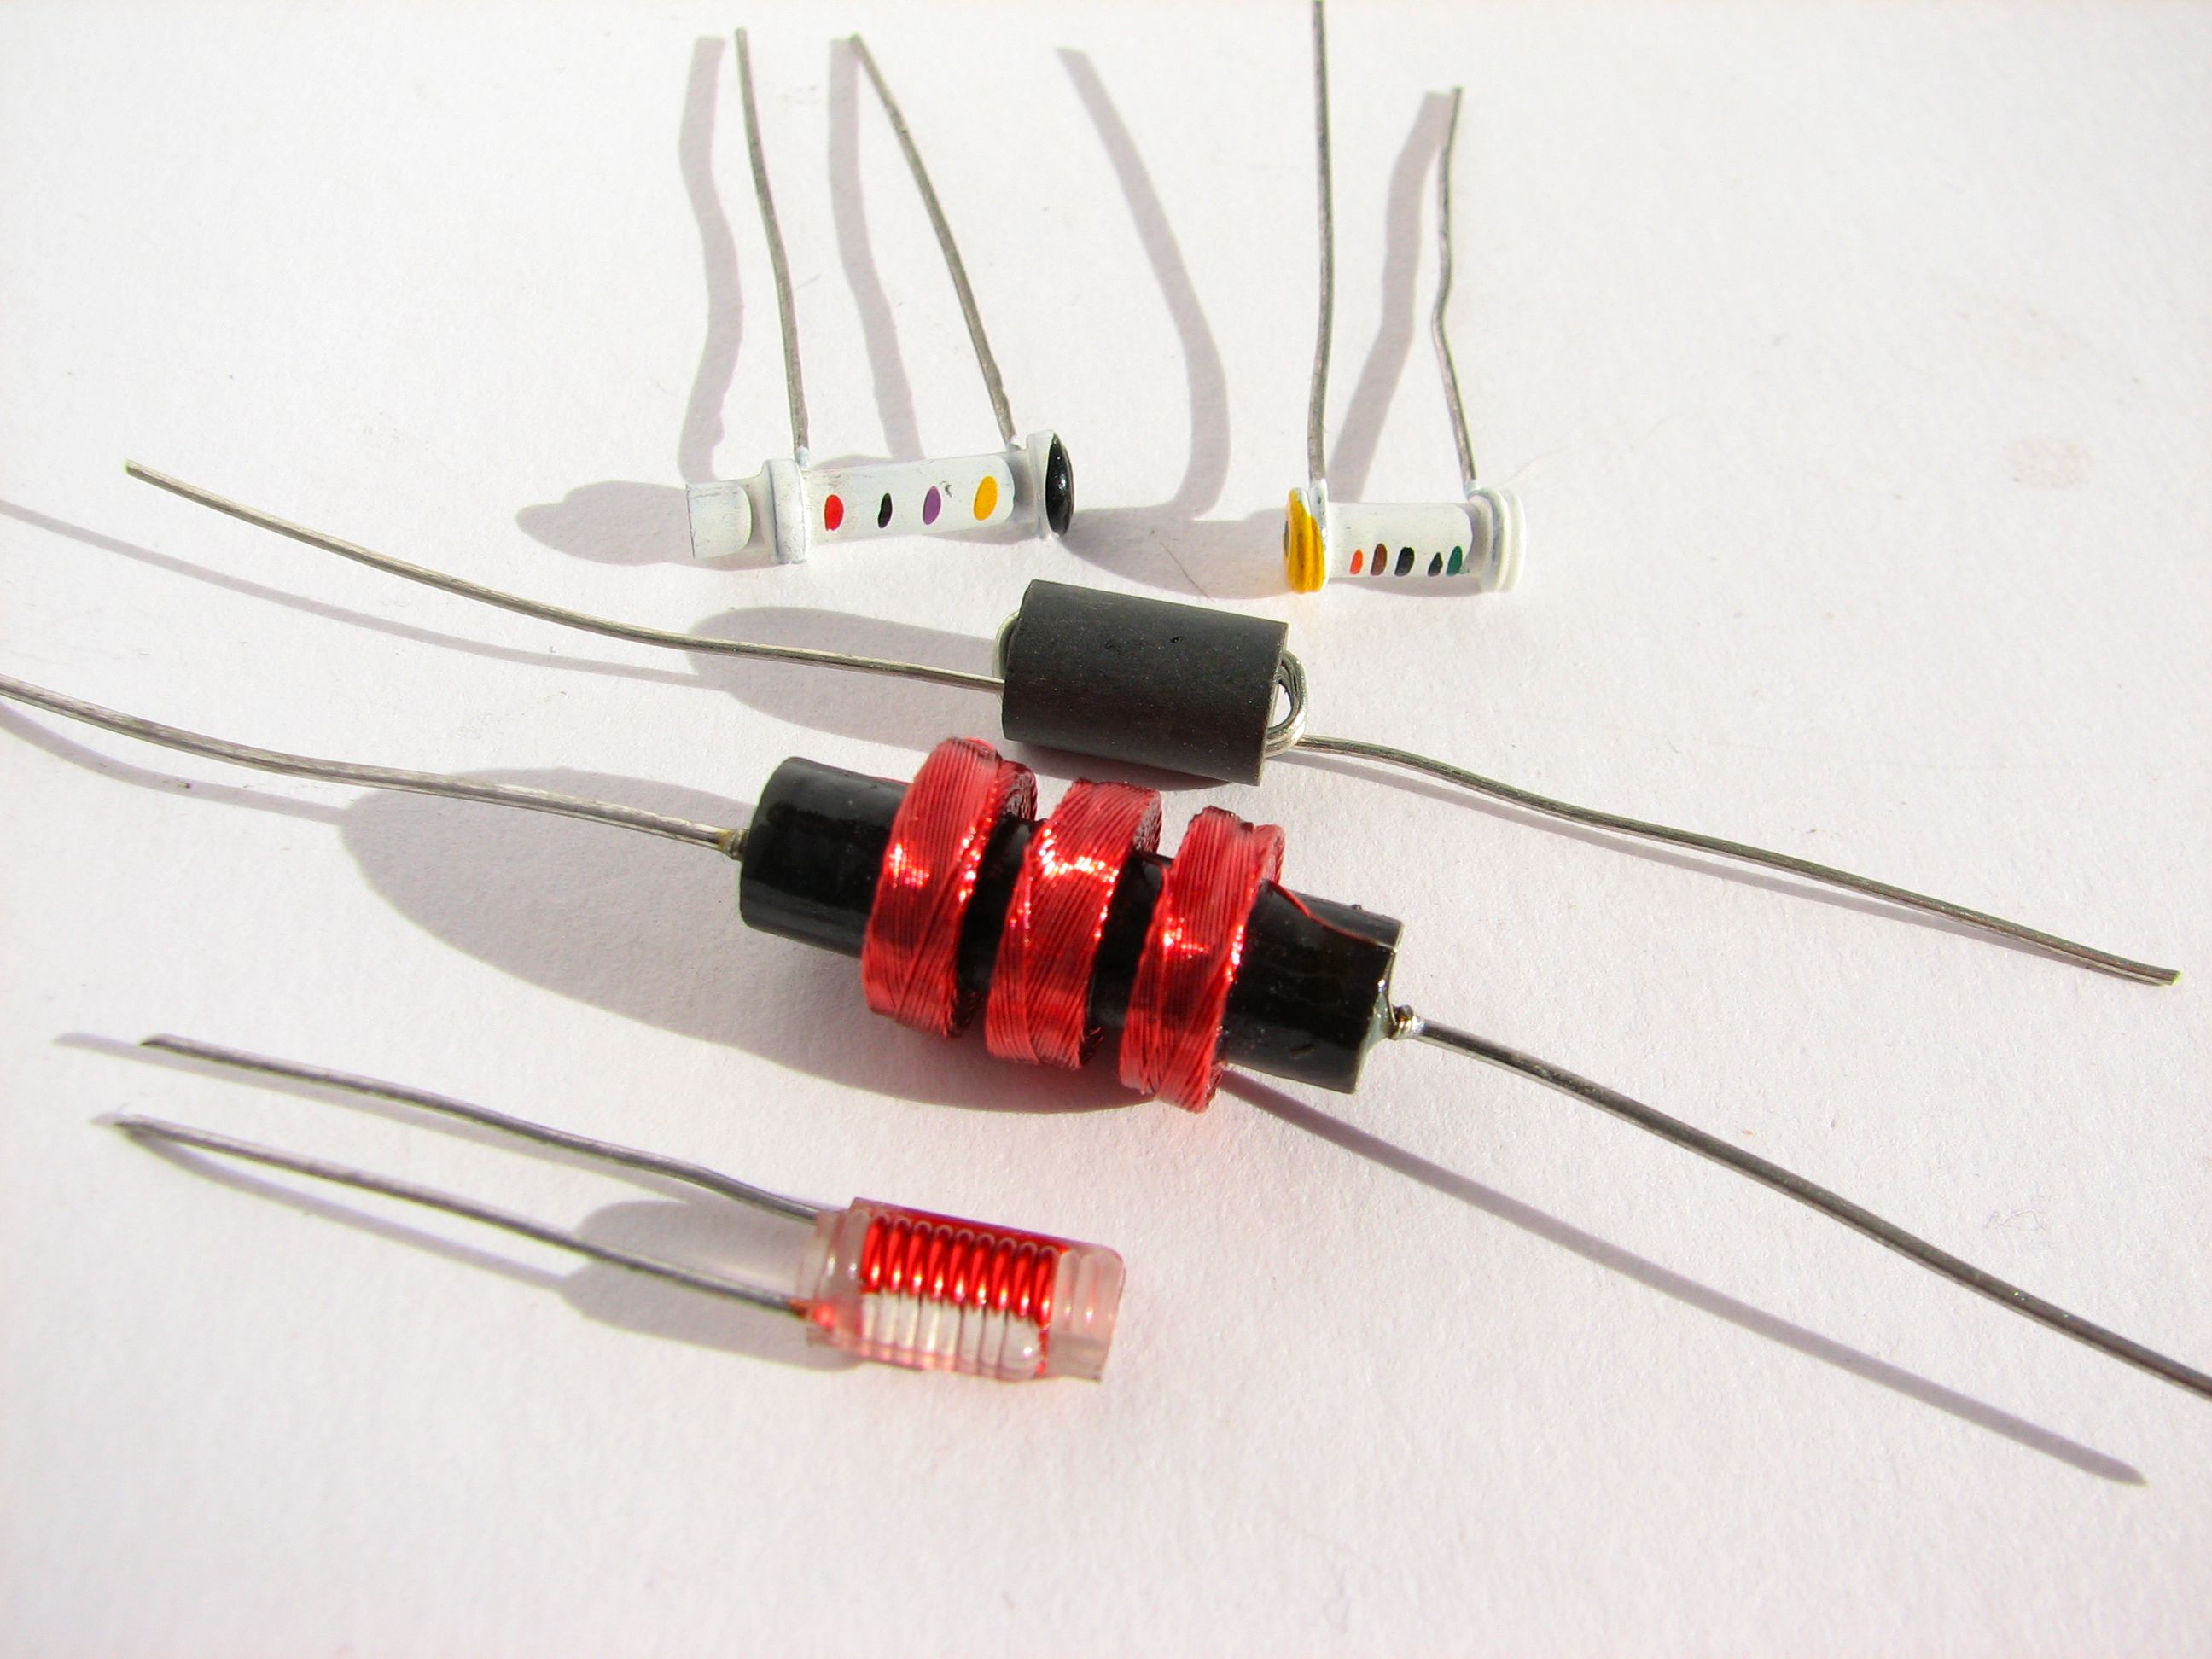
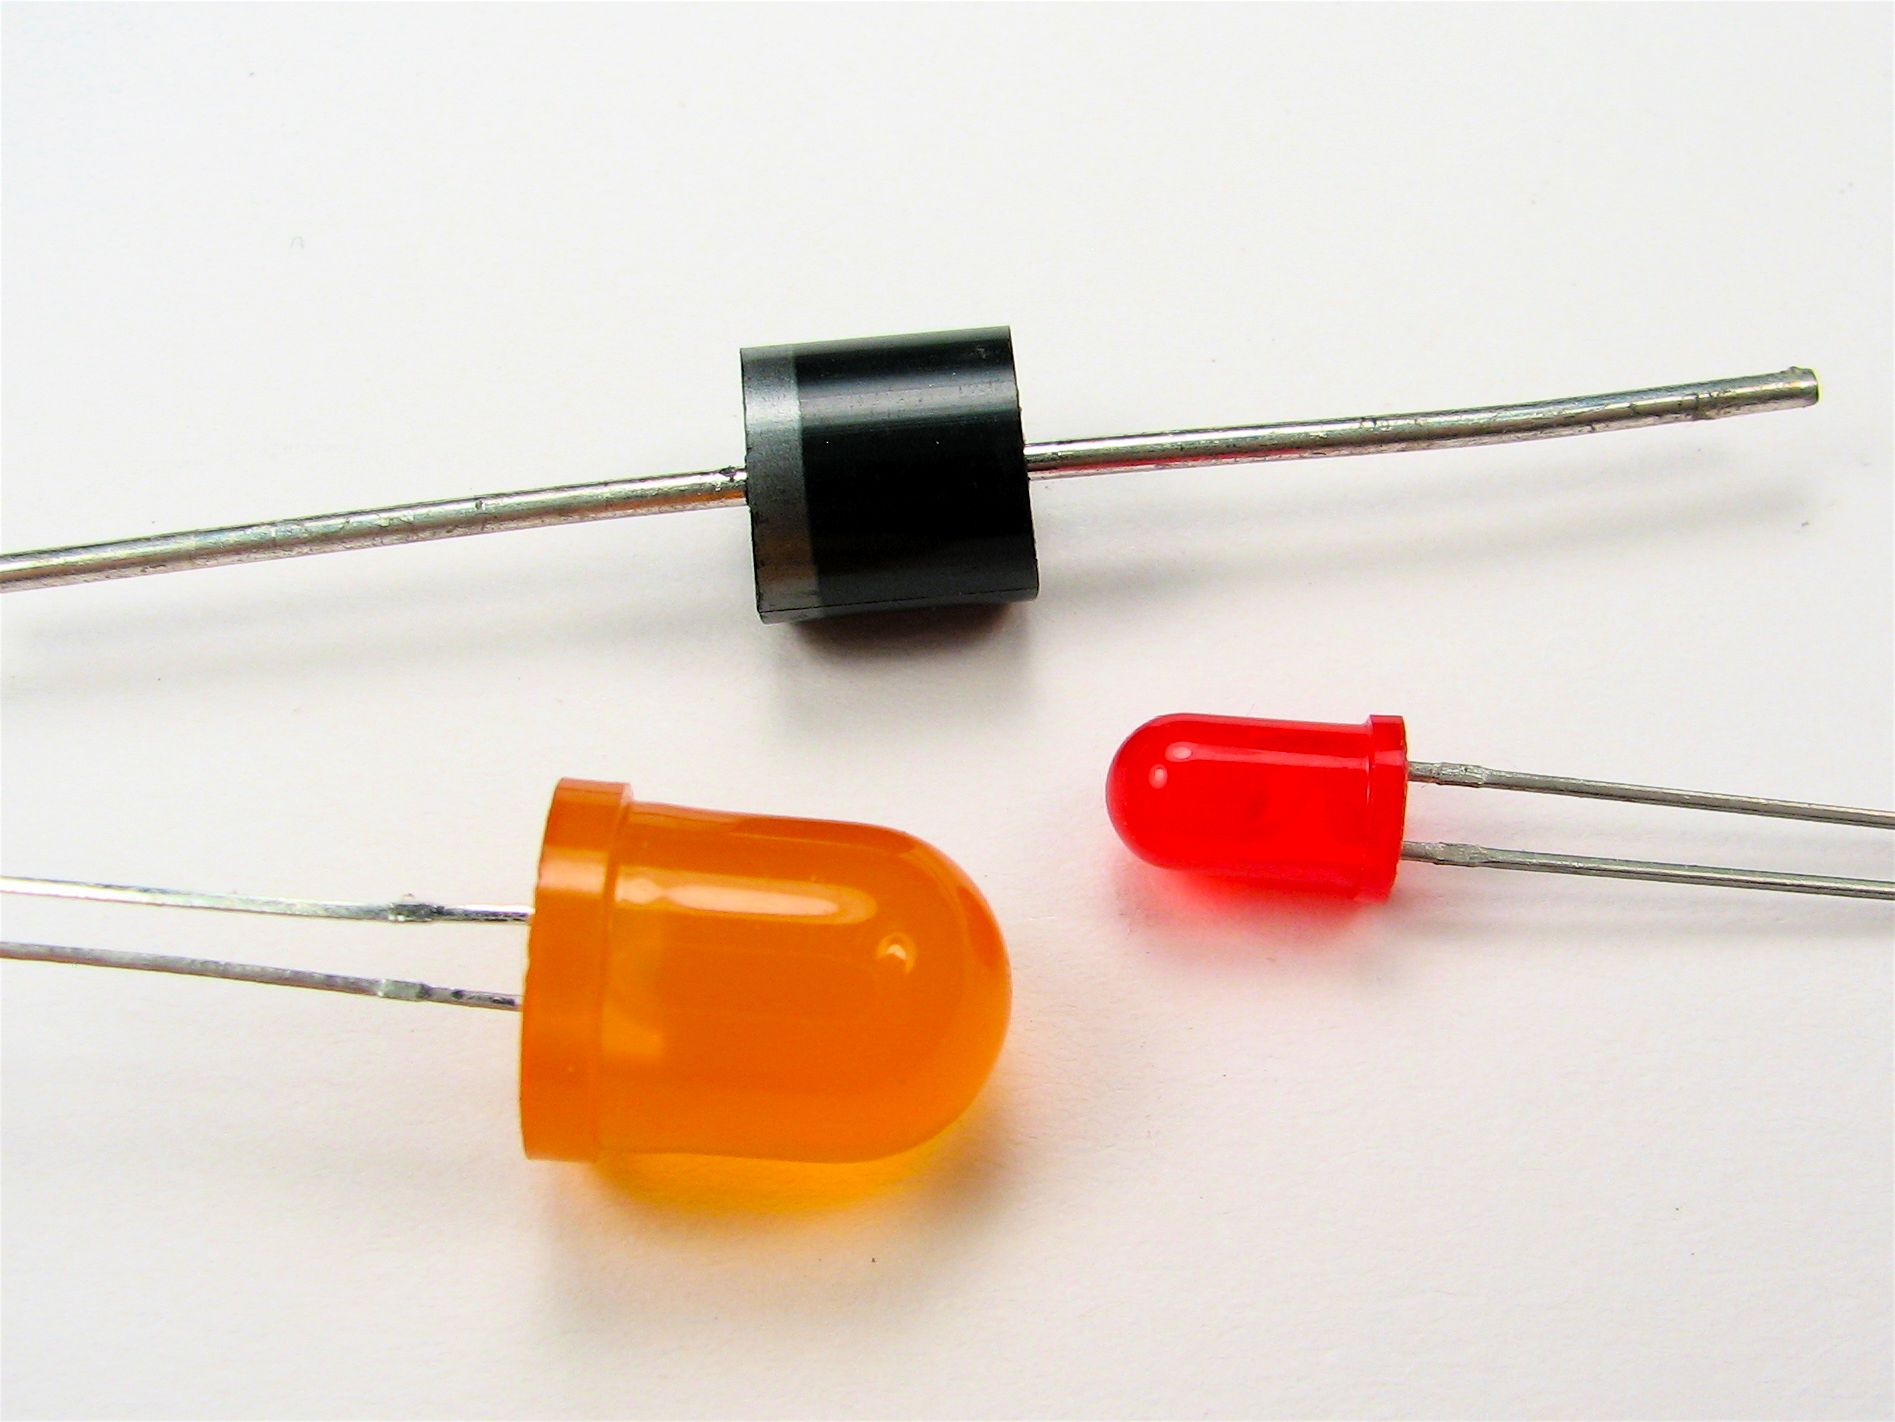
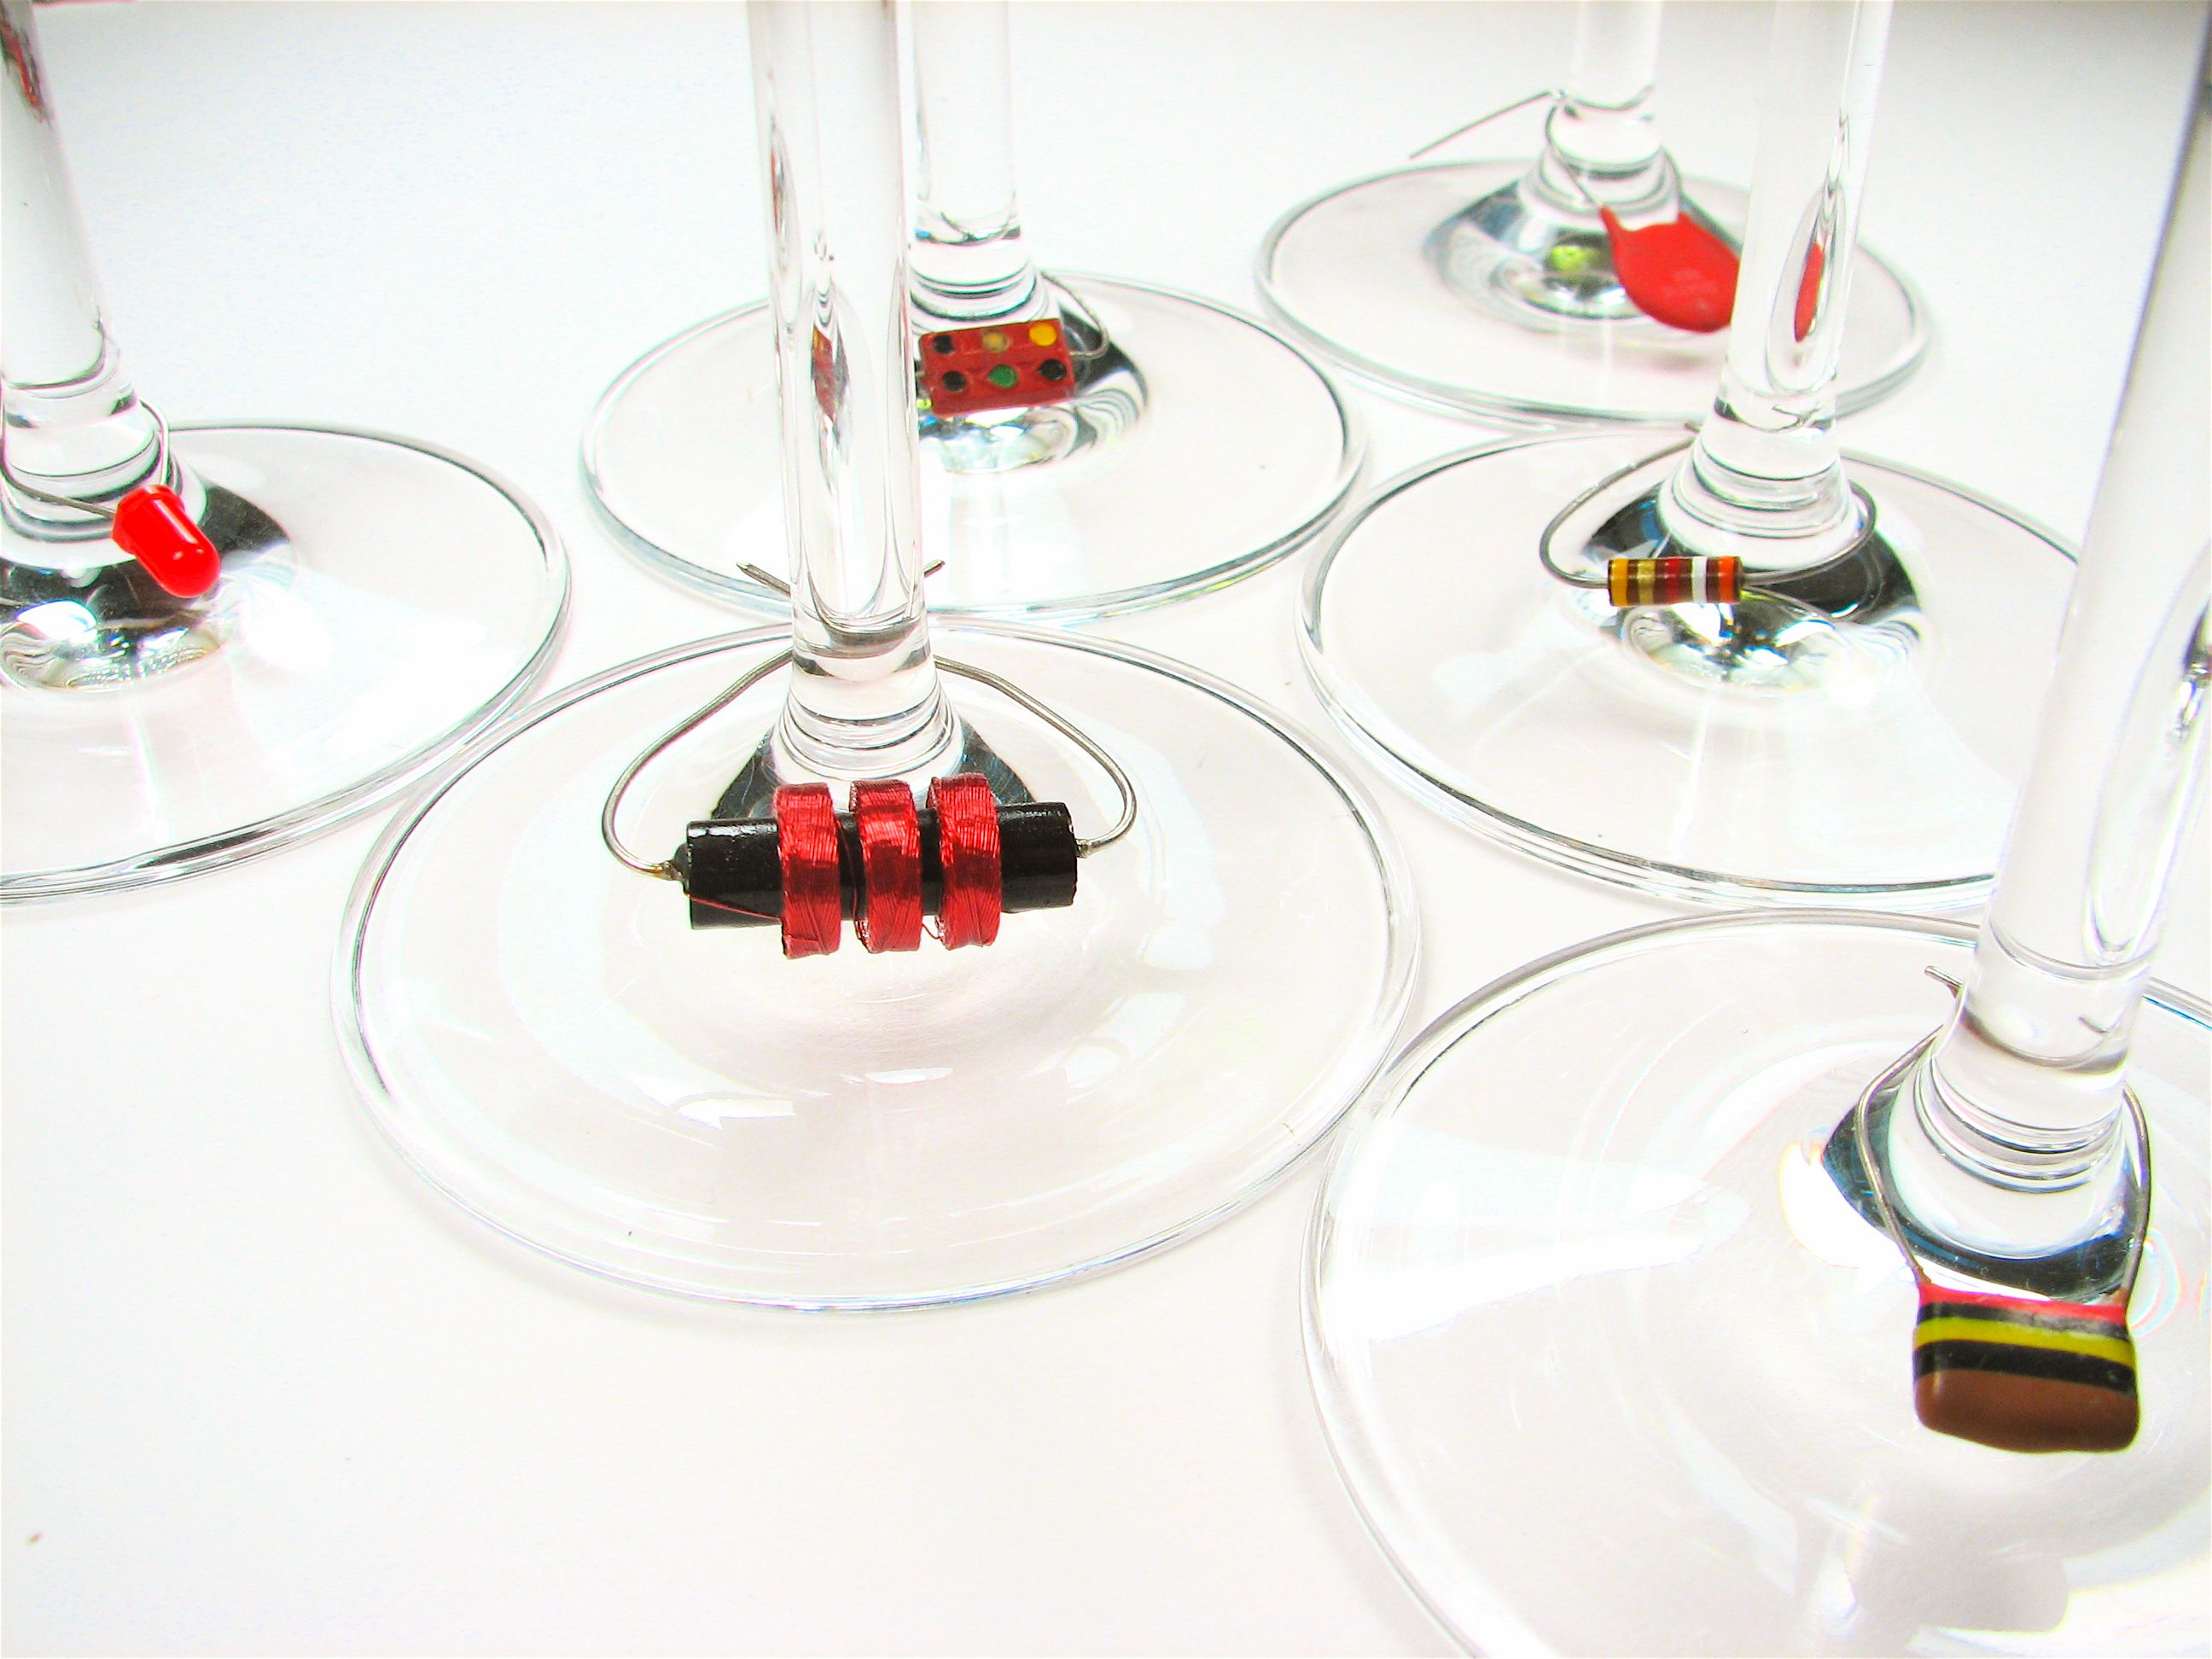
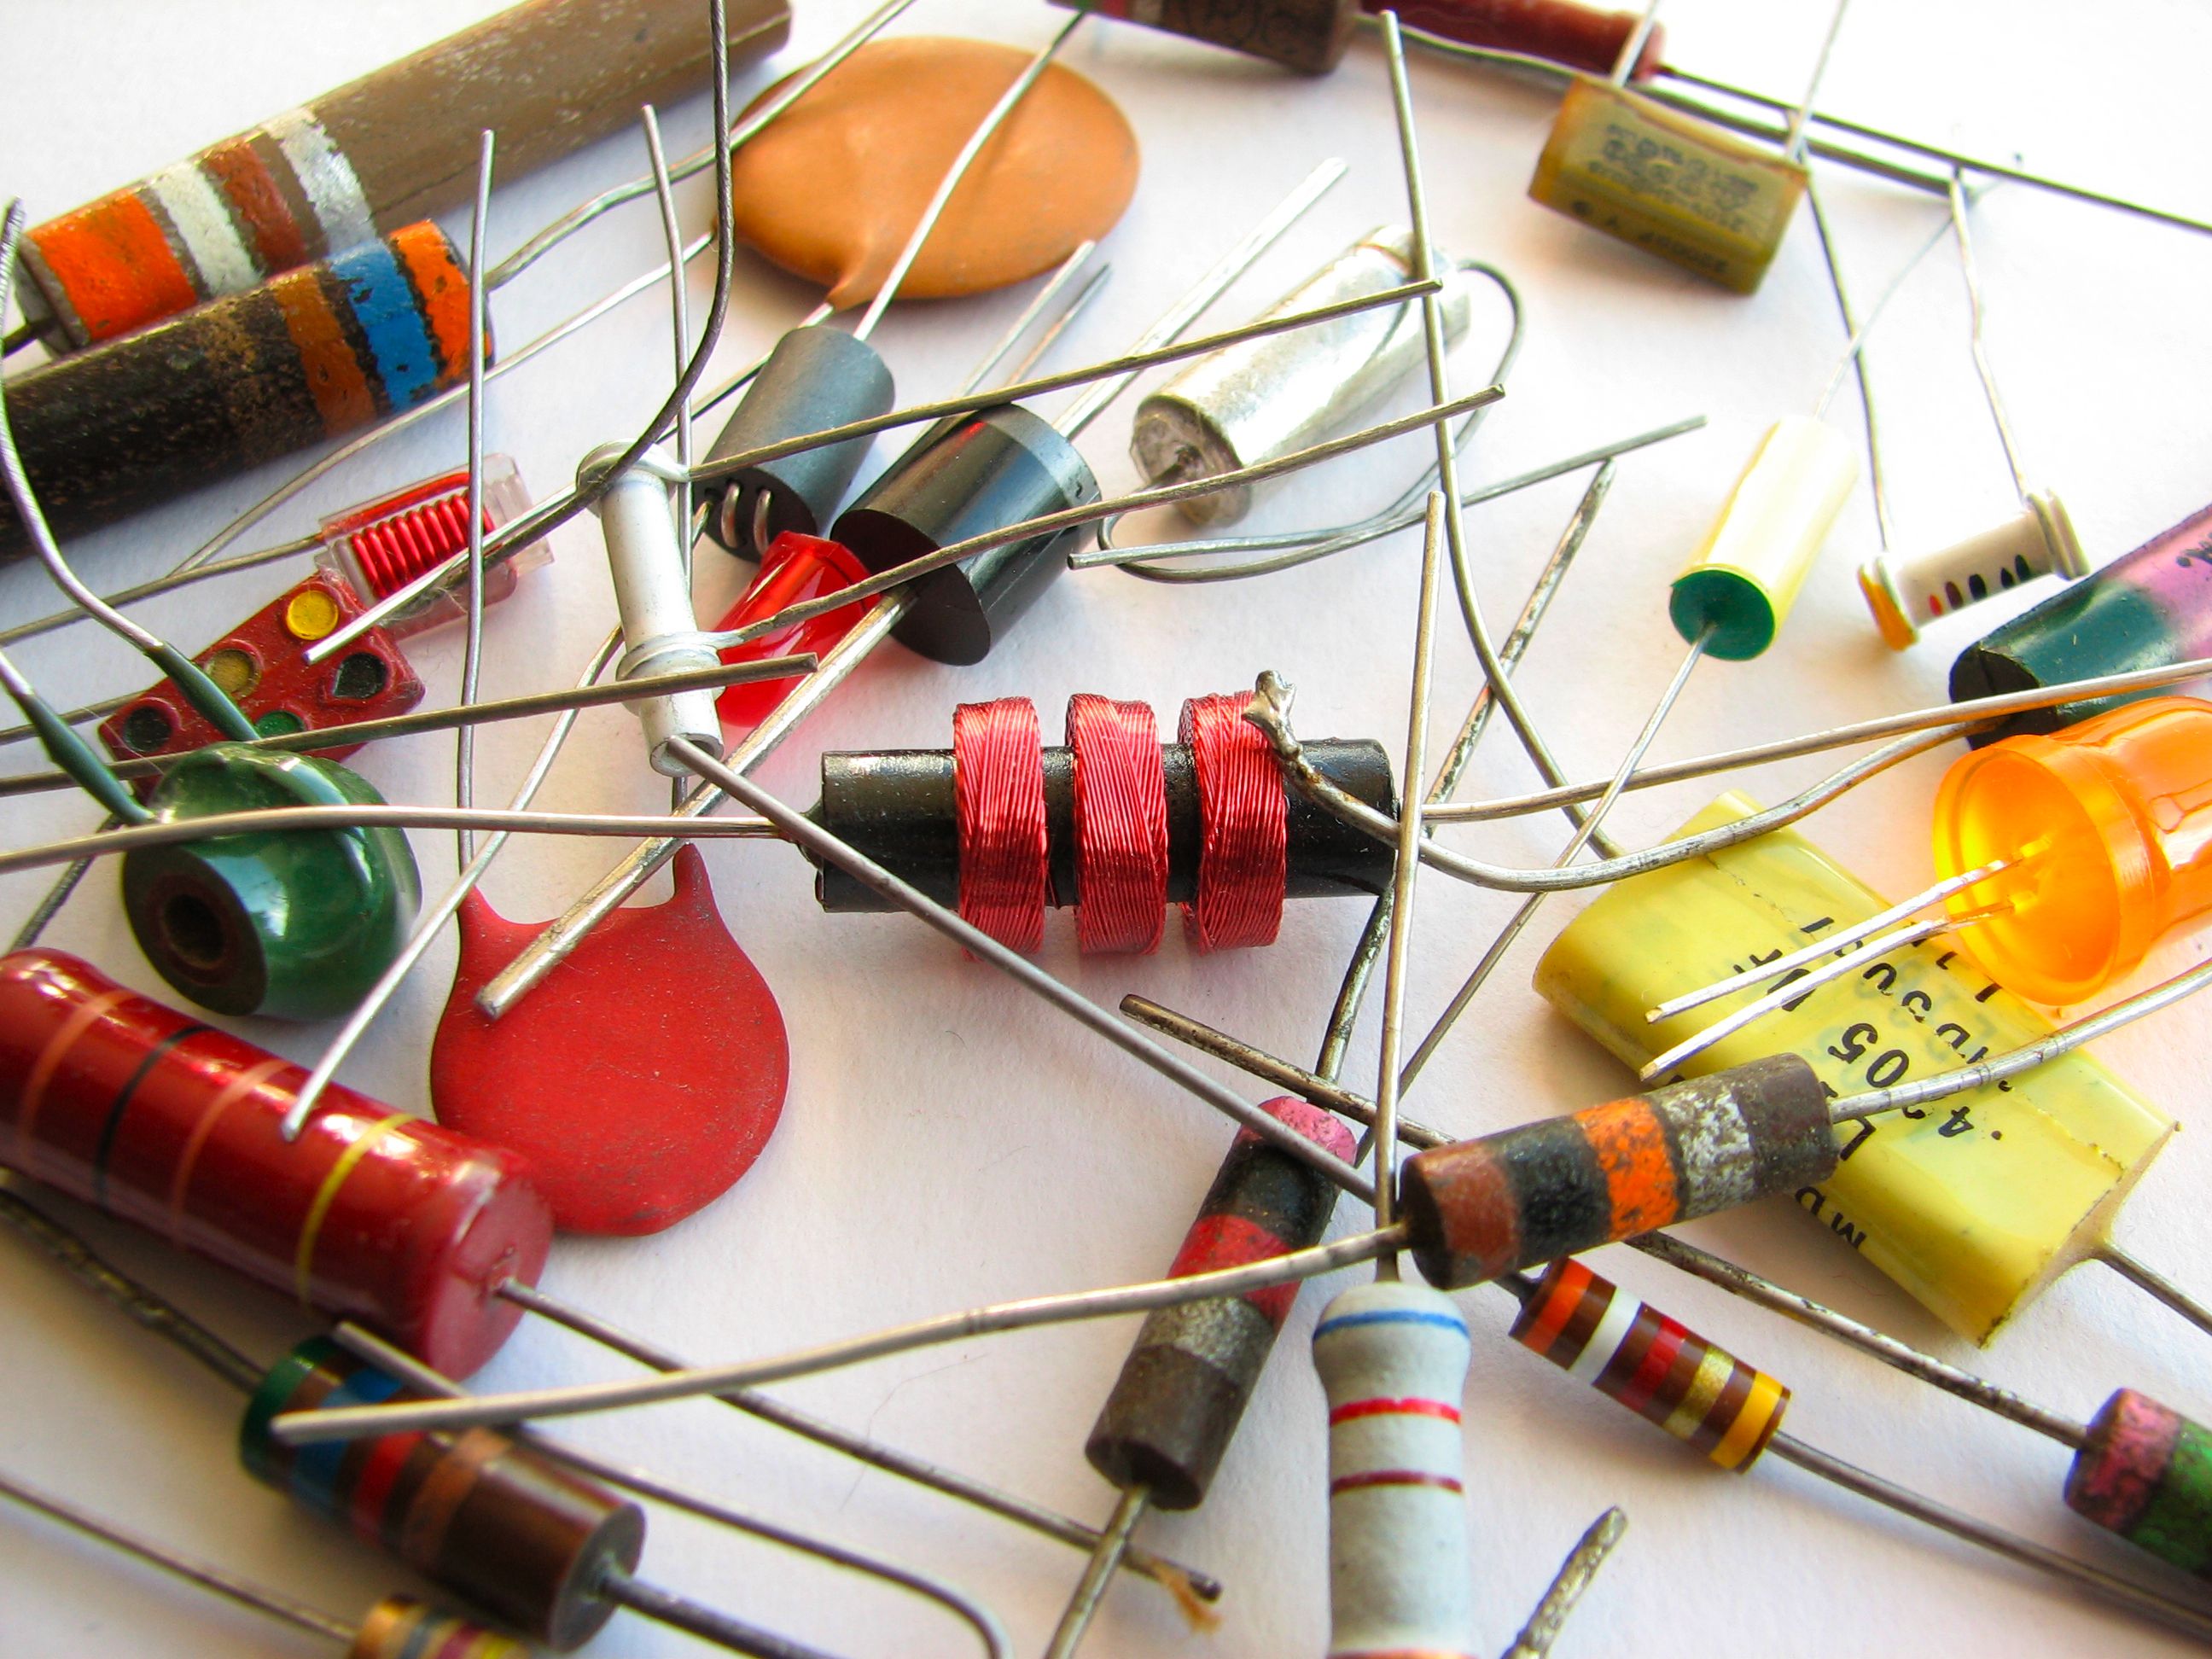
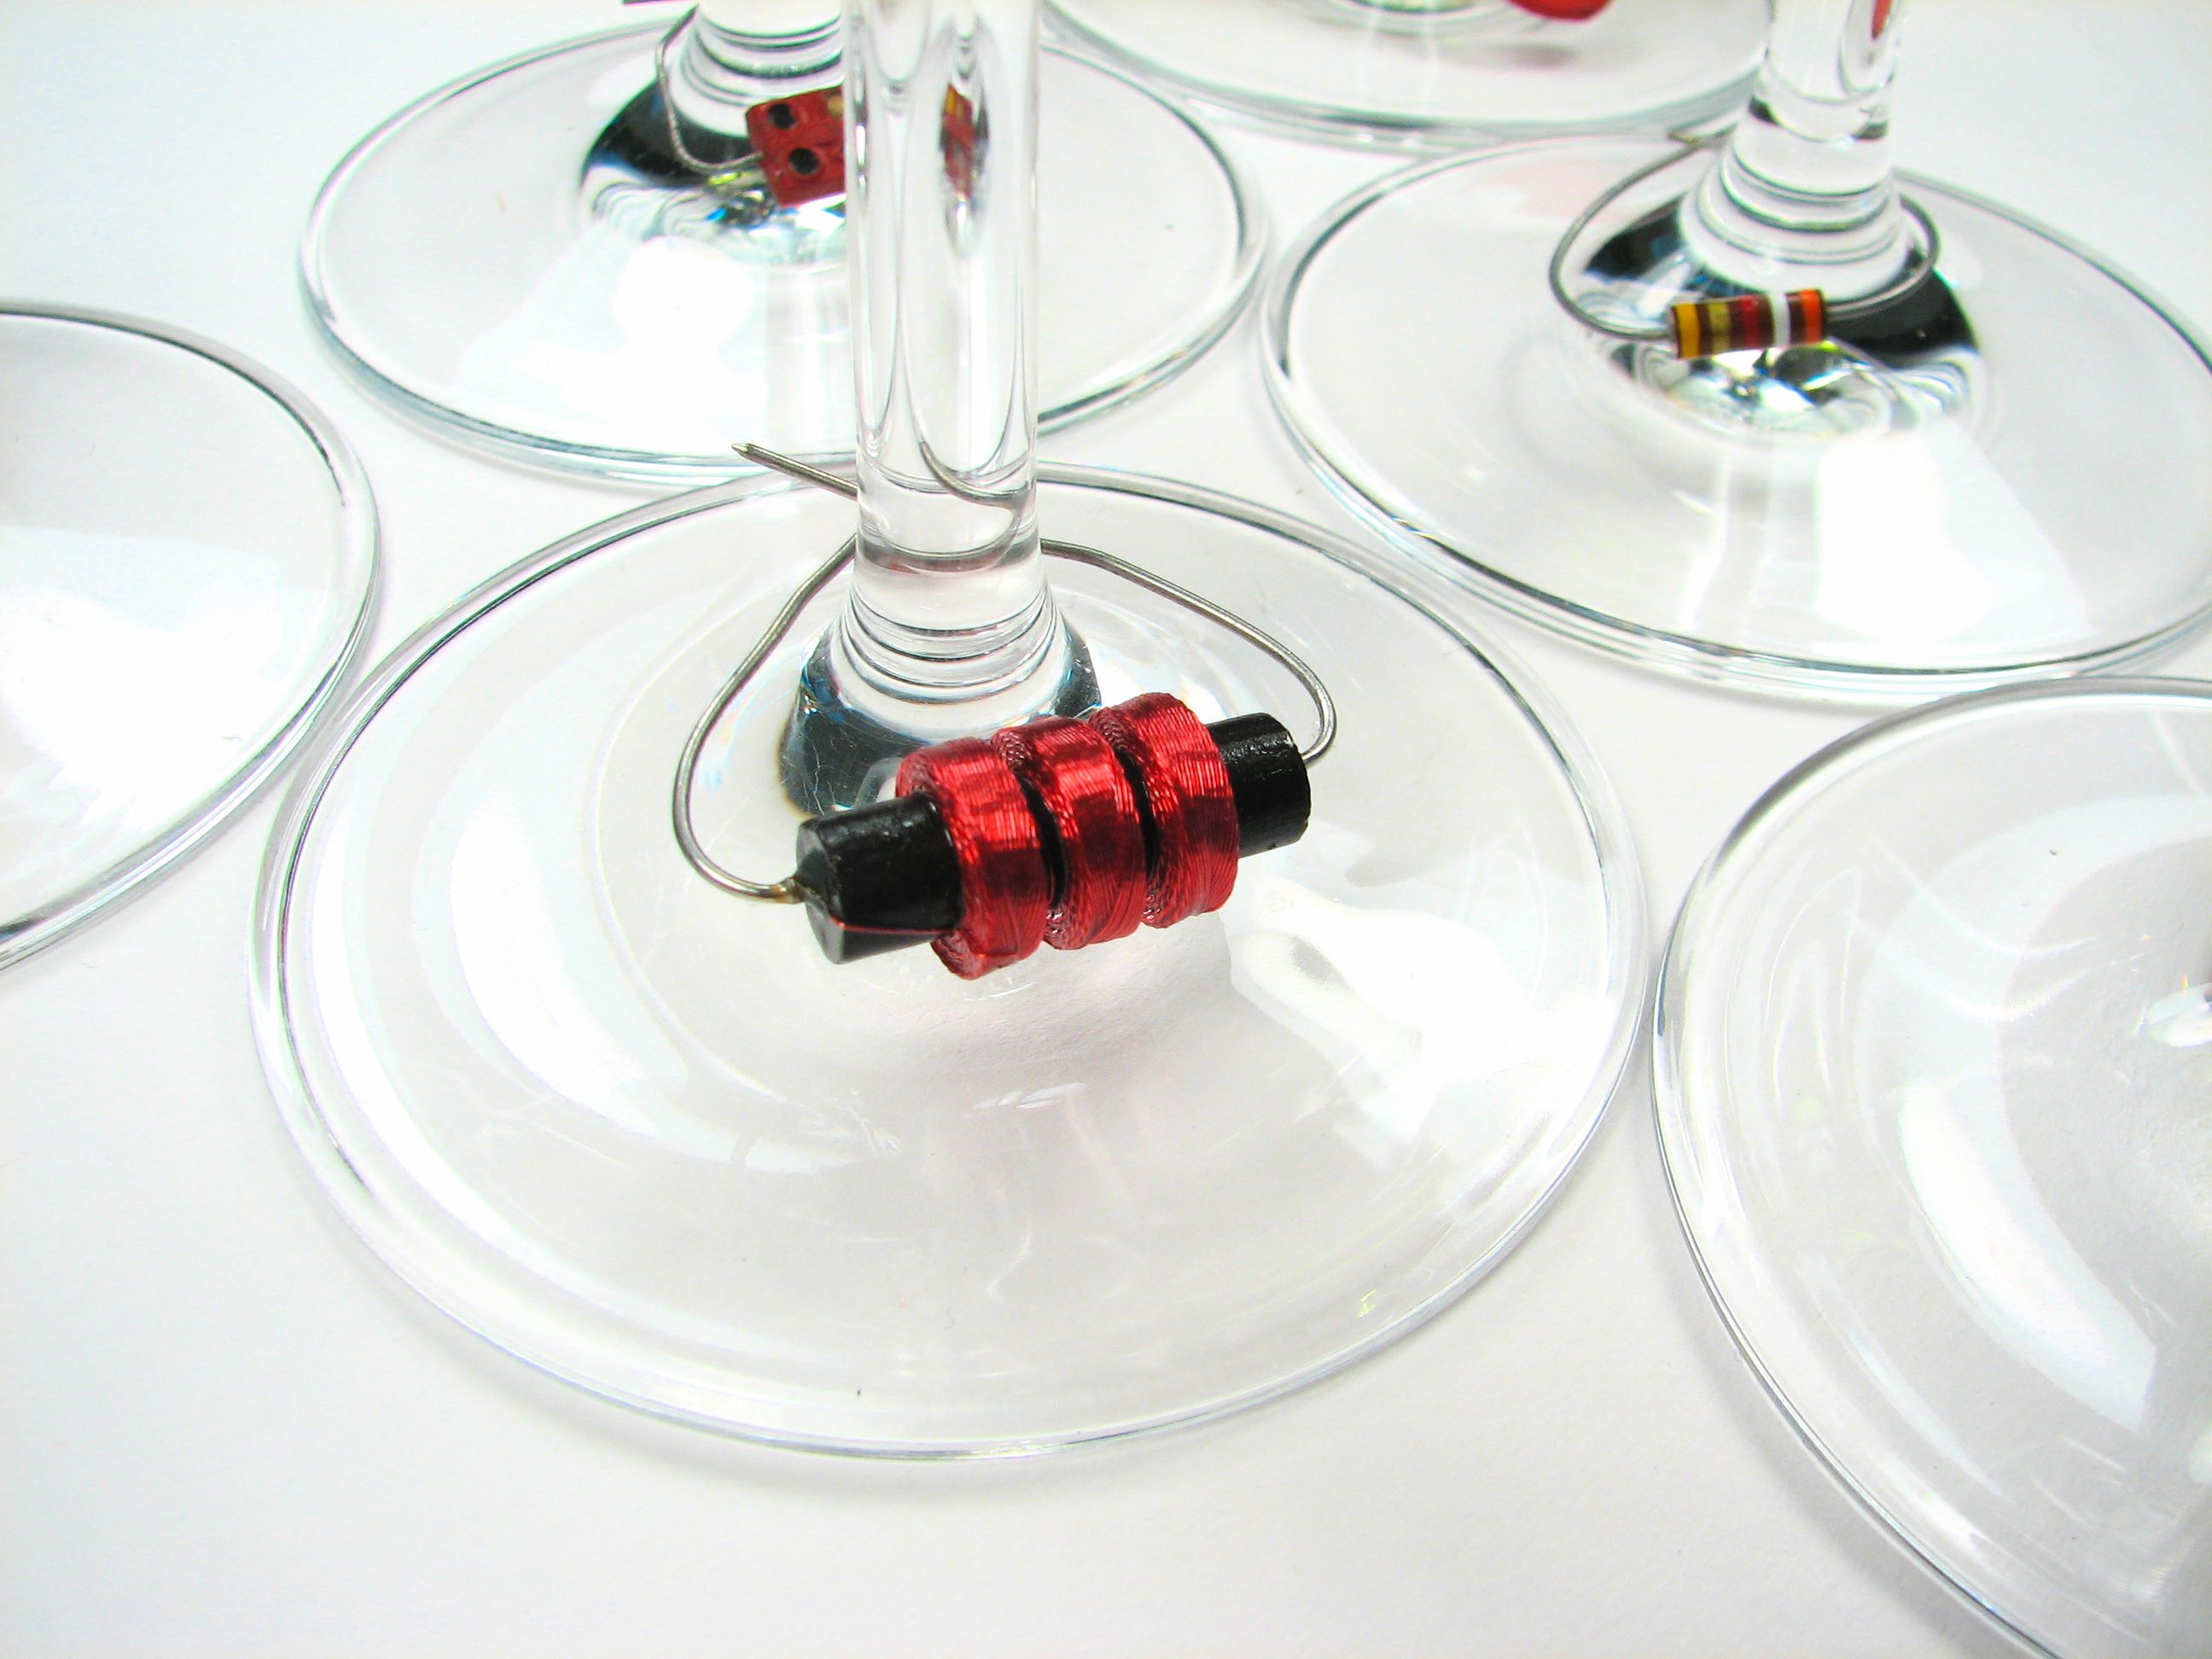
In the four photos above you can see some of the cool things that we were able to find for under fifteen cents each, including assorted (from noon) capacitors, diodes, inductors, and resistors. The primary things to look for in a component– besides price– is that the geometry will lend itself to bending the leads around the stem of a wine glass. Other than that, try to pick things that look sturdy, waterproof, unusual, and interesting.
It’s very important that your set of wine charms consist of items that are physically different from one another. There is enough variety amongst these components that it’s easy to pick out sets that minimize overlap. For example, you only see one domino-shaped capacitor with brightly colored dots.
Hardcore geeks may be tempted to use sets of resistors that are identical except for color code (“No I was Red-Red-Blue-Gold!!!”), but this is a very, very bad idea.

[Aside: Just in case you do want to mess with the electronics geeks that come to your party, choose components like these that are just a little bit ambiguous– if you’ve got the right crowd they’ll quickly begin debating whether one of these is a capacitor, inductor, or resistor.]

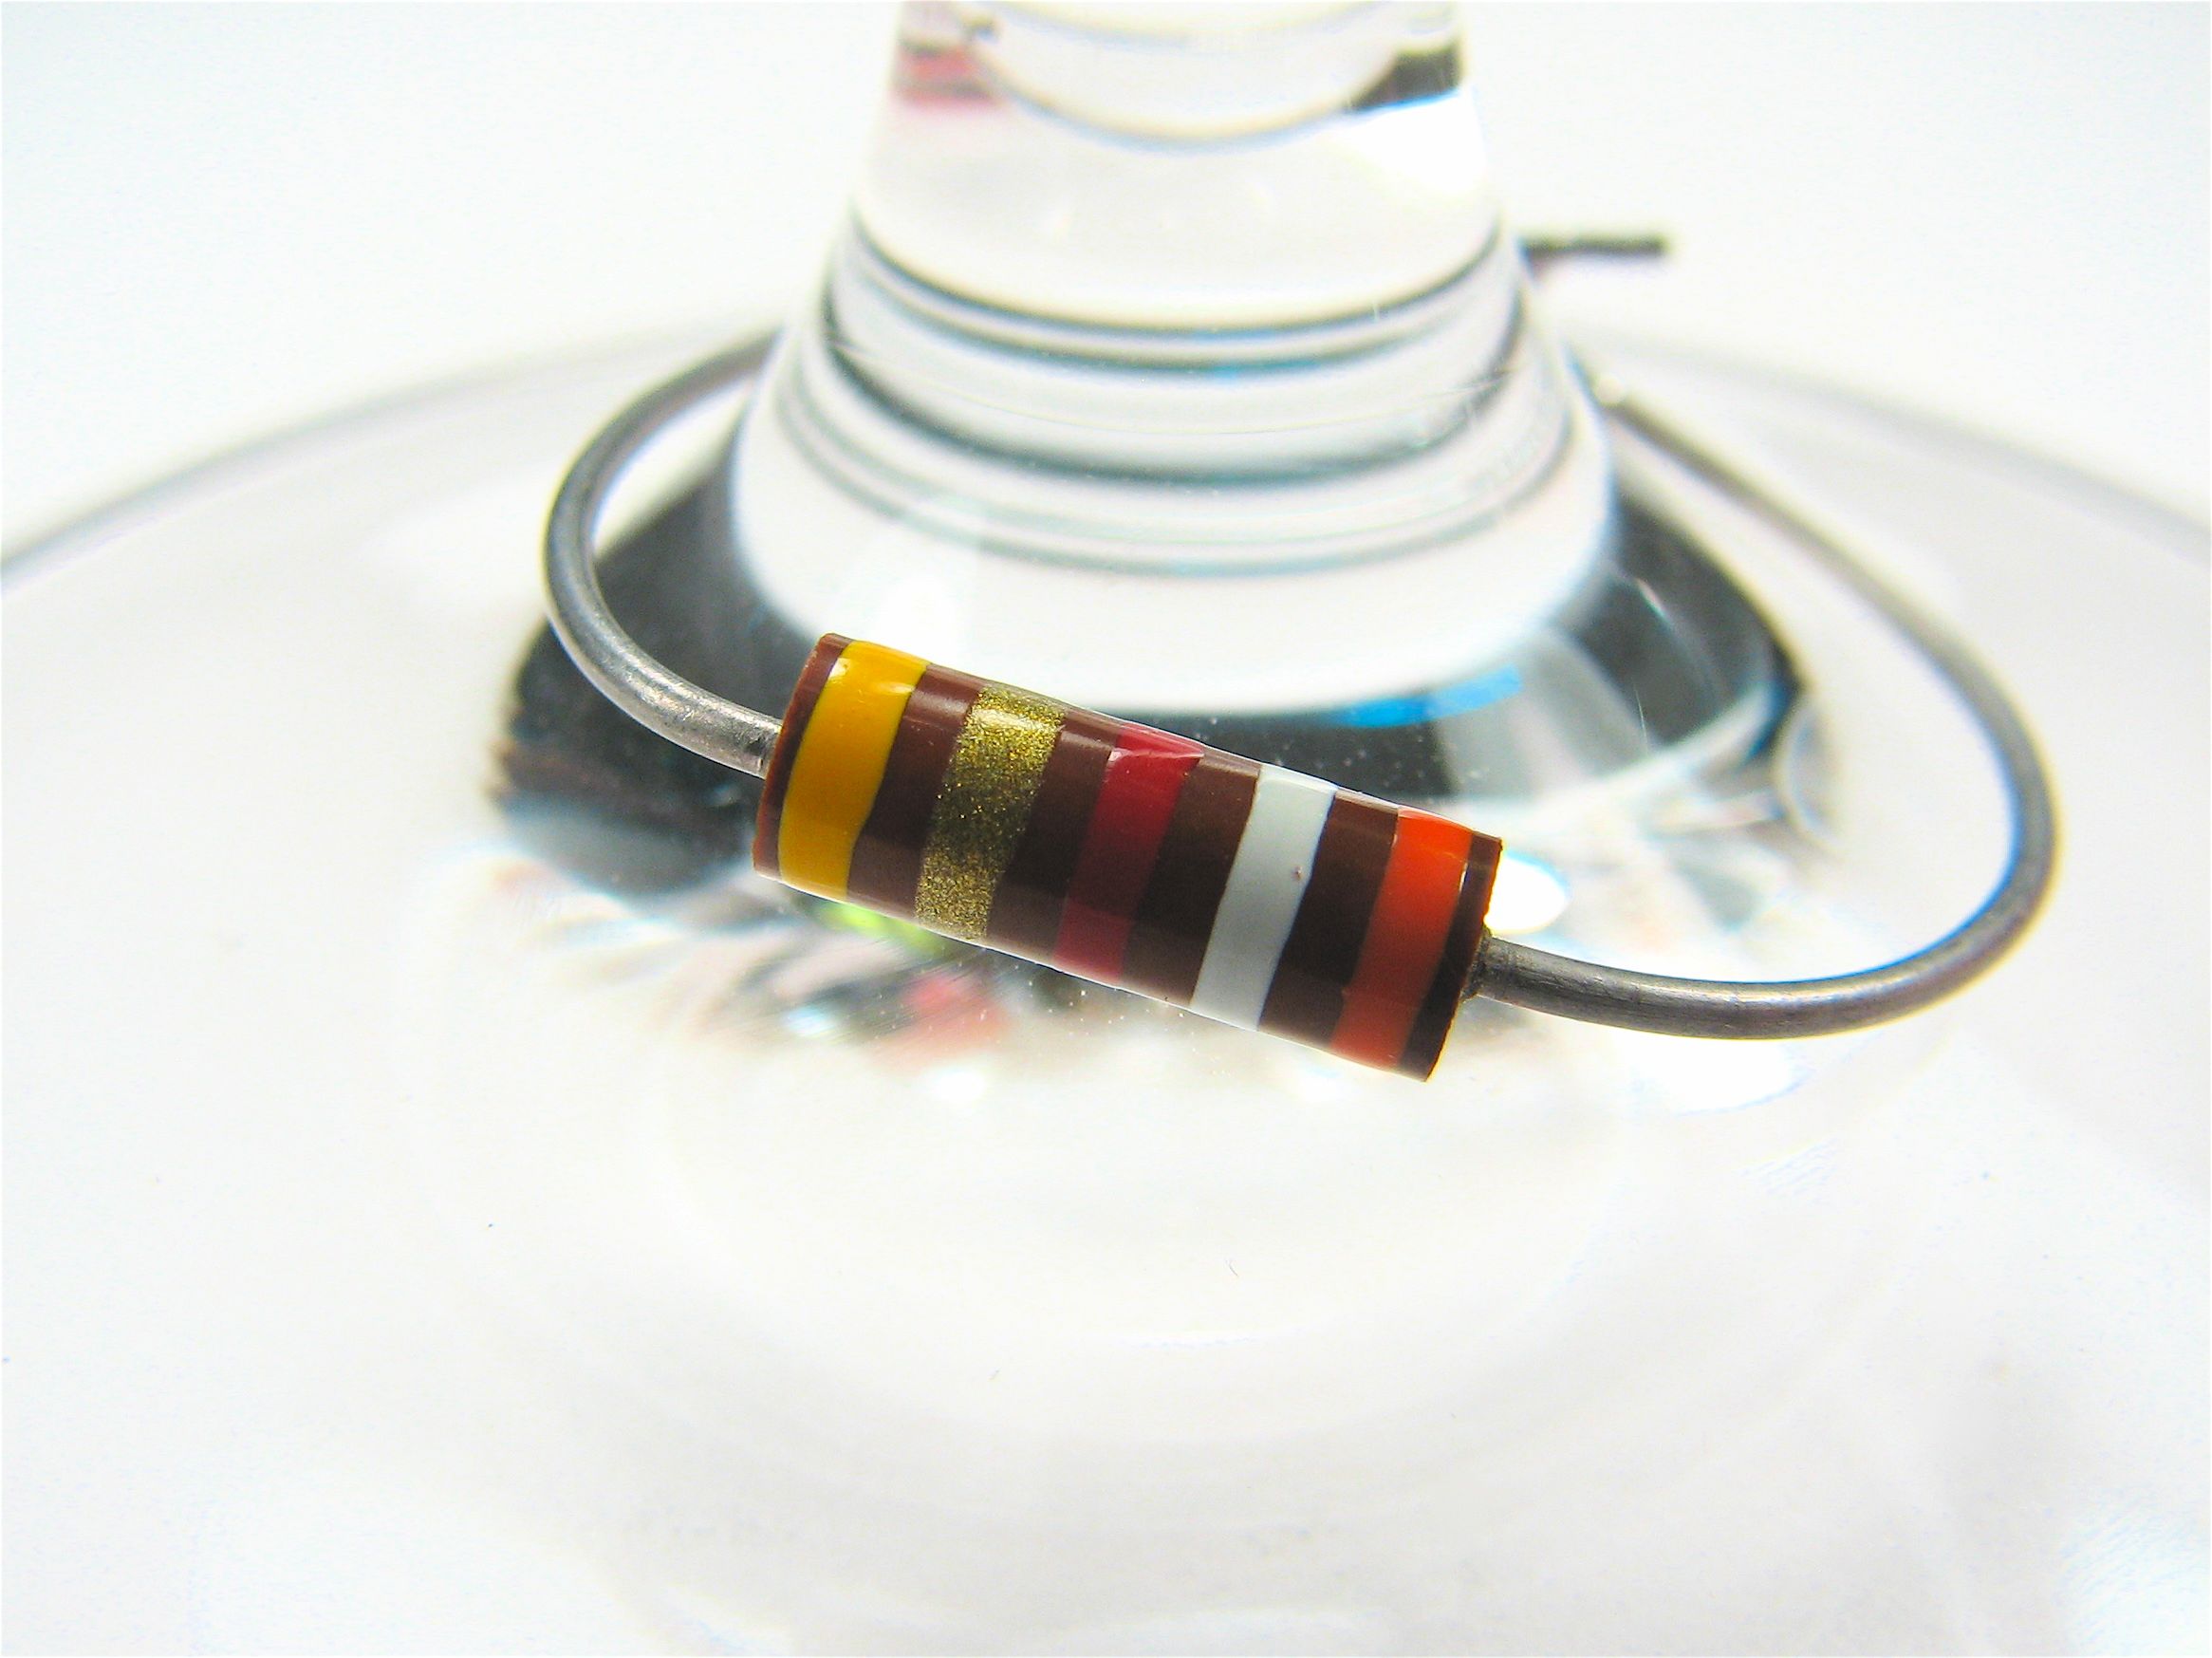
Our first wine charm will be based on this simple little resistor, however, the technique that we will describe can be used for any of these components.
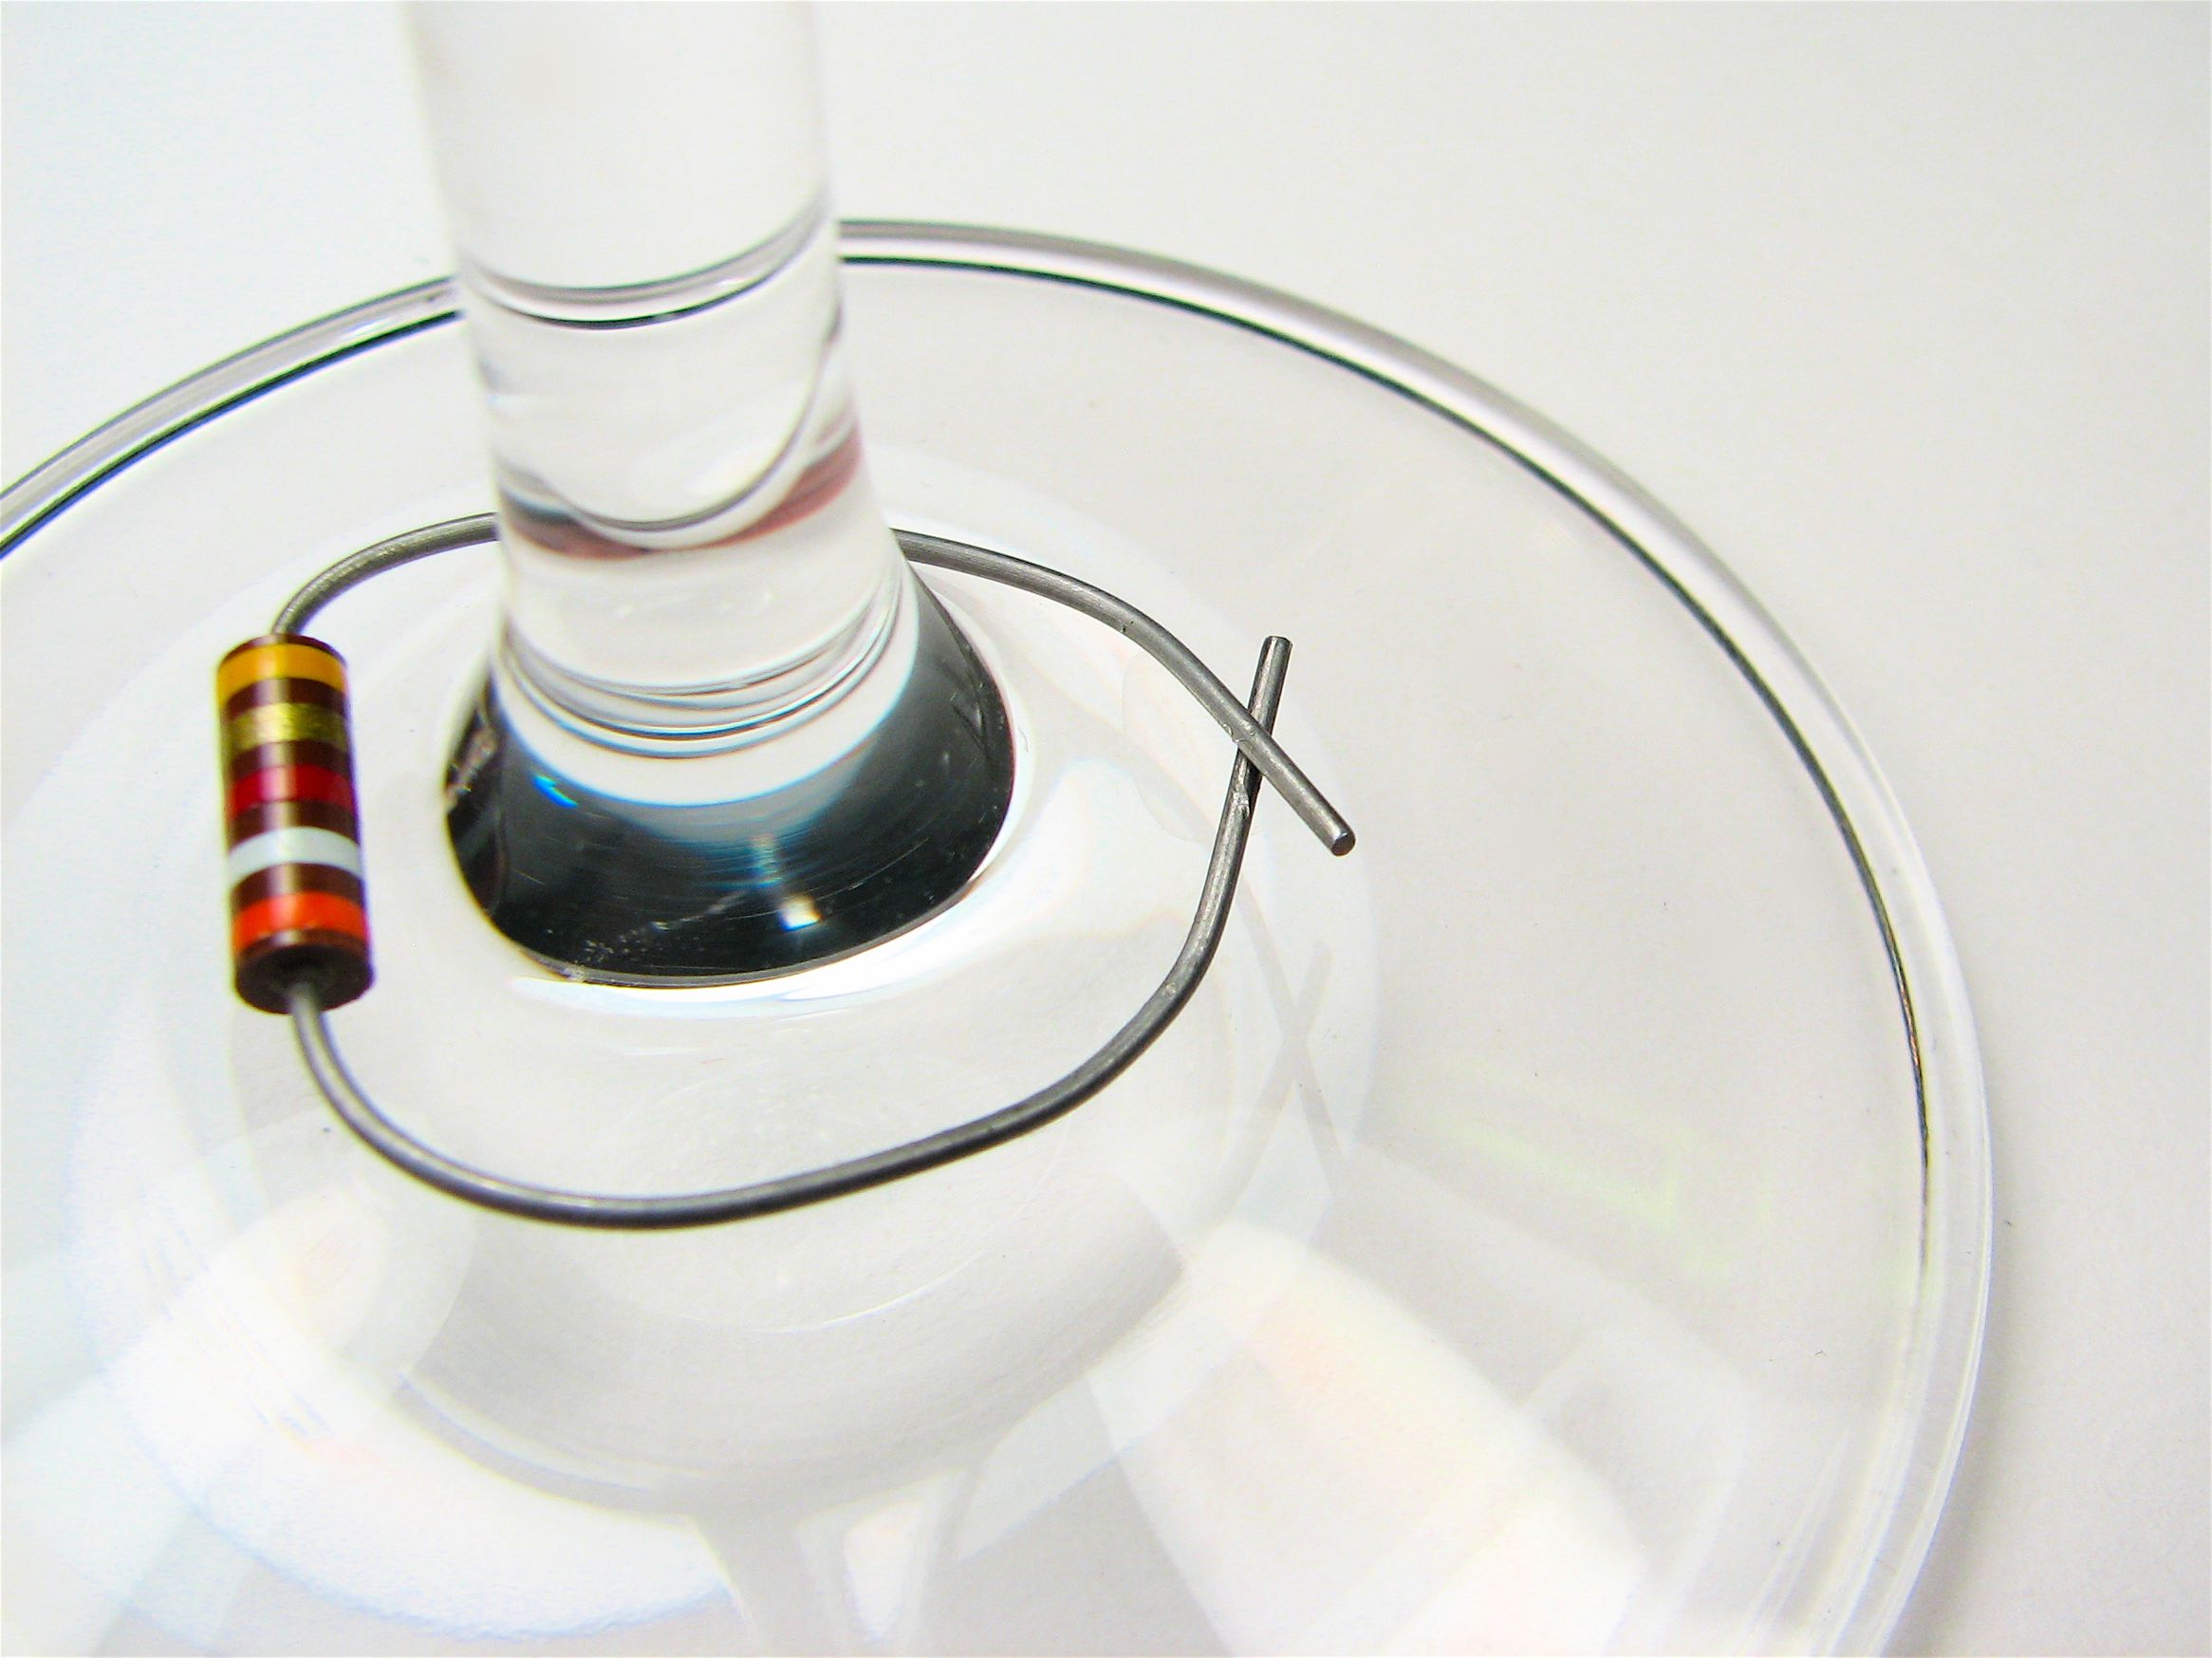
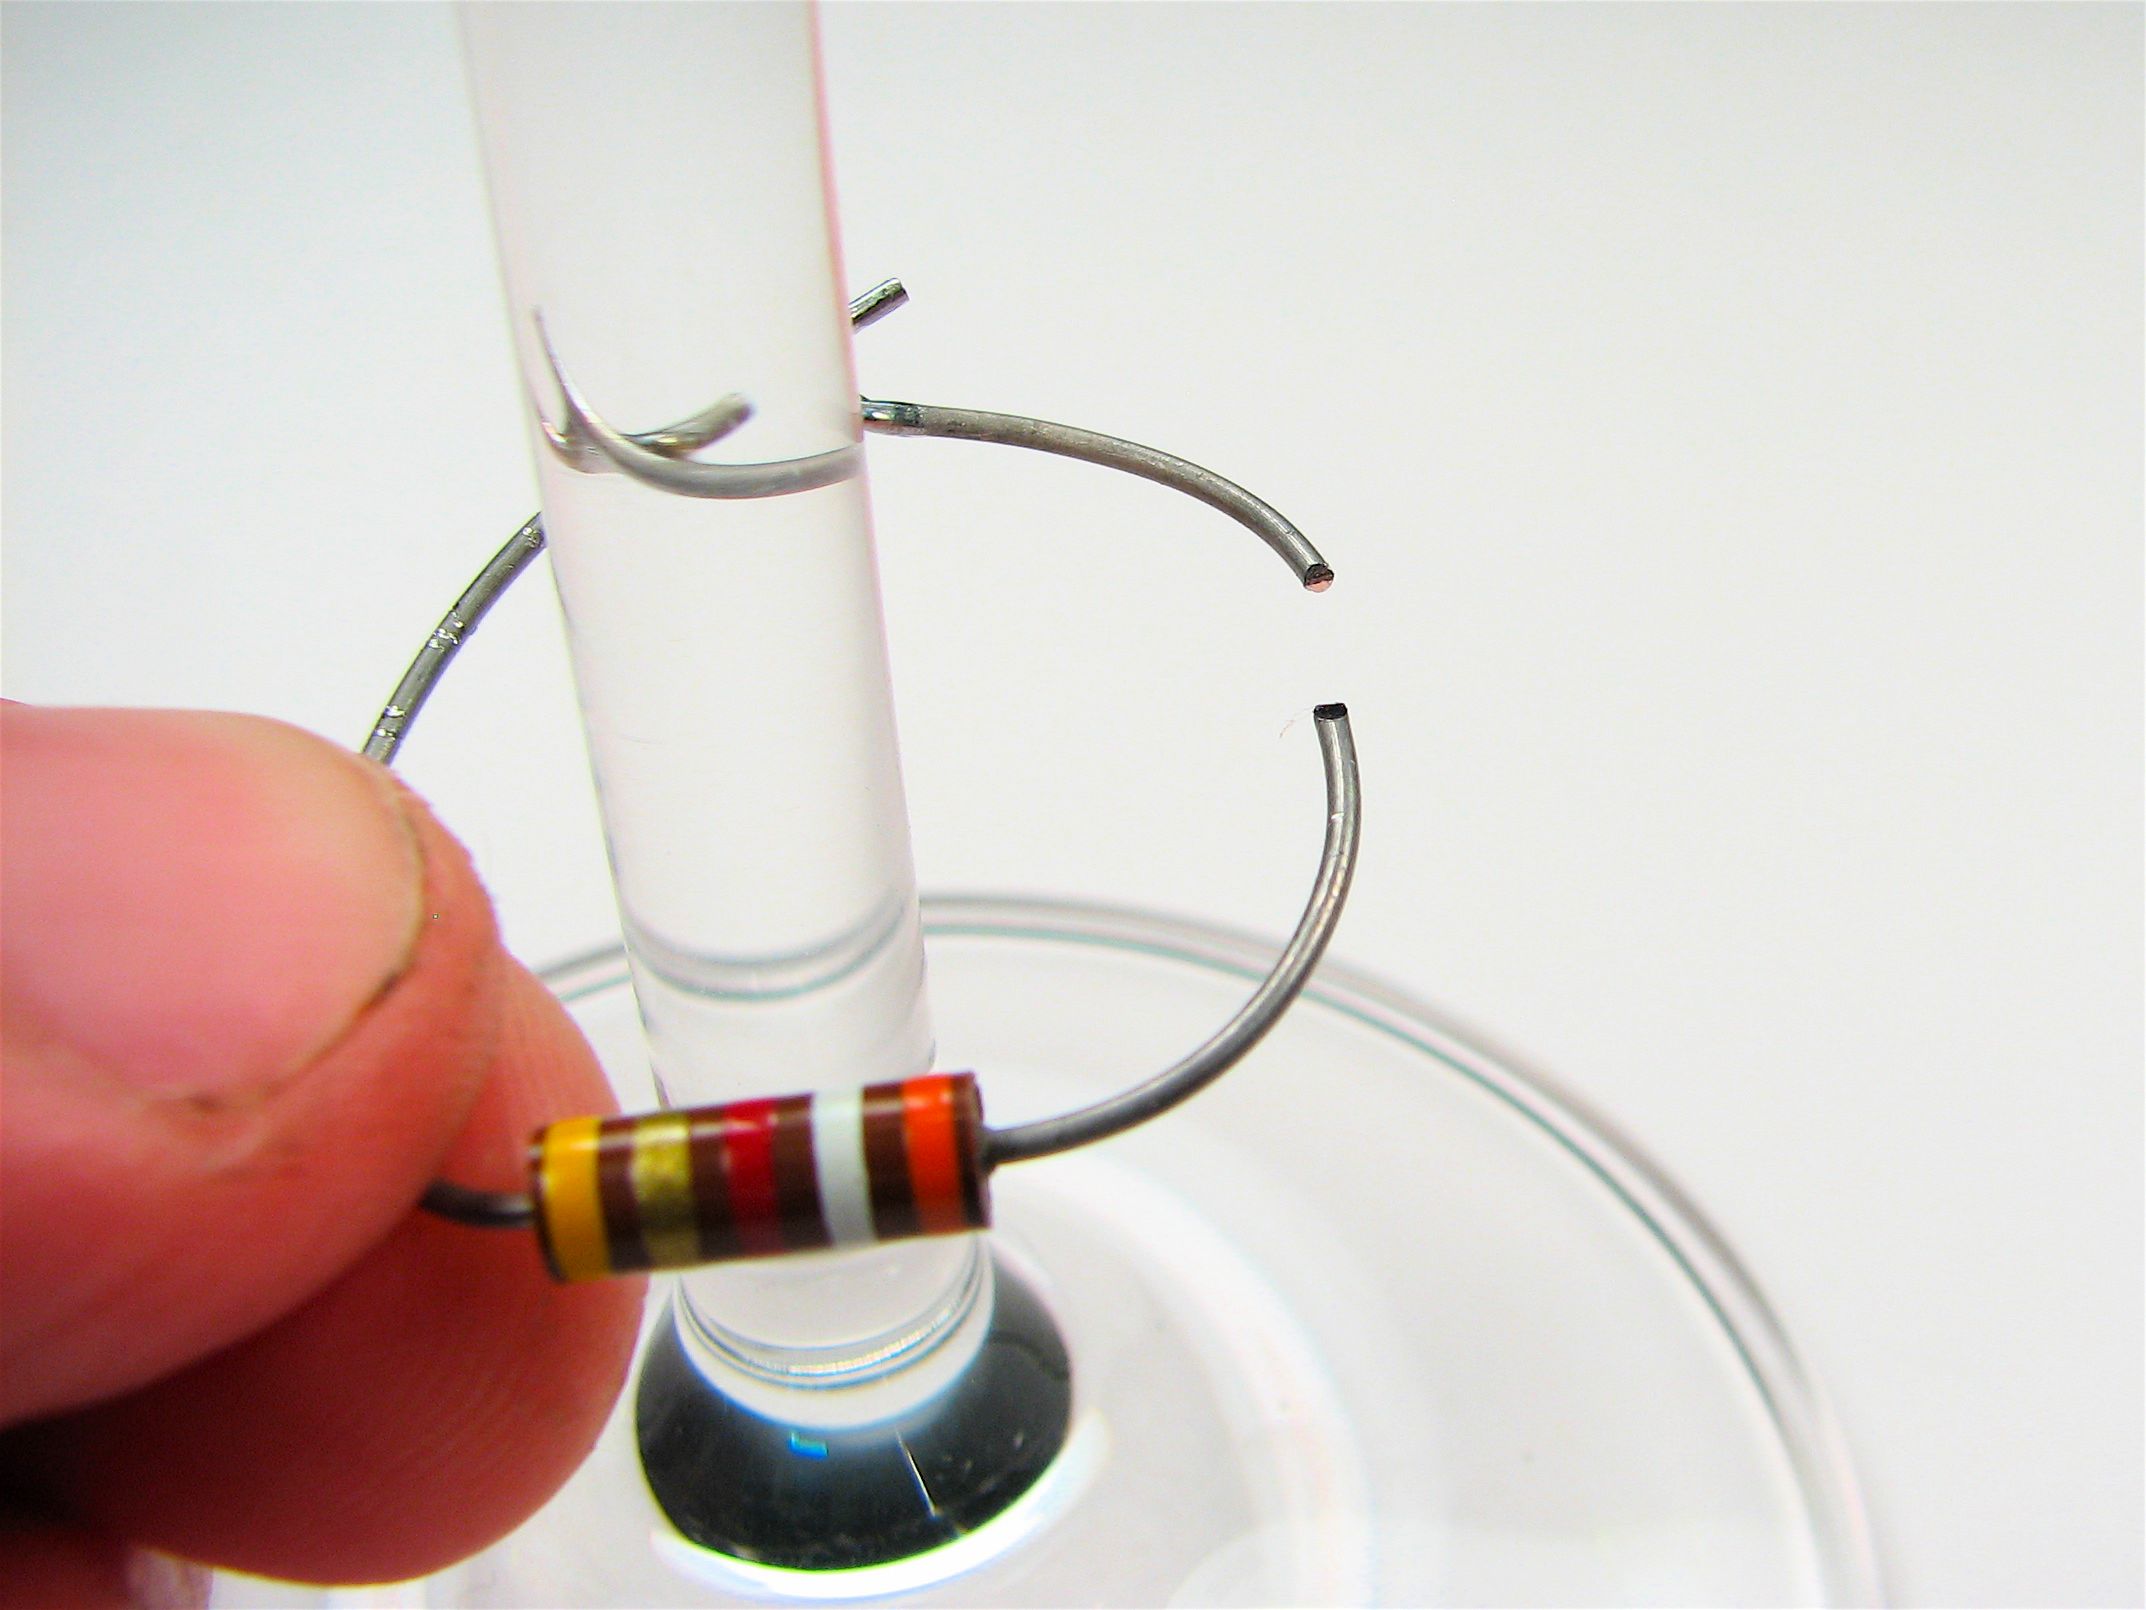
Bend the leads of the resistor around the stem of the wine glass so that they touch on the opposite side.
At this point, you have a fully-functional wine charm– and, if you like, you can stop right here and move on to the next component.
However, if you do stop, it’s more of a five-second project than a five minute project, and the result is much less impressive. In the next few steps we will solder the resistor in place, turning it into a semipermanent (but easily removable) wine charm.
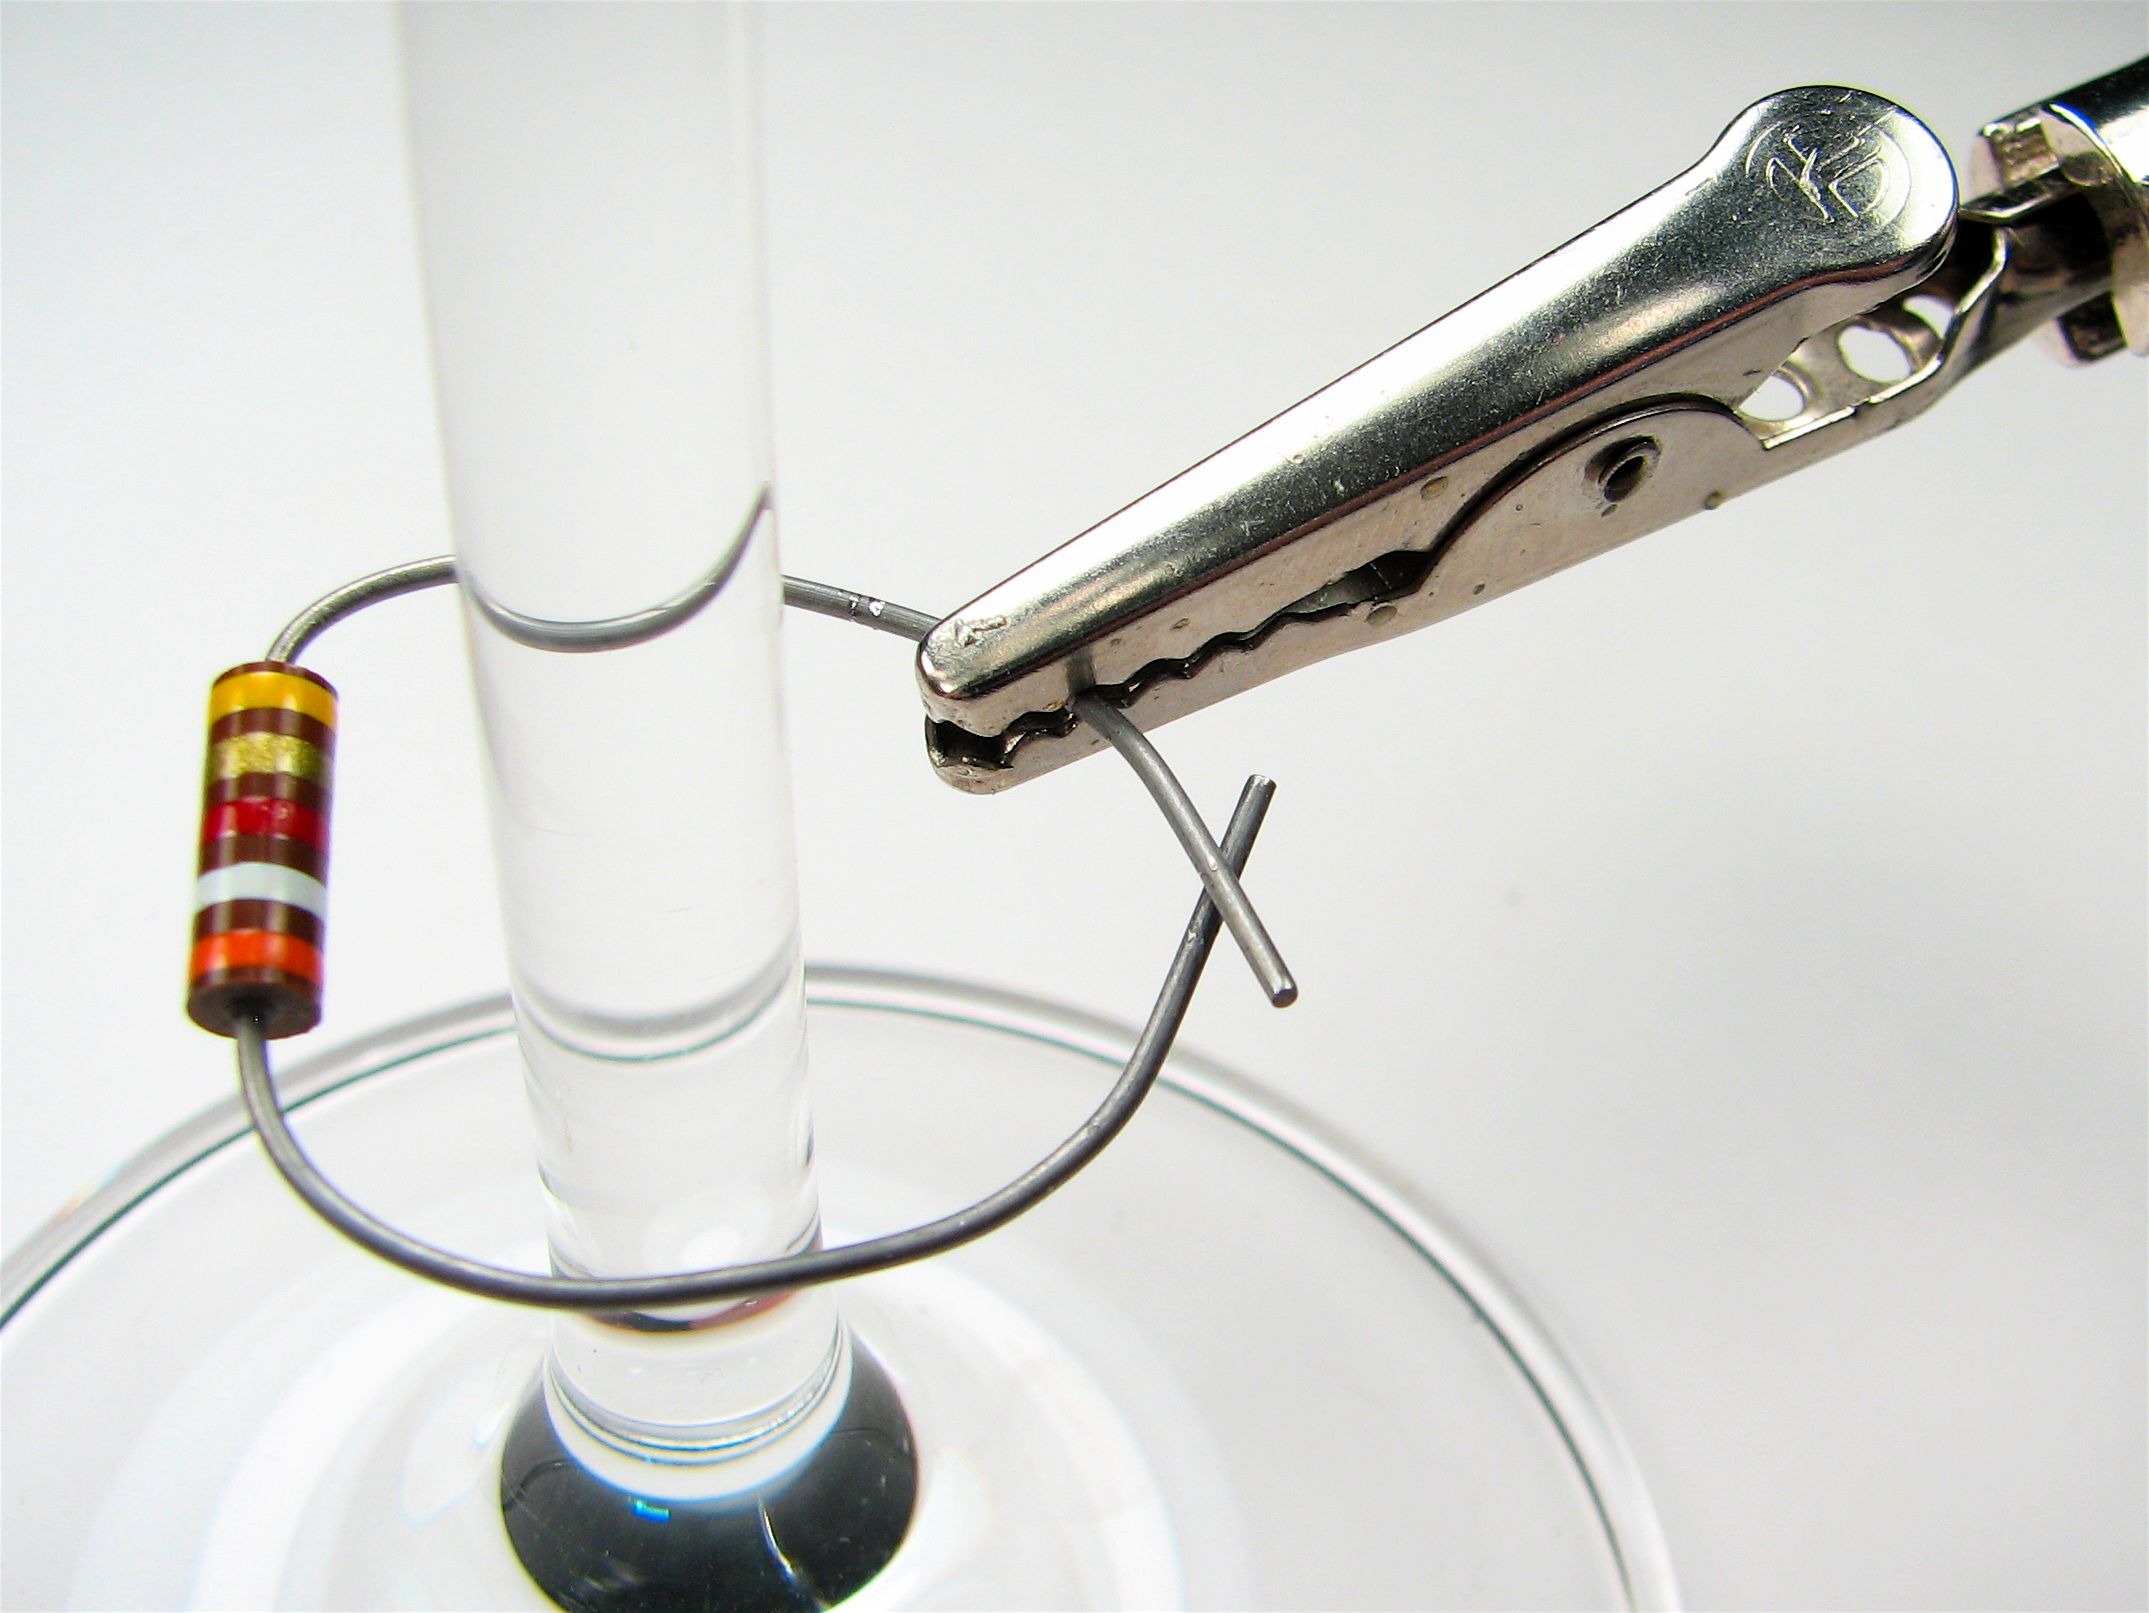
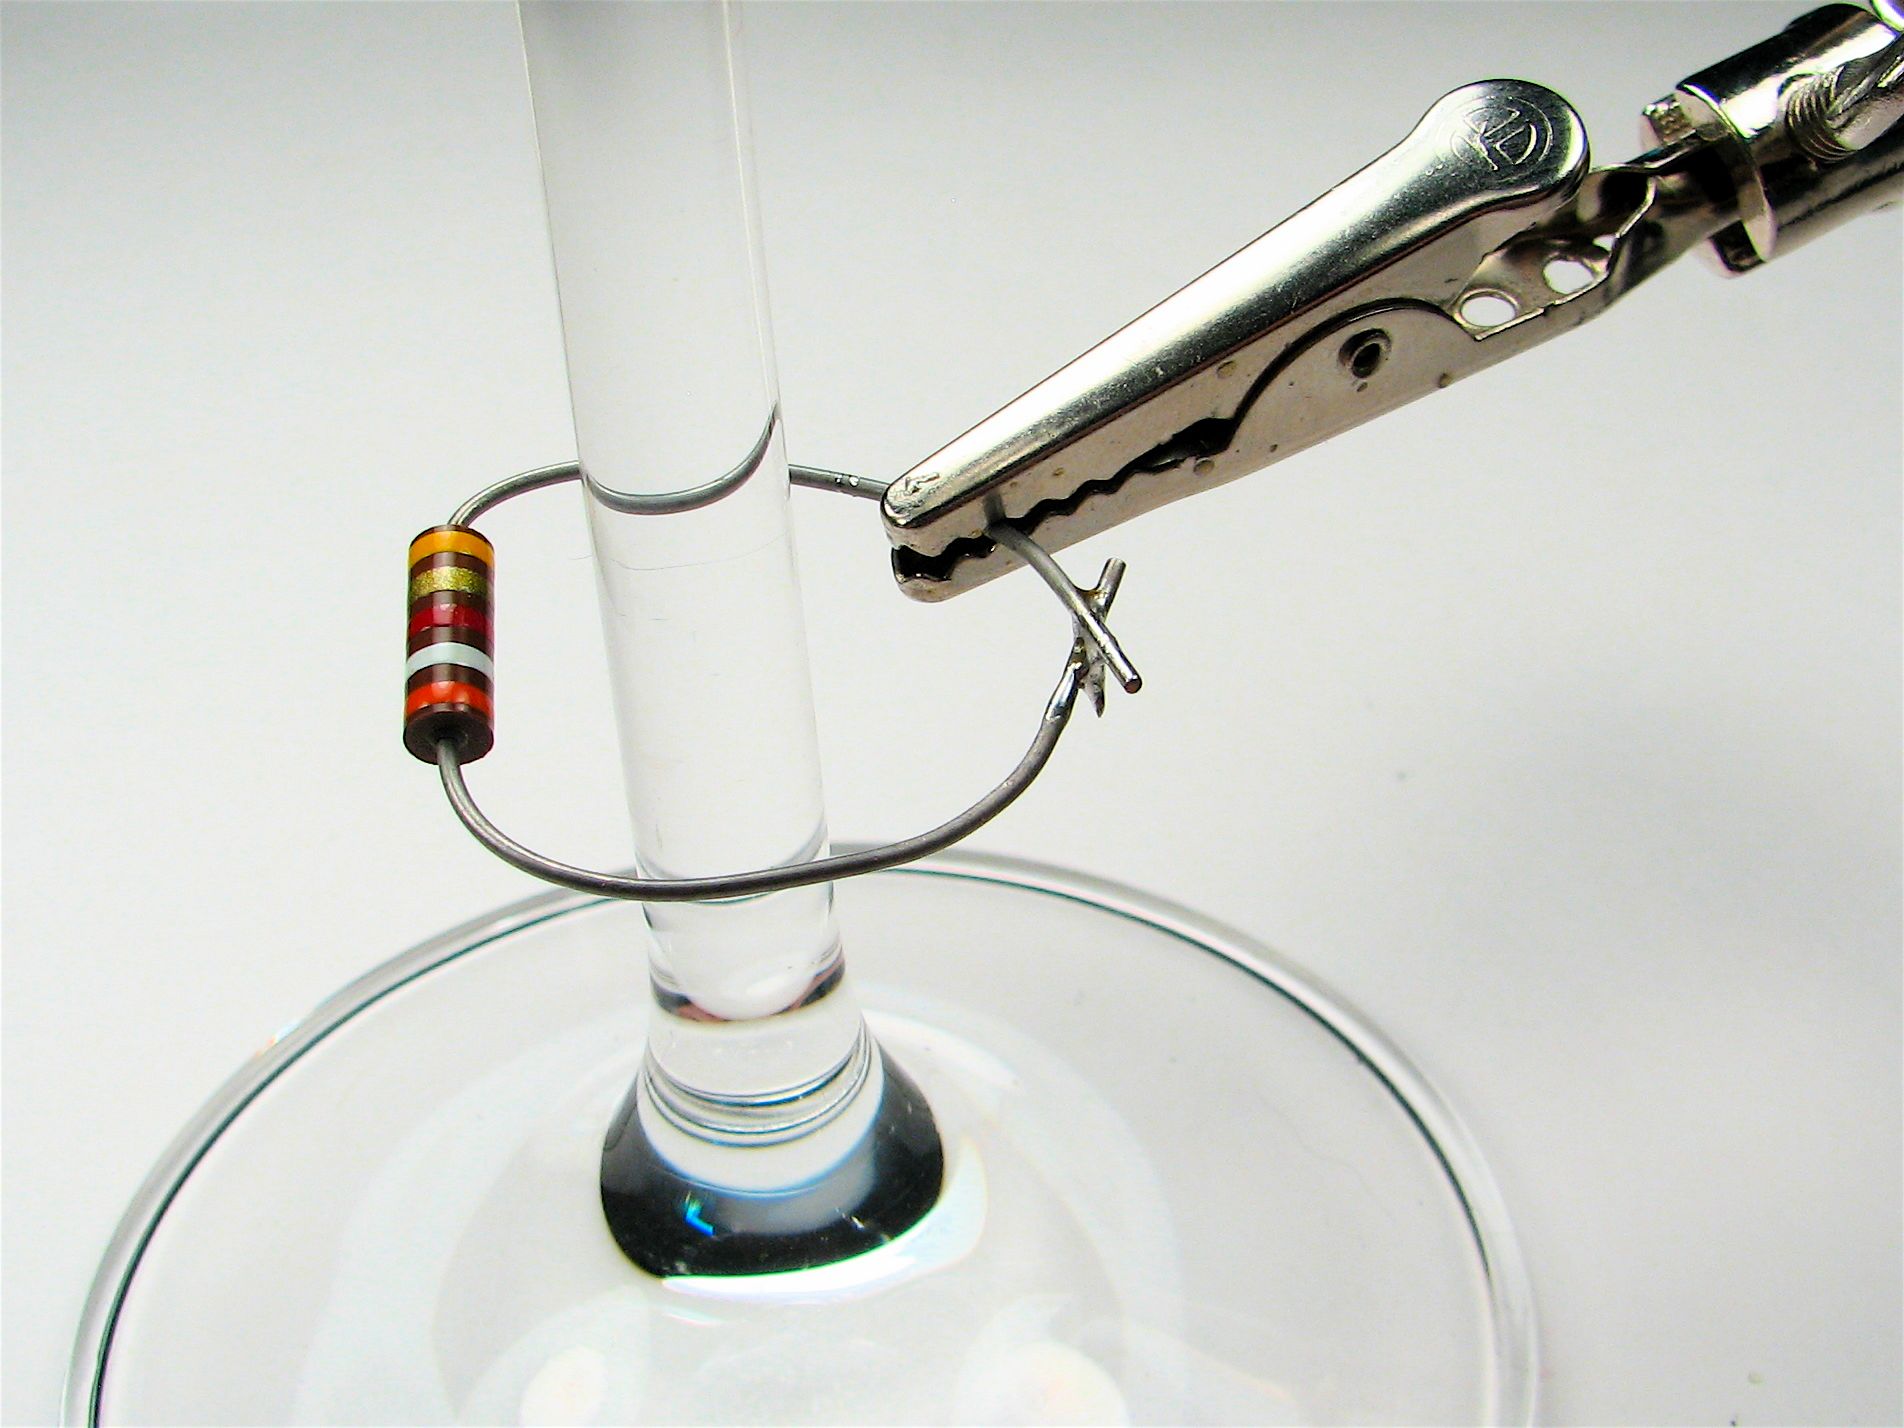
In order to solder the wine charm in place, it’s important that (1) it is held steady while looped around the wine glass stem, and (2) that there is minimal amount of thermal contact between the wine glass and the soldering iron– you don’t want to break the wine glass. Using a “helping hands” soldering tool provides a good solution to both problems, since you can hold the resistor and its leads without any of them touching the wine glass.
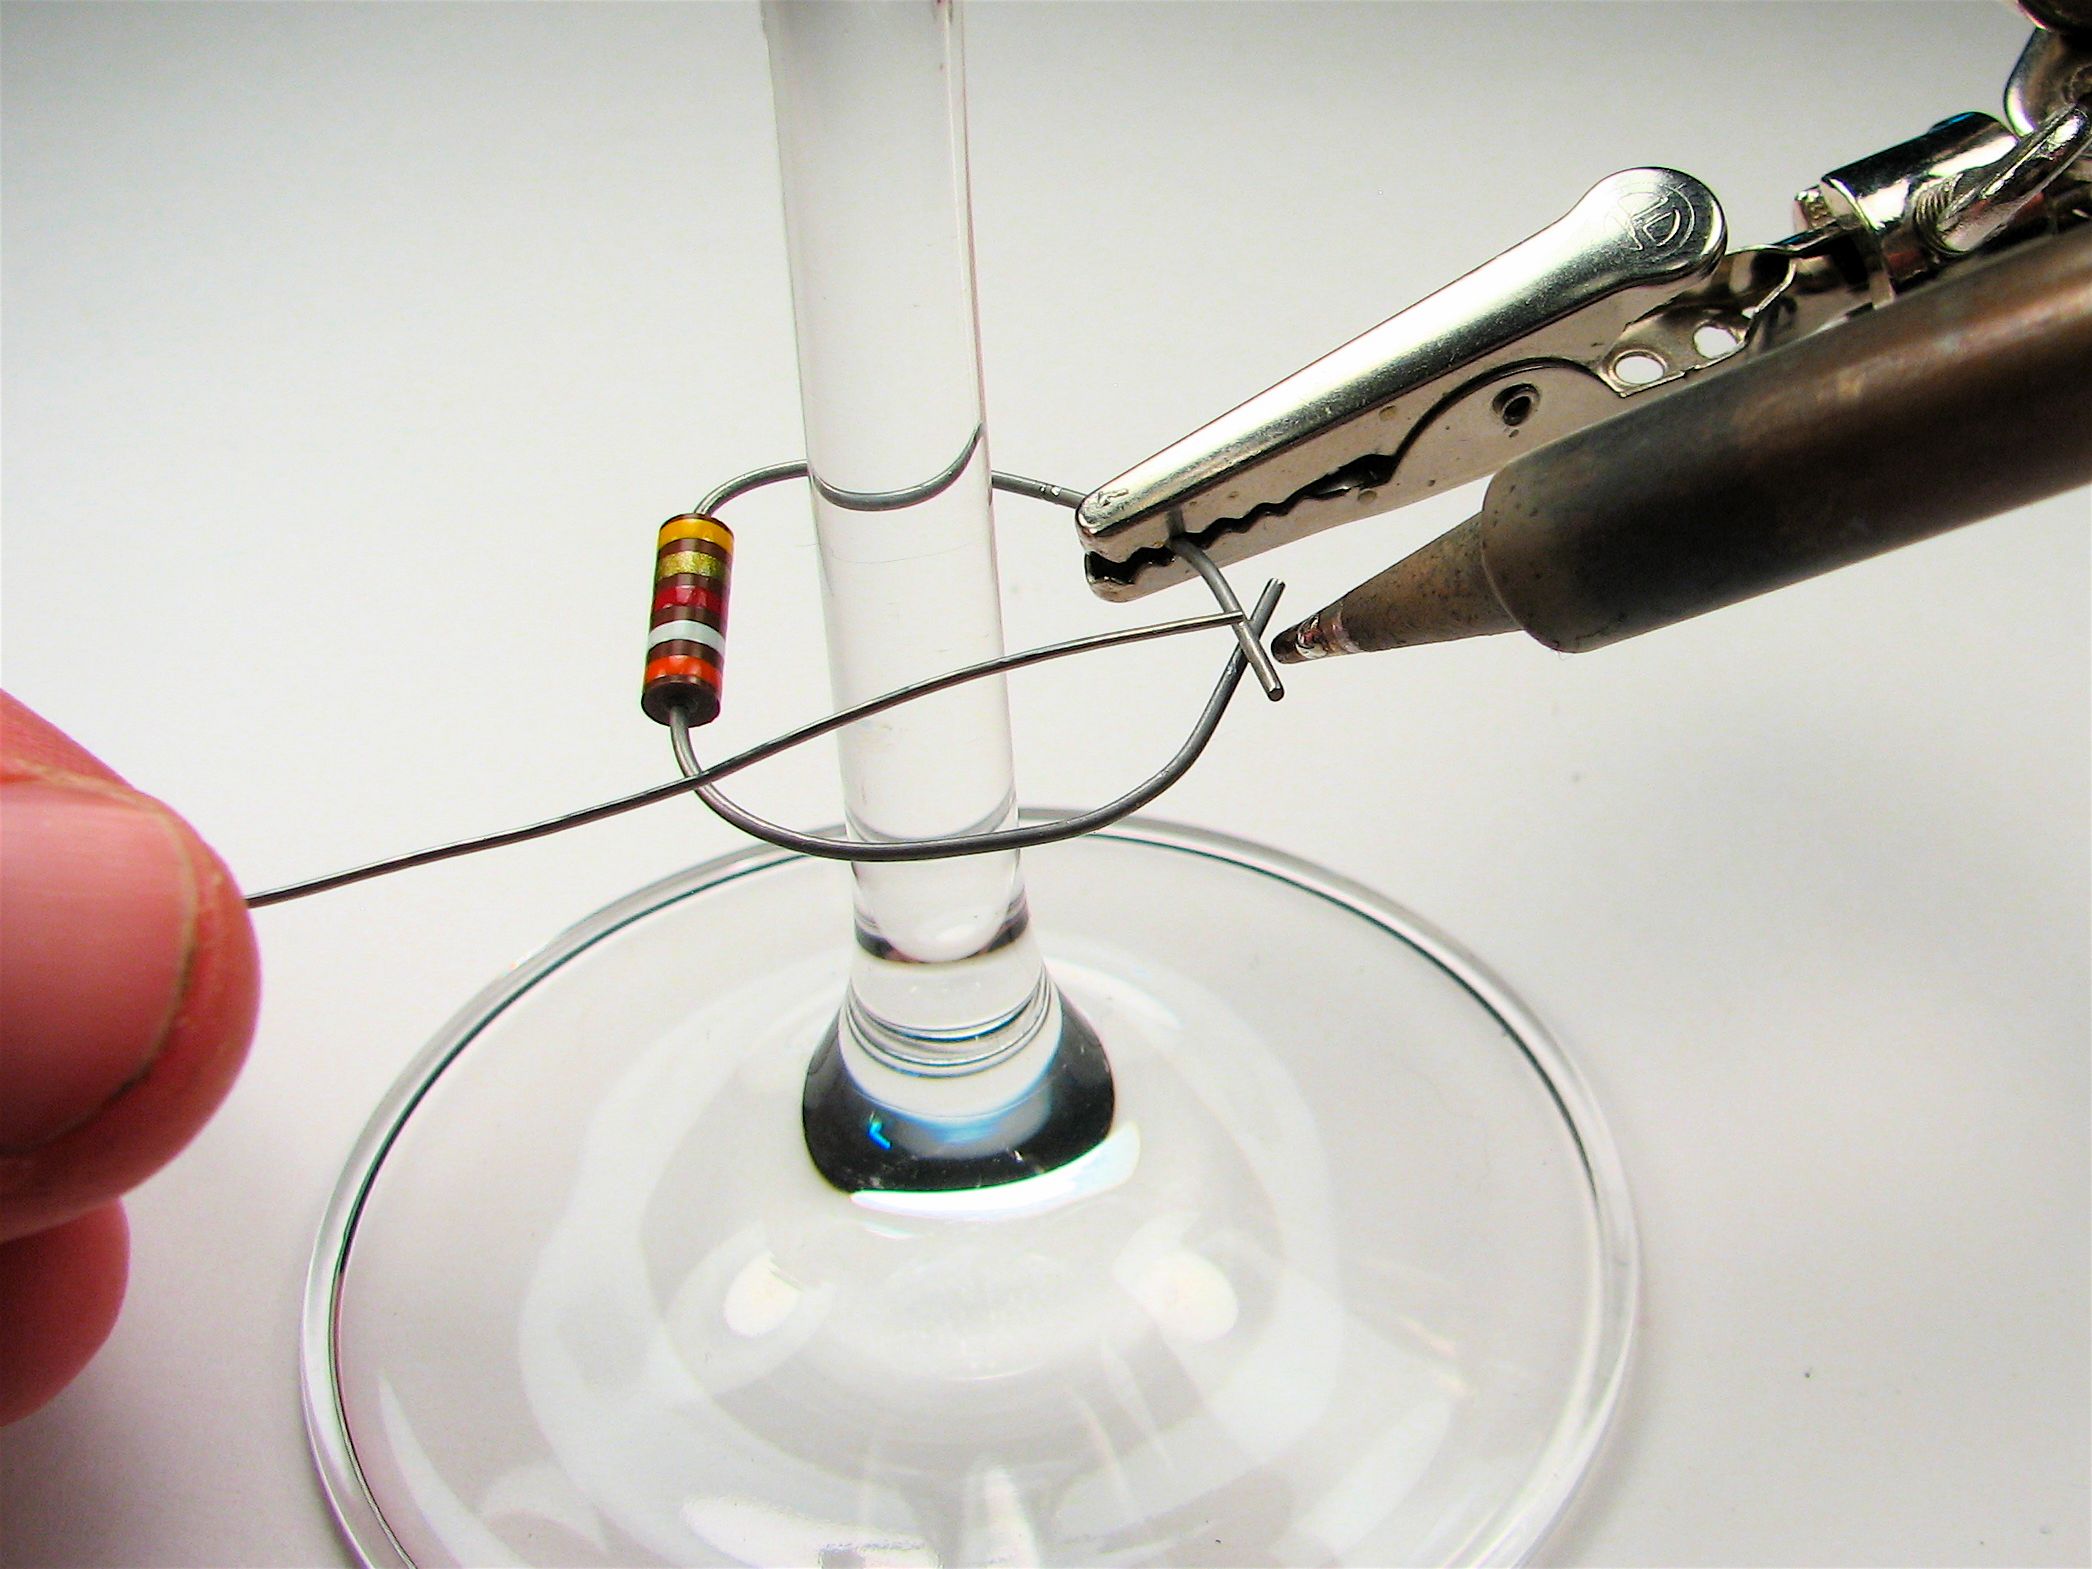
Once the component is safely clamped and not contacting the stem, you can solder it in place.
After soldering, let the component cool for a few seconds before letting it go. You might also want to trim off any sharp edges remaining; there are several here that should be trimmed.
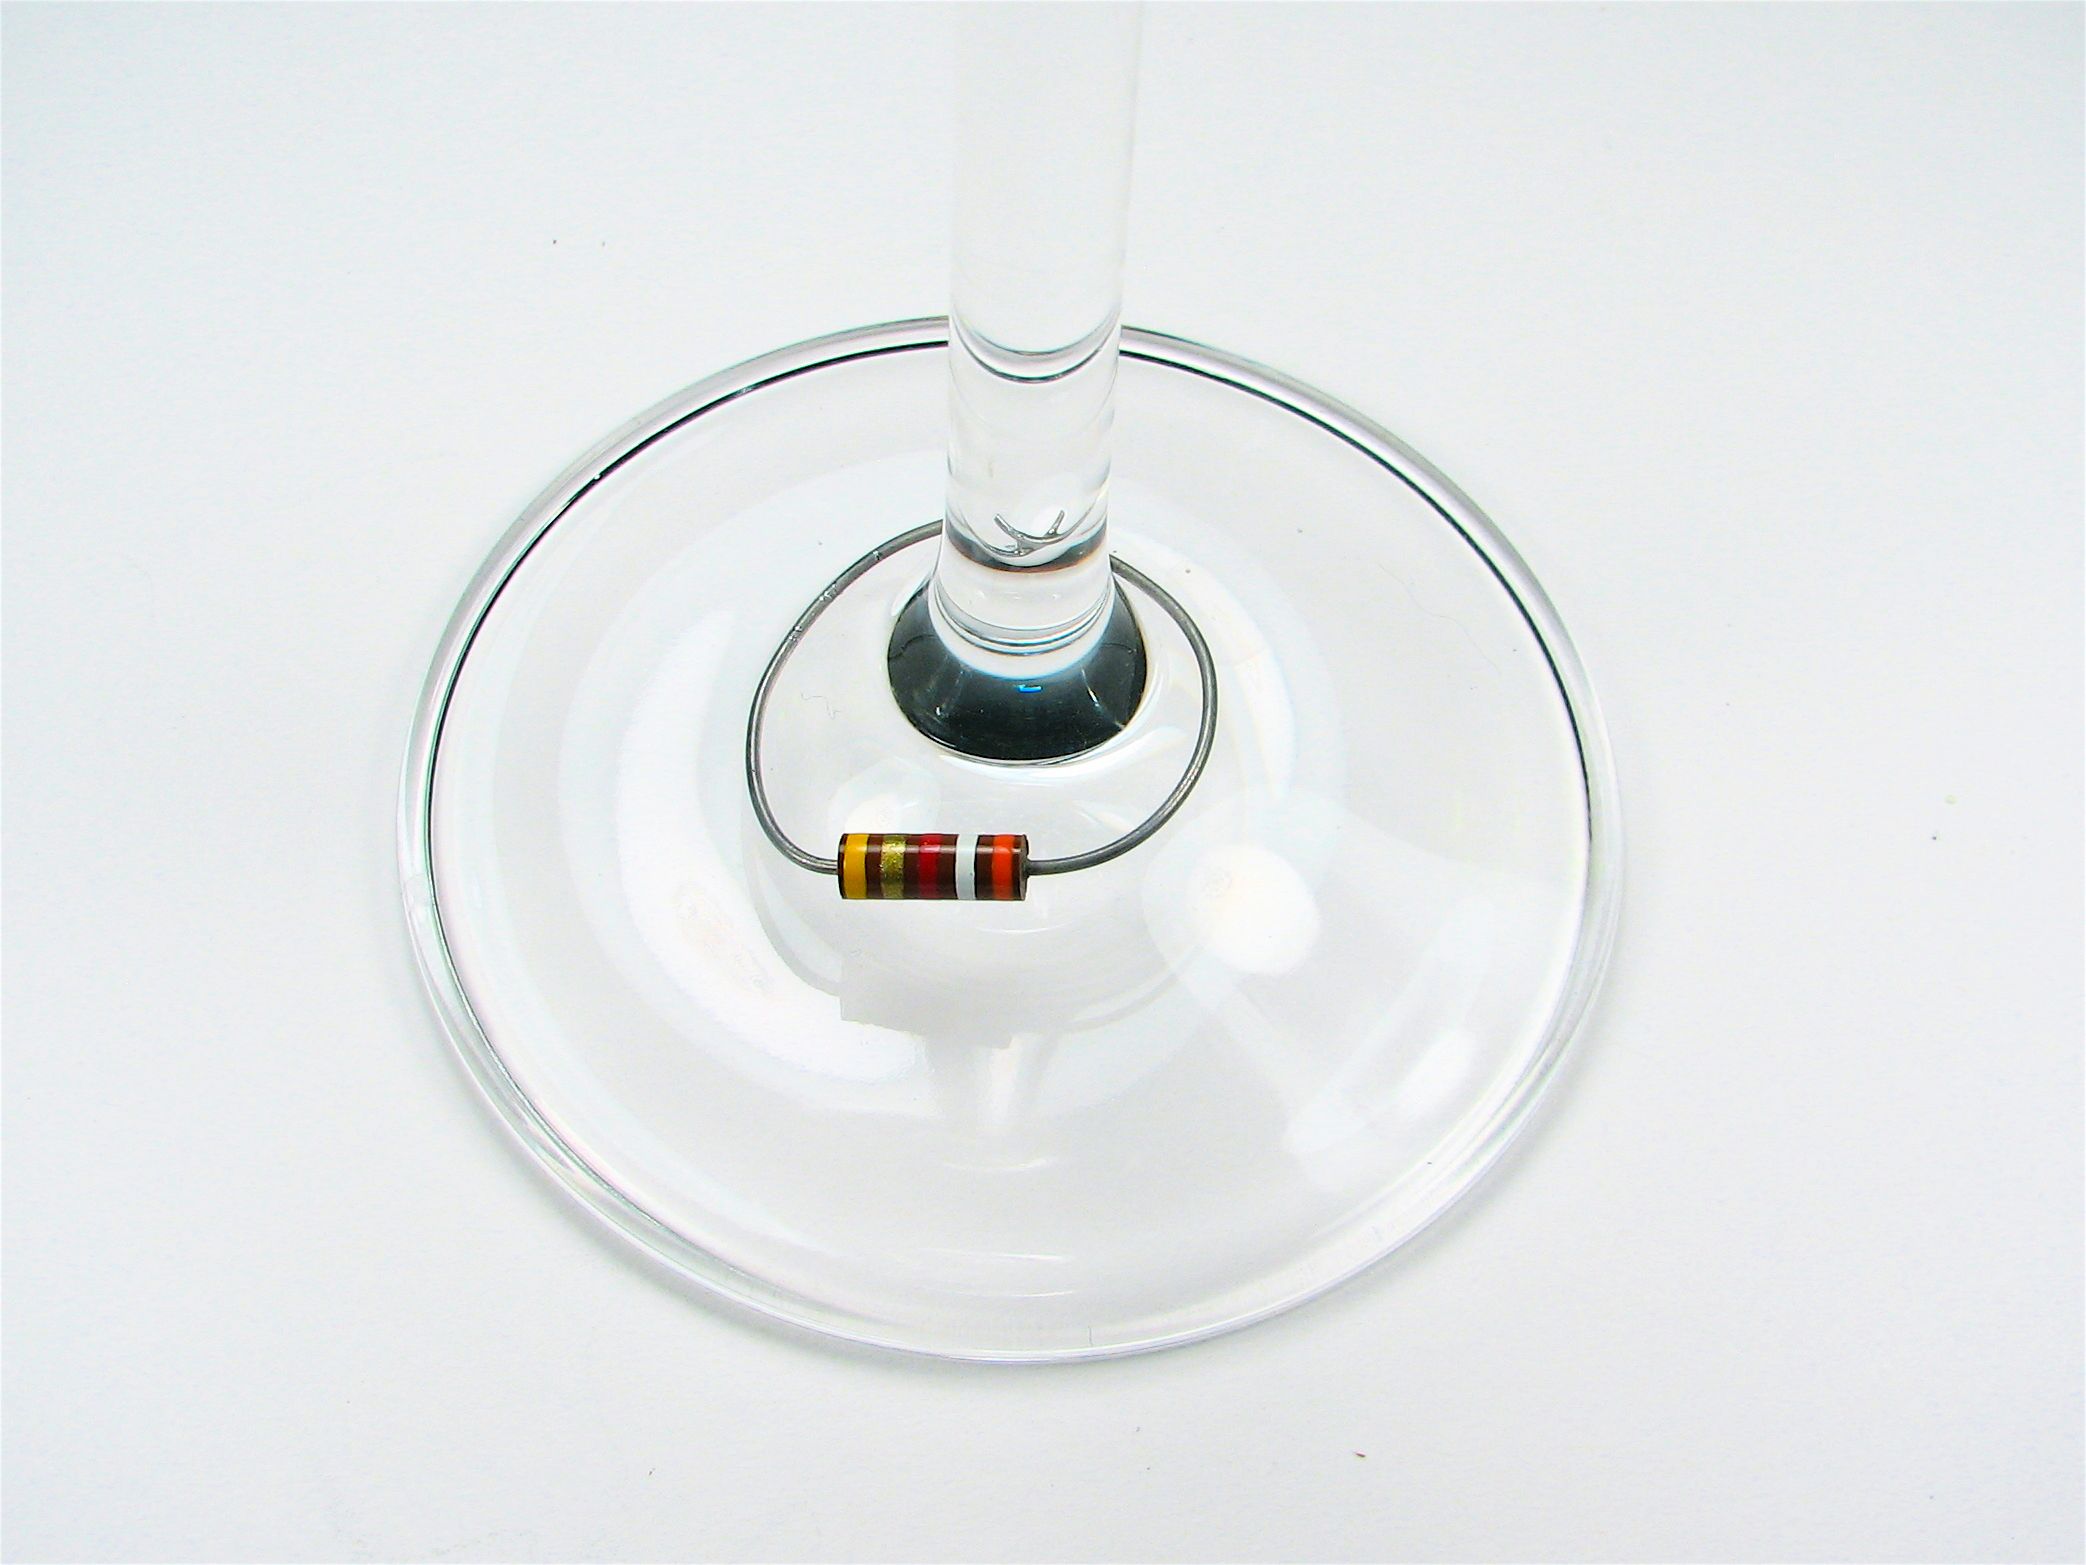
Having the wine charms semipermanently attached is really quite nice. They will stay connected indefinitely; until you’re ready to remove them. Besides not having to look for your wine charms, you won’t have to worry about one falling off at the wrong time, and you don’t need to be careful how you handle the loop– it won’t just spring open on you. Eliminating the clasp mechanism also makes the wine charm appear a little more simple and elegant, like it was meant to be there. There’s also a little bit of ship-in-the-bottle mystique about it, since there’s obviously no way that it could have been slipped over the base of the wine glass.
Most of the simple electronic components that we’ve shown here can handle cleaning and immersion in water. (A notable exception is any round cylindrical (electrolytic) capacitor– don’t get those wet.) In fact, these wine charms turn out to be surprisingly robust in practice. We have left several of these charms on our wine glasses which have now been used and cleaned (by hand) up to a dozen times, without any signs of degradation. Two caveats, however: don’t put these in the dishwasher, and no matter what kind of components you use, make sure after each wash that nothing has gone wrong.
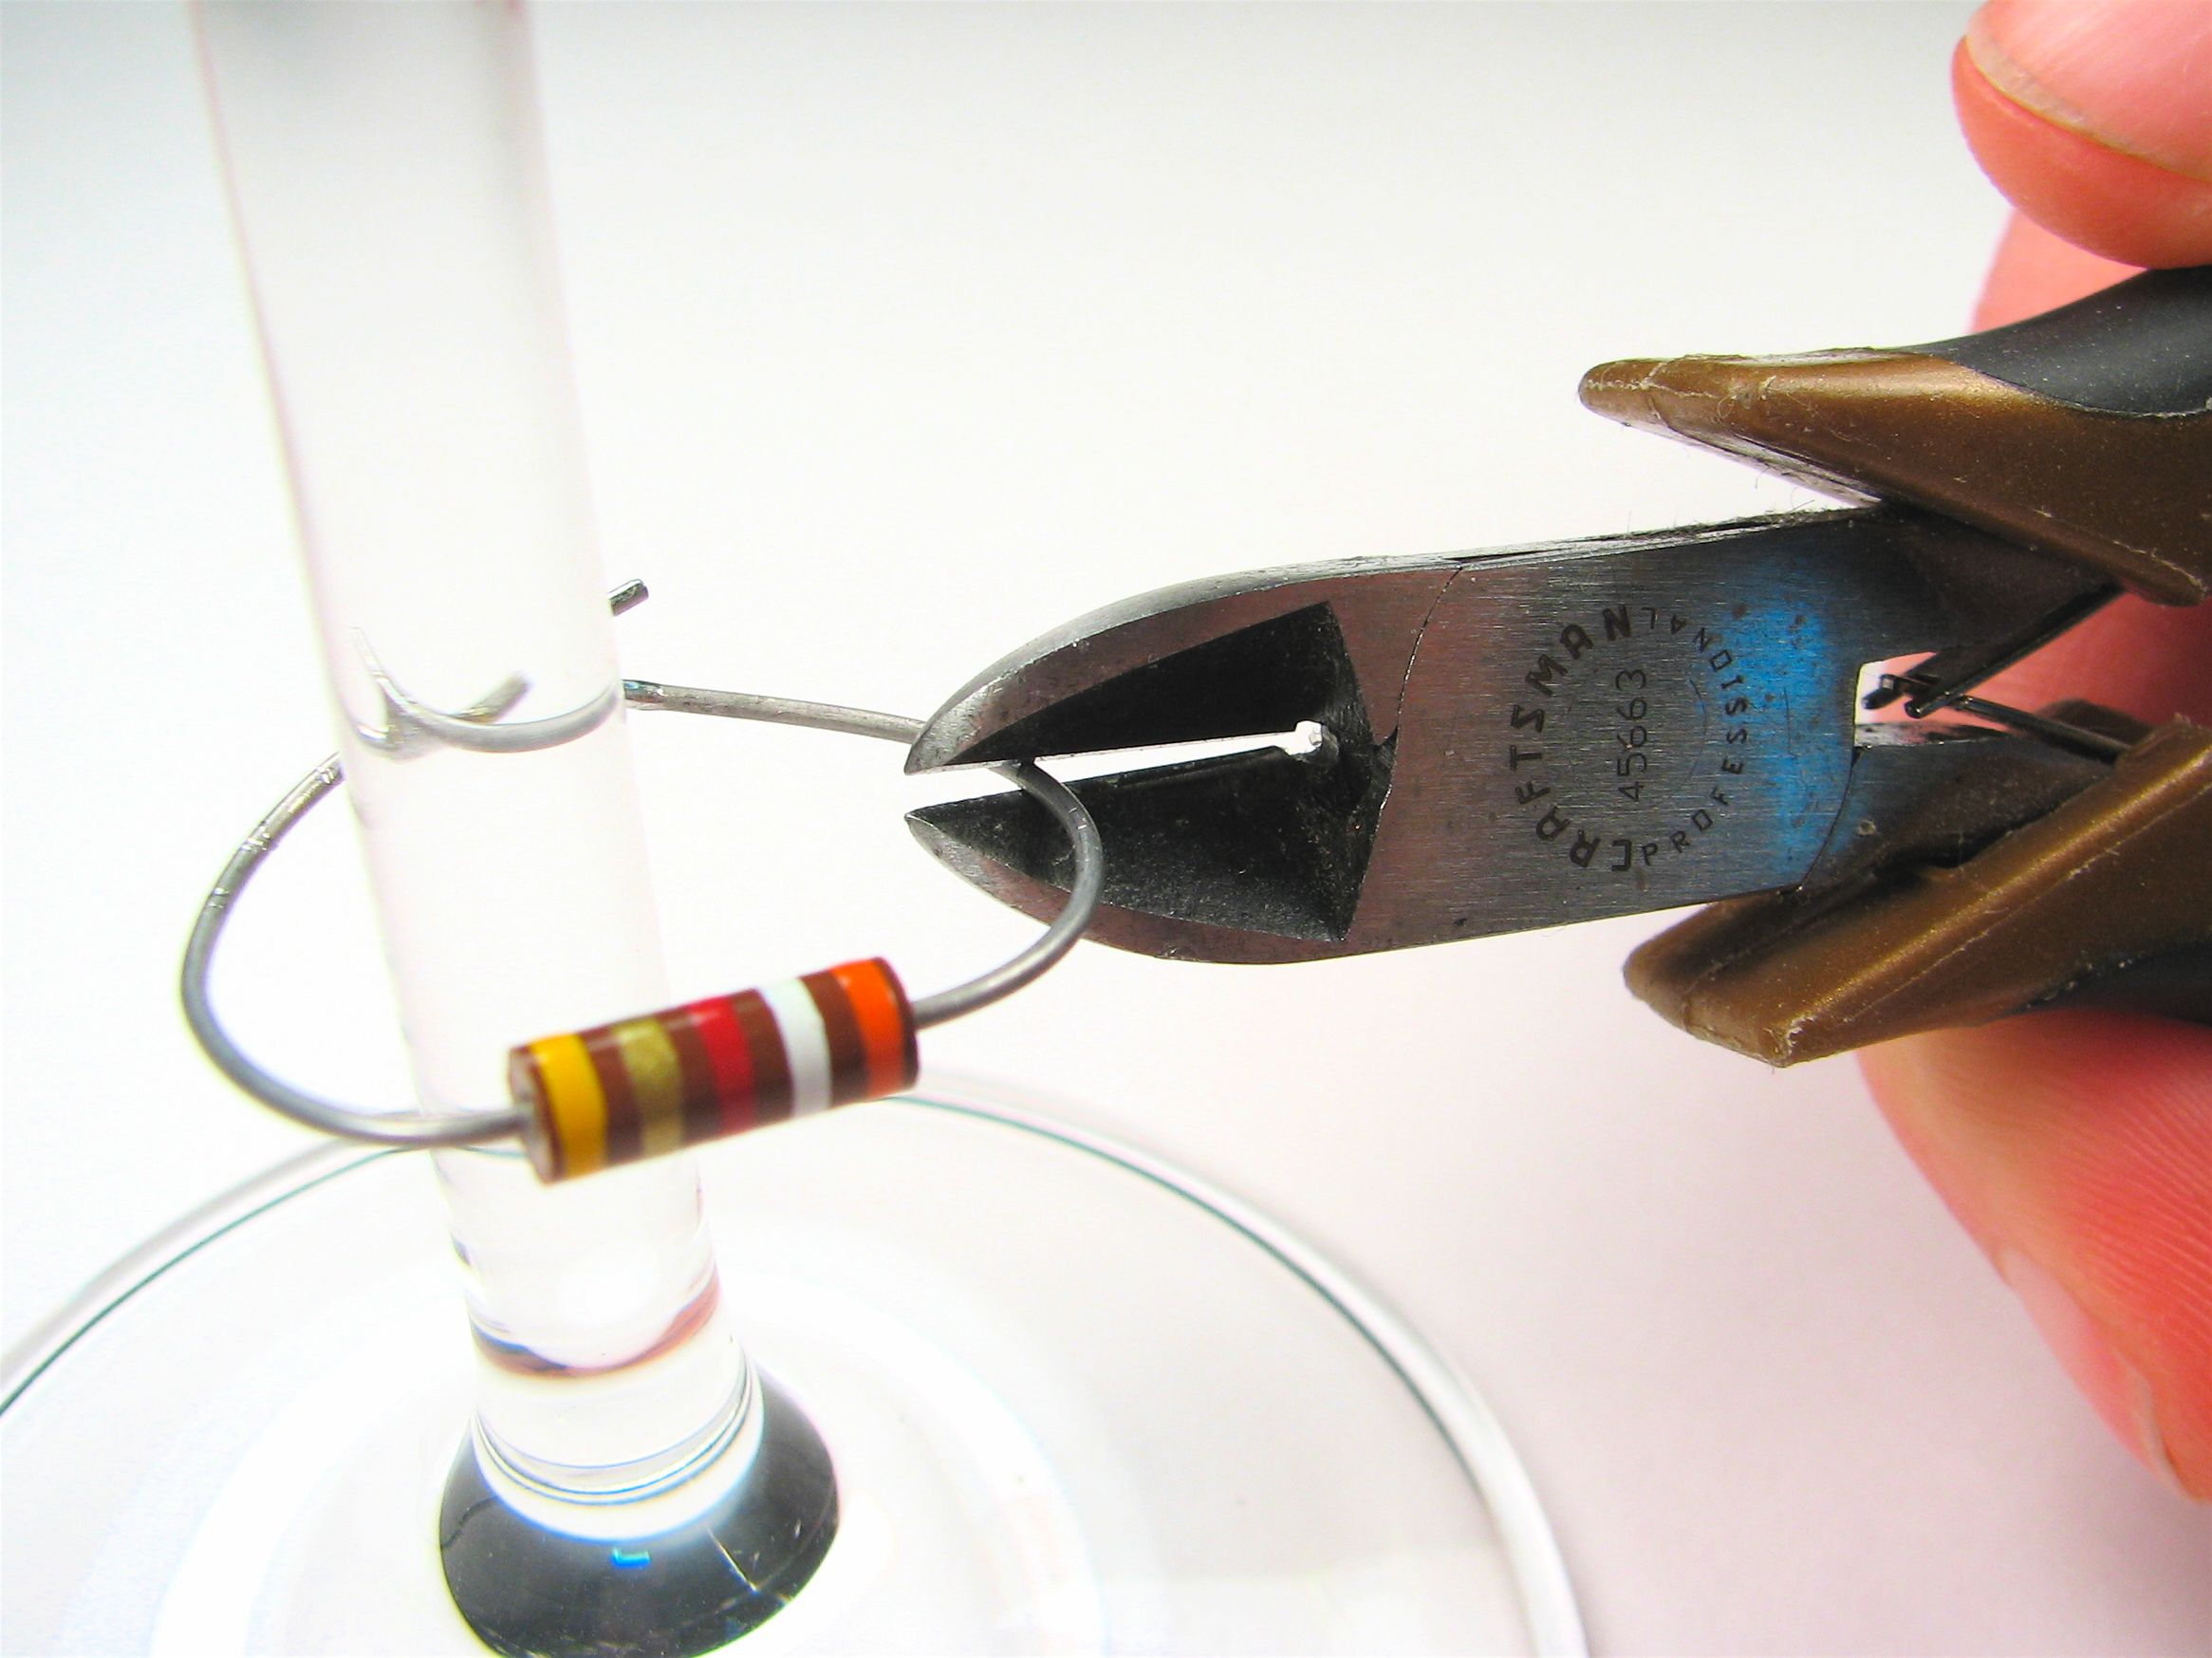
Depending on the type of component and what your washing procedures are like, the markings on the charm may fade eventually, or perhaps you just want to change resistor values, or from a capacitor to an inductor. The charms come off, well, like a charm, with a simple snip. We like these Craftsman Professional mini-plier cutters, but strong scissors will work for most components as well.
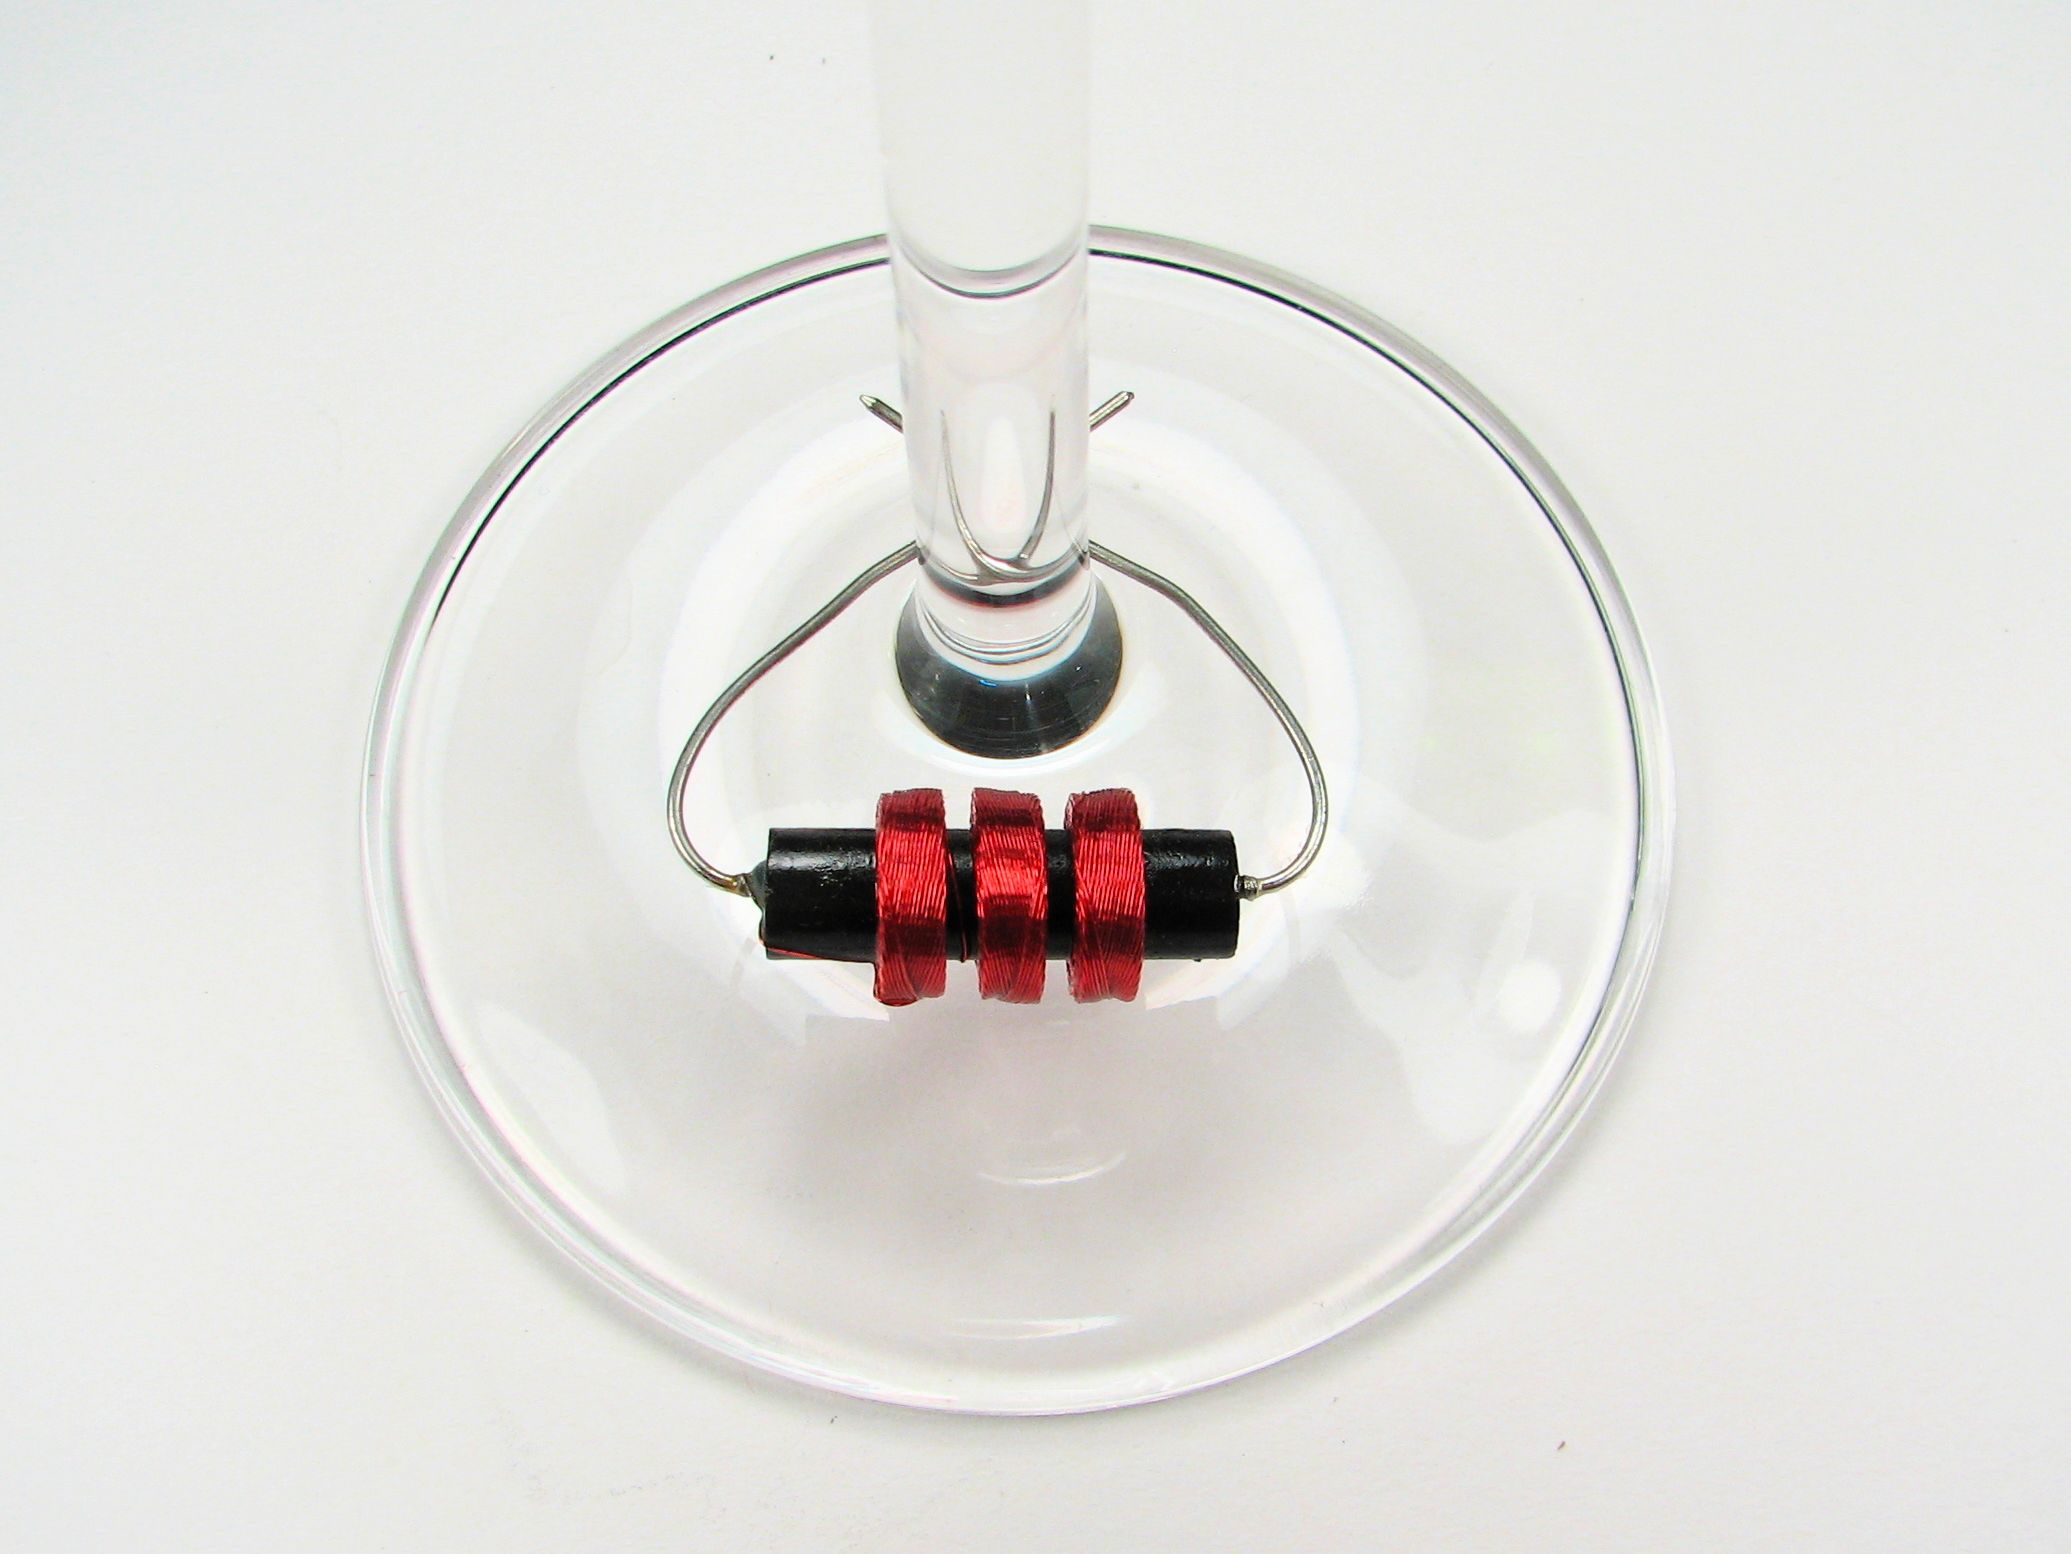
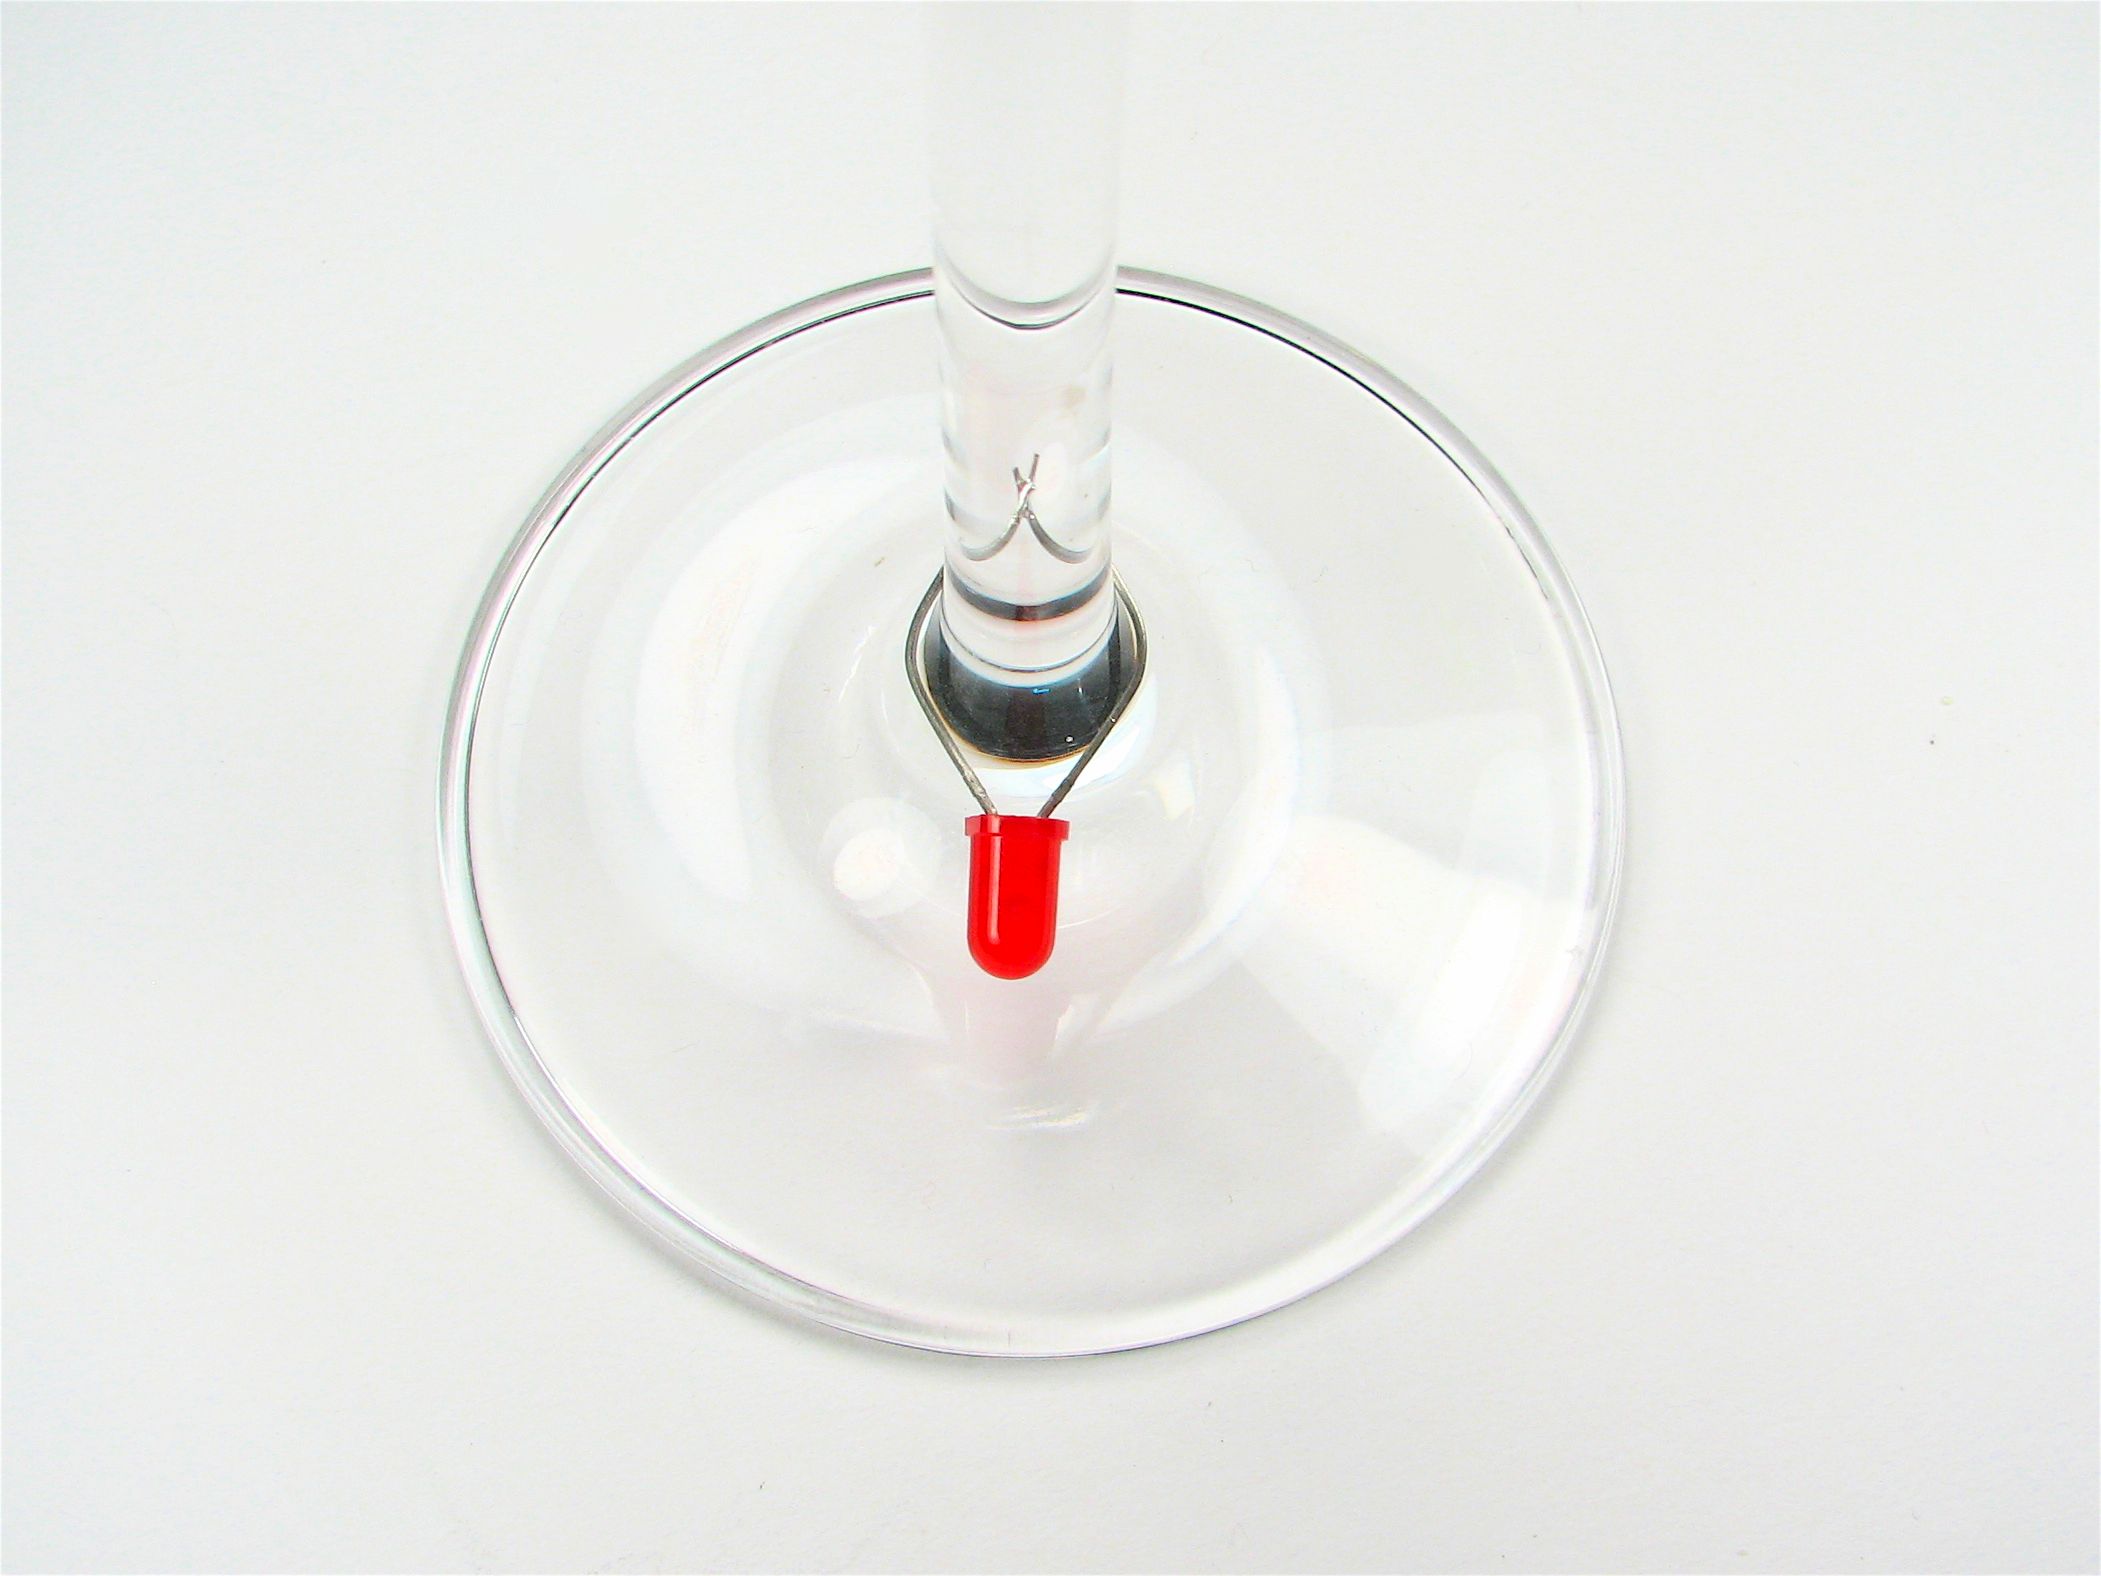
Here are some other designs that we like, including a lovely example with a bifilar-wound toroid:
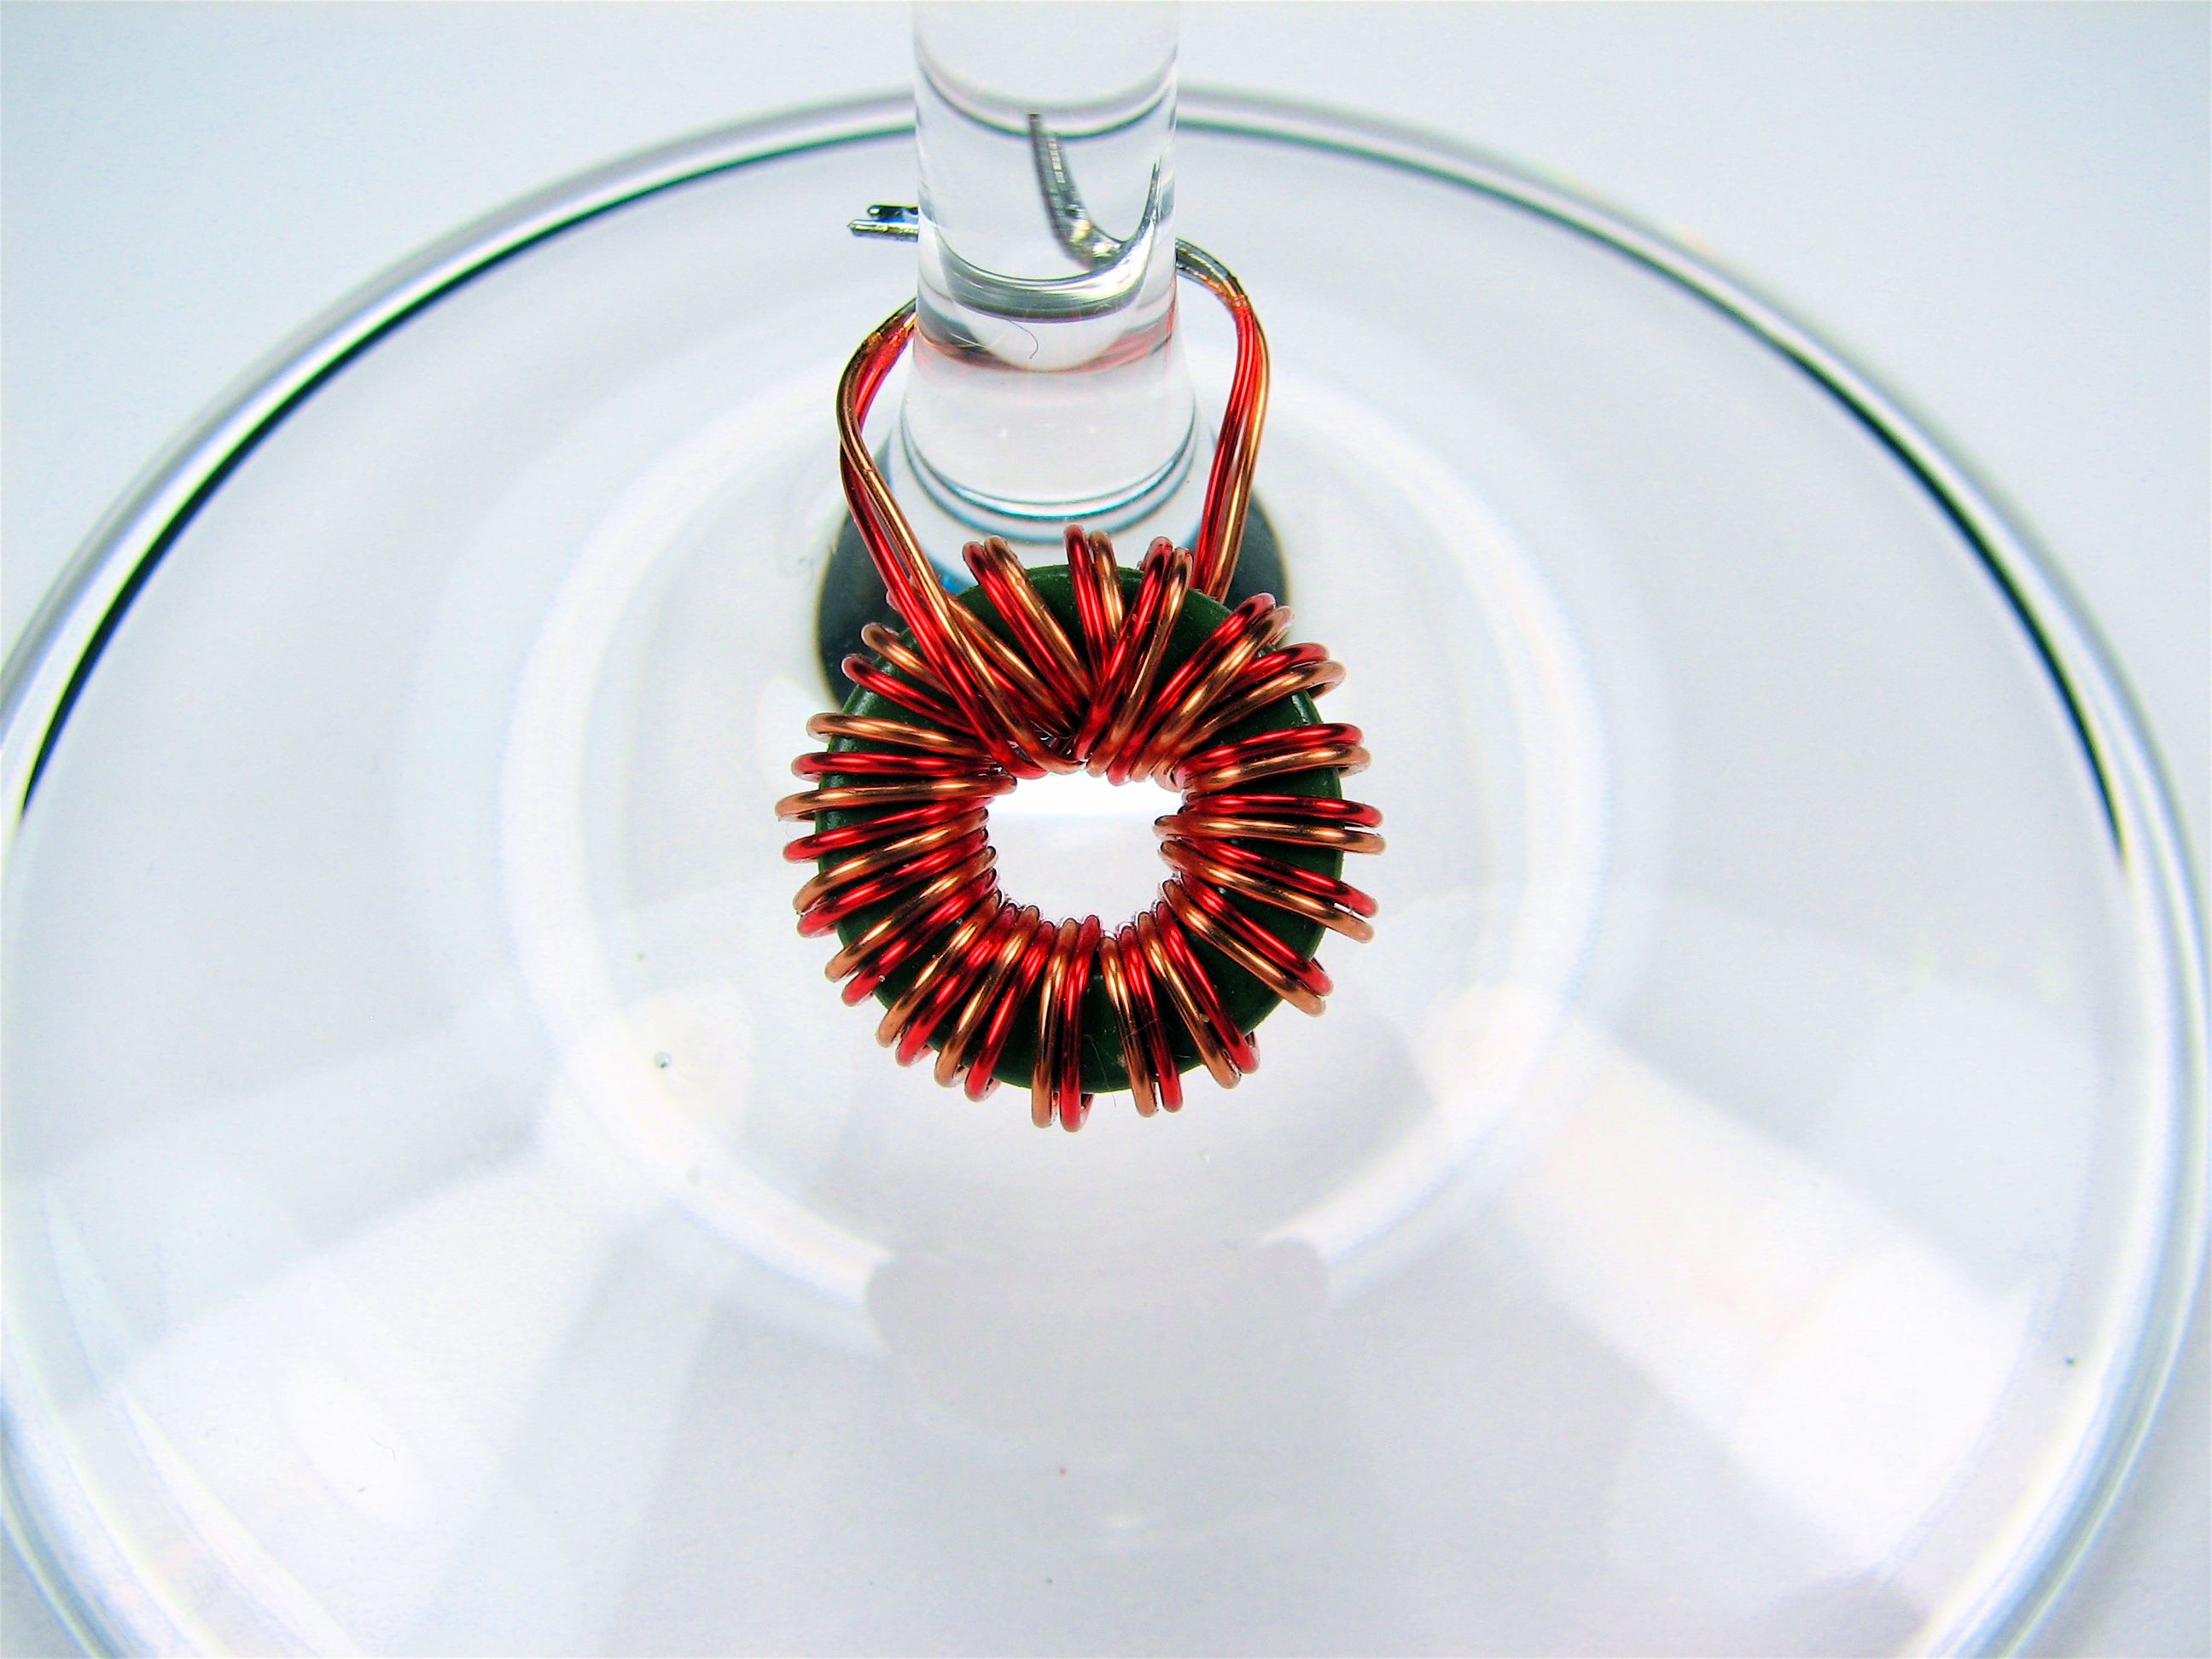
Have fun with your new wine charms!
Update: If you are looking for charming collections of components like these, we now have Charming Component Sets at our store.
You can do this with all resistors of different values, so the difference is obvious to people who know how to read colour codes and not so obvious to everyone else.
True, but as mentioned in the article, it’s a very, very bad idea. Either you’re in mixed company where not everyone knows their color codes or you’re in truly geeky company, where everyone does. In the former case, it’s not all that nice to those that don’t know their codes and a potential source of confusion to everyone. In the latter case, shouldn’t you still mix them up, or possibly choose those “mysterious” devices that people will discuss the type of device rather than just spend their type saying colors out loud?
—
Windell H. Oskay
drwho(at)evilmadscientist.com
http://www.evilmadscientist.com/
Soldering seems like overkill – you could easily bend the ends into little hooks.
Just bending it around works fine, and I would much rather do that than add hooks– the hooks will get in the way and catch on things. After soldering, they don’t catch on things at all.
—
Windell H. Oskay
drwho(at)evilmadscientist.com
http://www.evilmadscientist.com/
Nicely photographed.
Regards,
Peter Bryenton
http://www.brypix.com
Should you worry about the lead in the solder? Of course you’re not eating the charms, but when (say) immersed in hot soapy water, are you getting lead oxides all over your dishes?
That’s certainly a valid point. Metallic lead is not particularly soluble, but as you point out, it’s the oxides that you’ve got to worry about, and sitting around in soapy water could spread it. That is one of the reasons that (as we noted) that you shouldn’t put these in the dishwasher. When we’ve washed our glasses by hand, we’re just washing the glass part, not the electronics, so that doesn’t really seem to be an issue anyway. In any case, if you are concerned about contamination, you might want to do your electronics shopping online, rather than at your local electronics shop, so that you can easily purchase lead-free (or "RoHS") components.
—
Windell H. Oskay
drwho(at)evilmadscientist.com
http://www.evilmadscientist.com/
I’d be concerned about getting it on your hands while eating.
Again, if you’re worried about lead, why not use lead-free components and lead-free solder? Both are easy to find; nothing in this project requires you to use any lead at all.
—
Windell H. Oskay
drwho(at)evilmadscientist.com
http://www.evilmadscientist.com/
It’s not just lead you should be worried about. Flux and other heavy metals are present in all solders and components. RoHS does not address food safety.
YMMV.
but admittedly i’m not an electronics evil mad scientist!
how the heck do i find an electronics store with a good selection? i stopped by the Radio Shack near my house, and they had boring stuff. and when i look for ‘electronics stores’ in the yellowpages i find stuff like best buy. is there a chain or something specific i should search for to find a nice selection? i’m in atlanta, btw, so i’m sure there are good places if i only knew what to look for.
thanks !
dot
No, it’s not a stupid question– it’s one of the best and most difficult questions that we keep coming across. Unfortunately, there’s no easy solution.
Most towns have at least one “real” electronics shop, but it can be hard to find. The best way to find it is to ask someone that’s been doing electronics for years– ham radio people tend to be a good resource for that sort of thing, and you can probably find the local ones online. You might also try posting in the Make forums to see if anyone has some suggestions. Beyond that, creative Google searching is your friend, but you’ll need to look hard!
Good luck!
—
Windell H. Oskay
drwho(at)evilmadscientist.com
http://www.evilmadscientist.com/
I just found this list which suggests that Ack in Atlanta.
thanks for the suggestions, i’ll let ya know what i find.. :)
Nice idea. I’d be impressed with the DIY aspect of it if you’d picked through a dead VCR or something for components, rather than buying brand-new stuff. Maybe gone dumpster-diving for a dead computer, something like that. Buying stuff is easy.
One trouble with using recycled components, say from a computer, is that the leads of the components are always trimmed maximally short as part of the circuit board assembly process. Typically the leads of a component like a resistor are trimmed to about 1/4", hardly suitable for wrapping around a wine glass.
—
Windell H. Oskay
drwho(at)evilmadscientist.com
http://www.evilmadscientist.com/
I think another snazzy looking means of distinguishing whose glass is whose (while not necessarily a charm) would be to use small gauge (wire wrap) solid wire in various colors. You could bend a pring and wrap it around the stem of the glass. The translucent colors of the wire I’ve seen would look very nice and probably be even cheaper than actual components.
What a marvelously geek-chic idea!
I’m going to have to make myself a set of those.
Two other options.
Ask at the radio shack about a wider selection of compunents (they are usually quite helpful – they want repeat buisness more than a quick sale). Or even a specific part like a 1 farad capacitor for car audio or a 10 megaohm potentiometer. There is almost now way that they will have both of these so they will send you to a store that will. (again repeat buisness).
Search the local yellow pages for electronic component supply. (online use busness type).
If there’s a university or college in your town, try asking in the physics department.
Is there maybe a good way to "seal" them (applying sometime like, say, fingernail polish for example, to reduce the risk of leeching into our food and water supply?
Any clear lacquer– spray or brush– ought to seal these components pretty well.
—
Windell H. Oskay
drwho(at)evilmadscientist.com
http://www.evilmadscientist.com/
"Flux and other heavy metals are present in all solders and components."
Is that so?
I was under the impression that many chefs and other food-preparers use oranges, tin-coated steel cans, silver ware and pine-wood utensils, and copper-bottom pots.
Those are all food-safe materials, right?
My understanding is that practically all solder flux used in electronics is either rosin (pine-tree sap) or citric acid. http://en.wikipedia.org/wiki/flux_%28metallurgy%29
Most people using RoHS compliant solder are using SnAgCu solder (tin-silver-copper solder). http://en.wikipedia.org/wiki/solder
Therefore the most common kind of RoHS solder and solder flux seems to be entirely composed of food-safe materials.
How about taking an LED, adding a tiny switch and a watch battery? That helps you find your wine in the dark, a handy trick when the party gets *really* groovy.