


Chuck wrote in to say,
Well, I finally did it. Here is the first ever marriage proposal with an Alpha Clock Five!
(Youtube video here.)


Chuck wrote in to say,
Well, I finally did it. Here is the first ever marriage proposal with an Alpha Clock Five!
(Youtube video here.)

Jenslabs has published a thoughtful and thorough evaluation of a number of currently available rollerball and gel pens. He tested them using his Circlon machine.
One thing that anyone who as ever built a drawing machine realizes, is that to get quality results you need a quality pen. There are millions of pens out there, but after a little trial and error I realized that rollerball pens or pens with gel ink are the best pen types for my machine. Both rollerball and gel ink pens use a water based ink that is less viscous then the oil based ink used in ballpoint pens. The Circlon machine sometimes move very fast, so the pen has to be able to release enough ink to make solid lines even at high speed.

This is an excellent resource for folks with other drawing machines, such as Egg-Bots and WaterColorBots. We’ve linked to it from our page about choosing pens for the Egg-Bot as well.
“We Are with You, Mirror” is a piece by Brady Marks from VIVO Media Arts Centre that was shown at the Vancouver Mini Maker Faire. It is a 3D persistence of vision volumetric display that acts as a mirror, using four spinning Peggy 2 boards to reflect visitors movements in low resolution 3D LED glory.
Thank you to Brady for sending in the video!

A minor bump for one of our little open source Arduino add-ons. The Simple Relay Shield is an easy to use single-relay board that does one thing, and does it well: It adds a beefy little mechanical relay to an Arduino, which you control through pin Digital 4.

Version 2.0 adds the ability — by popular request — to control it from a pin other than D4. Solder the jumper in the normal way (in location JP), and it works on pin D4. Hook it up to any other digital pin, say to D7, and now you have a relay on that pin. The Simple Relay Shield is available as a complete soldering kit or as a bare PCB, and you can find documentation on our wiki.
Romy Randev of Looma is installing his latest piece, Penumbra at the Helix museum in Los Altos.
Penumbra is an interactive installation that responds to movement in its environment. Without any human interaction, Penumbra is disguised as a decorative glass wall. However, each colored glass tile illuminates individually as sensors that respond to movements control LEDs behind the glass.
Penumbra makes use of our Octolively modules, and we’ll be at Helix with Romy on Saturday March 29th, starting at 2:00 PM to talk about the art and tech behind Penumbra. Event information is available from Helix.

Gary writes:
I have fallen in love with your Diavolinos – thank you!
My question: does the “Simple target board” allow for the 6-pin FTDI Friend hookup to upload sketches? This is quick and easy with the Diavolino. I’m new to reading circuits and stuff, and I cannot tell looking at the target board. It says to use in-system programmer, but I prefer to not buy another interface. Thanks!
Excellent question! It is certainly possible, but not as quick and easy. Both the Diavolino and our ATmegaXX8 target boards boards use the same chip, usually the ATmega328P. But, one might say that our ATmegaXX8 board is a simple AVR target board optimized for use with an AVR ISP programmer (like the USBtinyISP), whereas the Diavolino is a simple target board optimized for use with the FTDI interface.

Versus a “bare” target board (with just the chip and power), there are four things that you would normally add, in order to use the FTDI interface to upload a sketch from within the Arduino environment:
Continue reading Basics: AVR Target Boards and Arduino Compatibility
Anton wrote in to ask:
I want to purchase your Larson Scanner kit but need to be able to run it from household current … is there a converter that you would recommend?
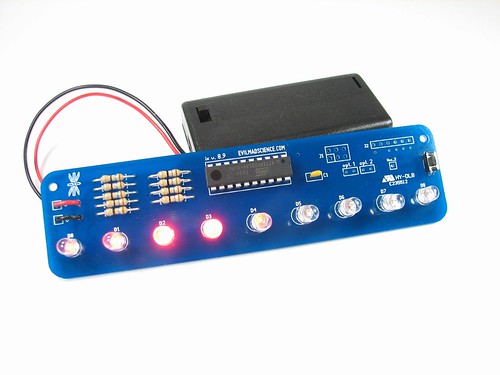
Since the Larson Scanner normally runs from 3 V DC, a regulated 3 V power supply can be hooked up in place of the 2xAA battery box. However, 5 V power supplies (like this one) are much more common, and the circuit can be run from 5 V with only minor changes. if you replace the nine 16 ohm resistors in the Larson Scanner kit with 120 – 150 ohm resistors, you can power it from 5 V directly.
Another related question we occasionally get is how to run the Larson Scanner with green LEDs. (Note: by green, we mean “pure” green LEDs which have a forward voltage of about 3 V. Older style yellow-green LEDs with a forward voltage of ~2 V can be used as drop-in replacements for the red ones.)
If running off of battery will work for you, this is an even simpler change: merely replace the 3 V battery holder with a 4.5 V one, such as a 3xAA. It is a happy coincidence that the circuit can run with red LEDs at 3 V or green LEDs at 4.5 V using the same 16 ohm resistor value. So how about running a green Larson Scanner from a 5 V power supply? Replace the nine 16 ohm resistors with 39 ohm resistors and you should be good to go.
You can find the documentation for the Larson Scanner and more stories about modding it on our wiki. We’d love to hear about any mods you do to the Larson Scanner in the comments or see pictures in the flickr pool.

I had a wonderful conversation with Elecia White of embedded.fm which you can hear in her 40th episode, titled Mwahaha Session.
I brought along a Snap-O-Lantern kit for her to give away one of her listeners, and you can find details of the give-away on the podcast page.

Over at Dead, too much lettuce., Scott built an Access Point garage door opener with a Raspberry Pi, an Arduino, and our Simple Relay Shield.
I bike to work. Bikes live in the garage. But with only 2 remotes, I could not keep one in my bag all the time to be able to get to the bike. So a new option had to be created. Most people would have bought a new remote…
Our friend Schuyler St. Leger added a vintage telephone bell to his Alpha Clock Five to make an alarm clock that could wake the dead— or at least a teenage boy who’s been watching late night TV.
