


Make your own edge-lit holiday cards using LEDs, plastic, paper, electrical tape, batteries, a pen, scissors, and a hobby knife.
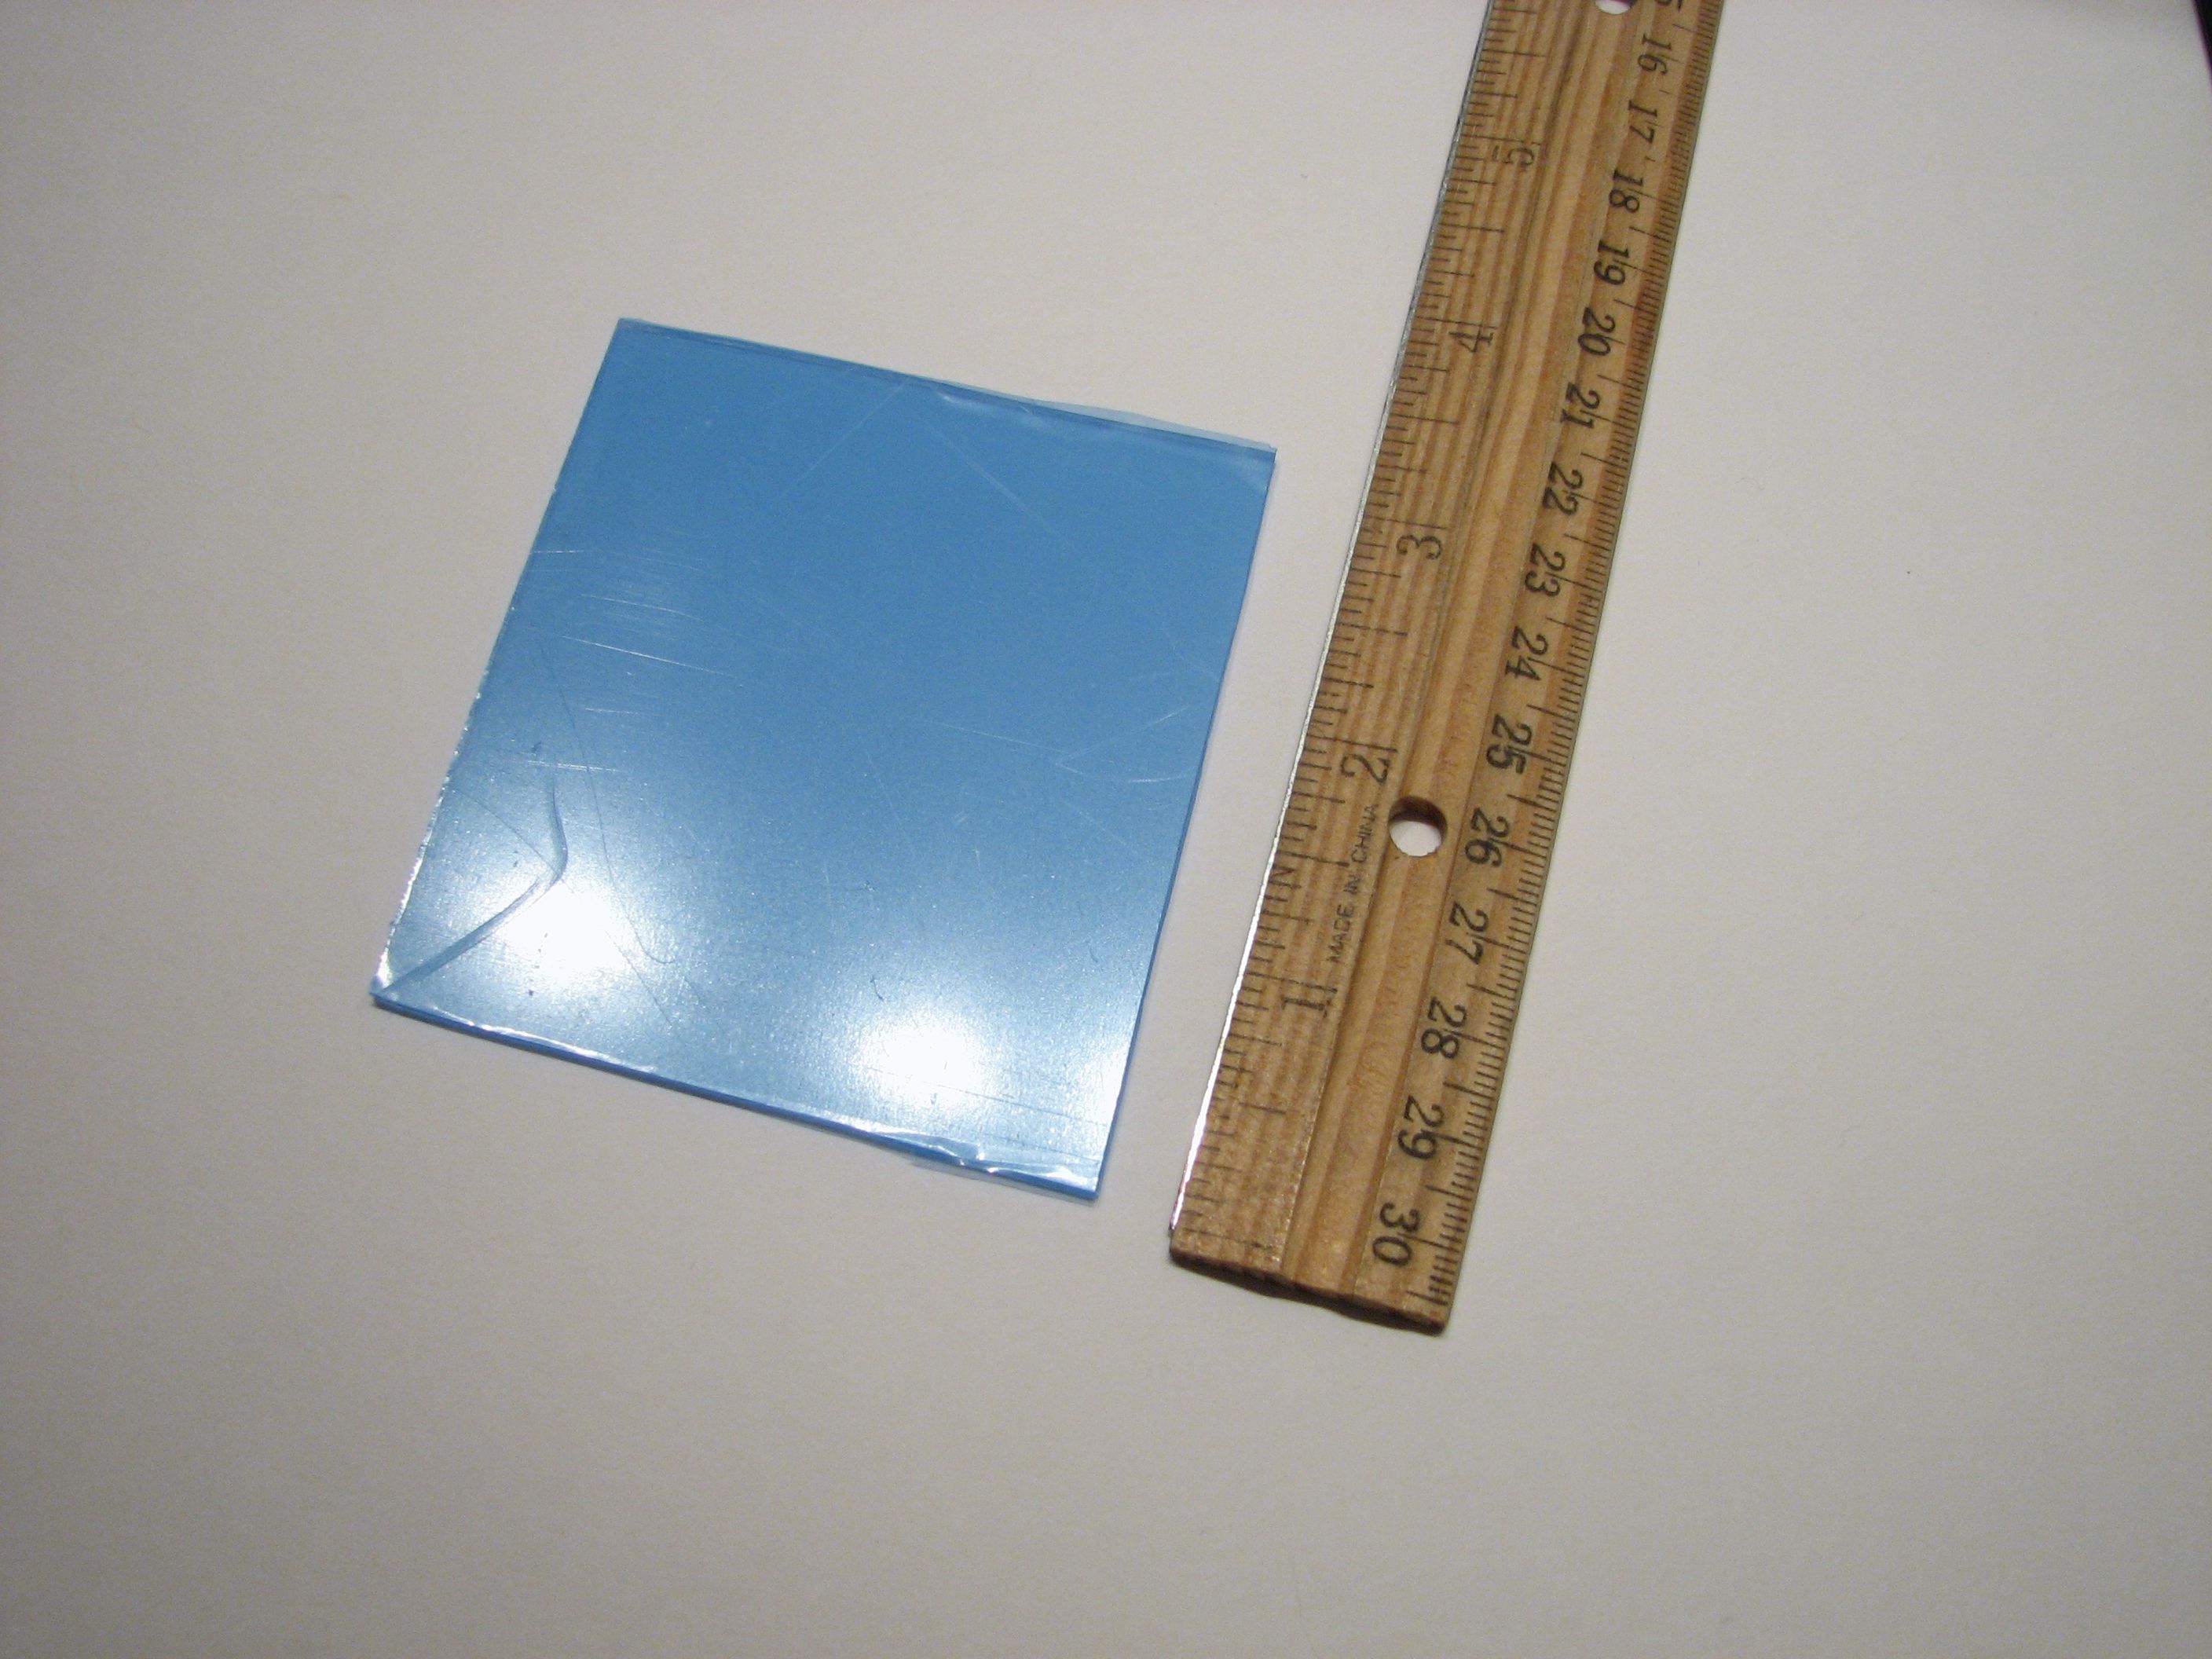
We begin with a piece of clear plastic roughly 1/16″ (1.6 mm) thick, approximately 2.5 x 3″ (65 x 75 mm).
We used acrylic, but you can also use polycarbonate, polypropylene, or a number of other clear plastics. You can cut a piece out of a thick-walled clear plastic container or get material like this at the hardware or hobby store. This clear acrylic came with protective blue film on both sides.
The initial sheet that we had was about 12″ square, and it turns out that this particular material *cannot* be cut with scissors– it cracks and shatters. What does work (for this and other brittle plastics) is to score the material with a sharp hobby knife (along a straight edge) and then quickly snap it to break the material along the score. Using that method, it’s pretty quick to cut an appropriately sized piece of plastic from a larger sheet.
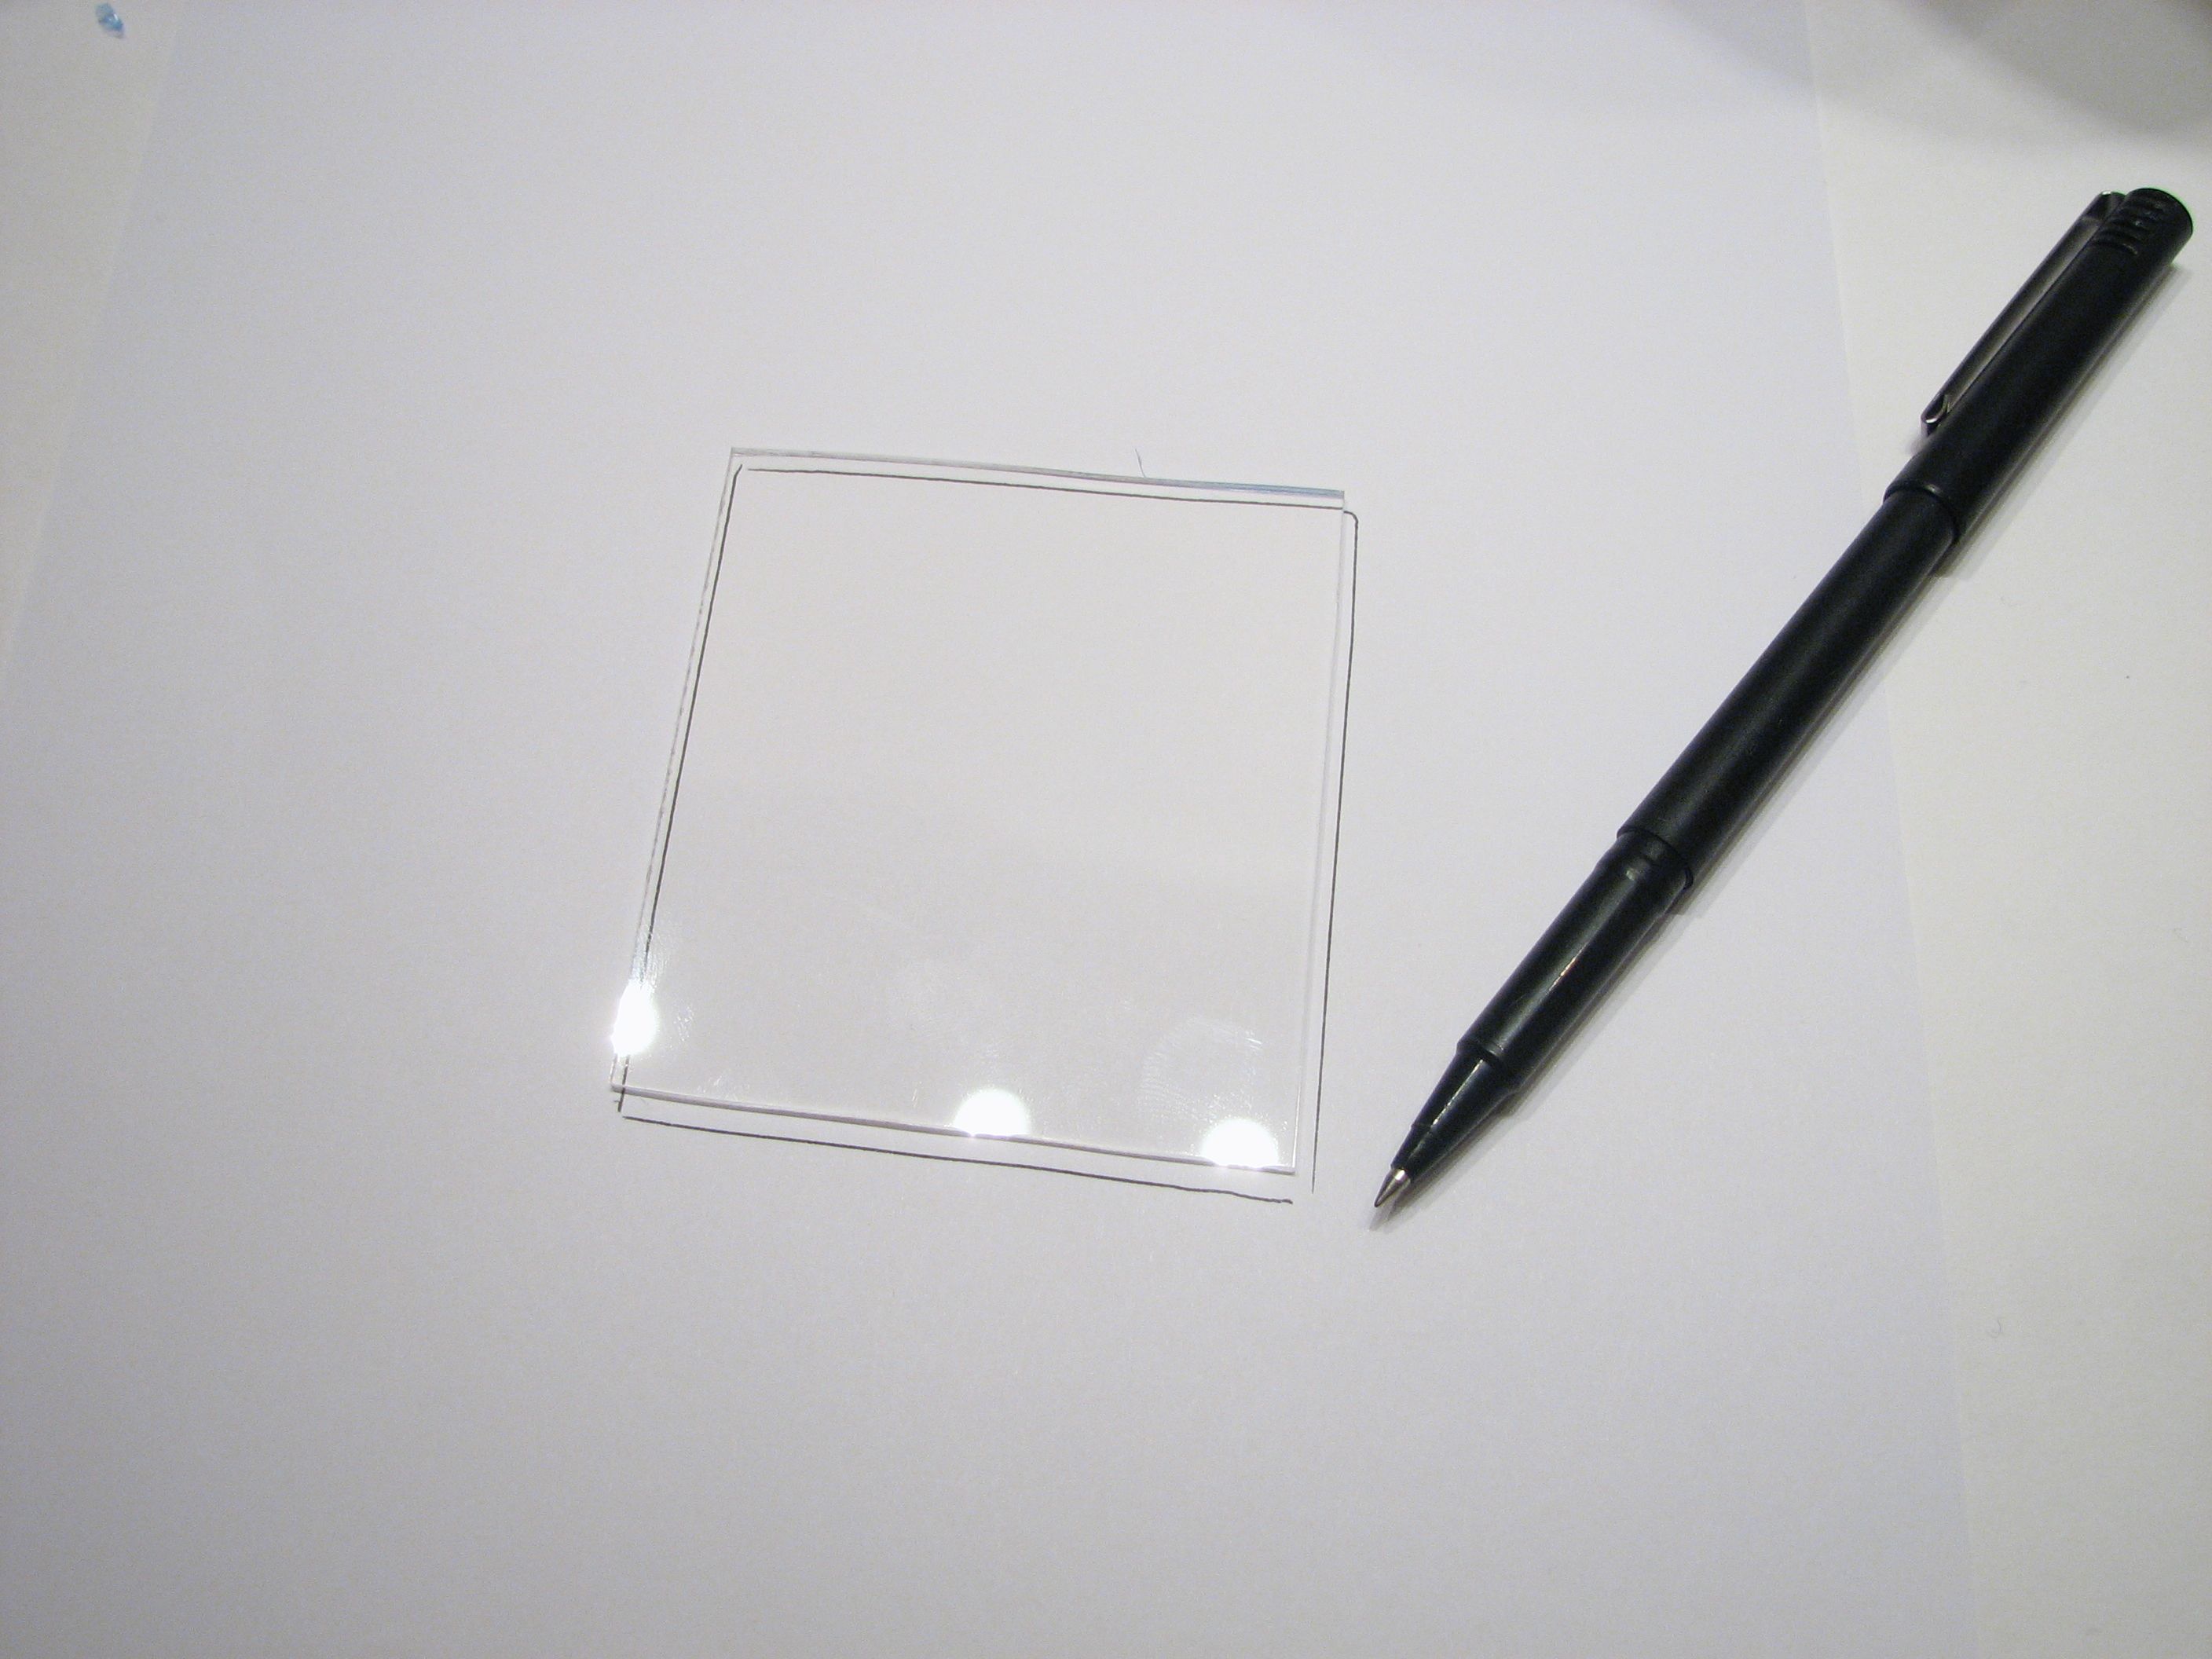
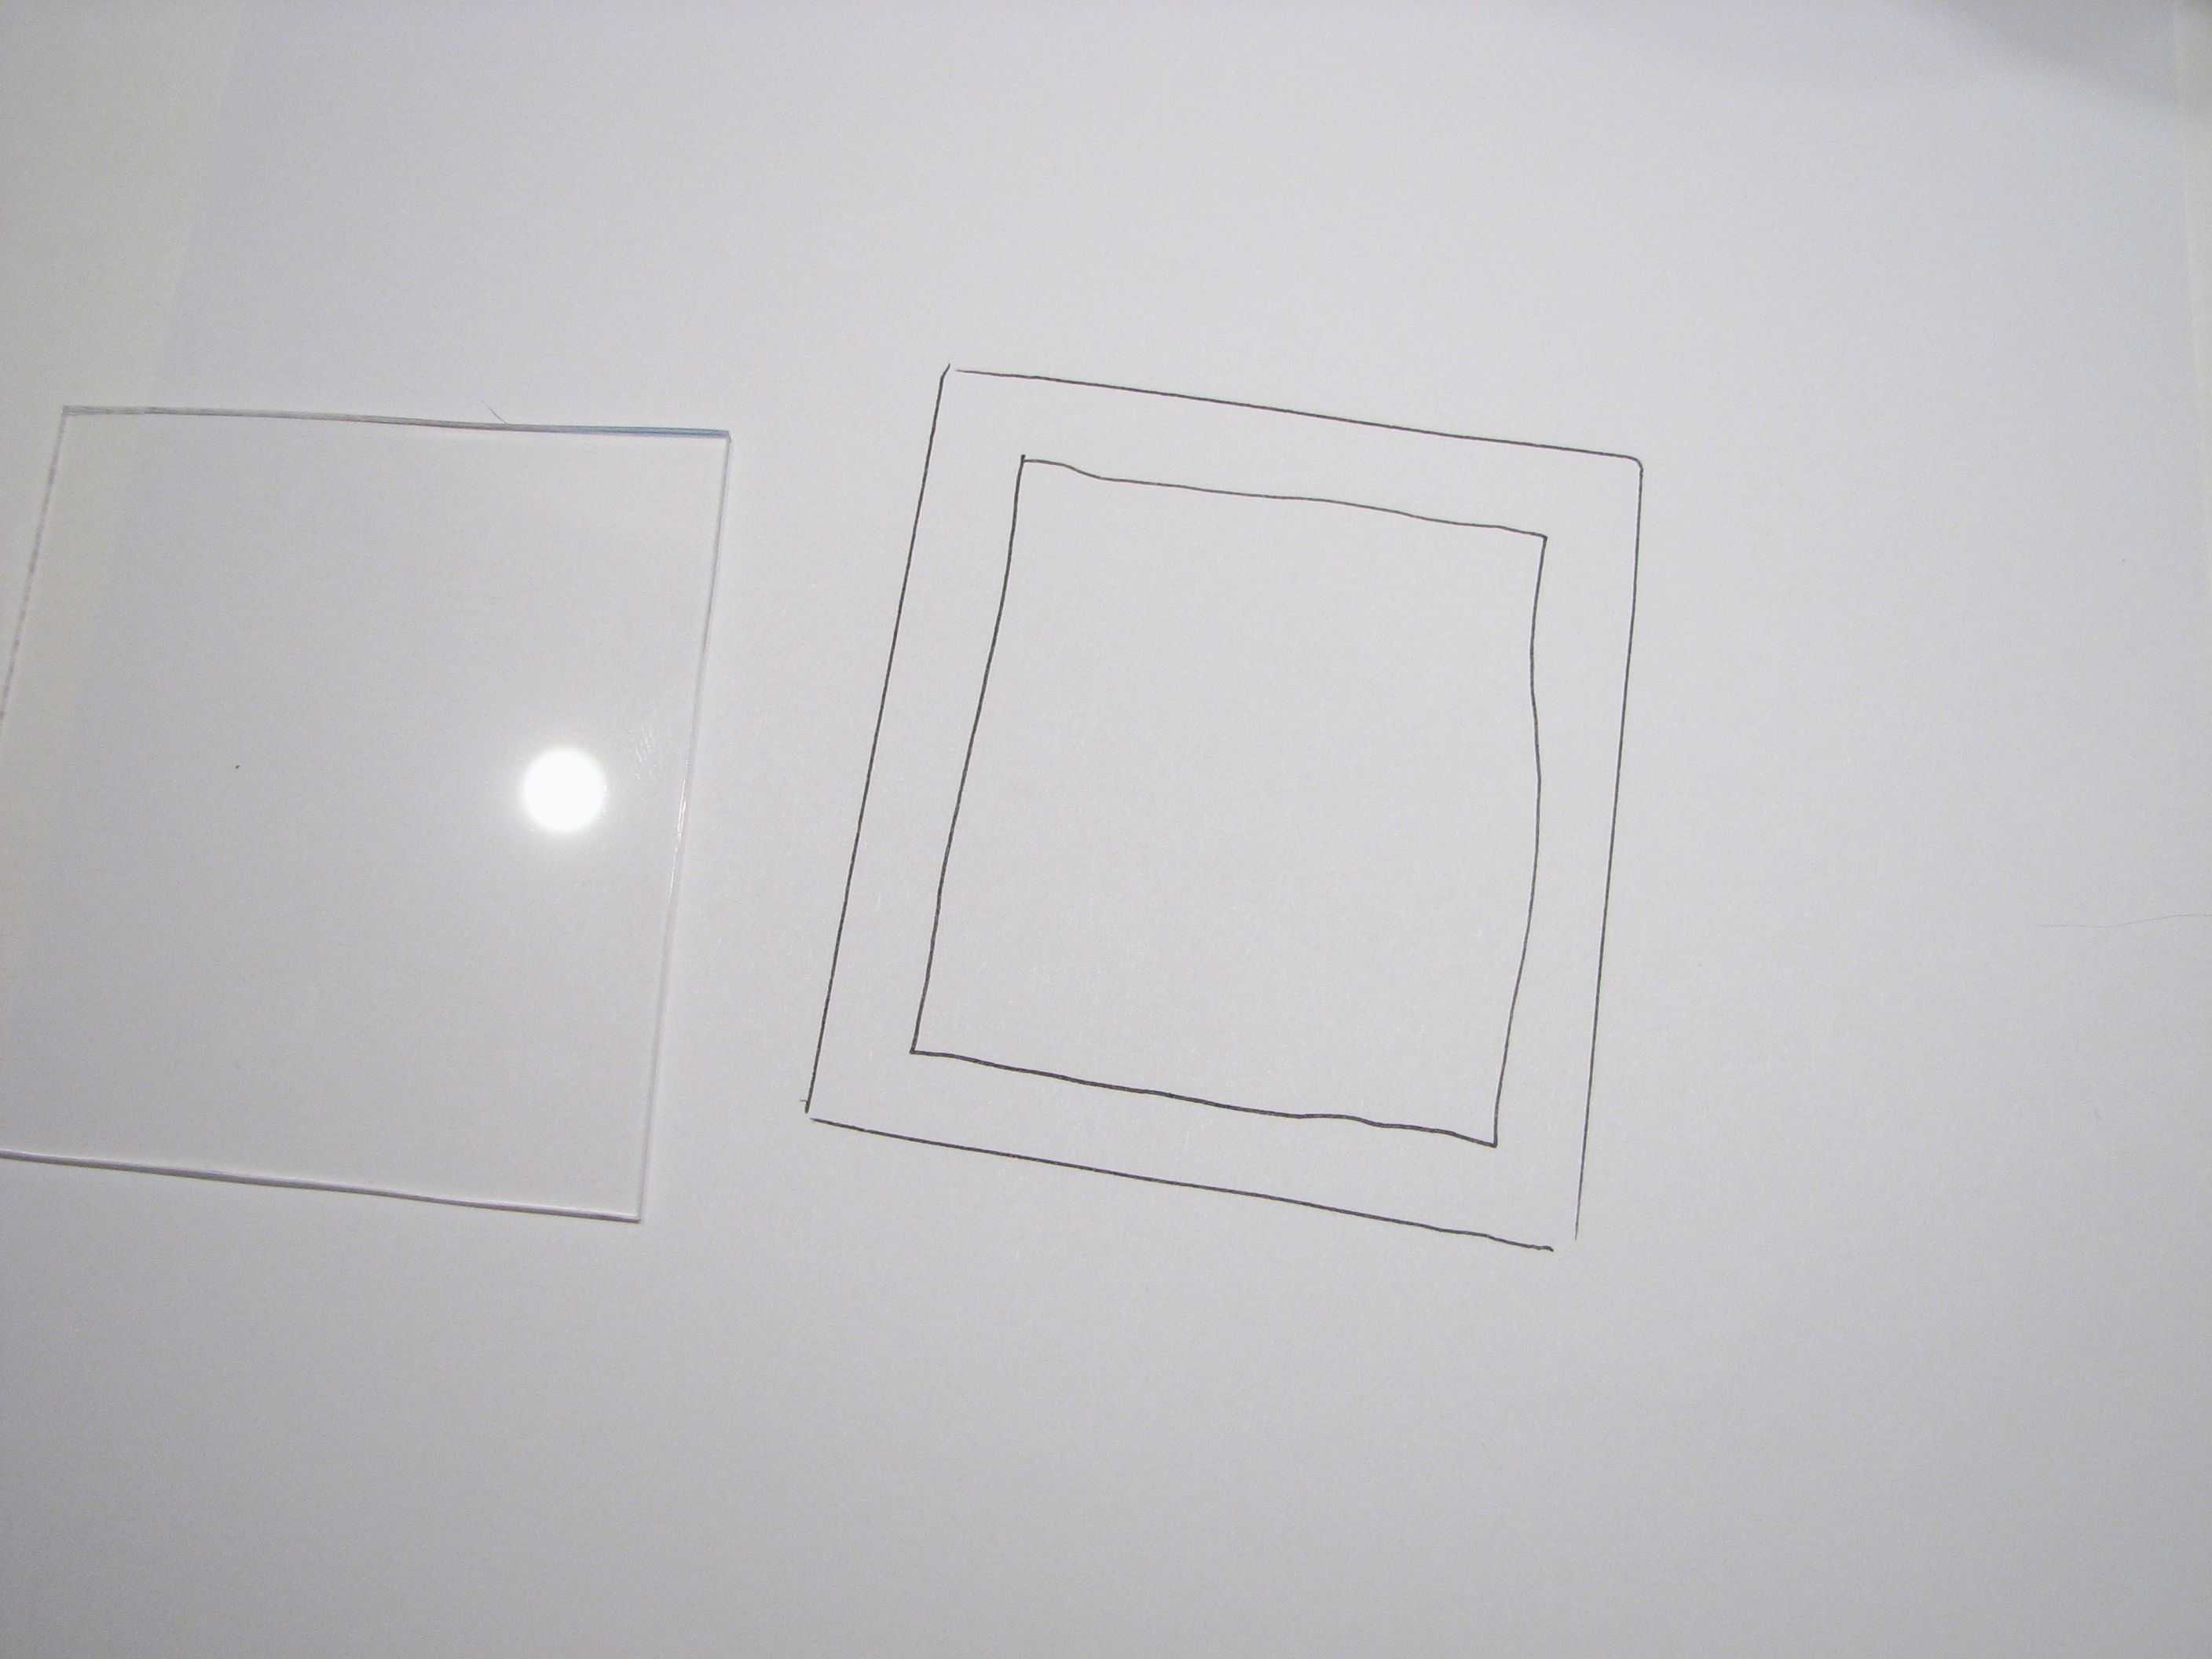
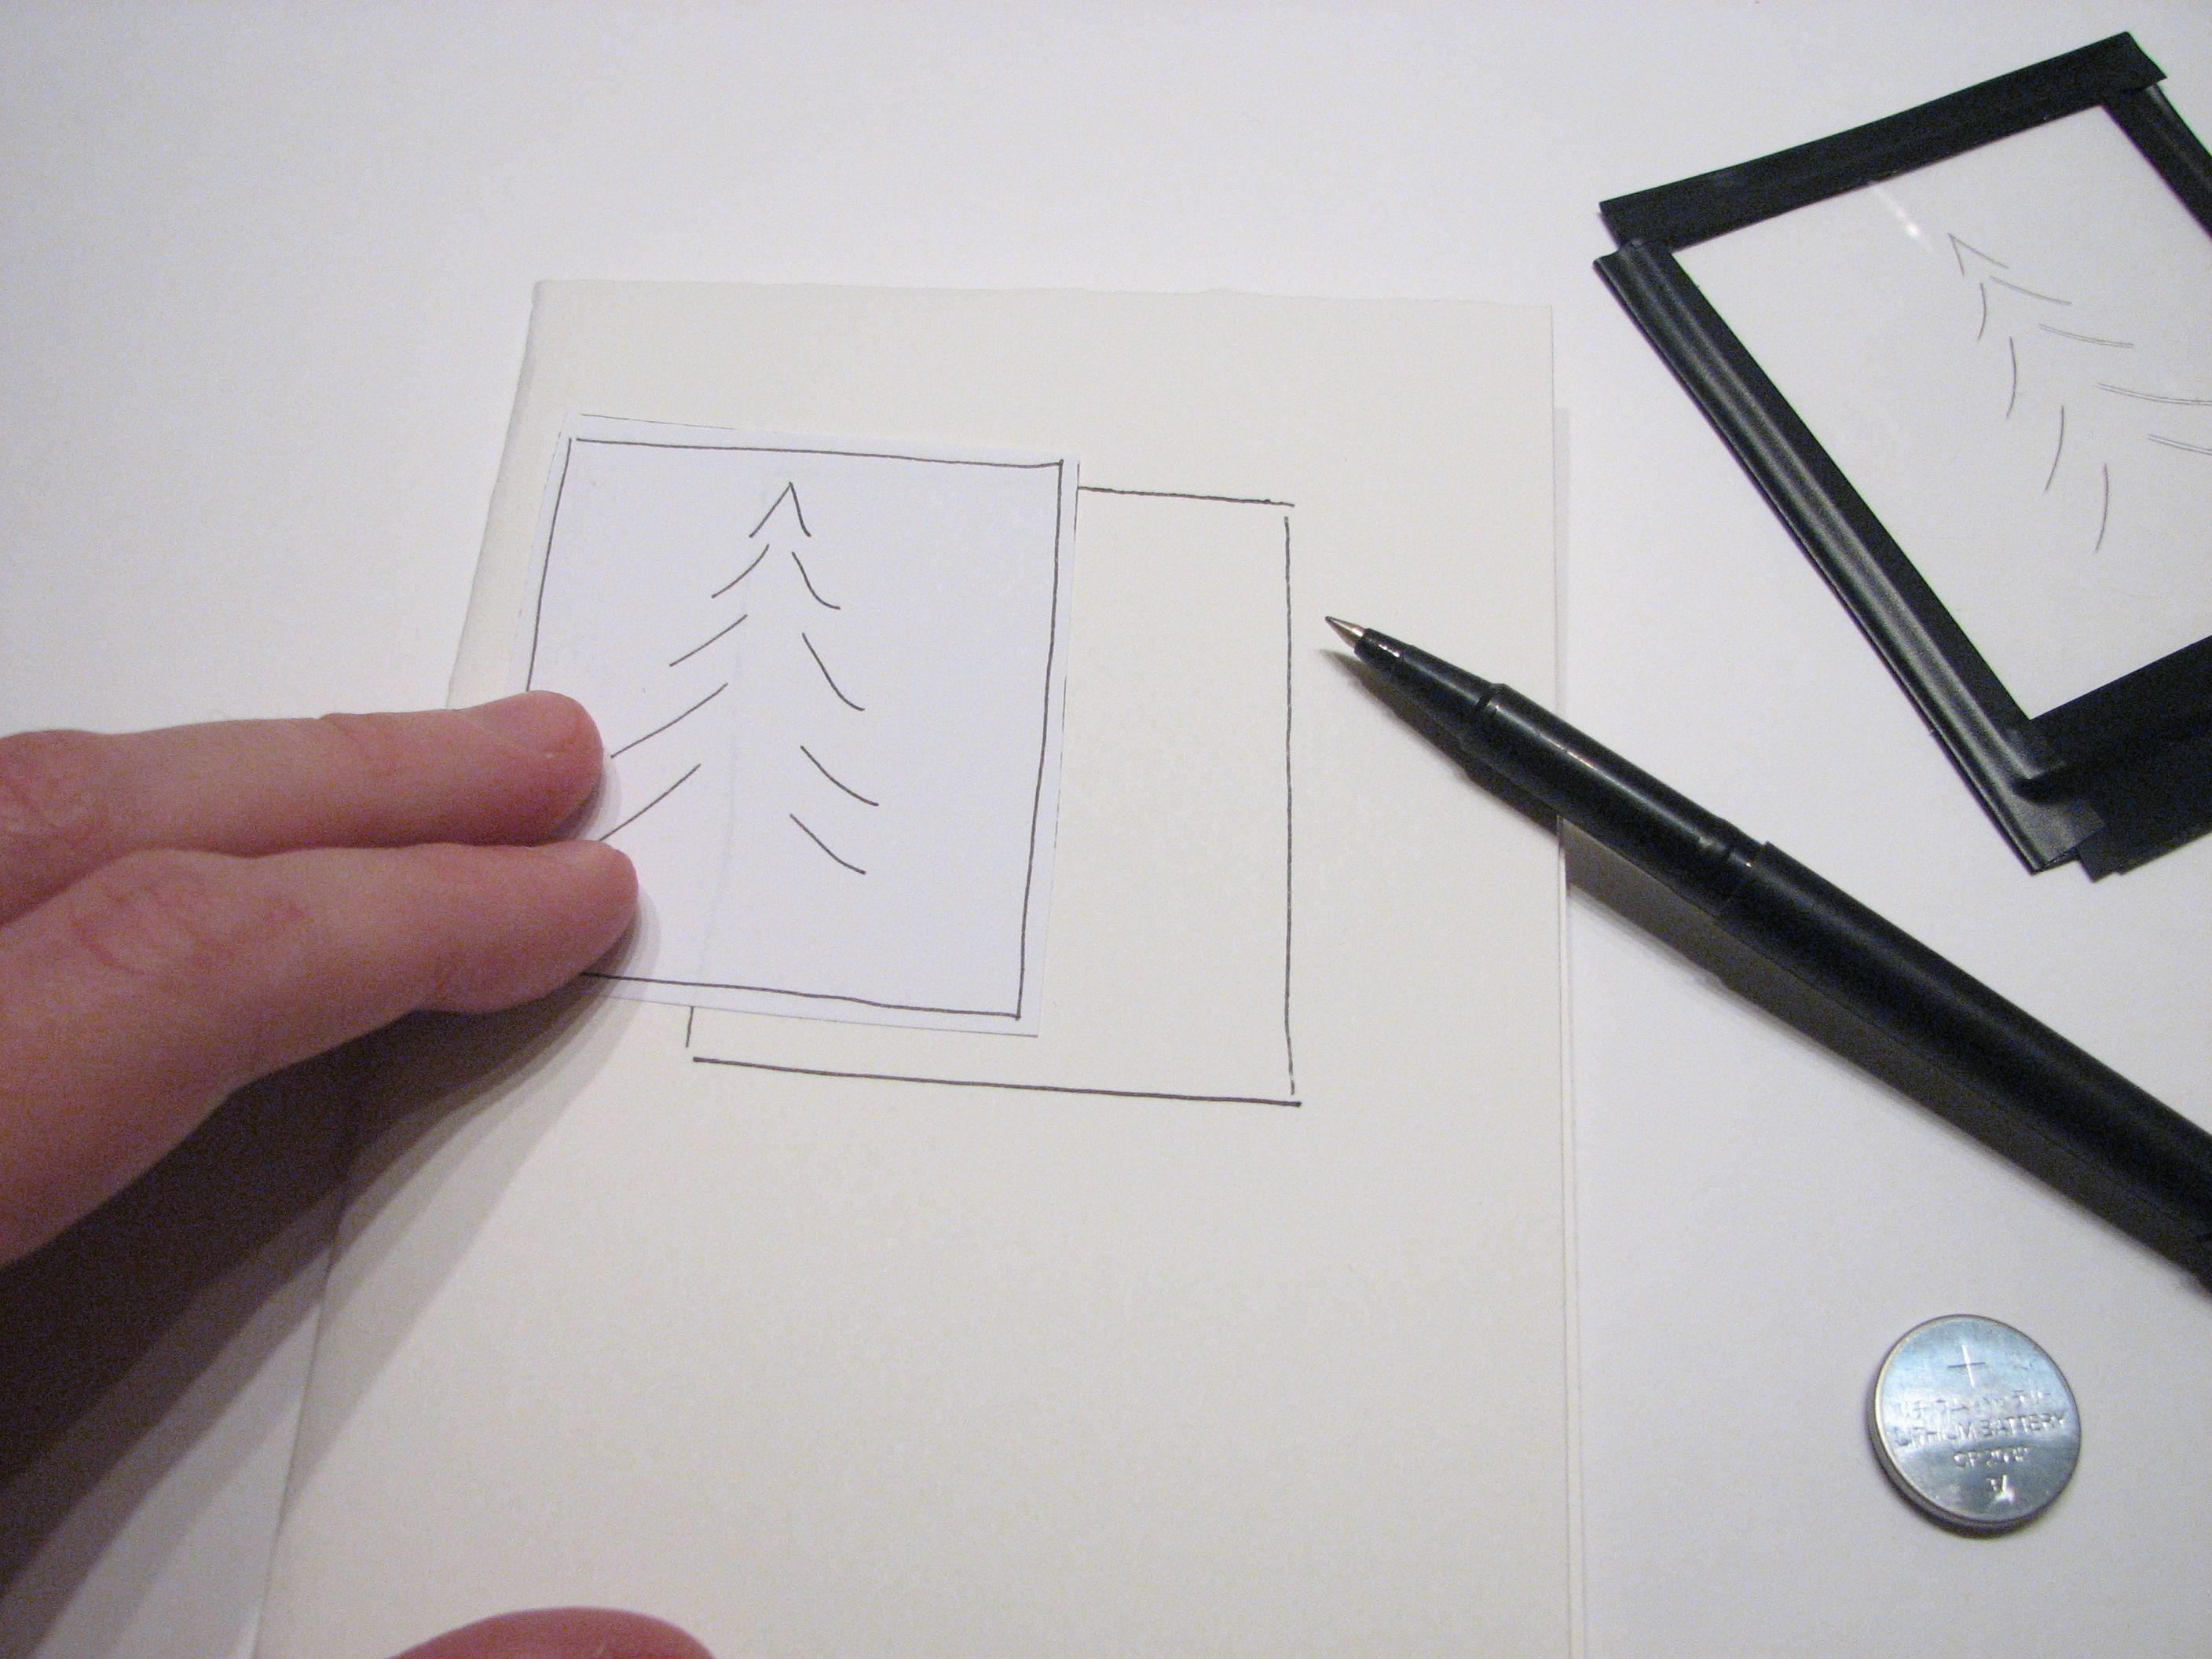
Trace the size of your plastic piece onto a sheet of paper. Then, draw a second rectangle inside the first, leaving about 0.5″ (13 mm) gap.
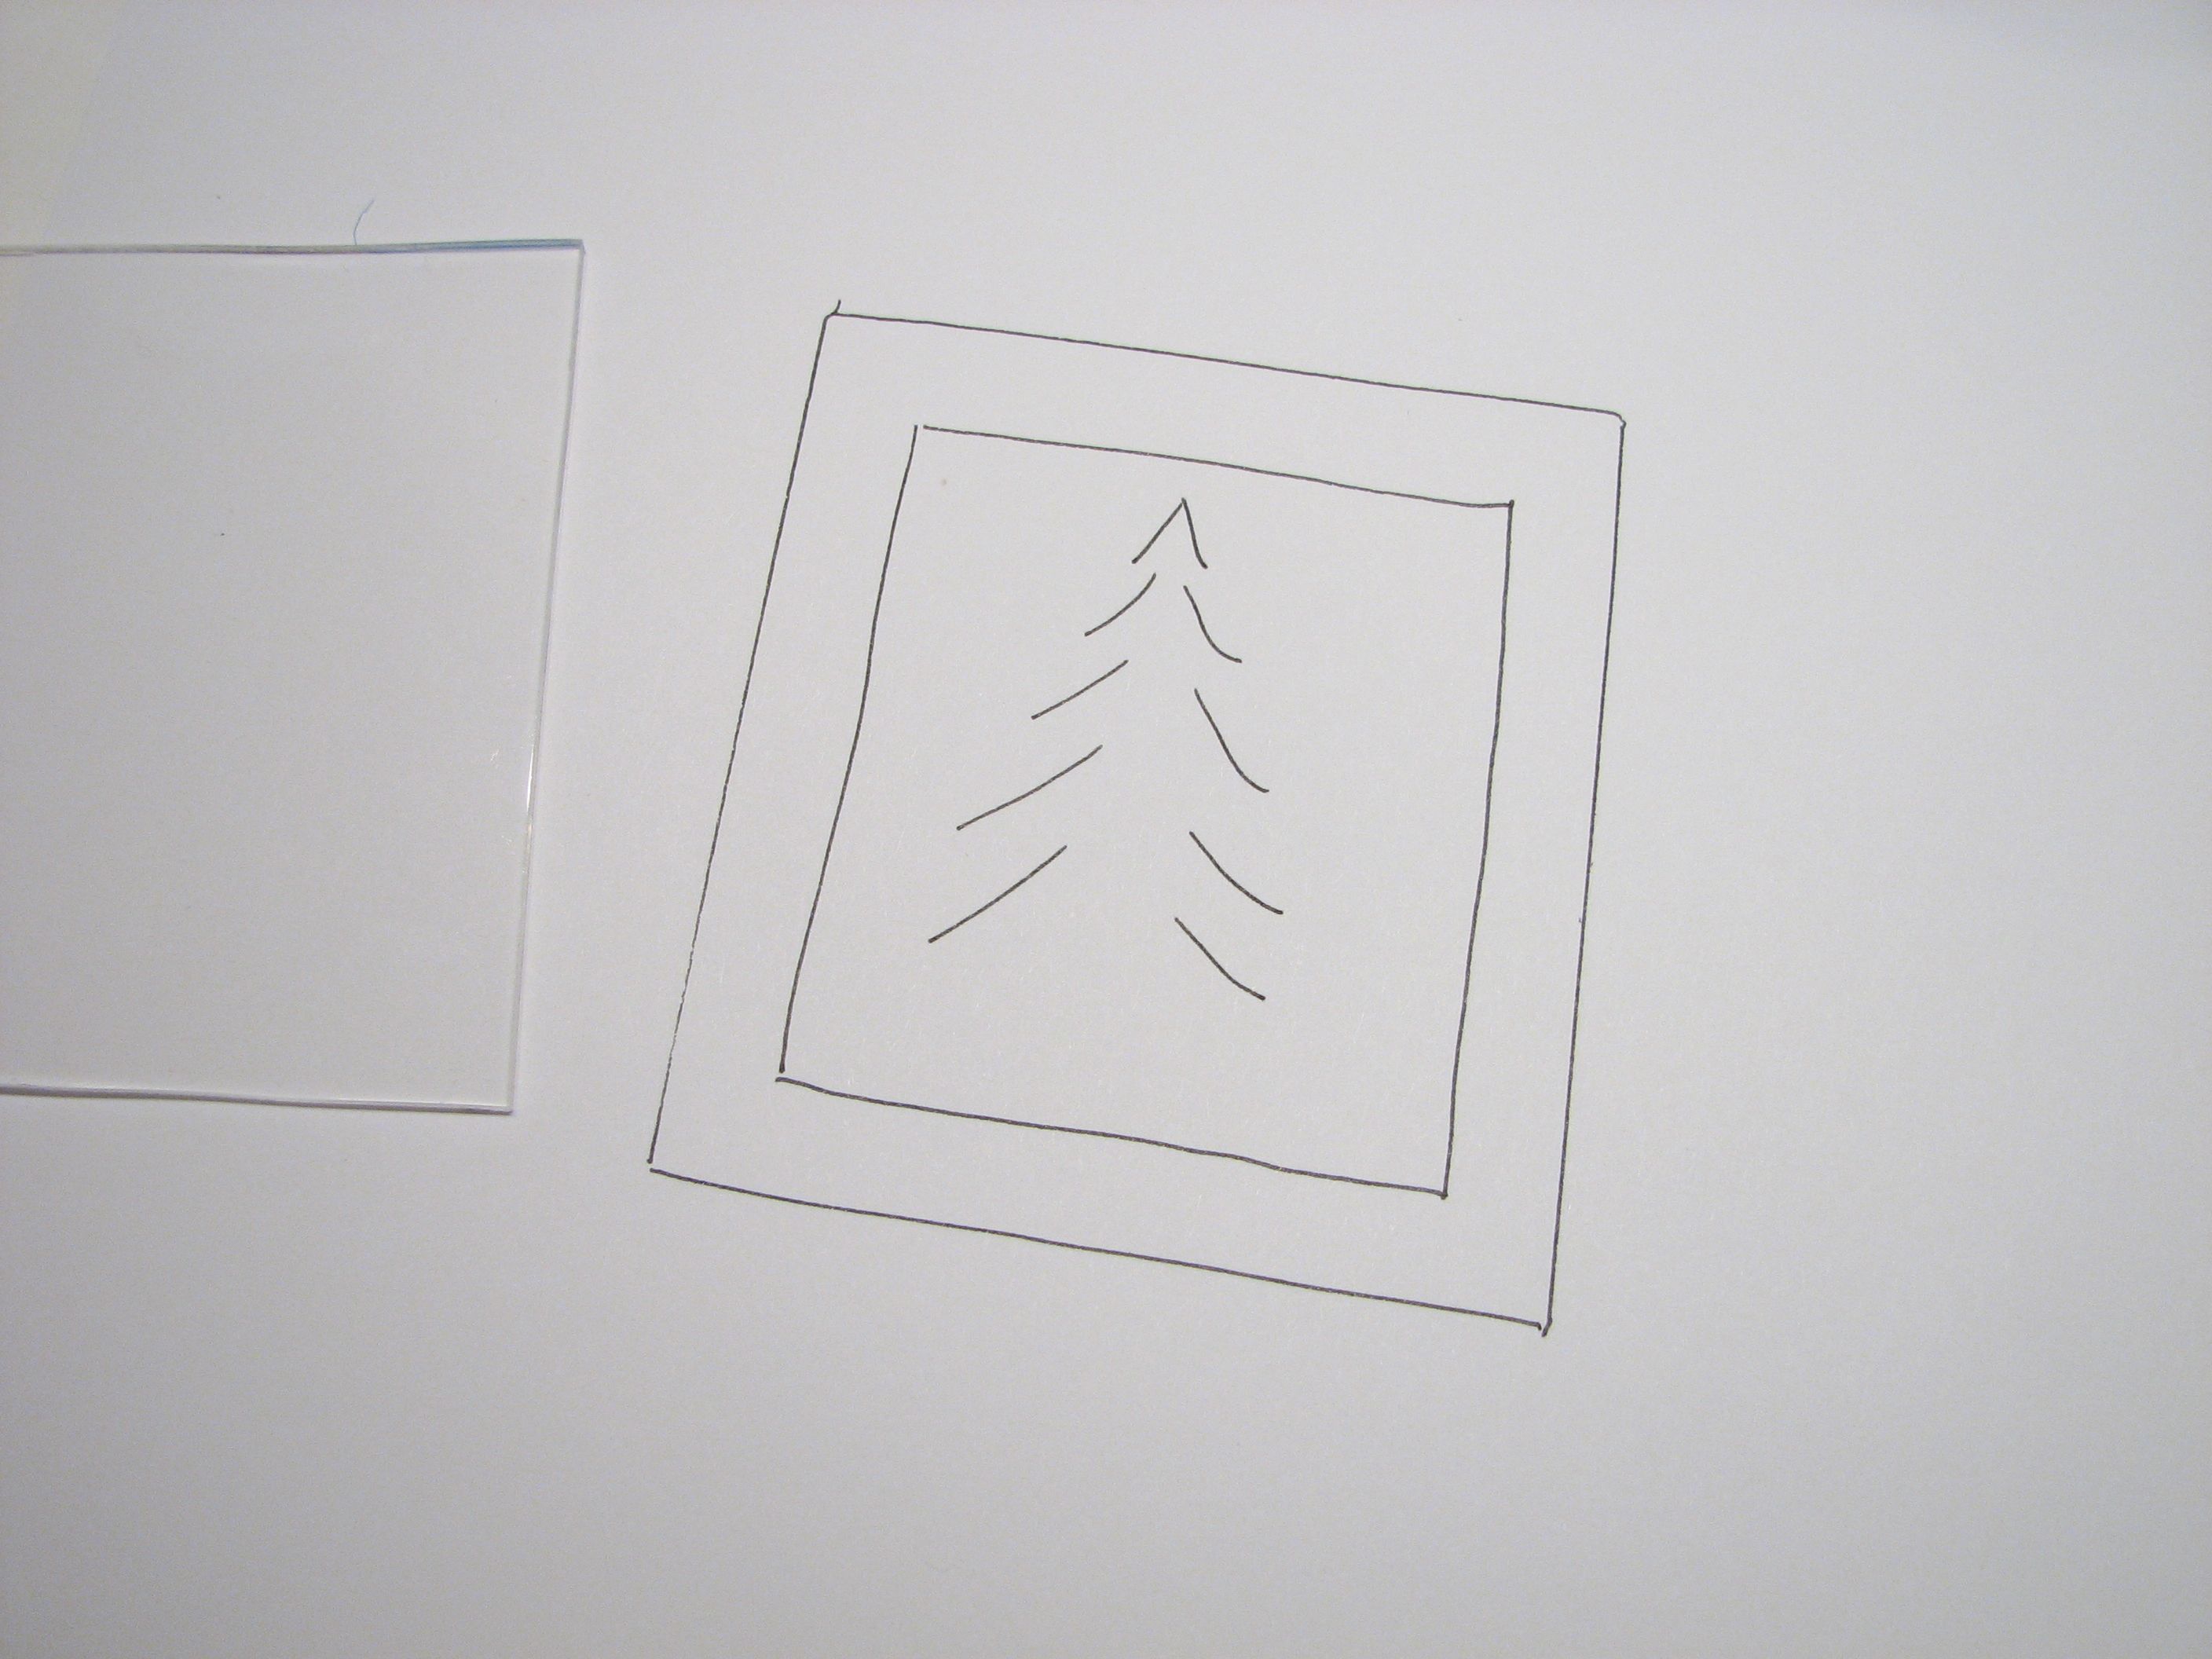
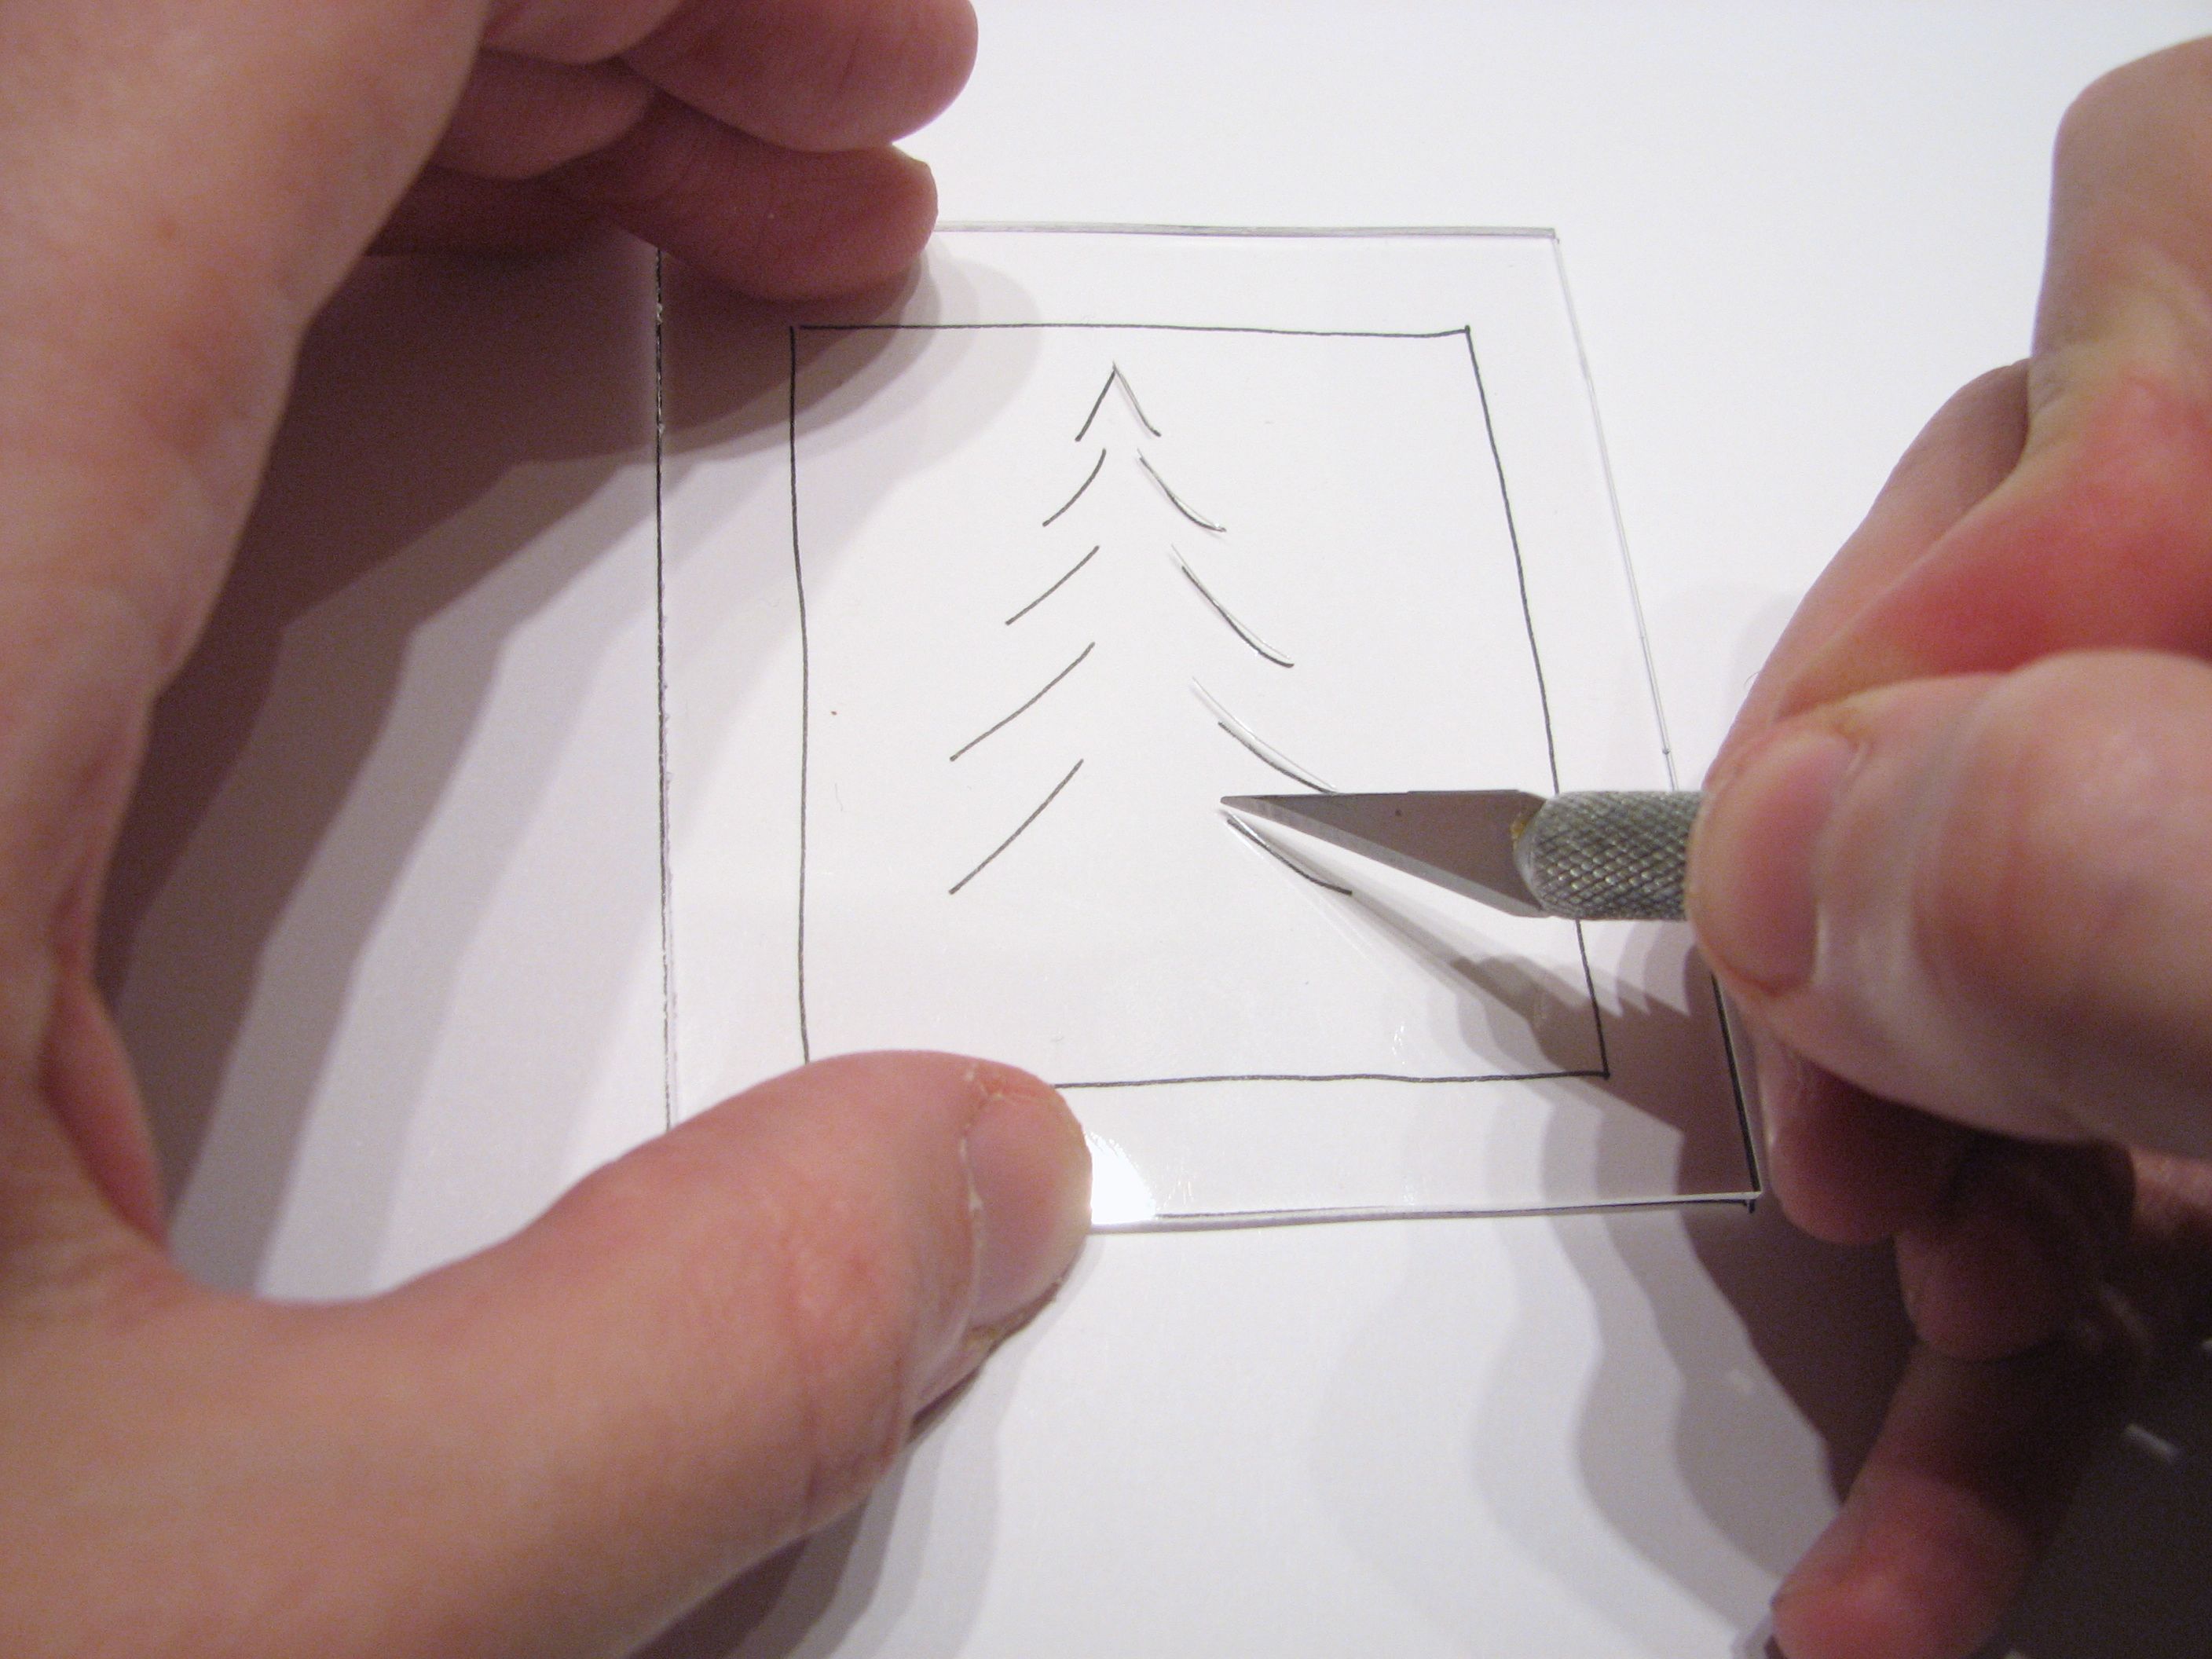
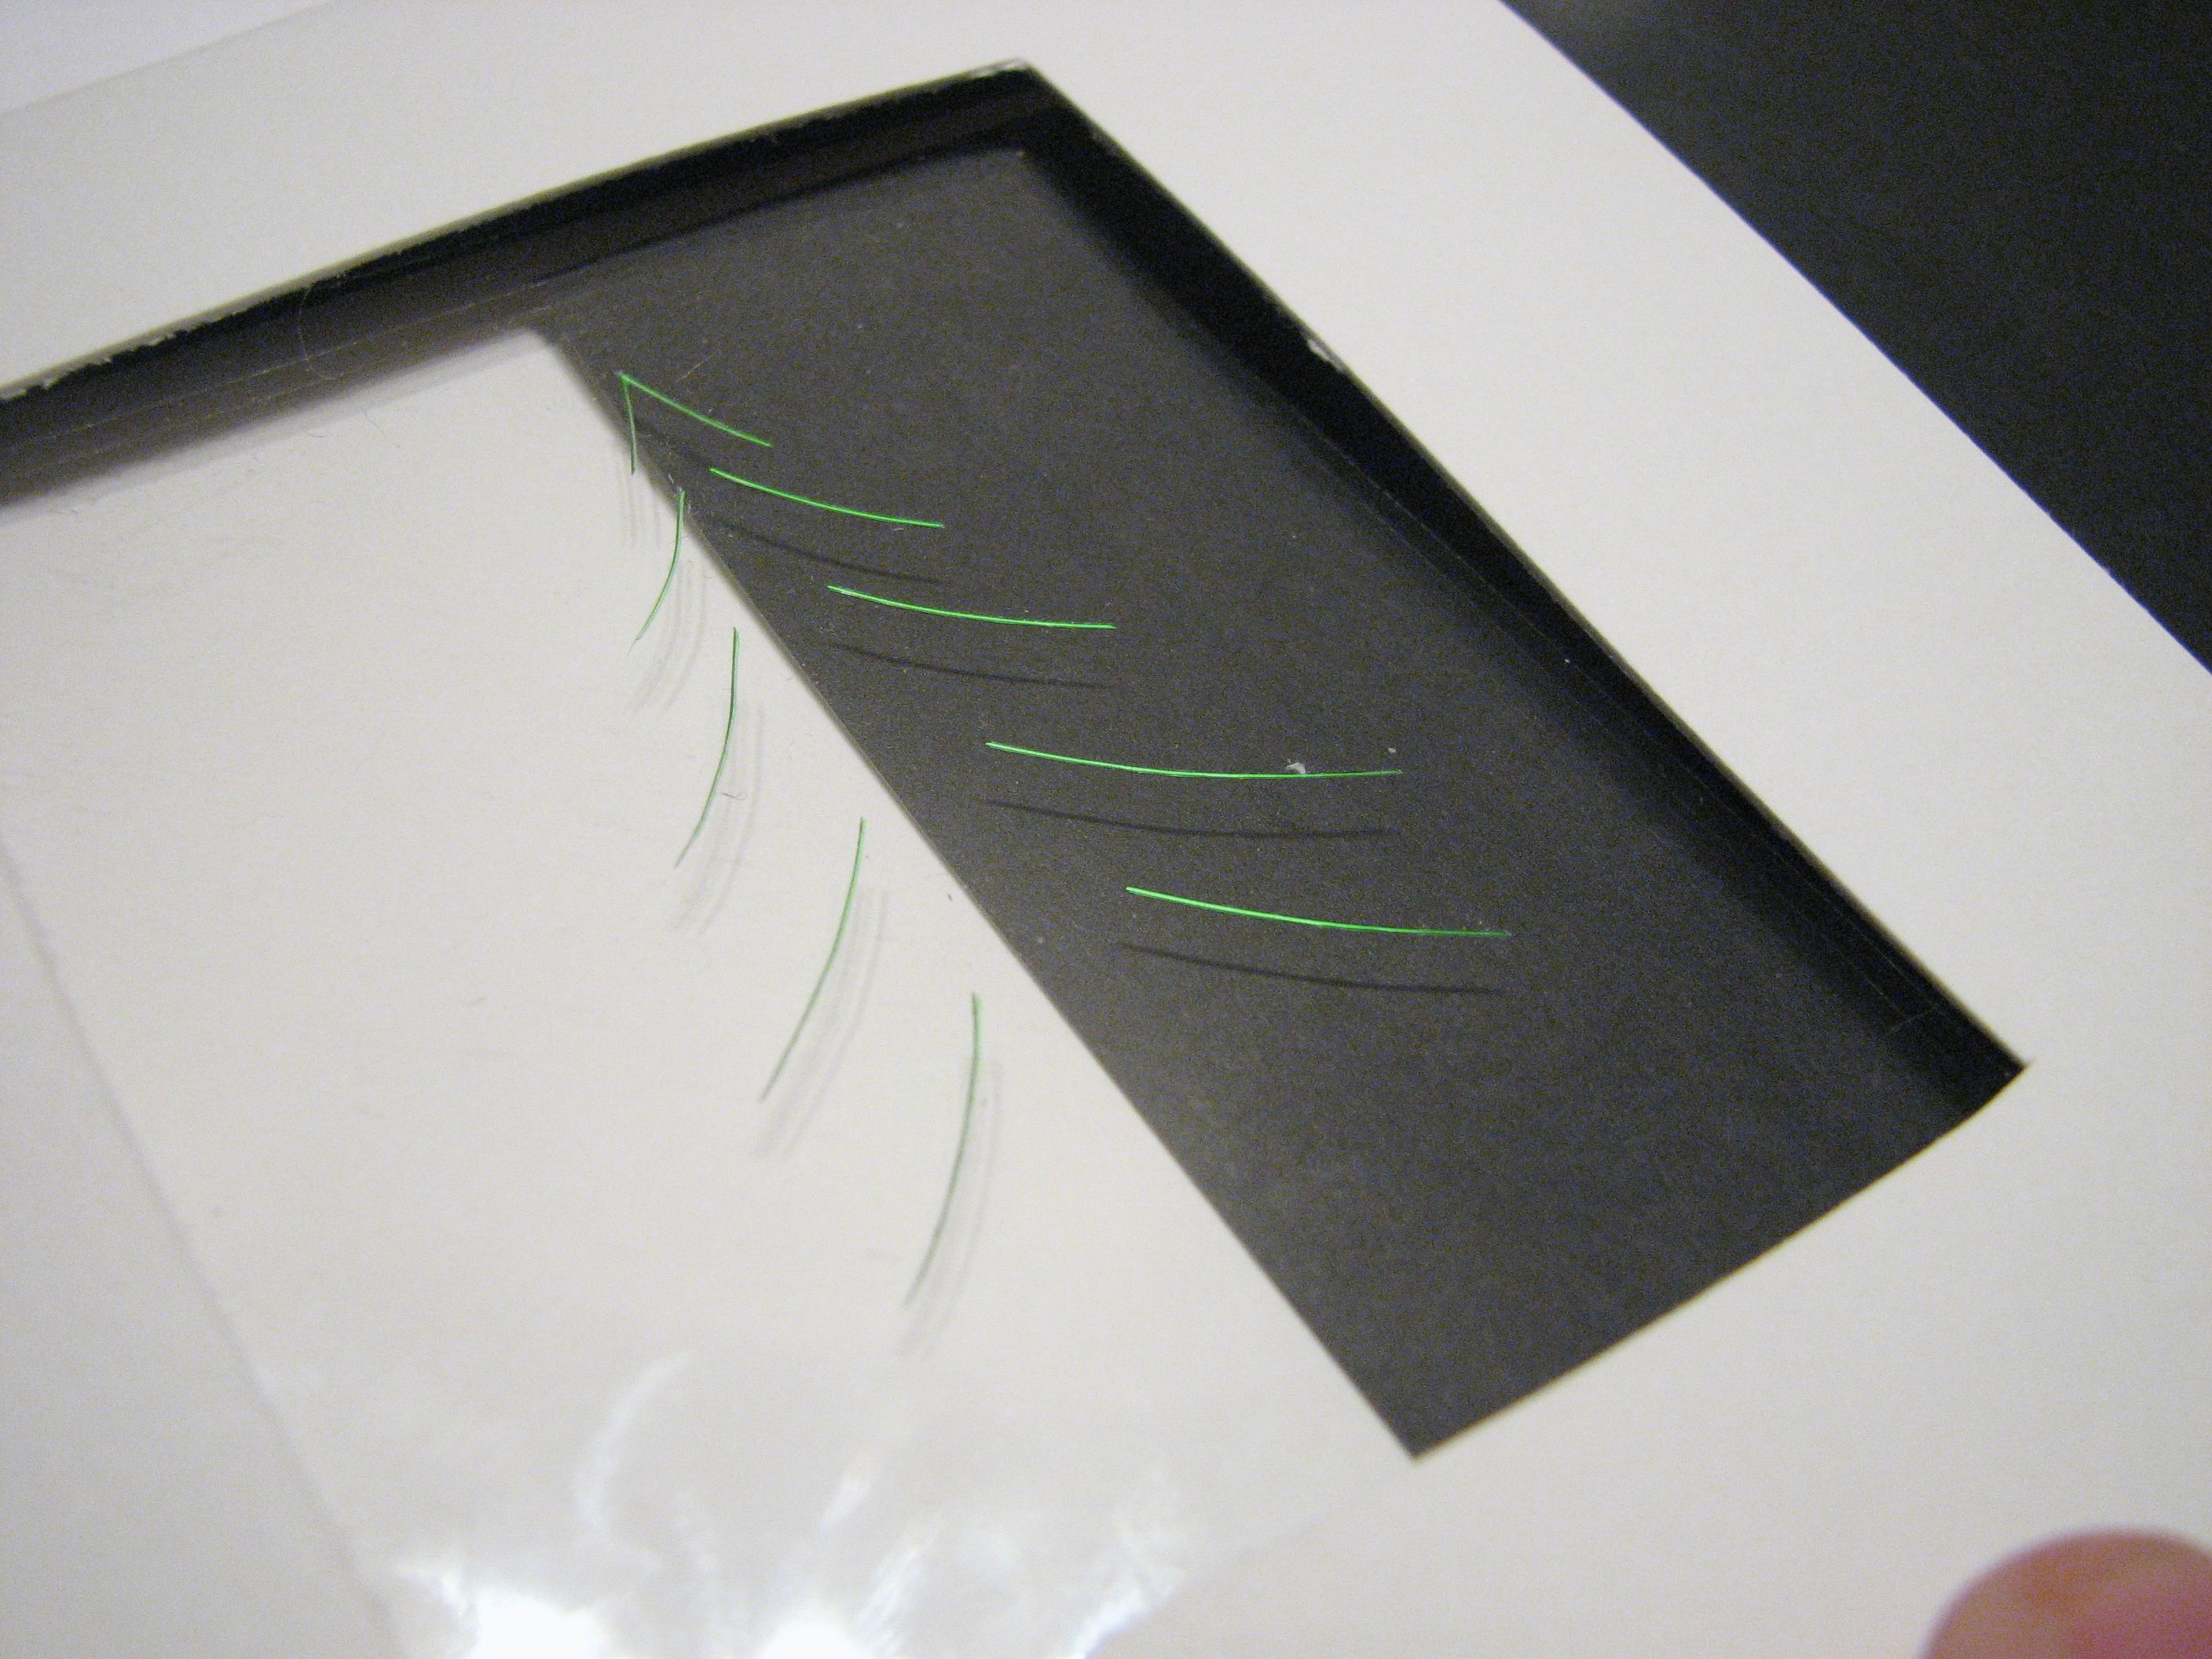
Make a drawing of what you’ll want on your card front; it should fit well within the inner rectangle on your paper. Once you’ve got a plan, put your plastic piece on top of the drawing and trace the shape into the plastic with the hobby knife.
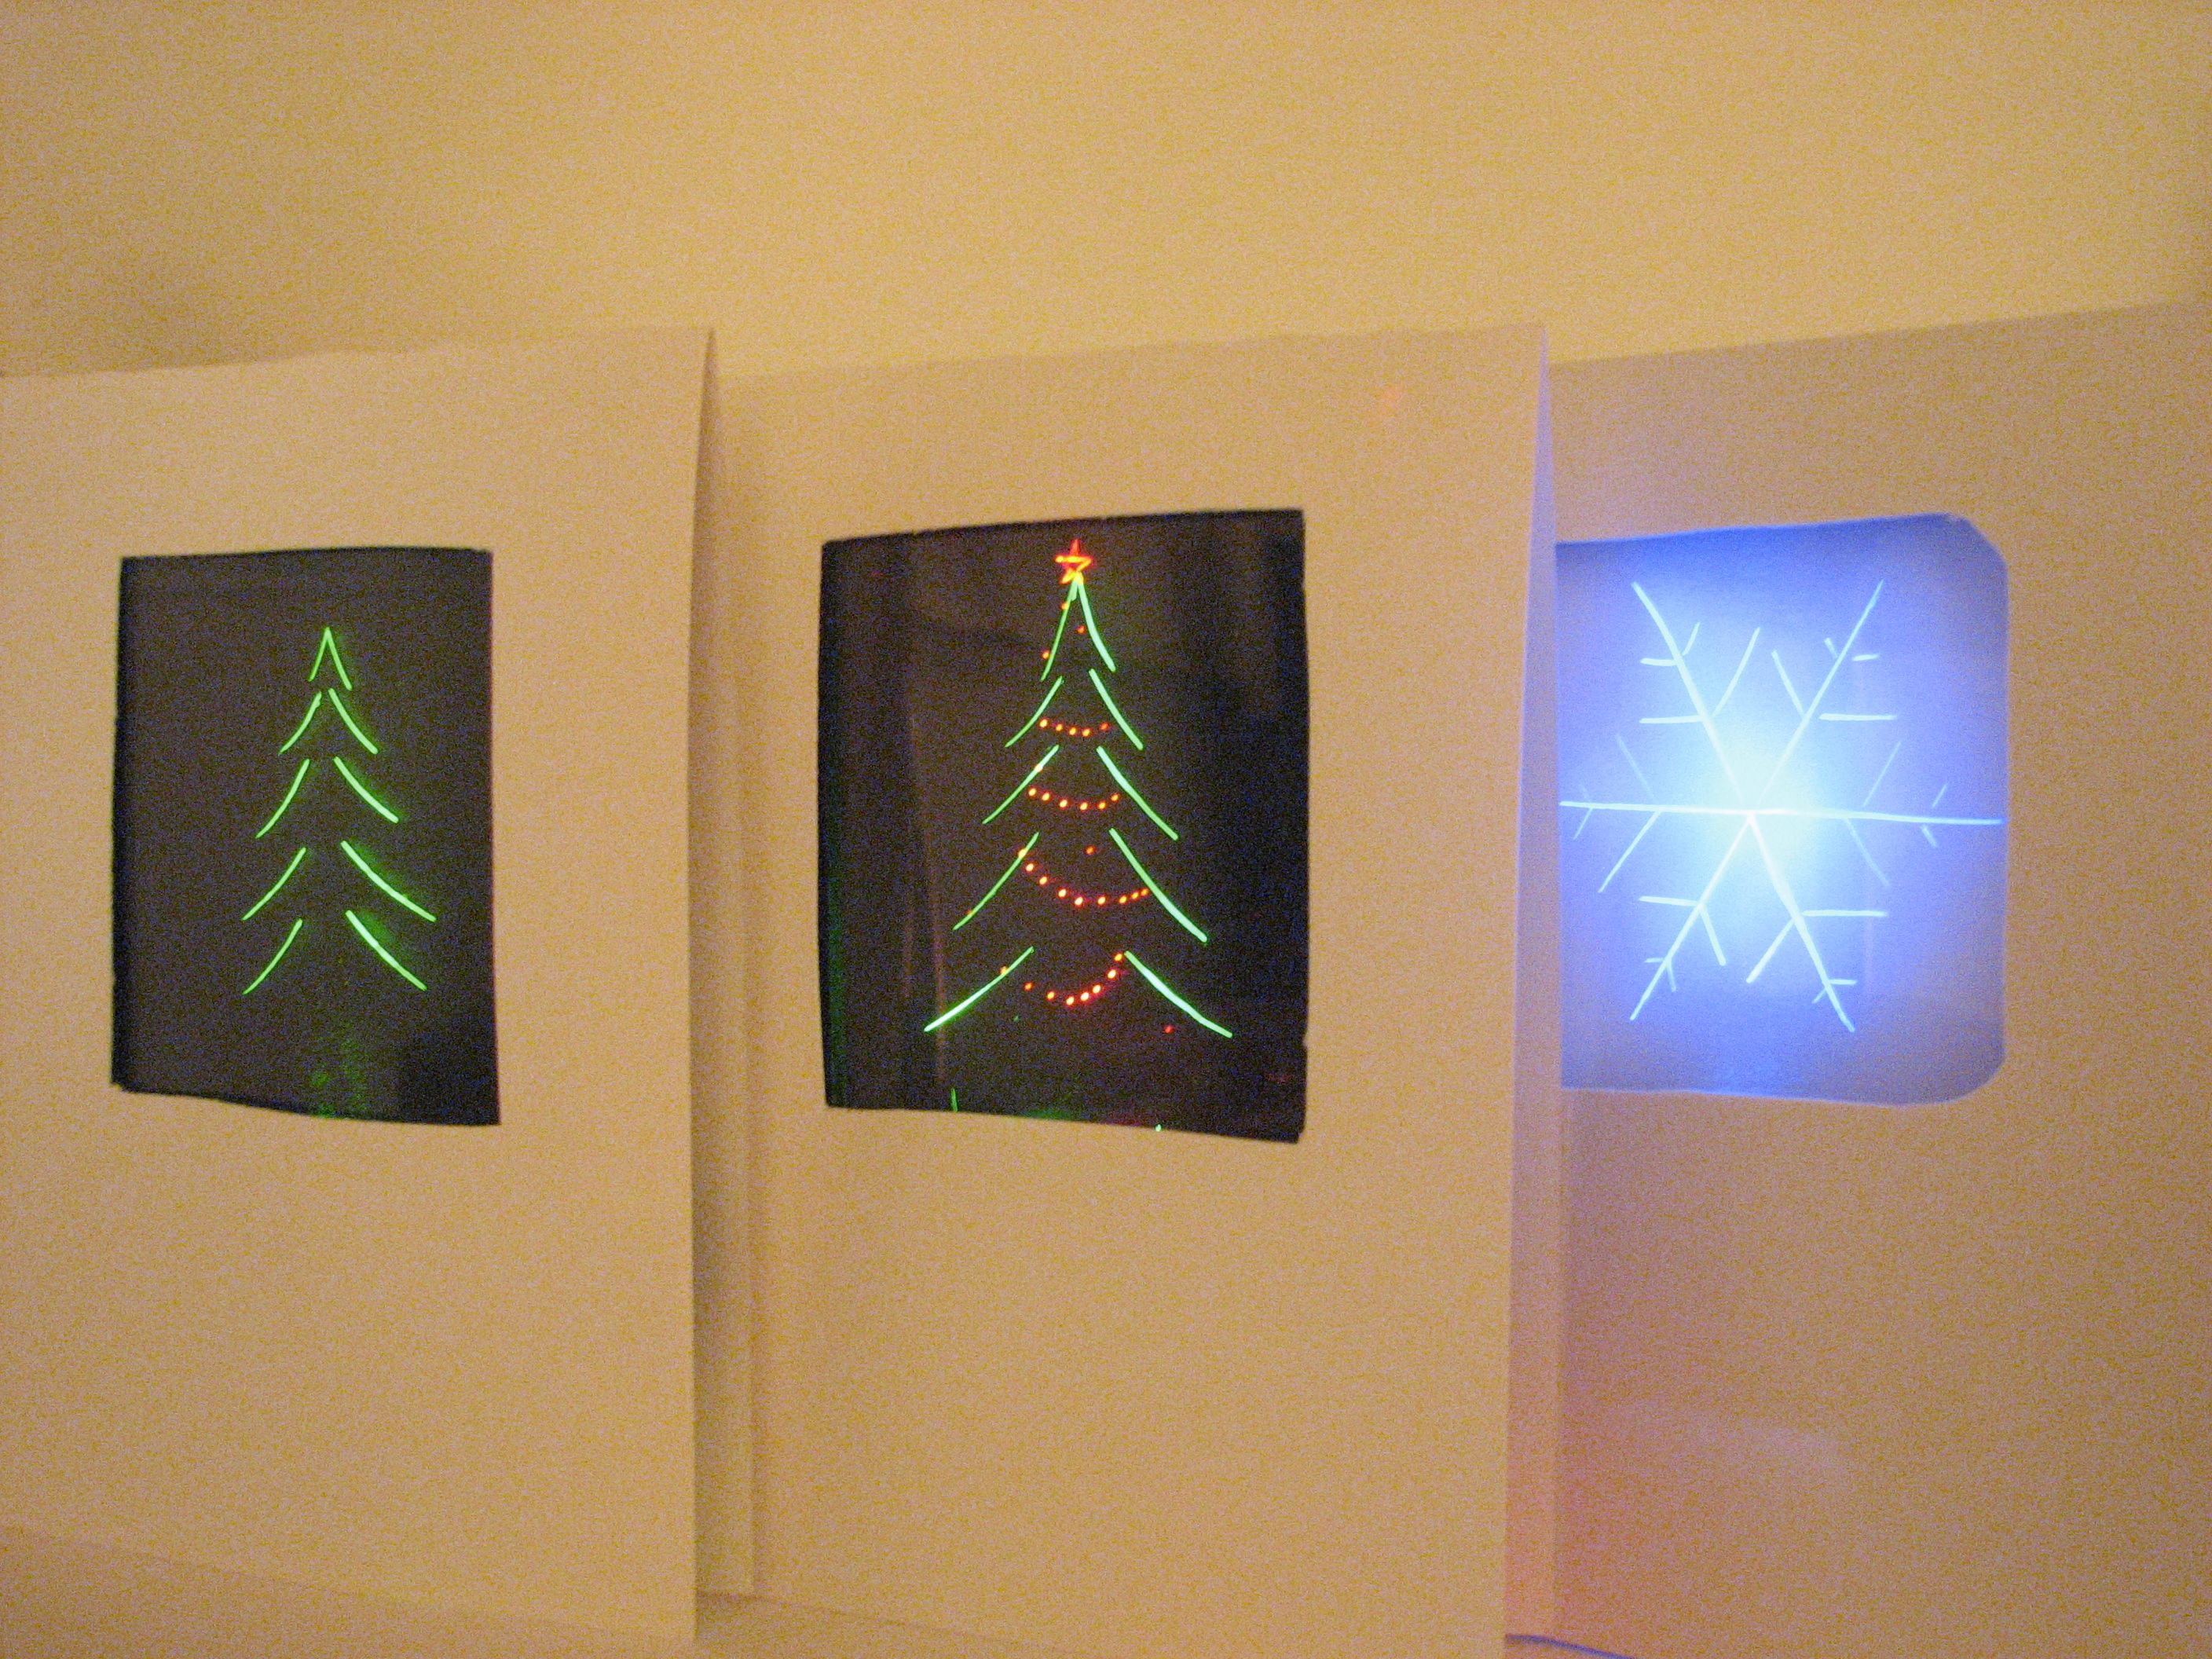
Obviously, how cool your shape looks will influence how cool the final product looks. This one is just a simple tree pattern– not too tricky. For the snowflake you can print out and trace some real snowflake patterns.
(For these and all other images here, click the pictures if you want to take a closer look.)
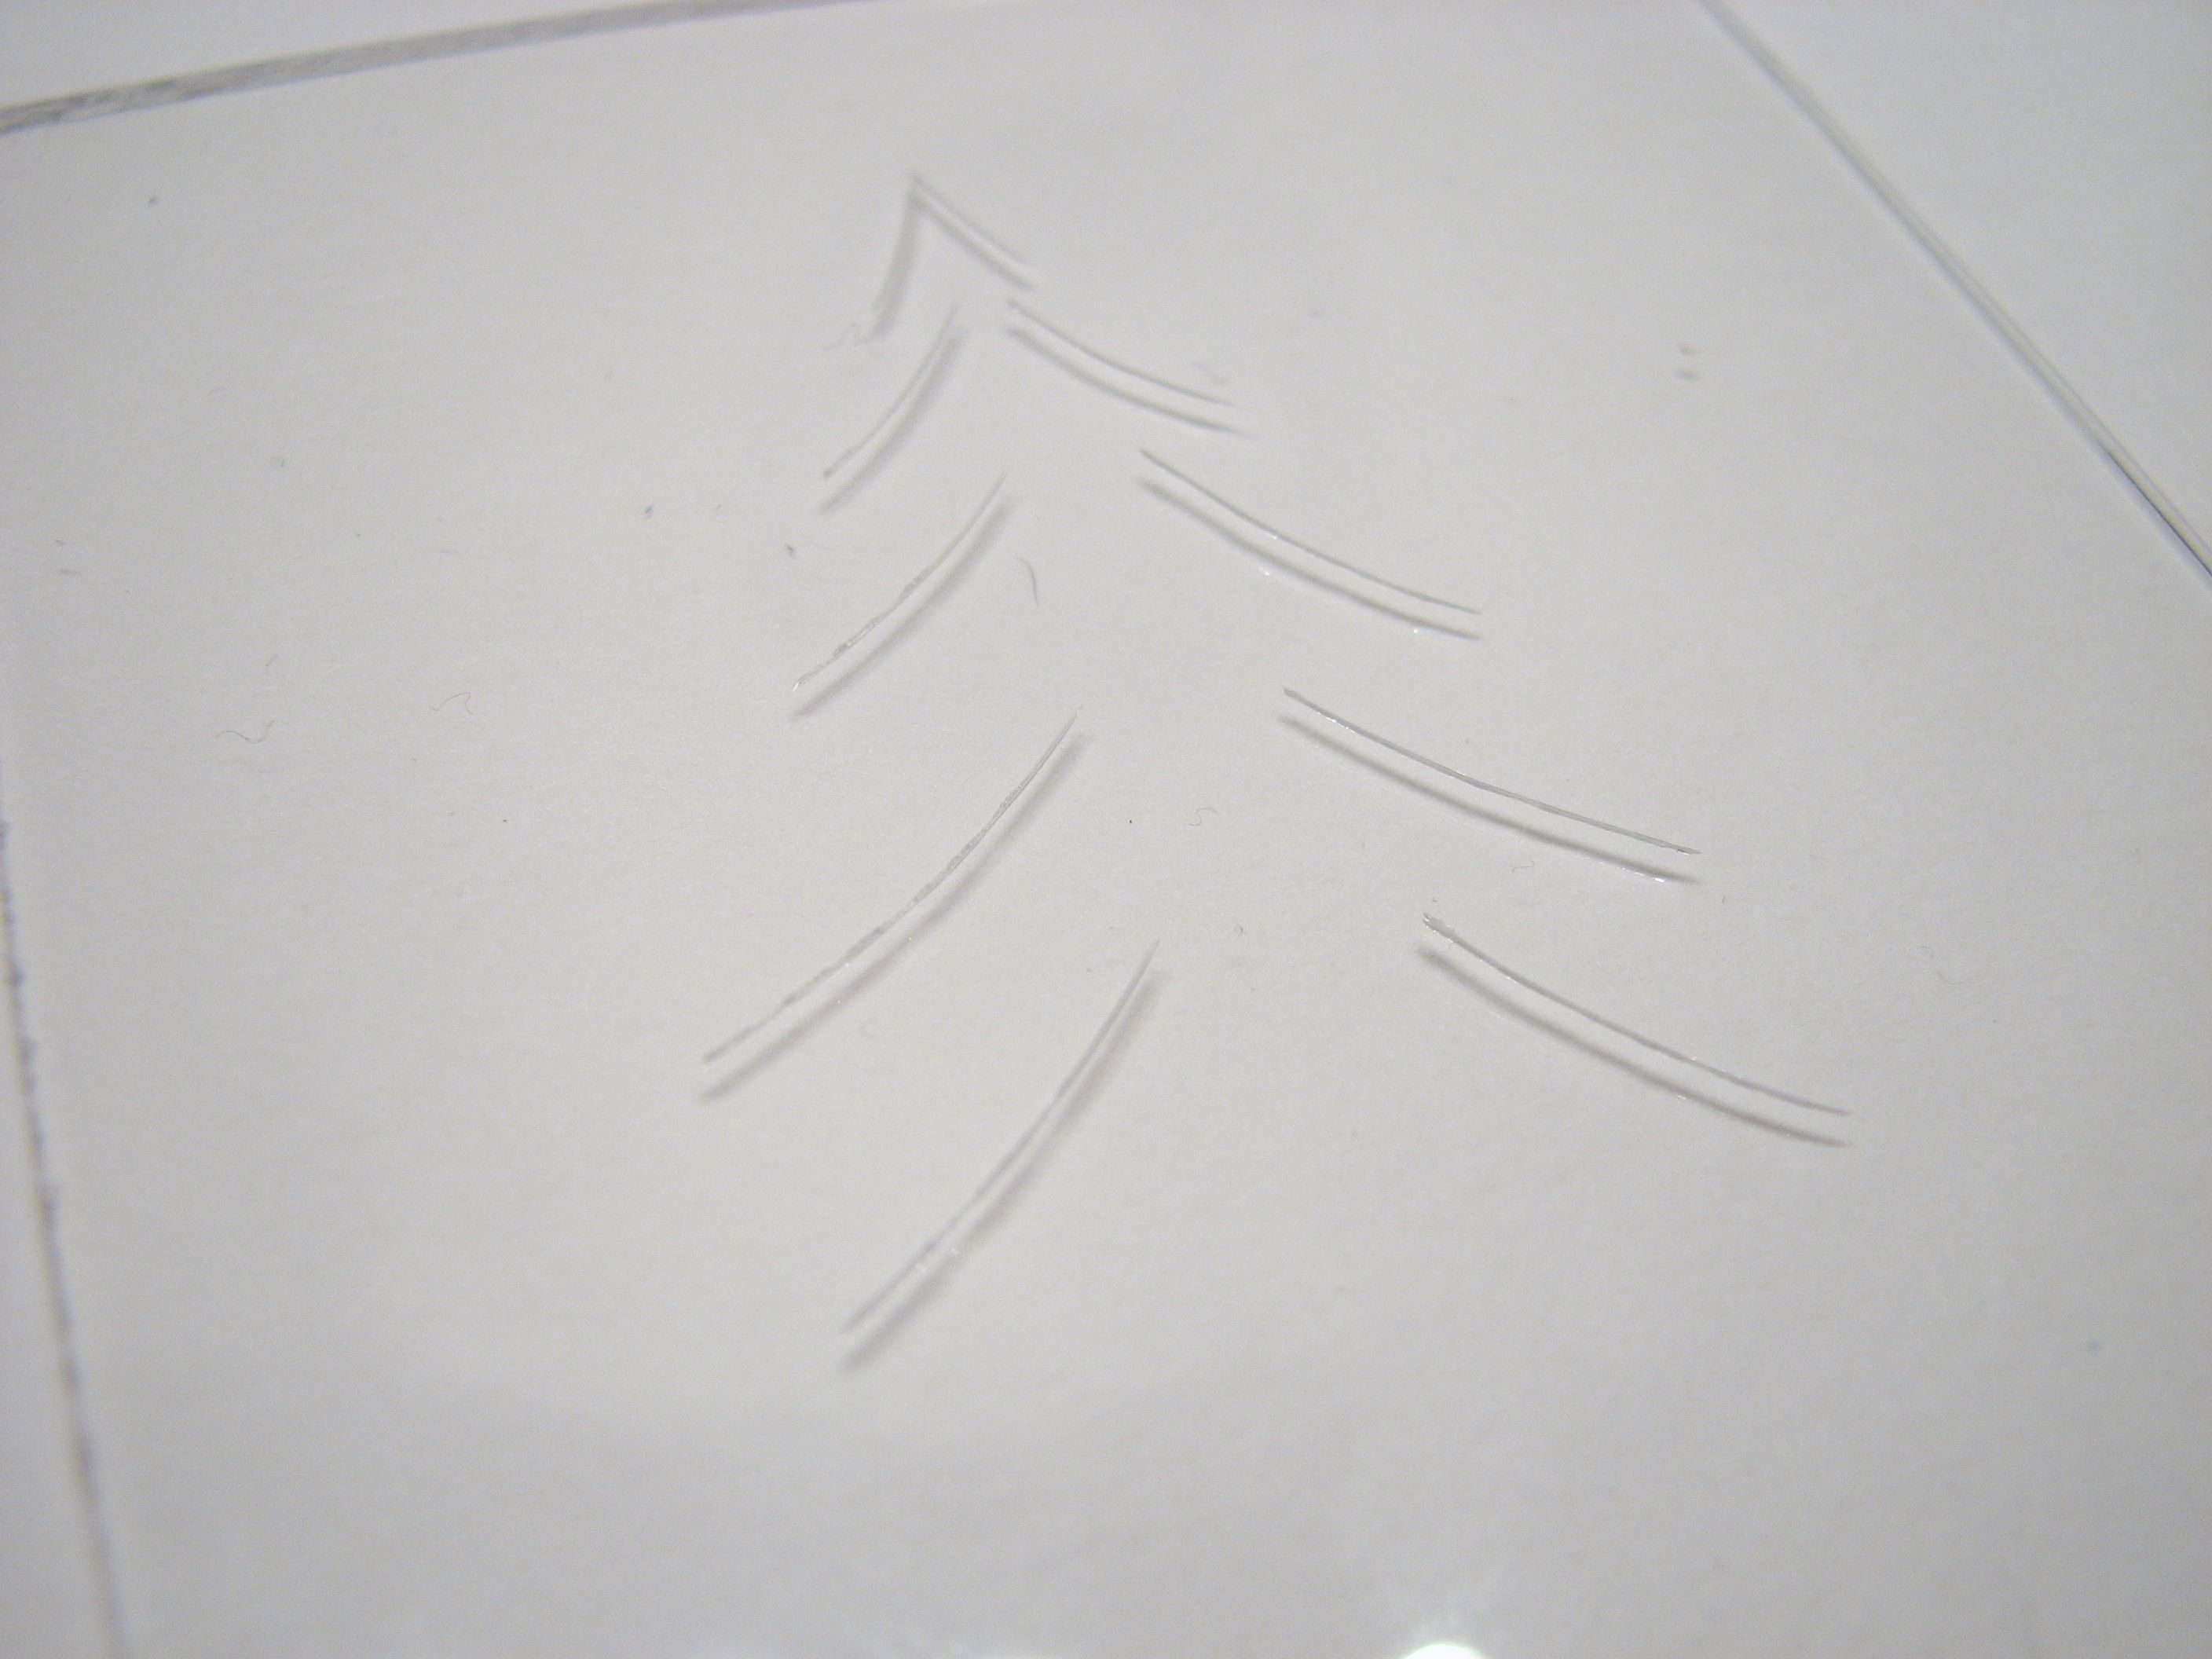
And here is the design scratched into the plastic.
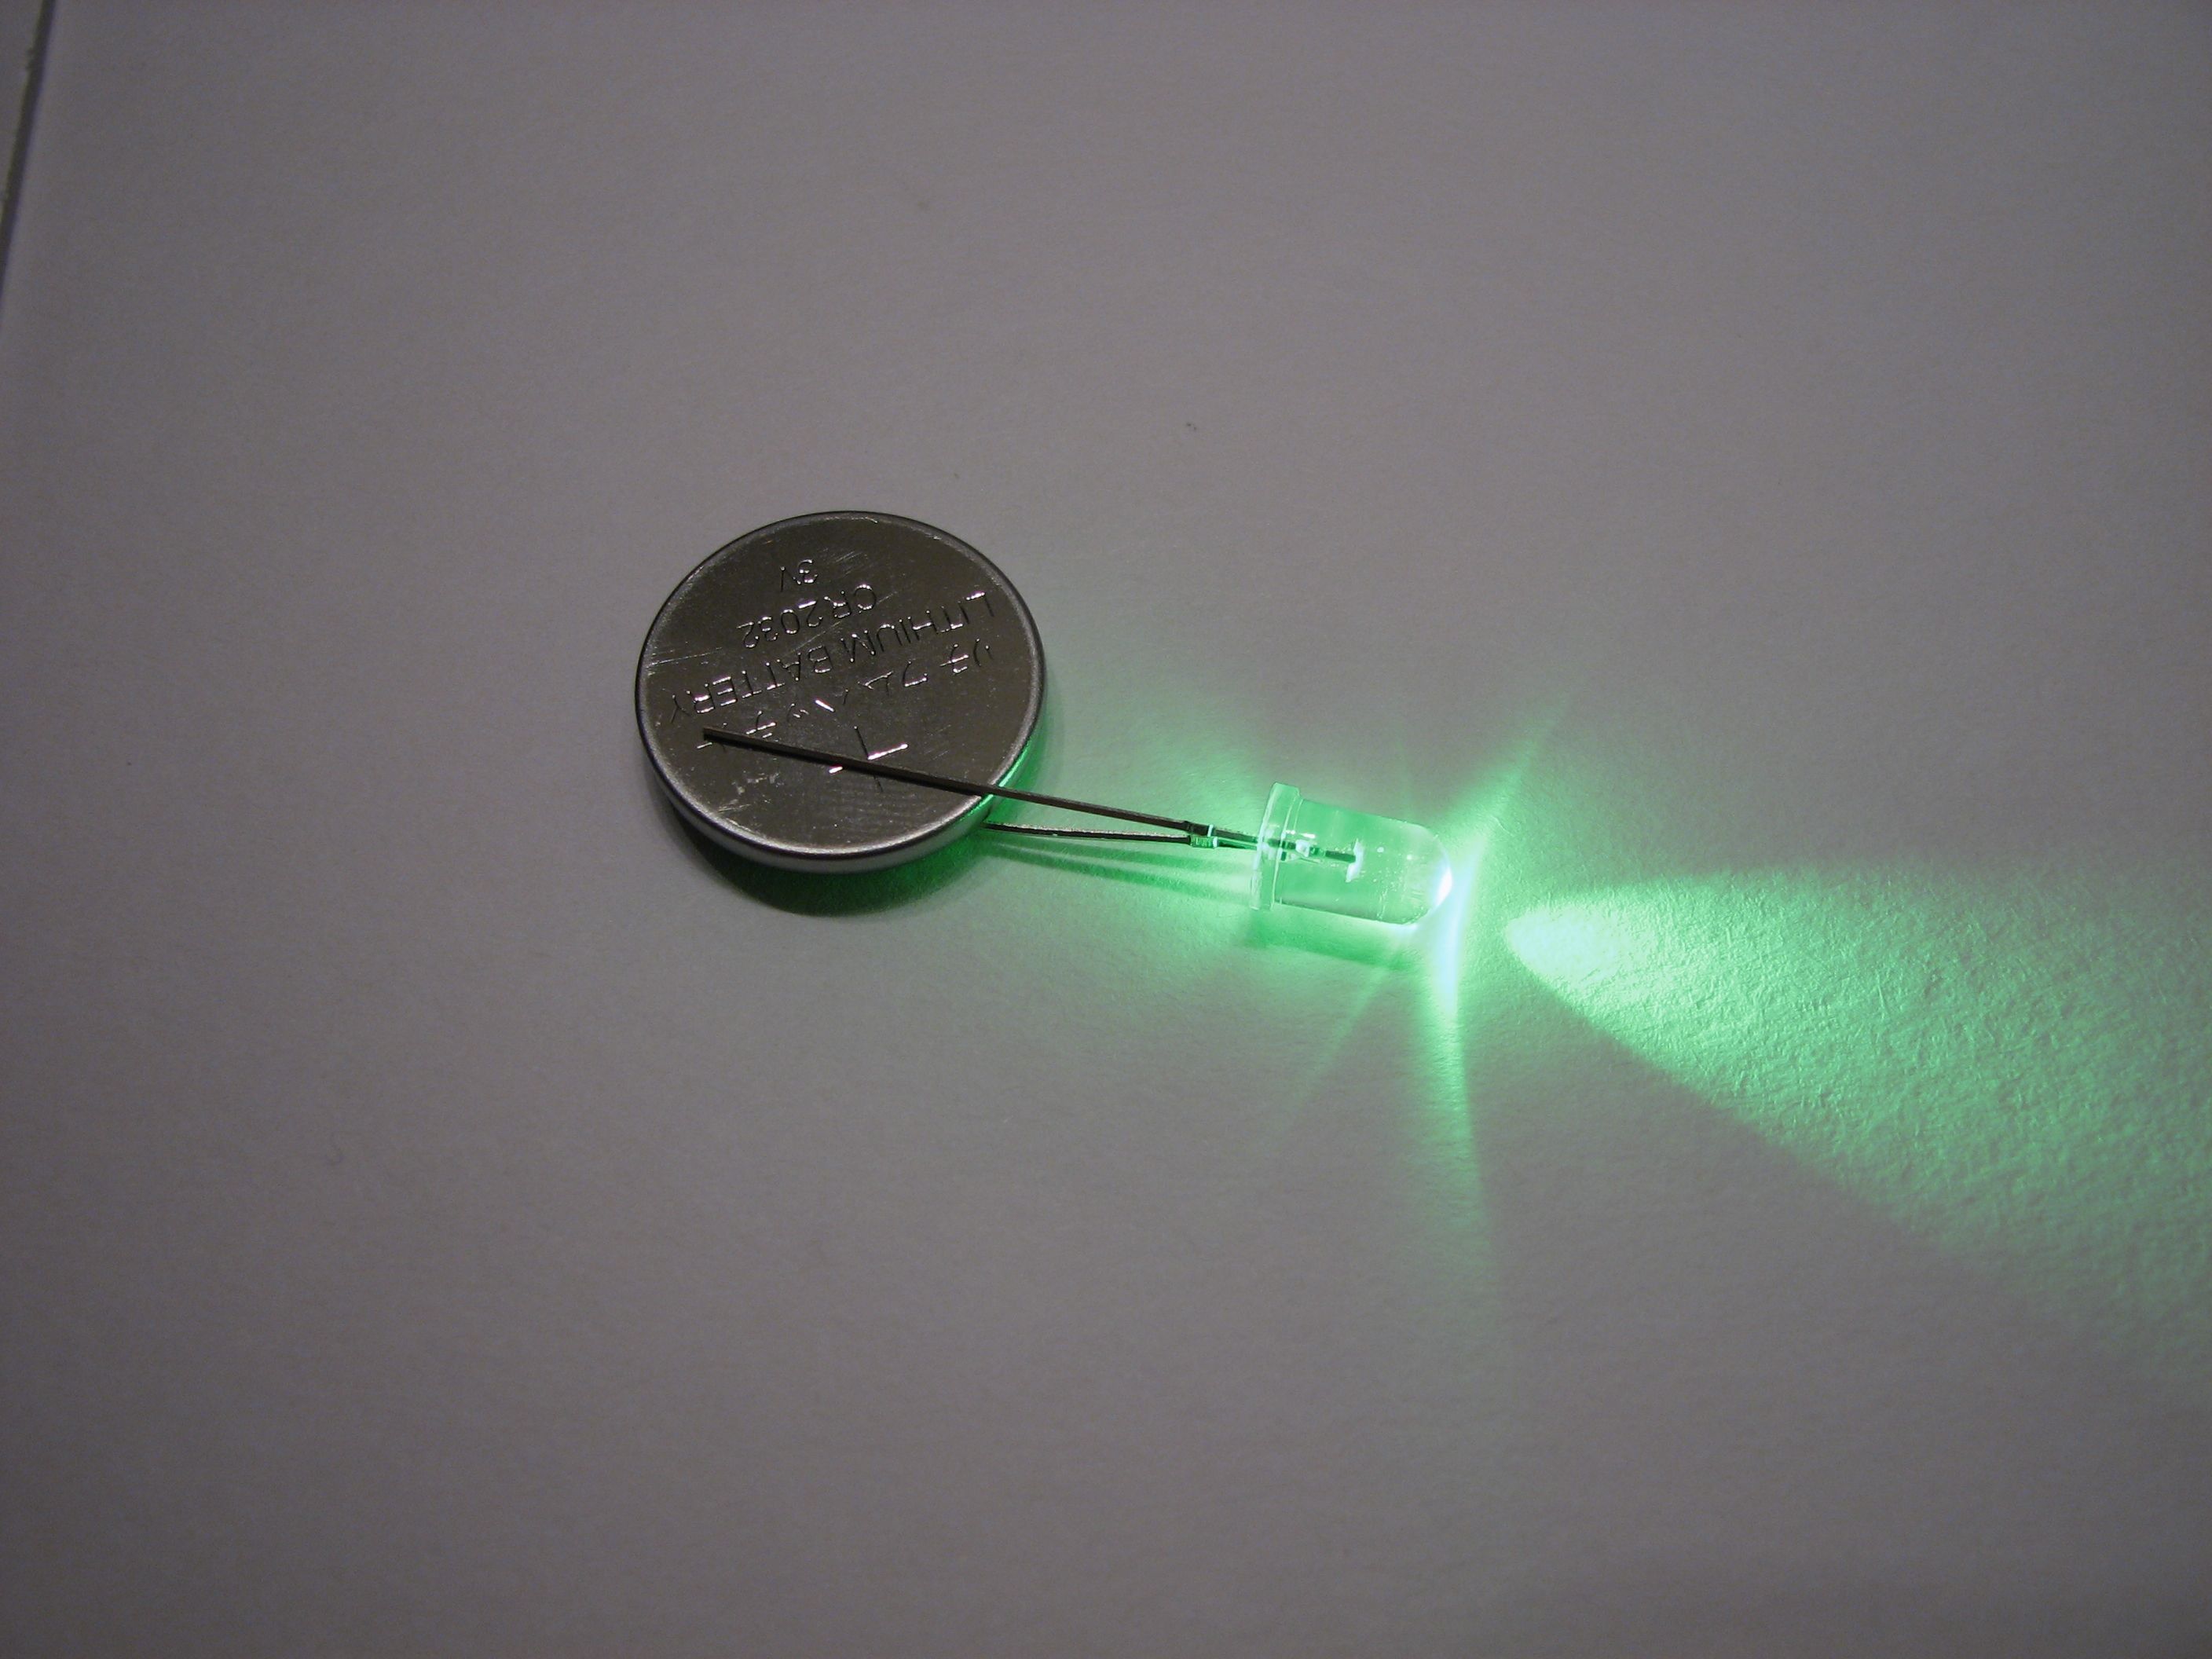
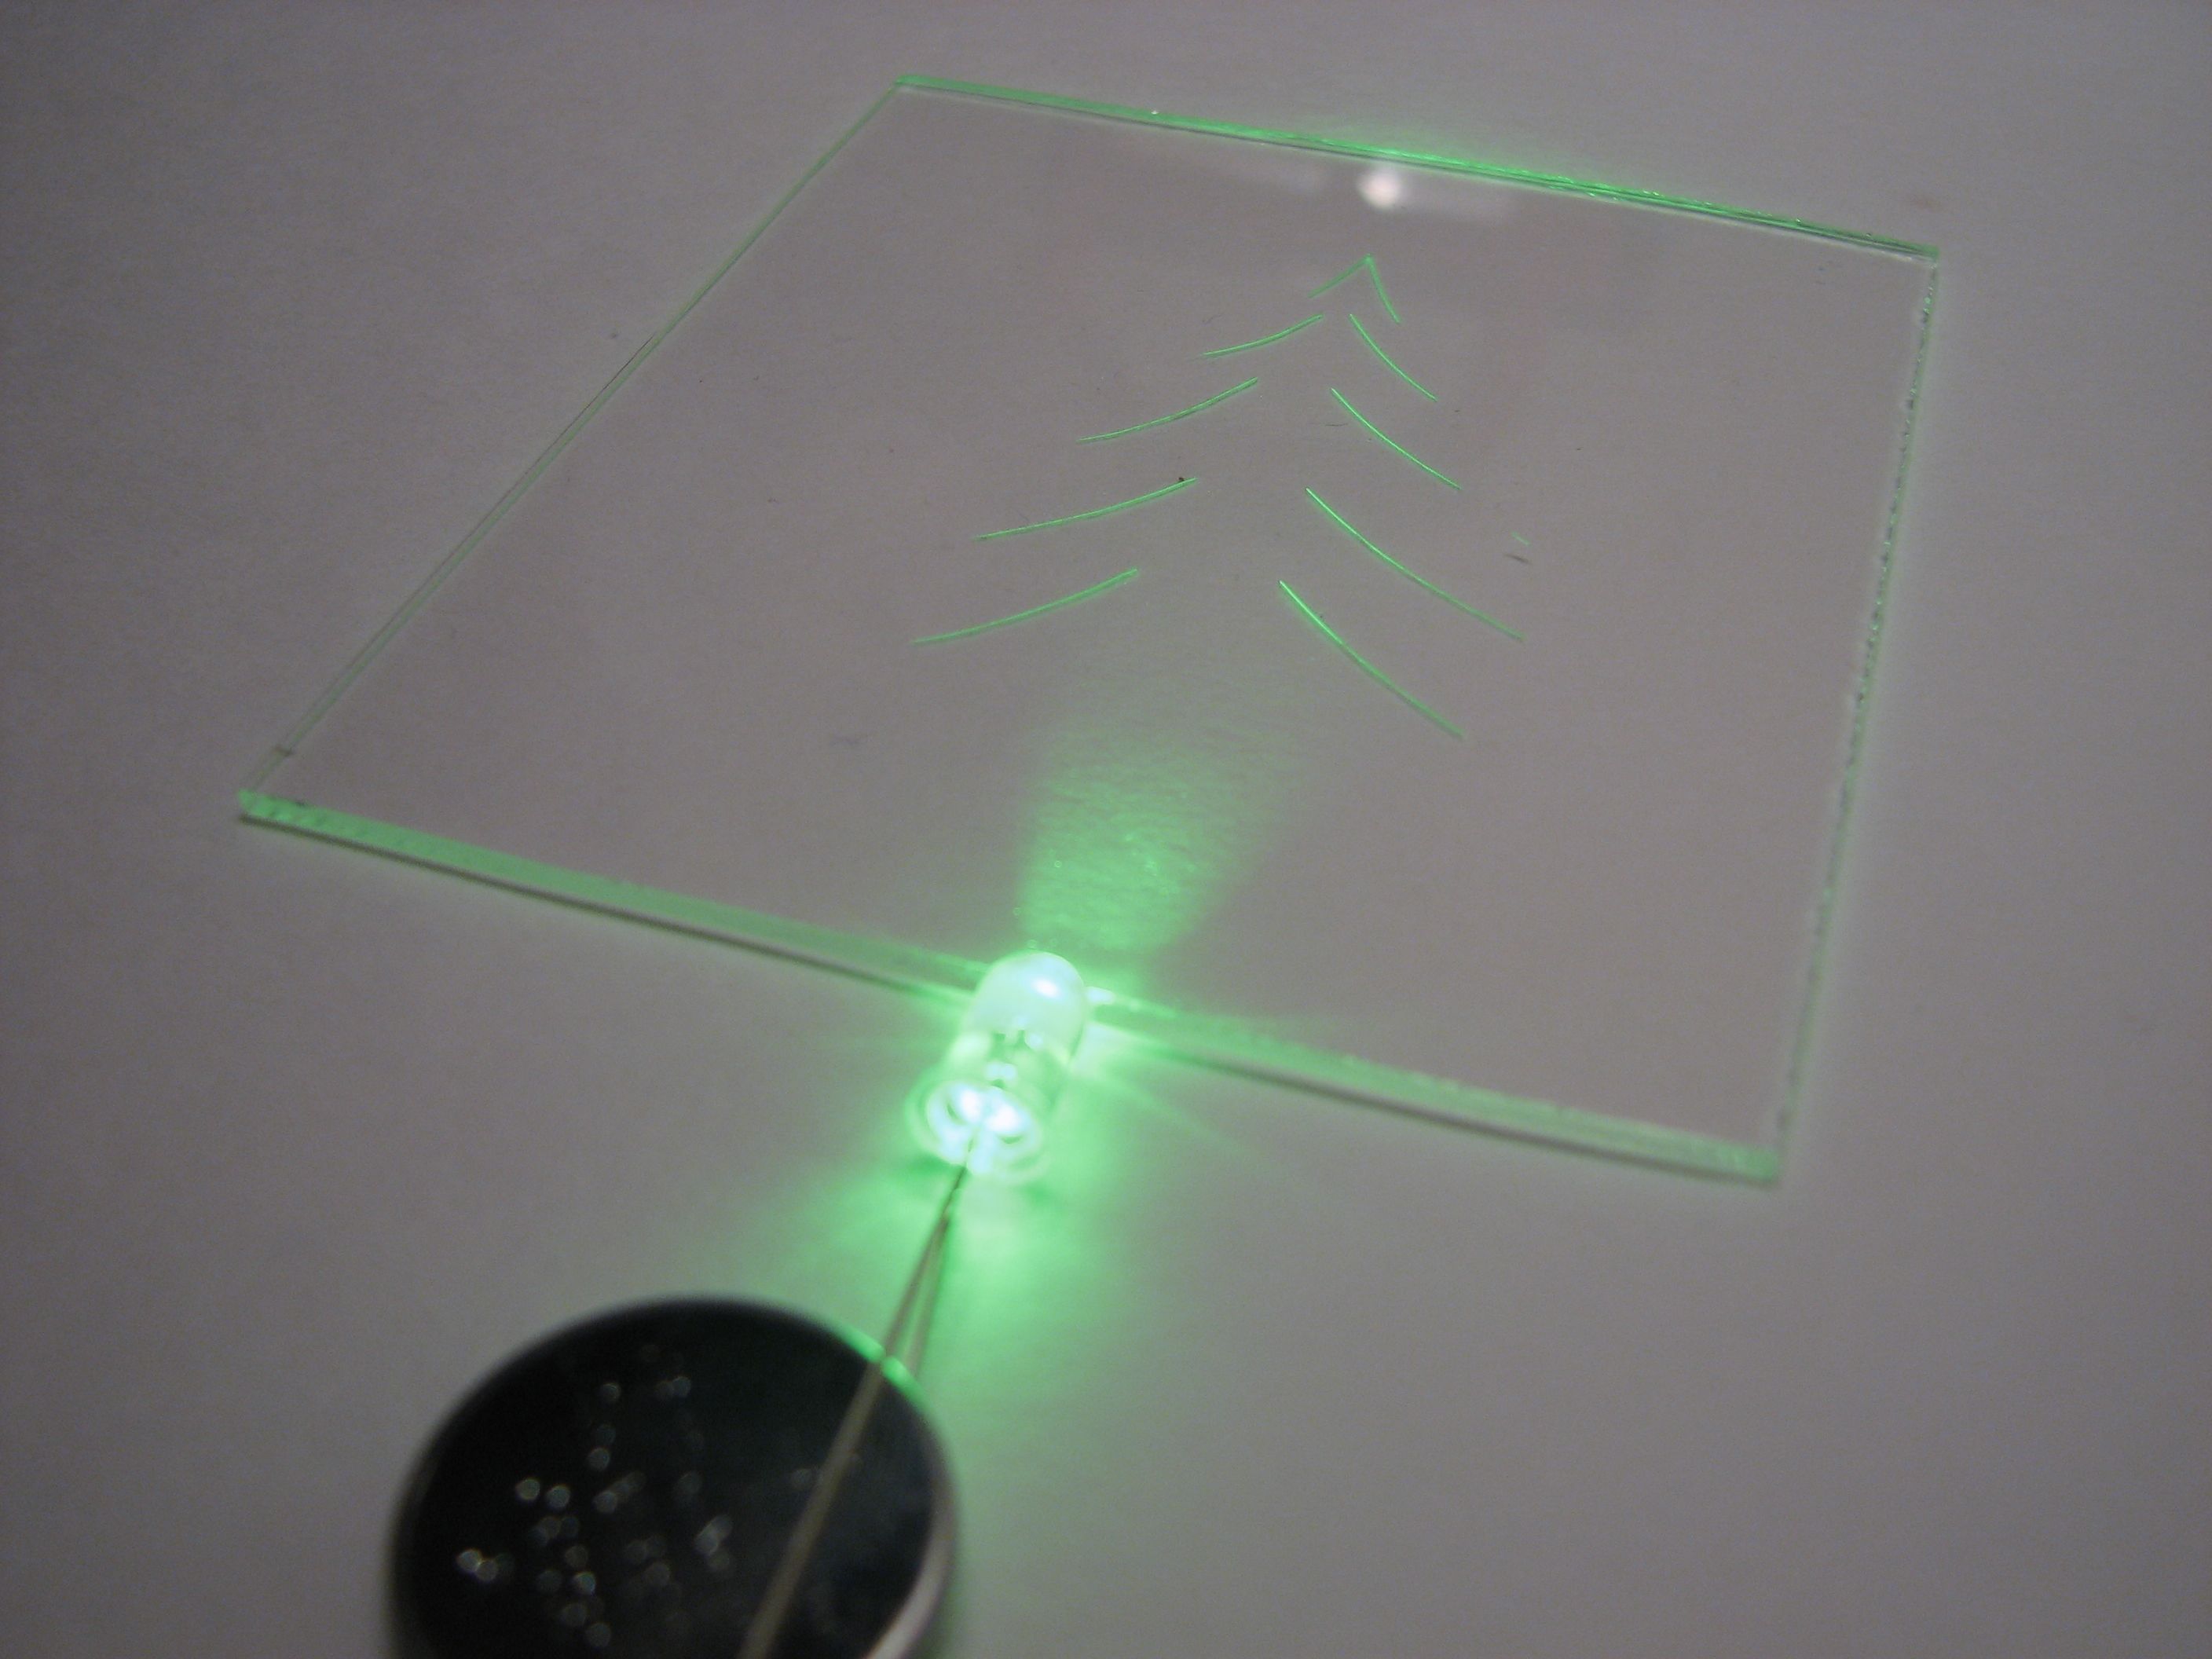
For our LED setup, we’re using a classic “LED Throwie” arrangement– an ultrabright LED is attached directly to the leads of a CR2032 lithium coin cell.
When the bright LED is pointed at the edge of the plastic, it travels through cleanly but lights up the areas that we’ve scratched.
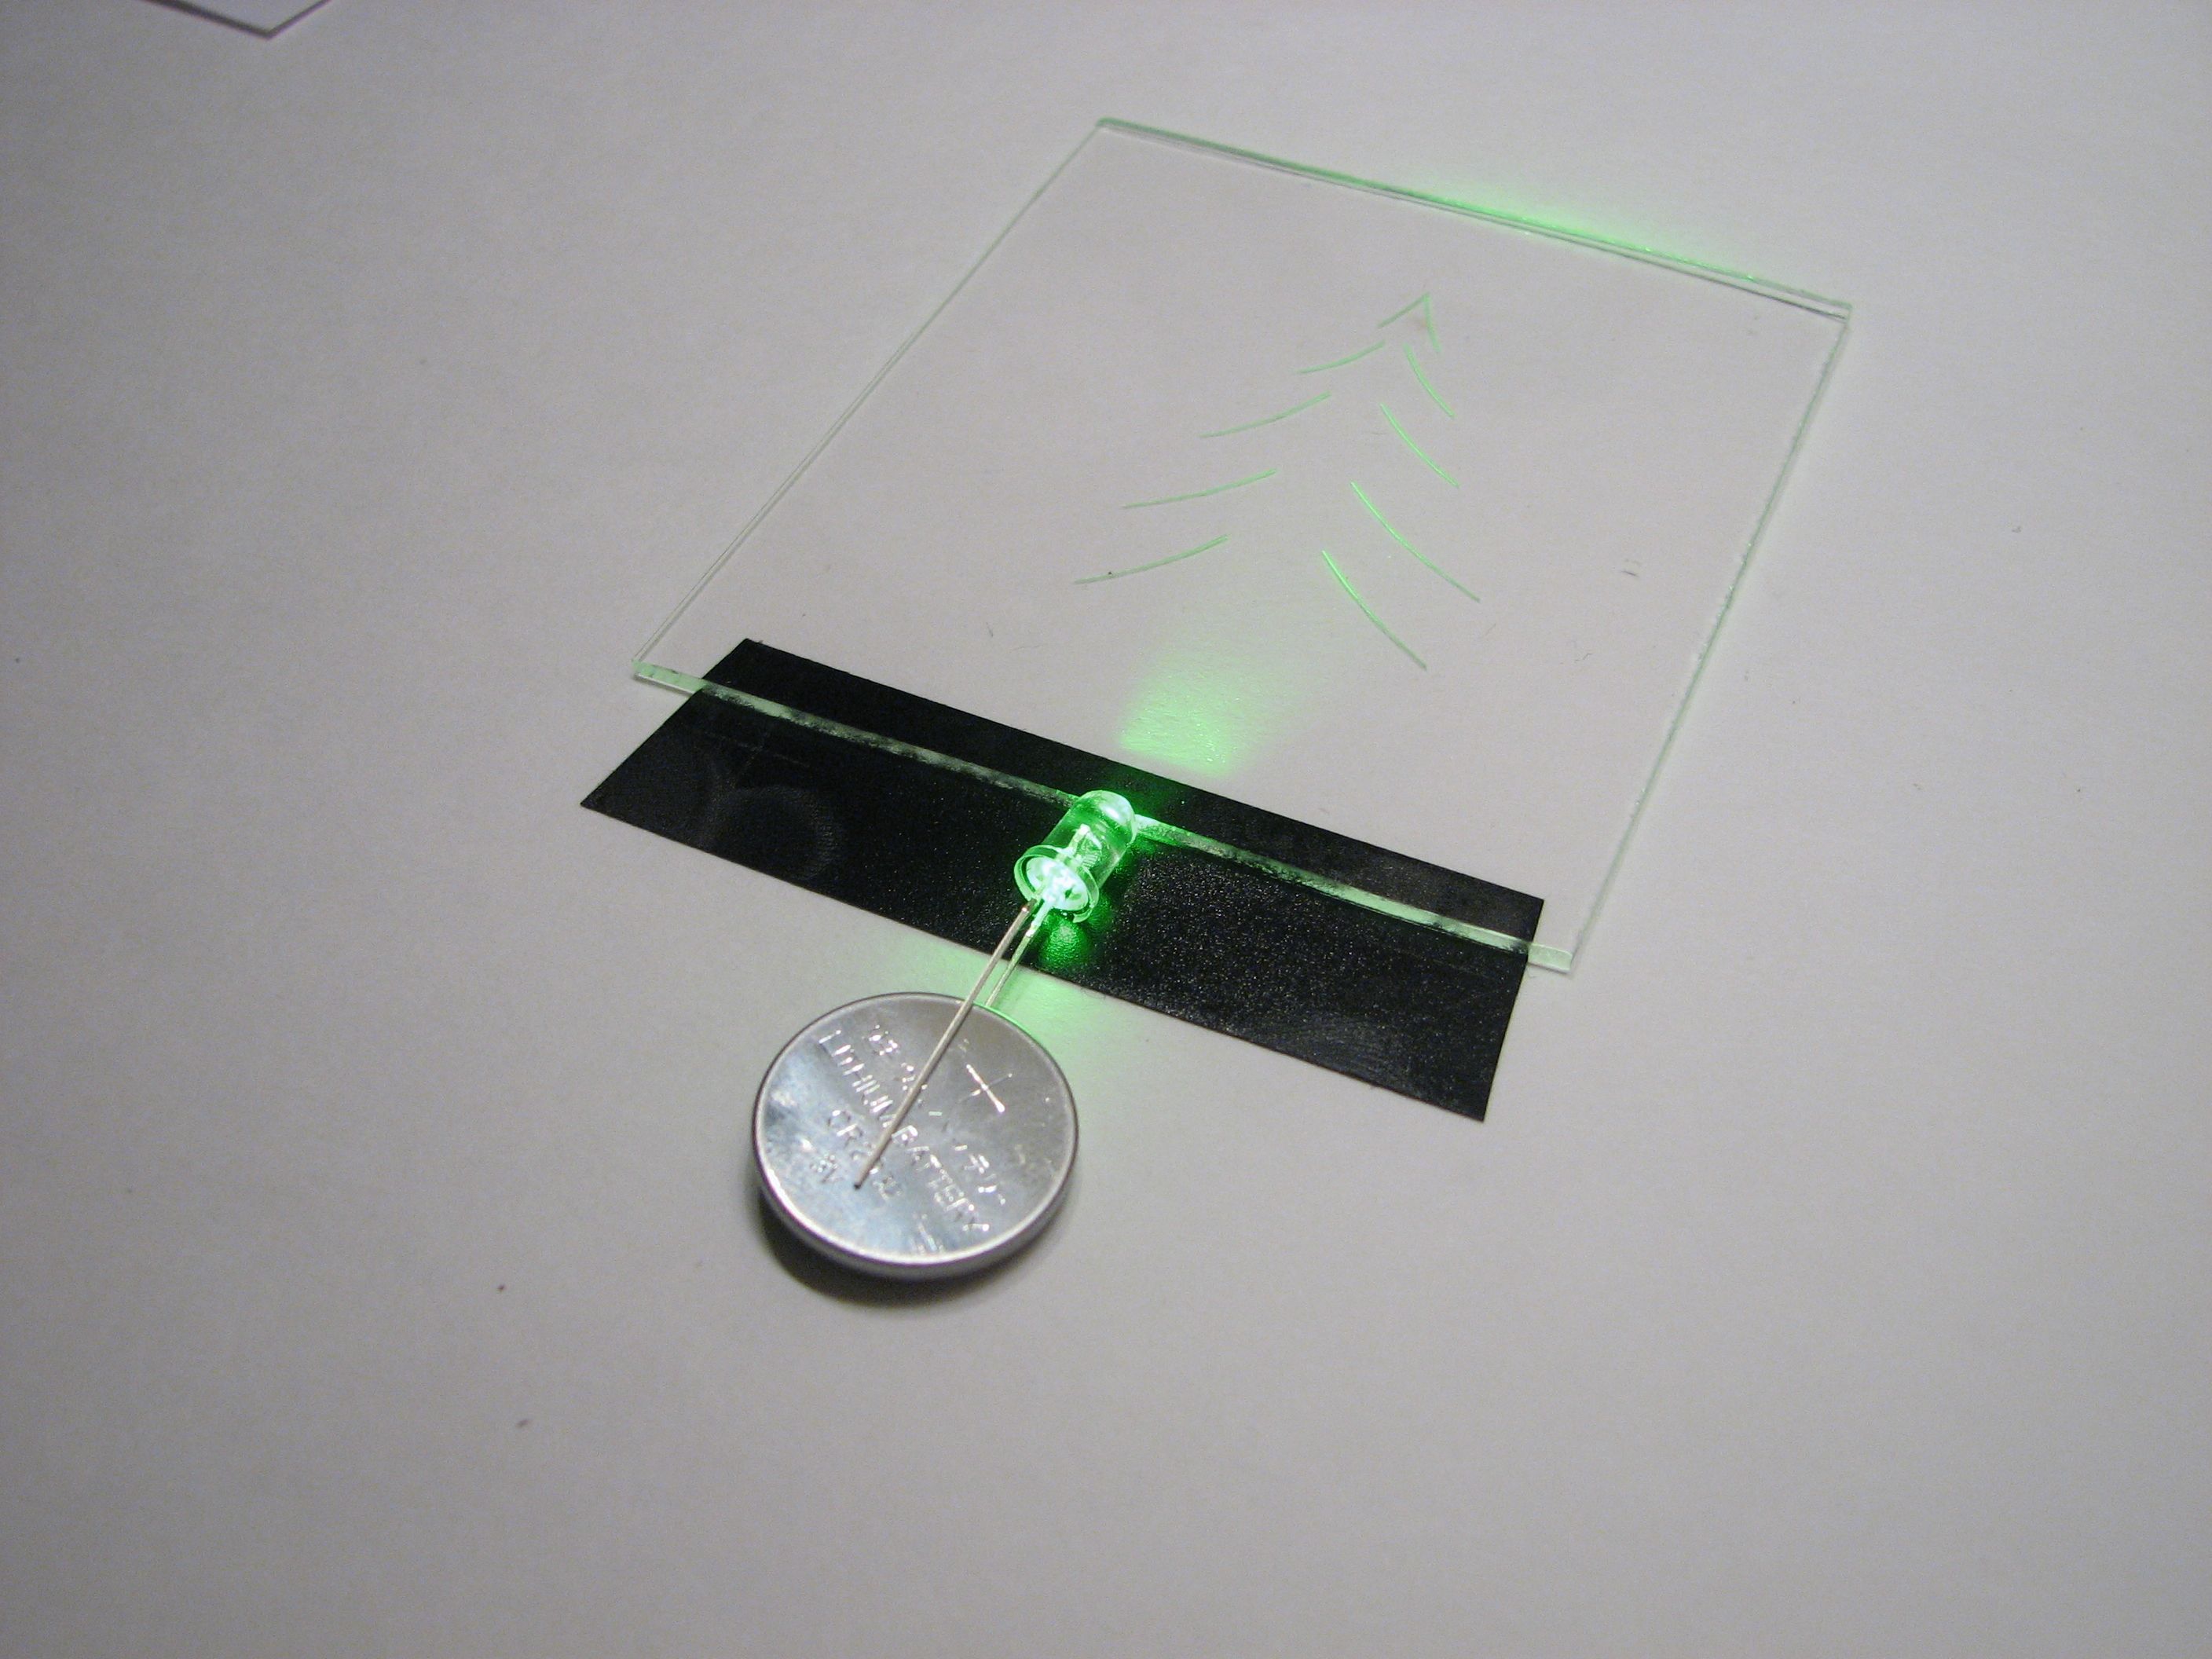
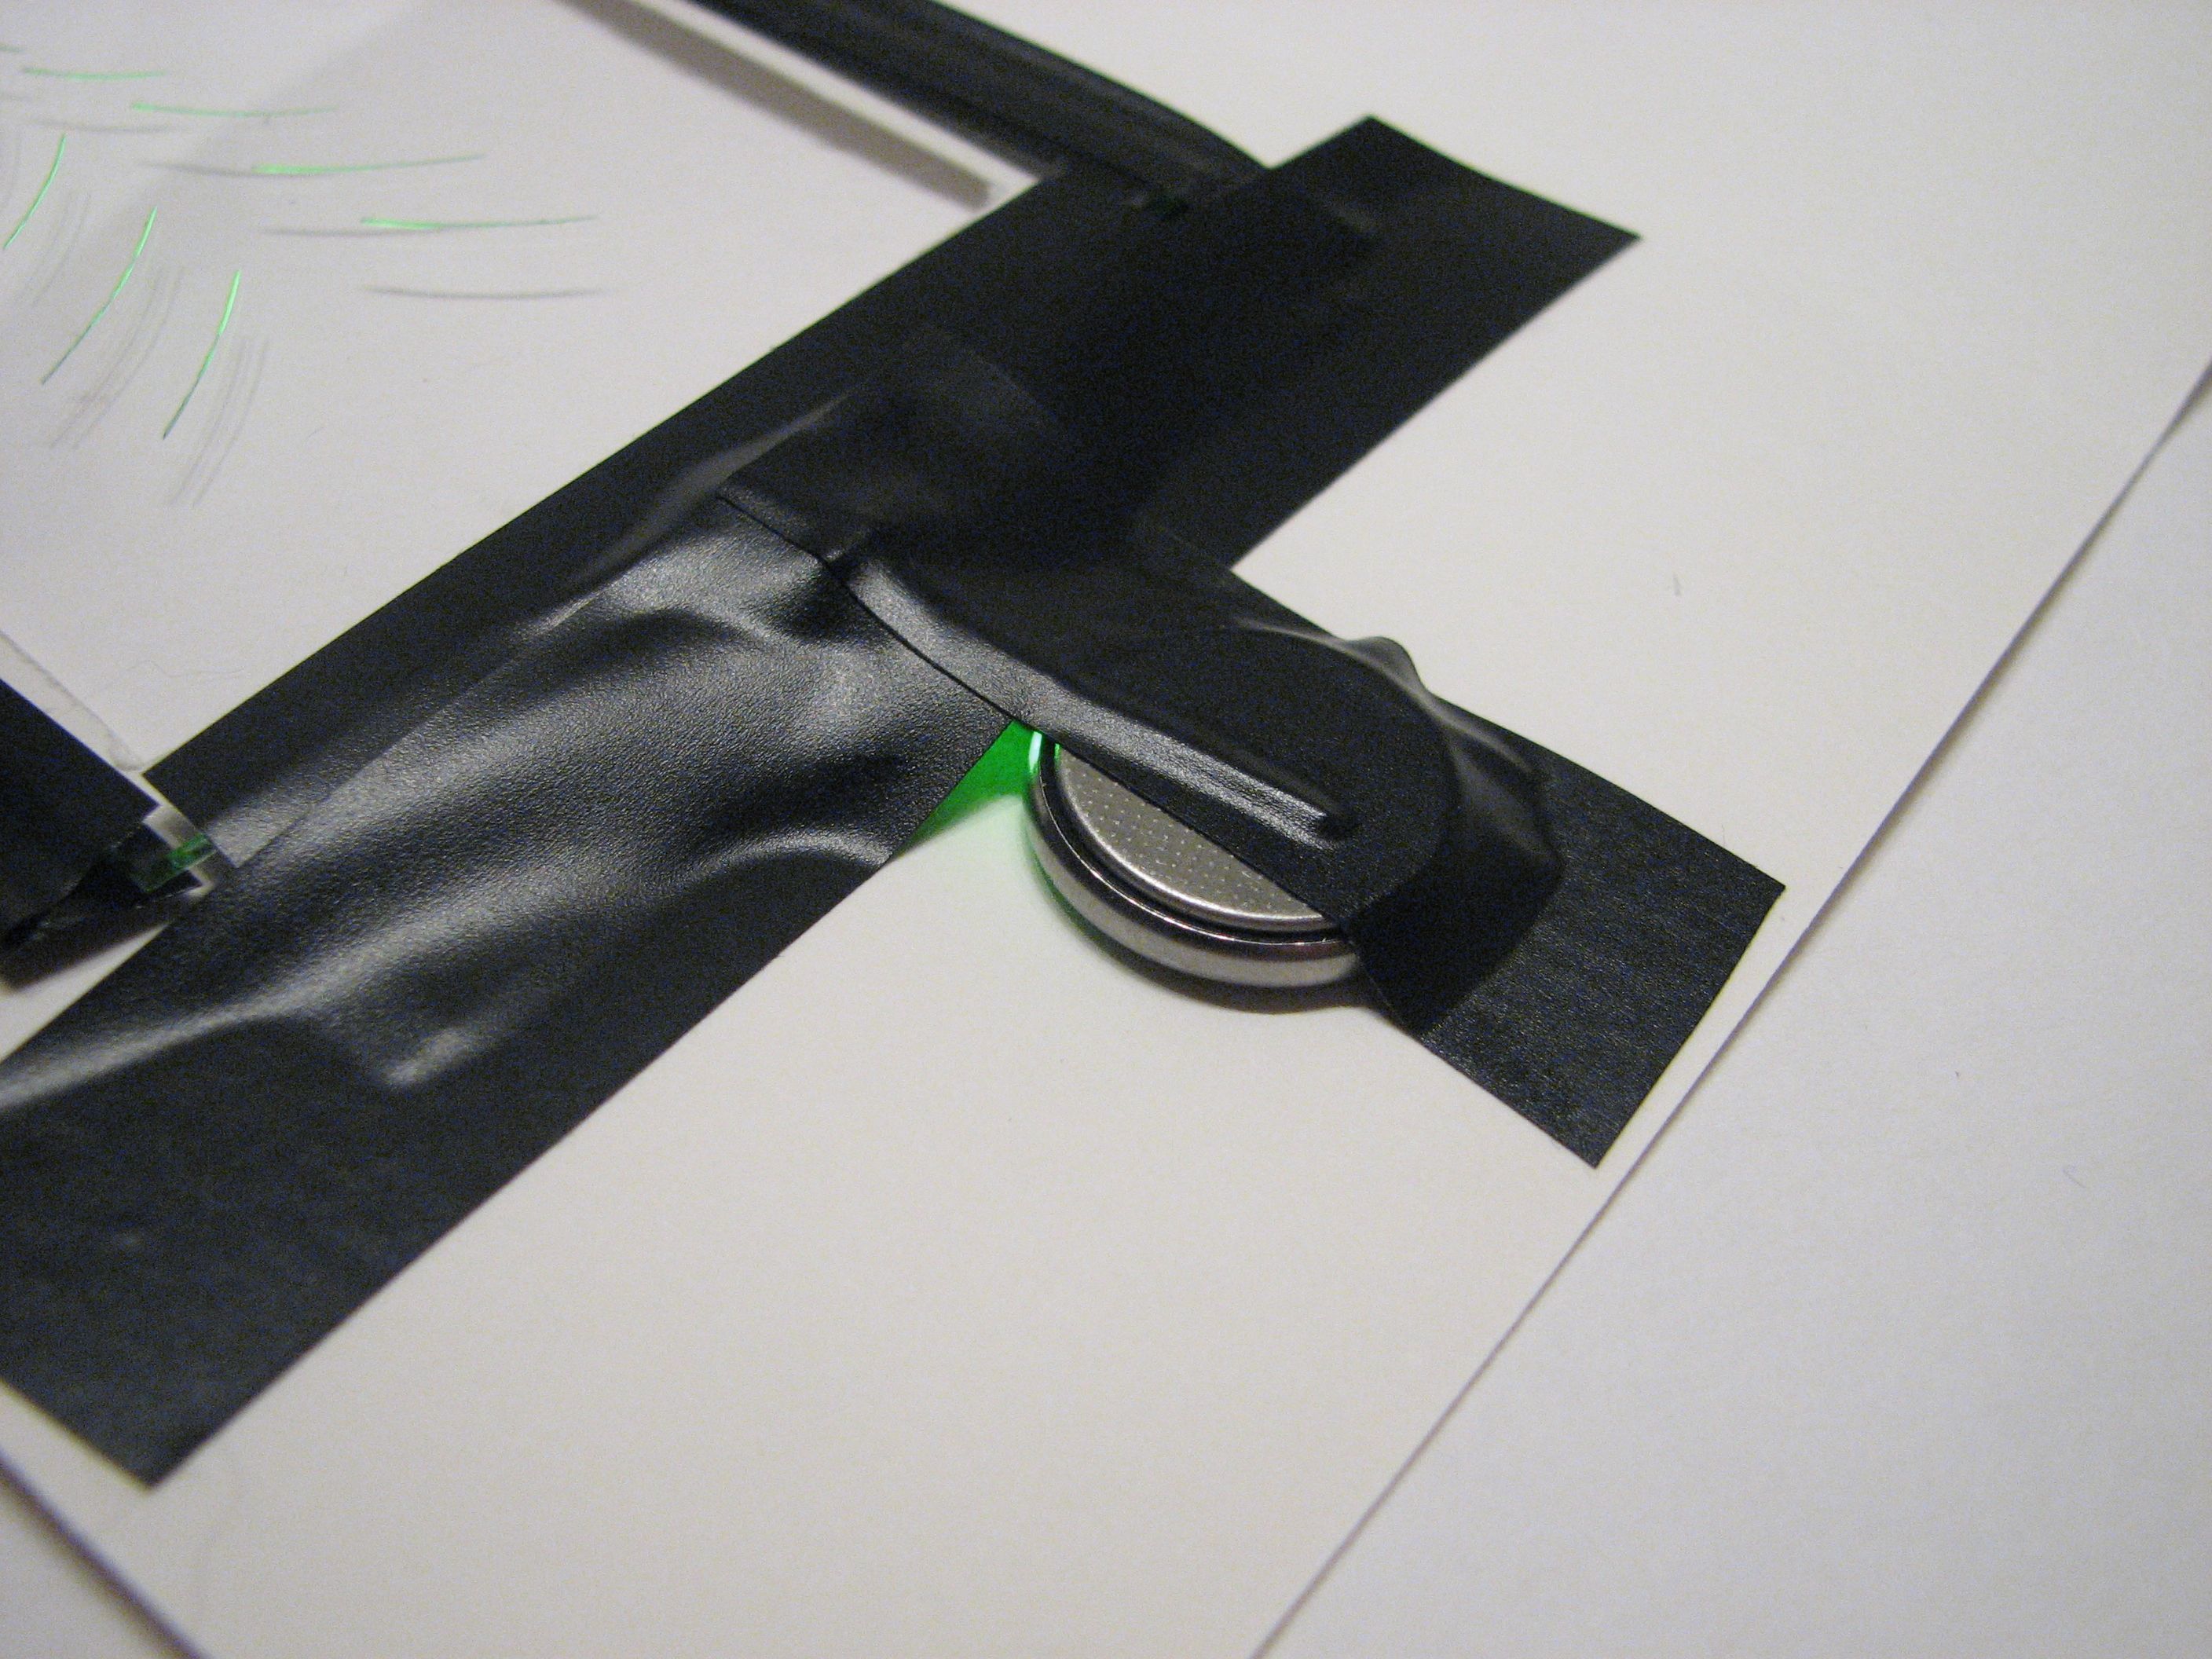
So we have the light going into the edge of the plastic. Next we need to (1) hold the LED there and (2) restrict light from going in directions that we don’t want. We can accomplish both of these goals by using black electrical tape to hold the LED in place. We start by putting down a piece of tape, sticky side up, and sticking the plastic plate and the LED to it. Next we add a matching piece of tape on top, forming a tight seal around the LED but keeping it pointing into the plastic.
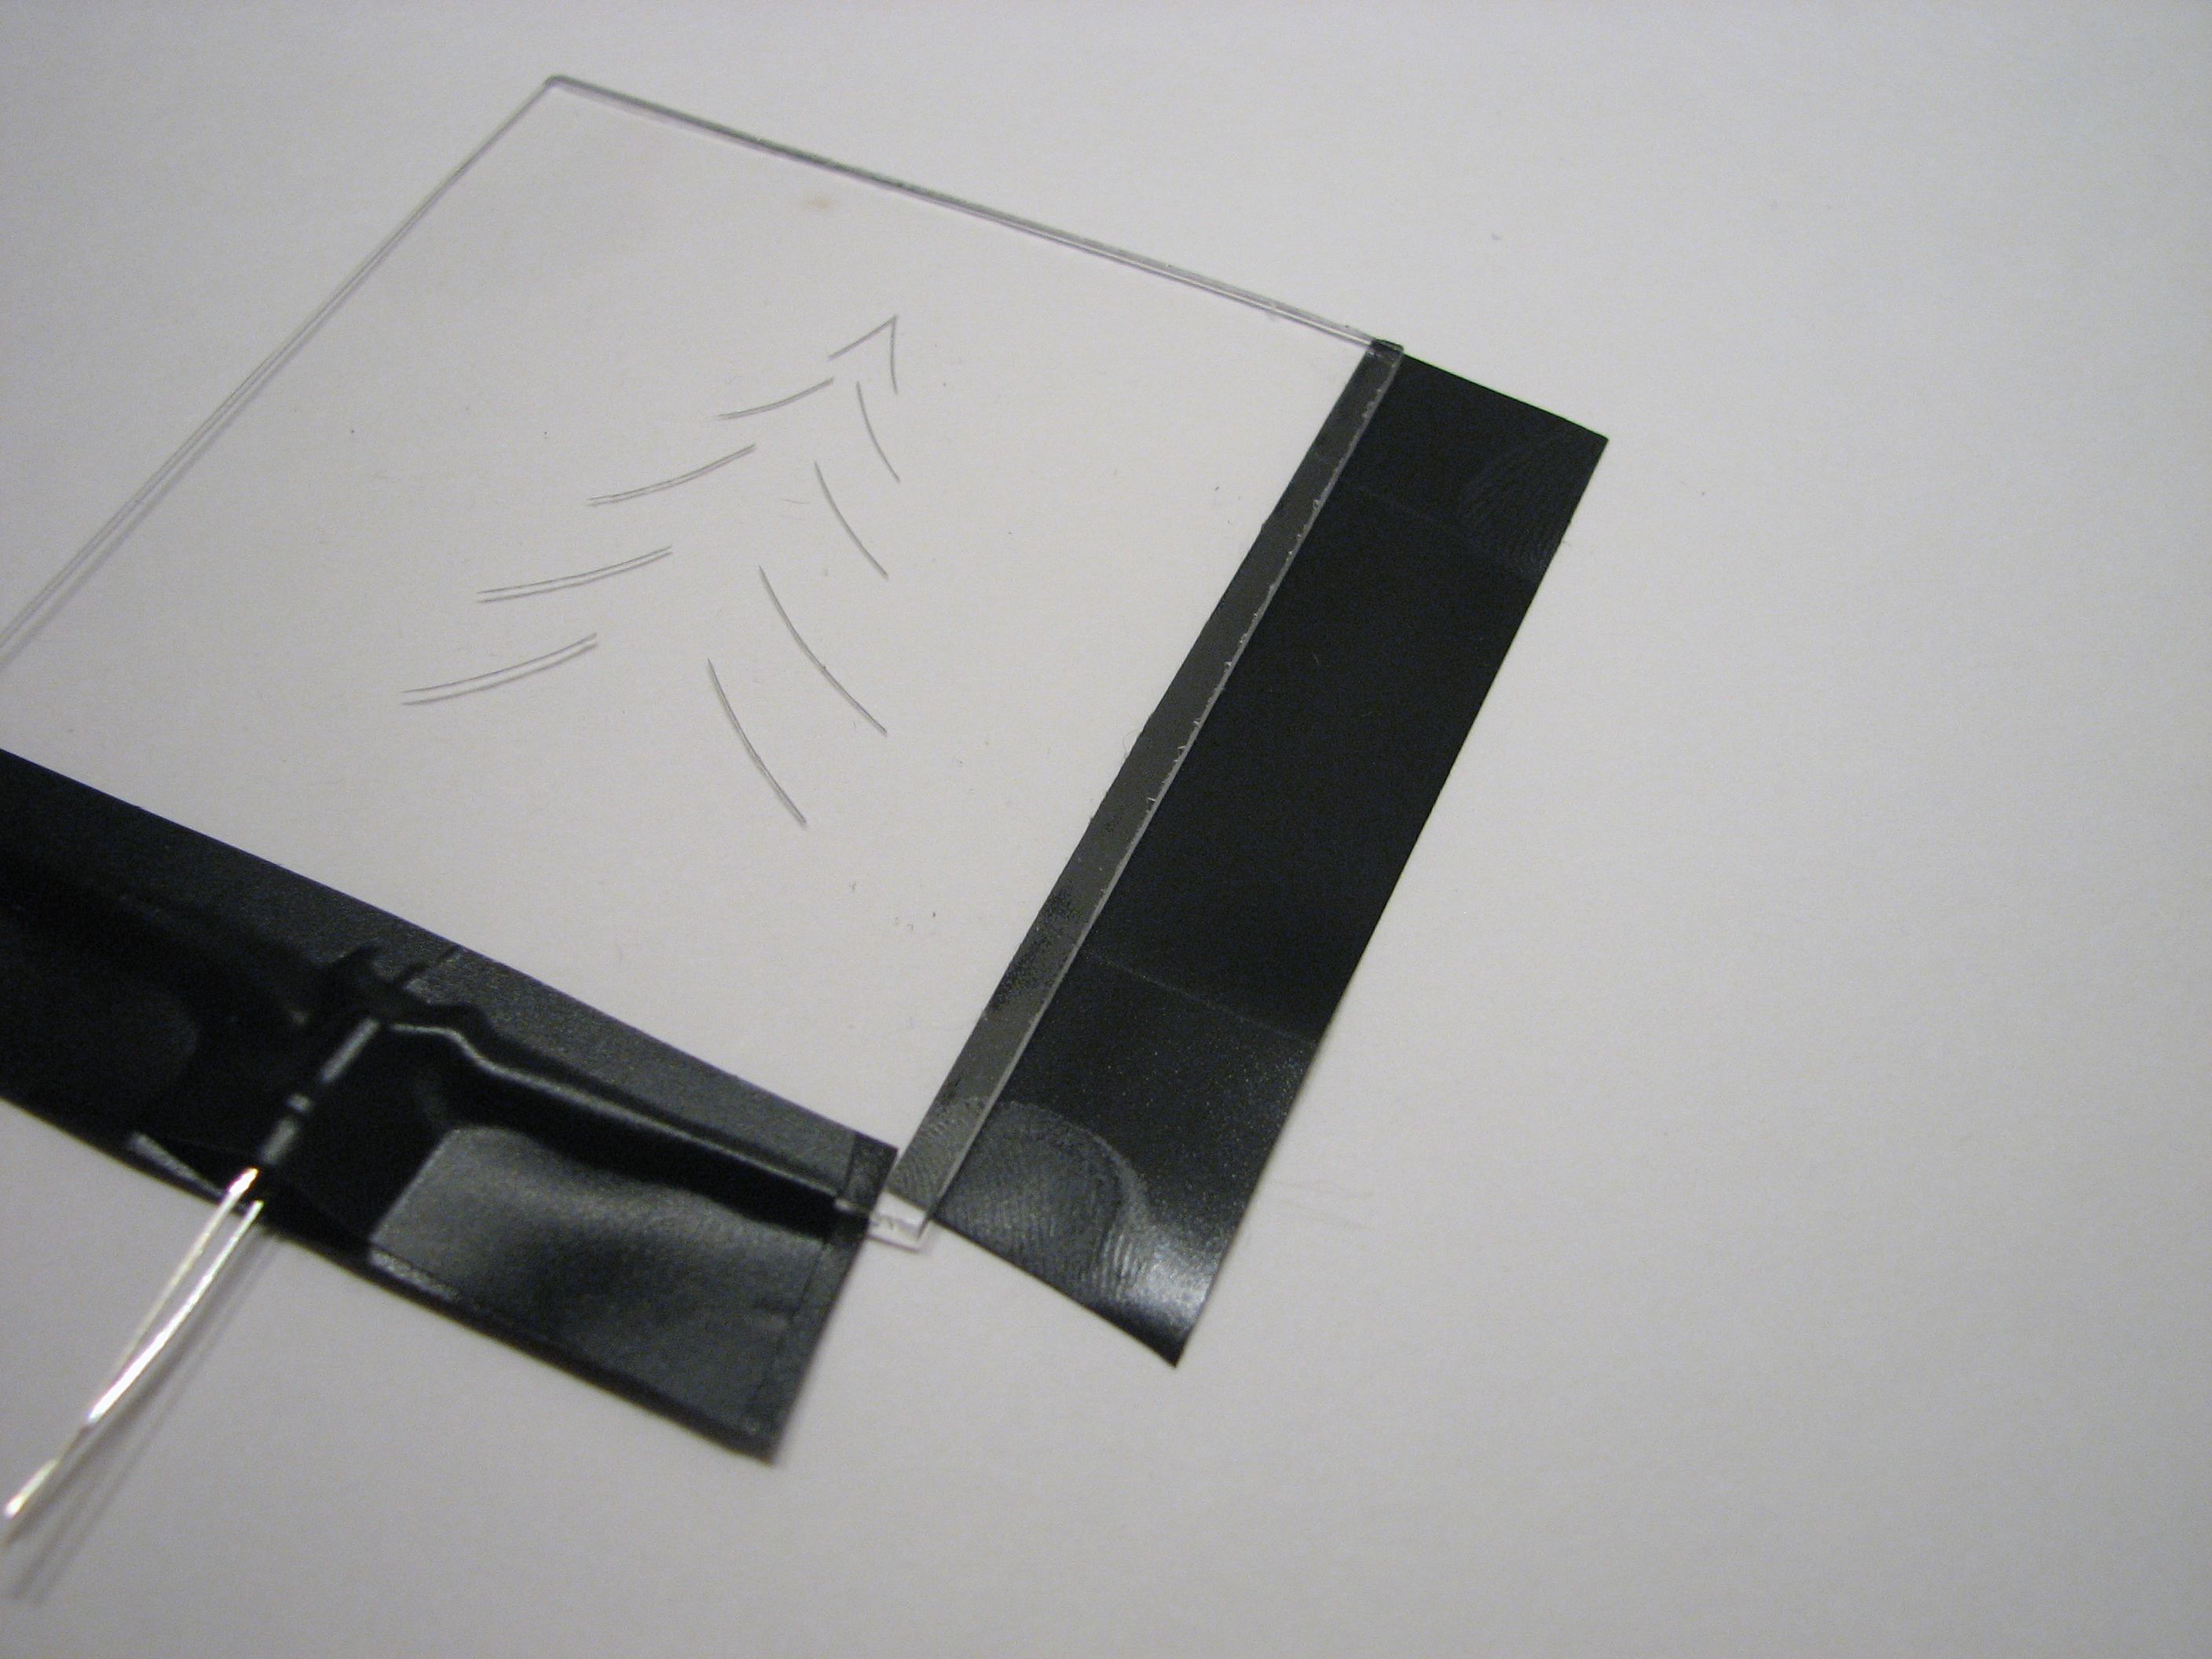
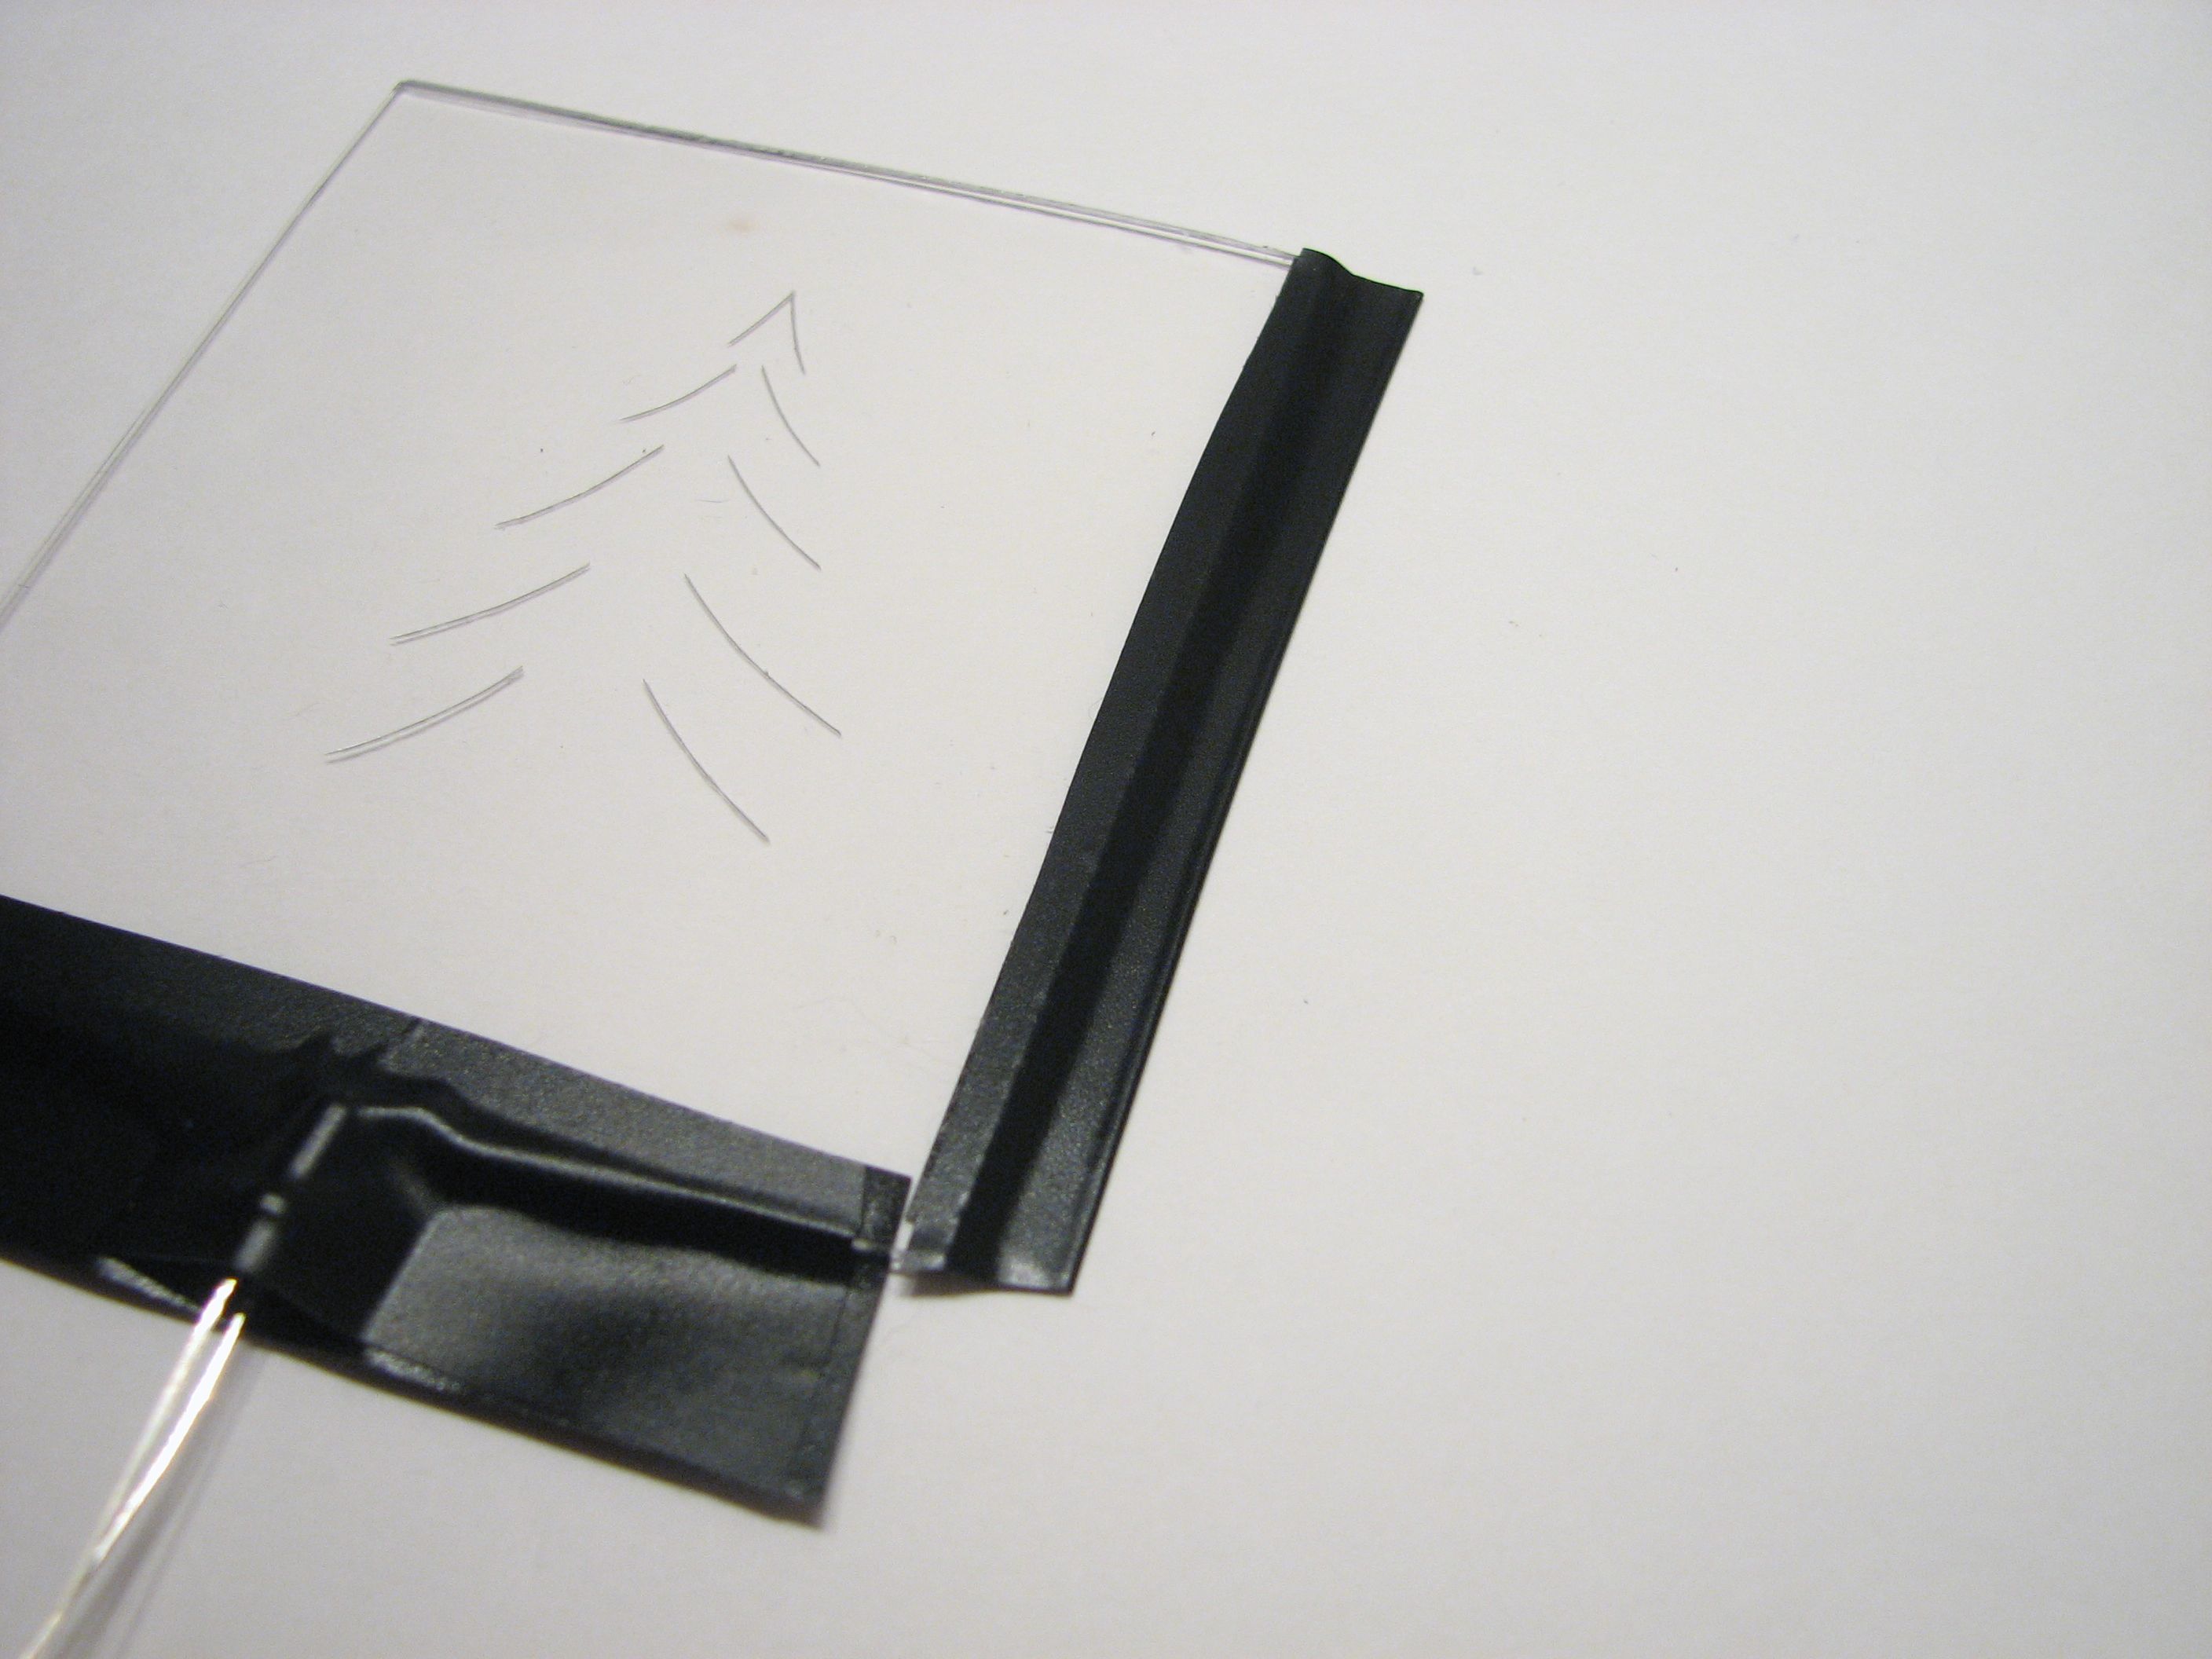
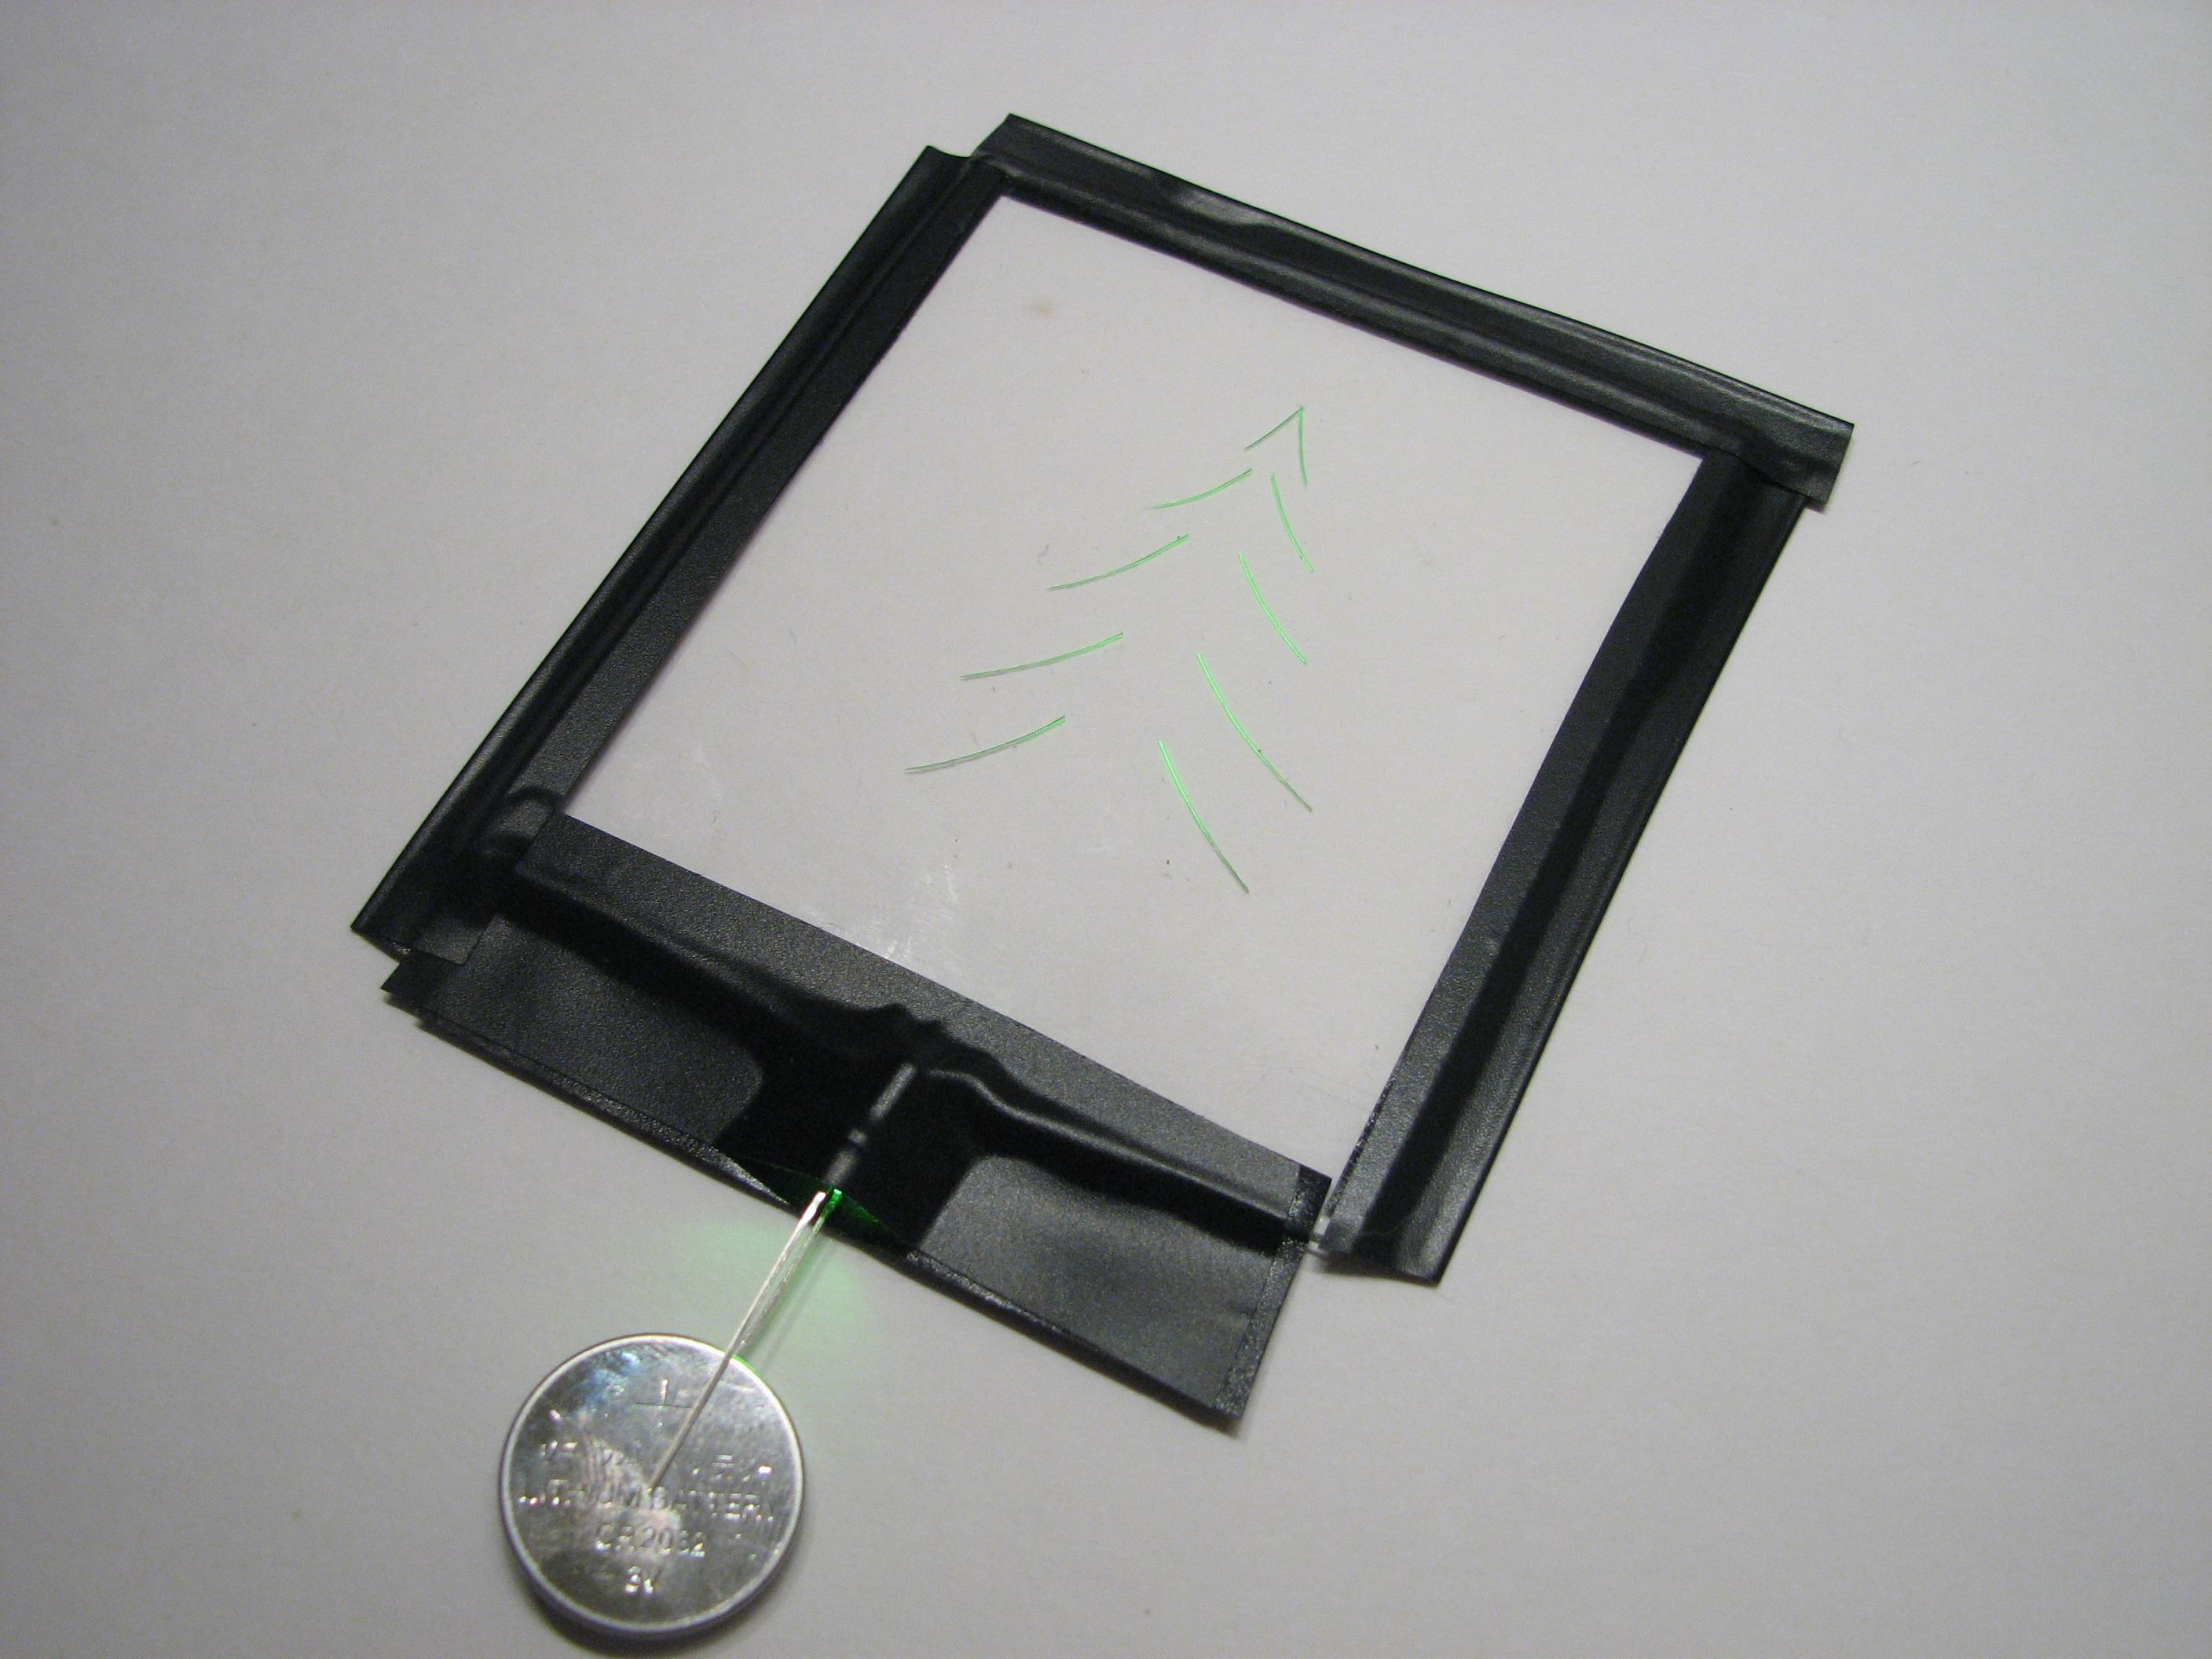
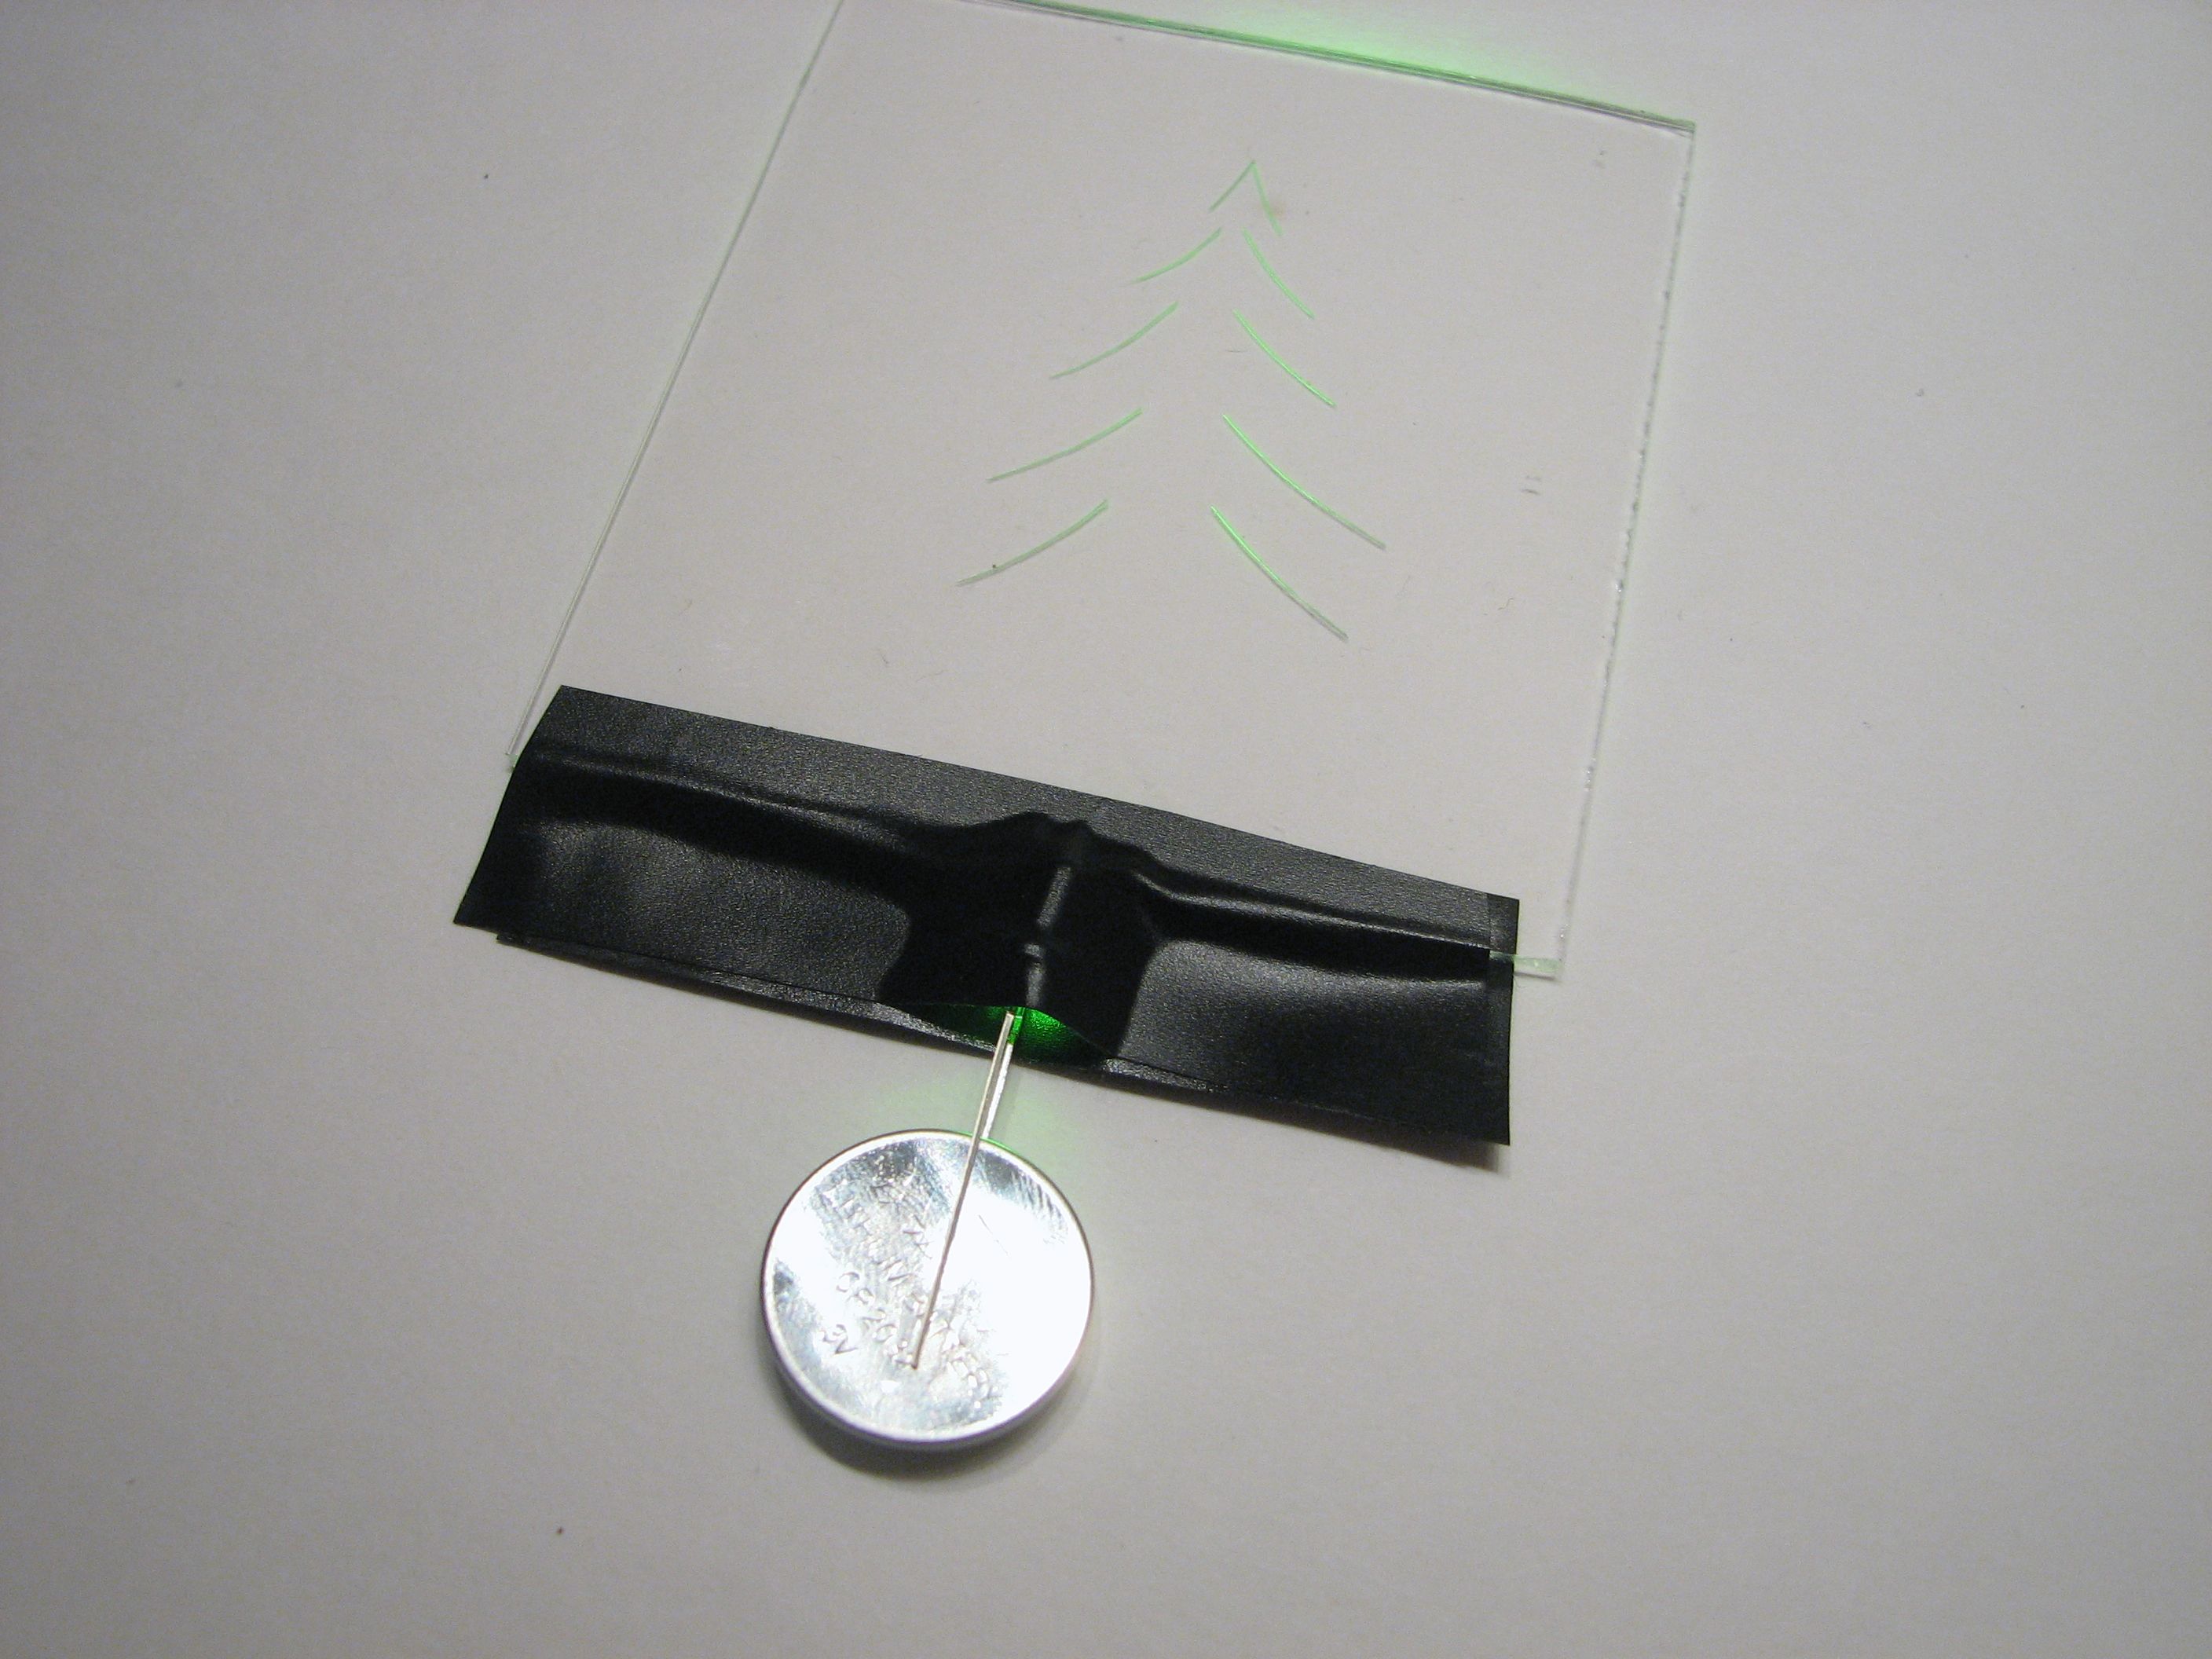
Next, wrap the other three sides of the plastic plate with black tape to keep them dark. Note that the tape only needs to go over the very edge of the plastic. After finishing that process, the single LED can light up the tree scratched into the plastic without much leakage of light elsewhere.

Next, we need to start the card itself. We used 9 x 12″ heavy bristol cardstock, but other heavy opaque papers will work as well, and the size really isn’t that critical. Fold it in half and in half again to make a classic greeting card shape, 4.5 x 6″ or so.
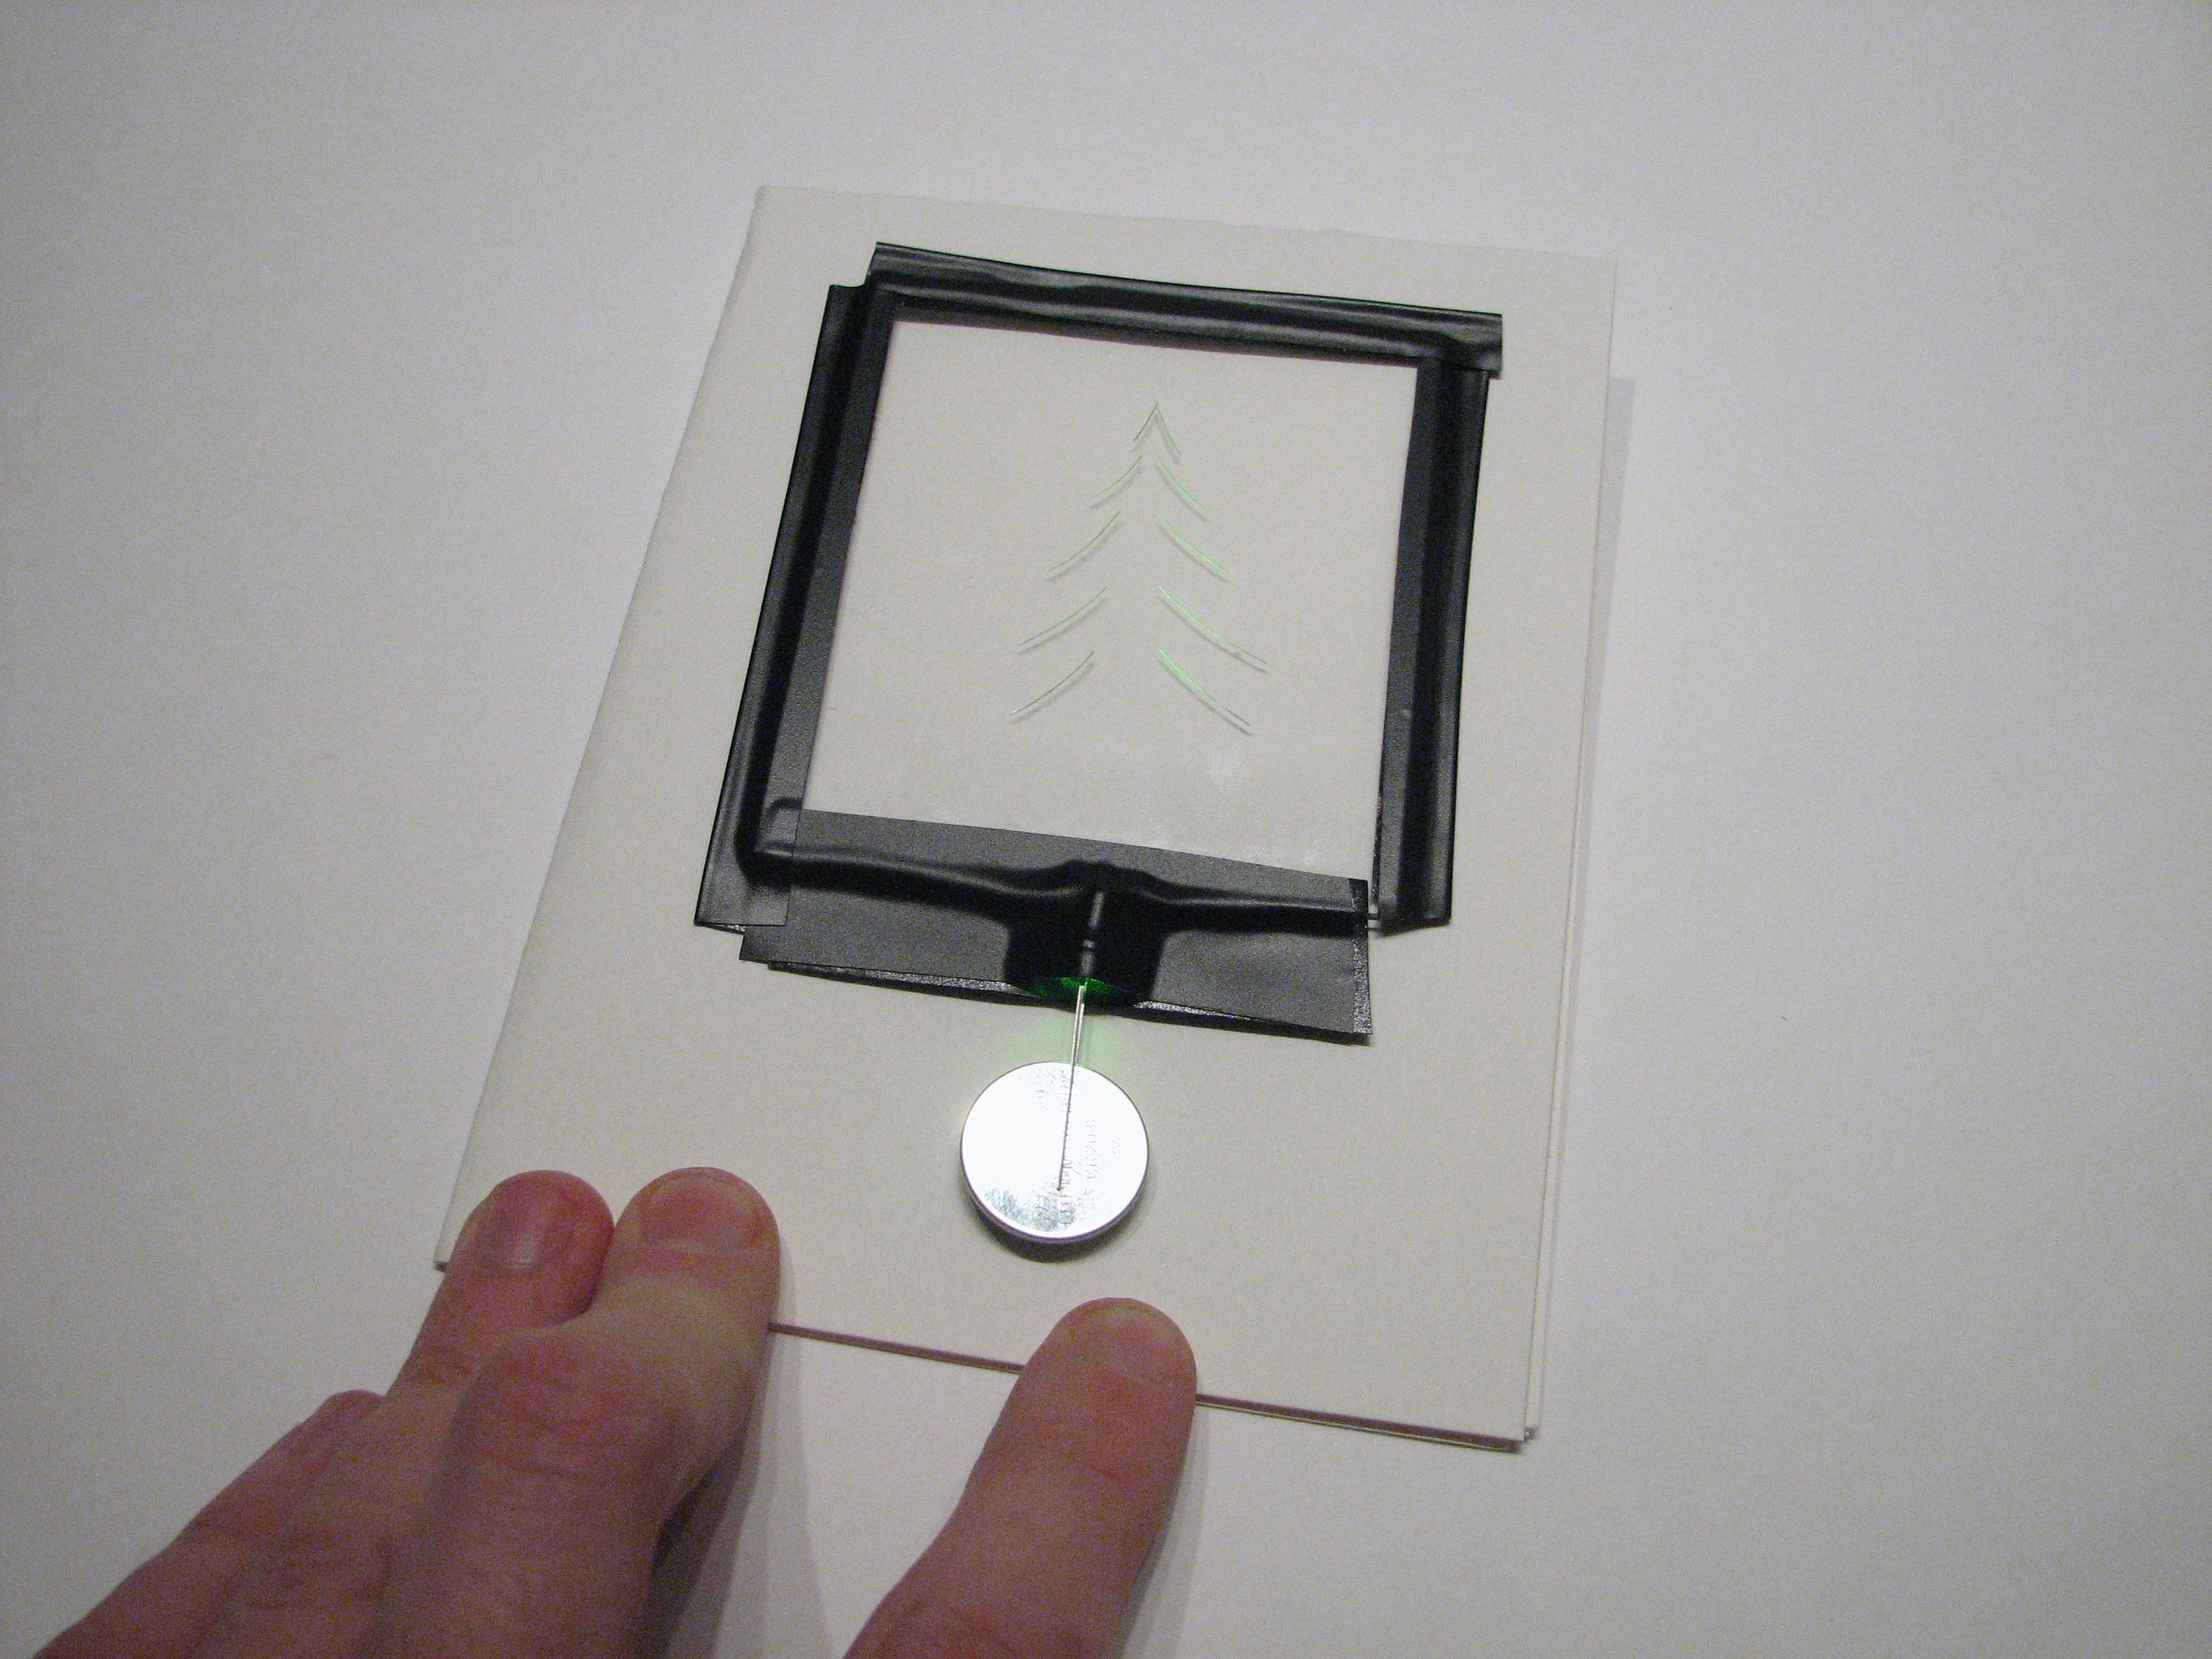
As shown above, place your completed edge-lit “innards” assembly on top of the folded card to make sure that it’s going to fit okay, and to determine right where you’re going to put it. What we’re going to do next is to cut a window in the front face of the card so that the clear plastic can show through.
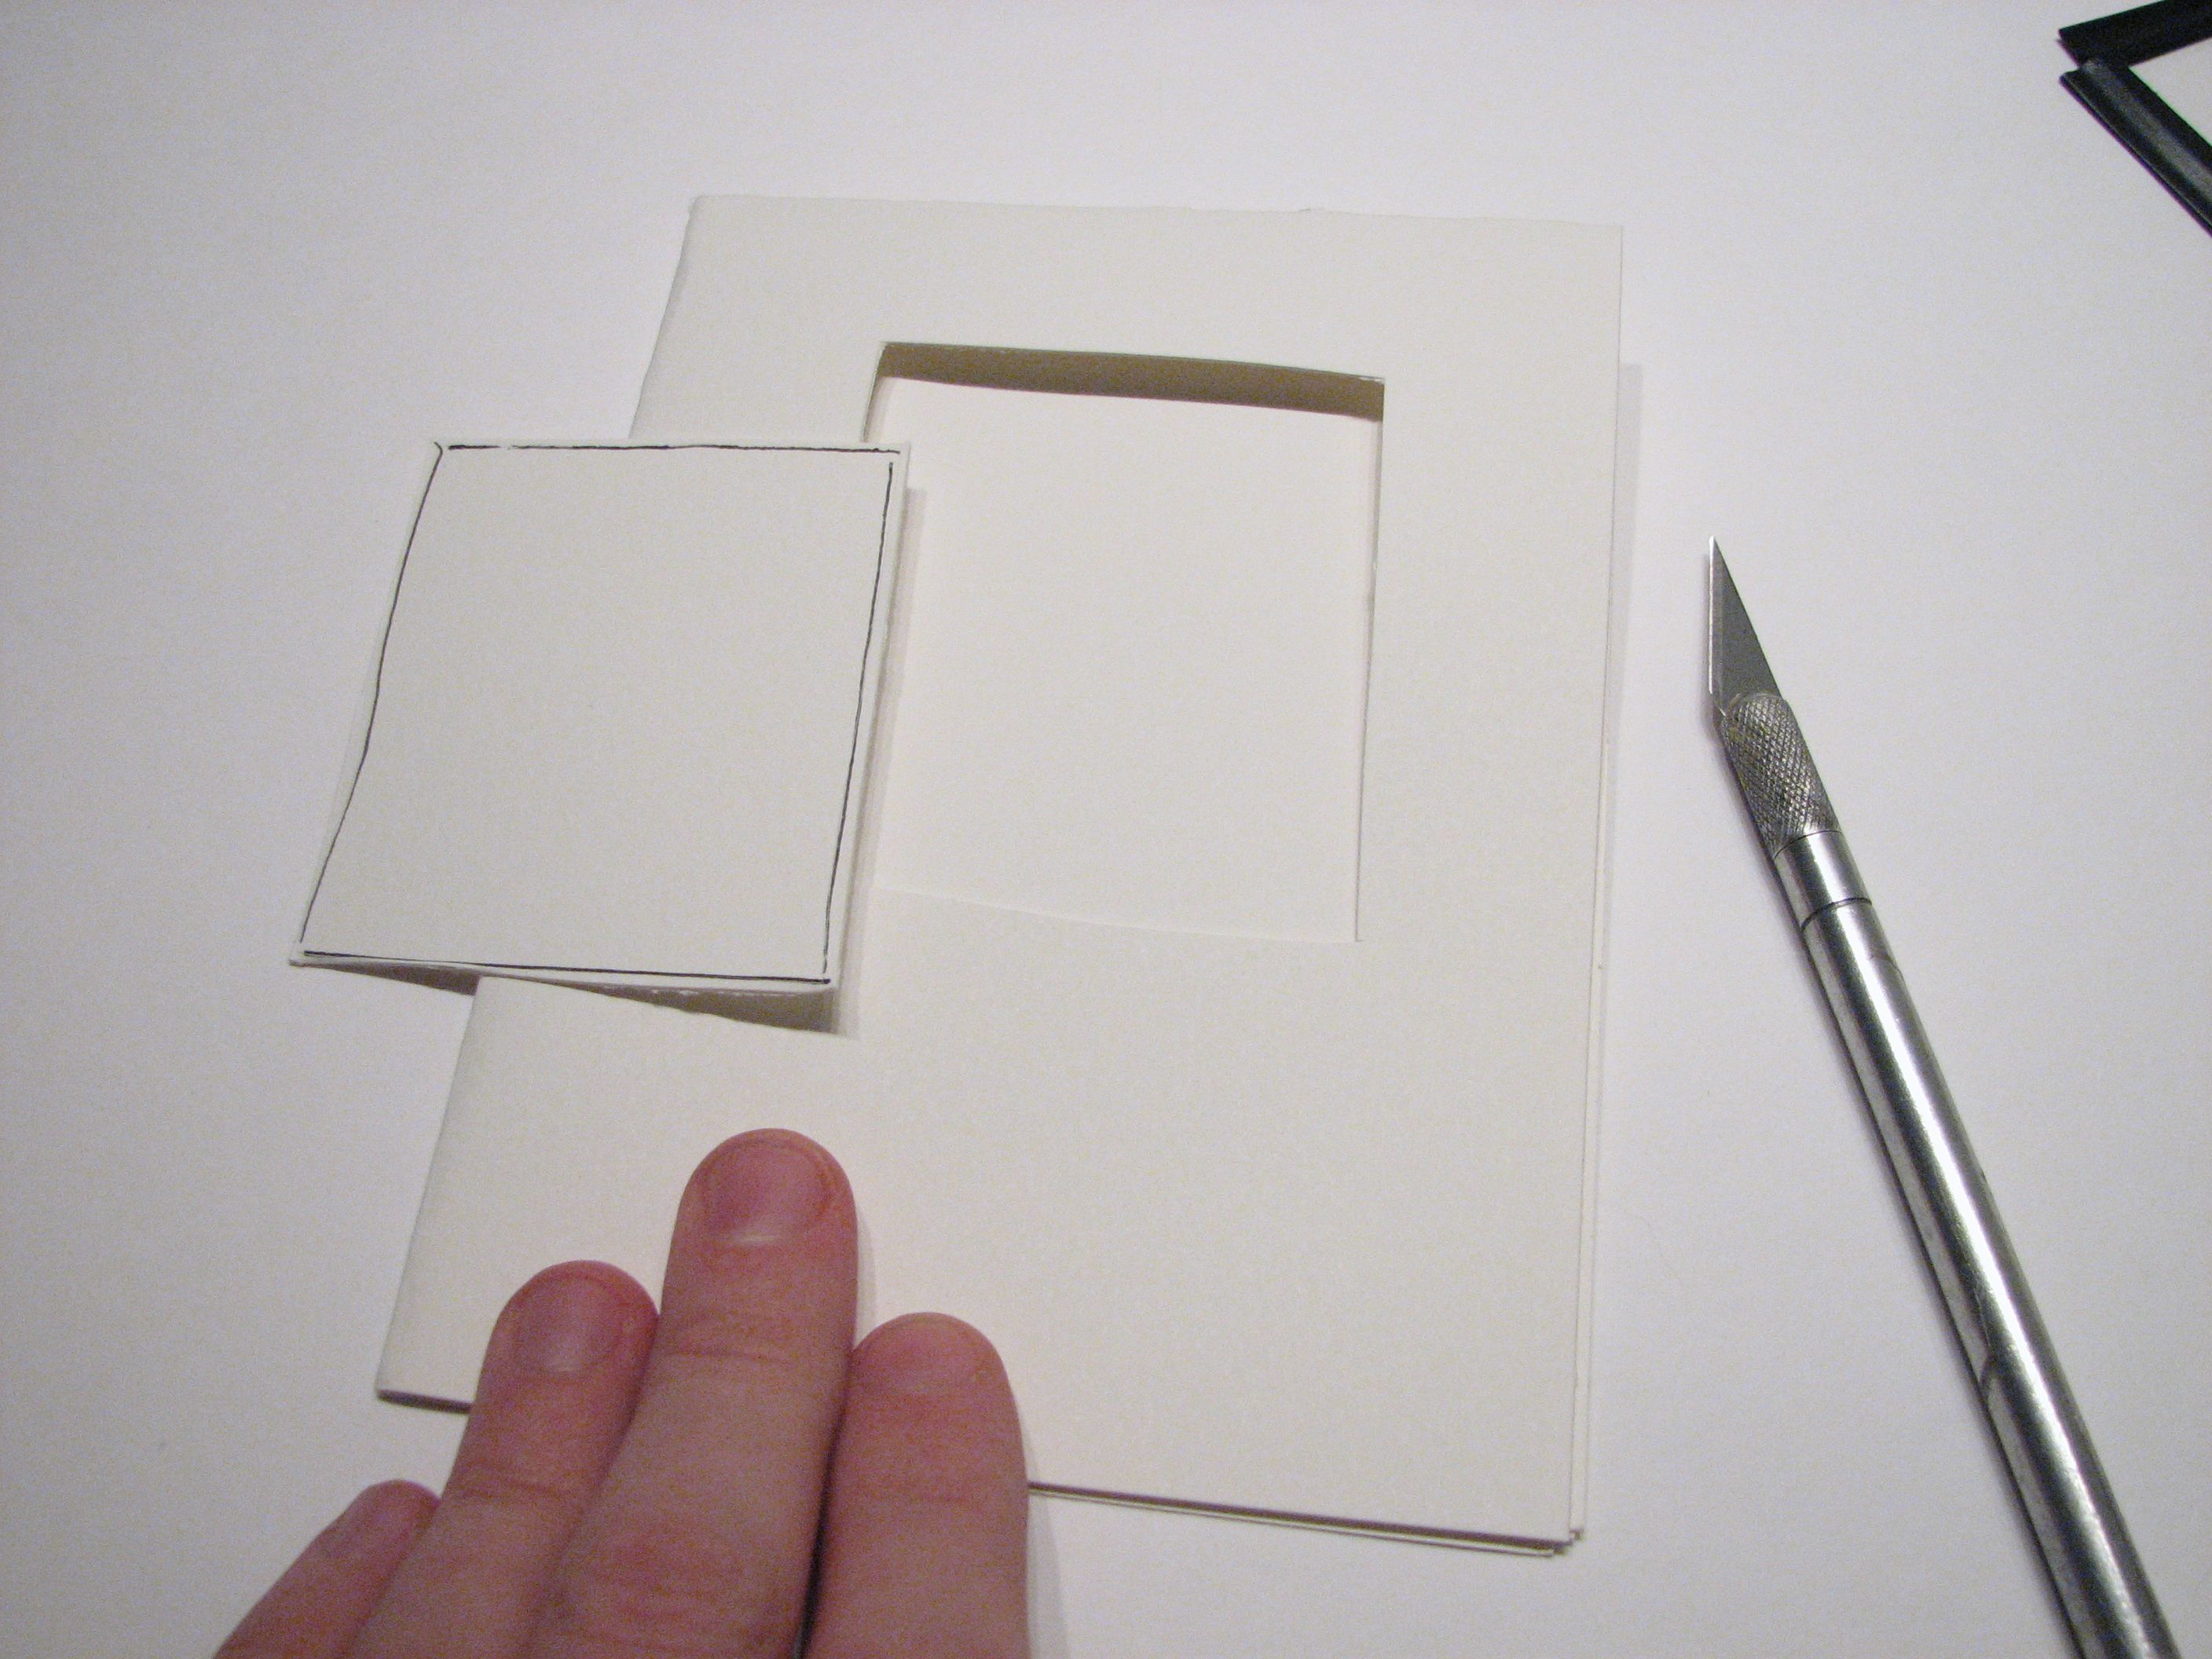
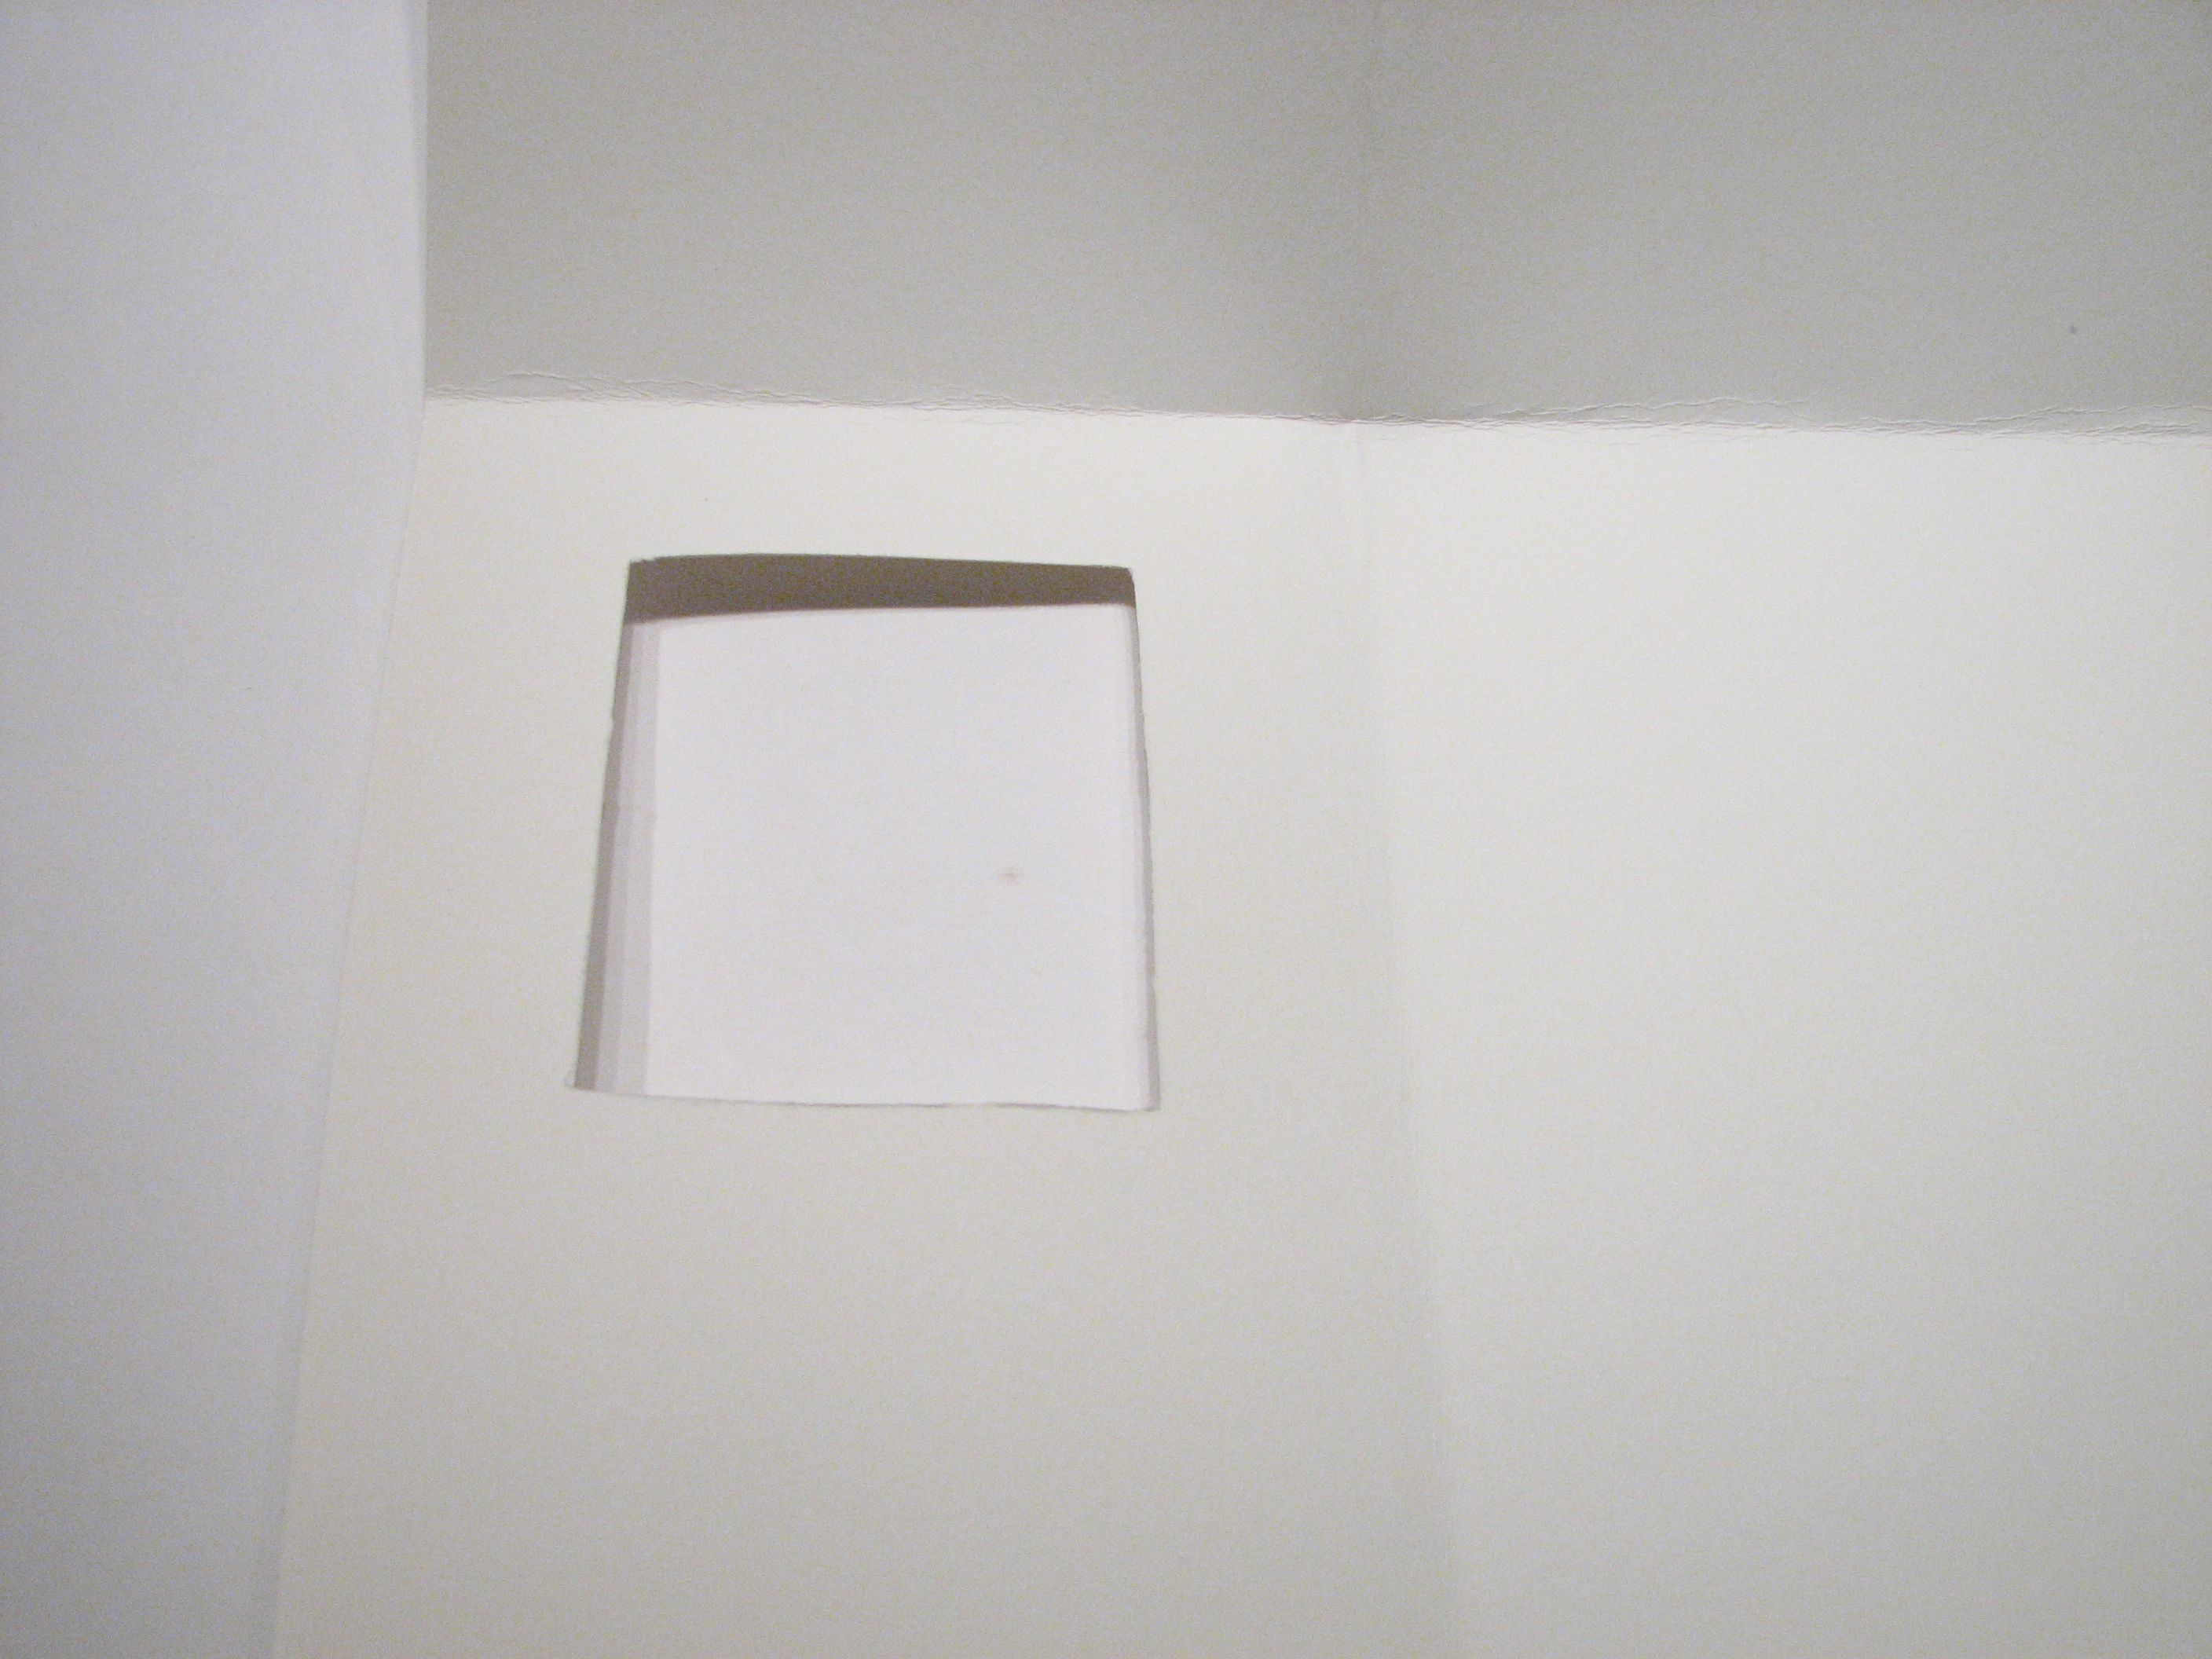
In order to cut out the front window, it’s helpful to have a template. Cut out the inner rectangle from your drawing and trace around its perimeter, marking the rectangle that you’ll cut out of the front face. Score the outline with the hobby knife and either carefully cut it out directly with the hobby knife or use scissors to cut to your scored mark. Open up the card to reveal the window from the inside– here is where we’ll attach the edge-lit plastic assembly.
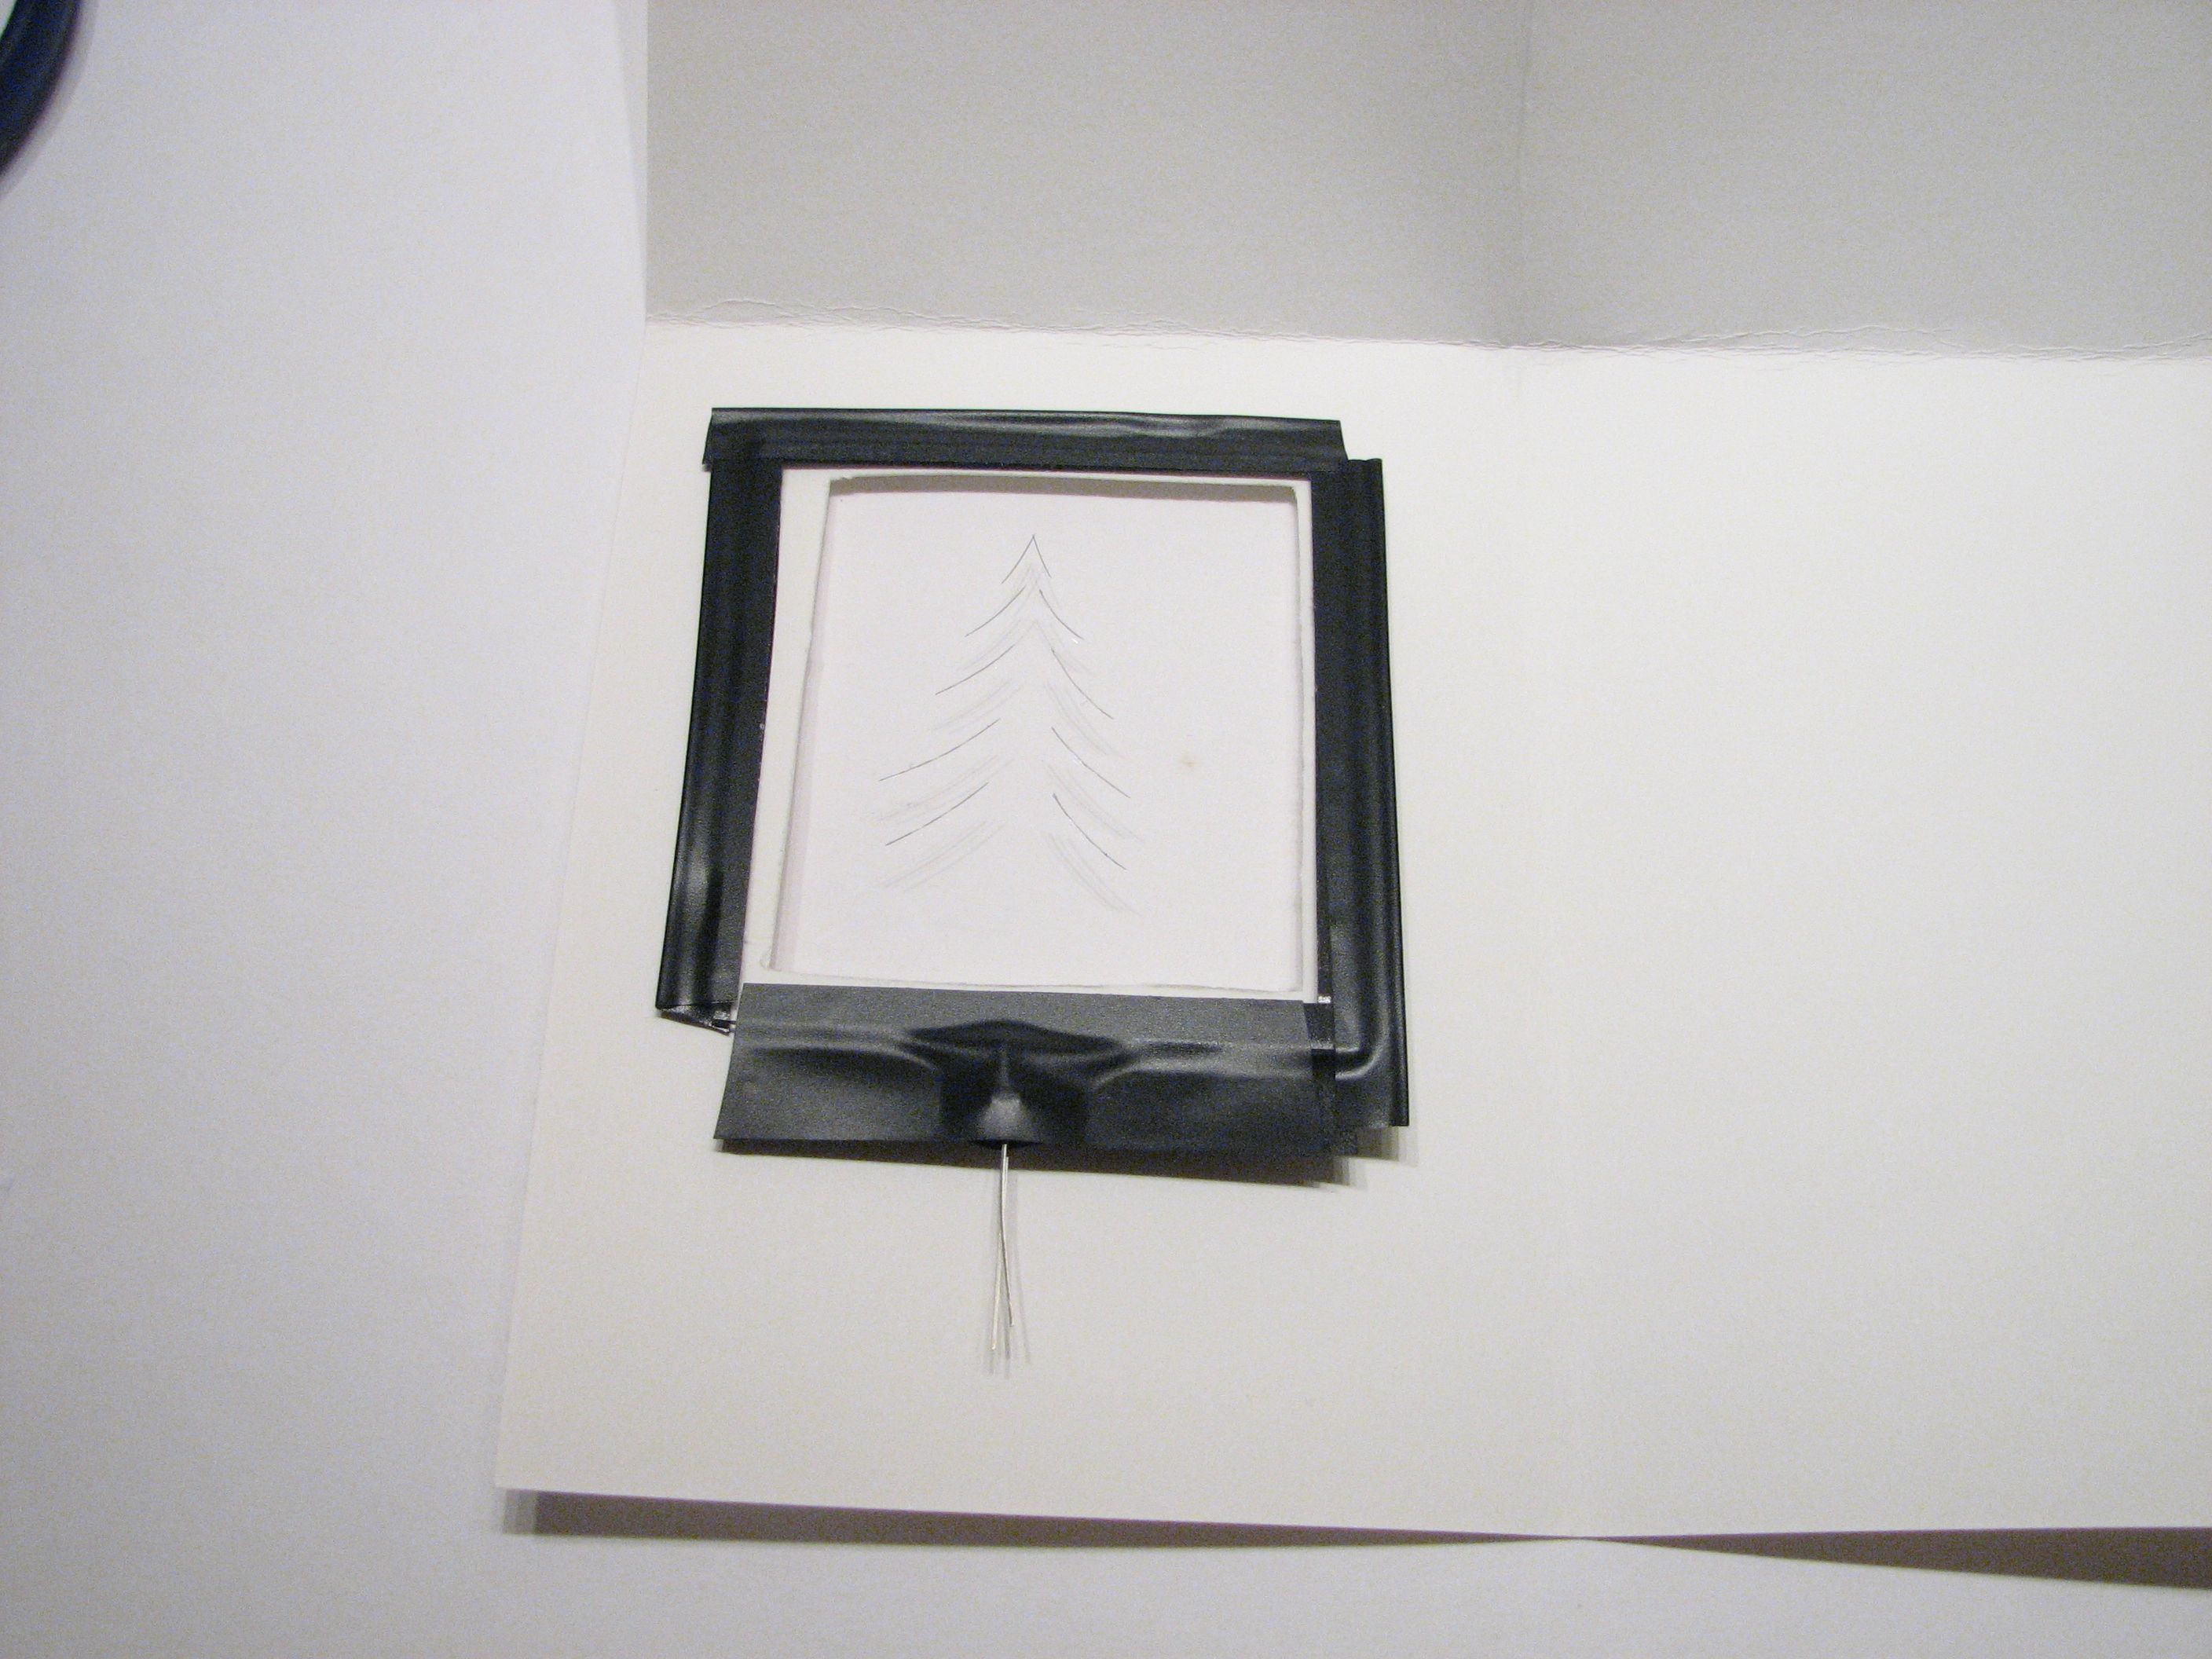
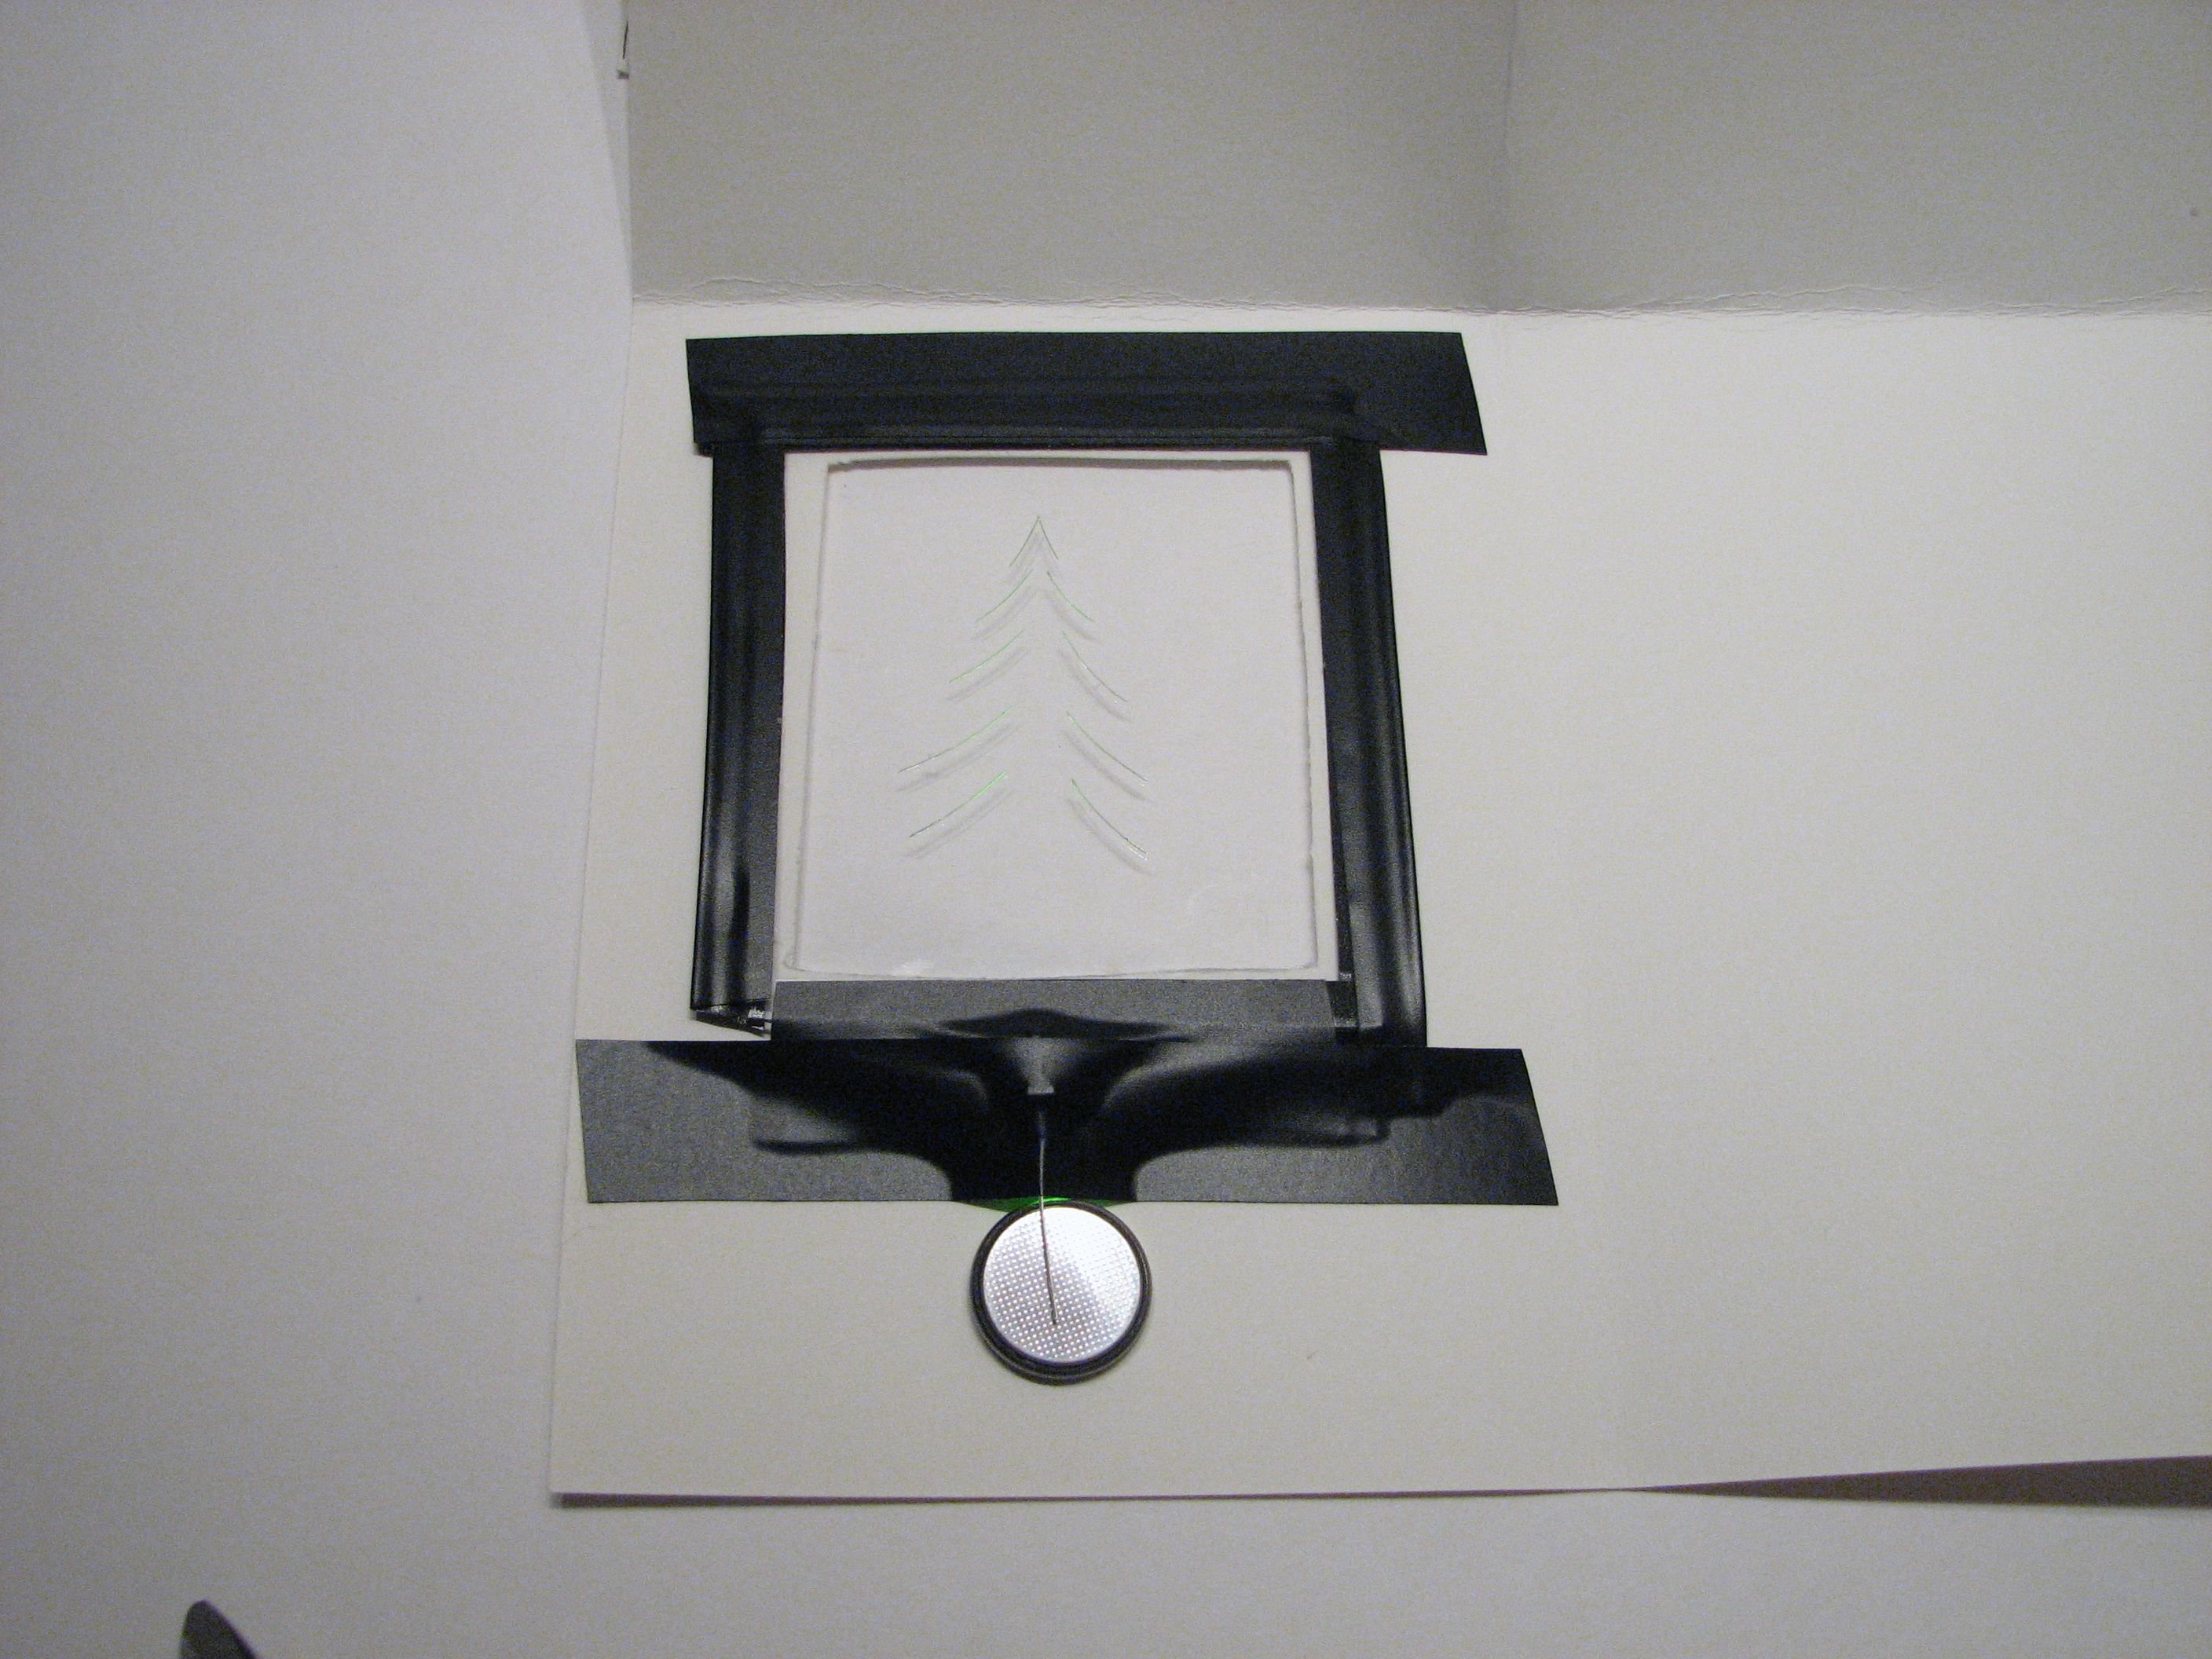
Now place the edge-lit assembly inside the card– in front of the window– with the smooth side of the plastic (not the side that you cut) facing down. Tape it in place, including the battery.
Note 1: In the lower picture, there is some green light spilling out onto the card. You may wish to first put down a layer of black electrical tape at that location to prevent light leakage, since it will probably be visible from the front of the card. (Example here.)
Note 2: We have taped the battery in place, so the card will be “on” until the battery goes dead in a week or so. That’s probably fine if you’re giving this as a gift in person, but not so good if you’re mailing it. But, you can rig it up so that it won’t turn on until it’s received by who ever you are sending it to: Insert a paper strip underneath the battery at this point that will prevent the LED from turning on– use a strip that pokes slightly outside of the card edge, and write “PULL” on the end of the strip.

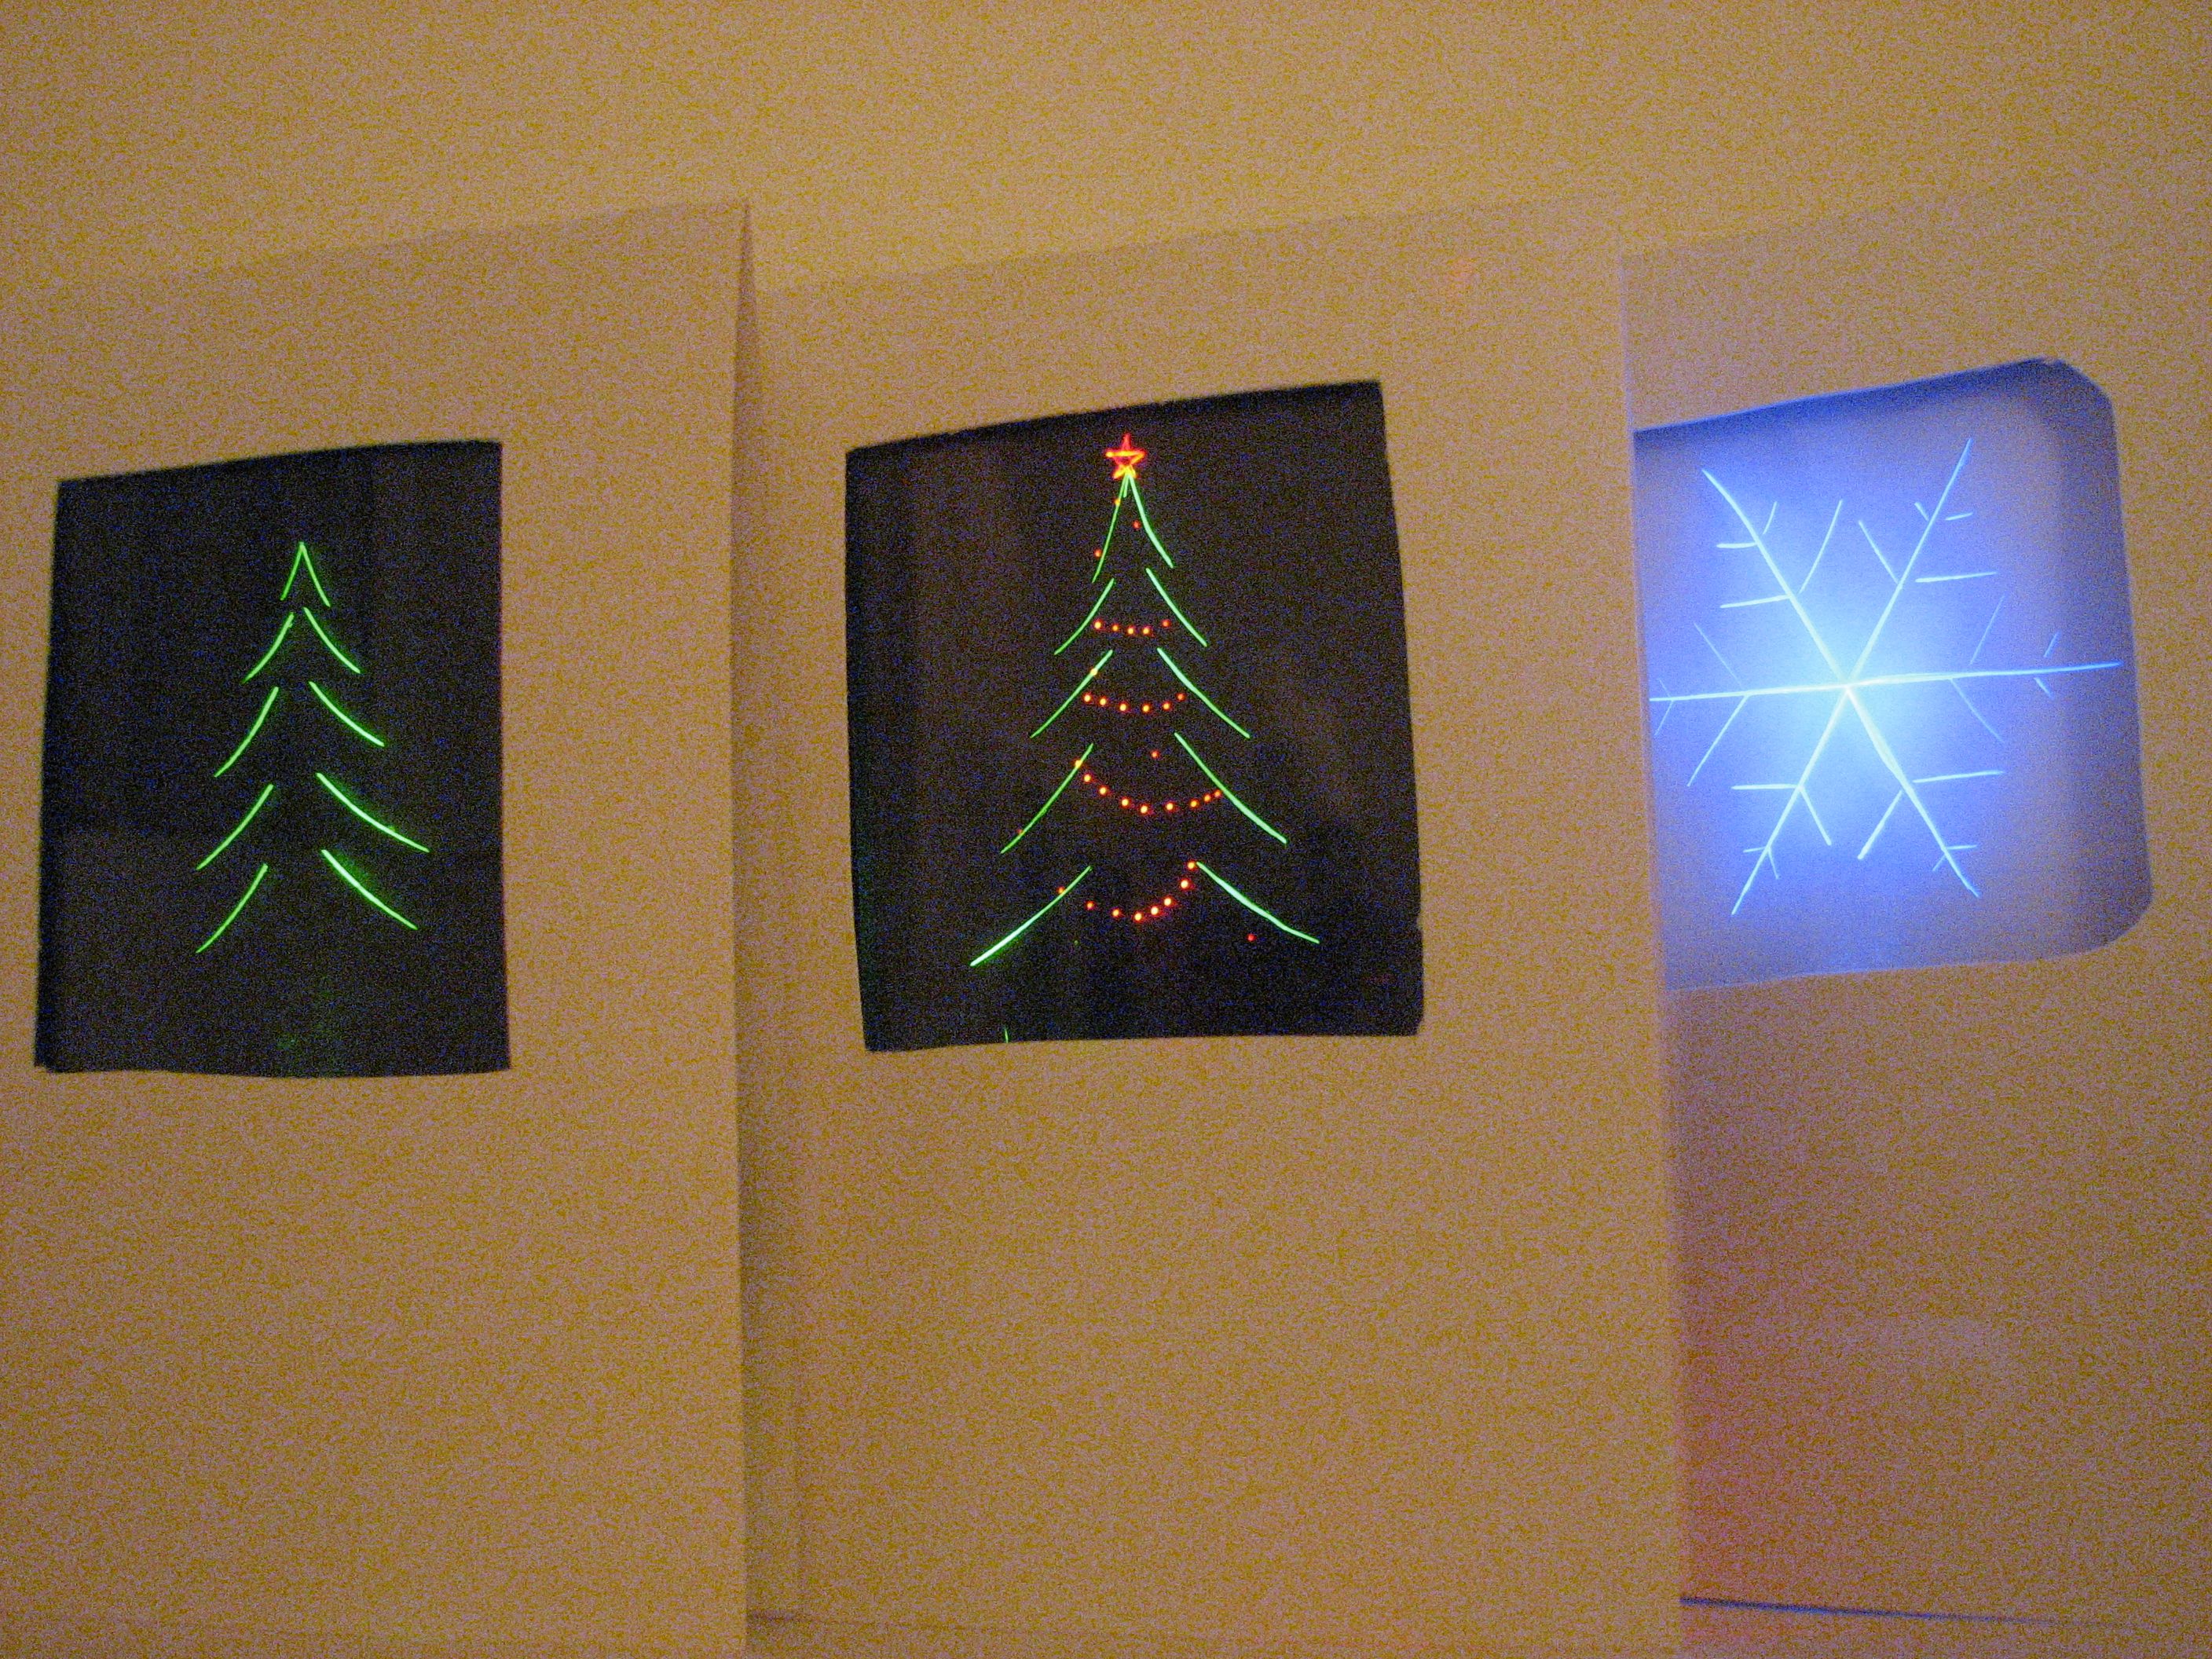
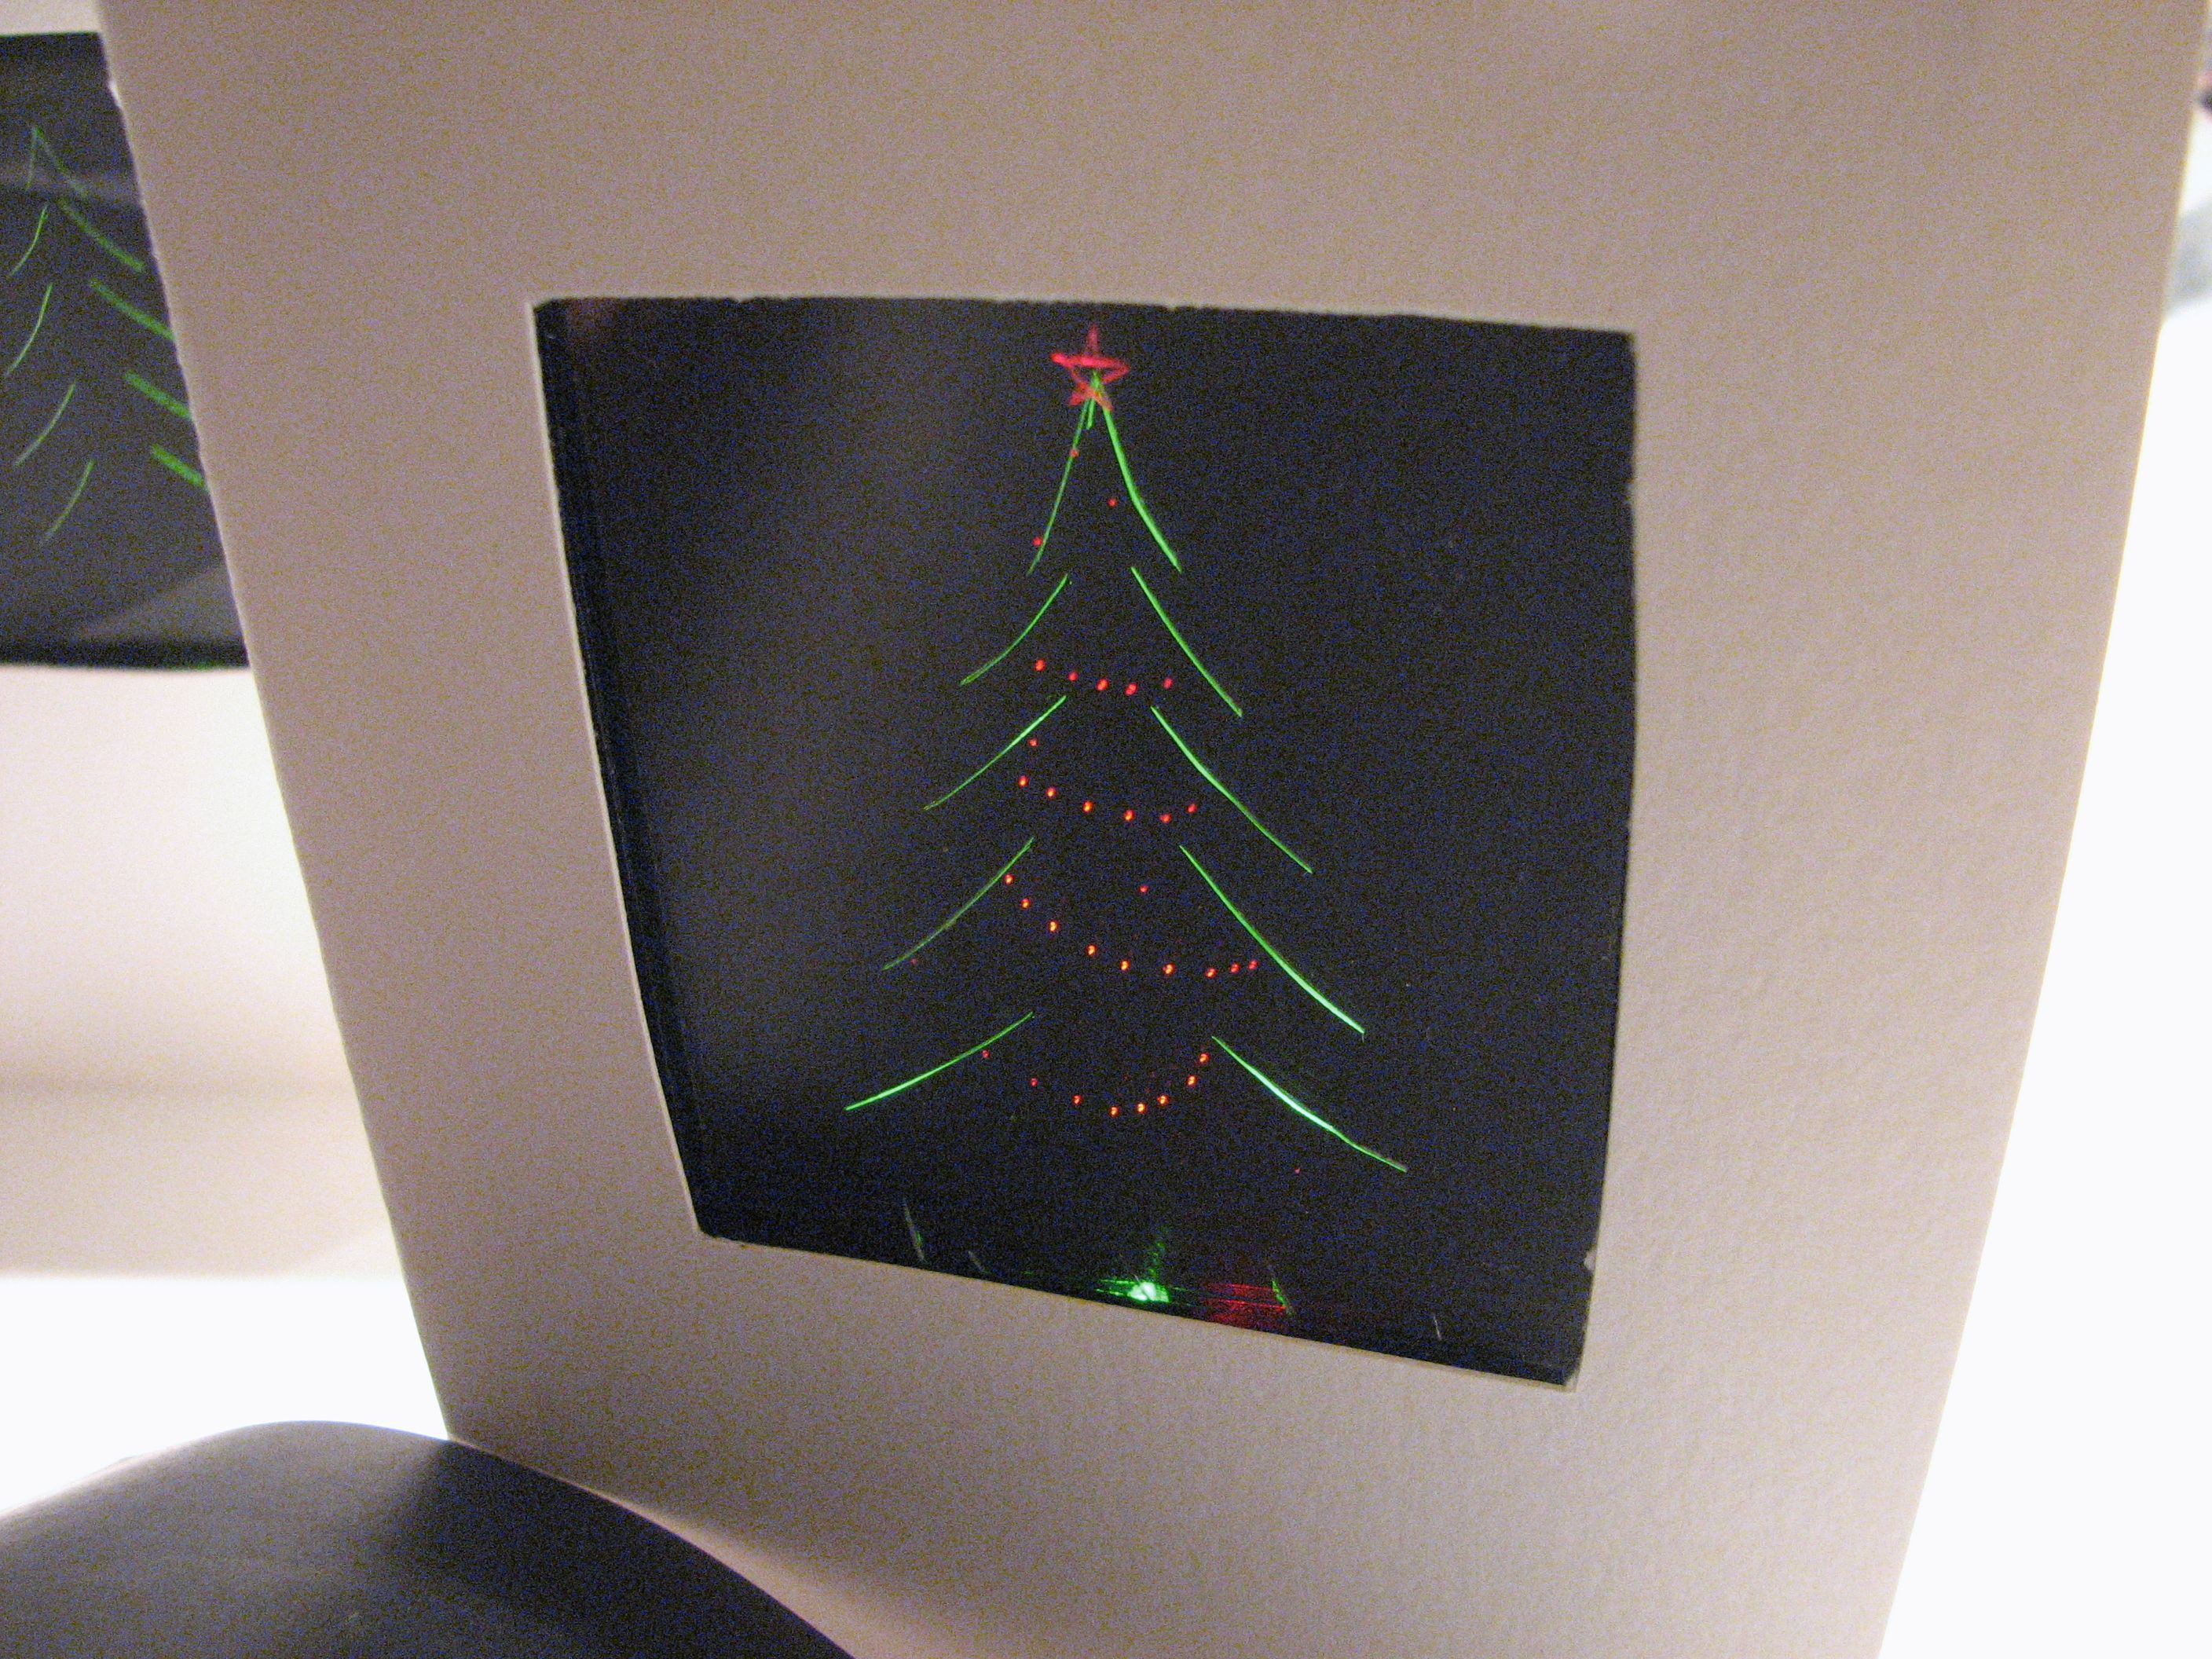
Close up the card and here’s how it looks from the front.
If you insert a piece of black paper behind the clear plastic, you might find that it improves the contrast.

… And here’s the completed card.

Our snowflake card, with a blue LED, came out pretty nicely as well. One that we didn’t get around to doing is a snowman card with a white LED. It’s pretty easy to imagine a number of other variations.
One final trick for extra coolness: use two layers. Two independent, stacked edge-lit displays, one with a green LED and one with a red LED:
It’s not easy to capture this with a photo, but the red dots are crisp and clear and float in front of the green of the tree because of the second layer– the 3D effect is really quite wonderful.
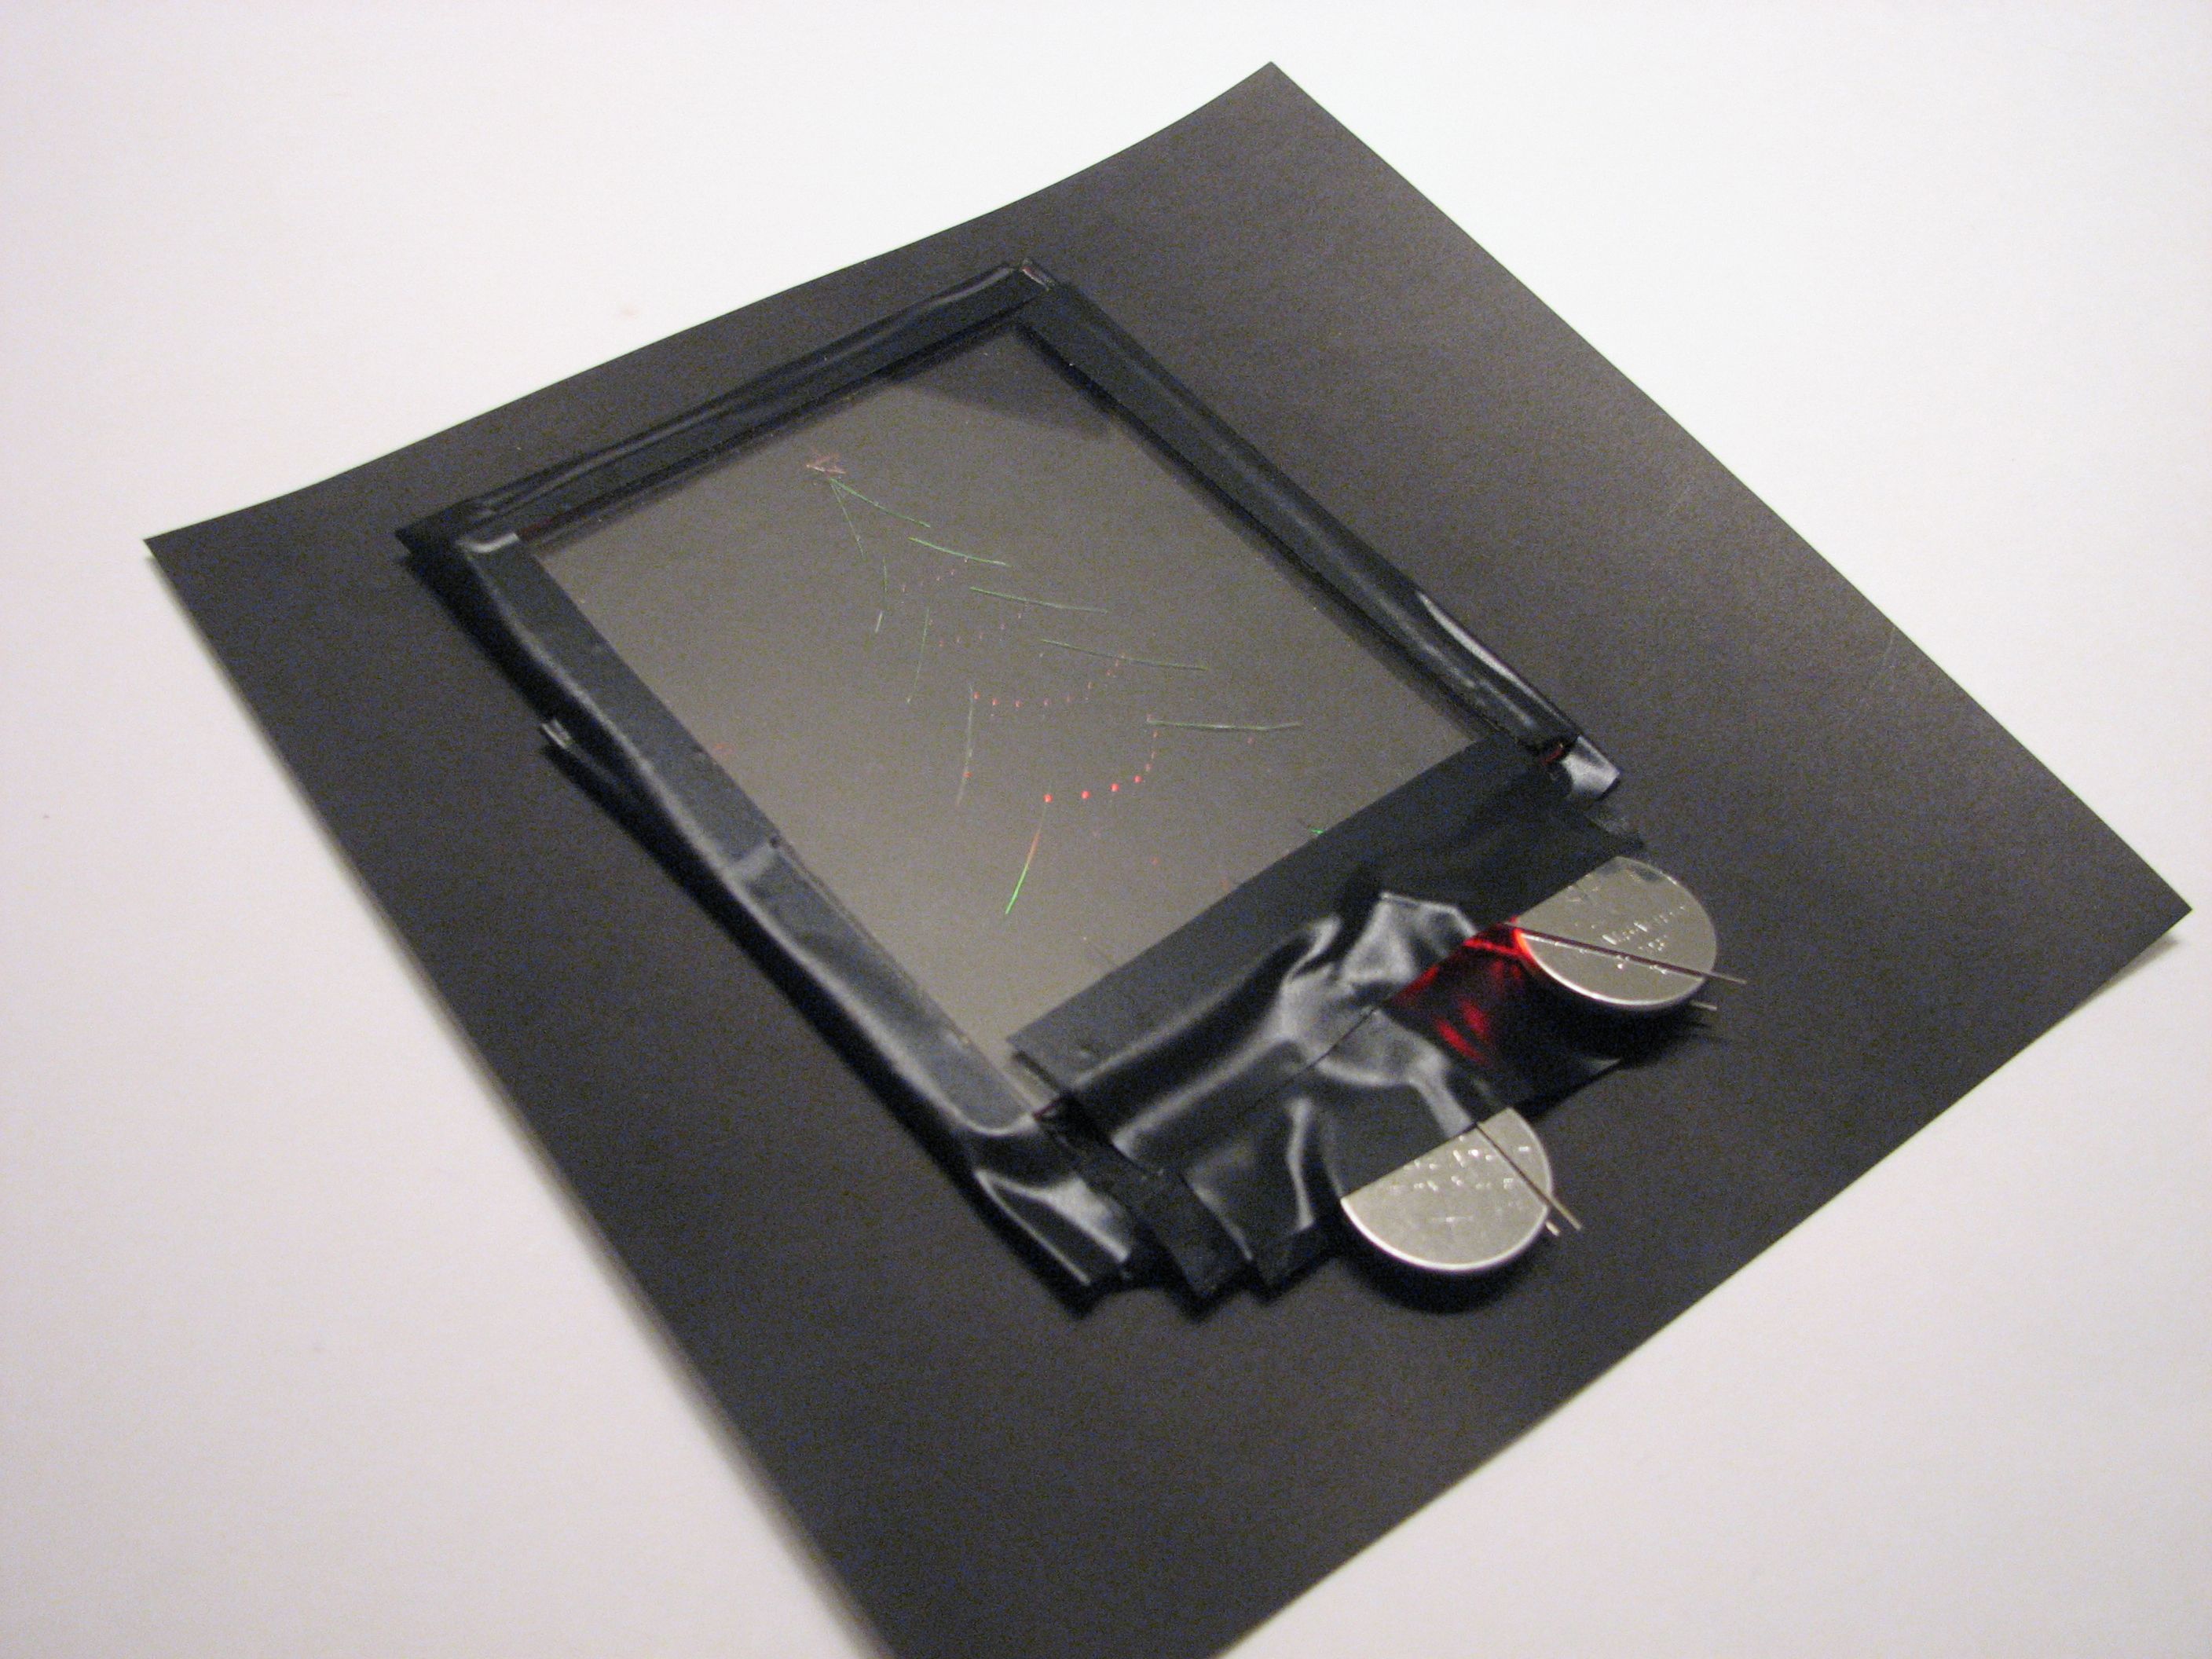
Inside, it’s just how you would expect: two stacked layers, each with electrical tape around the edges to prevent leakage.
(It’s worth noting that this is actually a very old display technique. Stack enough layers and you can even make a side-lit light-guide numeric display clock!)
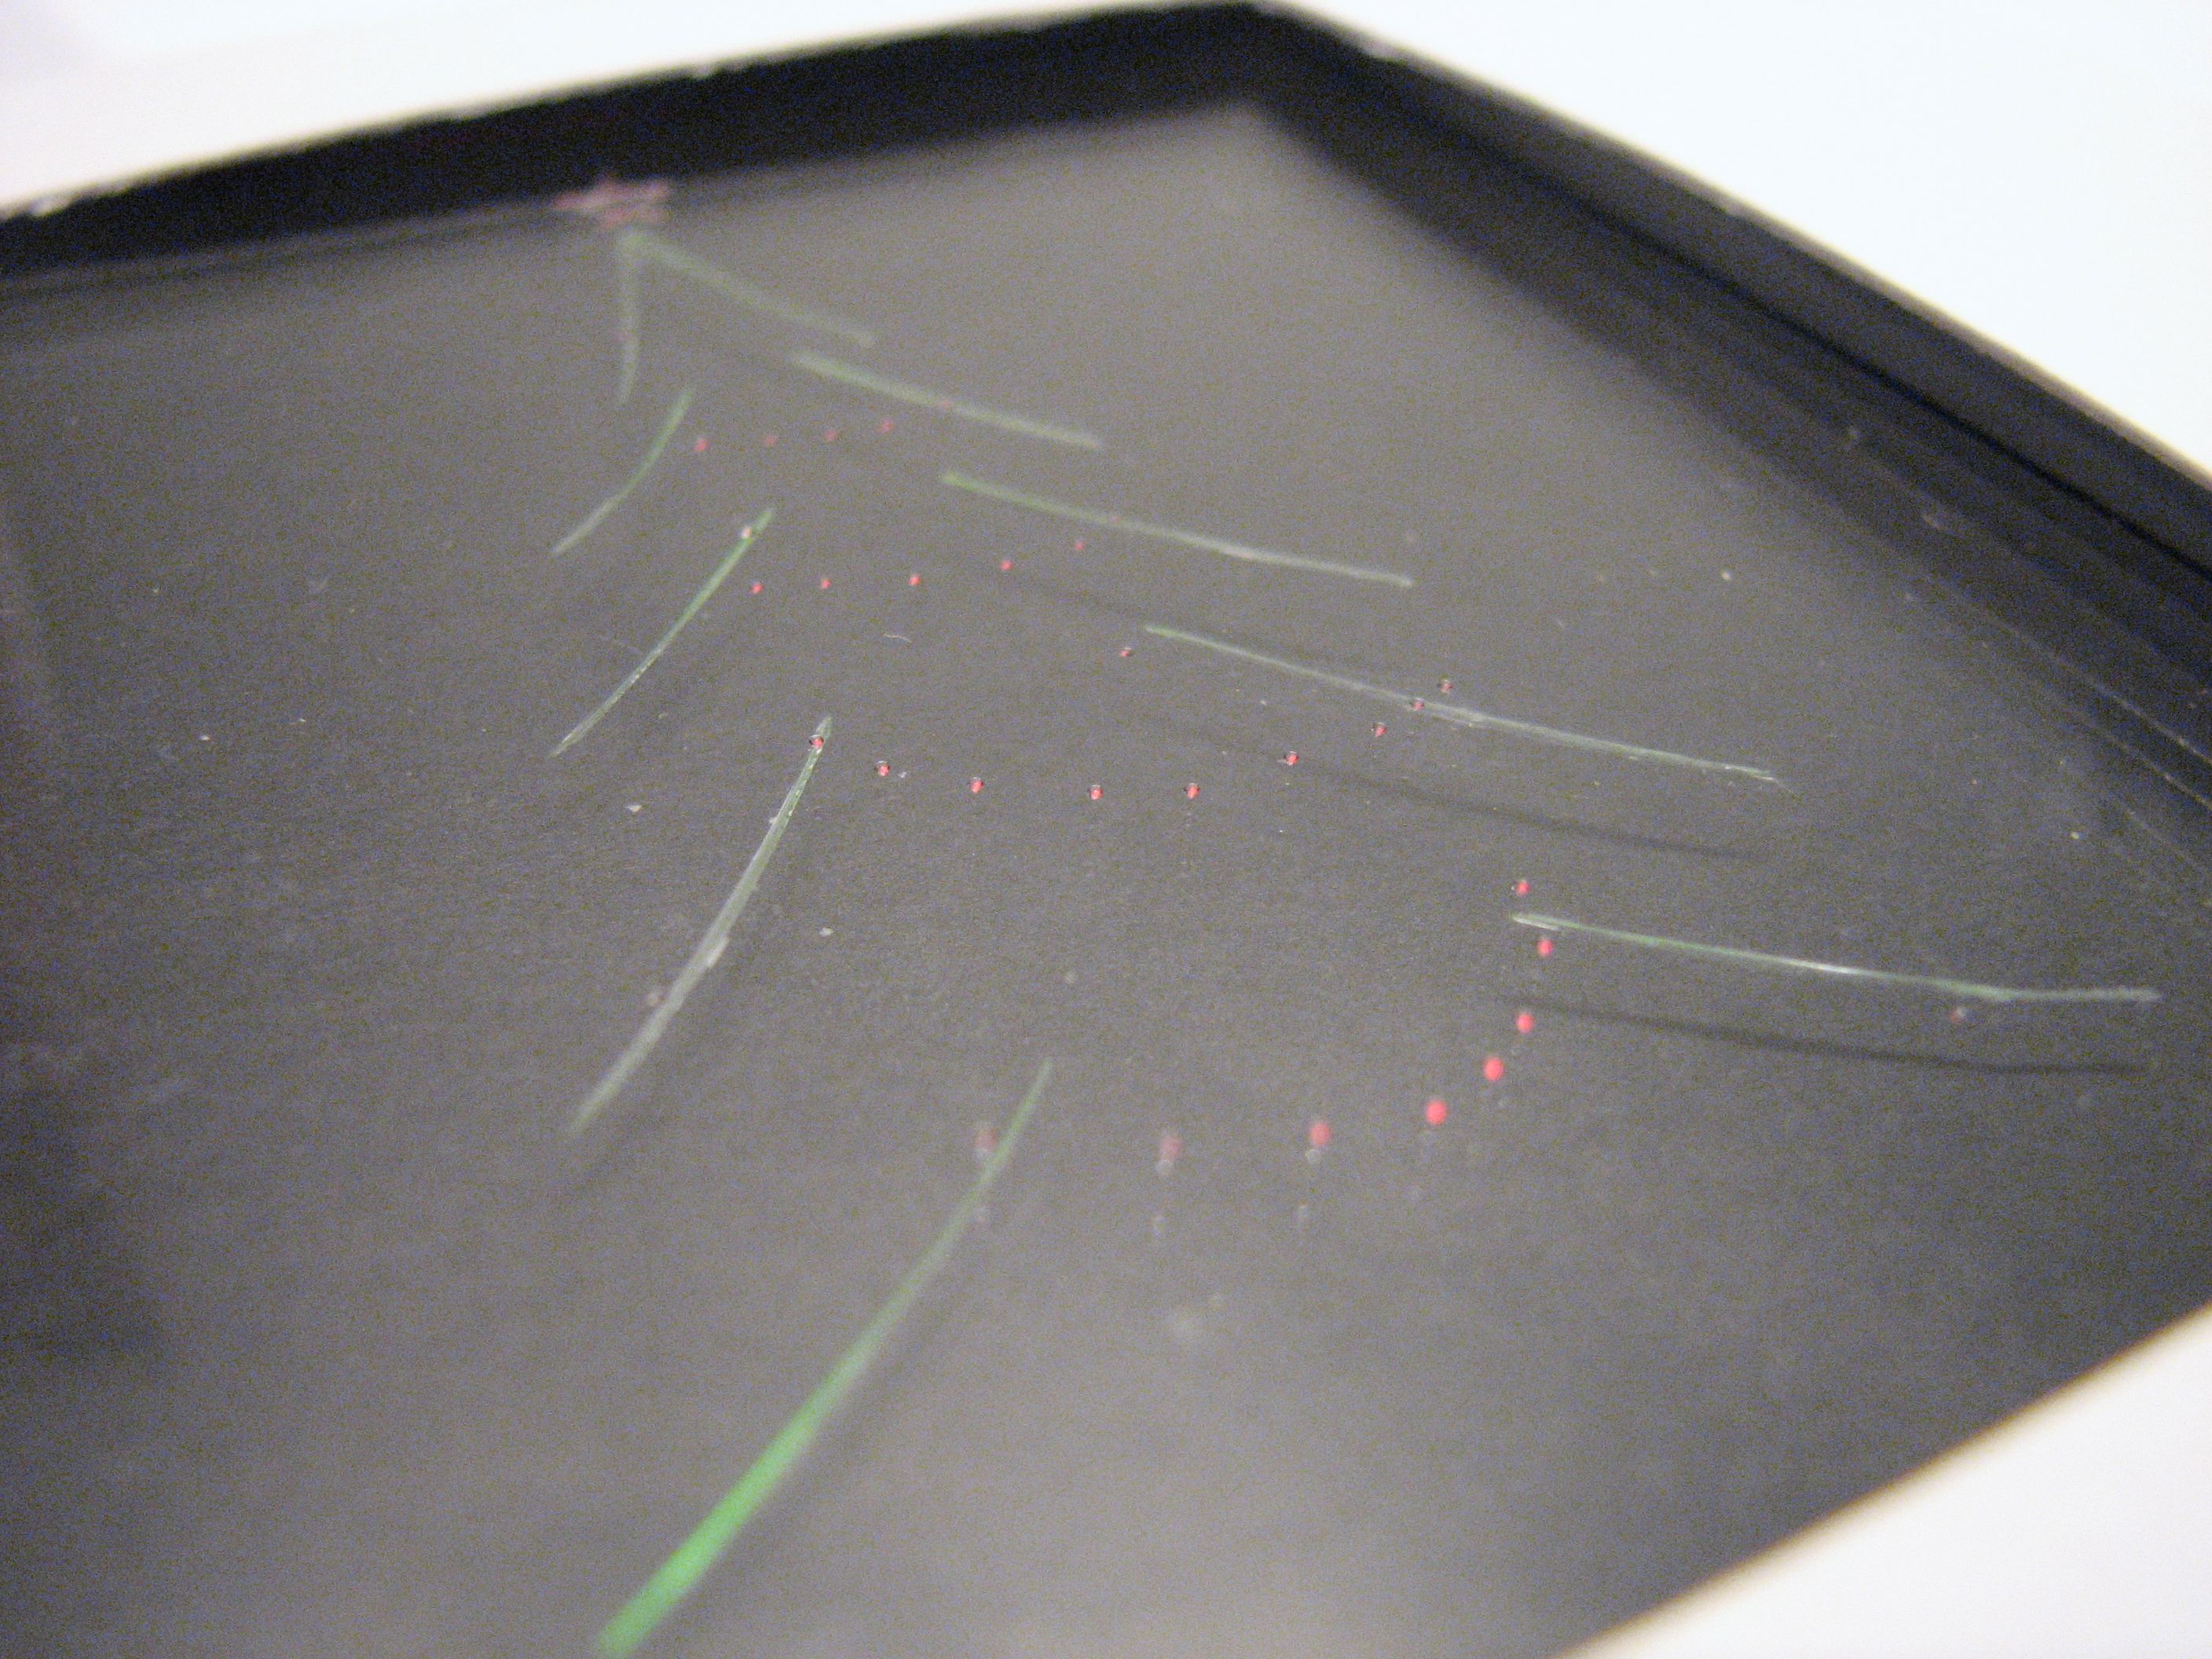
The dots on the red layer were made by pressing a push pin into the plastic, rather than using the knife.
And it’s a wrap!
Making your own edge-lit cards? Please show us pictures in the Evil Mad Science Auxiliary!
Update November 11, 2009: We’ve posted some revisions to this project here.

Very nice!
Could you save some light by wrapping the edges with a strip of aluminum foil instead (or under) the electrical tape – bouncing the light back from the edges rather than absorbing it all?
I seem to remember that backlight diffusers for LCD displays often use this trick to avoid wasting light along the edges.
Yes, of course. Reflective tape would be best for three sides Electrical tape has the advantage that it’s actually an insulator, which means that you can use it to wrap the battery and LED as well.
—
Windell H. Oskay
drwho(at)evilmadscientist.com
http://www.evilmadscientist.com/
White electrical tape might be a happy medium
Do you know any good places to get just a few LEDs? I want to use a couple for a craft project, but I don’t want to spend a ton of money on them. Also, if I have to get them online, I’d like to get them from a well-known, reputable site. But if you know of RL shops that carry them, so much the better.
Thank you!
First a little self-promotion: we may have what you need at the Evil Mad Science Shop. Other places to look in our links section are Hobby Electronics & Robotics and Surplus Electronics.
RadioShack has individual parts, including batteries and LED’s.
And you can pay an order of magnitude more for your parts there, too. What fun!
Excellent idea, I’ve just placed orders for parts to make 9 – and they’ll be USB powered cards! that way they can be displayed all christmas because there’s no worry about batteries running down and the recipients will be able to display them in forthcoming years too.
One thing I’m curious about, is the scratched/marked side of the acrylic orientated to the front of the card?
If using USB, watch that voltage and current on the LEDs! You’ll need a resistor in there.
As we said in the article, face the smooth side of the acrylic towards the observer– scratched side inwards.
—
Windell H. Oskay
drwho(at)evilmadscientist.com
http://www.evilmadscientist.com/
I’ve been tinkering with powering LEDs from USB for a couple of years now so have a nice stock of appropriate resistors. My favourite LED resistor calculator is http://led.linear1.org/led.wiz
The 3mm red, green & blue LEDs, wire & USB plugs have arrived, the 2x A4 sheets of 2mm acrylic should arrive tomorrow.
I can see this project getting more complex each year – adding in more layers with microcontroller controlled LEDs for blinking/fading and/or even a stripped down (very cheap) 1gb USB flash drive so you can give people winter pictures/music/video etc. – video christmas cards for their PCs :)
I might think that in the two layer card, you’d put the frontmost layer smooth side out, and put the rear layer smooth side in, so that the cut sides are pressed together. This for a design that you’d want to see less ‘floatyness’ than your tree exhibits.
Or perhaps on the back layer, or any internal layers for a 3+ layer card, you could score both sides with different parts of the design for a much more multidimentional look.
And lastly, if you wanted to use all sides of every layer, a very thin top layer to present a smooth surface to the viewer.
Have you tested to see how long the led will last with this battery?
Have you tried implementing a push switch button that will turn it on when wanted?
5-10 days is a usual figure for LED throwies, depending on the LED color mostly. You can use the trick that we described to make a paper switch, but adding a button to light it up somewhat defeats the purpose.
A better trick is to use the sliding piece of paper to turn the power off whenever you close the card.
—
Windell H. Oskay
drwho(at)evilmadscientist.com
http://www.evilmadscientist.com/
Does a plastic cd case would work?
Should be fine, although it’s very stiff and hard to work with.
—
Windell H. Oskay
drwho(at)evilmadscientist.com
http://www.evilmadscientist.com/
Wow, I just gave up after about four hours of trying to make one of these. It really depends on having a thin acrylic plastic. I was using just what I had lying around, which happened to be about a centimeter thick, and although i could mount the led inside the plastic, it simply would not be carved with the sharpest knife. I am, however, thinking of making a smaller keychain version, with the coin cell housed in half a 9V battery case :)
Wow– are you serious? You spent four hours trying to crack centimeter thick acrylic without realizing that it’s nigh impossible? (I’m quite impressed.)
—
Windell H. Oskay
drwho(at)evilmadscientist.com
http://www.evilmadscientist.com/
2 things:
1 – for cheap, reliable electronics parts, try mouser.com
Usually cheaper than Radio Shack, they ship quickly, and have the biggest selection EVER
2 – I had such trouble finding the right thickness of plastic…craft stores, hardware stores (big and small), hobby stores, art stores…I have yet to try this one out, but I just had a brain wave and guess what is 1/16" thick?
CD cases…
Hmm, what if you used the entire case as the card. Then you could put the battery under the black layer (where the CD clips onto) and even include a CD of Christmas music, family photos and cookie recipes.
Change that red LED to a blinking LED and your Christmas tree could have blinking lights!!
Better yet, use one of those slow color fading LEDs– cycling through red green and blue.
—
Windell H. Oskay
drwho(at)evilmadscientist.com
http://www.evilmadscientist.com/
Very Cool! I have 3 budding Evil Mad Scientists at home. We will have to try some of these projects!
This one looks neat. I’ll have to come back later.
sweet. now I know what i’ll use my only a buck cause they suck batteries for.
Maybe you should make a project utilizing rubber chickens…
Hey, i am deff doing this. but, how bout i use a thin sheet of glass with a picture of us two behind it with a big red heart around us in a picture frame? that sounds neat, cheap, and heartfelt!
Fine idea, but it’s much harder to etch glass as deeply as you can scratch plastic with a knife.
—
Windell H. Oskay
drwho(at)evilmadscientist.com
http://www.evilmadscientist.com/
Plus, you could "embellish" the picture behind it! You know, put a white halo and angel wings on one, red devil horns and a tail on the other one… switch off the LEDs when her parents come to visit. ;-)
hahahahhahhaah dude, i was laughing about that devil and angel idea! haha
that will be for valentines day….
This is a great project, definitely doing it with the nieces and nephews next week.
I understand that you did the bi-color ones by using two layers, each with their own etchings. I’m curious however, did you experiment at all with using two different leds on the same layer, most probably coming from opposing 90 degree directions? (though a 180 degree direct opposite orientation is plausibly interesting as well)
I could see arguments both way re: if it would either just blend the colors or instead leave some features more pronounced in one color versus the other, depending on the orientation and proximity of the scratches relative to which led and the viewing angle. I’ll probably mess around with this regards, though I’m interested in hearing if you tried that and/or came to any conclusion.
Well, it’s not really suitable if you want to fully separate the colors…
—
Windell H. Oskay
drwho(at)evilmadscientist.com
http://www.evilmadscientist.com/
Agreed. I suppose what I’m envisioning is a bit difficult to describe in text…. something like a kaleidoscope of several colors on a given pattern, like the snowflake. If I get anything good when messing around with this I’ll definitely upload to the flicker pool.
So incredible cool. I love this site and it’s very creative people. Merry xmas to you all :)
For another example of edge lighting – not Christmas cards – see: http://www.flickr.com/photos/12702006@N07/
I designed and built an edge lite wind blocker for my sports car. Page through the pics to find the WB. The pics will go away the end of Jan when Flickr begins charging – I don’t plan to subscribe.
Tim
Looks fun!
Patrik – I bought LEDs at Radio Shack, they came in packs of two and were not expensive.
My primary concern with Radio Shack LEDs would be that *they aren’t bright enough.*
—
Windell H. Oskay
drwho(at)evilmadscientist.com
http://www.evilmadscientist.com/
Very cool, making one today. It would be neat to make a giant one for a wall with a bunch of led’s all around it.
Im ike from Candyfab…
just made a yellow star one, great five min project Windell & Lenore!
Iv’e added a pull tag on mine, between the battery side and the leds, so It can be started on request easily.
Got a pic of the star? I was thinking of making one for my GF.
for a really spectacular effect add in one of these:
http://www.hvwtech.com/products_view.asp?ProductID=1056
light the tree layer with the green led, put a red and a blue led on the ornament layer attached to the picaxe. throw in a smd speaker and a couple of coin cell batteries. and use the code:
main:
play 2,3
play 3,3
play 1,3
goto main
the card will play jingle bells, silent night and rudolf the red nosed reindeer; and the ornaments will change colors.
I just uploaded a Holiday card to he EMS auxilary place.
http://www.flickr.com/photos/9607493@N08/3715545550/in/pool-evilmadscience
Here’s another one I just uploaded.
http://www.flickr.com/photos/9607493@N08/3715545624/in/pool-evilmadscience
qutest cards ever… <3 them…
I don’t know if anyone could help me at all … but it’s worth a shot.
I am trying to use LEDs for the first time to make a Valentine’s Day card for my electrical engineer boyfriend. I bought item #276-0084 from RadioShack (Red LED Assembly 12VDC, 15 mA, 50 mcd). The package states: "Red LED with holder and wire leads; built in 1/4 W, 680 ohm-resistor for 12VDC operation…" The power dissipation is 180 mW and forward voltage is 12V, the forward current is 15mA.
What type of battery should I use? Can I use one of those coin-type batteries like you use here?
Can I connect two of these to one battery?
Thank you for any help you could provide.
Forward voltage of 12 volts means that you’d need a 12v power source. The "button-style" batteries are only 3 volts.
You would probably be better off returning that and getting a barebones LED, such as part number 276041, or, since it’s lighting a flat sheet of plexi, a rectangular LED such as part number 276013 might be better.
Then take a look at the updated article about these cards, too: http://www.evilmadscientist.com/article.php/edgelit2
Also, the "Throwie Analysis" article about Red LEDs, http://www.evilmadscientist.com/article.php/throw, says that you shuold probably also pick up a 200 ohm resistor while you are at Radio Shack, to extend the battery life of the button battery.
For what it’s worth, the lowest prices I’ve found locally on the CR2032 batteries has been at Lowe’s Home Improvement. Drug stores, electronics stores, and other big-box stores around me tend to have prices on those batteries of around $4-6 EACH. Lowe’s sells them in a 2-pack for 4 bucks. Online in bulk is cheaper, but takes longer.
Thank you for your help.
I plan to go to Radio Shack and buy item number 276008 (Rectangular High-Brightness Red LED Lamp), a CR2032 battery, and a 200 ohm resistor. Are 200 ohm resistors called something else? I can’t seem to find one on the website.
Thanks again.
The closest value that Radio Shack carries is a 220-ohm resistor. The 1/8 Watt 220 Ohm Carbon Film Resistor (5 Pack) is what you want, part number 271-011.
That kind of LED is wired up so that you hook it directly to a car battery, and it’s dim enough that you’ll barely see it. It won’t be able to light an edge-lit card like this bright enough to see, and the holder will make it so that you can’t mount it mechanically how we do.
It would be *much* easier to follow the instructions here– using a small and bright LED (alone) with a coin cell.
Windell H. Oskay
drwho(at)evilmadscientist.com
http://www.evilmadscientist.com/
Thank you so much for your help.
this sounds really dumb but how do you do the paper switch if you have got battery attached to the LED, i make cards but am new to electronics like this, i want mine to go out when the card is shut.
any help would be appreciated.
A paper switch would be a piece of paper that slides between the battery and the lead of the LED when you want to turn it off. Usually, this would be hand operated.
If you want to make it automatically turn off when the lid is shut, that’s quite a bit harder but it is possible– look at pop-up book construction for tips on how to make a piece of paper slide in a particular way when the page is opened.
Windell H. Oskay
drwho(at)evilmadscientist.com
http://www.evilmadscientist.com/
I’ve just discovered your site and I think it’s AWESOME!!. I’ll try these christmas card and maybe then refresh a LED clock I’ve designed some time ago and never finishes it.
Congrats on your site!!