


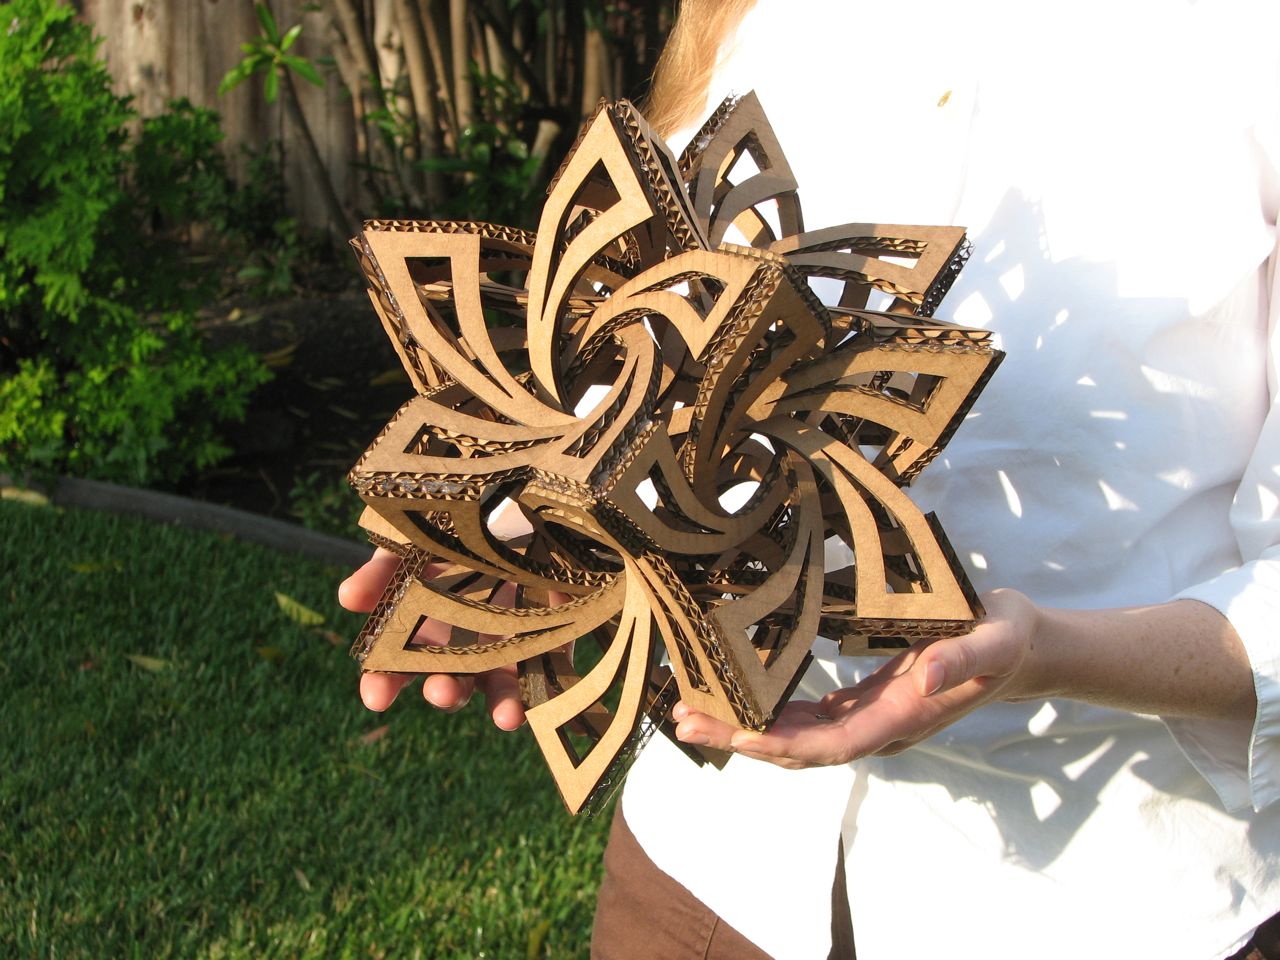
George W. Hart is a professor at Stony Brook and is one of our favorite artists, making a wide variety of stunning geometric sculptures. On his of his many works that has particularly captivated us for some time is a sculpture called Frabjous.
When we realized that George had posted a template for this sculpture we dropped everything, grabbed the cardboard and hot glue, and raced to build our own.
You’ll need papercraft type building materials: Paper, cardstock, or cardboard, and tape or glue. Also good scissors and/or a hobby knife with sharp blades. You can also build this with wood, plastic, or other materials, of course, but cardstock and cardboard are inexpensive and effective. Hot glue also proved to be excellent, providing sufficient strength and flexibility, and good working time.
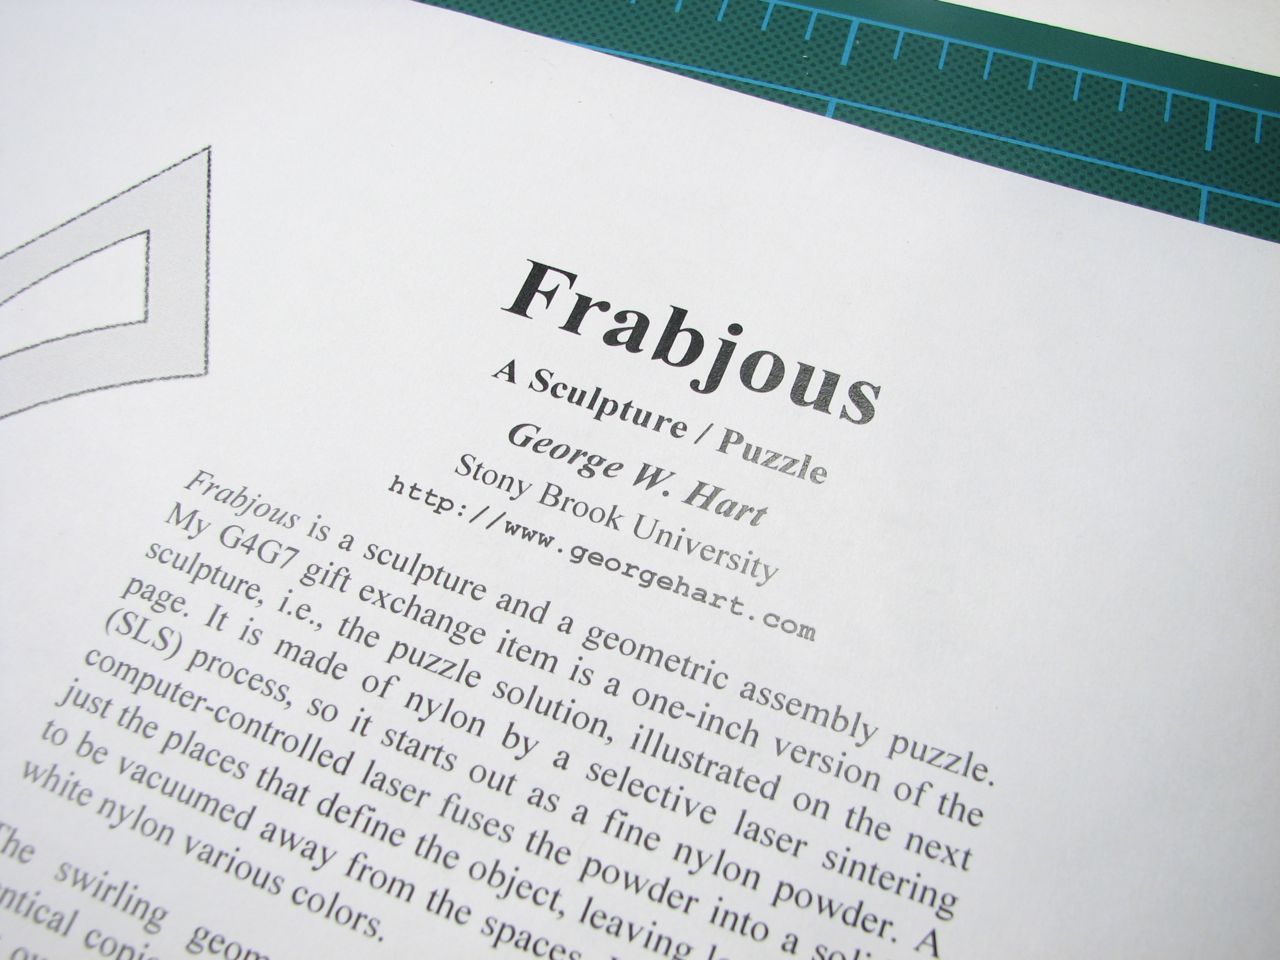
You can download the PDF template for Frabjous on its web page.
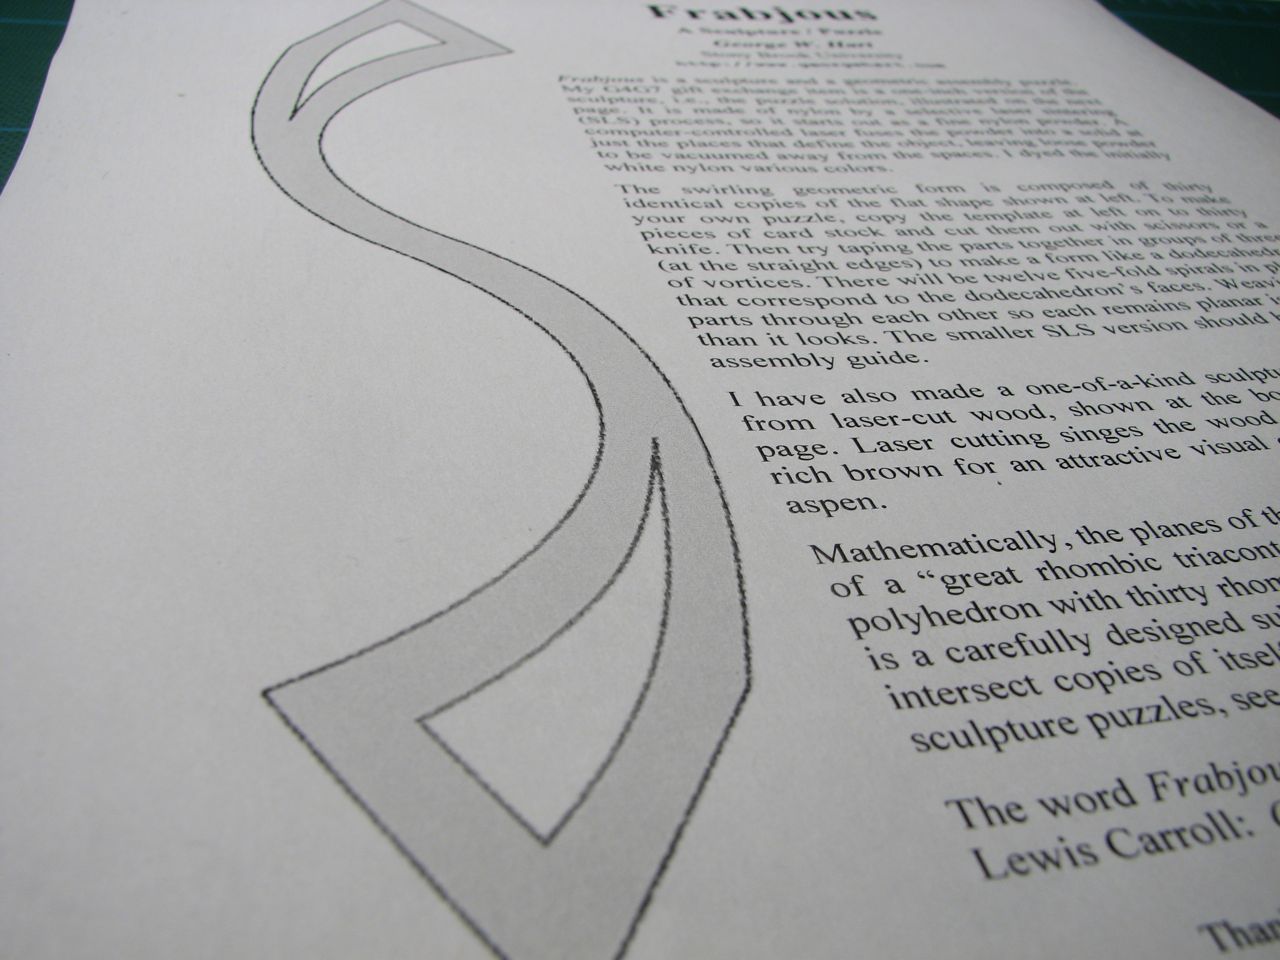
The sculpture is made out of 30 identical pieces, with this S-curve shape. (We’ll look at the reason for the shape a little later.) The design is scaleable: print out the template at the size that you would like to make it. Larger means more time cutting but it might be easier to assemble.
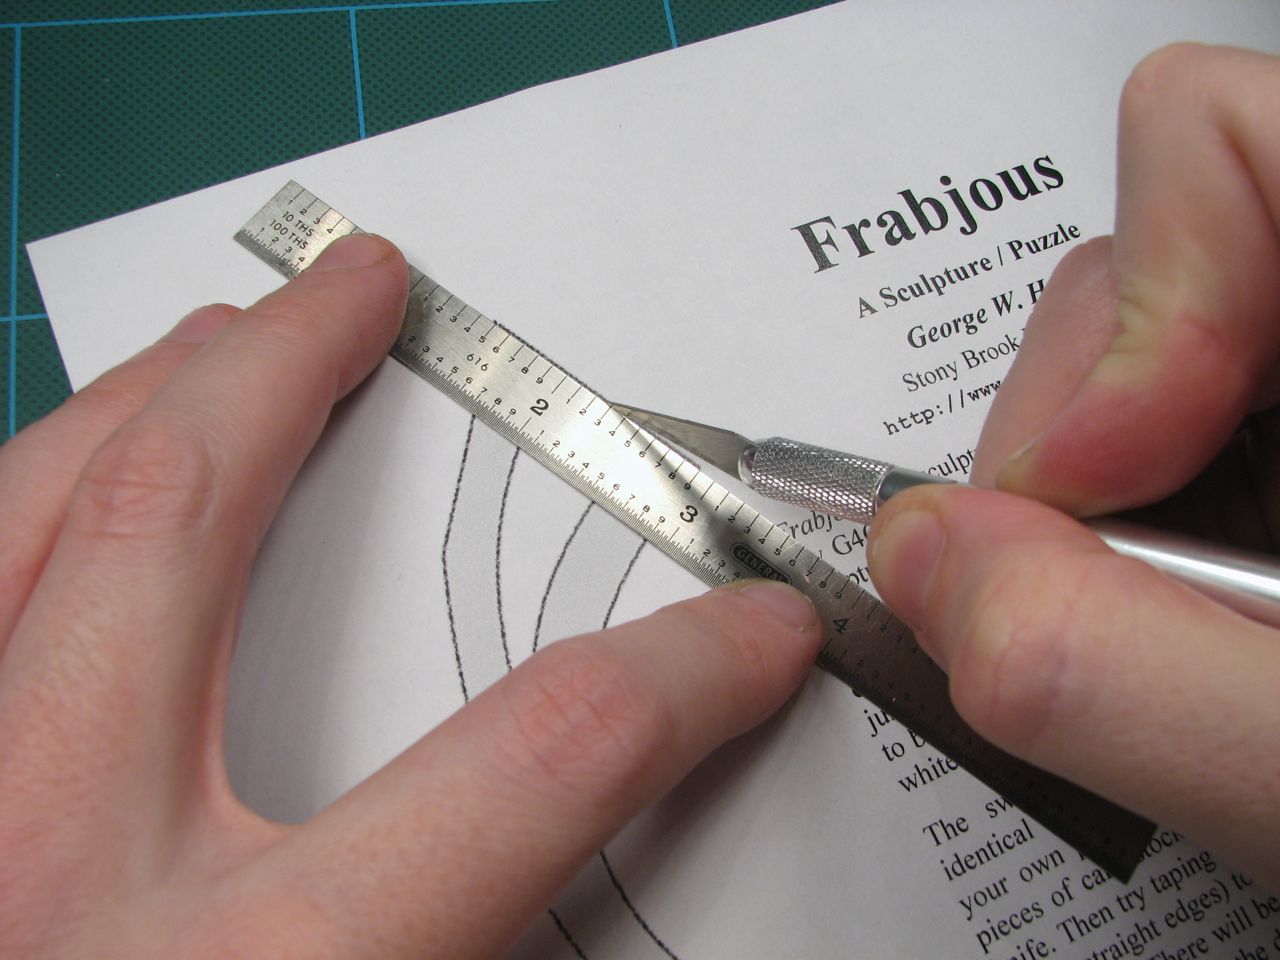
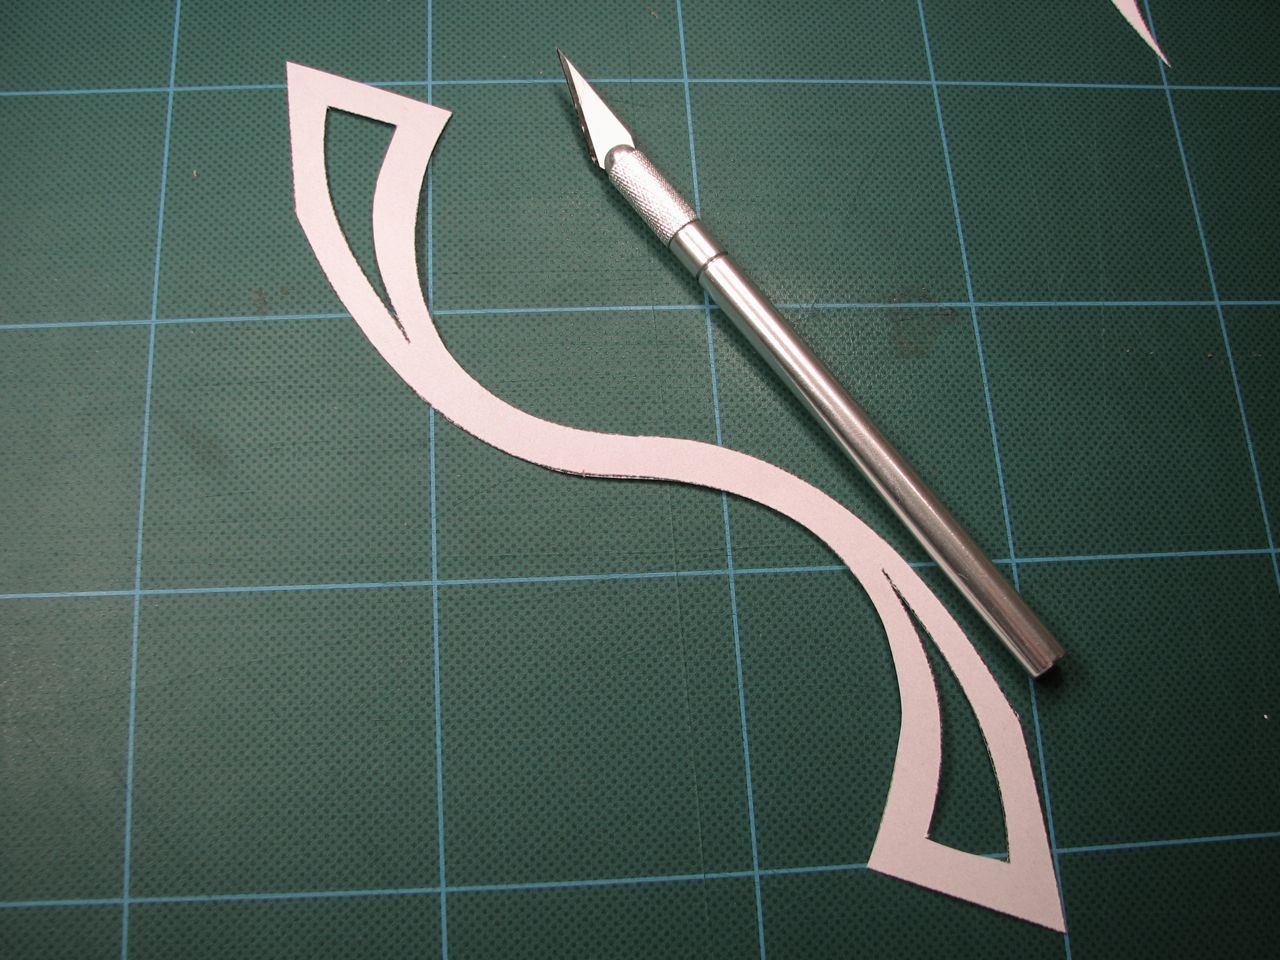
Cut out your template at your scale of choice. You can directly make 30 of those as a paper model or trace and cut out the model, like we did in cardboard.
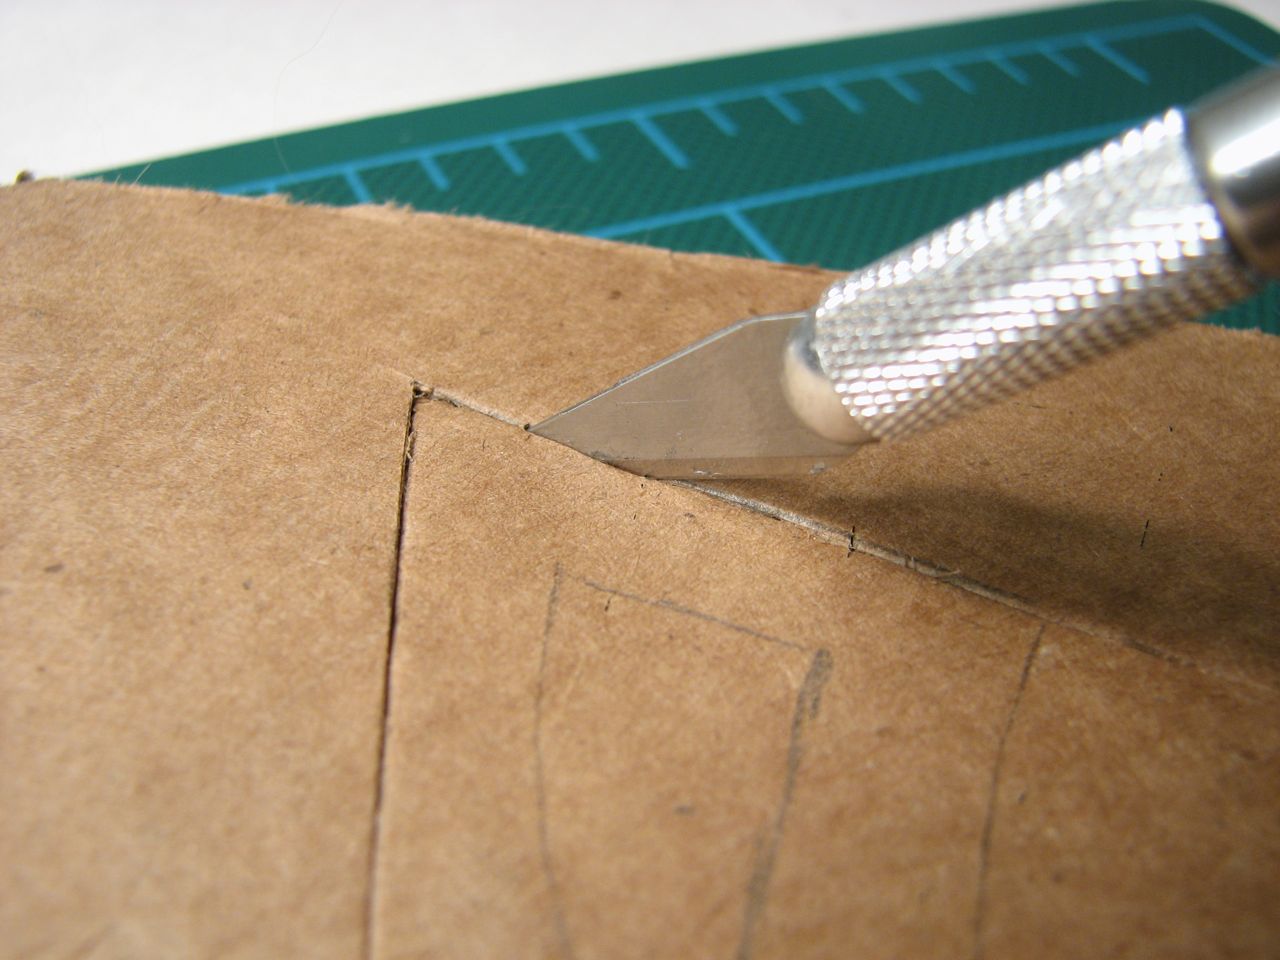
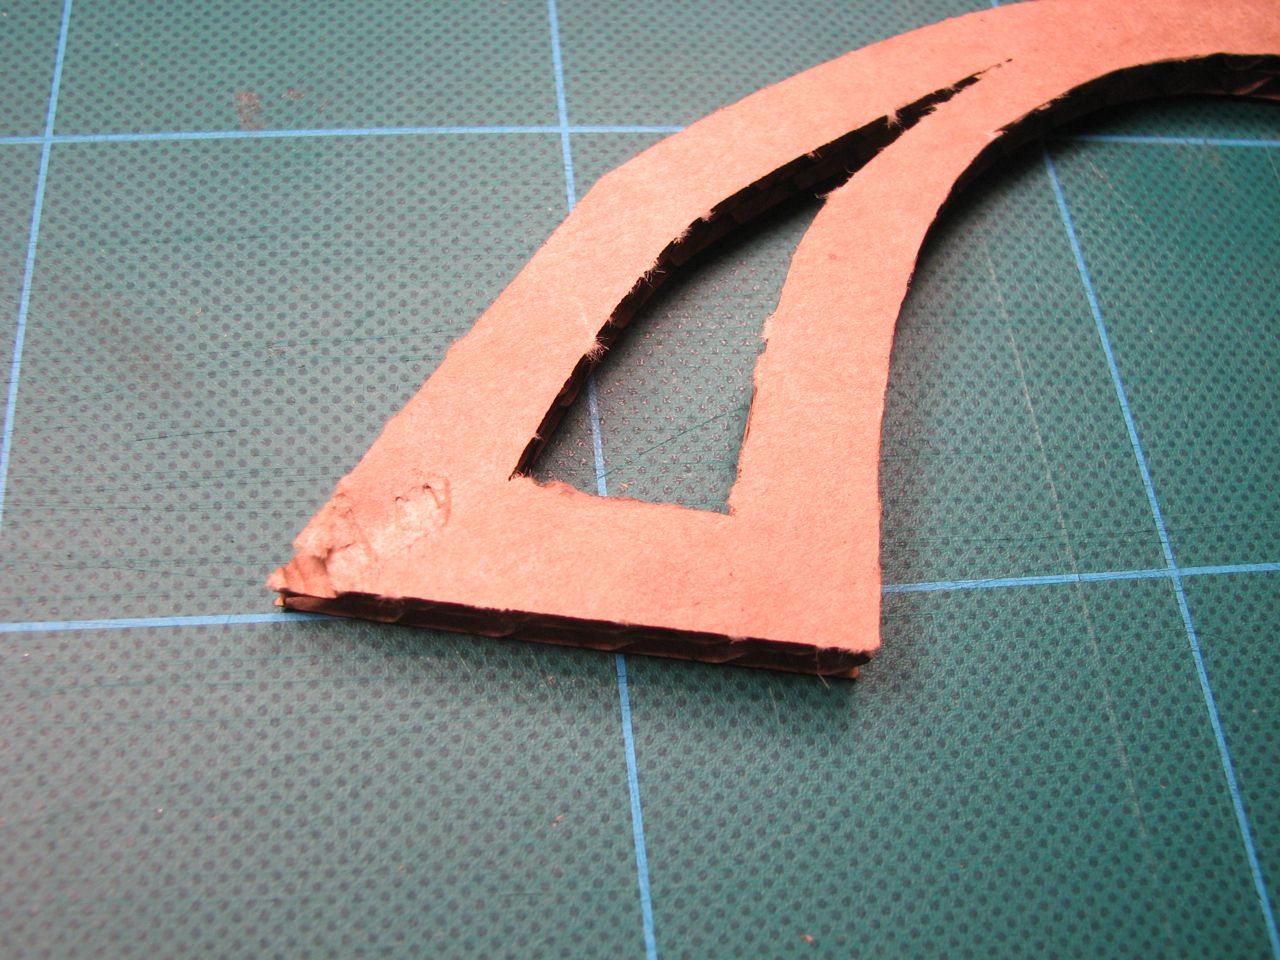
You need 30 pieces so this can *ahem* take a while. The good news is that the sculpture will still work even if your pieces are banged up, have lost some stiffness, or have occasional mistakes.
Big hint for cardboard: replace your blade often. (Here is where we get ours.)
Once you have all the pieces, then comes the challenging part, putting it all together.
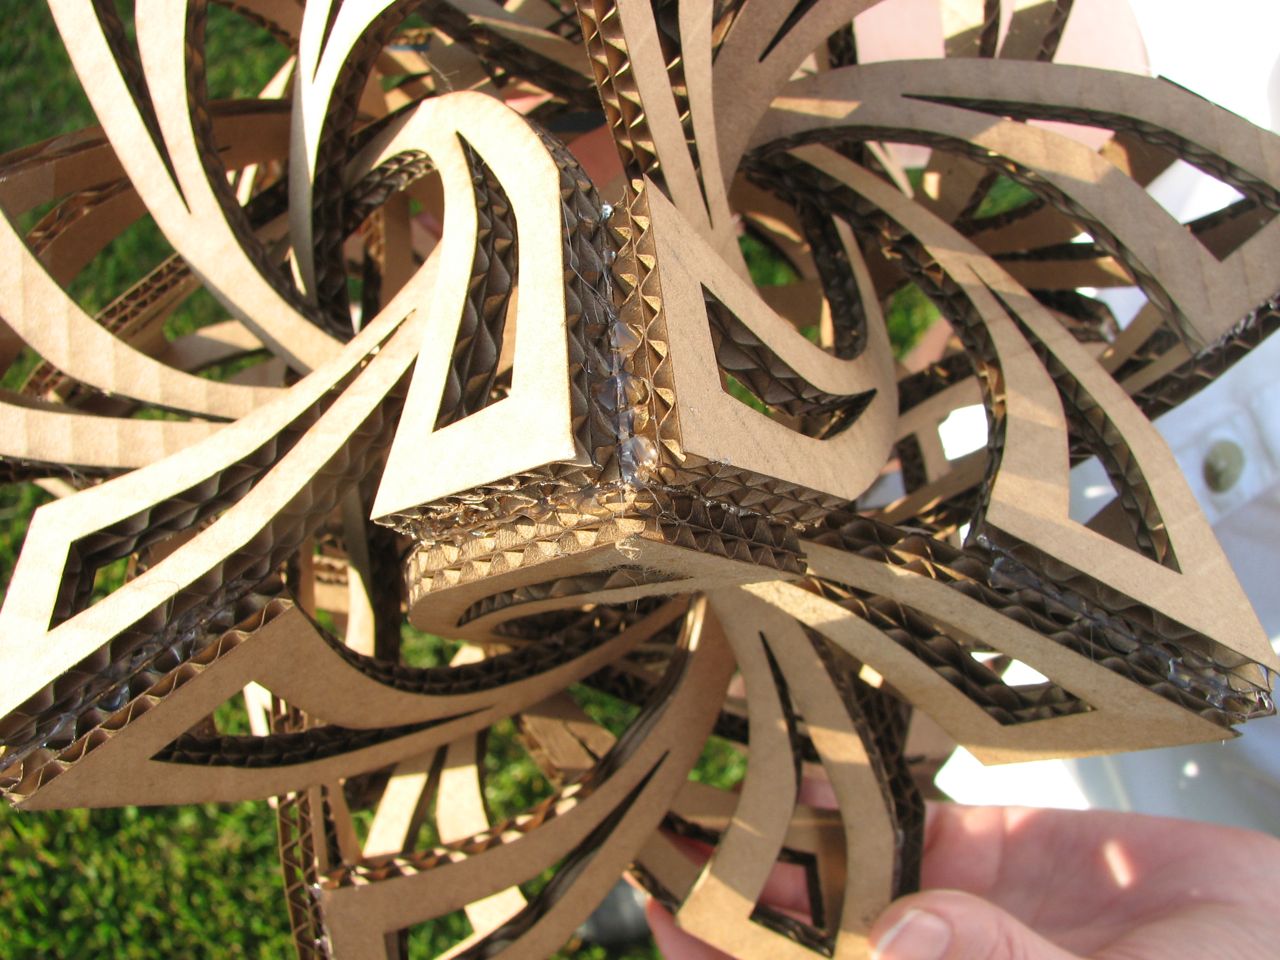
The first hint about construction is to look at the corners. Every intersection between the pieces is attached the same way: the flat ends are glued together, in a symmetrical arrangement. Unfortunately, this only gets you so far, and constructing the rest from that principle is a true puzzle indeed. To understand which pieces should go where, it’s helpful to look at the design from a geometric standpoint.
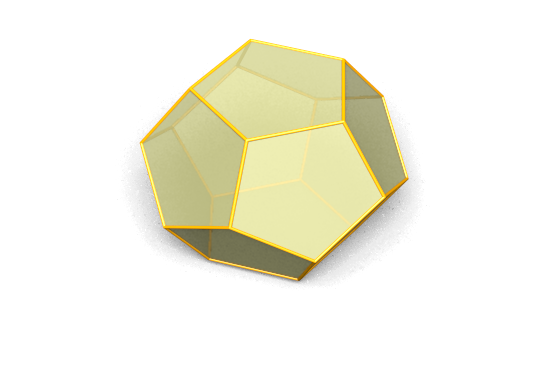
The parent shape donating its symmetry is a simple dodecahedron.
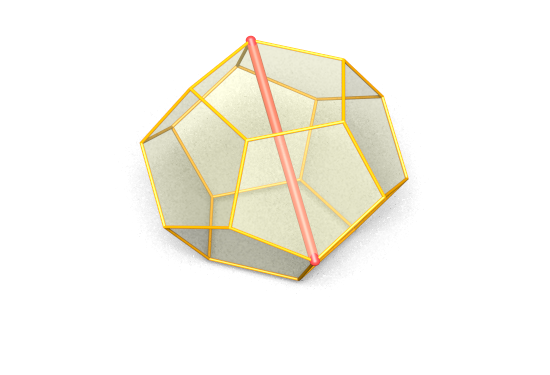
Within that shape we inscribe a line segment between two vertices: this is where our “puzzle pieces” will go– each will go where a line segment is and connect two vertices of the dodecahedron.
Each vertex of the dodecahedron is also a vertex of three bordering pentagons. To draw a line segment, pick one of those three pentagons, and connect the vertex to the corresponding opposite vertex of the neighboring pentagon as shown. This is probably the single most important thing for understanding how the sculpture goes together– that each piece fits in that relation to the overall shape.
Now, we’ve only drawn segment coming out from that top vertex, but obviously there are three such possible segments because there are three pentagons that touch there. This intersection of three “puzzle pieces” at the corners is exactly what we saw in the completed sculpture, where three pieces get glued together at each intersection.
Now what happens when we start drawing the segments coming out of more than one vertex?
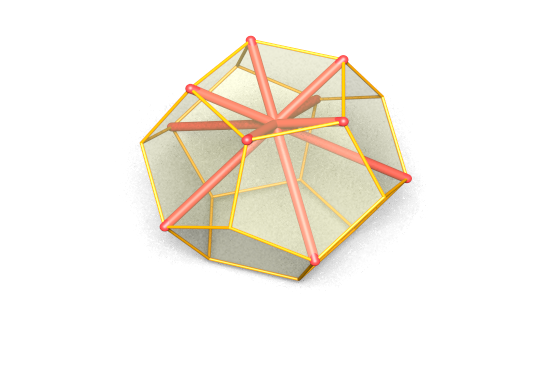
Here we’ve drawn one segment originating at each vertex of the top face. Unfortunately, this shows that our model– connecting vertex pairs as we have, with simple segments– leads to a problem. All five of these puzzle pieces would intersect.
The solution is to “bend” the segments to avoid the intersection:

Here’s a corrected curvy “segment” that will hopefully avoid bumping into others as we start to add more to our sculpture.
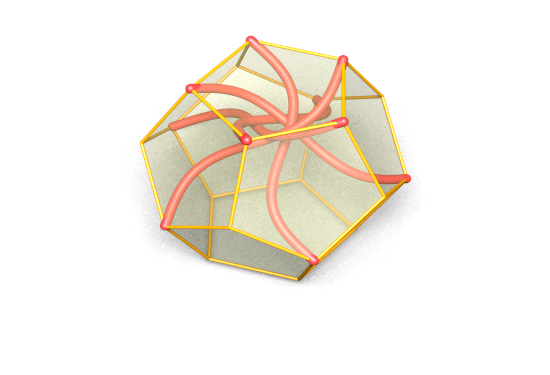
Yes– looks like we’re now avoiding intersection.
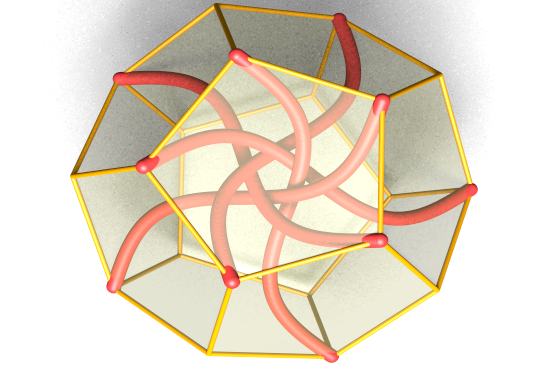
Taking a look at the model from the top, we can also now begin to see the “vortex” shapes from the original sculpture start to appear.
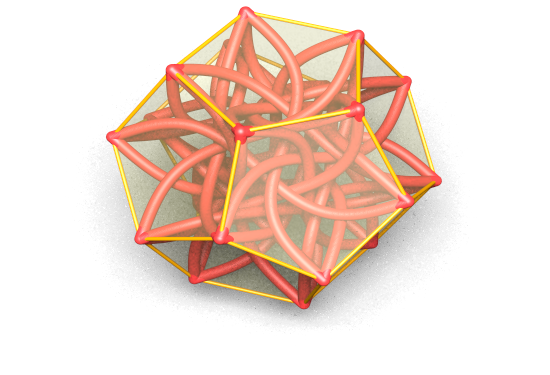
Adding the rest of the curves, between every relevant vertex pair, the sculpture emerges. In particular, note that we can now see the three pieces that come together at each vertex of the dodecahedron.

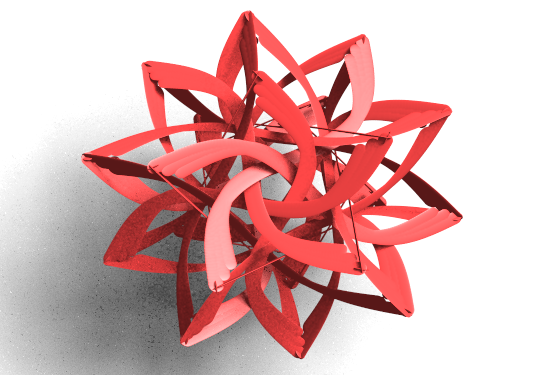
Without the framing dodecahedron, the shape looks more mysterious once again.
We have the geometry now, but we still need to replace our curves with flat shapes to begin to approximate the appearance of Frabjous.
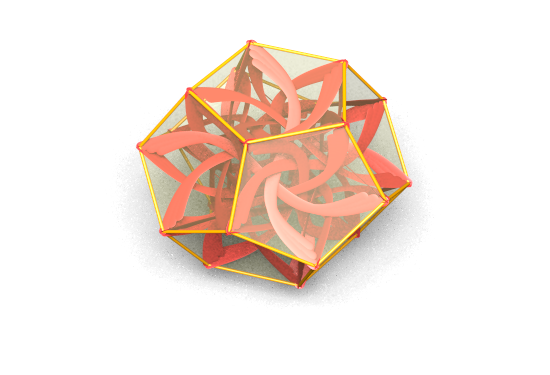
It’s a slightly crude drawing, but it might be helpful in seeing how the real-world version fits together.
You can see more pictures and renderings of this sculpture in this flickr photo set.

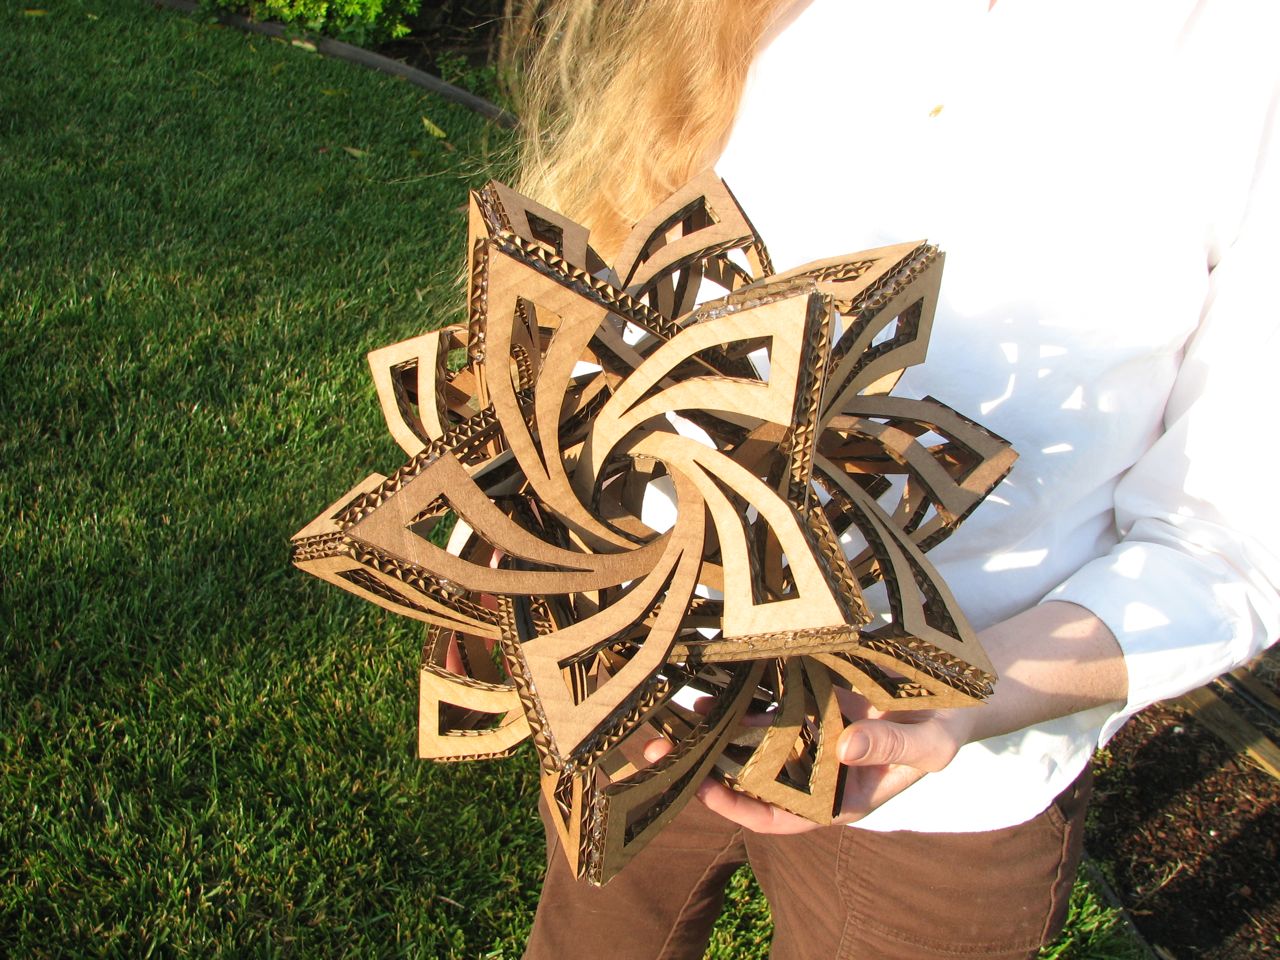
Looks great! The corrugated cardboard adds a nice little "decorated" edge to the whole thing.
I noticed that Hart posts the shape of the component pieces for many of the other puzzles on his website as well – I’ll have to make me one of those…
Now, how to design one of these puzzles, so the pieces tile the plane as well – so you can cut them out with only half the effort, and far less waste?
>Now, how to design one of these puzzles, so the pieces tile the plane as well
Yes, good point. These pieces do not tile efficiently. On the bright side, we started with old cardboard boxes– and reusing is at least as good as recycling. :)
—
Windell H. Oskay
drwho(at)evilmadscientist.com
http://www.evilmadscientist.com/
this is amazing. the fact that someone could ever do this with out a template is sheer genius. i am going to make one of these right after i move. hopefully
—
-avid twitter user: theycallmeshua
Very very nice! Two questions:
1. What did you use for the 3D illustrations? They are gorgeous.
2. Um, is there a reason you didn’t laser-cut the pieces? Seems pretty perfect for the job
We use POV-Ray for our 3D– it’s really quite excellent for 3D scenes (like these) that adapt themselves well to mathematical description.
As far as the laser goes, it’s an excellent idea. We’re thinking of trying a wooden version once we work out some slightly better means of attaching the edges to one another.
—
Windell H. Oskay
drwho(at)evilmadscientist.com
http://www.evilmadscientist.com/
Hello,
Do you use plain POV-RAY or just for renering and model with something else like MoRAY? Thanks….
We’re just using straight POV-Ray. This sort of design– pure geometry — lends itself well to making full scenes.
—
Windell H. Oskay
drwho(at)evilmadscientist.com
http://www.evilmadscientist.com/
Oo, fascinating. Lovely.
This would look great made out of coroplast (corrugated plastic). I’ve got a bunch of it just waiting for a higher purpose.
I am staring at your 3d thought process drawings and beginning to suspect that the chirality of your models is reversed from the actual frabjous you made!
Yup, works either way– just pick ONE when you’re putting it together!
—
Windell H. Oskay
drwho(at)evilmadscientist.com
http://www.evilmadscientist.com/
Mine looks more like this:
http://img194.imageshack.us/i/img1096o.jpg/
Could you please give me a tutorial how to build it up?
I didn’t know how to build it, there are no steps between one piece and the finished Frabjous…
(hope my english is not that bad ;) )
Step 1: Learn how to connect the three pieces at the edges, like we show in the photo.
Step 2: Learn the geometry, so that *you* understand which piece goes where. Once you understand how each piece fits into the puzzle, it becomes possible to see where the next one goes.
Step 3: Start joining pieces together at the ends, while understanding which piece is going to end up where in the final sculpture.
—
Windell H. Oskay
drwho(at)evilmadscientist.com
http://www.evilmadscientist.com/
It might help to assemble the pieces with masking tape before gluing them together permanently.
This was pretty challenging. Very nice post. Nice touch on giving the hint of how the pieces are placed in relation to the shell shape.
I laso had a bit of trouble figuring this out but was able to complete the structure anyway. I have it detailed here:
http://limatik.com/2009/11/how-i-solved-the-frabjous/
I didn’t give it all away though but go check it out.
http://www.thingiverse.com/thing:724
totally thingiverse’d
How about a CandyFrabjous?
I recently saw artwork and jewelry by Anthony Roussel made using laser cut wood
His rings and bangles look like topographical models and seems to be a quite unusual view on accessories
The mention of laser cut reminded me of the different projects you do and thought you may be interested in seeing another’s use of the tool: http://www.dazzle-exhibitions.co.uk/Dazzle/pages/AnthonyRoussel.aspx or http://www.anthonyroussel.co.uk/
I have just finished making a Frabjous out of foam-core board.
A few mistakes and backtracks along the way, but I finally got there!
I made the shapes a little longer to have some overlap where they come together. Gluing flat surfaces together is easier/stronger than joining an edge to an edge, but it won’t look quite as spiky.
When assembling, I glued some of the corners together, but stuck other corners together with post-it notes. In order to get the last few pieces in, I needed to loosen some of the other corners.
A hollow partial dodecahedon former is very handy to hold a partially-assembled frabjous together in the correct alignment so you can add to it.
Tag parts, e.g. "top", "needs fixing" with labels or blu-tack so that you know where you are up to, especially once you start re-doing bits and/or turning it over. I was tempted to label the ends of every piece with which corner it belonged to …
Check and re-check before final gluing. If the pieces don’t come together nicely at a corner, or a part is loose enough to fall out of the complete but unglued frabjous, then there probably _is_ a problem e.g. some part crossing over when it should be crossing under some other part.
Pictures later.
So I’ve cut out my pieces from chip-board and began assembling my frabjous however I’m having quite the time getting it together :(
As mentioned above I like the idea of using a partial dodecahedon to aid in assembly however I have no idea how large it should be.
I think the greatest issue I’m having (as Windell alludes to) is wrapping my brain around the inner geometry of the piece and truly understanding what it is I’m building. I’ll continue to trudge along, hopefully pics of my triumph will be forthcoming.
Lovely piece of art.
Lakshmi
http://www.tasteofmysore.com
You know, it would be awesome if somebody were to make this with gingerbread shapes and icing glue :-)
Myself, I’m just too lazy to even contemplate it.
Just make one myself with corrugated cardboard…it really does take a loooooong time, especially cutting out the 30 pieces…It took me 3 full days (1.5 weekends) to complete the puzzle. I initially thought the gluing pieces together part would be trivial….but it was a bit more confusing then I expected, had to backtrack and un-glue things a few times.
What is the angle between every 2 of 3 components?
How does one go about finding a local company that can punch out the parts for this with a laser cutter? What sort of data file do I have to provide?
Although, I’ve got to admit, your corrugated cardboard version sure looks good, and it’s something I can do by hand.
If I understand your question correctly, the angle is 116.565
I’m surprised nobody posted this. Someone made a template on Ponoko for this:
http://www.ponoko.com/make-your-own/toys/frabjous-cutting-template-pack-3110
George Hart has now been hired by the "Museum of Mathematics" in New York. They are selling a kit to make this in their store:
http://momath.org/shop/frabjous/
http://momath.org/shop/frabjous-special-edition/
It’s also available on Amazon.
Note: I am not associated in any way with the Museum of Mathematics or George Hart. I’m just a fan of his, I was checking on his web site and found this, and thought you’d like to know.