


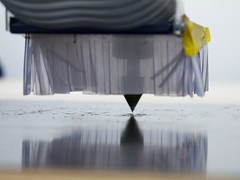
Recently we have seen some fantastic DIY examples of CNC image carving with traditional halftones and alternative versions with regions generated with reaction-diffusion equations. More impressively, all of this is now possible with freely available, homegrown software released by the people behind those projects (Here and here.)
Seeing these examples reminded us of another “classic” method of making halftones: ASCII art. In what follows, we walk through the process of using making CNC halftones for engraving or carving from both vintage and automatically generated ASCII art.
Seldom seen nowadays, ASCII art is a computer graphics technique where grayscale photos or artwork are represented by keyboard characters on a regularly spaced grid. And while it does show up occasionally in the history of computer graphics, it is perhaps more important as a cultural artifact of the BBS era of computer networking.
While making ASCII art was once a painstaking process of hand creation– a true art –much of what is called “ASCII art” these days is automatically generated.
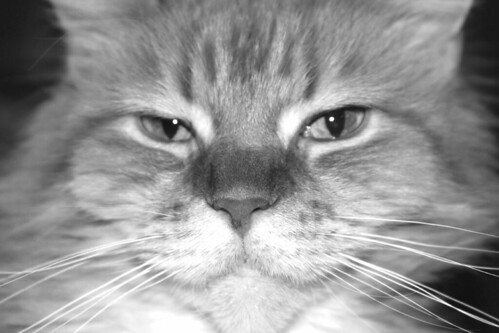
Let’s suppose that we start with a high-resolution source image:
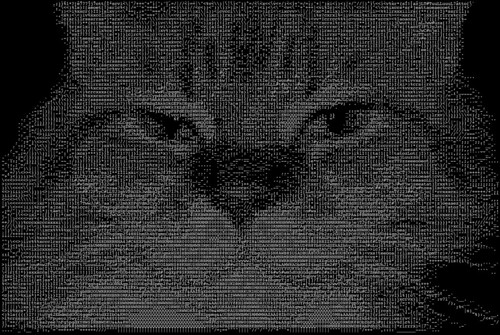
That picture is then divided up into a grid, and the average brightness of each grid cell is computed. Depending on the brightness of each grid cell, it is overlaid with an ASCII character, where the character is chosen depending on its brightness (with ‘.’ at one extreme and ‘Q’ at the other). To do this, we used a custom sketch written in Processing, which takes an image as the source and saves a PDF file as the output. (If you’re interested, the sketch is available for download here, a 1.7 MB .zip archive)
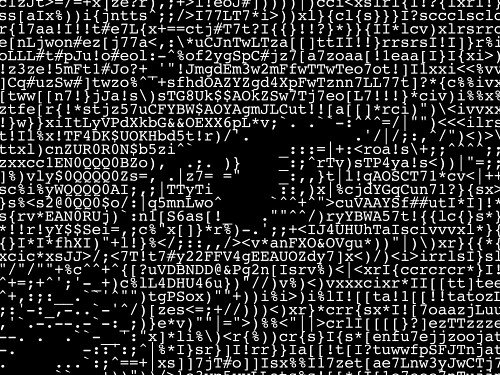
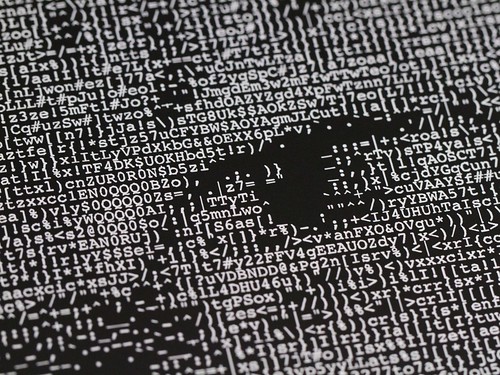
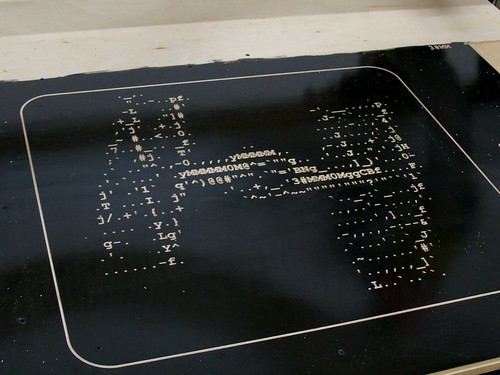
After processing, we’re left with an automatically-generated “ascii art” halftone version of that picture. (It is worth pointing out that the halftone here is only of moderate quality– the particular ASCII map used is rather far from linear with brightness, which causes some saturation of the tones. This could very easily be improved with a new brightness map model that actually calculates the brightness of the different ASCII characters.)
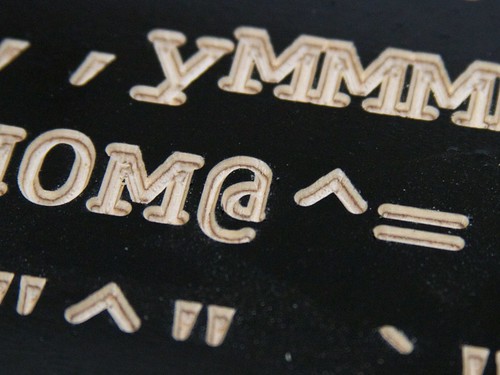
Zooming in on that artwork fine enough to see the actual characters, it looks like this:
The above image was generated directly from the PDF output by the Processing sketch. To produce this in real life, we took a sheet of “engravable” acrylic– white acrylic with a very thin layer of black acrylic on top –and laser engraved it. Here is the result:
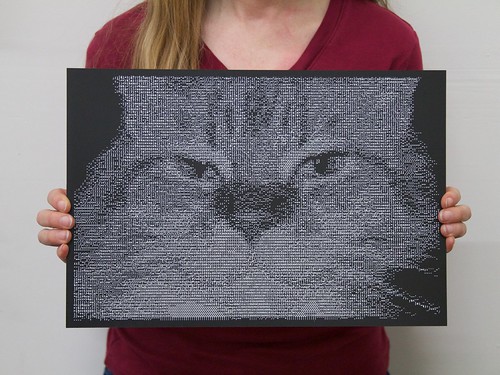
Up close, this has a remarkable resemblance to the artwork above. The main difference seems to be that is that this is a photograph:
While this “automatically generated” ASCII art is pretty neat, there’s also something to be said for true “old school” ASCII art, laid out by hand, one character at a time.
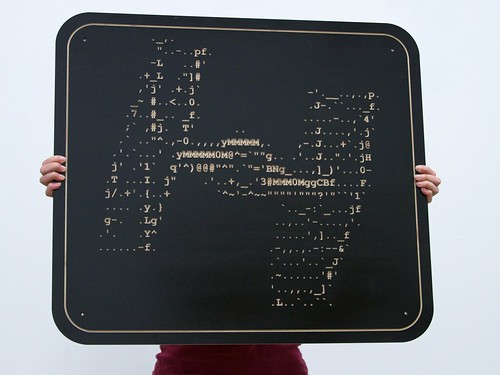
Browsing through some rather impressive archives of ASCII art, we came across this gem by Raymond E Brunner
                ._,.
           "..-..pf.
          -L   ..#'
        .+_L  ."]#
        ,'j' .+.j`                 -'.__..,.,p.
       _~ #..<..0.                 .J-.``..._f.
      .7..#_.. _f.                .....-..,`4'
      ;` ,#j.  T'      ..         ..J....,'.j`
     .` .."^.,-0.,,,,yMMMMM,.    ,-.J...+`.j@
    .'.`...' .yMMMMM0M@^=`""g.. .'..J..".'.jH
    j' .'1`  q'^)@@#"^".`"='BNg_...,]_)'...0-
   .T ...I. j"    .'..+,_.'3#MMM0MggCBf....F.
   j/.+'.{..+       `^~'-^~~""""'"""?'"``'1`
   .... .y.}                  `.._-:`_...jf
   g-.  .Lg'                 ..,..'-....,'.
  .'.   .Y^                  .....',].._f
  ......-f.                 .-,,.,.-:--&`
                            .`...'..`_J`
                            .~......'#'
  Ray Brunner               '..,,.,_]`     Sienar Fleet Systems' TIE/In
                            .L..`..``.     Space Superiority Starfighter (2)
For this, with a smaller number of lines, we scaled it up enough that we could mechanically engrave the individual letters, using a CNC router with a V-carving bit. For the smallest feature size to be about 1/16" (or a little larger) the whole design ended up being about 30 inches across.

We began with a sheet of 1/4" plywood, and coated the top surface with a black polyurethane finish, to give the "black screen" effect. Carving through this reveals the white (or nearly so) wood underneath.
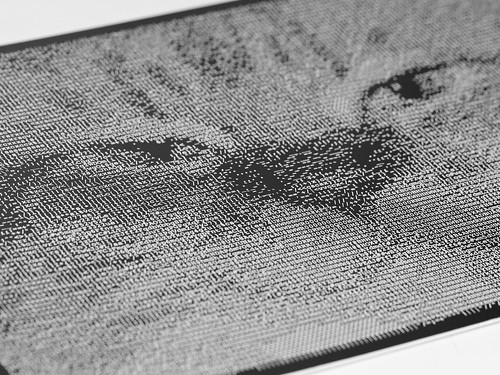
Up close, the carved characters in the plywood reveal the inner layers and bands. These aren't a major concern, as you don't tend to notice them from a distance. Also, zoomed in this close onto the characters, you really can't tell what the image looks like at all.
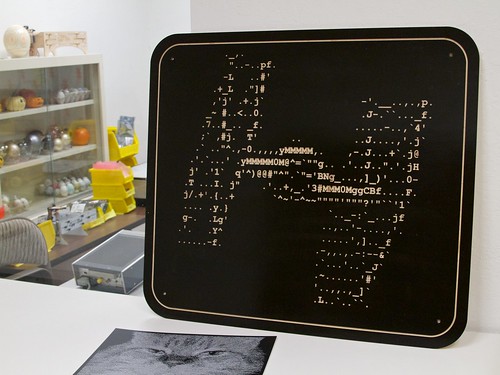
And, here is what it looks like for scale-- notice the cat in foreground. This is really much, much larger than the laser engraved artwork.
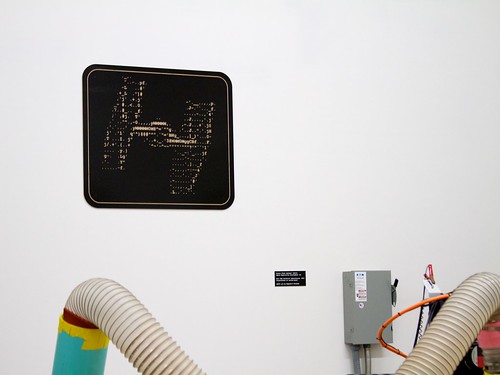
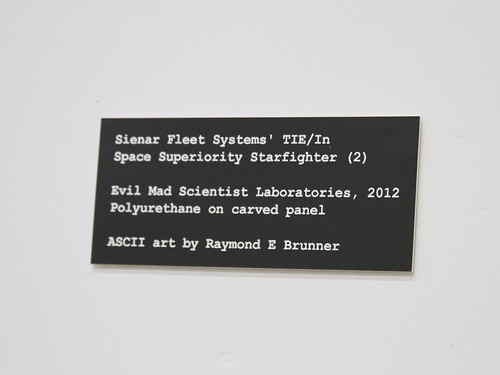
Finally, you might have noticed that the original ASCII artwork had a credit and caption embedded within it. We reunited this information with the artwork when we hung it on the wall, on the separate gallery tag.

I’m surprised you didn’t do conventional halftoning by using a large bit (or a countersink bit) and variable depth.
I’ve had some success with laser cutting halftones in various materials. Two neat properties are that they can cast half tone shadows and when backlit the otherwise “negative” image becomes a fairly visible positive.
Very, very nice!
Windell H. Oskay
drwho(at)evilmadscientist.com
http://www.evilmadscientist.com/
I’m surprised you didn’t mention GIMP in here. When saving a picture, change the extension to .txt (plain text) for ASCII art. I even experimented with color ASCII art, made by creating ASCII art for red, green, and blue layers, then merging them together in GIMP again.
Also, both GIMP and old school ASCII art writers take advantage of character shapes to better illustrate the images they form.
What did you use to generate the gcode for the cnc version?
We use VCarve Pro by Vectric.
Windell H. Oskay
drwho(at)evilmadscientist.com
http://www.evilmadscientist.com/
Here’s a spin on something you’ll recognize. The pattern on the top was done with the reaction / diffusion software.
http://www.facebook.com/photo.php?fbid=10150655891028973&l=ecc70cf6ee