A Utah Teapot is an ideal design for a geeky ornament. For this one, I generated a vector stipple drawing from a photograph of the source object for this digital design icon. There are certainly many other ways to create a Utah Teapot ornament, including, of course, 3D printing.
I removed any background stipples and plotted it on an ornament. The ornament is 2.6 inches in diameter and I used a 0.2 tip Copic Multiliner SP. I have posted the design on thingiverse.
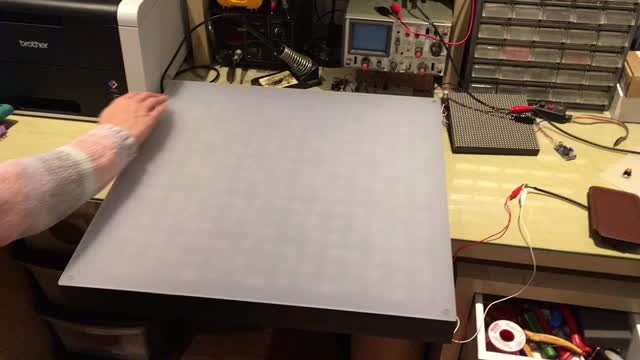
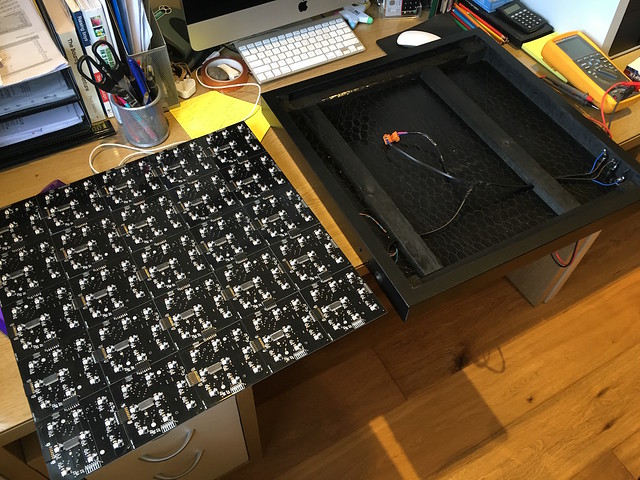
Craig shared this project which evolved with the assistance of the Octolively project.
Thanks for the previous help you gave me when I was designing my own IR proximity boards. I thought you may want to have a look at the finished item.
I have attached a picture of the 25 100mmx100mm boards and a video of the table working. Each one had a SOIC PIC 18F26K22 on it, with 9 IR transmitters and receivers and 9 x WS2812b addressable LEDs on. They all kind of communicate with each other so that each board does the same IR reading of the same ‘pixel’ at the same time as the others. I simply have a pin on the board which outputs low whan it is working (taking a reading’, then after it is done, it changes to an input pin, it continually looks at this pin until it goes high, meaning all the other boards have also completed that particular reading and then it’s on to the next one.
I also have a calibration function so any thickness opaque covering can be put on the table top.
I have 2 buttons on it. One to change the colour (including the rainbow fade) and also a button to change the fade speed.
Thank you, Craig, for sharing your project! We’re glad you were able to get inspiration and helpful information from one of our projects.
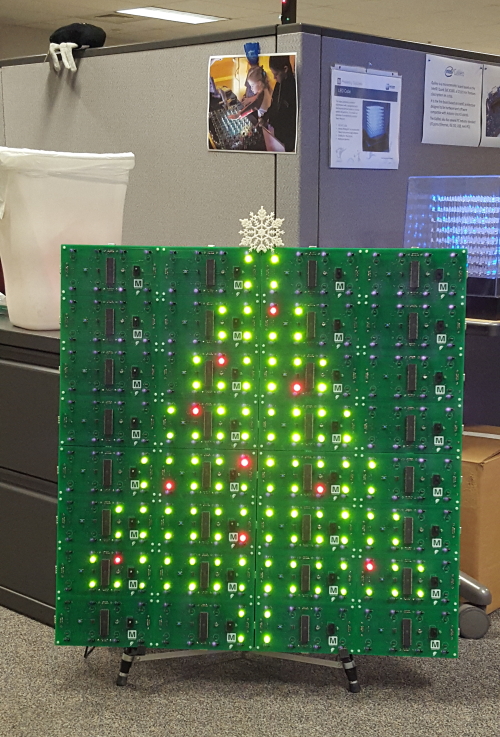
Our friends at Mouser sent us this picture of their Octolively derived display, updated for the holidays:
We continue to have fun with your Octolively module design. In the attached photo you can see why we decided to use sockets for the LEDs on our boards. We plan on changing out the display for each of the holidays.
I was a little concerned at first about using the red LEDs with resistors that were chosen for white or blue, but they’re socketed, so replacing any that get damaged by overdriving should be easy! Looks like a fun way to celebrate at the office, and the snowflake tree-topper is a nice touch.
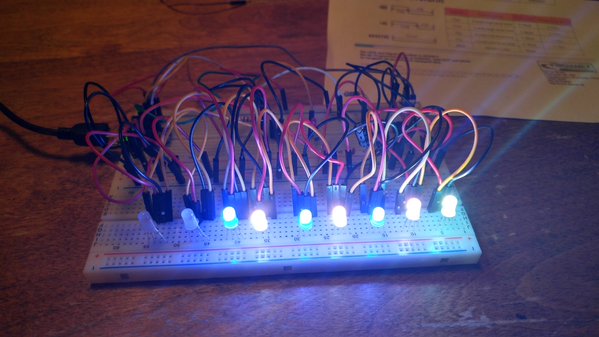
This is why #OSHA is awesome! In a pinch+some parts we made our electronic menorah. @EMSL design & @adafruit trinket.
If you want to roll your own, the open source hardware documentation is on our wiki. If you’re not keen on the breadboard aesthetic for your hanukkiyah, you can still get the Mega Menorah 9000 kit.
After some troubleshooting and finishing her Deluxe LED Menorah kit, Judith wrote to say:
That’s me showing off success! I want to thank you again for leading me through the process- and just in time for Hanukkah. I’ll really enjoy using it.
Thanks for sending the picture and sharing your success with us!
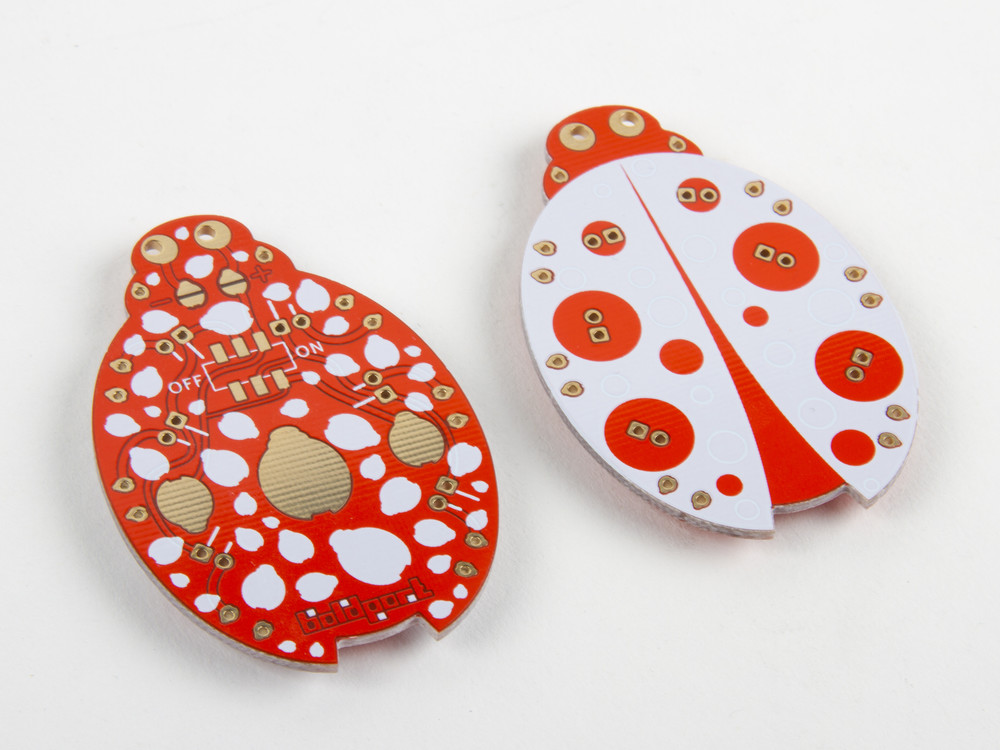
This simple and playful soldering kit is based on the on the beautiful Buggy circuit board designed by Saar Drimer of Boldport.
The first version of this circuit board was created as a badge for the hardwear.io hardware security conference in The Hague. This new version of the Buggy is a complete kit, featuring an updated circuit board, with a power switch and six candle-flicker LEDs.
A cool detail is that its six legs are actually the current-limiting resistors for those six LEDs. They are posable (giving it quite a bit of personality) and we have given it little red tubing socks to cover up the otherwise-conductive feet.
The Boldport Buggy kit is available now at our store, and you can read more about its design at Boldport.
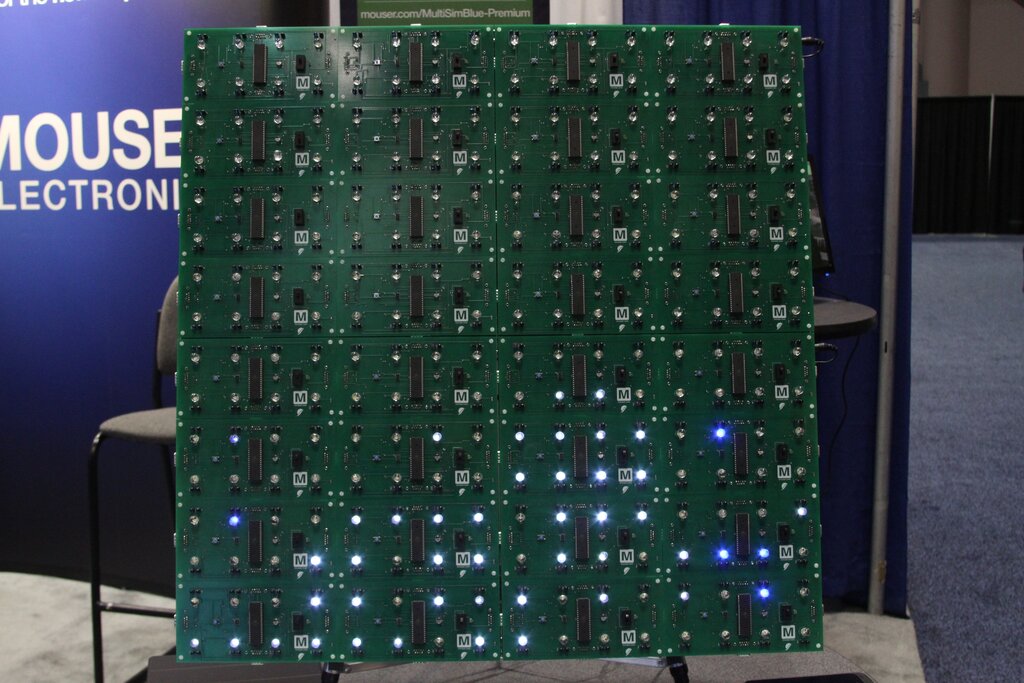
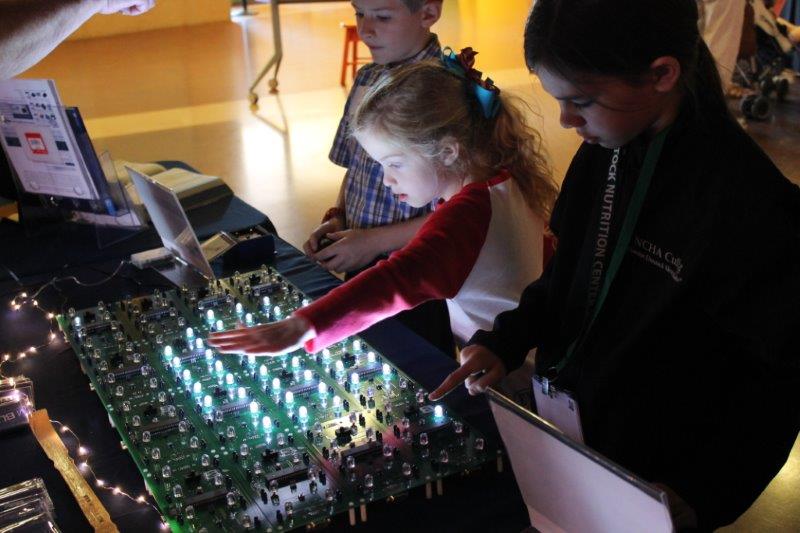
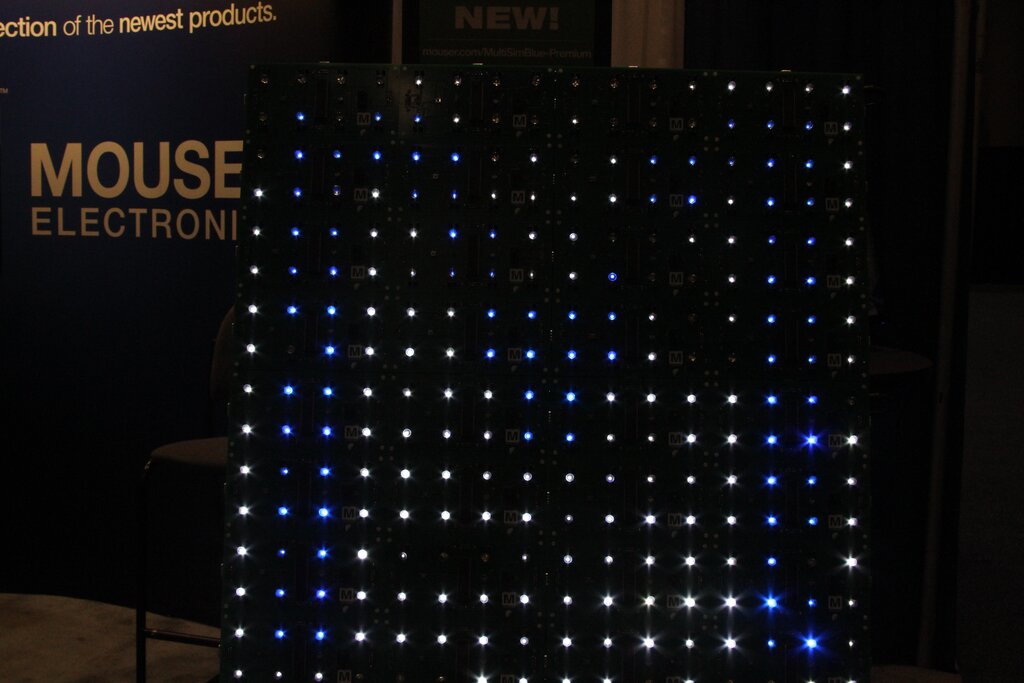
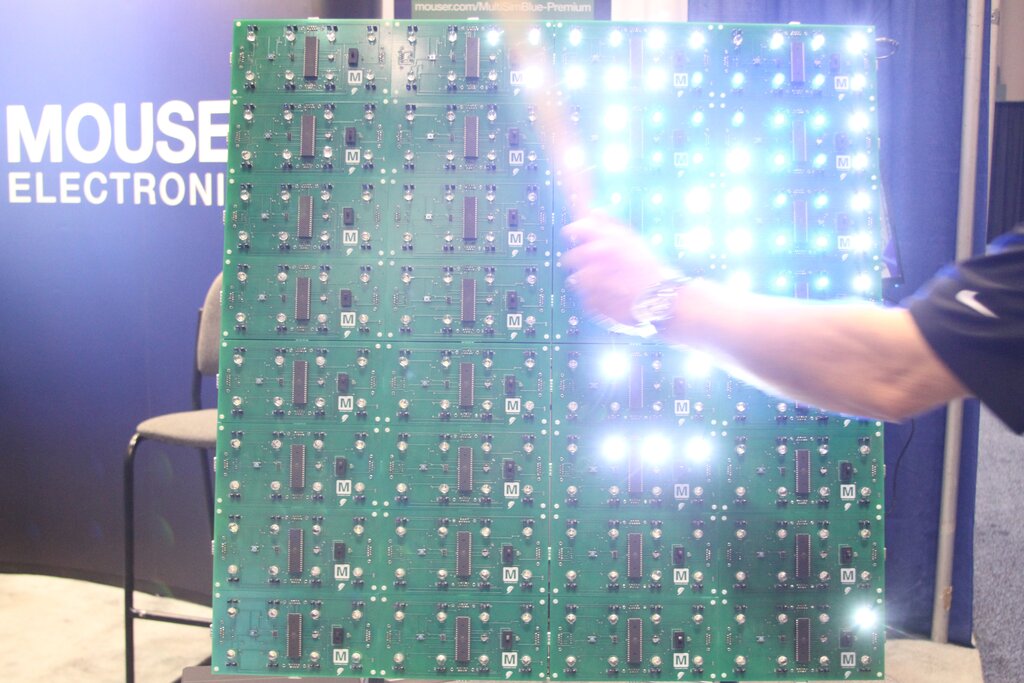
We dropped by ARMTechCon last week to check out a tip sent in by email (thanks, Barry!) that Mouser Electronics was displaying something that looked like our Octolively modules.
Photo courtesy of Mouser
Mouser staff had been inspired by an installation of our Interactive LED Panels to create something interactive that they could show off at Engineers Week at the Fort Worth Museum of Science and History. They used the Octolively as the basis for their project, and the kids loved it of course.
For trade shows, they built up a display with a mix of blue and white LEDs to show off the Mouser “M”. Based on the foot traffic it got while I was at the booth, it is quite popular.
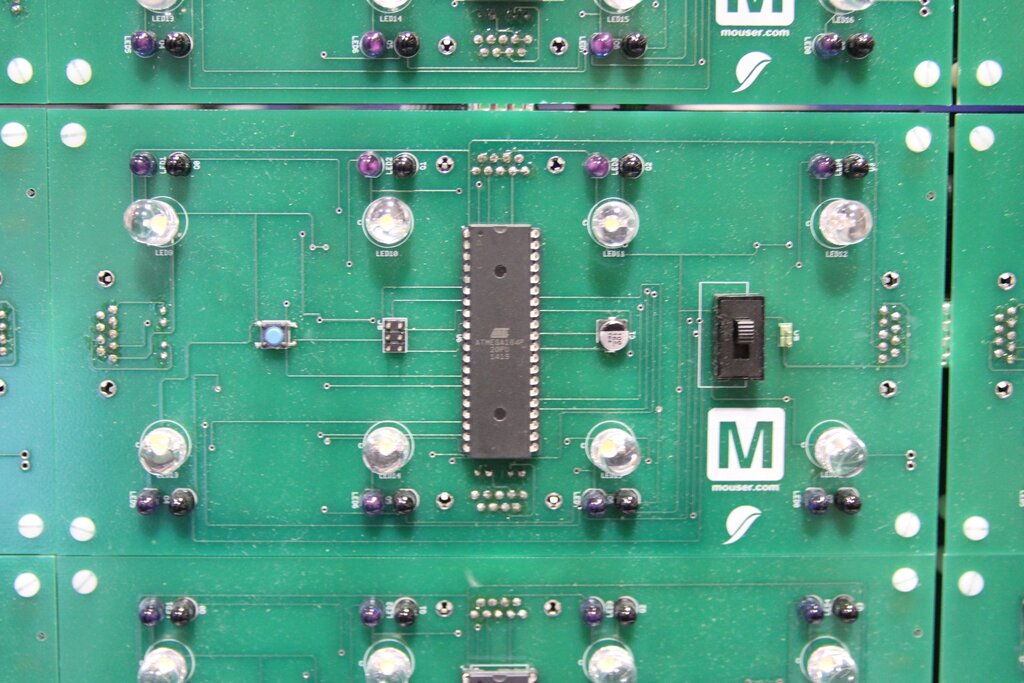
They made some minor changes from our original Octolively design and used different connector types to highlight Mouser’s product lines. The heart of the project is still the 40-pin DIP ATmega164P (perhaps anomalous at an ARM conference) running our Octolively code, which gave the Mouser folks a chance to play with some microcontroller programming.
It’s always exciting to see a derivative of one of our projects in the wild. Thanks to the Mouser folks for sharing their project story and sending the museum picture for us to share.
Ken Shirriff has written an excellent exploration of the 741 op-amp, including decapping a metal can package AD741. There’s a very cool interactive viewer so that you can click on the components in the schematic or on the picture of the die to see what each one is and does.
…The 25pF capacitor in the 741 has a very small value but takes up a large fraction of the chip’s area. You can see the capacitor in the middle of the die photo; it is the largest structure on the chip. …
Our very own XL741 is referenced in the footnotes, too.