When I saw Simone from Othermill running her machine this weekend, I told her about an idea I had for a metal dragonfly hair clip. She quickly grabbed the file from Sam DeRose’s Light-up PCB Pins tutorial. After carving the texture and doing the cutout, the only other tools needed to complete the project were a pair of pliers to bend the wings and some glue to affix it to a clip. It turned out great!
The DIYIC Protoboard
Introducing our new kit, DIYIC, which stands for “Do-It-Yourself Integrated Circuit!” This breadboard-style solderable proto board is shaped like a giant integrated circuit. It’s a freeform complement to our 555 and 741 “dis-integrated circuit” kits. Make your own custom 8-pin integrated circuit, use it as a giant connectorized breakout board for smaller components, or however you see fit.

The matte-black circuit board is extra thick and has subtle white markings including an alphanumeric grid and pin number labels.

The wiring pattern — that of classic breadboards — is easy to see by looking at the exposed traces on bottom of the board. Connections to the 8 terminal posts are through the three-position strips on the PCB; each is labeled with the corresponding pin number.
The DIYIC is available either as a bare circuit board or in a full kit, complete with the “Integrated Circuit Leg” stand and 8 color coded thumbscrew terminal posts.
Linkdump: November 2014

- Maps Of Street Layouts Colored By Orientation (via jwz)
- Yes We Can. But Should We? The unintended consequences of the maker movement
- Black hole physics and Interstellar
- Comic: Robot that Screams. Available as a print here.
- OpenTrons: Open-Source Rapid Prototyping for Biology
- It Took 23 Years to Link Amelia Earhart’s Disappearance to This Scrap of Metal
- Mechanical CPU Clock — Inspired by the Digi-Comp II
- An honest look at Ampy and Juse @ Dropkicker, motion and solar energy harvesting phone chargers.
- Basics of Prototyping with cardboard
- Video: How paperclips are made. German language, but so cool it doesn’t need words.
Ostrich EggBot 2.0
We’ve just released version 2.0 of our Ostrich EggBot kit! This is the giant size EggBot. Like the smaller models, it’s a machine capable of drawing on the surface of all kinds of spherical and egg-shaped objects up to 6.25 inches (15 cm) in diameter, including large ostrich eggs.
This chassis of the new version is CNC machined from melamine-faced MDF, and laser engraved with markings and calibration scales. (The previous version was made of plywood; you can read about it here.) We’ve also updated the graphics, and rolled in a number of subtle improvements based on user suggestions and our own extensive experience with the machine and other members of the EggBot family.
With a relatively large chicken egg chucked into the holders, you can get a better sense of scale. (An ostrich egg is a terrible object to suggest a sense of size!)
The tailstock (the sliding portion of the right hand side) has been slightly redesigned for higher stiffness and better ease of use. The bulk of the stiffness in the directions that we care about (that is, in the directions where the chassis material is not strong) derives from the steel angle brackets, and the new tailstock helps to reinforce that for better overall rigidity.
One of the best things about the new chassis material is that it laser engraves particularly well, giving high-contrast, highly readable adjustment scales on the sides. And that makes it all easier to use in practice. All considered, this has turned out to be quite a nice little upgrade.
Robot heart
For Halloween this year, I went as a robot, wearing a silver dress with a slowly pulsing LED heart glowing visibly under the fabric.
The LED is a one watt white LED, which we’re running at about 50 mA. It has a wide viewing angle, and the star-shaped mount lies conveniently flat. The LED is wired up to the PCB with a pair of twisted magnet wires. Magnet wire is flexible and thin, which makes it hardly noticeable under clothing. It is controlled by ATtiny2313 (running the code from our Mac sleep light pumpkin project) and powered by three AAA batteries. The PCB corners were rounded off so it wouldn’t be stabby.
The dress was fully lined, which made it very convenient for mounting electronics. I pinned a makeshift pocket onto the liner, and tucked the battery holder and PCB in the pocket. I could feel the battery holder switch and turn it on and off through the fabric.
The LED was taped to the dress liner with medical tape to hold it in place. An extra piece or two of tape held the wires to make sure there was appropriate slack for movement. (A note on tape: use the good stuff. The cheap paper tape in the off-brand first aid kit only stuck to itself and the magnet wire. 3M plastic medical tape worked great and came off easily.) This makes it easy to disassemble after Halloween.
You can find more costume projects in our Halloween Project Archive.
Pumpkin Faces for EggBot

renegade_geek posted a set of Pumpkin Faces on thingiverse for the EggBot. They’re cleverly arranged in layers so that you can hide and show the different eye, nose and mouth options.
A collection of separate eyes, noses and mouths, each set on its own layer, for a customized jack-o-lantern/ghost face to be printed with the Eggbot. These were made to print on ping pong balls. You may need to adjust for eggs and other less regularly shaped items. I have included a “faces menu” PDF so that you can clearly review your choices. This was really helpful in a classroom situation.

Giant Snap-O-Lantern
Ubergenius posted his Snap-O-Lantern built with a foam pumpkin:
Awe, it’s so… OMG!!! #evilmadscientist #battleforthebones
Q and A with NanoBeam

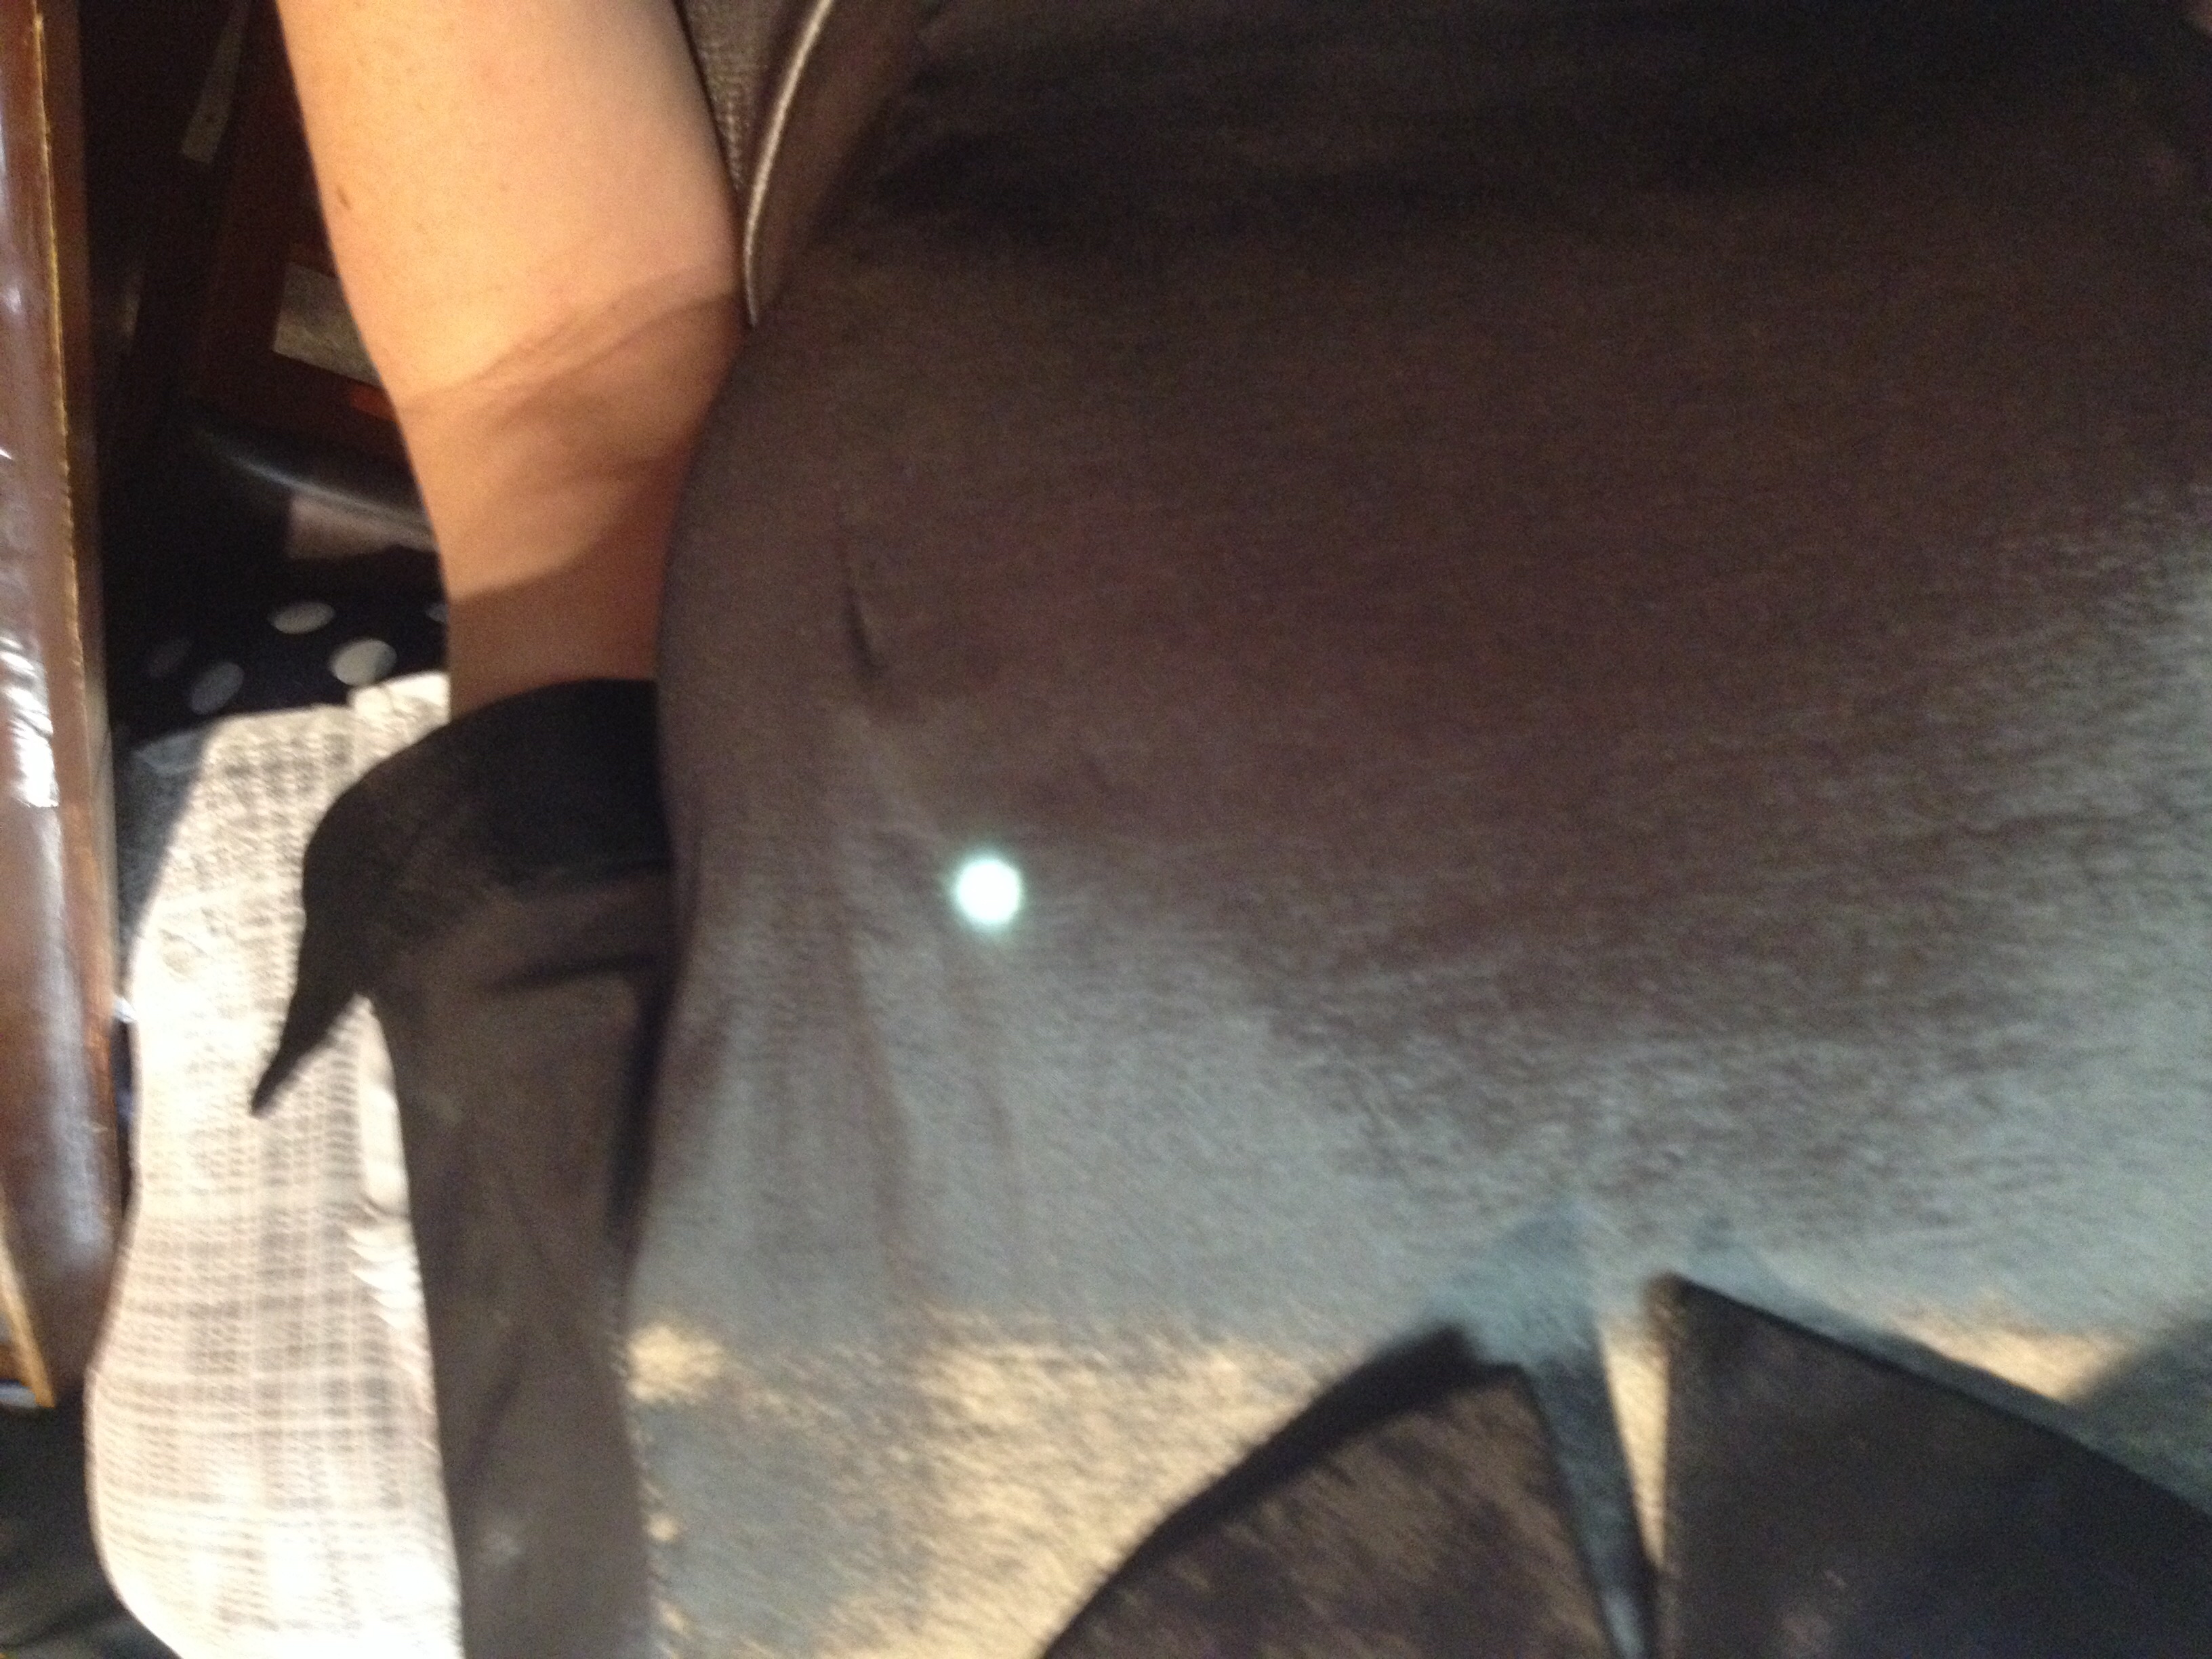
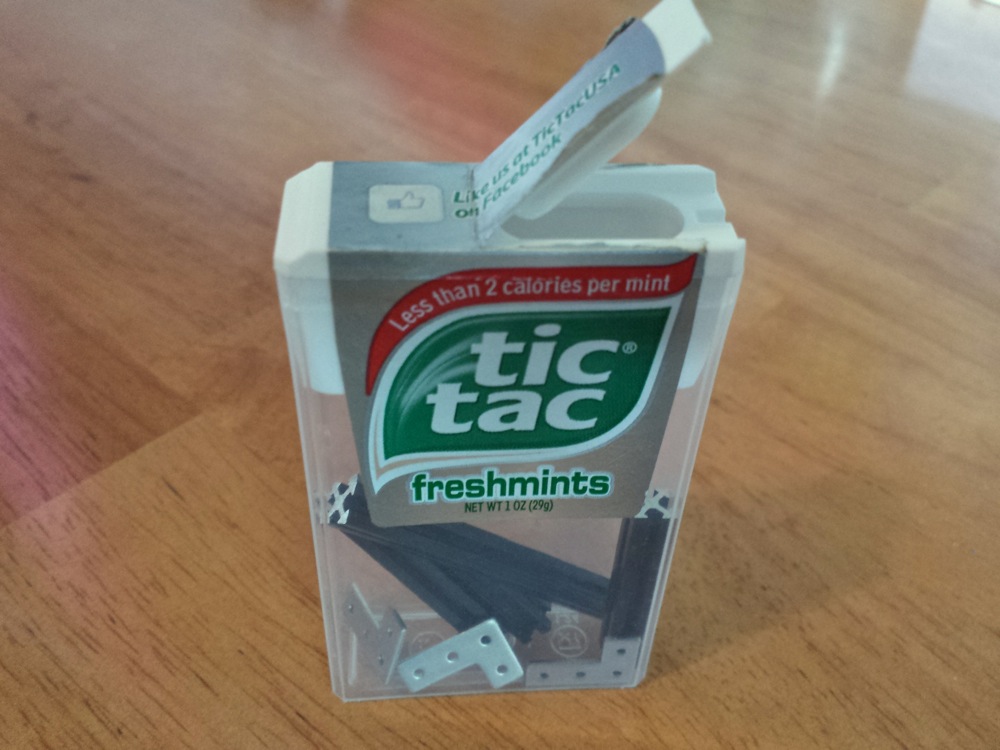
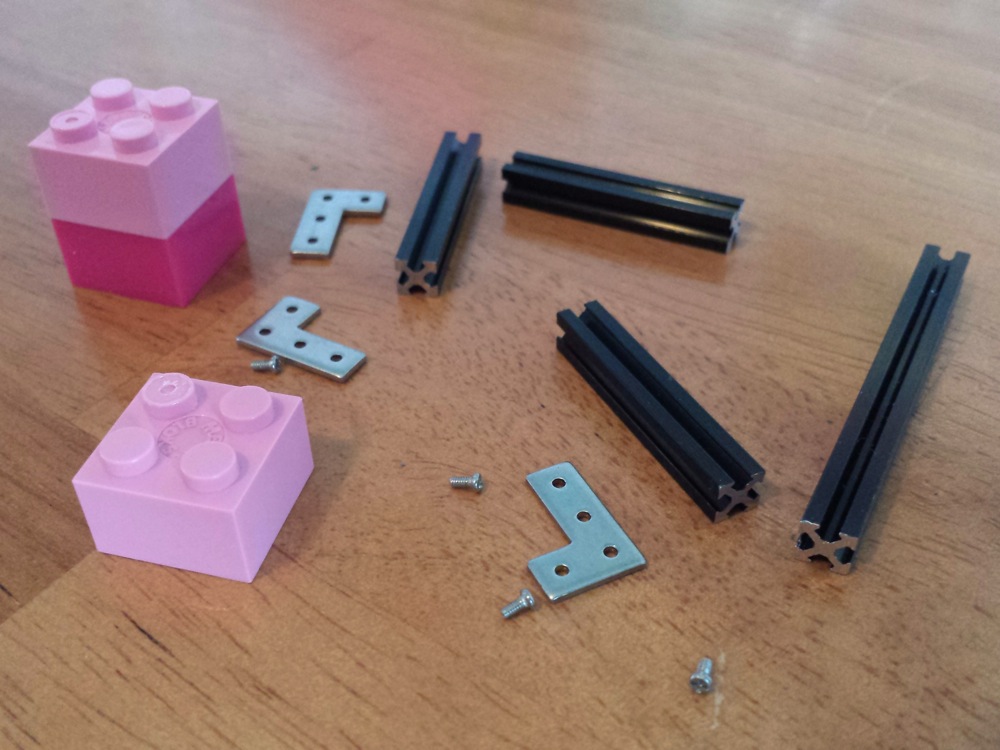
When we saw NanoBeam on Kickstarter, we had a hard time comprehending just how small it is. So we asked Hyrum if he could send us some pictures for a better sense of scale, and he obliged. Yes, it fits in a tic-tac box. After seeing just how teeny-tiny a 5 mm beam is (one quarter the cross sectional area of Maker Beam and one ninth of Open Beam), our next question was “What the heck?” So we asked what made him think of making such a tiny beam.
I just wanted some tiny beams to build a small robot. I looked all over the place but couldn’t find what I wanted. After some research, and talking to some extruding companies, I designed a beam that was so small it challenged all the rules of this manufacturing science. I made a few on my cnc mill before I commissioned the die, to be sure it was what I wanted.

How did you find a factory to work with?
I combed the web and talked to a lot of companies. I finally found one that focused on small extrusions. I saw the amazingly small and precise work they were doing for companies like Boeing and 3M and I knew I found the company I needed.

What kind of fasteners do you use for something this small?
I used the largest screw I could but they are still small. The size is M1.2; you will find these in some pairs of glasses. I’ve got 3 designs for the nuts, I am waiting on manufacturing samples for the last one before I decide for sure which I will use.

We asked what he thought NanoBeam would be useful for.
Immediately, I see this making a splash with small robots, quad copters and electronic enclosures. I also see it being great for diy wearables, scale models and crafts. I recently got feedback from a guy that wanted to use them as a frame, conductor and heat sink for an LED array. I can’t wait to see something like that. I’m going to get some stock without the black coating for this application.
We’re also very interested to see what people do with such a tiny extrusion! Thanks to Hyrum for answering our questions. You can find out more, and check out his designs (Open Source Hardware definition compliant) at the NanoBeam website and the Kickstarter campaign page.
Linkdump: October 2014
- A partial solar eclipse on Thursday October 23 (today), visible from most of North America.
- October 23 is also Mole Day. (10^23)
- Utah Teapots in the Sky
- Generative 3d Printing with Processing
- The Bezier Game
- Things that coincidentally happen to look like cellular automata: tiny mushrooms
- Sculptural electronics
- Peppytides: a 3D printed molecular peptite construction set, where you can build your own proteins!
- avremu: An AVR Emulator written in pure LaTeX. (FAQ includes “Are you insane?”)
- How the carrot became orange
- Computational design of mechanical automata
- Hoverboard patent
- Bad precedent: FTDI, makers of USB-serial interface ICs, have updated their drivers to brick counterfeit devices.
Evil Mad Scientist Open House: November 13

Reminder: Our annual open house is TONIGHT.
When: Thursday, November 13, 5 pm ? 9 pm
Where: Evil Mad Scientist Laboratories
175 San Lazaro Ave, Suite 150
Sunnyvale, CA, 94086
You can check out our latest projects, play with the giant Digi-Comp II, meet Zener the cat, see our latest projects (including some sneak previews!) and share in food and conversation.


