


Summer is here, and with it, the advancing aqueous arms race! Squirt cannons, water balloon launchers, and myriad other technologies for soaking your fellow citizens.
One of the classic squirt mechanisms is the “water weenie,” where the water is stored under pressure in a length of elastic tubing, and the force to eject the water is provided by the restoring force of that tubing. Often the elastic tubing is a simple length of latex “surgical” tubing, or in the case of the classic Wham-O Water Wiennie, a literal rubber balloon. While people have almost certainly been squirting each other with these things since (we’re guessing about ten minutes after) the invention of the water balloon, the technology has more recently been reinvented as the “constant pressure system” used in modern high-end water guns.
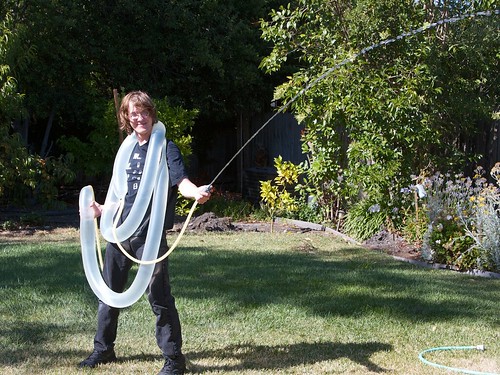
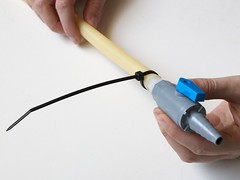
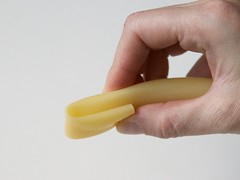
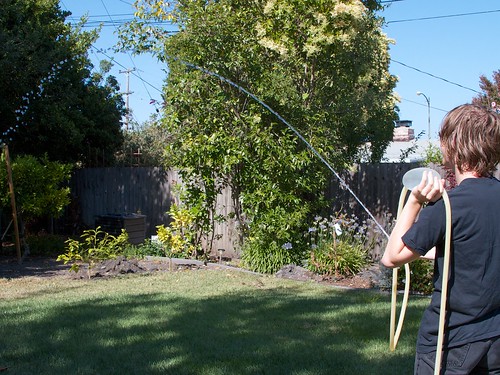
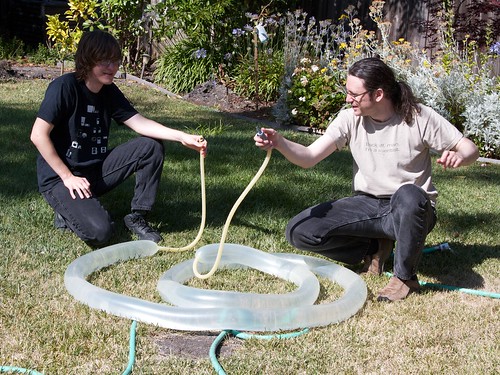
Here is our take on the water weenie: How to make your own high-performance, arbitrary-capacity squirt machine, starting with basic hardware. Our 10′ version shown above— which you can lift if you’re strong! —throws water up to 25 feet and can empty over ten gallons of water onto your target in one continuous shot. And of course, you can make it bigger if you want to.
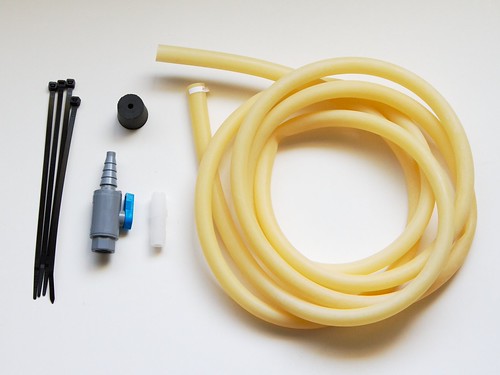
Parts:
Tubing
The tubing is the central feature of the water weenie, and your choice of tubing size necessarily drives all of the other choices. While “surgical” latex tubing is generally the best choice, there are other options, and you can even use a bike tube in a pinch.
For high ultimate volume, we picked 1/2″ ID latex tubing, #5234K261 from McMaster-Carr. This tubing has 5/8″ OD and a 1/16″ Wall. This is a thin-wall latex tubing, which stretches rather easily and is quite easy to fill. However, this kind of tubing is also commonly available with thick walls of 3/32″ or 1/8″ thick. Using a thicker wall means (A) that the water weenie will be harder to fill but (B) will be able to propel water further.
The other variable to consider, the one which has the most influence over the total capacity, is the length of the tubing. Bearing in mind that the tubing stretches in every direction— including lengthwise —you’d have a darn fine squirting machine with even just one foot of tubing. However, we went off the deep end and used a continuous 10′ length of tubing.
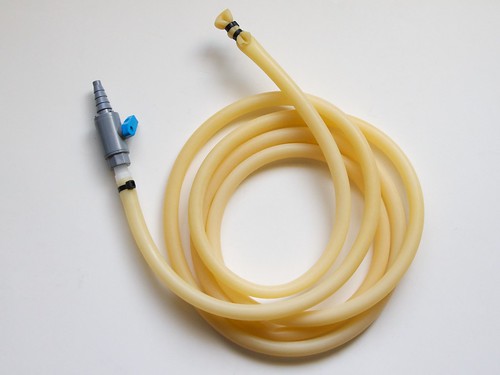
Valve, Nozzle, and Barbed Tube Fitting
Our valve and nozzle are one piece, #45975K61 from McMaster-Carr. That’s a “Miniature PVC High-Flow Ball Valve,” threaded as 1/4″ NPT on one end with a barbed fitting on the other end that we are using as our output nozzle. It’s a really solid piece of hardware that feels great in your hand. The valve opens in half a turn and is even easy to open one handed. The nozzle end is internally smooth and gives a very even stream, roughly 3/16″ in diameter. You might consider a similar valve but with smaller output diameter for higher stream velocity, or larger output diameter for higher flow volume.
As the valve and nozzle assembly has a female threaded port on one end, we also needed a barbed tube fitting with a 1/4″ NPT thread on one end, #53055K215 from McMaster-Carr.
Cable ties
We used standard heavy-duty cable ties for securing the two ends of the tubing, as we’ll discuss in the next section.
Stopper
There are any number of ways to fill a water weenie. The most efficient method would be to add a separate large-diameter fill port behind the nozzle valve— possibly just another ball valve at the tail end of the tubing. We opted for a simpler method, to just stick a rubber stopper (with a through-hole) on the end of the nozzle and to jam that into the end of garden hose.
Aside: The inner diameter of the “male” end of a garden hose tends to vary a bit, but we believe that a #4 stopper would be just about right. Unfortunately, all that we had lying around was a #5.5 stopper, so we had to use a F-F adapter on our hose end as you’ll see later.
Building it

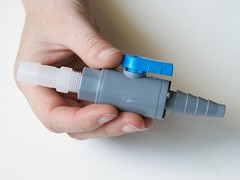
First step: Thread the barbed tube adapter into the ball valve assembly. Tighten it well.
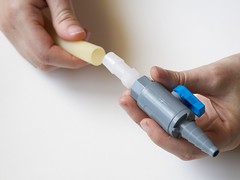

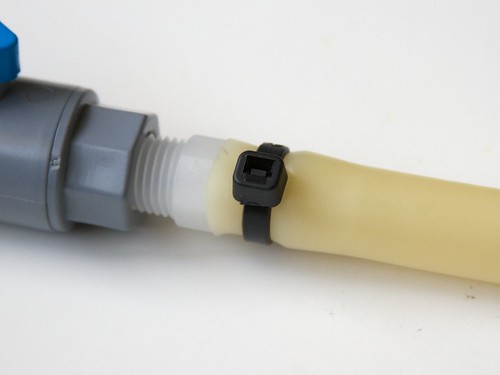
Slip the tubing over the barbed fitting. This will take a bit of effort, but slide it up as far as it will go.
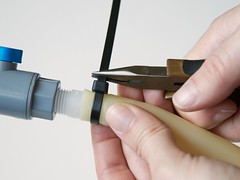

Next, lock the tubing to the barbed fitting with one of the cable ties. It needs to be tight. You can use a pair of pliers to ratchet the cable tie as far as it will go, or (better) use a proper cable tie installation tool.
Once tight, trim away the excess end of the cable tie.
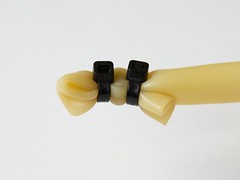
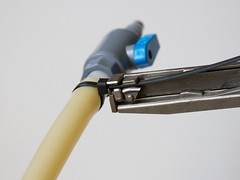
Use two more cable ties to seal the tail end of the rubber tubing. First fold the tubing back on itself to create a crimp in the end, and then fold it over lengthwise to create a circular cross section that can be held down with the pair of cable ties.
That’s it for the building part of the project, now onto getting some water in there!
Filling it
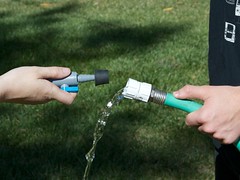

To fill the water weenie, put the stopper on the end, open up the ball valve (such that the handle is in line with the direction of water flow) and press it into the hose end.
At first the latex tubing will “tense up” a bit and slightly expand in diameter along the whole length.
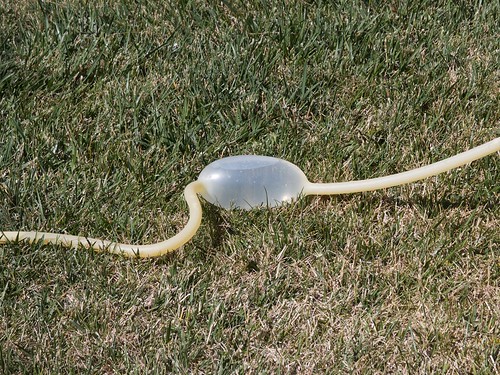
And then, suddenly, you’ll get the bulge.
While it might look like the tubing is about to burst, it’s actually quite strong. The bulged section of tubing expands to a consistent larger diameter (about 4 inches in diameter for our tubing), and grows noticeably in length. The surface of bulged section feels taut and inflexible— the rubber is actually quite flexible, but here is the part where it is stretched to its limit.
The bulged section of the tubing provides the majority of the water capacity and the majority of the pressure for expelling the water. As soon as you have a bulge (of any size), you can disconnect from your water supply for a minute to test out your firing
system.

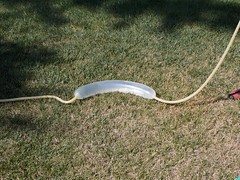
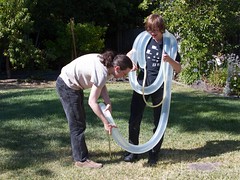
Or, you can just keep filling. The bulge keeps growing as you keep adding water.
And growing… and growing.
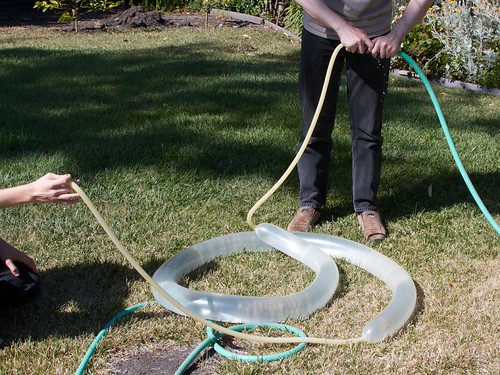
With a larger tube (and a large enough platform on which to transport it), this can scale up considerably.
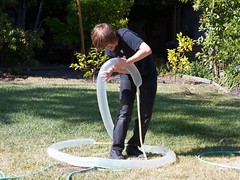
In this case, we were limited chiefly by our ability to lift the darned thing.
The bulged section had expanded to roughly 16 feet in length. With a 4-inch diameter, that’s about 2400 cubic inches, or 10 gallons of water, weighing in at some 85 pounds. With a reasonably strong back and some assistance, it’s even wearable.
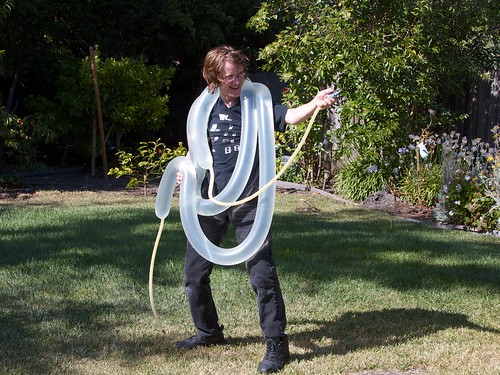
Our original intent for the project has been to fold up the inflated tube within a backpack. As it turns out, that wouldn’t have worked— not only because the bulging tube is so voluminous, but also because it’s likely impossible to coil it into a much smaller diameter.
But no matter: we’re now ready for summer.

This definitely brings back fond memories — both of Water Weenies(tm) which I had, but also of the fun of having an older brother buy me 10+ feet of surgical tubing with which to make more. A similar fun, but more expensive project is the Waterzooka (http://www.instructables.com/id/The-Ultimate-Squirt-Gun-Build-a-WATERZOOKA/). For some reason, they’ve stopped redistributing their nice build guide (PDF) but it is redistributable as per the guide’s copyright notice.
Dan
What a coincidence! Just last week I was thinking about the home-made water weenies my friends and I built as teens. The increase in length is amazing and, if used without foresight (what teen has foresight?), can be a bit problematic. My friend Mark created his Water Weenie out of 3 feet of surgical tubing. He filled it and then in an effort to be stealthy wrapped the water weapon around himself, under his shirt. Spying his prey (another of our friends), Mark walked calmly up (water weapon unseen) and let fly. It worked great right up to the point where the elastic tubing regained most of it’s original length whereupon Mark learned what it must feel like to be attacked by a boa constrictor. It was quite funny to watch Mark try to get the ever-tightening rubber tubing pulled from around him while water was spraying everywhere.
Back in the old days, we didn’t use plastic nozzles. We cut the top half off a glass coke bottle and stuffed the open end of 6 or more lengths of the thick walled tubing into the back of it. Called it a moriah. Those were some water fights.
WOW, thank you so much for the part numbers – I’ve been yammering about Water Weenies for years and nobody on the east coast knows about them, was this a west coast thing? Now, finally: JUSTICE! Killer parts too. Nicely done.
I wanna see what happens when you fill one past capacity!
One wonders what would happen if a valve and nozzle where to “accidentally” be installed at both ends of the weenie?
My dad always made these when I was growing up — brings back great memories.
Word of warning – if your surgical tubing is in any way compromised or dry rotted, it will sound like a gunshot going off if you rupture one of these…
I used to make these back in the 70s! I tied a knot in the surgical tubing and used a hose clamp and the front half of a ball-point pen for the nozzle. The ball point pen tip fits nicely into a brass garden sprayer for filling and my thumb was the valve. Good times!
And, if it’s wrapped around your body when it explodes, (I recommend getting new tubing regularly to prevent the explosions) you will find yourself with an enormous welt. I’ve had several on the back of my neck. It’s worth it, but I thought I’d chip in a word of caution.
I bought many of these at craft fairs in the early 90’s for myself and my kids. I remember them as having a clamp of some sort, you just pressed it with your thump to release the water.
I bought surgical tubing of the same dimension but when I filled it the very first time, it burst. Must be a difference in quality between brands. Just saw a post above about it sounding like a gunshot when it breaks. That’s for sure! Must have been dry-rot or something. Back to eBay…