


As Marty McFly says, “You don’t just walk into a store and buy plutonium.” Actually, all I was after was neodymium, but the principle still applies. I needed a pile of rare earth magnets in a hurry. Neodymium-iron-boron (NdFeB) magnets are cheap, extremely strong, and surprisingly ubiquitous. Despite this, most corner drugstores do not carry sets of rare-earth magnets, and it can be hard to get them unless you have a few days to wait for a package.
It turns out that you can get NdFeB magnets at the corner drugstore, and they’re cheap. You just have to extract them from the toys that they come in.
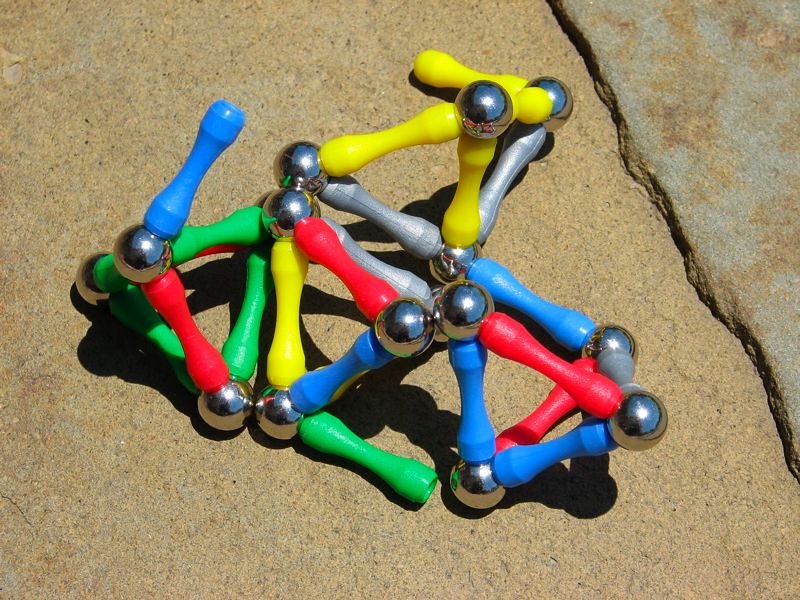
Pictured is a small pile of magnetic building toys, which you can get almost anywhere. Most toy stores have them. Amazon & Target sell sets of magnets like this. Here is an example: a $20 set that includes 94 rods and 36 balls. The 94 rods each have two magnets, which works out to 188 magnets for $20, or about $0.11 each. The magnets themselves are plated, medium-high grade NdFeB cylinders 3/16″ in diameter and 1/8″ thick. My favorite magnet shop, K & J Magnetics, sells a similar (perhaps slightly better) type for $0.17 each, at 100 pieces. Other magnet shops sell similar magnets as well. Clearly, that the cost of the magnet toys is dominated by the costs of the magnets themselves, and there isn’t much savings in either buying the magnets directly or extracting them from toys.
It is possible to extract the magnets mechanically, by cutting into the plastic. This works but it’s very (1) time consuming to individually extract them this way and (2) easy to cut into or break the magnets this way. NdFeB magnets are quite brittle and the metal plating scratches off easily if you’re using a hacksaw to cut the plastic. You could also consider using heat to melt the plastic away. Unfortunately, standard grades of NdFeB begin to fail permanently at 80 degrees C, so that isn’t really an option either. (Other types of magnets, including Cobalt and AlNiCo, are less brittle and withstand higher temperature. For these reasons they are still widely used, even though they have a lower energy density than NdFeB.)
The perfect solution is to use acetone to soften the plastic, which avoids both of these problems.
You will need: Acetone, steel bowl, steel screwdriver, magnet toys, paper towels. Low-grade acetone is fine, such as acetone sold as nail polish remover. Careful: ordinary “nail polish remover” that contains some fraction of acetone will not do the job; you want the stuff that is (nearly) pure acetone. Expect to spend $1-5 if you don’t have any acetone handy.Approximate Time: 5 minute setup, 3 hours waiting, 10-20 minute cleanup, depending on how many magnets you are extracting.
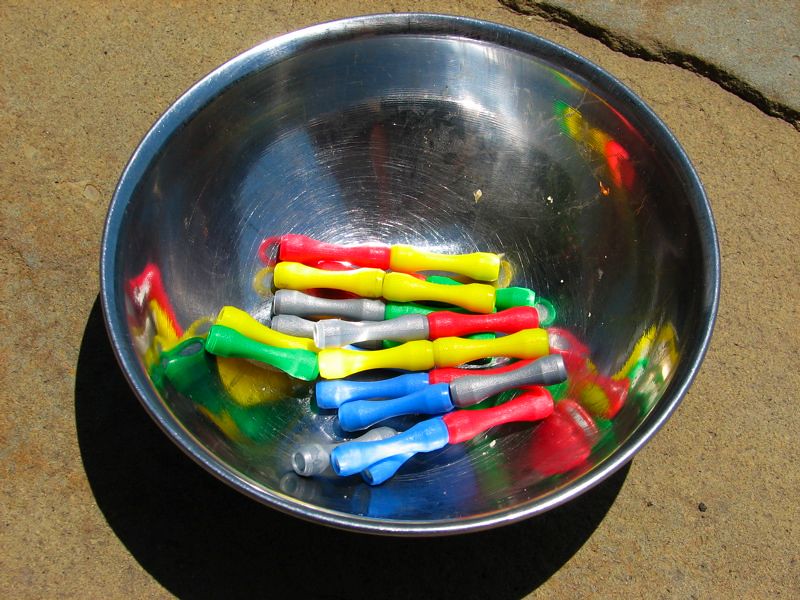
Begin by putting the rods in a metal bowl. Magnetic steel is best. Do notuse a plastic bowl for this. A steel bowl not only makes cleanup easy, but it helps to separate out the magnets: As soon as the plastic is soft, the magnets move out of the rods and stick either to other magnets or to the sides of the bowl.Set the balls aside and save them for your next ball clock project or something.

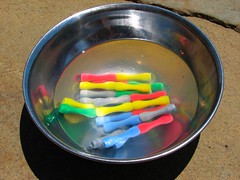
Here’s the acetone. This is fairly clean acetone, a higher grade than is really needed. Again, the acetone sold in the same aisle as the nail polish is a good bet for this job.
Pour in just enough acetone to cover the rods. The effect is immediate– the plastic begins bubbling and the acetone discolors within seconds. If this seems like a nasty chemical to be working with, just remember that it’s also one that your body produces. (That said, don’t drink it.)
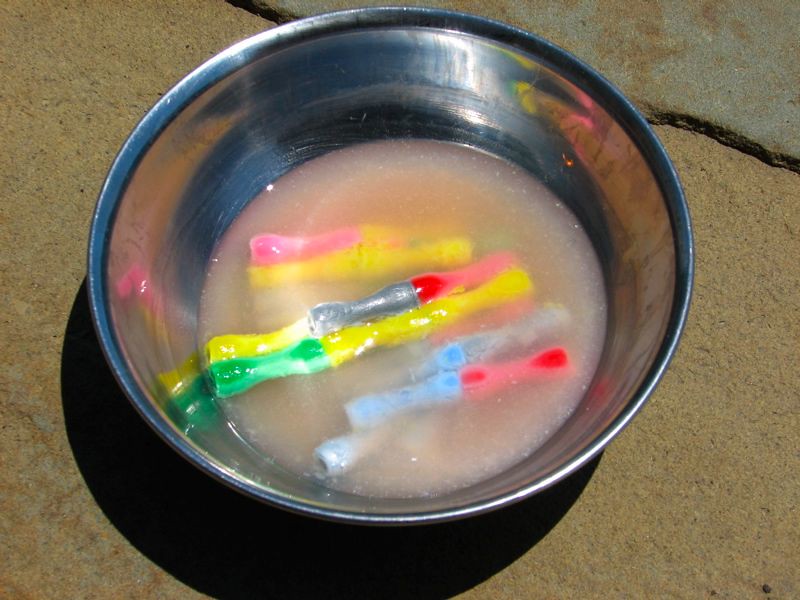
Thirty minutes later… Ewww! The level of the acetone has fallen, since I left it in the sunlight on a day when it’s a hundred degrees out. (I should have left it in the shade.) Add a little more acetone to keep the plastic covered.
Three hours after putting the rods in the acetone, the plastic is soft. I take a little screwdriver and begin searching around for magnets. Some of them have already come out and are attached to each other, to the bottom, or both. Stir the mess a little bit to help this process along. Some of the magnets should stick to the screwdriver as well.
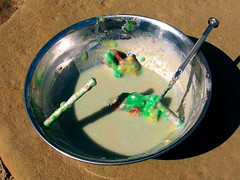
After stirring for about one minute, two self-assembled towers of magnets have emerged. There were still a couple of magnets in the soft plastic masses. They’re easy to identify because they would really like to stick to the screwdriver.
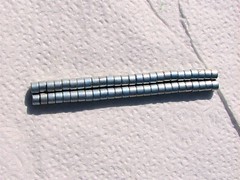
The results! Wipe the magnets individually on all sides with a paper (or cloth) towel dipped in clean acetone. The soft plastic can get trapped between them and stick them together quite well at this stage. This is easy, but can take a while if you’ve got a lot of shiny new magnets to clean. I ended up with 52 magnets here, indicating that I started with 26 rods. Naturally, the bowl and screwdriver clean up pretty easily with acetone as well.
Have fun with your new magnets!
Technorati tags: magnet, diy, make, toys, destruction, reuse, recycle, recycling, raw materials
But uuh, can that plastic emulsion be turned into anything good? eew…
:)
Funny you should ask. After extracting the magnets, I poured the
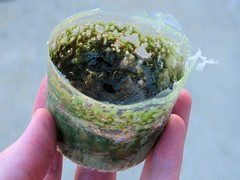
remaining
acetone (and plastic) into a paper cup to let it evaporate. Yesterday I
tore
the paper cup away from its now-solidified contents and here are the
results:
You could certainly have done something more creative with it. I’ve
done very little casting of plastic, and it seems like it’s a technique that
might be exploited (somewhat more intentionally) to better effect.
What’s
interesting is that this resulting plastic mass (mess?) weights almost
nothing, considering its size. The weight of the magnet toys is clearly
dominated by the weight of the magnets, and the insubstantial plastic is
just there for the ride.
—
Windell H. Oskay
drwho(at)evilmadscientist.com
http://www.evilmadscientist.com/
And the waste is weed killer. Just dribble on the weeds poking up in the sidewalk. Or the dandylions in your lawn.
That… wouldn’t be the most environmentally sound thing to do.
I wouldn’t go breathing in acetone fumes (so do this outside) 0r getting it on my skin, even if it is used as a nail polish nrmover, or getting it in my eyes (so maybe wear goggles).
mark
I have "harvested" the same type of magnets using a pair of wire cutters. Just set the edge of the cutters just below the magnet and more or less crimp the plastic not cut it. You don’t need to cut all the way though the plastic they either fall out or you can use the metal of the cutter to pull it out. I did about 200 of them in 45 minutes an only broke 2 magnets.
I kept scratching and breaking mine when I tried cutting them out. =(
—
Windell H. Oskay
drwho(at)evilmadscientist.com
http://www.evilmadscientist.com/
I’m new and I wouldn’t know how to start a thread, but has anyone here ever tinkered with Gauss rifles?
They use magnets much like those, or they use an electric coil and copper wire, a capacitor and a power supply and switch. They can propel a metal ball or a bolt with a fair amount of power, I’m certain lethal if fired from the electromagnetic coil.. A demonstration I saw, put a hole through a metal coffee can.
Yeah acetone burns like hell after a little bit, but its not really gonna mess up your skin. Admittedly my skin is oily and insensitive, but as far as I know everyone who uses oil based paint cleans up their hands and equipment with acetone or denatured alcohol.
Gasoline might dissolve the plastic faster; thought its less environmentally friendly and won’t mix with water.
hy!
with the mix acetone/plastic U can make a sort of napalm.
ps : I love smell napalm in the morning while listenning Wagner walkirie
cheers all
thÿ