


You’ve just finished cooking something tasty on the stove and now you need a place to set it down on your dining table. You could reach for that old cast iron trivet, or a simple cork trivet, or the even the trendy silicone one.
But, if you really want to impress your geeky friends, this is the one to whip out.
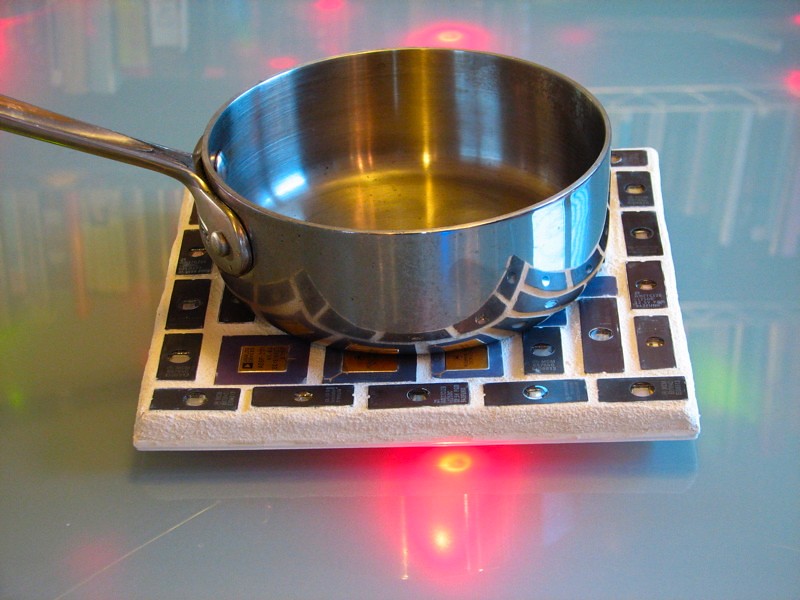
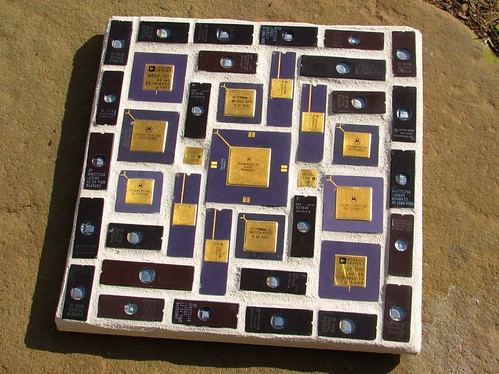
Here is a genuinely useful kitchen tool that you can make: a trivet built out of old computer chips.

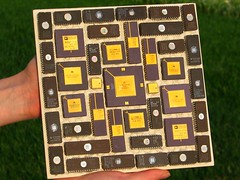
The first thing that you’ll need to do is obtain a pile of chips, so begin by opening up your computer looking around for any chips that you might be able to use. Use only chips with ceramic, metal, and/or glass packages, since plastic packaged chips are prone to melting when exposed to high heat.
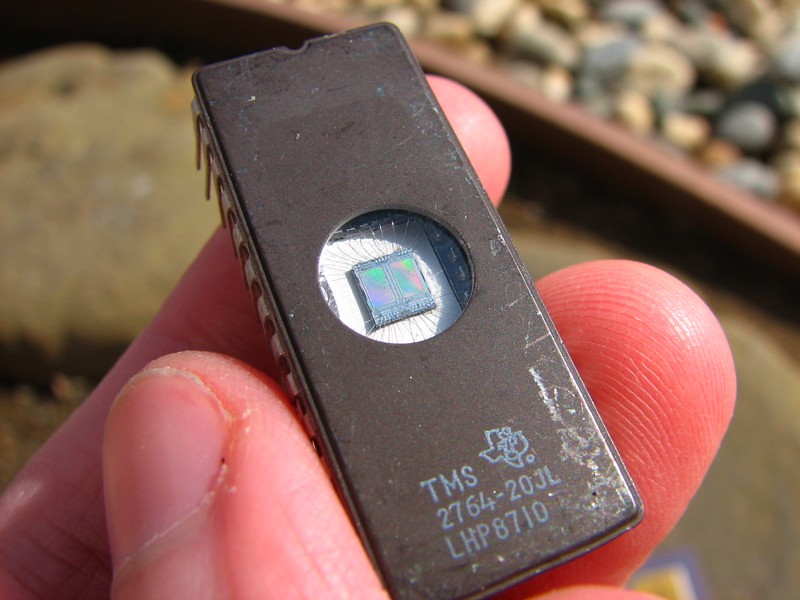
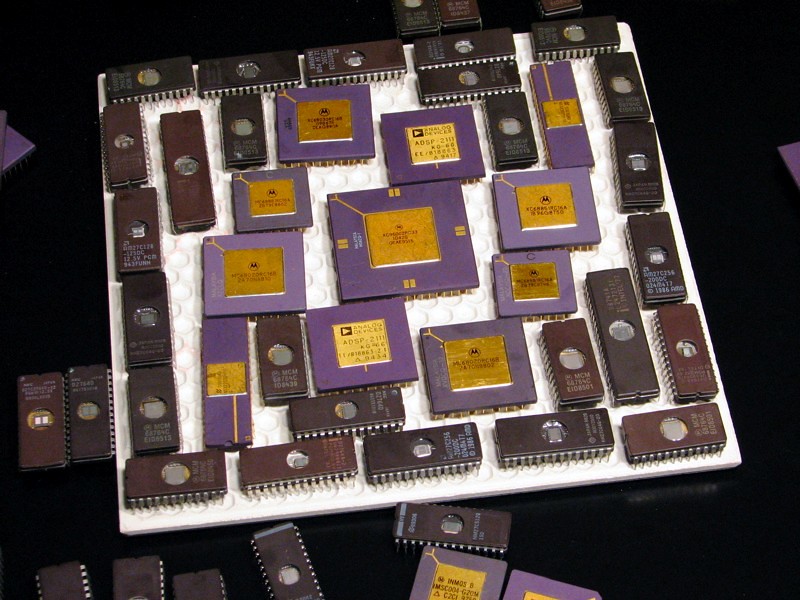
My favorite types of chips for this application are large flat CPU packages (like the 486 and 68030, shown above left) and classic EPROM chips (like the one on the right) which have a fused-silica window to let ultraviolet light in.
This is a recycling project; it’s a great time to gather up all of your old chips that have “DEAD?” written on them, and put them to use. If you don’t have chips like this lying around, ask your geek friends– they probably do.
If all else fails (and/or if you have no friends), you can always buy some chips. Check for bulk sets of used chips on eBay, or maybe look for ceramic chips in the Jameco grab bags.
Once you’ve got enough chips, it’s time to get the other components that you need.
Expect to spend $5-10 at a home improvement store. You’ll need a big plain tile as a substrate for your work, a tube of construction adhesive (either self contained or caulk-gun style), and a small box of sanded grout in your choice of color.
The construction technique is essentially the same as we used for the mixed media mosaic dining table, which actually included a couple of chips. We’ll glue the chips down to a substrate to hold them in place while we grout around them.
The first part of construction is the hardest: Figuring out how to arrange your chips. Begin by taking your tile and pointing the rough side up; that’s the side that we’ll be gluing to. Arrange your chips on the tile such that all of the gaps between chips (and to the edge of the tile) are greater than one eighth of an inch and less than three eighths. Since the chips are all squares or rectangles, you might think that it’s just like playing Tetris with the easy pieces only, but it’s actually harder than it looks. Don’t be afraid to dump your chips off and start over a few times– your end product might be greatly improved.
Removing the chips one at a time, use the construction adhesive to fix the chips in place. Use the minimum amount of adhesive necessary to hold the chips, and try not to get too much into the space between the chips. If you are using chips of different thicknesses, you will also need to pay attention to making the top surfaces of the chips level with each other.
Once all the chips are glued in place, you must wait for the adhesive to cure, typically at least 24 hours.
One day later, the adhesive has cured. Check carefully to make sure that you didn’t forget to glue any of the chips in place.
Here is how our trivet looked at this stage. The adhesive that we used was a clear latex-based formula, which ended up looking like the output of a hot glue gun after it had cured.
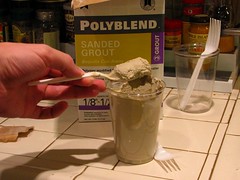
It’s now time to mix up some grout. While you can, in principle, read and follow the directions on the grout container, I’ve always just put a big few spoonfulls of the powder in a disposable cup, stirred it up while adding a teaspoon of water at a time, and aimed for the consistency of toothpaste. But heck, for all I know, that’s what it actually *says to do* in the directions.
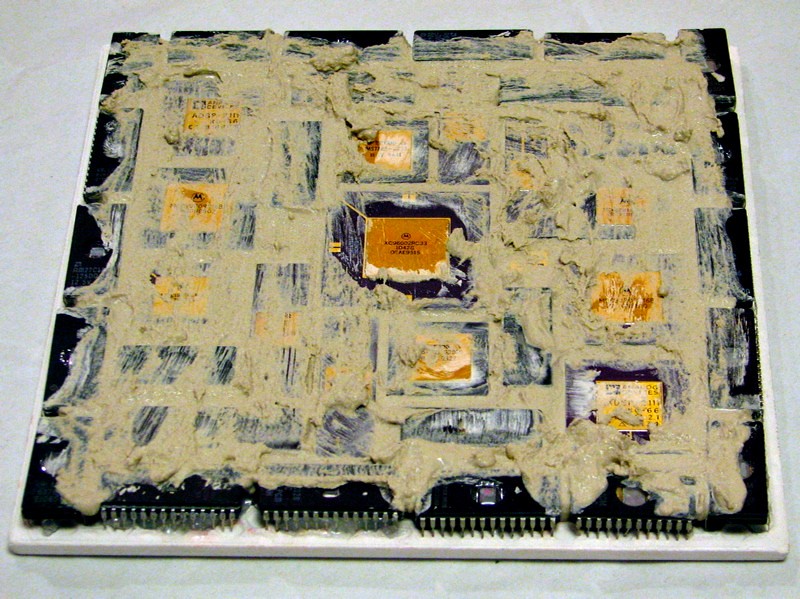
Here’s where it gets messy, and temporarily ugly: Fill the deep gaps between the chips with the grout paste, and wipe the excess away. Try to do this with some tools, rather than with your fingers. Rubber gloves, spoons, and squeegees can be handy for this part.
Besides filling in the gaps between the chips, you will need to add extra grout paste around the outer edge of the base tile to construct a smooth edge and smooth corners, and then wipe as much grout as you can off of the top of the chips before allowing the grout to cure. I’ve found that a wet cotton swab is great for cleaning wet grout off of small things like these.
After the grout has cured in a day or two, you can (with more effort) remove incidental bits of grout that you may have missed earlier while it was still wet.
Your completed trivet should be able to handle pots and pans that come off of the stove at fairly high temperatures. If you have used (as we did) chip packages that are ceramic with metal lids, a possible concern is that the lids, which are held on by solder, which could loosened if an extremely hot pan with high heat capacity– say cast iron that has been baked at above 450 F– were placed on it. In any case, we have been regularly using our trivet and we have not yet seen any evidence of heat damage of any kind. However that does not rule out the possibility that it could happen in extreme cases Naturally, if you build your trivet out of chips without metal lids,this need not be a concern.
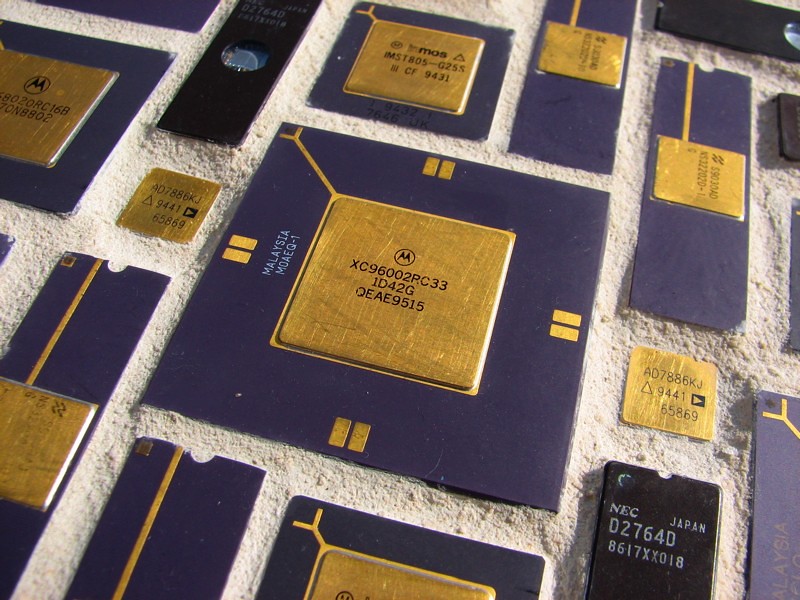
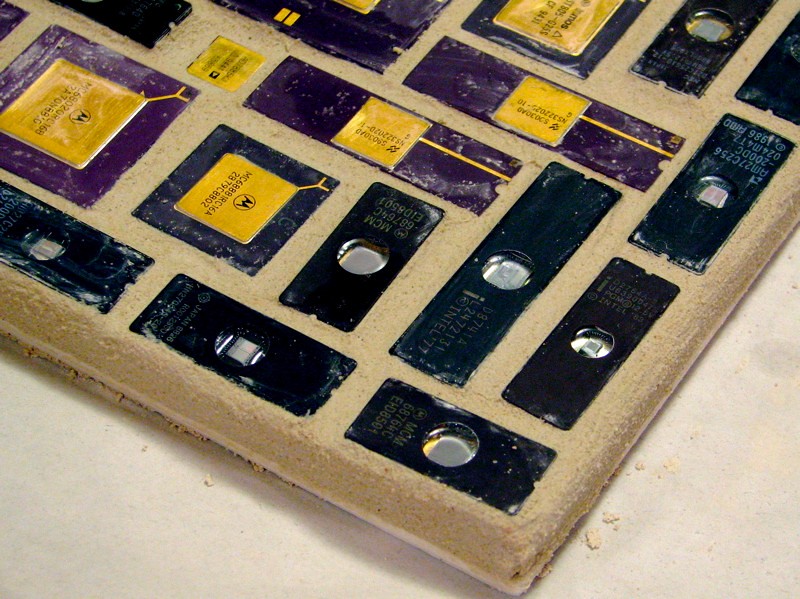
Here is what the surface of the completed trivet looks like in a little more detail. The photo on the left shows the center chip of the trivet, the magnificent — but highly obsolescent– XC96002, a Motorola DSP chip.
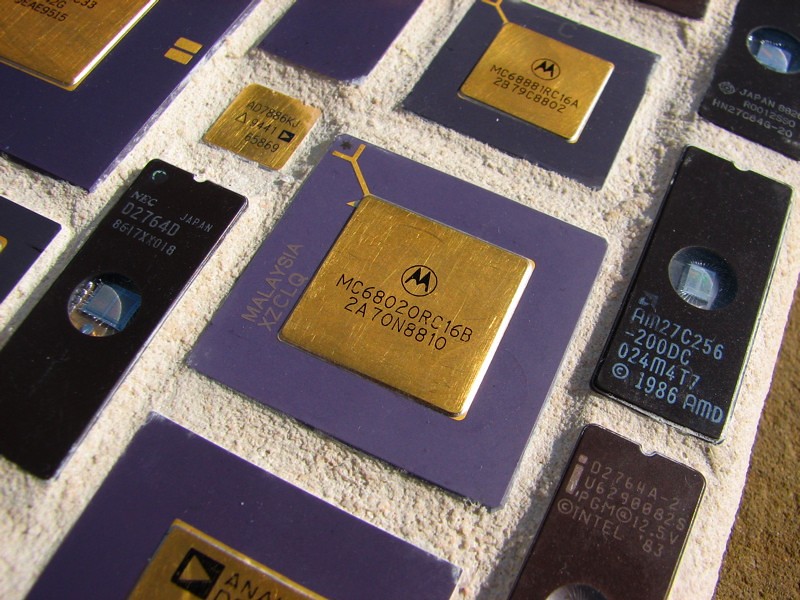
On the right is a close up showing the 16 MHz 68020, with its 68881 math co-processor. A classic combination! It also reminds me a bit of this combination found in our old dining table.
If you liked this project, you may want to see some of the other evilmadscientist.com technological recycling projects:
How to make hard drive PCB picture frames
How to make hard drive wind chimes
How to extract magnets from plastic toys
mixed media mosaic dining table
[Further (Future) Reading: We’ve written a separate and detailed step-by-step guide to making your own computer chip trivet, which will be published in The Hungry Scientist Cookbook, forthcoming from ReganBooks at HarperCollins in September, 2007. ]
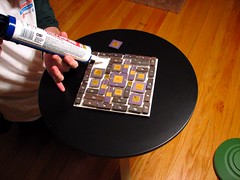
I’m expecting to get a large number of old chips thrown my way, and am planning on tiling my desk with them. I’ll probably grout between them, but since it’s a writing surface, I’m planning to top it off with a glass (or plexiglass?) plate.
Hmm… anyone know if an optical mouse is likely to work on such a surface (glass with chips/grouting directly below it)?
One more question: How have you handled the chips with pins on their undersides? Cut them off, or bent them over, or just left them standing high on the pins? The chips I’ll receive will probably have the pins (deliberately) damaged…
Cheers, Matt
If I lift my optical mouse more than about a sixteenth of an inch above my desk, it seems to no longer work. I’m guessing that’s because it’s a fixed focus device and the optical sensor is out of focus. You might need (gasp!) use a mousepad of some sort, so start looking around for one that will look nice on your desk– maybe a thin piece of frosted-texture clear plastic?
Right now I have two computers on my desk, each with an optical mouse. Once (Apple Pro Mouse) works fine, the other (off brand) does not work at all unless I provide it with a mouse pad. Same desk… just different mice. Your mice may vary.
On all things of this nature that I’ve made, I’ve kept all of the pins in place, pretty close to the original configuration. If they are slightly banged up, that’s okay. The help keep the vertical spacing uniform and they provide surfaces that can be used to glue the chips in place prior to putting the grout in.
—
Windell H. Oskay
drwho(at)evilmadscientist.com
http://www.evilmadscientist.com/
How about making a second trivet out of old heatsinks :)
—
http://www.piku.org.uk
That’s a fine idea; it’s very practical.
However, it’s not clear to me how to make it look best– do you rest the pot on the flat surface of the heat sinks? That might loook boring, or scratch the hell out of your table, so you’d have to point them down. Then you’re resting the pot on the fins of the heat sinks– so they’d better all be approximately the same height. It could work….
—
Windell H. Oskay
drwho(at)evilmadscientist.com
http://www.evilmadscientist.com/
Do you have to wear suits to make a computer chip?
Yes!
Nice trivet.
With respect to your various improvised armor solutions.. a bullet from a revolver is nothing compared to fragments from an IED. Do some research on the masses and velocities from artillery shell shrapnel.