


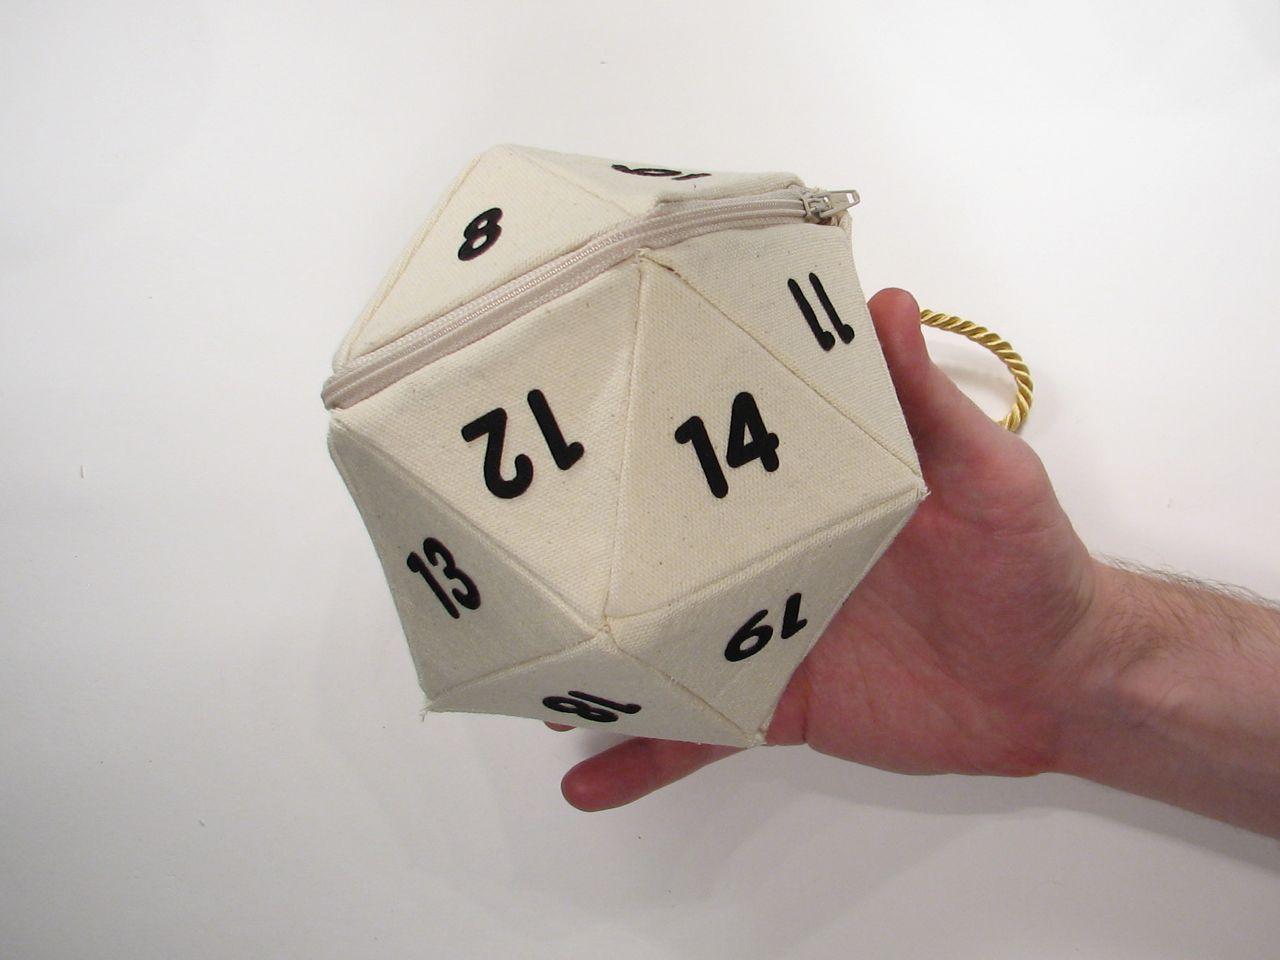
By popular request following the d12 bag, here it is: the d20 bag! Now you can make your very own icosahedron.
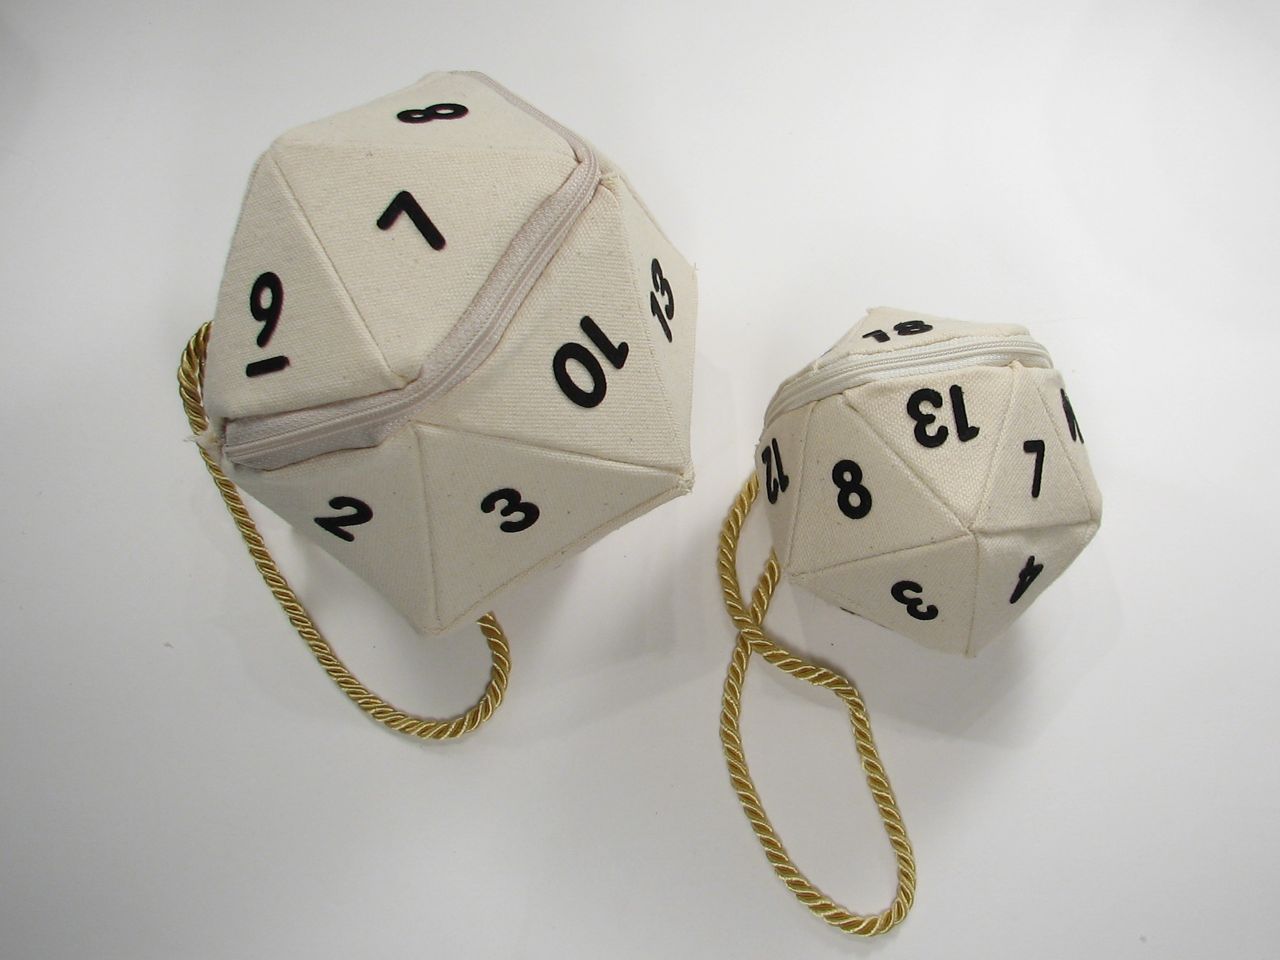
We’re making a pattern and kit for this project available in two sizes: darling and practical. The tiny one is just over three inches tall, and holds little things for you. The larger size is about five inches tall and will fit your phone, wallet and keys along with your dice.
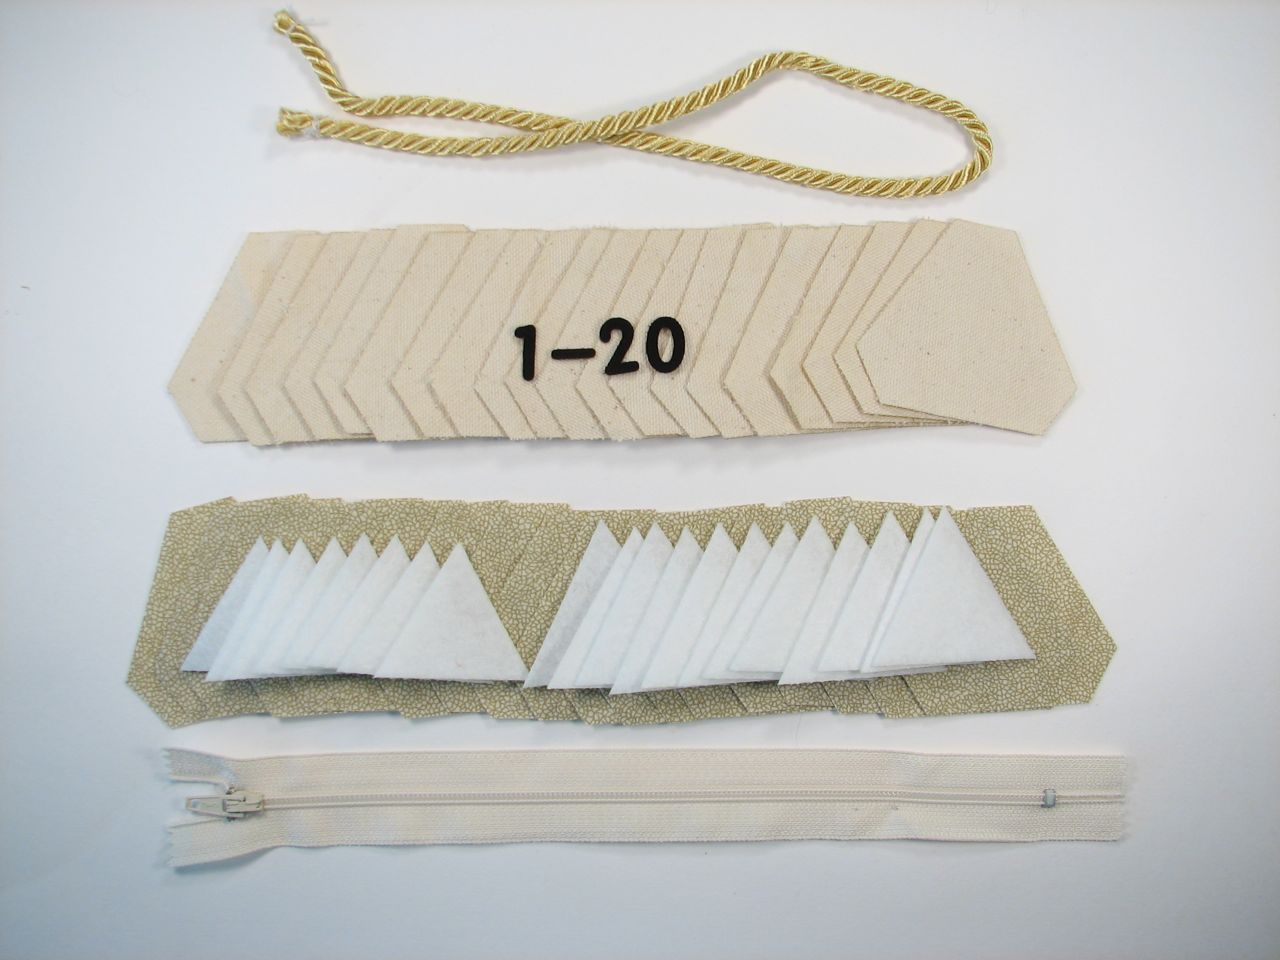
There are a deceptively large number of parts to cut out, which is one of the main reasons that a kit makes sense here.
Our kit includes twenty canvas pieces, twenty iron-on stiffener triangles, twenty cotton liner pieces, a cord for the handle, a zipper, and iron-on numbers 1-20 in the lovely font BPreplay. The iron-on numbers are made from a cotton-poly blend which fuses as it is laser cut so that it won’t fray. Assembly takes a few hours and requires thread, needle, scissors, pins and an iron (for fabric, not solder). A sewing machine will make some parts go faster.
d20 bag instructions:
If you’re using your own materials, the small pattern is available here (26 kB PDF) and the large pattern is available here (24 kB PDF). The small bag takes a 9″ zipper, and the large bag takes a 14″ zipper. Depending on how you lay out your pieces, you’ll need about two square feet of fabric of each type, with a little less needed for the smaller bag.
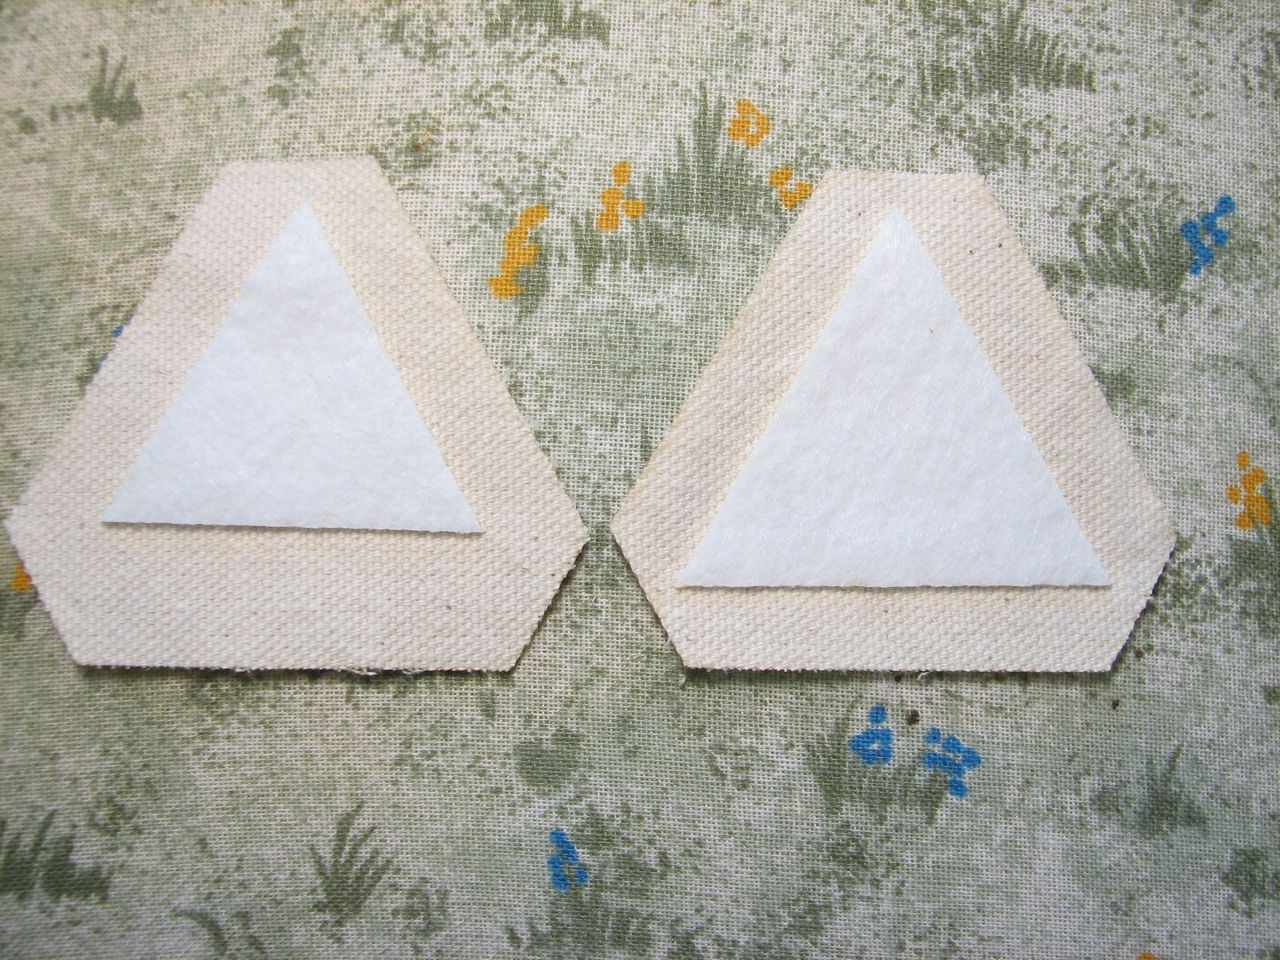
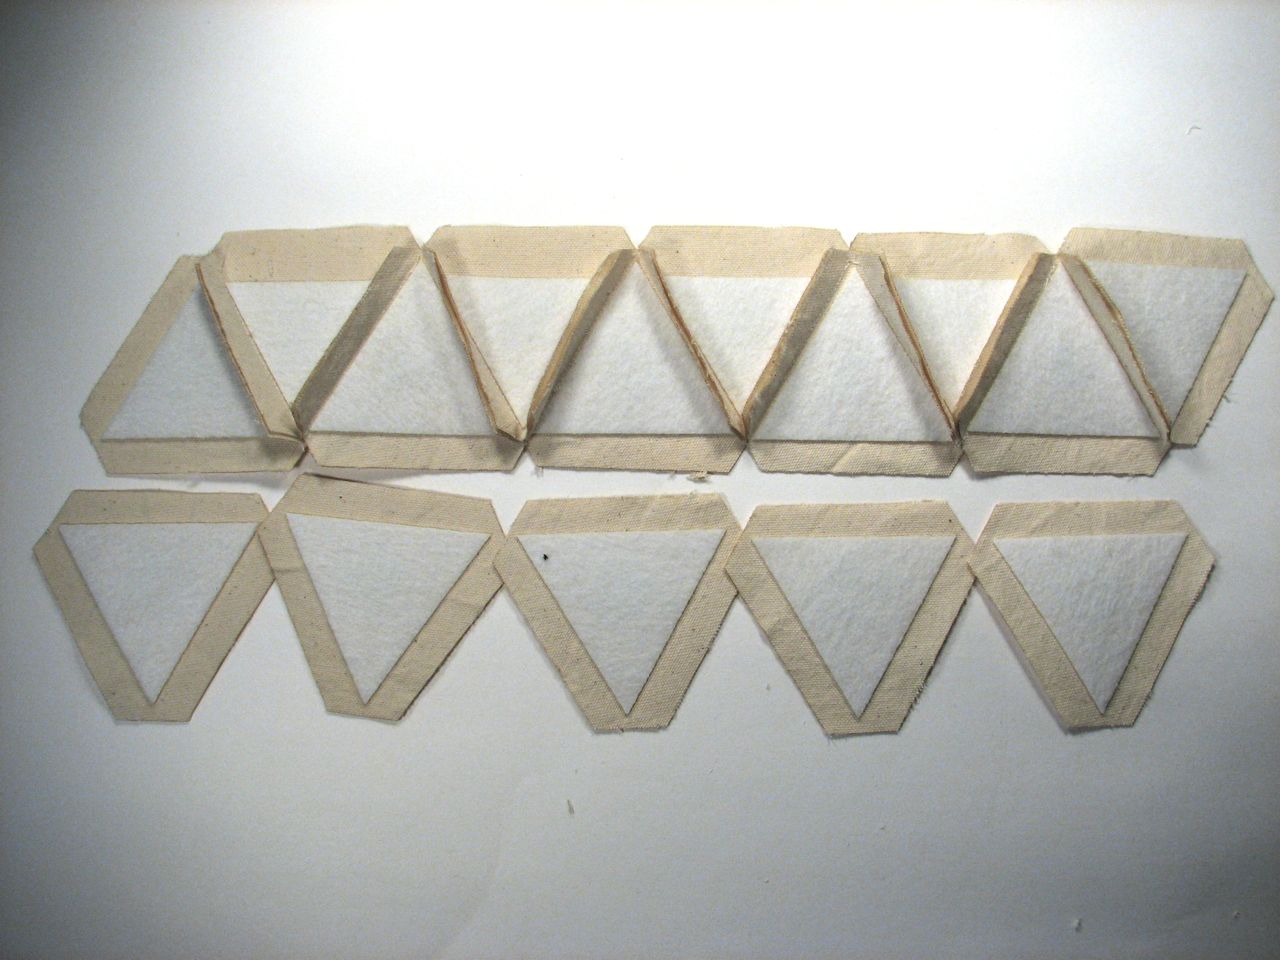
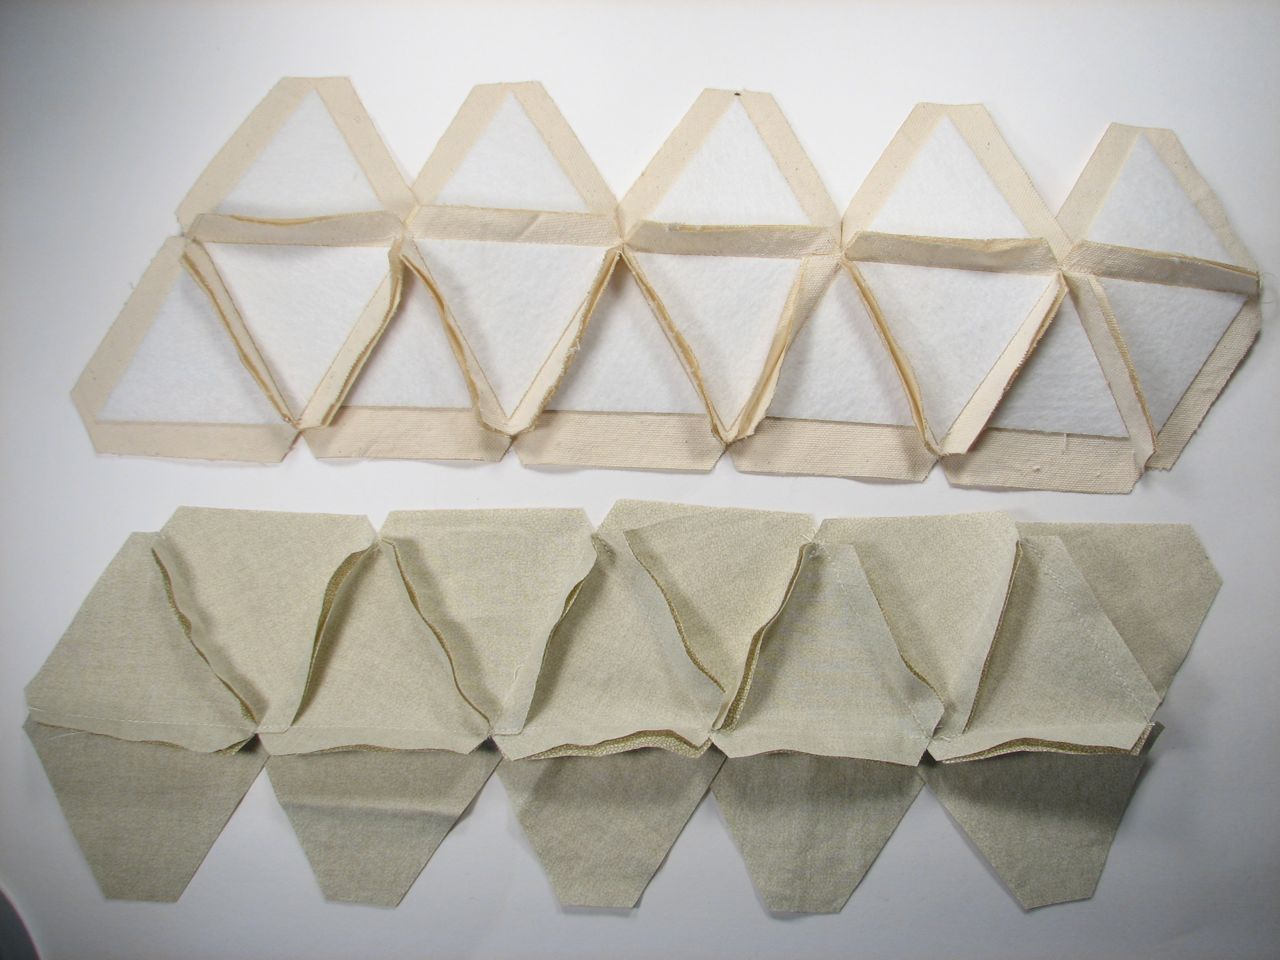
There are two sizes of iron-on stiffener panels: little ones (eight of these) and bigger ones (twelve of these). The little ones are to allow clearance for the zipper. The standard allowance the sides of the triangles is about a quarter inch for the tiny bag and about three-eighths for the handbag. The smaller stiffeners that go next to the zippers have the same allowance on the two regular sides, and an additional quarter inch on the zipper side.
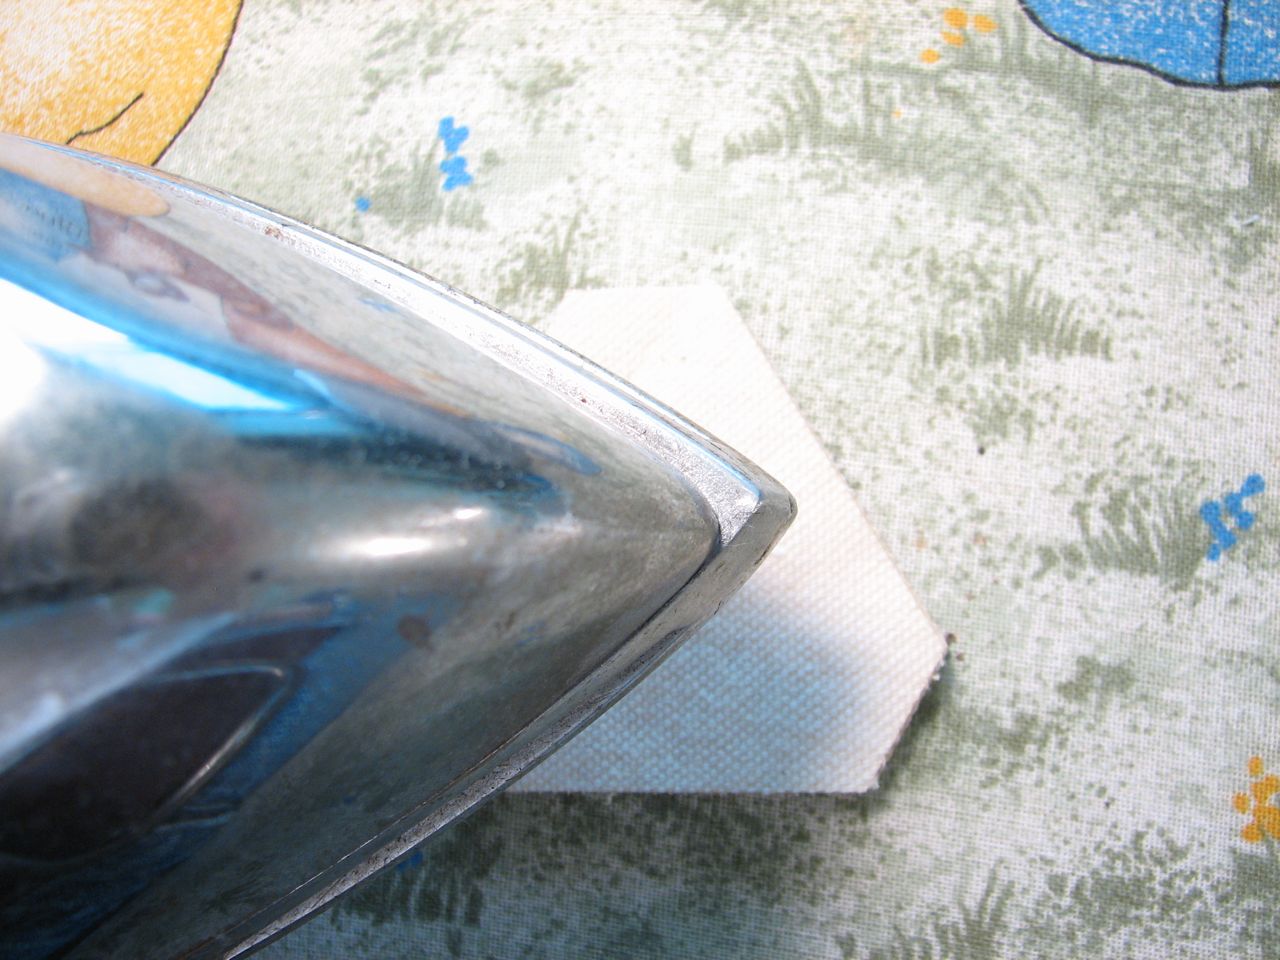
Place the stiffener with the plasticky side (may be very smooth like the back of the numbers or may be rough but have a distinctly plastic texture) against the canvas, and place a hot dry iron on the canvas side for 5-8 seconds.
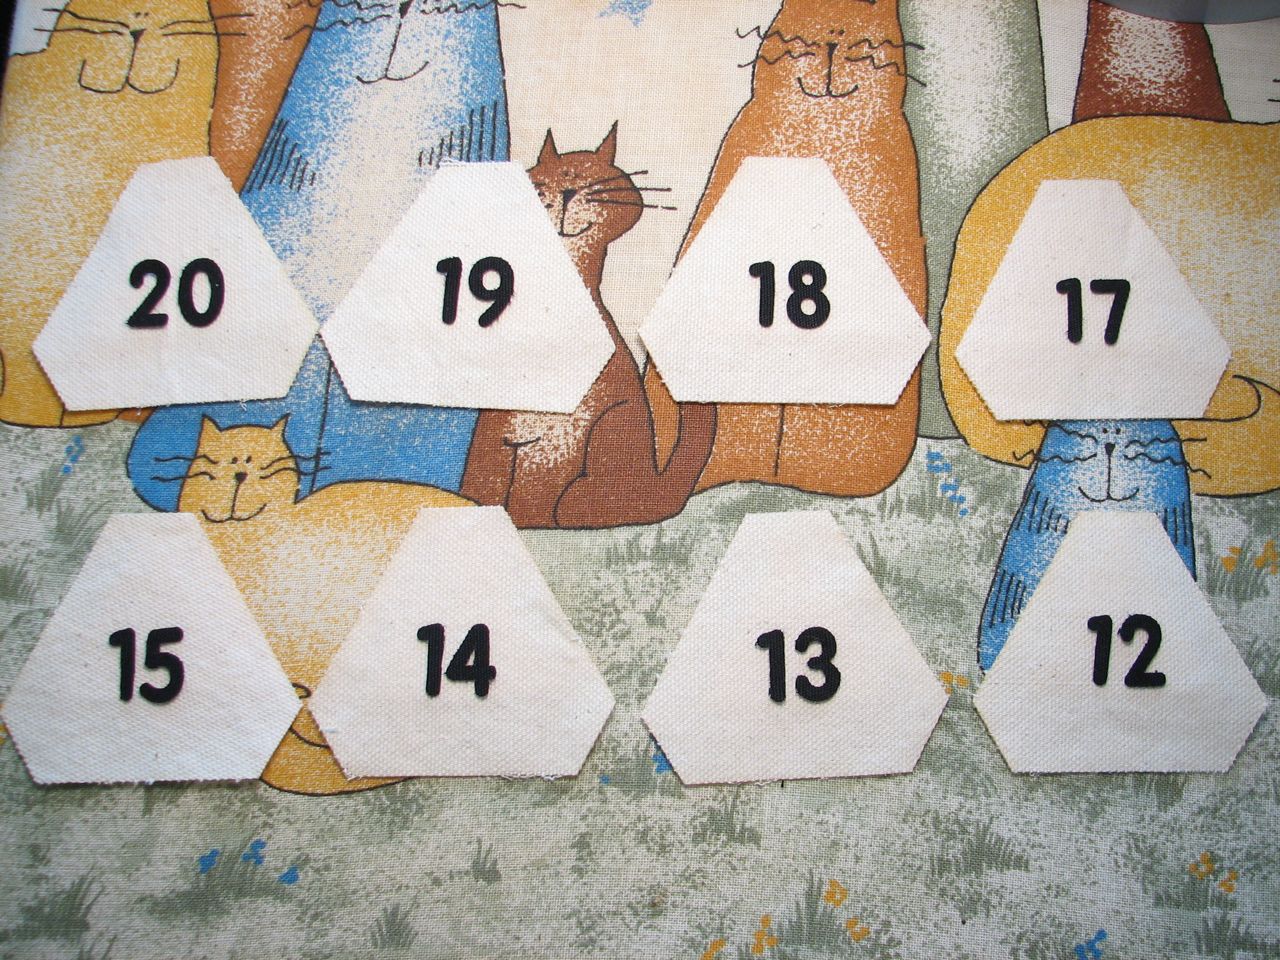
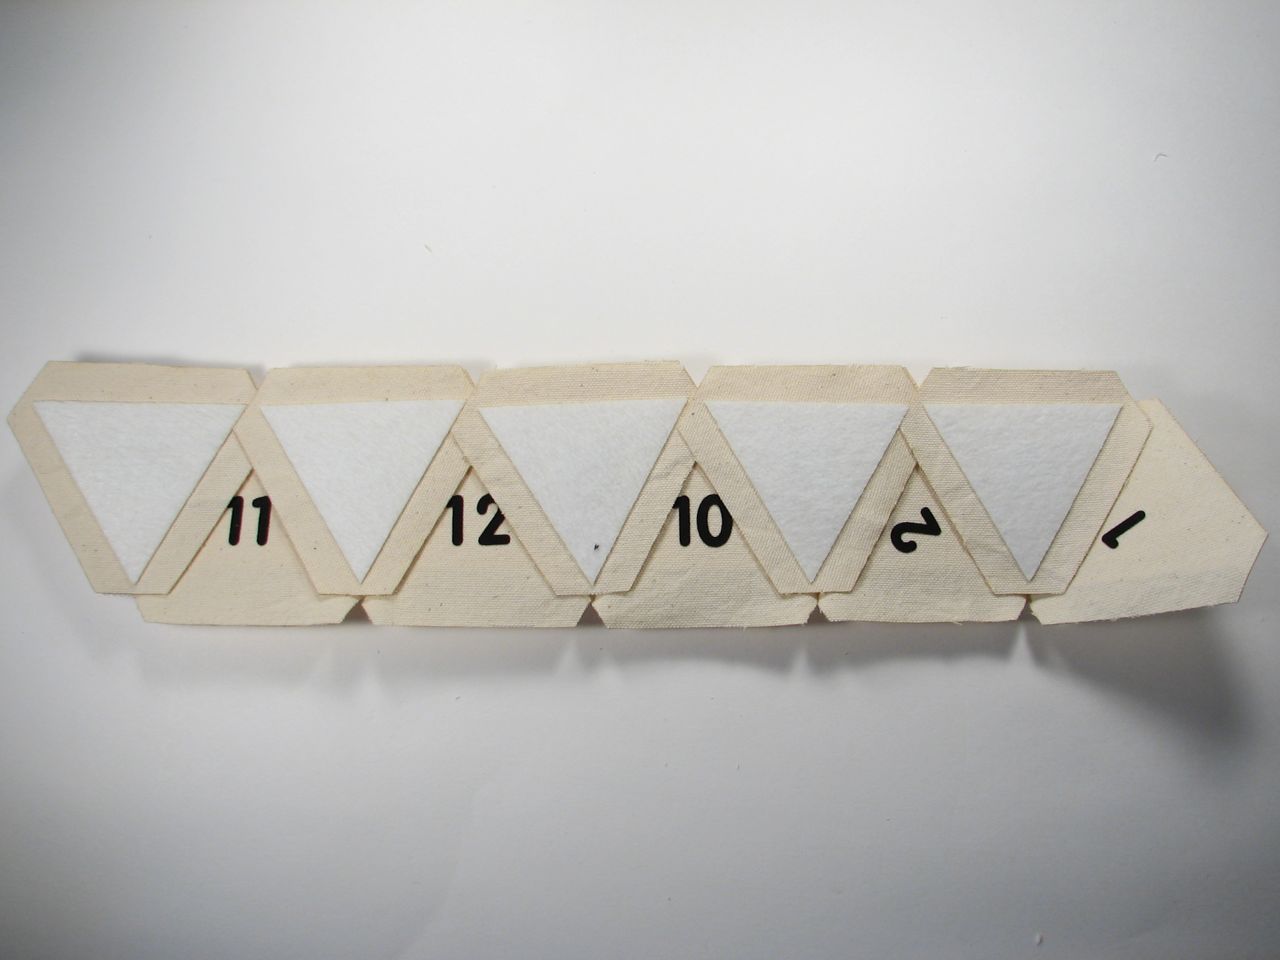
Arrange your numbers and fuse them under the iron for 5-8 seconds.
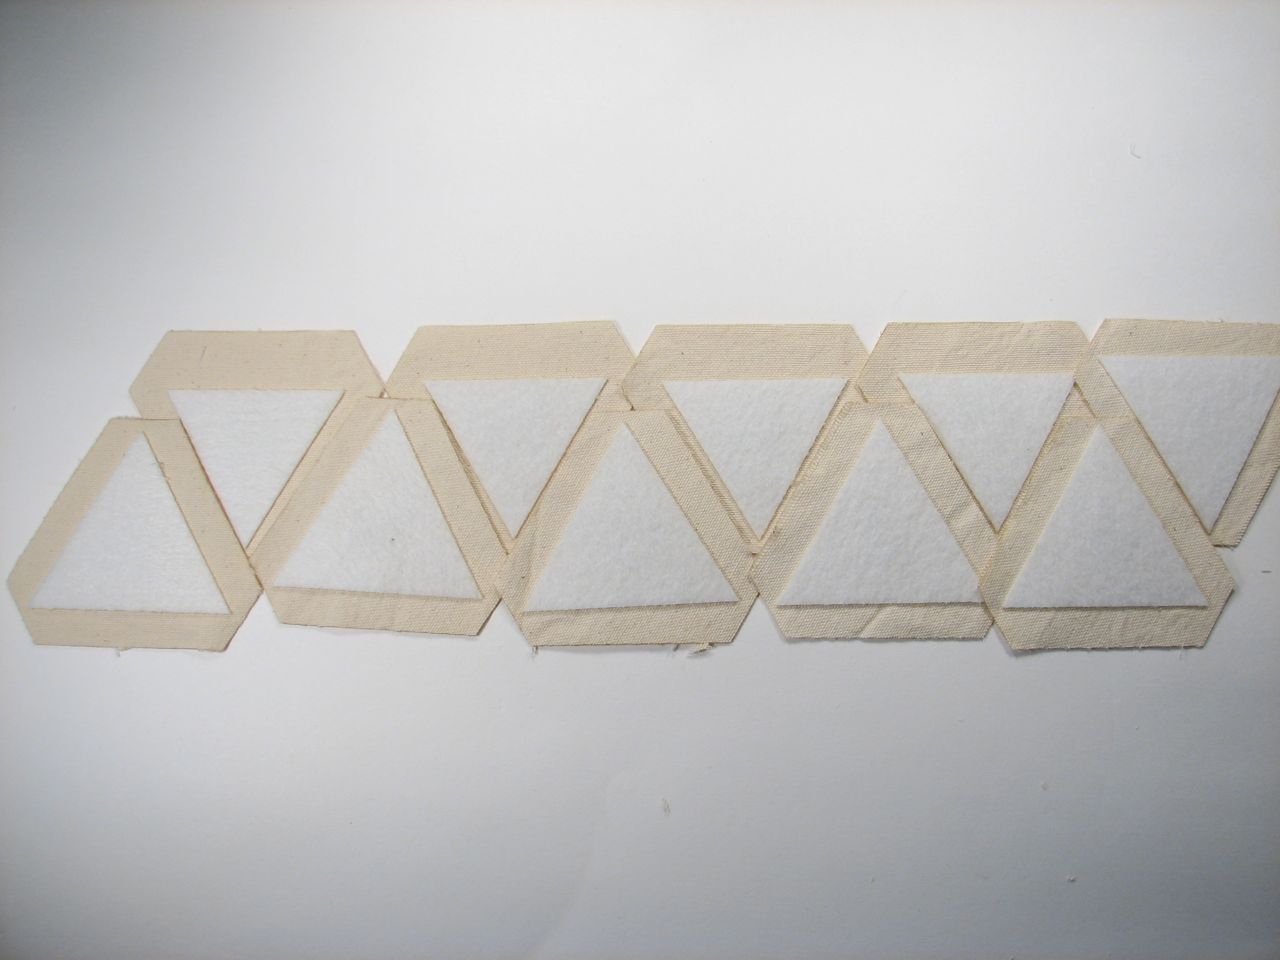
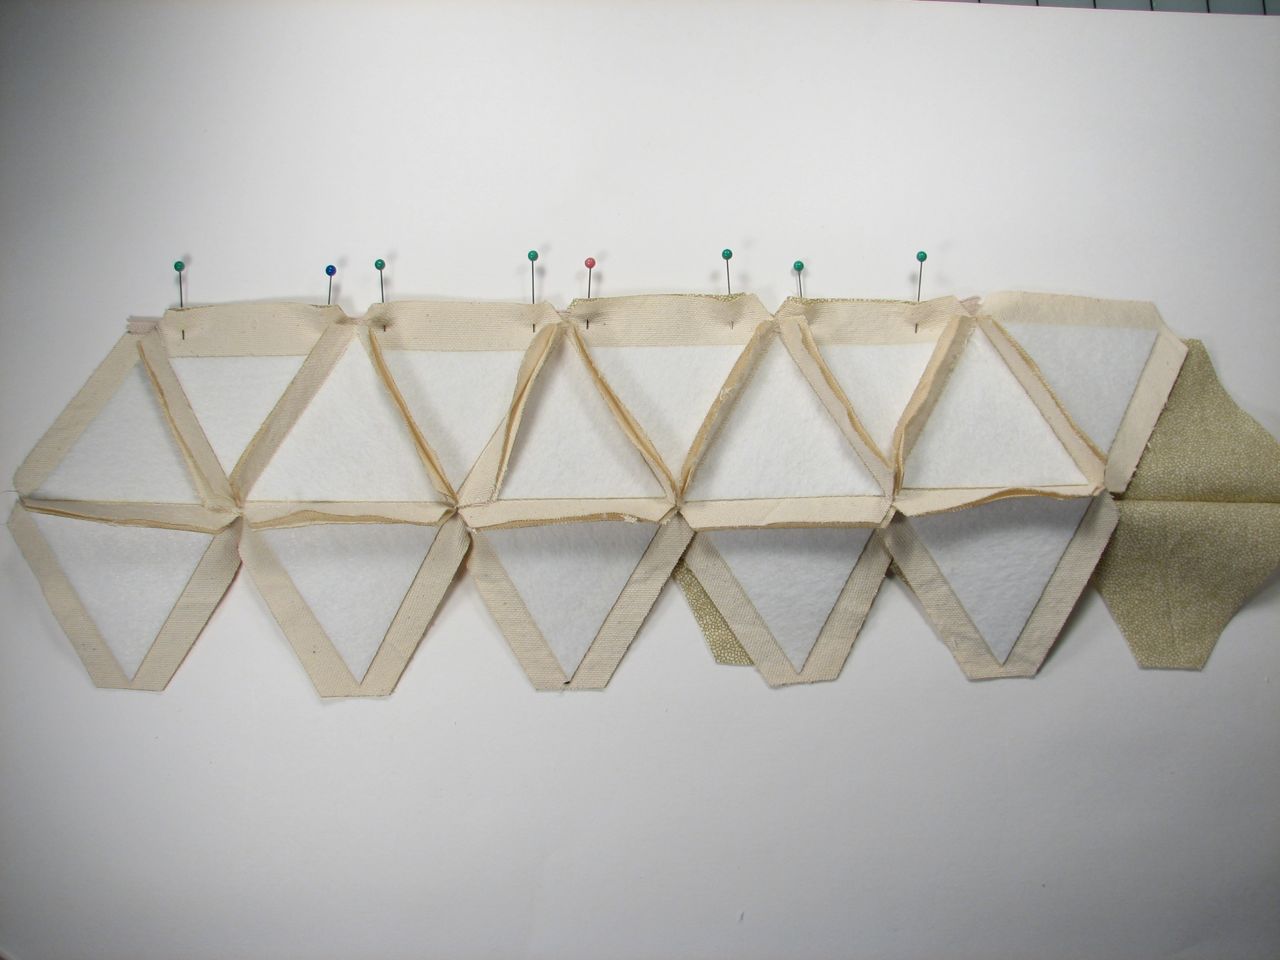
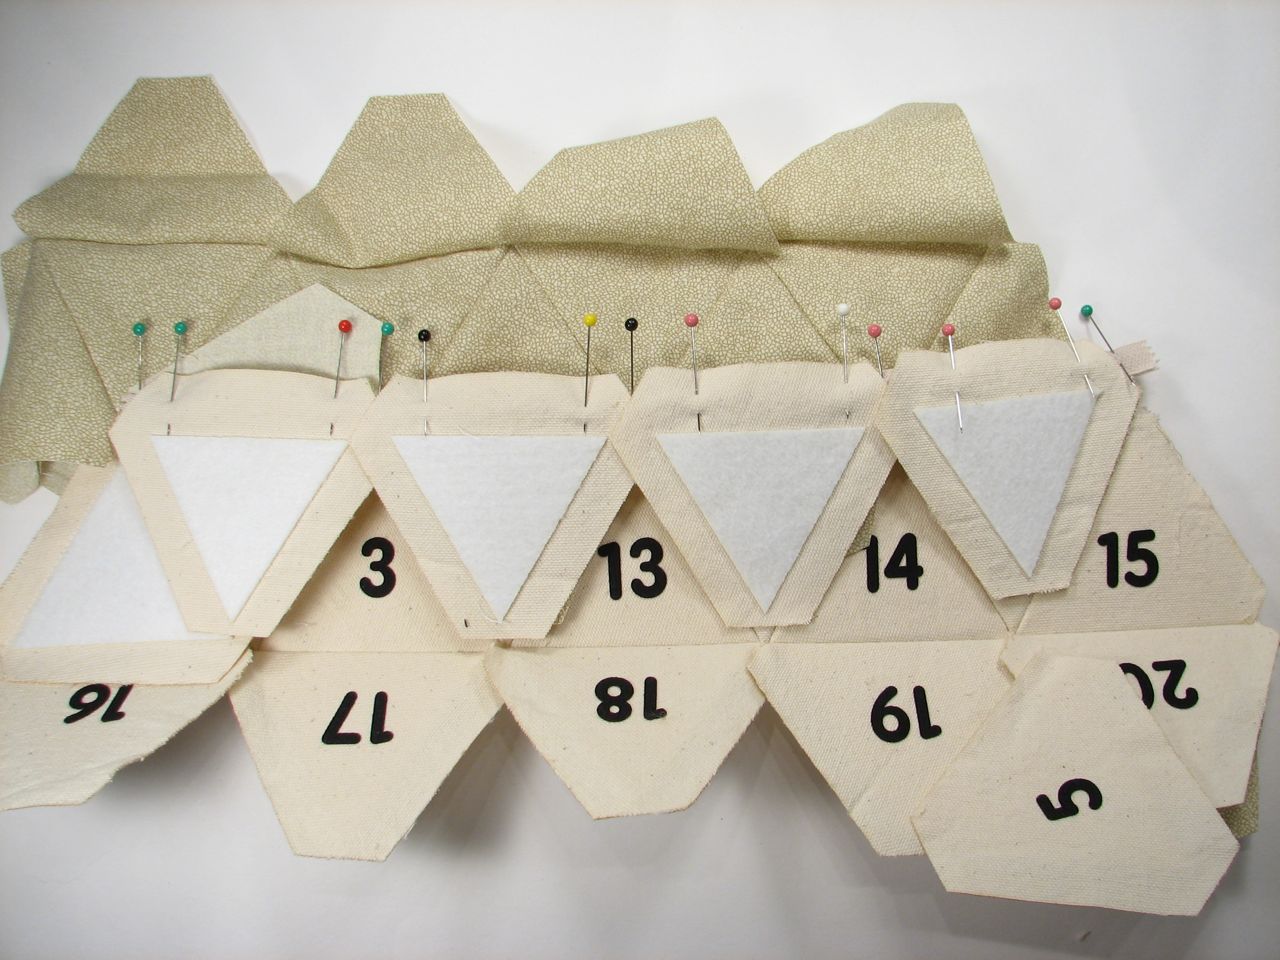
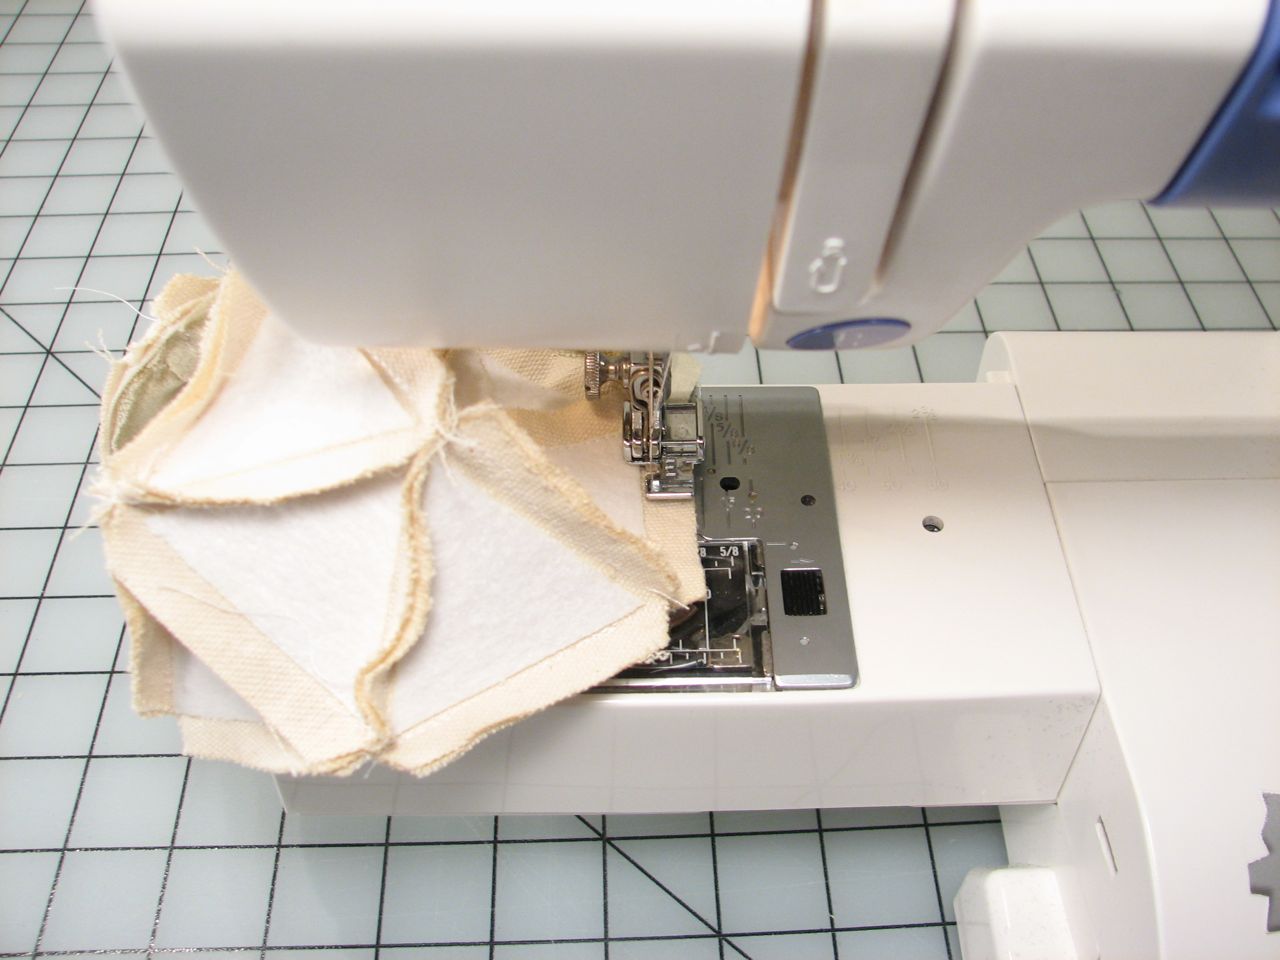
The first set of pieces to sew together are the ten that form the band around the center of the bag. There will also be five pieces on the bottom and five pieces for the lid. Lay them out in the order you’ll want to sew them in, with all of the zipper sides (smaller stiffeners with wider margin on one side) aligned. There will be one triangle in that row of the normal size: that’s where the lid attaches to the bottom of the bag.
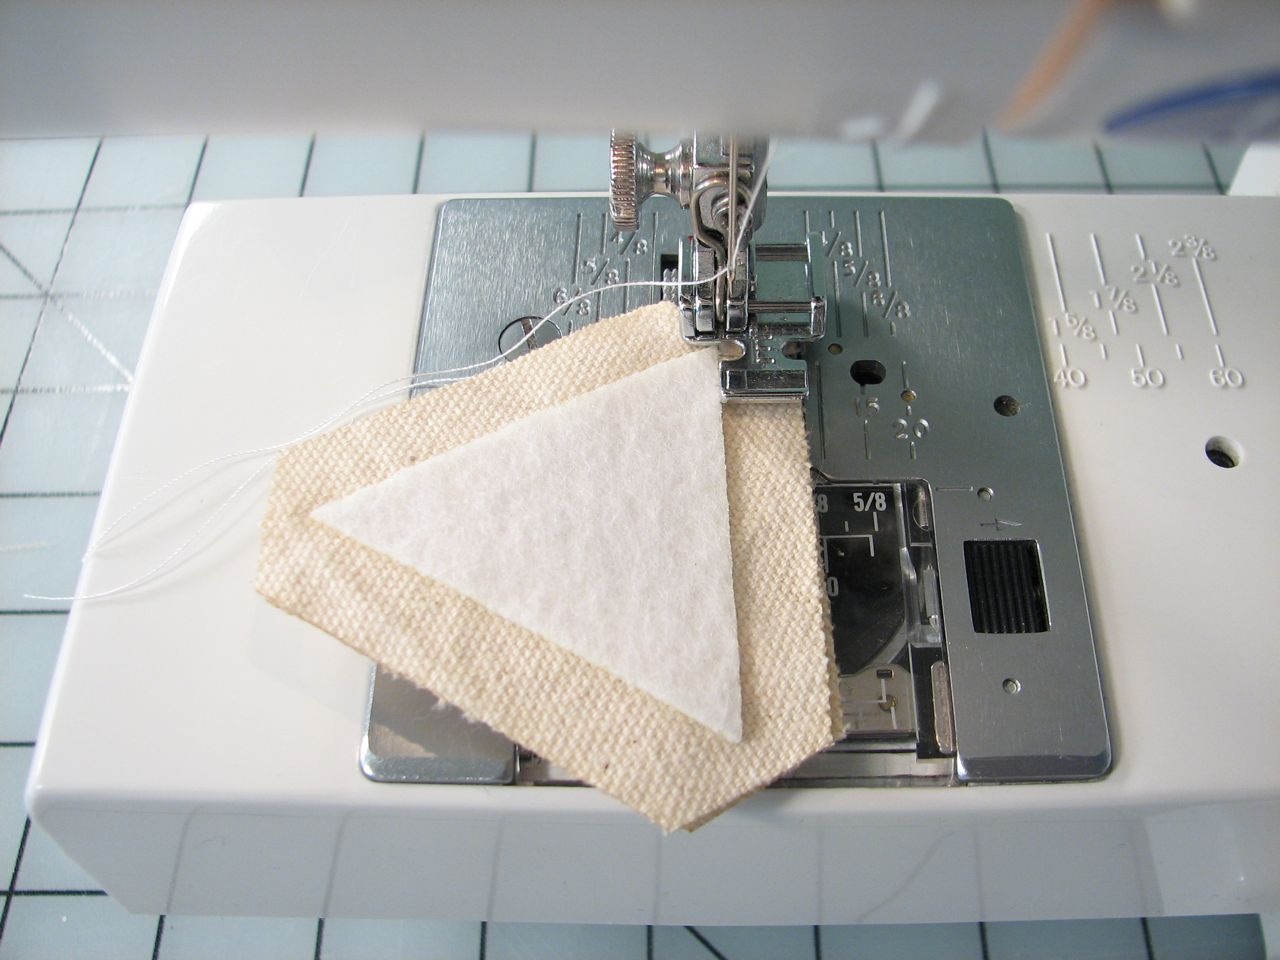
If sewing by machine, your zipper foot will help guide the stiffeners along.
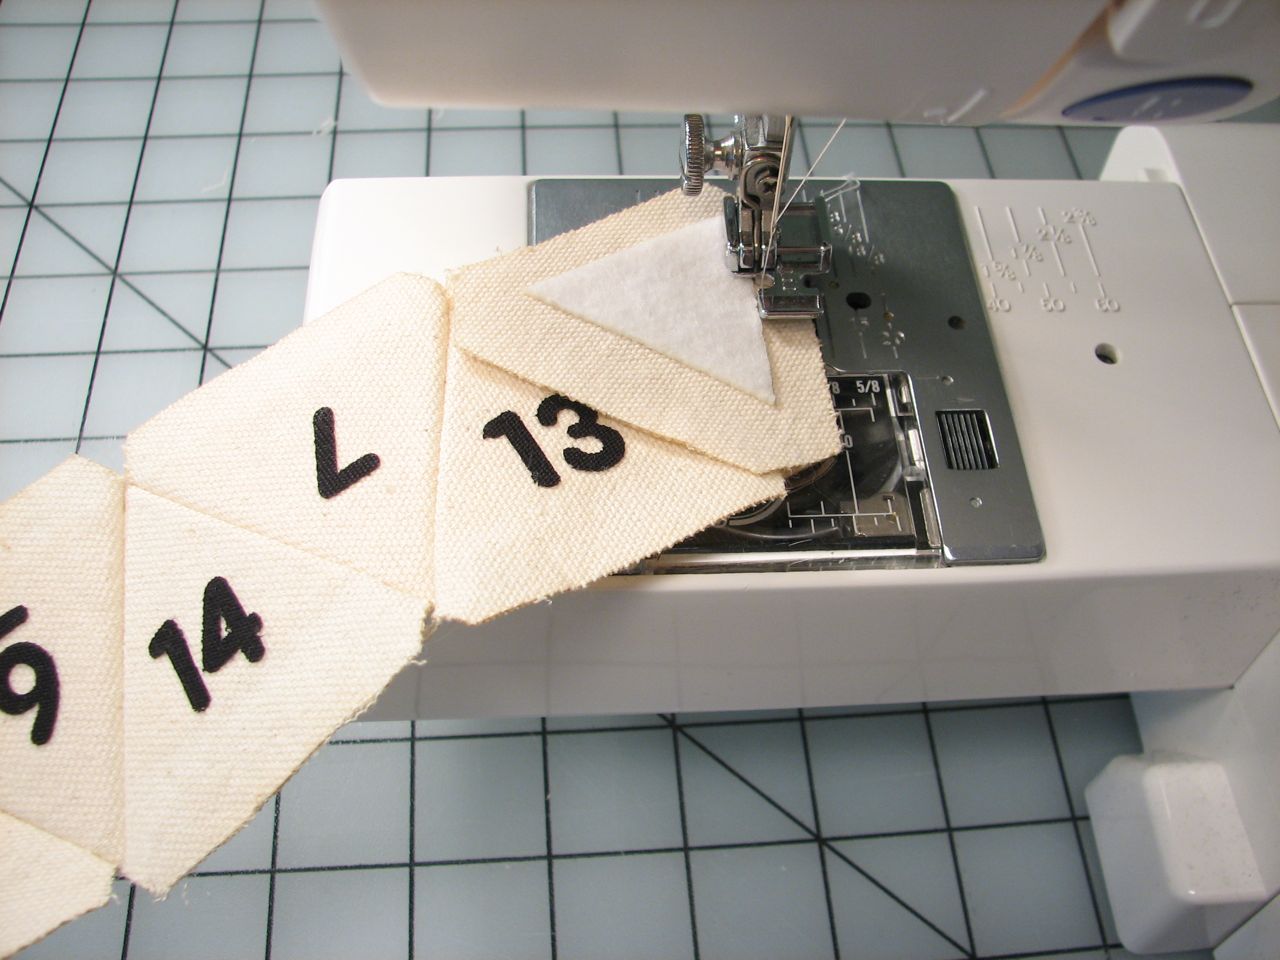
Sew each piece until you’ve got all ten strung together.
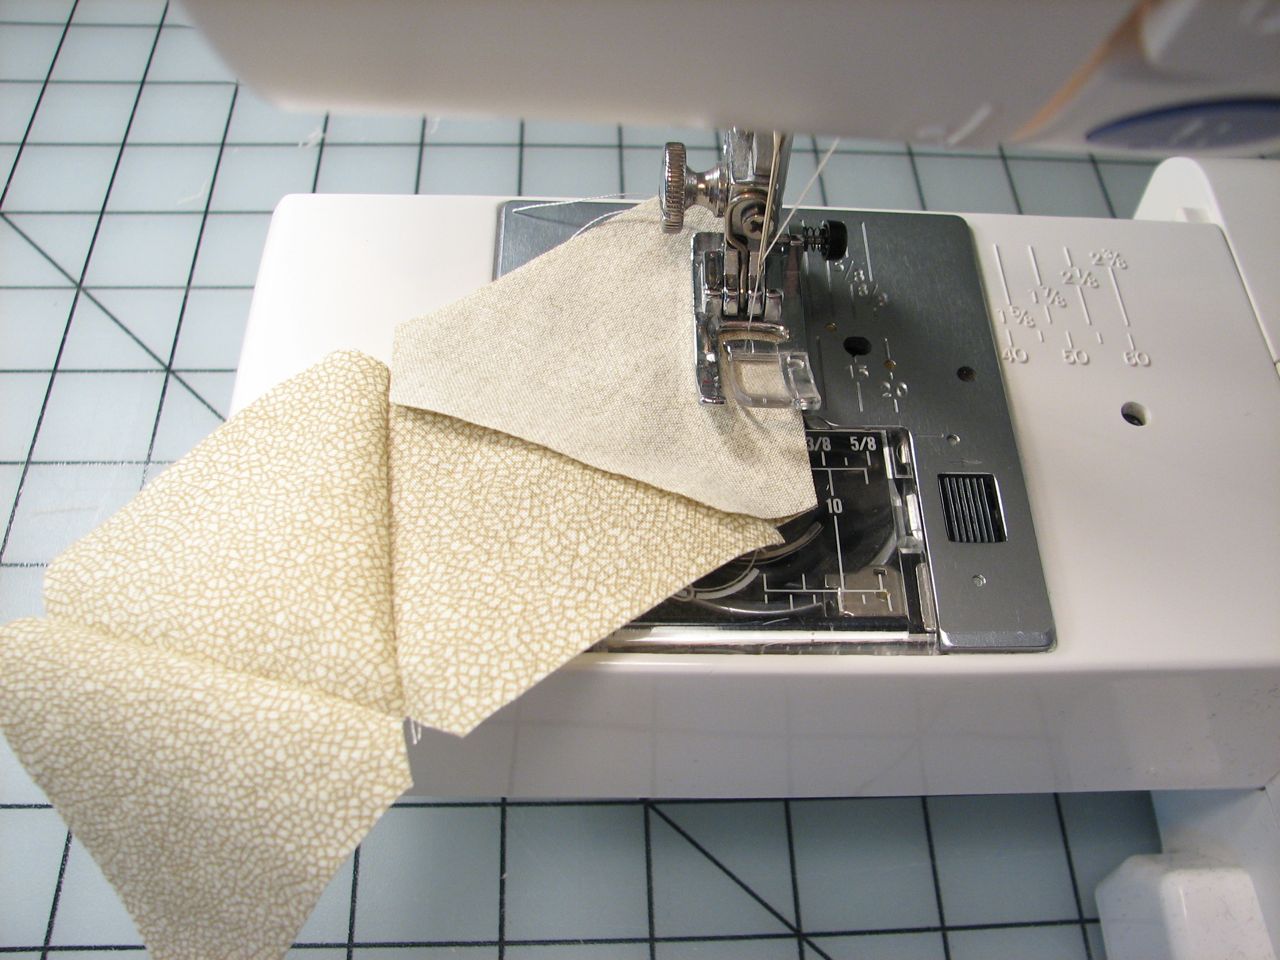
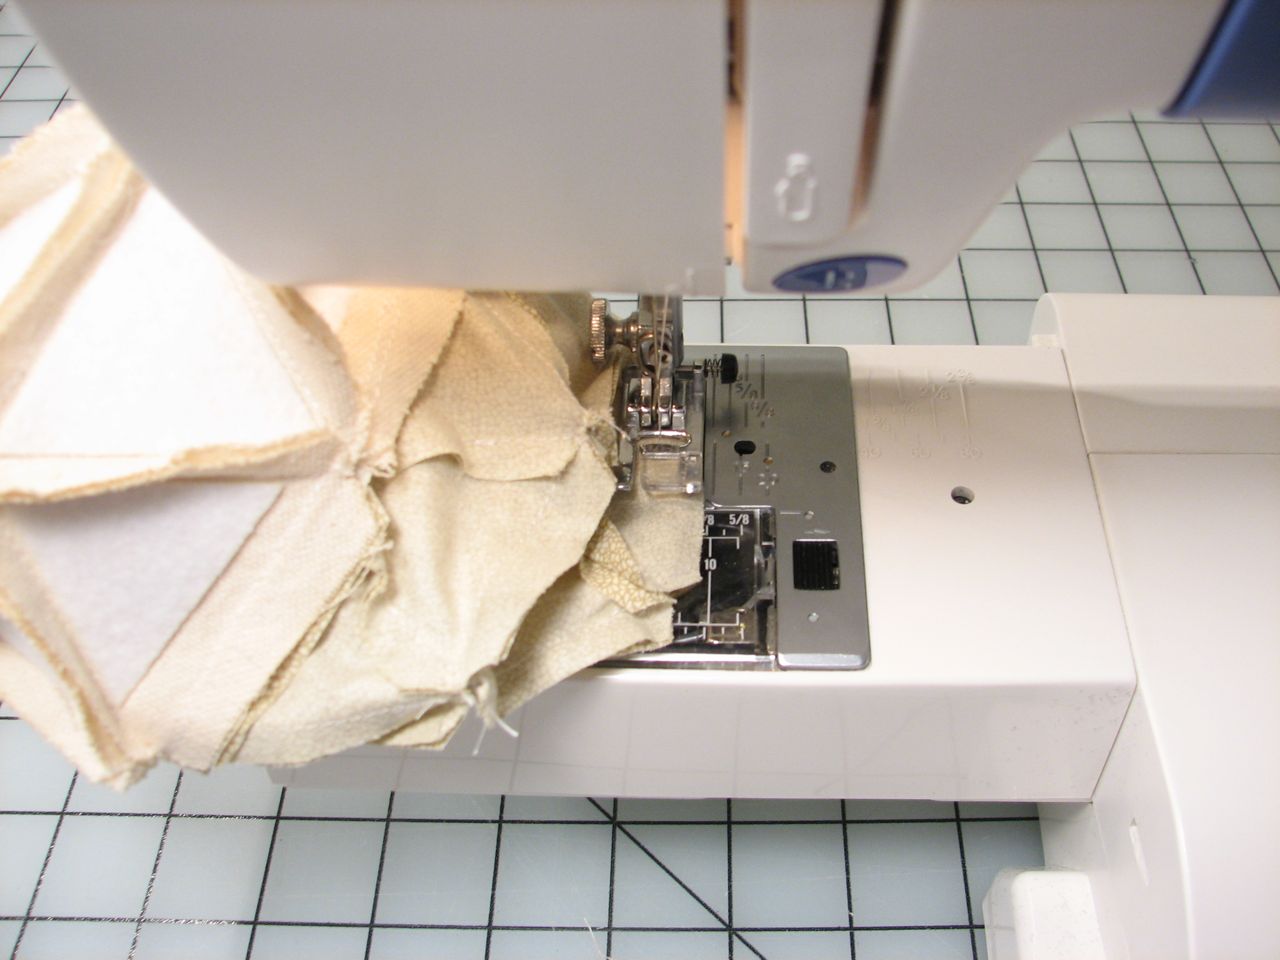
The next thing is to sew the bottom five panels on.
Lay them over the sewn strip (on the non-zipper edge), overlapping the edges and sew straight across the whole batch.
You’ll also need to make the same shape with the liner material. Sew the pieces together with a 3/8″ allowance.
Follow the same pattern as for the bag body.
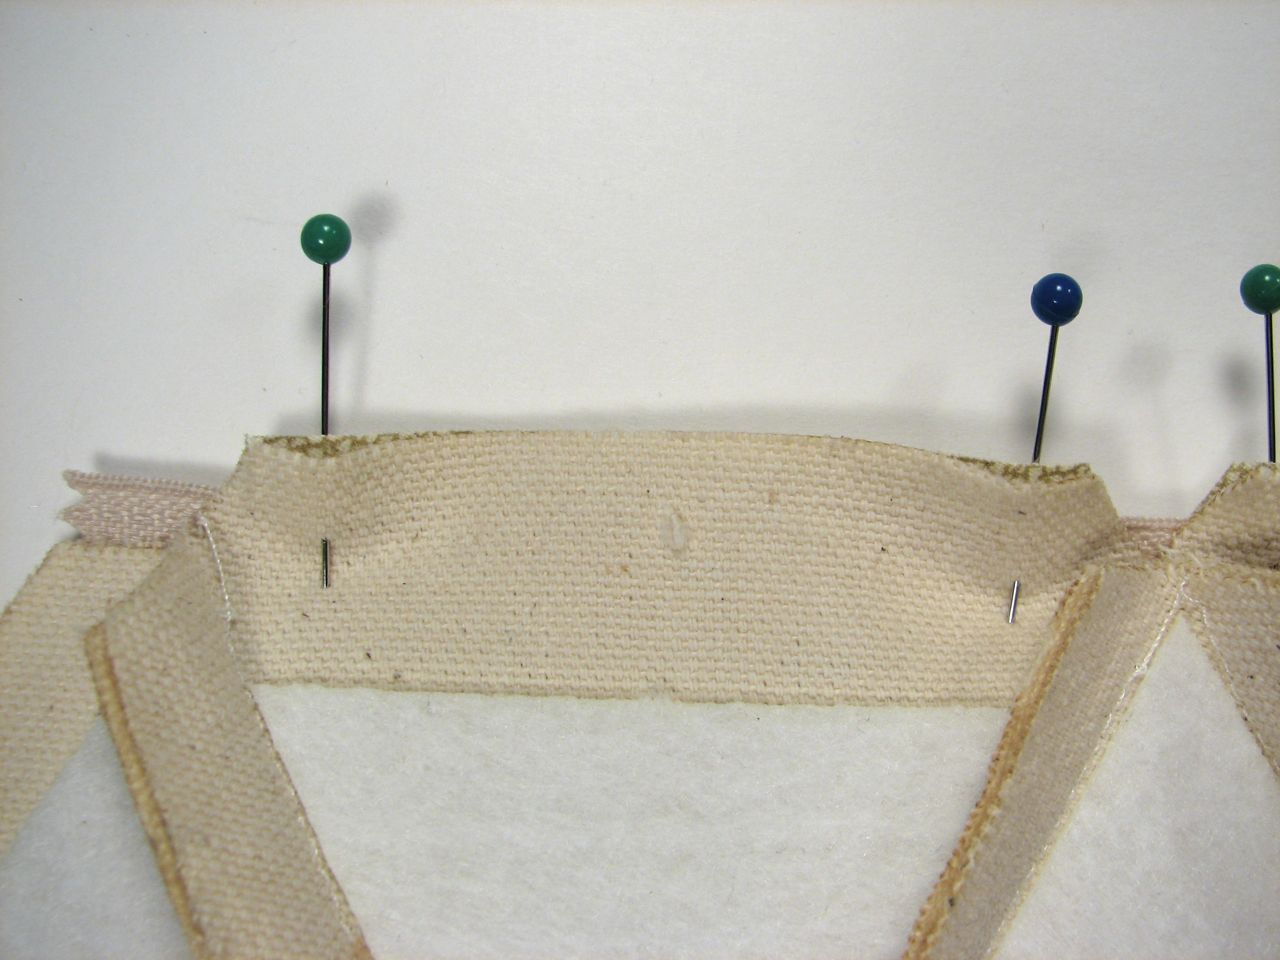
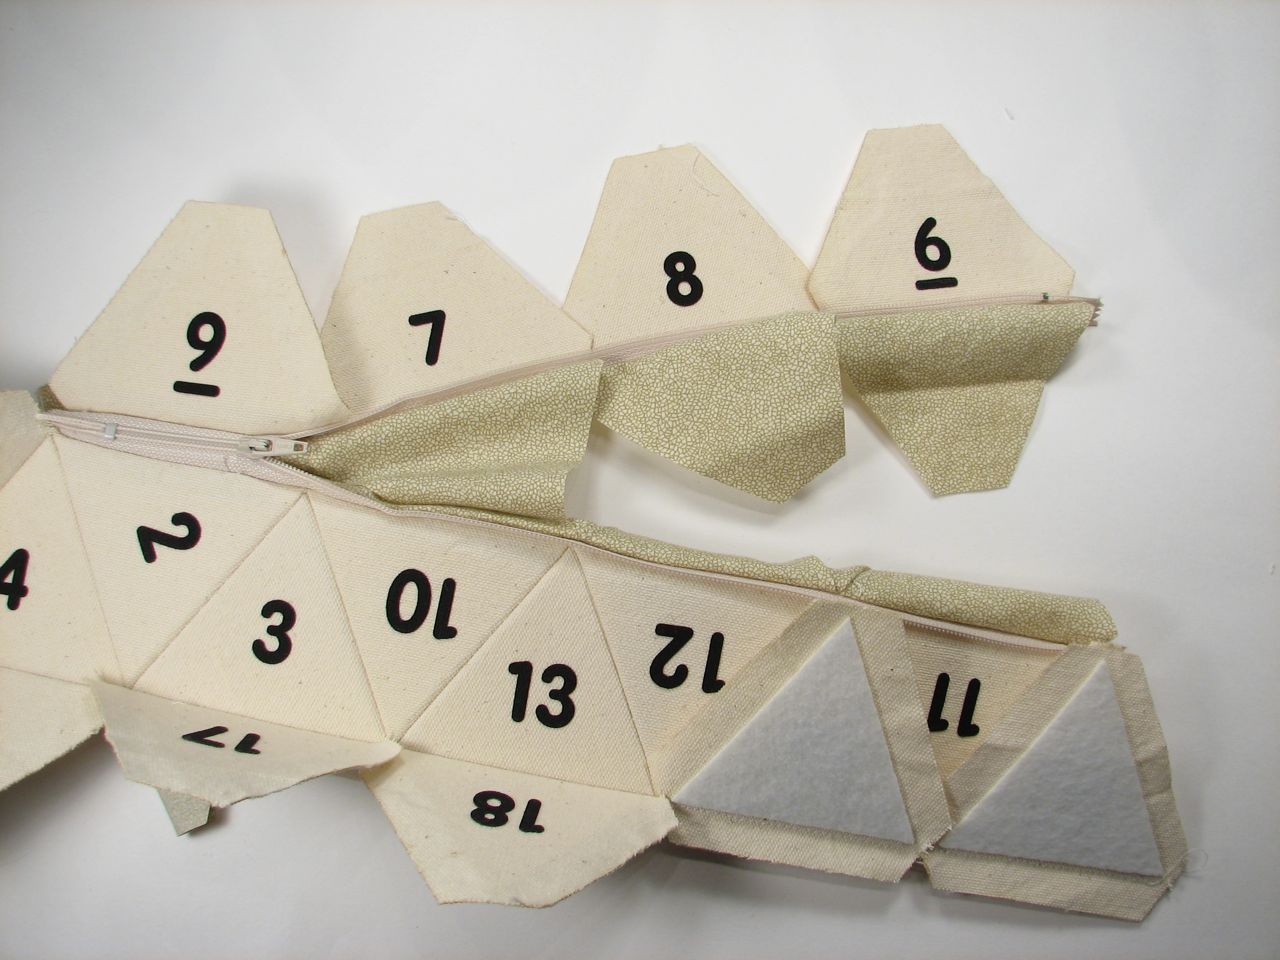
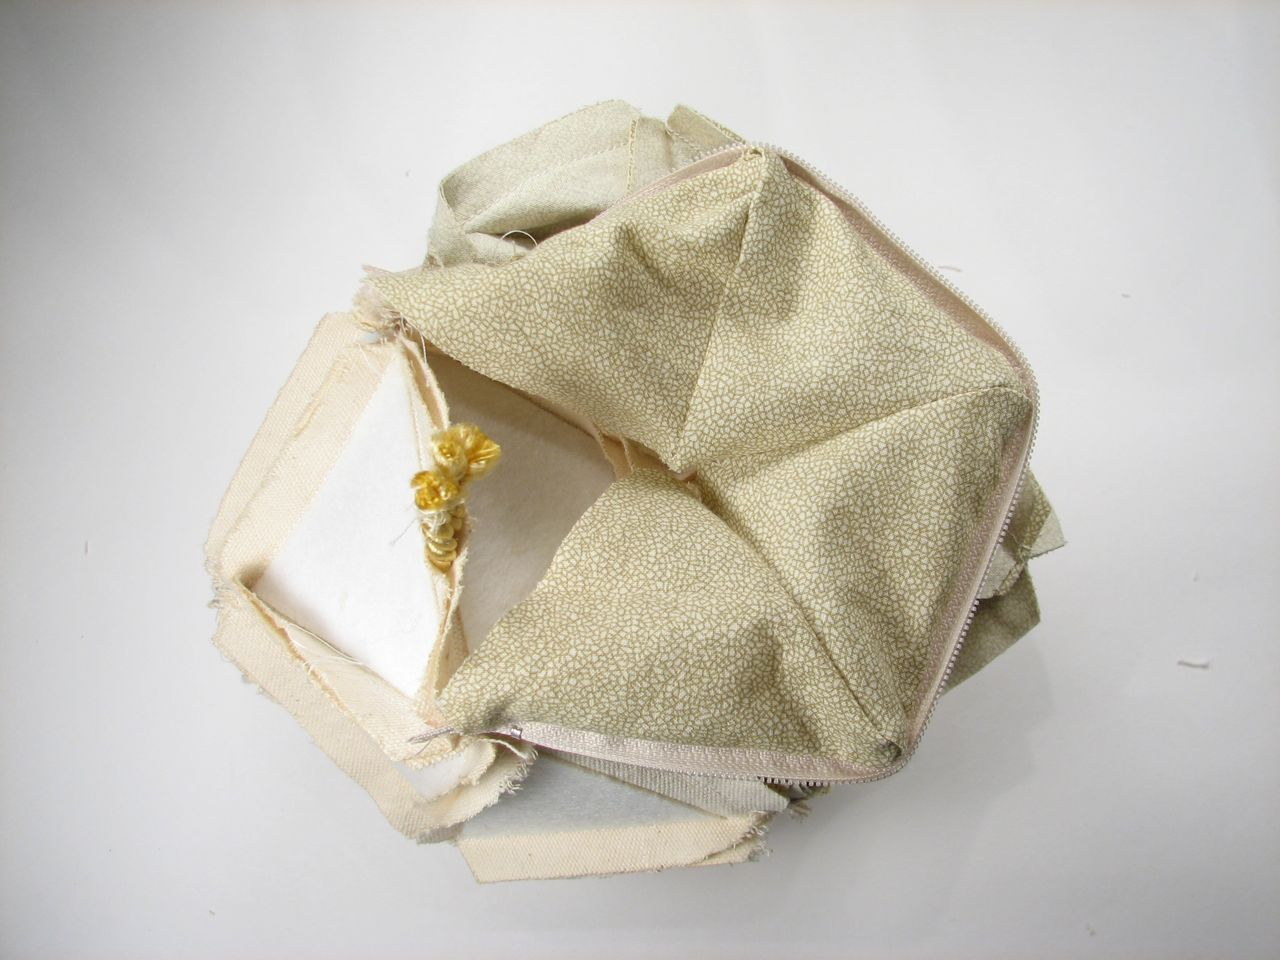
Once you have both done, it will be time to pin the zipper in place between the canvas and the liner. The zipper should be aligned fairly deeply so that the seam goes just below the intersection of the triangles.
Pin across the zipper and sew it in place.
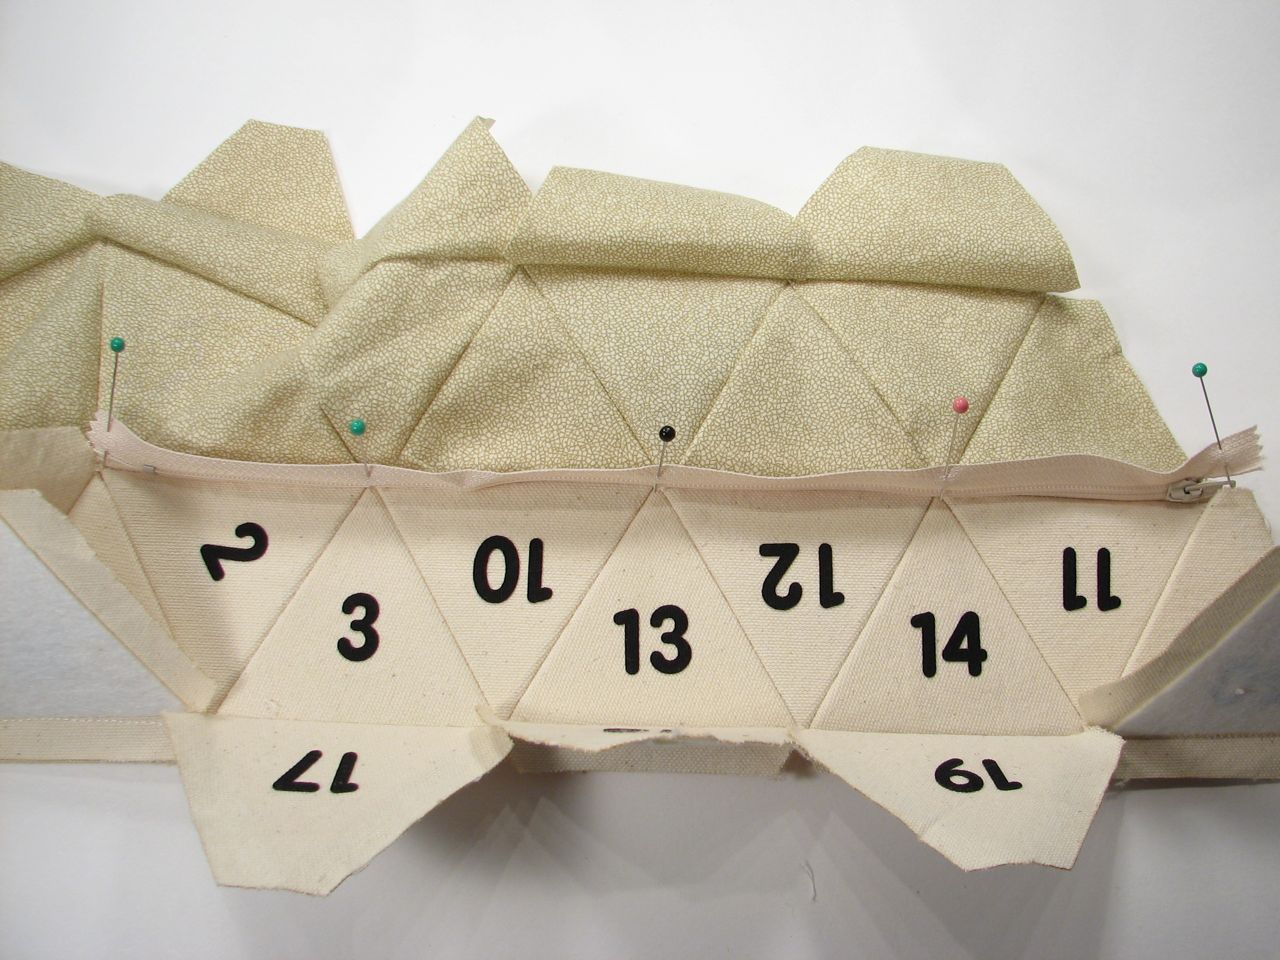
Once the zipper is in place, close it and mark the triangle intersections with pins on the lid side of the zipper.
Pin the zipper edge pieces for the lid to the zipper with four more of the loose liner pieces.
Sew the zipper on and test it to make sure it can freely open and close.
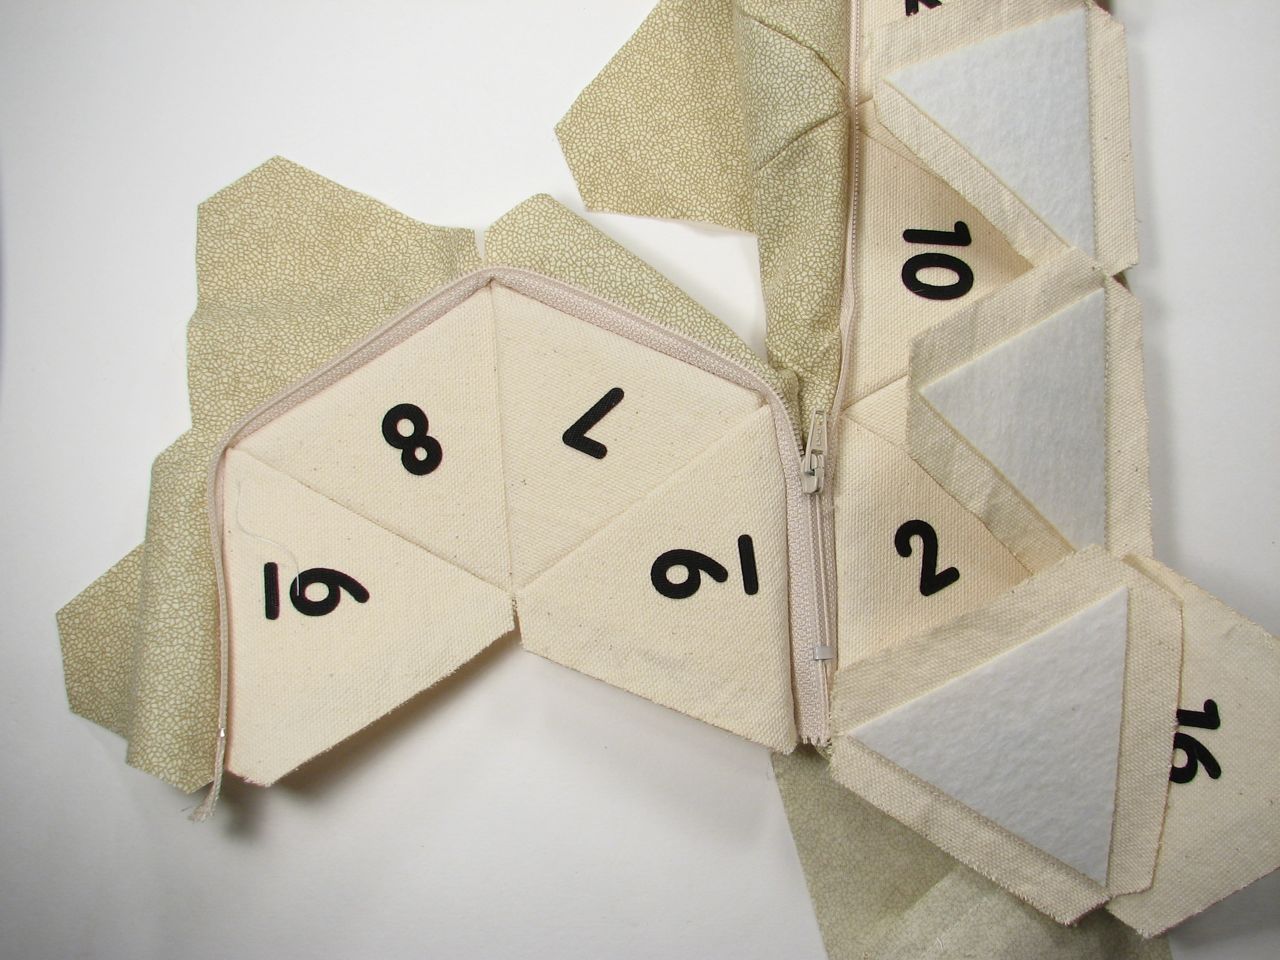
Next, begin sewing the lid together. Start at the open end and sew toward the intersection at the zipper edge.
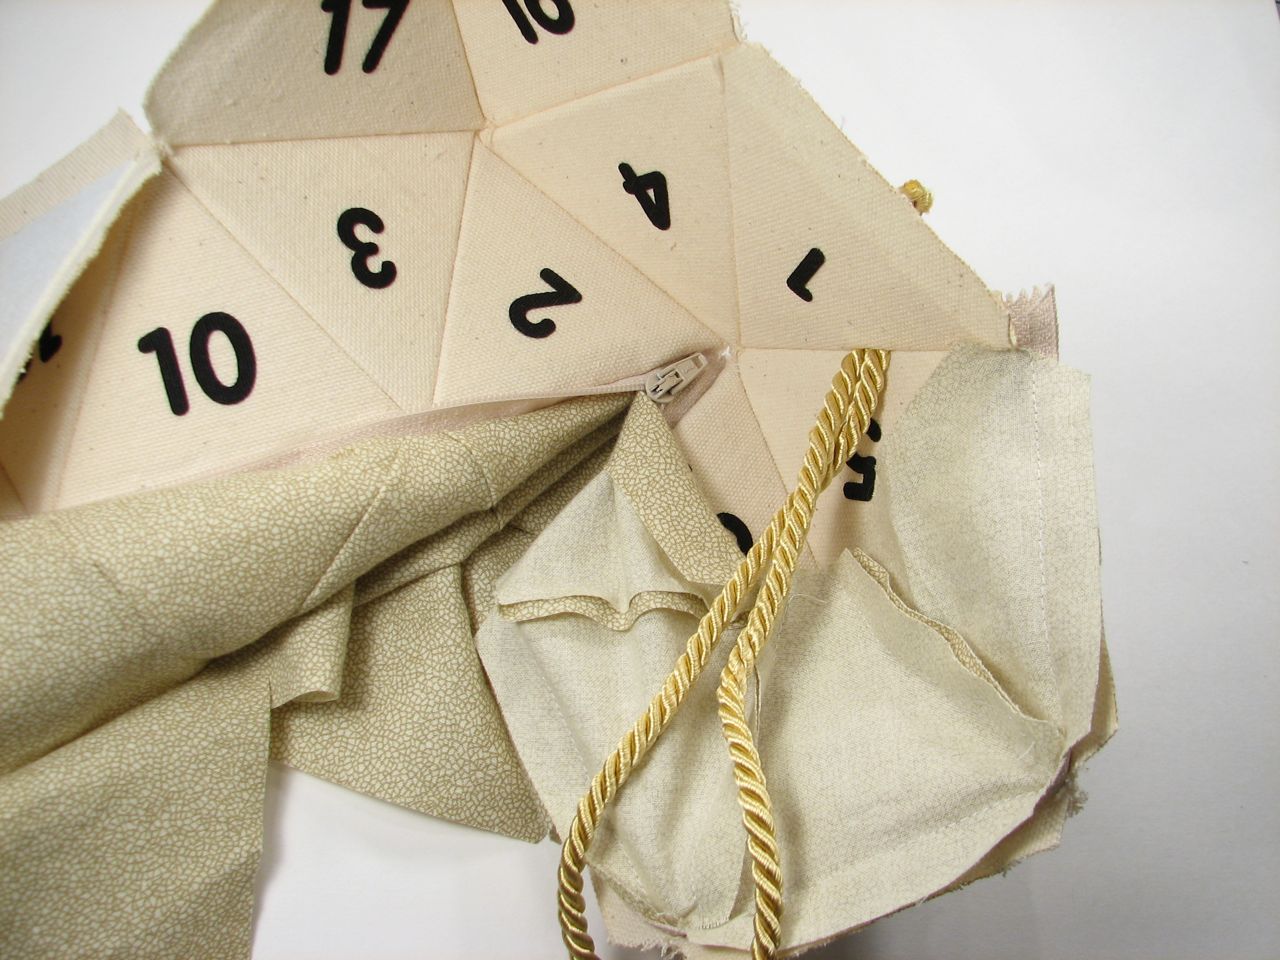
Sew the last lid piece in and attach it to the main body of the bag with the cord placed between the pieces.
Piece the canvas together before the liner, as the liner is more flexible and doesn’t need to be as exact.
Finish piecing the liner except for the last piece. Leave it loose so that you can turn the bag right side out.
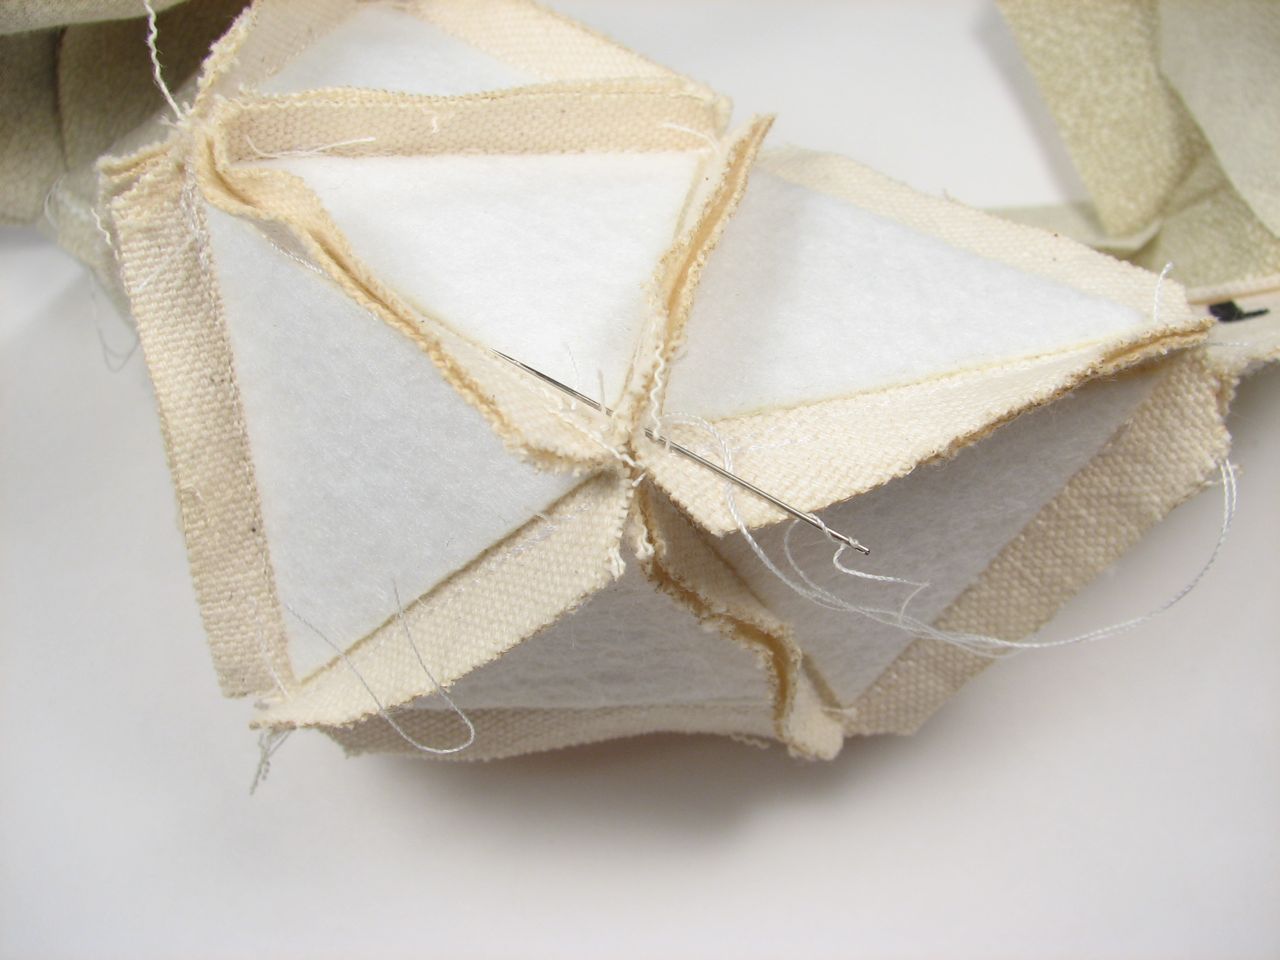
Check the points of the canvas to see if any of them are loose, and close the gap if there is one by hand stitching.
Turn the lid right-side out.
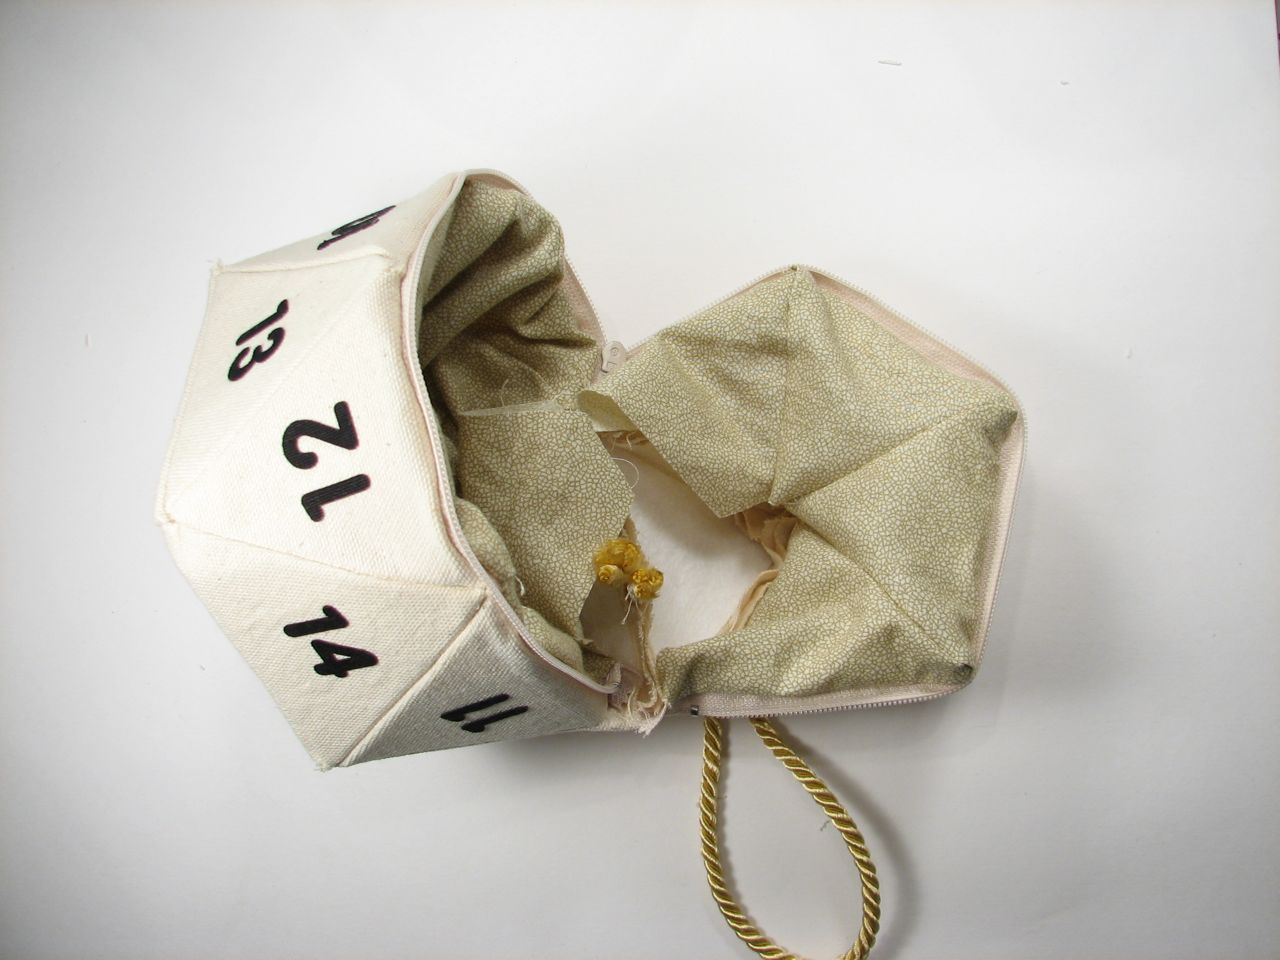
Feed the canvas through the last opening in the liner to turn it right-side out as well. Check all of your points to make sure they’re neat before sewing the liner shut.
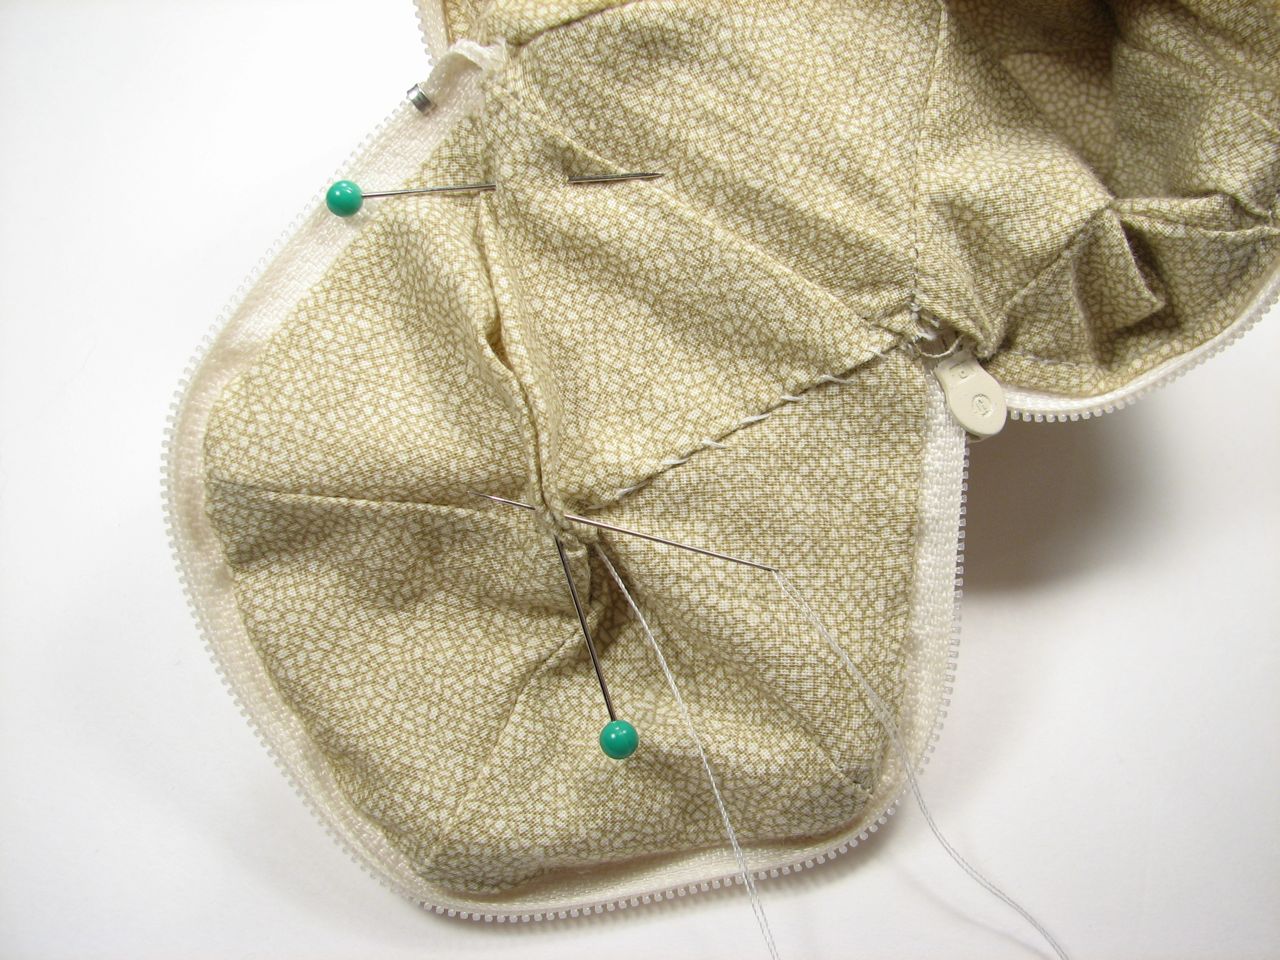
Pin the last flap of liner and sew it shut.
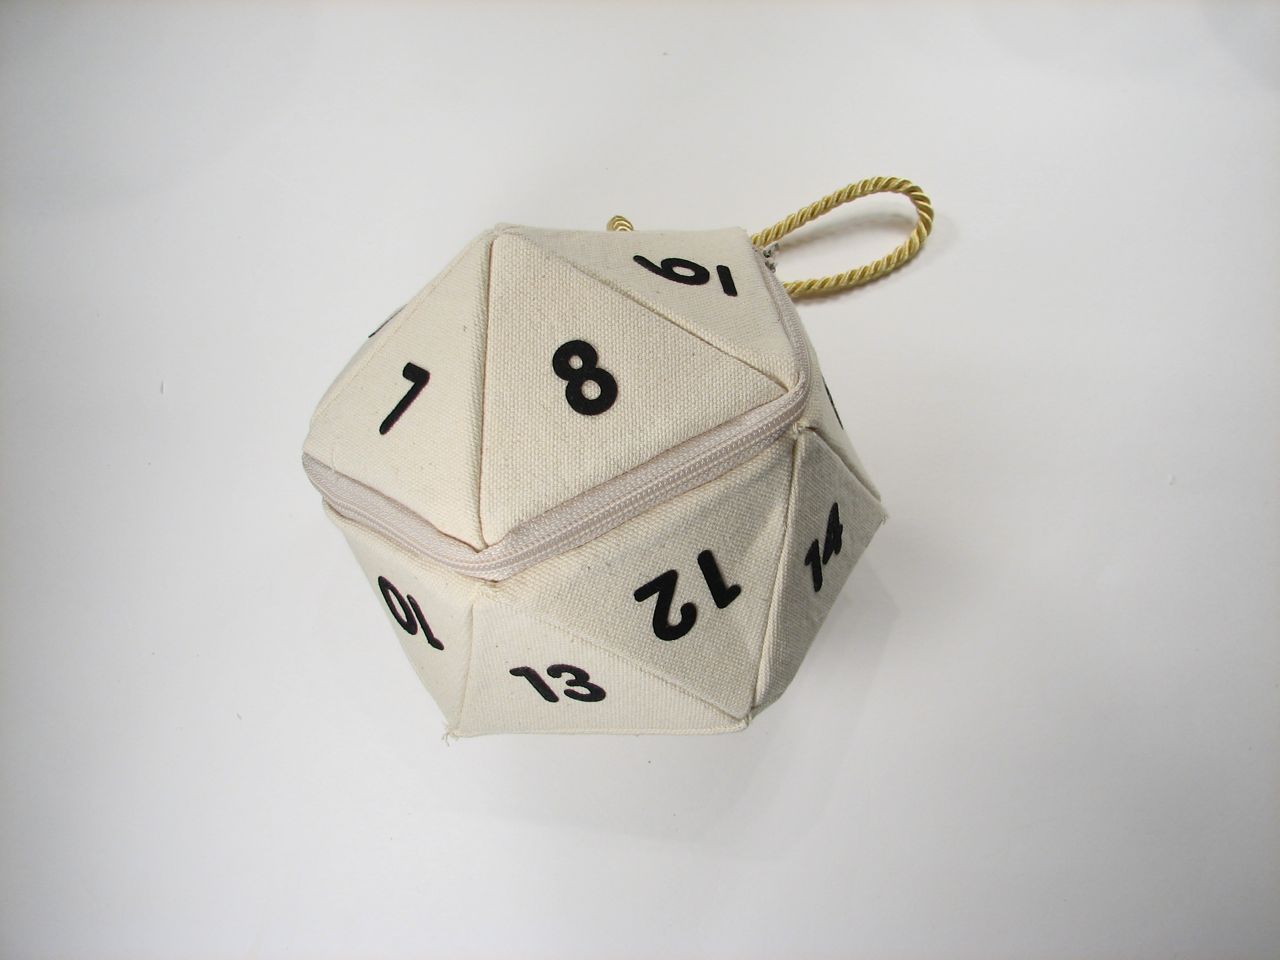
And that’s it!
As always, if you are inspired by our projects, we’d love to see the results in the Evil Mad Scientist flickr Auxiliary.
Updated August 3, 2009 to add zipper lengths, yardage and variations in stiffener adhesive texture.
Is it too OCD of me to point out that opposite faces of the die should add up to 21? It might help to have a real D20 handy to help with placement of the pieces.
When I made my first d12, I followed an example die exactly, so I understand the compulsion. After that, I winged it. I’ll leave the level of authenticity up to the individual maker, but yes, having a example close by can be nice.
i’ll have you know that on the d20’s that i use, i believe its only the 20-1 and the 11-10 that are on opposite sides of the dice. not to say that that’s how it’s supposed to be…..
Well depends, when you buy the super big d20s for life totals for games like magic the gathering, the numbering is in order like how this bag is done.
In true d20s 1 and 20 are opposites; and 11 and 10 are opposites.
I am definitely going to make this bag… probably making 5 of them for all my dice fiend friends. I probably do both 1-20 labeled one and the one following the numbering on the d20s I own.
What length zippers do the two bags require? Thanks!
Zipper sizes are 9" for the small, 14" for the large.
Thank you!!
Thank you so much for posting this! I am working on one as a birthday present for a friend who recently started playing D&D. I’m embroidering the numbers in blue on black fabric for the outside, and have a matching blue to use as lining… Slow going, but I’m excited about it so far!
What type or weight of interfacing did you use?
Peltex 71 is what we use for the stiffener panels.
i feel like a nerd but thats the coolest thing ever!!!!!!!!!
I found mine @ Joanns in the sections for other interfacing. Usually found near the cutting table.
what are the stiffeners made of? i cant find stiffeners at any craft store =(
As mentioned in the comments above, Peltex 71 is what we use for the stiffener panels.
thank youu =)
i think im gonna end up buying the kit
How much of the zipper should I have left over on either side of the four panels?
Probably a little less than an inch. The zipper (if you’re doing the large bag) is 14", and the triangle sides are about 3", so there should be about 12" of zipper across the four pieces.
This is impressive – I was looking for patterns to make a set of soft toy dice as both my husband and I play D&D and are expecting twin boys in four months time. I’m a patchworker, so will modify your pattern a bit, as I am going to stuff them and have rattles/bells inside. Let me know if you’re interested in seeing photos (which probably won’t be available for six months or so). janine dot sedgwick at gmail dot com.
I tried to use the pattern from the pdf, but I was curious –
The 14in zipper seems to be too long for the large D20 pattern – the sides (4 in contact with the zipper) add up to just over 10 inches after the sewing allowance, so there was excess zipper. Is the PDF printing the pattern too small, or so I need a smaller zipper?
Four 3" sides = 12", with a little extra for making the turns. I found that 12" was not always sufficient, and 14" is the next size up.
I’ll try adding a bit more ease at the turns – its was just that once I added the 3/8" allowance, the sides came down to 2 and 3/4" off the printed pattern (after making sure my printer wasn’t compressing the PDF for any reason), which left a good 3 inches excess off the 14" zipper.
Tinker-tinker-tinker – thanks!
If I wanted to purchase the custom black fabric iron-on numbers 1-20 or the 1-12 set where could I purchase those?
Thanks!
Our webstore does sell sets of “just the numbers.” Please use the Evil Mad Science contact form. :)
Windell H. Oskay
drwho(at)evilmadscientist.com
http://www.evilmadscientist.com/
I need a new hand bag anyway so I’m excited to make this. I might even make a dinky small one to go clubbing with but just make it extra shiny or out of patent pleather hahahaha
I have some down time at work right now, and I’m going to be joining a D&D group in a couple weeks. So I need to get started on this soon! I’ve had these kits laying around for too long now.
I was asking my wife some questions about the process. She said you need to be more specific than "hot iron" for the fusible stiffeners and the numbers. There should be directions with the exact iron setting you need to use. Do you have that information?
I just failed my skill check on this. My wife has way more points in Craft (sewing), I’m going to need her help. To me, the sewing machine is just another power tool. This project needs more finesse than I’ve got.
By the way, I used my model airplane iron, with it set to around 350ºF for ironing on the stiffeners and numbers. The web site for the stiffener material mentioned above said "Wool" setting, and I measured my wife’s good iron at that setting at about that. She wouldn’t let me use her good iron for that. It seemed to work well at that temp.
Sorry for the slow reply–yes, the wool setting is what is recommended, but it is less sensitive than traditional fabric crafters may think, and a hobby iron is a great choice. Thanks for posting the temperature measurements you made.
I’m almost done with mine. My wife came up with a suggestion to make it easier on me. Make the lining and the shell separately, and she’ll hand-sew the liner in. She’s done the top, and part of the bottom and it looks great so far. It was a lot simpler than stitching the inside and outside to the zipper at the same time, and doing all that inside-out stuff. The hand stitching is more tedious, but my wife says she likes that sort of thing. Pics coming soon!
I definitely got several Sewing skill-ups on this project. I haven’t done much sewing since I made a few frostline kits 20 years ago.
Turns out a “Pound of Dice” fits perfect!