


We have mentioned Eggbot several times this year as we demonstrated it at Maker Faires in San Mateo and Detroit, as well as at the California state fair. And today, we’re very pleased to (finally) reveal the the design of our new kit.
So what’s an Eggbot? It’s a machine capable of drawing on spherical or ellipsoidal surfaces. You might say, a pen plotter for spherical coordinates. Or a simple but unusual CNC machine, ripe for hacking. Or an educational robot– and you’d be right on all accounts.
It’s worthwhile to point out that there’s actually quite a bit of history here in this project. The Eggbot kit is the result of our collaboration with Bruce Shapiro, Ben Trombley, and Brian Schmalz. Bruce designed the first Eggbot back in 1990, and there’s been a process of continuous evolution ever since.
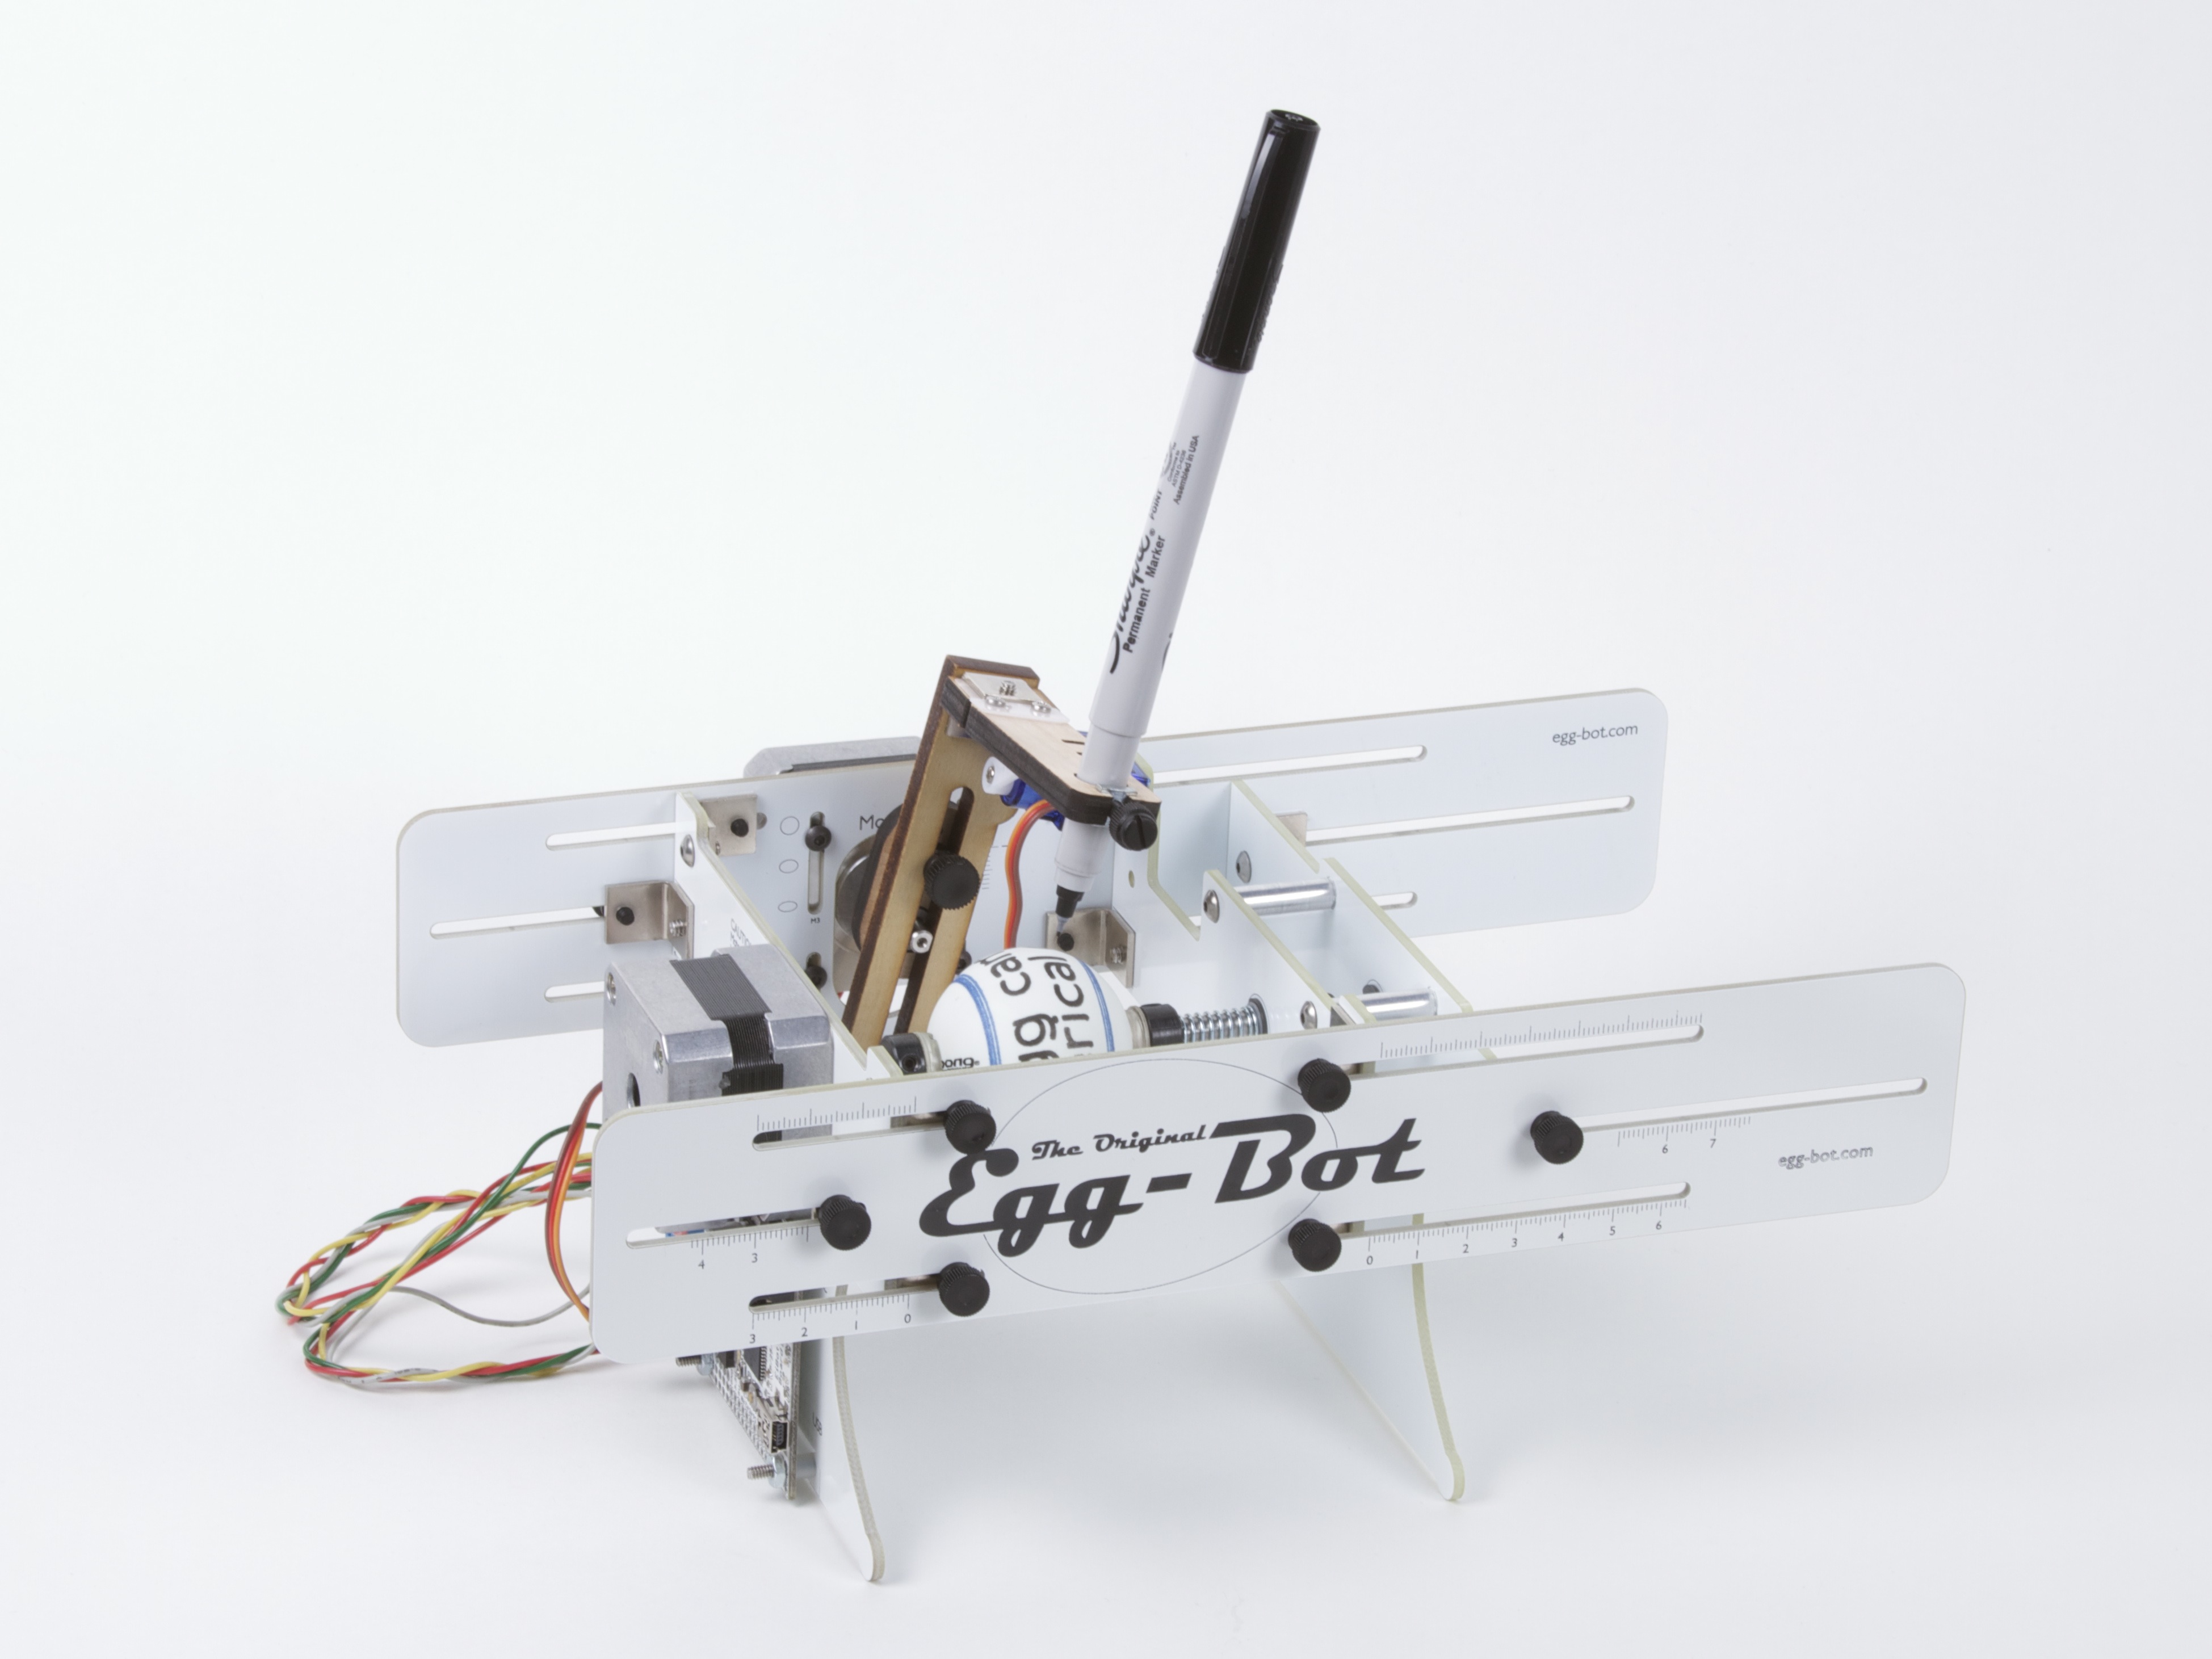
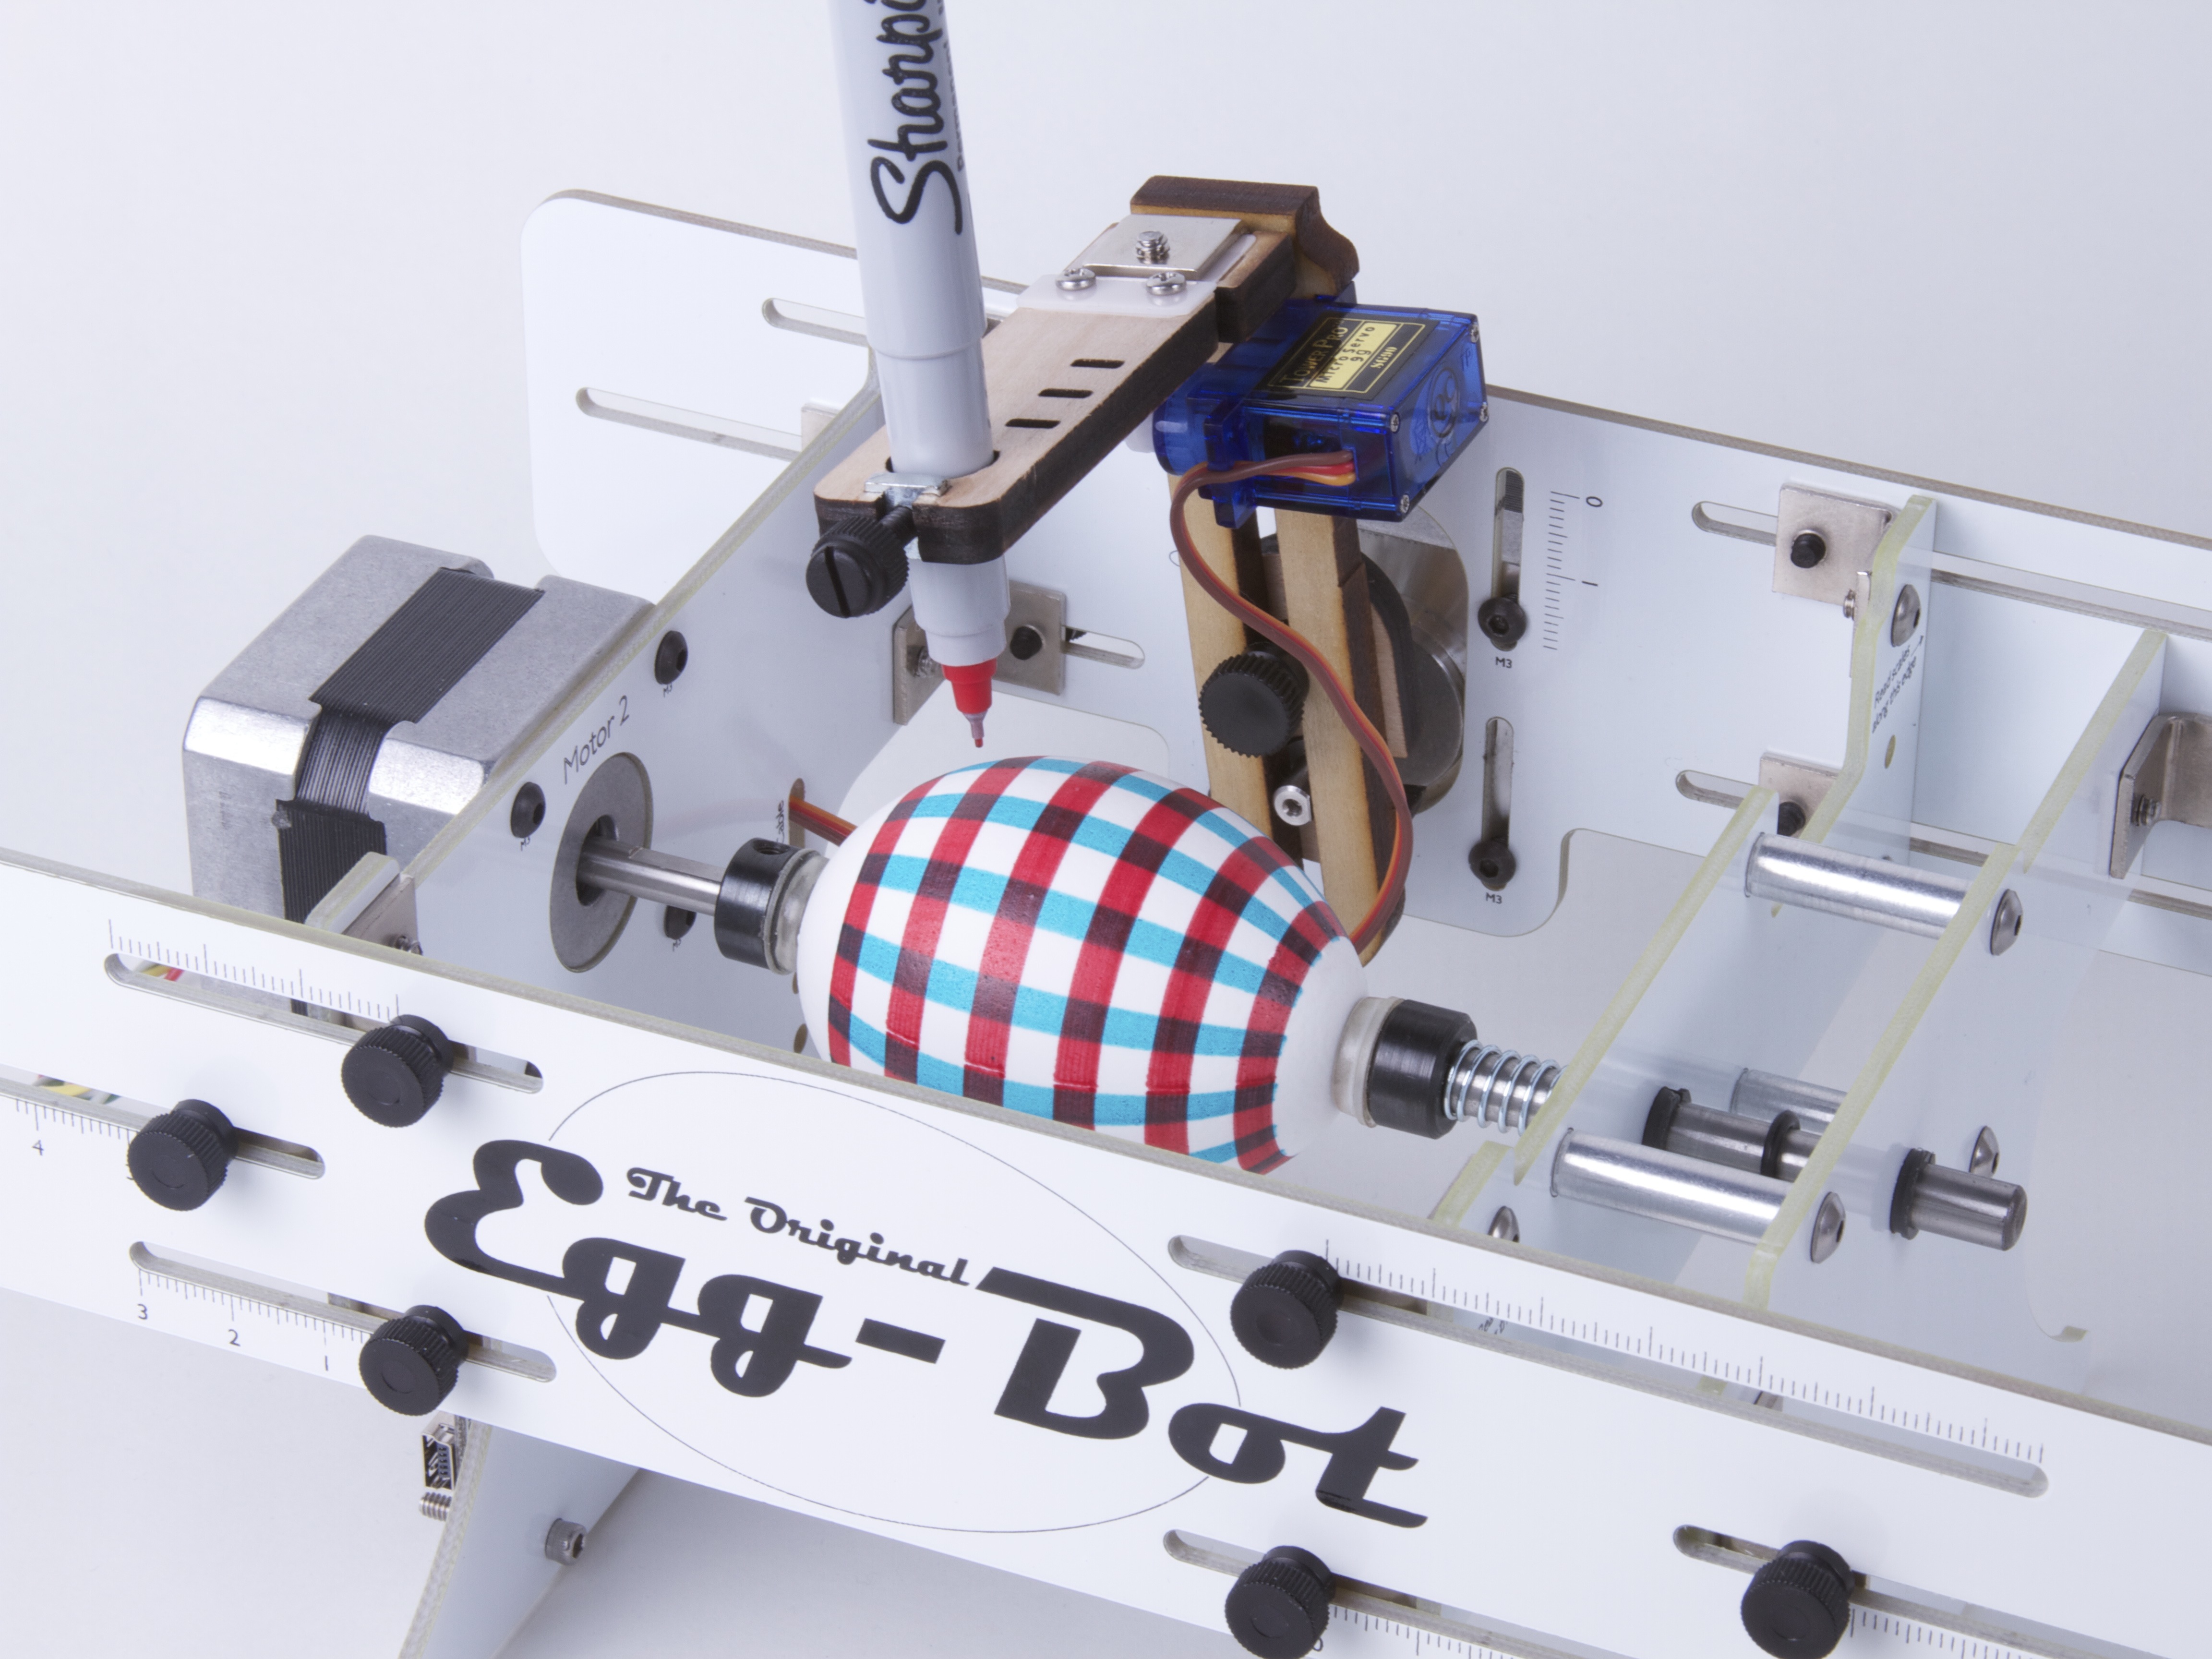
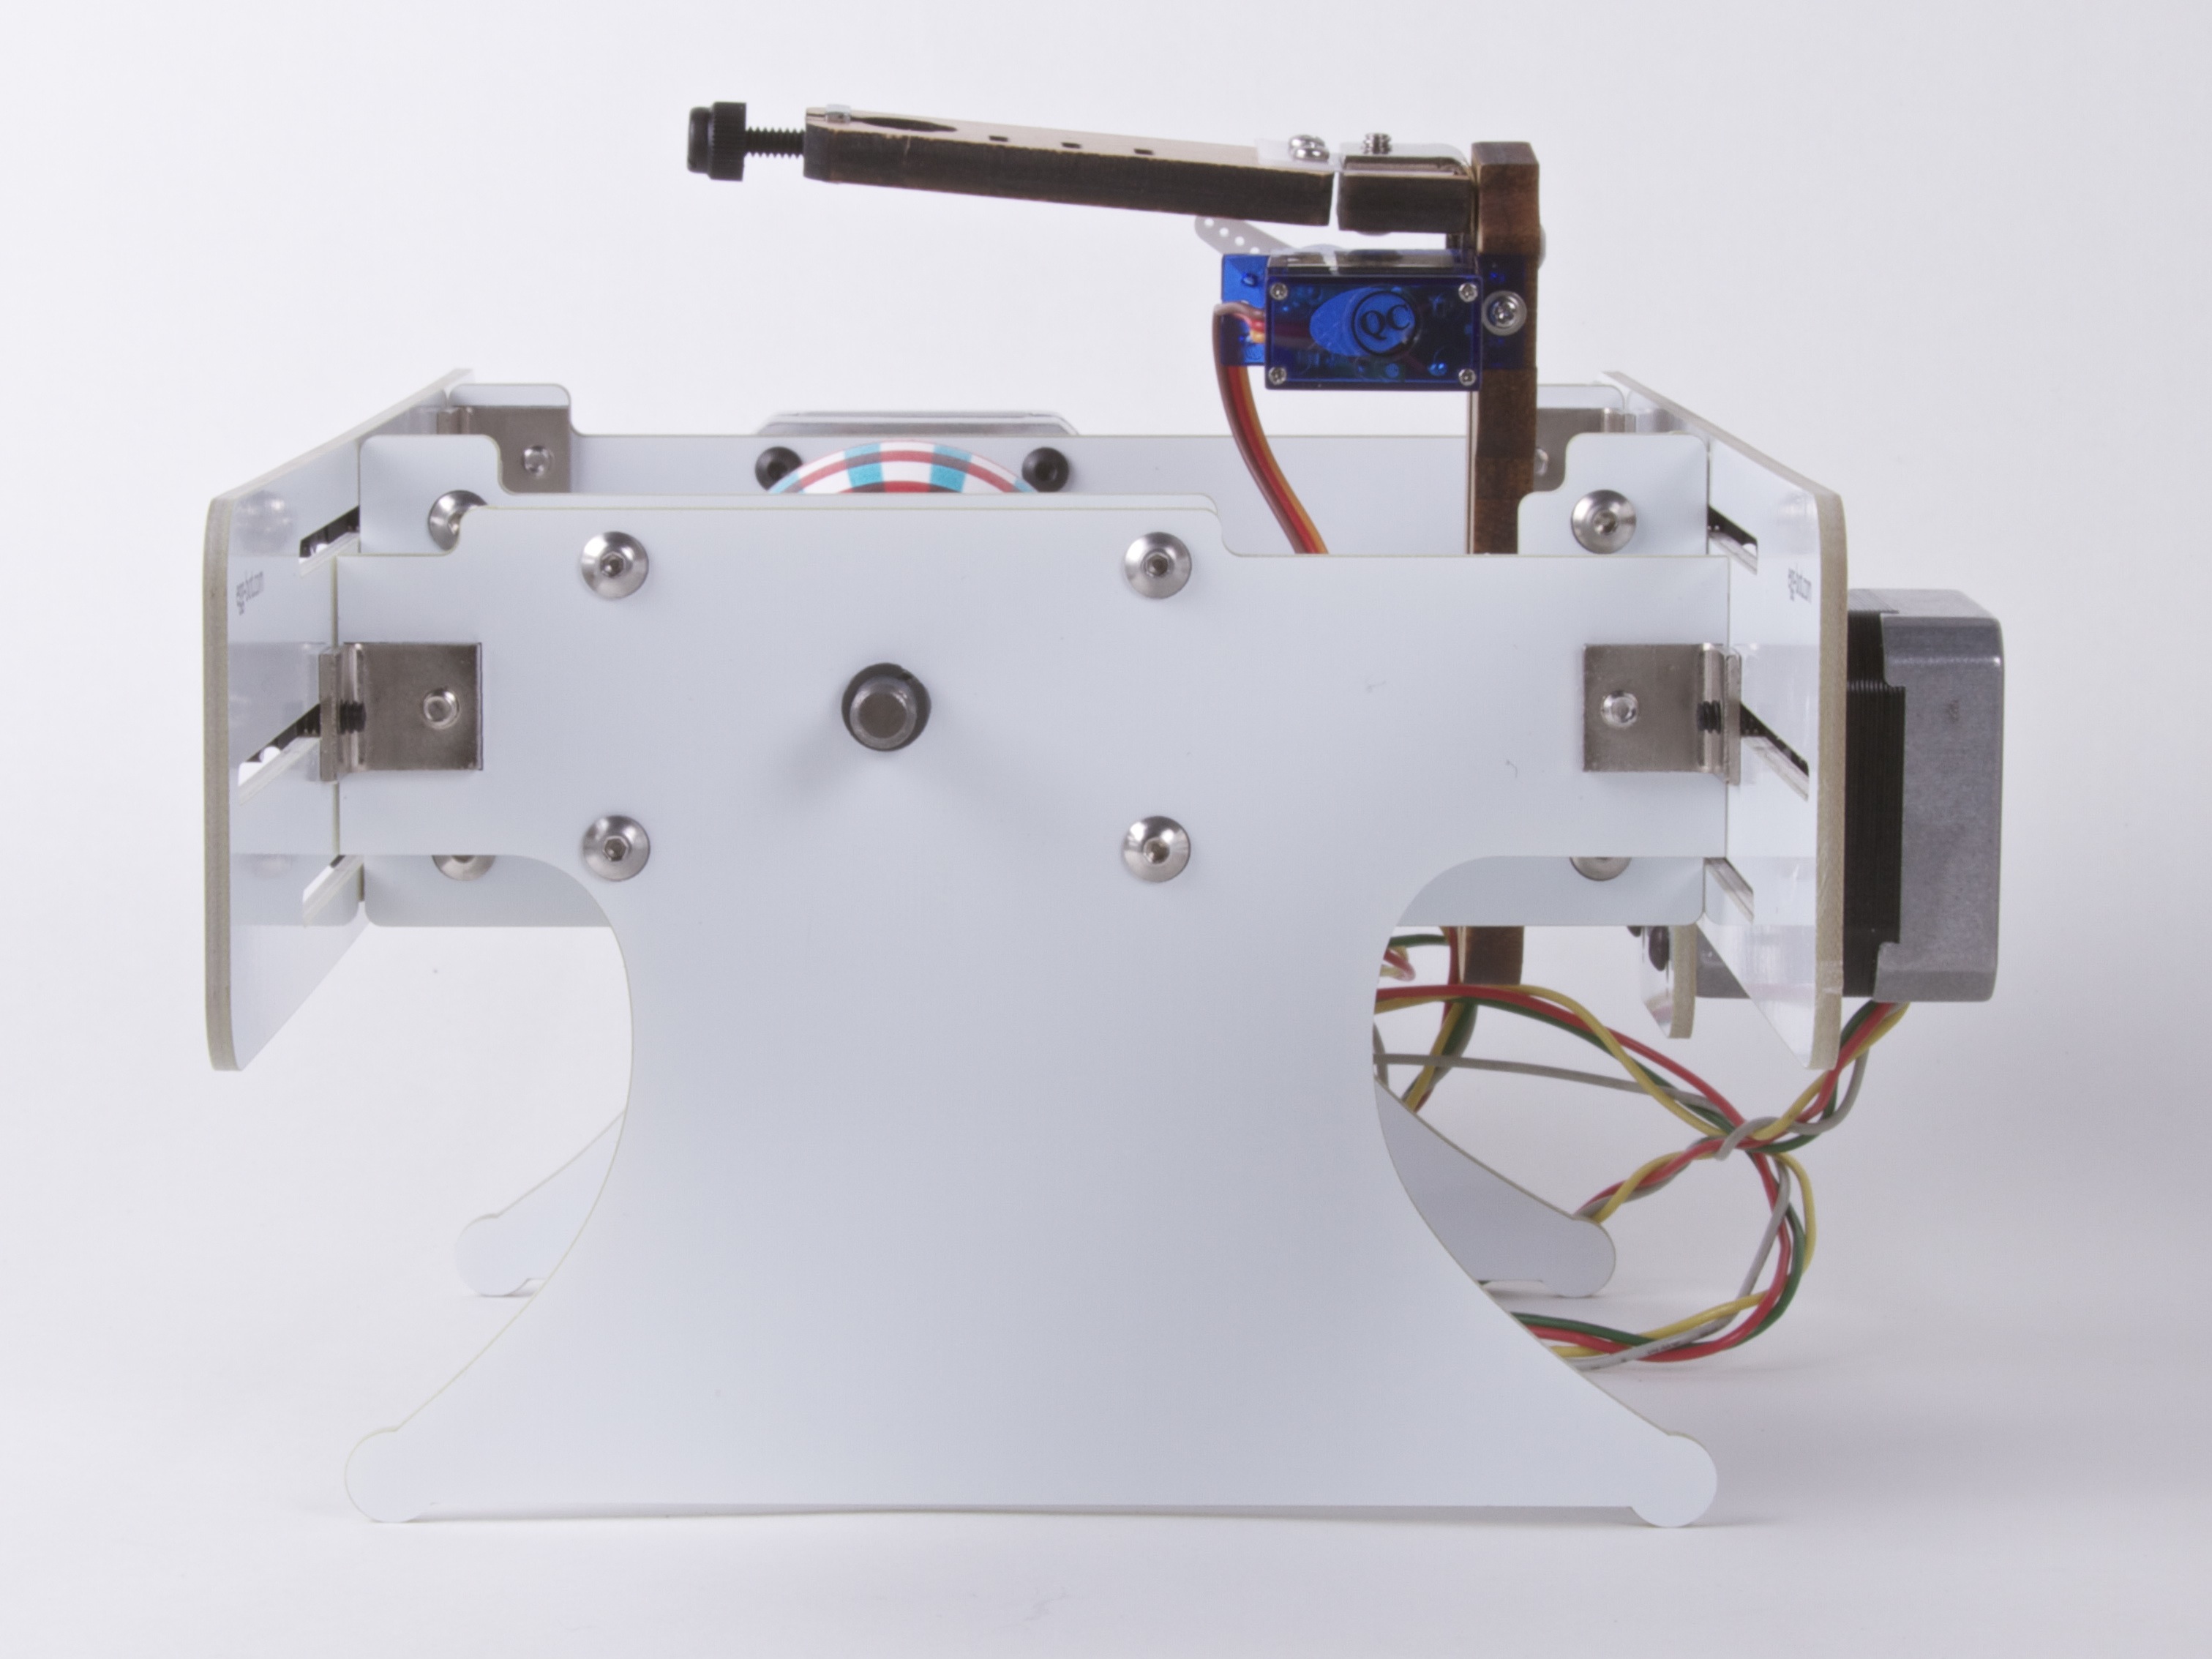
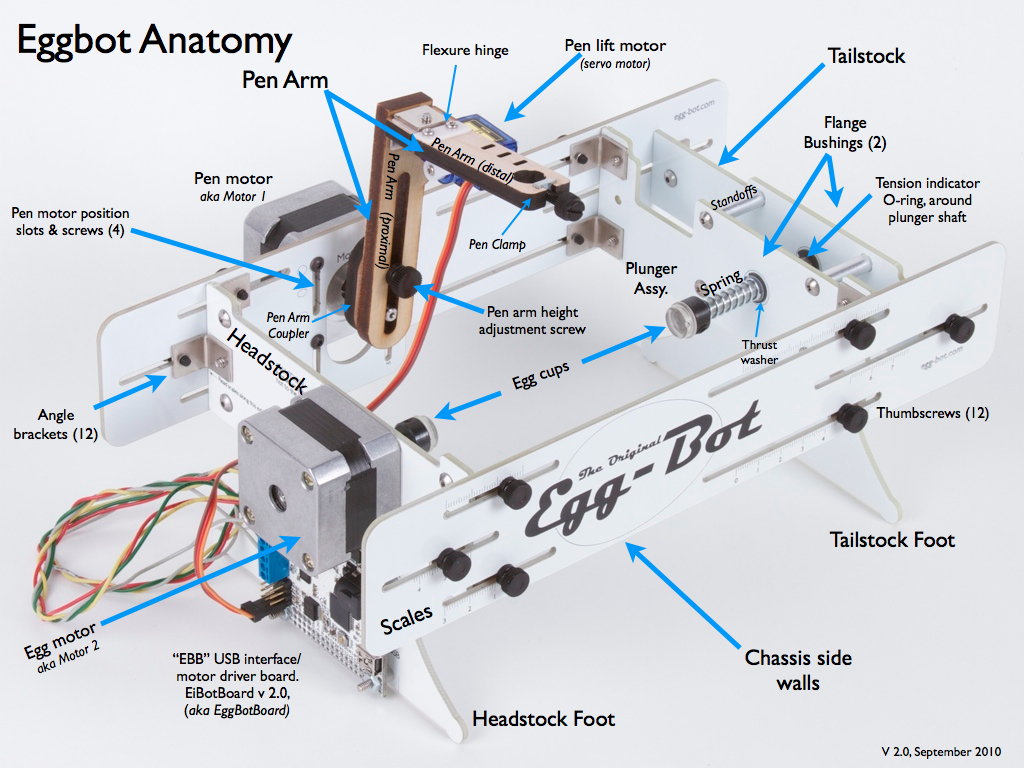
The Eggbot has a rigid but adjustable chassis that allows you to mount spherical or egg-shaped objects of various sizes, and rotate them about their axis of symmetry using a stepping motor under computer control. A second stepping motor moves a pen about an axis perpendicular to that “egg” axis, and a small servo motor raises or lowers the pen above the egg surface.
Above, you can see how we adjust the eggbot adjusted for drawing on ping-pong balls. Below, a somewhat larger object: a medium-large “vanity” lightbulb:

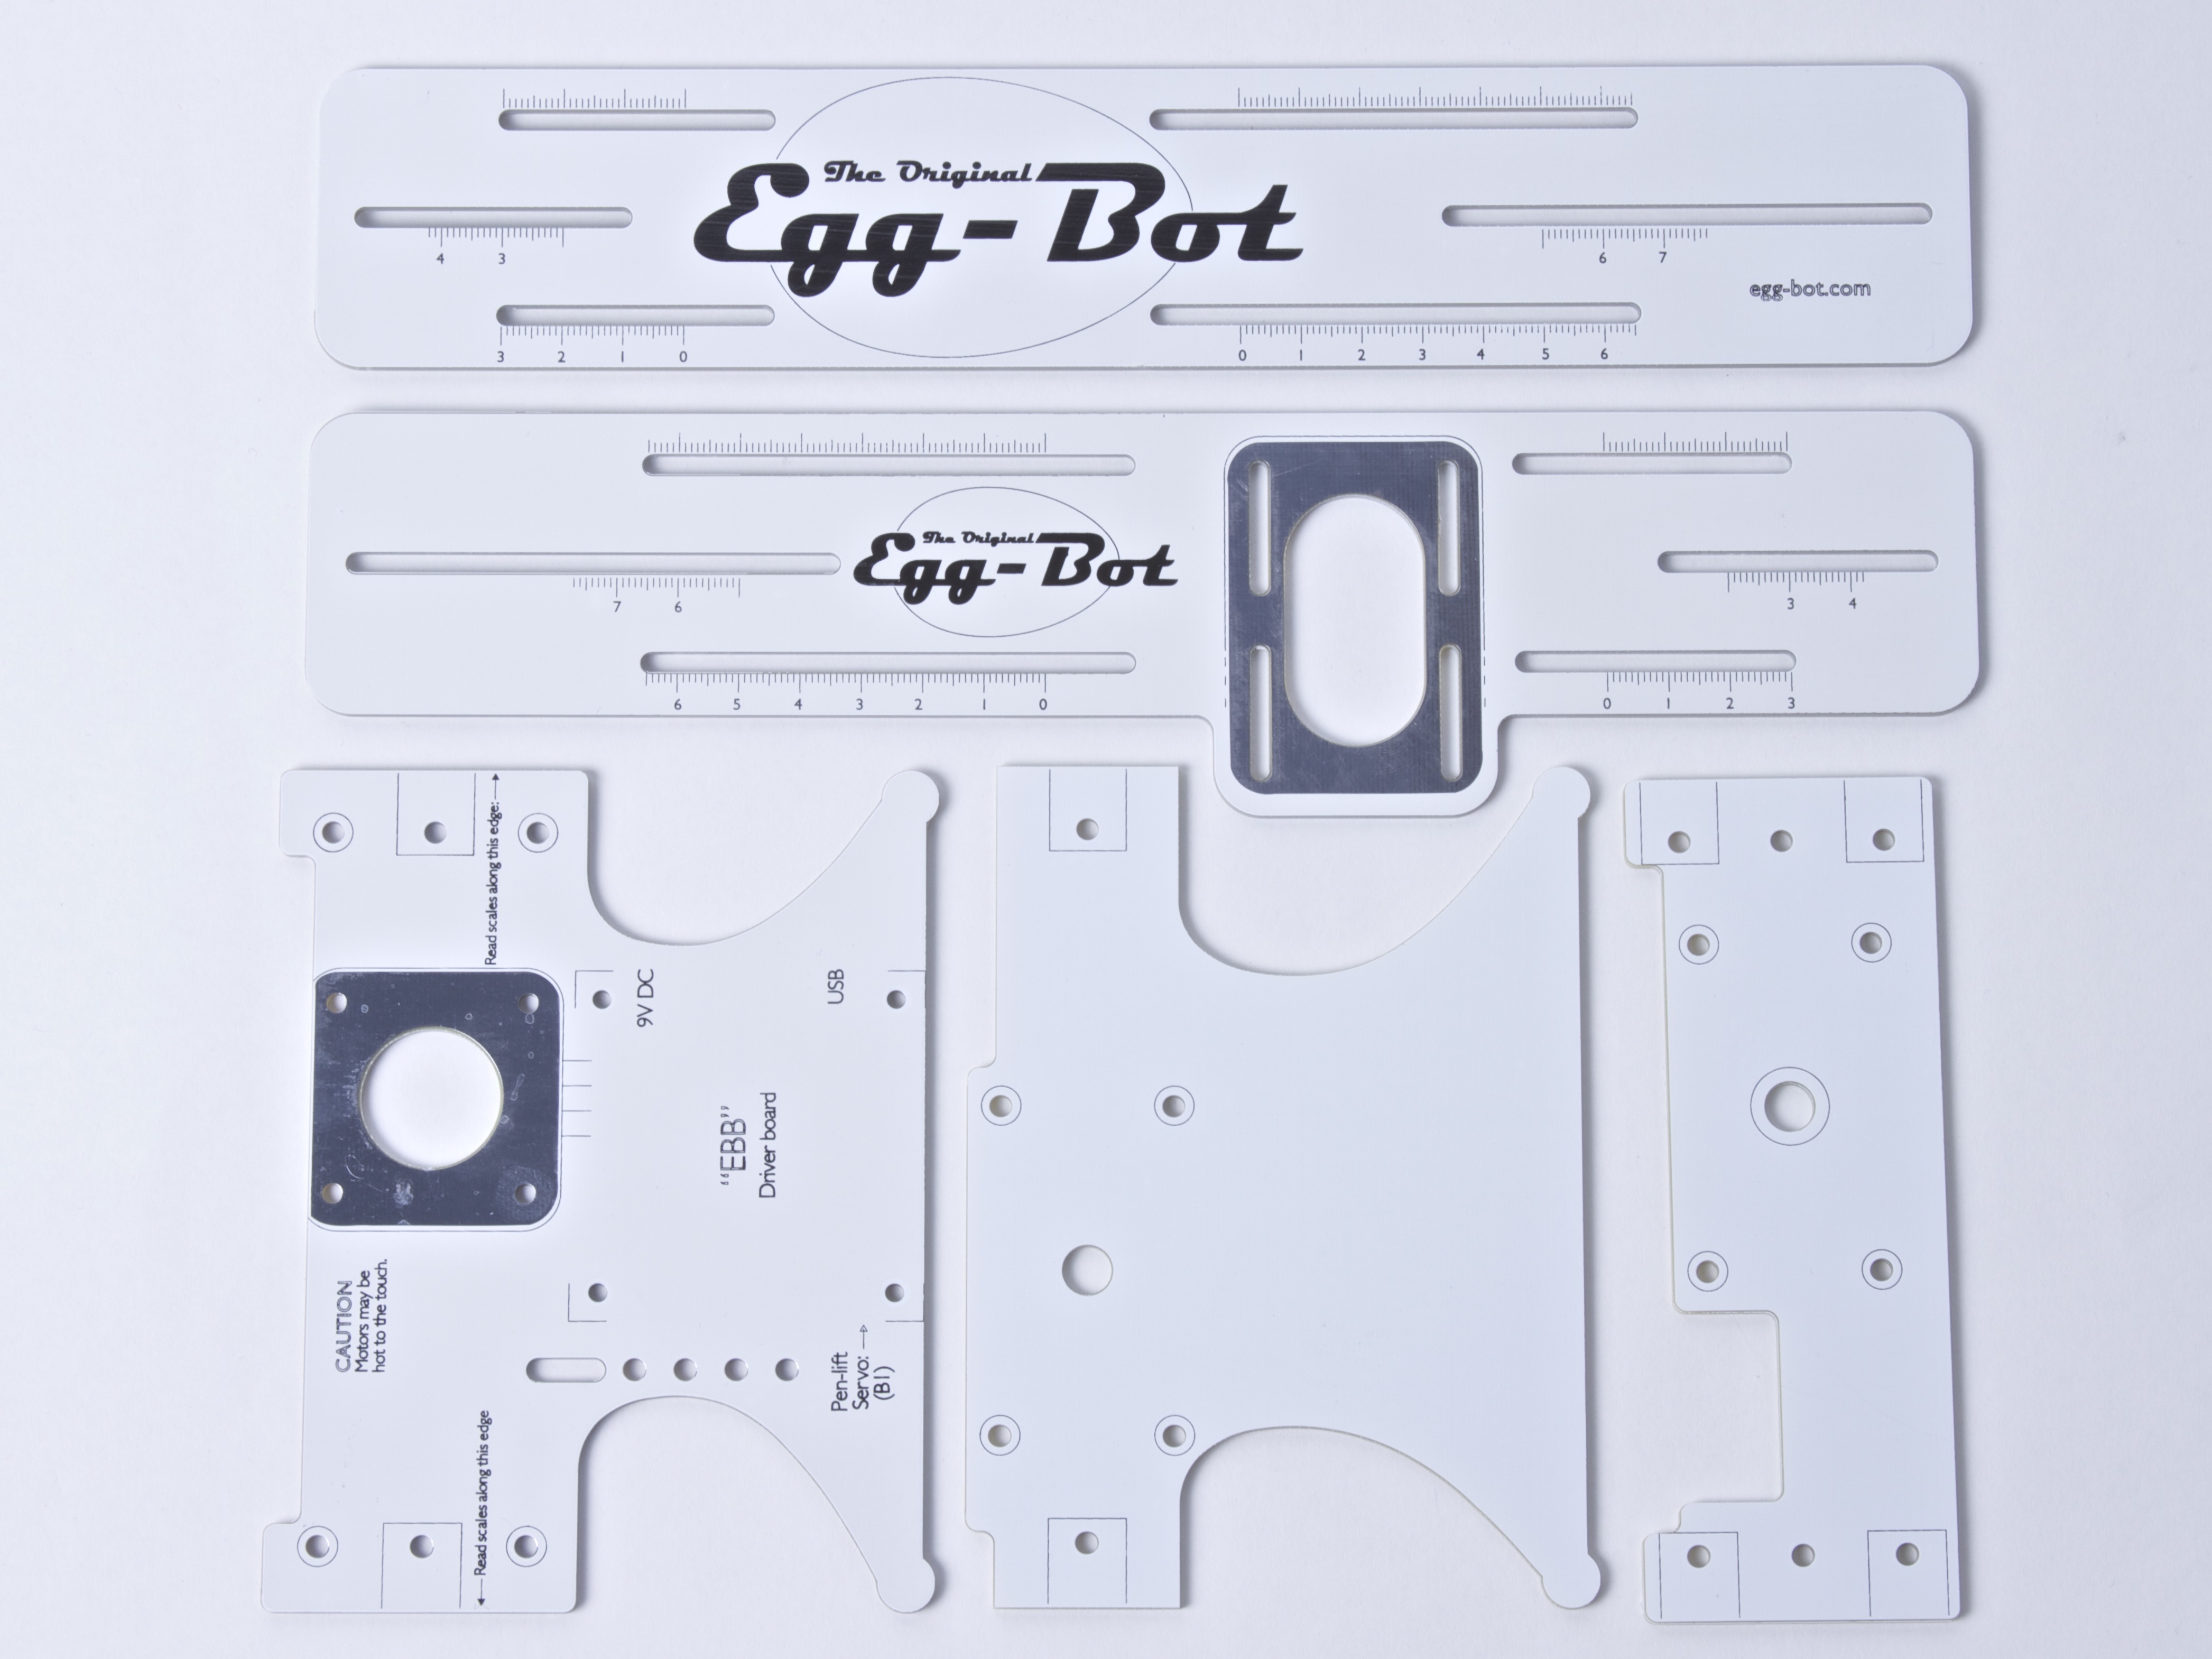
One of the major components of the chassis is this set of five individually routed 0.100″ (2.5 mm) fiberglass shapes. These are actually fabricated in a circuit board process. Their thickness makes them significantly more rigid than normal 1/16″ circuit boards. There are a few reasons for the circuit board process– the primary one is that it makes our robot remarkably rigid and durable. A side benefit is that we can use the copper layers to form integrated heat sinks for the stepper motors.
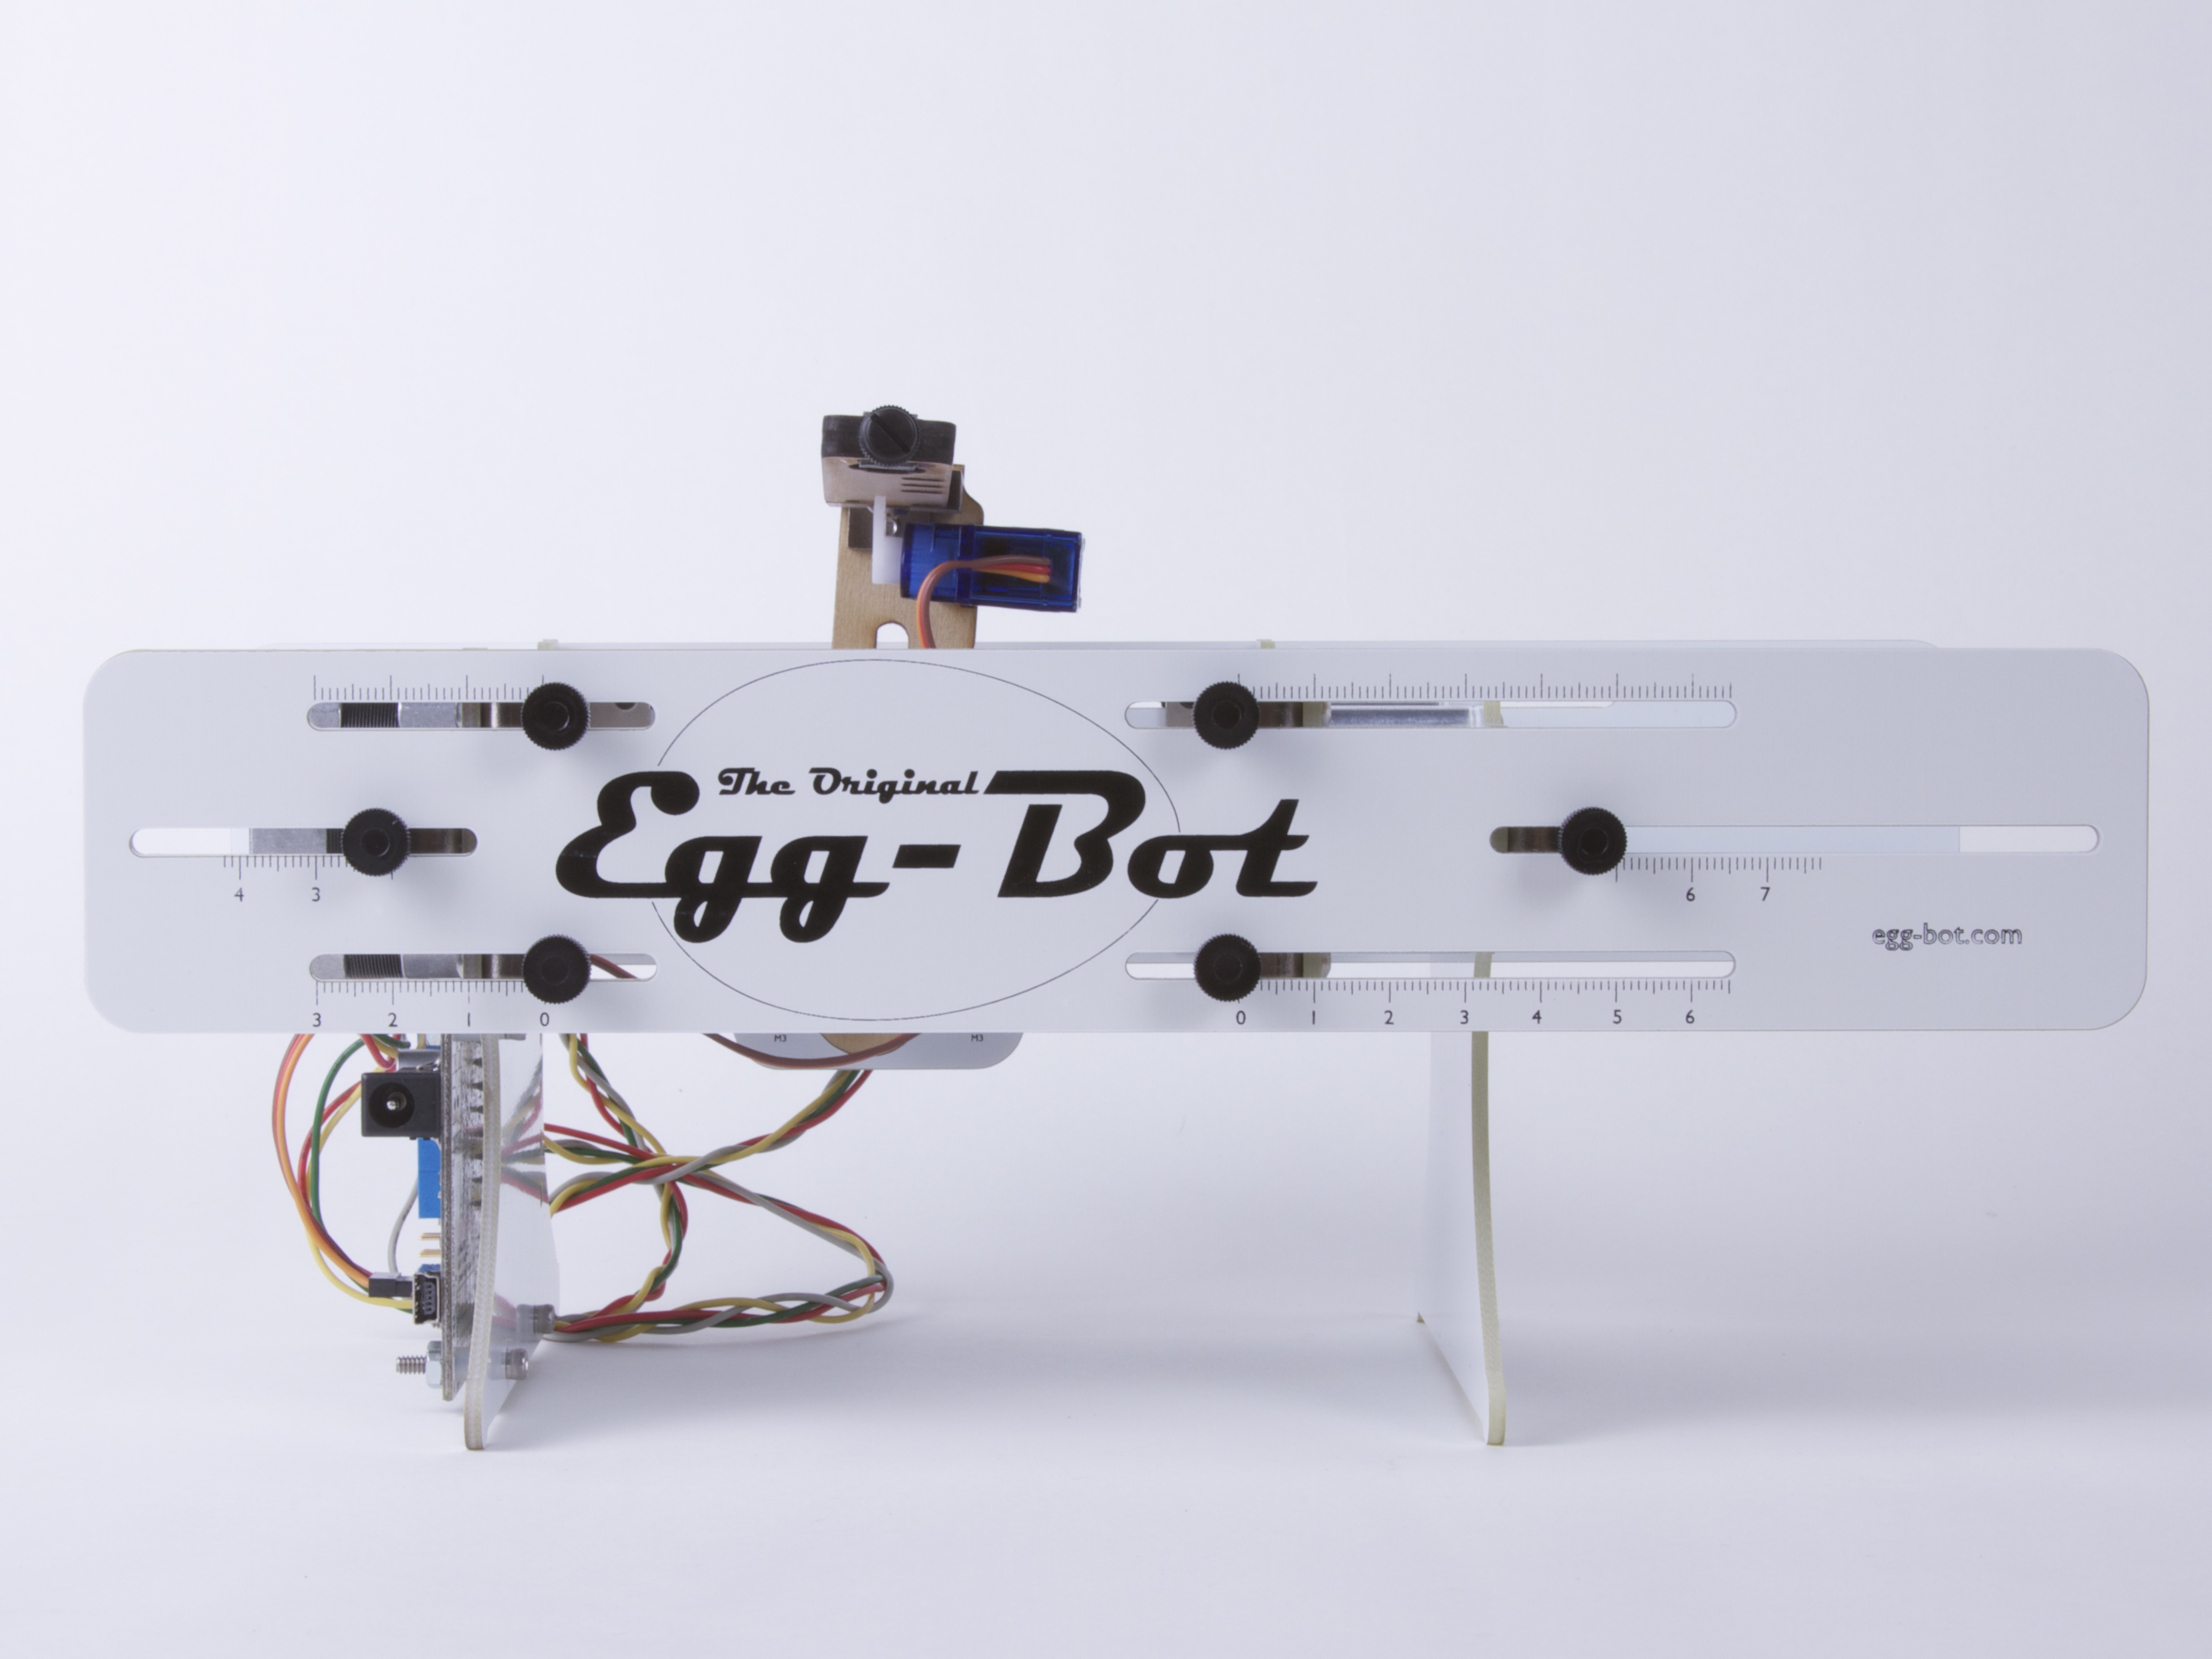

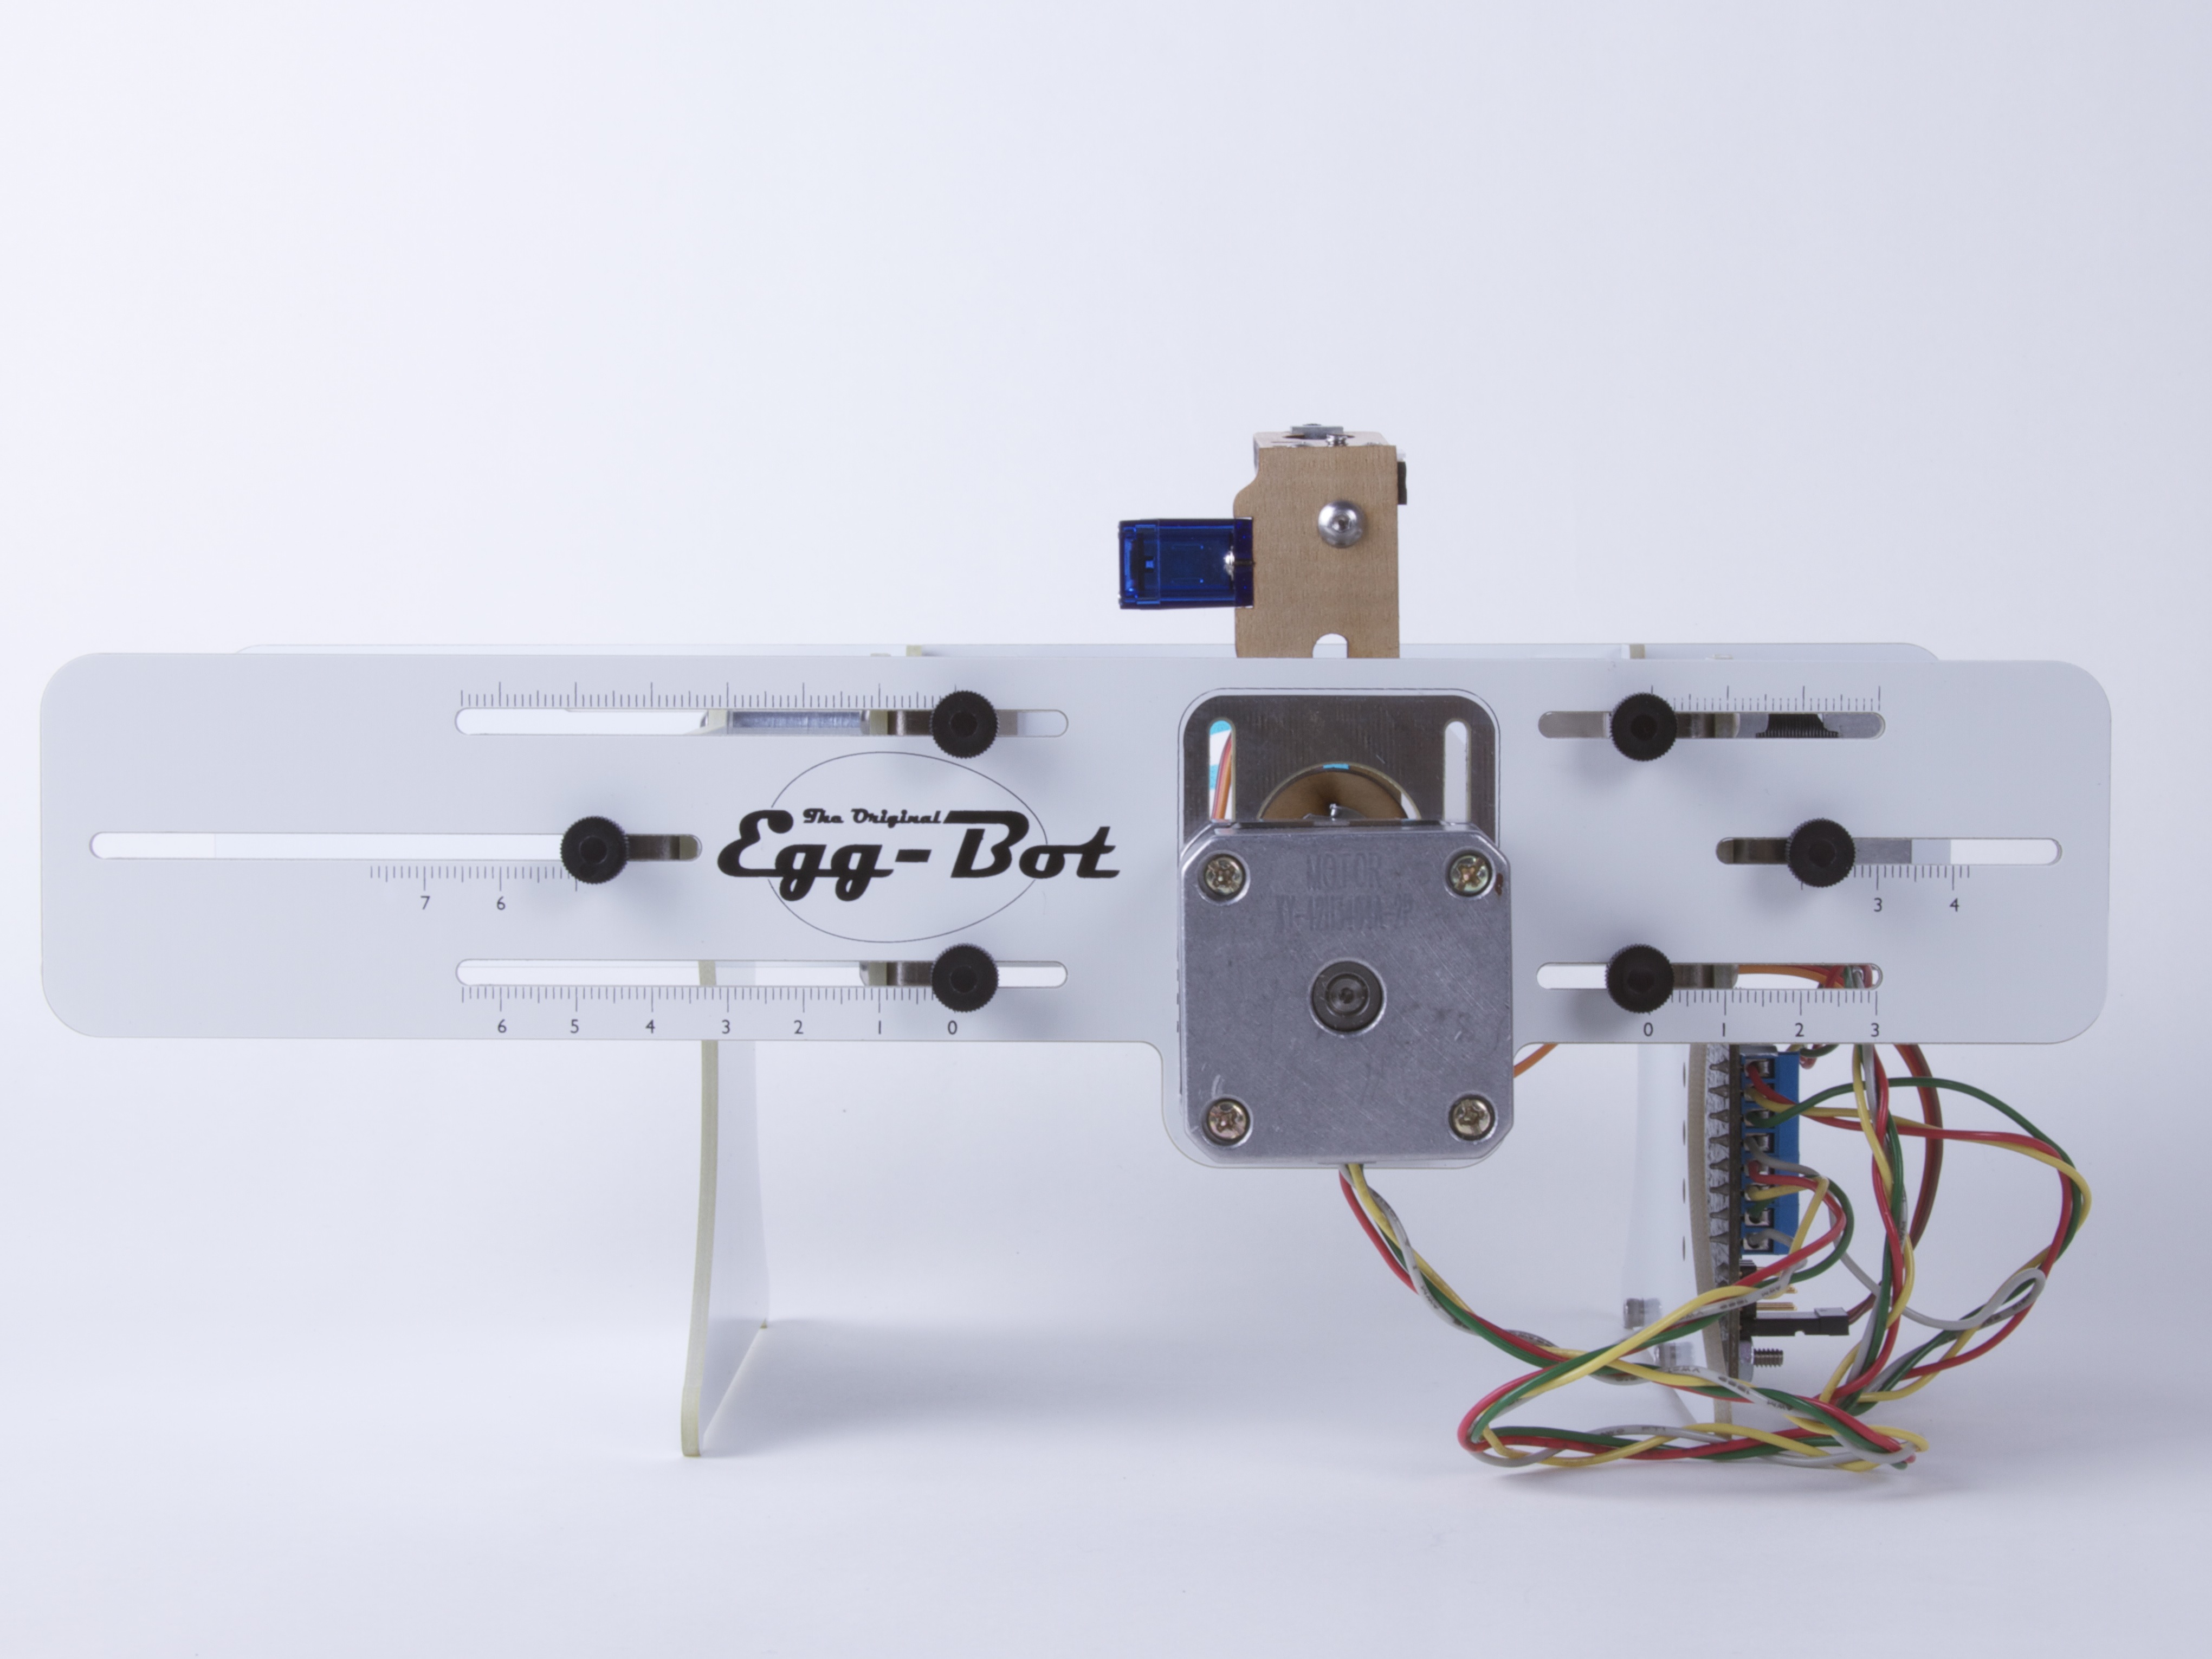
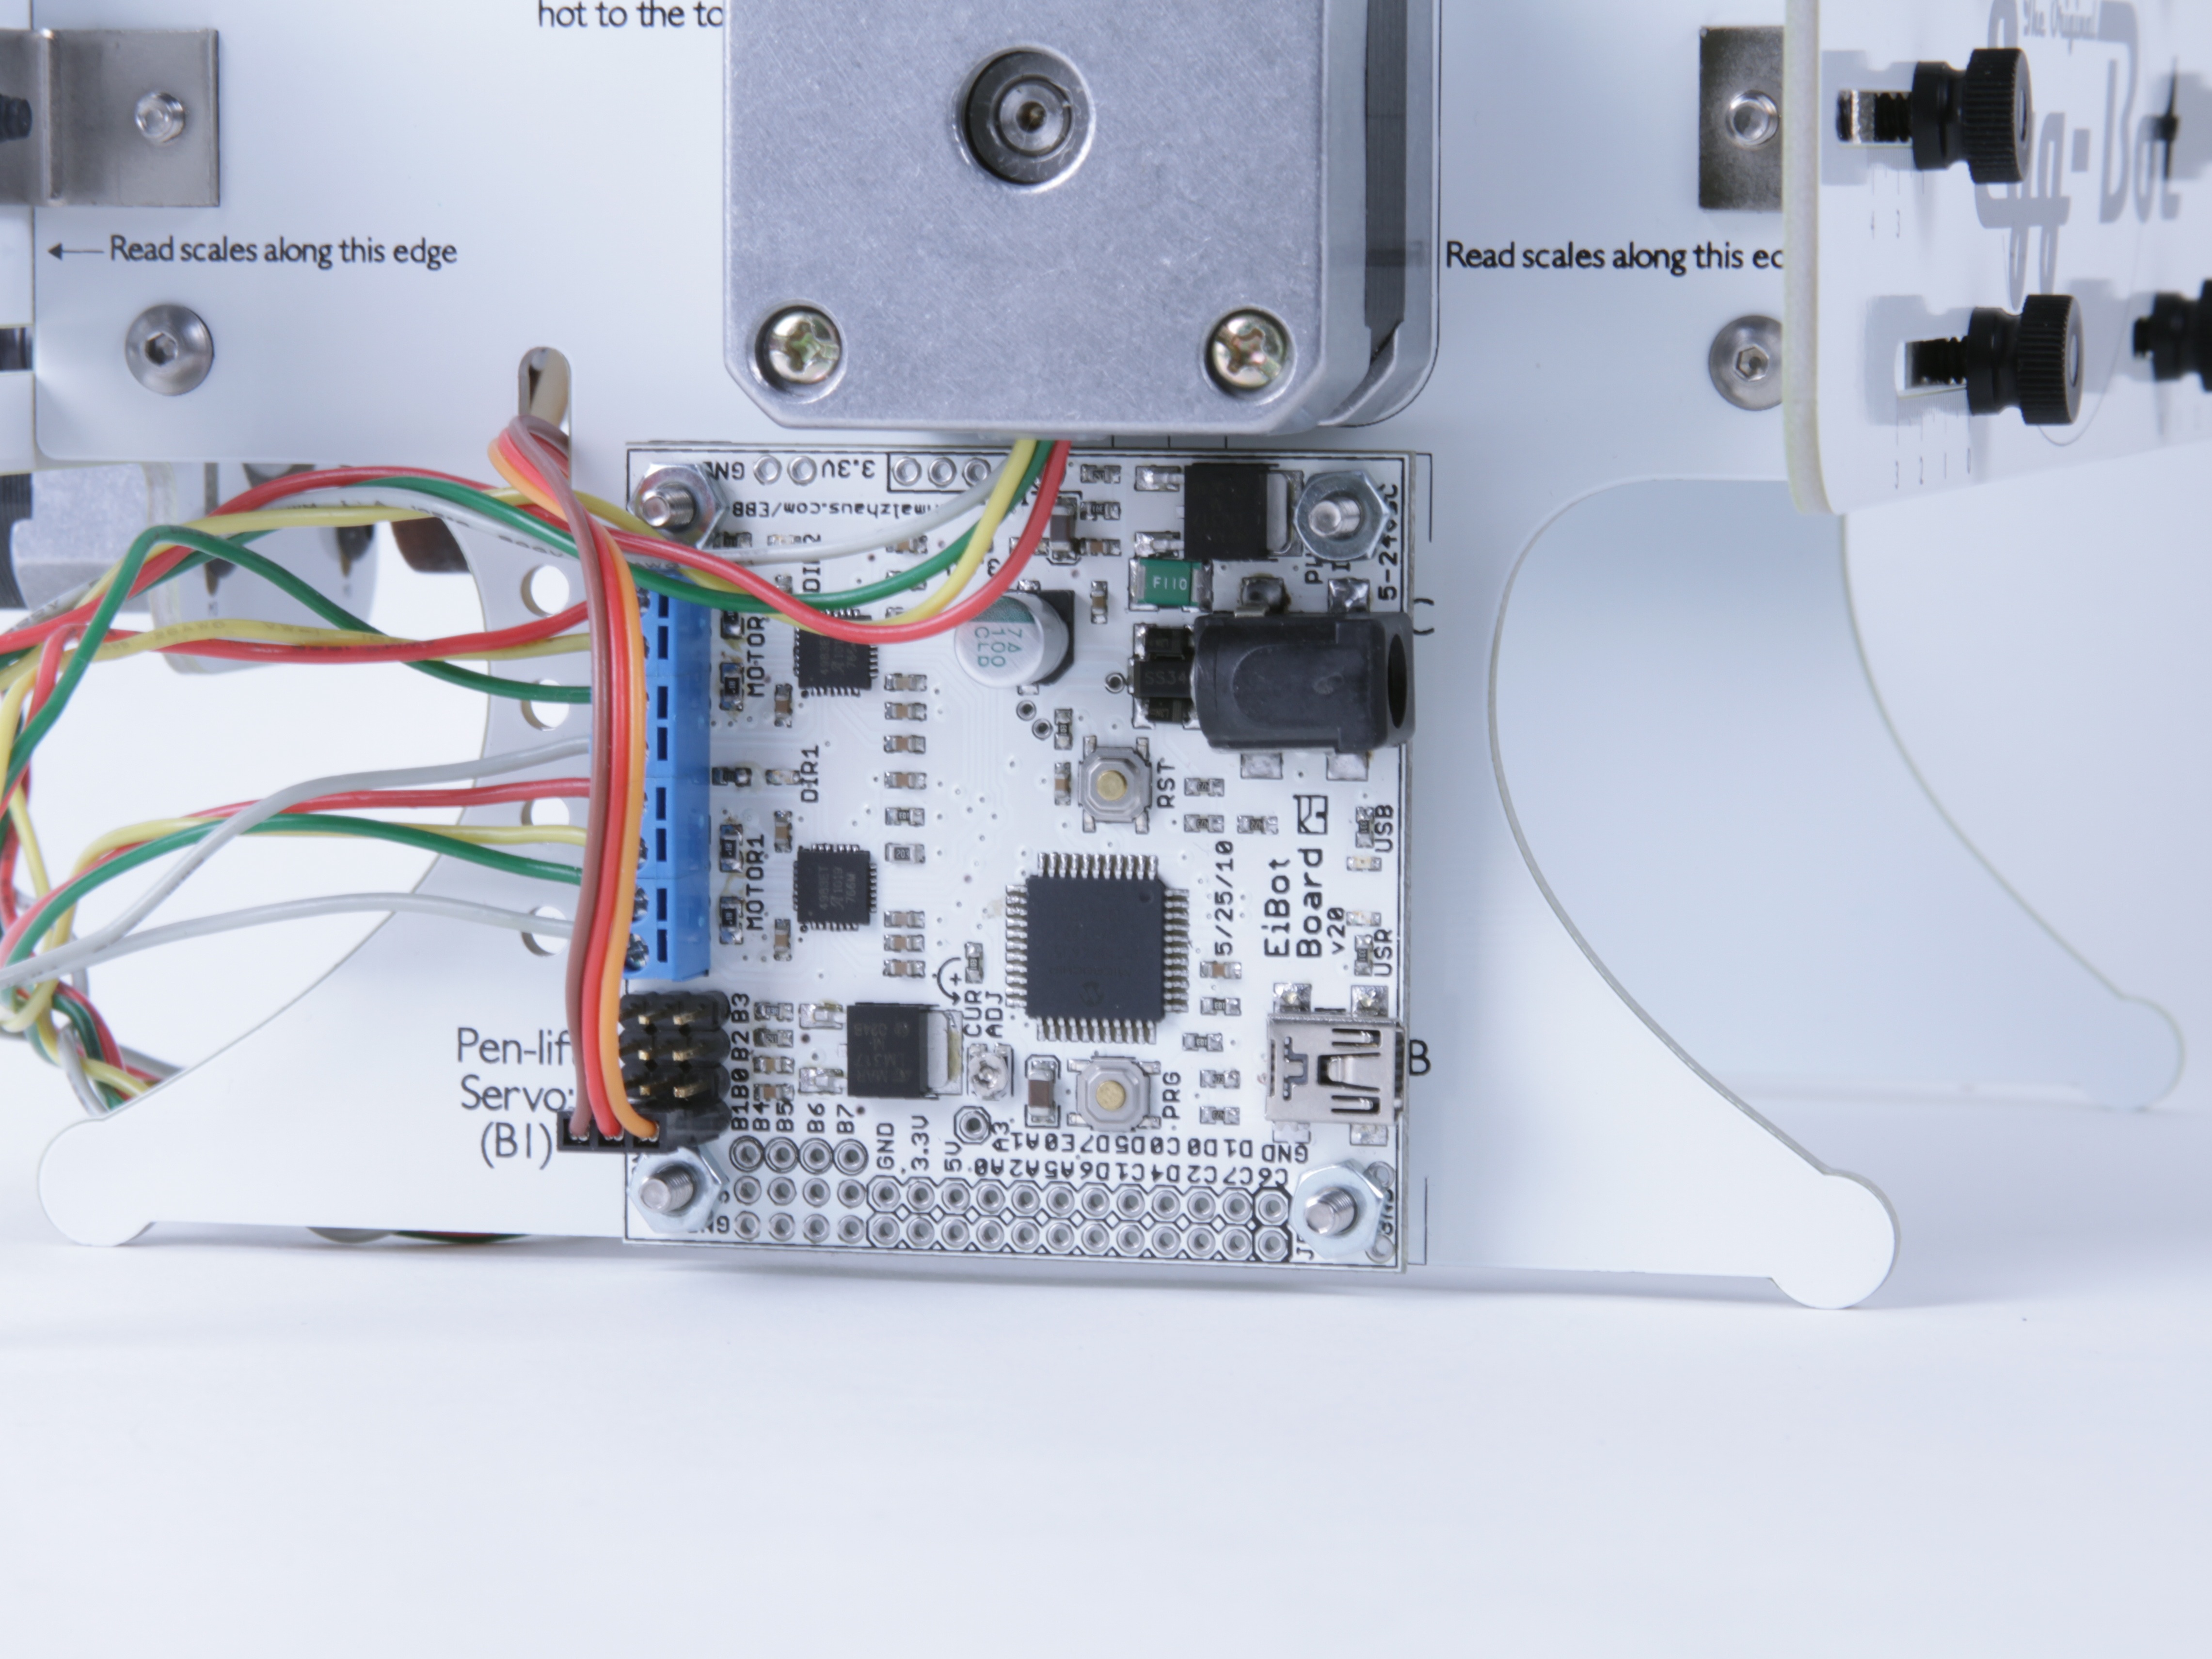
The Eggbot kit includes Brian Schmalz’s EiBotBoard (EBB), which includes a USB interface and dual microstepping bipolar stepper driver. With its 16X microstepping and the 200 step/rev motors, we get a resolution of 3200 steps/revolution in each axis.
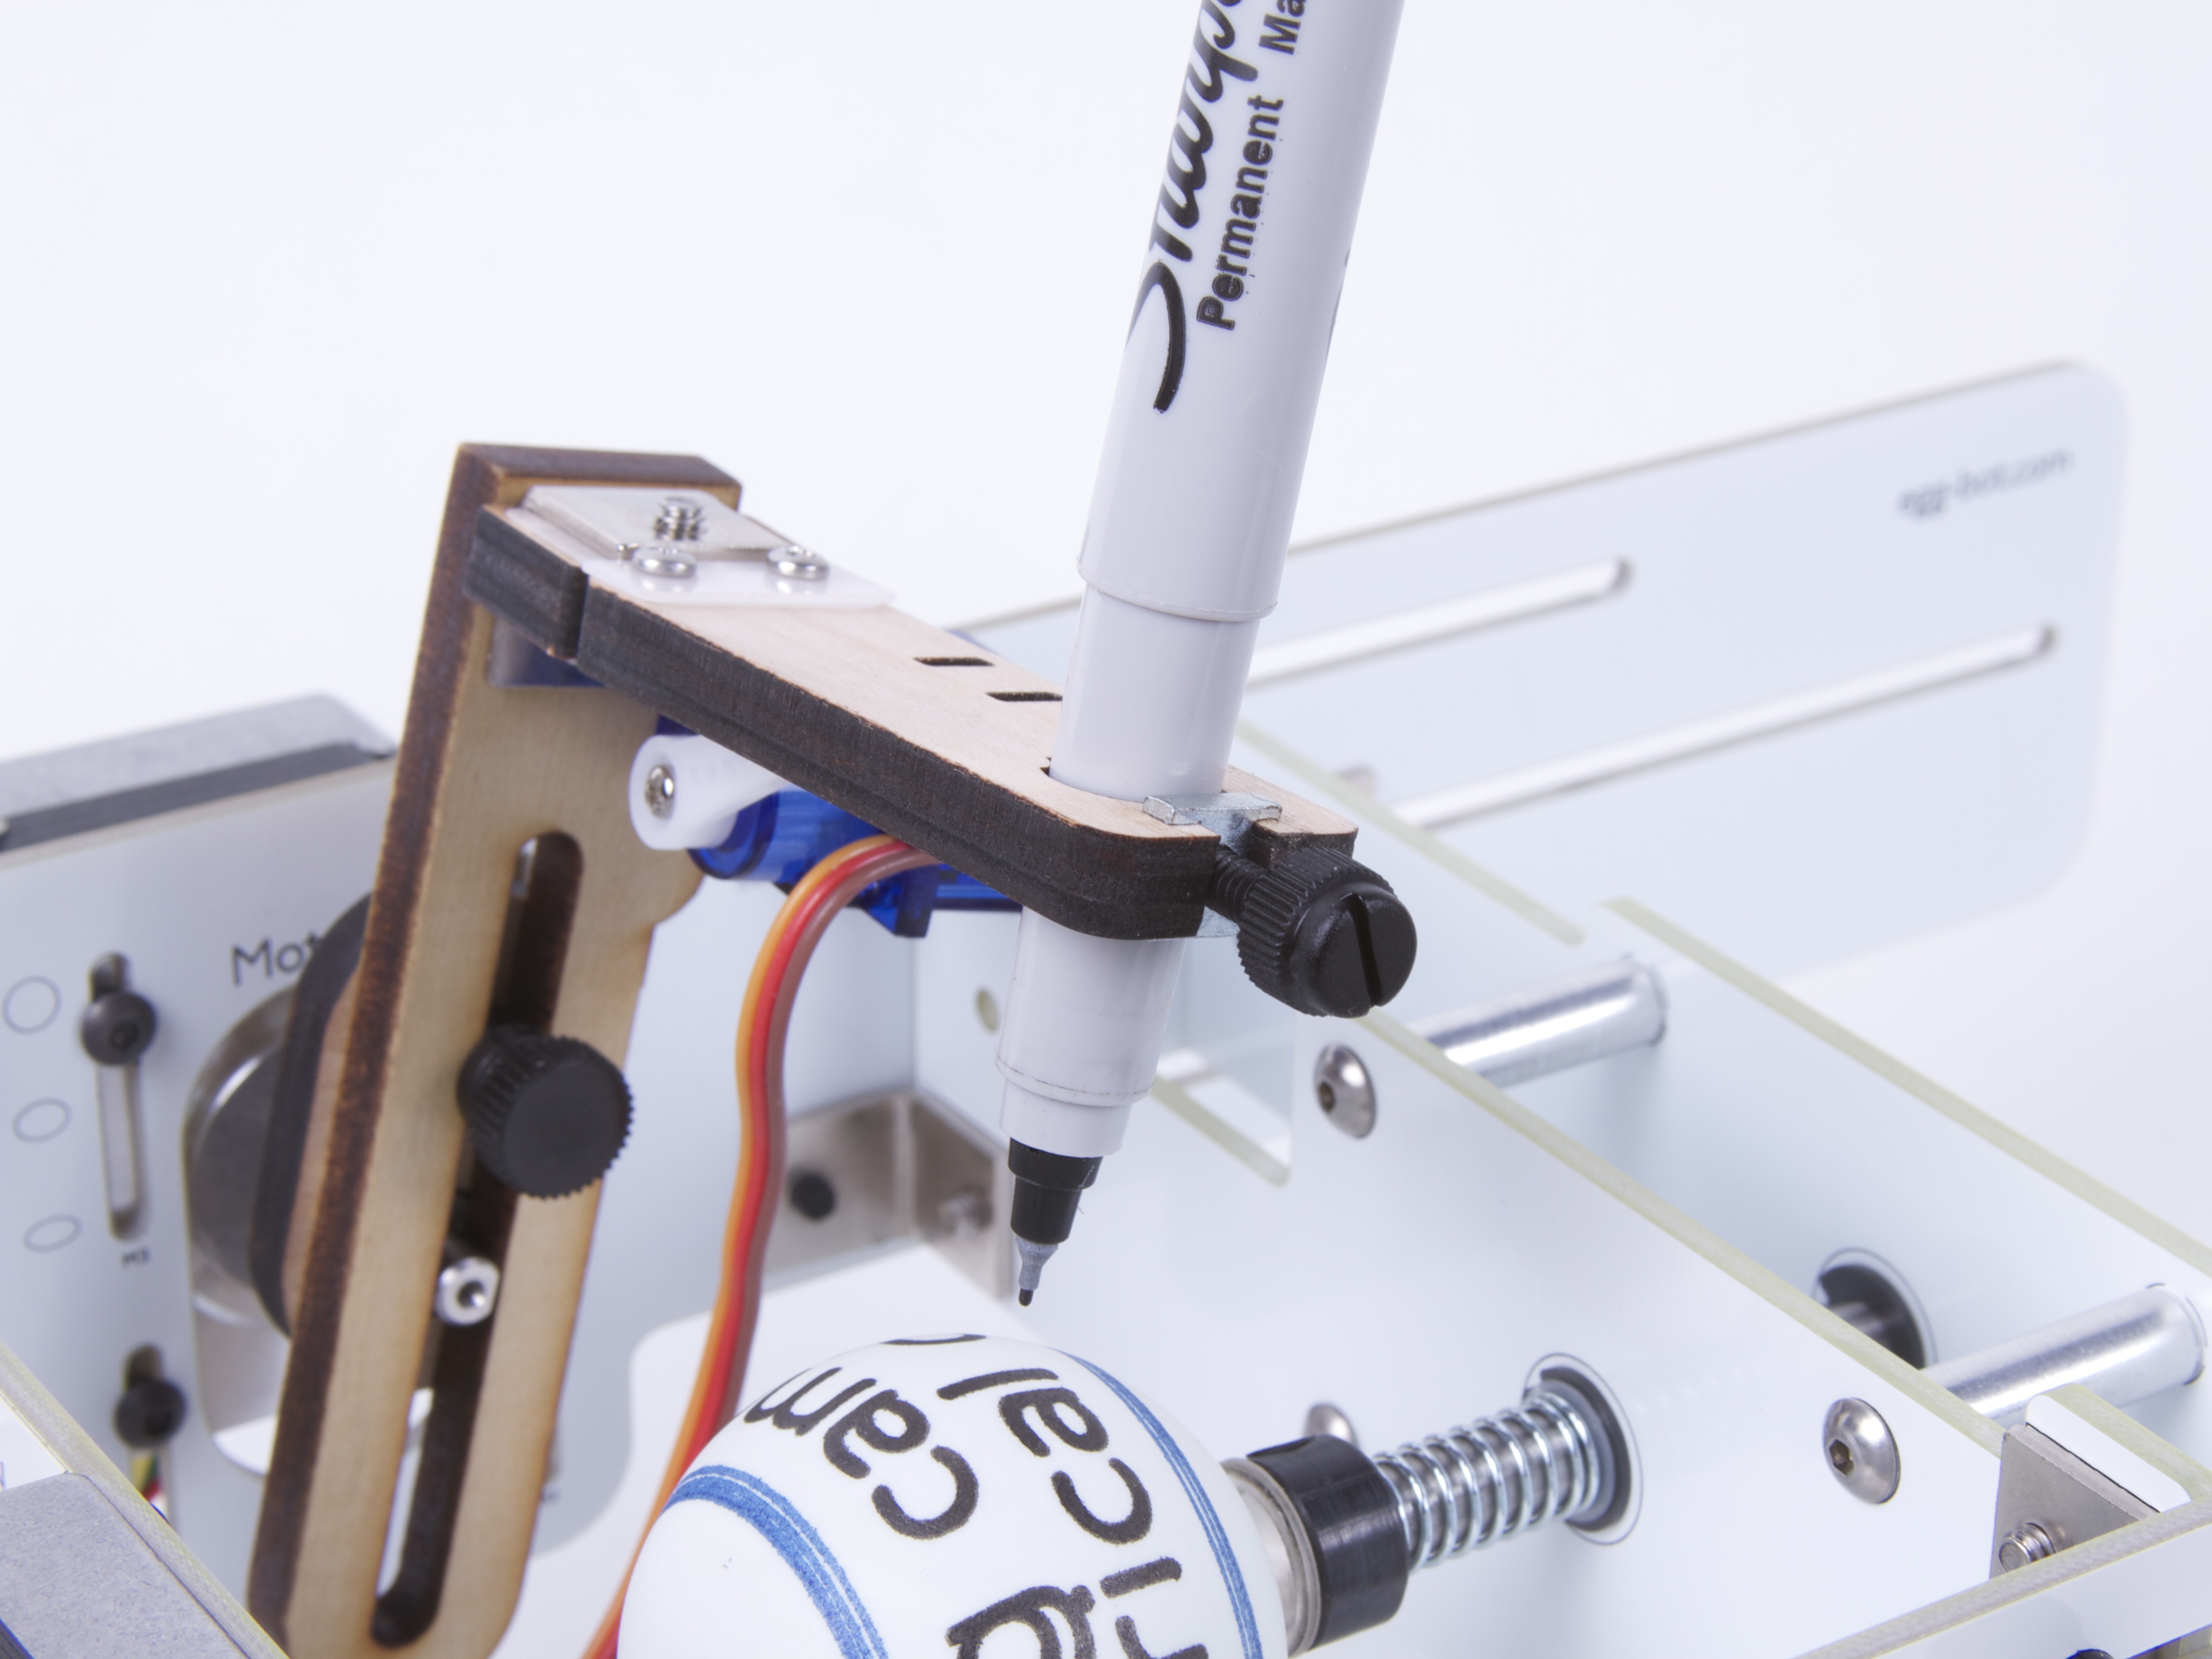
The EBB also controls the little servo motor that raises and lowers the pen arm. In previous versions of the Eggbot kit, raising and lowering the pen has usually been done with a solenoid. But the servo motor allows very small, precise motion to raise and lower the pen over the surface. The end of the pen arm is hinged with an acetal flexure for precise bending, and the pen arm clamp fits ultra fine Sharpie pens and many others.

And the results? Pretty good. The objects shown here include golf balls, eggs, Christmas ornaments, and light bulbs.
The plots that you see here were made in Inkscape, and plotted to the Eggbot using our Eggbot extension, written in Python. The basic operation is much like that of a printer driver: you import or make a drawing in Inkscape, and use the extensions to plot your drawing onto whatever object you’ve mounted in the Eggbot. It’s all handled through a graphical user interface, and works cleanly on Mac, Windows and Linux.
There is, of course, much more to the design in detail.
Our web store is now taking orders for Eggbot kits, although there may be a waiting list.
Eggbot is an open source hardware+software project. You can find documentation and additional support resources for the Egg-Bot list here:
- Official site, egg-bot.com, featuring the FAQ.
- Main documentation site: http://wiki.evilmadscientist.com/eggbot
- Eggbot Forum here on Evil mad Scientist Laboratories
- Details about the EiBotBoard
- You may want to join the new Eggbot user mailing list
- Eggbot code is hosted at Google Code
Great ! Congrats
It must be very nice to watch the printing process; will get one soon!
Shana Tovah !
I can totally see a stop-motion video, or a sped up normal video, showing the drawing process, in my head for this.
I can’t decide what the background music is, though. Most fast-stop-motion real-life videos in my head have "Yakety Sax", from Benny Hill, behind them, but I can totally see using "Ready, Steady, Go", too. :)
Beautiful work! For some applications, Wilton Foodwriter markers might be just the thing, although the resolution would be somewhat lower than a Sharpie.
Nice! Have been waiting for this since you first posted about it. Cheers, tamberg
Is that an "Egg Man" lyric I spy on that egg?! Comes from a chicken not a bunny, dummy!
Very cool! It’s great to see this egg-citing kit finally in production! (groan)
So what’s next for the Evil Mad Scientists? *crosses fingers for a $300 PCB mill*
They exist as kit already. Zentool works has a kit for $329. I would post the link but the spamfilters keep killing my post.
Thanks for the link! The motors and drivers cost extra, so a complete kit is $520. But, that’s pretty darned reasonable.
Brilliant. Ordered one straight away for our hackerspace.
Cheers,
Gavin
sites.google.com/site/mechatronicsguy
the store page says it can draw on "ping pong bulbs"
XD
Er… yeah. Those are like ping pong balls that you put LEDs inside, right?
Windell H. Oskay
drwho(at)evilmadscientist.com
http://www.evilmadscientist.com/
Right! They’re the latest LED Trowie rage! ;) Only egg-bot owner’s can be custom monogrammed.
Let’s hope Patton Oswalt doesn’t get wind of this…
http://www.youtube.com/watch?v=U0LzsThR2eI
I had something like this when I was a kid back in 1973. It was pretty neat.
I had a similar device 35+ years ago. It was called the "Decoregger." (Google it.)
However, this contraption appears to be considerably more advanced.
I need some kit for cup or tube engraving -with horizontal motion
We might be able to make a mod kit to do this– "Tube-Bot"? Just doesn’t have the same ring to it….
Windell H. Oskay
drwho(at)evilmadscientist.com
http://www.evilmadscientist.com/
Strange/stupid question: has anybody thought about putting a small (100 mW) laser instead of a marker on it? That way, you could (slowly, albeit) engrave something. Just imagine it "laser engraved Easter eggs"
Yes, that’s in the FAQ. :)
Windell H. Oskay
drwho(at)evilmadscientist.com
http://www.evilmadscientist.com/
A simple idea like this could incorporate a lathe tool into a rapid prototyping / 3d printer bot (ie: makerbot, reprap, fab@home).
Lathes can be a very handy fabrication device.
Just got my kit. Had it built in an hour and plotted my first egg within 2.
The instructions are fantastic and this is a cool little kit. Very eager to start hacking around and seeing what I can get it to do!
I rate this a 8 out of 10! Very much worth the money!