


Here we present two open-source, do-it-yourself, microcontroller-powered holiday electronics projects: A micro-readerboard Christmas tree ornament and a mini-LED Hanukkah menorah. Read on to see exactly what they do (Check out the video!), how they work, and how you can make your own.
What do they do?
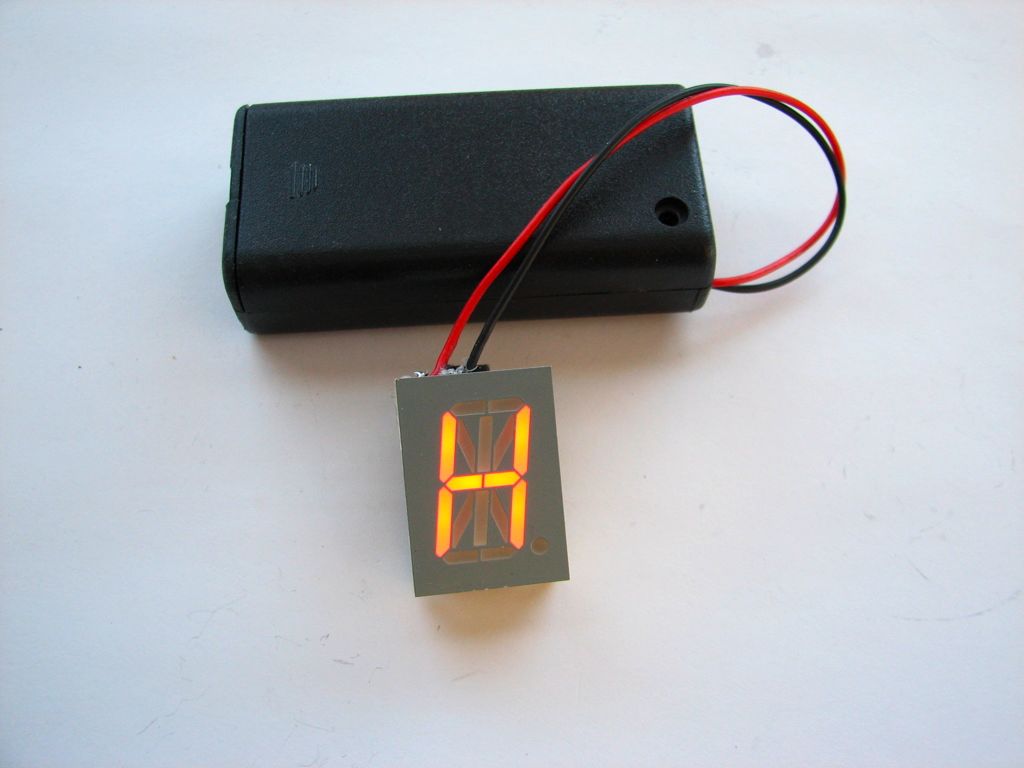
Our micro-readerboard Christmas tree ornament displays a short message, one letter at a time, on a bright single-character alphanumeric LED display. In the animation here, the ornament is displaying the word “ornament.”
Each ornament is pre-programmed with a list of 36 different short phrases. Every time that an ornament is switched off and back on, it picks a new message from its memory to repeat.
Among the other phrases in the original set of 36 are such cheerful, sarcastic, and geeky ones as:
- “no peeking at the presents,”
- “happy new year,”
- “warning warning this tree will self destruct,”
- “my other tree is a Hanukkah bush,” and
- “all your gift are belong to us.”
Additionally, one of the phrases, “i am showing off my programs,” begins a demo mode that cycles through the set of phrases so that you can see them all.
UPDATE: We have posted a new and vastly improved– but still open source– version of the LED micro-readerboard project. Read about it here
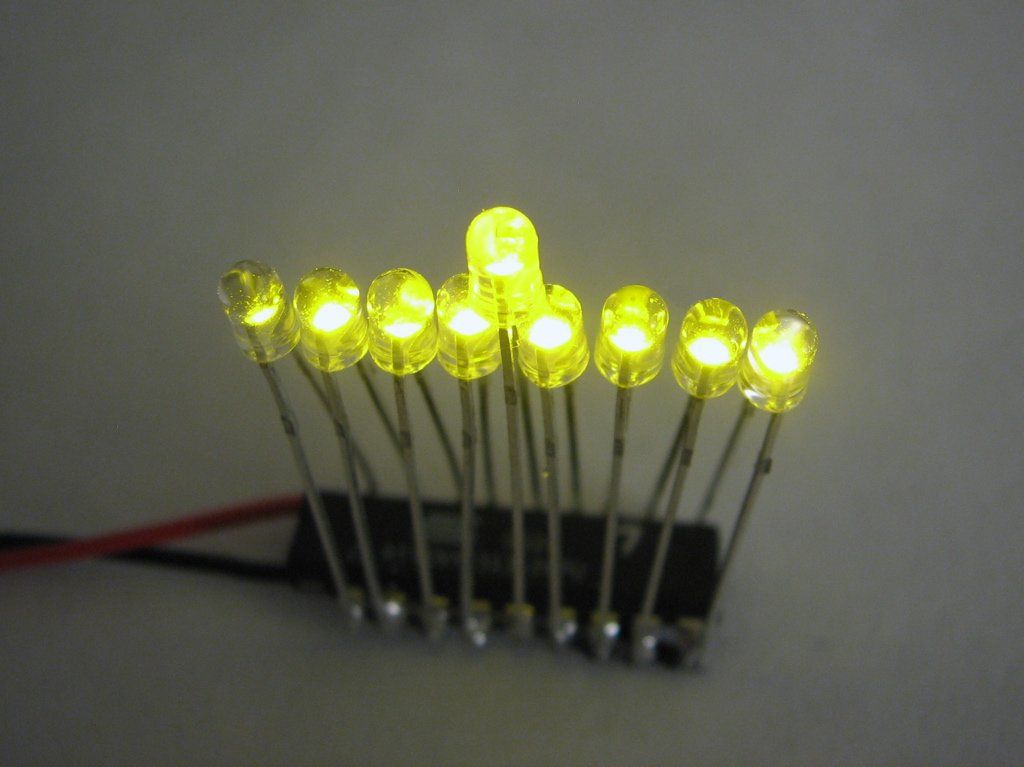
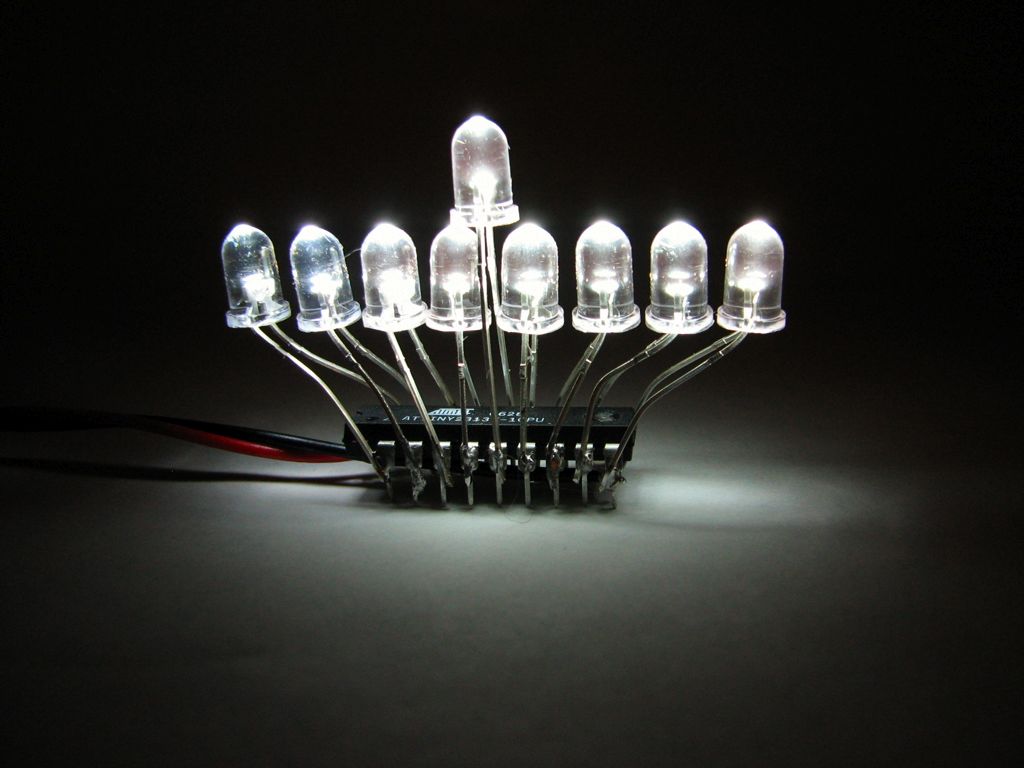
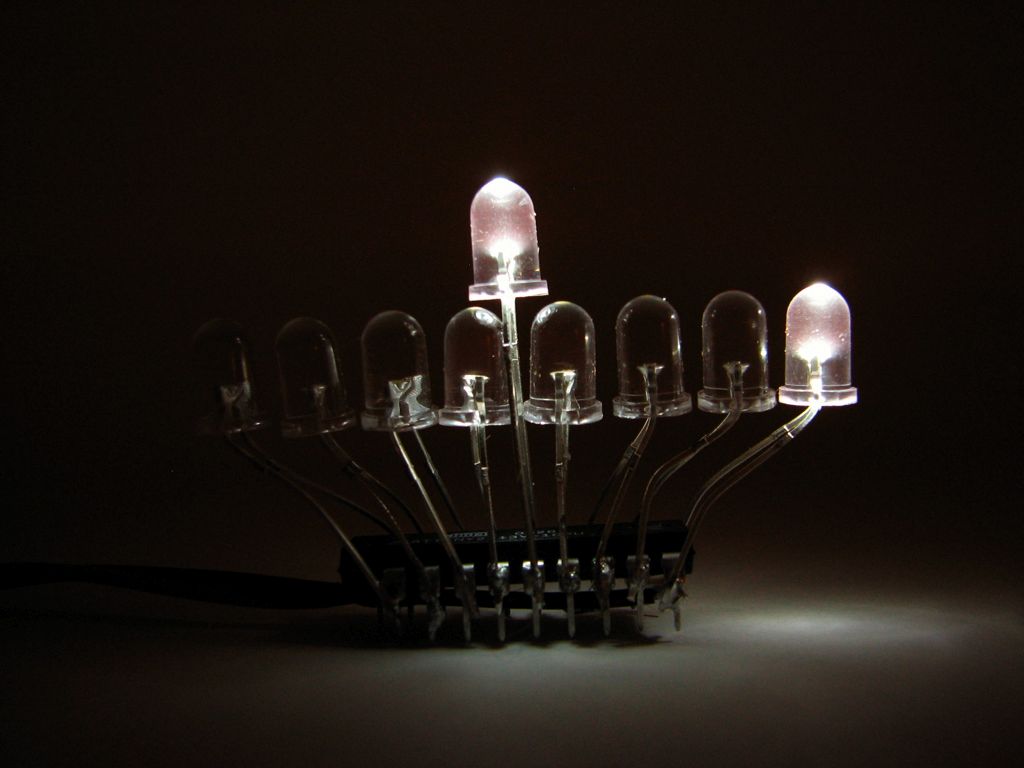
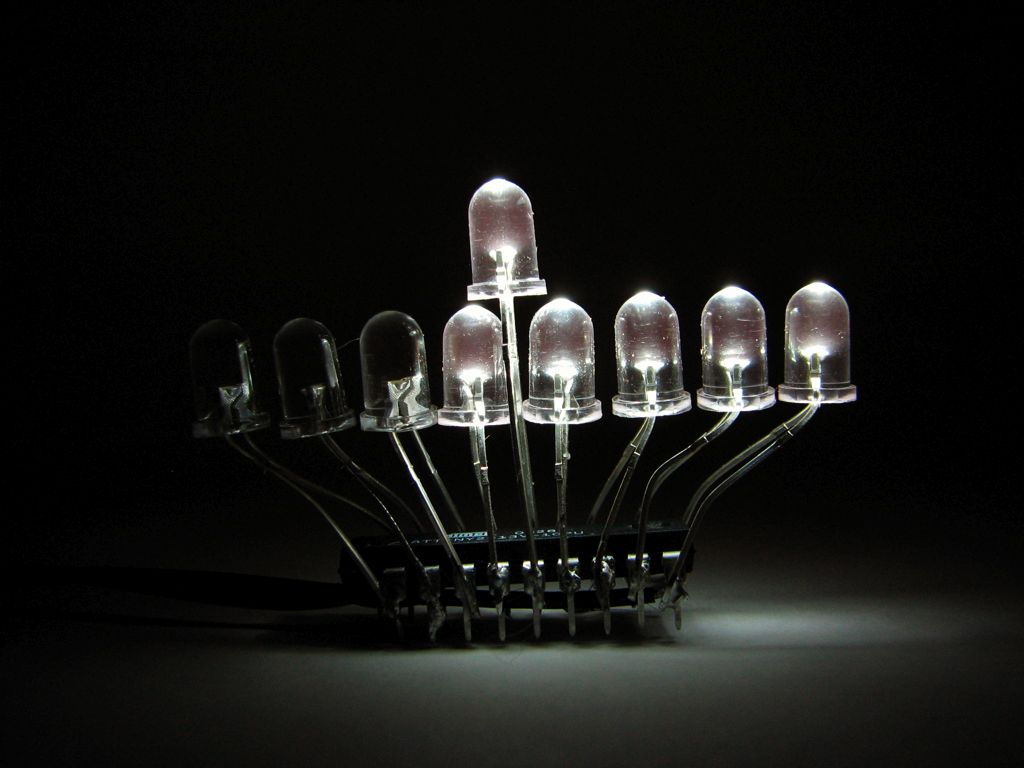
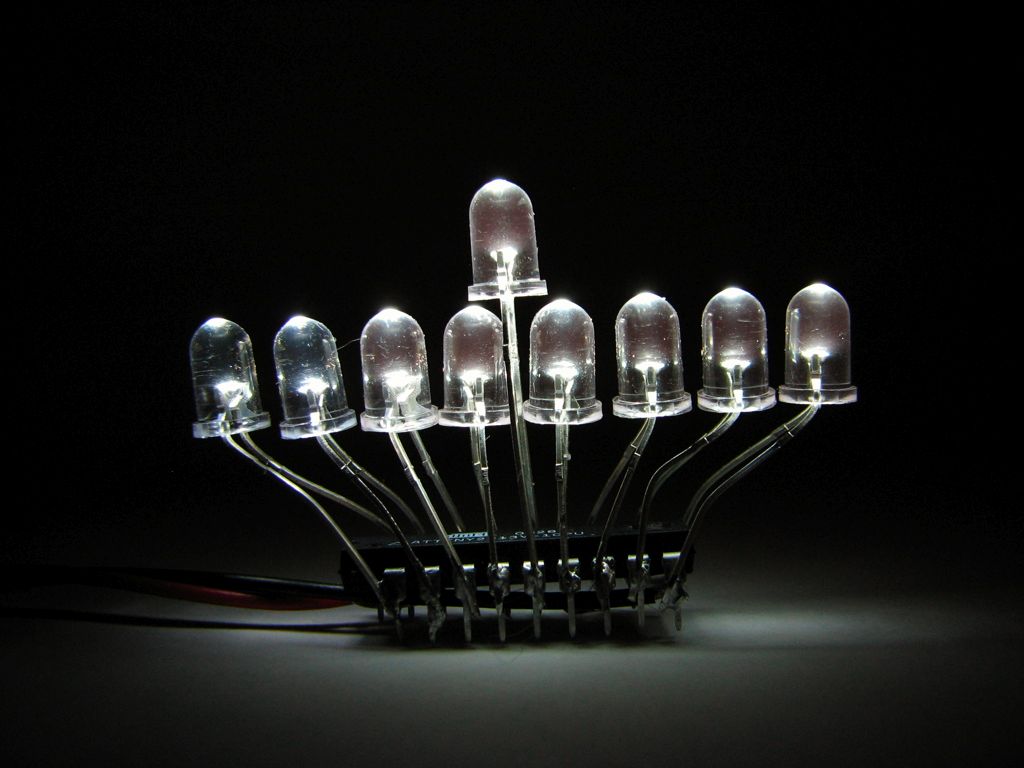
Our mini-LED Hanukkah menorah is a modern update of the traditional hanukkiyah, the nine-armed Hanukkah candelabrum.
Two candles are lit on the first night of Hanukkah (one “real” candle plus the uppity lighter candle, or shamash which apparently doesn’t count), three on the second night, right up to nine on the eighth night. That’s (2+9)*(8/2)=44 candles all together, for those of you keeping score.
Ours works pretty much the same way, but uses a whole lot less wax. When you turn it on, it steadily (without blinking or animation) displays the correct configuration of LED “candles” for a given night of Hanukkah. Each time that it is switched off and back on, it displays one more light than it did the previous time that you turned it on– unless it showed all nine last time:


Just in case you do crave animation, there is also a neat demo mode (which comes after the 8th night) that cycles through the different configurations at a rate of one about “day” per second.
How do they work?
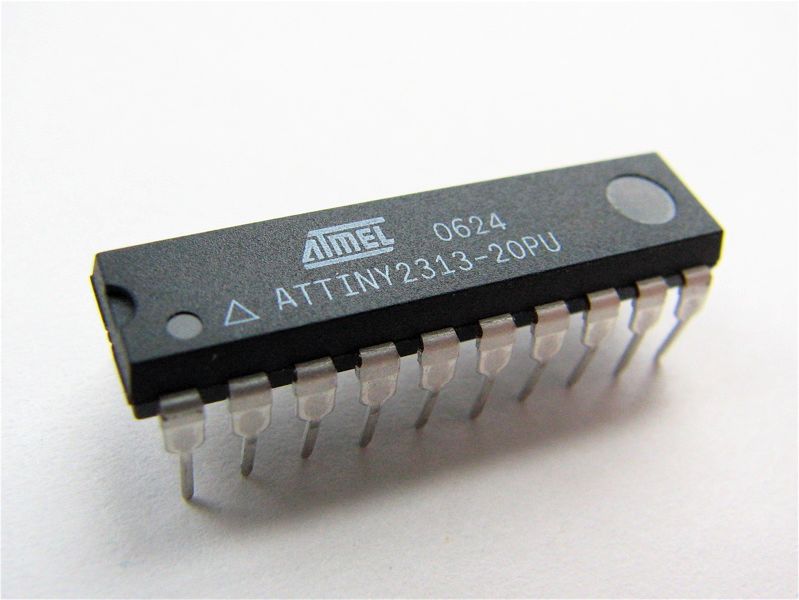
These two projects are based on the Atmel ATtiny2313, a powerful little 8-bit AVR microcontroller. This microcontroller is an inexpensive single-chip computer complete with a clock, 2 kB of flash memory, and 128 bytes each of SRAM and EEPROM memory.
As we have the chip configured, 17 of the chip’s 20 pins can be used as logical outputs to directly drive LEDs. The remaining three pins are for power (2.7 – 5.5 V DC), ground, and a reset pin reserved for programming use. You can find a diagram of that configuration here.
Since the microcontroller is a little computer, it doesn’t really do anything without a program. We wrote our two programs in C, and they do basically what you’d expect: tell the chip when to turn the different lights on and off. There’s a little bit of work in building the font table for the ornament, but even that isn’t so bad.
One trick that we used: An integer representing the current message displayed on the ornament (or the day on the menorah) is stored in EEPROM, a type of nonvolatile memory, in order to let the chip change its behavior from the previous time that it was turned on. Once the code was written, we used open source, cross-platform development tools (including avr-gcc and avrdude) to compile the C code into a binary firmware object and program the device through a low-cost USB programmer.
How do you make them?
To begin building either project, you first need to acquire the components, including a programmed microcontroller. The most important consideration in building these projects is whether or not you want to program your own microcontroller. If your answer is a resounding “No,” don’t worry, you can still build it: we’ve put together some low-cost kits that include pre-programmed microcontrollers. Get one of those and join us down where it says “Assembling the ornament.”
Programming your own chips
Programming your own microcontrollers is a great idea because it gives you the flexibility to put your own set of phrases in the code for the micro-readerboard ornament. You can also change the display in any number of ways in case you decide to use a different variety of LED display.
If you already have a working setup for programming 20-pin AVR chips, Bob is your uncle. Download the C source code and makefiles for the readerboard here and the menorah here.
If you haven’t programmed AVRs yet, this is a fine time to start, so here are a couple of pointers about where to start looking. If you have a computer with a parallel port and are running Linux or Windows, you can build your own microcontroller programmer for about $10 and set it up with free software. However, we prefer a USB ISP programmer like the USBtiny. There are easy single-package installers for the software toolchain available for
windows and Mac, so use those.
The other components that you need for either project are a battery box (or other voltage source) and the LED displays. I recommend a 2 x AA box (with switch) for the ornament, and a 3 x AA box (with switch) for the menorah. For the menorah, you need nine LEDs. While just about any variety of LED will work, it is somewhat easier to use ones that come in a small diameter (3 mm) package.
For the ornament, we used the Kingbright PSA08-11HWA, a red 16-segment single-character alphanumeric LED display. It has a fairly large 20mm ( 0.8 inch) character height, and a common-anode drive configuration. The downside of this particular display is that it has somewhat variable availability. You can often get them on eBay, and they can be found at electronics surplus shops from time to time. (We just bought more than 200 of them to put in our kits.)
You can get a compatible but brighter version of the same display (the PSA08-11EWA) from Circuit Specialists for $3.72 each. As an alternative to using a dedicated alphanumeric display, you can certainly arrange discrete LEDs in the same pattern; it might be best to use rectangular-shaped LEDs or to use two LEDs (driven in parallel) for each segment. If you’re willing to modify the code a little bit, you can also consider using any number of other available dot-matrix or other alphanumeric LED devices. It’s just a matter of tweaking the font table a bit.
Assembling the ornament
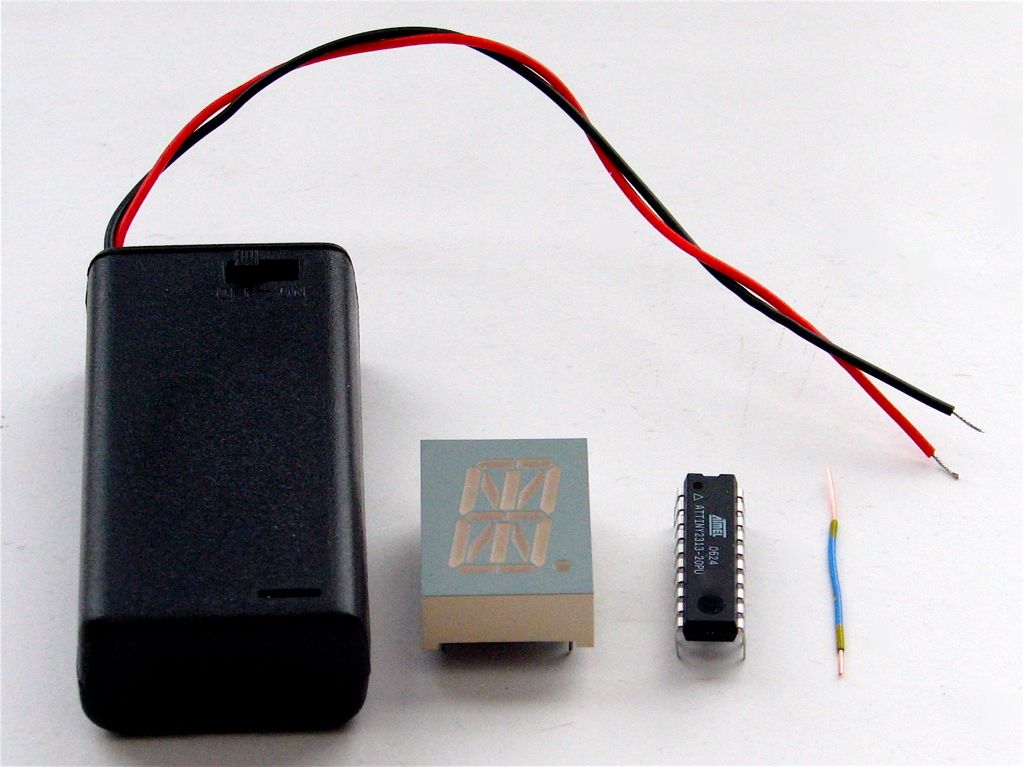
To assemble one of the ornaments, put together a little kit containing the battery box, the LED display (the PSA08-11HWA or equivalent; you may need wiring changes with other types of devices), the programmed microcontroller, and a little piece of insulated copper wire. Once you’ve got your kit collected, you might prefer to follow along with our printable ornament Instructions (420 kB PDF document).
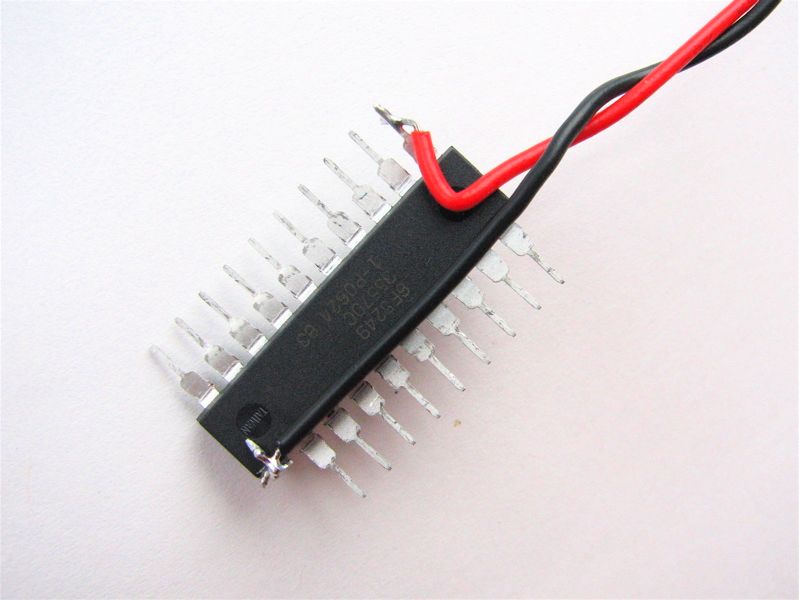
Begin by bending all of the leads of the chip out flat, except for pin 10, which should be bent down, around the belly of the chip (and the chip is belly-up in the photo). Solder the red wire from the battery box to pin 20 of the chip (+Vcc) and the black wire to pin 10 (GND).
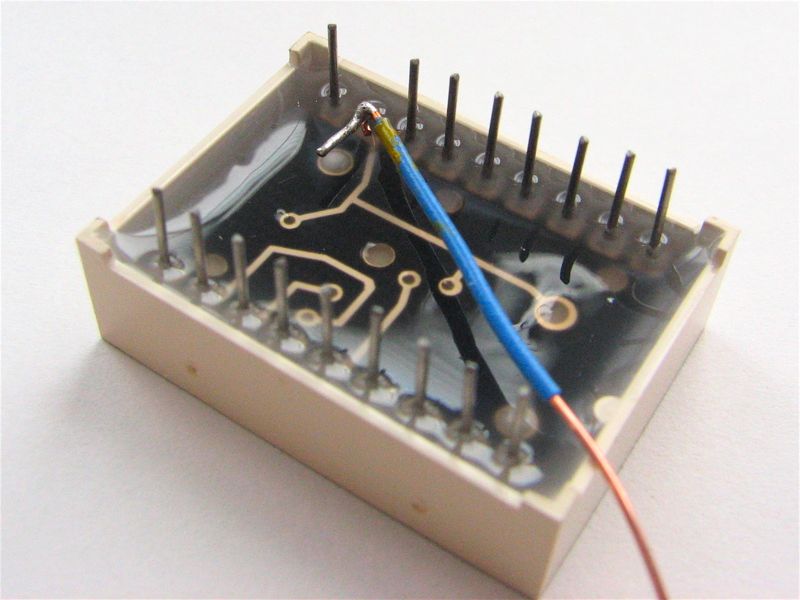
Identify the common anode in the LED display: It’s the second pin in the corner by the decimal point. Bend it down flat and solder the short insulated wire to it. bend the wire so that it goes past the opposite corner of the display. Mate the microcontroller to the LED display and see how they fit together: Pin 10 of the microcontroller (the bent-down one) lines up to the corner with the decimal point and the “lonely” pin of the LED standing there. Pins 1 and 20 of the microcontroller should not contact the pins of the LED, but most of the others do.
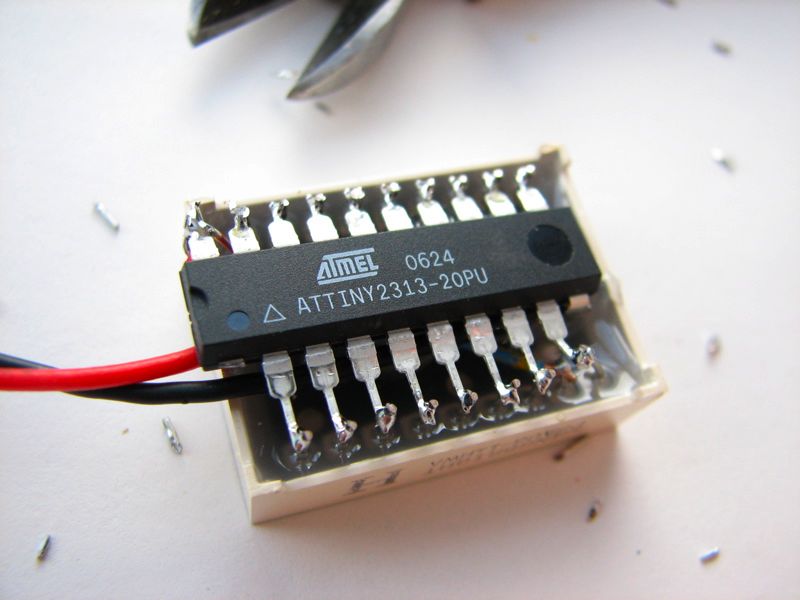
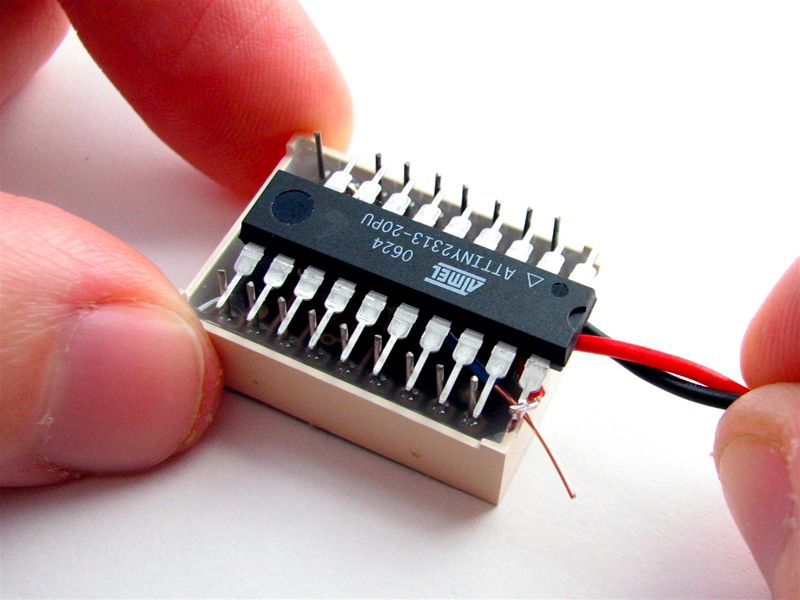
Pins 2-8 and 10-19 of the microcontrollers should be resting against pins of the LED display; solder those connections. Solder pin 9 of the microcontroller to the “lonely” pin of the LED, which might take a little bending to make possible. Solder the other end of the wire from the common cathode of the LED display to pin 20 of the microcontroller. Trim away excess leads and wire to complete the ornament.
Need help? Leave your question over in the support area.
Assembling the Menorah
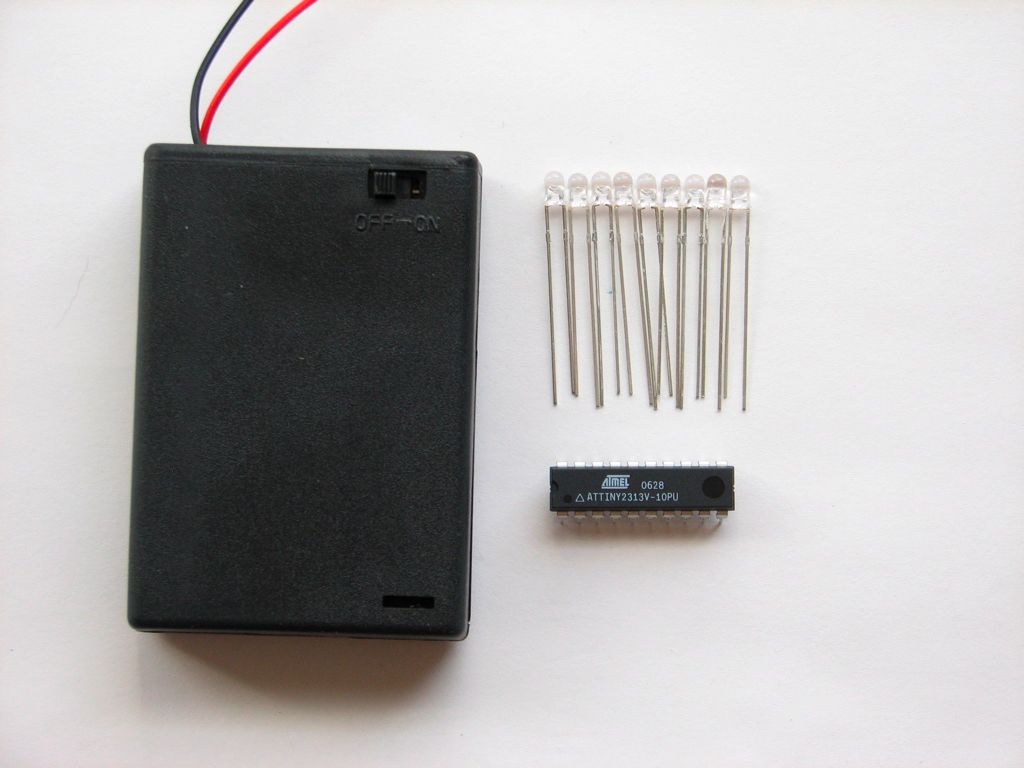

To assemble one of the menorahs, put together a little kit containing the battery box, nine LEDs, and the programmed microcontroller. Once you’ve got your kit collected you might prefer to follow along with our printable menorah Instructions (400 kB PDF document).
Begin by soldering the red wire from the battery box to pin 20 of the chip (+Vcc) and the black wire to pin 10 (GND).
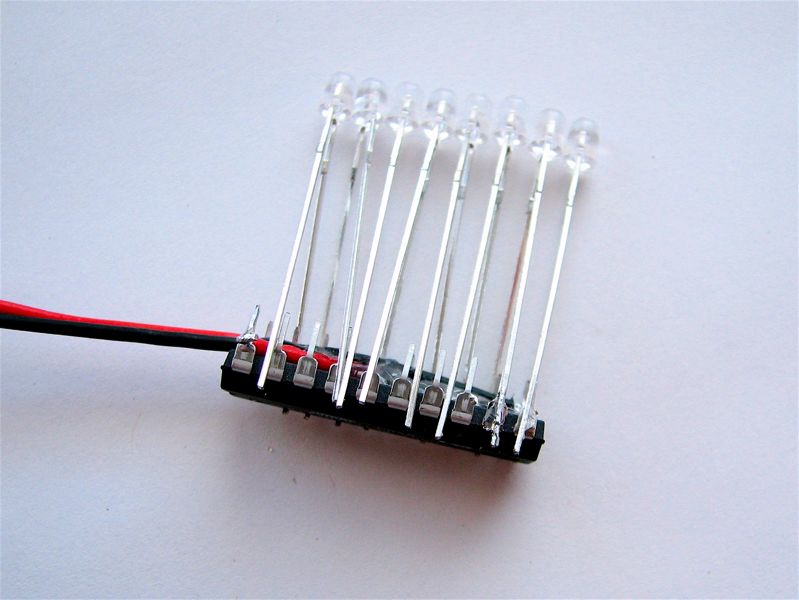
The cathodes of the nine LEDs on the menorah will connect to pins 2-10, and the anodes connect to the pins directly opposite them: pins 11-19. (There’s a circuit diagram on the reference page.)
The LEDs that are shown here are small (3 mm) types. It may take more effort to bend the leads into place if you use larger diameter LEDs like the white ones that we used for some of our menorahs.
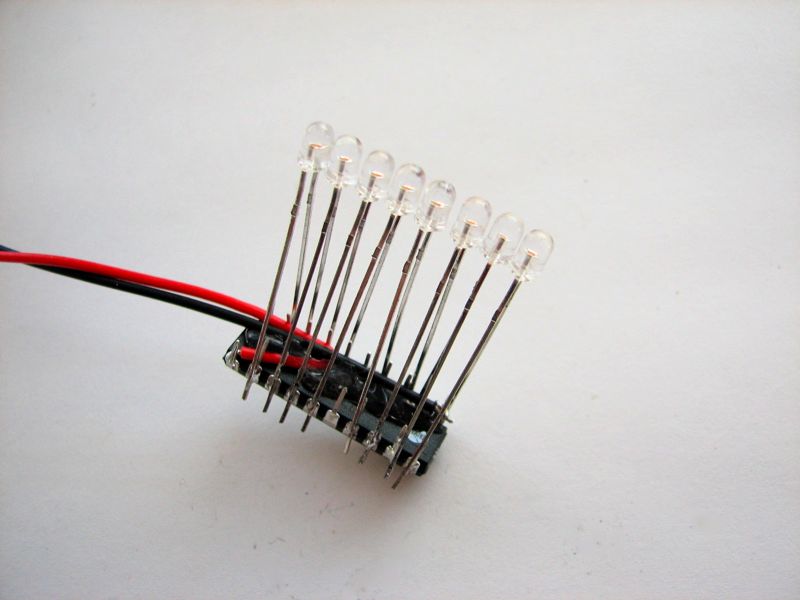
Begin by connecting the cathodes of the eight lower LEDs, to pins 2-5 and 7-10. Once that’s done, flip it around and solder the anode of each LED to the pin directly across from where the cathode is soldered; pins 11-14 and 16-19.
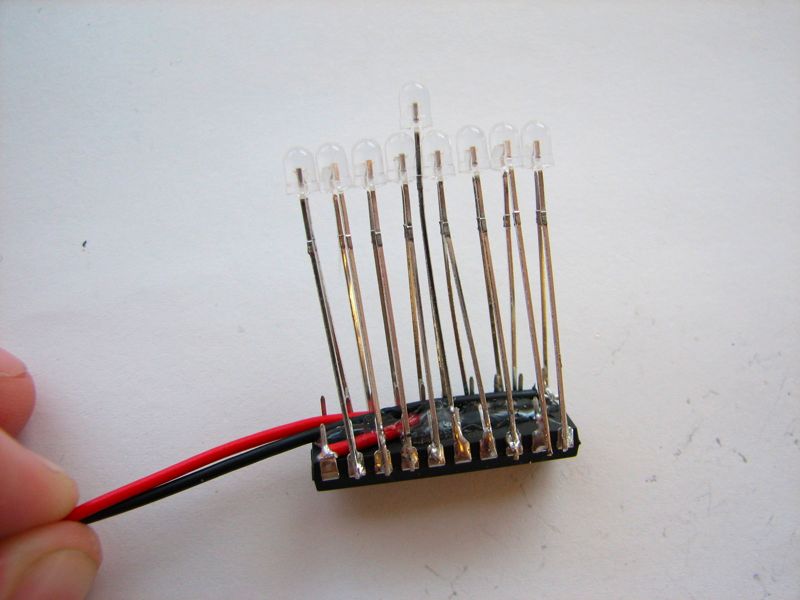
Now there’s only one more LED to solder: Connect the anode to pin 15, and cathode to pin 6. It’s nice to put it at a slightly different elevation than the others, so that you can tell them apart even when the power is off. Trim away excess leads and wire to complete the menorah.
Need help? Leave your question over in the support area.
That’s it!
Good luck with your holiday electronics projects!
Quick links:
[Reference data] [Support] [Programming AVR] [Kits]
These are very elegant! But am I missing something, or are there no dropping resistors on the LEDs?
Generally speaking, no dropping resistors are needed if you are careful
with how much current and voltage you apply and at what duty cycle.
The menorah drives the LEDs hard, but with a low duty cycle; it uses fast
pulse width modulation and each LED is only on (as much as) 1/9 of the
time. Since the output current limit of the chip is around 40 mA, and the
duty cycle is so low, we are safely in the pulsed-mode operating regime
of the LEDs.
For the ornament, the maximum voltage actually developed is around 2.4
V, which does run the current a bit high– approaching 40 mA. While
that’s higher than the rated continuous current, it’s much lower than the
rated peak current. The average power seems to be low enough to be
safe: I’ve yet failed to burn out any segments. However, adding a
resistor would improve the power efficiency of the ornament; if you do
so, add a 40 ohm, 1/4 W resistor to the common anode of the LED
display.
—
Windell H. Oskay
drwho(at)evilmadscientist.com
http://www.evilmadscientist.com/
Ah, I was hoping it was something like that!
Thanks!
Great kit!
My son and I put it together last night and attached it to his Christmas stocking. I wrote about it on my blog. I hope you don’t mind me linking to your animated GIF (it is a hyperlink to your kit page) – I didn’t have time to make one for myself.
No problem! And thanks for noticing our instructions– we’re very proud
of them!
—
Windell H. Oskay
drwho(at)evilmadscientist.com
http://www.evilmadscientist.com/
Just an oddity. If ours runs for a long time (over an hour or so), it gets into a state where all of the segments flash rapidly – almost a vibration like effect. A quick power cycle won’t fix it, but turning it off for a while (several minutes) will "reset" it. It doesn’t seem to be running hot or anything.
Is this a software state or a controller problem?
How long should it be able to run continually on a fresh set of batteries?
That sounds like a thermal problem, not a software problem. I think
that you must genuinely have a bum chip– I’m going to send you a new
one tomorrow morning.
Last night while I was programming and testing a batch of chips, I noticed
that one of them acted differently from the rest– it mostly worked but
has a tendency to linger in the "blinking" state. It’s very strange– every
single byte of its programming was repeatedly tested *and verified* to be
the same as the others in the batch, and yet it was clearly acting
differently than all of the others. It chip must have a genuine hardware
defect of some sort– I’m not sure quite what type, but it has some things
in common with what you were seeing. Anyway, I’ll let one of the
*working* chips that I’ve programmed run for several hours today to
make sure that it doesn’t behave like that. =)
Battery life is never going to be that good, when running that many LEDs
that high with that high of a duty cycle. =( I haven’t actually measured the
start-to-finish time on a fresh set of batteries, but let’s just say that you
should turn off the power when no one is looking.
—
Windell H. Oskay
drwho(at)evilmadscientist.com
http://www.evilmadscientist.com/
What a great little gadget. I built a few of these ornaments using some Lite-On LEDs and they work great. They have different pinouts than the Kingbrights so I had to mount the MPU differently and modify the font definitions. They’re also more power hungry than the PSA08s, so I modified the firmware to multiplex the character segments. They’re a little dimmer, but still perfectly acceptable. The batteries should last longer too.
Thanks Windell.
Geoff.
Sounds neat! Would you consider posting a photo of it to the flickr group?
—
Windell H. Oskay
drwho(at)evilmadscientist.com
http://www.evilmadscientist.com/
Done. Allthough, they don’t look much different than yours.
Anyway, it’s a neat and elegant little hack.
Thanks again for the idea.
Way nicer than your photos is the EMSL electronic menorah. I have one, which my wonderful son soldered. I am unreasonably in love with my tiny menorah.
am gonna look hereabouts for a quicktime movie of your menorah lighting up on it’s "9th nite" setting: strobing.
Wotta concept:
video EvilMadMenorah-
maybe it’ll replace the tv yule log?
"I can dream, cant I??" mwahahahaha