


 We first demonstrated printing on pumpkins with an Eggbot last year at Maker Faire New York.
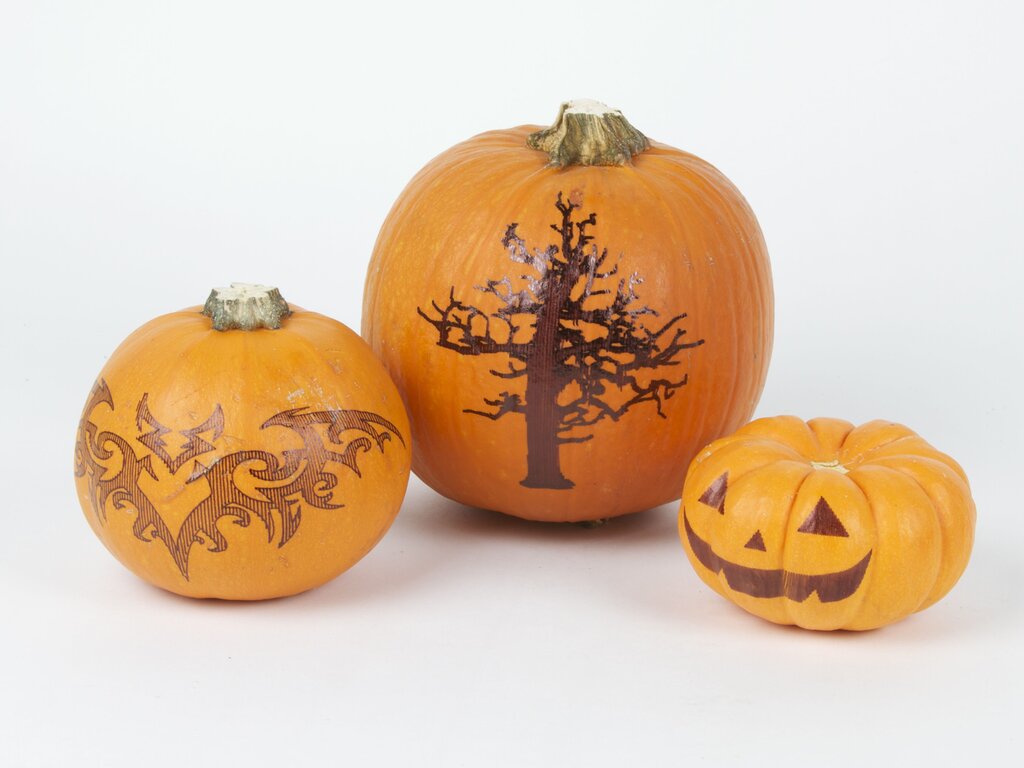
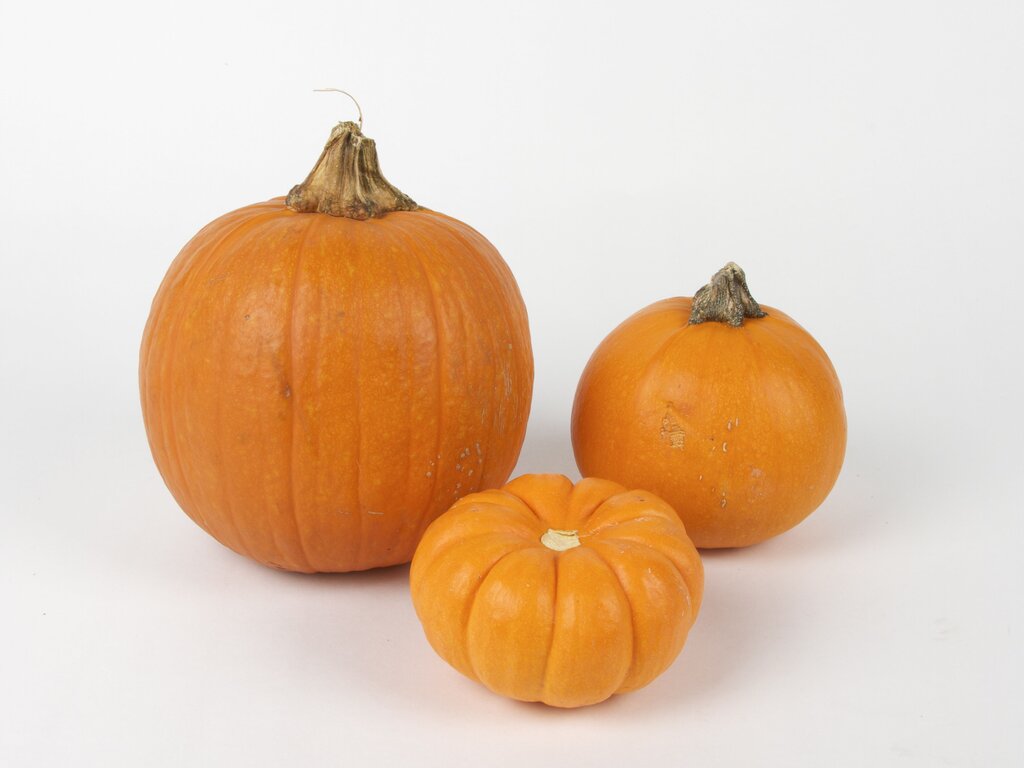 The first step is to choose your pumpkins carefully. Take a tape measure with you and remember that the Original Eggbot fits objects up to 4.25″ in diameter and the Ostrich Eggbot can fit objects up to 6.25″ in diameter. The larger pumpkin above is a little under 6″ in diameter, and the little round pie pumpkin and the mini-pumpkin are about 4″ in diameter.
Smooth pumpkins are easier to work with, as grooves and bumps can be difficult for the pen to navigate. Pie pumpkins tend to have a little less “character” than pumpkins sold for jack-o-lanterns, and tend to be quite a bit smaller, so they are a good choice. Overall symmetry makes things easier, too. Some decorative gourds have very smooth skin, which is nice, and can be interesting shapes, from pear, to ghost-like to very round.
The first step is to choose your pumpkins carefully. Take a tape measure with you and remember that the Original Eggbot fits objects up to 4.25″ in diameter and the Ostrich Eggbot can fit objects up to 6.25″ in diameter. The larger pumpkin above is a little under 6″ in diameter, and the little round pie pumpkin and the mini-pumpkin are about 4″ in diameter.
Smooth pumpkins are easier to work with, as grooves and bumps can be difficult for the pen to navigate. Pie pumpkins tend to have a little less “character” than pumpkins sold for jack-o-lanterns, and tend to be quite a bit smaller, so they are a good choice. Overall symmetry makes things easier, too. Some decorative gourds have very smooth skin, which is nice, and can be interesting shapes, from pear, to ghost-like to very round.
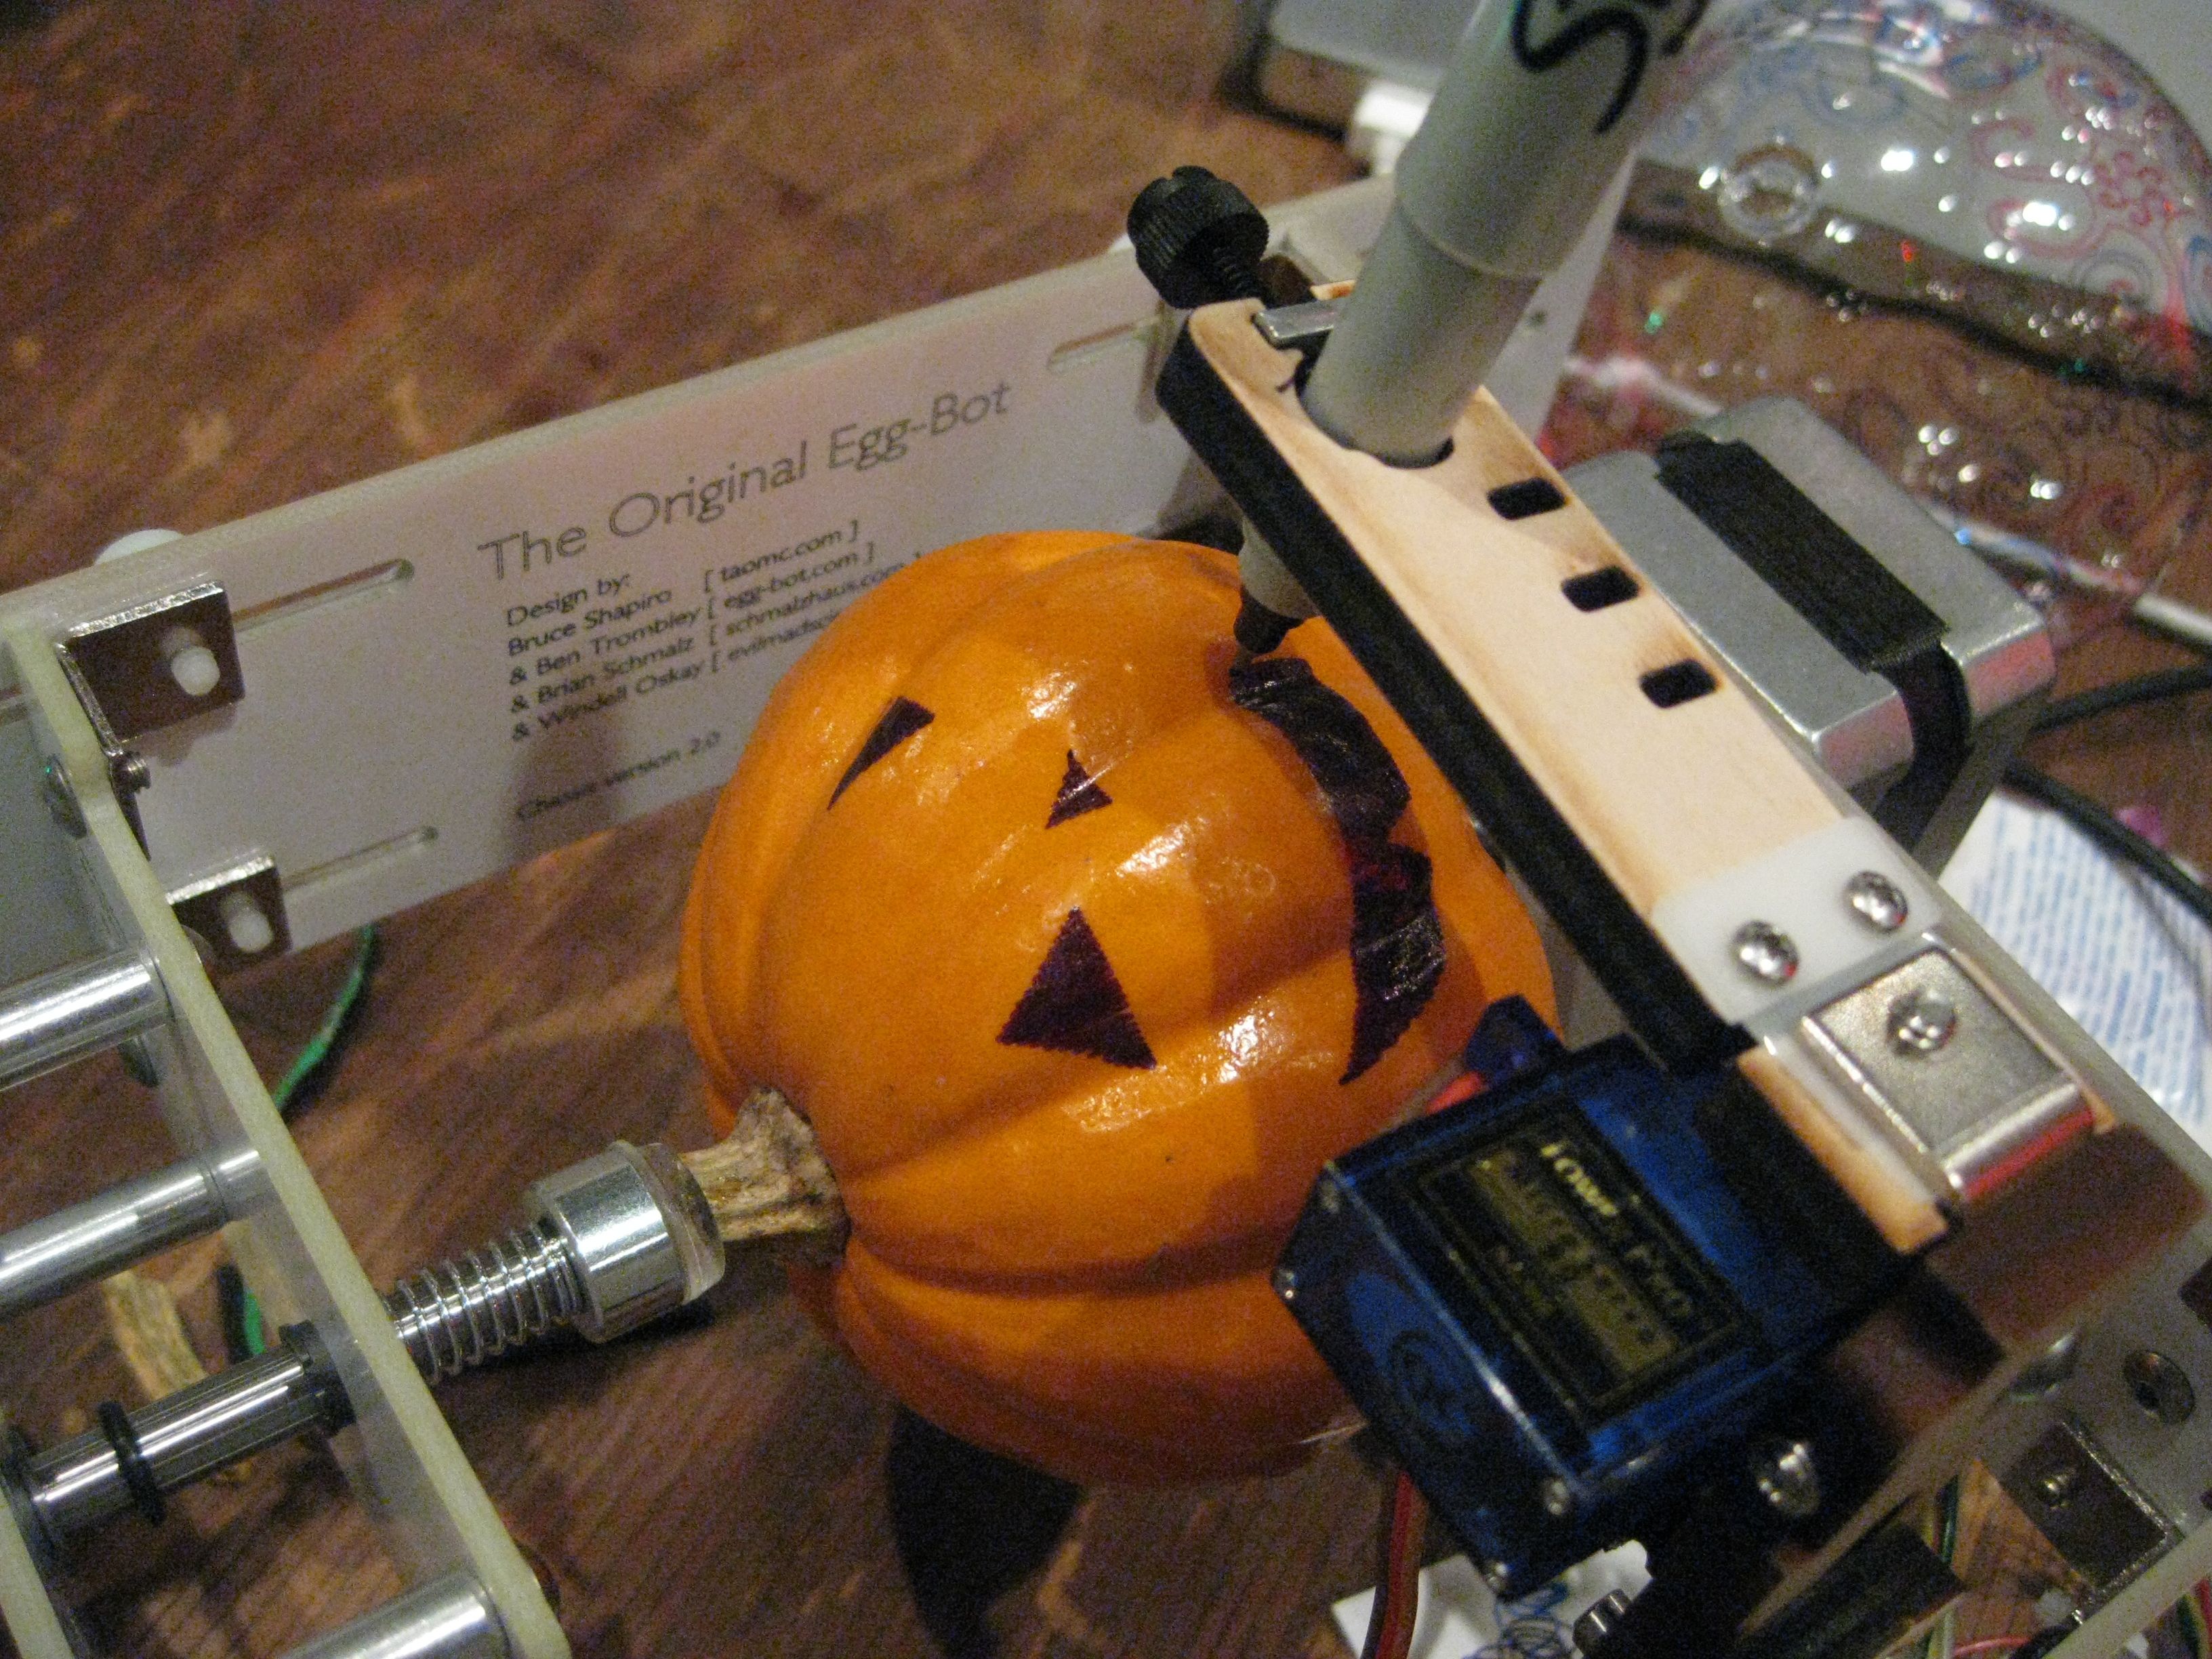
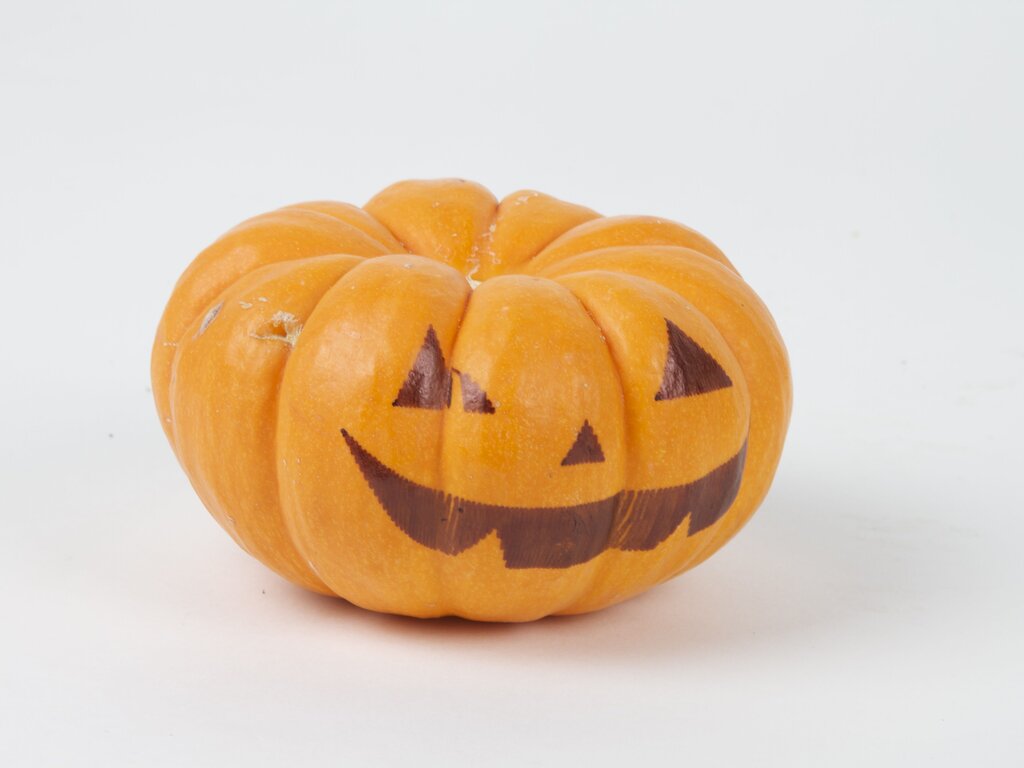 Mini pumpkins usually fit well, and often have smooth stem-free top which is easy to fit into the Eggbot. Ones with deep grooves can be challenging, as the pen may leave gaps (like the one on the eye of the jack-o-lantern above) as it moves quickly down into the groove. They also may need a broader range of pen up/down motion to allow the pen to fit into the deeper grooves.
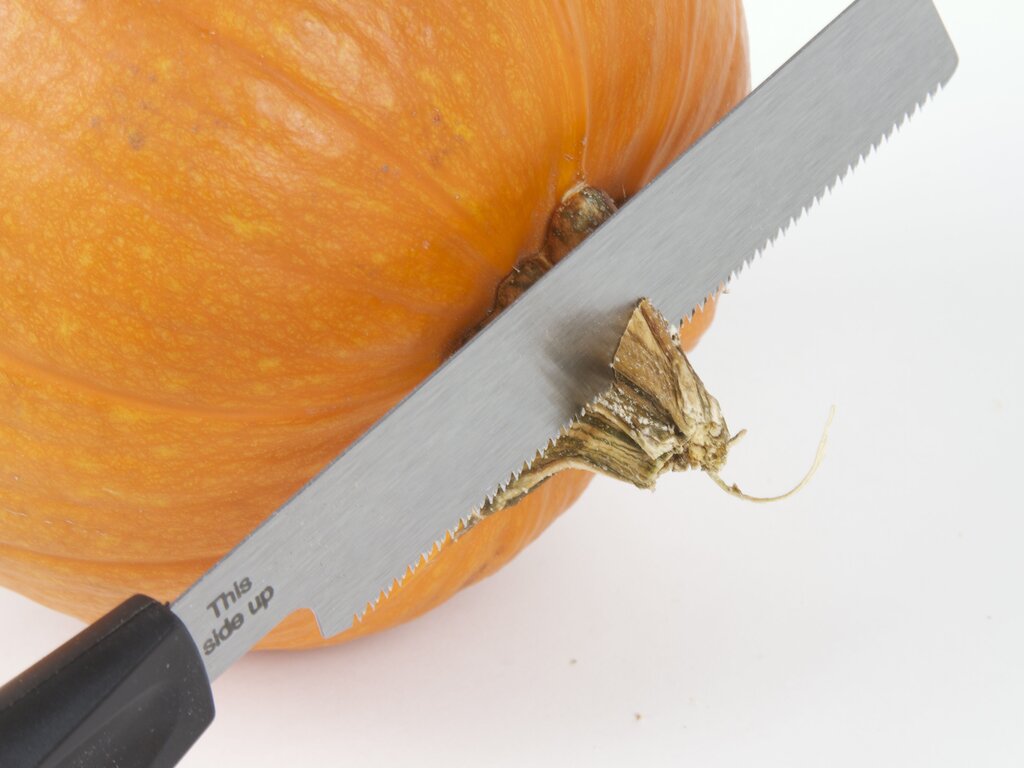 Most pumpkins will have a rough stem that won’t fit well in the Eggbot’s couplers. You can use a saw, a knife, a power sander, or many other tools to make a smooth surface on the stem for the Eggbot to couple to. You won’t want to pick a pumpkin for the Eggbot based on its awesome handle-like stem.
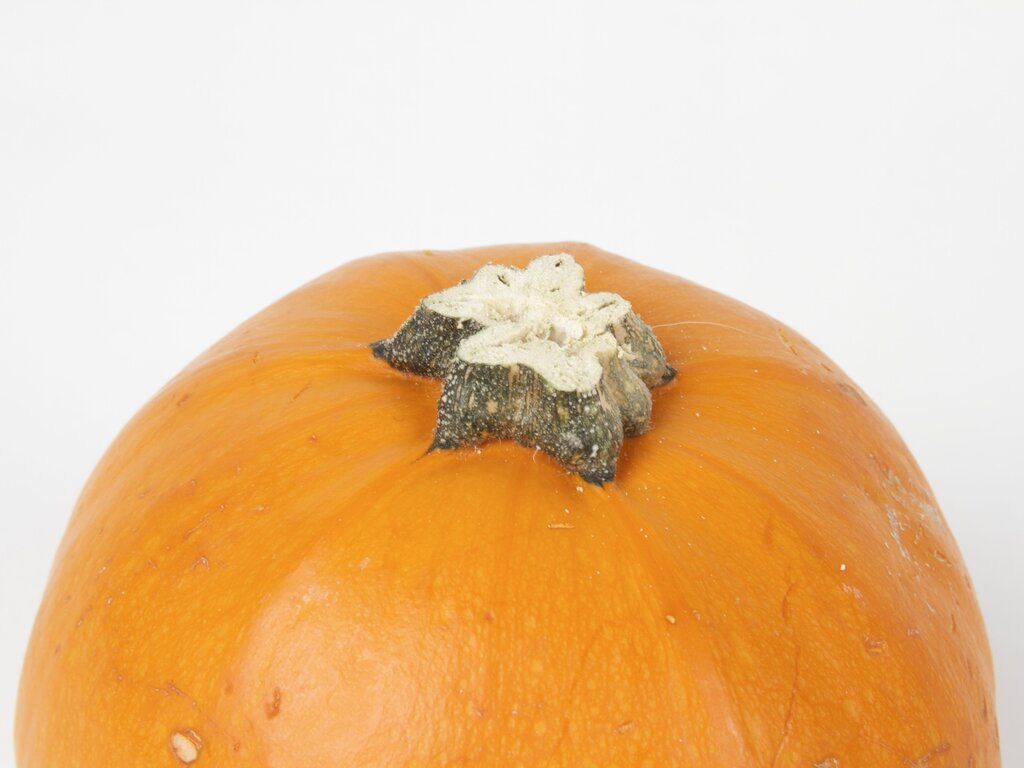 Once there is a flat surface to work with, you’ll be ready to put your pumpkin in the Eggbot.
 It helps to have a large surface area to couple to the smooth skin of the pumpkin, so using the precision egg coupler is a really good idea. The rubber coupler on the plunger of the Original Eggbot grips into the stem end quite well.
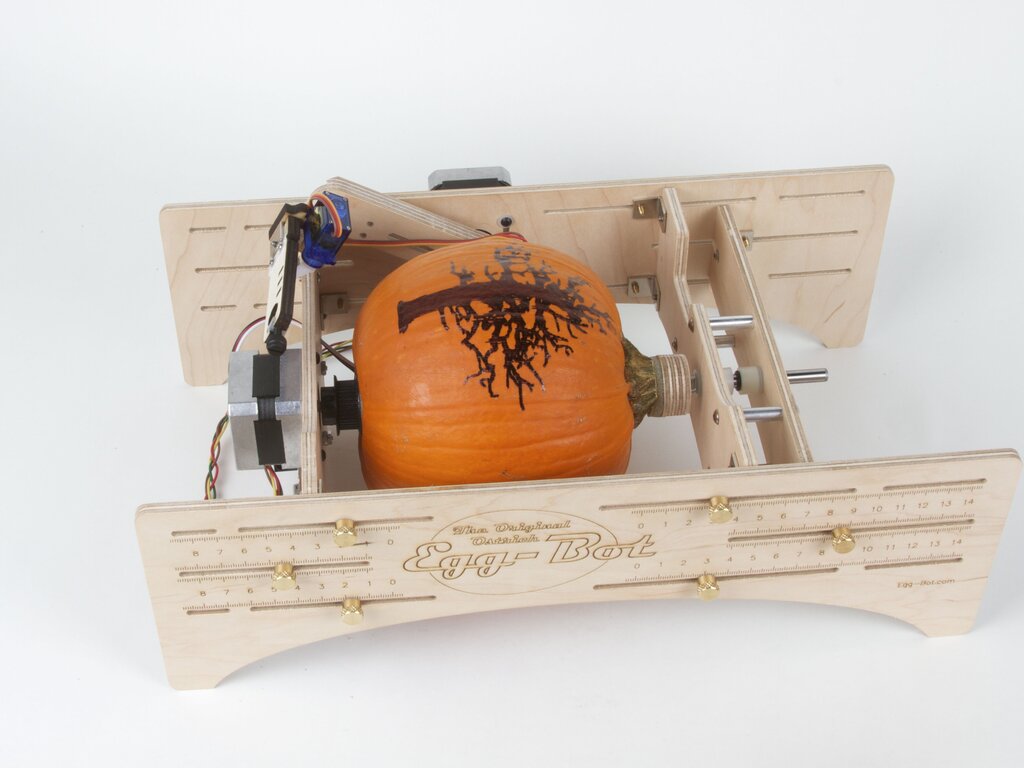 When working with larger objects, especially in the Ostrich Eggbot, slowing the pen speed significantly may be necessary. It improves your precision and keeps the motors moving smoothly in spite of the huge heavy pumpkin they’re turning.
Getting your ink flowing just before you start plotting is always a good idea, and especially so with glossy skinned pumpkins. Keep a slip of paper handy to bleed some ink onto before starting.
You can also use the Eggbot to transfer a design to the pumpkin for later carving. You can use a light colored pen so that it any remaining ink doesn’t show up much, or you can remove remaining traces of Sharpie ink with rubbing alcohol.
When working with larger objects, especially in the Ostrich Eggbot, slowing the pen speed significantly may be necessary. It improves your precision and keeps the motors moving smoothly in spite of the huge heavy pumpkin they’re turning.
Getting your ink flowing just before you start plotting is always a good idea, and especially so with glossy skinned pumpkins. Keep a slip of paper handy to bleed some ink onto before starting.
You can also use the Eggbot to transfer a design to the pumpkin for later carving. You can use a light colored pen so that it any remaining ink doesn’t show up much, or you can remove remaining traces of Sharpie ink with rubbing alcohol.
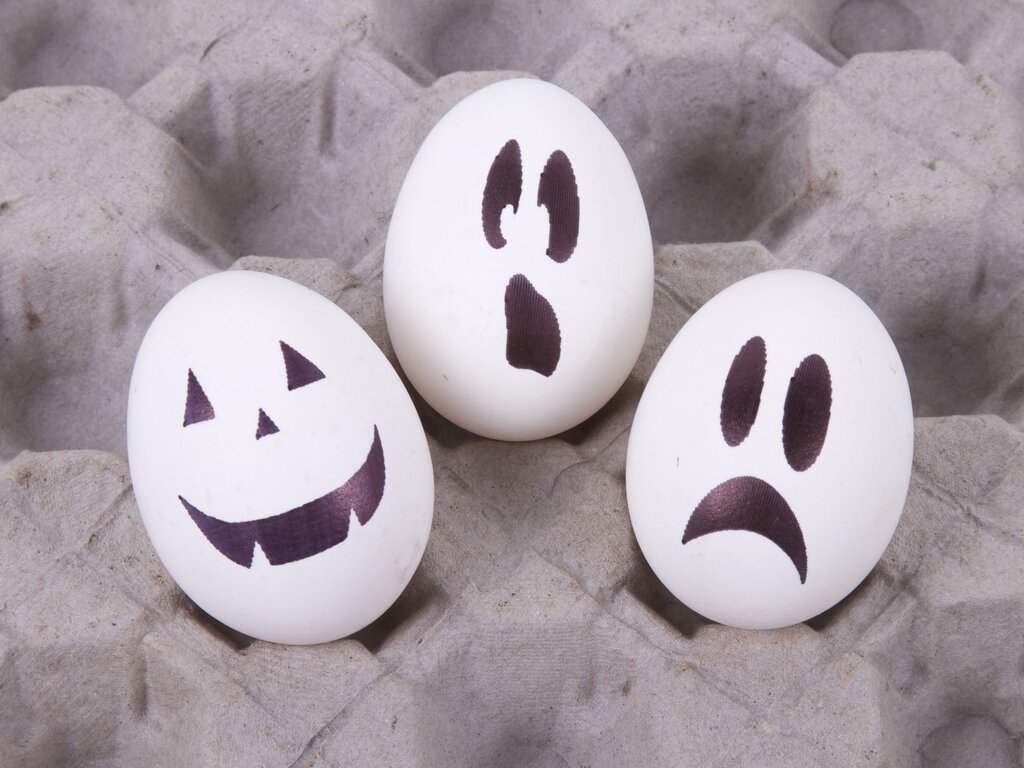 And of course, you can always still use eggs. They’re perfect for little ghosties.
The jack-o-lantern and bat tattoo designs shown are from the example files available on the Eggbot google code site, and the tree design is from the Open Clip Art Library.
You can find more pumpkin projects in our Halloween Project Archive.

How hard would it be to replace the pen with a cutting tool? In other words, what would you recommend to CNC carve a Jack-o-Lantern?
The Eggbot frame and pen arm are not stiff enough to provide good support for most carving tools. You could use a lightweight high-speed rotary tool, but just about anything else (a knife, for example) requires much more force than the Eggbot can provide. We would primarily recommend using the Eggbot to lay out a pattern on your pumpkin for later carving with other tools.
Windell H. Oskay
drwho(at)evilmadscientist.com
http://www.evilmadscientist.com/
Perhaps it could hold the flex shaft attachment for a Dremel? It wouldn’t have to support the weight of the Dremel that way.
Yes, that’s one way to do it. Unfortunately, the flex shaft attachment is bit stiff and bulky on its own….
Windell H. Oskay
drwho(at)evilmadscientist.com
http://www.evilmadscientist.com/
Uhh, so what happens if you attach a very skinny knife to this contraption?
It drags along the surface of the object, possibly scratching it. (See above comments for more info.)