


Awesome little LED Jack-o’-lanterns are quick and easy to build yourself, in the tradition of LED throwies.
Special bonuses: (1) Now with candle-flame flickering LEDs and (2) way brighter than those little LED tea lights!
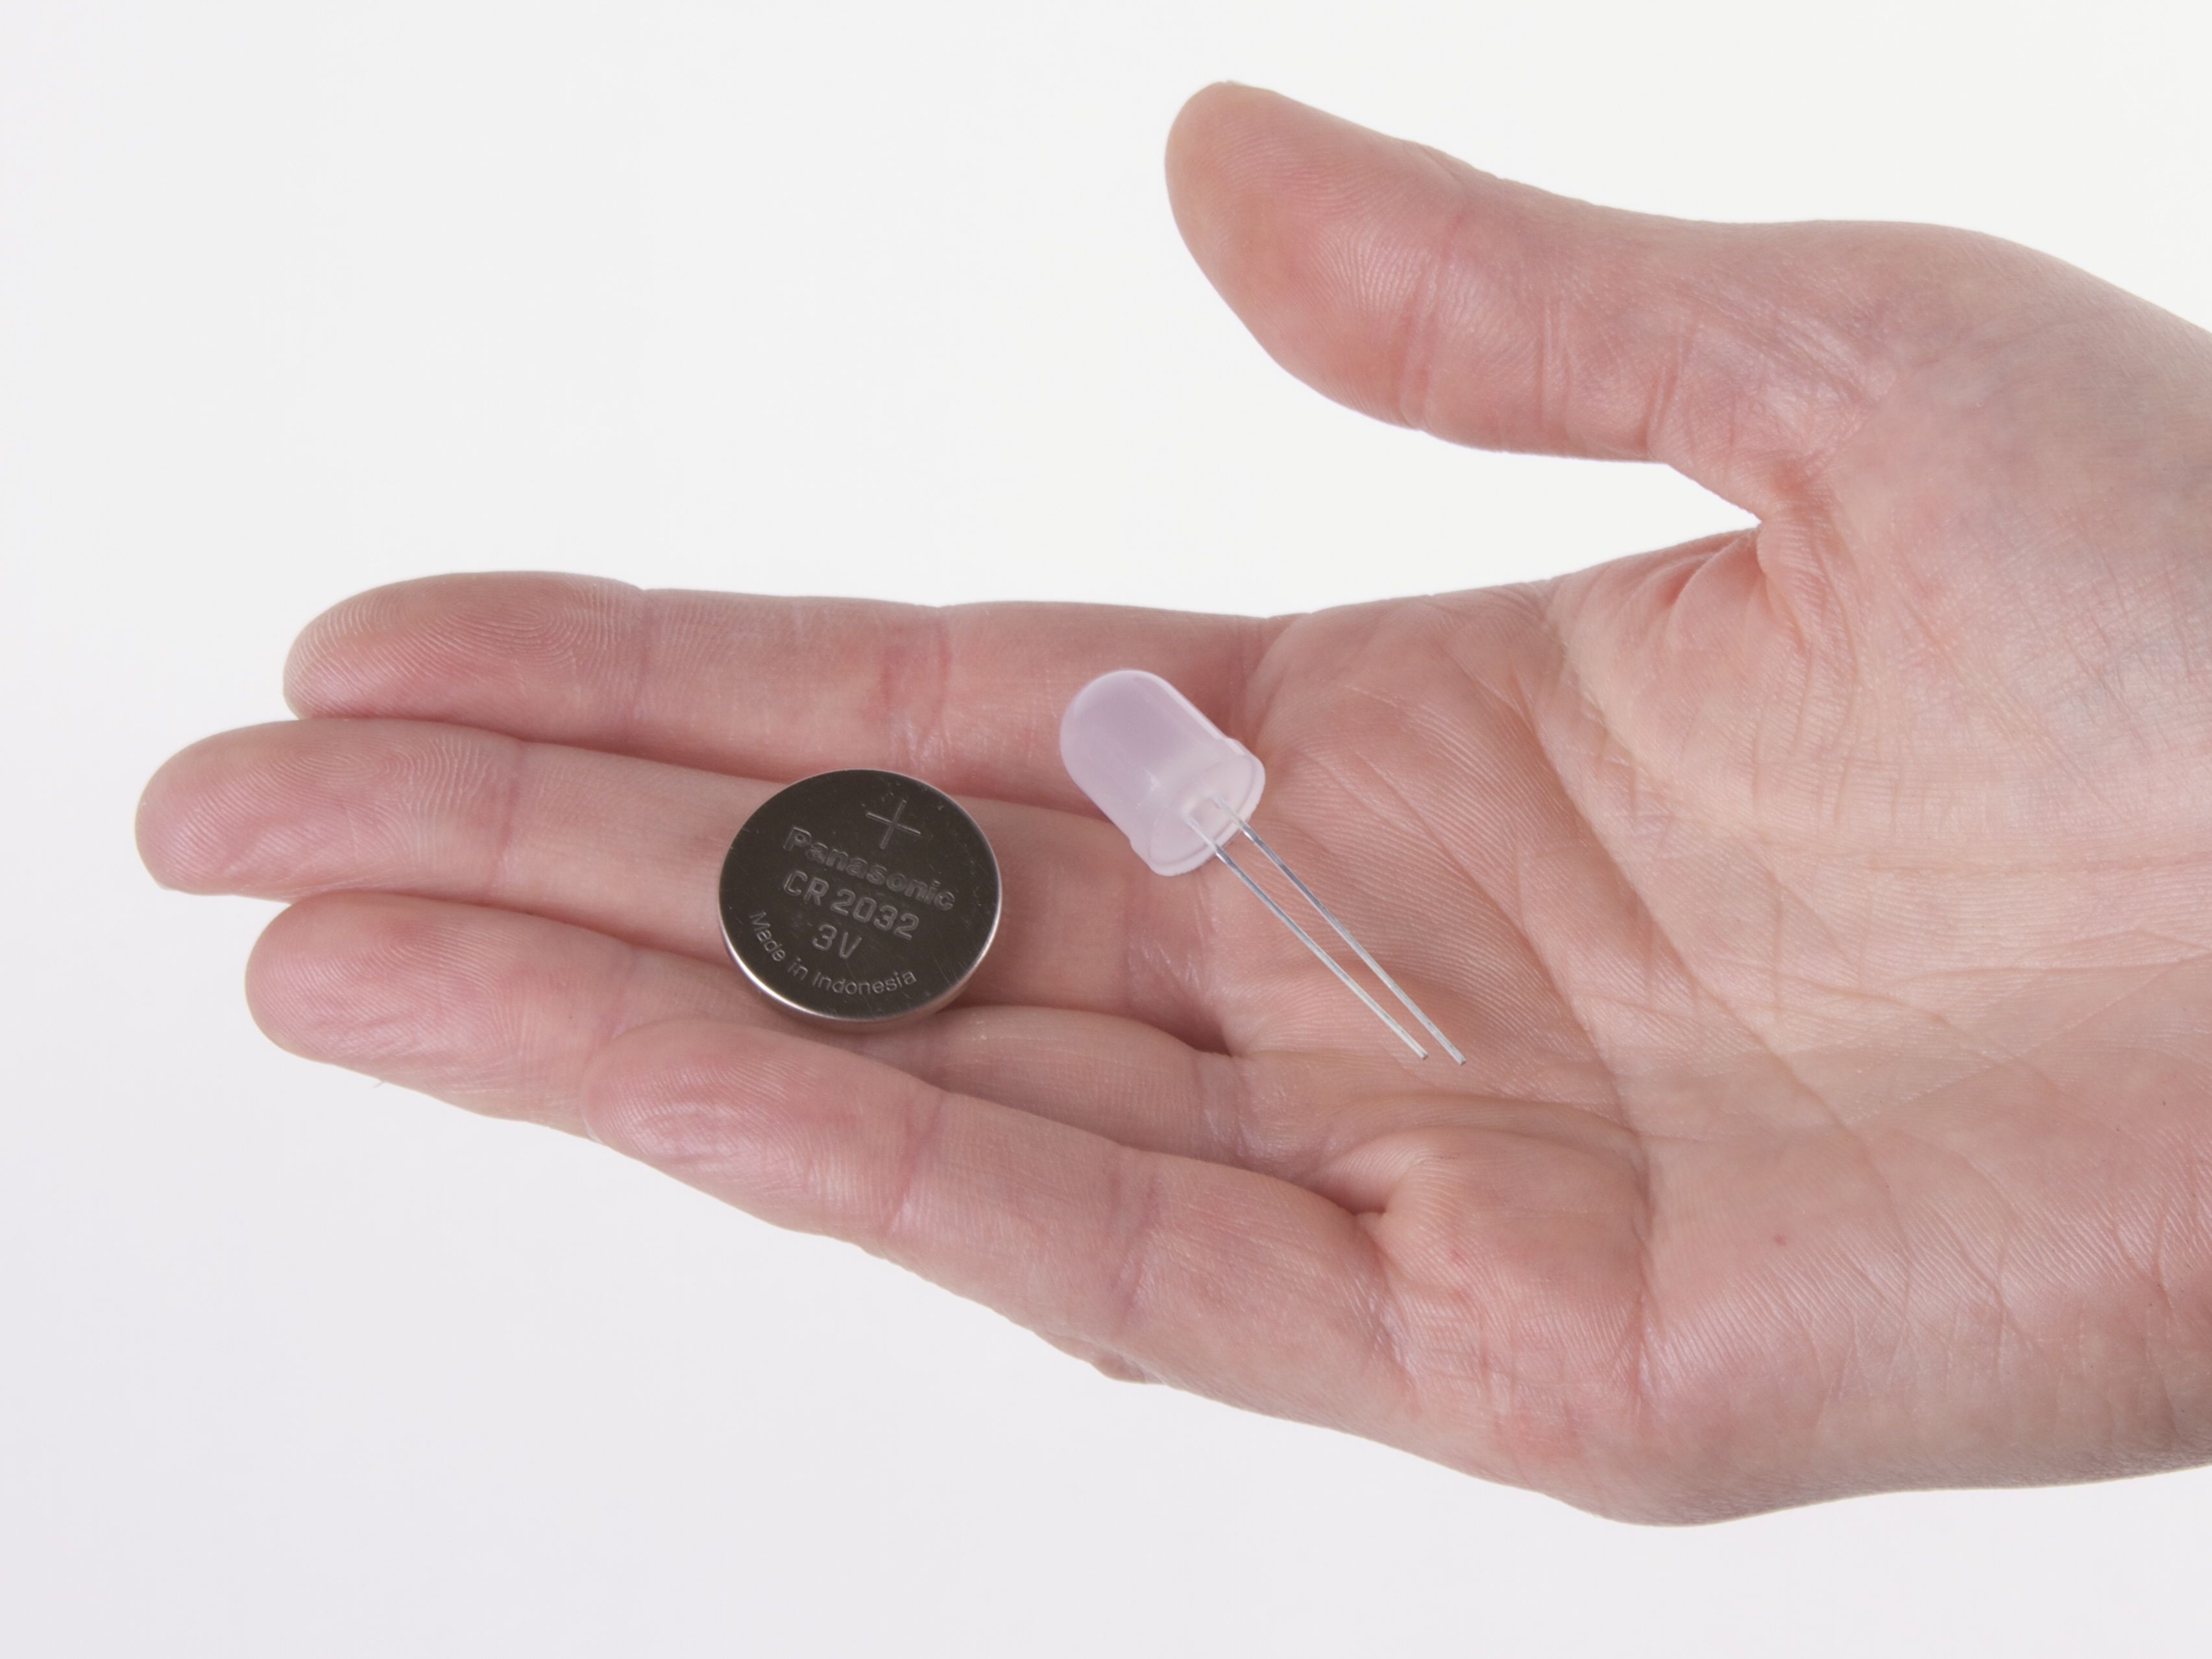
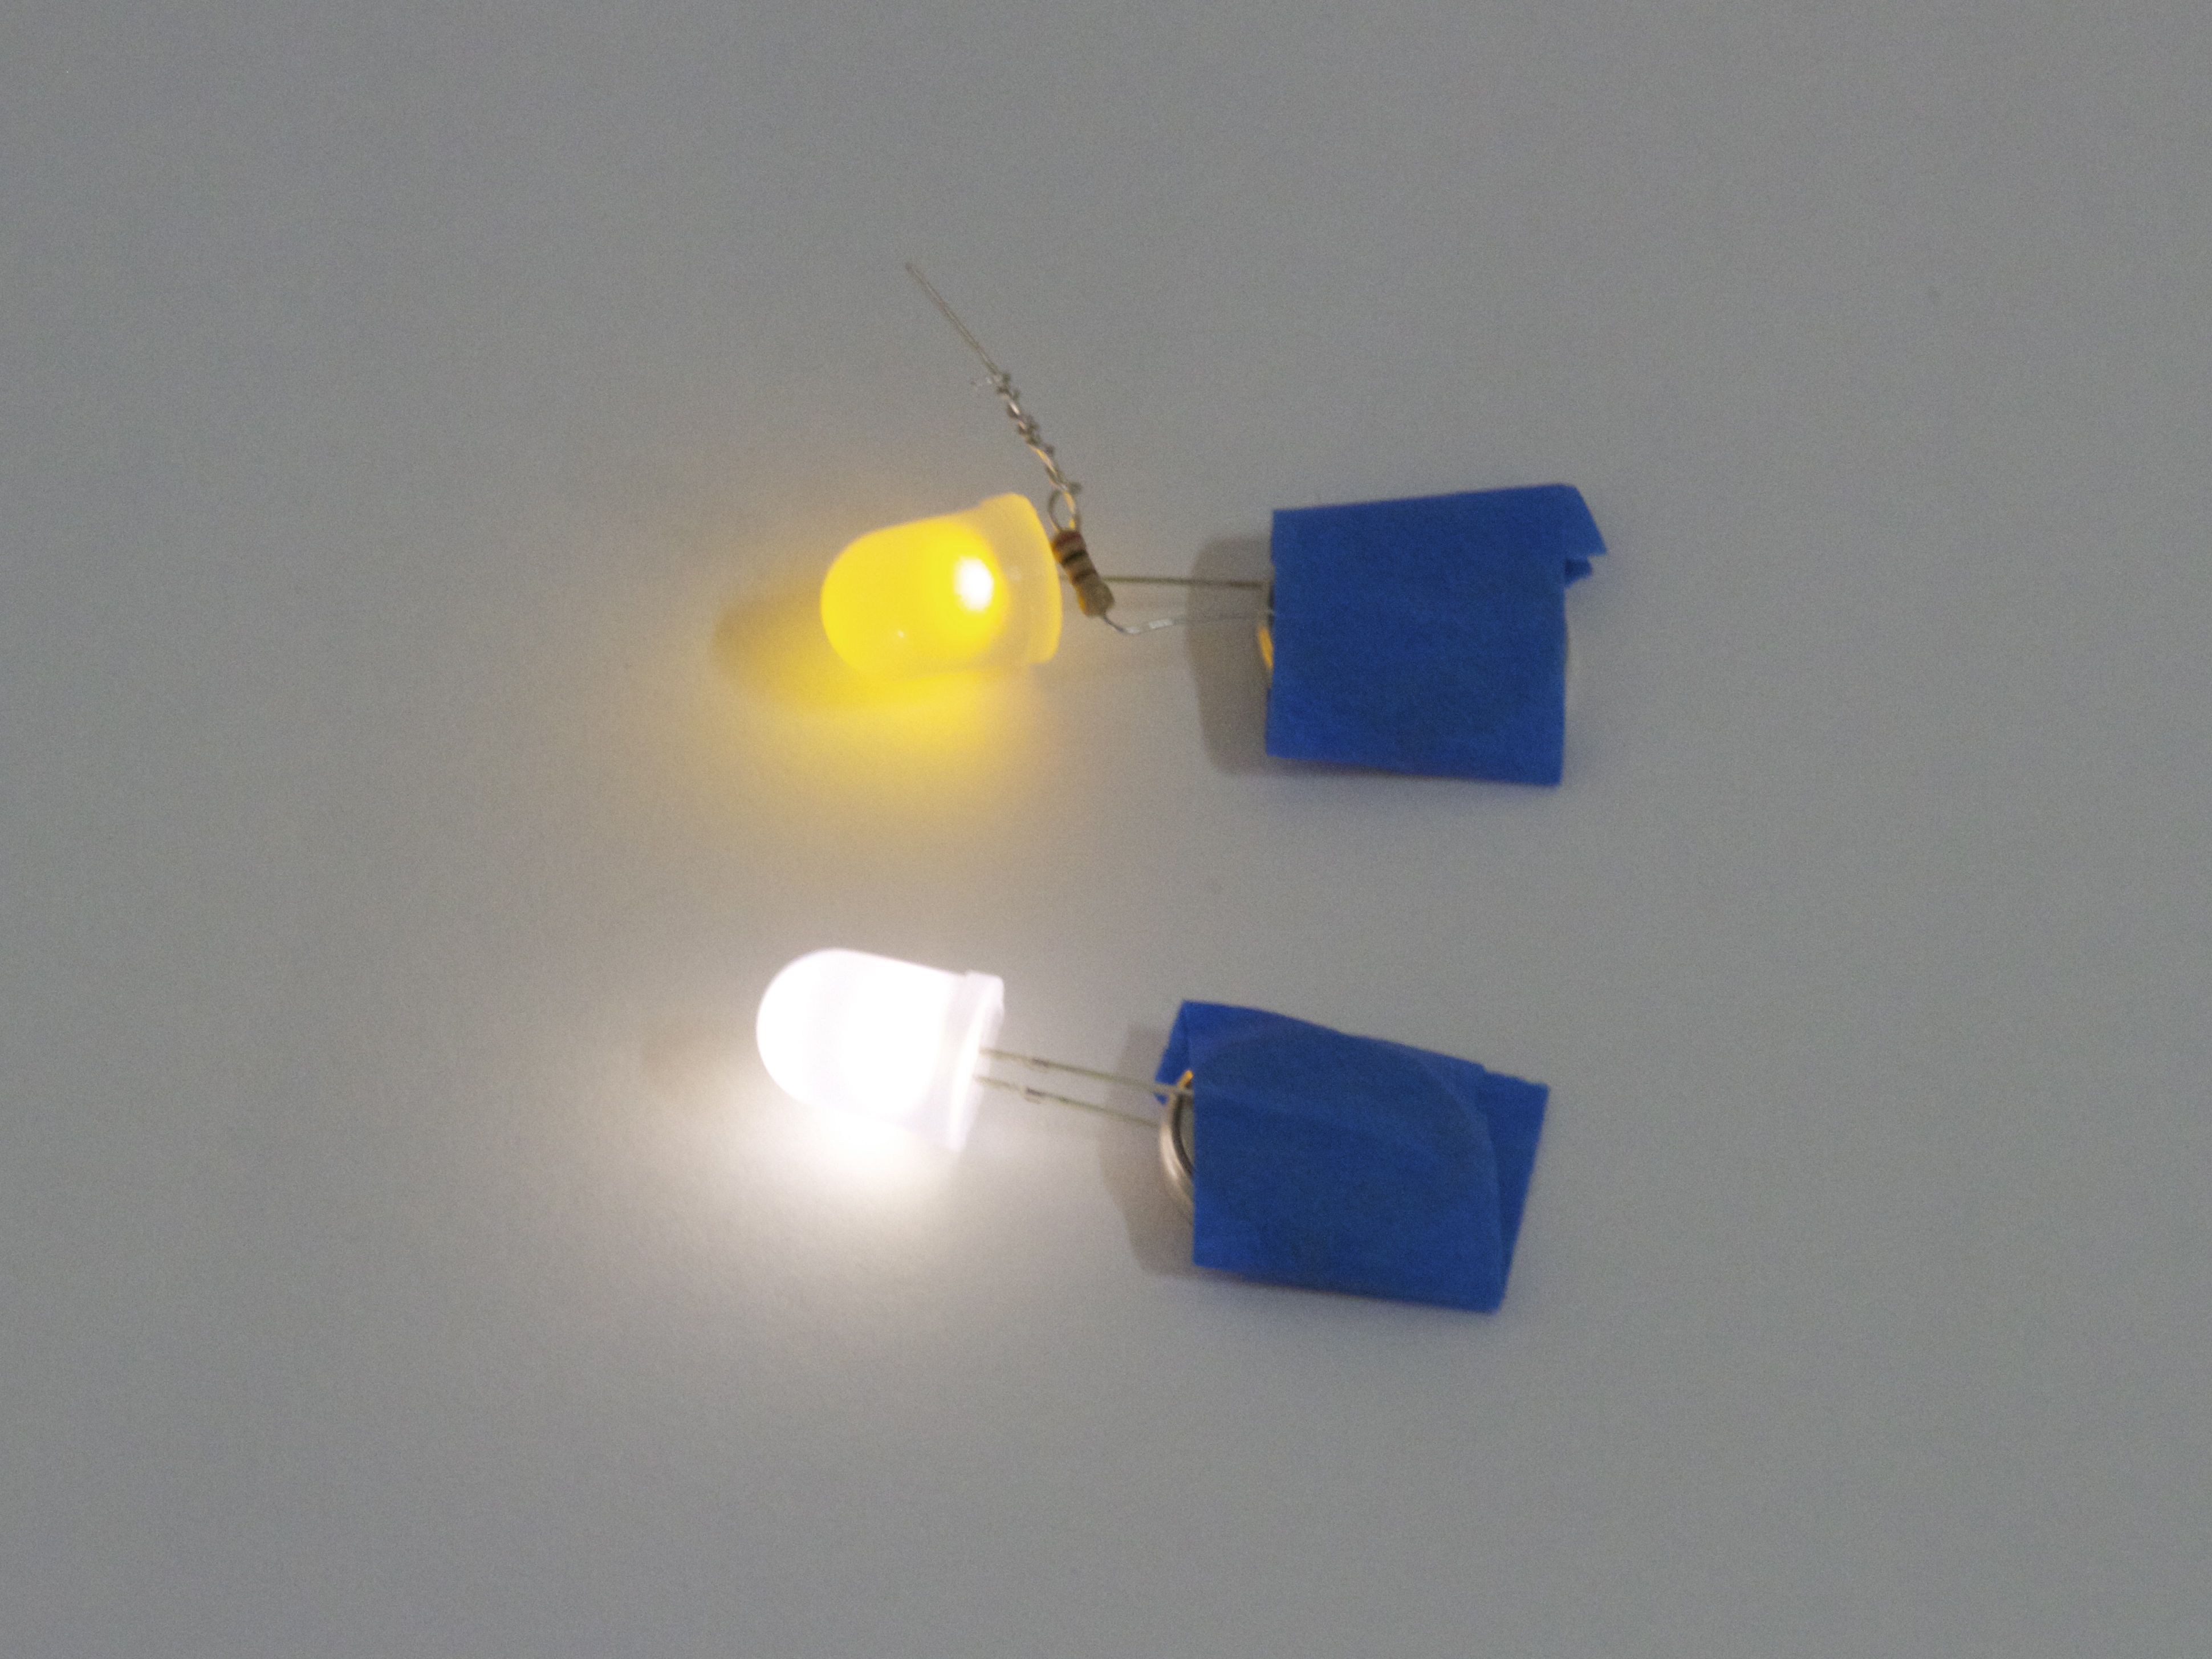
The basic ingredients are a simple LED– preferably blue or white (we’ll get to why in a moment) –and a CR2032 coin cell. We’re using diffused-lens 10 mm warm white “candle flicker” LEDs, which contain a built-in flickering circuit that imitates the random fluctuations of a candle flame. You’ll also need some tape, for example masking tape, to hold it all together.

If you slip the leads of the LED around the coin cell (long lead of the LED towards the + side of the battery), the LED lights up, and you can then use tape to hold the leads of the LED in place. Hopefully you can also use the tape to help keep the electrical parts separate from residual moisture inside your pumpkin.
Now, about that color selection. LEDs towards the “blue” end of the spectrum (blue, white, warm white, deep green, and ultraviolet) will run like this for up to two weeks on a single battery, if you keep it dry and not too cold. (And twice that, if you turn it off during the daytime.) But what if you have, say, a yellow LED?
 |
 |
LEDs at the “red” end of the spectrum (those with red, yellow, orange, or yellow-green colors) –have a lower “forward voltage” and therefore will draw much more current and eat through a battery much faster.
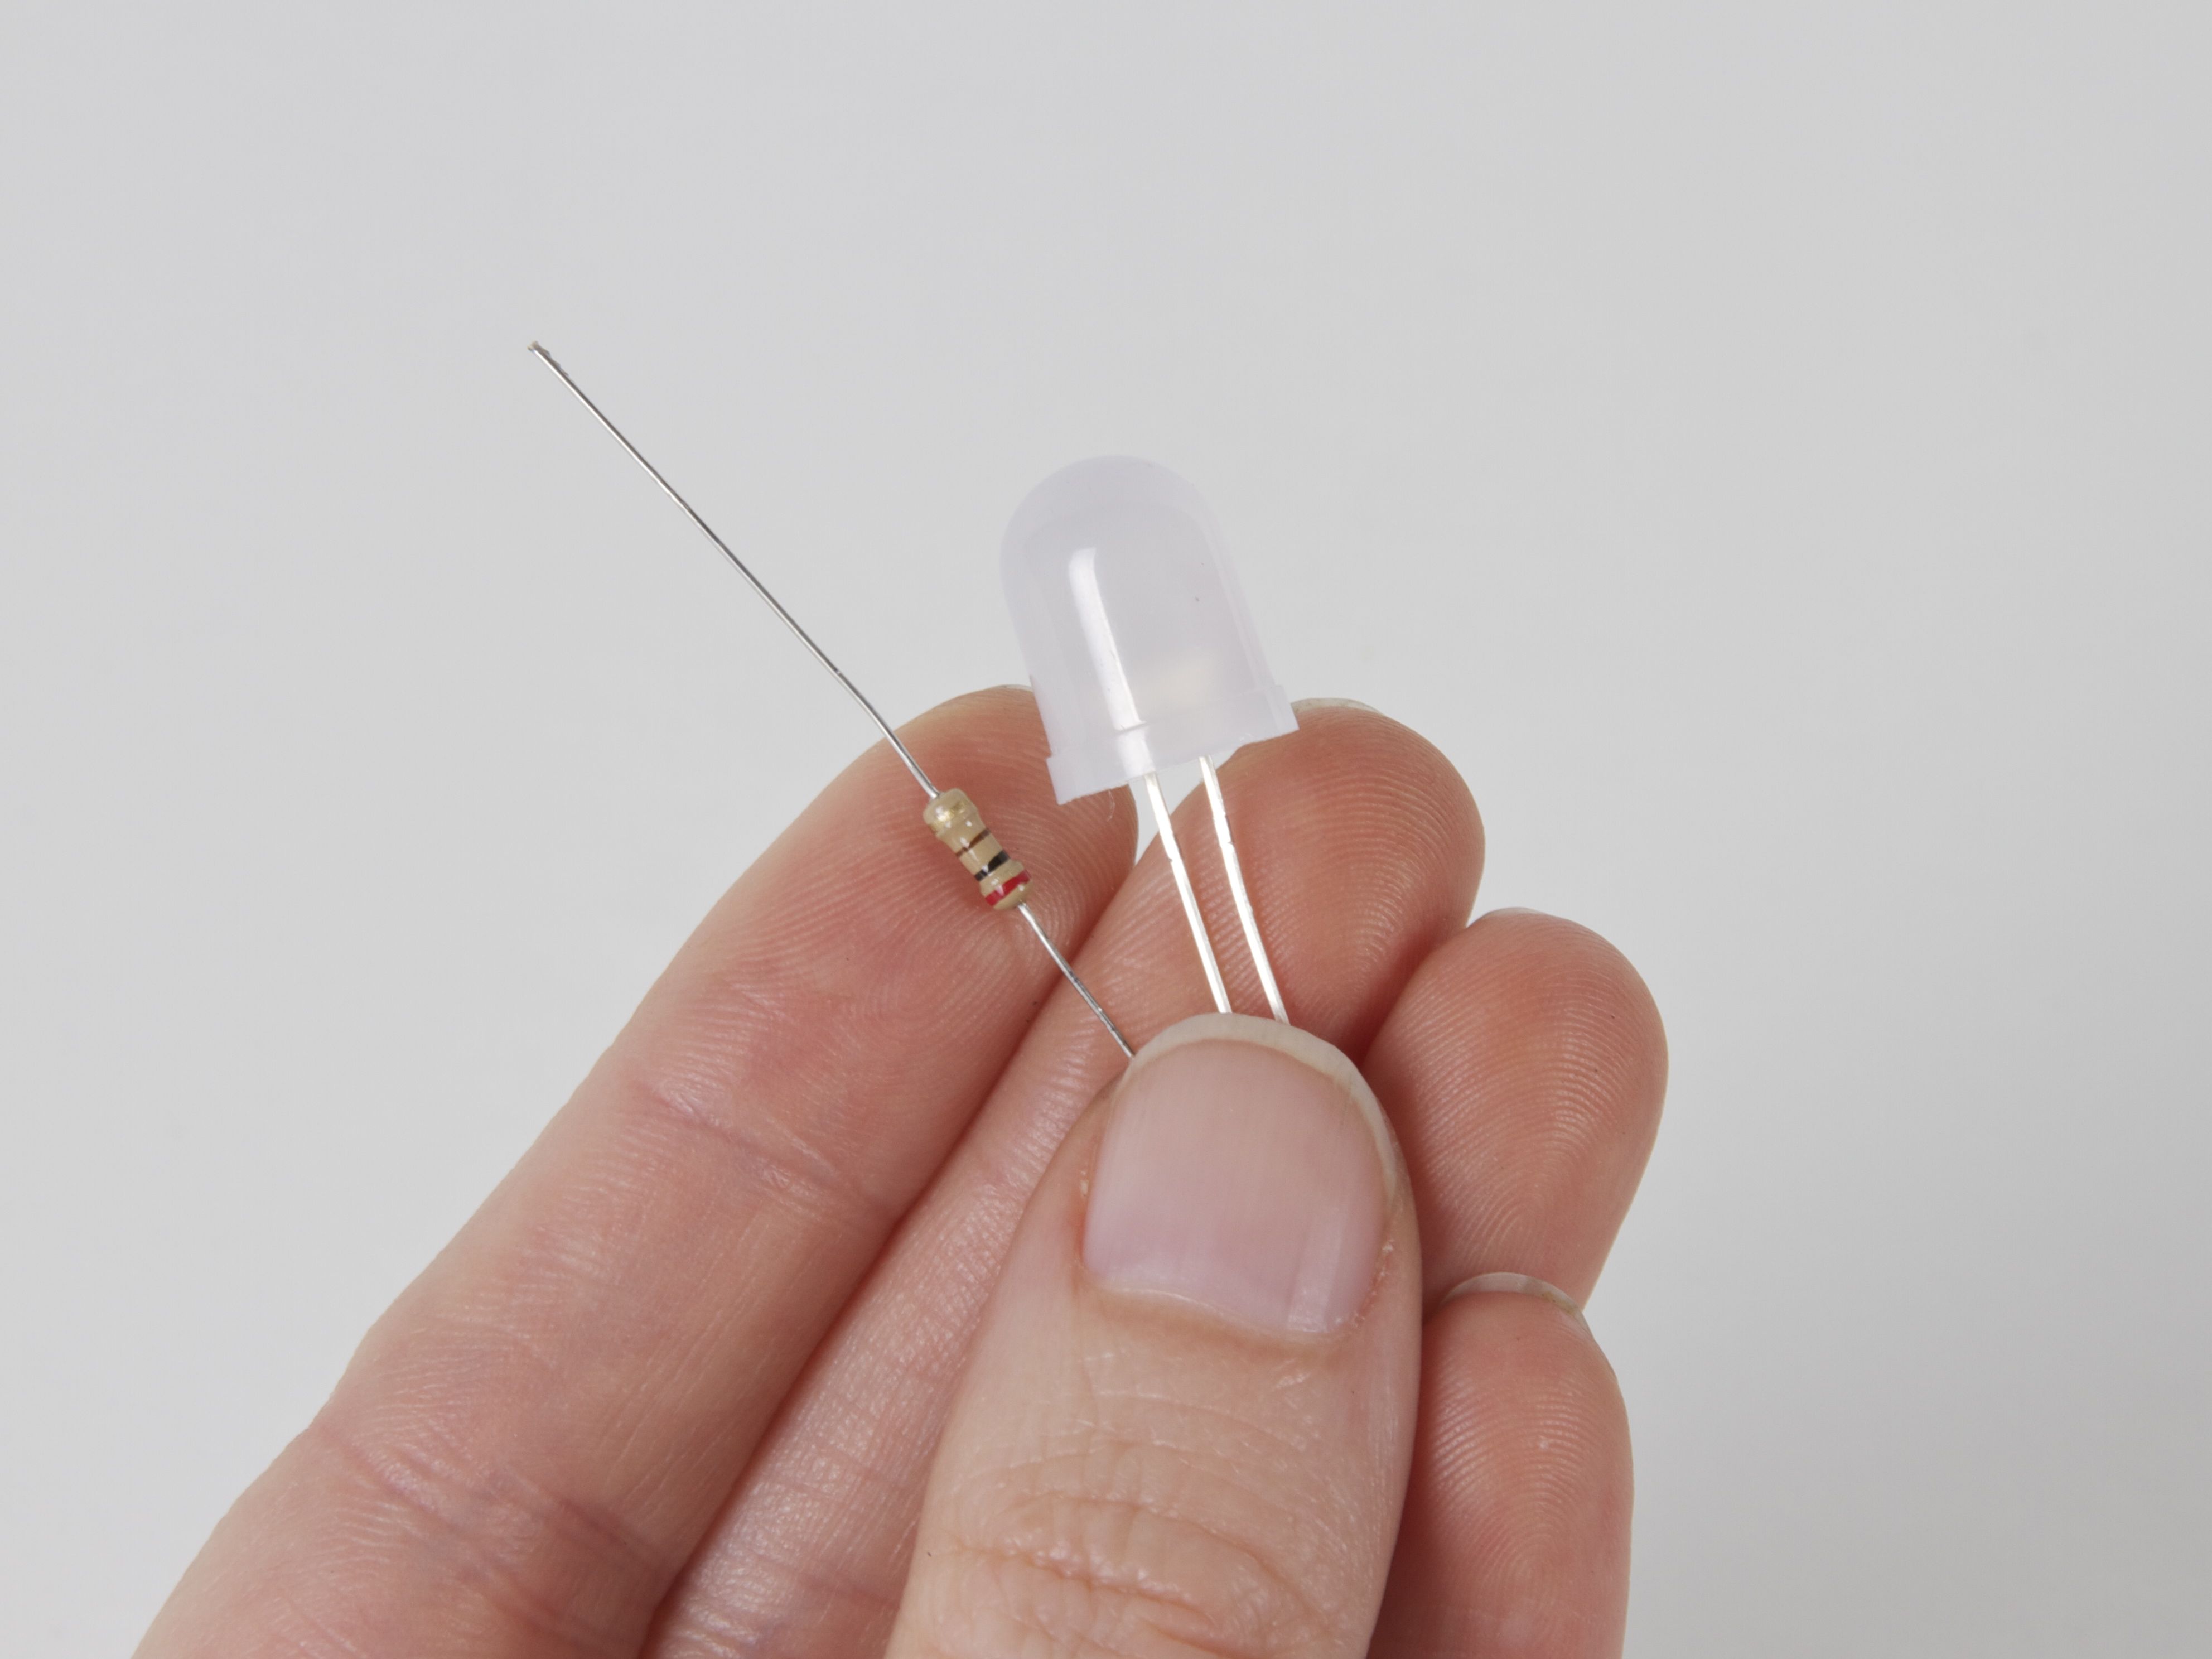
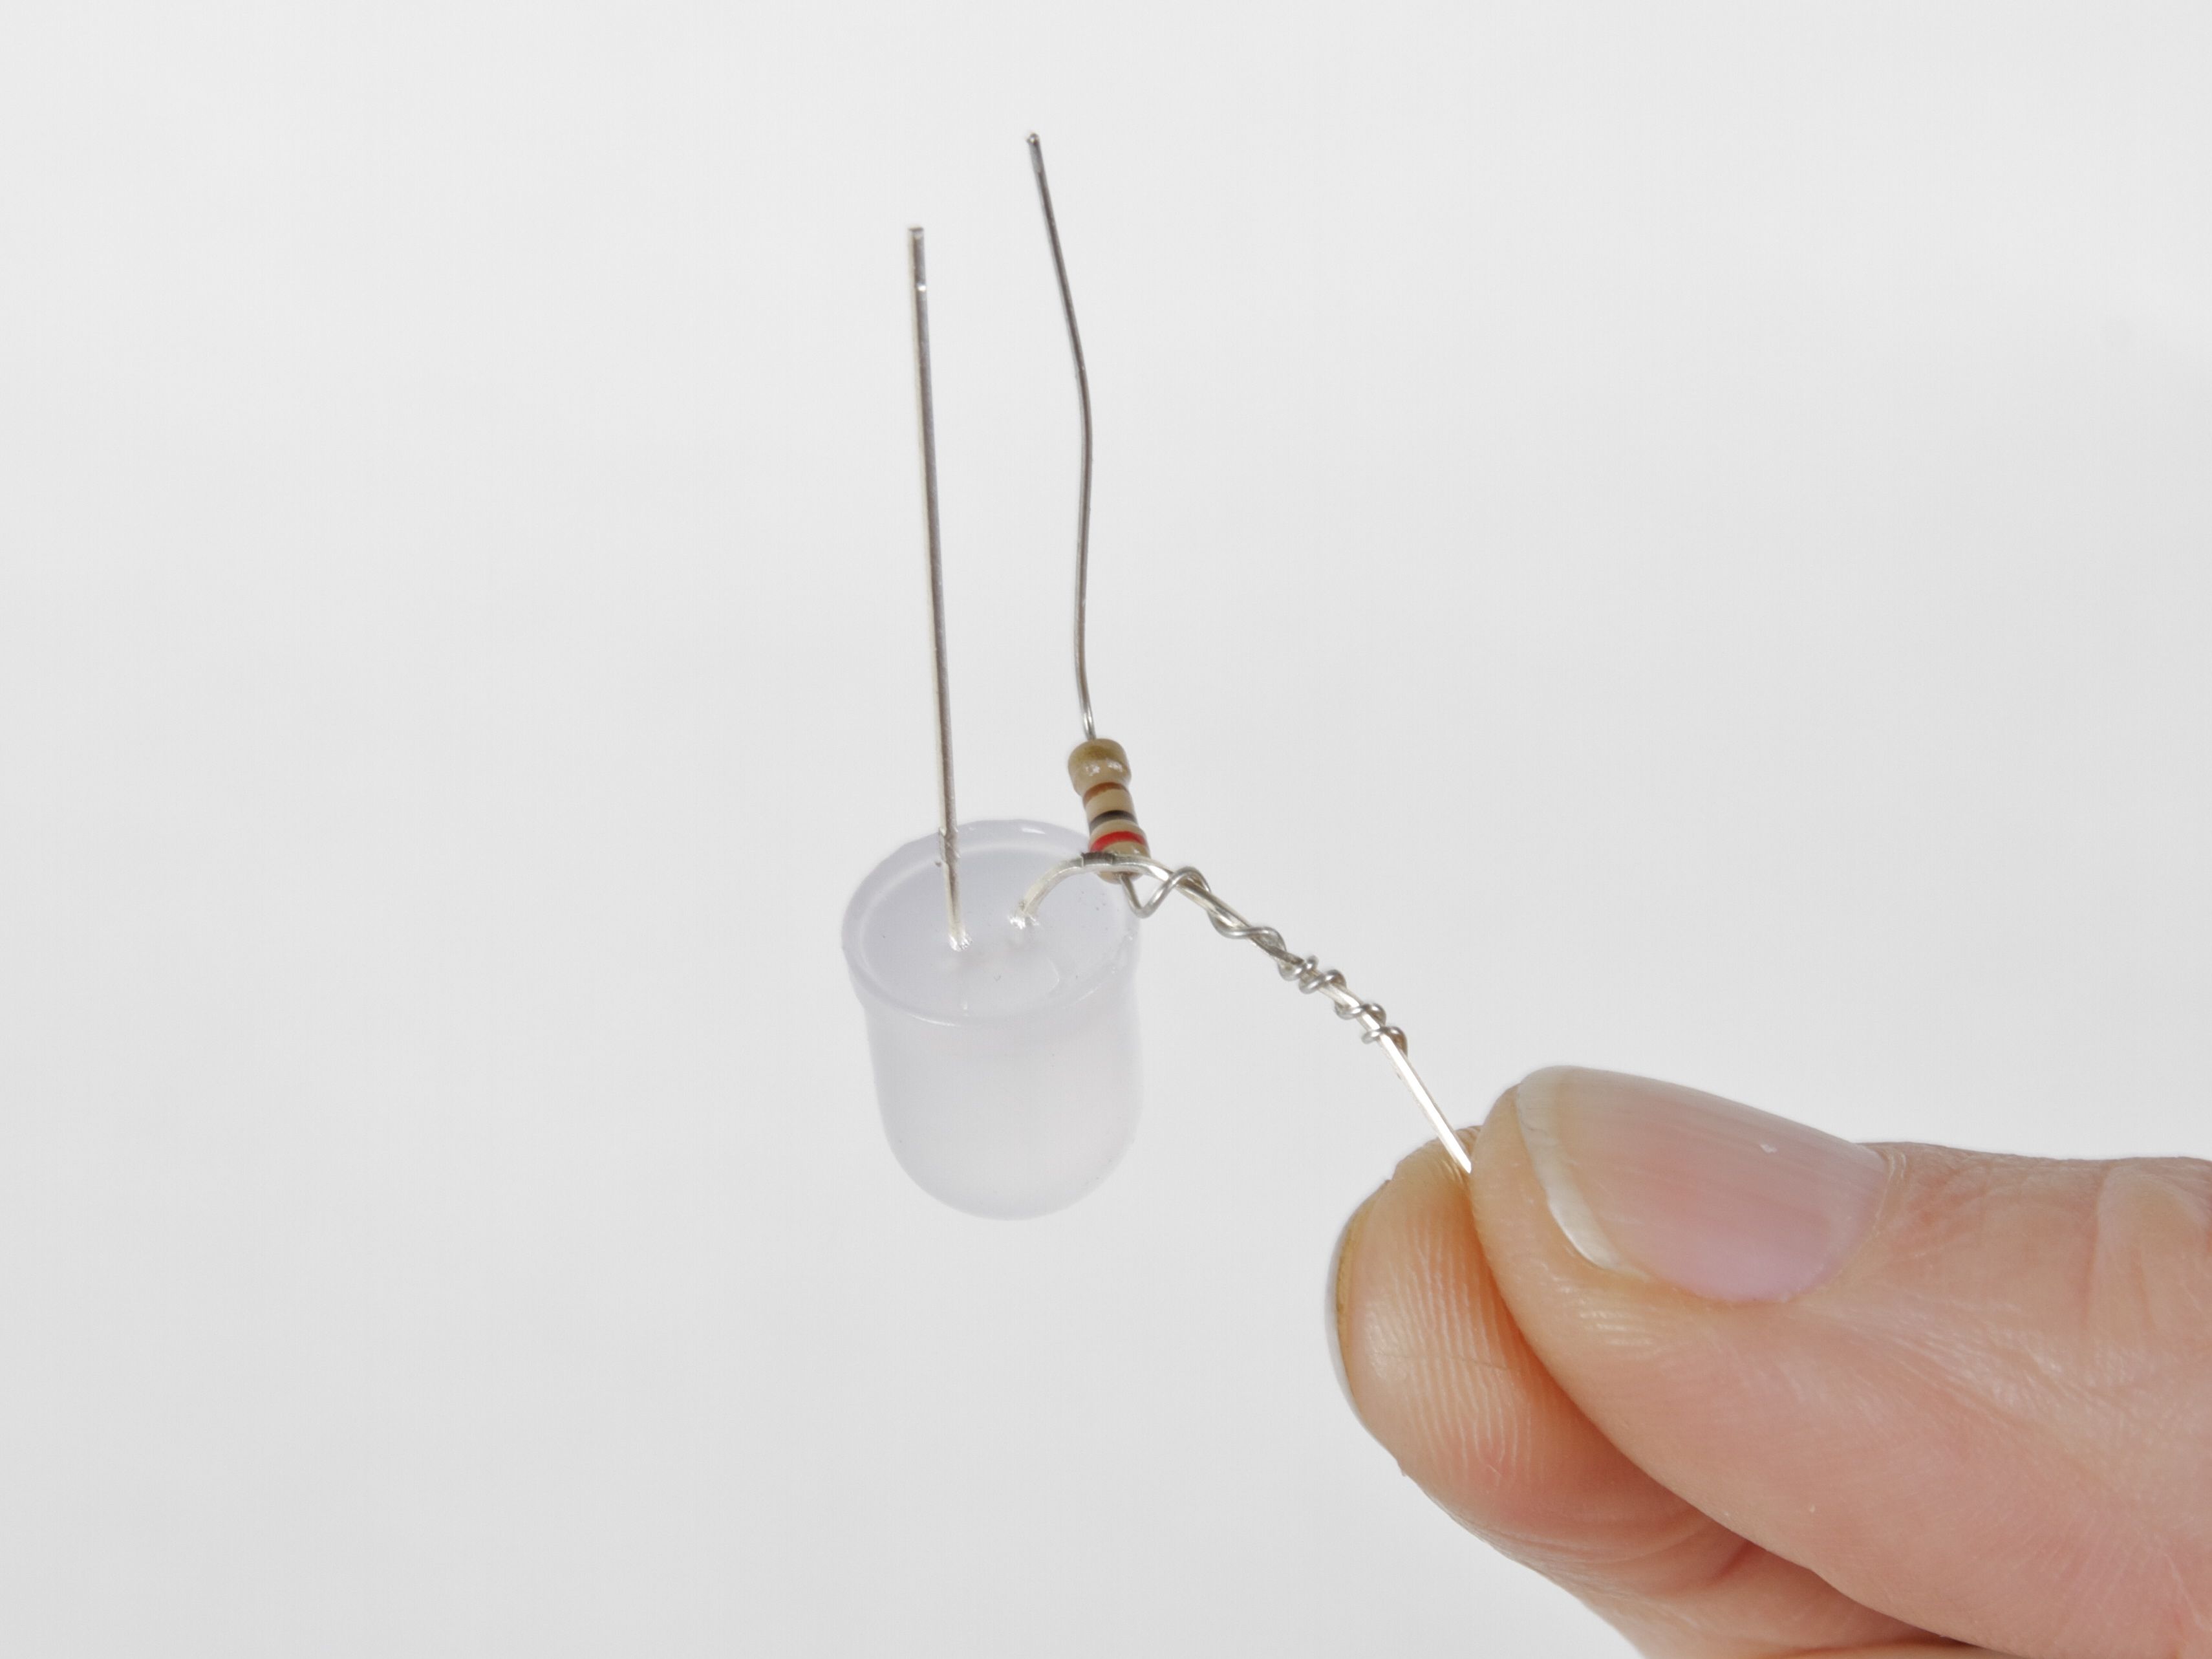
A solution is to add a series resistor (say 50 – 200 ohms), by twisting the resistor lead with the lead of one of the LEDs, so that the LED runs at much lower current, similar to the amount that the blue and white LEDs use. More about that technique can be found here.
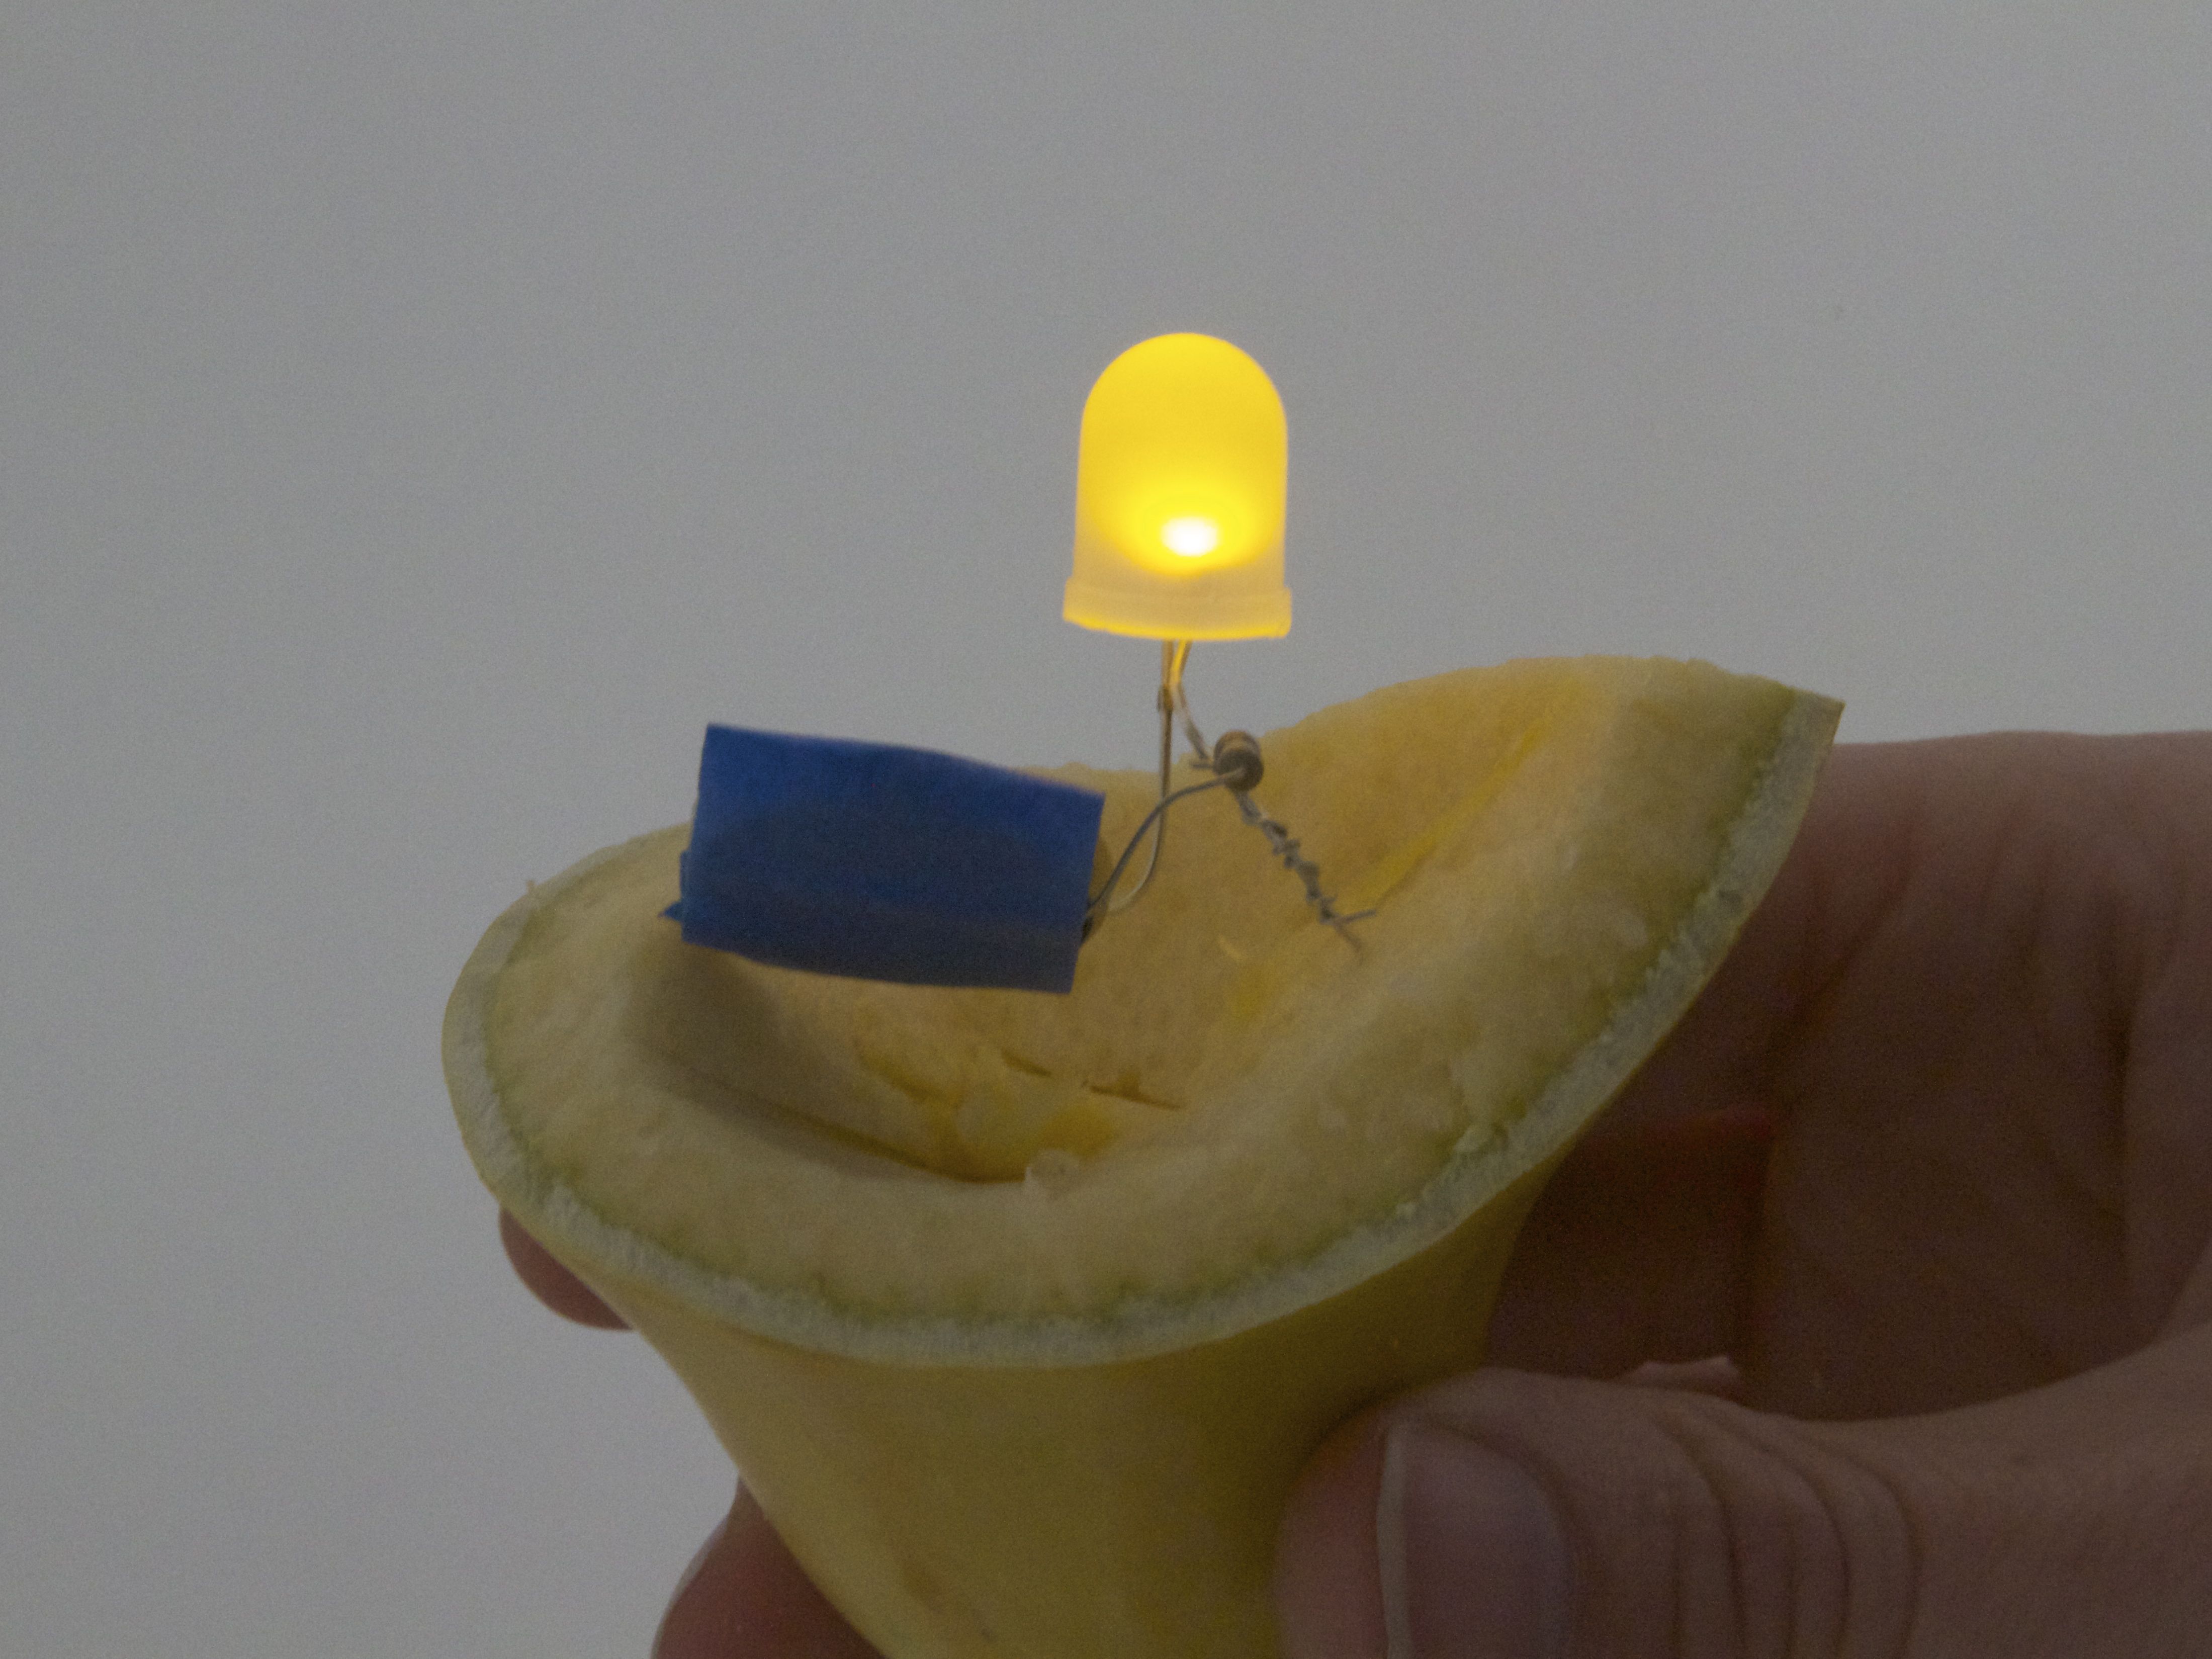
One nice side benefit of using a resistor: That third lead makes a great pushpin to hold your LED to the roof of your pumpkin.
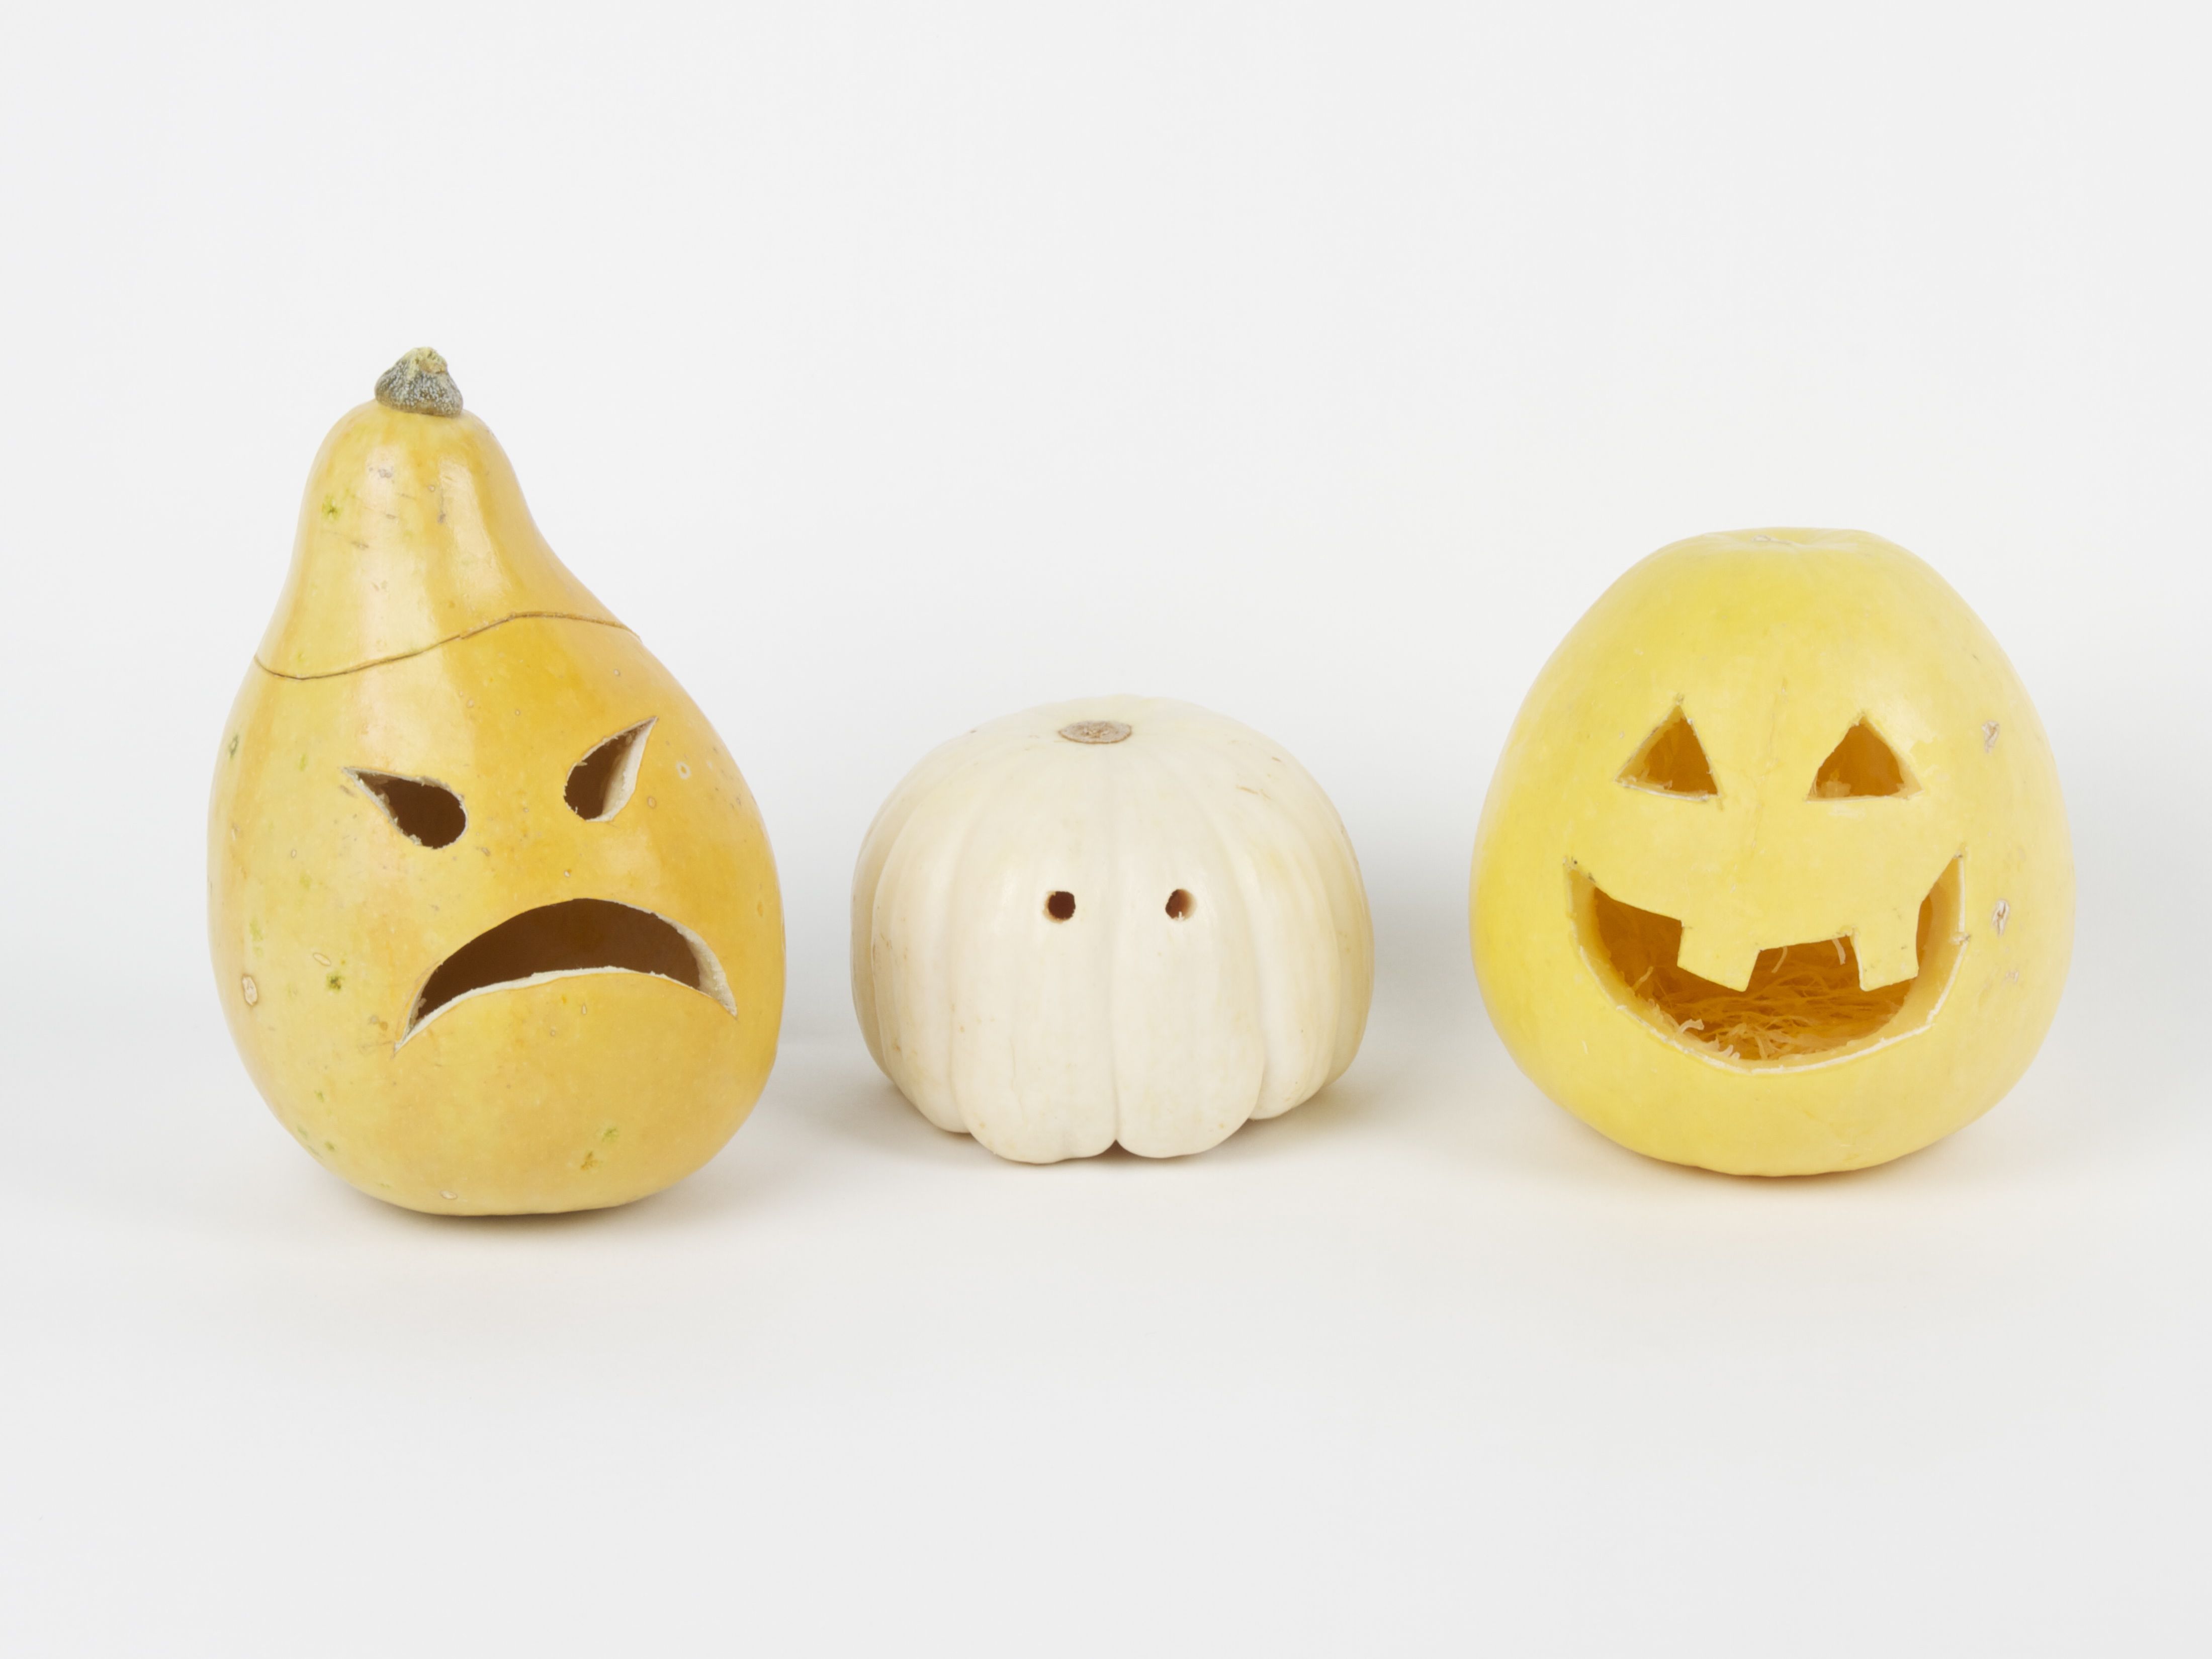
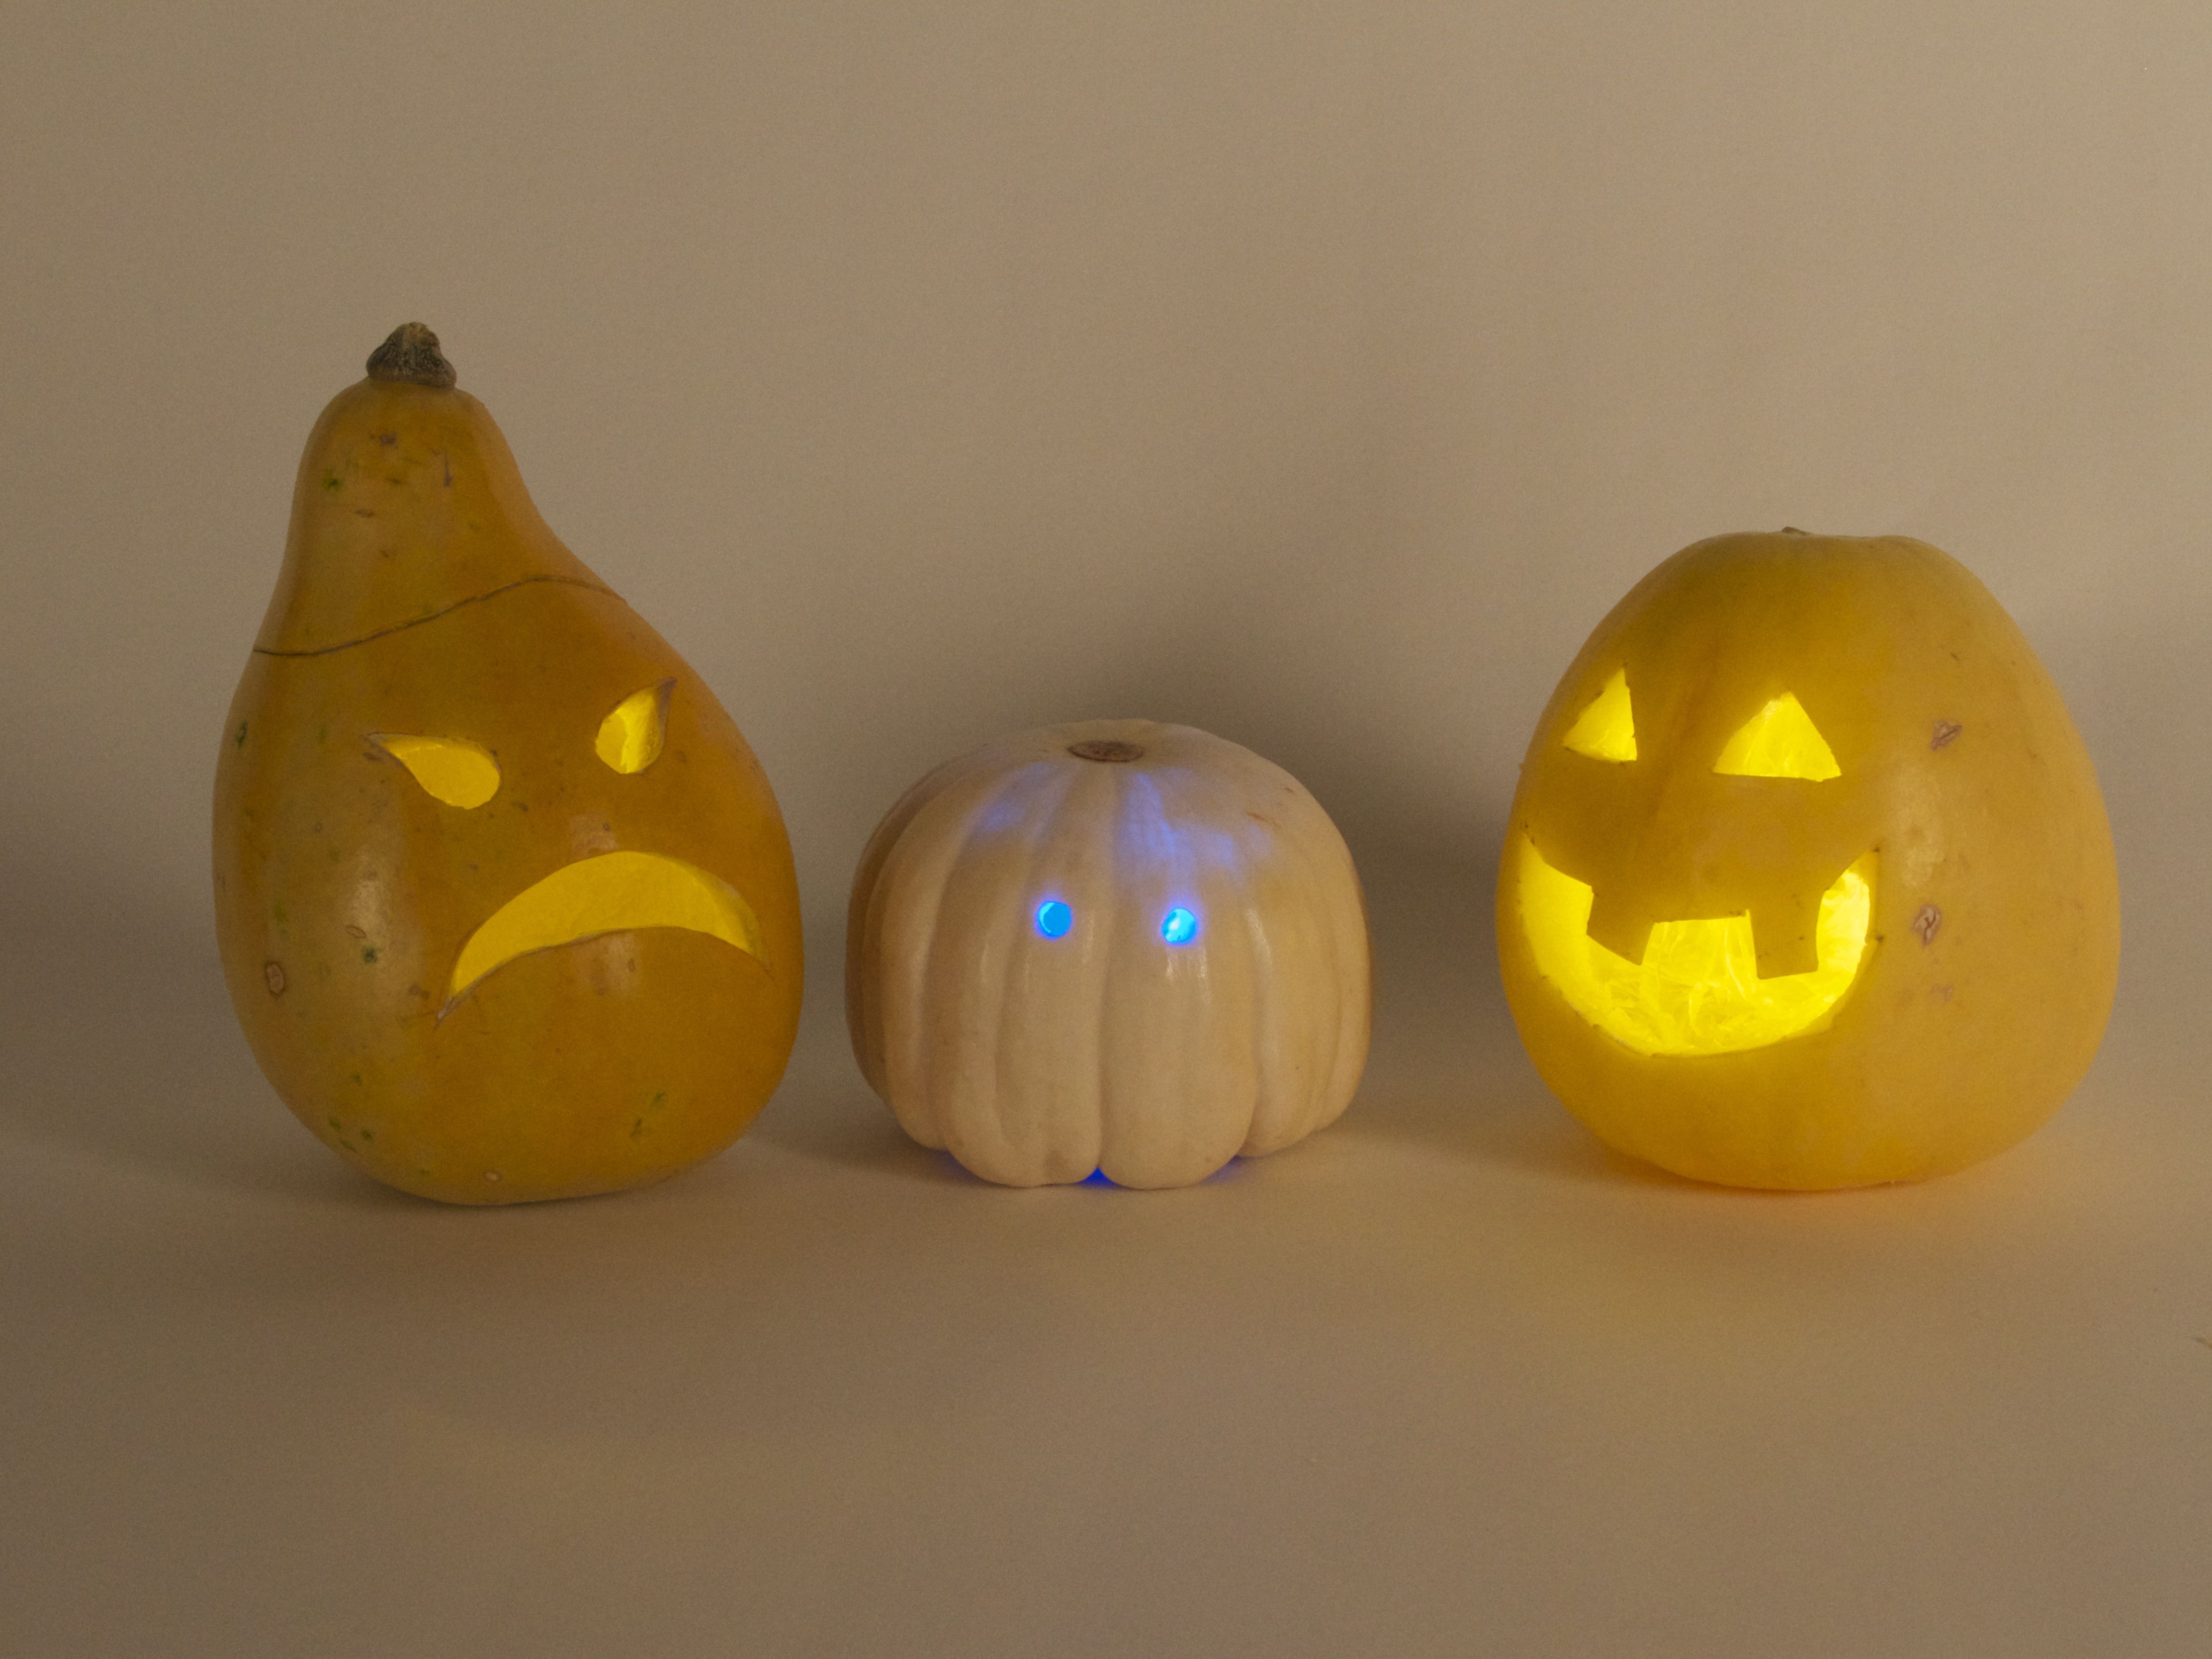
Next, the carving part. We have here two small decorative gourds– on the left and right –and a white mini-pumpkin in the center.
As we have noted in the past, mini-pumpkins tend to lose their shape only a few days after carving. Small decorative gourds like these are somewhat harder to carve, but last much longer.
At this point, simply insert the lit-up LEDs. Ideally, anchor them in the lids or otherwise position them so to that the LED isn’t directly visible.
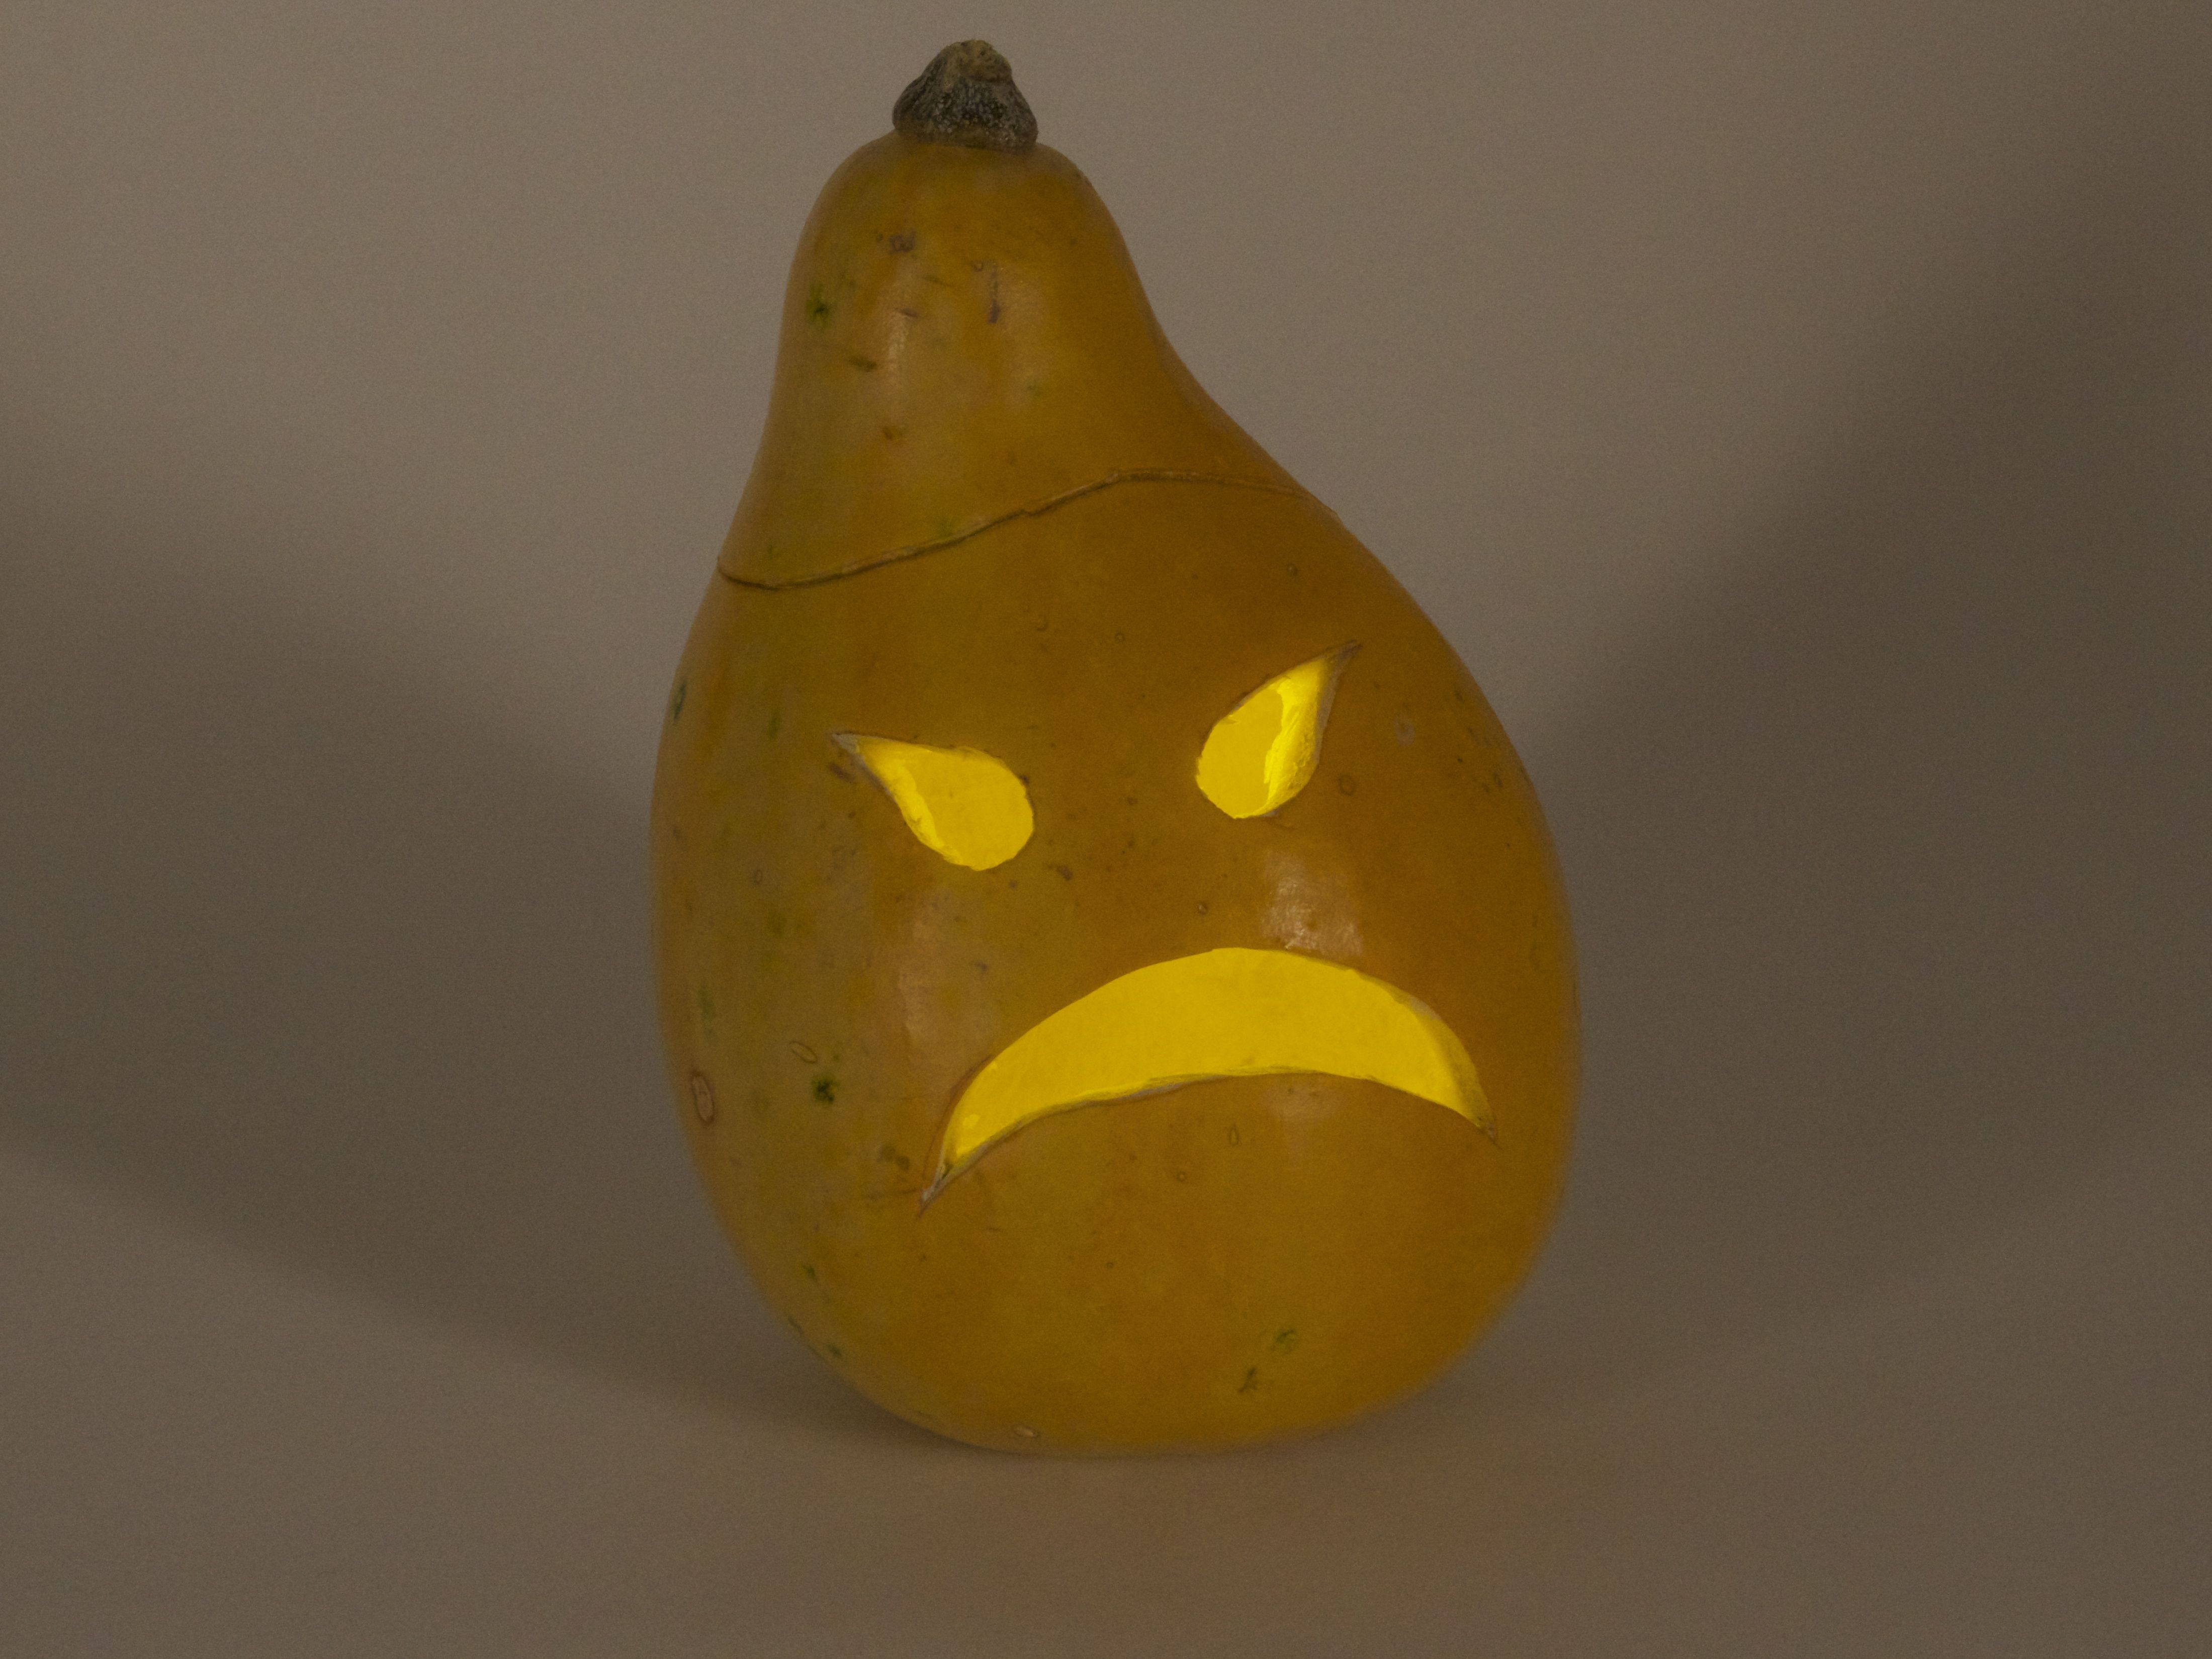
The LEDs that we’re using are 10 mm diffused-lens types, which have a huge viewing angle, and light up the entire inside of the pumpkin or gourd. Indirect lighting gives a much better candle-like effect, and looks particularly cool in a pumpkin that’s too small to support a real candle flame.
And here is super quick video, showing the process, with the flickery results:
(Video is embedded above. Click here to see it on YouTube if you can’t view it here.)
Ready for deployment on porch or windowsill!
You can find more pumpkin projects in our Halloween Project Archive.
I had a pumpkin last year with an RGB-LED, plugged into an Arduino programmed to display random colors. That looked awesome. The pumpkin next to it of course was a Cylon.
Avoid mushy pumpkins! I’ve got a pumpkin from last year, and I expect to get several more years out of it.
I follow the advice of "The Joy Of Cooking" and bake my pumpkins at about 375 for 45 min to an hour. Actually I open them and scoop out the stringy stuff first. After baking I can scoop out the pulp. I make a pretty good pumpkin soup this way, but that’s not the point. What concerns us here is the nice, hard pumpkin shell that remains. After I bake ’em the pumpkin will scoop out to only about 1/8 inch thick. They’ll stay a little wet inside and start to mold. A fan, or just a handful of salt and rice can take care of that. Also, don’t go too big. Any larger than a pie pumpkin and they tend to collapse while you’re baking them. Big pumpkins don’t taste good either. After hollowing and drying them, I use a dremel to carve them. They’re too hard and brittle for traditional carving. I have been using led tea lights to light them, b/c an actual fire candle would most certainly cause such a dry, woody thing to erupt in flame. I like the bigger LED idea though. Tea lights are ok at night, but something brighter would be nice.
Big pumpkins taste fine – I cook and eat mine every year! This technique sounds great, but don’t throw away the perfectly good food you’re scooping out.
Do I make an error? A CR2023 has about 280 mAh. The text claims a white LED will burn up to 2 weeks. But 280 mAh / (14 * 24h) ~ 0.8 mA. But a white LED will draw 10 to 20 mA and the battery will finished in 1 or 2 days.
No, you made several errors. :)
See here for a full article about this topic.
Windell H. Oskay
drwho(at)evilmadscientist.com
http://www.evilmadscientist.com/
Nice article. But I am rigth the LED will not burn for 2 weeks.
Care to explain your reasoning? There’s simply no way to get an LED to behave the way that you’re suggesting here.
Windell H. Oskay
drwho(at)evilmadscientist.com
http://www.evilmadscientist.com/
The candle-flicker LEDs are great.
I bought a few from your shop and did some mini-pumpkin carving with a half-dozen kids yesterday. Kids and adults were all fascinated by the flickering LED lights and they looked just right alongside the larger candle-lit lanterns. It didn’t matter that the LEDs were white because the reflection from the orange inside gives plenty of colour.
Best way to see if they last 2 weeks…. experiment! I now have two little girls who are fascinated by their little flickering lights. I will be made well aware of when they stop working! However, if they only in practice draw 2.75 mA after 24 hours and that falls as the voltage drops, I would expect to get a week or so out of them. Hopefully the flicker reduces the average current slightly too!
Can I use any kind of white LED for this, or does it need to have certain characteristics (ie: less than 2.7 voltage, certain value for amperage, etc?)
I ask because I’ve ordered the LEDs from evilmadescientist, but dont think they are going to arrive in time for the event, I’d like to see if I can source the LED’s locally as a backup plan.
Great idea btw, love the low-cost standalone light!
Please see this article for some notes on behavior of this type of circuit with different LED types. Any “low power” LEDs will work but red/yellow/orange/yellow-green ones will wear through the battery quickly, while pure green/blue/white LEDs will last for quite a while.
And, if you have concerns about shipping times from our store, please contact our store directly. Thanks!
Windell H. Oskay
drwho(at)evilmadscientist.com
http://www.evilmadscientist.com/