


A common problem that you may come across when building “a box” to do something– whether a one-off gizmo or bona fide scientific instrument –is the rats nest of wires. A similar problem occurs when you need to run a bunch of basic wires out from your box to other devices. Unless there’s a standard cable lying around that does exactly what you need, you can end up with messy tangles of wires outside of your box as well.
There are many well-known solutions of course, as varied as elegantly laced wiring harnesses, cable tiesand teflon spaghetti sleeving, heat shrink tubing and cold shrink tape, and (possibly for the brave and/or insane) duct tape and paperclips.
One of the other basic methods– well known to many people who build electronics –is to twist wire bundles with a hand drill and a friend. This is a quick and awesome trick that makes durable cables, short or long, exactly to your specifications, and shockingly fast.
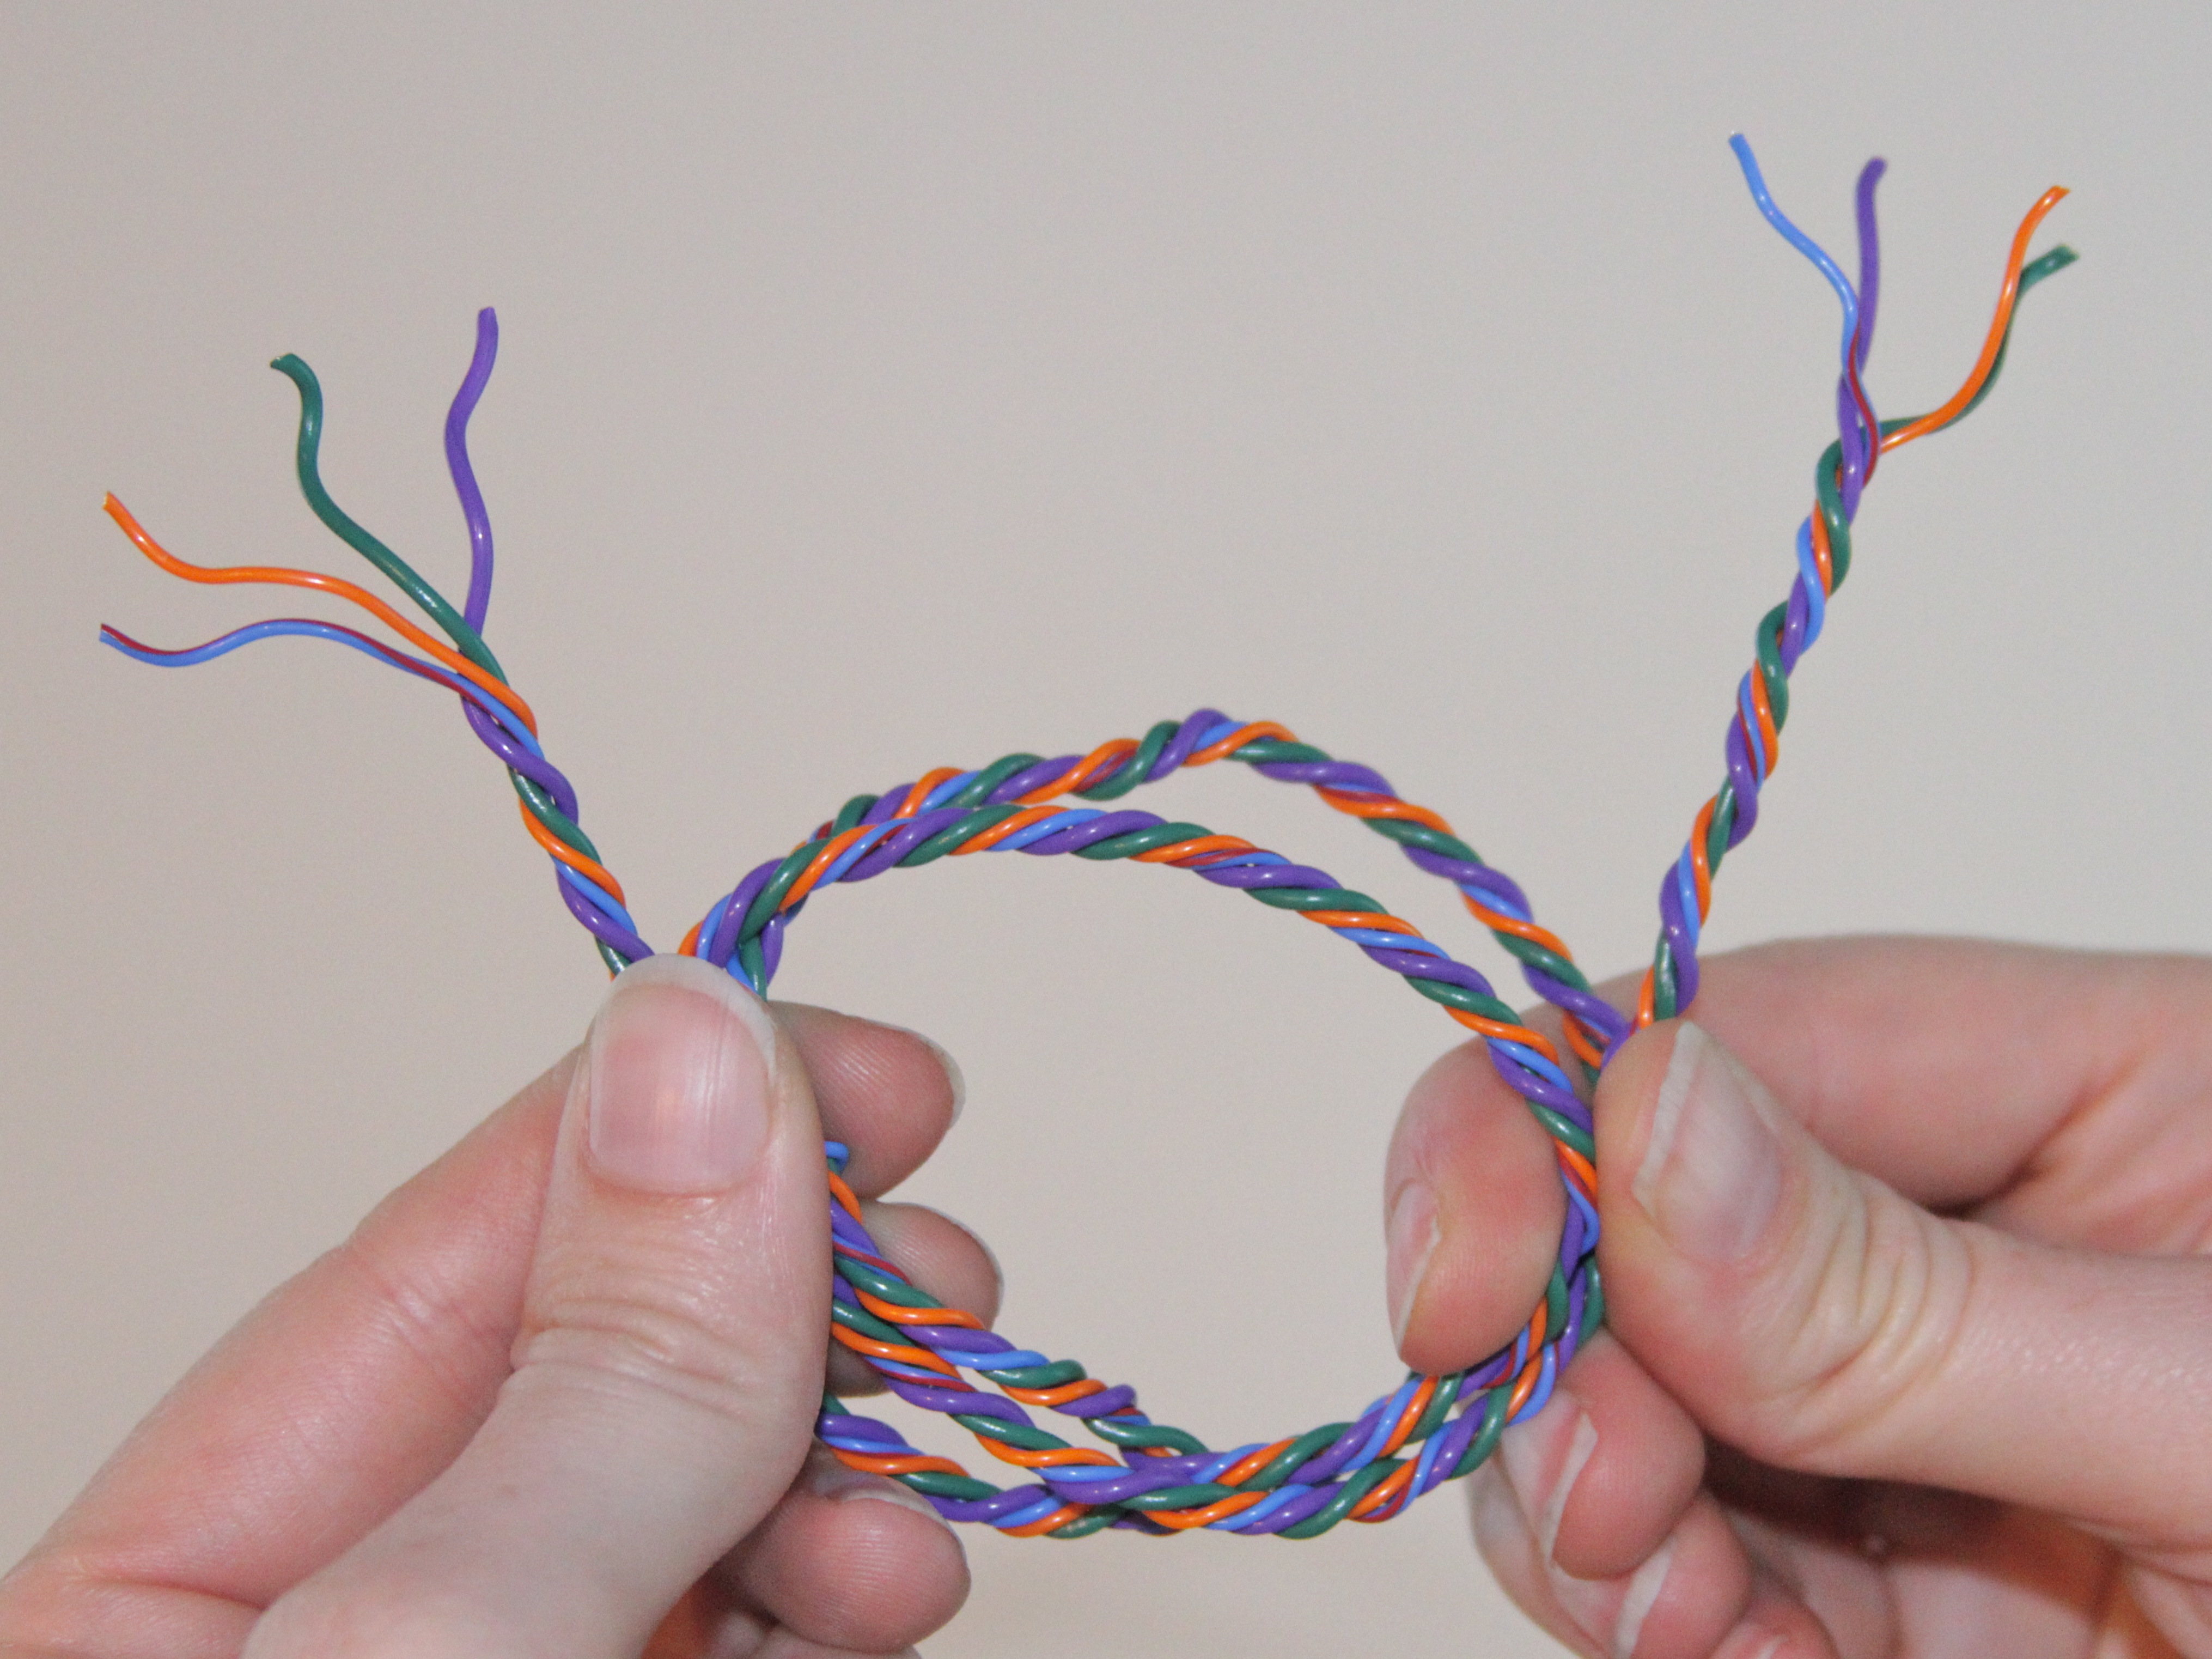
Let’s suppose that we need to run these four wires from point A to point B. They can be a mix of stranded or solid core wires, with different diameters an insulation types. The orange and blue wires in this bundle happen to be stranded copper wires with a particularly slippery PTFE jacket.
Twisting any length of these wires by hand is fairly difficult, because they don’t tend to stay where put. Fortunately, we only need to twist the first inch or two:
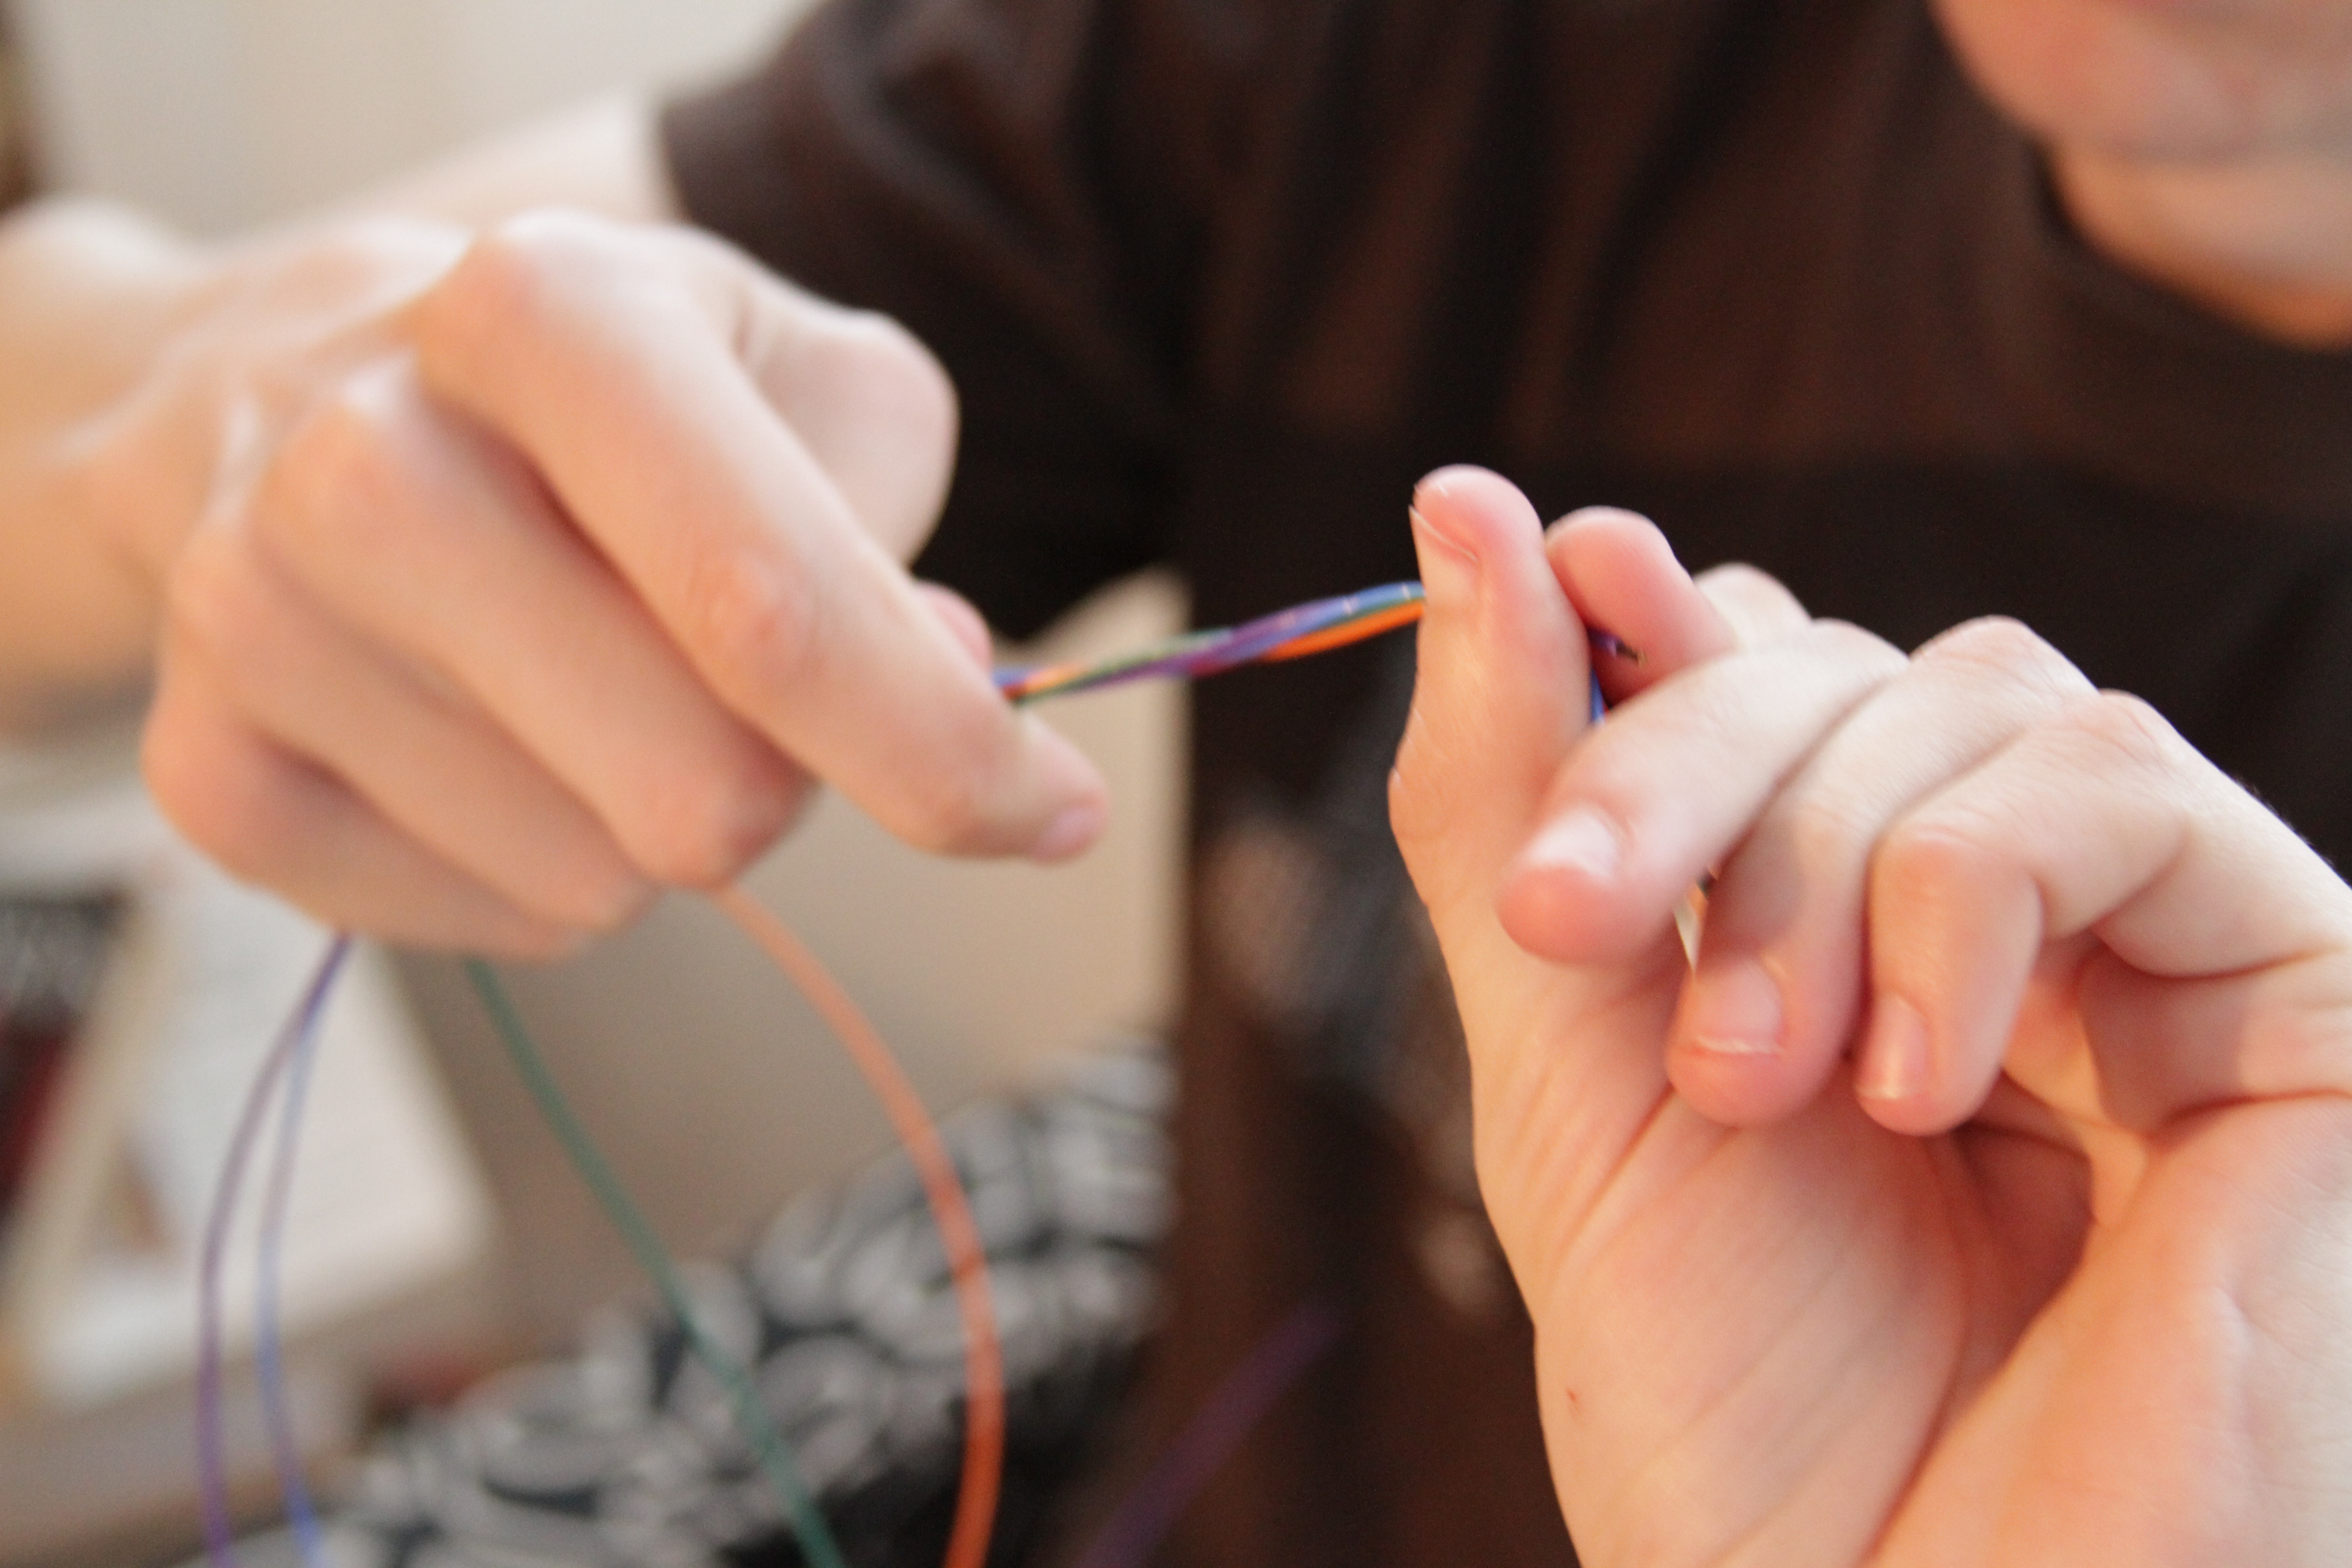
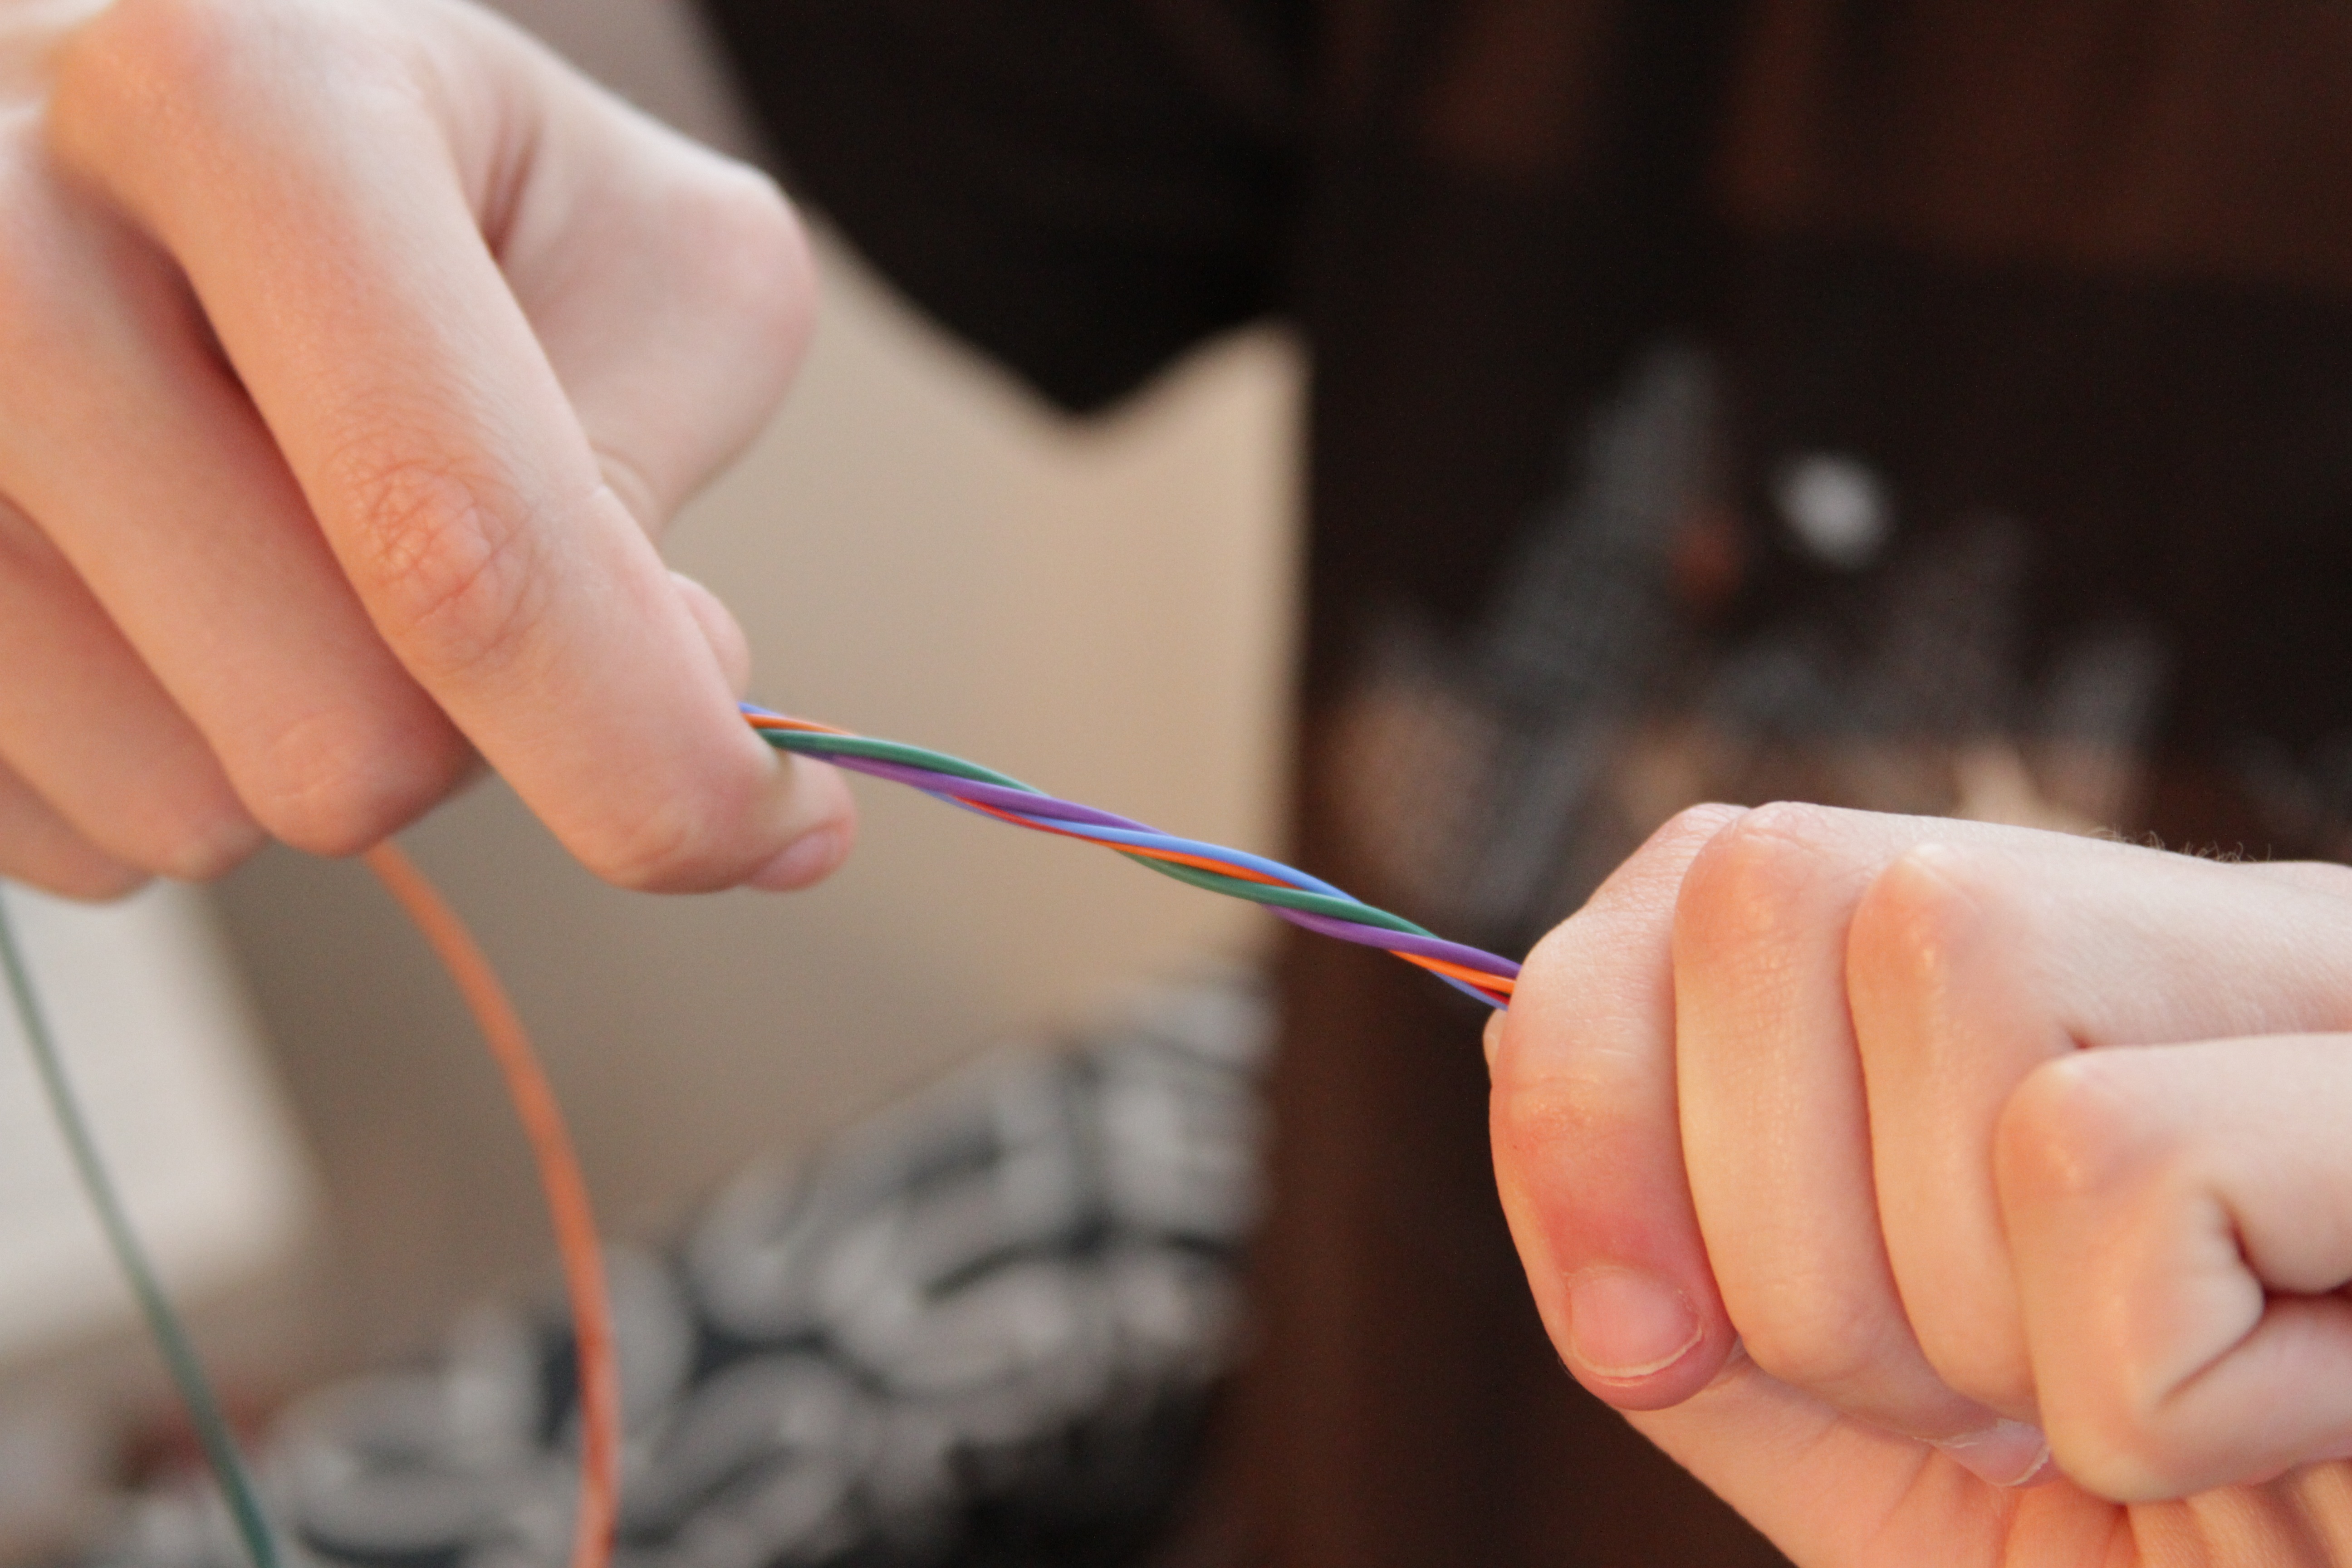
Twist the first couple of inches of all the strands together and bend them over once.

Then, get the drill.
As we said, you need a hand drill and a friend to build these. If you don’t have a friend, a bench vise will do in a pinch (pun intended). A standard electric hand drill works great, but I’ve also heard of occasional success with adapted cordless screwdrivers. Do not use any sort of heavy machinery– drill press, lathe, or mill; it will not be safe.
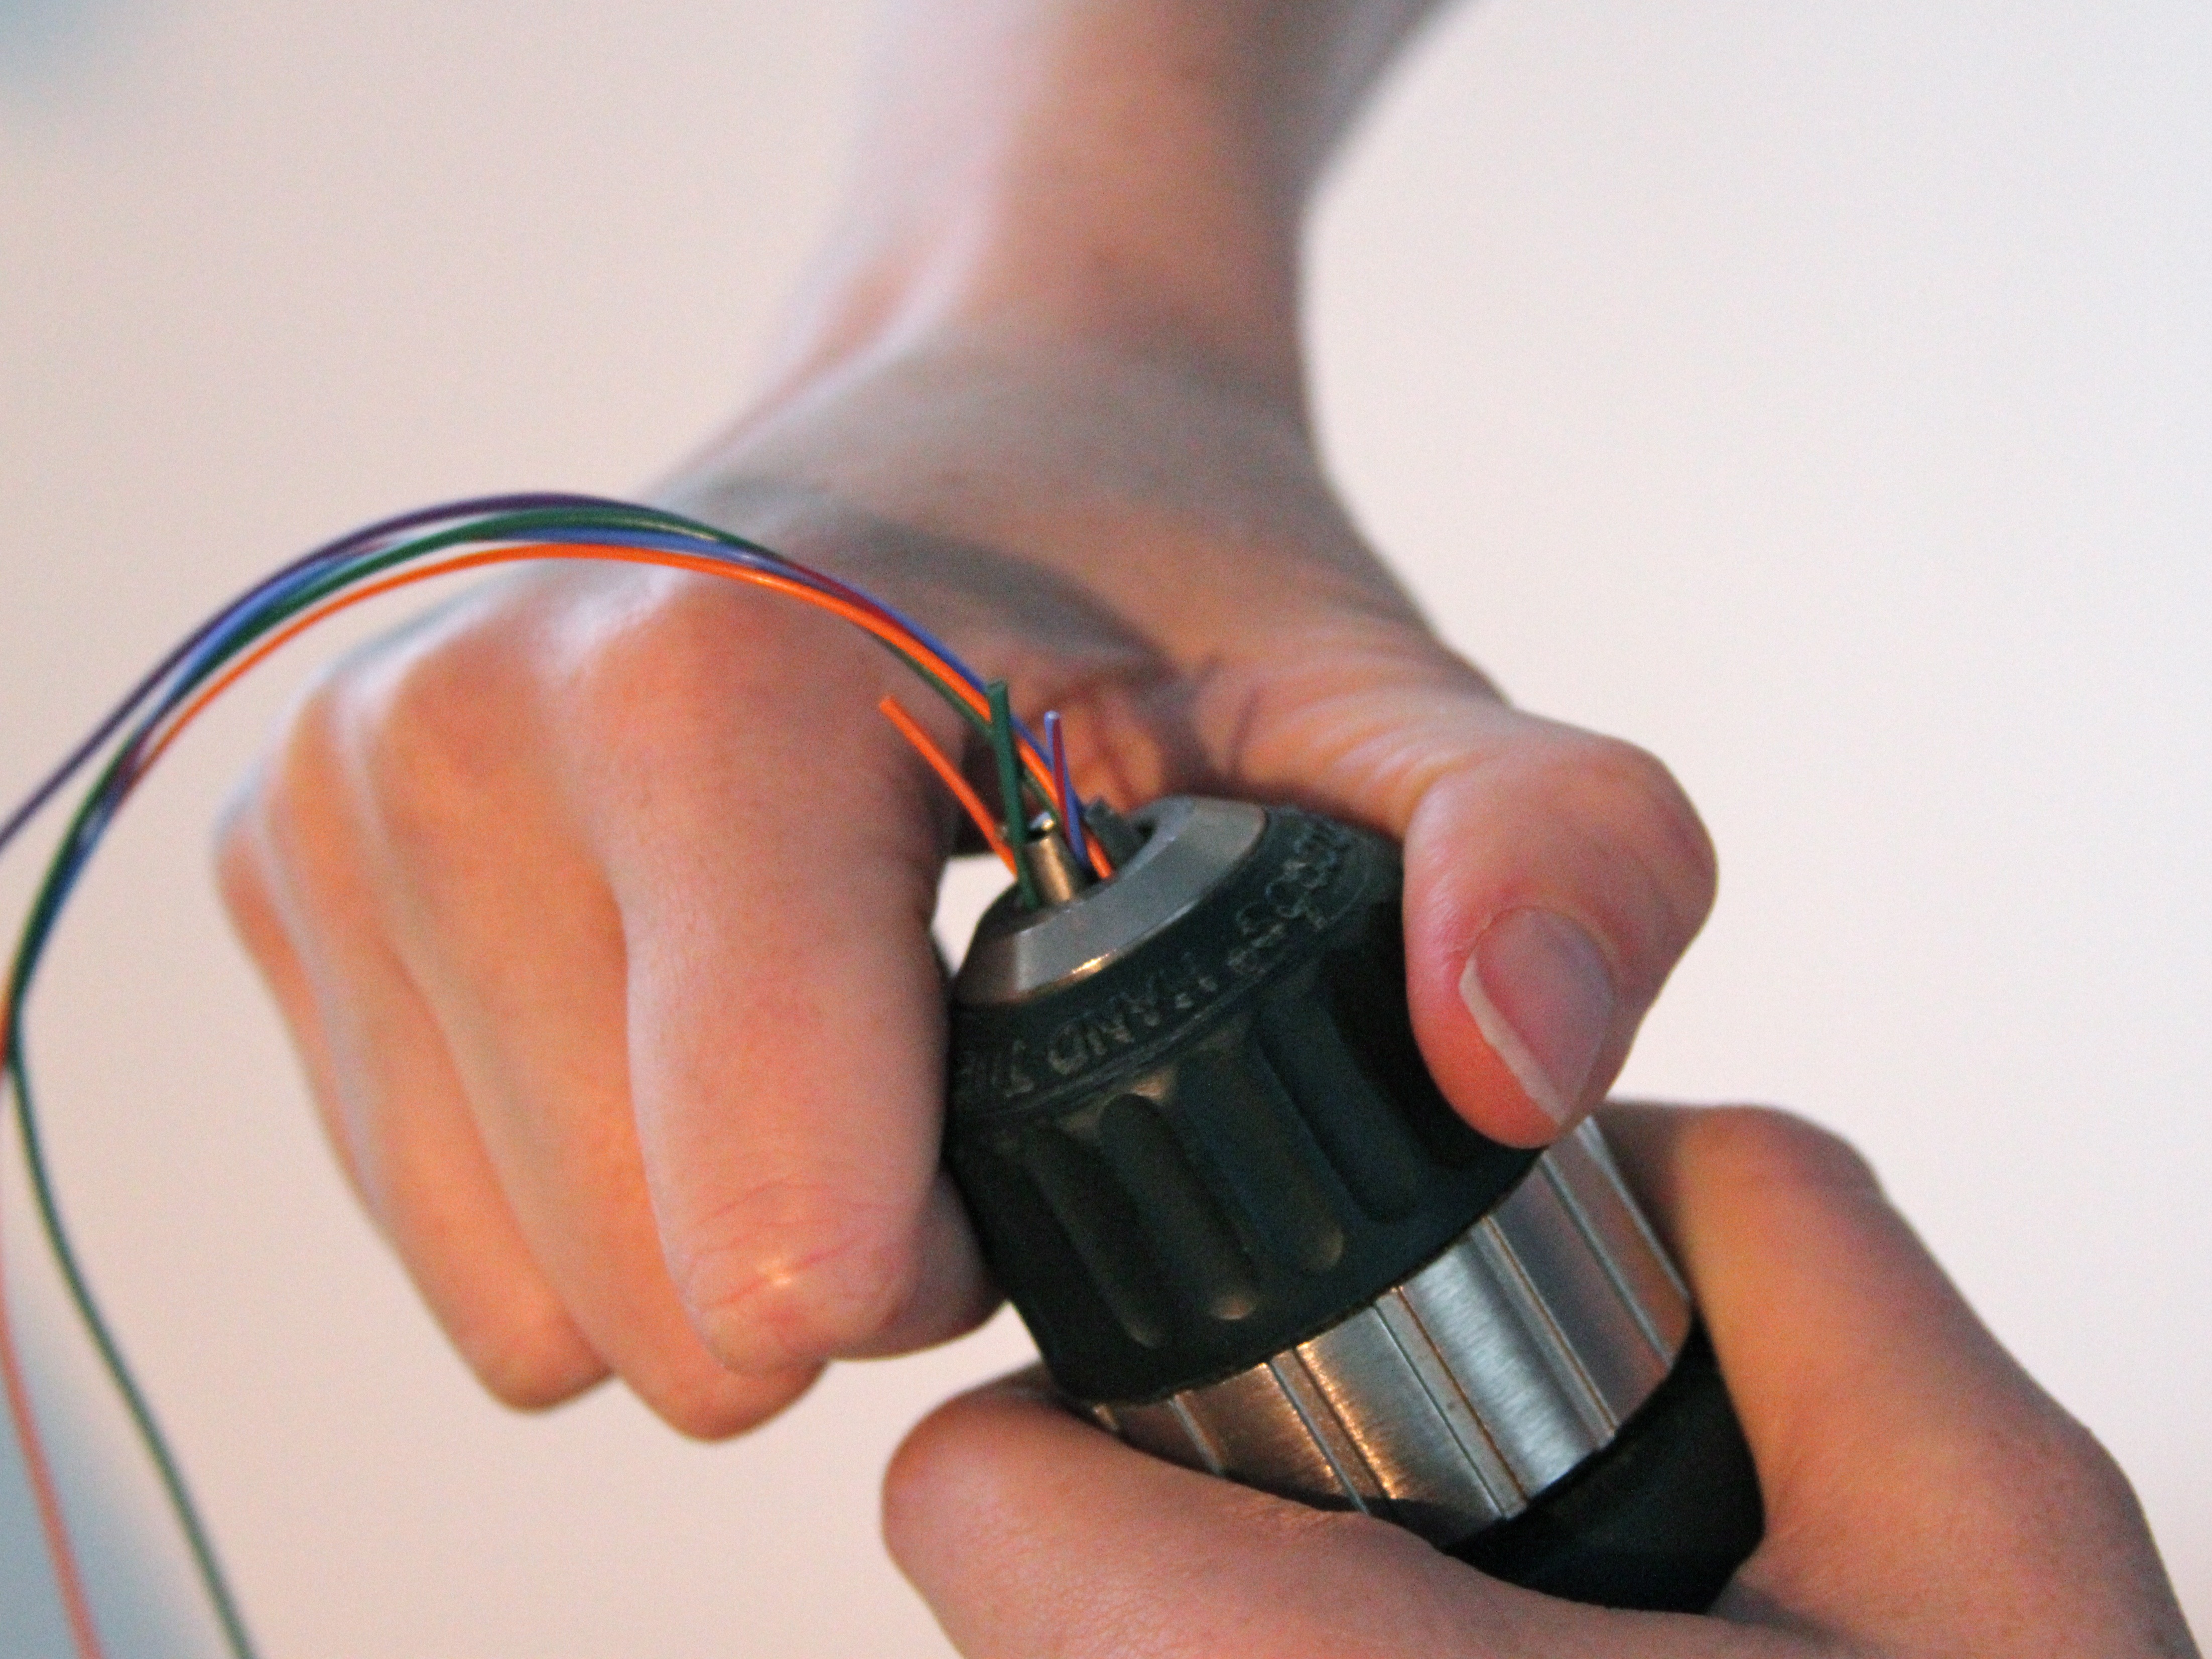
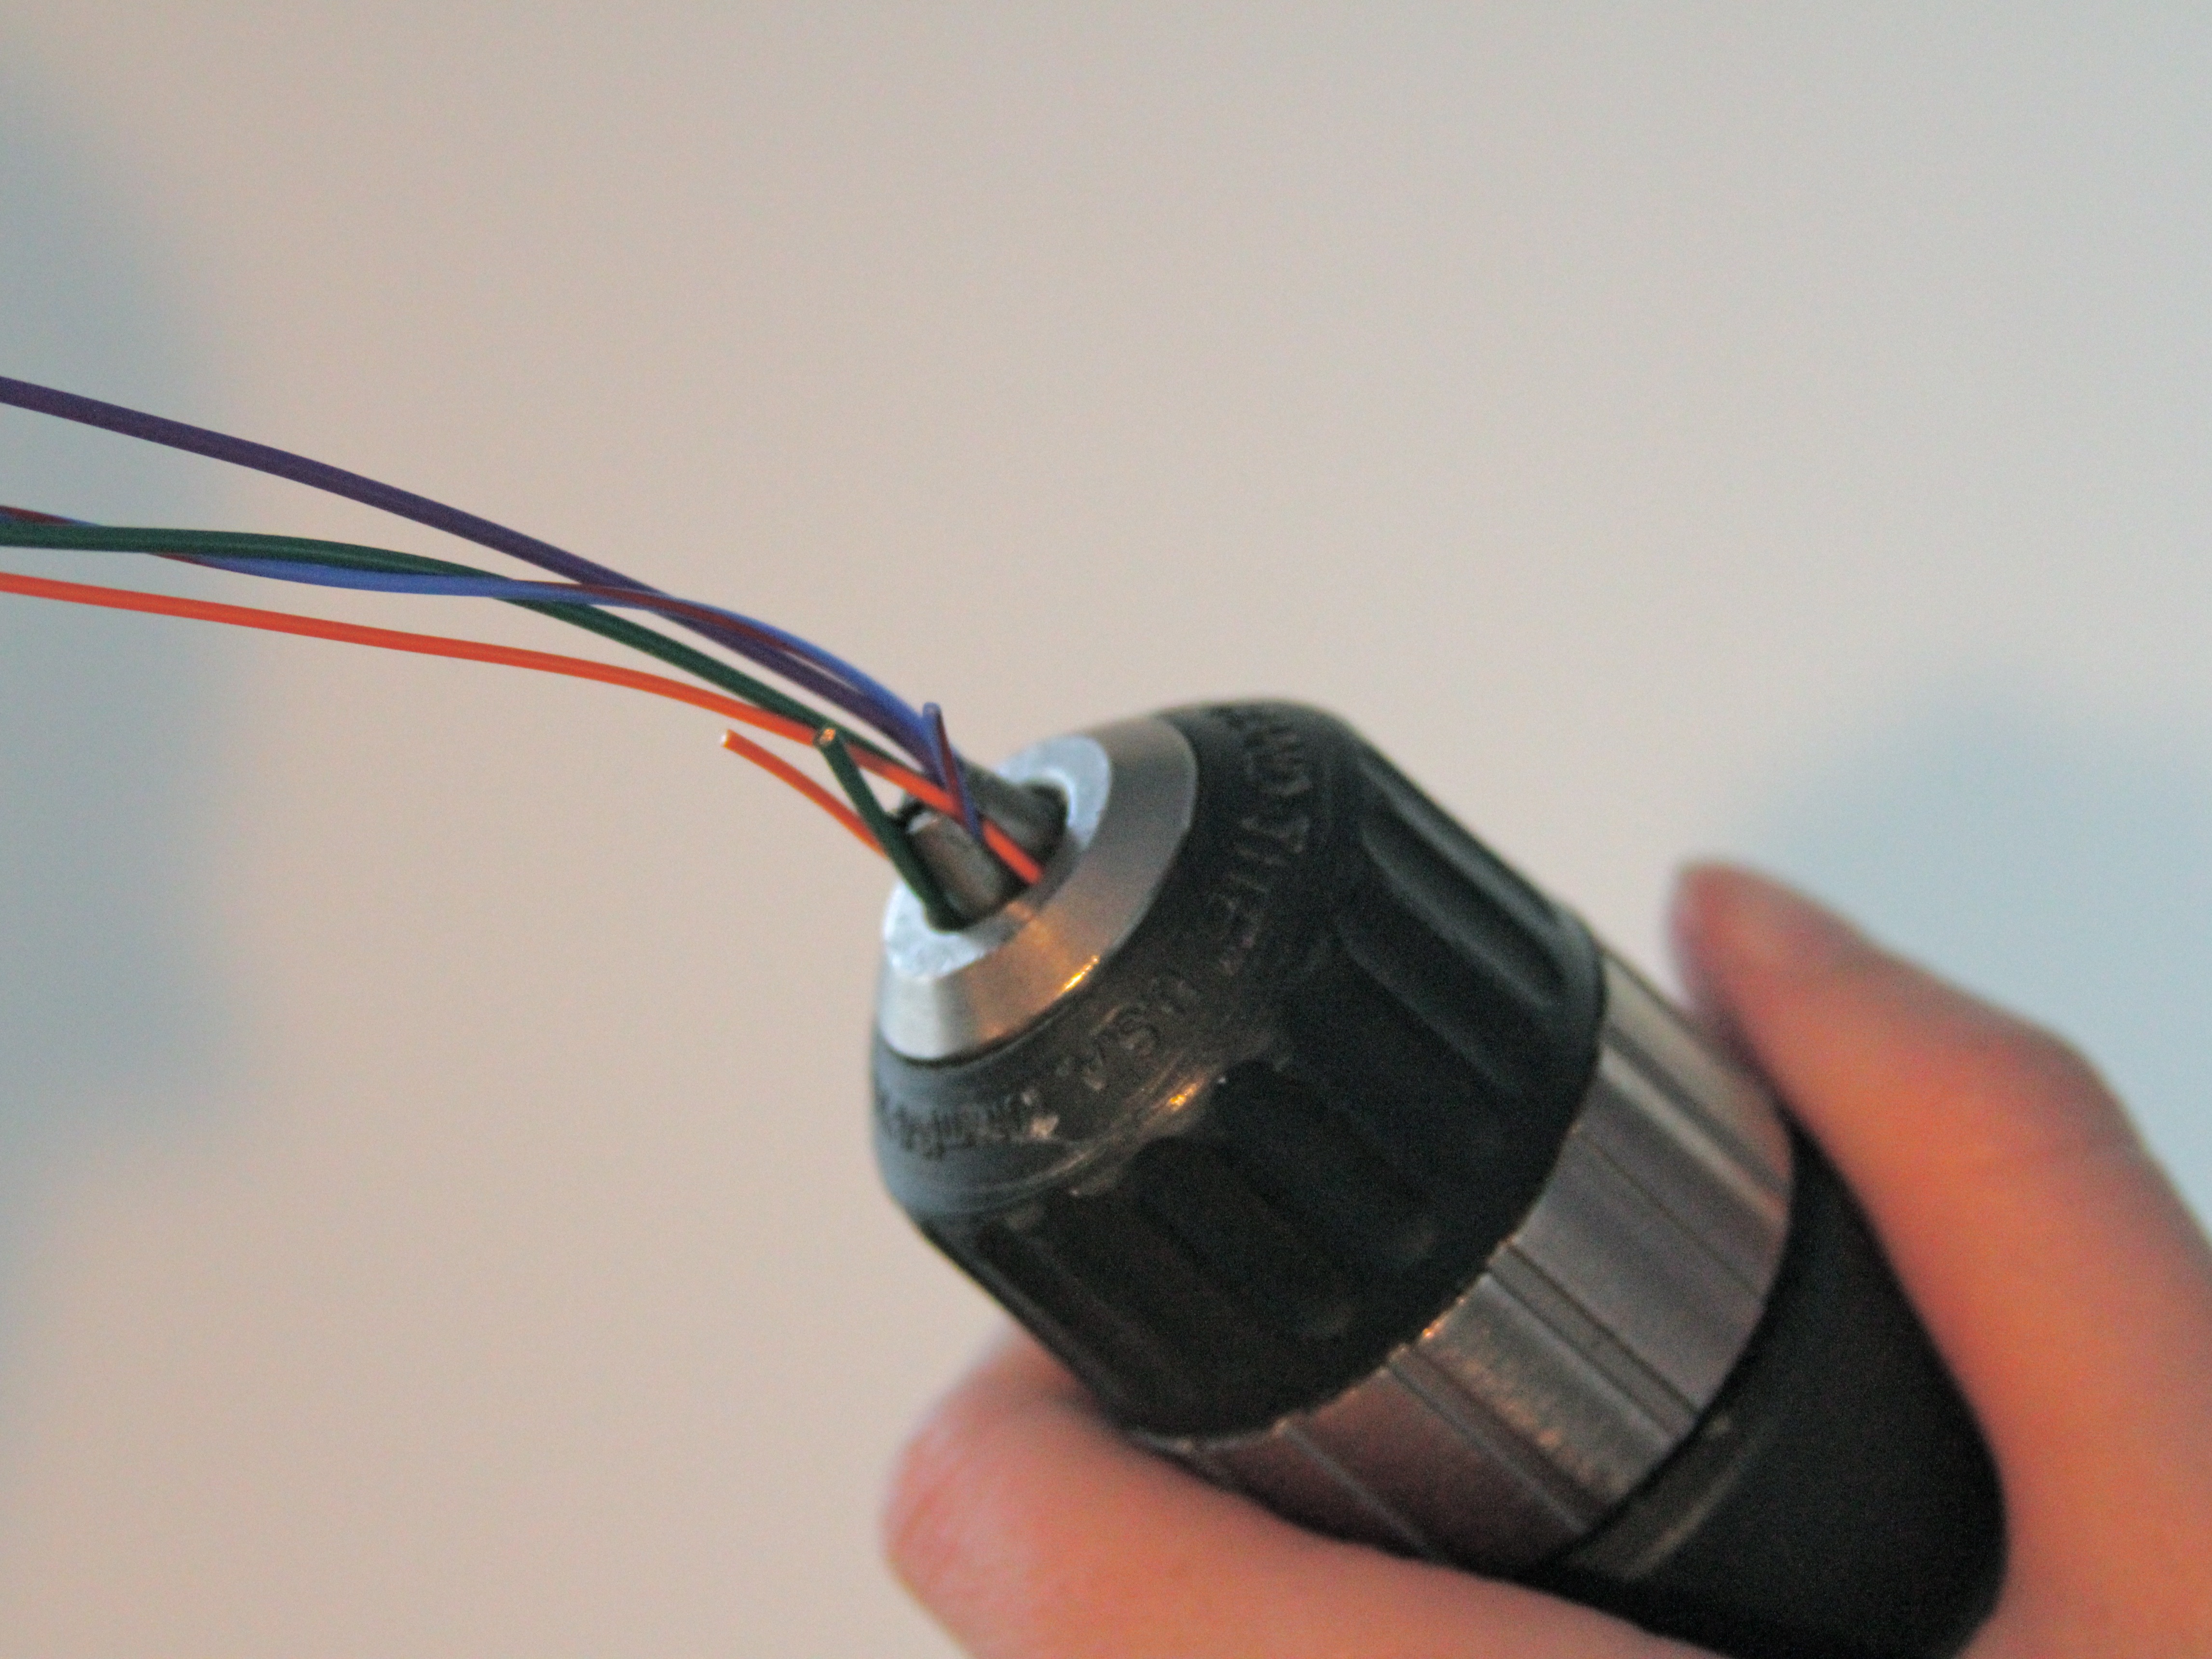
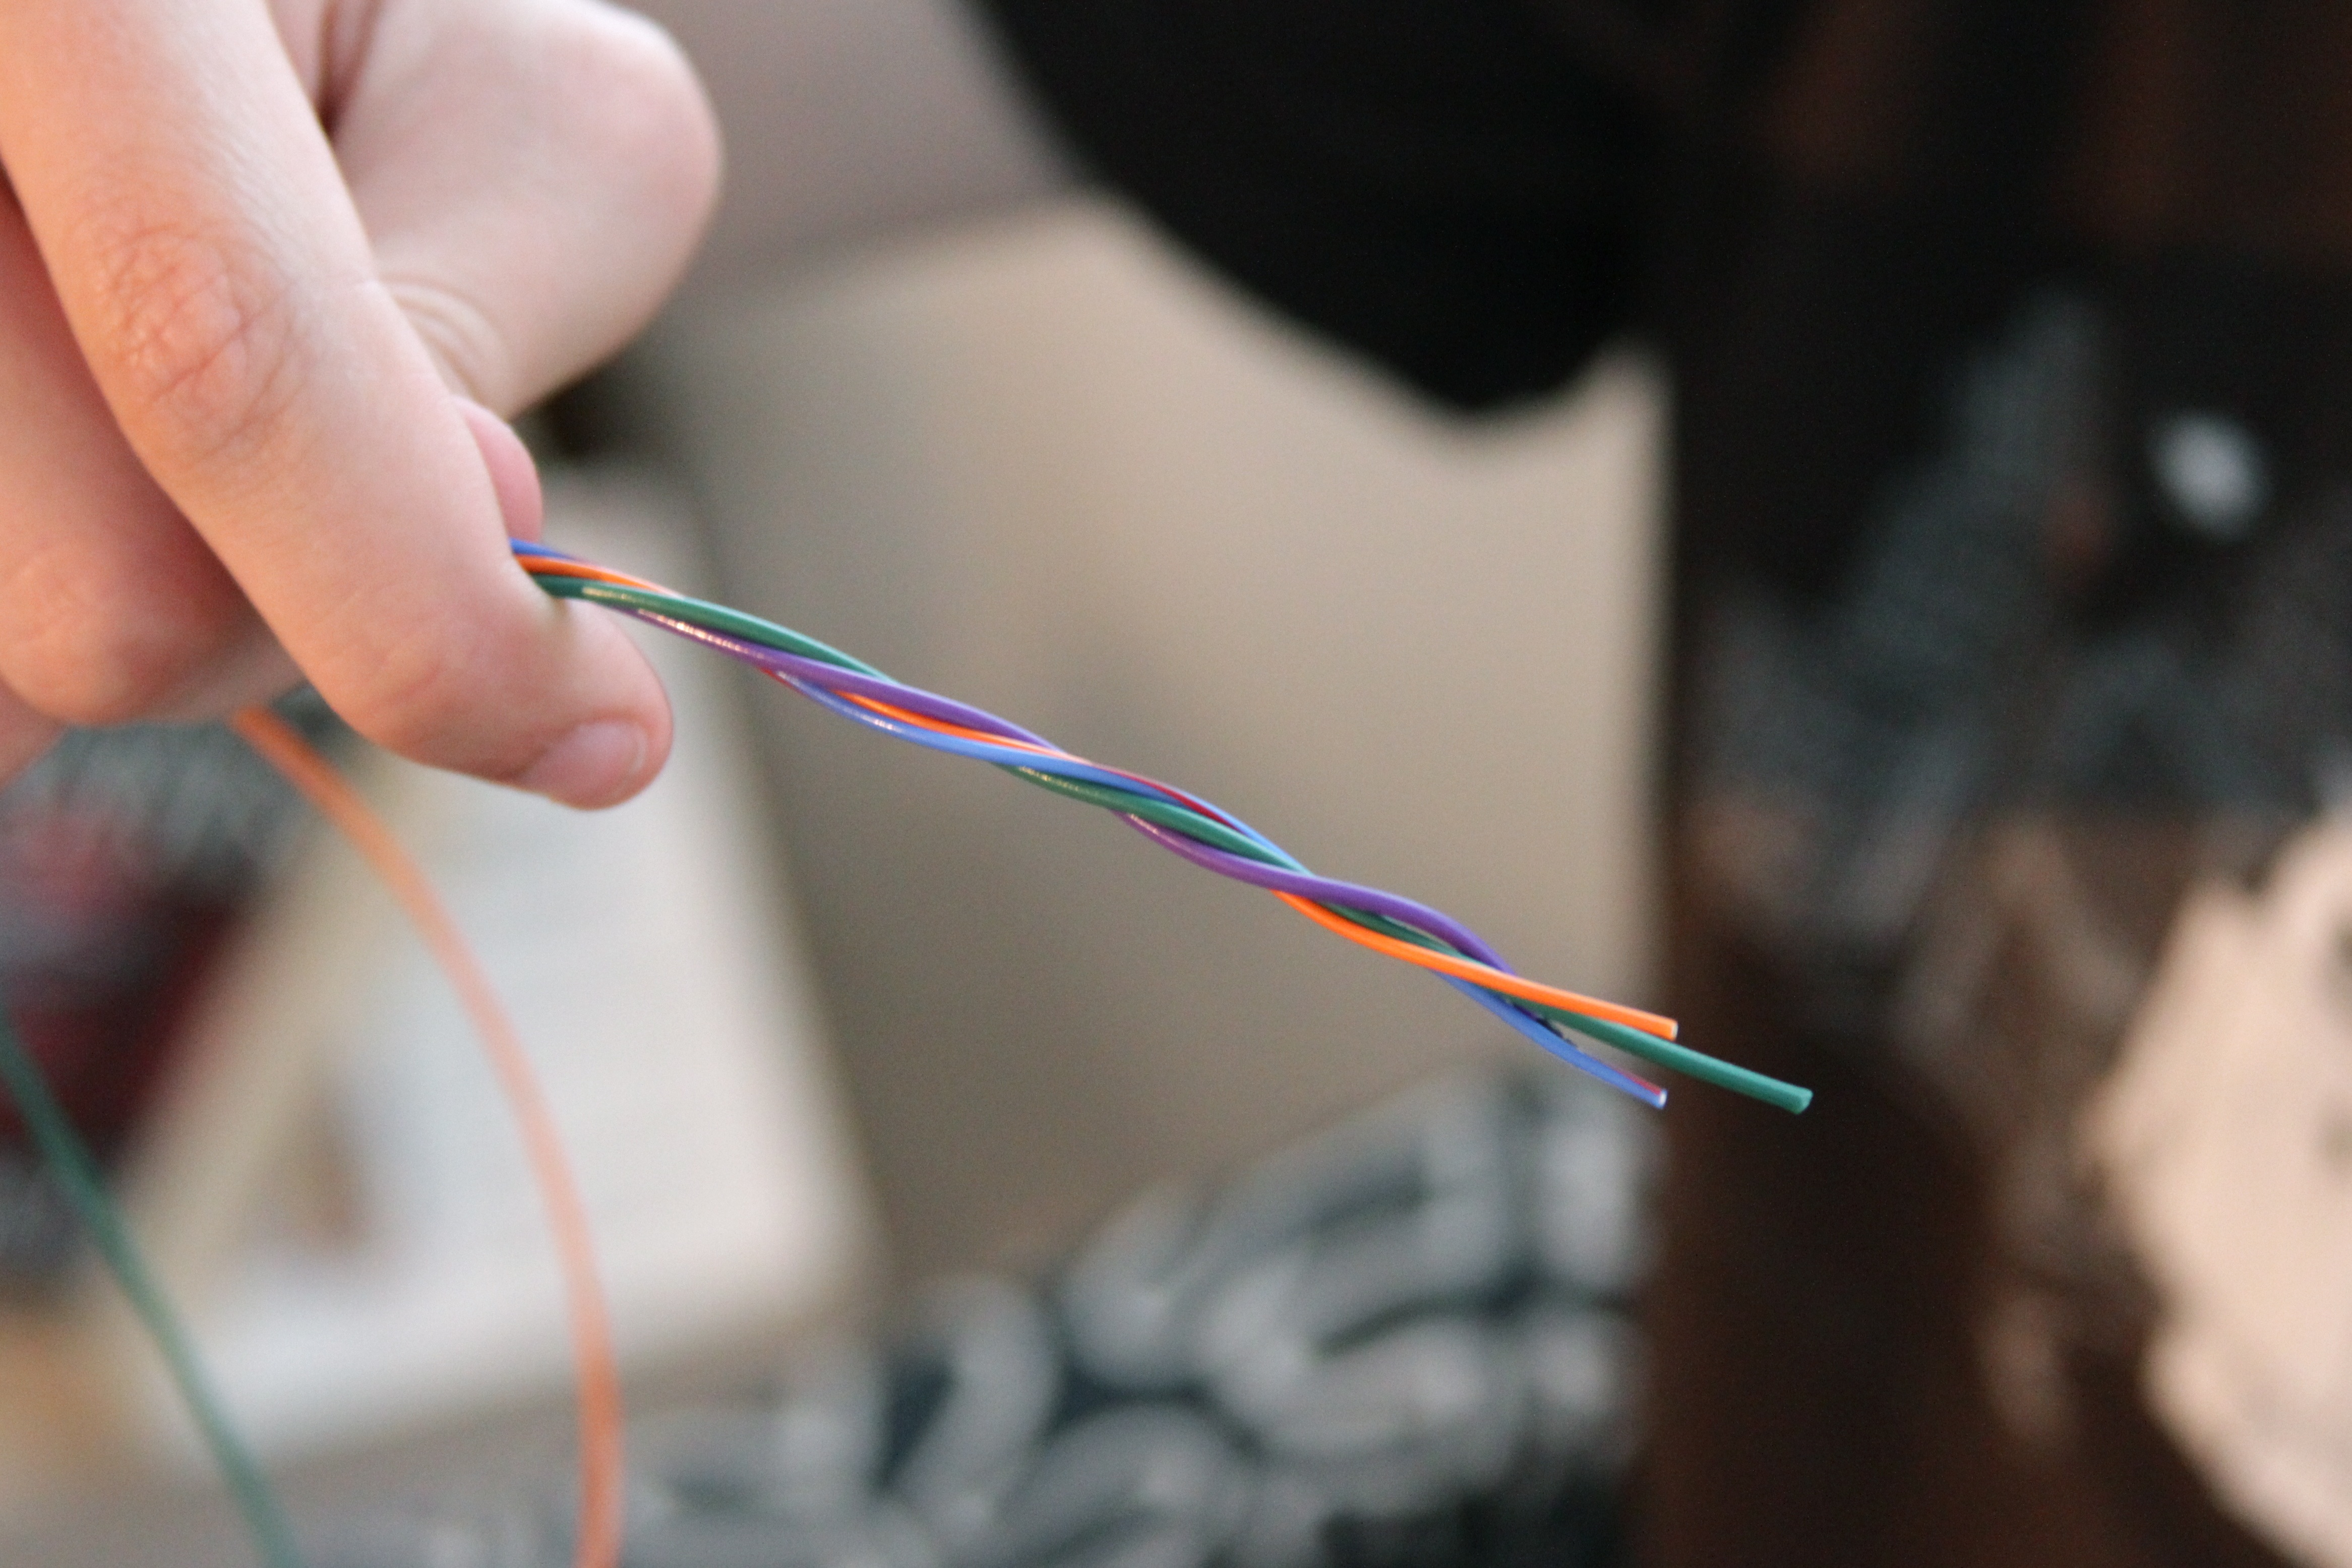
Insert the bent-over twisted cable ends into the drill chuck, and tighten it down. (Keyless chucks help make this fast.)

Hand the loose cable ends to your friend, and stretch out the cables to their length. It’s important that your friend keep a firm but not too tight grip. If something goes wrong, the wire should safely pull out of their hand.
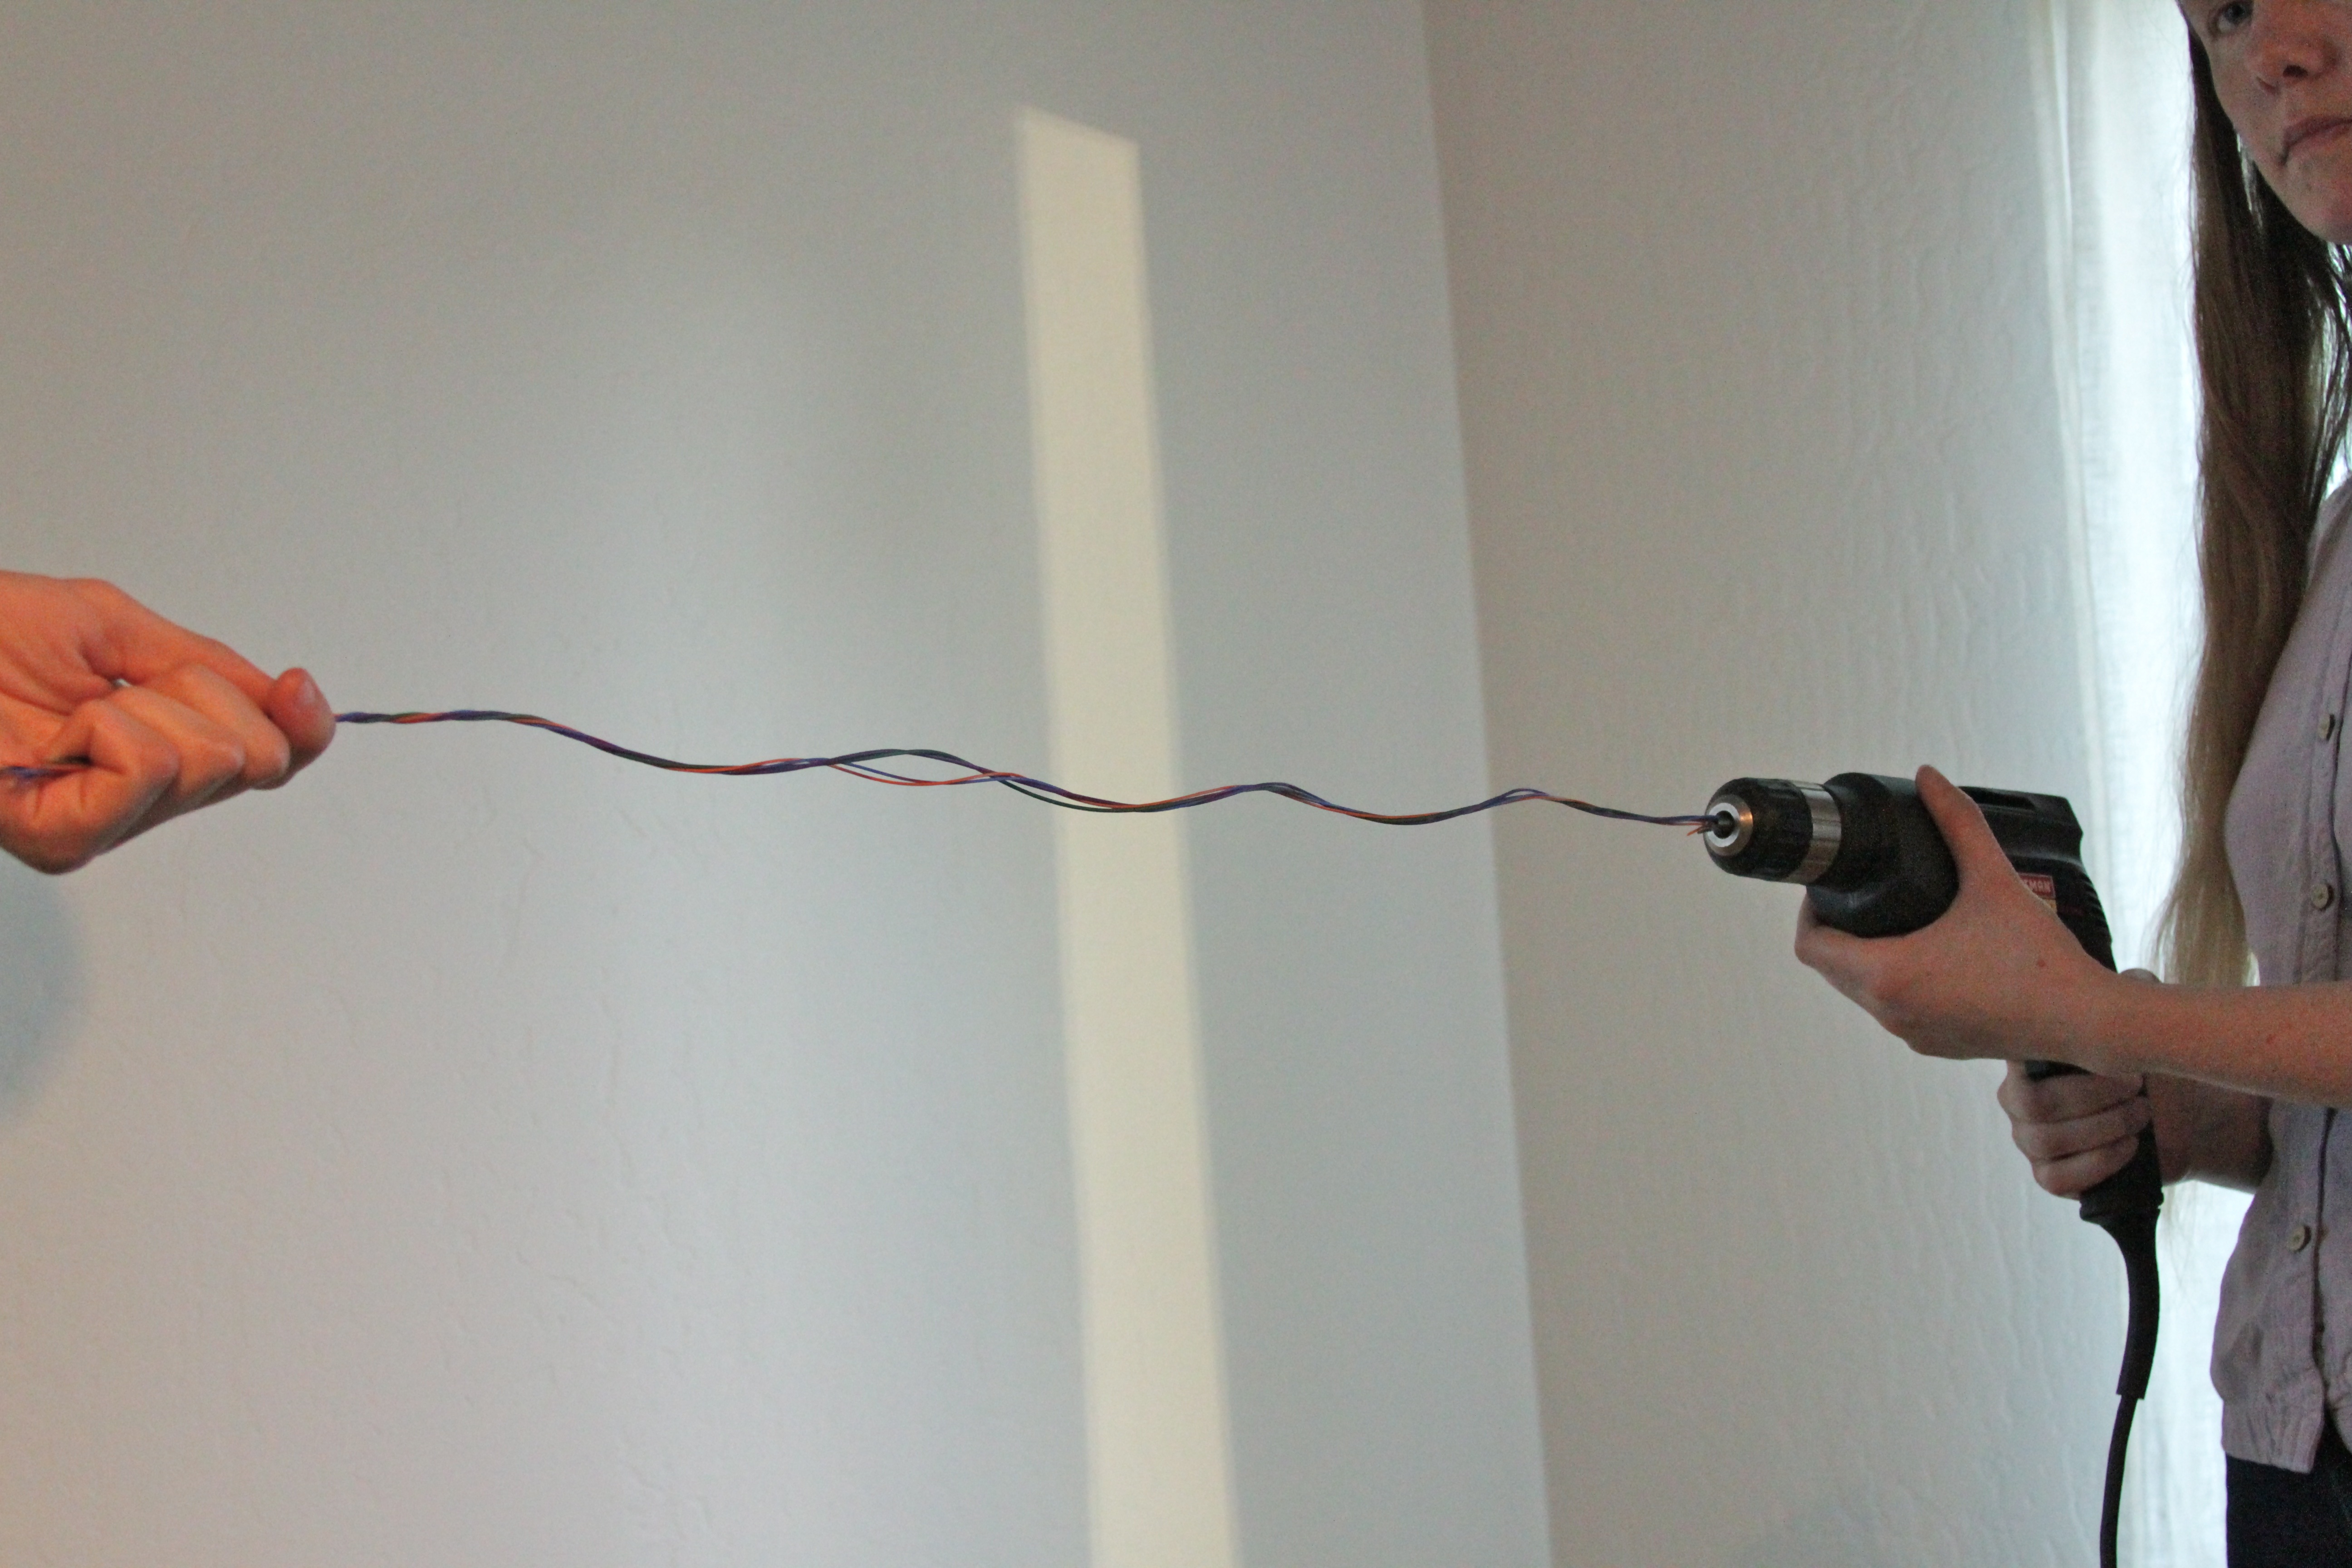
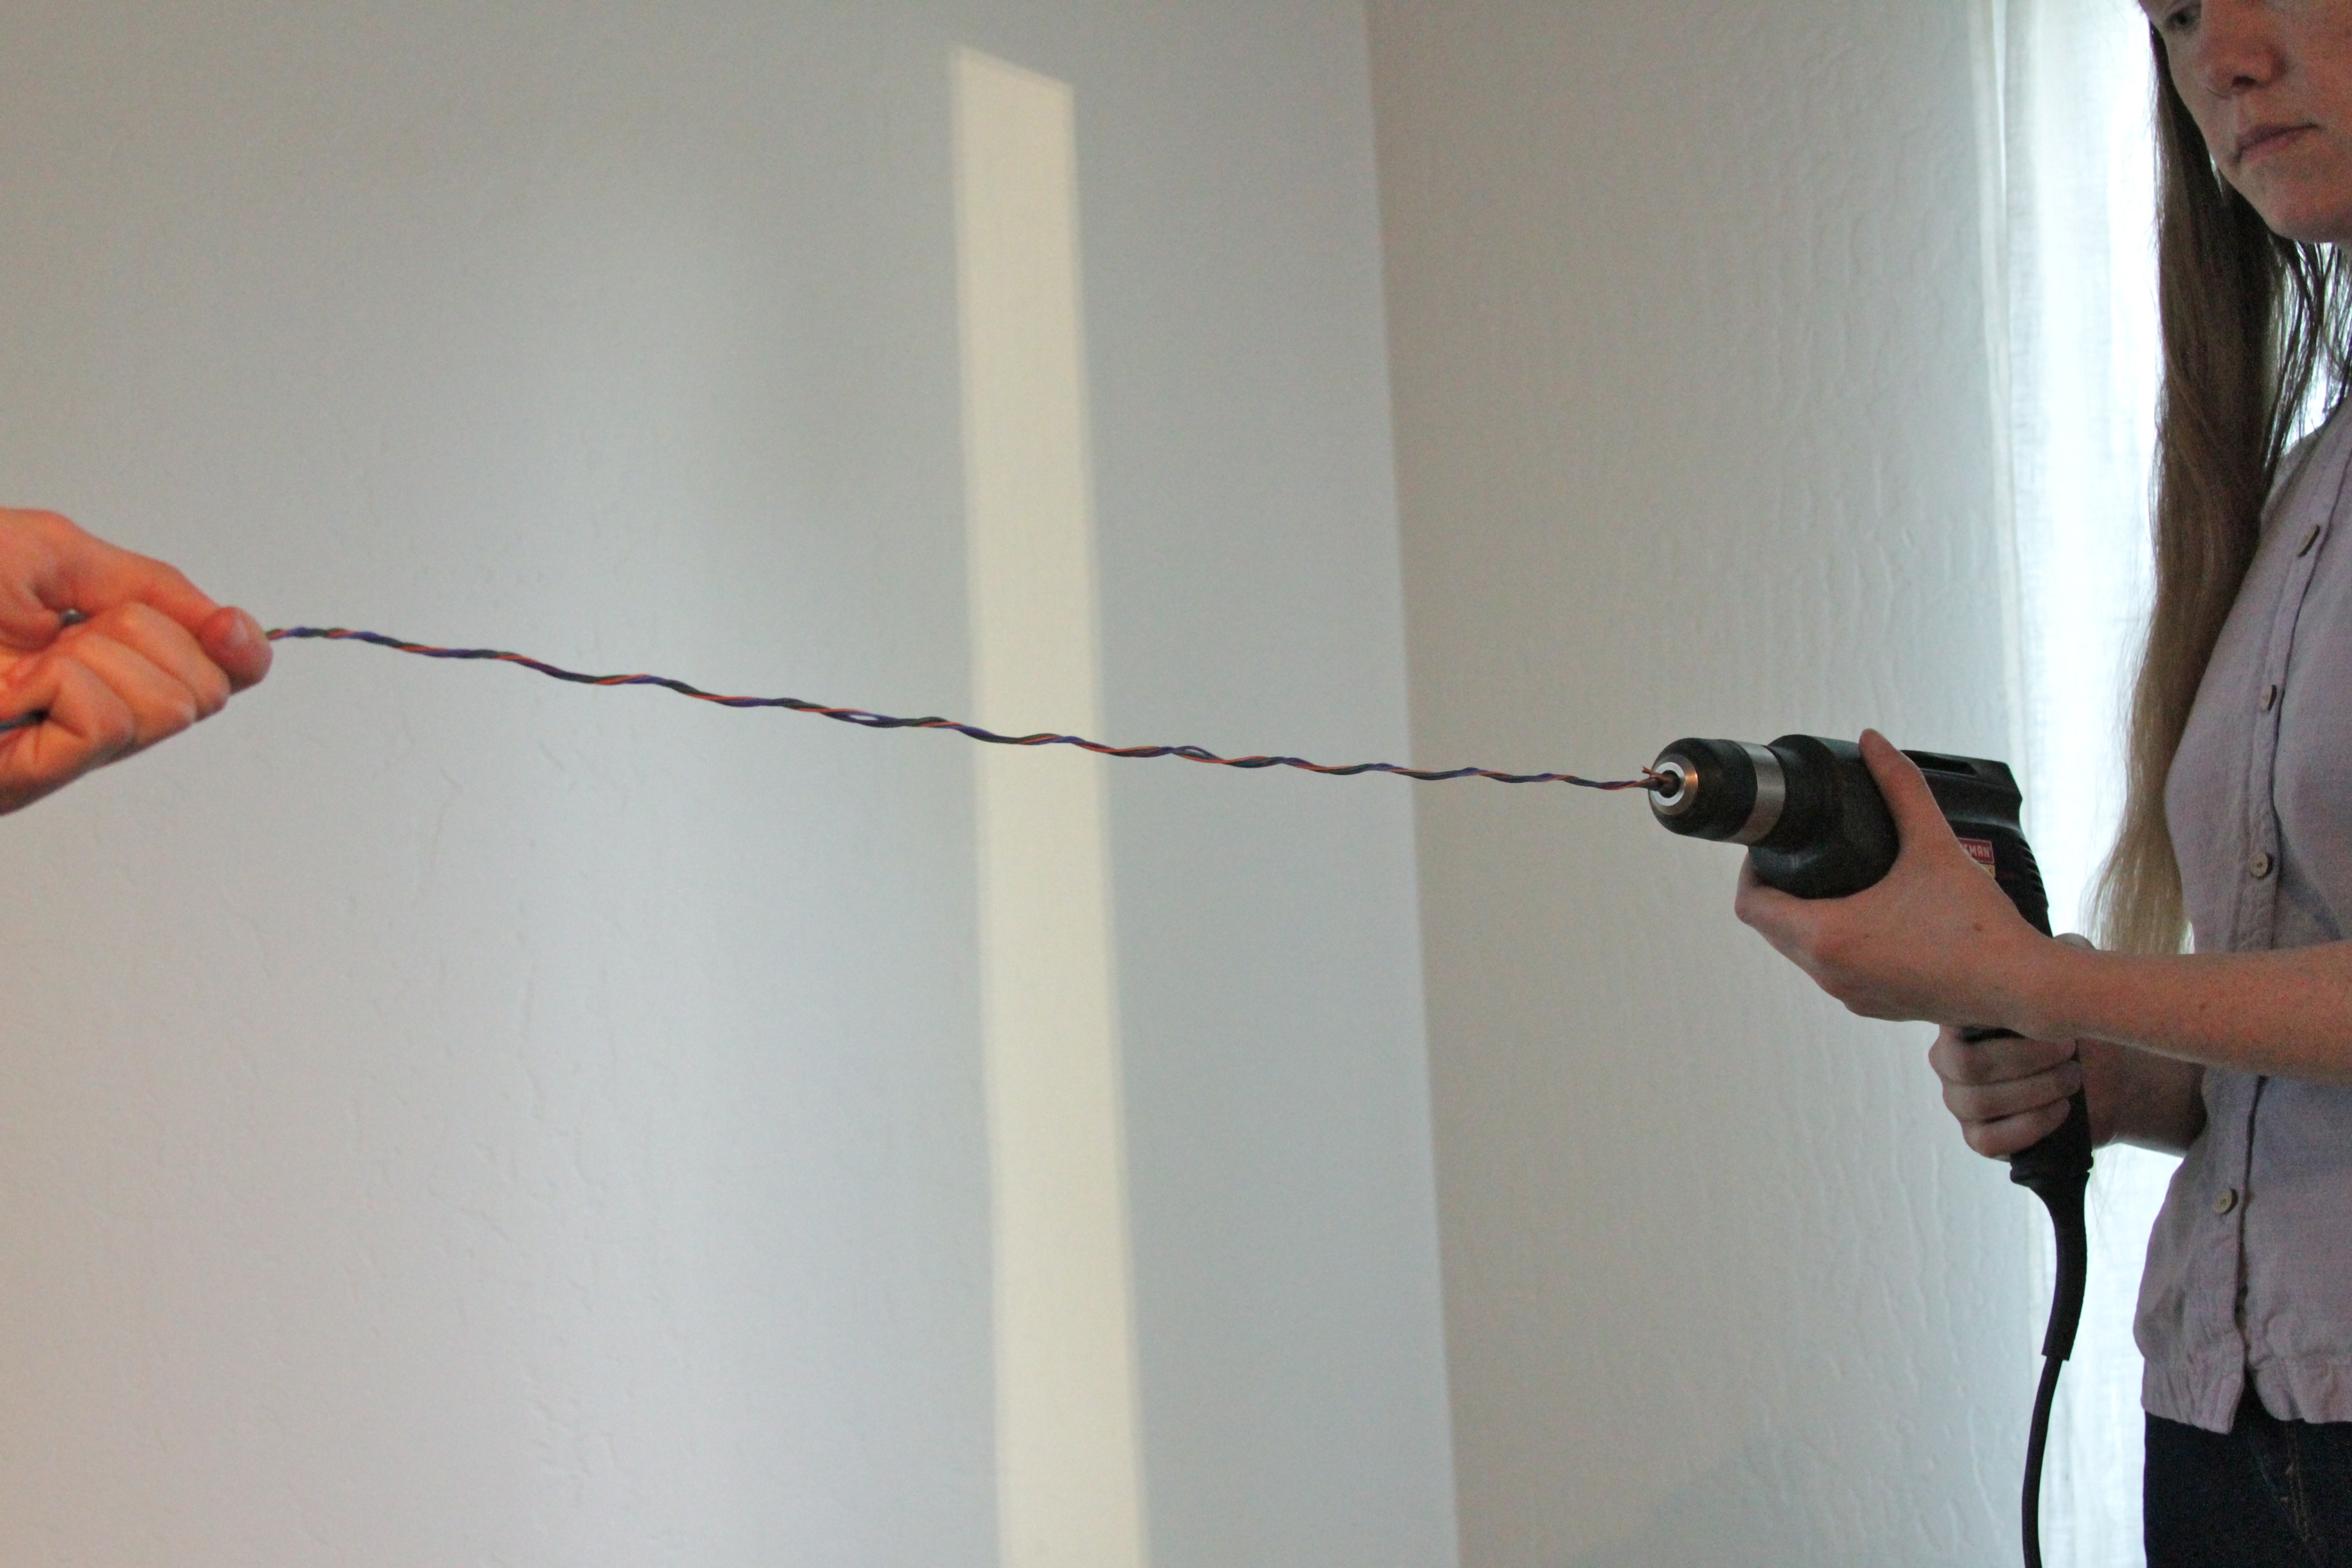
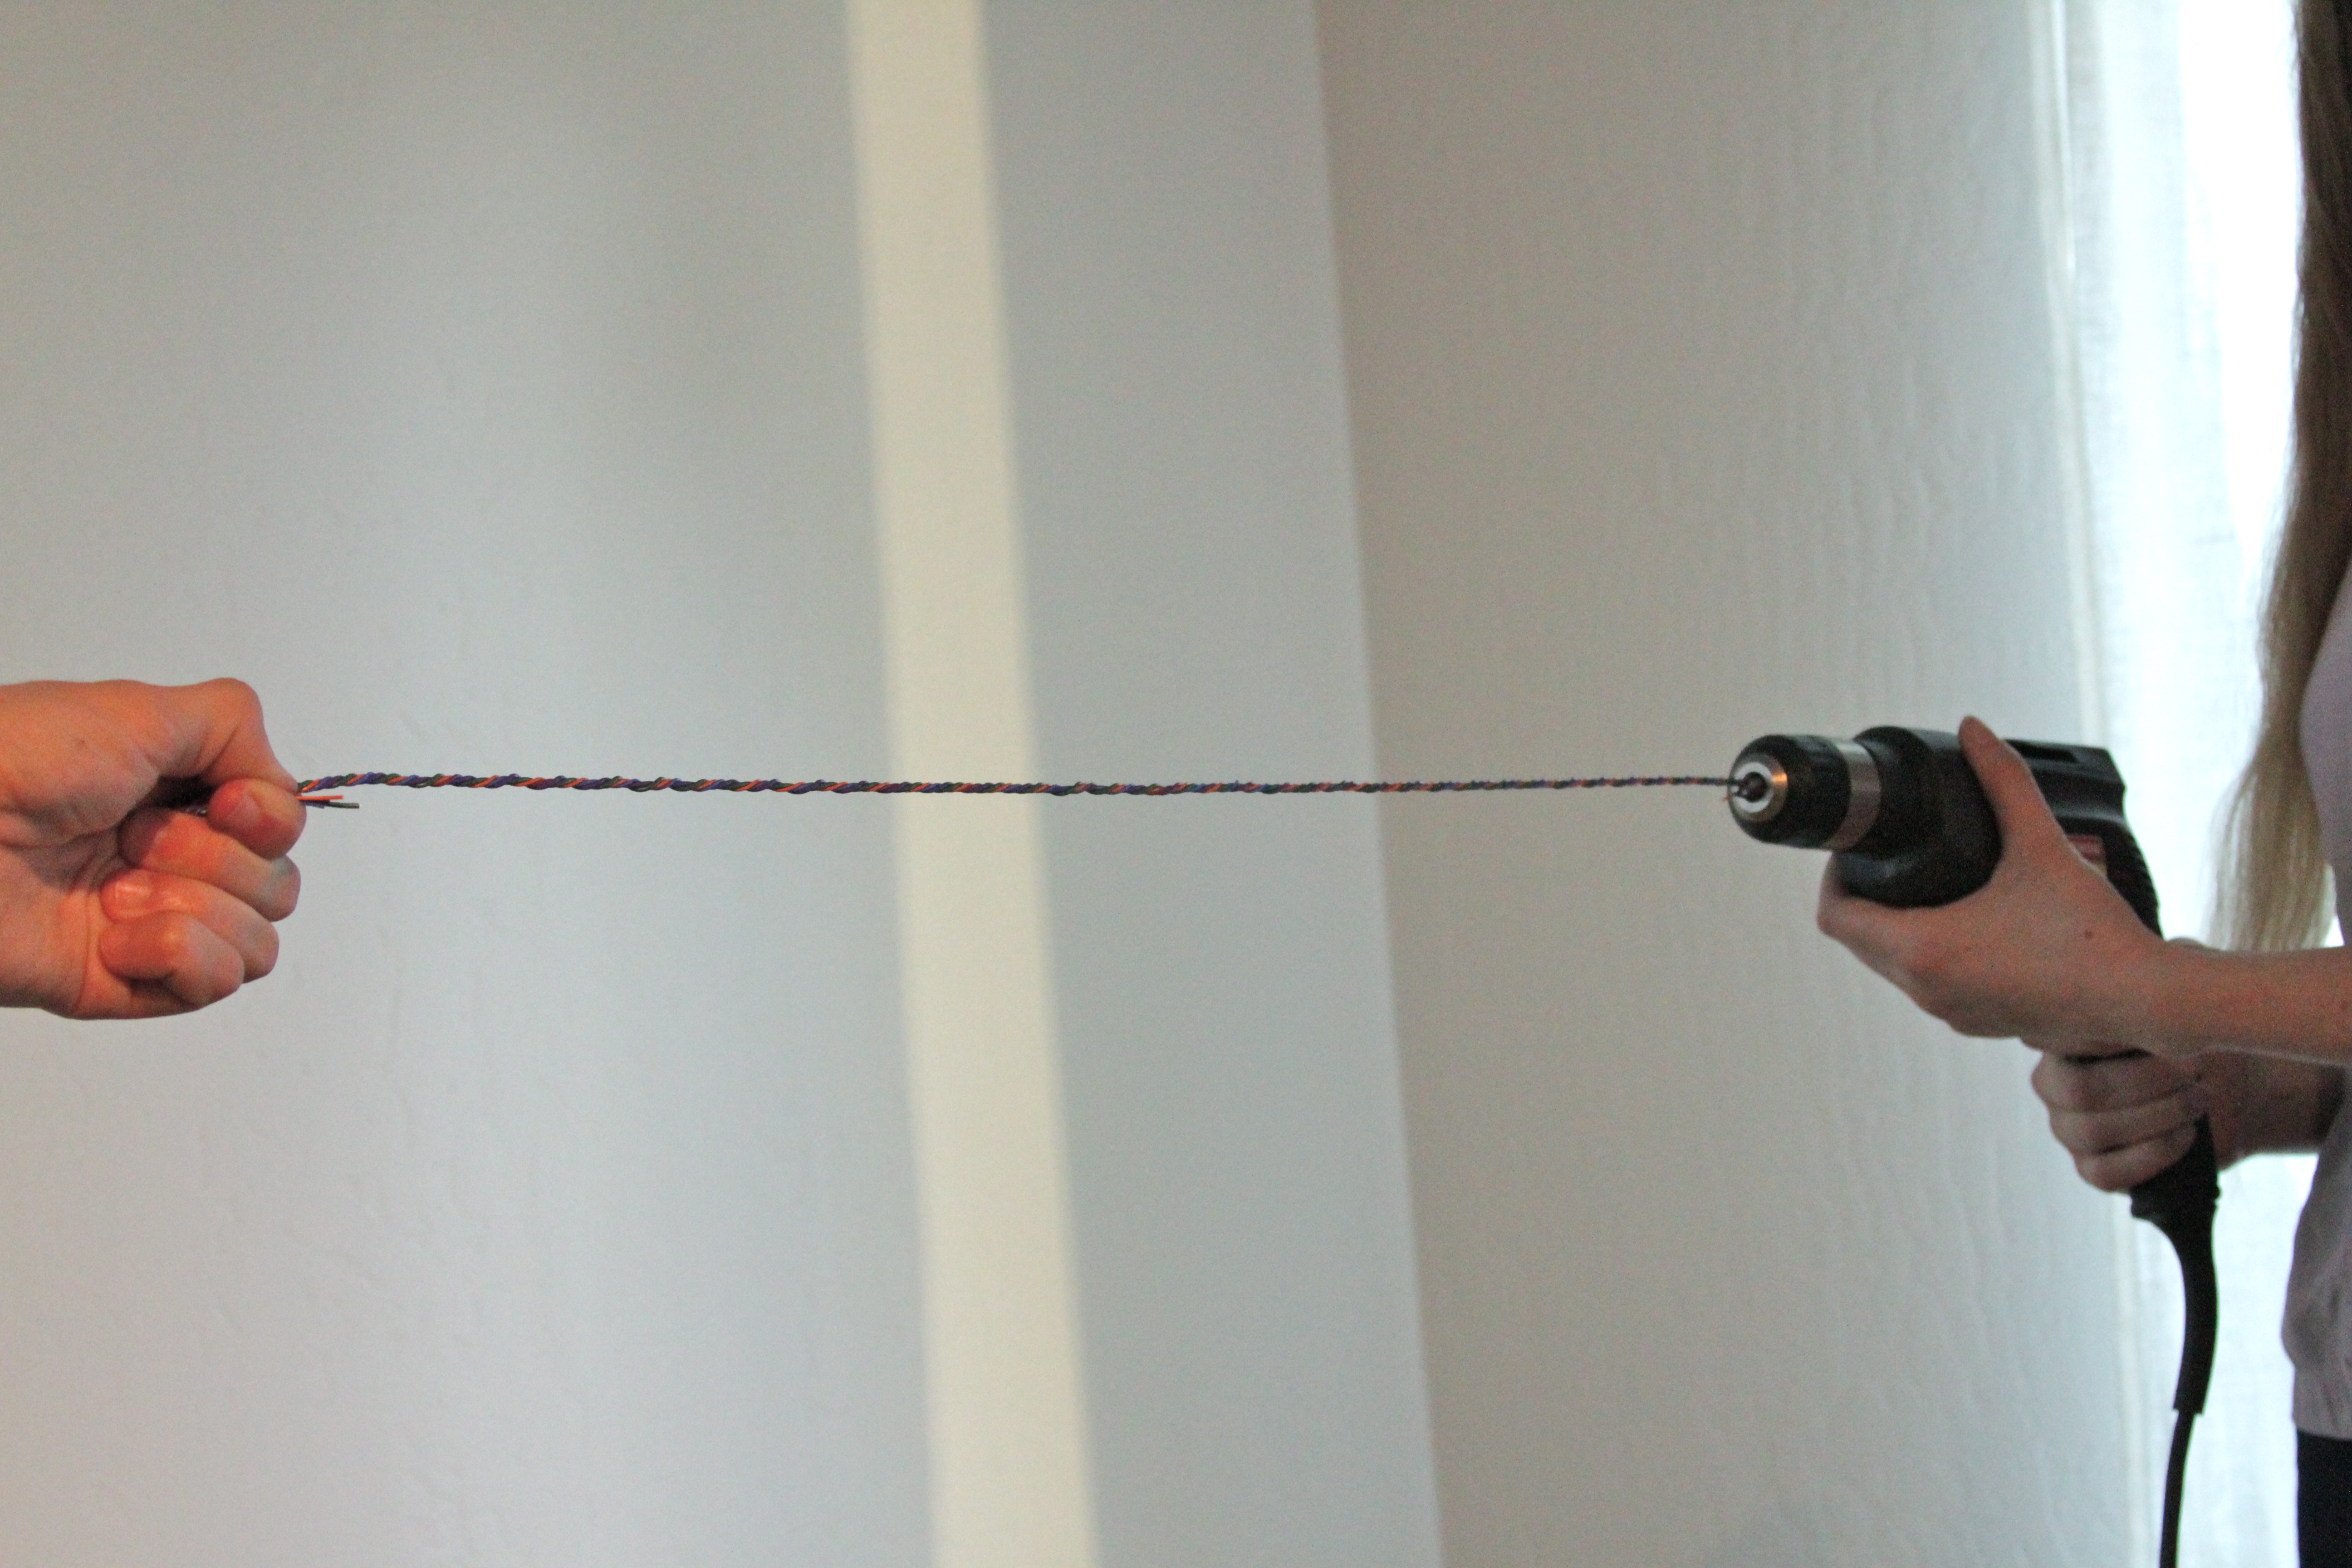
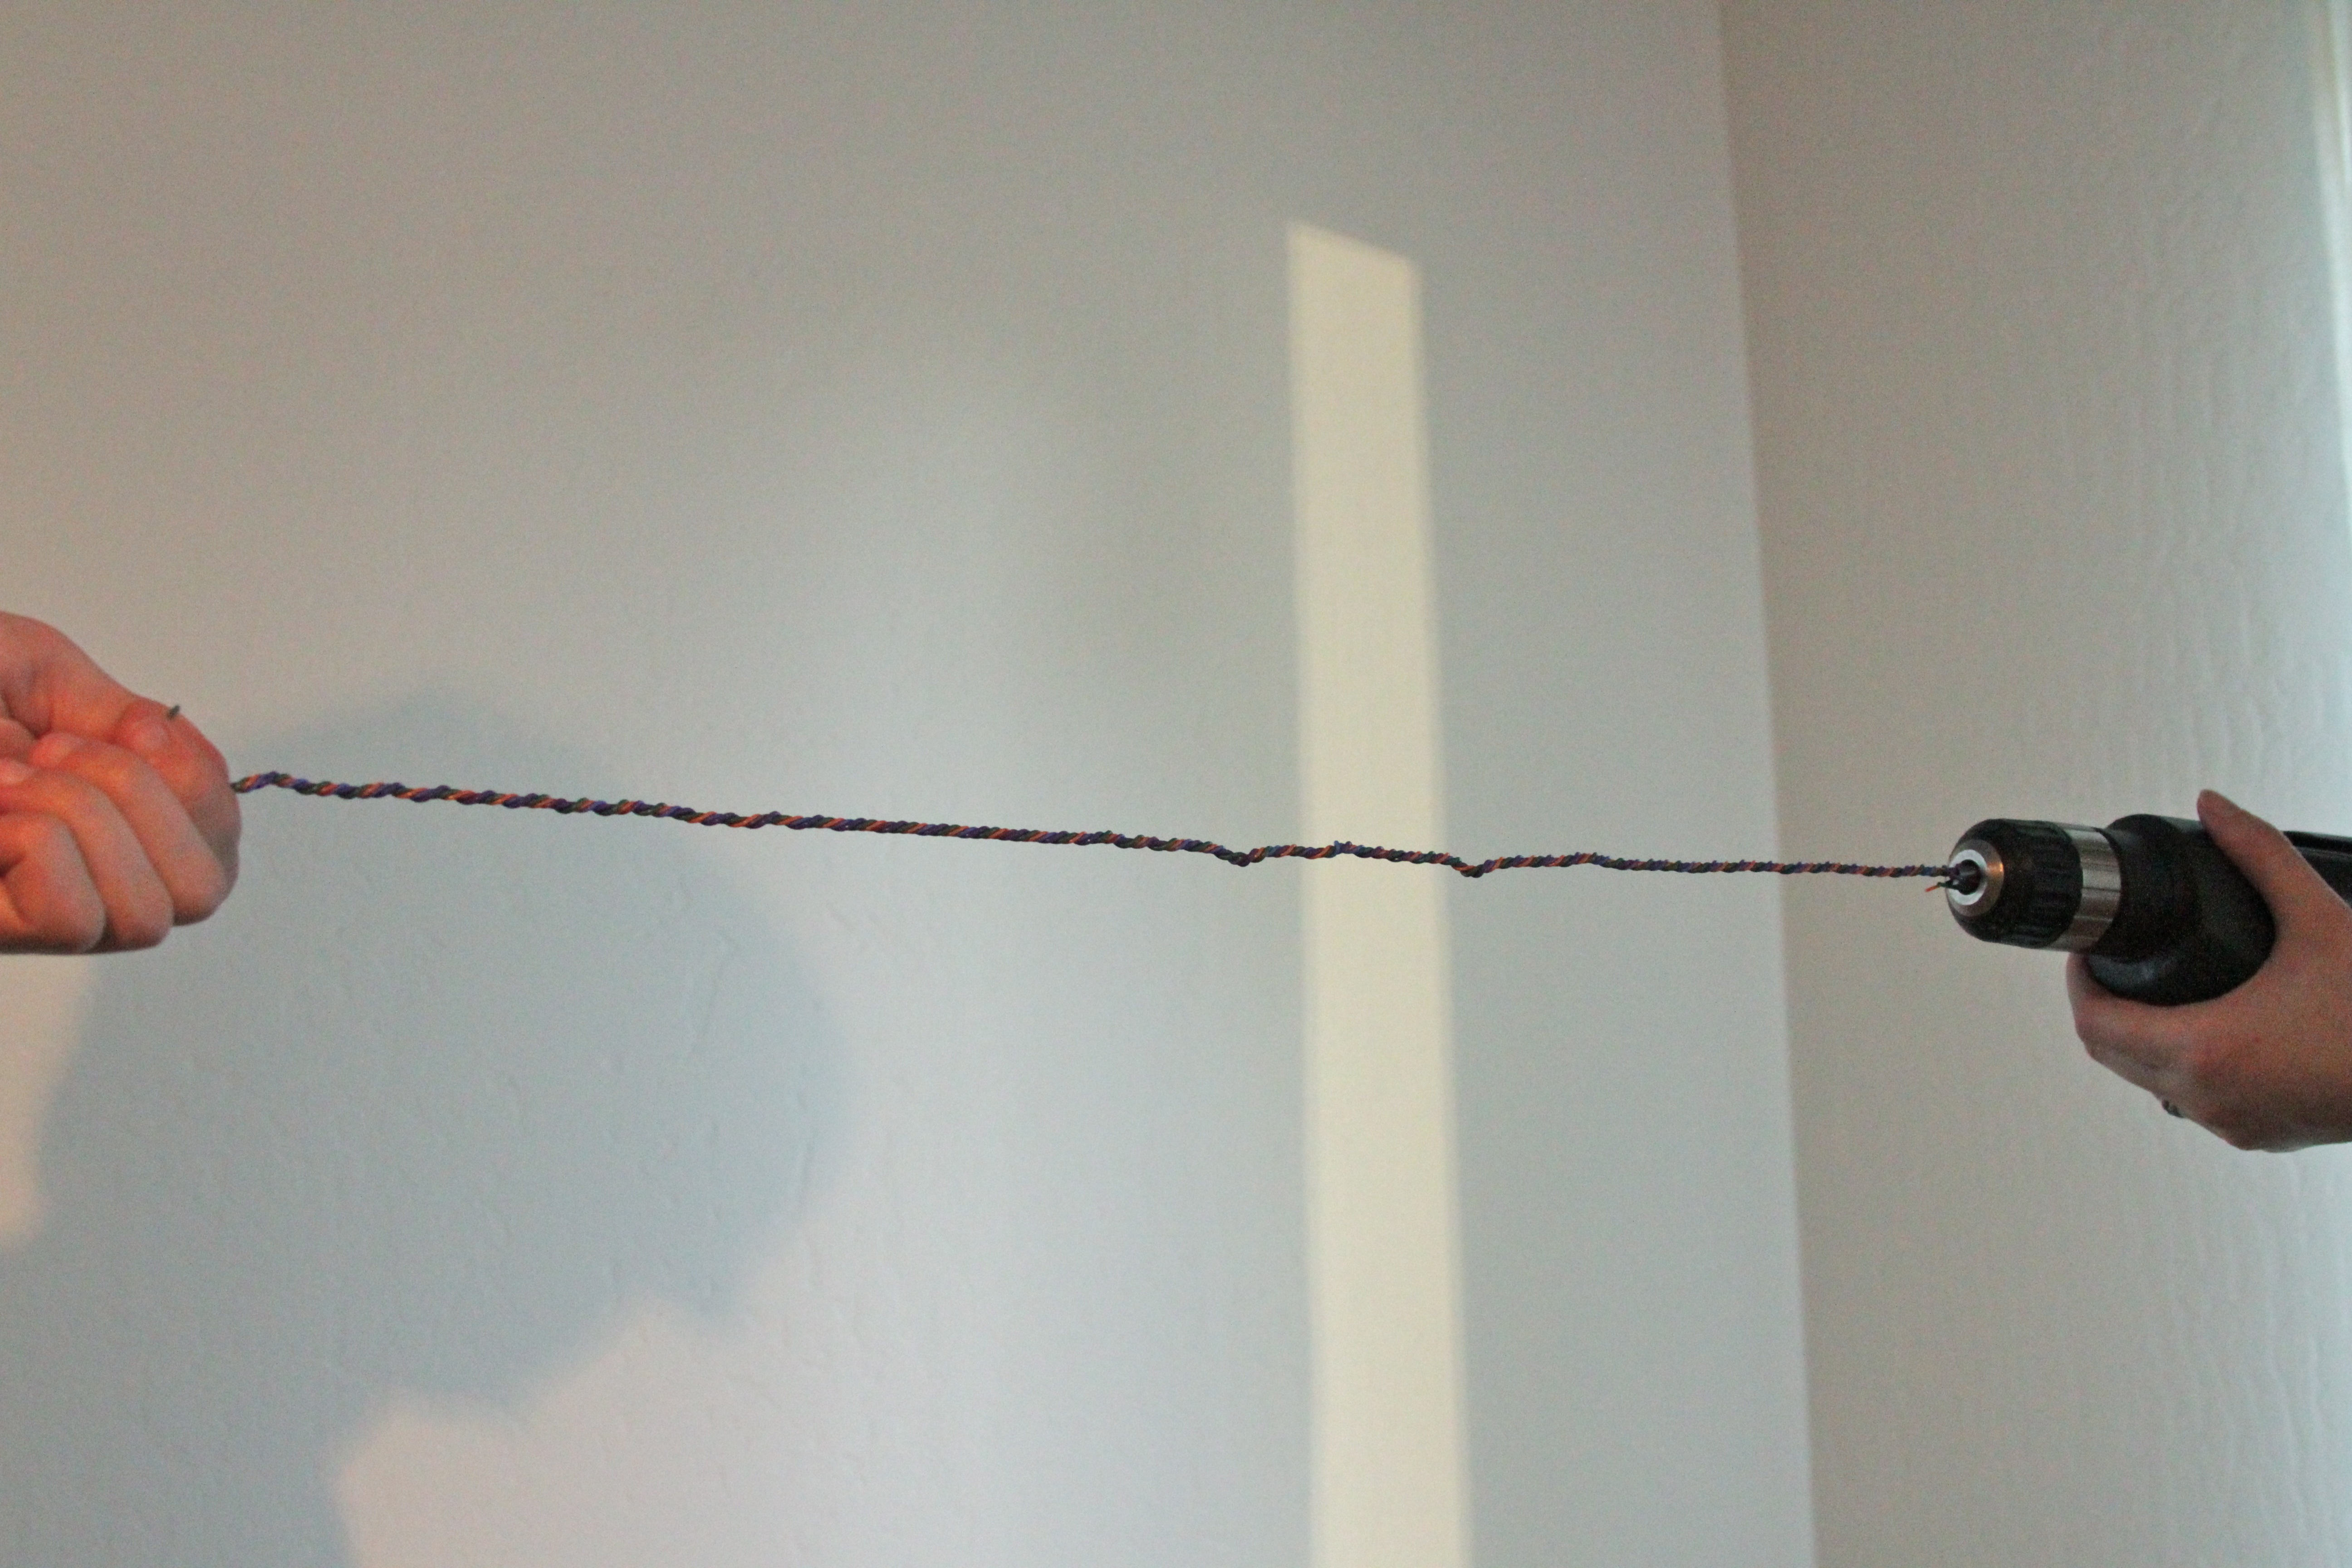
Now, run the drill. Run very slowly at first, making sure that the wire does not whip around. You can speed up as it becomes stable. By the time that the wires stop looking smooth and just begin buckling, it’s done. Don’t overdo it, as the wires may begin to stretch in undesirable ways. Total time elapsed on this step is usually under 30 seconds.

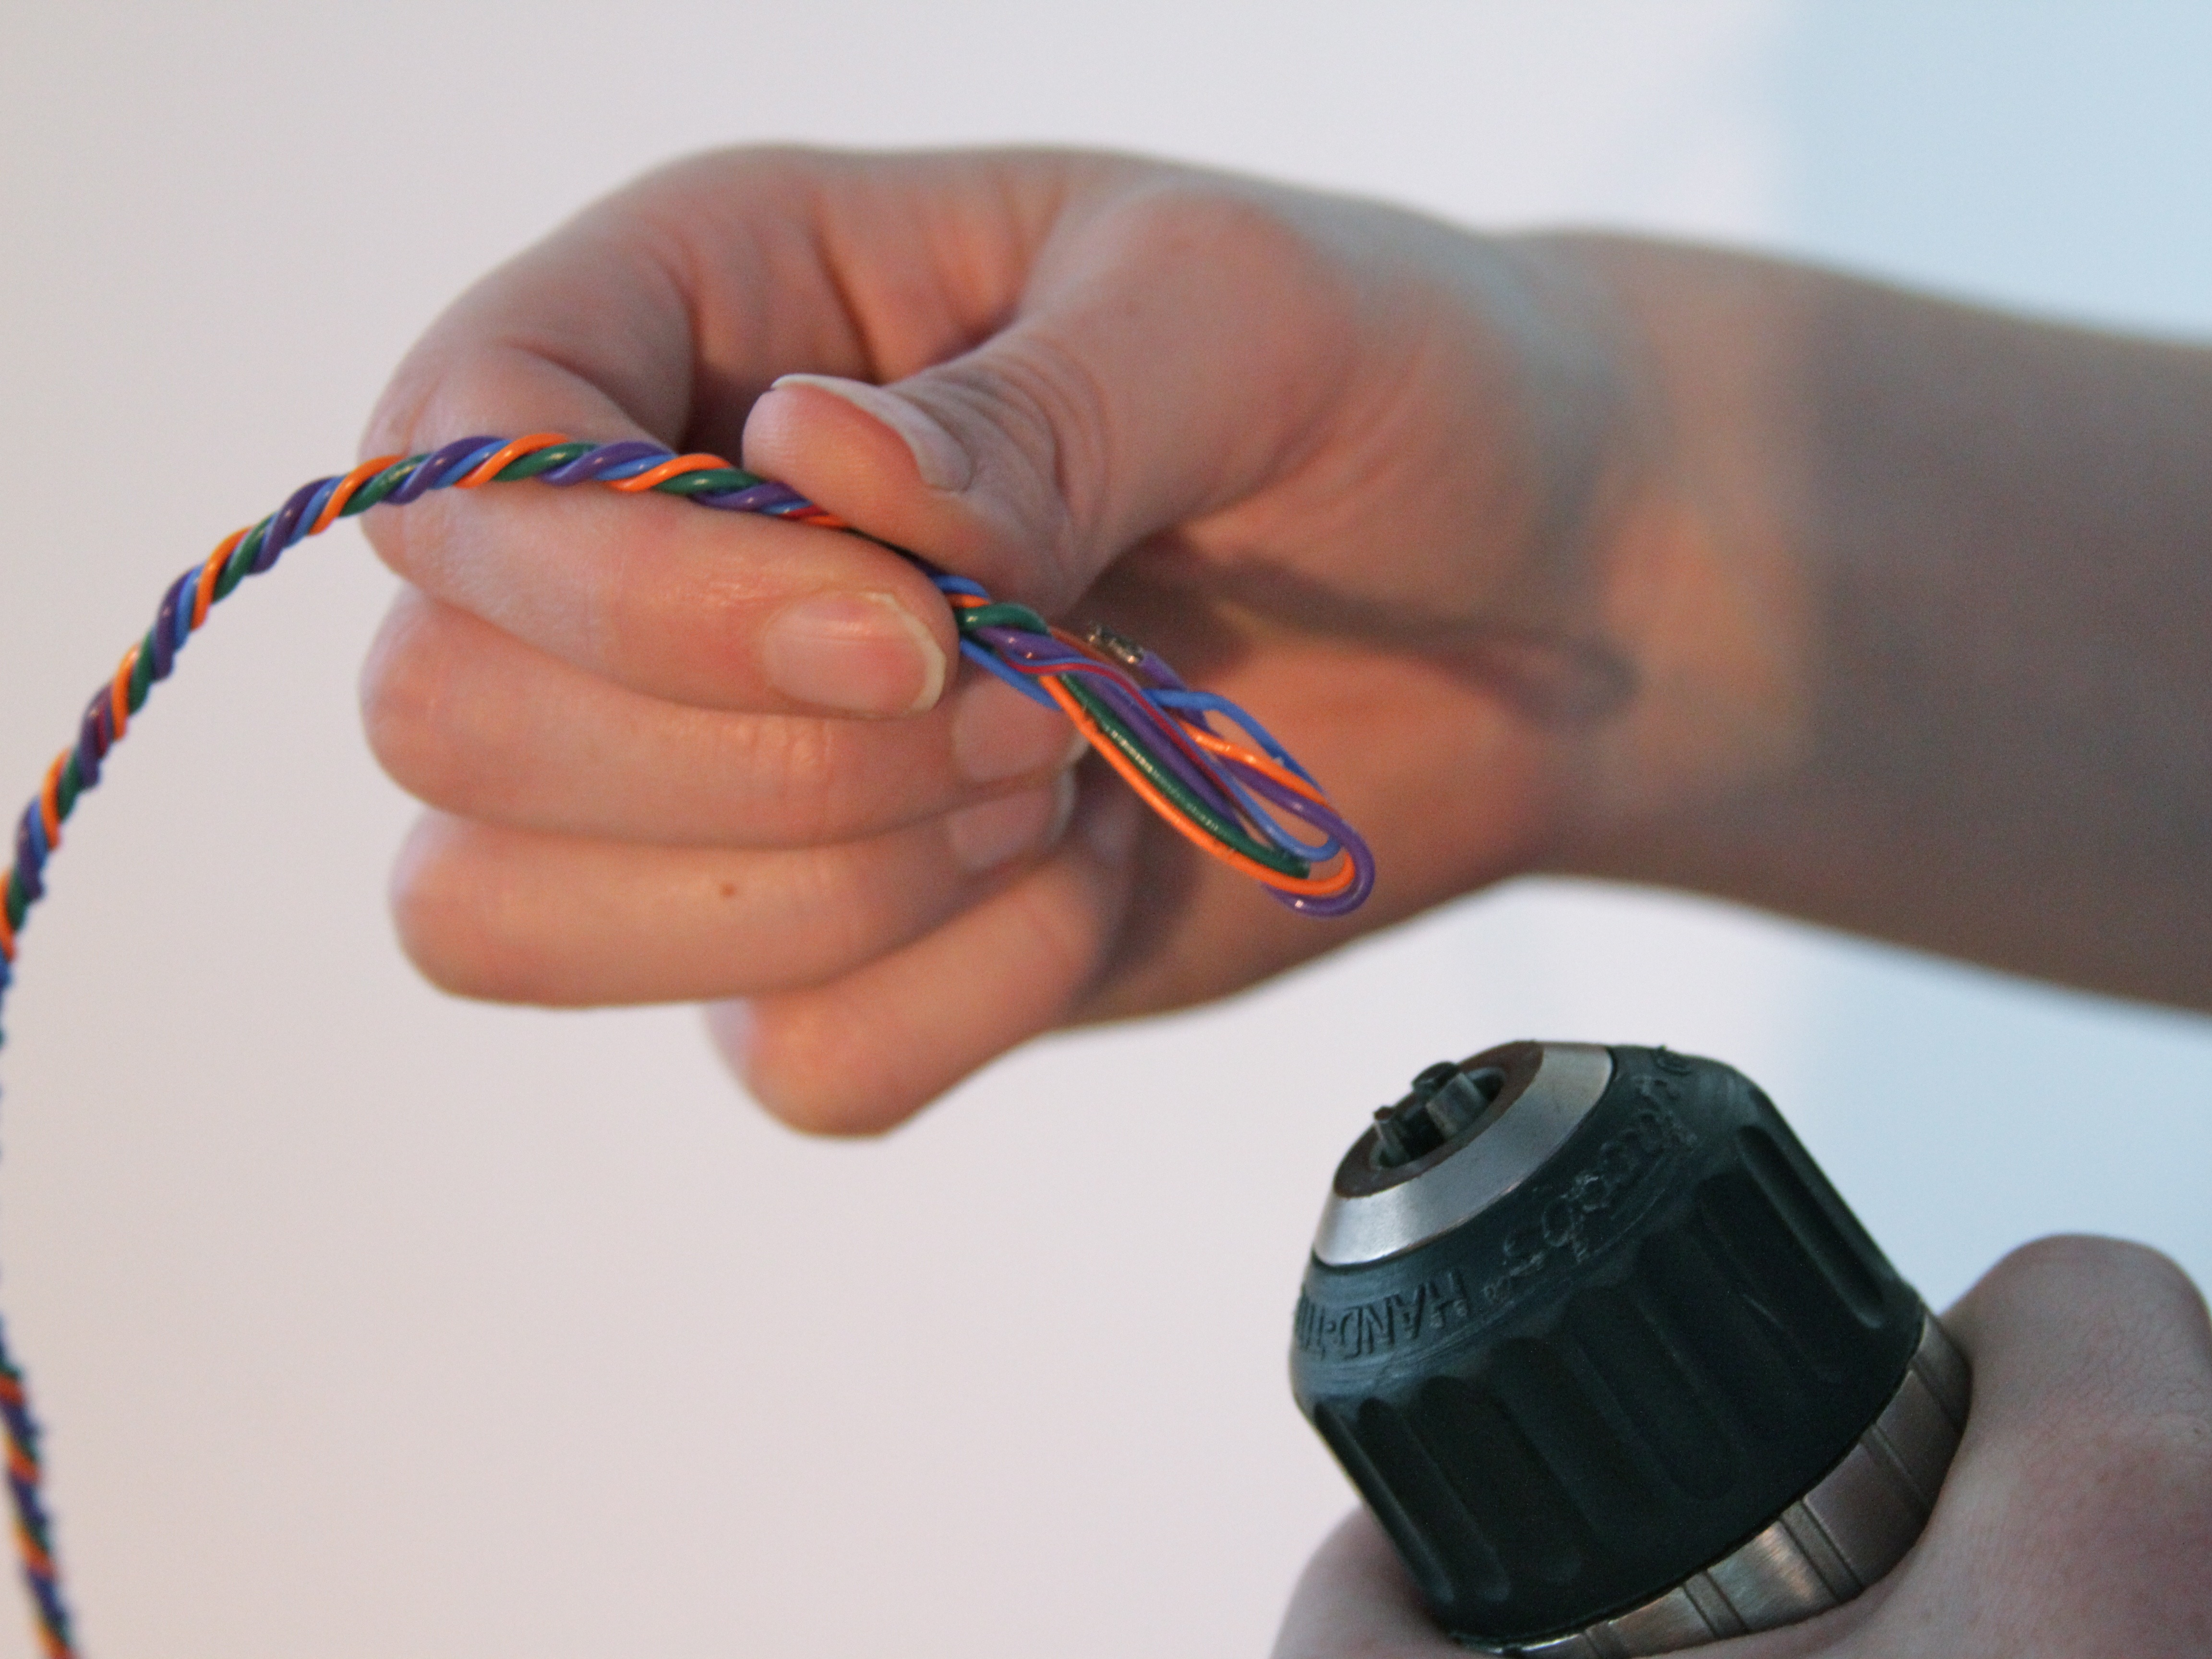

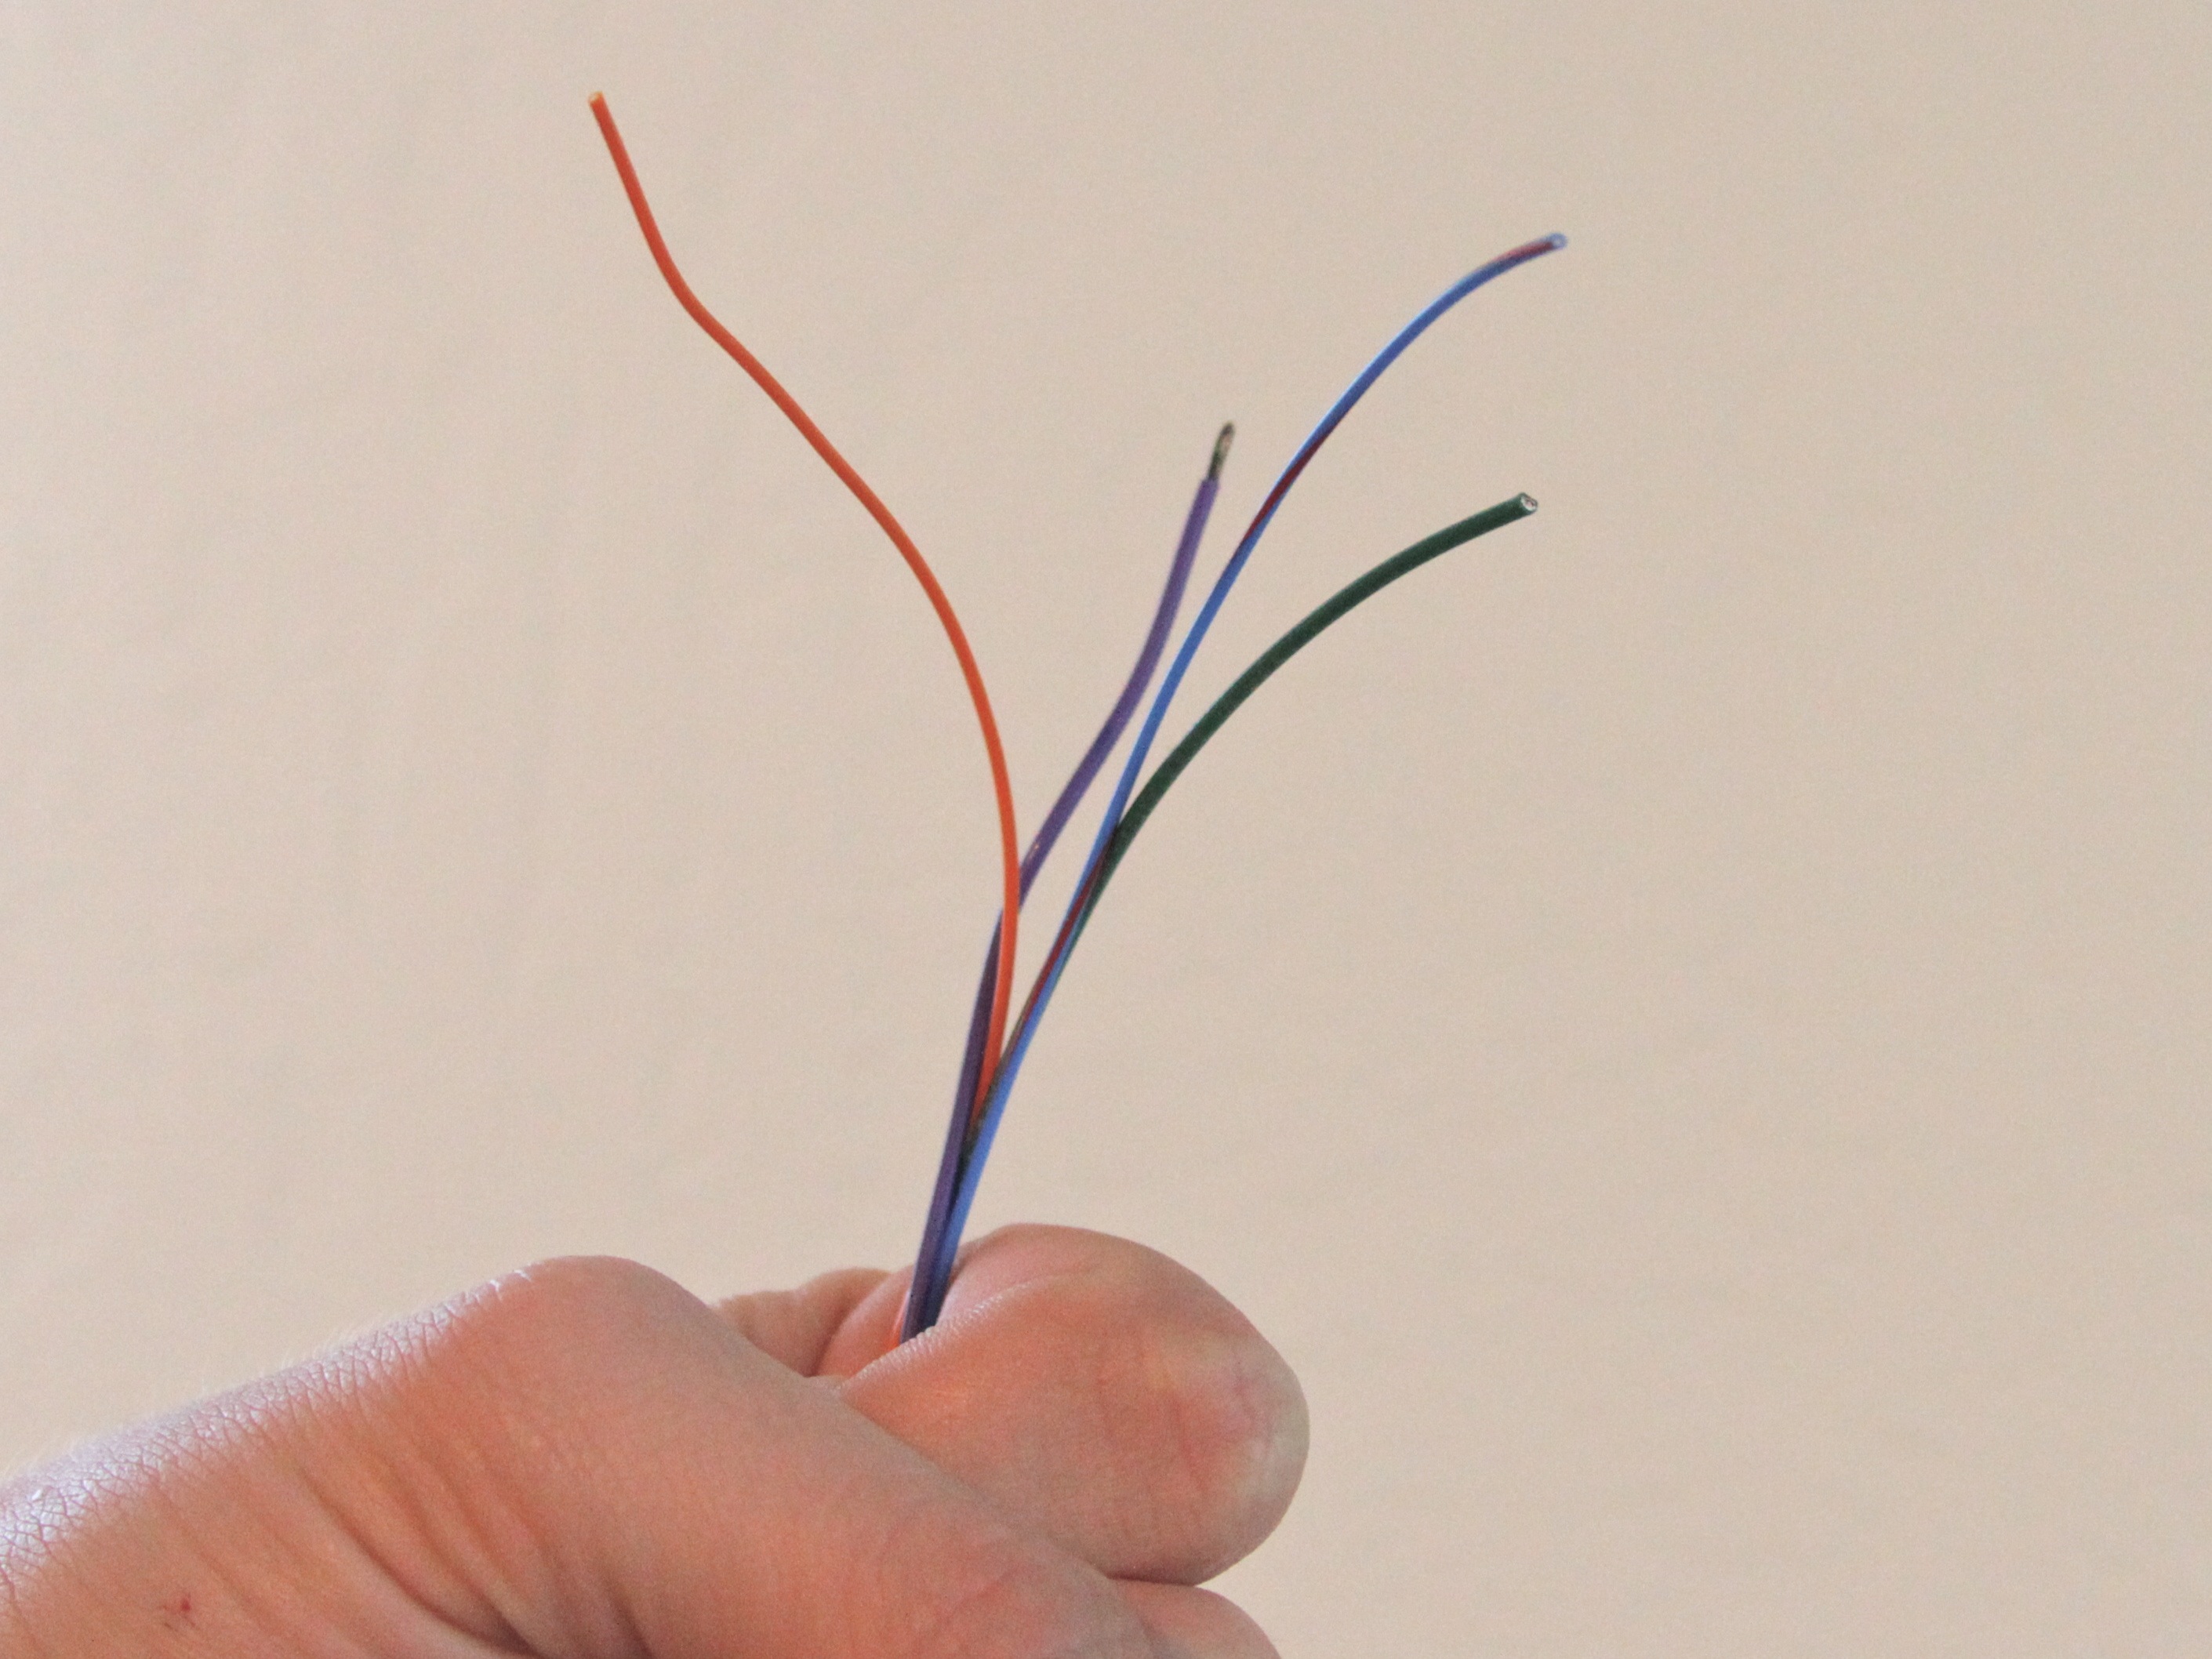
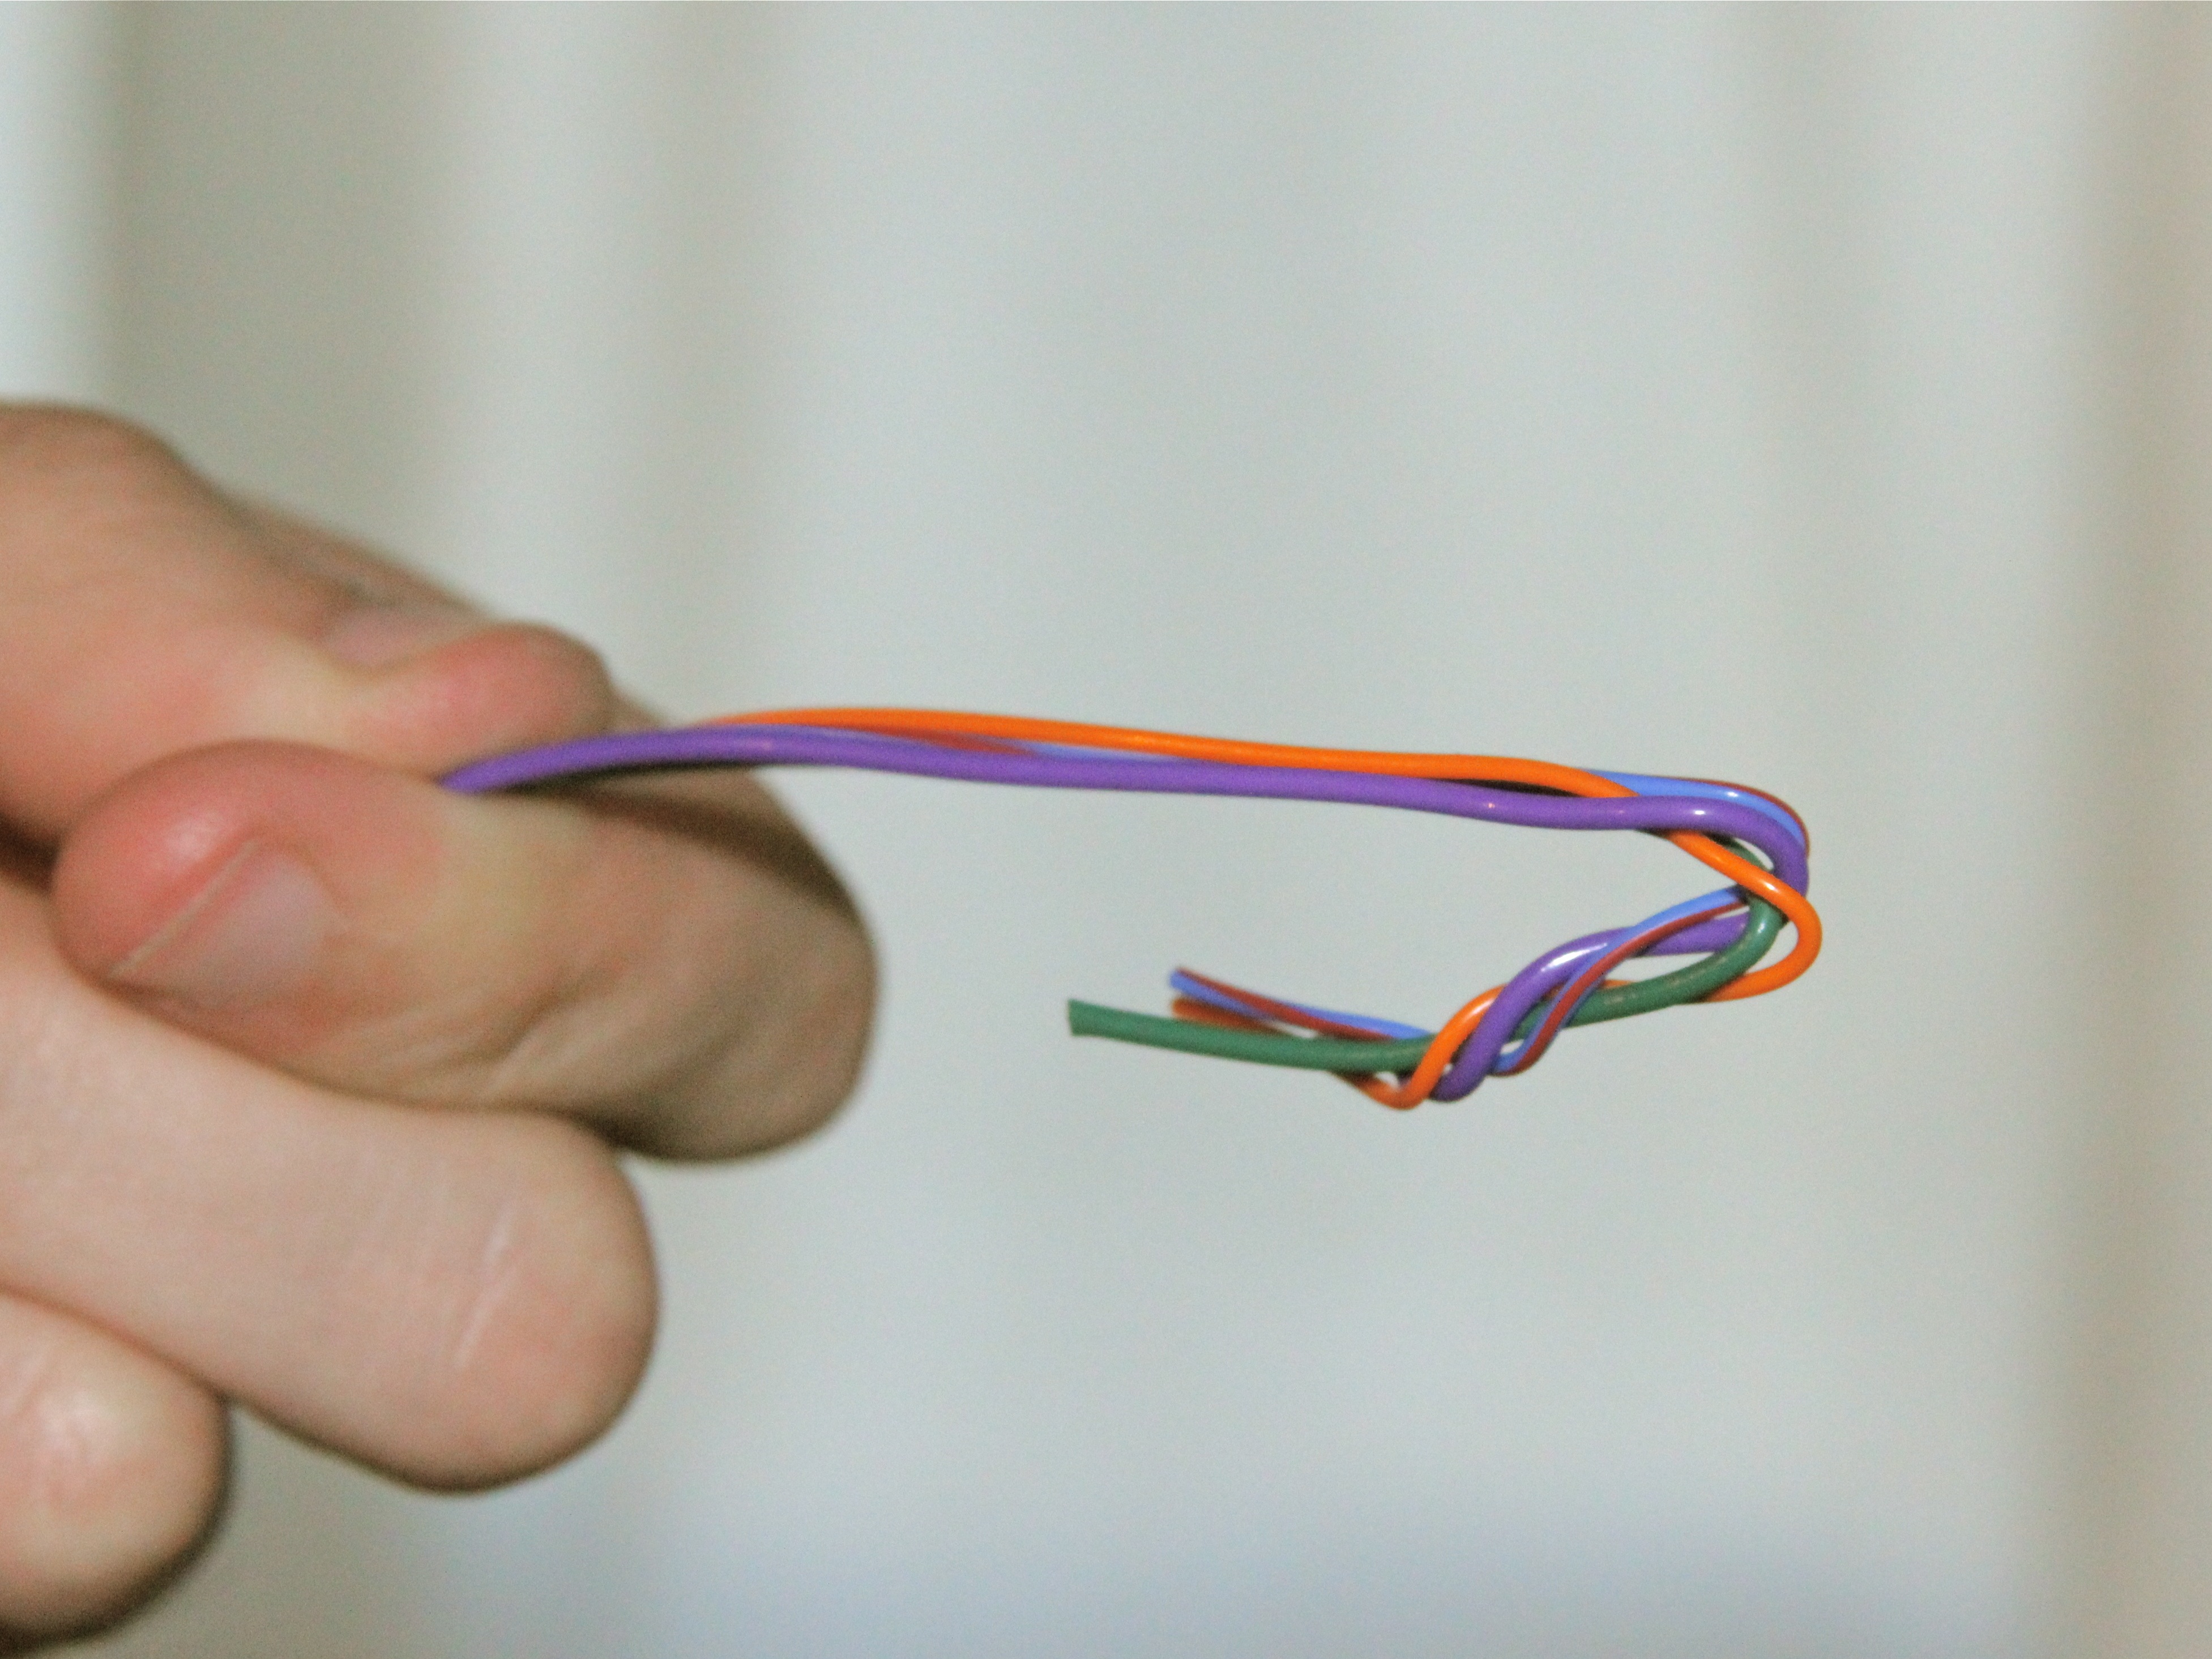
Unchuck the wire, trim and pluck apart the ends, and there you go: a neat little wire bundle, ready to take on the world:

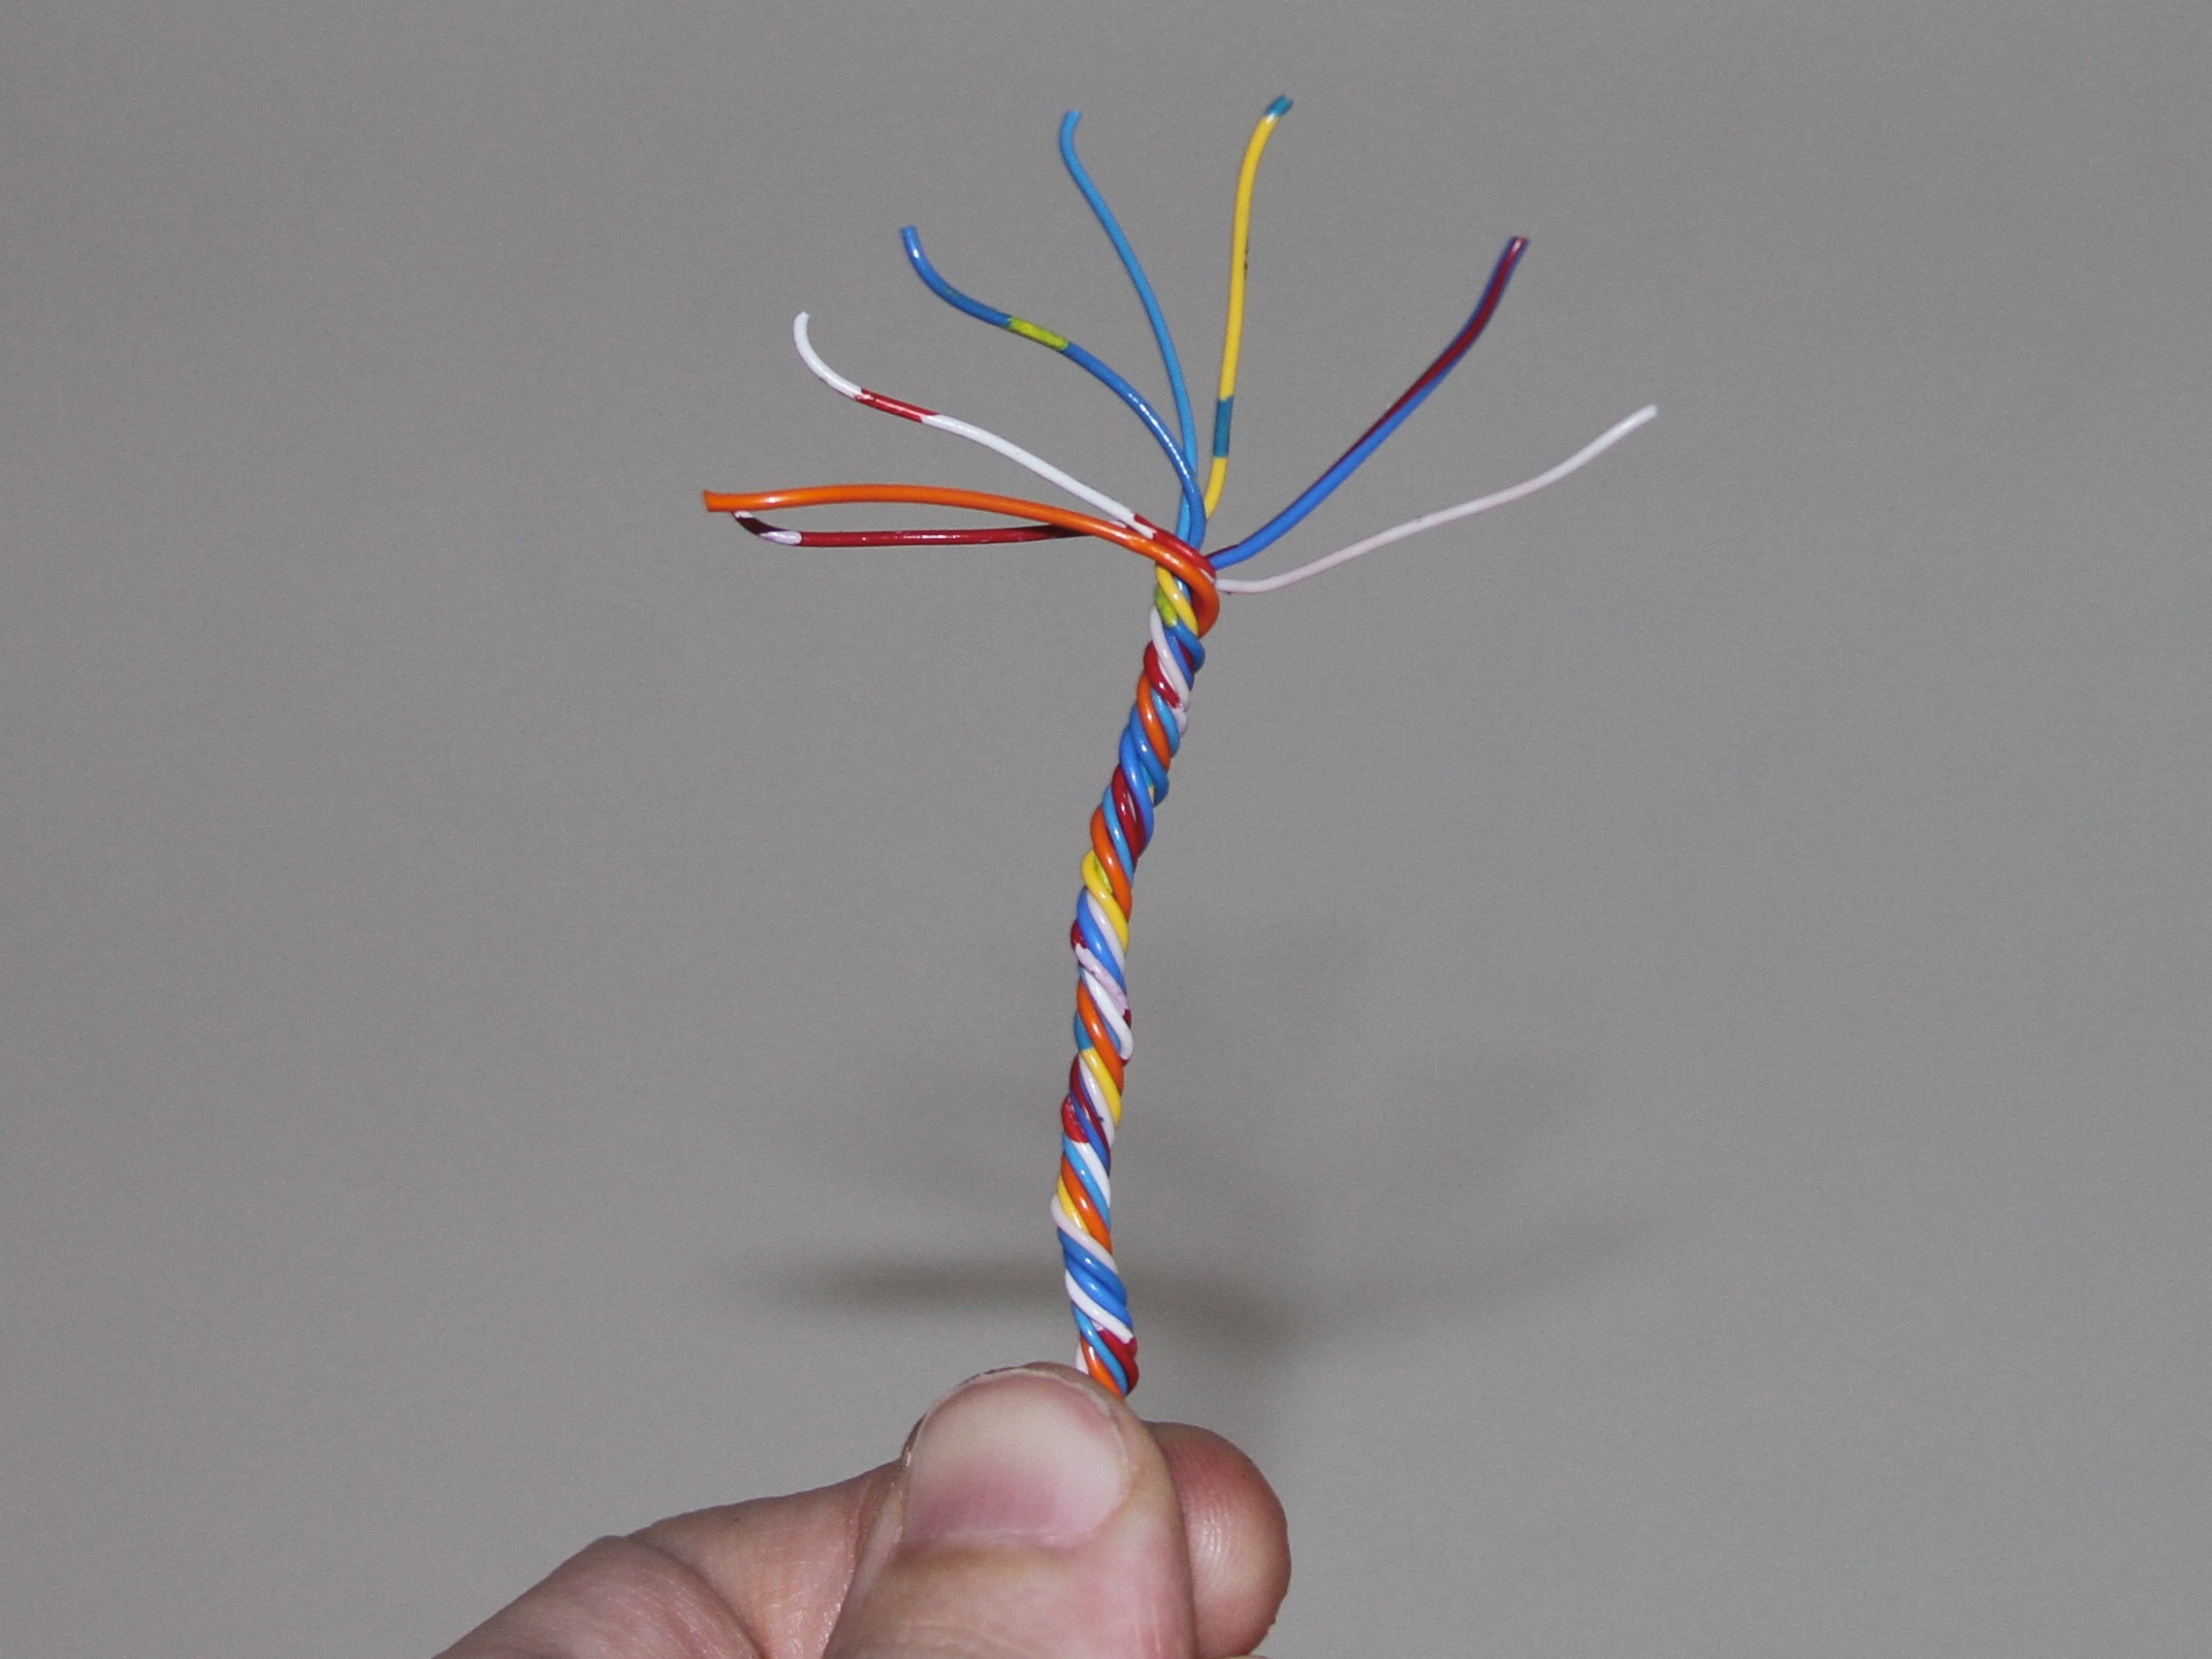
You can obviously do much more complex wiring as well. Wire bundles like these have internal tension and tend to stay together quite well.
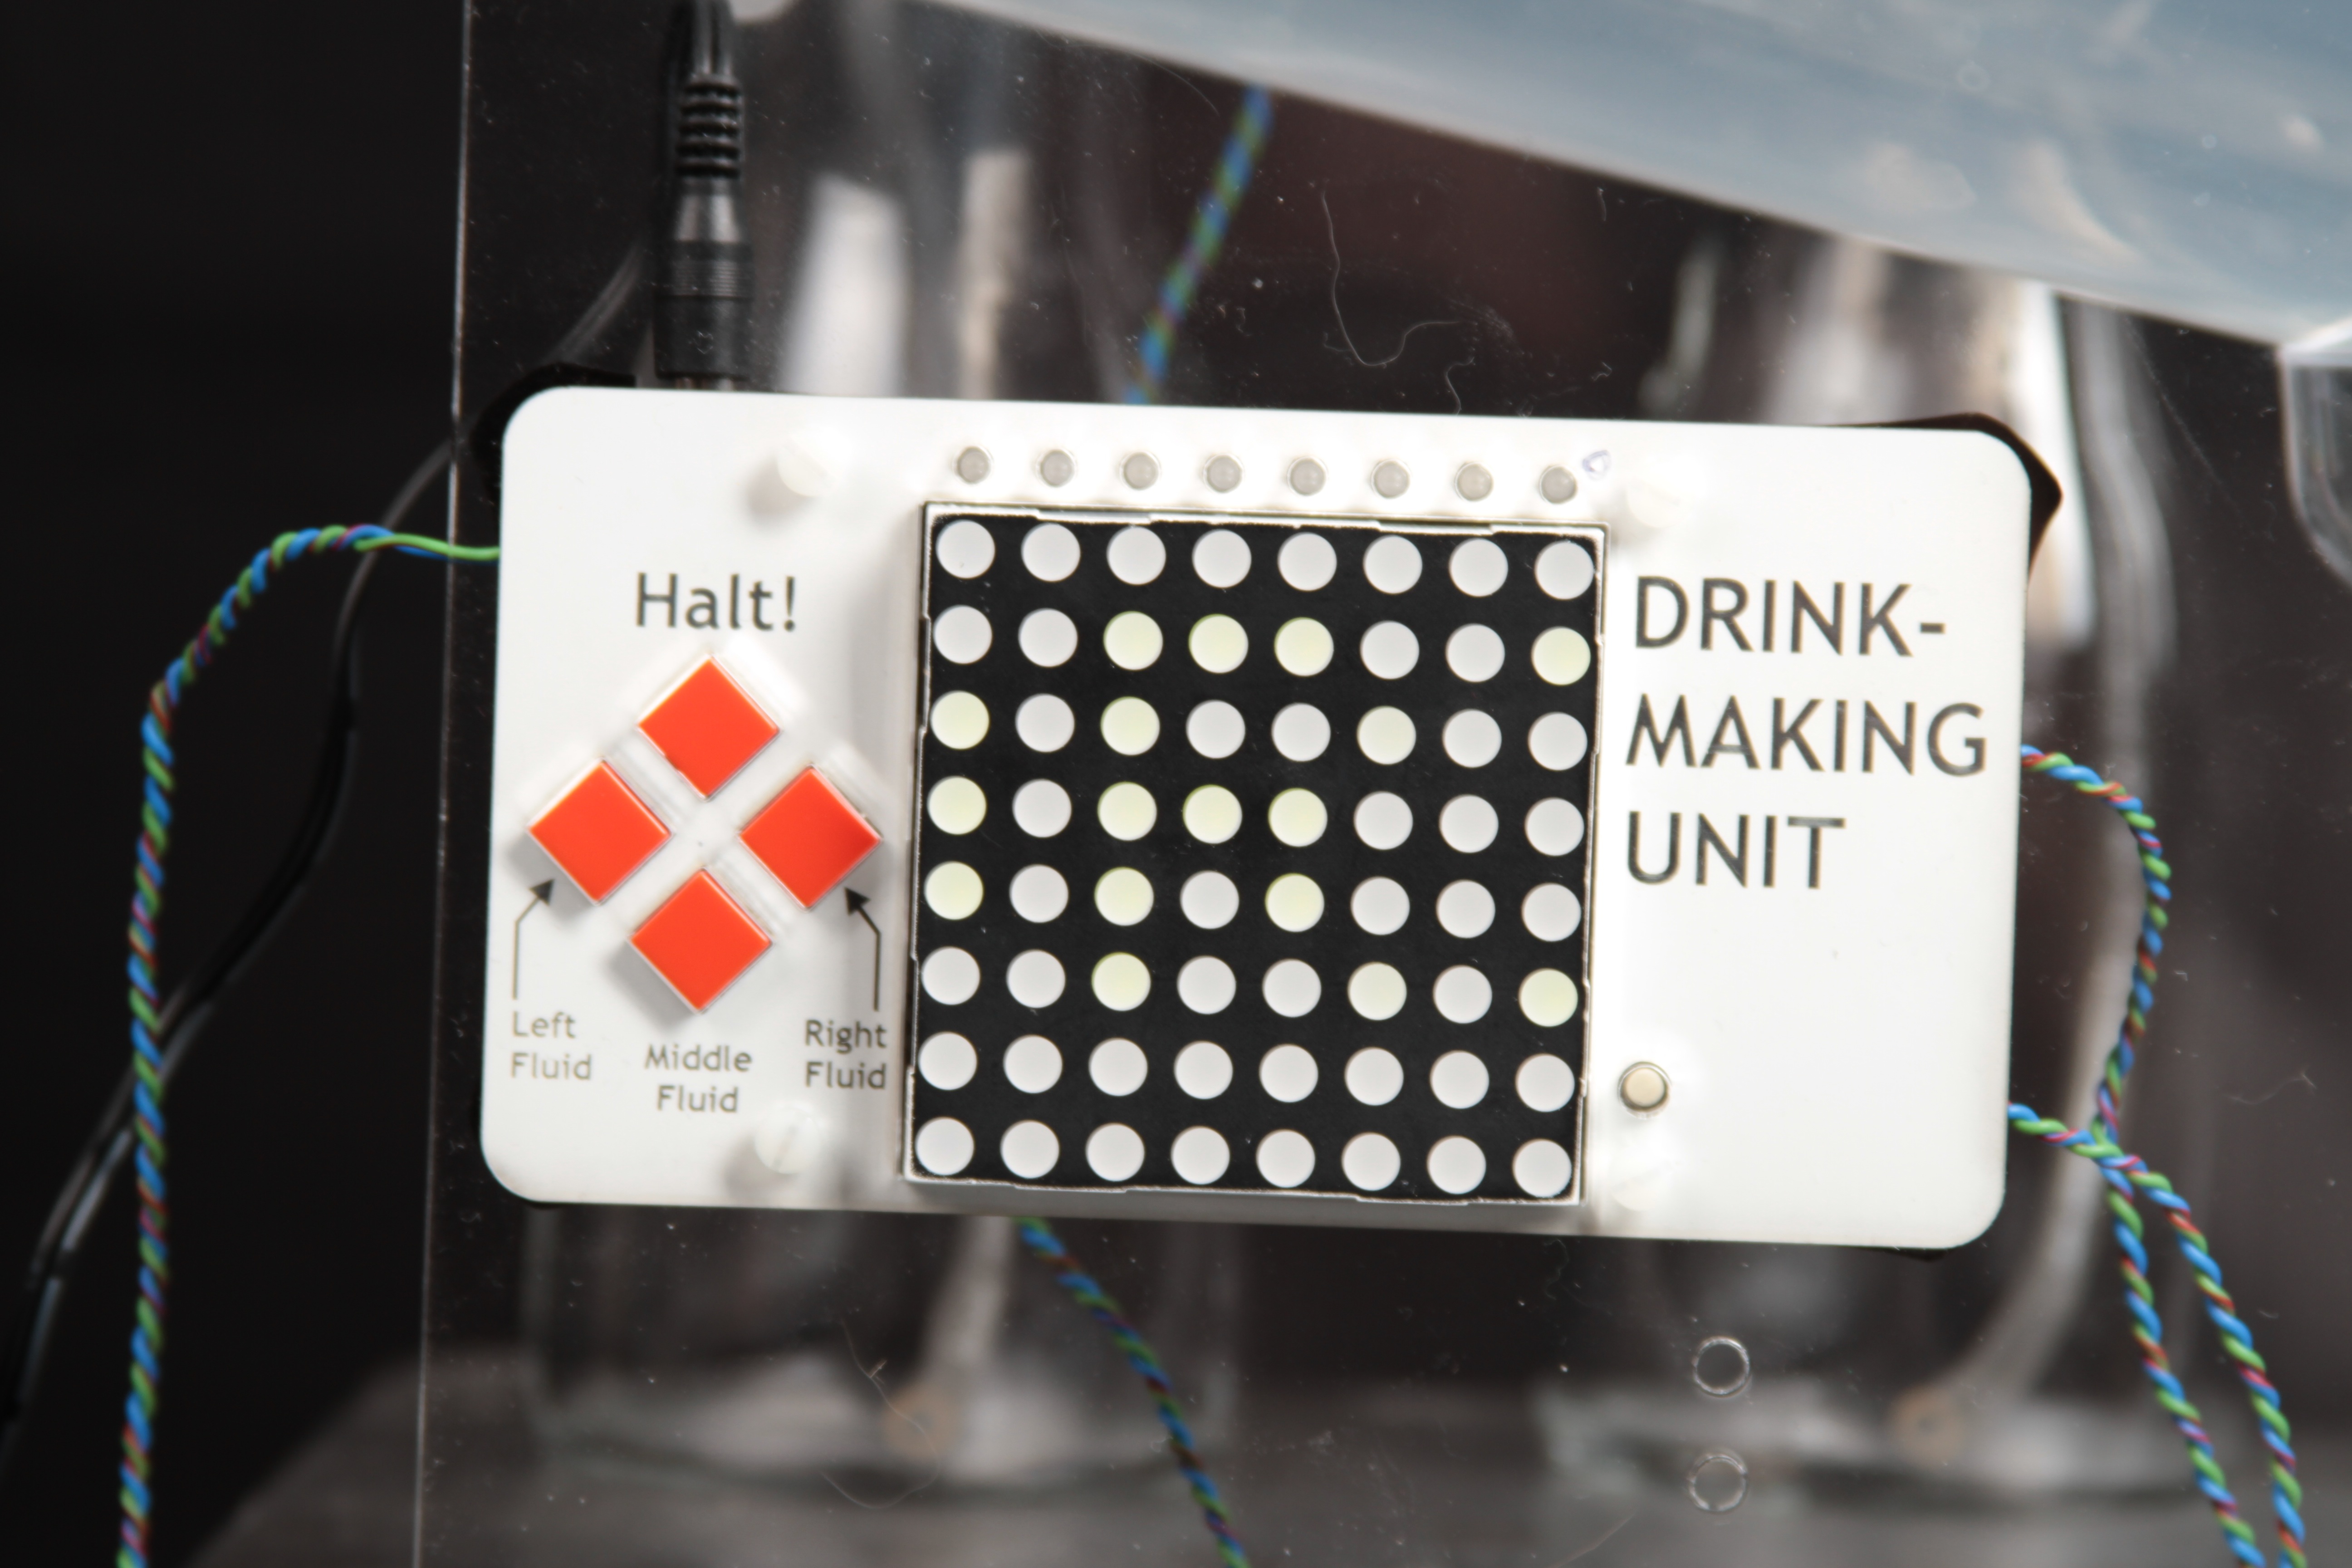
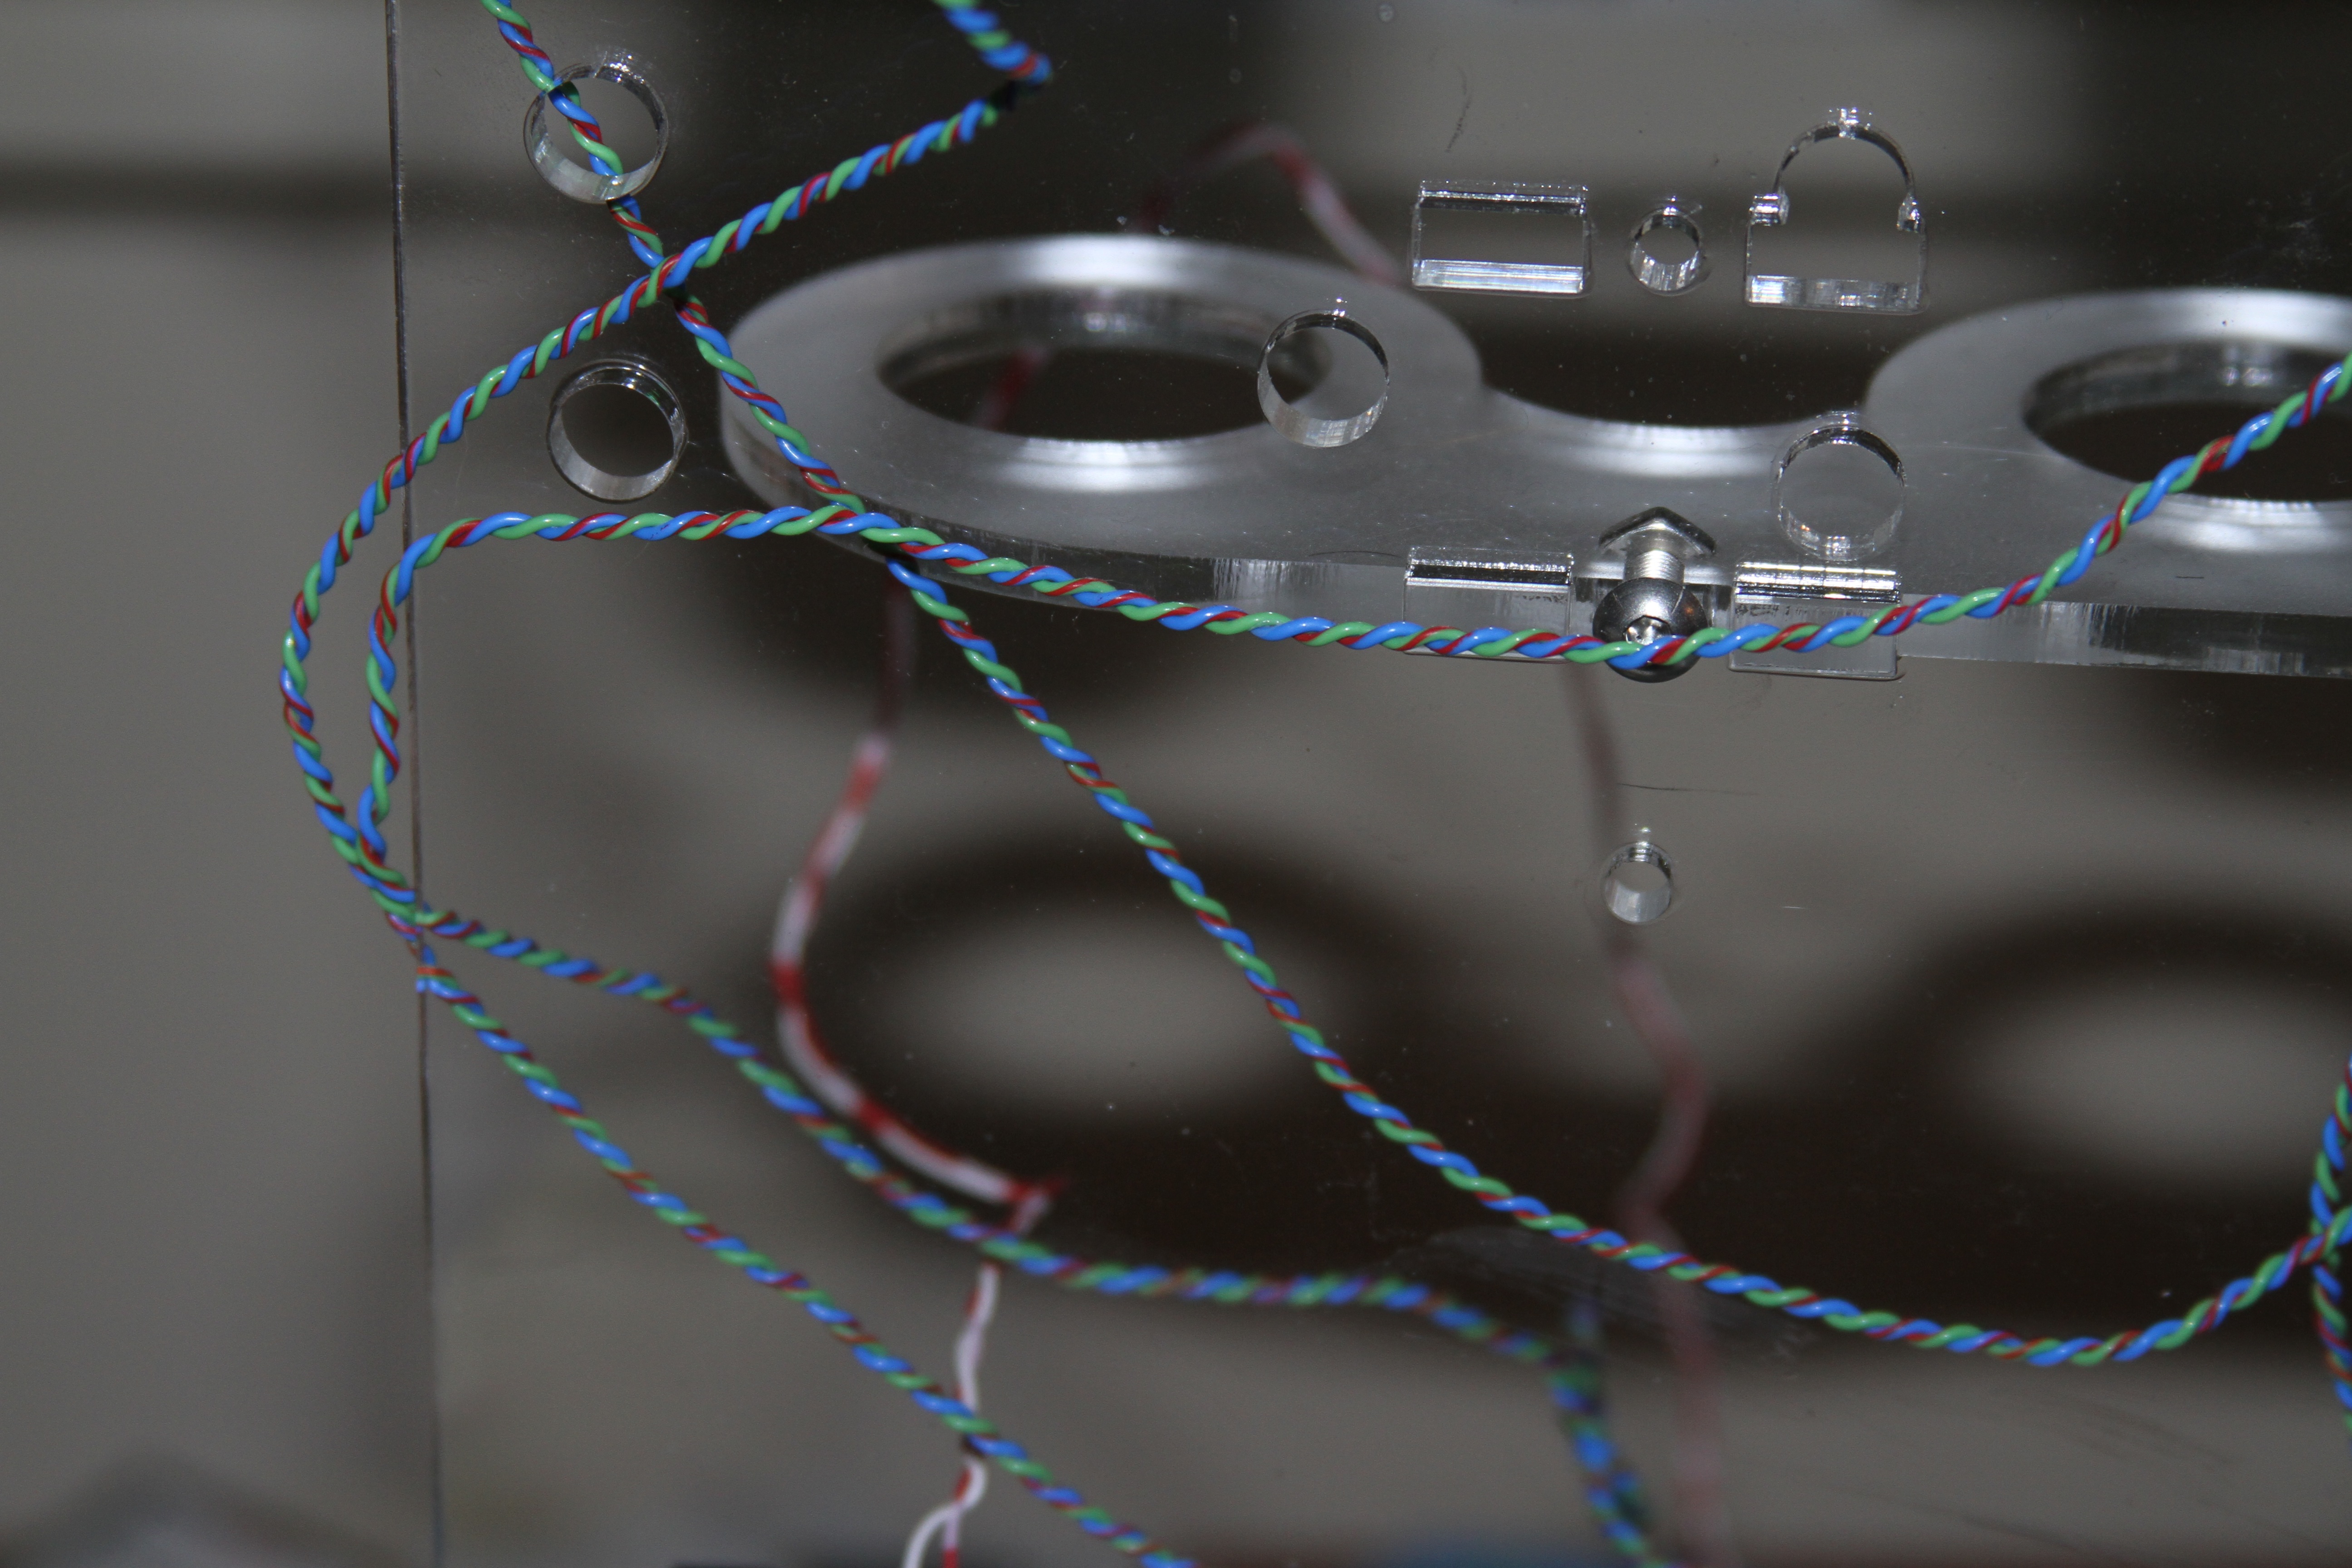
Here is a much simpler example of the same technique. In our Drink Making Unit project, we had a central controller that had two wires each running out to the three separate motors.
Instead of running six loose lines, we instead made these three extremely effective and neat-looking twisted pairs. (Or more precisely, we made one long twisted pair and cut it into thirds.)
Twisted bundles like these are very well behaved– not only do they look professional, but they feel good as well, with a natural springiness, and they seem to resist snagging.
So there you have it, a tried and true method, perfect making for simple one-off wiring harnesses, and making neat cable bundles to run between your devices.
It should probably go without saying, but this technique is very useful for general-purpose wiring, and is not for anything requiring special considerations. If your project requires high voltage, transmission lines, heater wires, or wires otherwise driven outside of normal parameters, you probably need to work with those wires separately and not collect them into a twisted bundle like this.
My Dad showed me how to do this when I was a kid. Somehow I always got to be on the "holding" end of the process rather than the fun end…
The bundles we made years ago are still going strong, some in devices that have been disassembled and put back together many times, these bundles are definitely robust!
I like to chuck a cup hook or eye bolt in the drill, take the bundle of wires and loop it once over the hook and then use masking tape or a velcro cable tie to hold it in place while twisting. Solves the issue you sometimes get when you try to chuck a bunch of little wires directly in the drill and some keep falling out.
If you can’t find a friend, you can tie the loose end onto any suitable and stable object, like the back of a chair, a hook on a wall, etc. As the drill spins the wire bundle will start to get shorter. Simply maintain tension on the wire bundle so it doesn’t flop around, and slowly walk forward as the wire shortens. (I suppose I’m used to making wire bundles several meters long…) When removing the wire from the drill, don’t just let go! Hold onto it and let it slowly spin back as it relaxes. Otherwise, it’ll twist back on itself.
Just be sure it can’t come loose – I was doing this with the cable end held securely (so I thought) in a vise. As the wire got shorter, I walked toward the vise and sped up the drill. About three feet away, the wire slipped out of the vise (or broke) and gave me the worst whipping on my legs I’ve ever gotten!
If you have a vise, works just as well with some padding to protect the wires.
I used to do this to make neat wire whips when I was a kid. My dad always had a ton of wire laying around from various projects and I would spin three or four wires into a bundle, then three or four bundles into a larger bundle and so on, until the diameter of of the braid was substantial enough to fit into a quarter inch aluminum pipe. I’d thread the massive cable through a 1′ section of pipe, leaving about 6" of overhang on one end, and three or four feet on the other. I then crimped the end of the pipe with a vise and folded the 6" overhang back up onto the pipe itself and wrapped it with black electrical tape to create a molded "handle" of sorts. Then I’d put three or four large wire ties about 2" from the other end to keep it from unwinding. The mass of the wire was so great, you could whip clean through a glass bottle or the occasional aluminum can. The insulation came off the ends of the wire past the wire ties and gave it a cool copper look and of course the whip itself was a technicolor nightmare. Ahhh . . . memories.
These could be made more durable with a rope-making machine. That would counter-rotate the individual strands, when they start to untwist they twist the main rope tighter, and the same goes for the main rope untwisting.
I think the wire looks better with less twists per unit length. The problem is, the wire will tend to unwind when released… To get over this, wind until you have reached the number of twists you want, and then slightly stretch the wire lengthways a little (Just a little, not too much).
The stretch will cause the wire to stay twisted after you release it from the drill…
For three wire bundles, I just braid them. Any more than that and I get confused :(
This reminds me of a trick-of-the-trade from the valve-radio days, the "gimmick capacitor":
http://bit.ly/9mHCmT
It’s just two wires twisted together to make a very-low-value cap, but there are some applications where a gimmick cap is very valuable. If you use yards of wire you might be able to run it up to a pretty high value!
I’ve done harnesses using this technique up to 30 meters long-works great!
One trick that helps on the really long ones-
If you just stop and unchuck when you reached the desired "twist", the #@!$ thing will go crazy on you and wrap back on itself when released-after all, all that twist has to go somewhere…
Go past that point while pulling hard on the drill-than reverse a few seconds and unchuck. It’ll flop harmlessly onto the floor straight as an arrow.
I’ve also found that if you need to feed wires into a conduit by "pushing" them in that twisting them in this manner first makes it sooooo much easier.
…called safety wire pliers, and it’s designed specifically to grab and twist wires. Inexpensive, compact, and pretty much impossible to hurt yourself with (unlike a power drill). They’re used in aircraft and motorsports maintenance.
http://images.harborfreight.com/cpi/photos/45300-45399/45341.gif
About $12 at Harbor Freight
Ok, having done this for my old job, I can attest that it actually is done in industry. The method we used was the vice+drill method, but we would do whole 25′ or 50′ sections of wire at a time. We would then clip and toss a couple inches on either of the ends, as they inevitably got messed up beyond use. Then just cut the remaining bundle into the necessary lengths and had the assemblers put them into products.
The major stumbling point to watch out for when doing this is to make sure that the wire twists, but doesn’t double back on itself. It takes a bit of patience, but it’s totally doable.
Great stuff!!
I wonder by how much the resulting twisted wire braid is shorter than the individual original wires. I suppose it has to do with the thickness of the original wires?
Cheers!