


Question: What the heck is PONG supposed to be?
When you’re playing it, it feels like the video game representation of some real-life sport. You’re bouncing a ball back and forth with another player, which at first glance sounds a lot like like table tennis, AKA ping pong– and that would seem to explain the name. And yet, PONG is two-dimensional and free of gravity. The ball goes in a straight line, at a fairly constant rate of travel. And you don’t play ping pong by rotating a wheel. Come to think of it, it’s not a darned thing like ping pong. So what the heck is it?
To answer this important question, we built this real-life Tabletop Pong game.
But, let’s back up for a second. PONG is one of the earliest arcade video games, released by Atari way back in 1972. (It was not the first video game, but it’s venerable indeed.)
We’re certainly not the first to build a real-world analog of a video game or even of PONG itself.
In looking at just a few of the “real world” examples of video games, we’ve come across examples of real-world Pac-man, Royksopp’s space invaders, and this Tetris-inspired sculpture.
While there are other examples in this little genre, the most relevant for us to mention is the Pongmechanik project (better link for photo and video). Built from 2003-2004, Pongmechanik was a startlingly faithful mechanical representation of PONG– right down to the pixelated square floating on guide wires across the playfield. And amazing though it is, it does not feel much like a “real-world” game, but instead more like wonderful old electromechanical arcade games.
Coming back to our main question now, what is PONG supposed to represent?
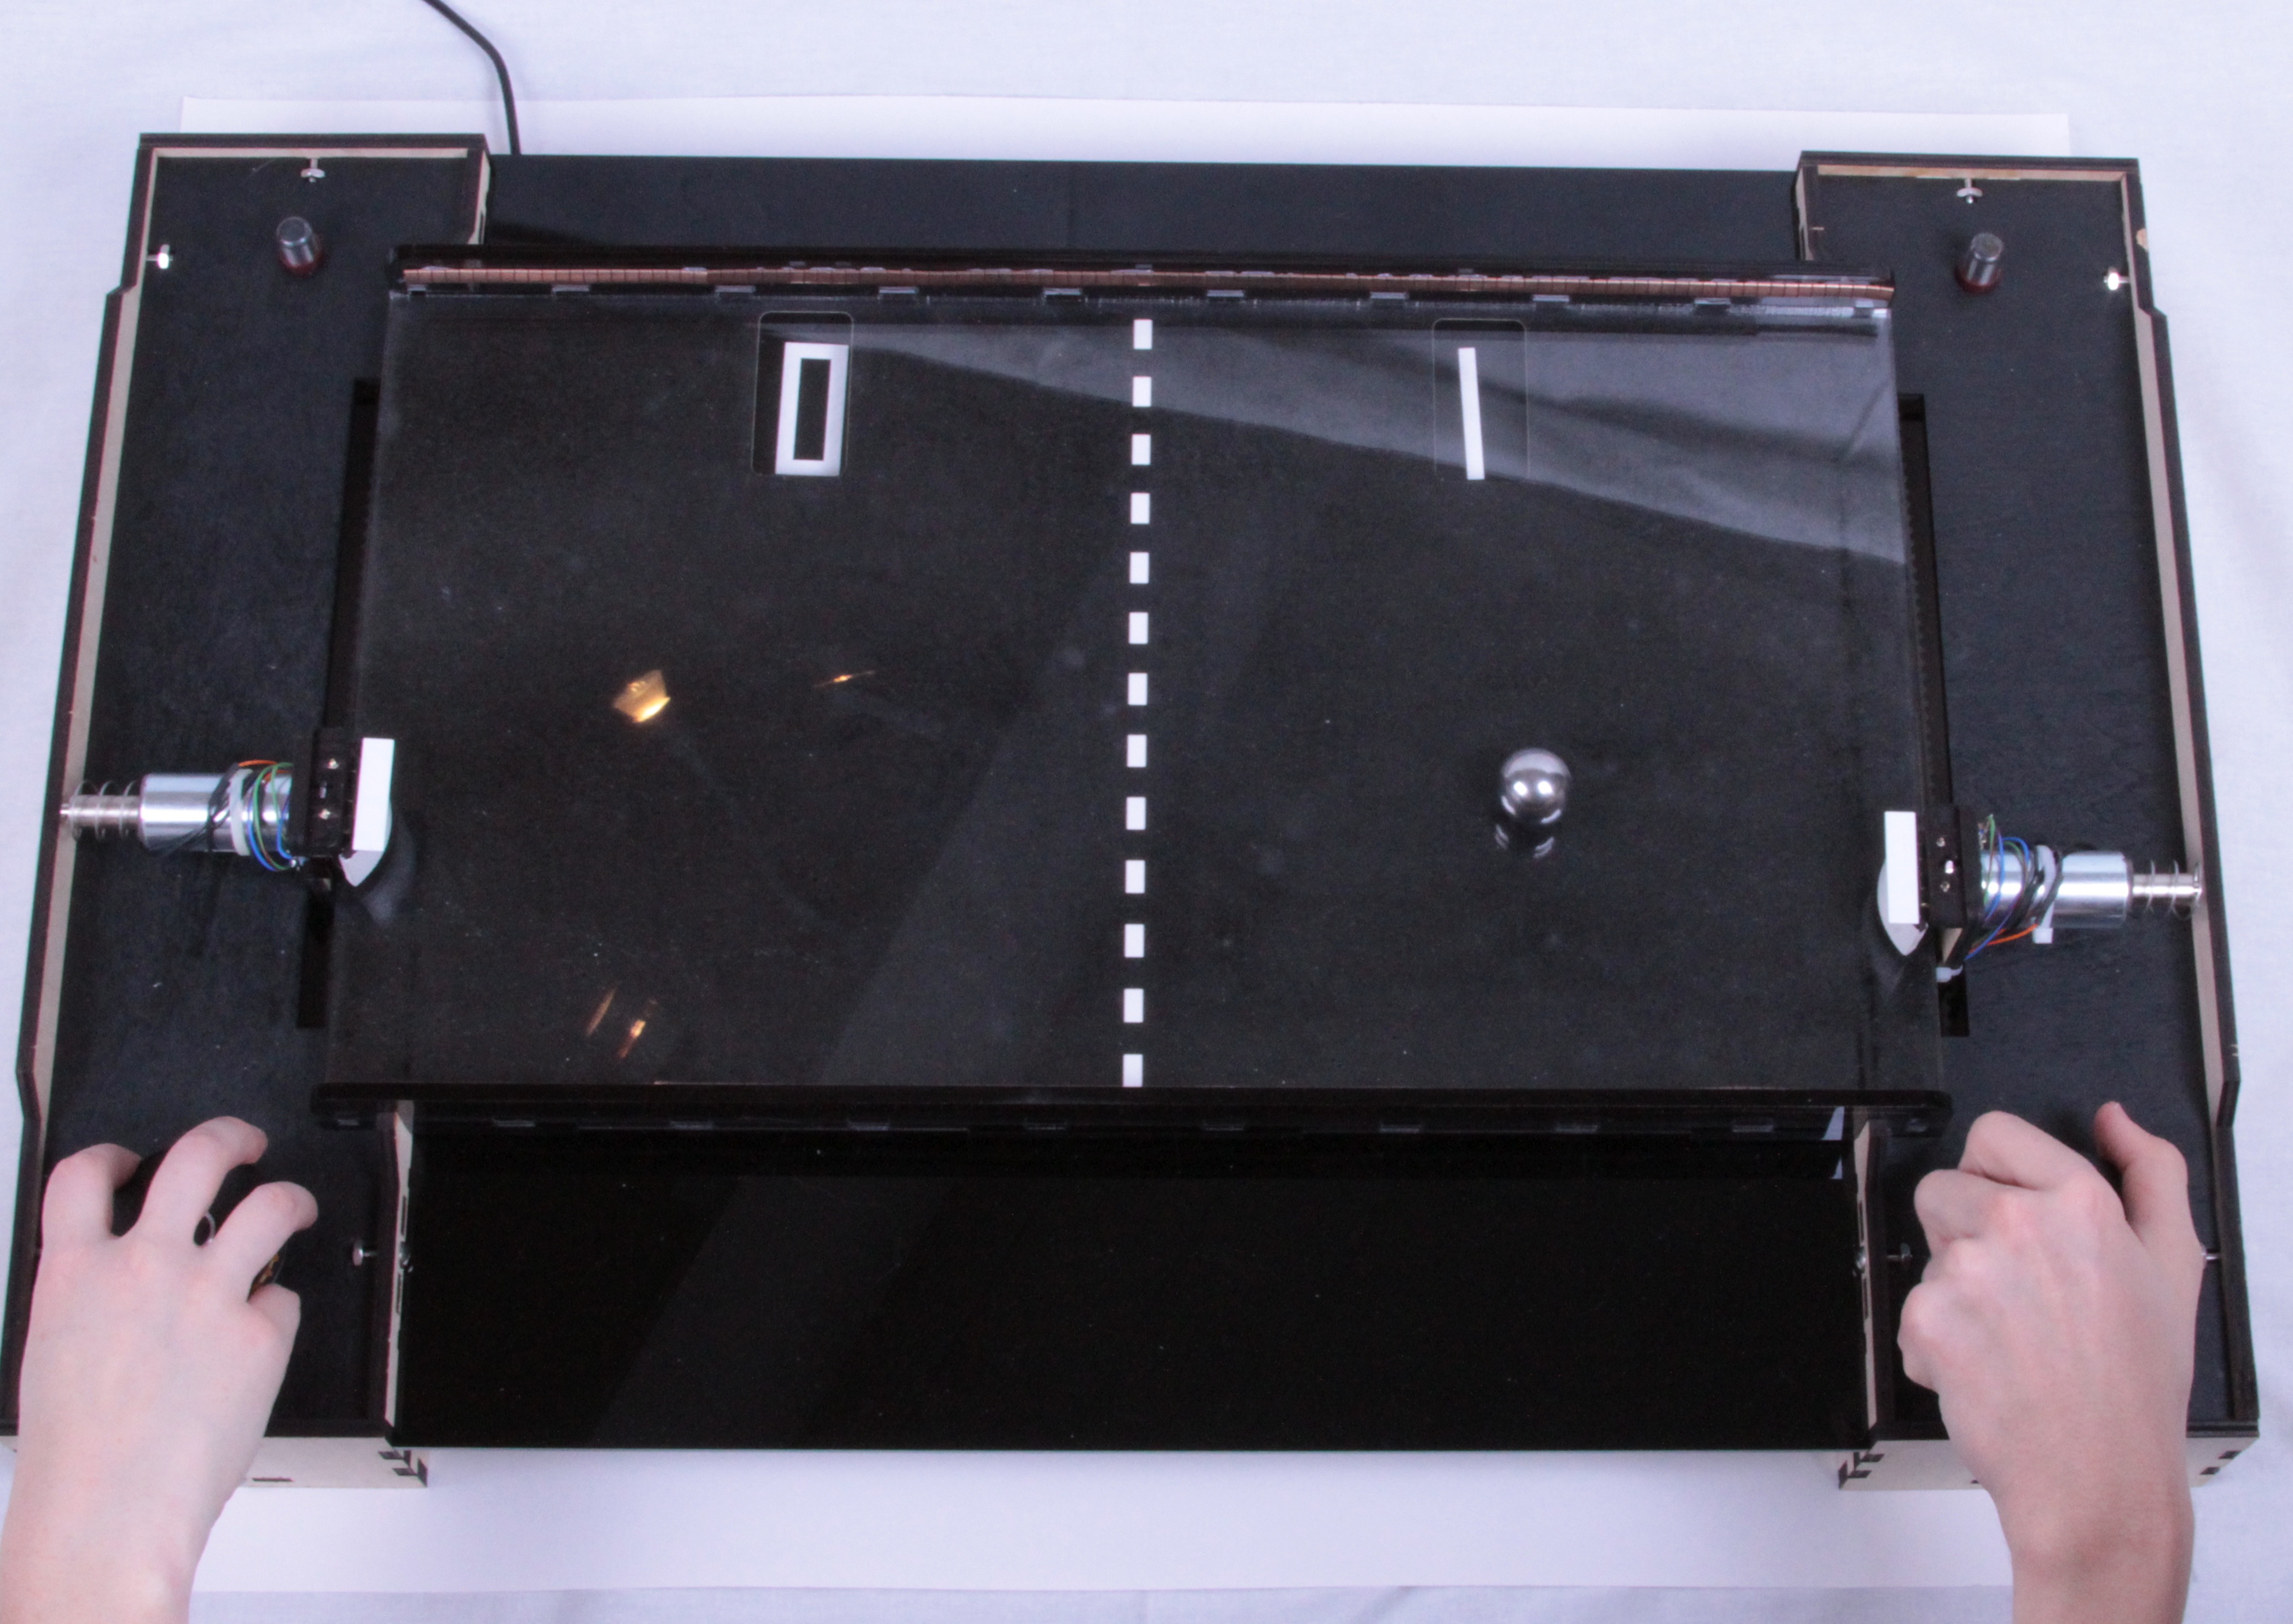
Our answer to this question is a game somewhere between pinball and ping pong: Two players each have a single knob that controls the position of a paddle along a short track. Using the paddles, they bounce the ball back and forth and try not to miss the ball, lest the other player score a point. The paddle surfaces are curved, so that the ball reflects in different directions depending on the position of impact. The paddles are powered, so that the ball keeps a fairly constant velocity between the two sides, and the speed gradually increases as the game is played. The playfield is level and has a dotted line down the middle, and the scores are displayed on either side of that line. There are top and bottom walls of the playfield that the ball can bounce off of. Sounds possible, right? So we built it.
We documented the build with (a heck of a lot of) photos, which are available in this flickr set; probably the best way to see them is to flip through the whole set– we’ve embedded a picture set below, so click through to flickr if you can’t see it.
And of course, you’ll want to know how it looks in practice so we took a quick video while trying it out for the first time– bugs and all. It’s embedded below. Again, if you can’t see it, you may want to click through and view it on YouTube.
In what follows, we’ll walk briefly through the build, pointing out some features along the way.
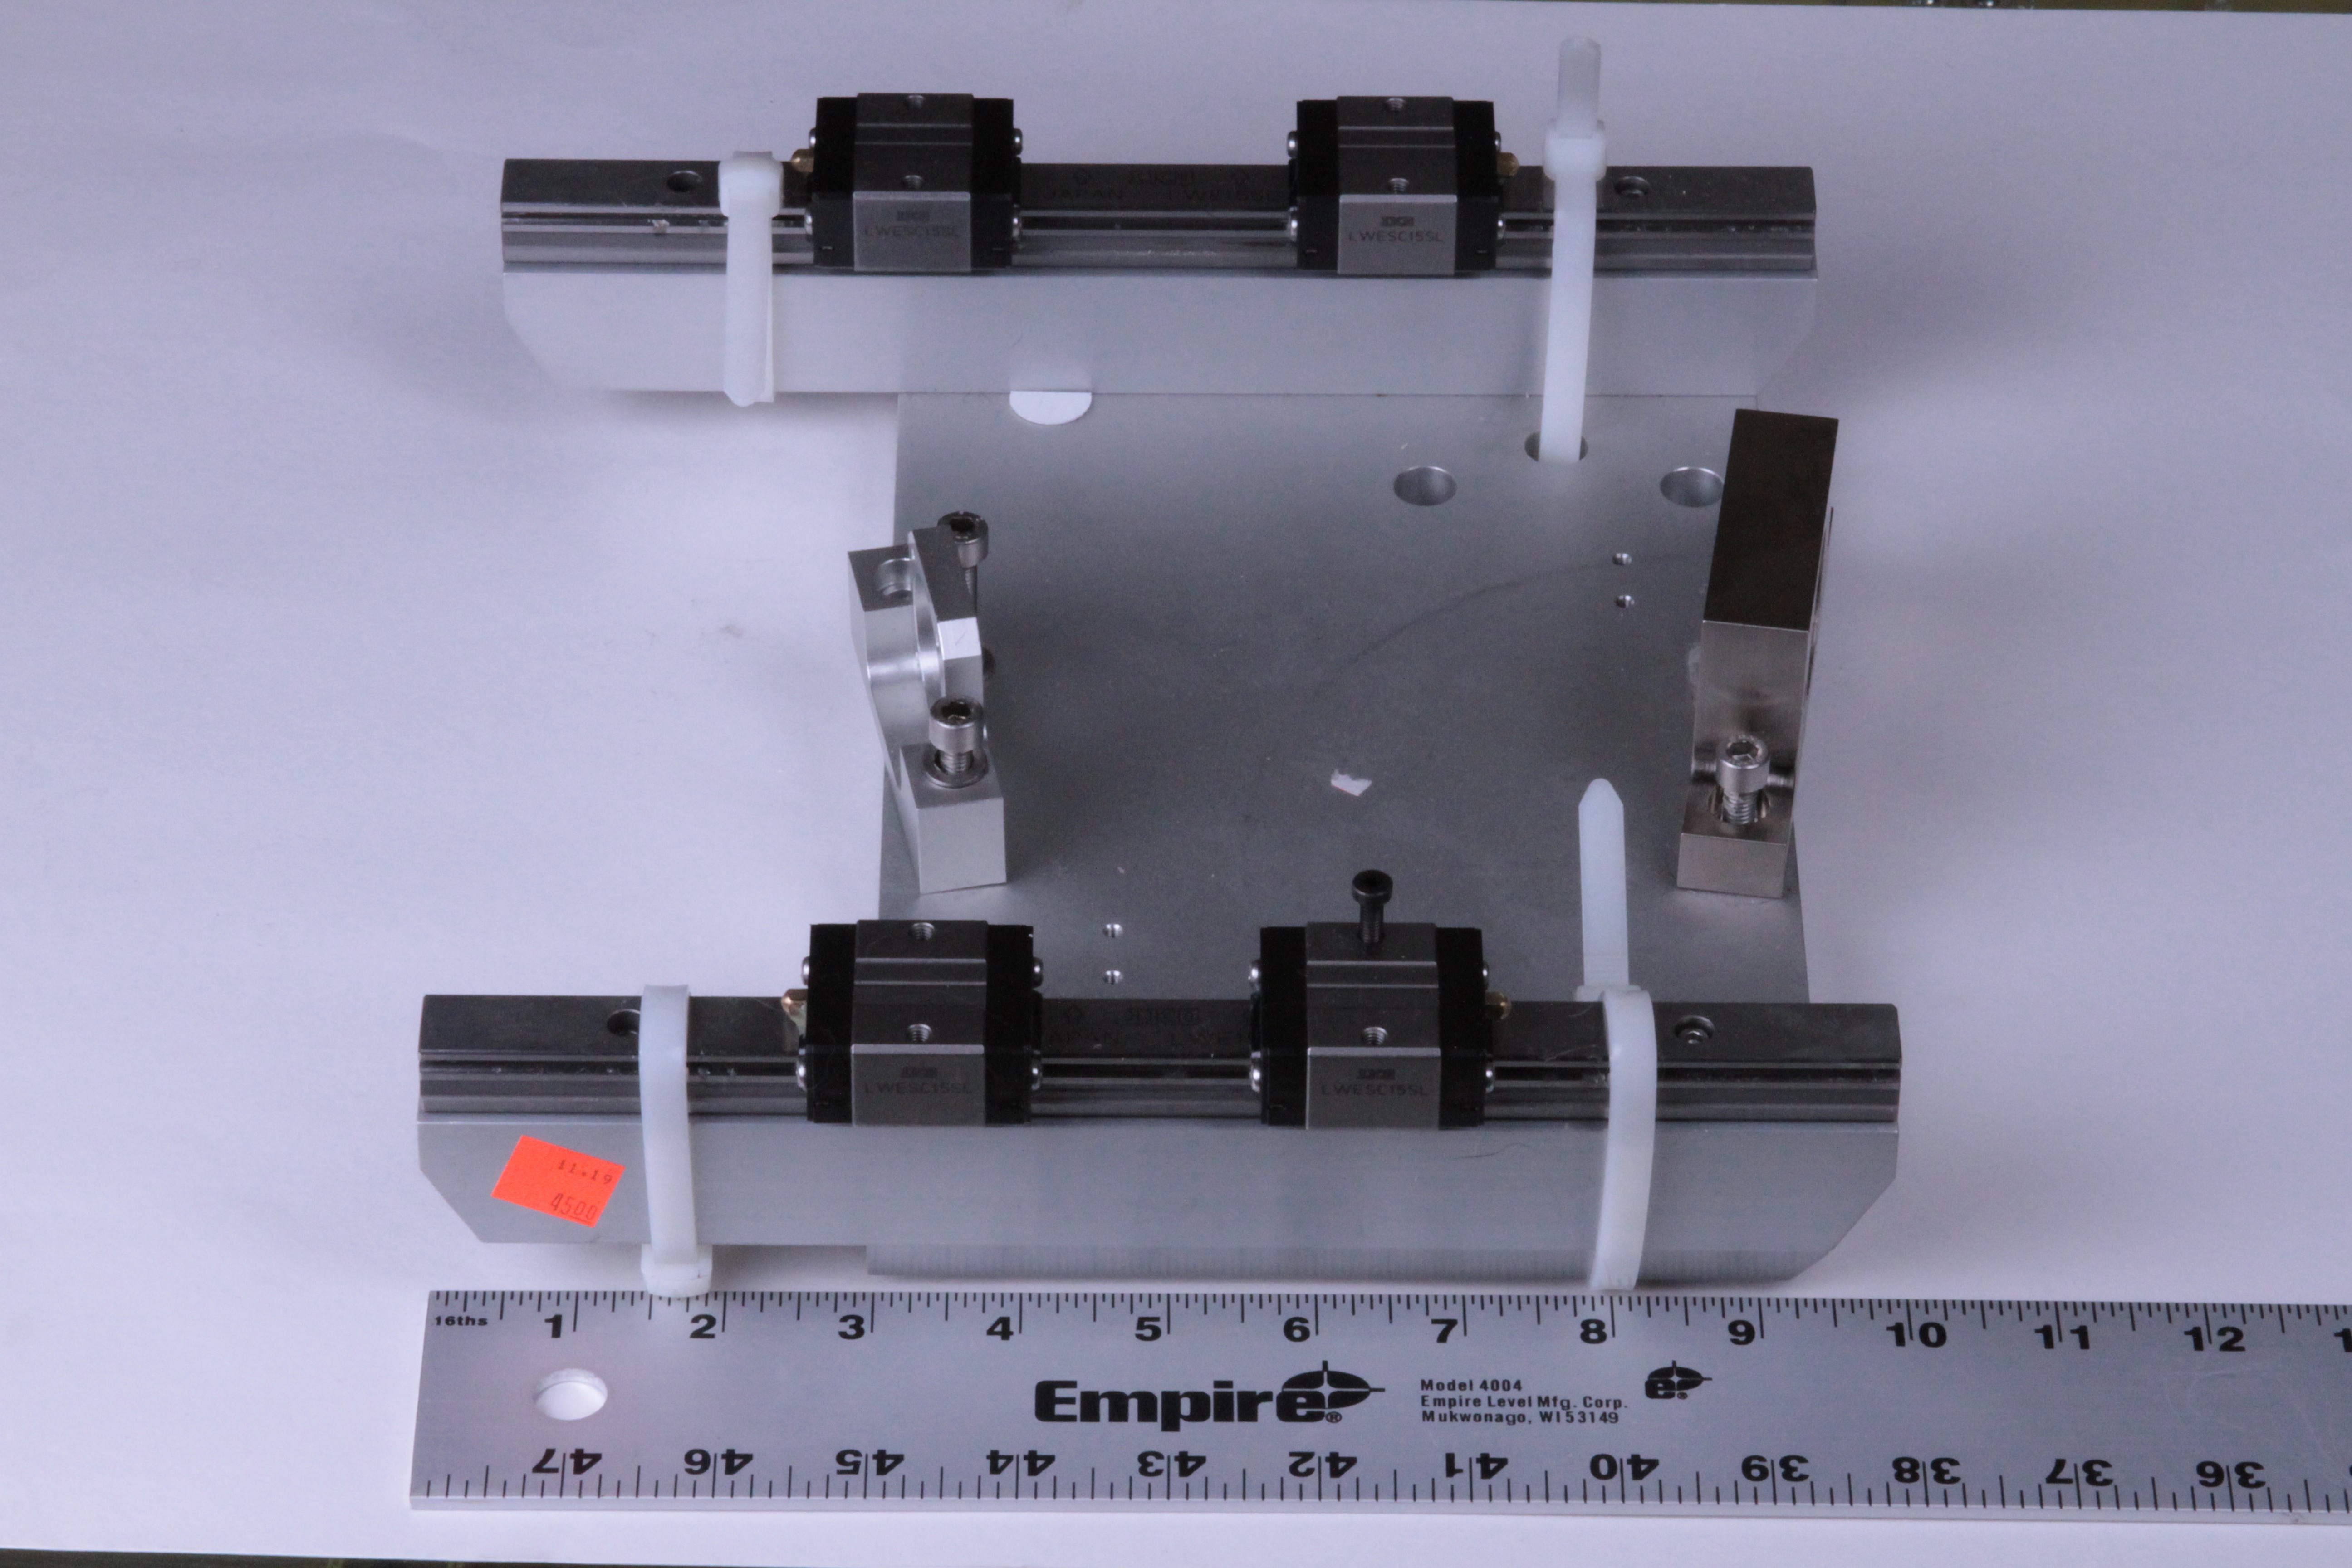
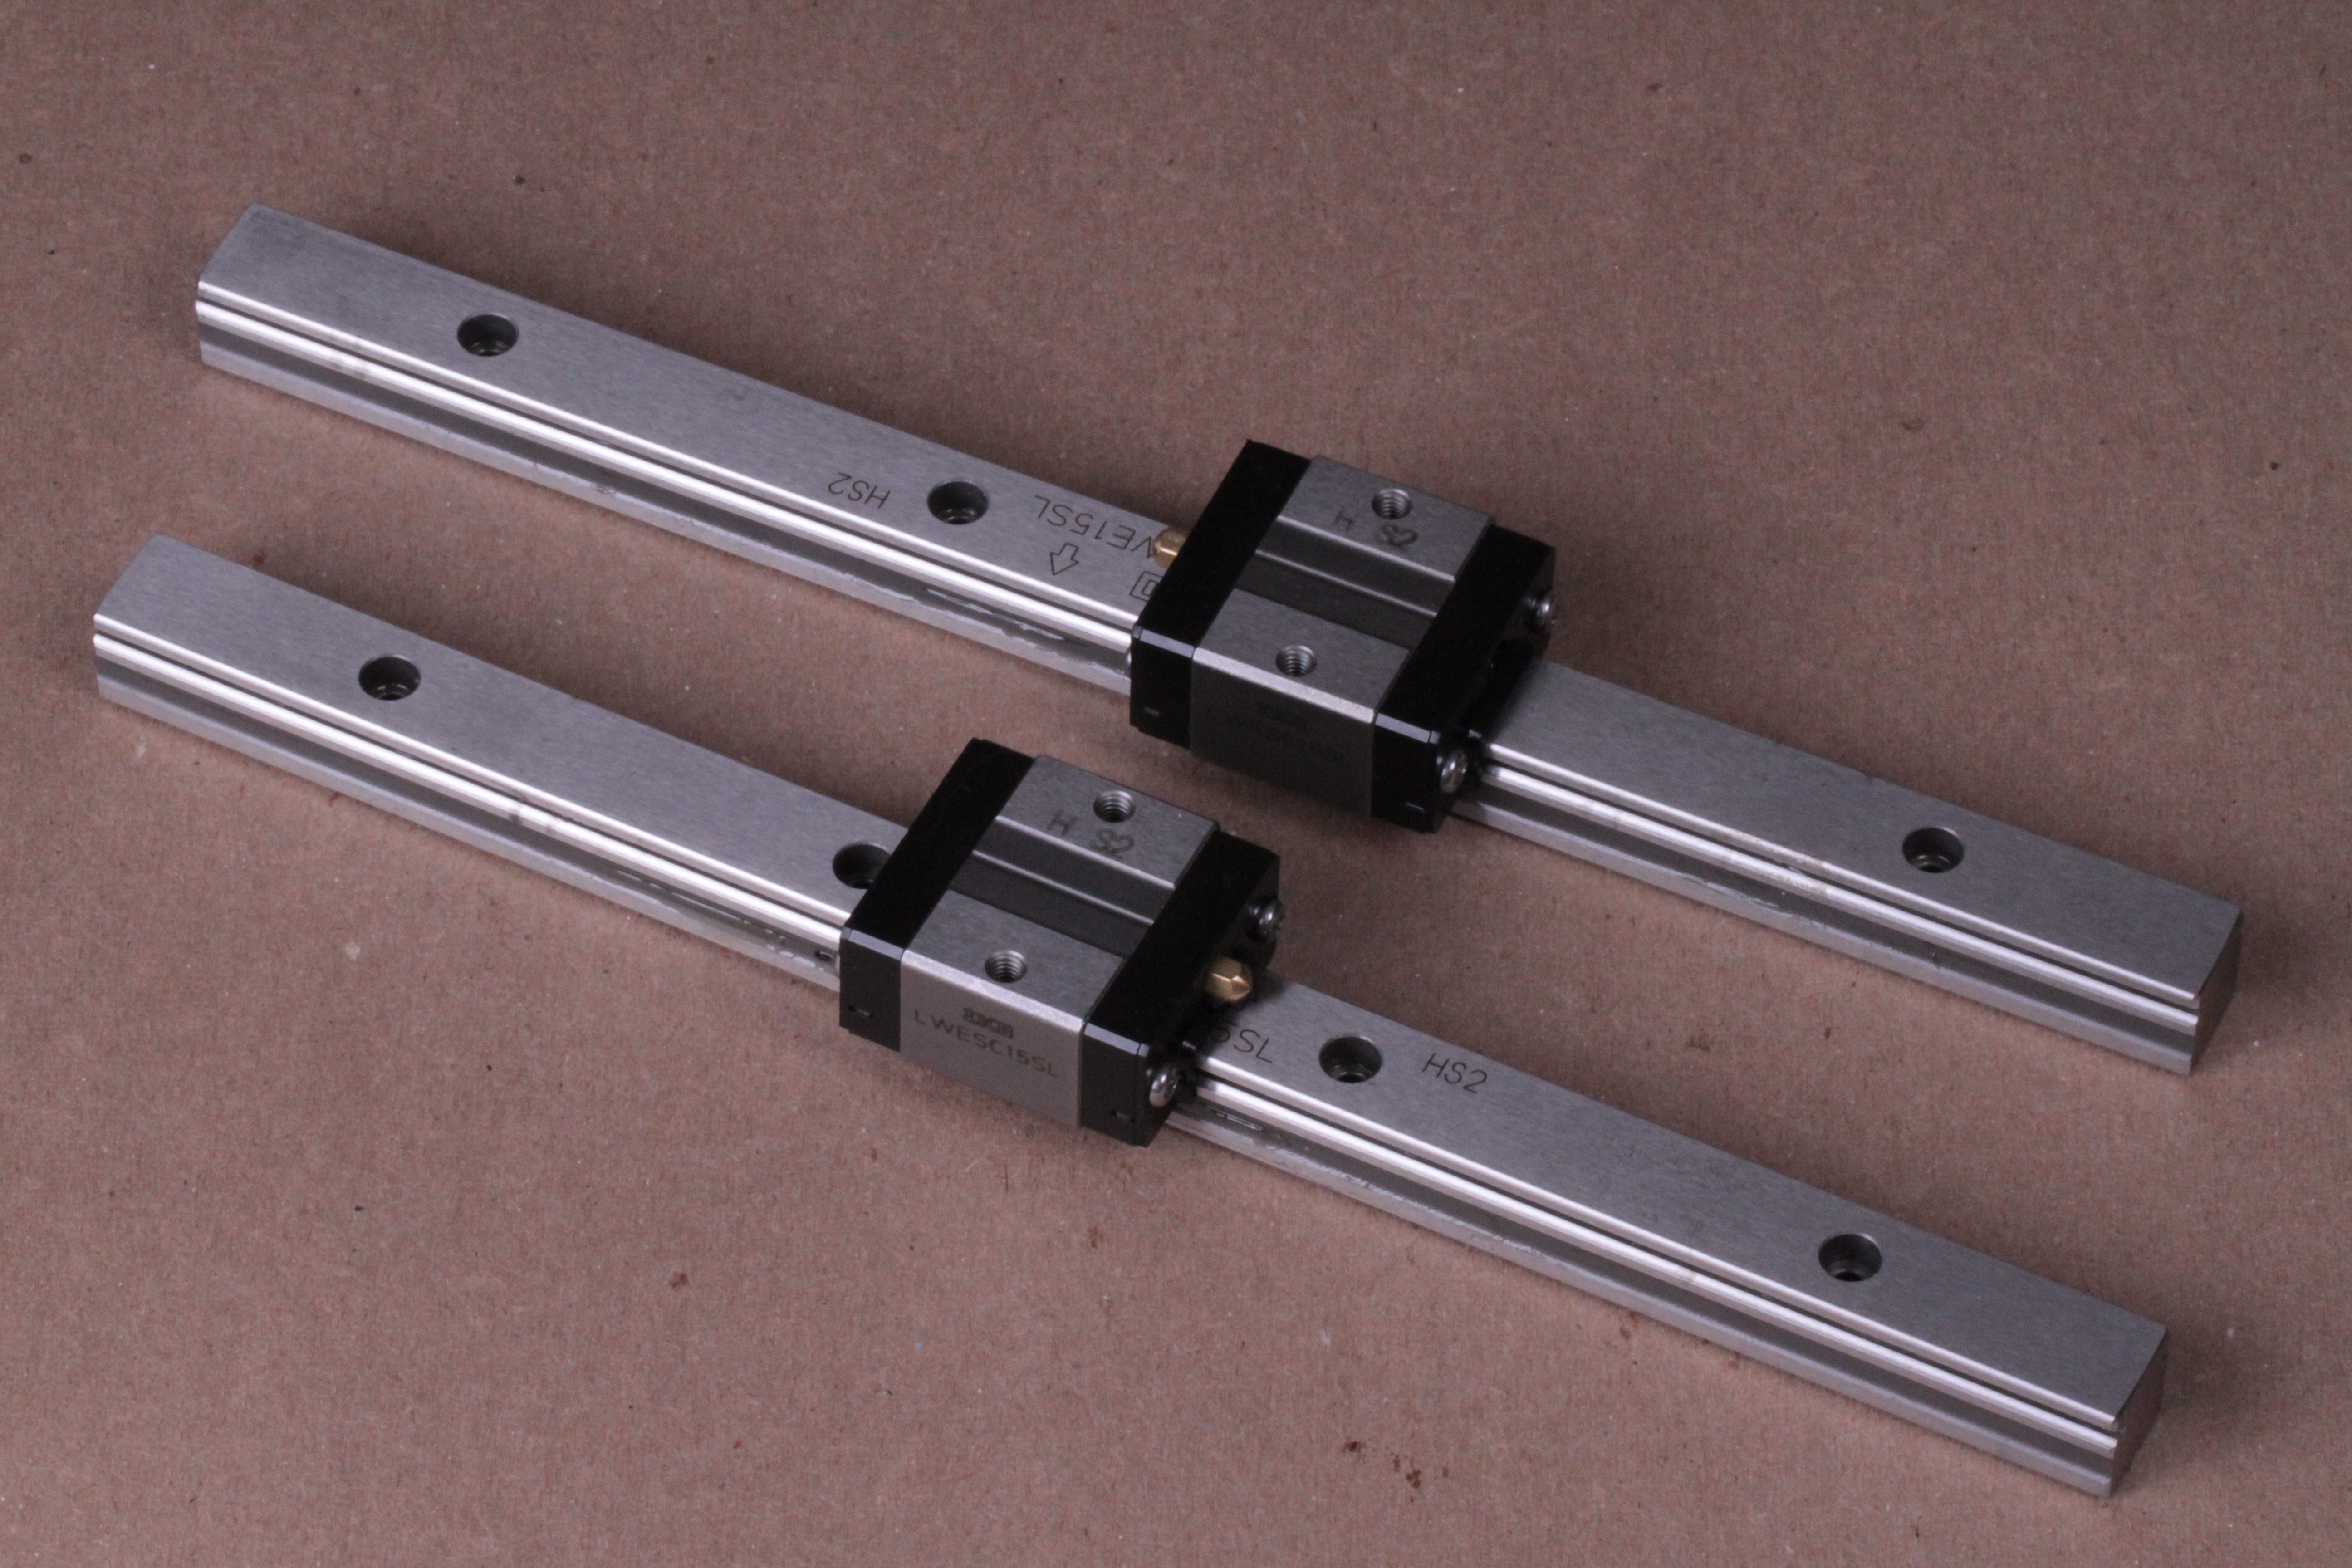
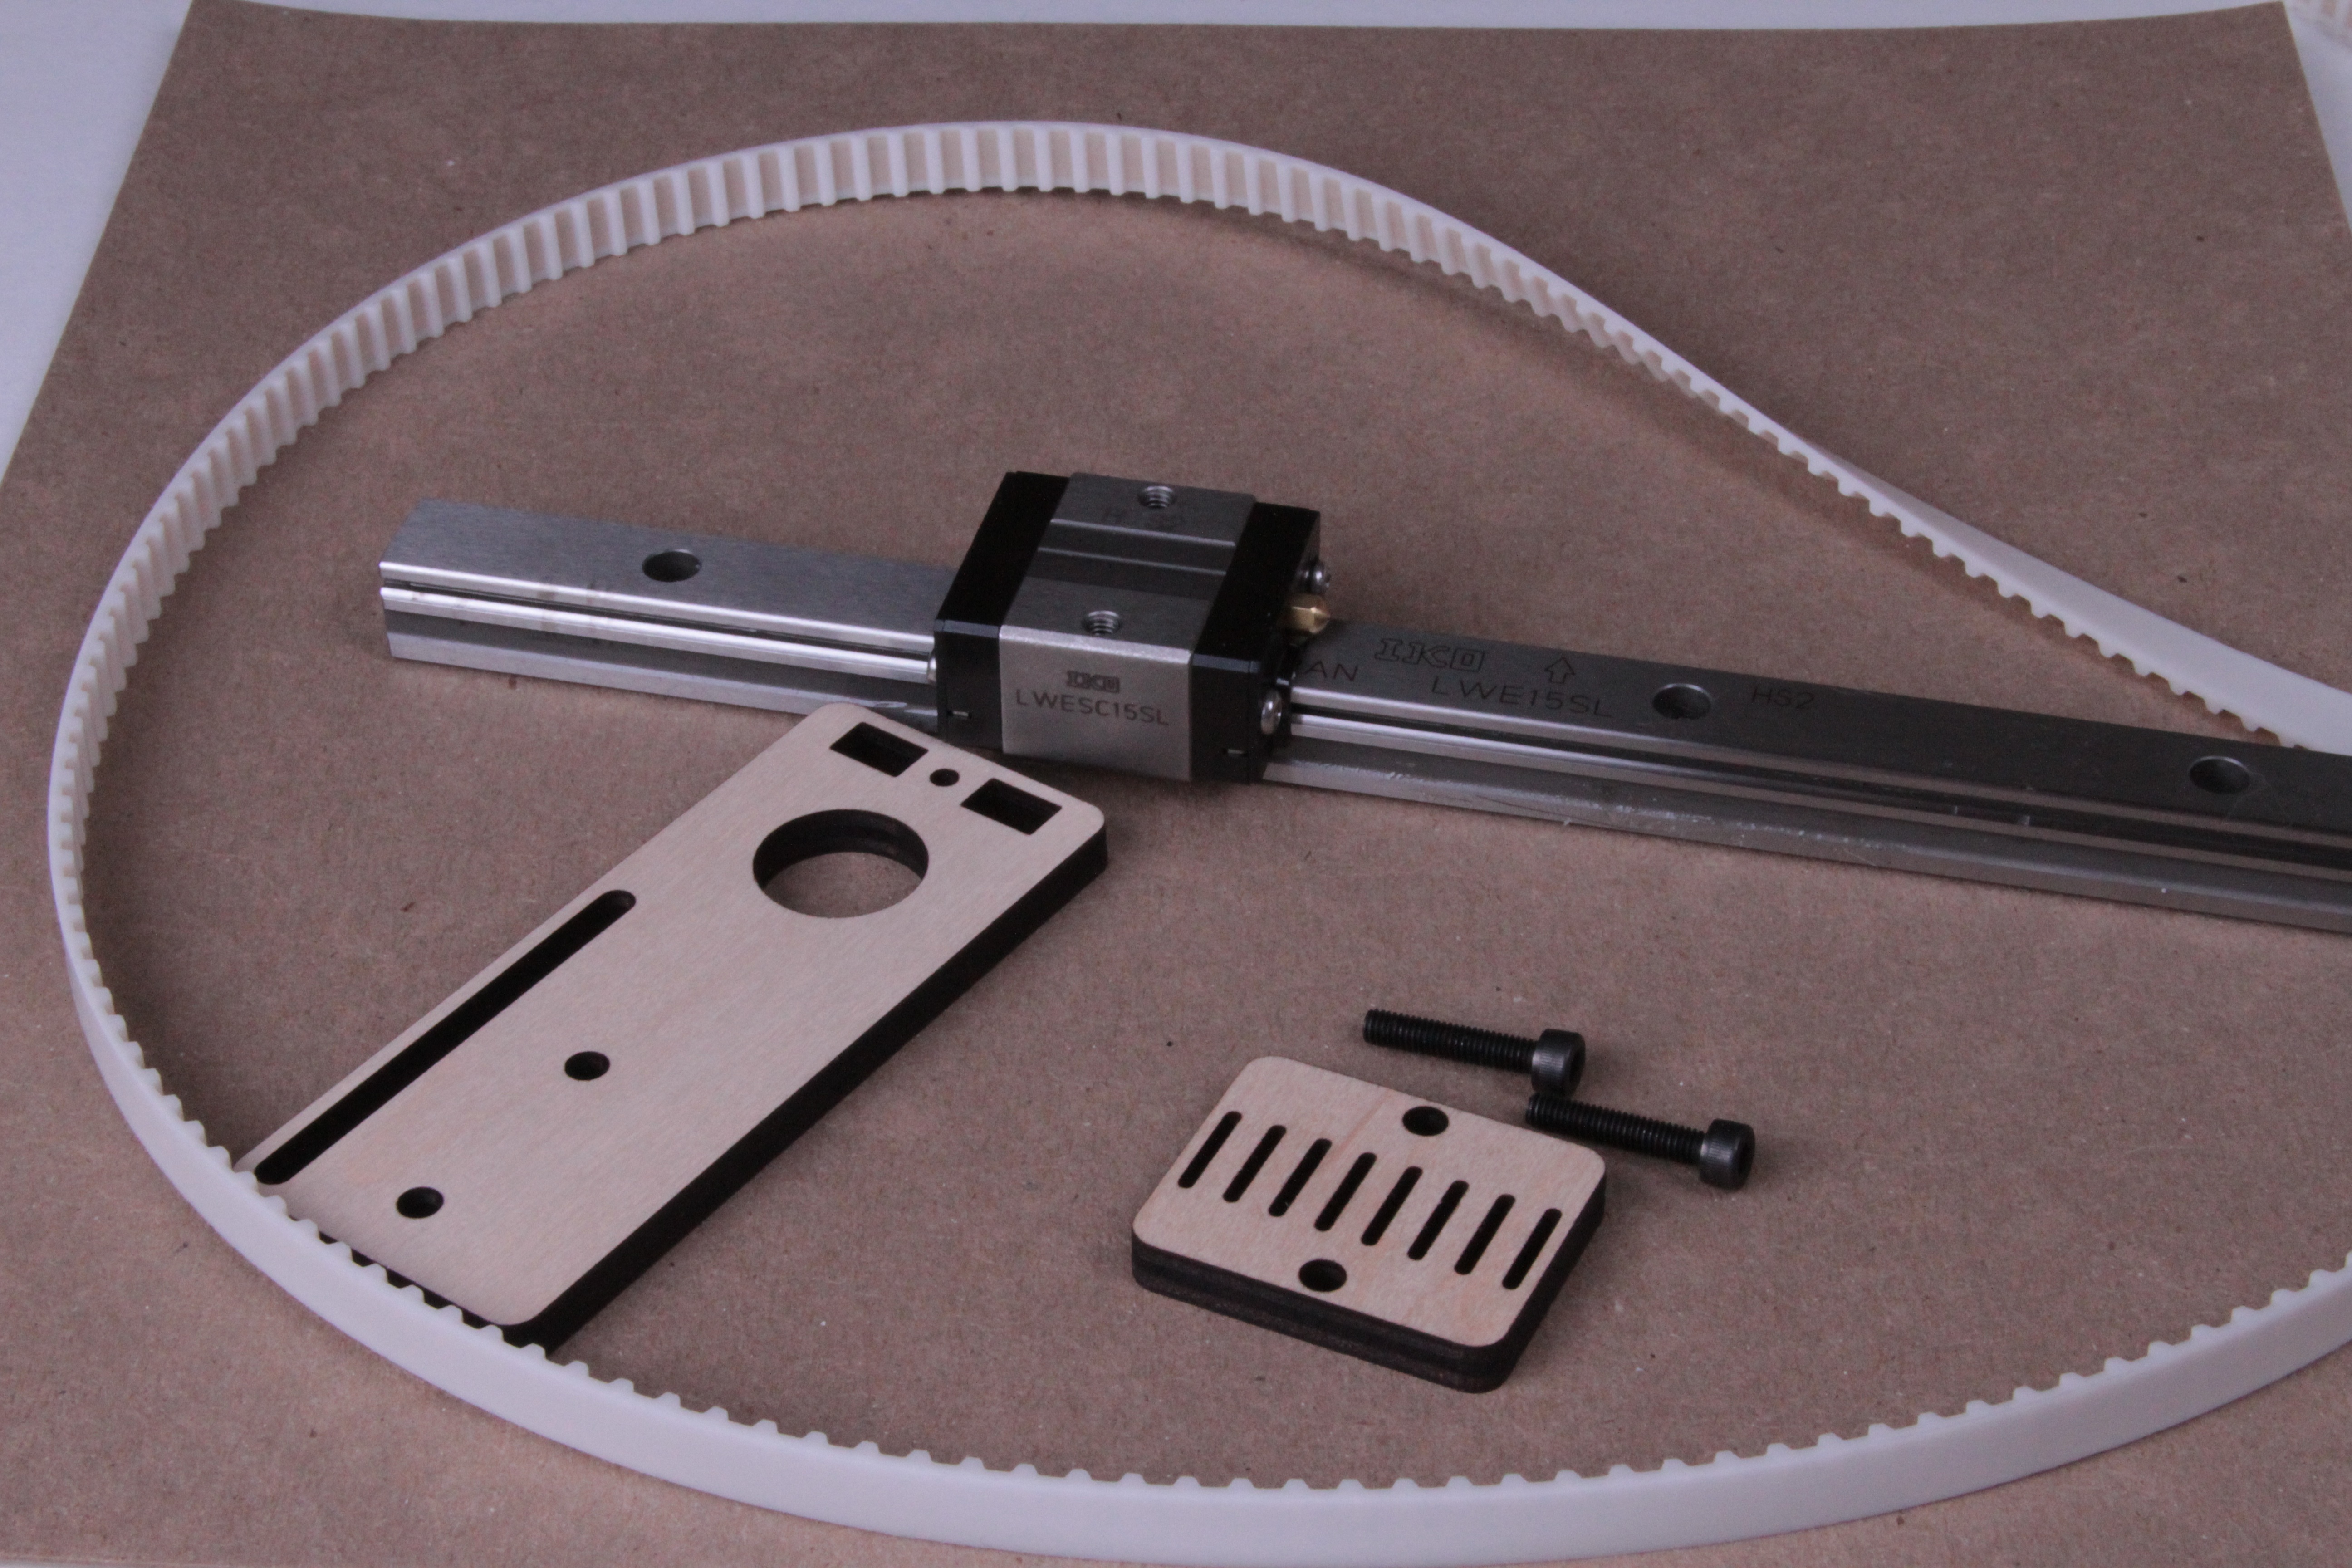
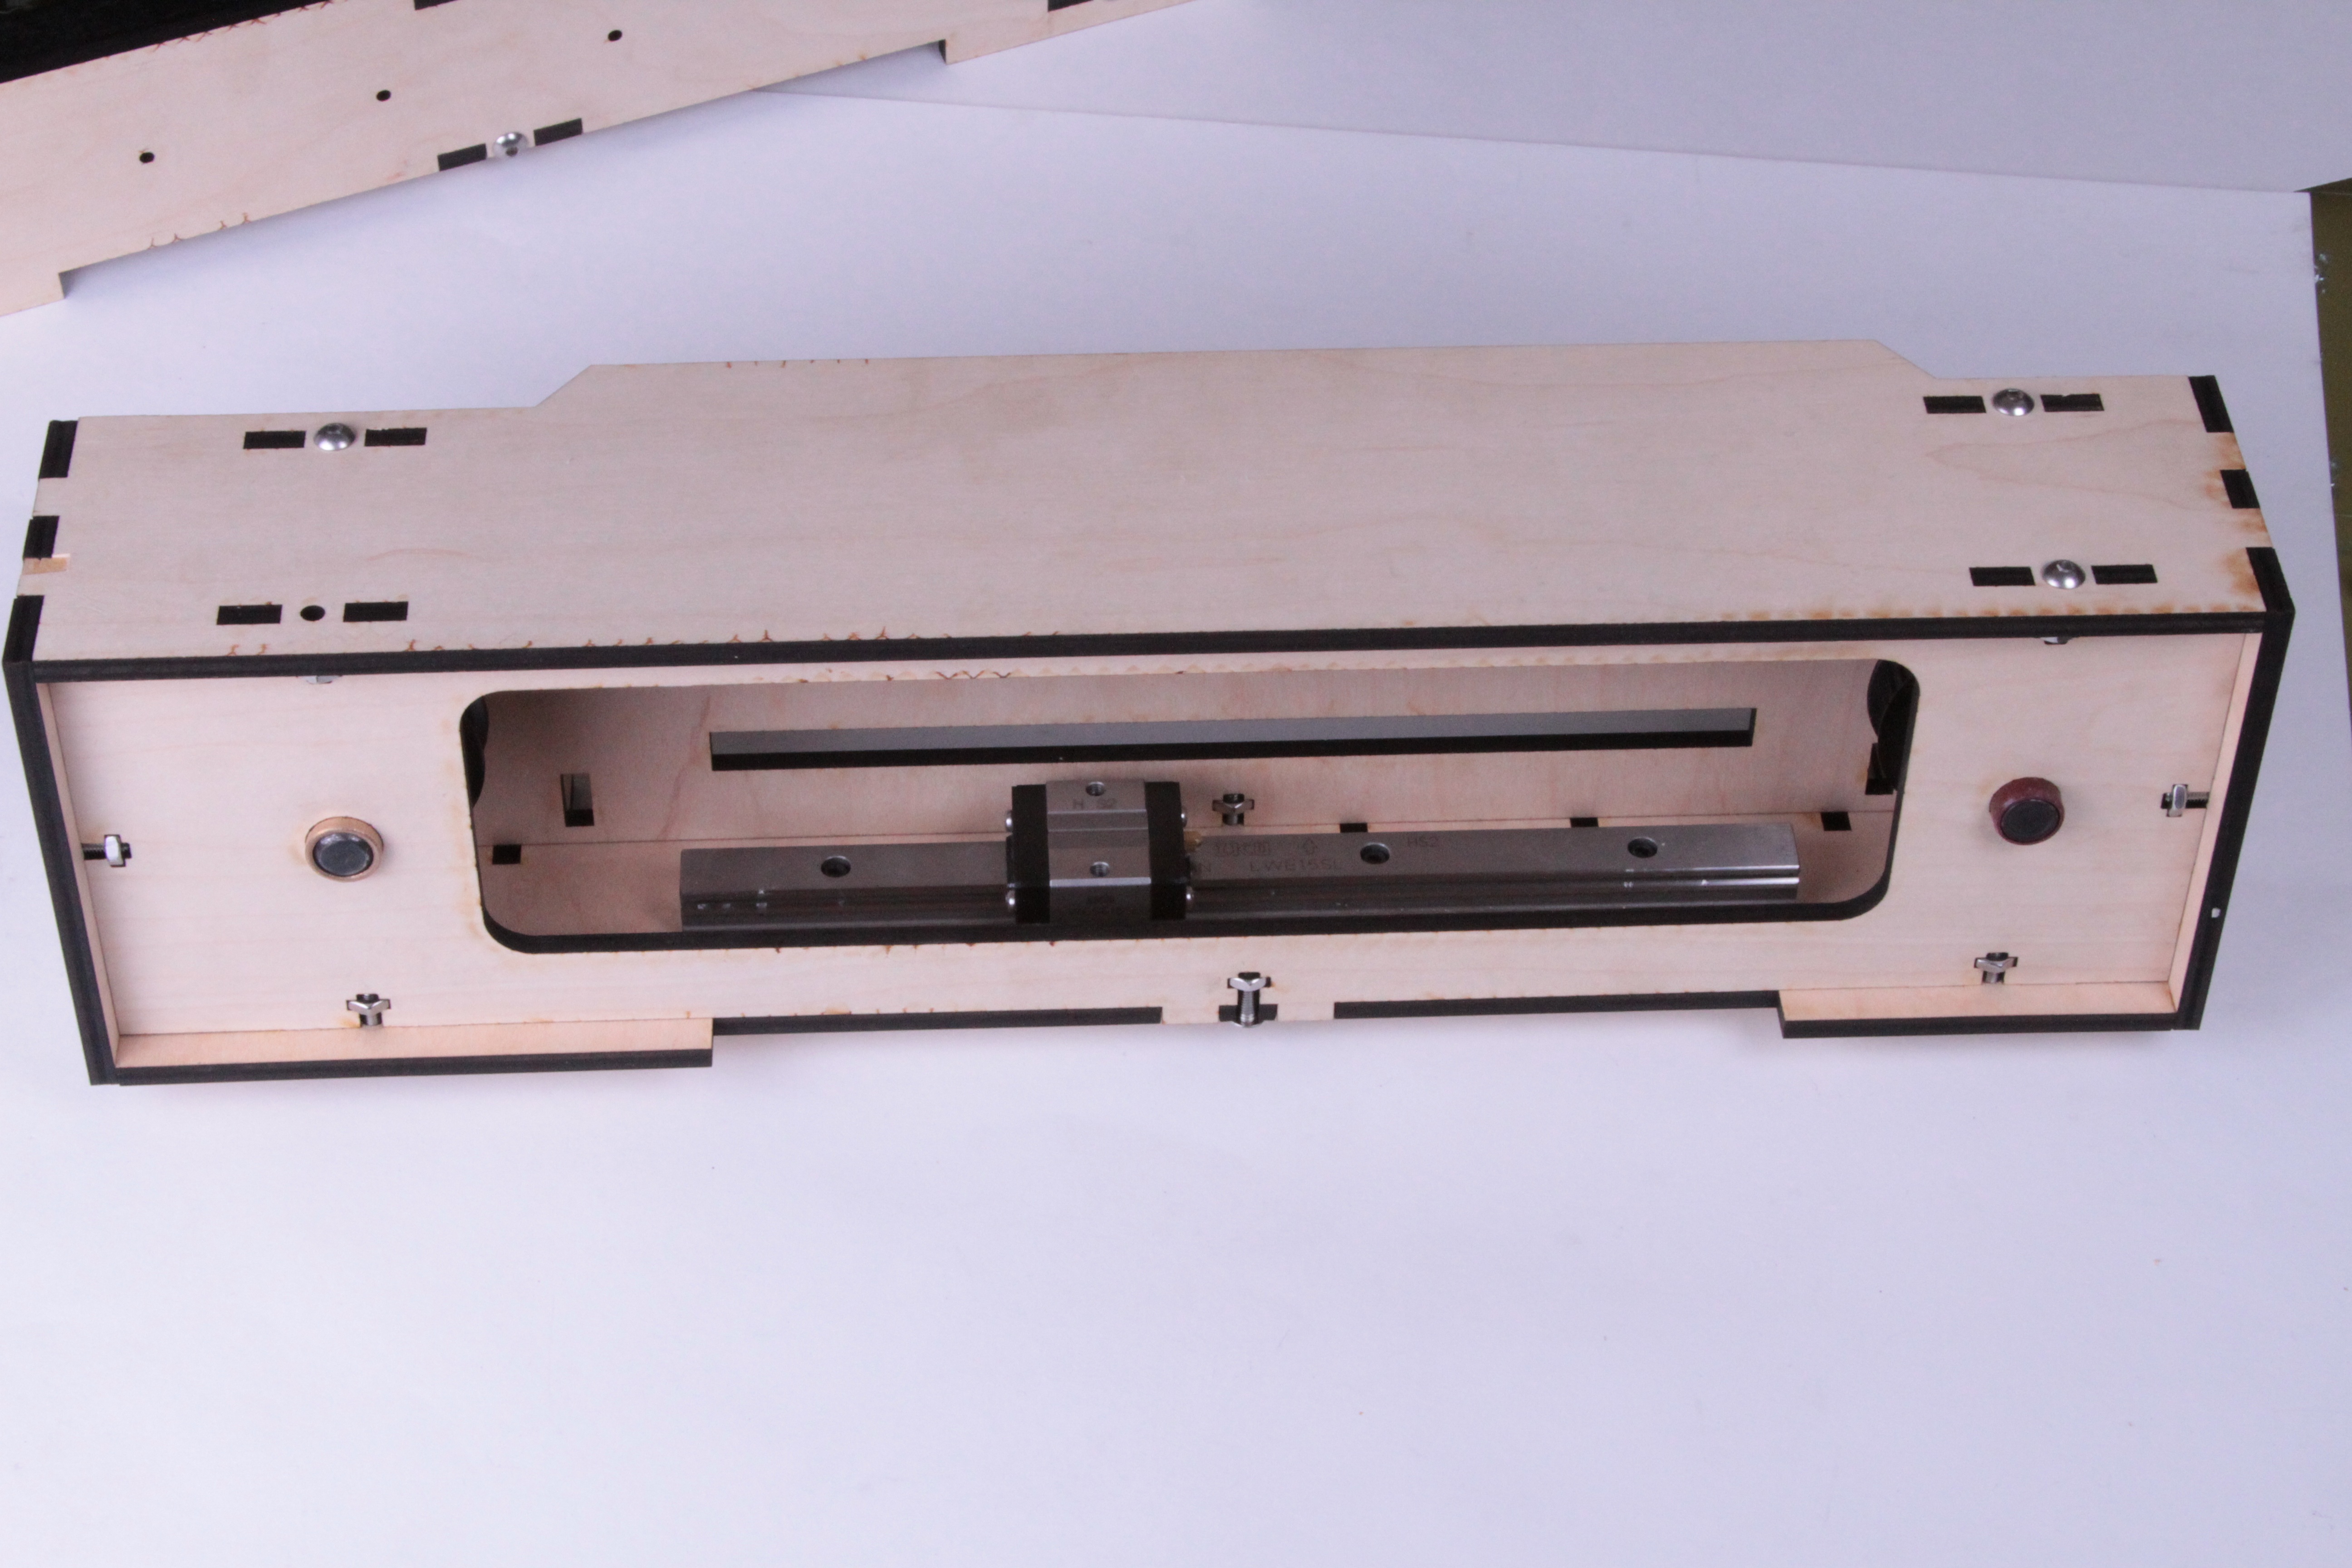
The paddles need to slide along a track. We found this nice assembly at a local surplus shop for 45 dollars. It had two linear bearings sets on board by IKO, each with a 9.75″ long rail.
We stripped out the linear stages and designed some laser-cut plywood pieces to act as paddles that could be moved around by a timing belt (white). Minor challenge here: finding metric screws to work with the IKO rails and bearings.
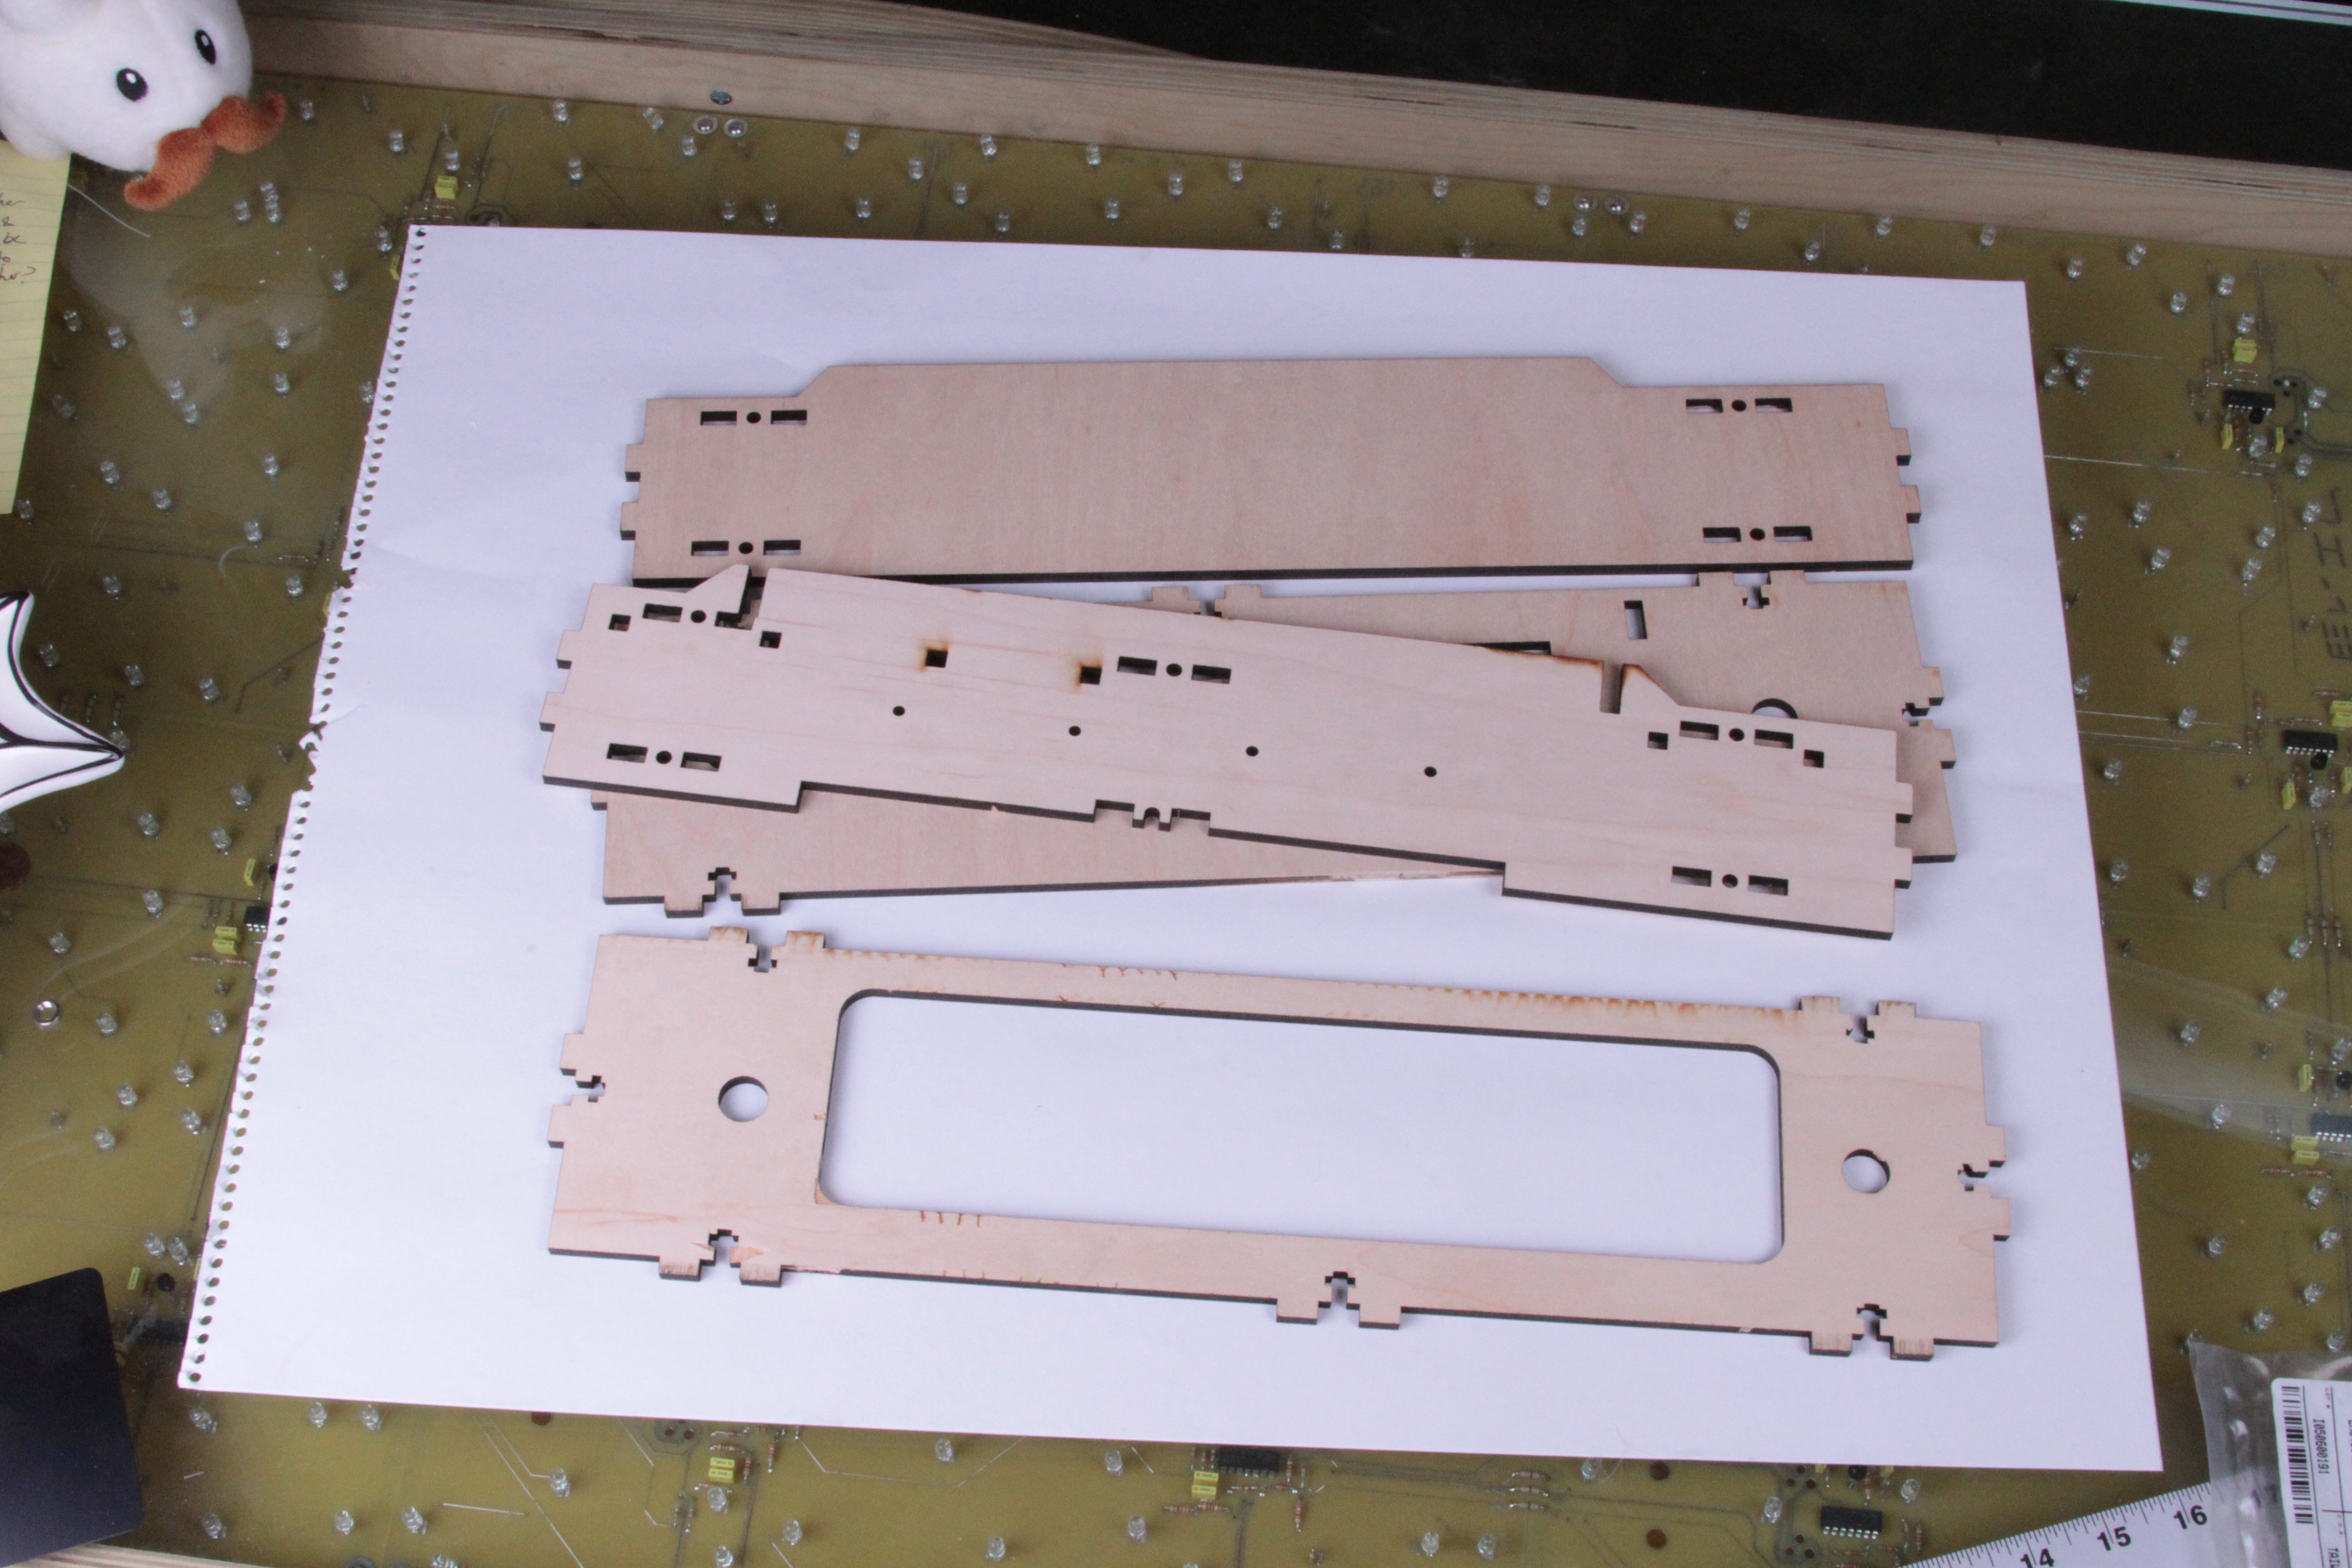
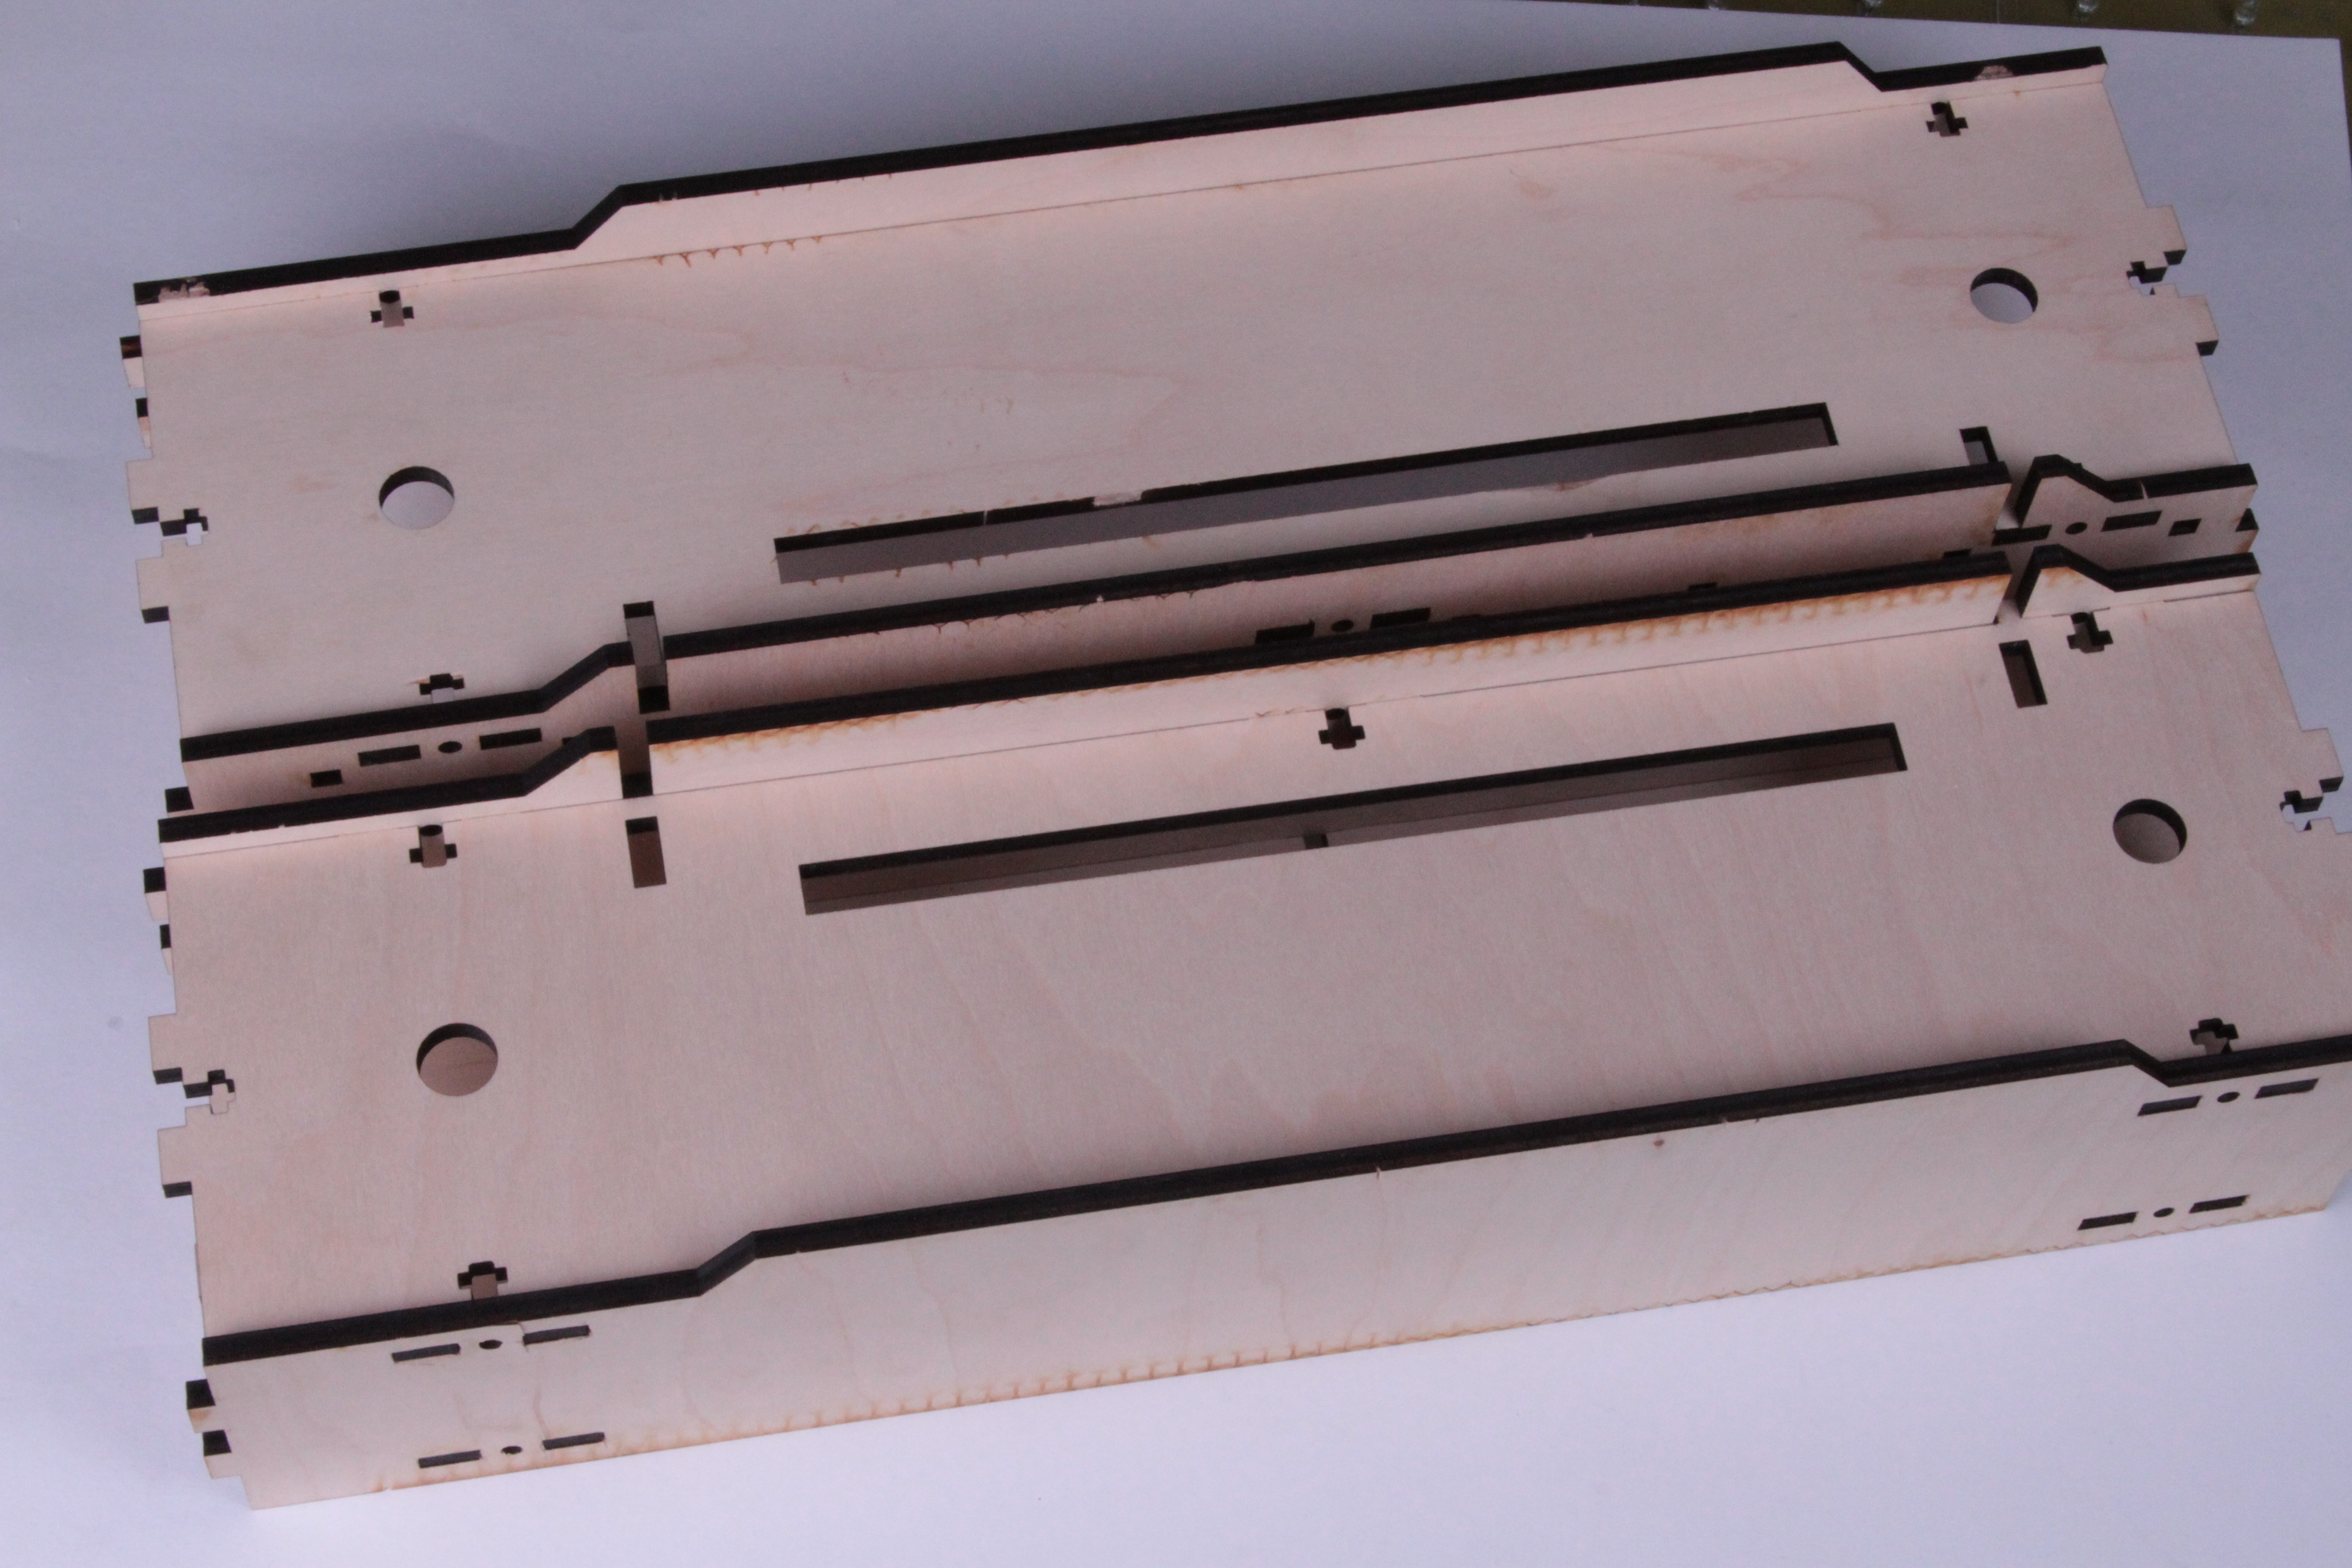
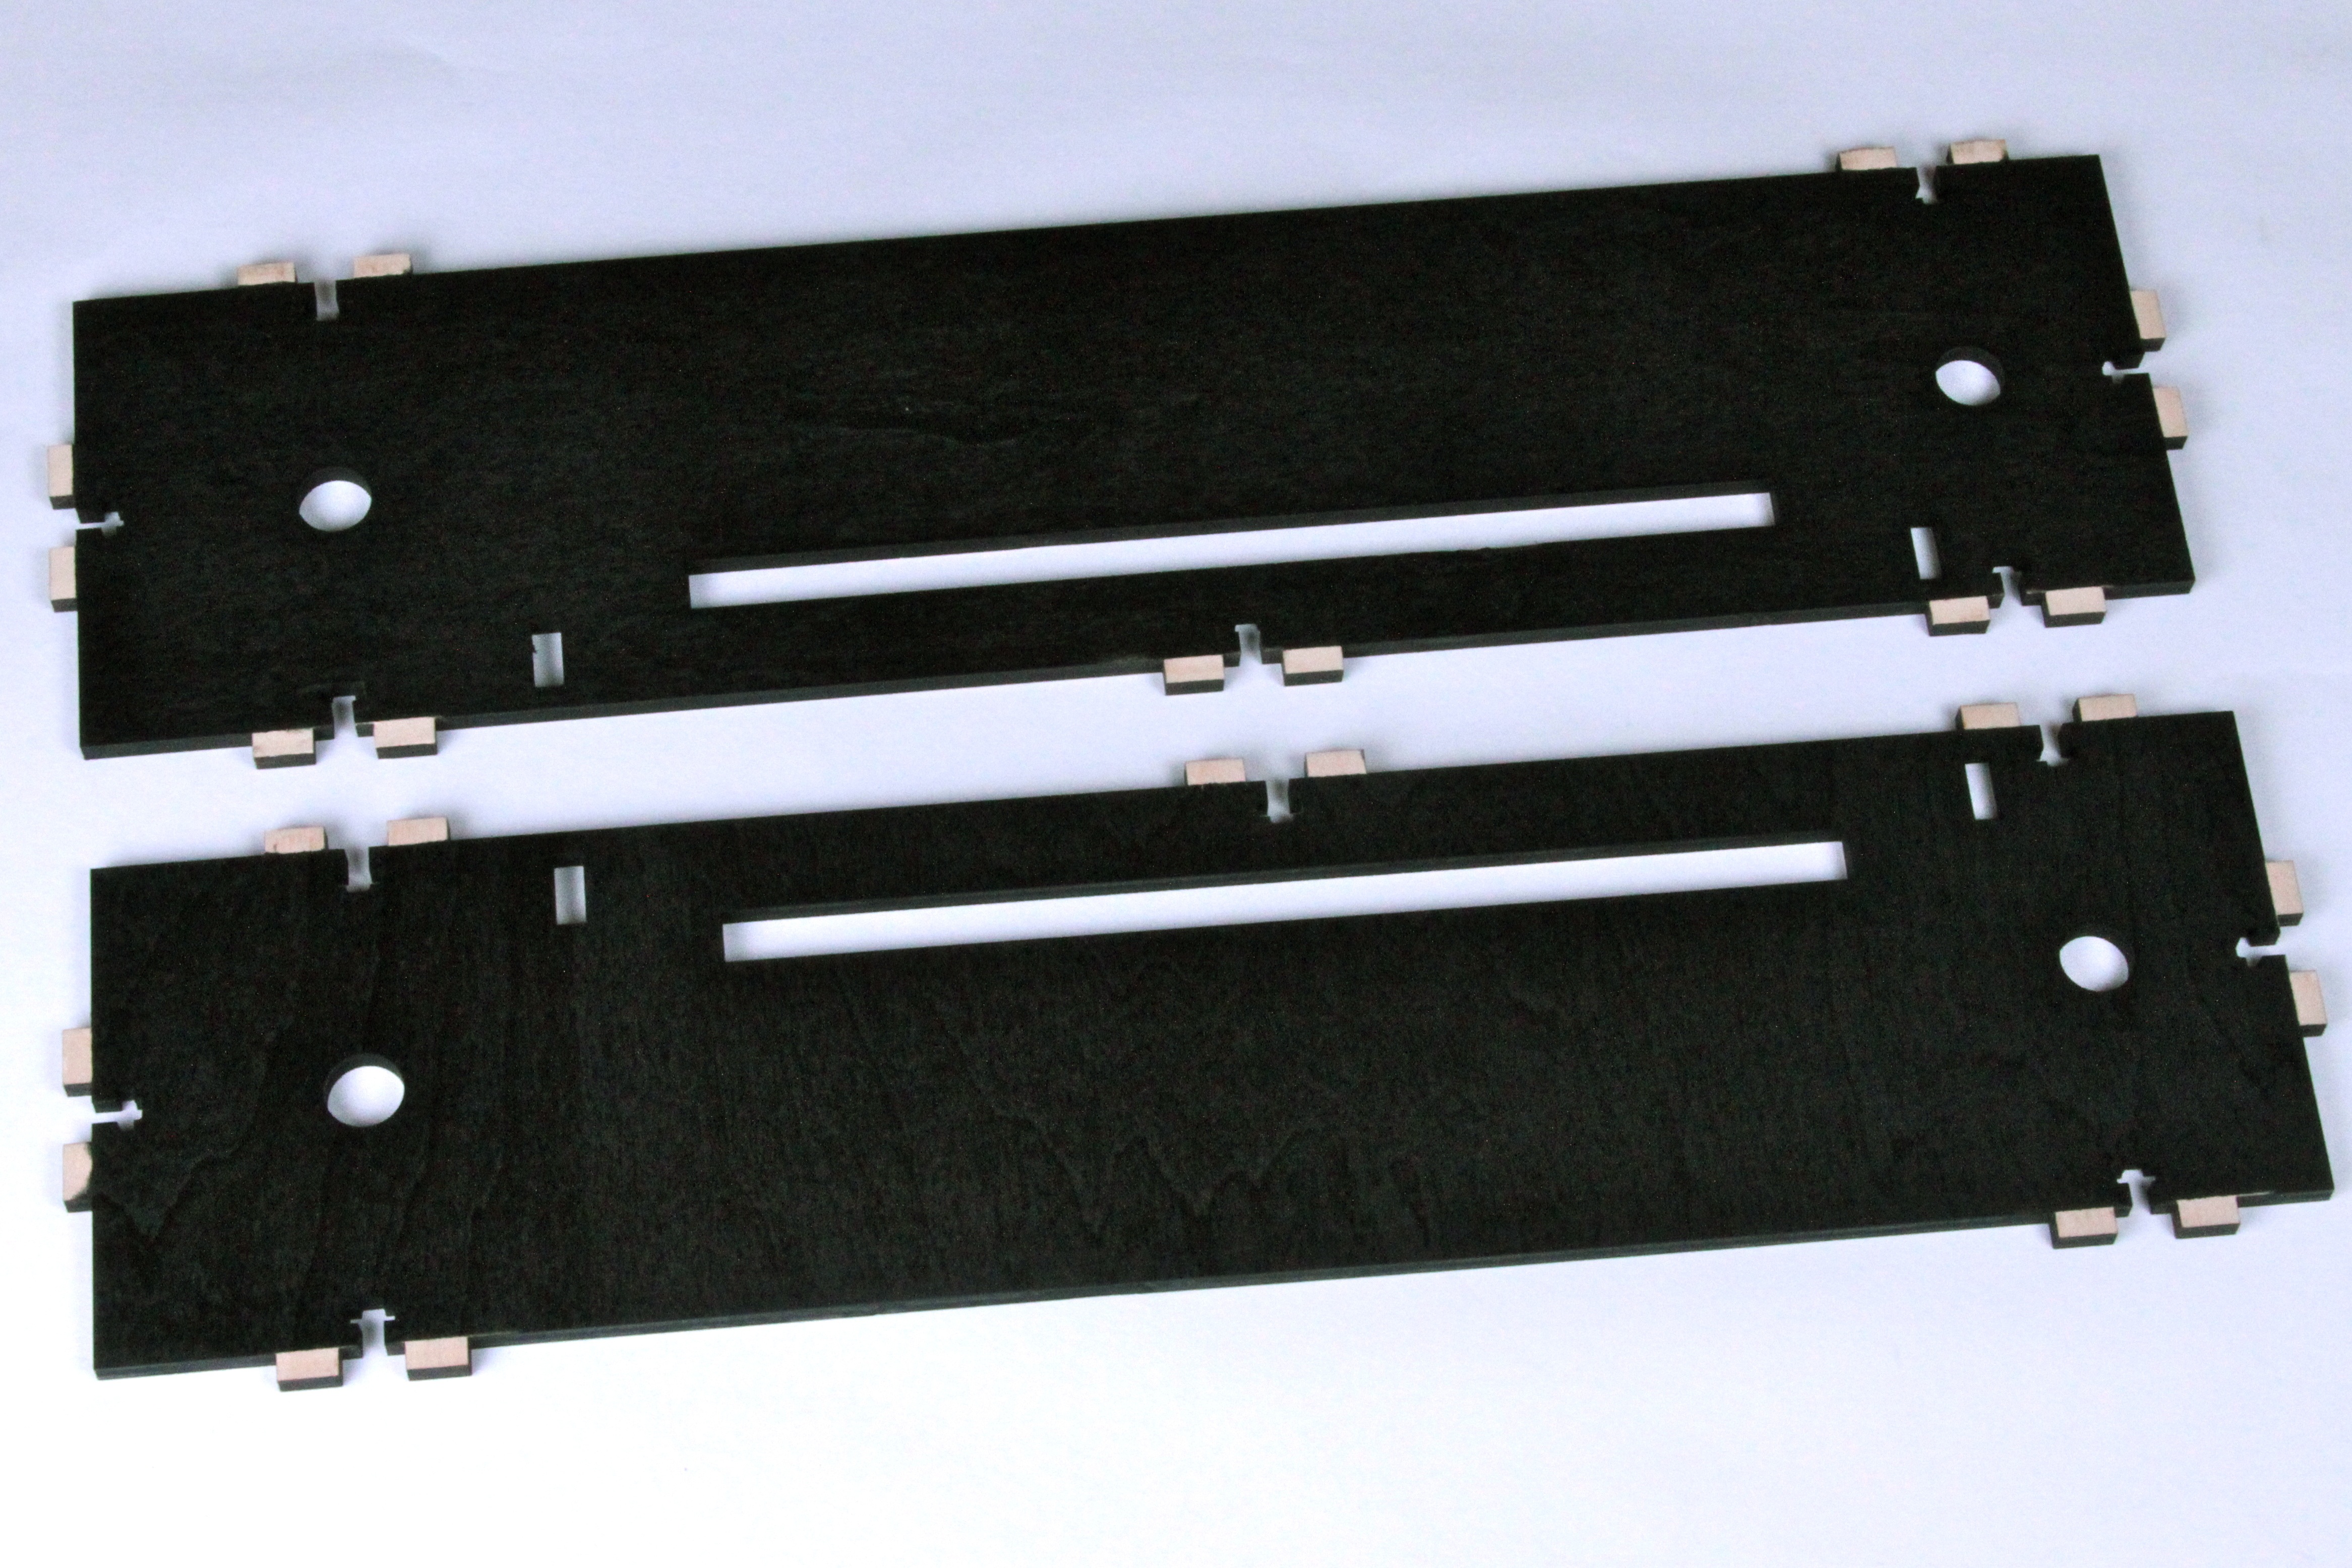
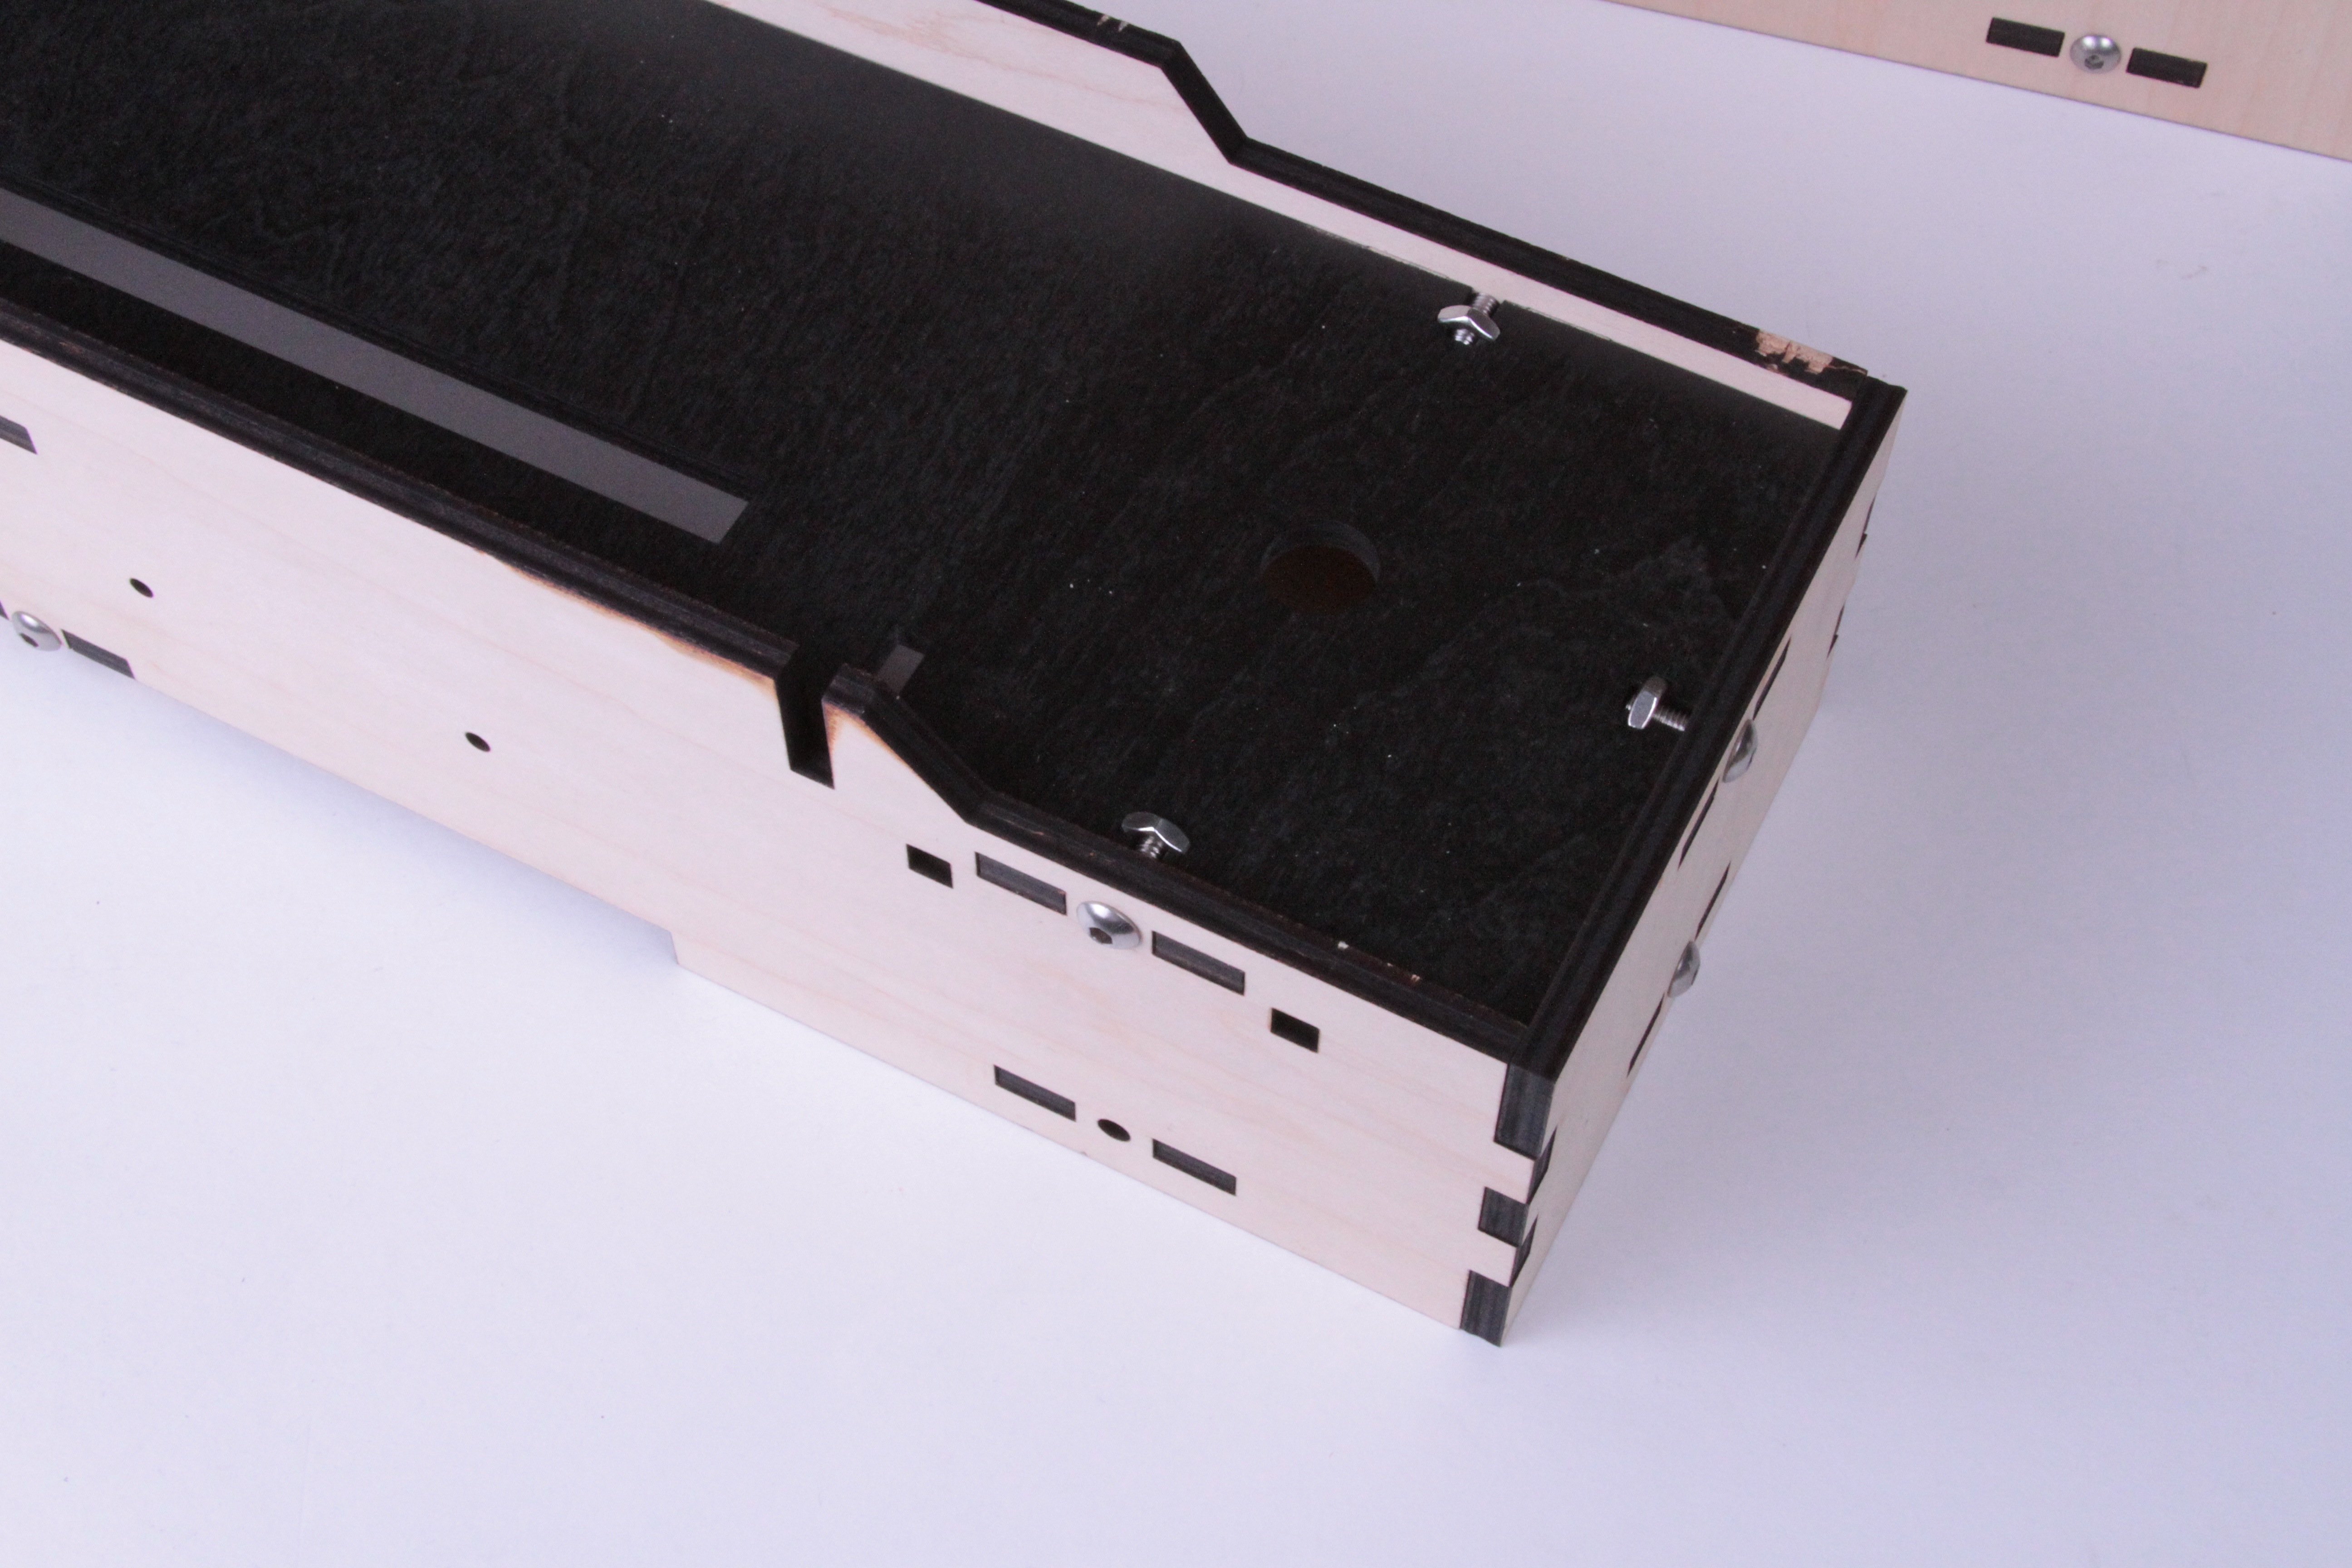
Next, more lasering. Each rail will get mounted in a wooden box, with a slit for the paddle to slide down. We painted the top panel of each box black so that it will have the right look from above when the project is complete.
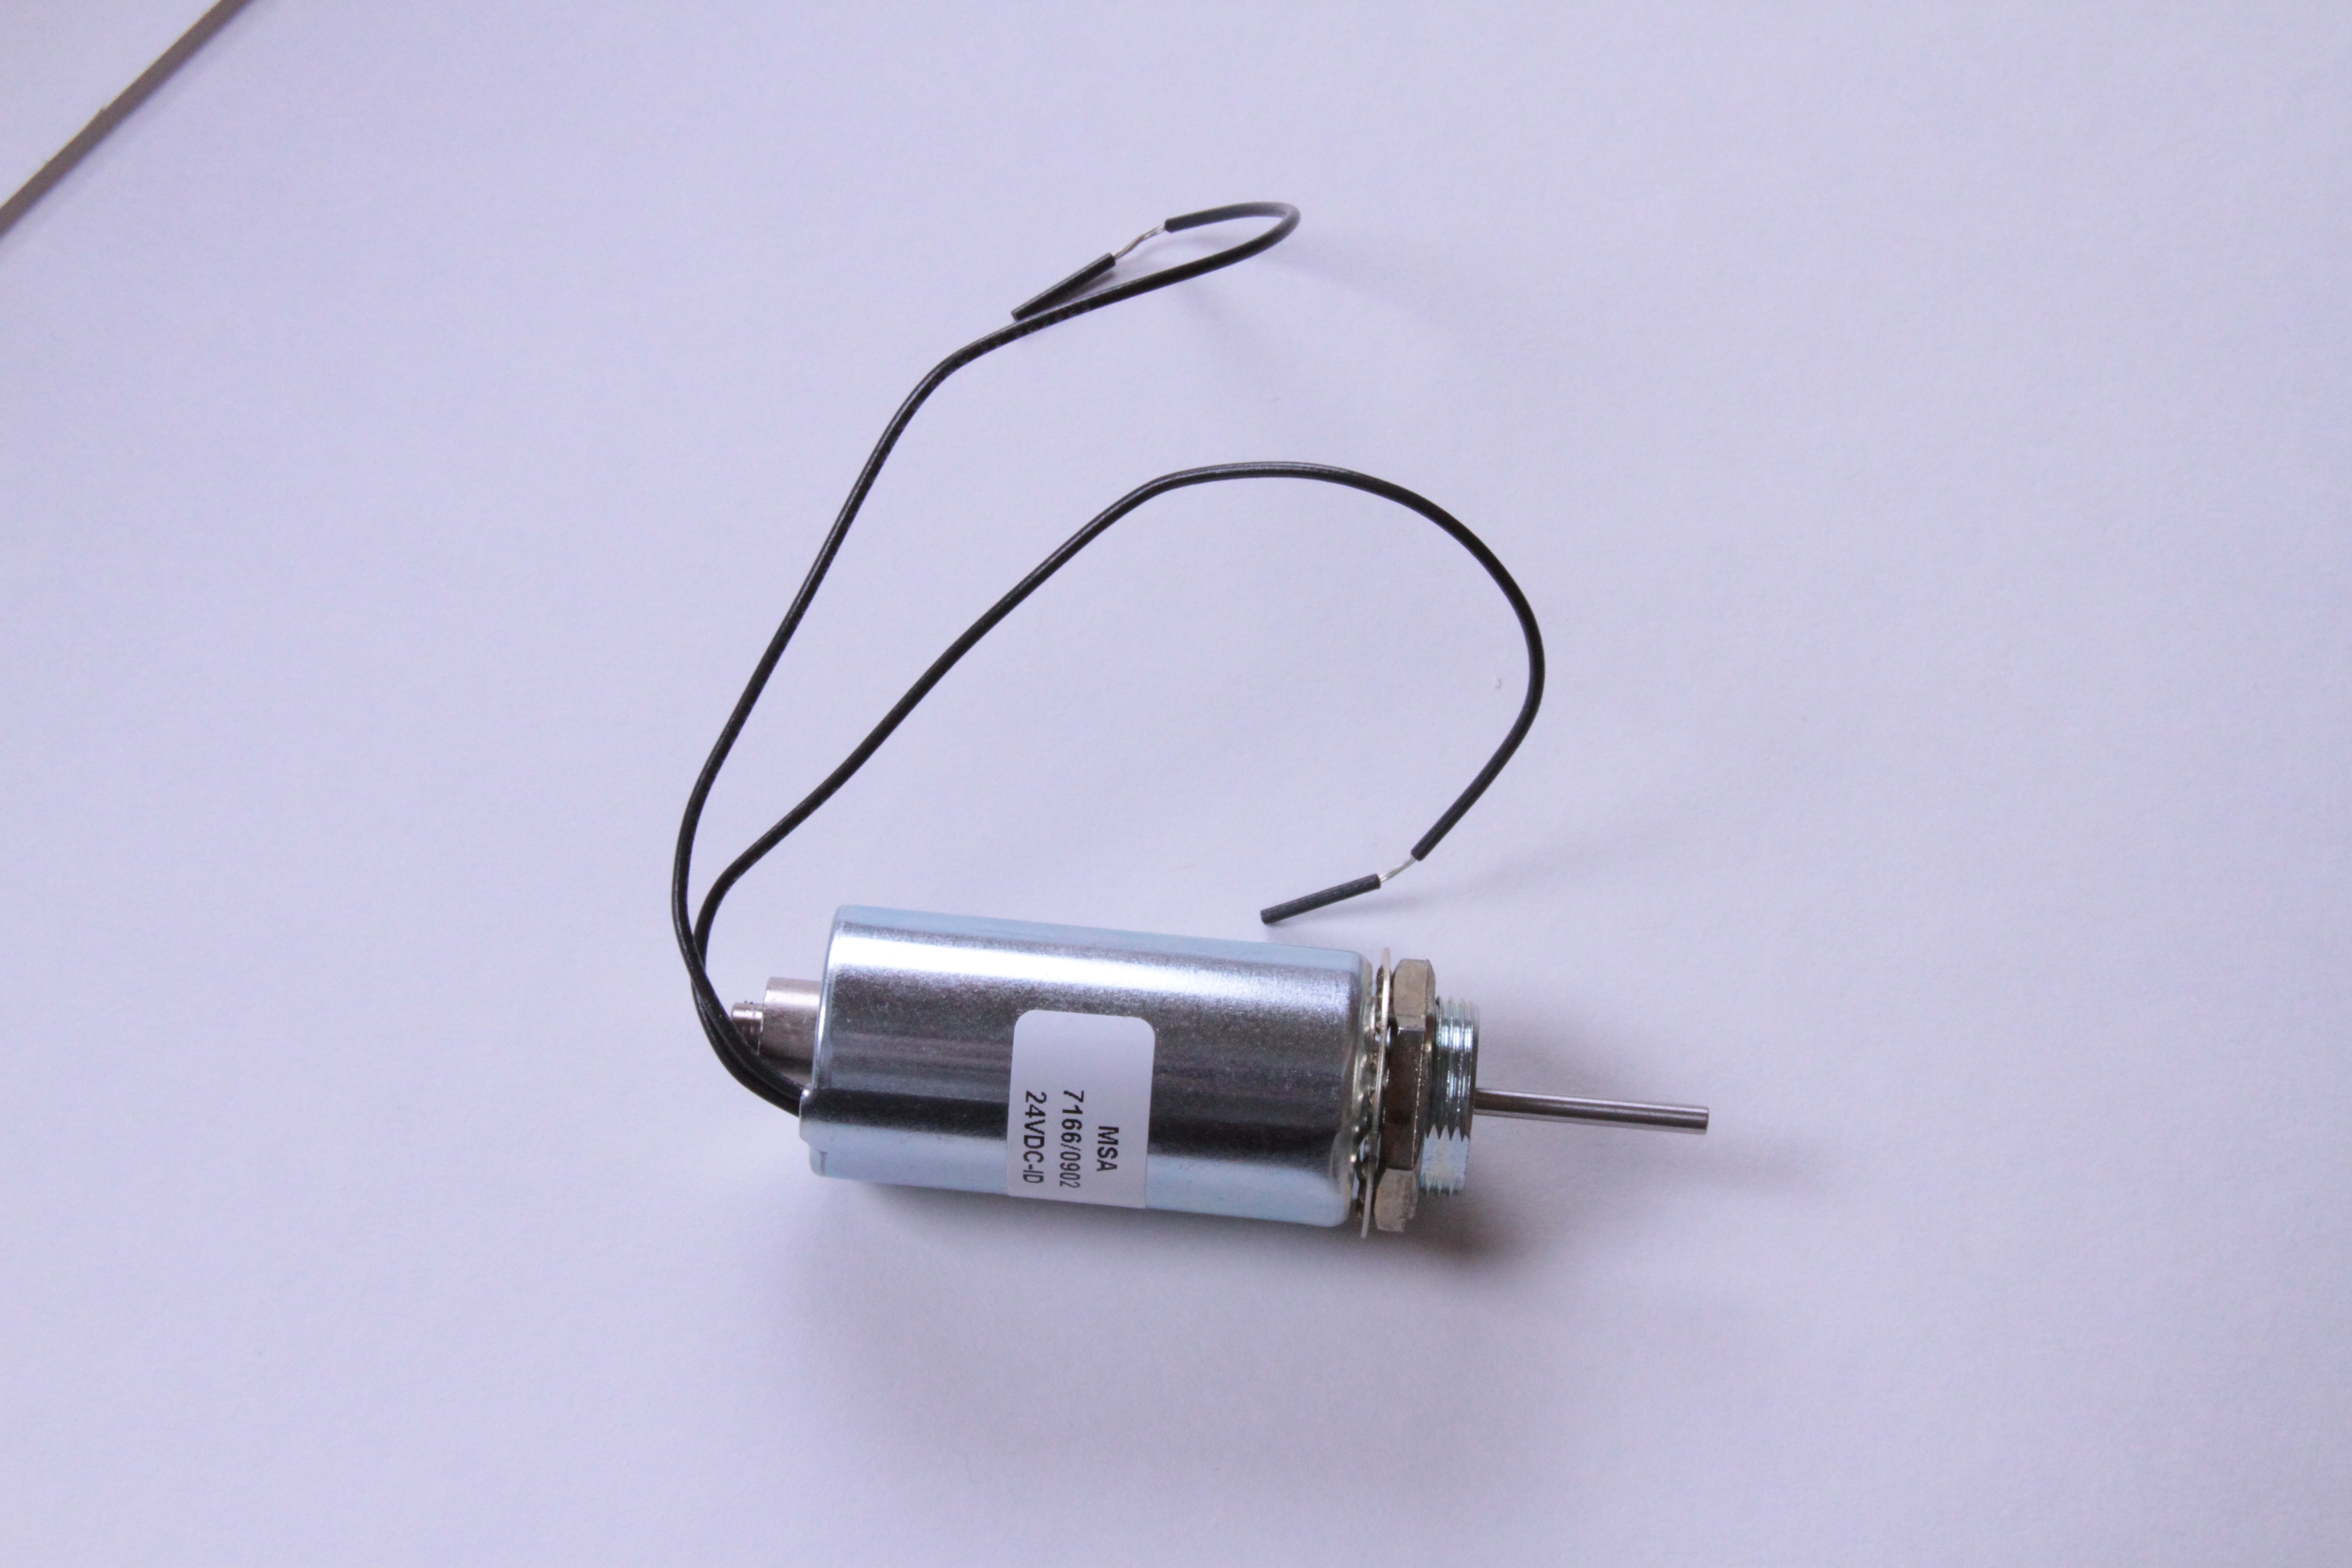
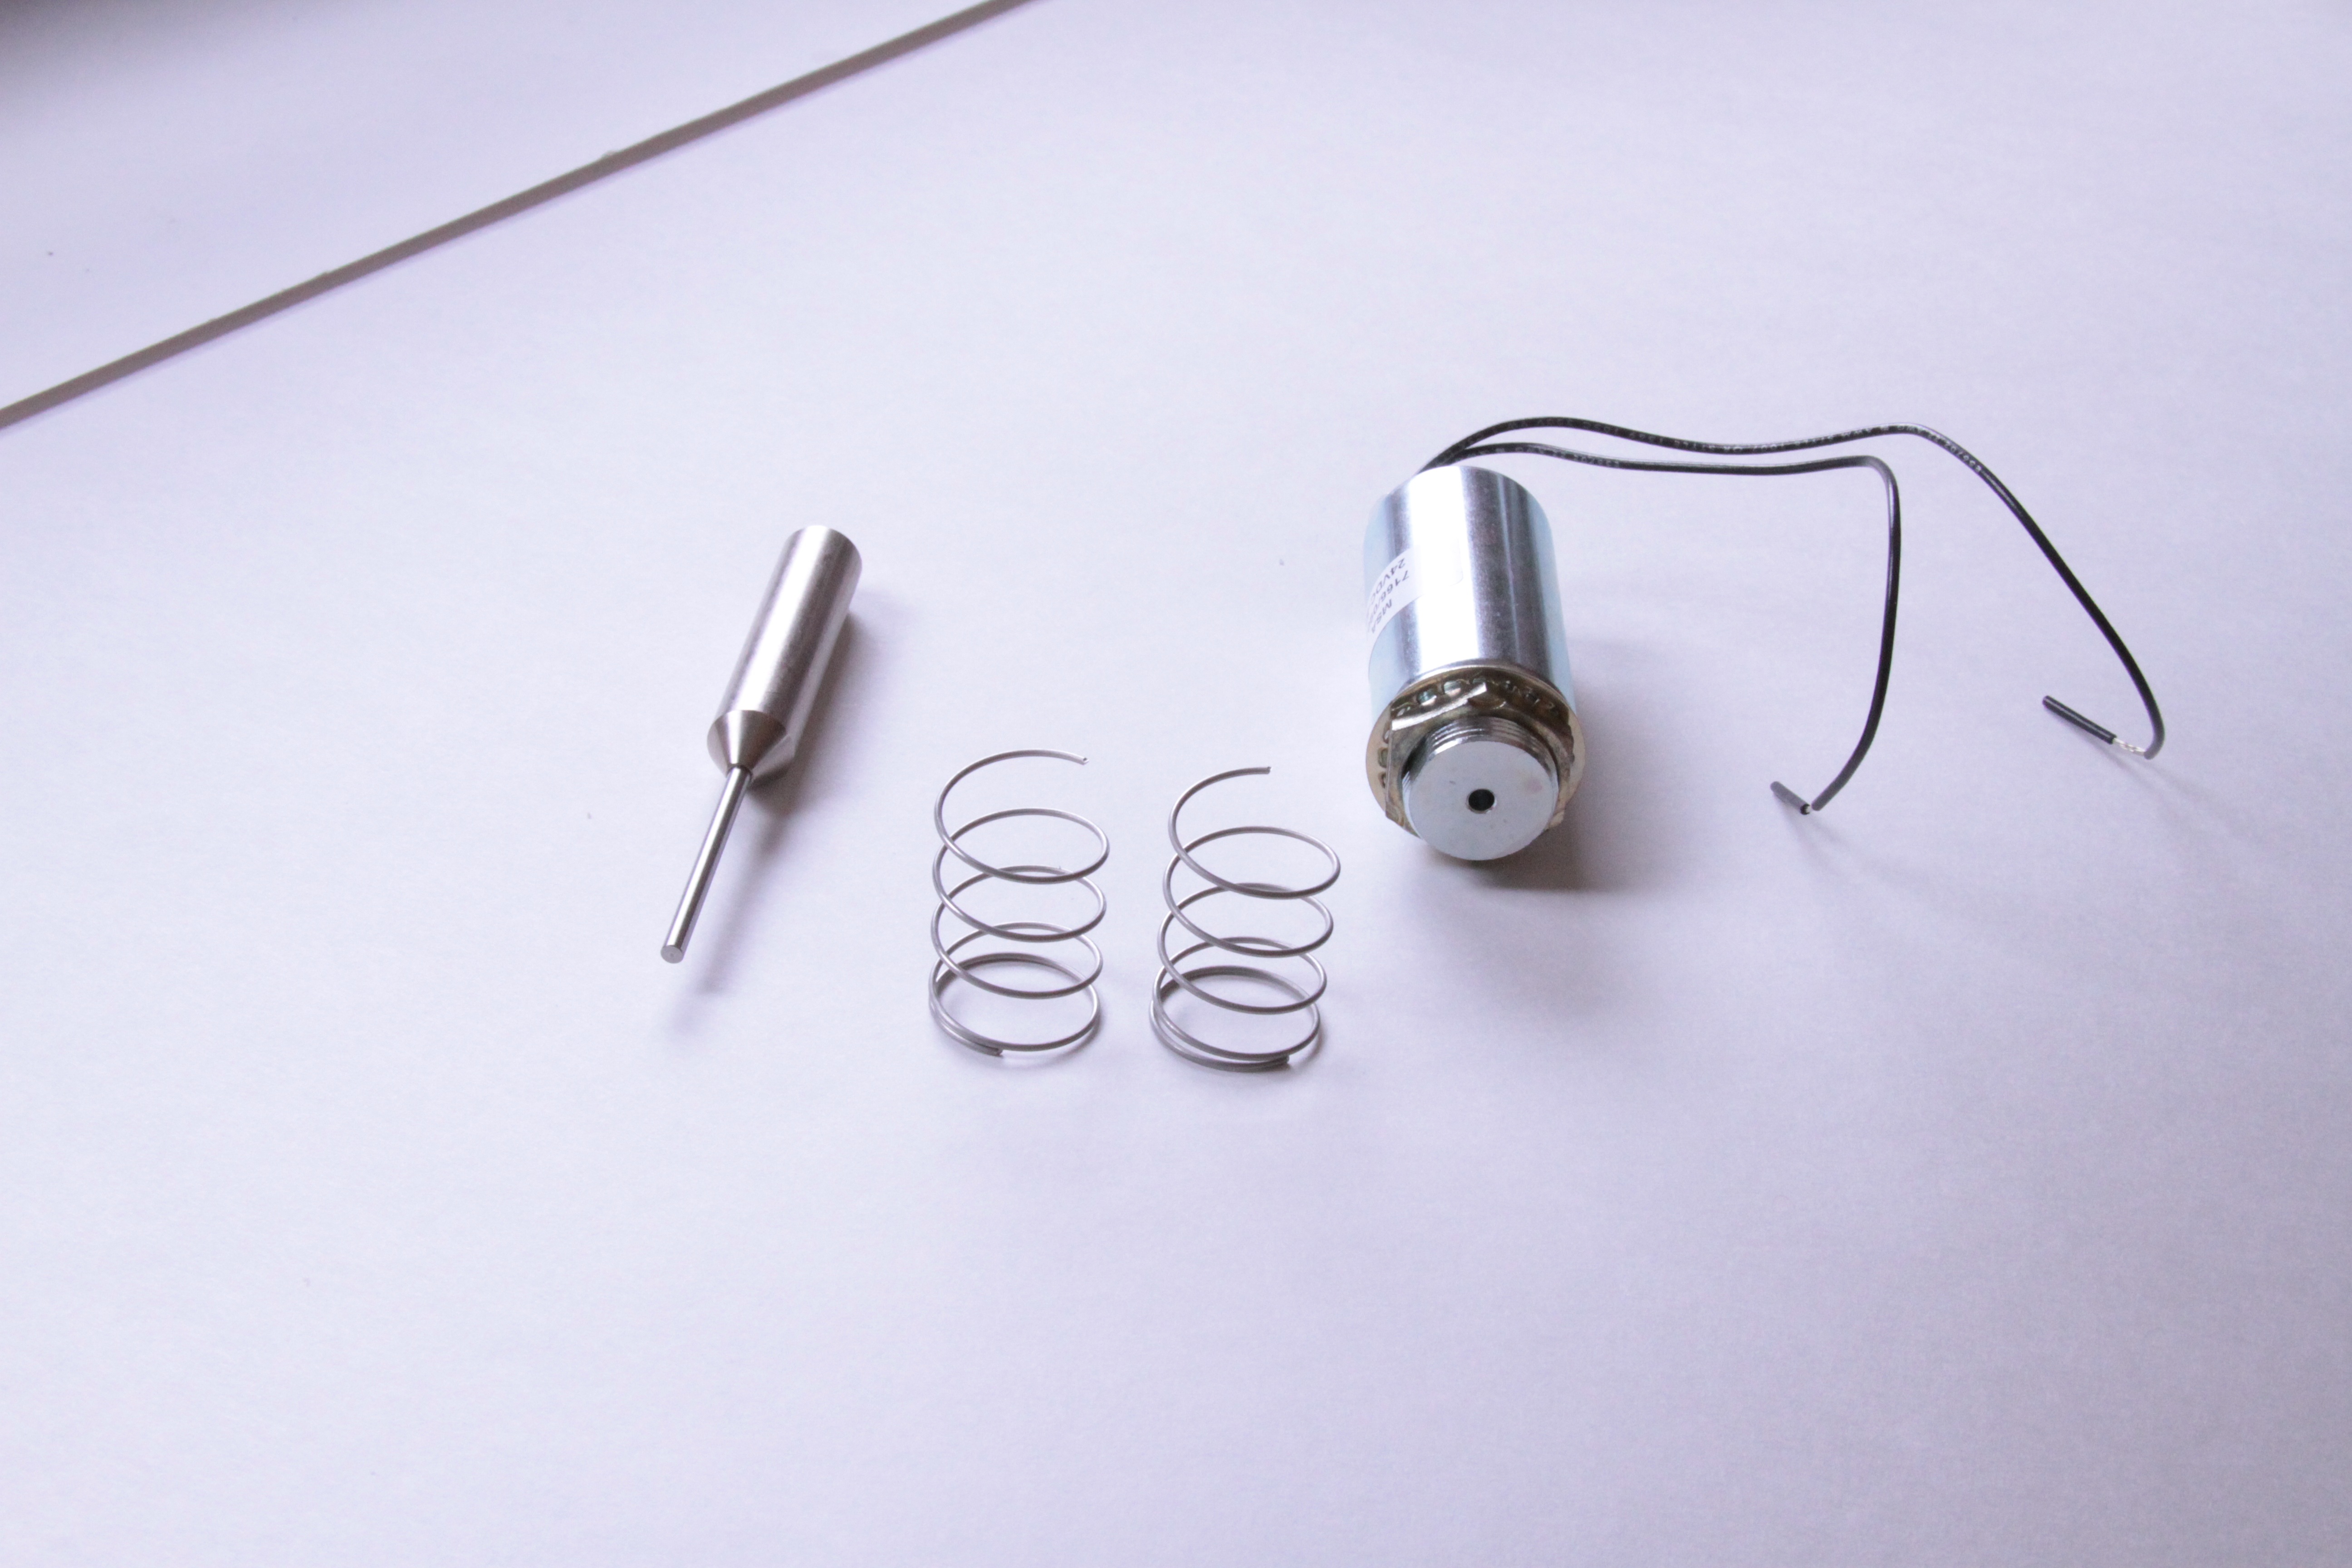
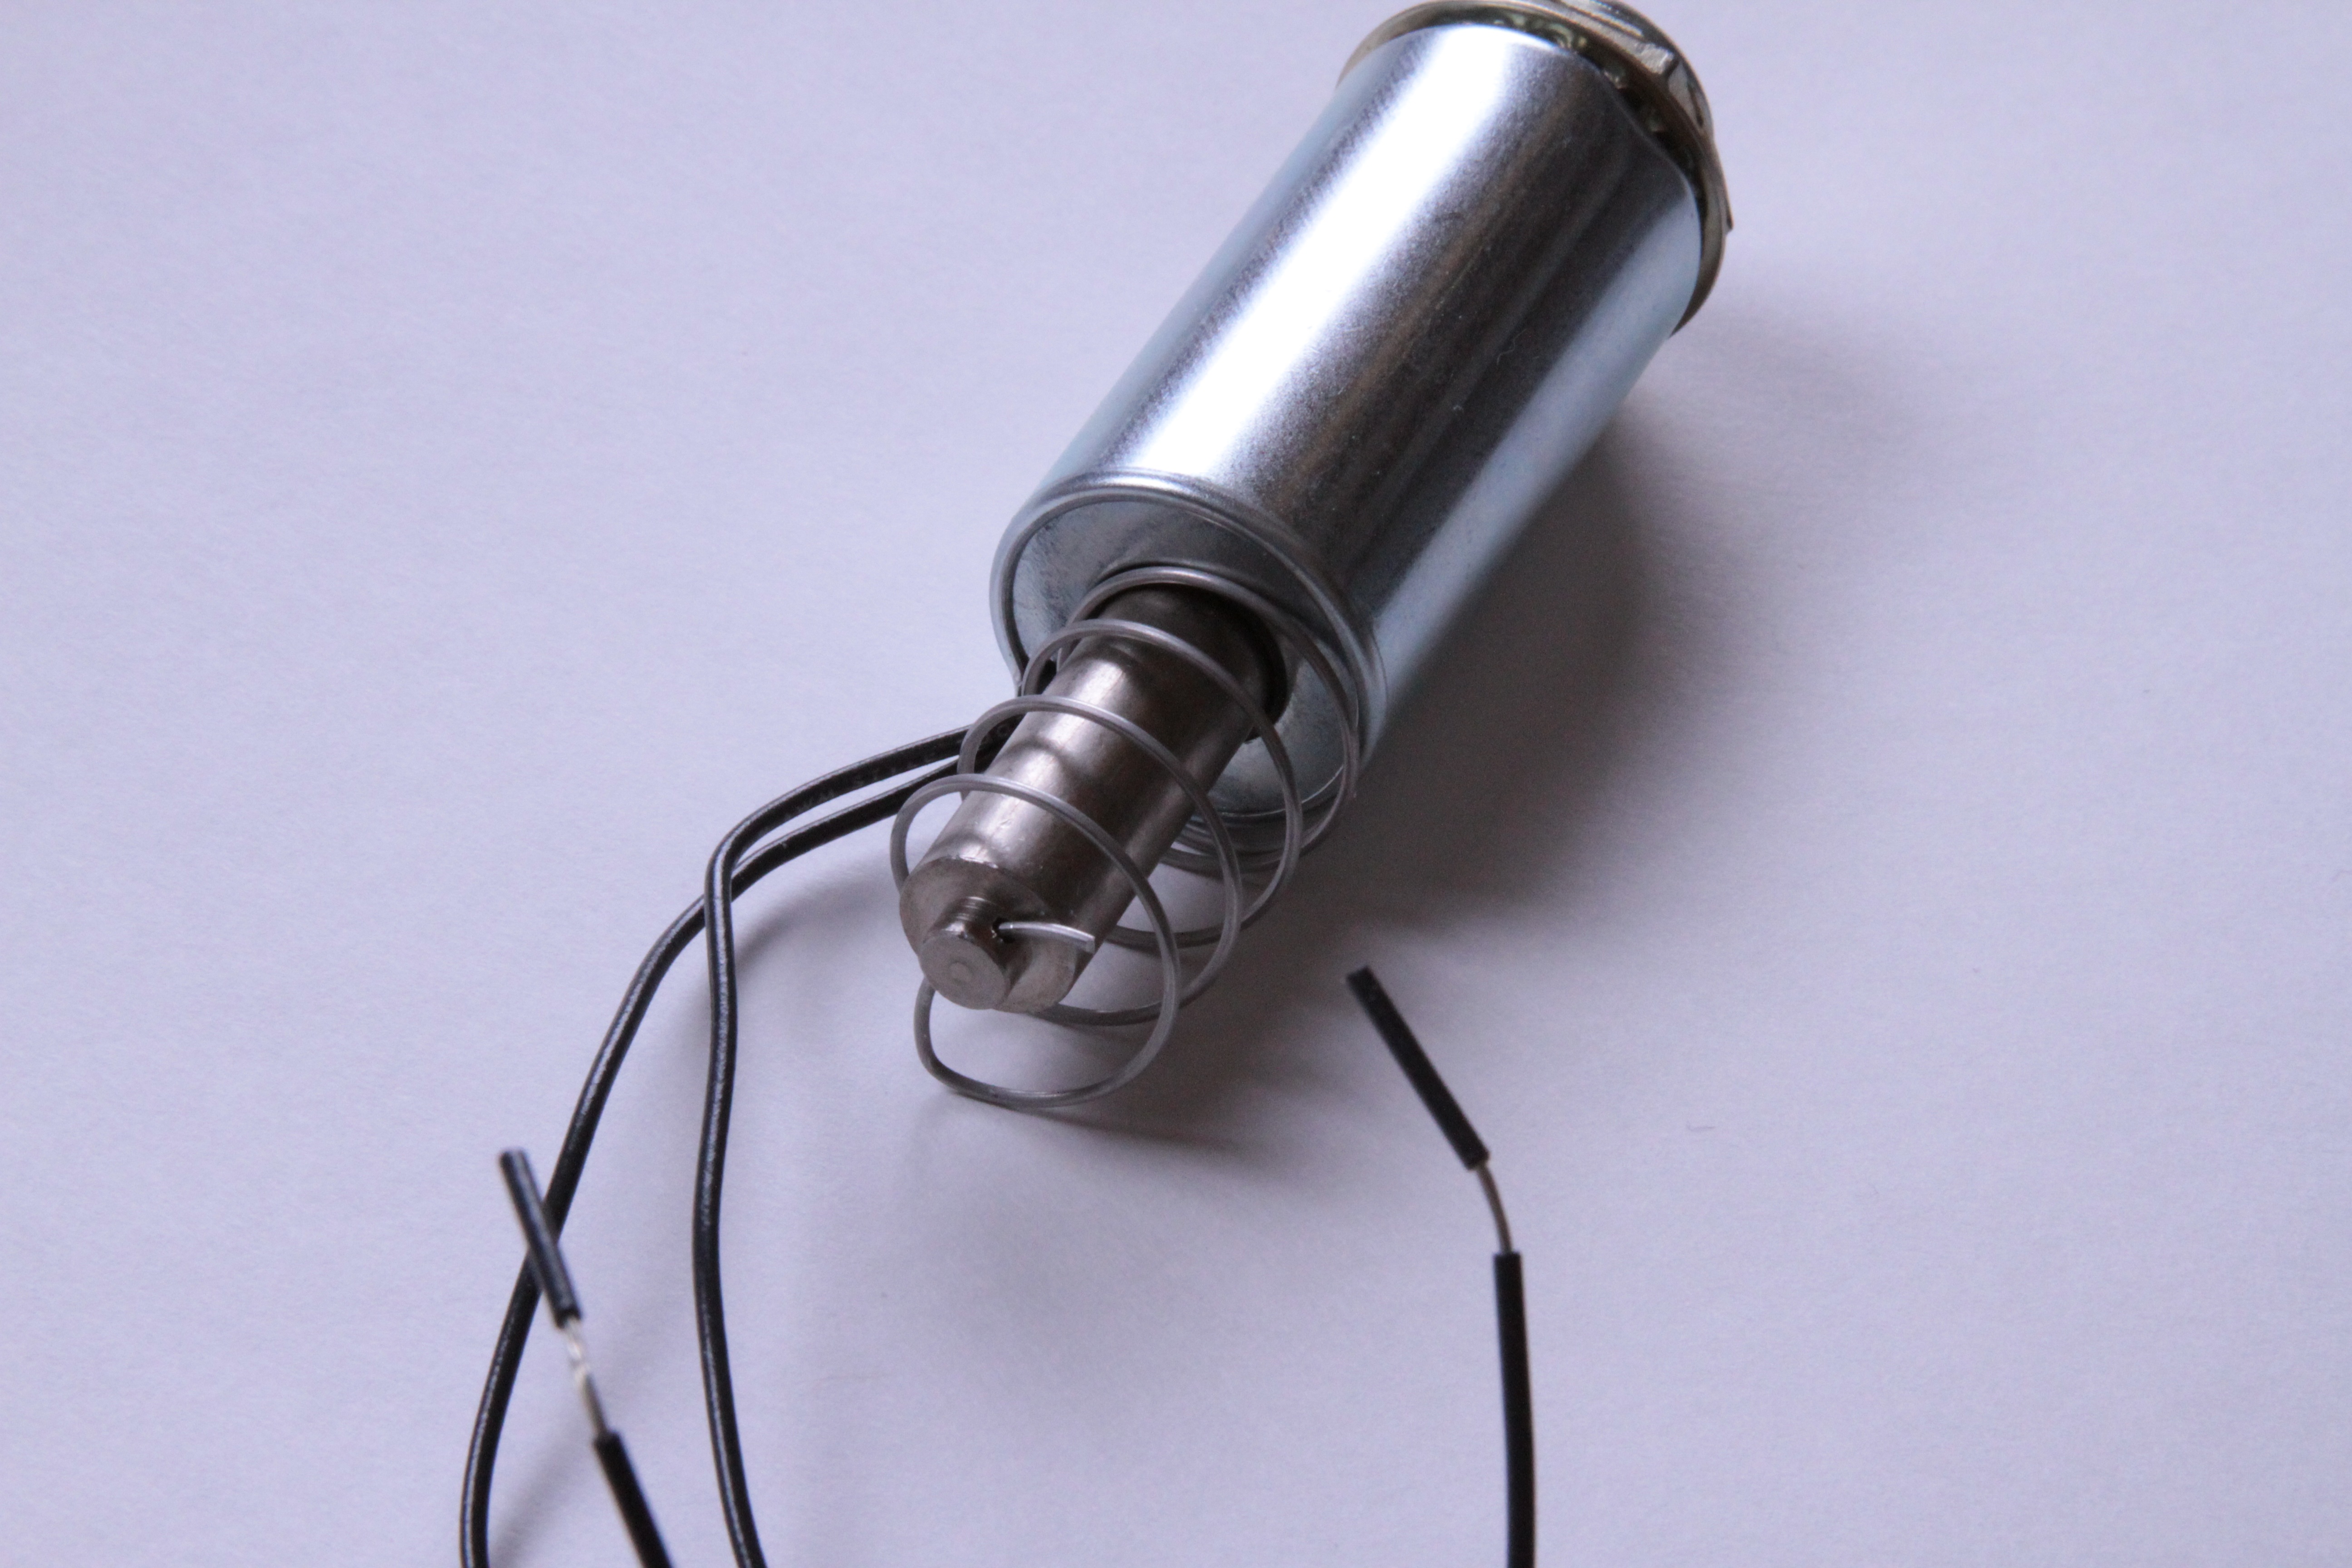
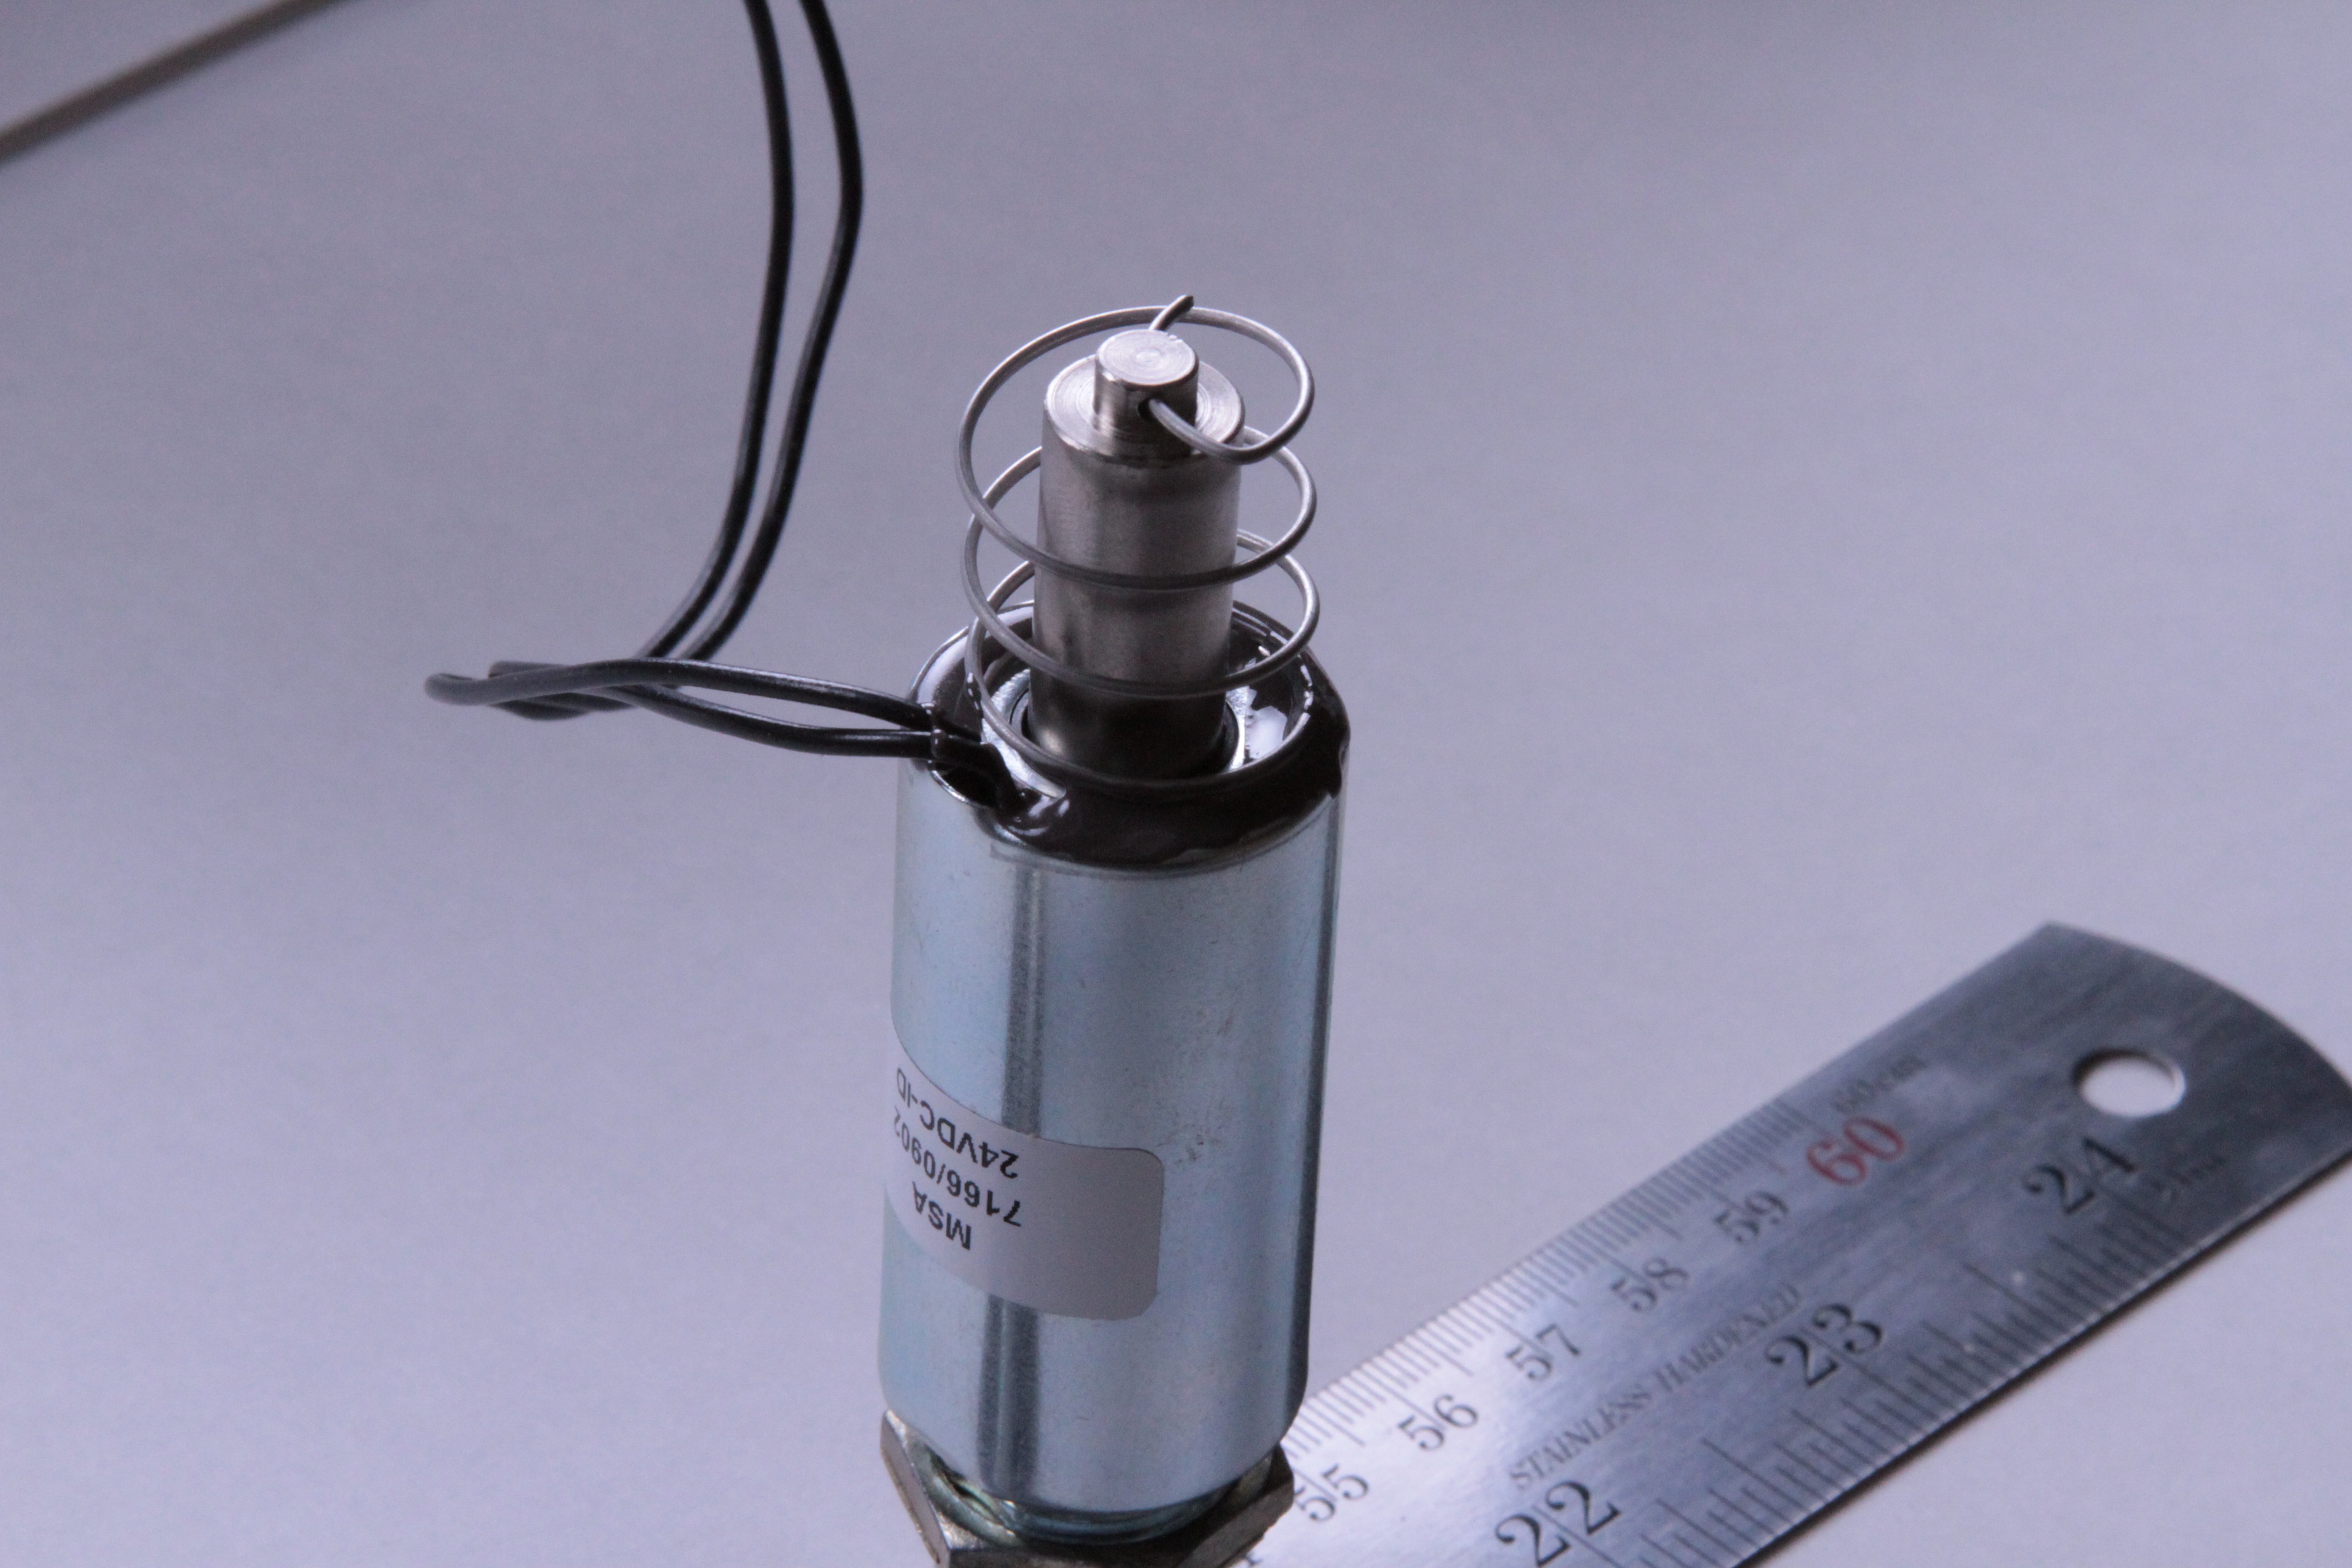
The paddles need to be powered to keep the ball moving. We got this 24 V pusher solenoid from McMaster-Carr. It didn’t come with a return spring nor a place to put one, so we (a) drilled a hole in the back of the plunger (b) found a spring, cut it apart, bent it, and fed it through the back of the plunger and (c) glued it all down with JB weld. (Damn, that stuff is strong.)

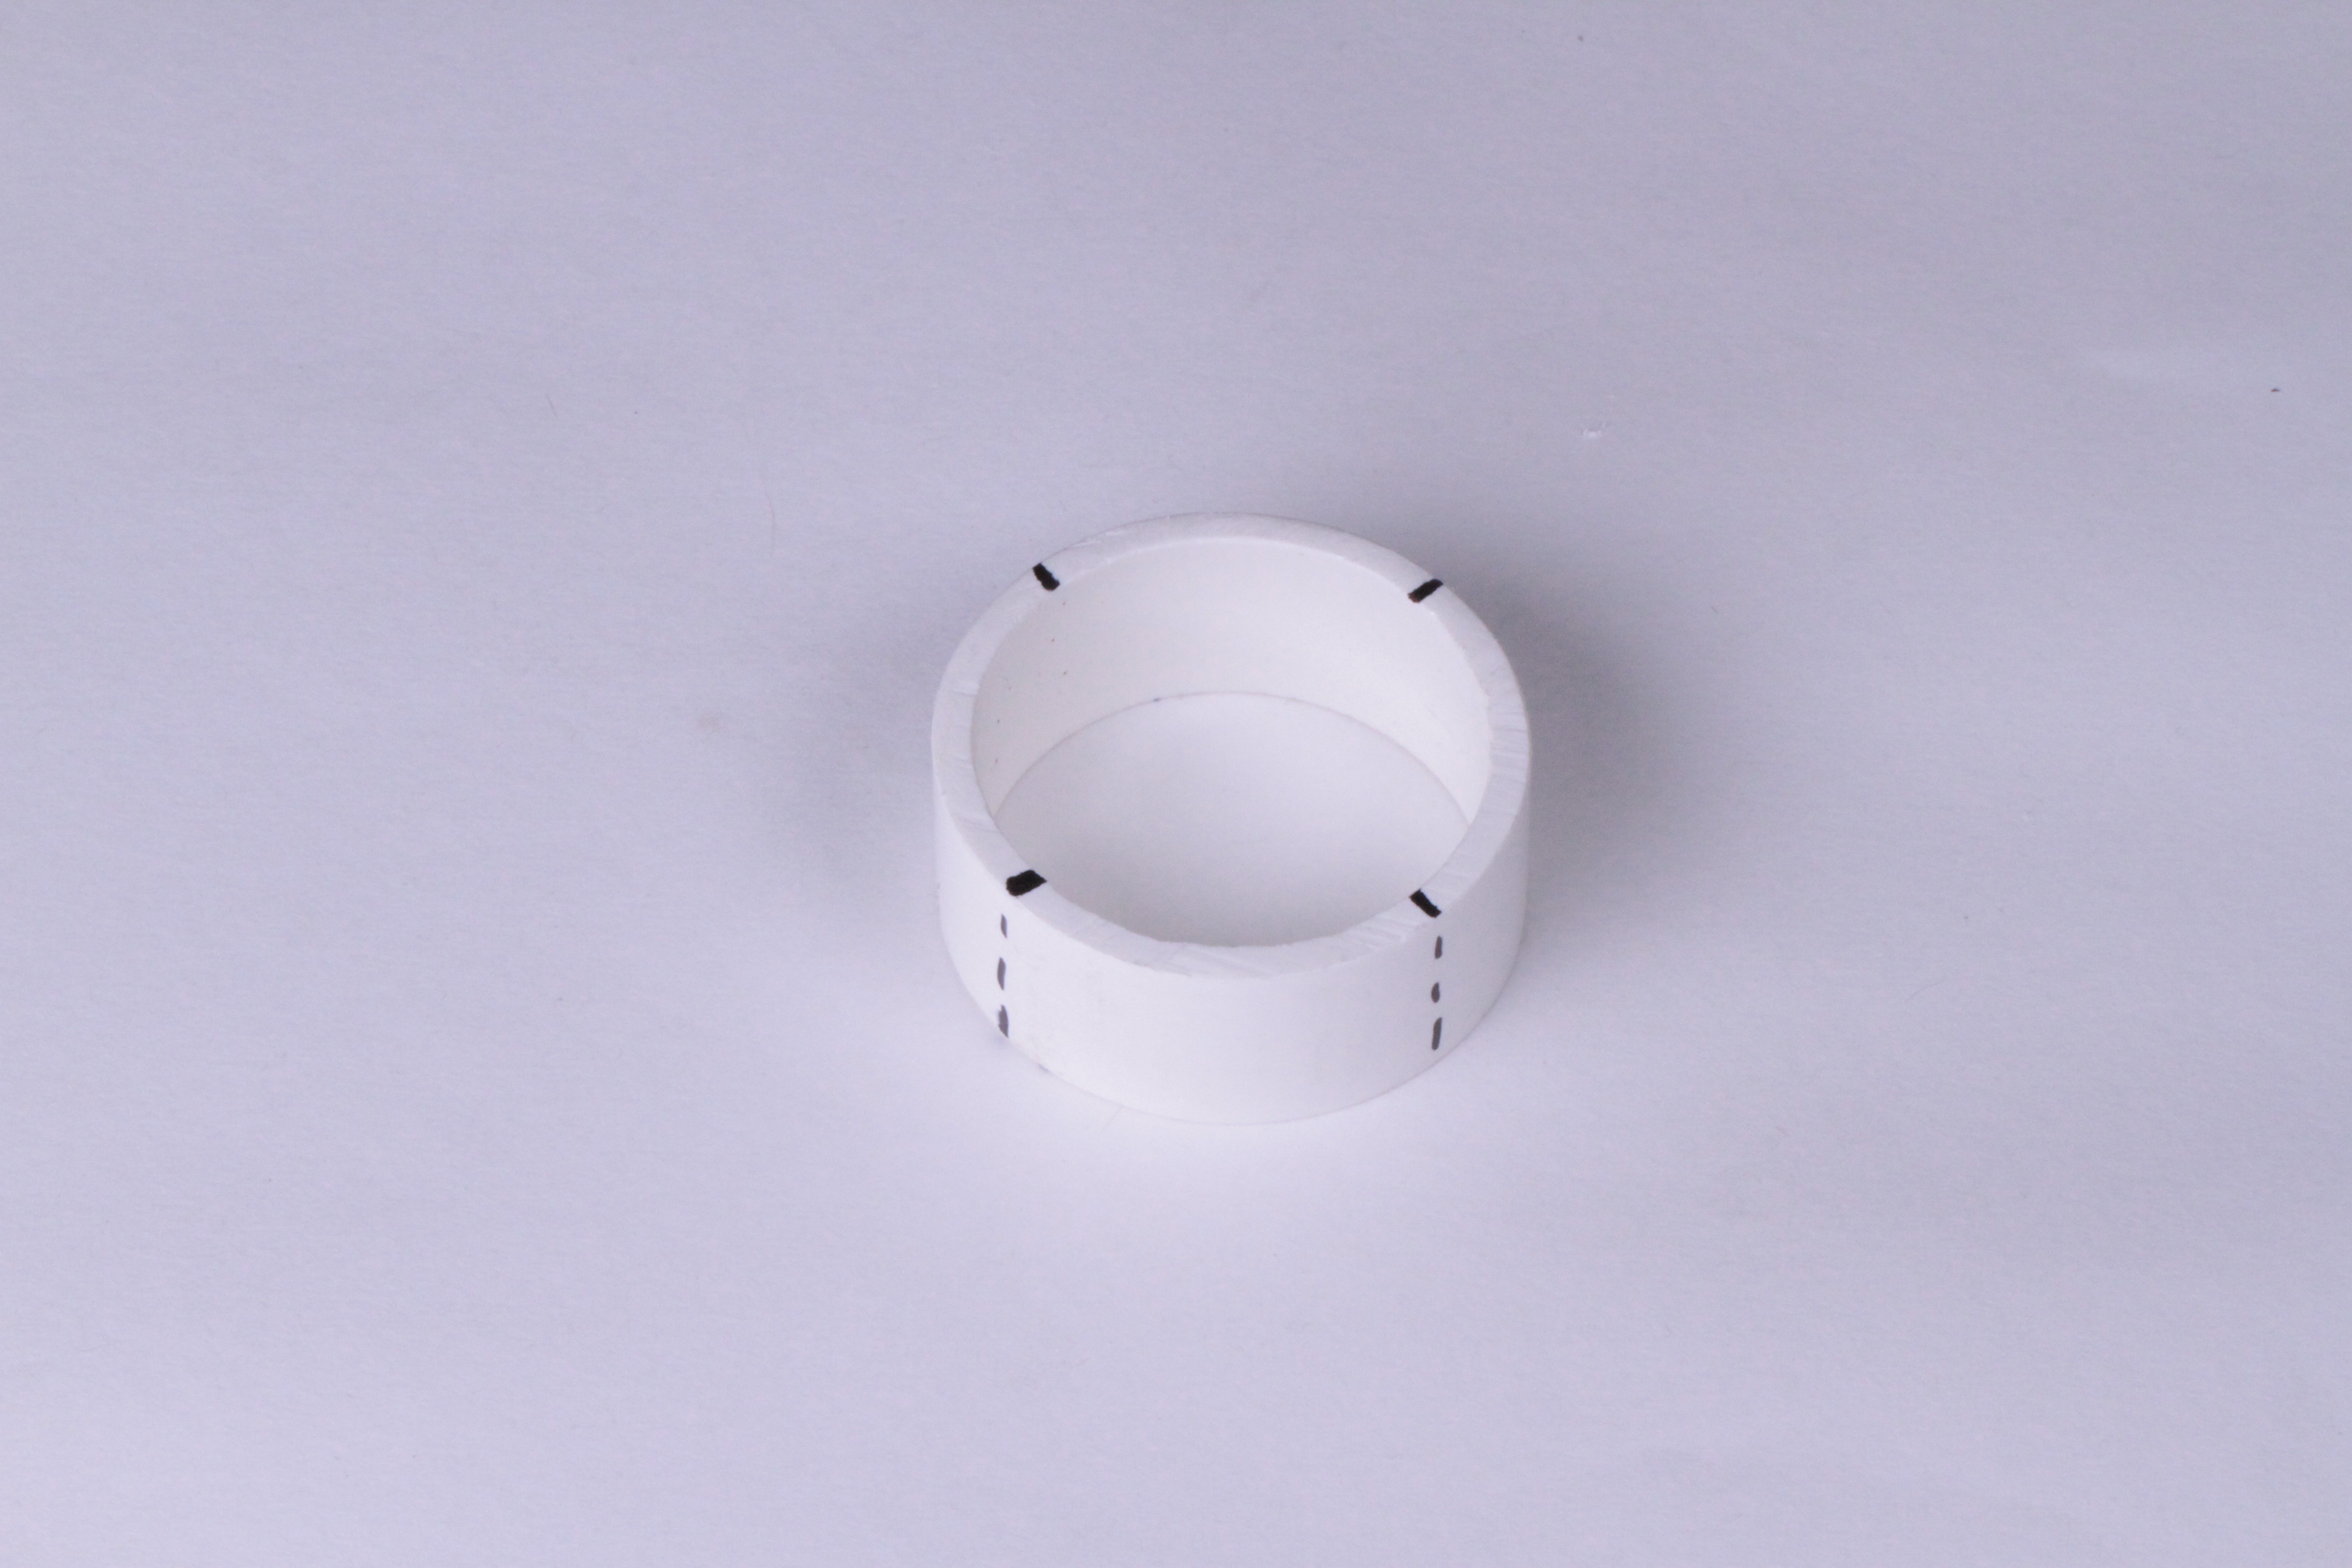
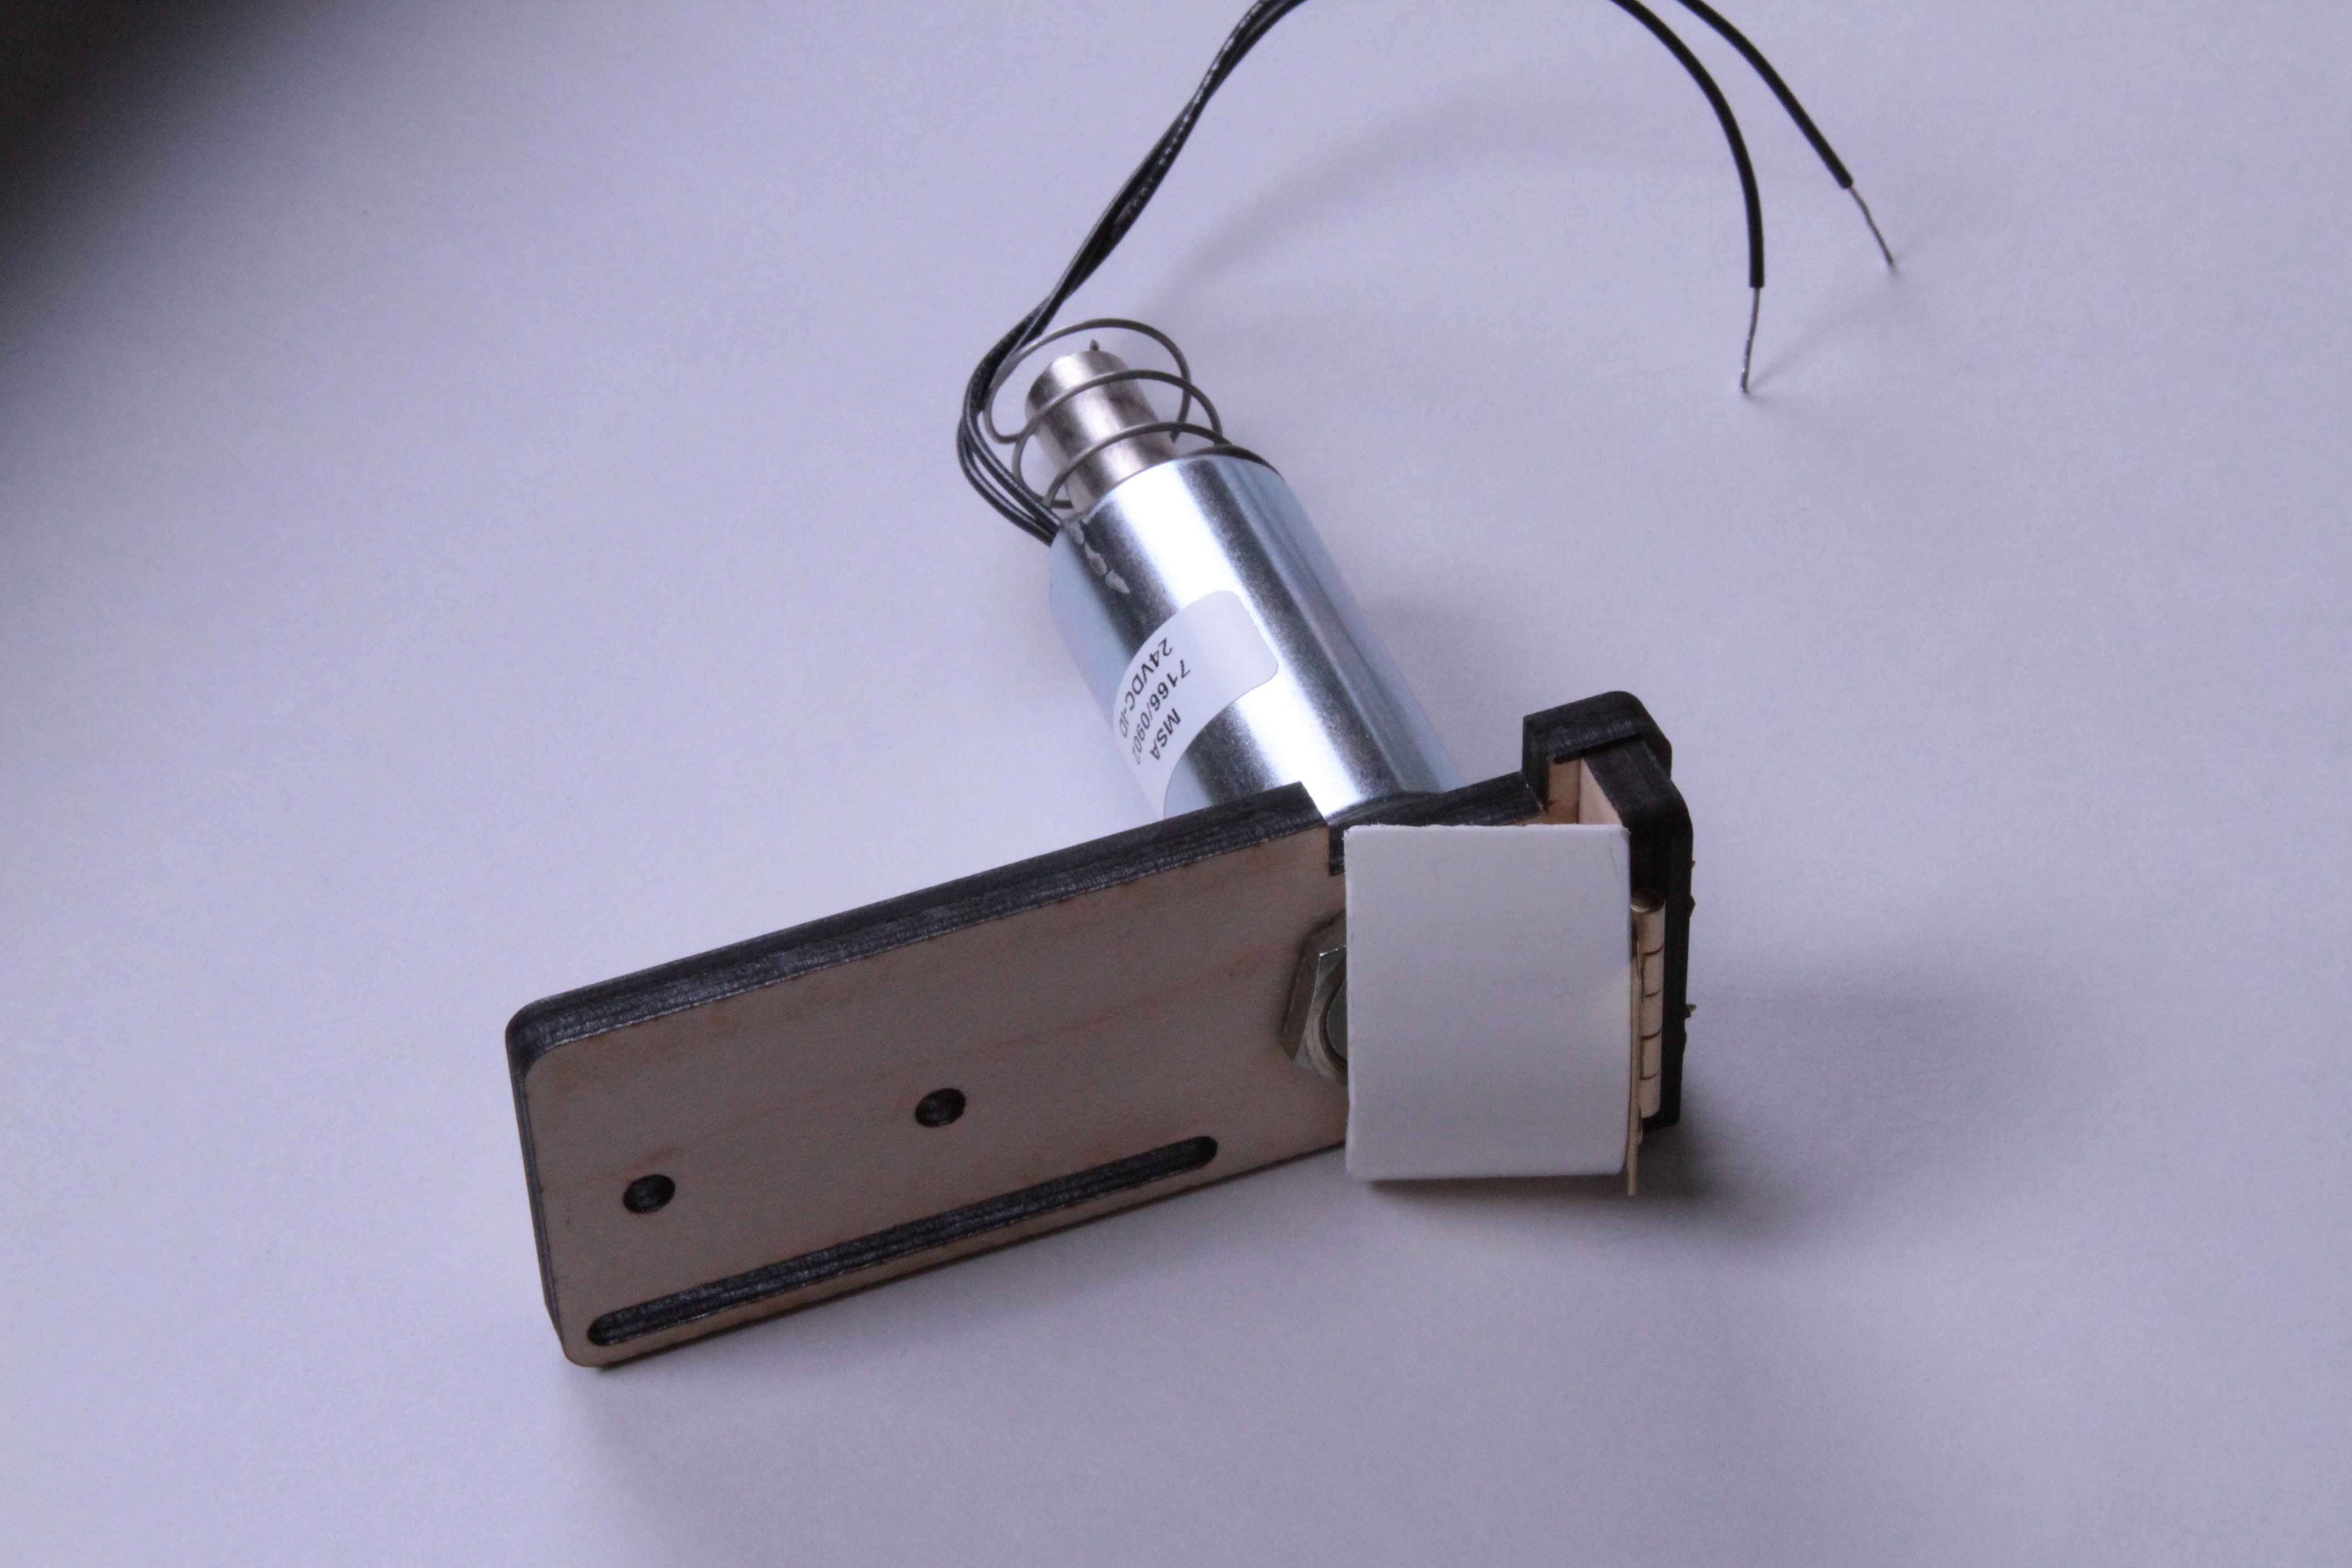
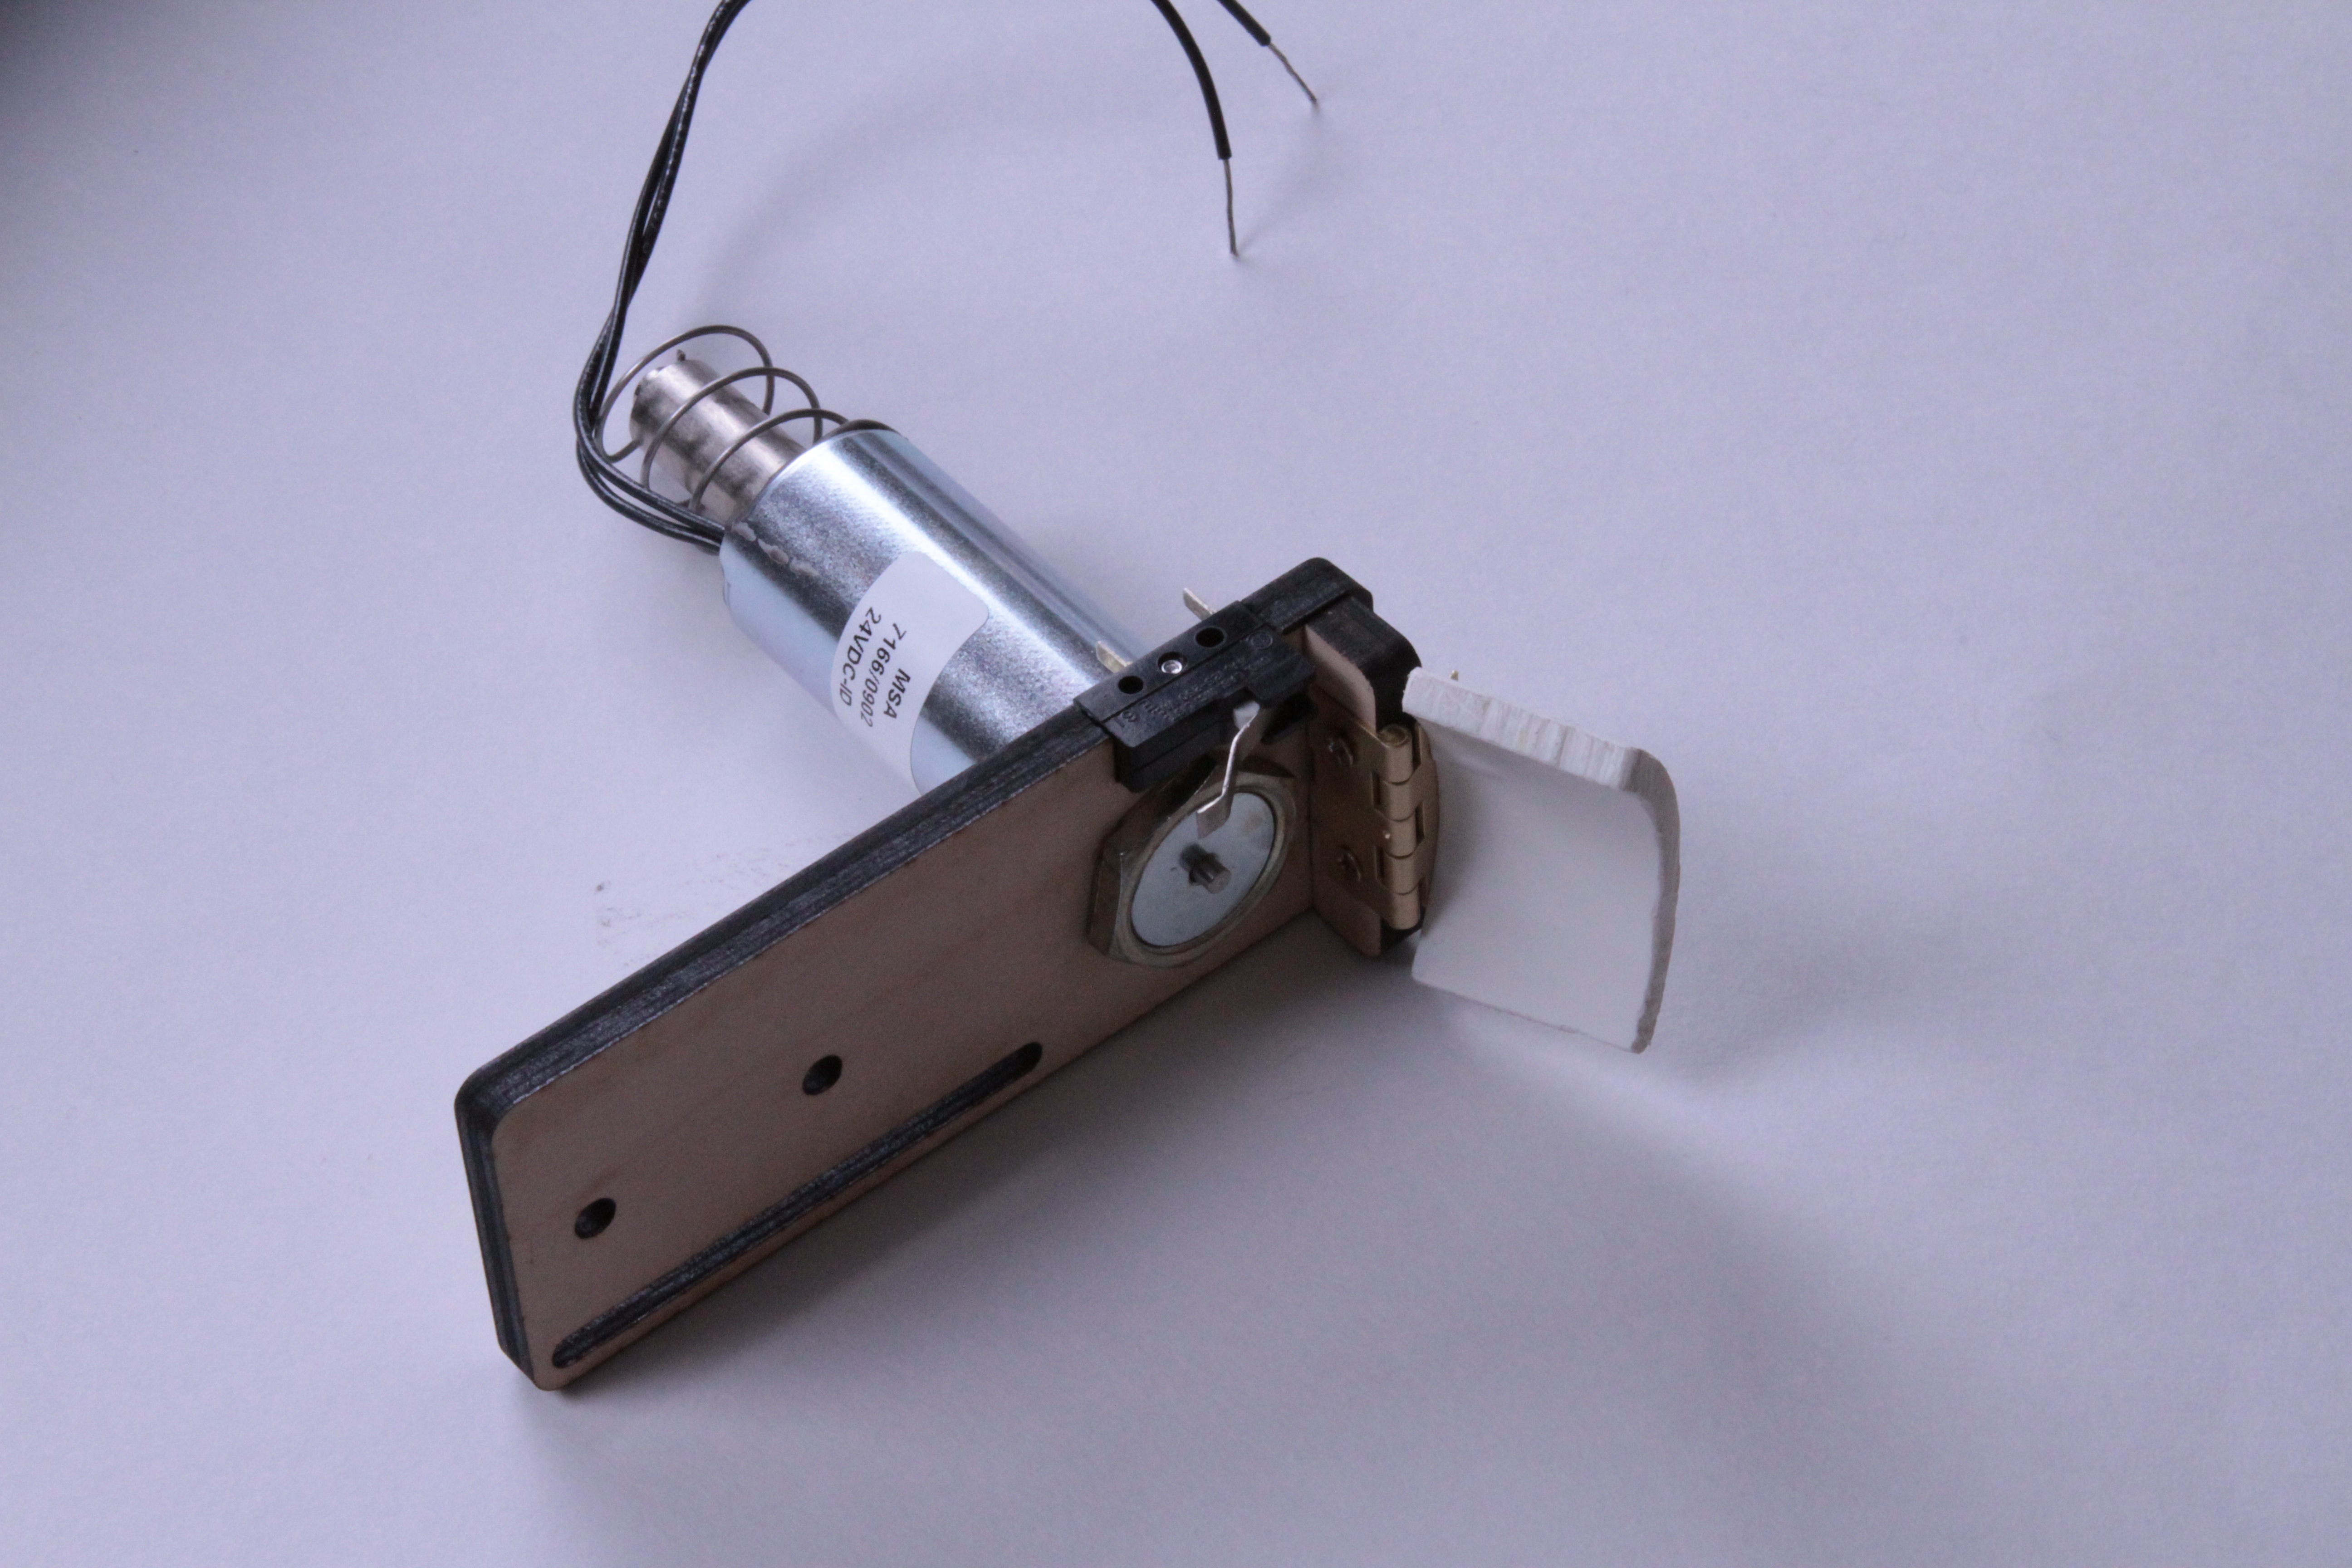
The paddles need to detect a ball hitting it. We found some soft-touch limit-detecting microswitches that seem to work nicely. The paddle surface is a 1/4 section of a PVC pipe, about 1″ thick. Put it all together with the solenoid and the paddle assembly, plus a hardware-store miniature brass hinge.
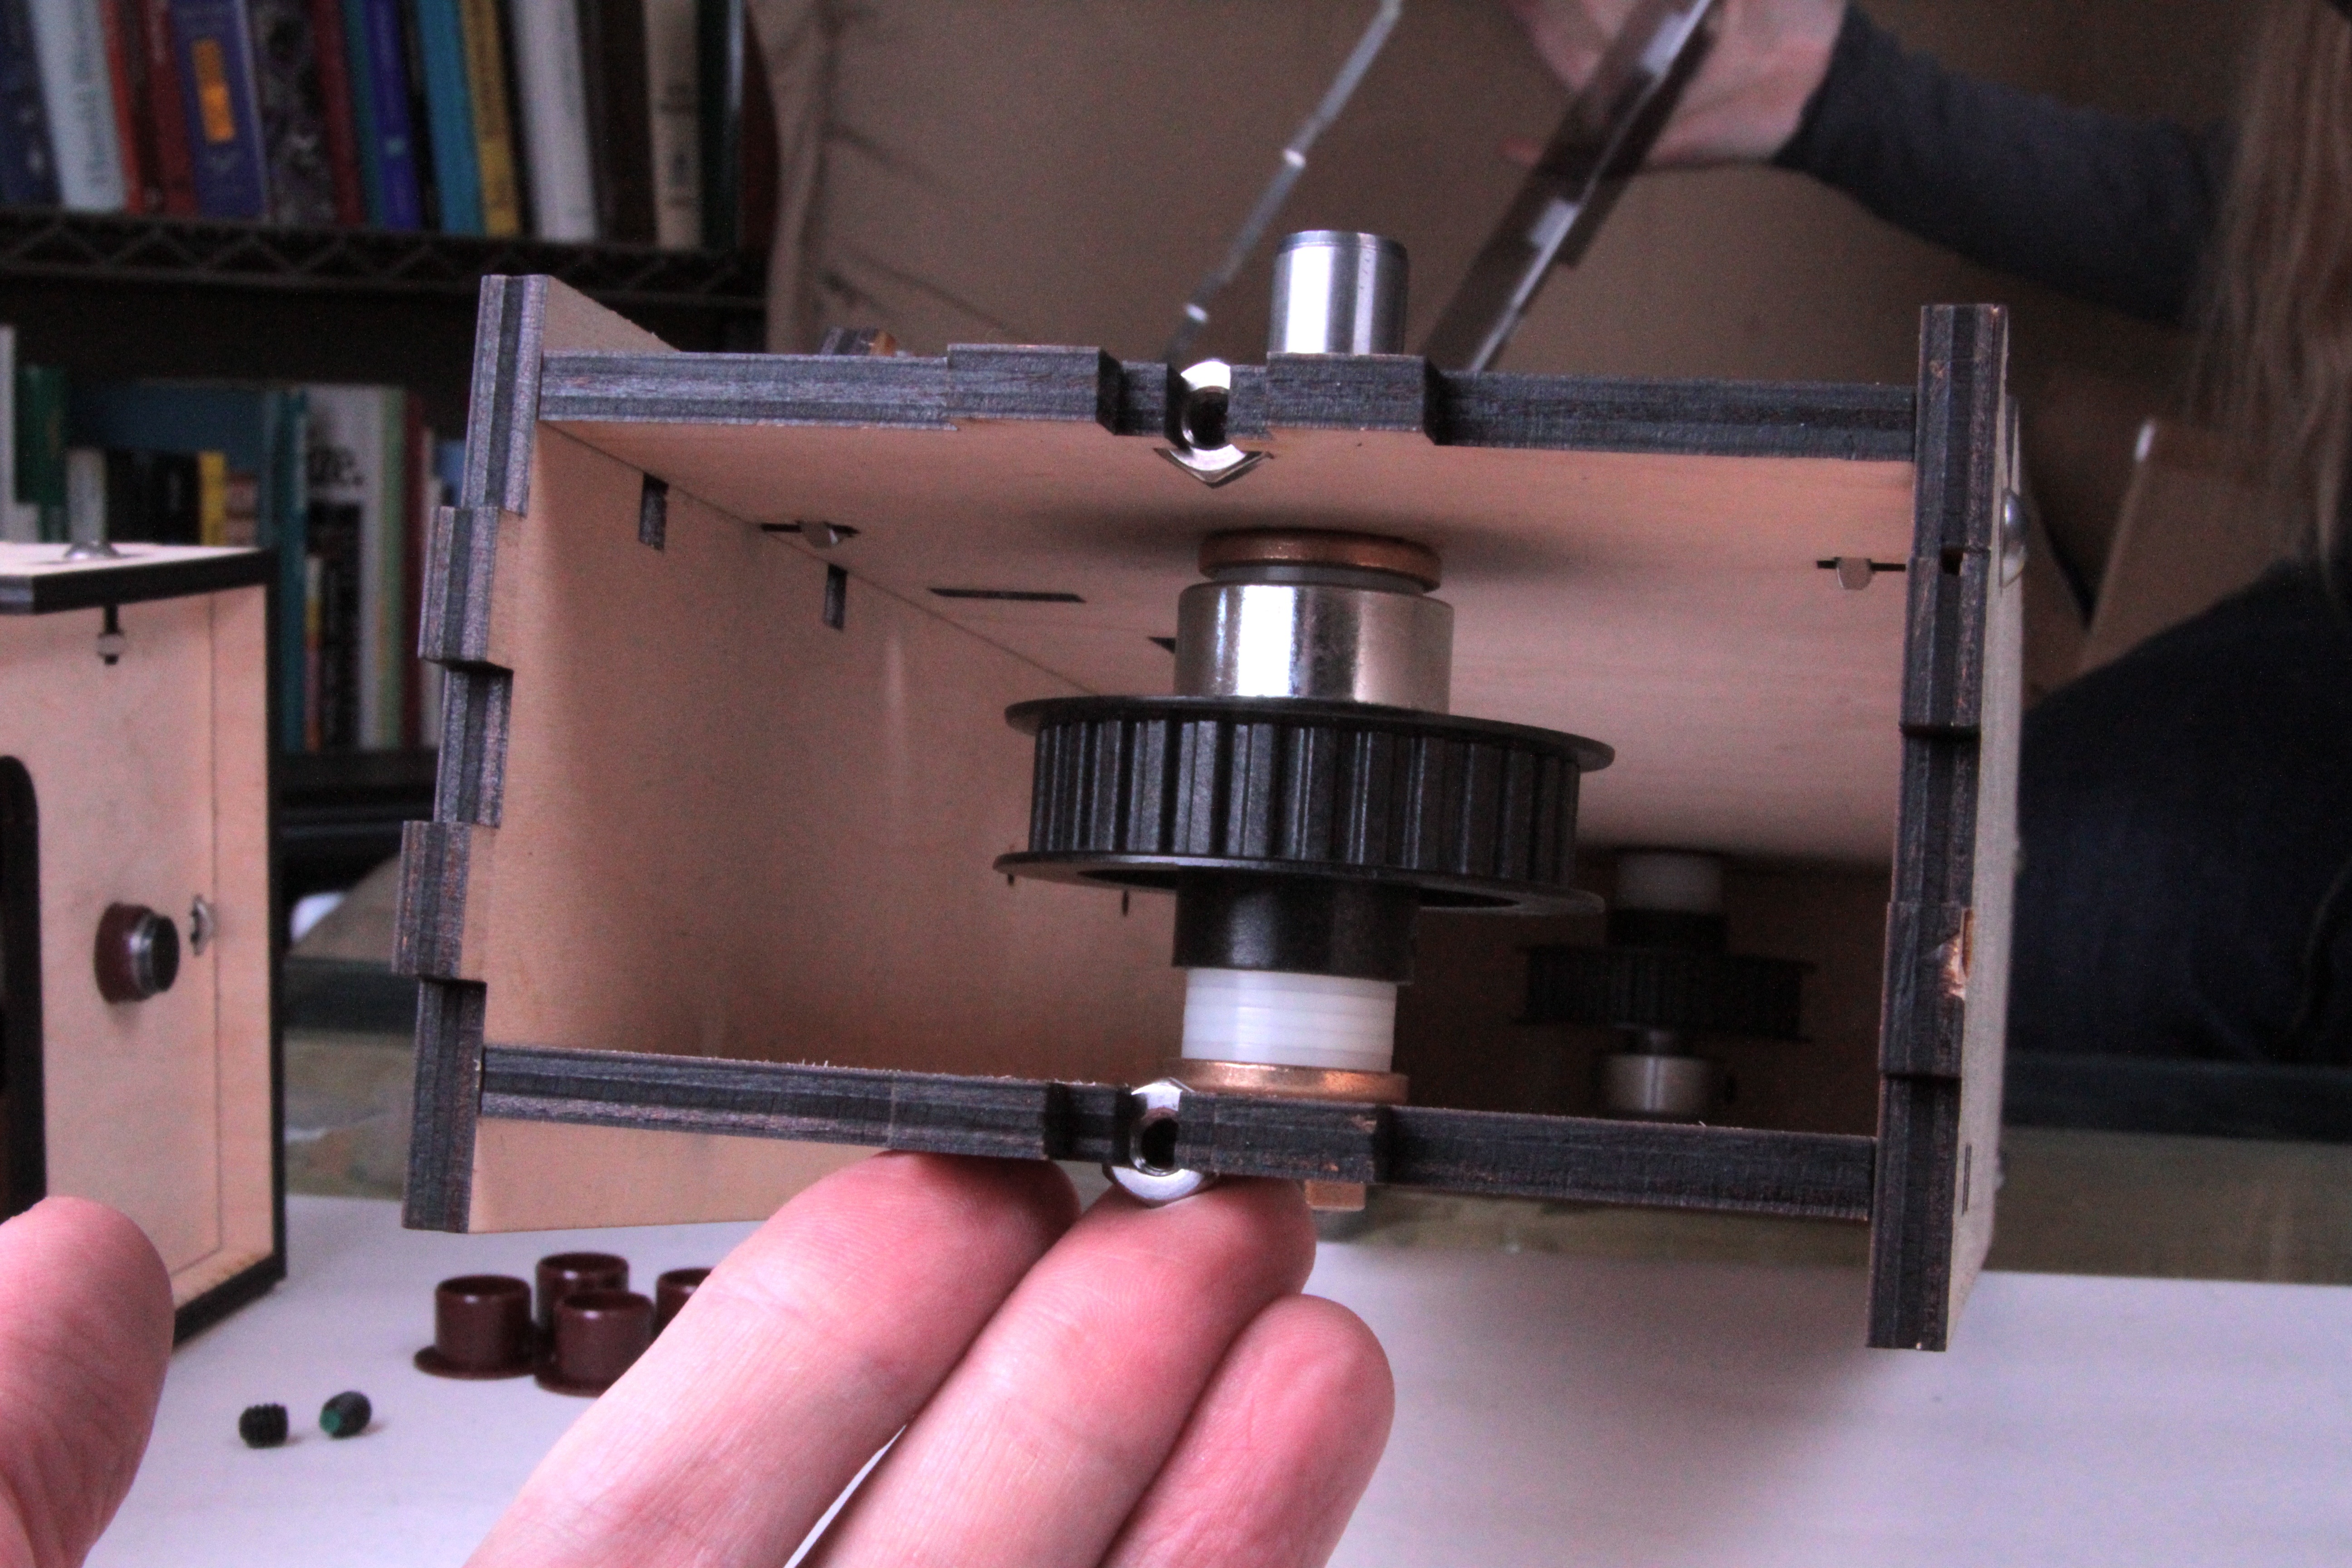
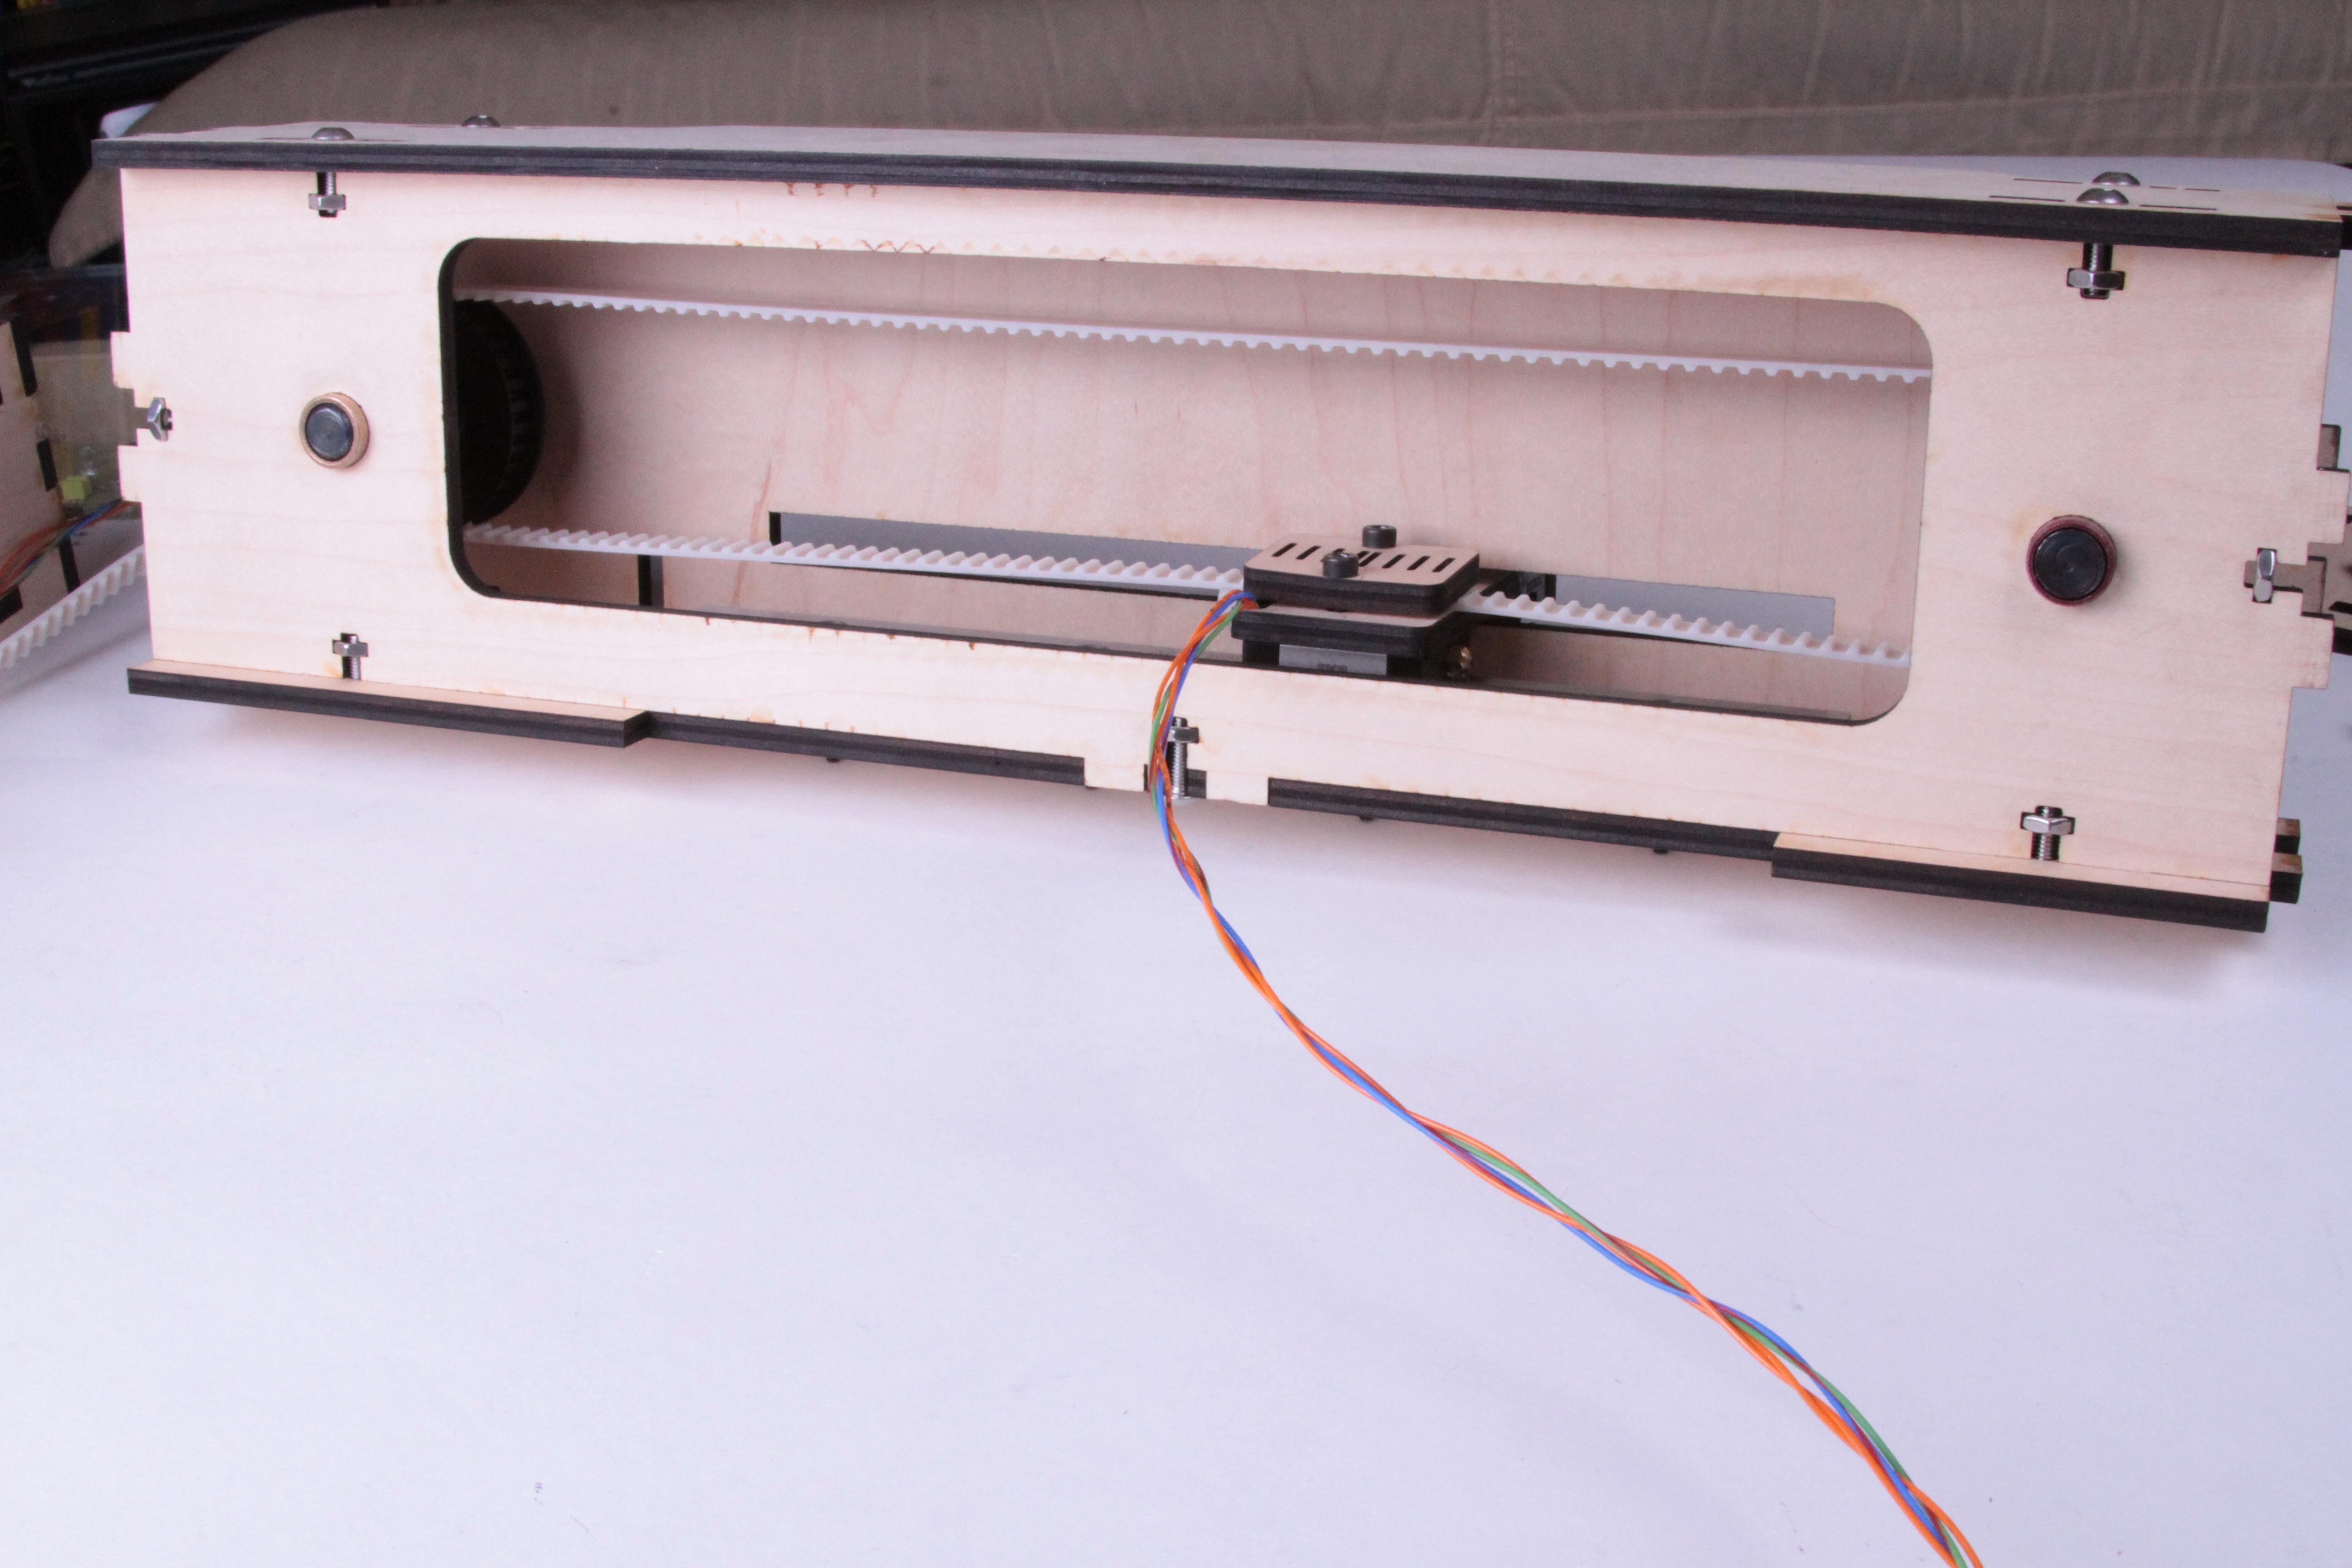
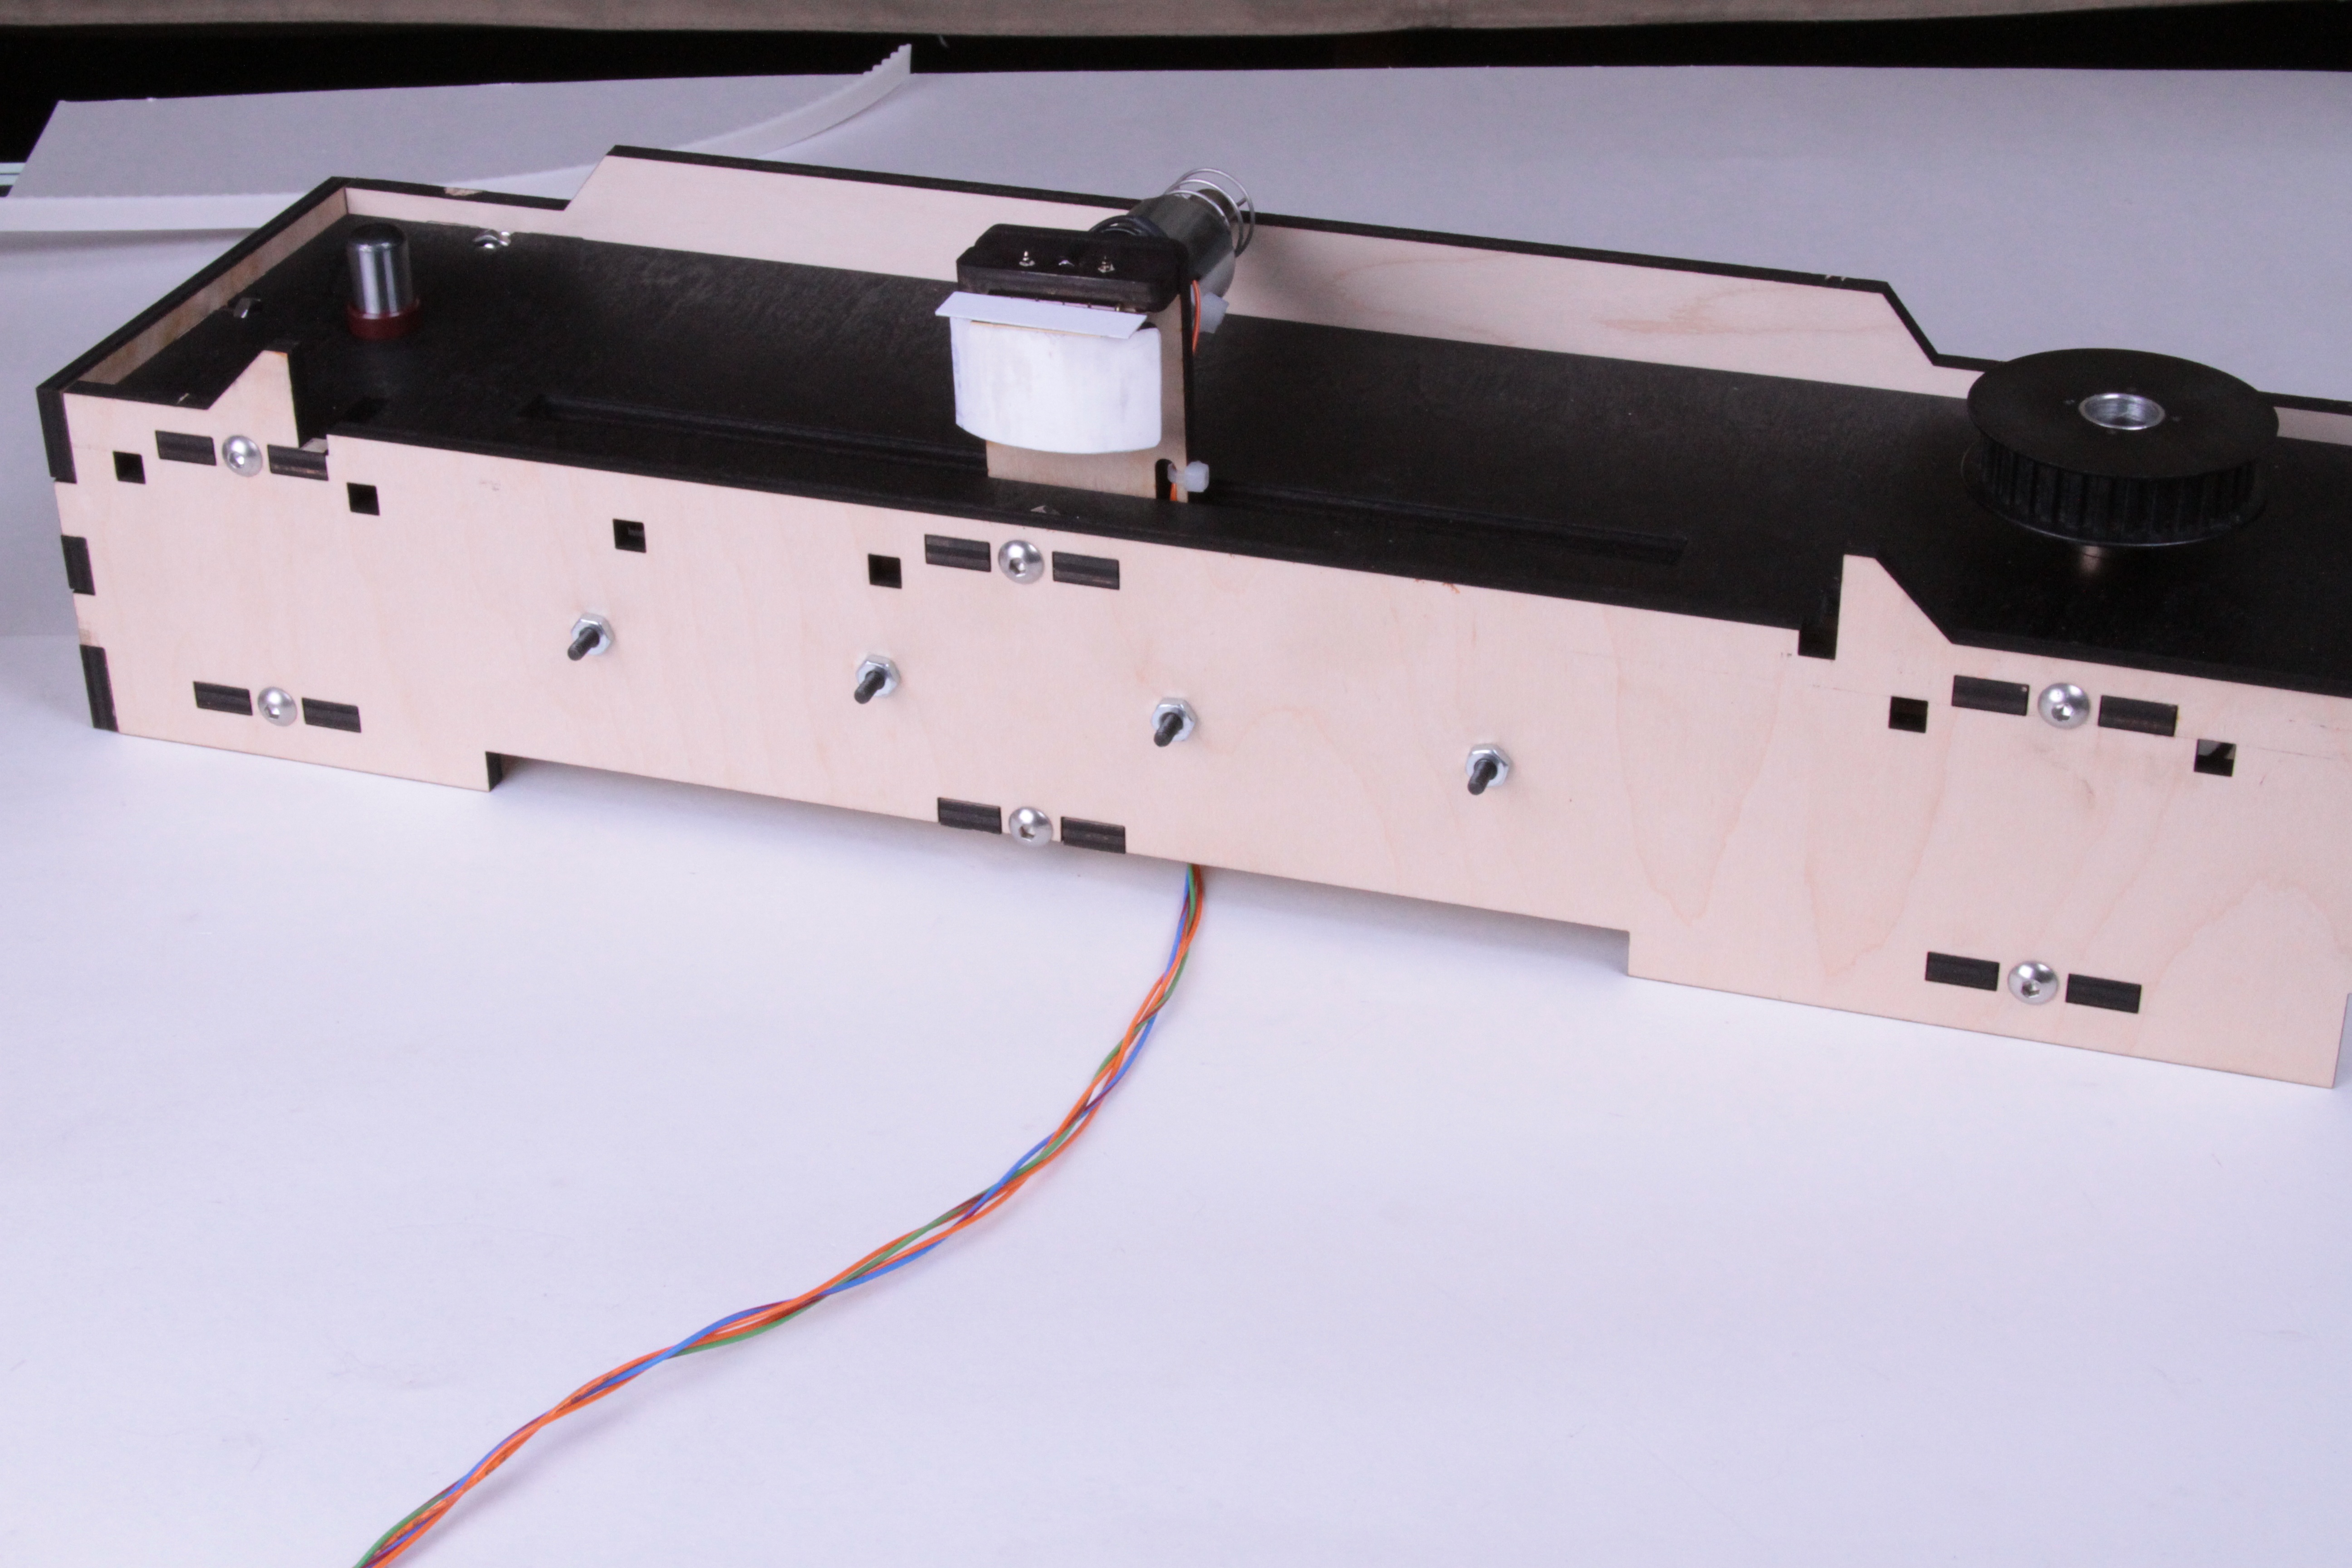
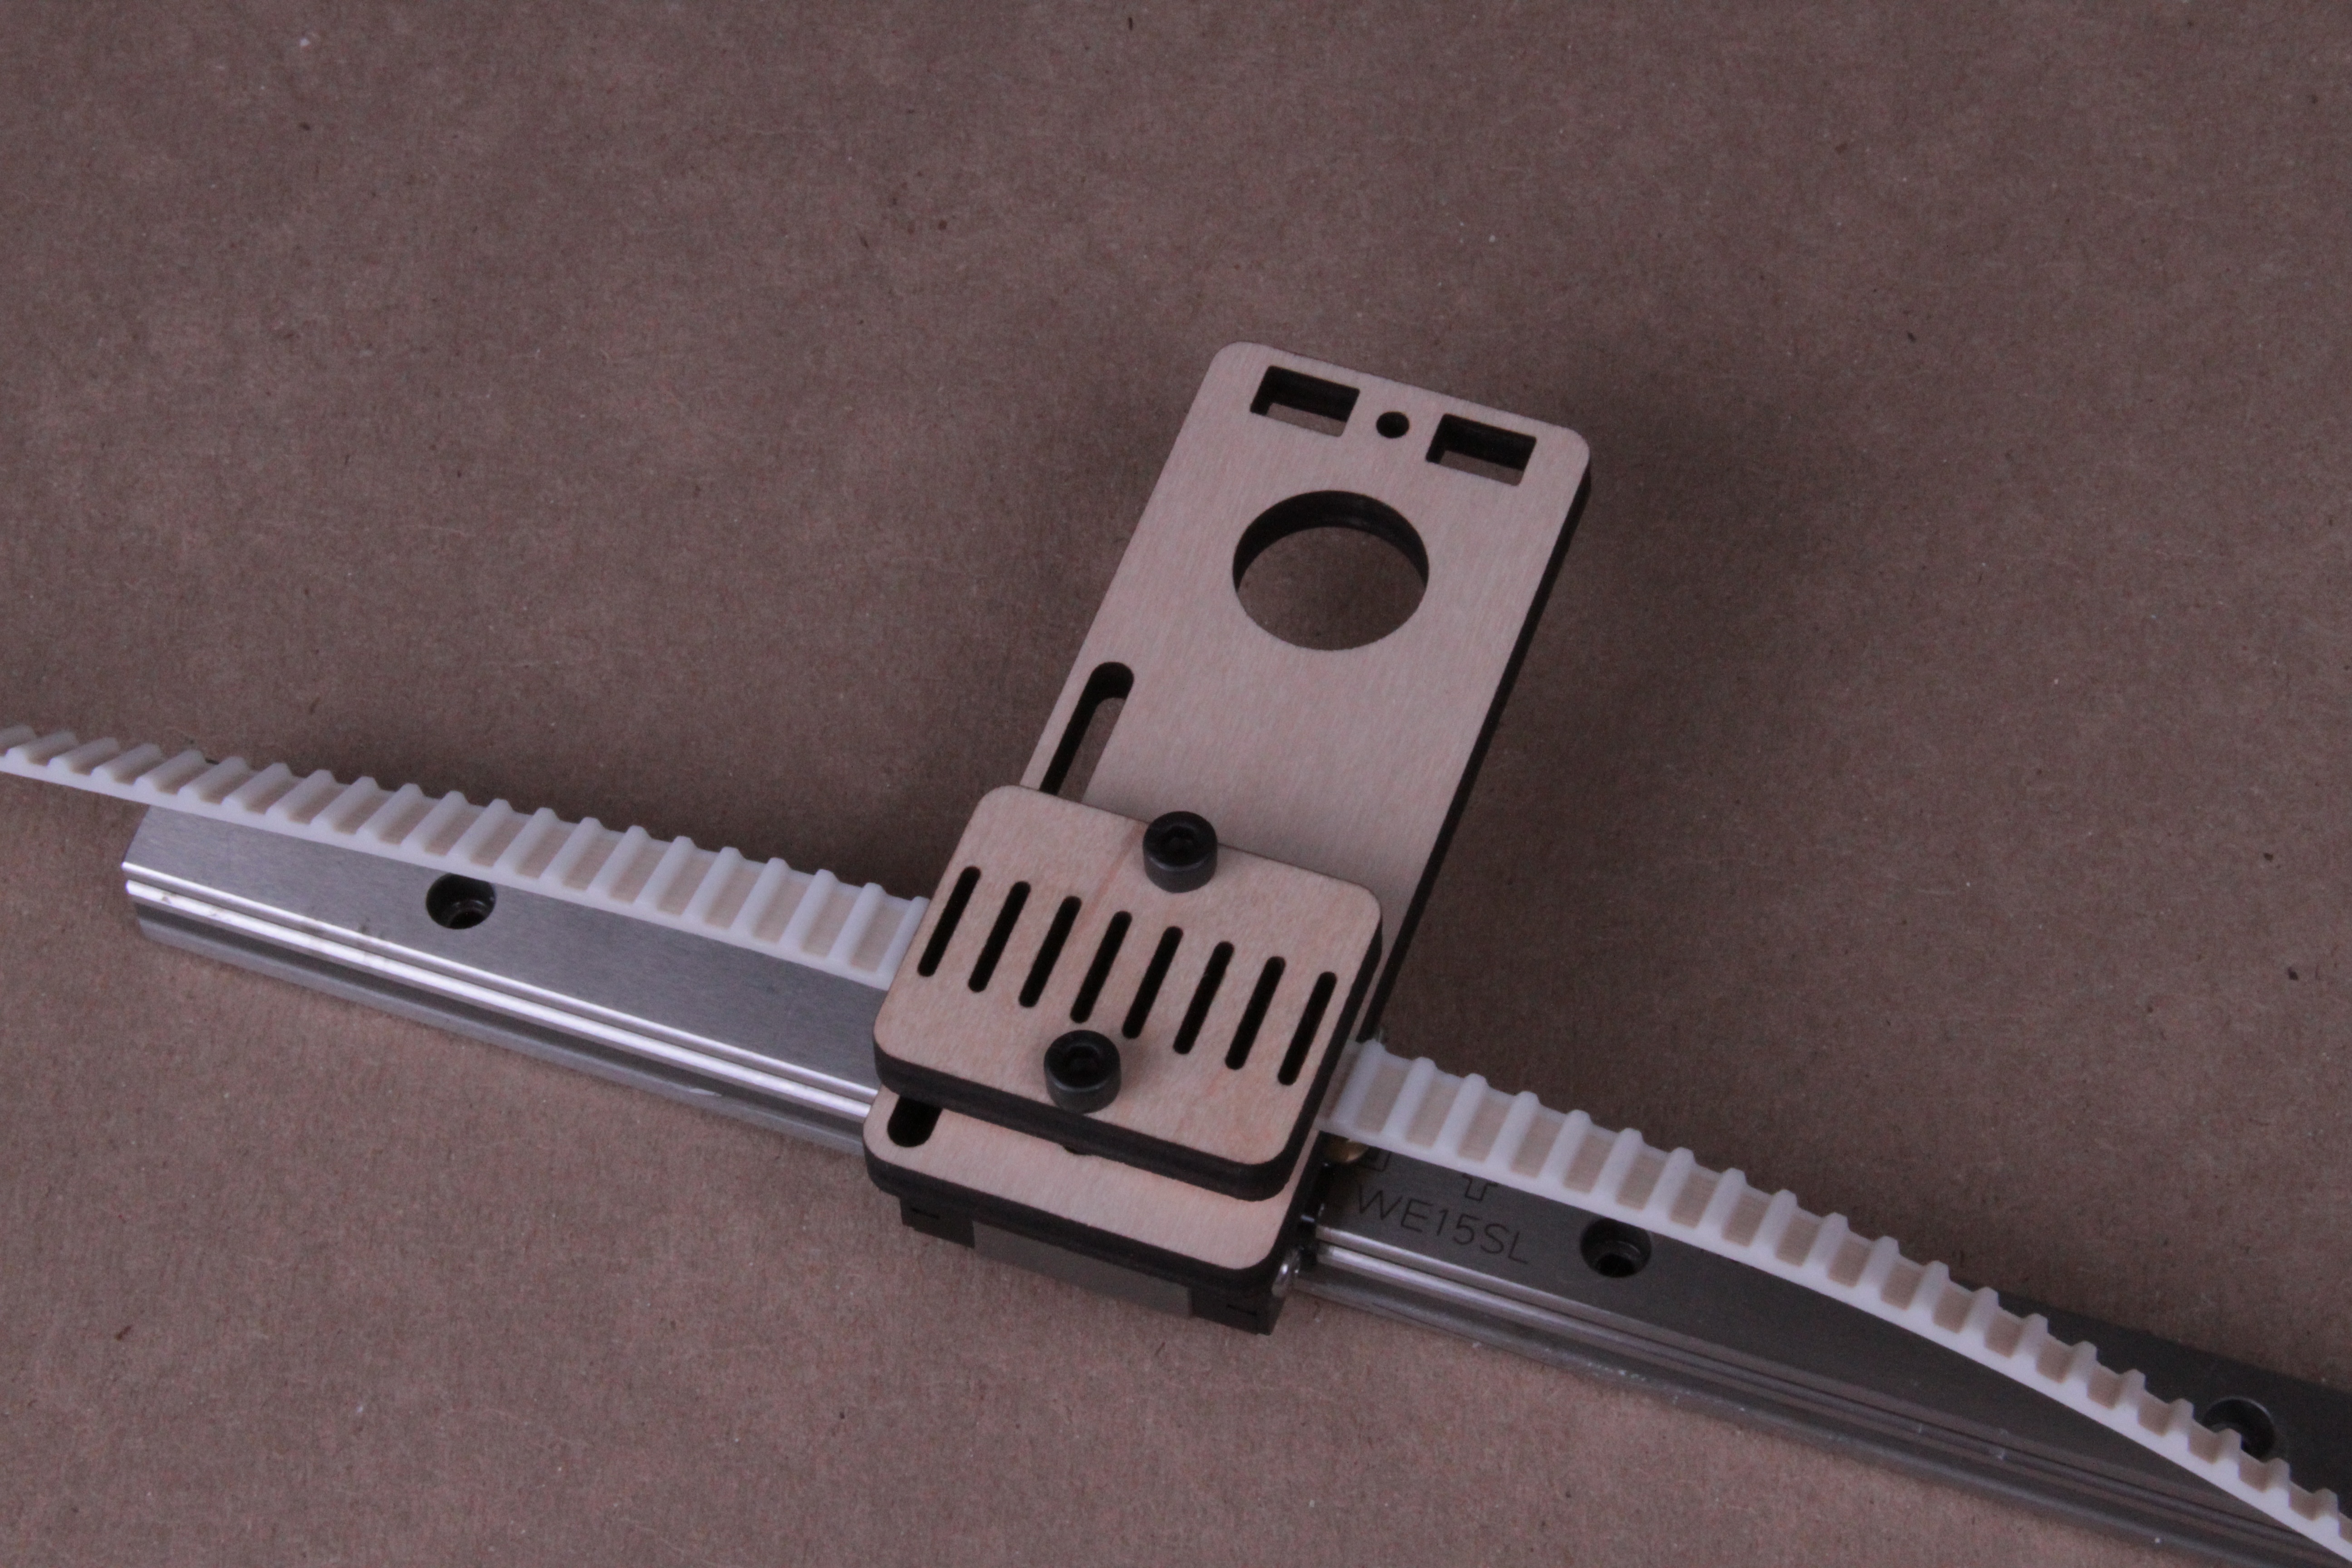
Inside the wooden paddle box are two timing belt pulleys. One is turned directly by a knob that will be added to the top, and the othe is free spinning. As the timing belt turns it slides the paddle assembly, which is mounted to the linear slide system and can move up and down the slot.
The overall feeling that you get turning the knob is a lot like operating foosball controls.
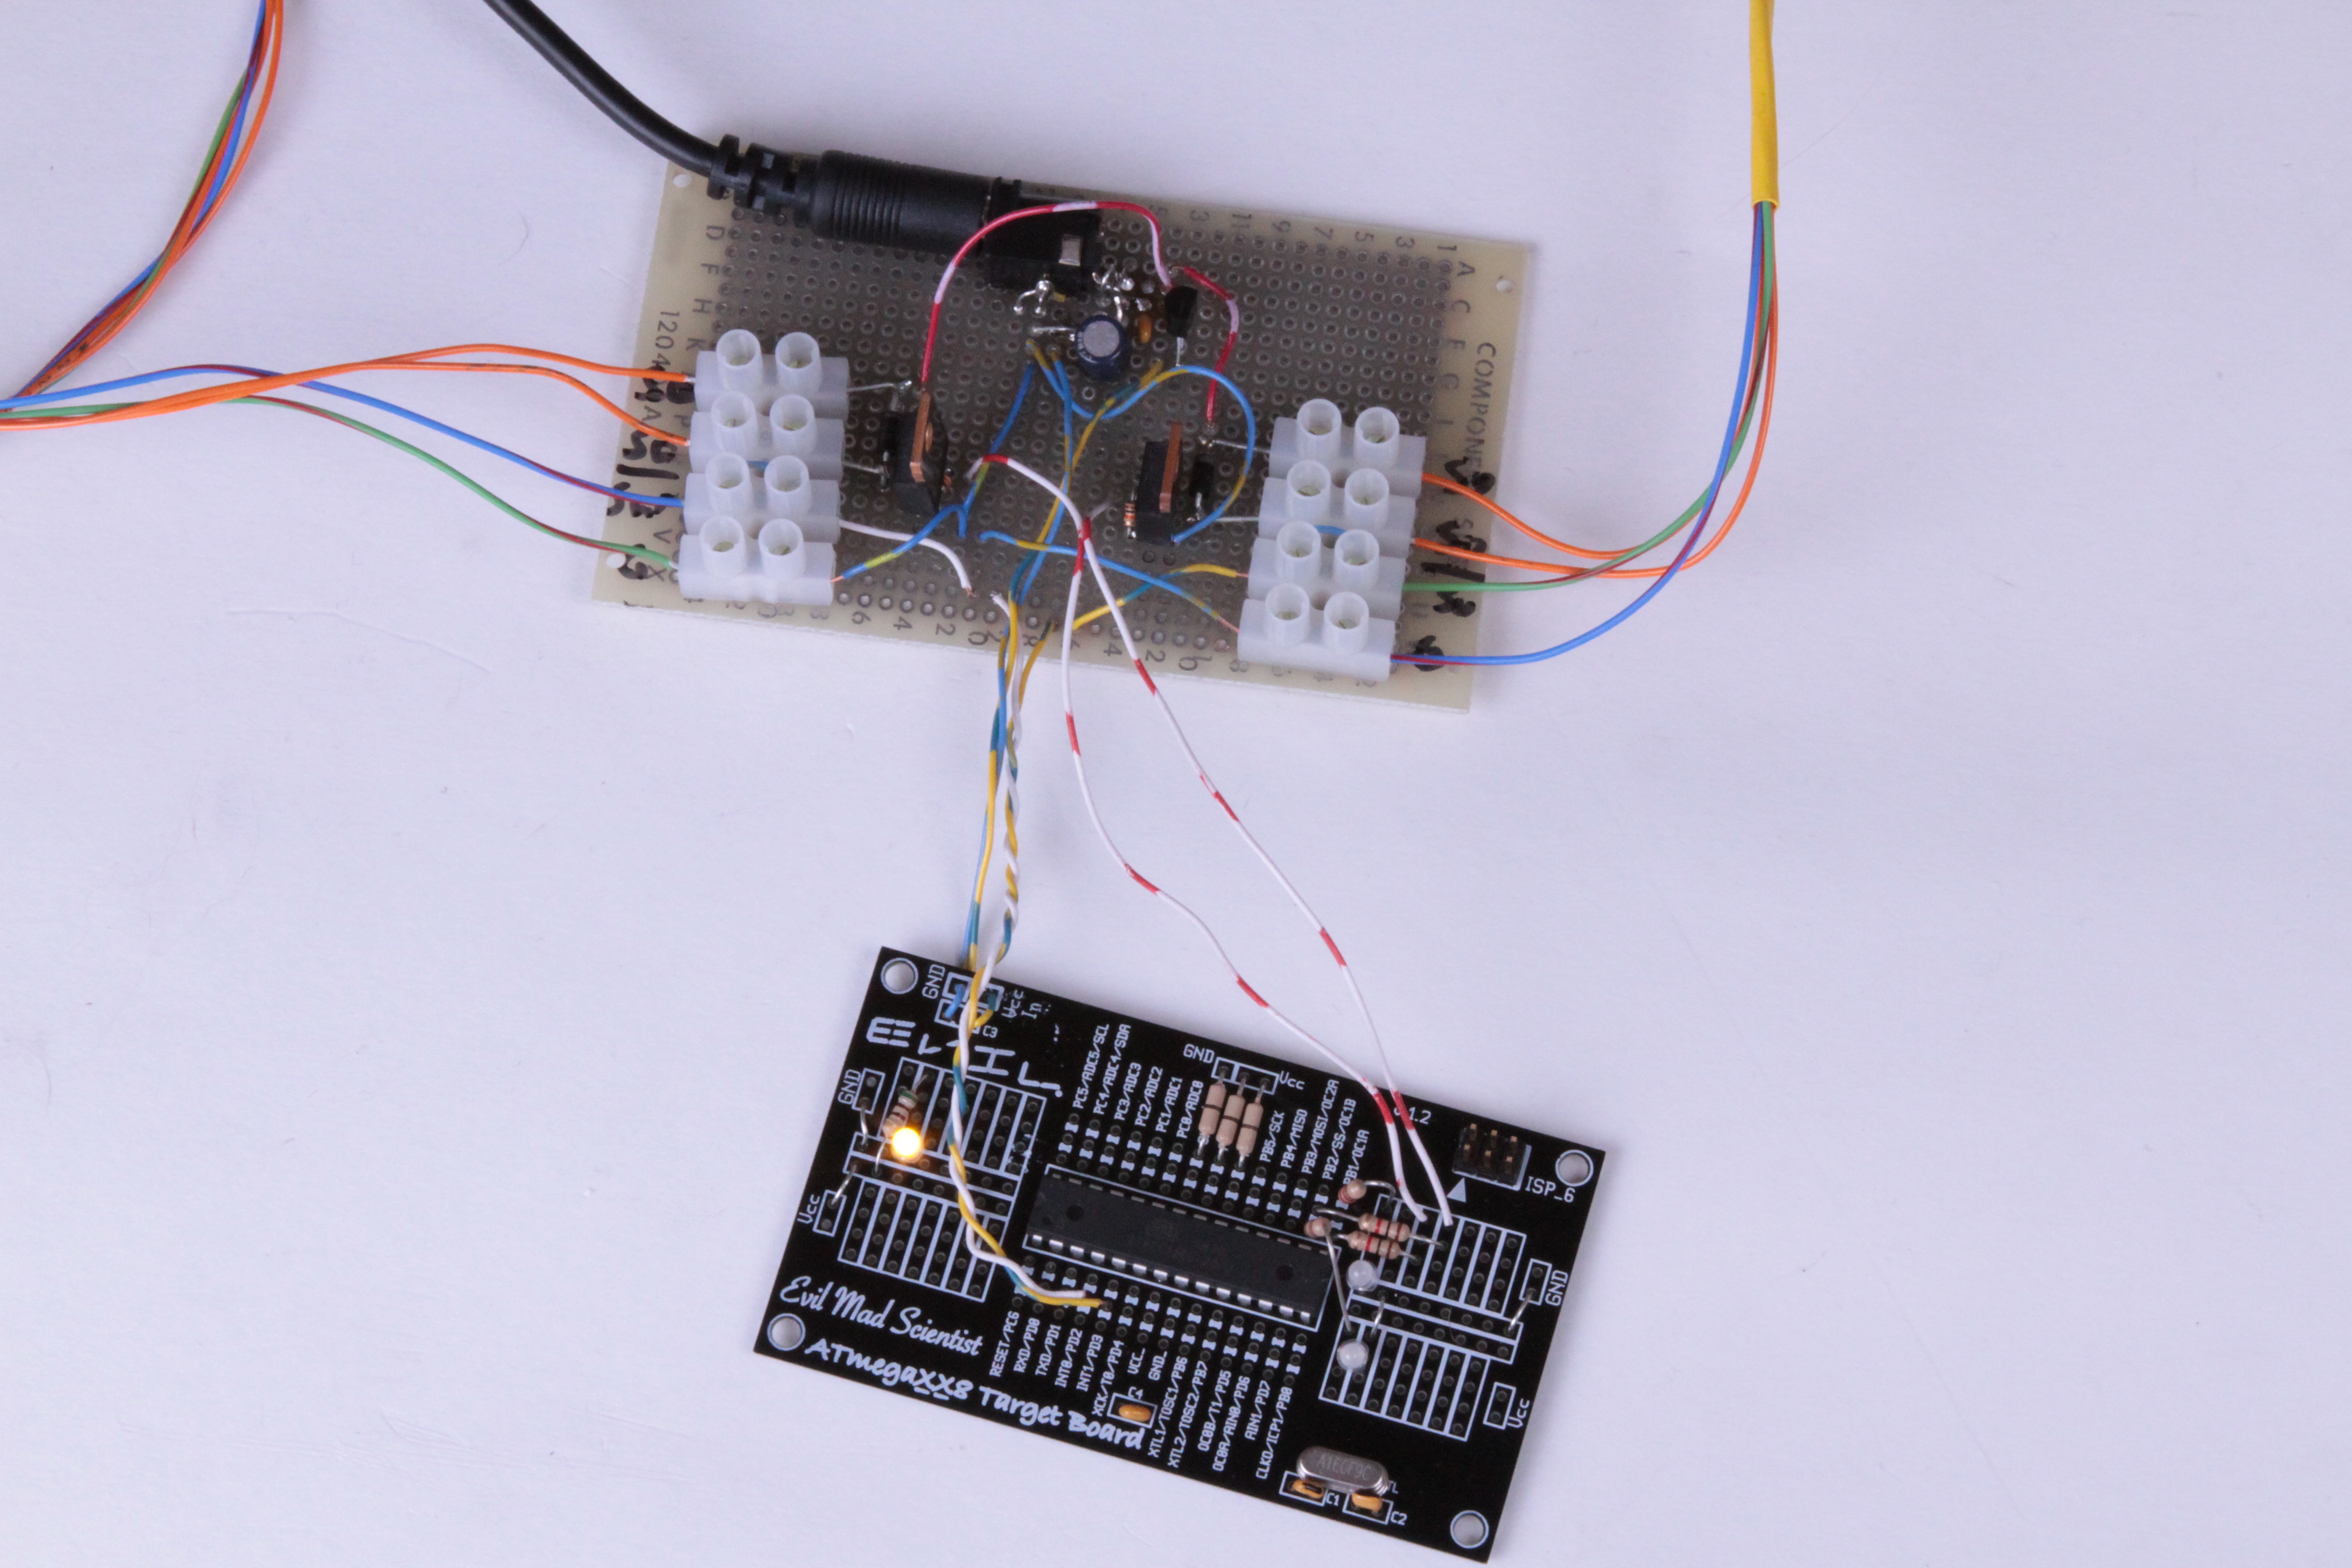
The two solenoids are driven by high-current n-channel MOSFETs with reverse protection diodes. They are driven by an ATmega168 microcontroller. The program is very simple: when the switch is closed (because the ball hit the paddle) the paddle solenoid is fired for a set length of time, with a gentle stop. This would be easy enough to do with analog electronics as well, but it sure is easy to write a nice debouncing routine on an AVR.
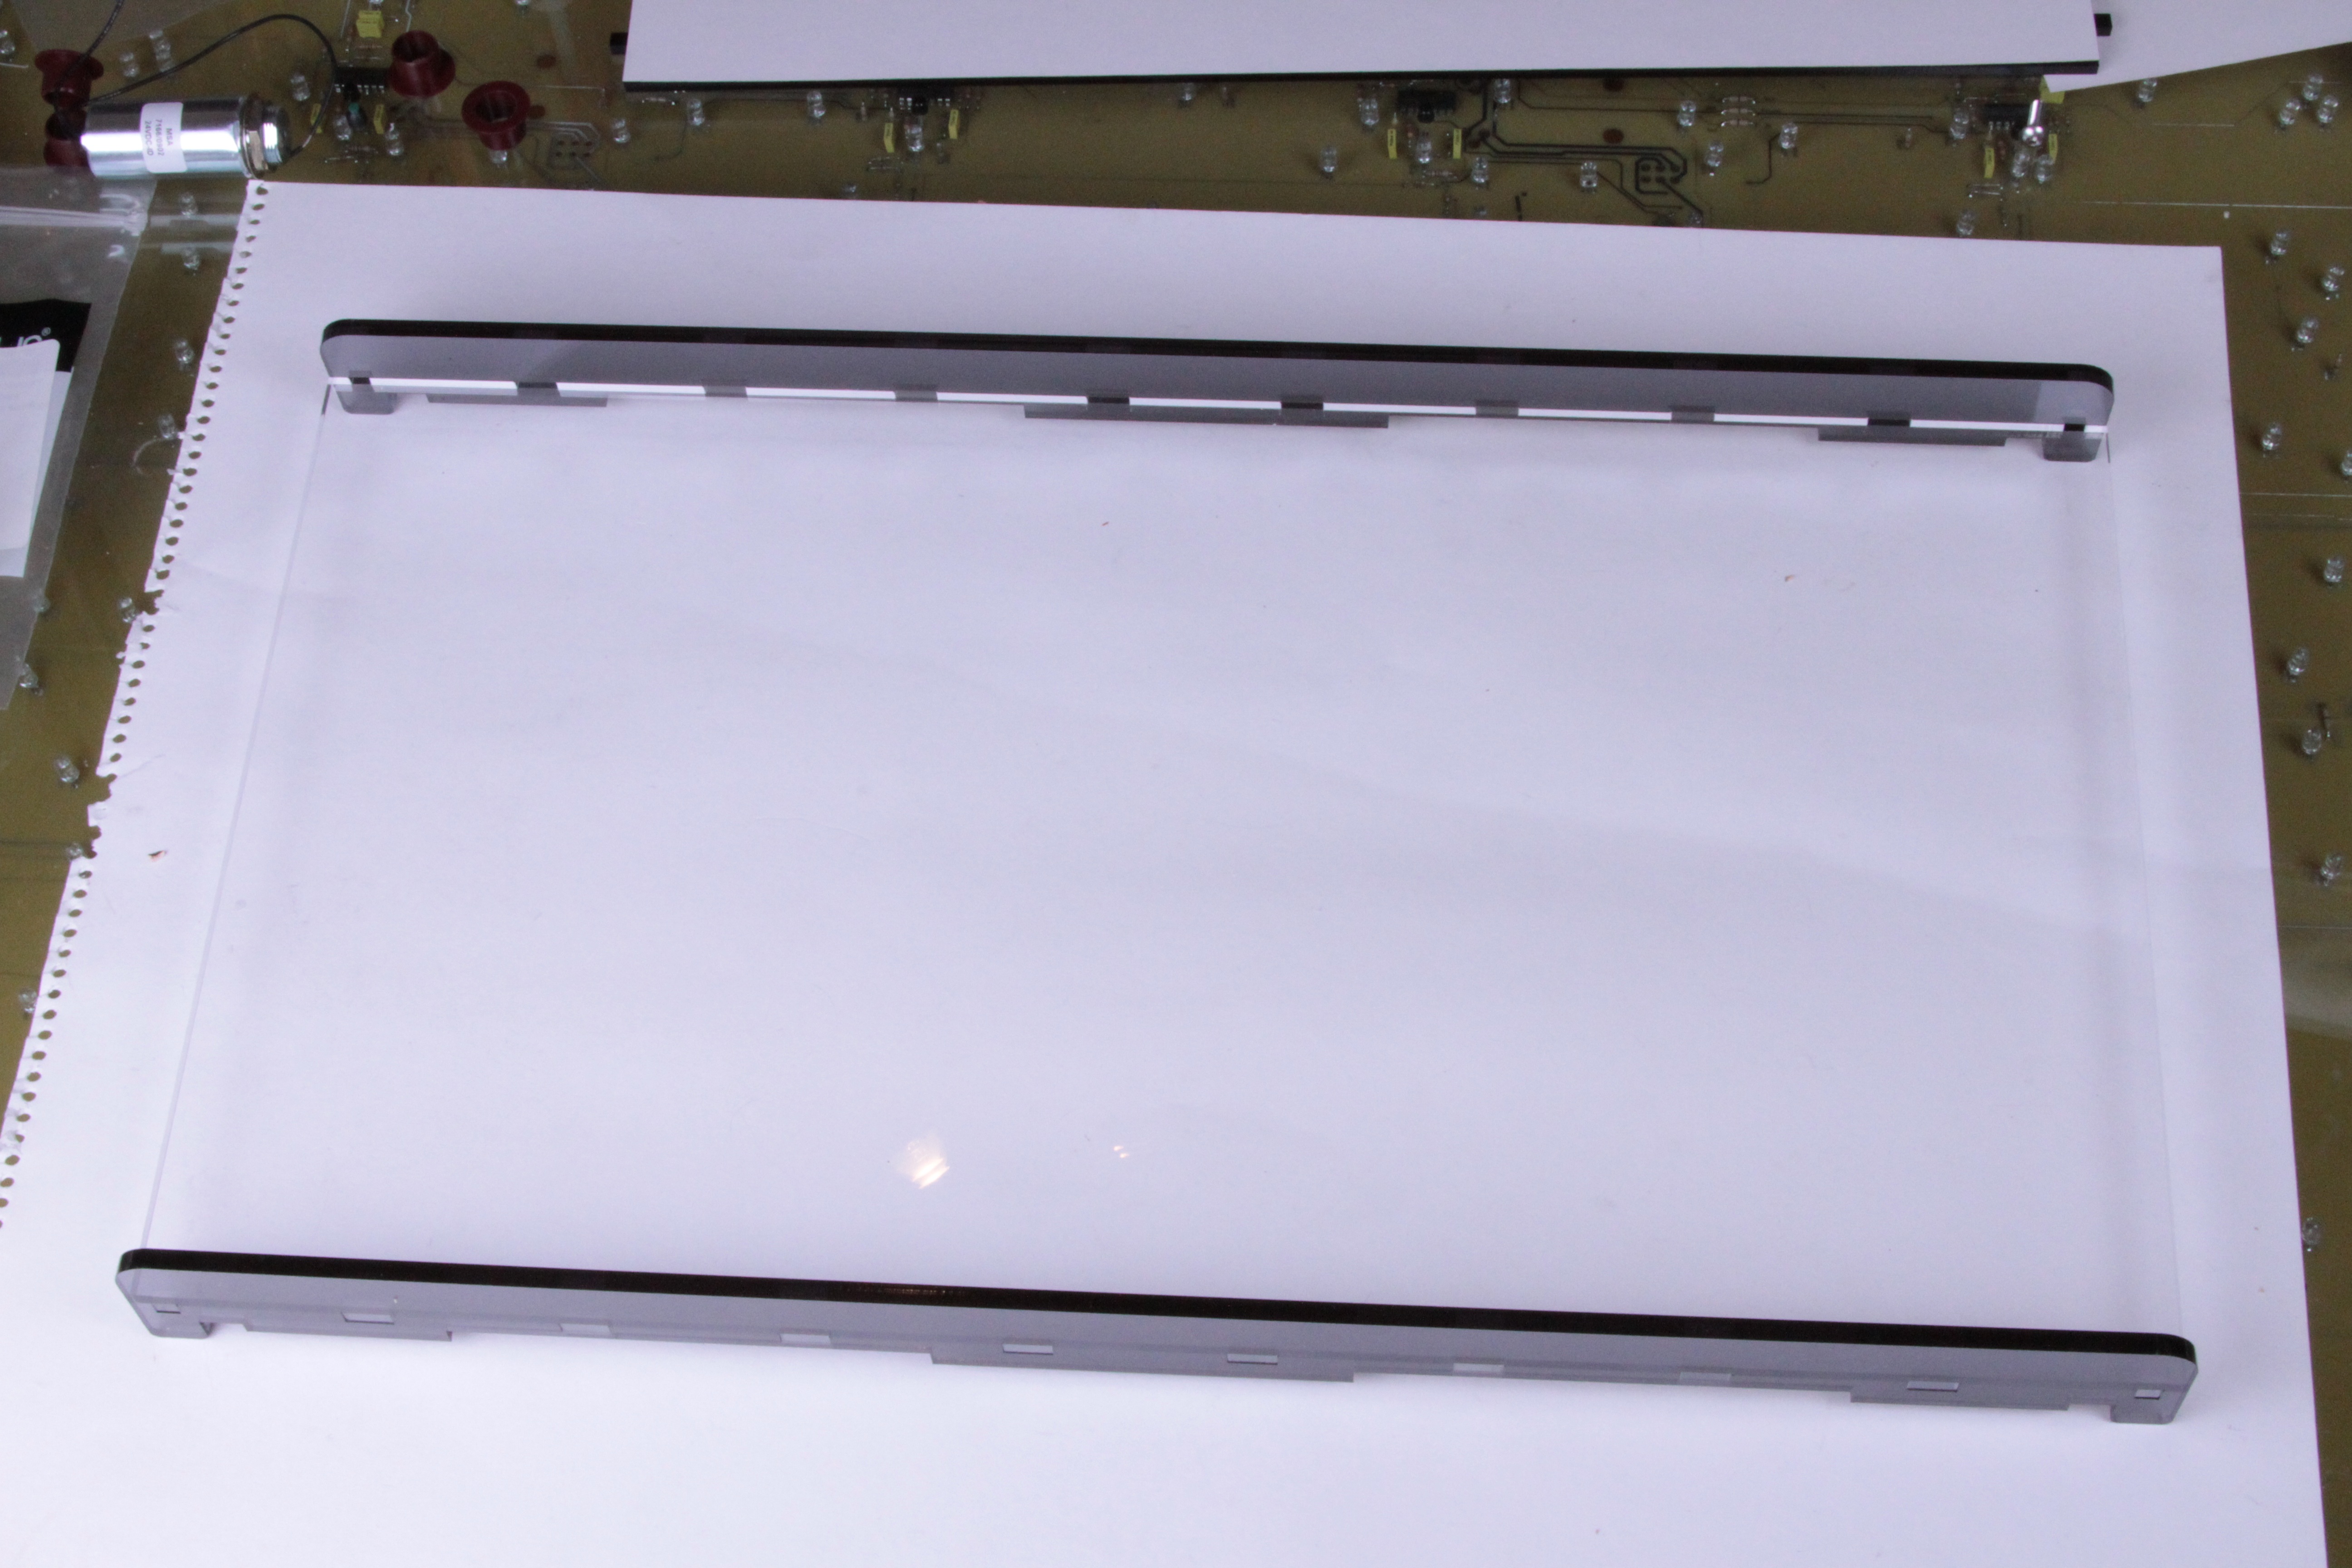
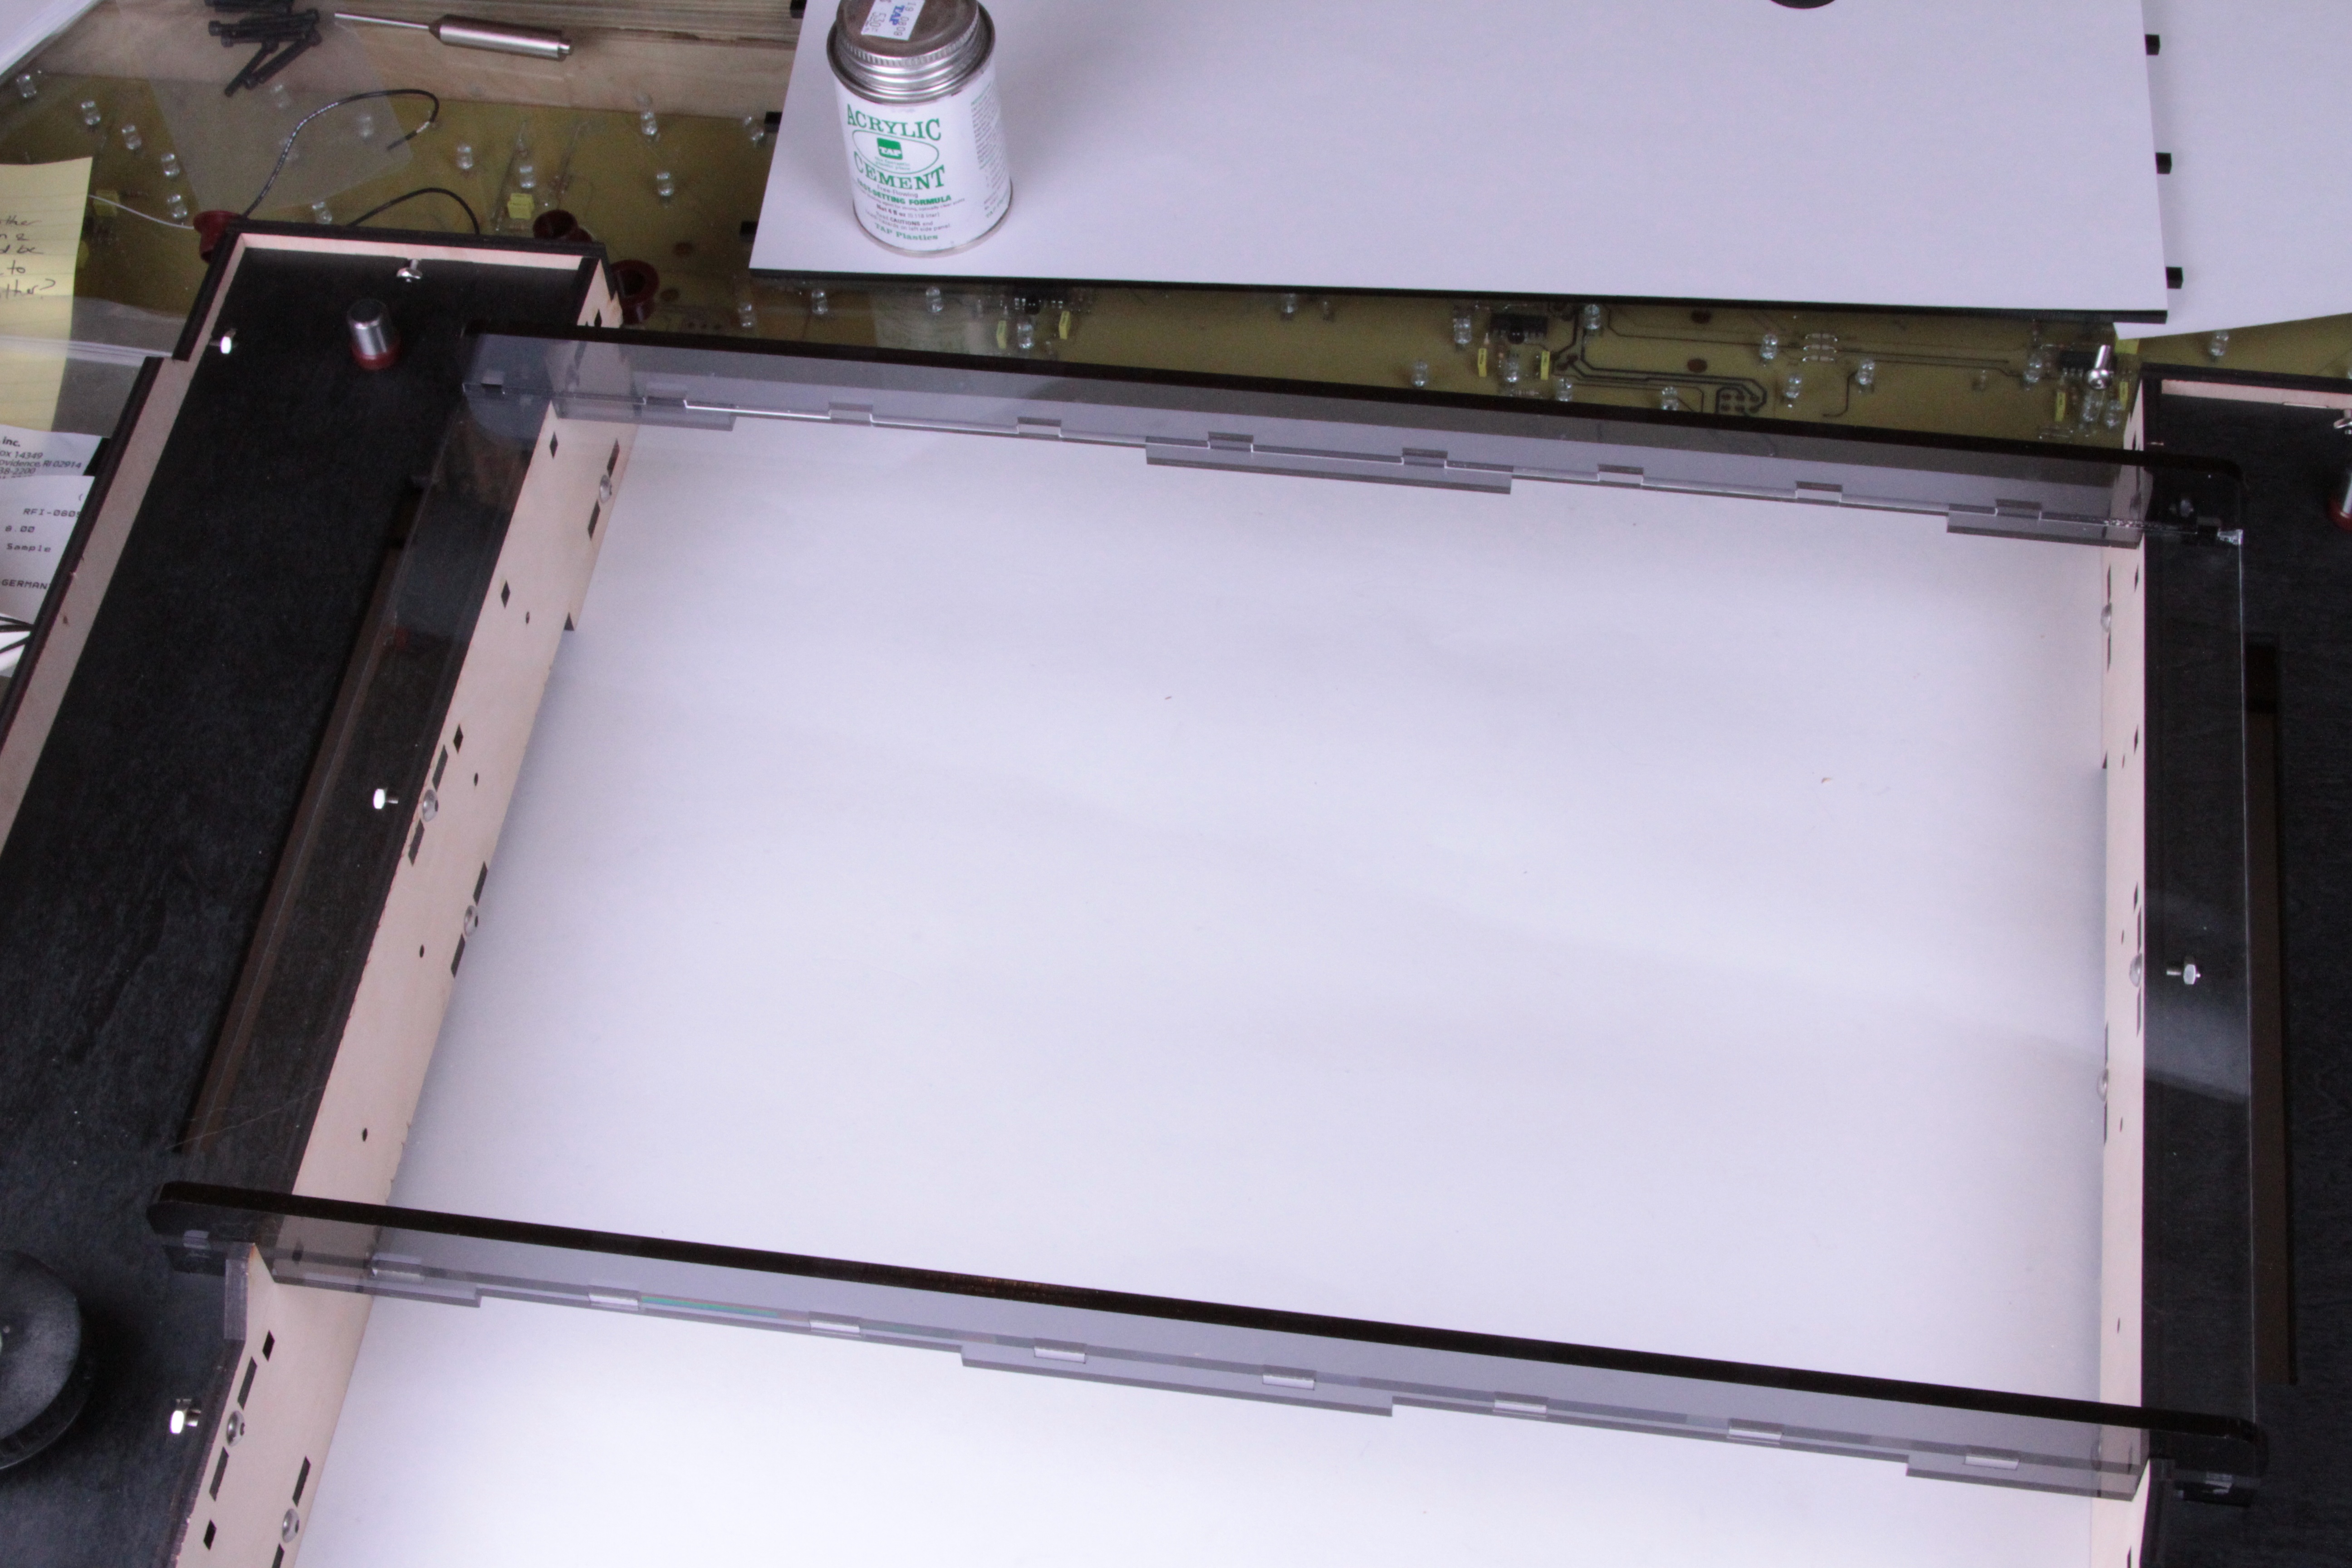
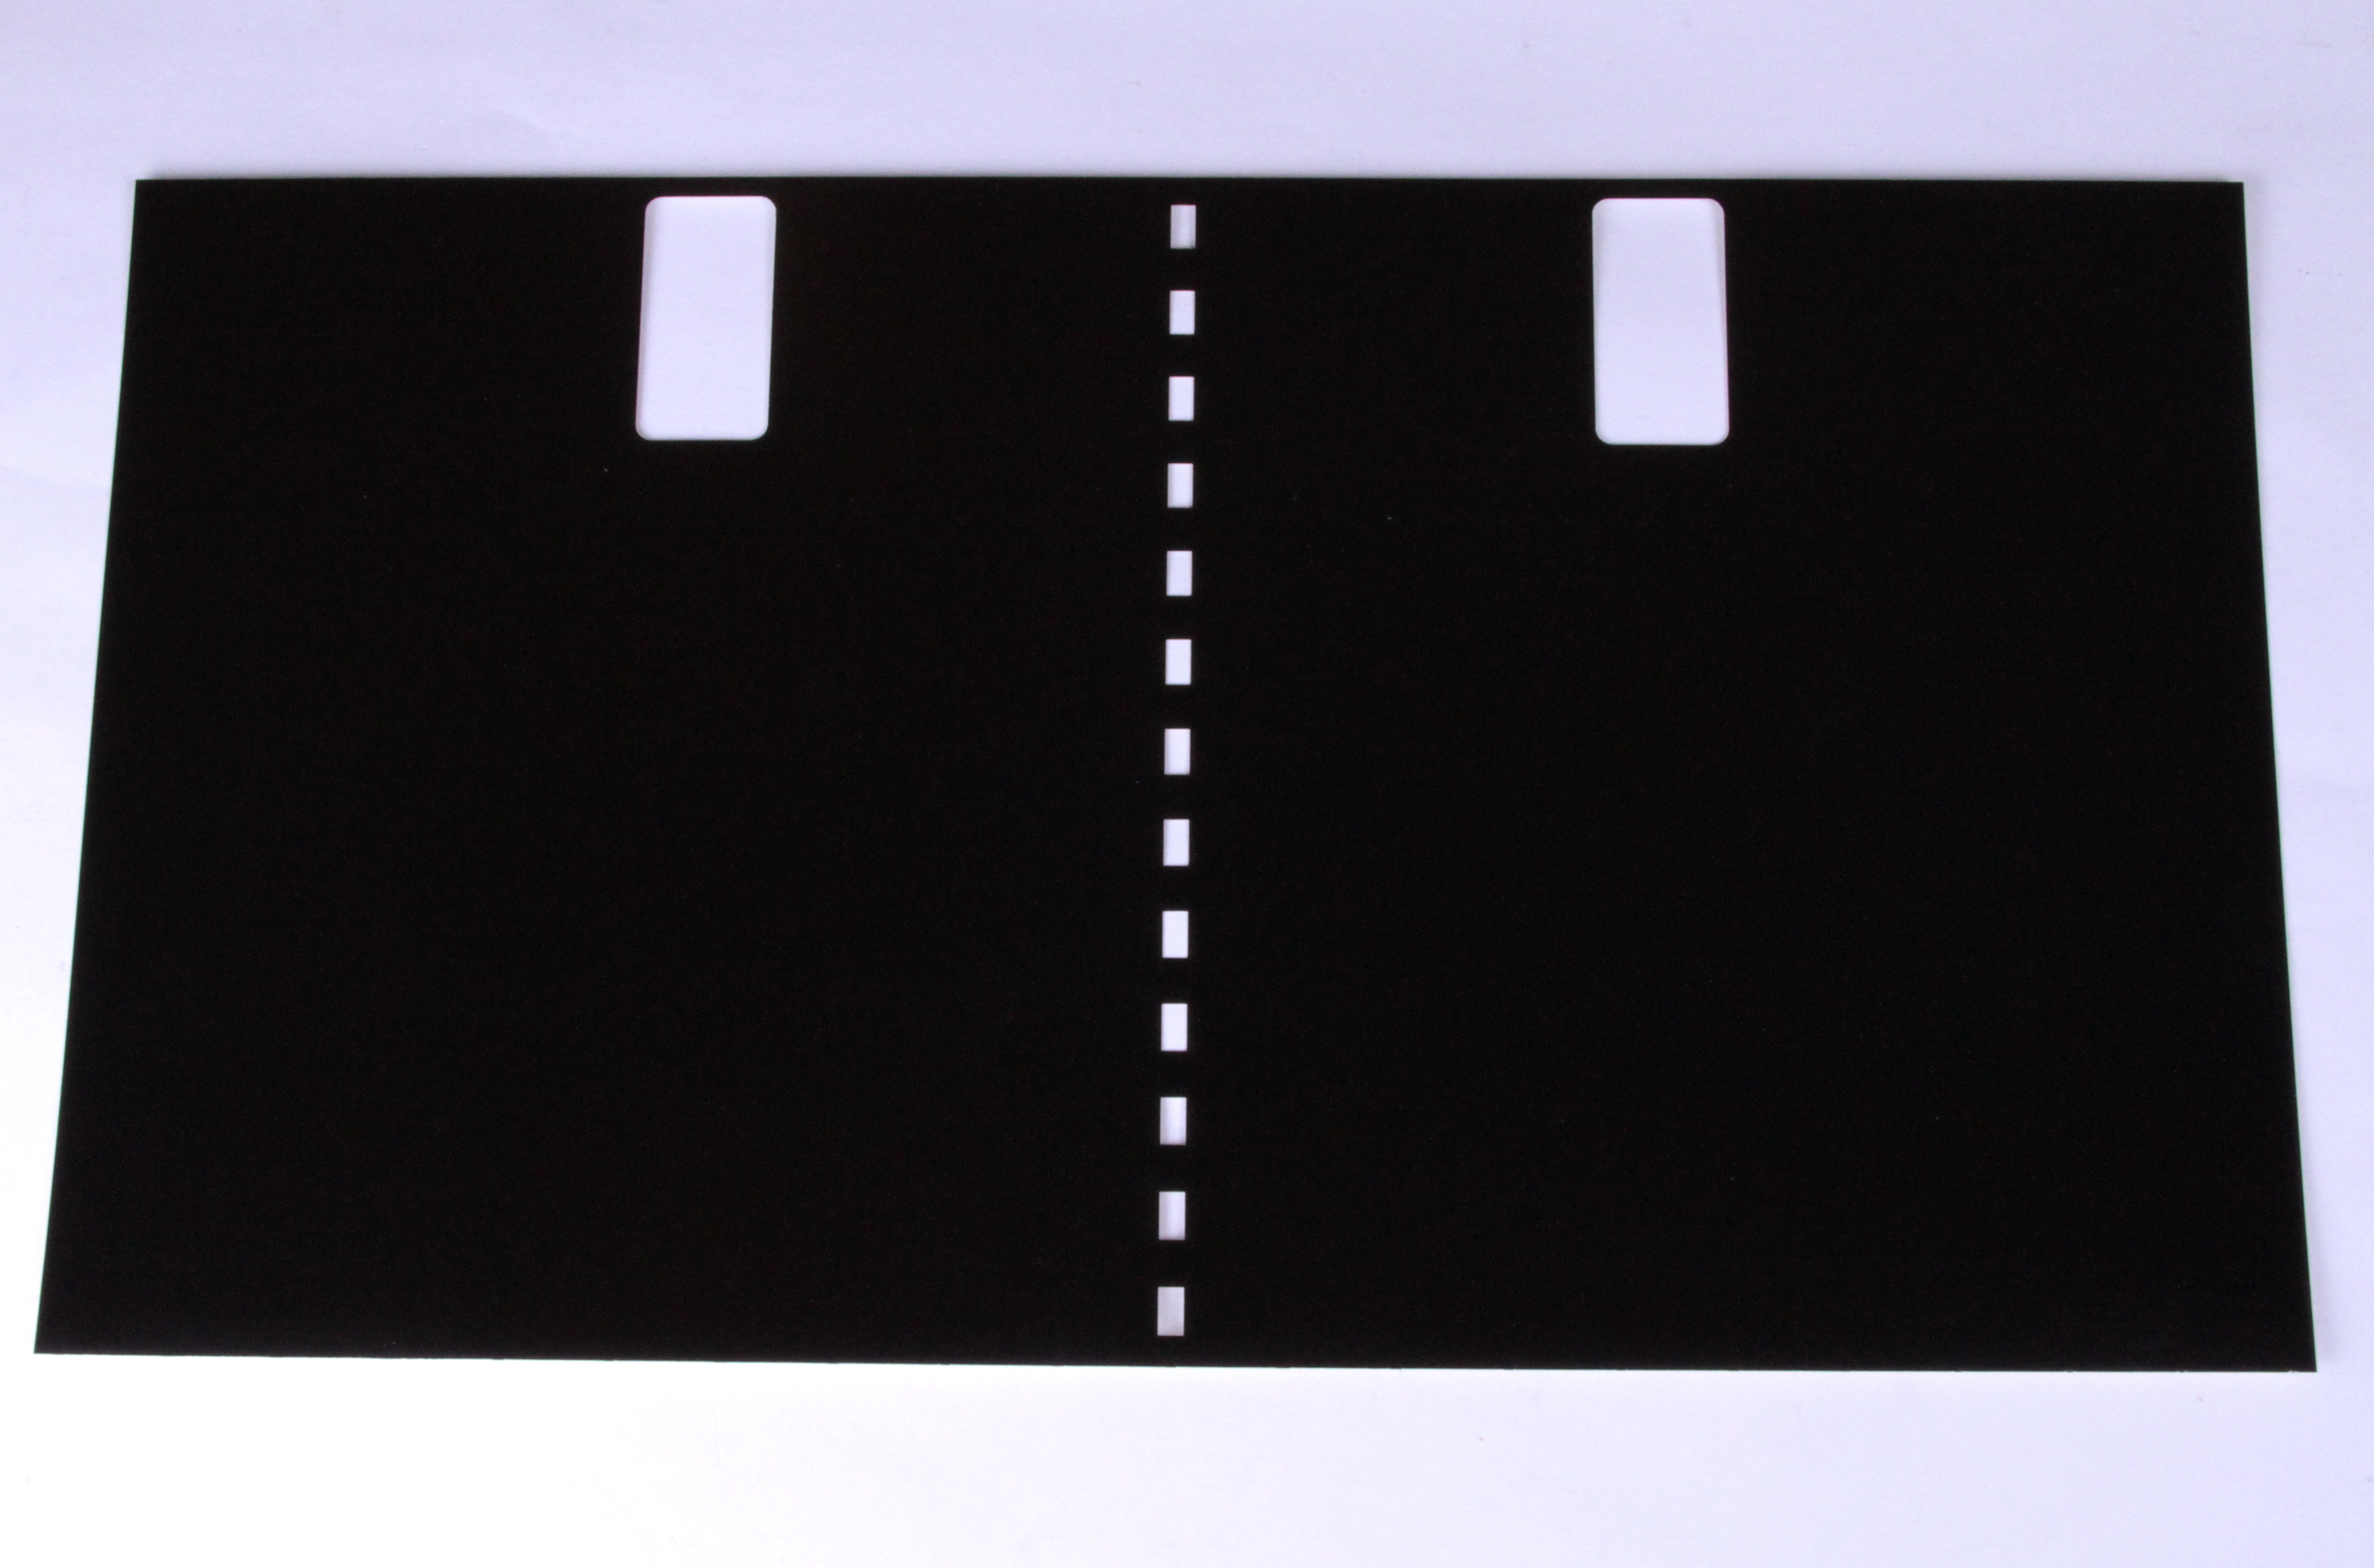
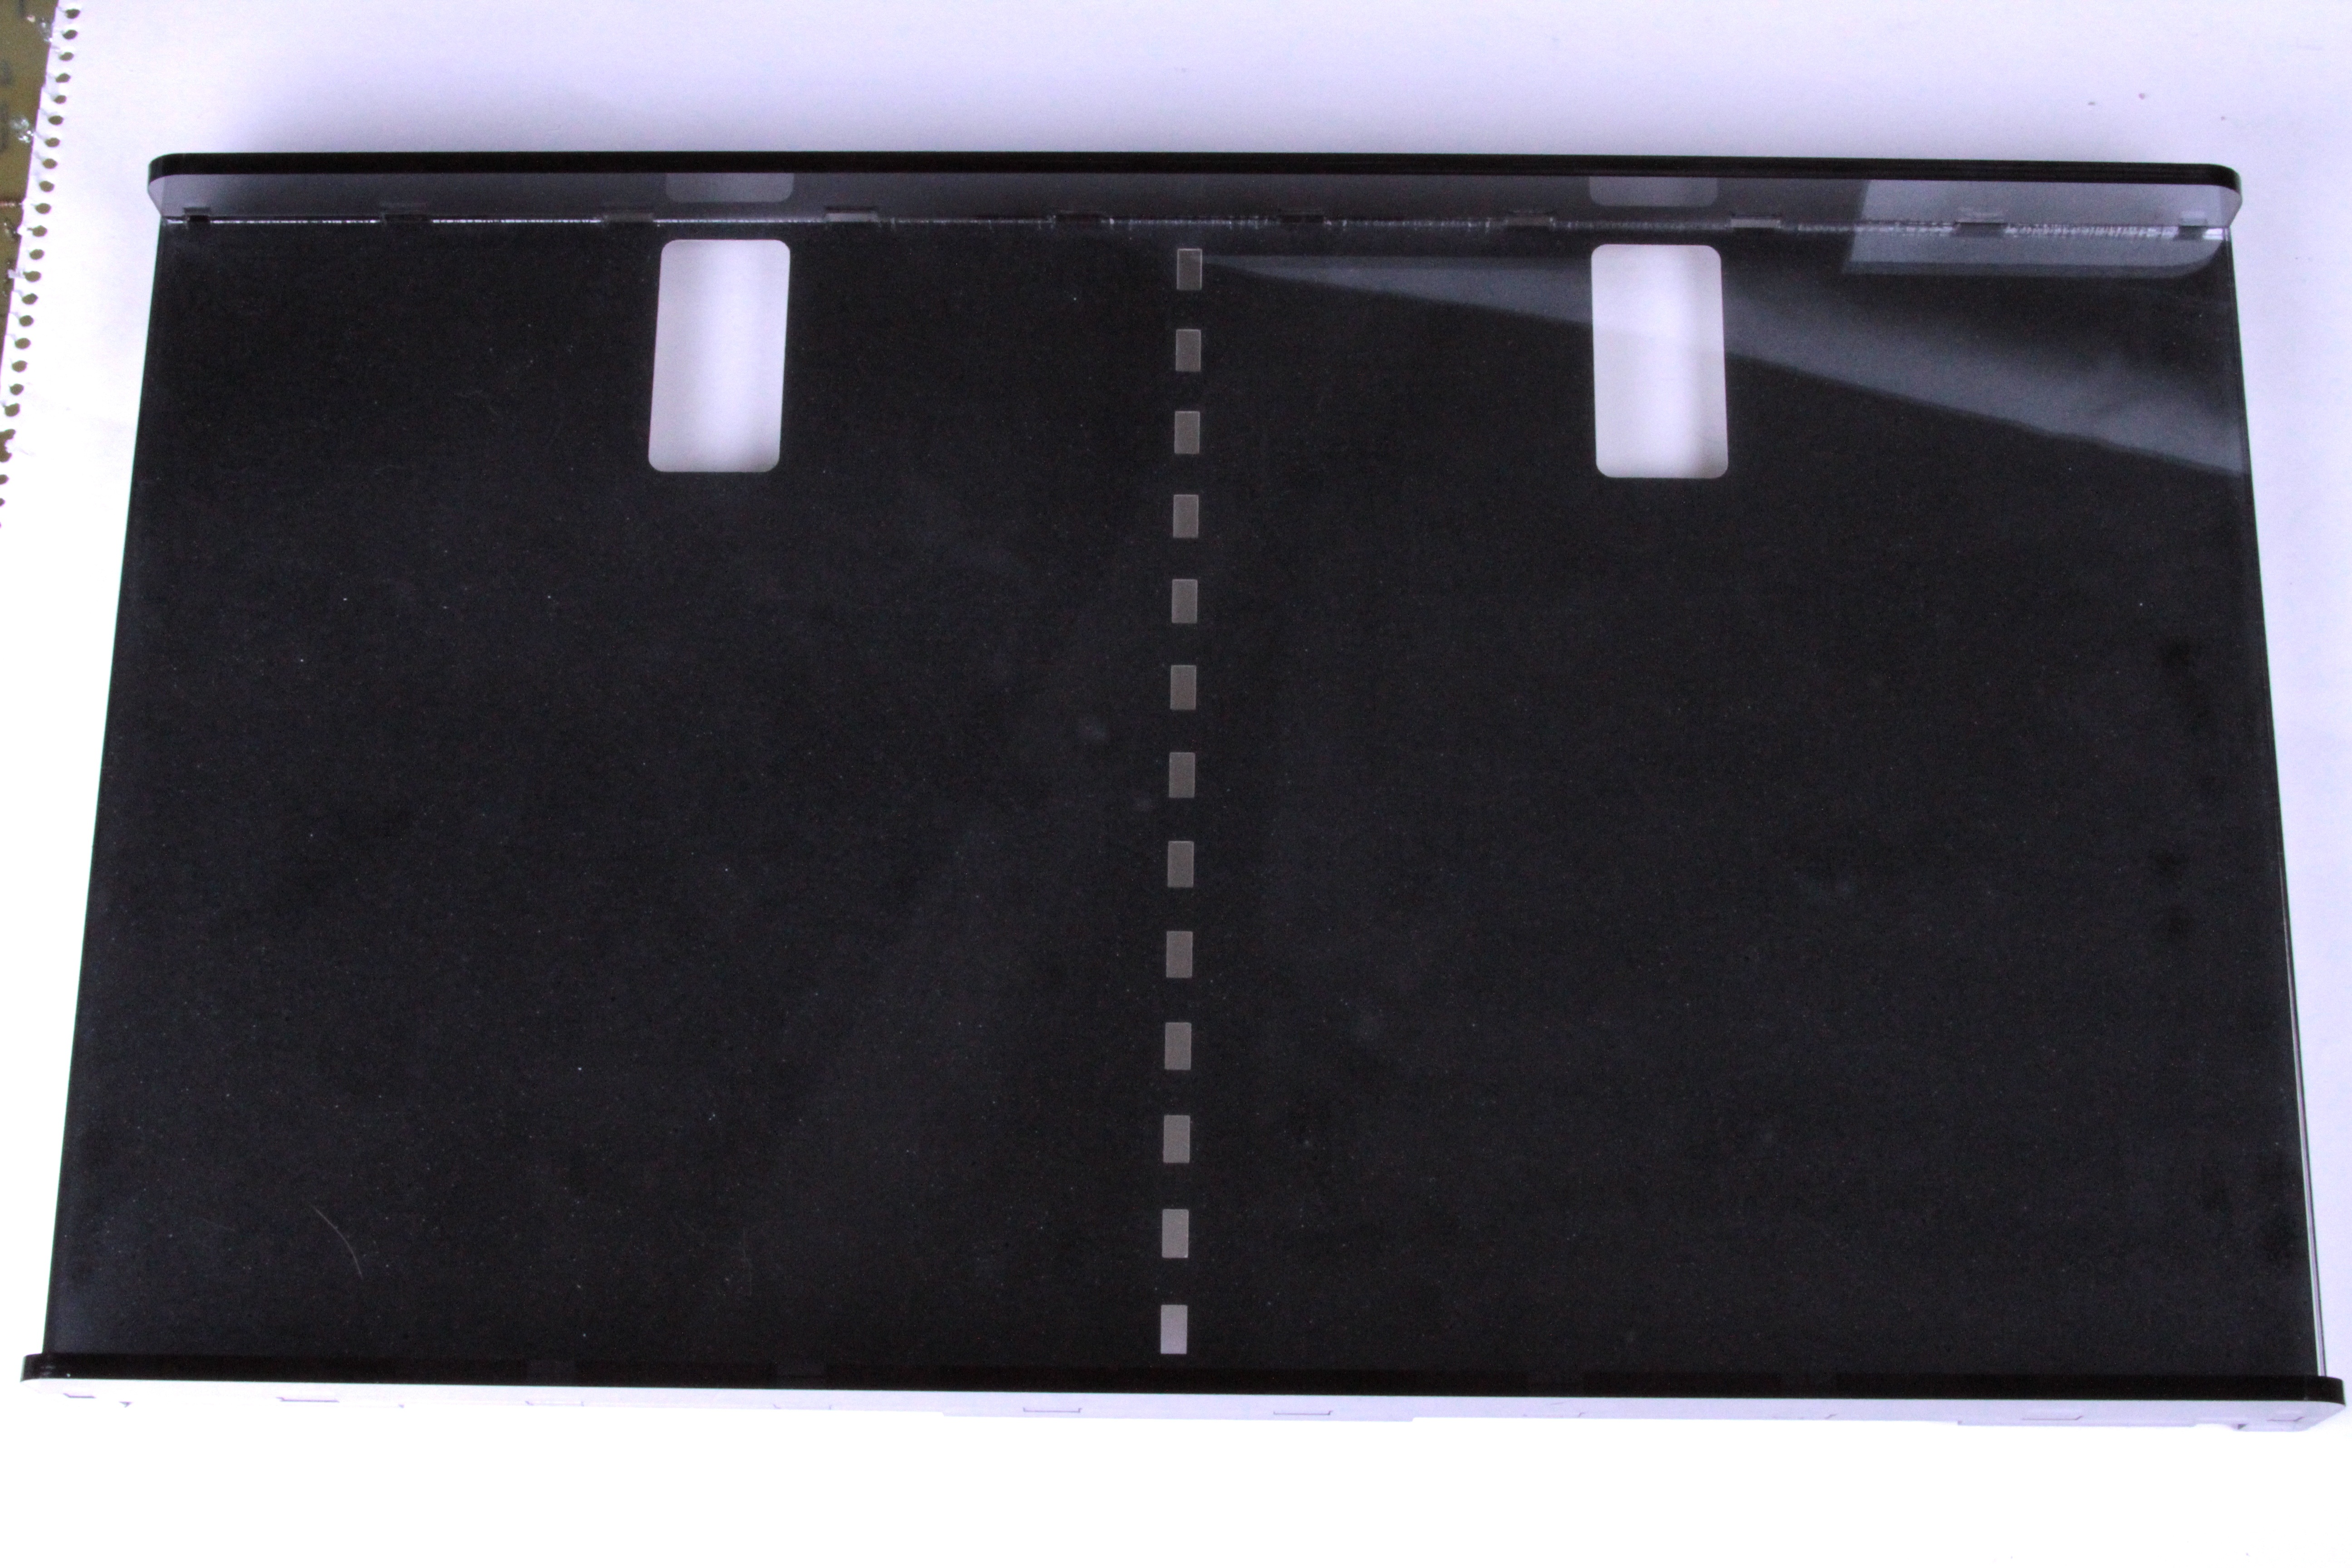
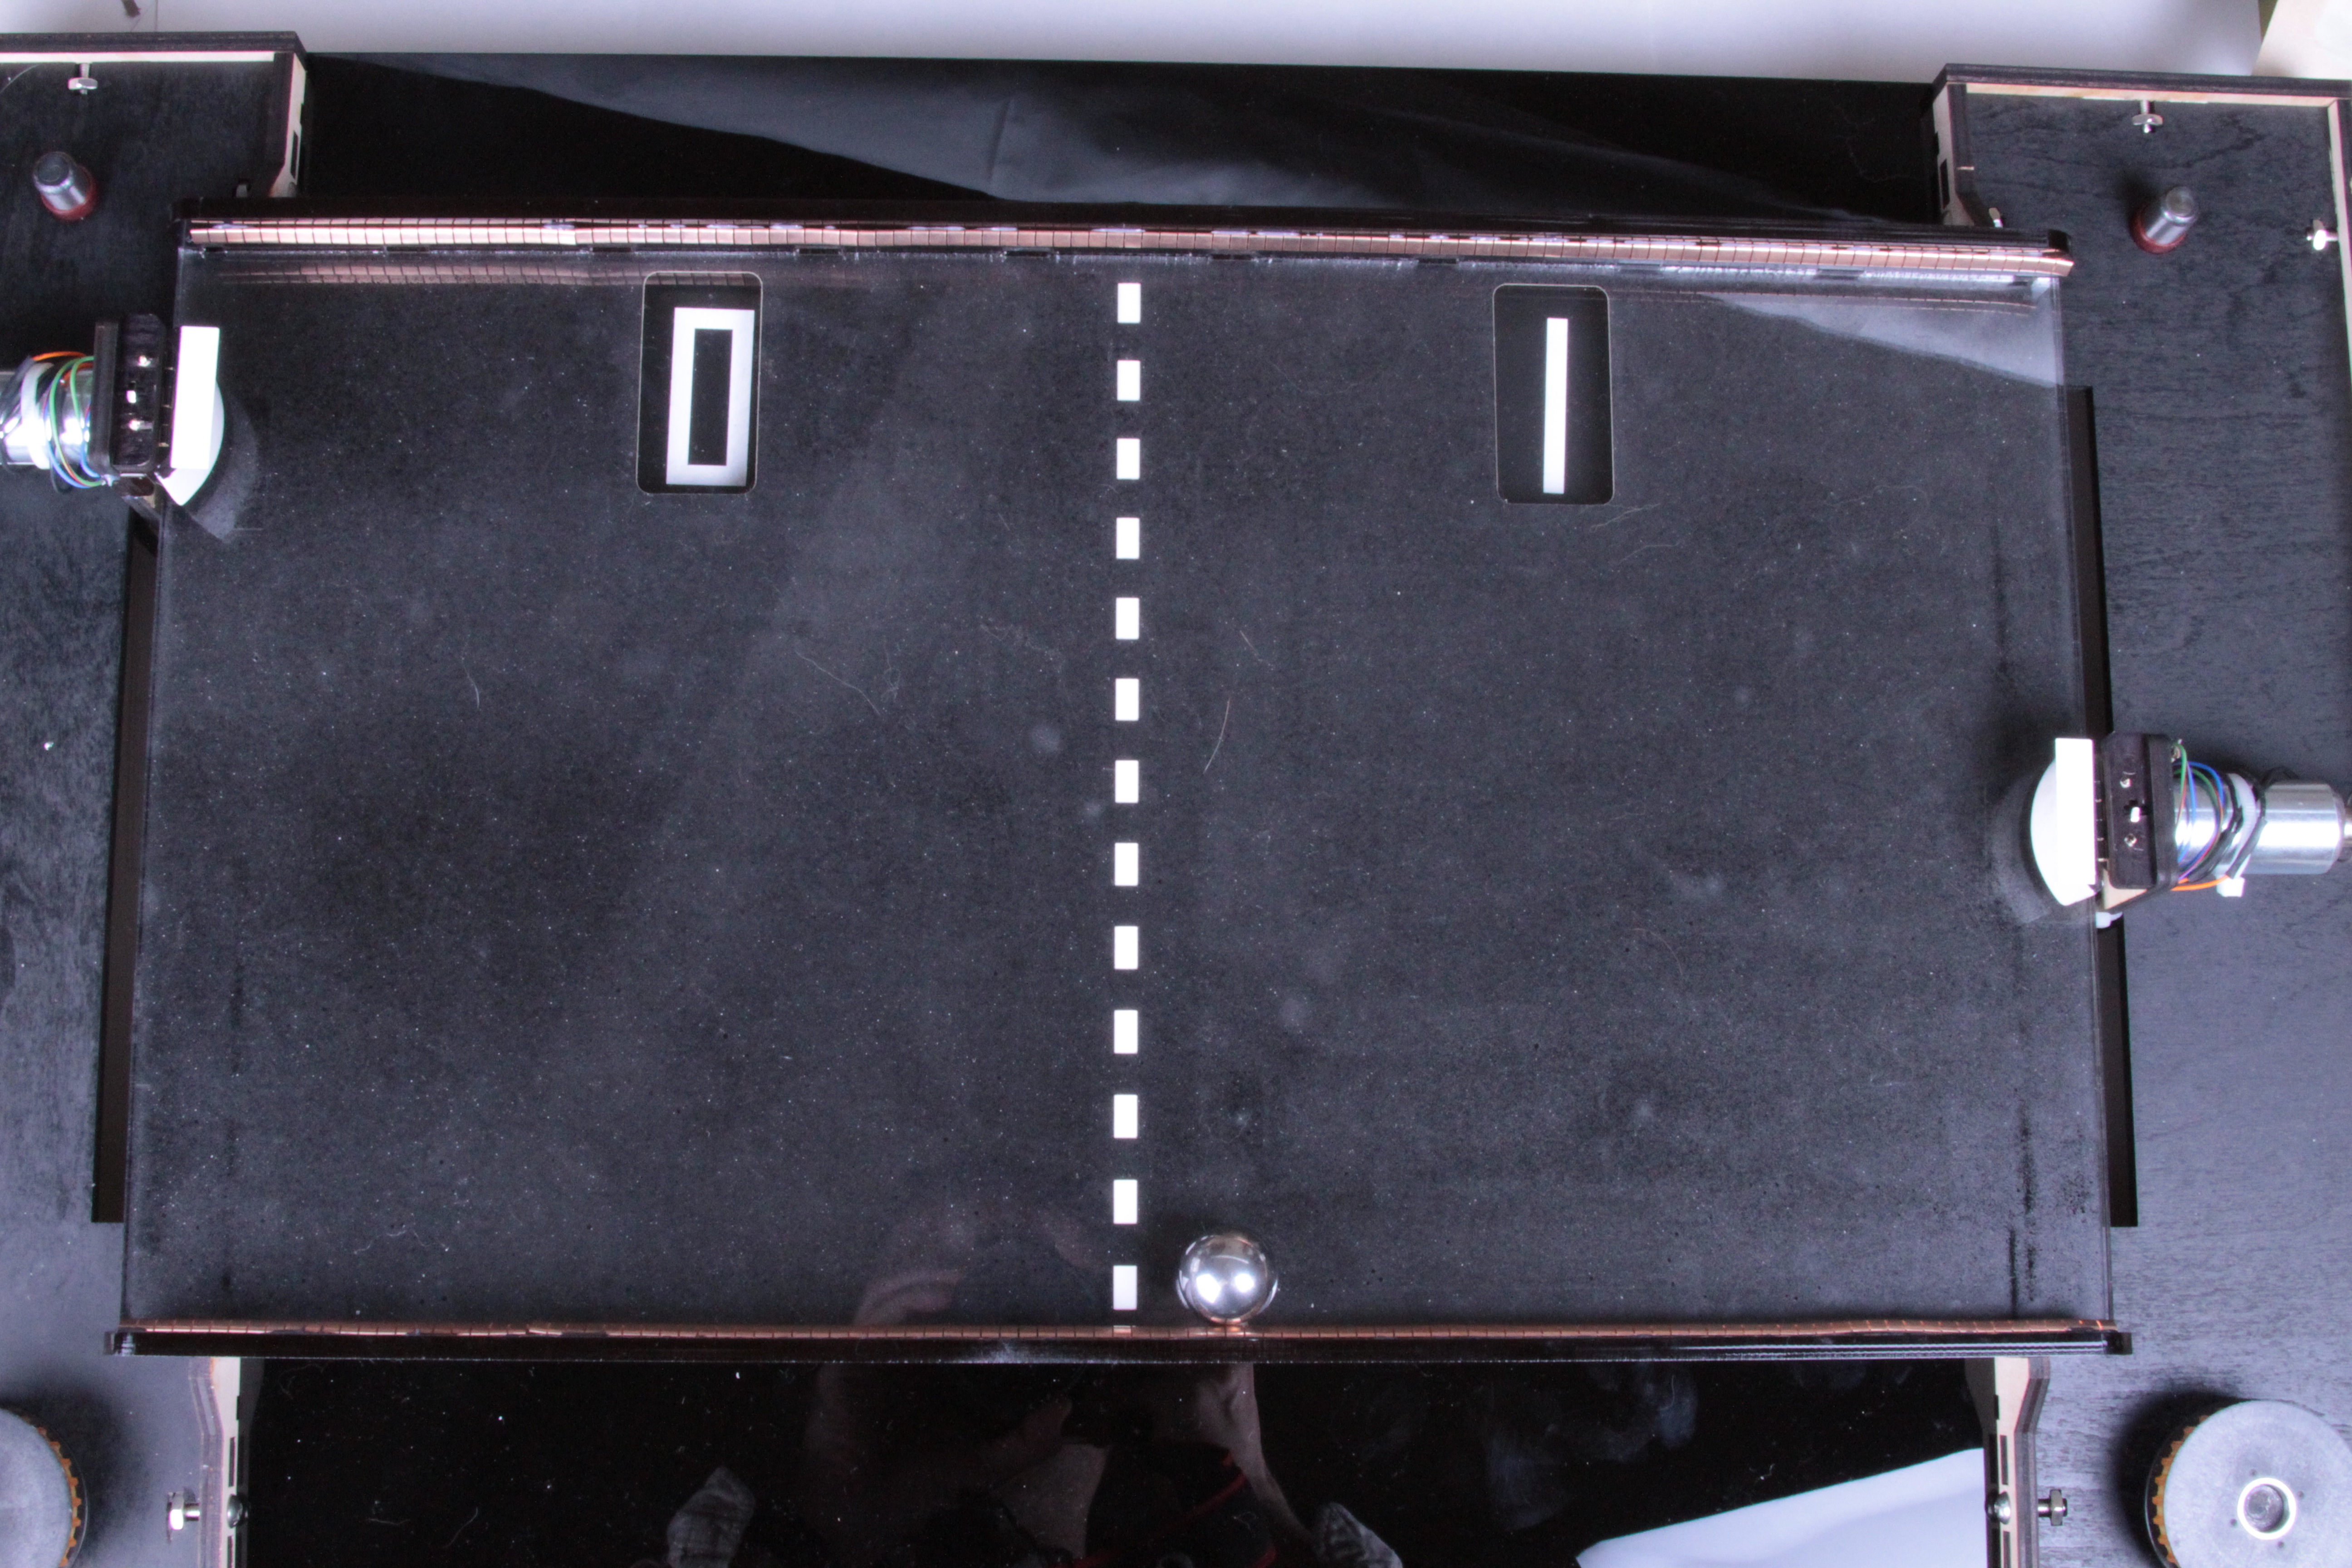
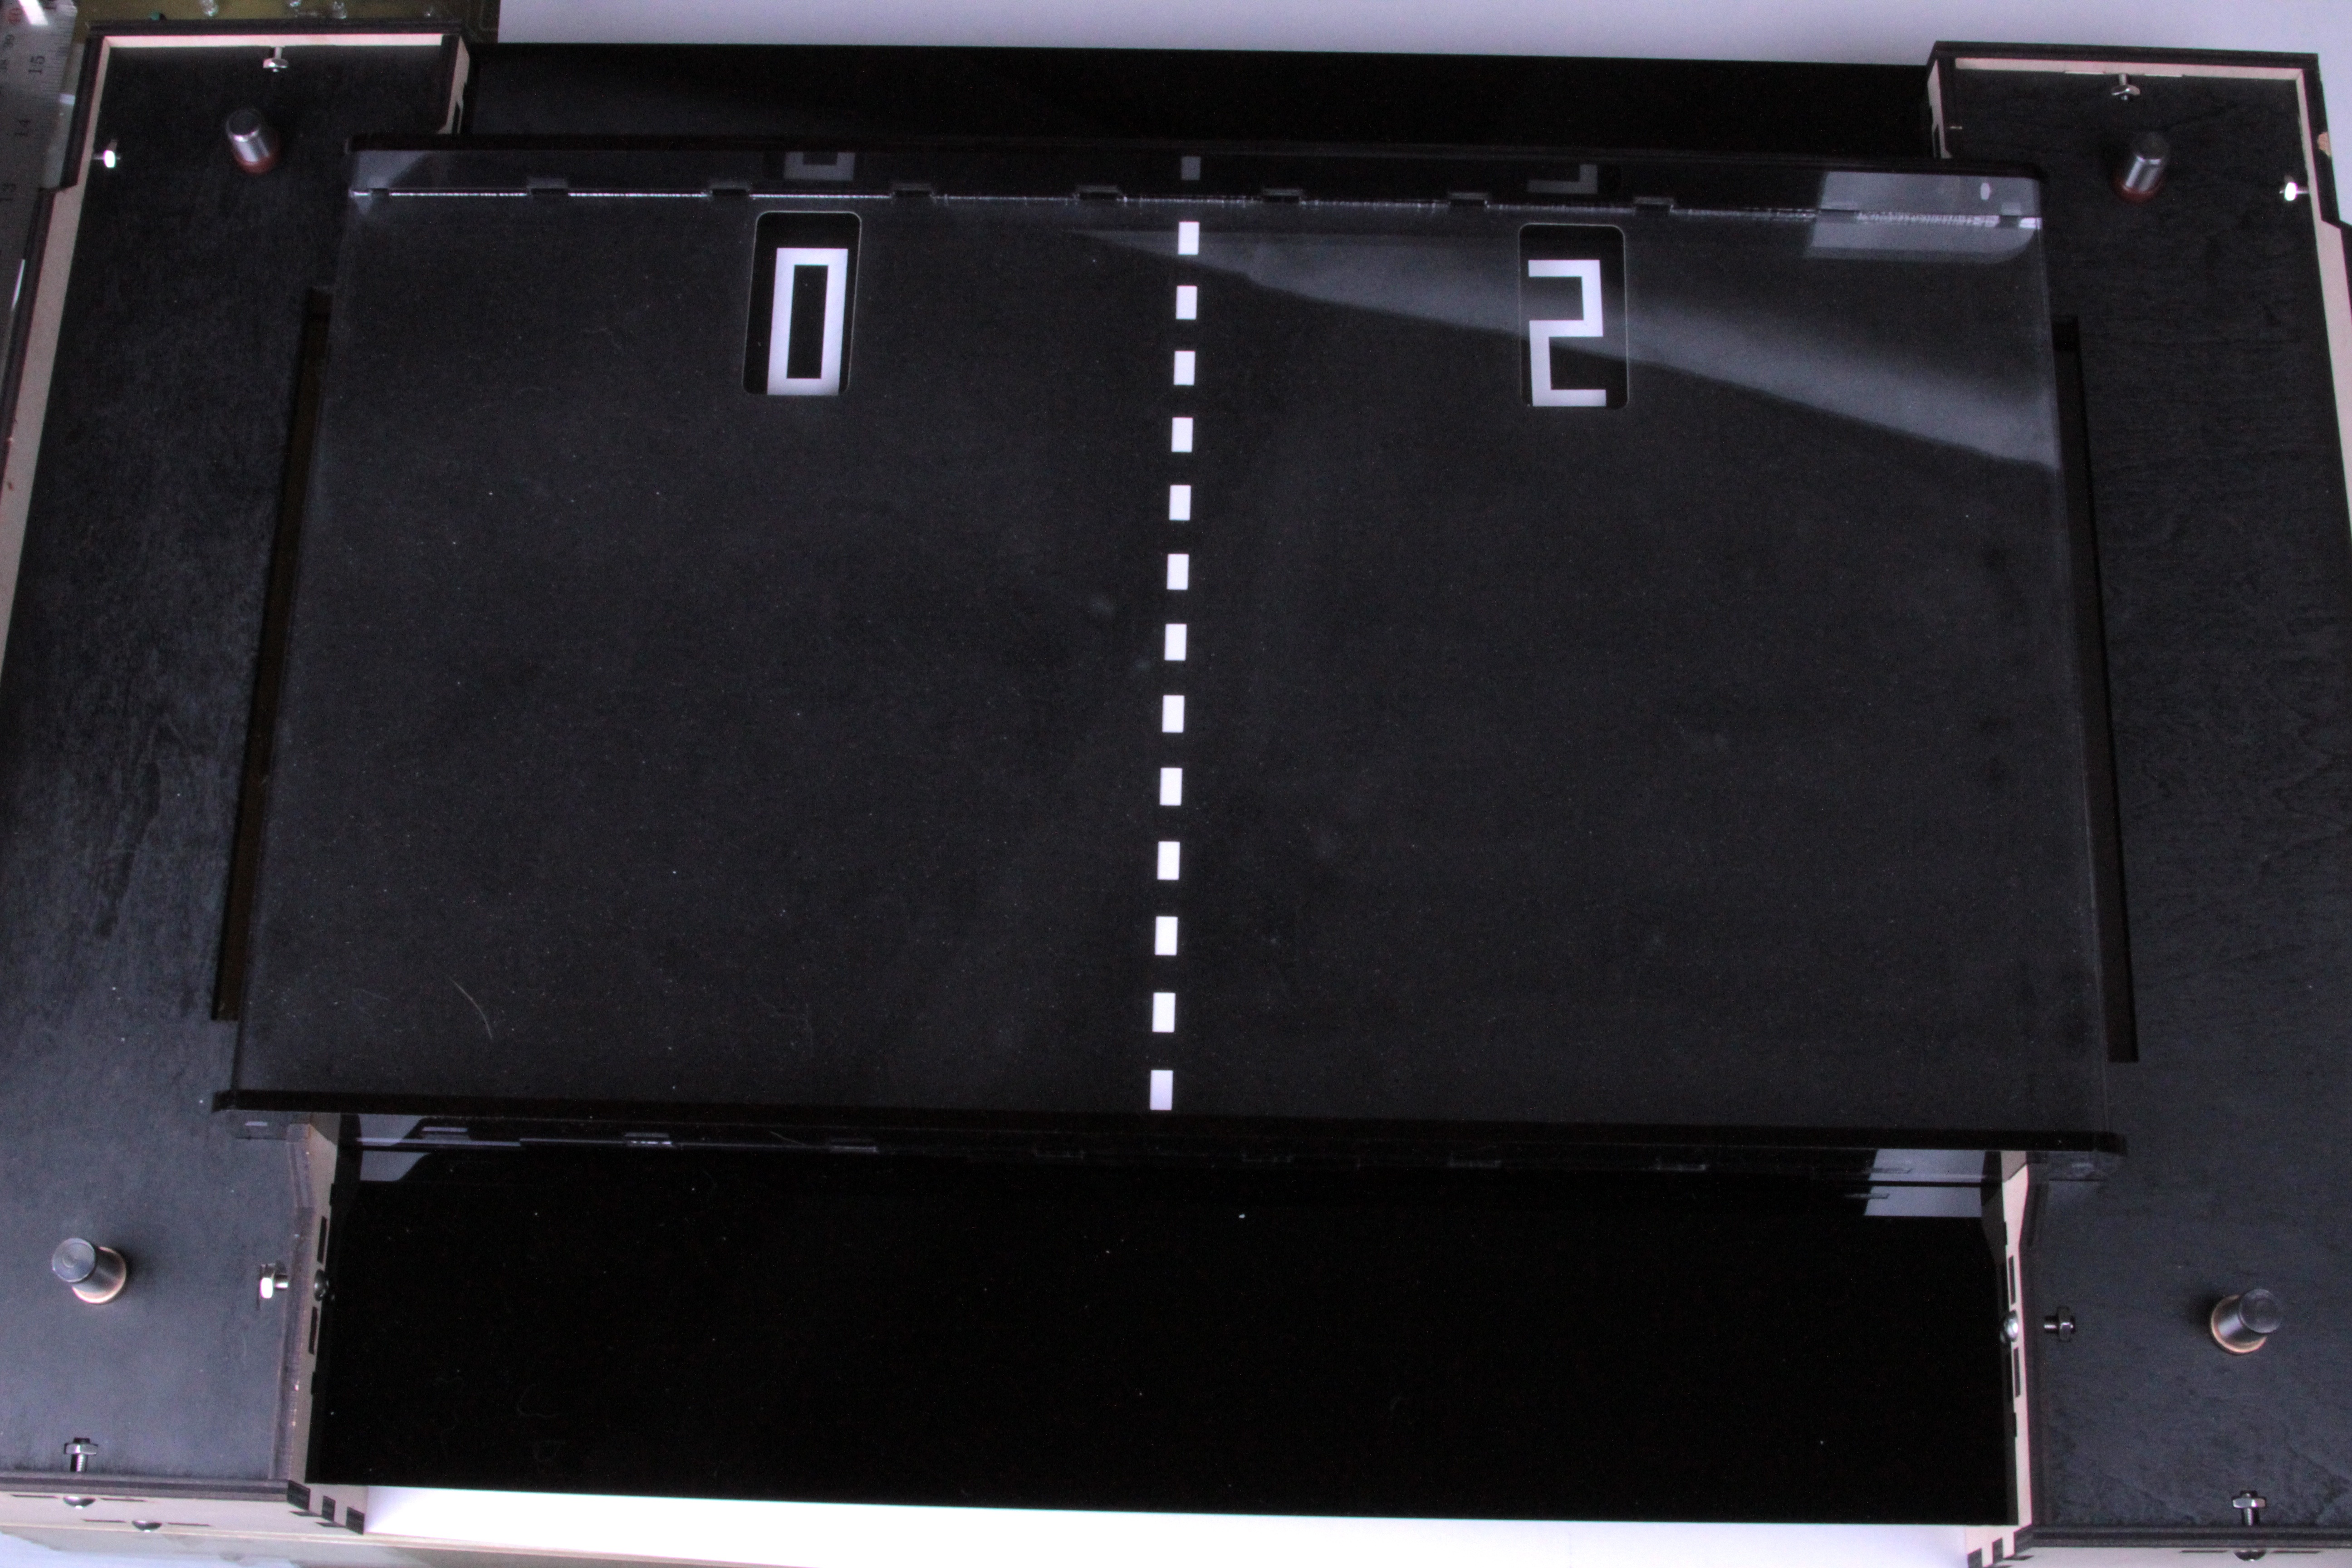
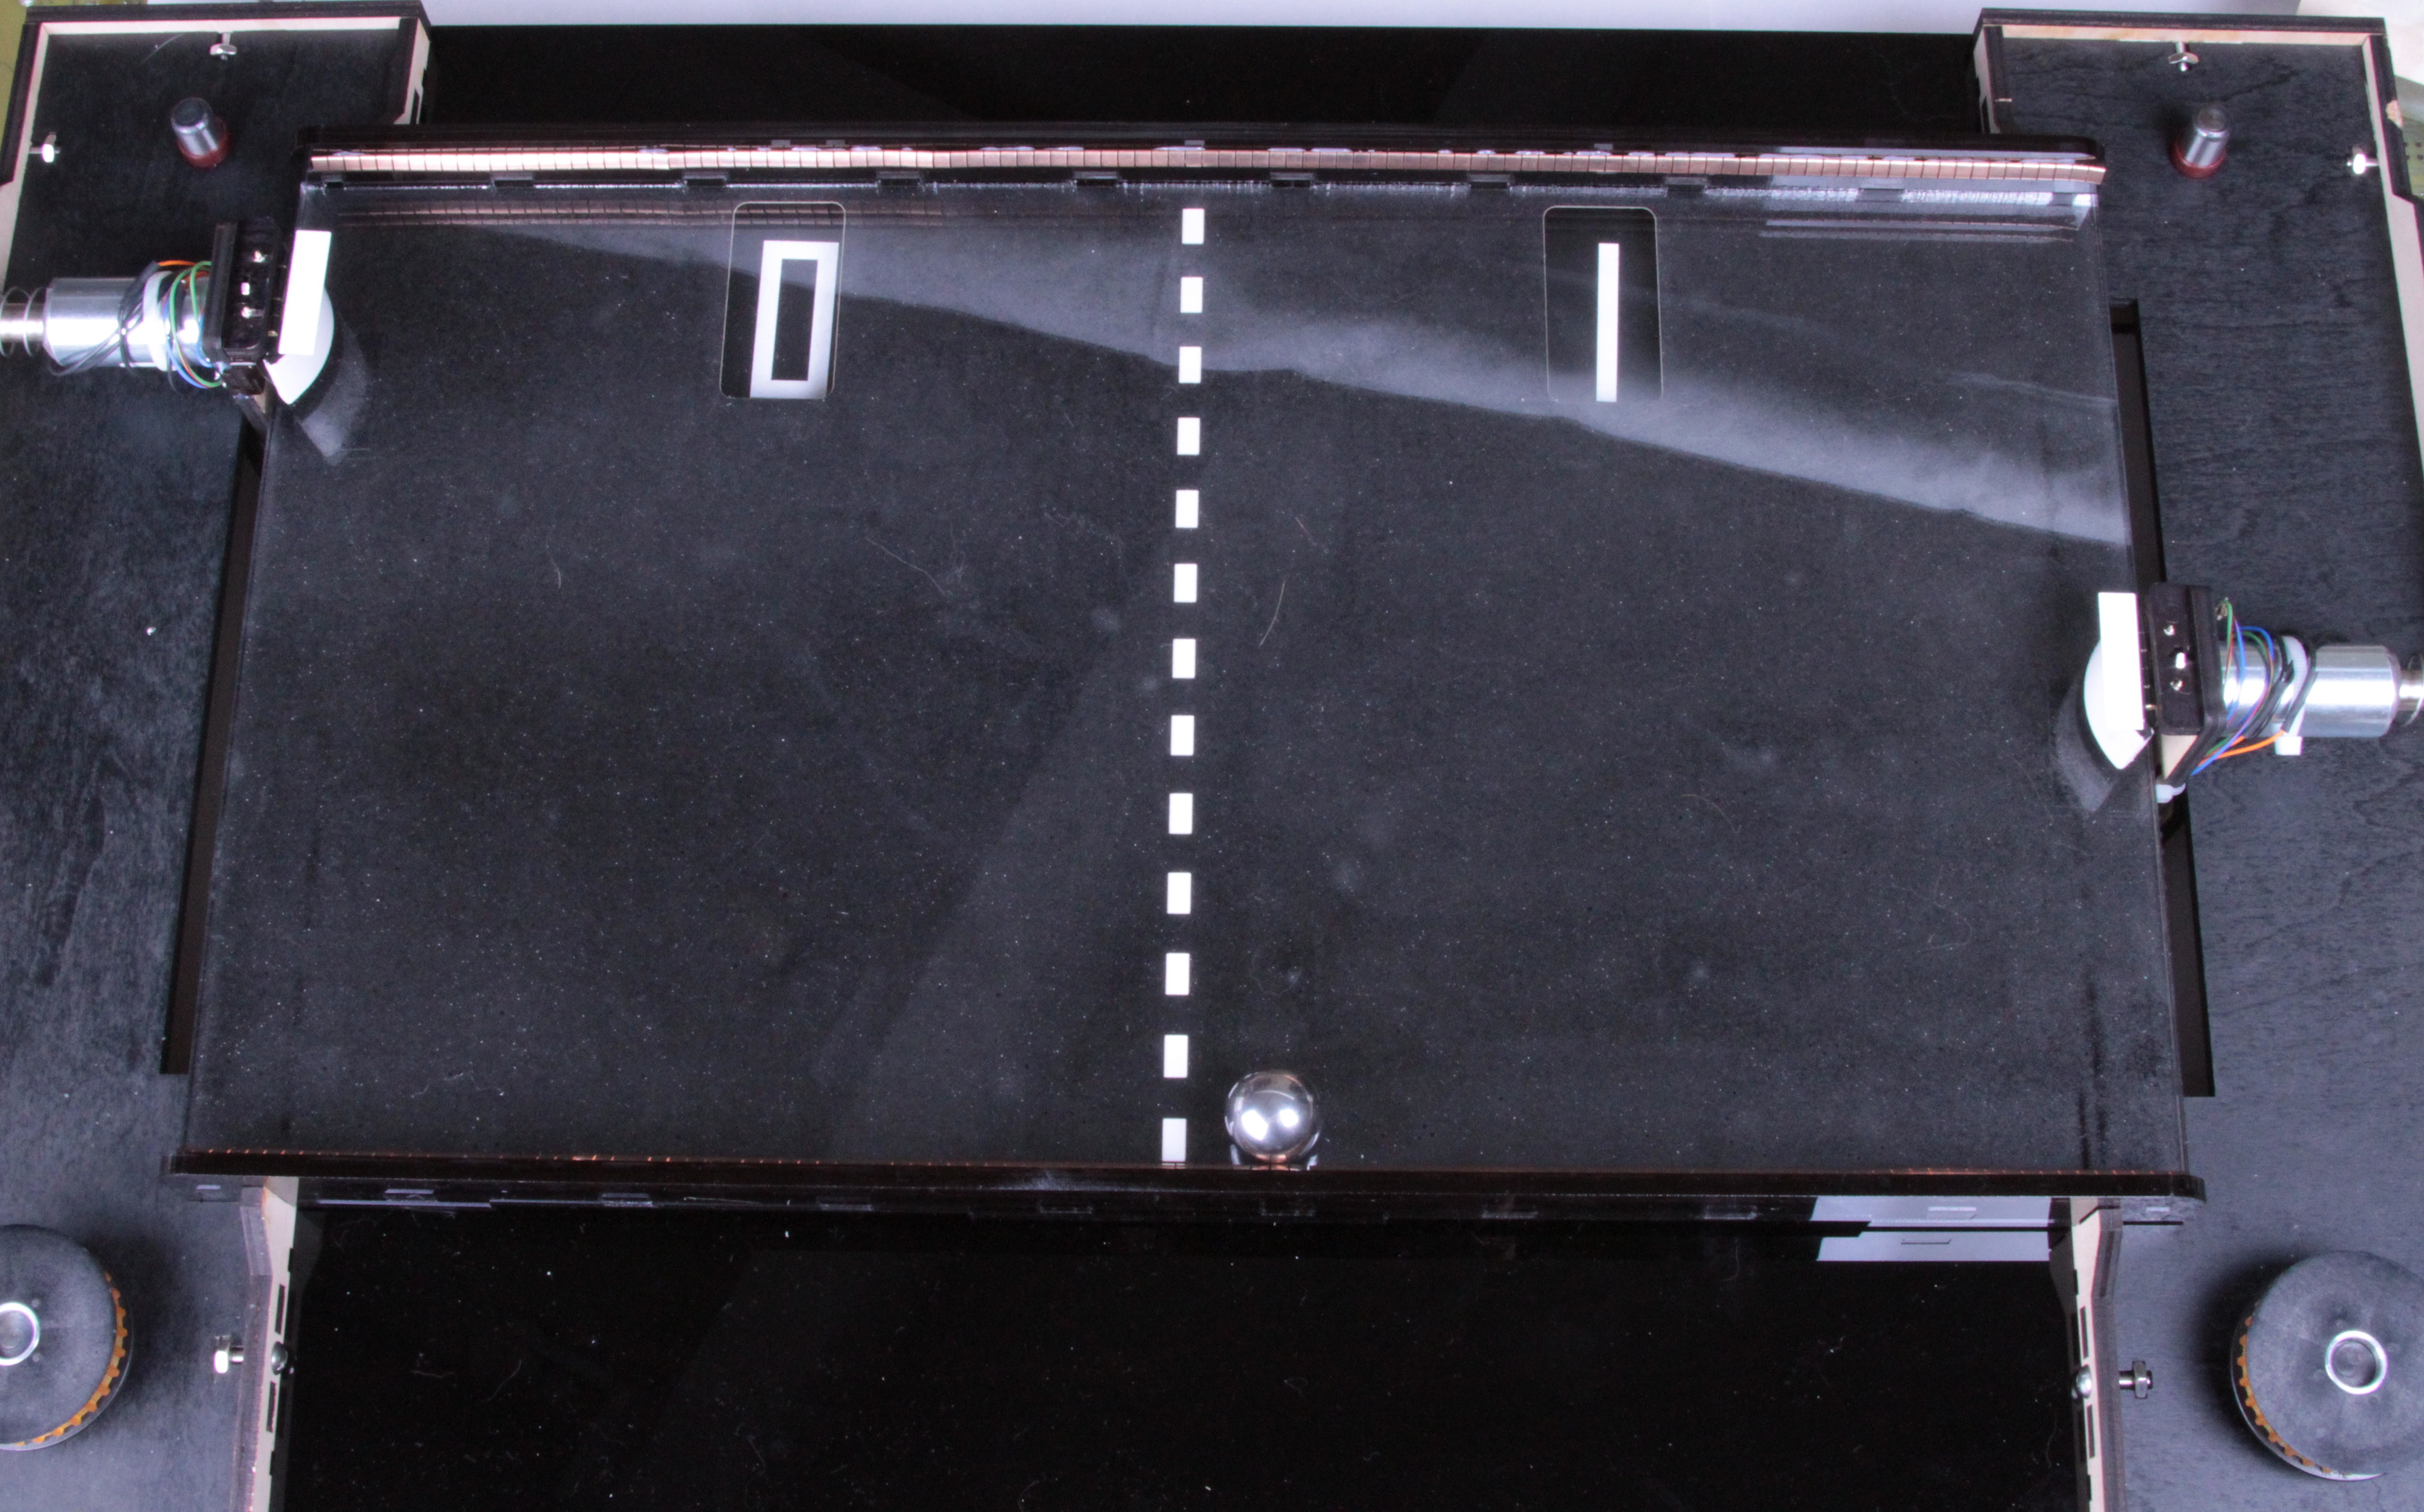
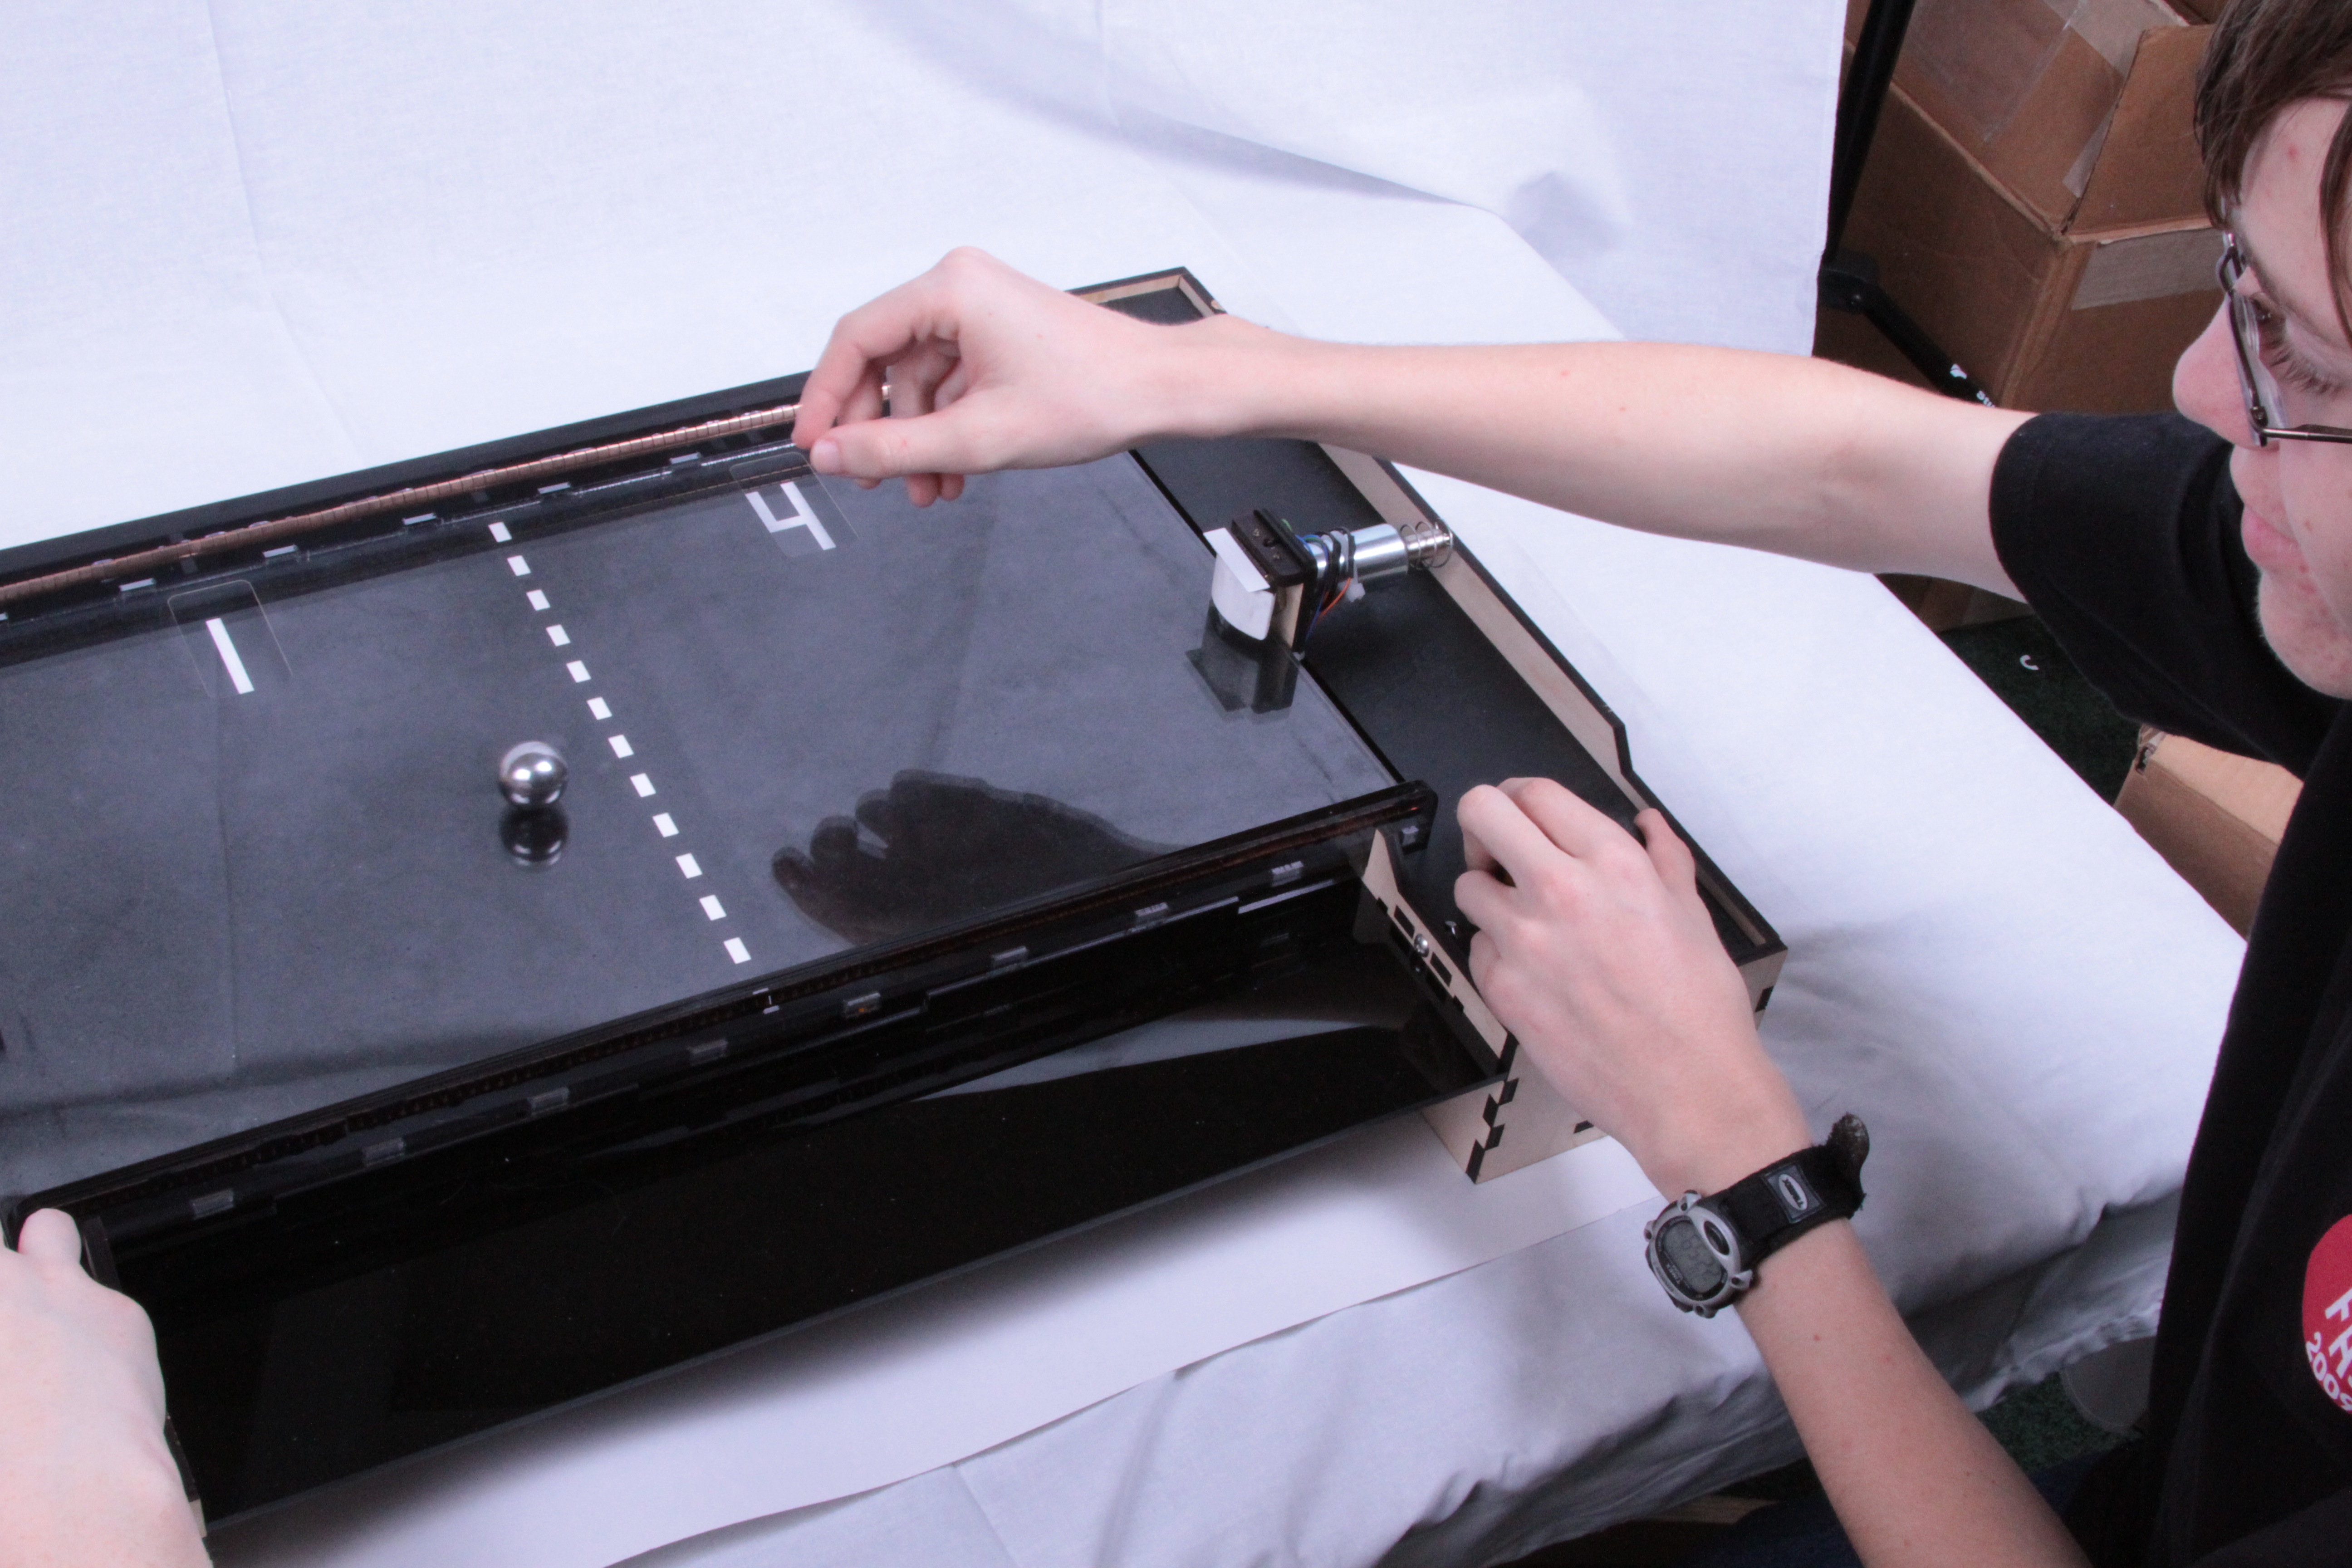
The playfield is made of clear acrylic, and is held together by acrylic cement. It spans the distance between the two paddle boxes and locks them into place. Beneath the acrylic, we attached a piece of carefully cut glossy black paper that gives the characteristic shape of the playfield– it’s held in place with spray adhesive. The dotted line in the middle is emphasized with a second white piece of paper attached beneath the black paper.
The remaining cutouts are to display the score.
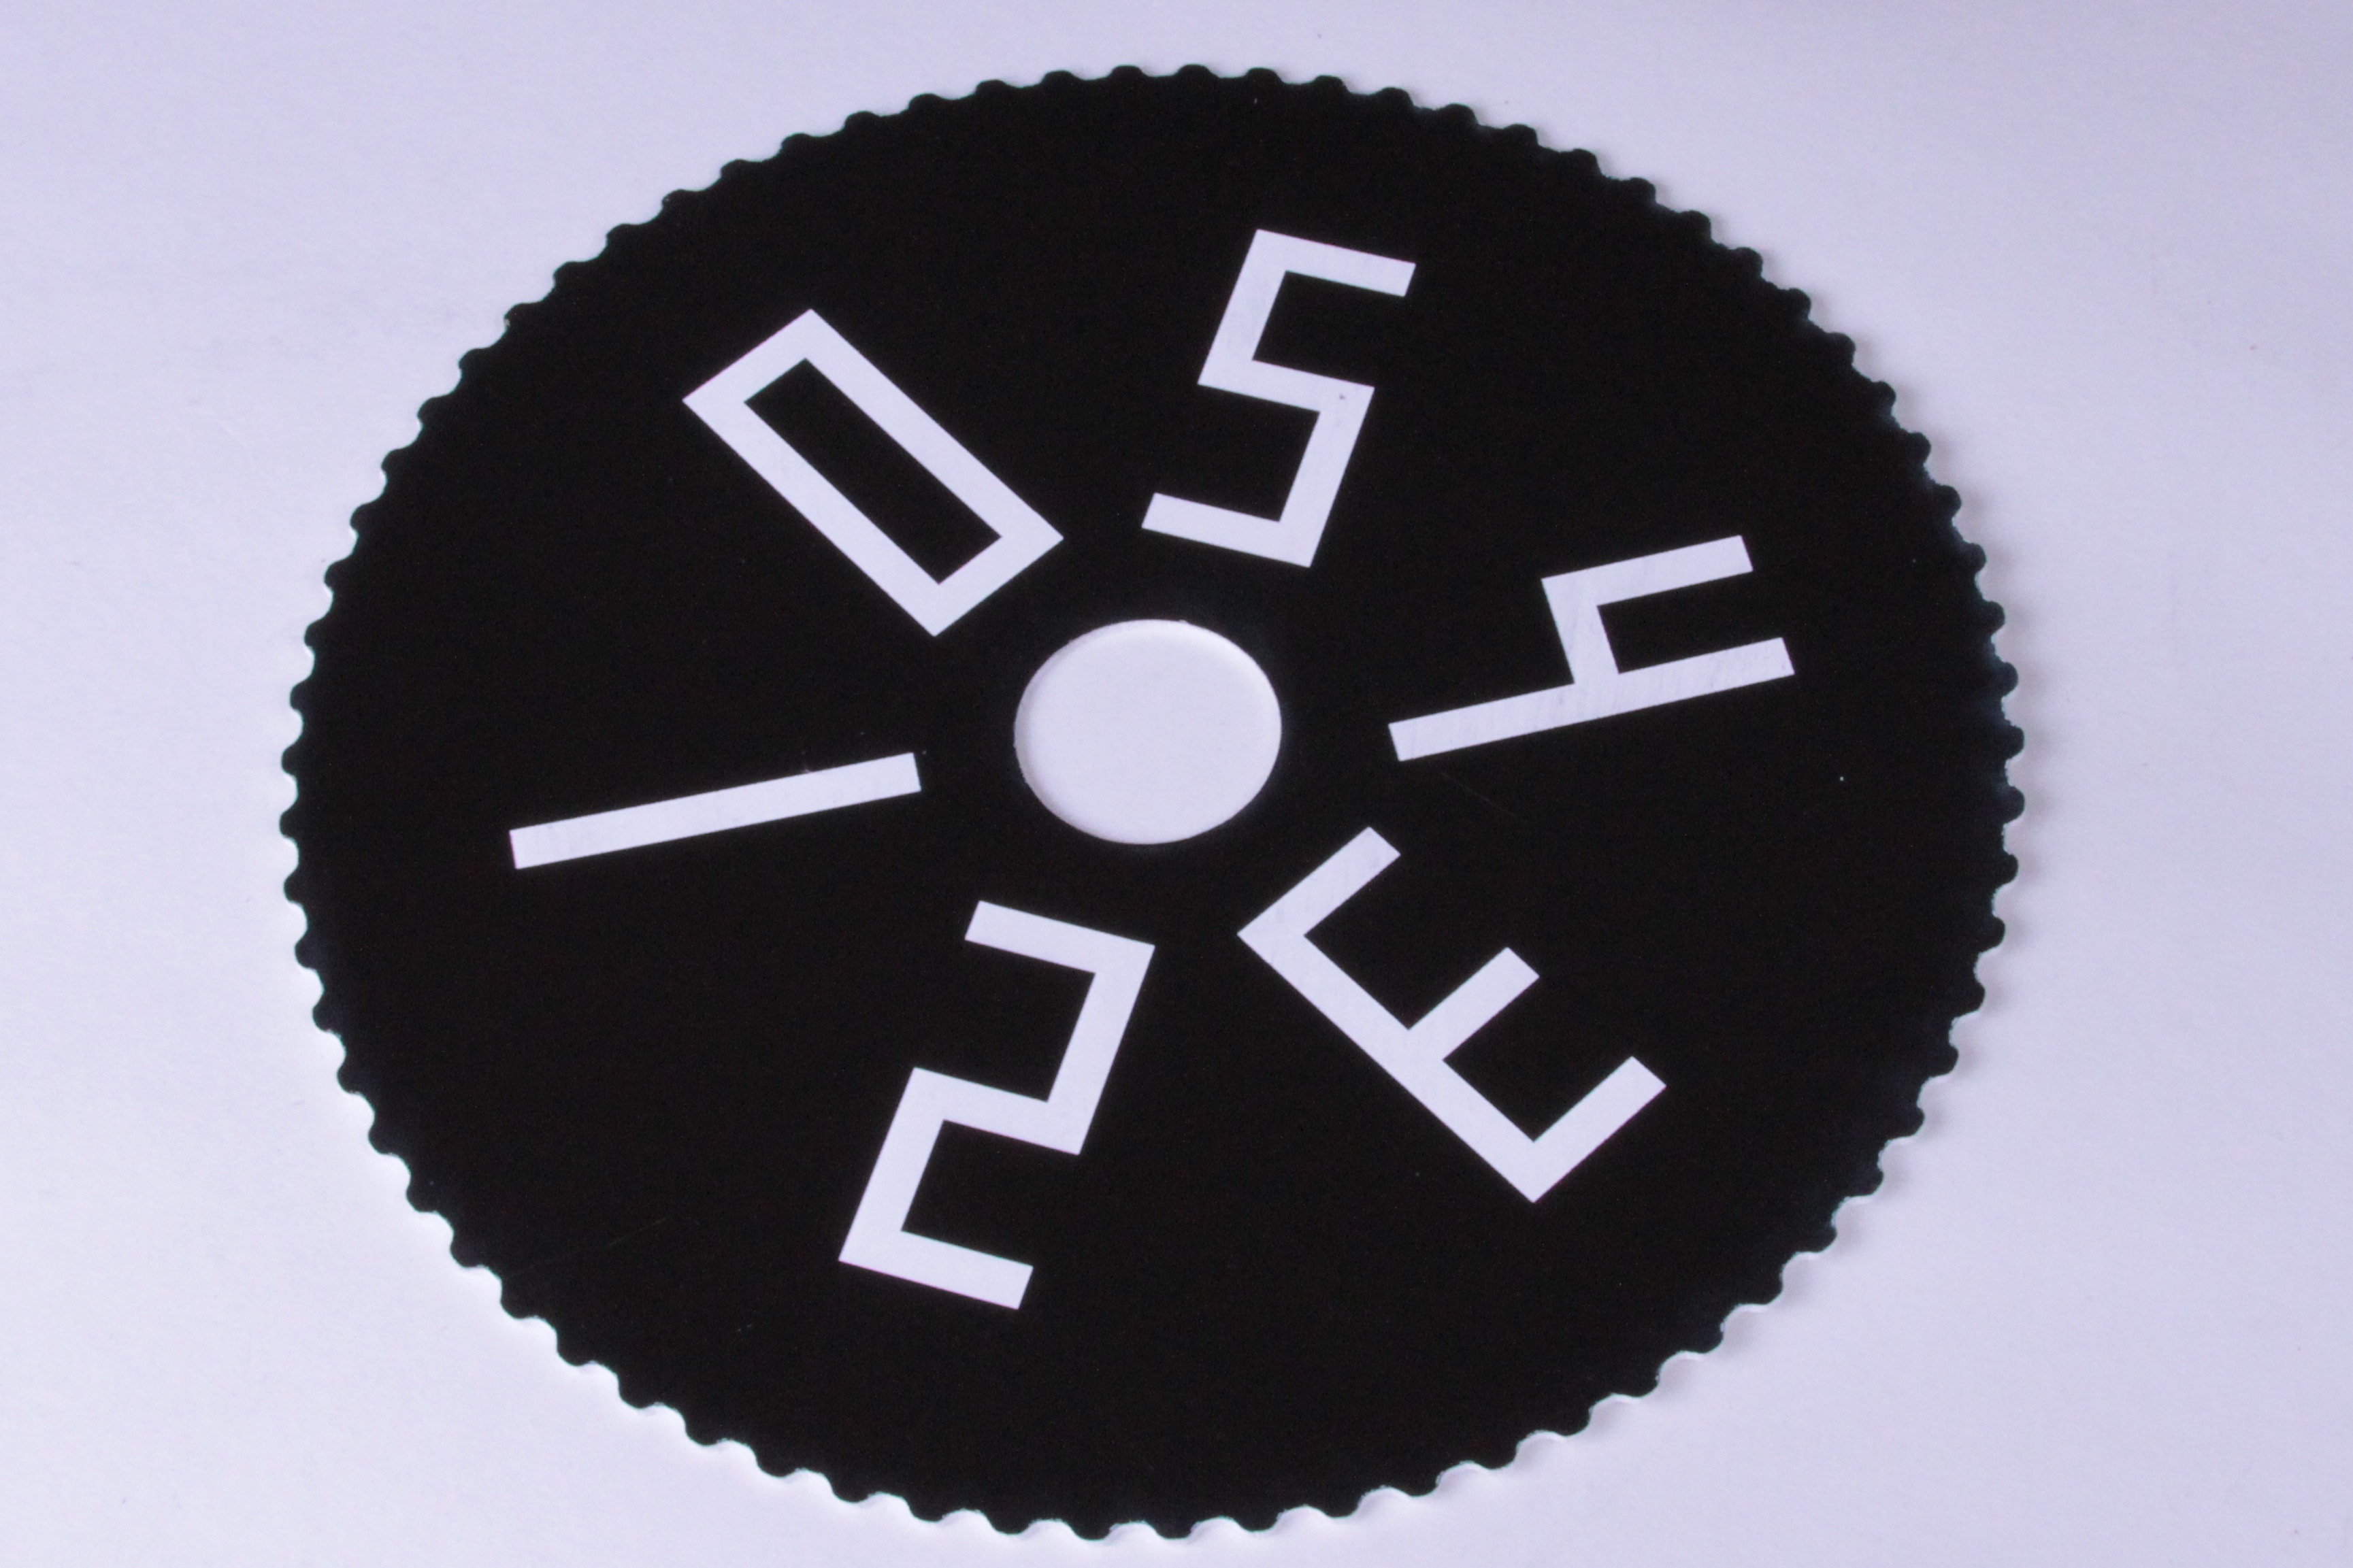
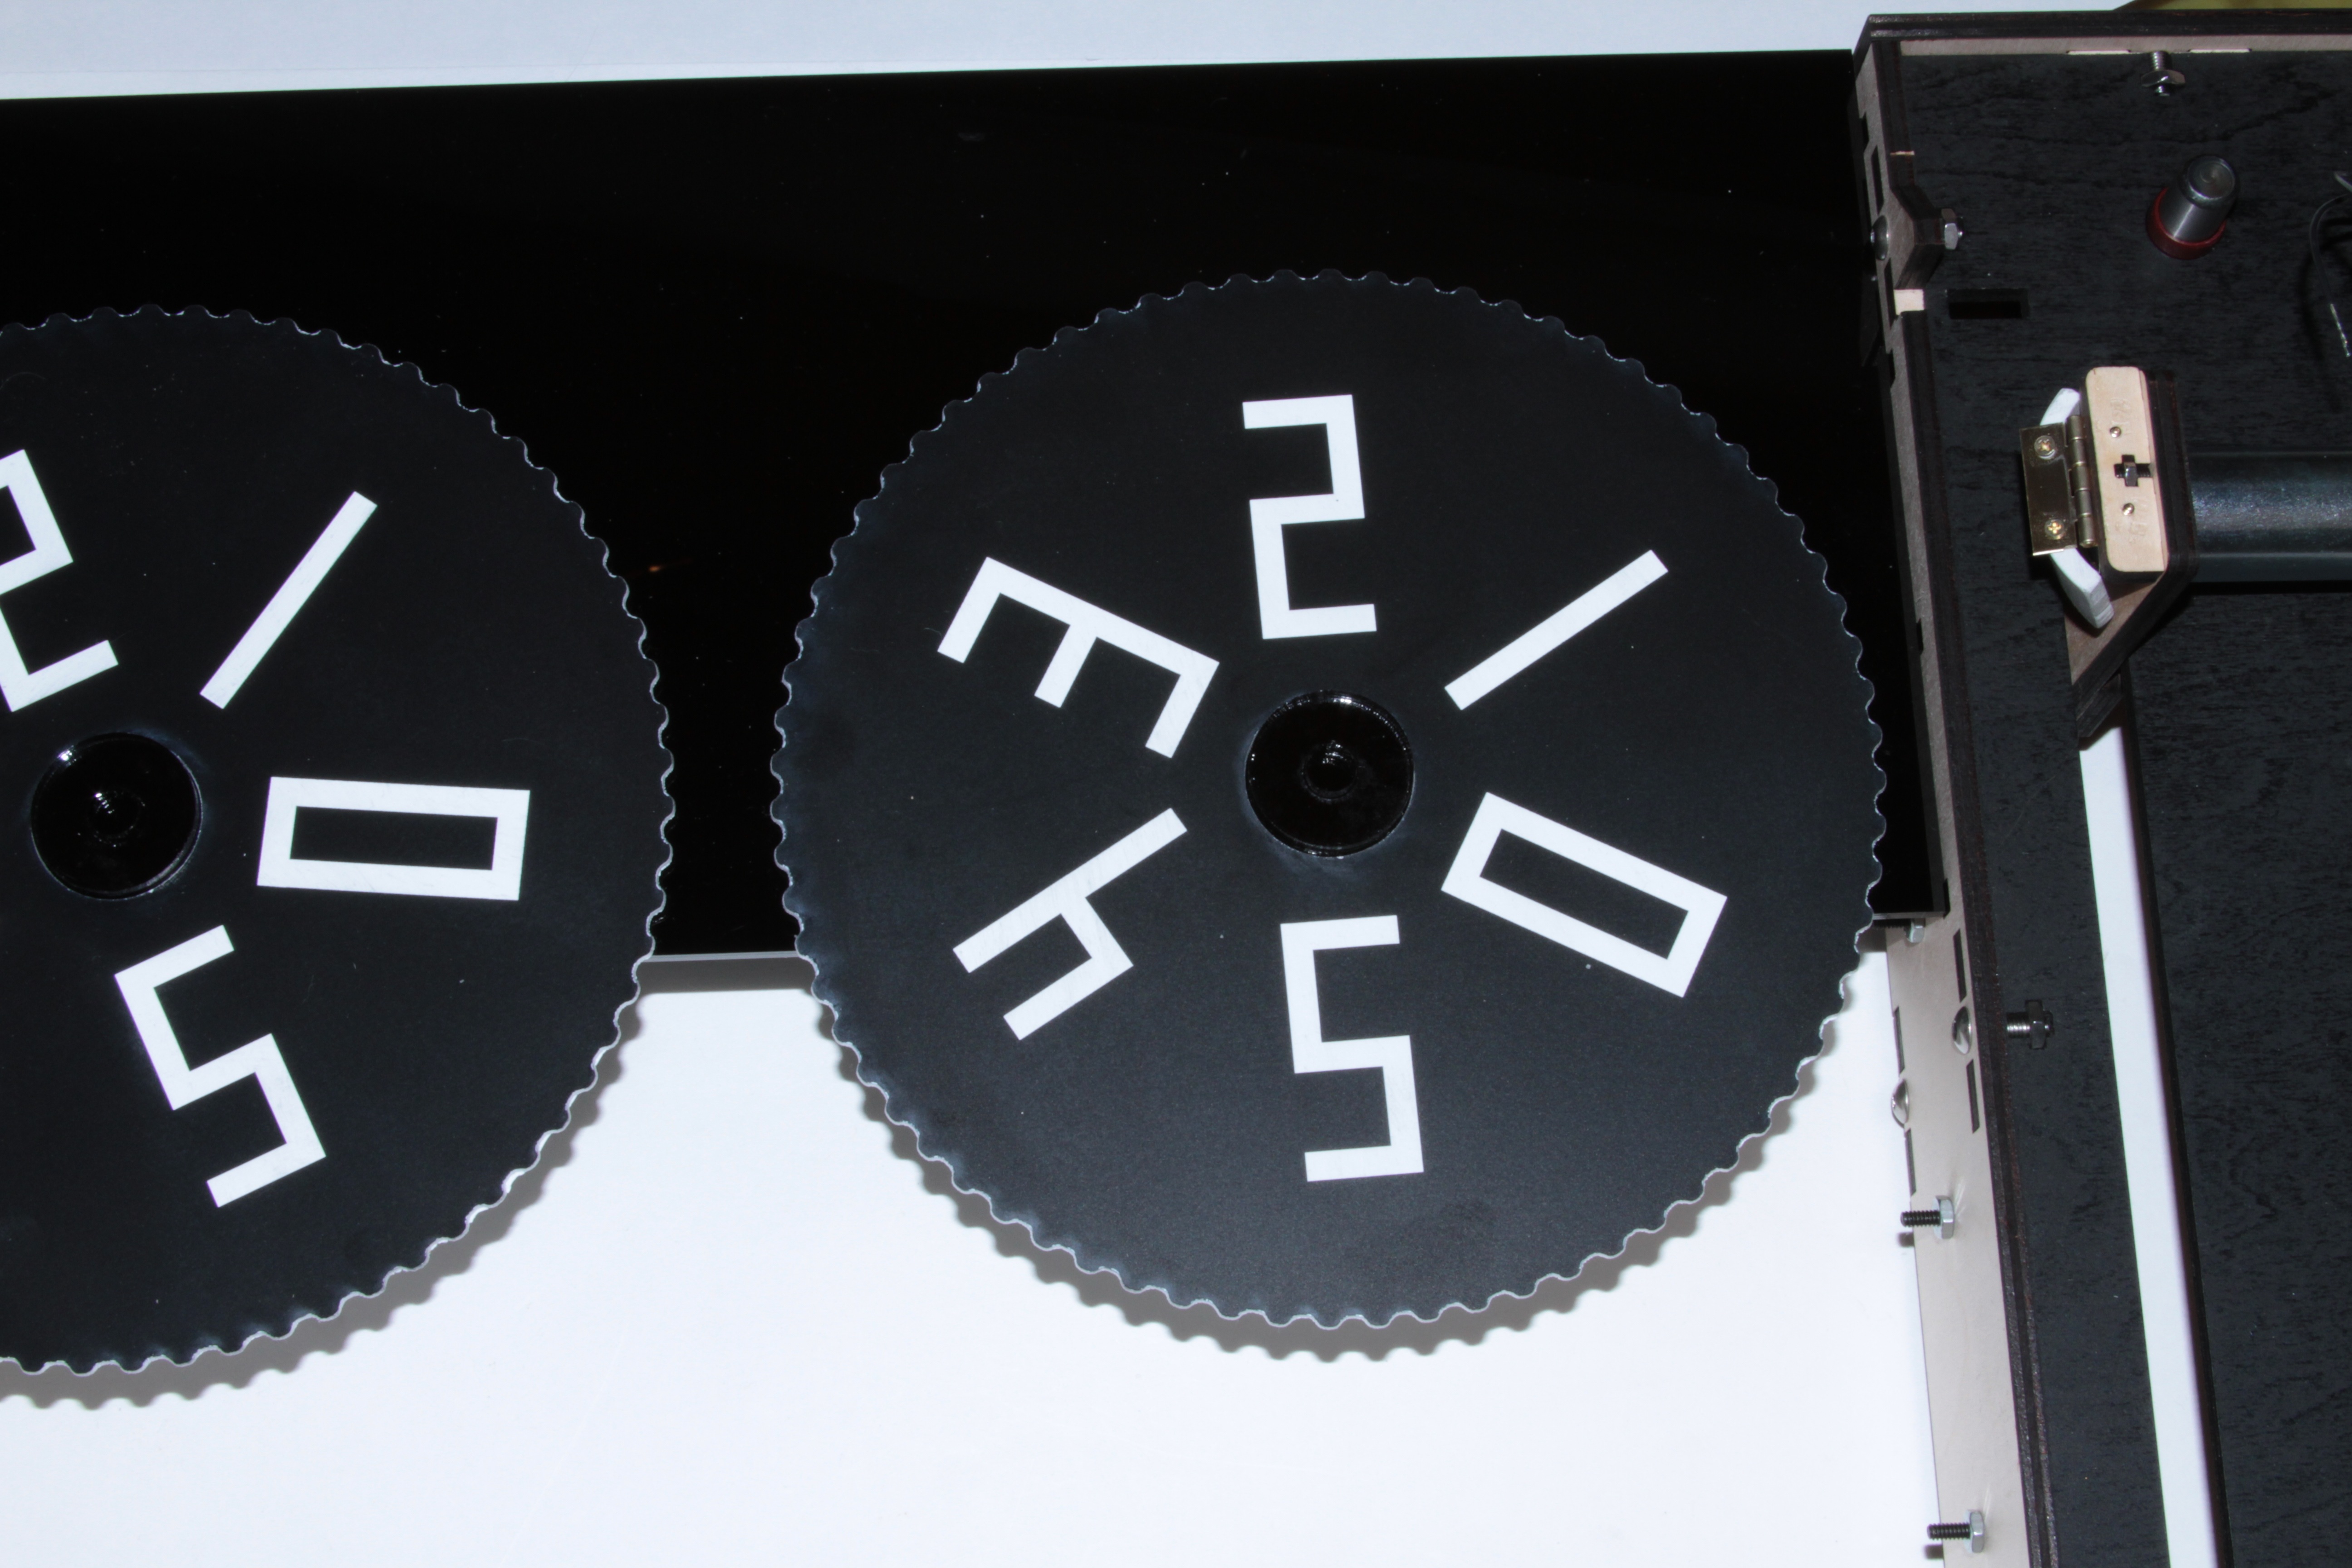
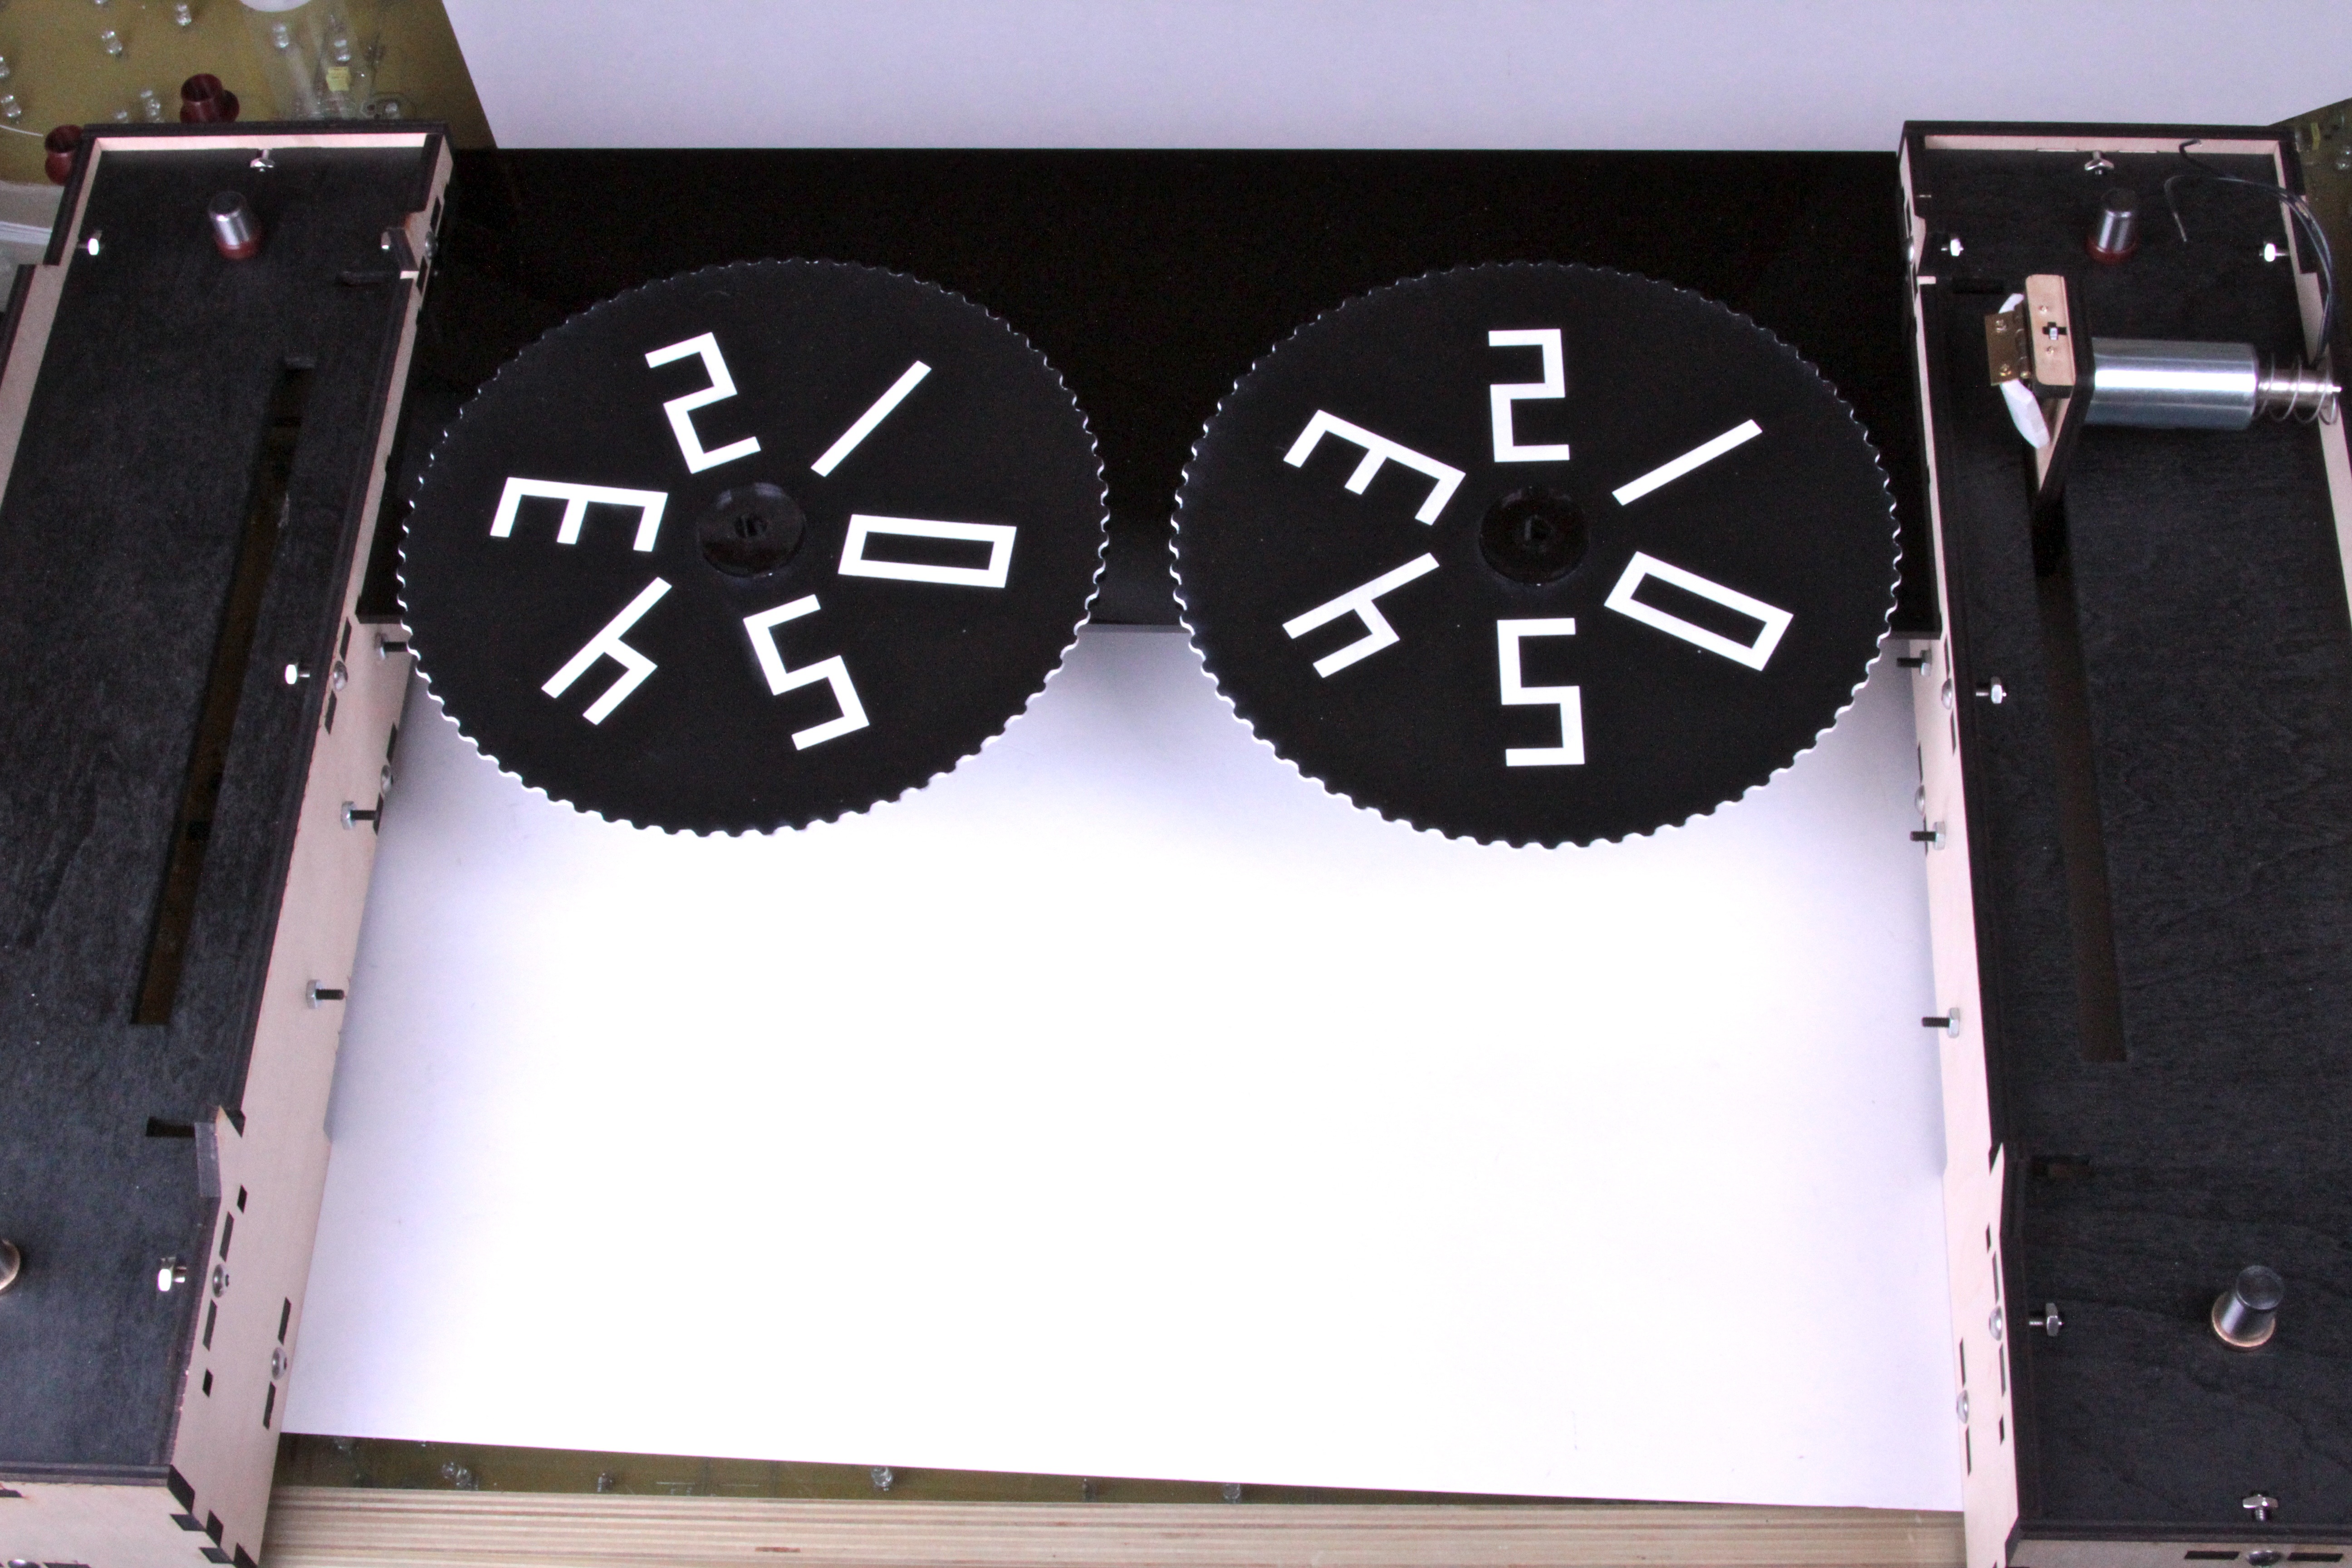
Our score wheel is a piece of 1/16″ thick two-tone engravable plastic. The outer edge is knurled (or the two-dimensional equivalent, ridged?) to give a better grip when turning it by hand. The inner cutout allows it to sit around a 1/4″ tall acrylic cylinder, cemented to the black material below, that acts as a plain bearing. Once the playfield is added on top, it’s pretty easy to read the score. The top edge of the wheel reaches past the top of the playfield, so it just takes a finger touch to spin it to the desired value.
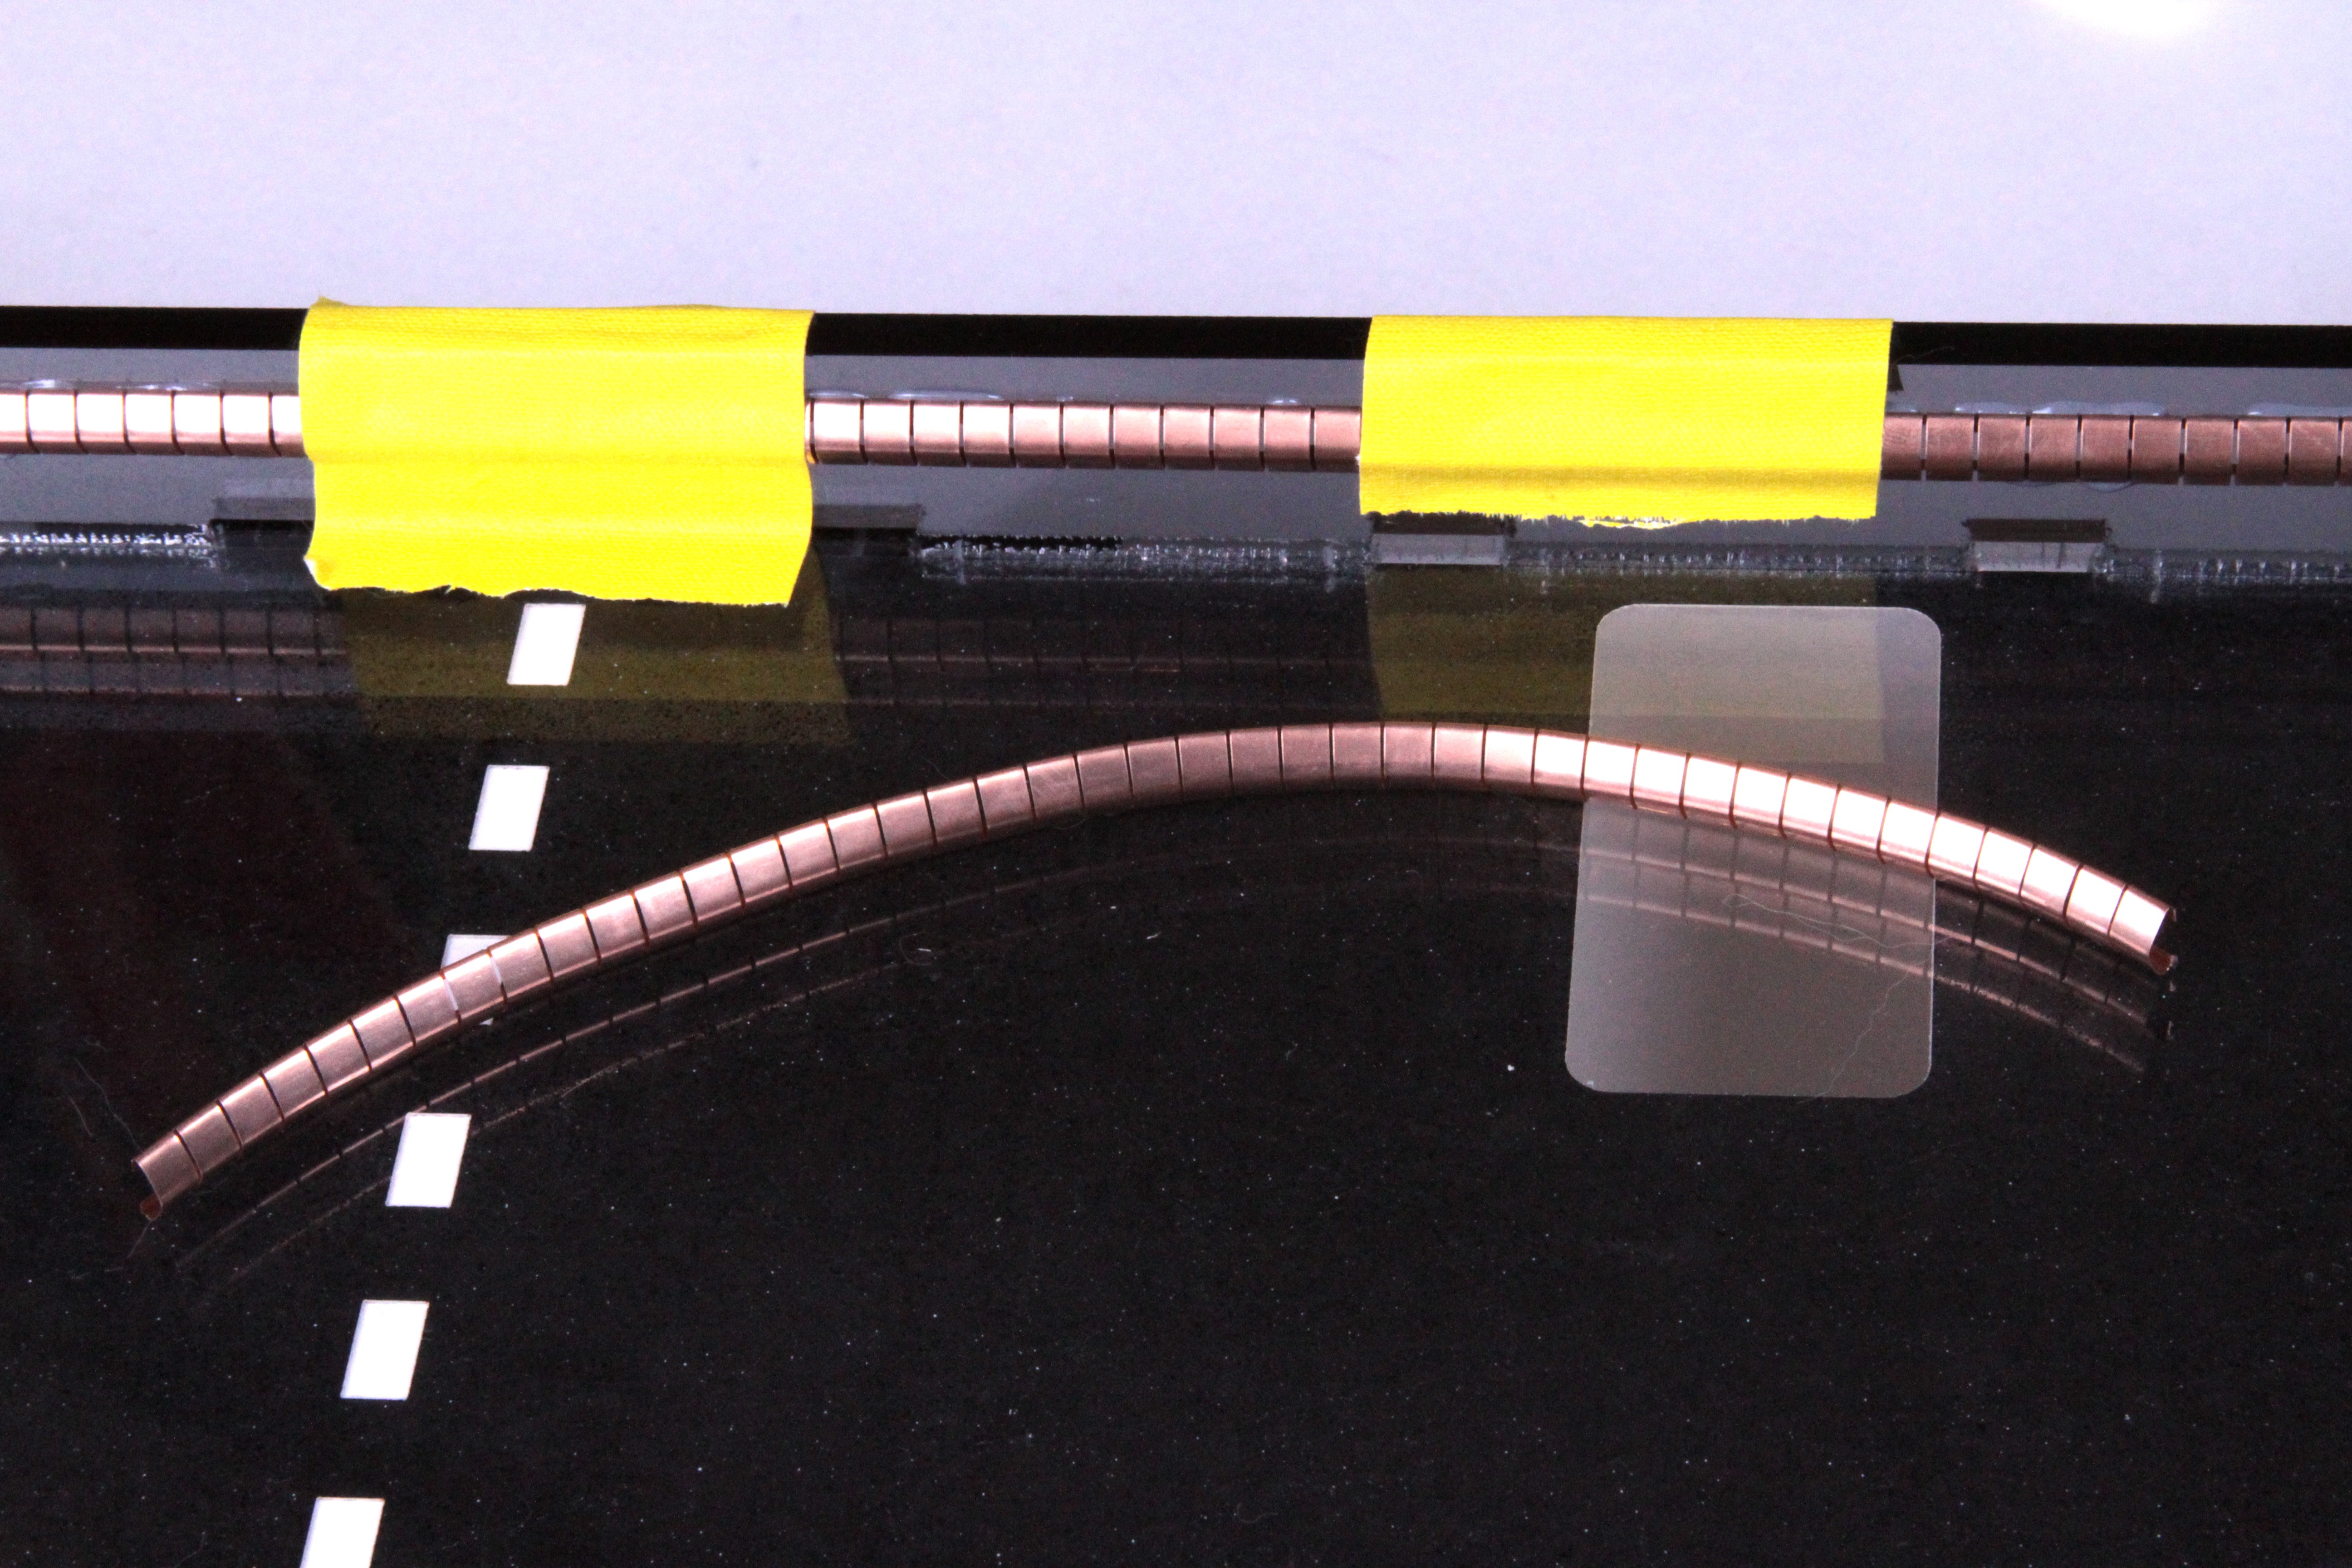
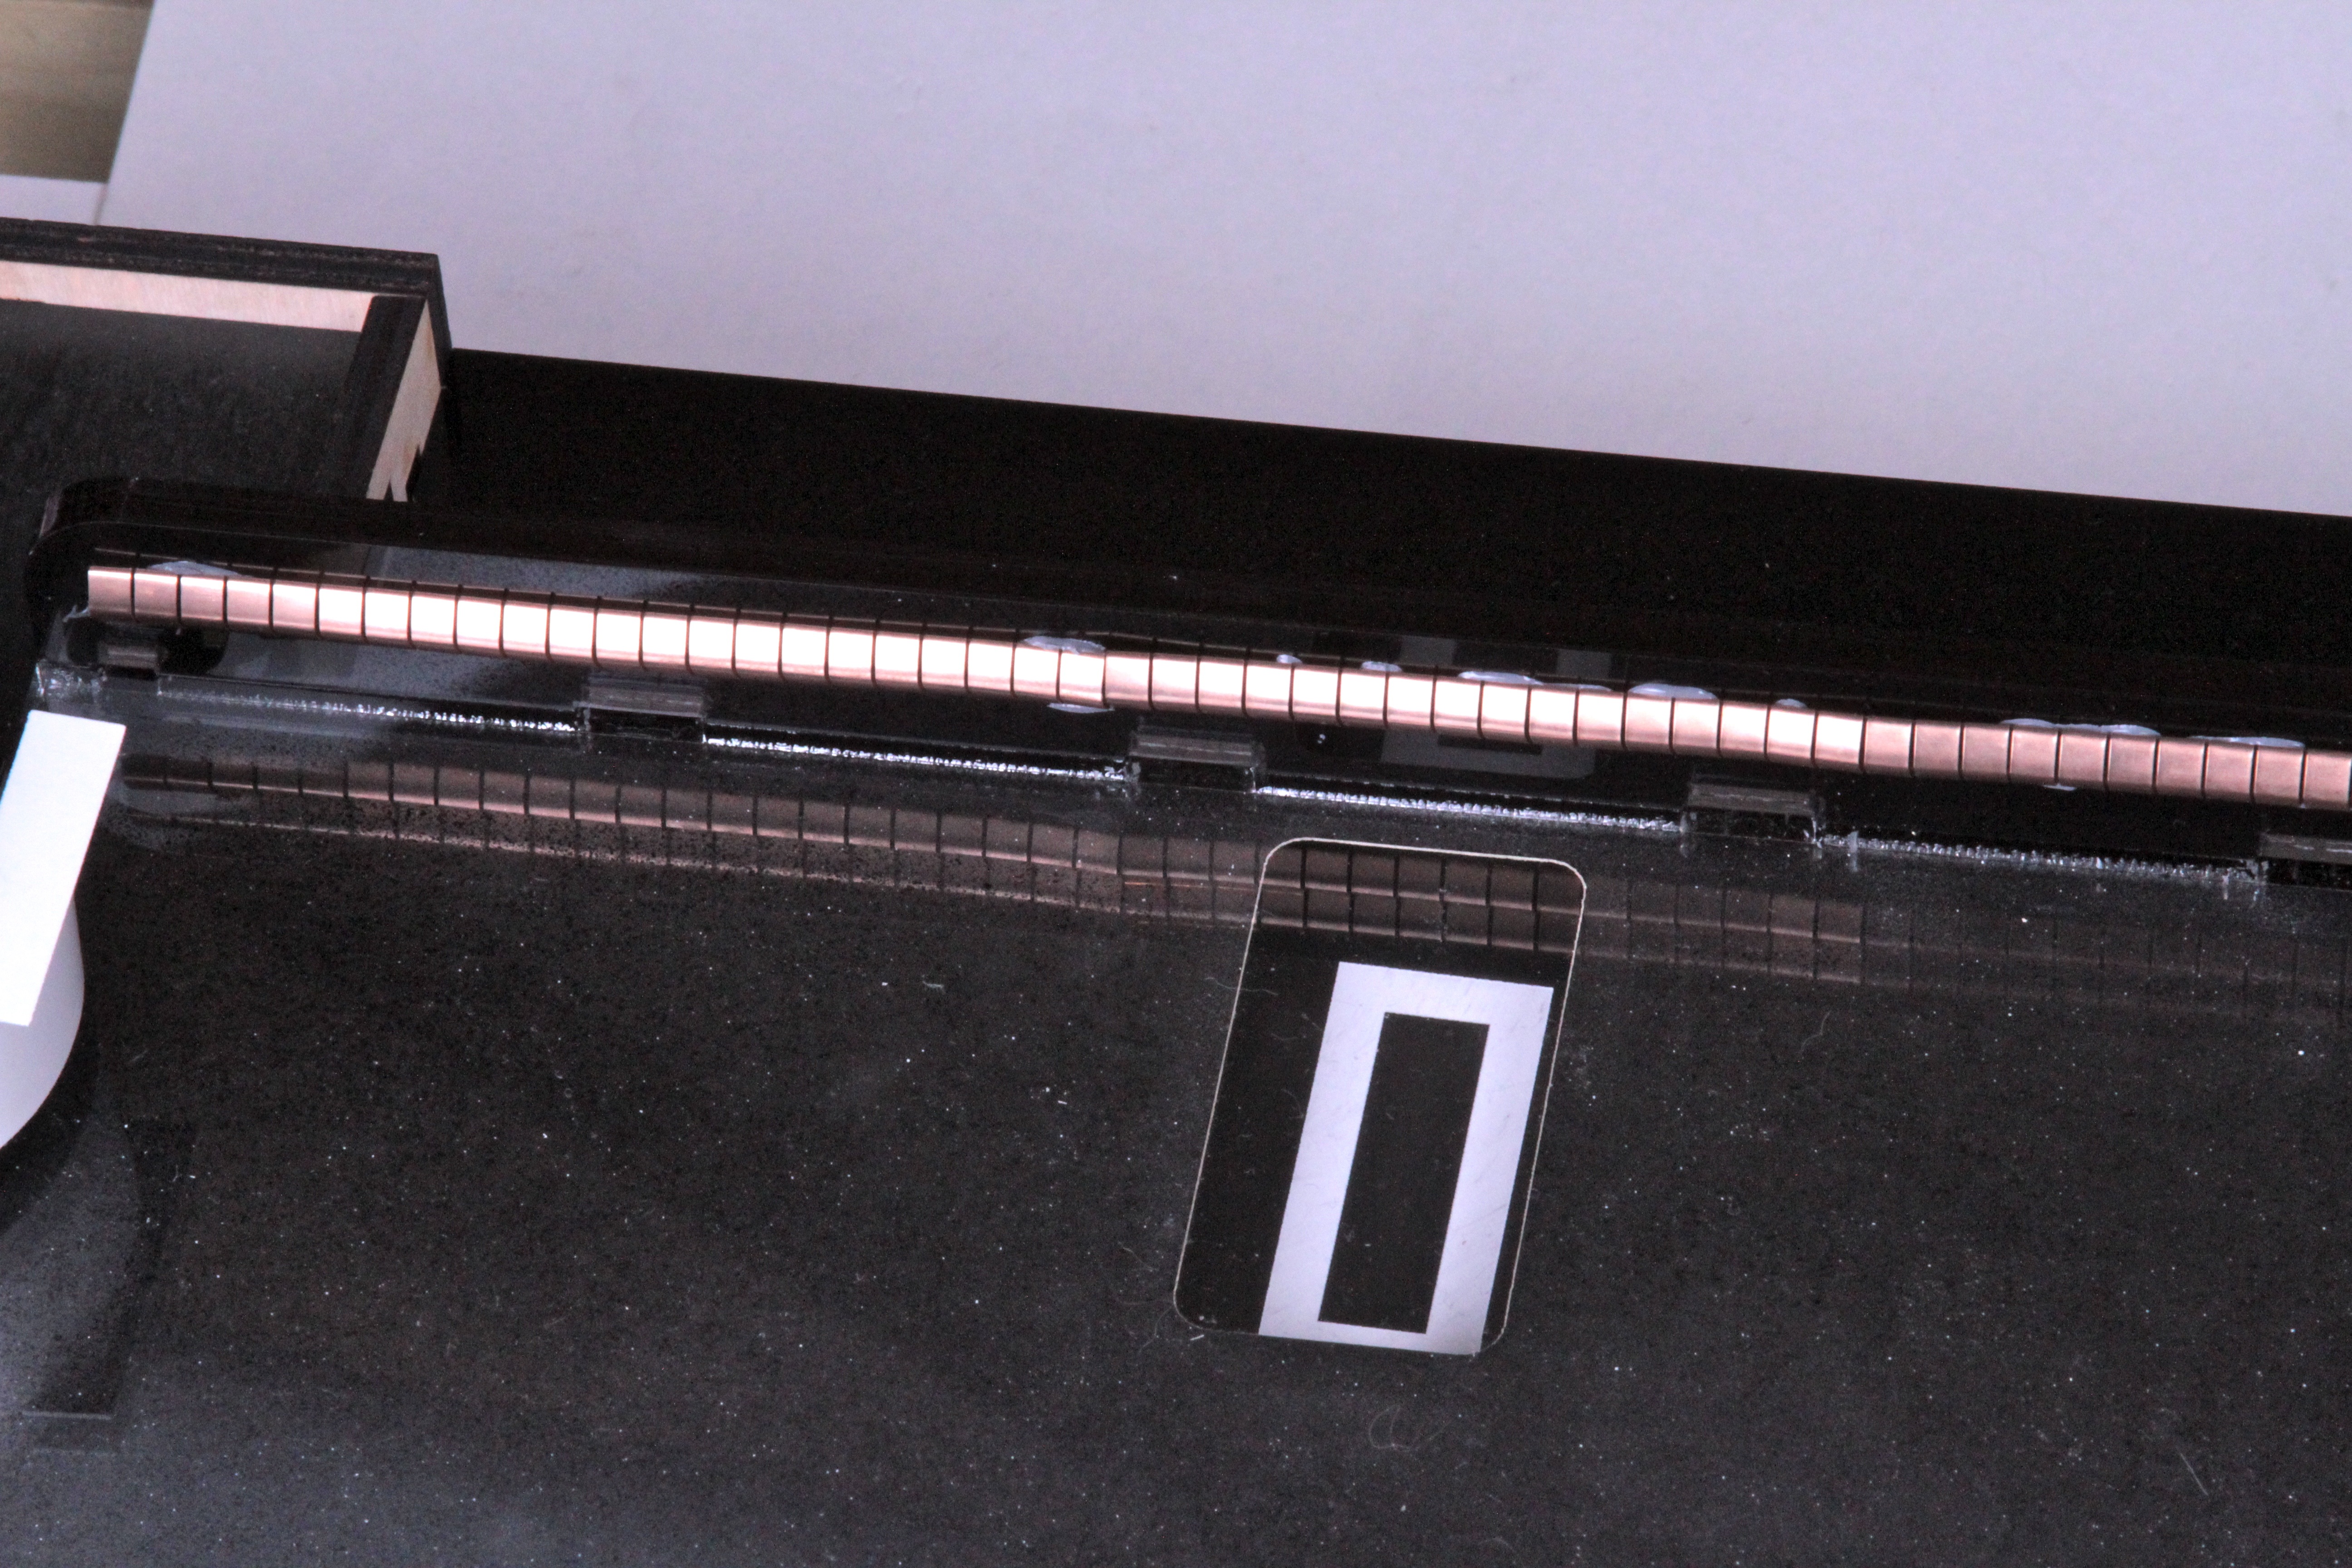
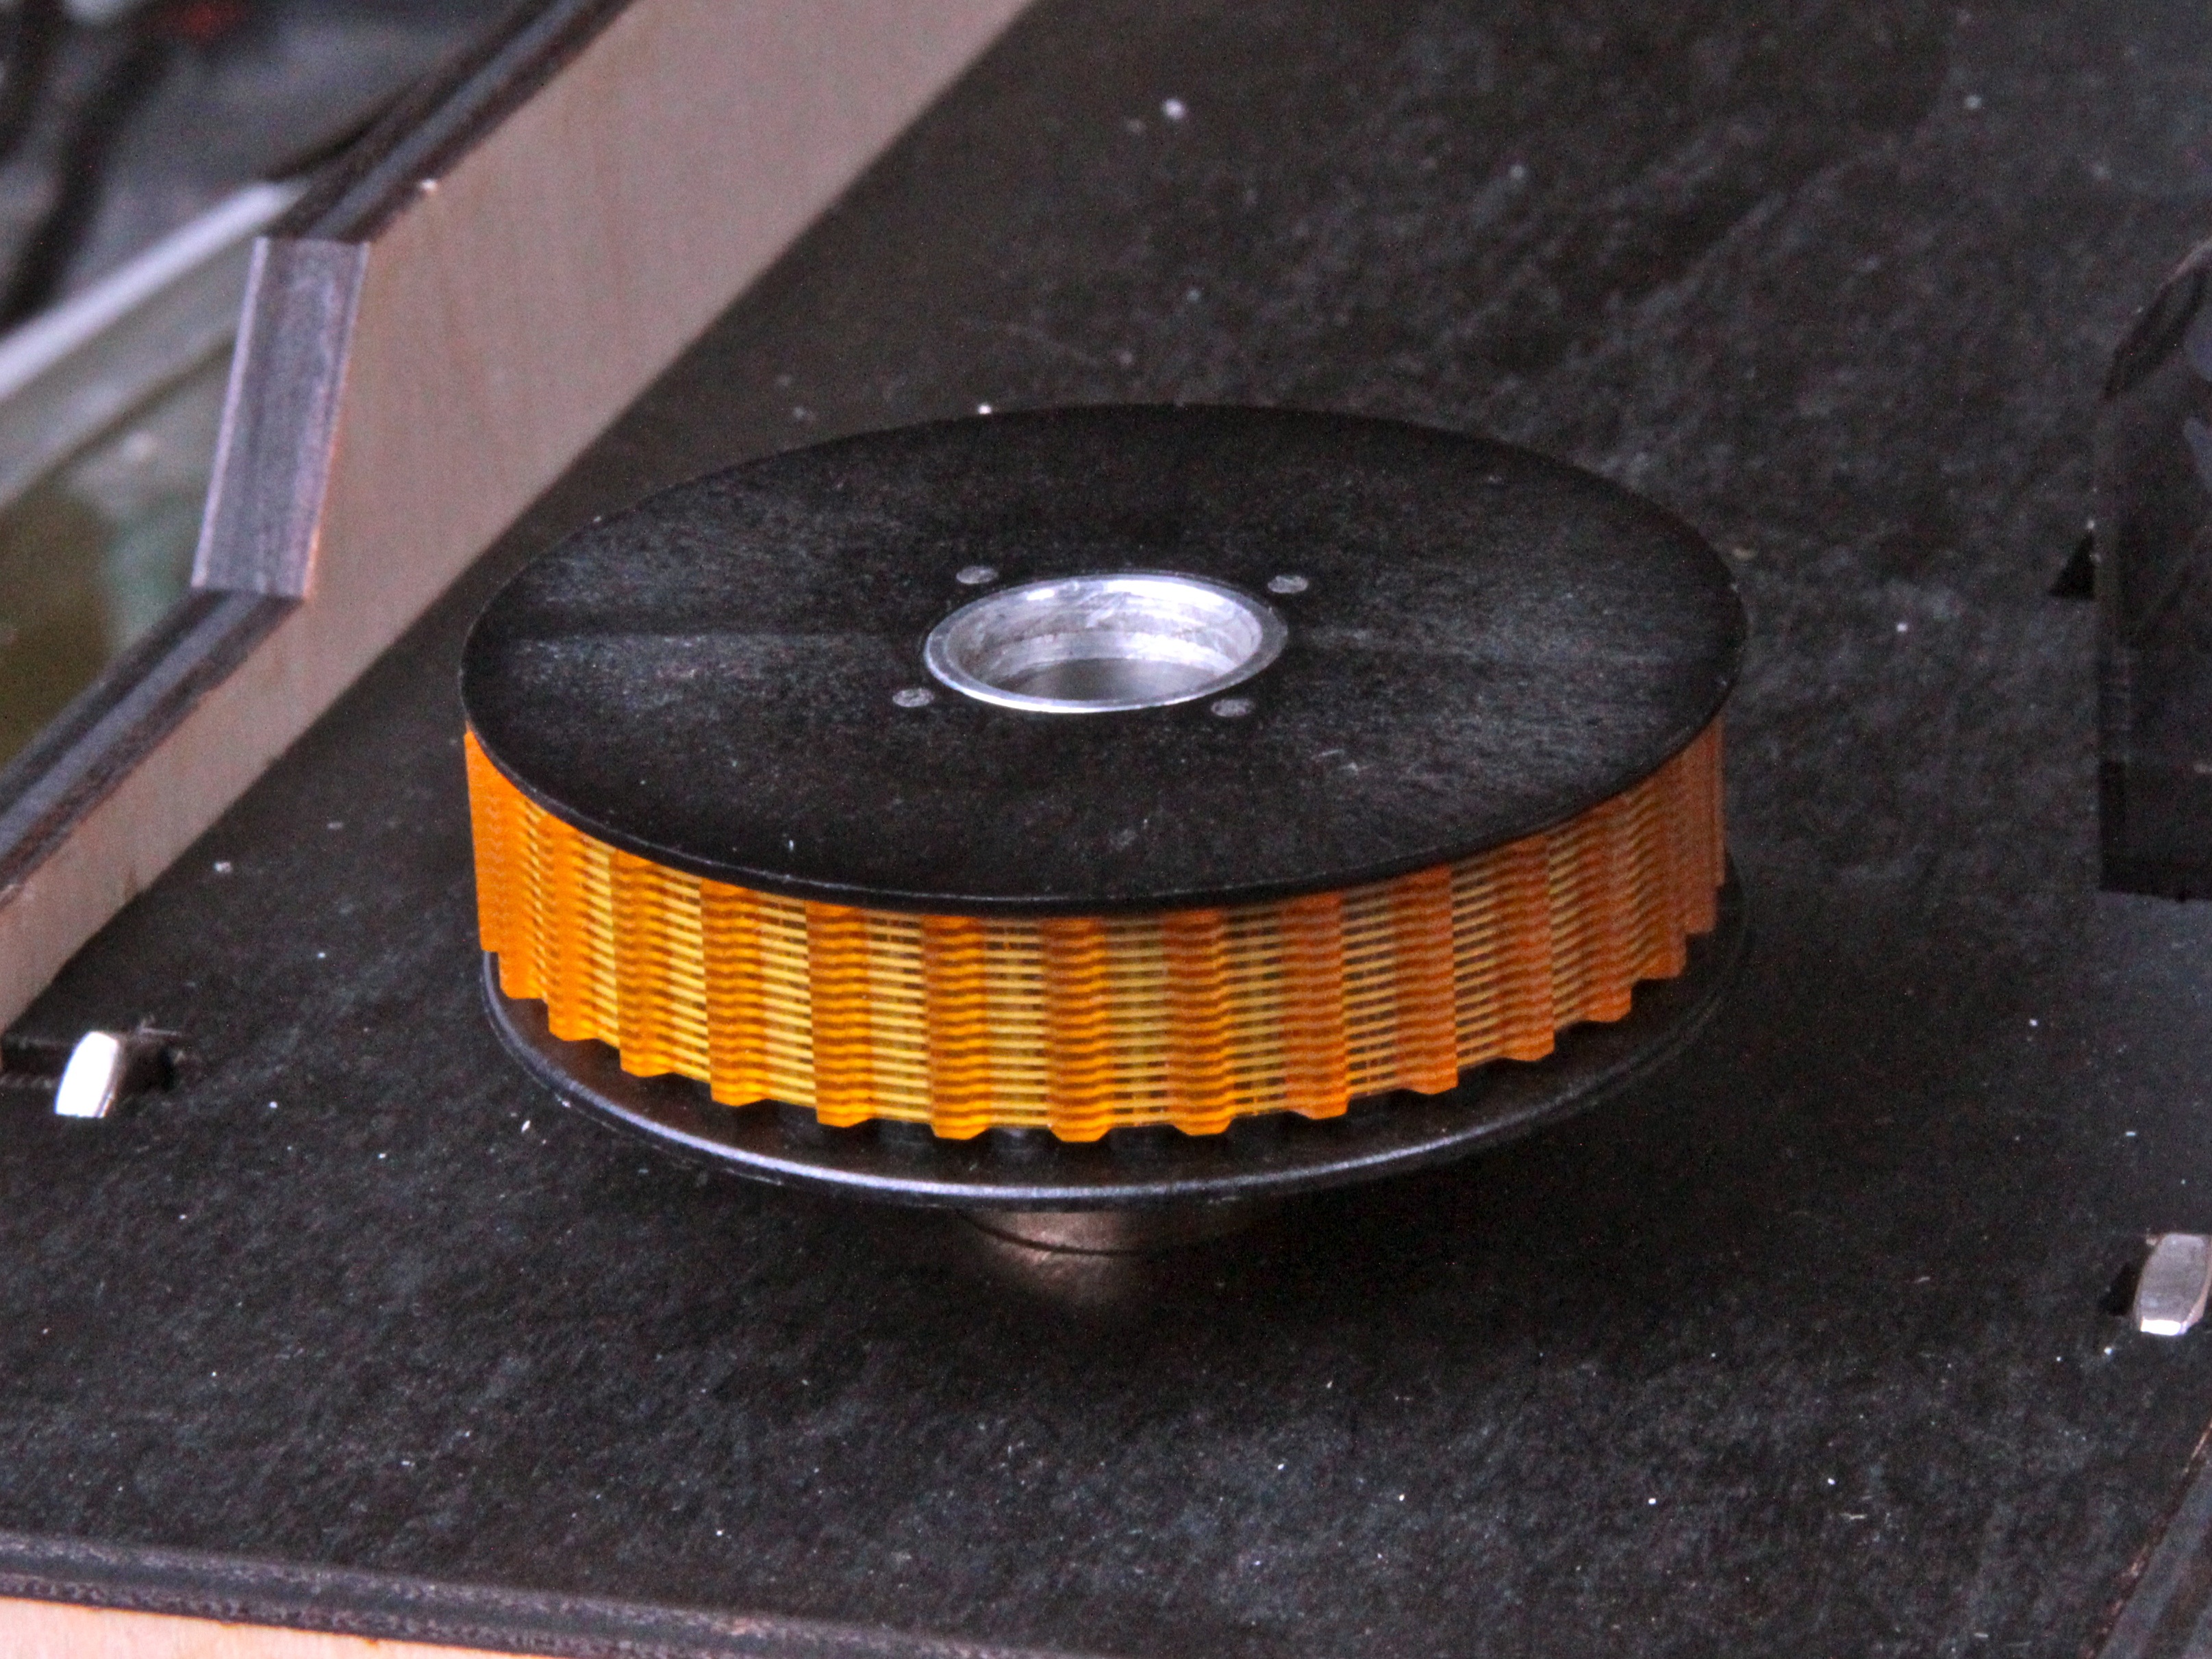
And some final touches. The top and bottom walls of the playfield need to be bouncy. Acrylic is not. At the surplus shops, we found some beryllium copper finger strip– the sort of thing that is used for providing flexible EMI shielding near covers of instruments and computer cases. It’s all kinds of springy, and can be glued in place with tough epoxy–that makes the walls remarkablyelastic.
The knobs on both sides get a neat rubber grip– made from an old double-sided timing belt and pulley, and finally we add the ball– a 1 1/4″ steel ball bearing.
And it’s a wrap. What fun!

Awesome! I remember when Pong first came around, I looked at it as ping pong on a TV screen (and it cost a quarter- way more than a game of pool). But later when air hockey came to the arcades, I figured that was the closest thing we’ll get to real-world Pong.
Air hockey… good idea. Maybe we should build another version based on that. :)
—
Windell H. Oskay
drwho(at)evilmadscientist.com
http://www.evilmadscientist.com/
One Up to the Air Hockey!
My parents have a clockwork pong game sitting around somewhere. It was a little handheld thing that you wind up, and a light would start moving back and forth. The path curved as it moved, and you had to hold down the right one of three buttons on your end to make it bounce back. If you didn’t, it would stop and you had to push a button to release it. Score was kept by turning knobs.
The only electronic part in it was the LED that lit up.
The whole thing was black plastic, and designed to look like an electronic game. I think it would be a great thing to tear apart to recreate the design in wood and brass with exposed mechanisms.
This mechanical Pong type game was called "Blip" and it was made by Tomy toys. I have one somewhere, the LED is burned out (or maybe it’s desoldered?).
Tomy had a lot of semi-electro-mechanical toys like this in the 80’s, the favourite toys that I had (or wanted) when I was a kid were all made by Tomy: the Atomic Pinball, which worked on a single motor with a lot of gears and things that would activate the bumpers and the score counter, the Armatron robotic arm, which again worked with a single motor, with mechanical joysticks that would move gears that would make each part of the arm move. They also had a few other mostly mechanical games like the Blip that would reproduce a video-game-like experience with mostly gears and motors.
I’ve always been fascinated with electromechanical reproductions of video-games like this Pong machine.
I’ve been trying to find a way to make an electromechanical Pac-Man game. The fundamental problem with a mechanical Pac-Man has to do with the fact that to make the characters move you need some arms coming from the side (on a belt or something) that connect to Pac-Man and each ghost, but each arm would limit the movement of the others.
I still have an Armatron robotic arm. It still works. It originally came with some accessory pieces that you had to pick up and stack using the arm. I miss placed the accessory pieces, but have kept the arm.
It is still interesting to play with from time to time.
very nice. You need to make the bumper surface curved so that the place where the ball hits it effects (predictably) the direction the ball goes off in, just like in the game. Also making the board peak in the middle and slope off to either side would prevent the ball getting lost, although it would hurt the pong-like linearity of motion. Great build though!
The paddle surfaces *are* curved– each is a 90-degree arc section.
We do need to turn up the power a bit to the paddles. Not sure about tilting the game board– maybe….
—
Windell H. Oskay
drwho(at)evilmadscientist.com
http://www.evilmadscientist.com/
While you have curved the paddles, your solenoid is not pushing the surface forward but rather "opening" the paddle like a hinge. This makes it impossible for the angle of the paddle to be transferred to the ball properly. You need to glue the curved surface directly to the solenoid instead of the current hinged design. Just a thought.
It’s pretty awesome btw.
Also some more ideas of improvment…..
There are these "rolling eyeballs" you can get at halloween. They are a weighted ball suspended inside a clear shell so that the eye is always looking up even if it is in motion. You could make/hack one of those, only a black inner ball with a white square on top. This would replicate the look of the original ball. In pong, everytime the ball is successfully hit the speed gets higher. You could replaite this with a bit of circuitry that increases the voltage sent to the paddles with each hit and resets when the ball drains. Also the upper/lower walls in pong not only bounced the ball, but added speed, so a low powered solenoid in those might be nice.
That angle is pretty small, and it’s constrained to stay on the table top by gravity. If you want to be picky at that level, the suggestion of pushing with a curved surface in one constant direction is no good either– it might actually be worse. Rather, the pushing needs to be in the direction that the ball is going, or for symmetry on the normal to the curve at the point of incidence.
This is actually a solved problem in pinball machines– the active bumpers push radially outwards in all directions with a ring– this would work much better.
—
Windell H. Oskay
drwho(at)evilmadscientist.com
http://www.evilmadscientist.com/
This looks like a lot of fun!
I believe the word for "2D knurling" you’re looking for is "reeding." That’s what it’s called on coin edges, at least.
Thanks!
Yes, "reeding" sounds about right. Although, reeding on a coin is usually 3D in nature, an example of knurling, in fact. Is it still reeding as the thickness goes to zero?
—
Windell H. Oskay
drwho(at)evilmadscientist.com
http://www.evilmadscientist.com/
What about a sensor on the top and bottom edges of the paddle to detect when the ball passes back? Tx eye on the paddle and Rx on the top and bottom edges; beam break means ball passed and the other player’s score increments.
We’ll probably do something like this to activate the solenoids rather than use the switch… As for scoring, we had figured to tilt the endzones to that the ball rolls to activate a switch. But it turns out that we *really like* the mechanical score wheels– it would be easy, but a big loss for design, to replace it with a giant LED score board.
—
Windell H. Oskay
drwho(at)evilmadscientist.com
http://www.evilmadscientist.com/
I agree that a giant LED scoreboard would be a loss for design. However, an electromechanical system that turns the score wheel would be really cool – conveniently, the edges of the score wheel are knurled so you could do something like that (and was actually what I expected that you had done when I saw the pictures of the score wheel before reading the text).
In the game Little Big Planet, someone made a giant calculator, and 7 segment displays are created using "pistons" that move a segment in and out of a window. It’d be extraordinarily complex, but what about something like that. Small, low powered solenoids or small servos sliding segments into and out of the segment windows. A simple counter and BCD converter would select the servo/solenoid positions as the ball was shot out of the field of play. It’d cost more than the wheel, even automating the wheel, but the mechanical wow factor would actually be increased significantly I think.
Another option would be to create a number "belt" that would spin on a pair of rollers (for each display). It’d give a bit more room for higher counts (0-9). If you want to reach teens, then add a flip over 1 digit. Just a "flag" that can be flipped into or out of view with a small lever or solenoid. If you want to avoid a soft plastic or paper spool for the numbers, you could create tiles that could be linked together like a chain, and then turn the reel with geometrically shaped rollers to match the tile size.
This is AWESOME!!!!
Maybe you could use 7 segment LED displays for scoring in the next revision. (I looked at pictures and didn’t read, so don’t shoot me if any of this has already been mentioned) Also, a proximity sensor on each "paddle" pointed straight down where the ball would be so that the plungers actuate even if the ball does not touch the paddle with any force.
Great job. I’m envious. ;)
That’s great!
Now, if you were truly mad, you might try building Barbarian Invaders.
Nice Game.. could kill hours with that :)
You could as an improvement add two spirit levels (horizontal and vertical) along the two borders of the main table and make some kind of arrangement to "level" the plan in order to get a perfect surface.
Regards
Amol
If you slightly bent the table top, the ball won’t get stuck.
Hi, one questions, where do you cut the wood (furniture) ? Ponoko ?
We did this one ourselves, but Ponoko is a fine option as well. Also Pololu, and a few others. Don’t forget TechShop either!
—
Windell H. Oskay
drwho(at)evilmadscientist.com
http://www.evilmadscientist.com/
Veiwers of ReBoot might remember that, before Phong would give advice, he required that the one seeking advice beat him in a game of physical pong.
Life is much better inside computers…except the virals are always causing problems, tears appear out of nowhere, Users keep inputting games…yes, you. How dare you beat the CPUs at solitaire. (Sorry if you don’t know the show…)
video archive: http://purplemagpie.0catch.com/reboot/archive.html%5D
just pong (after game): http://www.youtube.com/watch?v=IdZB2O0l0zk&feature=player_embedded#
I was reminded of this awesome LEGO version of Donkey Kong I read about a while back…
http://wrench.vib.org/lego/donkeykong/
You forgot one of the most important part… level the table.
Congratulations on creating a remarkable tribute to my original game. It’s great to see the old game re-created in a different technology. One important thing you left out was the coin slot.
Keep up the good work and thanks for remembering Pong.
Nolan? :) Thanks for making the legend and legacy of Atari !
congratulations to EMScientist for a cool Pong clone!
Rob
You’ve truly lost your mind!!!!!!!!!!!!!! This is over the top. Too evil. HOLY ******************
-Steven
Cool! Now let’s see someone build a Tabletop BreakOut!
Hi, I happen to have two of these table top style coin slotted machines that have been sitting in my garage for 25 years now. I believe at least one of them worked. I also have a bomb dropper arcade machine that comes from the same era. It only has one button to press, when the bomber is over a target. It does work and only lacks the square red button. If there is any substantial interest, I’ll dig them out and assess them