


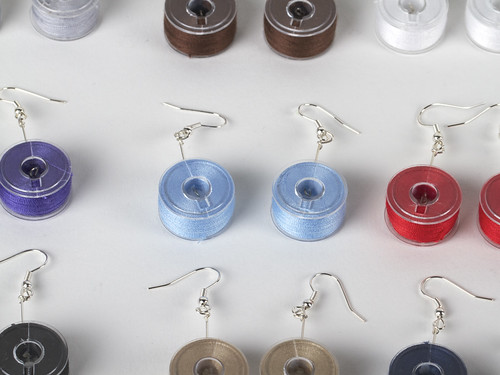
If you play with sewing machines and like to hang things from holes in your ears, have we got the project for you! These easy-to-make bobbin earrings are very inexpensive, take only a few minutes each, and can be made in practically any color.
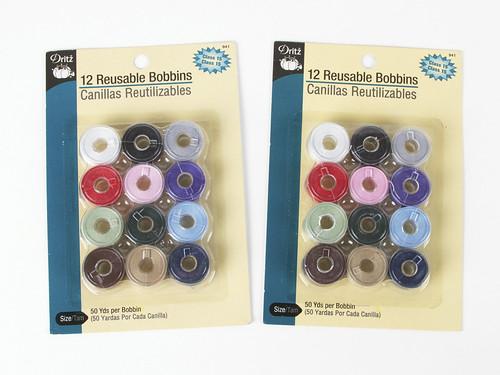
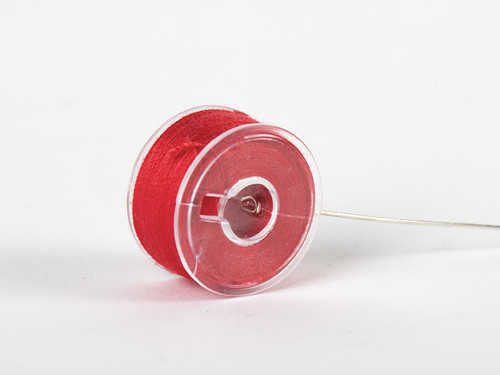
First— and… surprise! —you’ll need some bobbins. You can wind your own or purchase pre-wound bobbins at your local sewing shop. These common packages come with 12 pre-wound bobbins, each with a different color of thread.
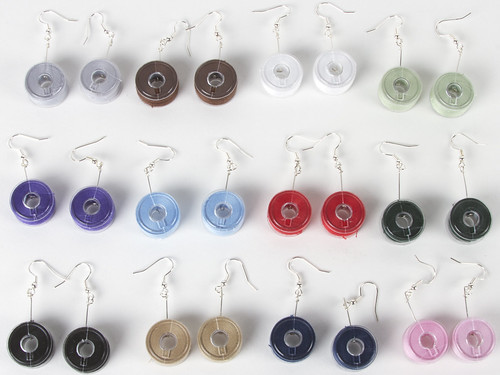
With two packs, you can make twelve different pairs of earrings, and have a match for every outfit.
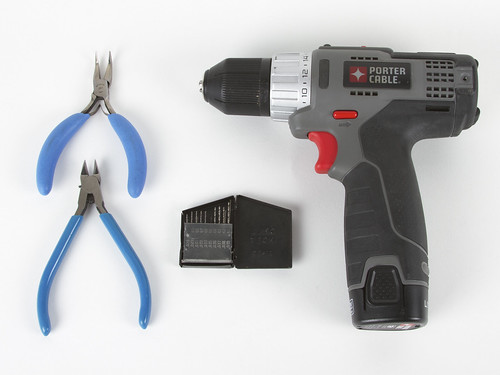
You’ll also need tools: needle-nose pliers, wire clippers, a skinny drill bit (we used a #61 bit, 0.039″ or 0.99 mm bit), and a pin vise or battery operated handheld power drill. And (not shown) thin CA (super) glue.

You’ll also need the appropriate findings: fish-hook style earwires and header pins. You can find these at most craft stores and at beading and gem shops.

Now, let’s get building. First, drill a hole through the side of the bobbin, starting at the middle of the thread on the side and then all the way through to the center. The safest way to do this is to drill through by hand, by mounting the drill bit in a pin vise and turning it by hand. However, that can take quite a while.
Another method— which must be approached with great care on such delicate parts —is to use a battery-operated handheld power drill with adjustable speed. Preferably one with a low-speed mode. And, if at all possible, gently mount the bobbin in a vise for this part, so that you don’t end up drilling into your fingers. (Do not use a plug-in drill for applications like this; it’s simply not safe.)
The thread acts a bit like a self-healing surface, so you may need to re-drill the hole a time or two before proceeding to the next step.
(Aside: we’re big fans of this fast-charging, compact, and most especially light-weight drill from Porter-Cable.)
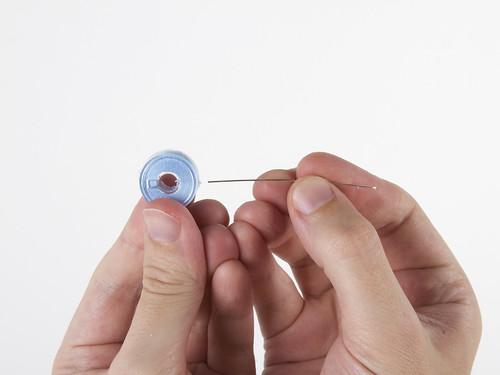
Guide the header pin into the hole. If you find this part difficult, re-read the part above about self-healing surfaces!
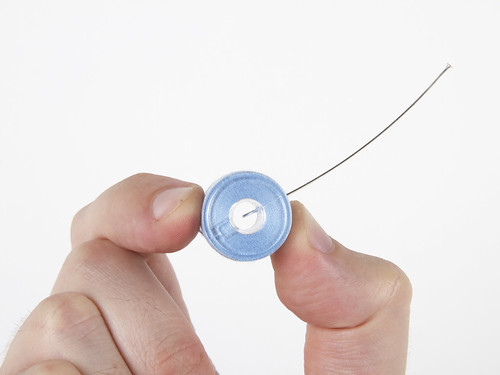
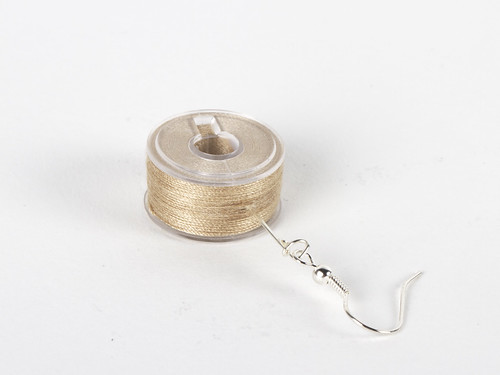
Here’s the header pin guided through the bobbin, poking into the center.

Using needle-nose pliers, bend the end of the wire back on itself to make a loop. A type like this with a bent tip is handy.
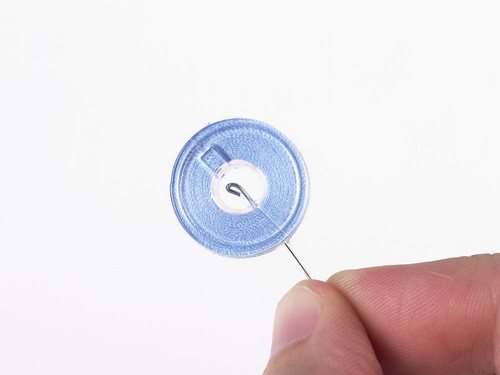
The loop will hold the wire end in place when the bobbin is hung from the wire.
For a less visible wire end, bend the loop at a 90 degree angle so that it will be hidden in the center of the bobbin.
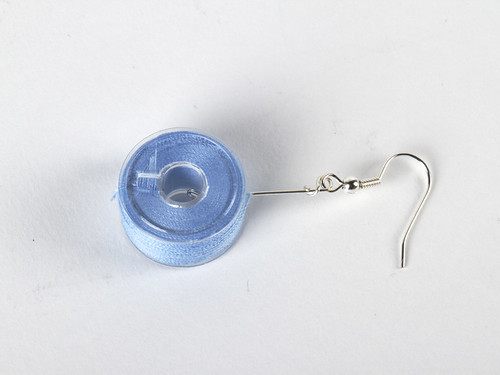
Next, attach the earring wire and clip away any excess length the header pin.
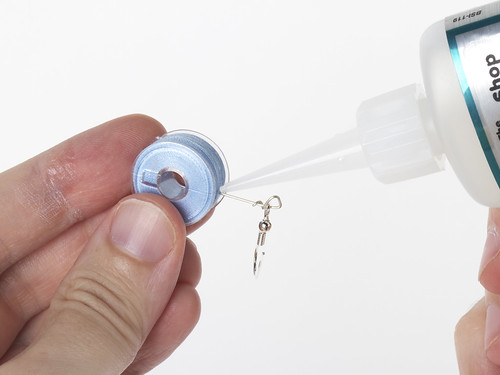
Finally, add a small drop of super glue (CA) at the base of the header pin to keep the threads from fraying. You may want to add a second drop of glue to the inside of the bobbin, to keep the other end of the wire fixed in place.
The drop of super glue may darken the threads a bit, but it will hold them in place quite reliably. It is less noticeable on some colors, like this beige thread.

Continue with a color for every occasion!

You could make a bigger loop and put a bead on it.
(I have an ancient hand drill. Beats a pin vise.)