


EXTERMINATE!!! EXTERMINATE!!! EXTERMINATE!!!
We Evil Mad Scientists like Halloween. A lot.
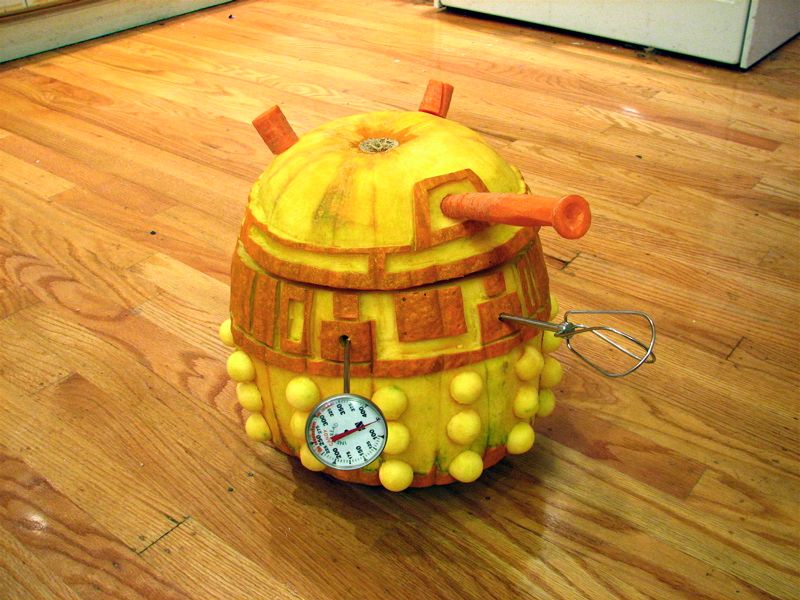
You might have already seen our old-school Cylon Jack-o-lantern. Here is another halloween electronics project, hopefully in time for you to make your own: It’s a radio-controlled robotic Dalek that can move around and turn its head. Oh, and did I mention that it’s a pumpkin?
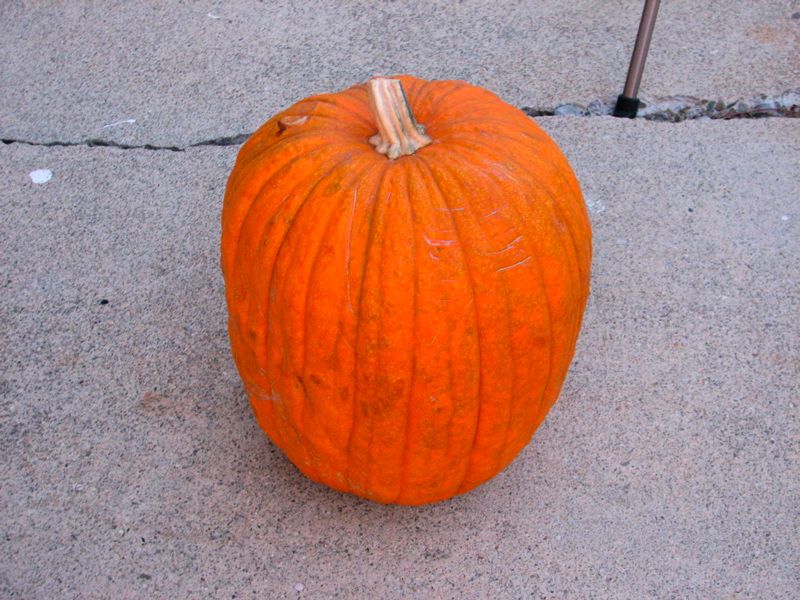
Here’s the victim, a standard size grocery-store pumpkin with a nice thick mottled skin. You might also see that it tapers down slightly; it’s slightly wider at the top than the bottom.
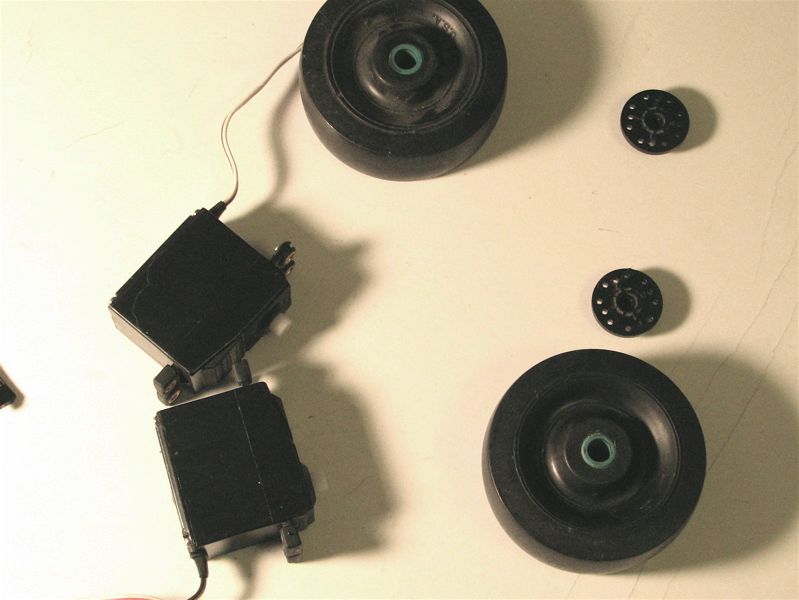
I went to a local junk shop and picked up two heavy rubber wheels, which will be the drive wheels. The wheels will mount to a couple of standard servo motors, shown for scale. I also picked up a cheap office-chair caster, which will be the third wheel.
We need a total of three motors; two drive motors and one to rotate the head. For each of these applications, I used a standard servo motor, modified for continuous rotation according to these instructions. The instructions suggest replacing the pot in the servo motor with a pair of fixed resistors. While I believe that that is (in principle) the best way to go, I was unable to make it work in several tries– probably just due to the poor tolerance on my resistors. So, I replaced the original 5k pots with minature trimpots like the one shown here. This is quite nice because you can easily trim the zero-point of your servo motor.
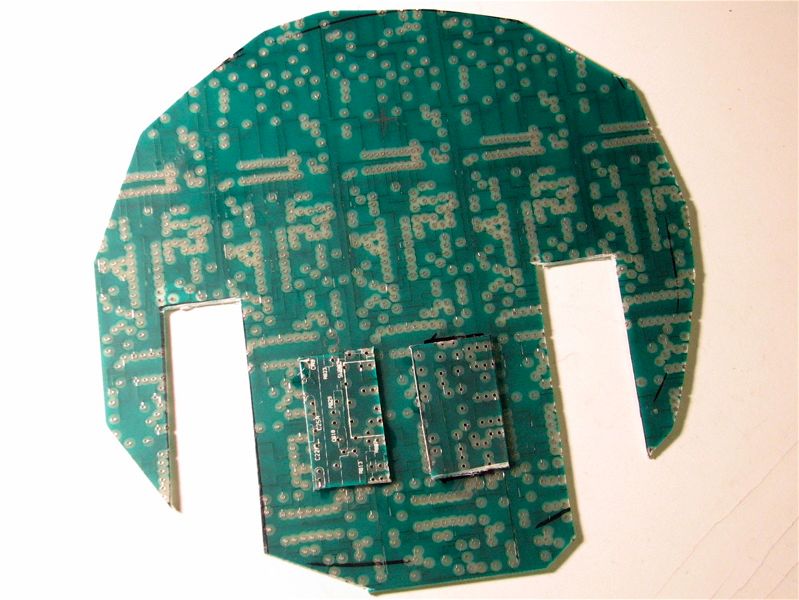

For the platform, I took a large and blank printed circuit board and cut it to shape. (Big tinsnips work quite well for this; hardly anything else short of a hydraulic shear works at all.) I drilled a couple of extra holes for wiring and for cable ties to hold the servo motors in place.
The wheels were glued to the round servo horns on the outputs of the two motors. This turned out to be the weak point in the whole system, as they had a tendency to fall off. The problem is this: the pumpkin is really heavy, which hadn’t really occurred to me when I built this part. The servo motors are actually great for this; they are strong and fast, but in this particular case, they need to turn a shaft, not just the wheel itself.
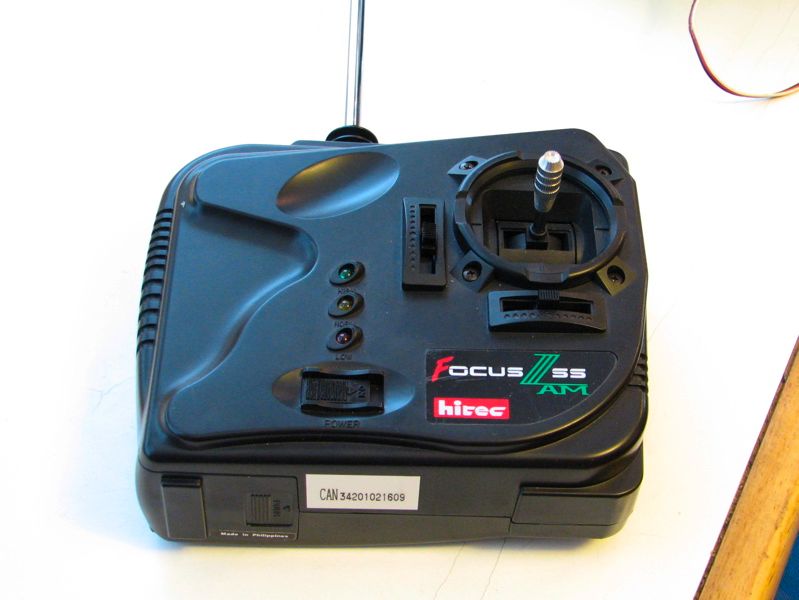
Here is the radio system. It’s a Hitec Focus III single-stick system. It has a third control channel on the back (not visible). One of the nice features that it has is servo mixing, intended for use in certain types of model airplanes. Servo mixing changes the thrust and steering mode from that of a radio-control car (one motor controls thrust, one controls direction) to that of a radio-control tank, where both motors are involved in thust and steering control. (With servo mixing enabled, the left-right and up-down controls are summed and differenced such that pushing the stick in the “up” direction causes both servos to move in opposite direction, pushing the robot forward. Similarly, pushing the control stick left or right causes the robot to turn. The third channel of the radio control system is not affected by the mixing option.)
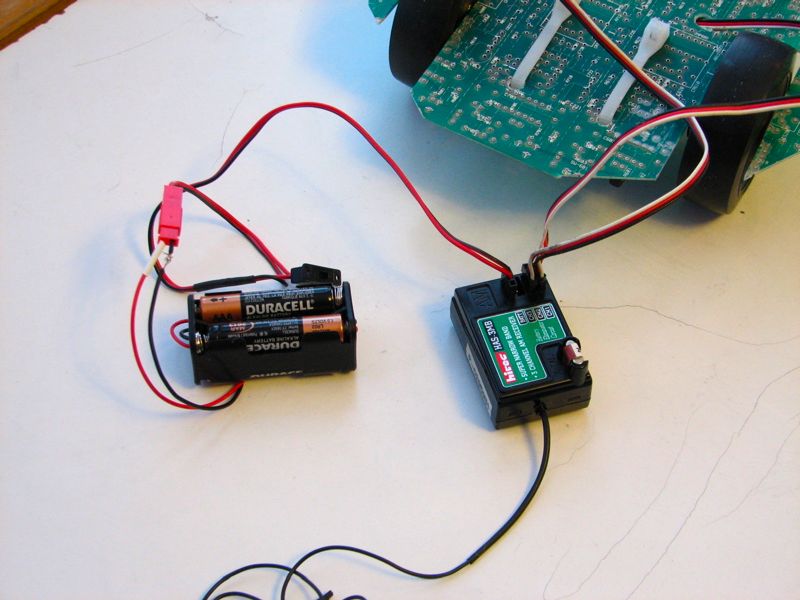
The receiver and the three servo motors are powered by four AAA batteries. For longer run times, you can of course use larger batteries.
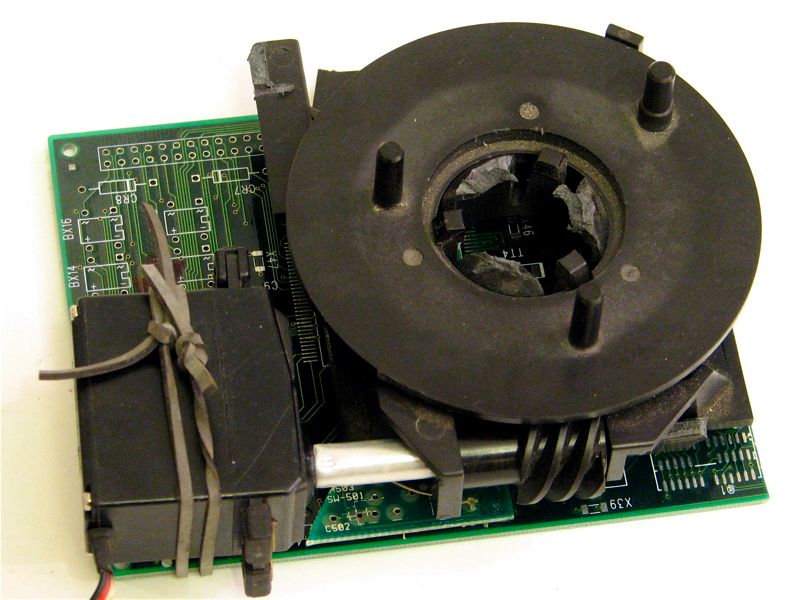
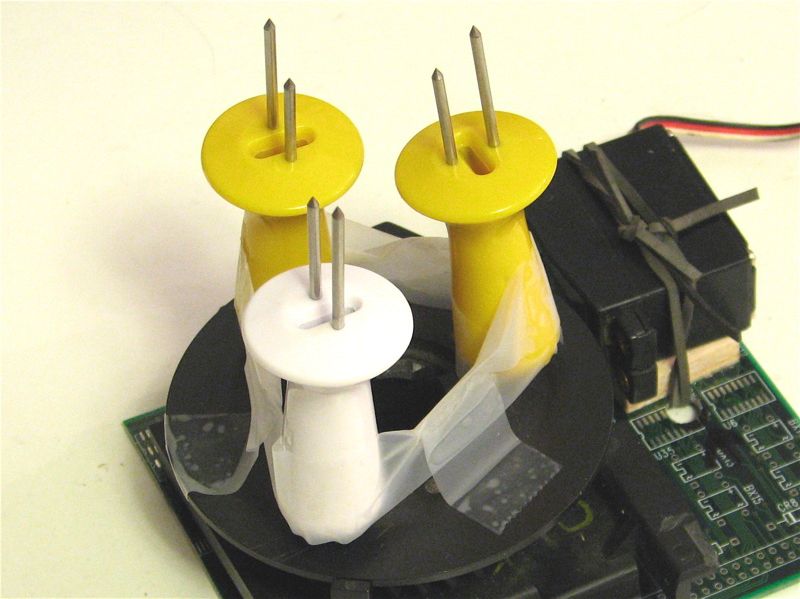
The third servo motor controls the rotation of the head of the Dalek. The actual mechanism is a large plastic bearing with worm-gear mechanism; it was originally the system to rotate the pen carousel on an old HP drafting plotter. I adapted the drive shaft to be turned by the third servo motor, which was also modified for continuous rotation.
One of the challenges was how to adapt this device to hold the heavy lid of the pumpkin. I opted to impale the lid on a few corn holders, so I attached them to the carousel as you see here.

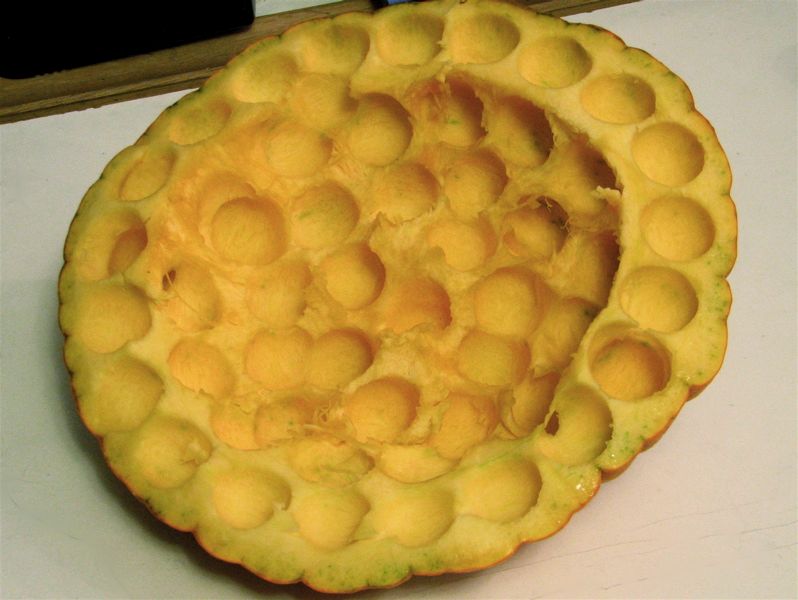
Because of the shape of the pumpkin, we decided to carve it upside down. The “head” of the Dalek that you see here is actually the bottom of the pumpkin. We took the “lid” of the pumpkin, which has the stem, and cut it up like crazy with a melon baller, as you can see on the right.
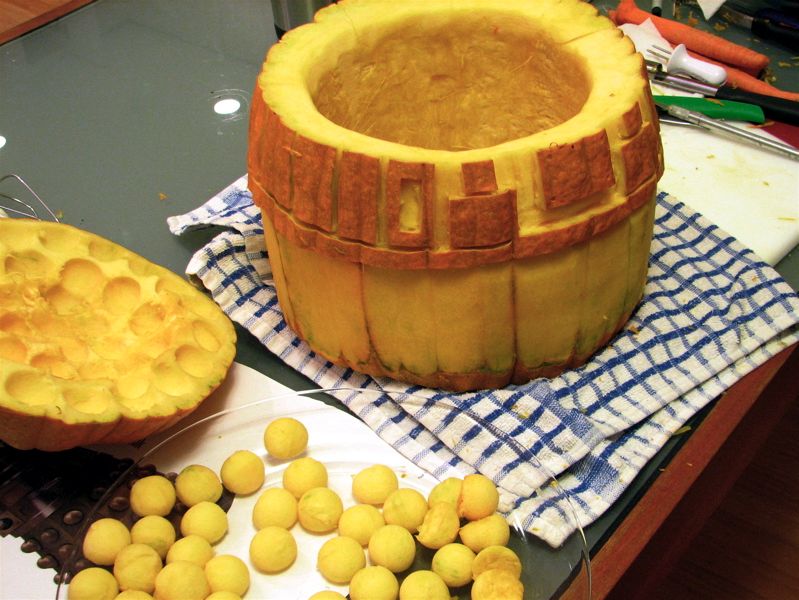
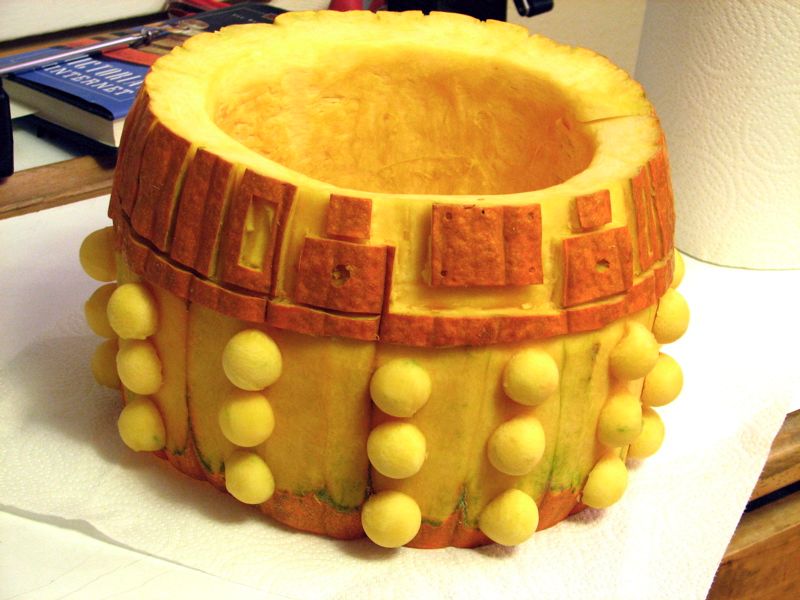
Here is the most time-consuming stage of the build: Carving the pumpkin. I cut fourteen flat faces into the lower sides of the pumpkin. In doing so, I removed much more material from the pumpkin than I did during the stage of removing the seeds!After getting the shape correct, the punpkin balls (well, hemispheres) were attached with toothpicks.
Final touches: The “eye” and two “ears” are pieces of carrot. Instead of the toilet plunger and paint rollers that the originals had, I used a hand-mixer beater paddle and a candy thermometer. I think that they both work pretty well. Overall, however, the shape is almost too round to be recognized as a Dalek. But, we are somewhat constrained by the shape of the pumpkin. With a bit of work, you could make a pretty good R2D2 by the same method. I hope someone else does that because I’m not planning to. =)
Now: Pimp your Dalek! Add one of those blinky lights that indicates when its talking. Download some Dalek voices, and put them inside the pumpkin with a speaker. The possibilities are endless!
We also made a short movie of our Dalek moving around a bit. You can see that the alignment of the head rotation motor is rather poor, but other than that it seems to work admirably.
Watch it on YouTube.
Finally a few links, as long as we’re on the subject of Daleks. Check out the Dalek Jack-o-lantern, Dalek troops, the Snow Dalek, and lots of cool Lego Daleks. If you do download the Dalek voices from the BBC to put in your pumpkin, note that Daleks prefer iPods.
You can find more pumpkin projects in our Halloween Project Archive.

AHHH, It can move around and turn its head but can it Levatate?
Sadly, no.
However, we do have some good ideas about how to
make that happen. =)
—
Windell H. Oskay
drwho(at)evilmadscientist.com
http://www.evilmadscientist.com/
No, there’s nothing sad about that. Daleks should not levitate. They have no need to climb stairs.
That’s what Ogrons are for.
–Megan
Bet it’s still useless across a ploughed field!
Wow, you humans! You’re so ingenious. I mean look at the labor you’ve put into the endeavor! It’s incredible! I mean, really! Look at it!
Certainly gave me a fright upon spying it.
Now as to some of these hair-brained responses, well, to that I can only say, Time-lock for you!
Brilliant!
Instead of the thermometer, you might want to look at one of these….
http://igearusa.com/unplstforipi.html
Ha!
Windell H. Oskay
drwho(at)evilmadscientist.com
http://www.evilmadscientist.com/
ILLUMINATE! ILLUMINATE! ILLUMINATE!
That is fabulous, great work!
I love this pumpkin! If I were more technologically inclined, I would probably try it myself. :) I’ve included your link on my small site about Doctor Who templates for pumpkins. Hope you don’t mind!
Doctor Who Pumpkin Patterns
Now I want to fight it with a Tardis pumpkin!