


 Last year I published a project for a no sew iPhone cozy, which attracted a fair amount of trash talk for being what it is. And here it is, still going strong after a year of daily use. It finally started to wear out, and not because the fused seams were weak, but because the edges of the iPhone finally wore through the fabric.
A quick remake was in order. As long as we’re making a new one, it’s a good opportunity to demonstrate the process.
Last year I published a project for a no sew iPhone cozy, which attracted a fair amount of trash talk for being what it is. And here it is, still going strong after a year of daily use. It finally started to wear out, and not because the fused seams were weak, but because the edges of the iPhone finally wore through the fabric.
A quick remake was in order. As long as we’re making a new one, it’s a good opportunity to demonstrate the process.
 We’ll skip the structural design of that project, since we’ve already covered it, but there are some interesting tricks for making the decorative pieces. The obvious approach would be to fuse the webbing to cut out shapes of fabric, but a better approach is to first fuse the webbing to the fabric.
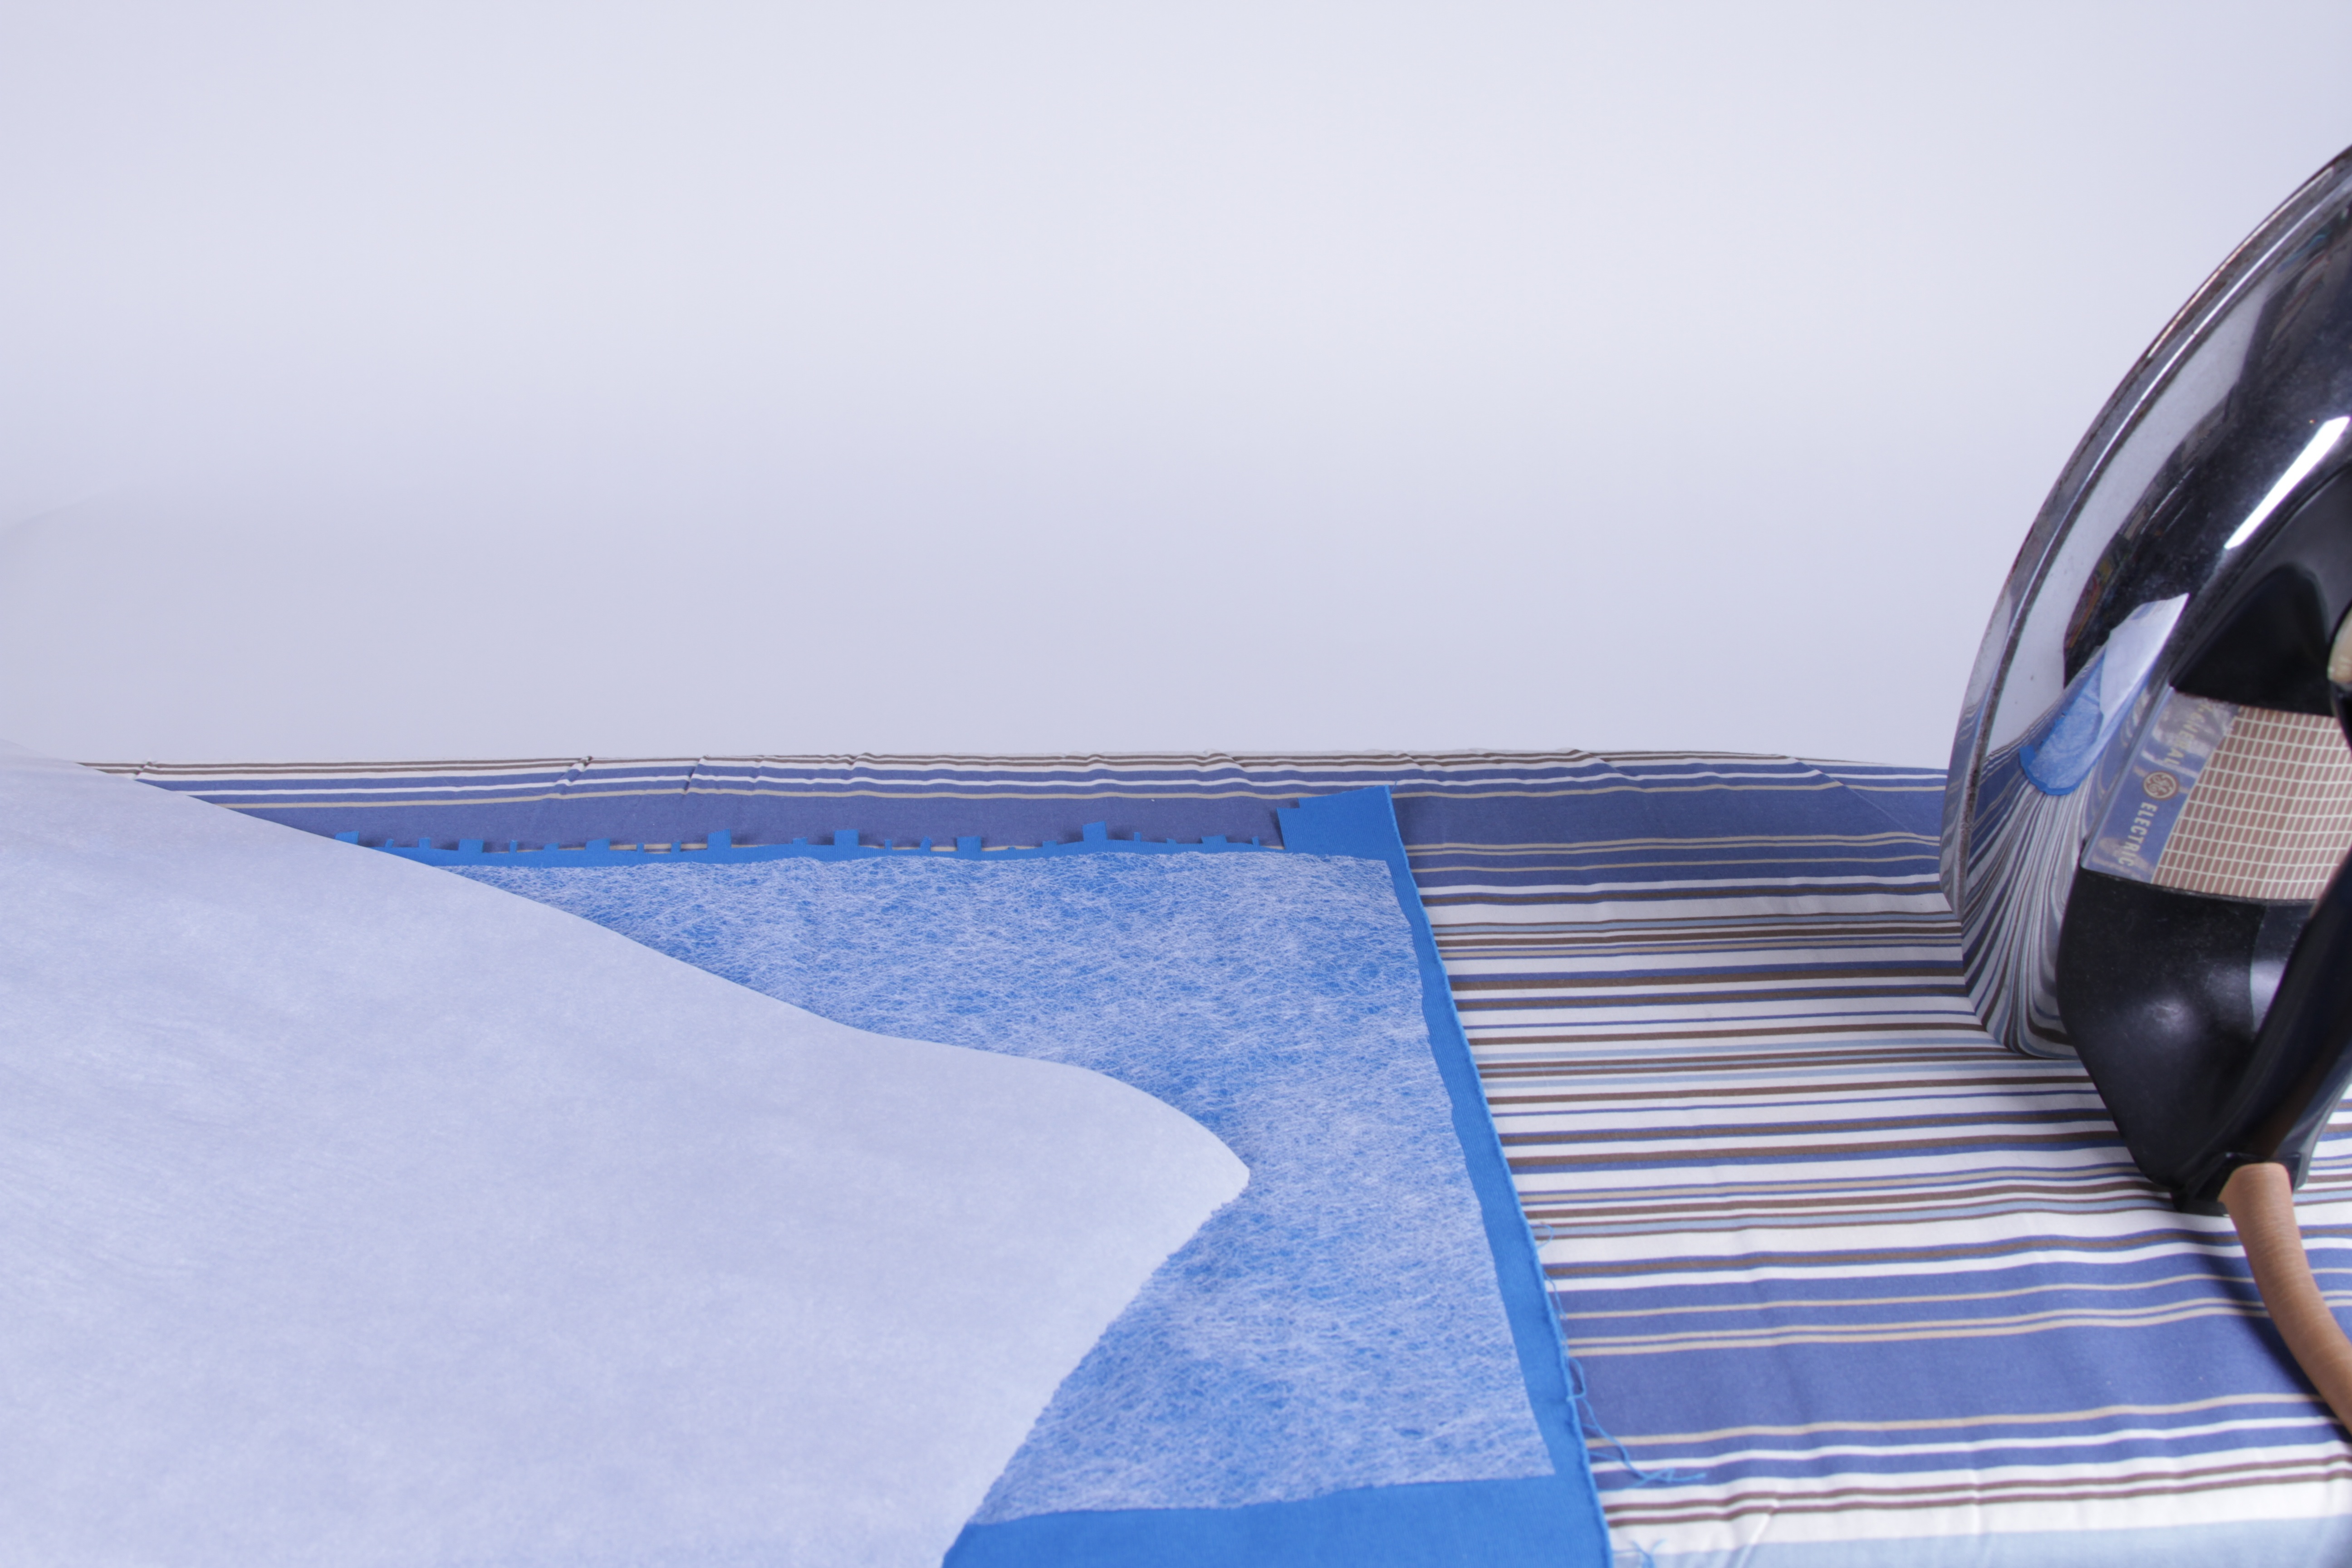
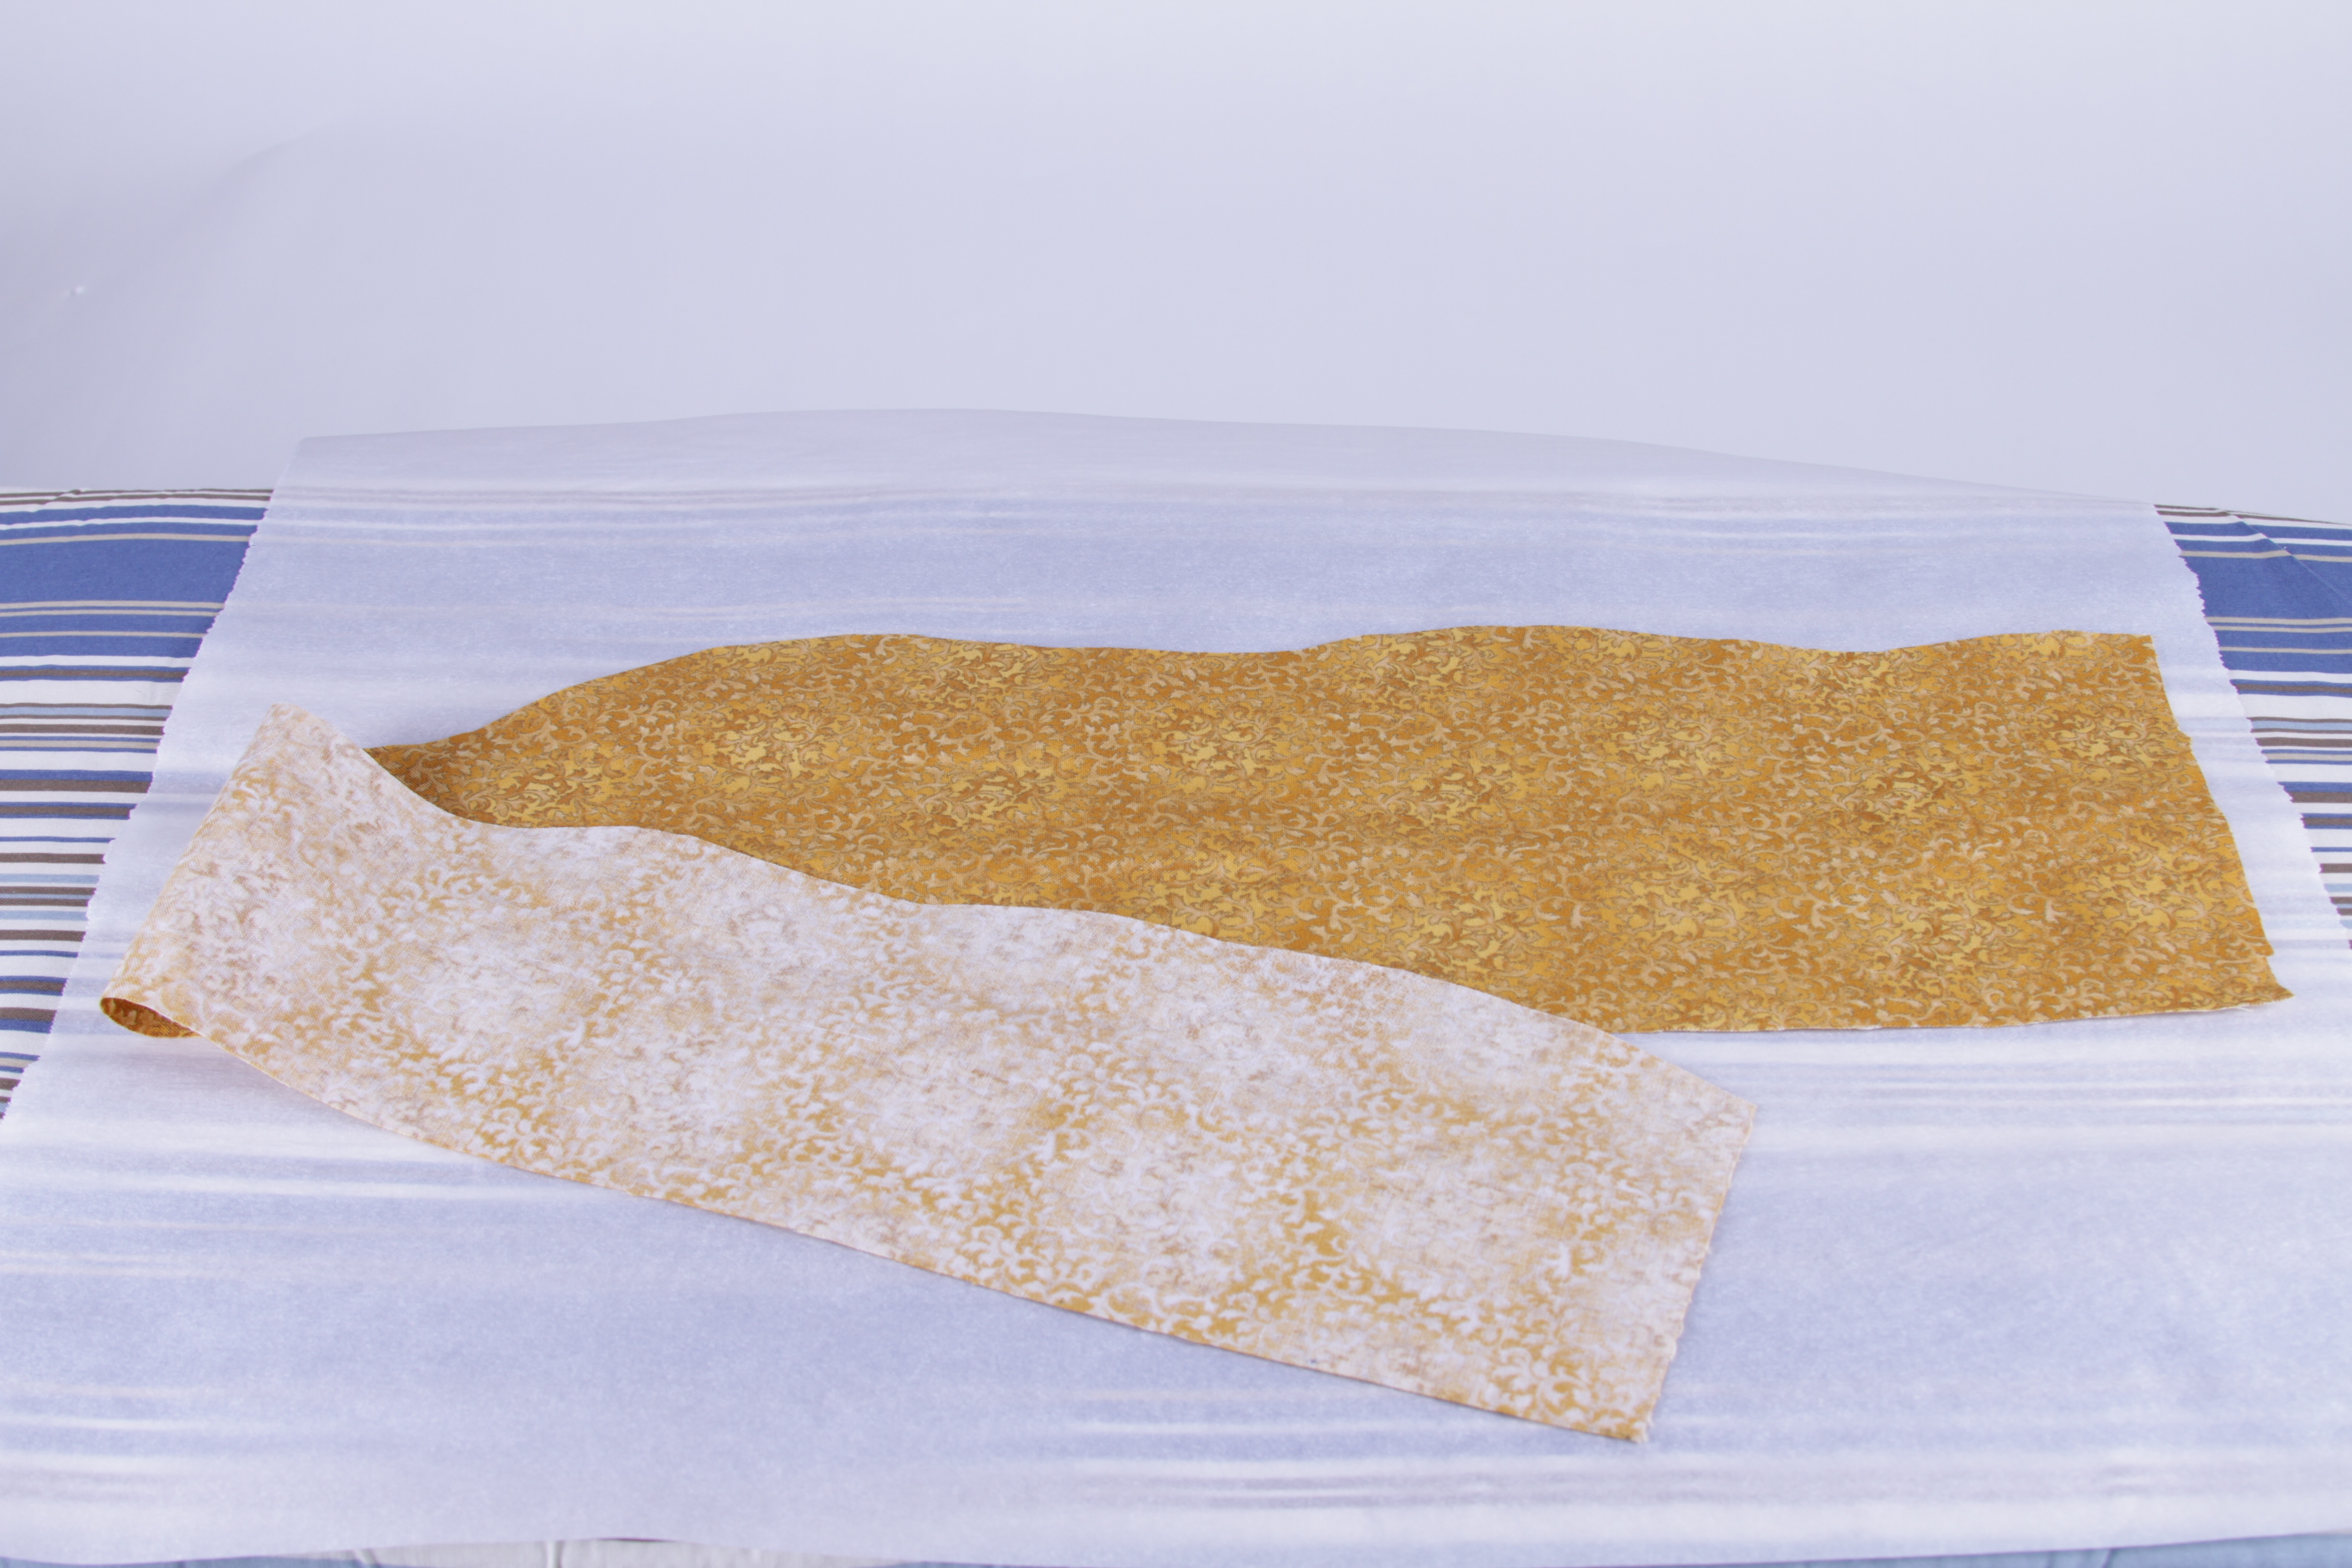
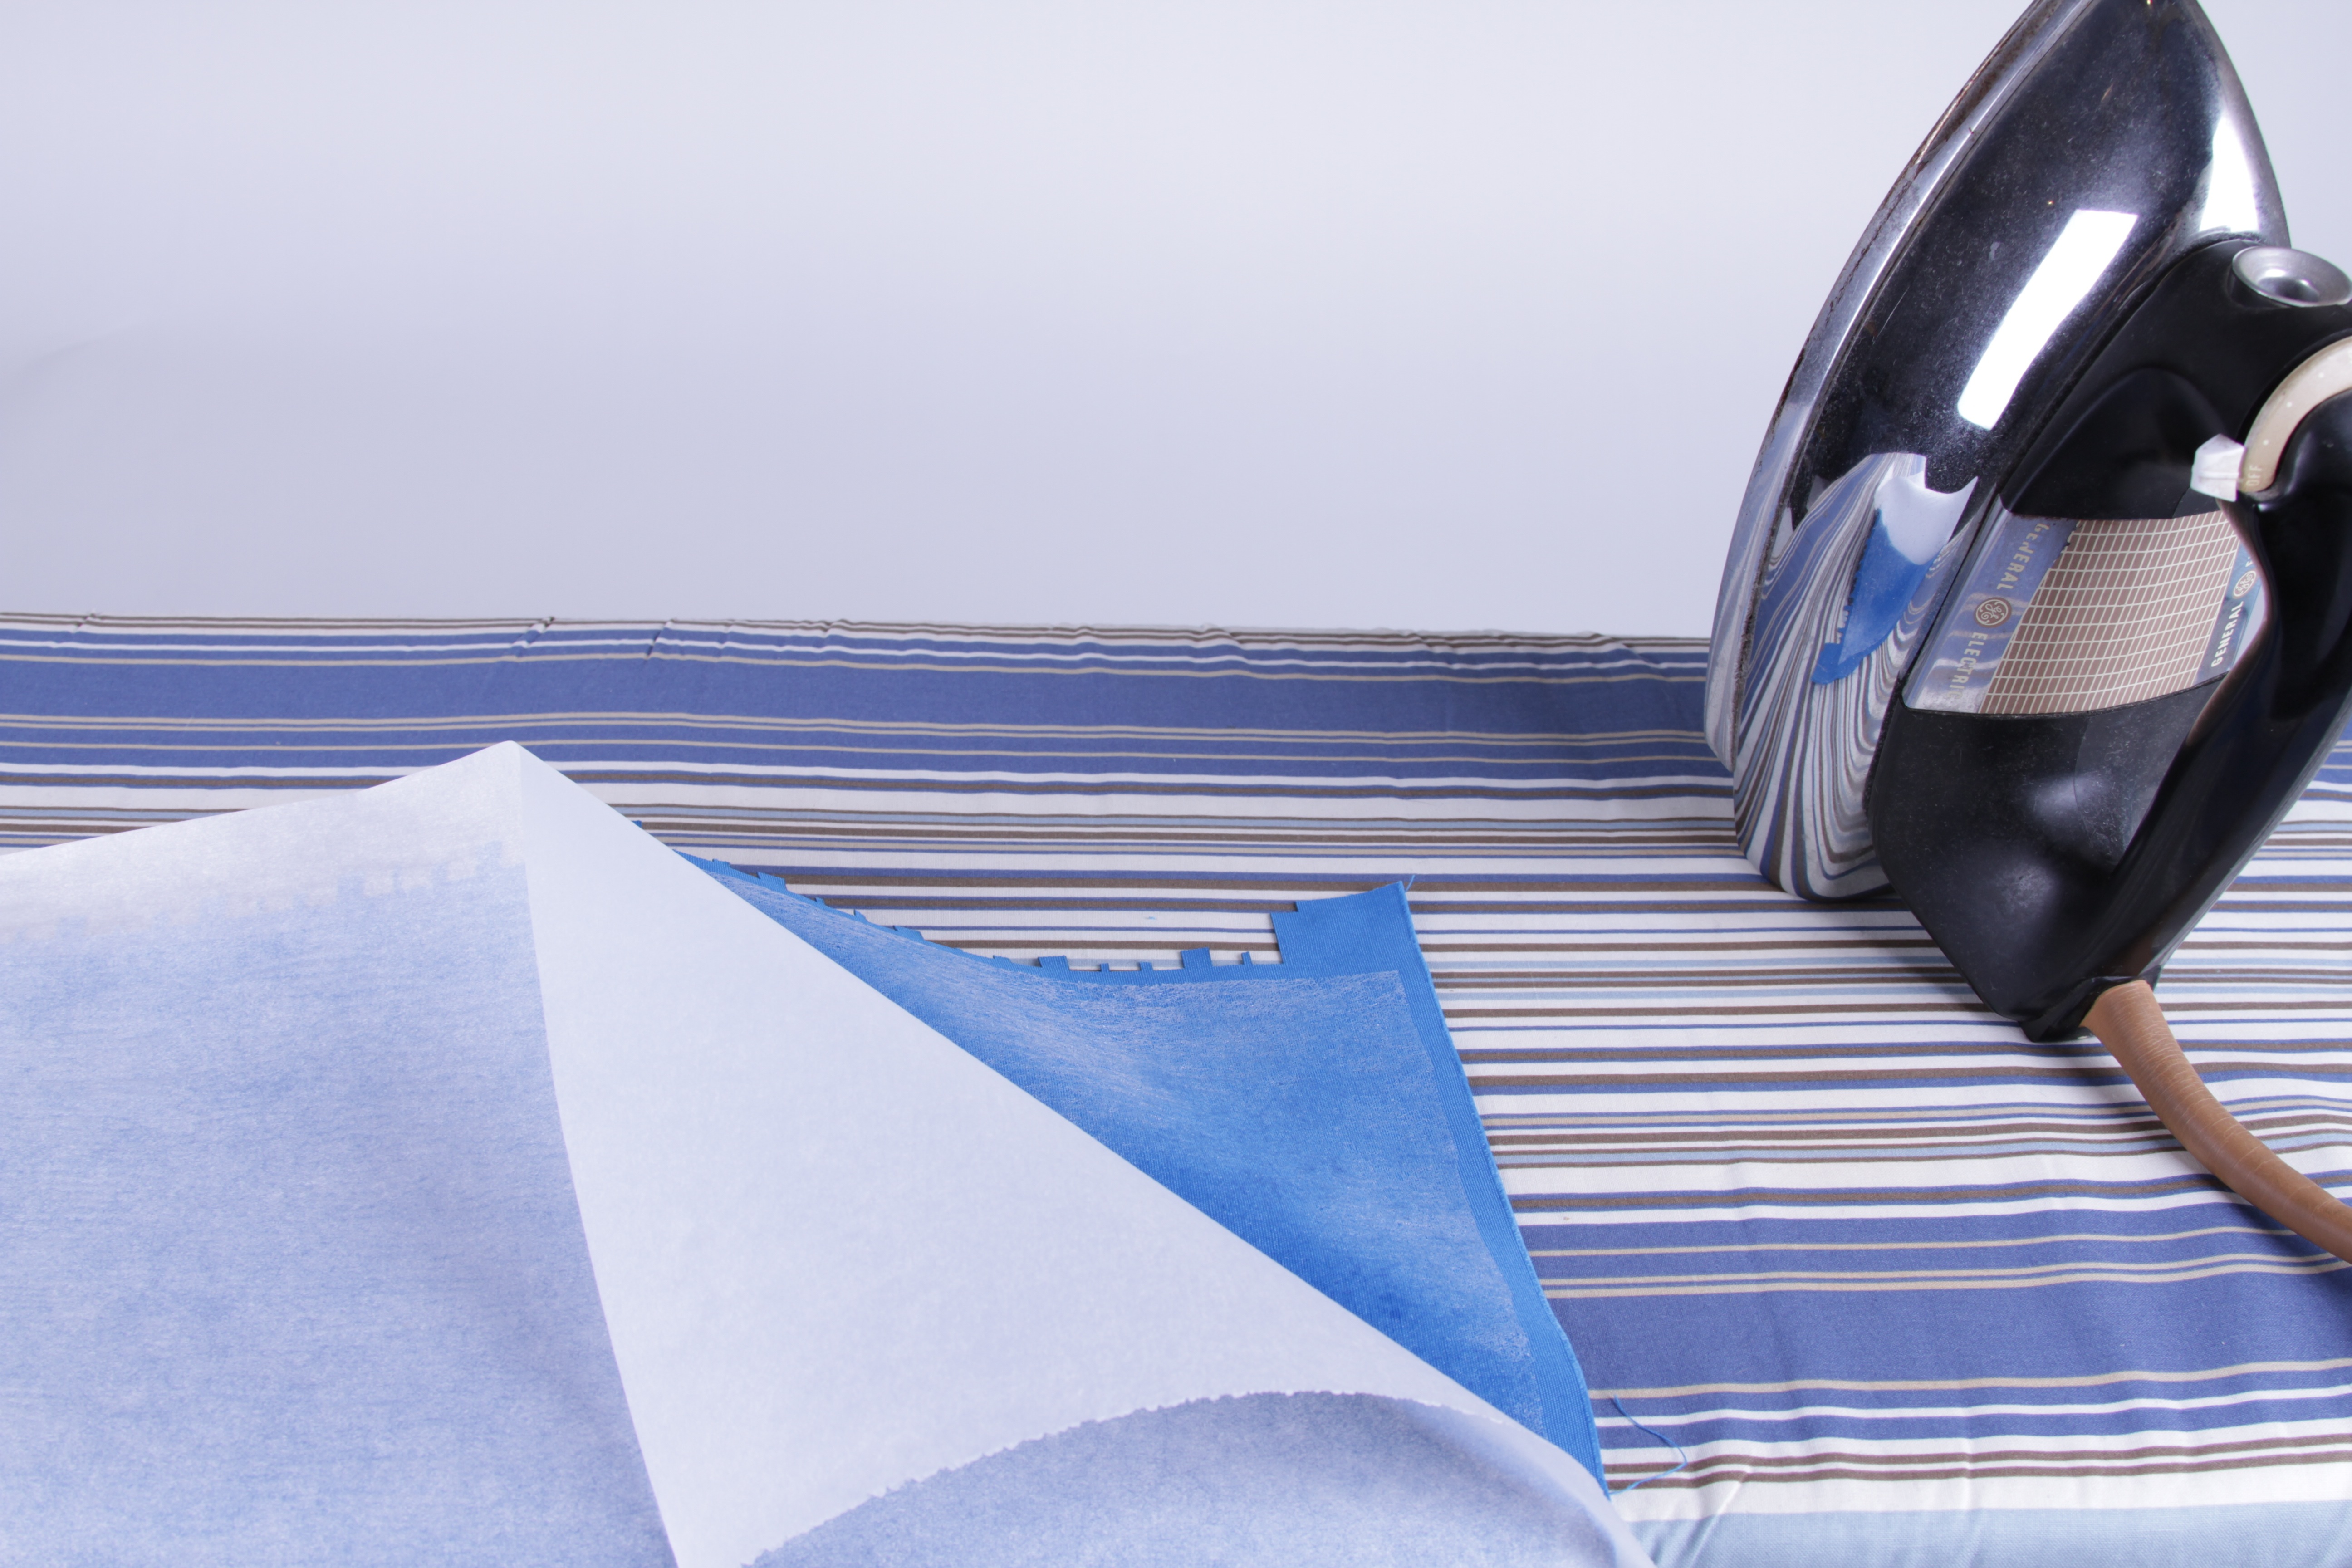 To do this, I have used both paper backed webbing as well as unbacked webbing. A fantastic trick here is to use unbacked webbing in combination with parchment paper. It’s reusable and peels away much more easily than the commercial paper backing.
Once the parchment is peeled away, the fabric can go straight in the cutter. One of the benefits of using a laser cutter for fabric, especially polyester blends, is that it sears and fuses the edges, which helps to protect against fraying. If the fabric is cut fusible side down, it tacks it down to the cutting platform, which helps keep the pieces from blowing around.
To do this, I have used both paper backed webbing as well as unbacked webbing. A fantastic trick here is to use unbacked webbing in combination with parchment paper. It’s reusable and peels away much more easily than the commercial paper backing.
Once the parchment is peeled away, the fabric can go straight in the cutter. One of the benefits of using a laser cutter for fabric, especially polyester blends, is that it sears and fuses the edges, which helps to protect against fraying. If the fabric is cut fusible side down, it tacks it down to the cutting platform, which helps keep the pieces from blowing around.
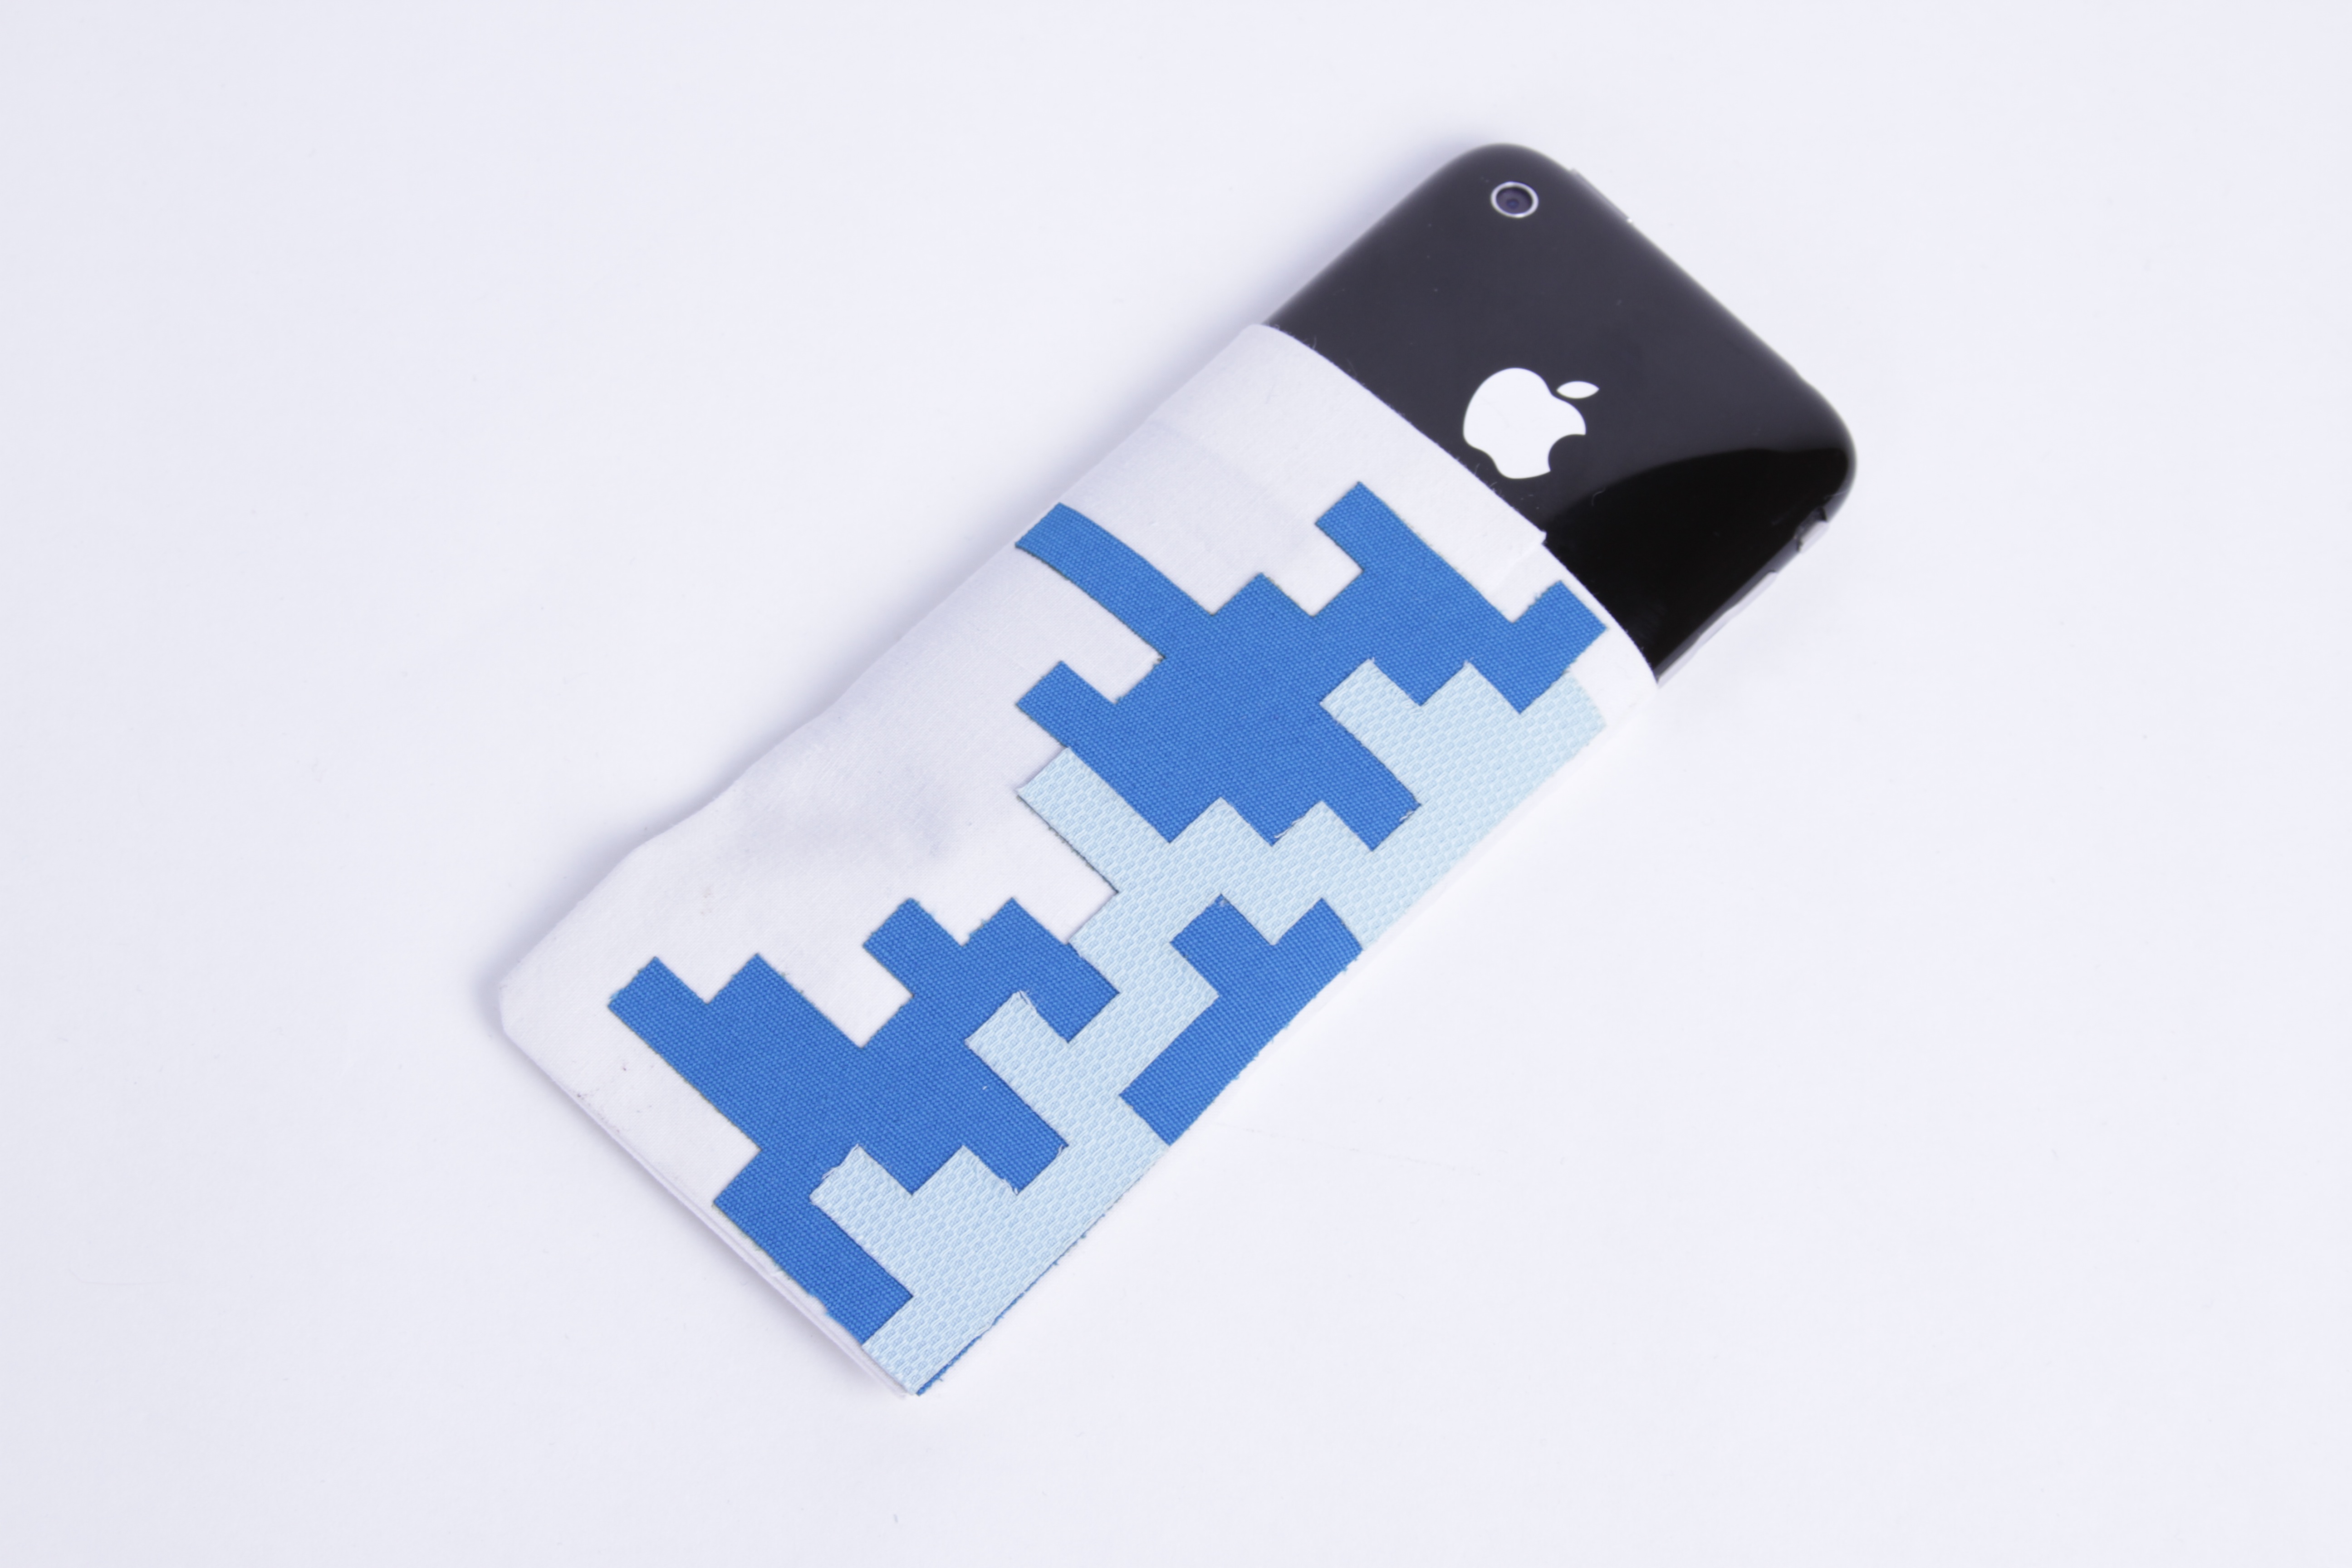
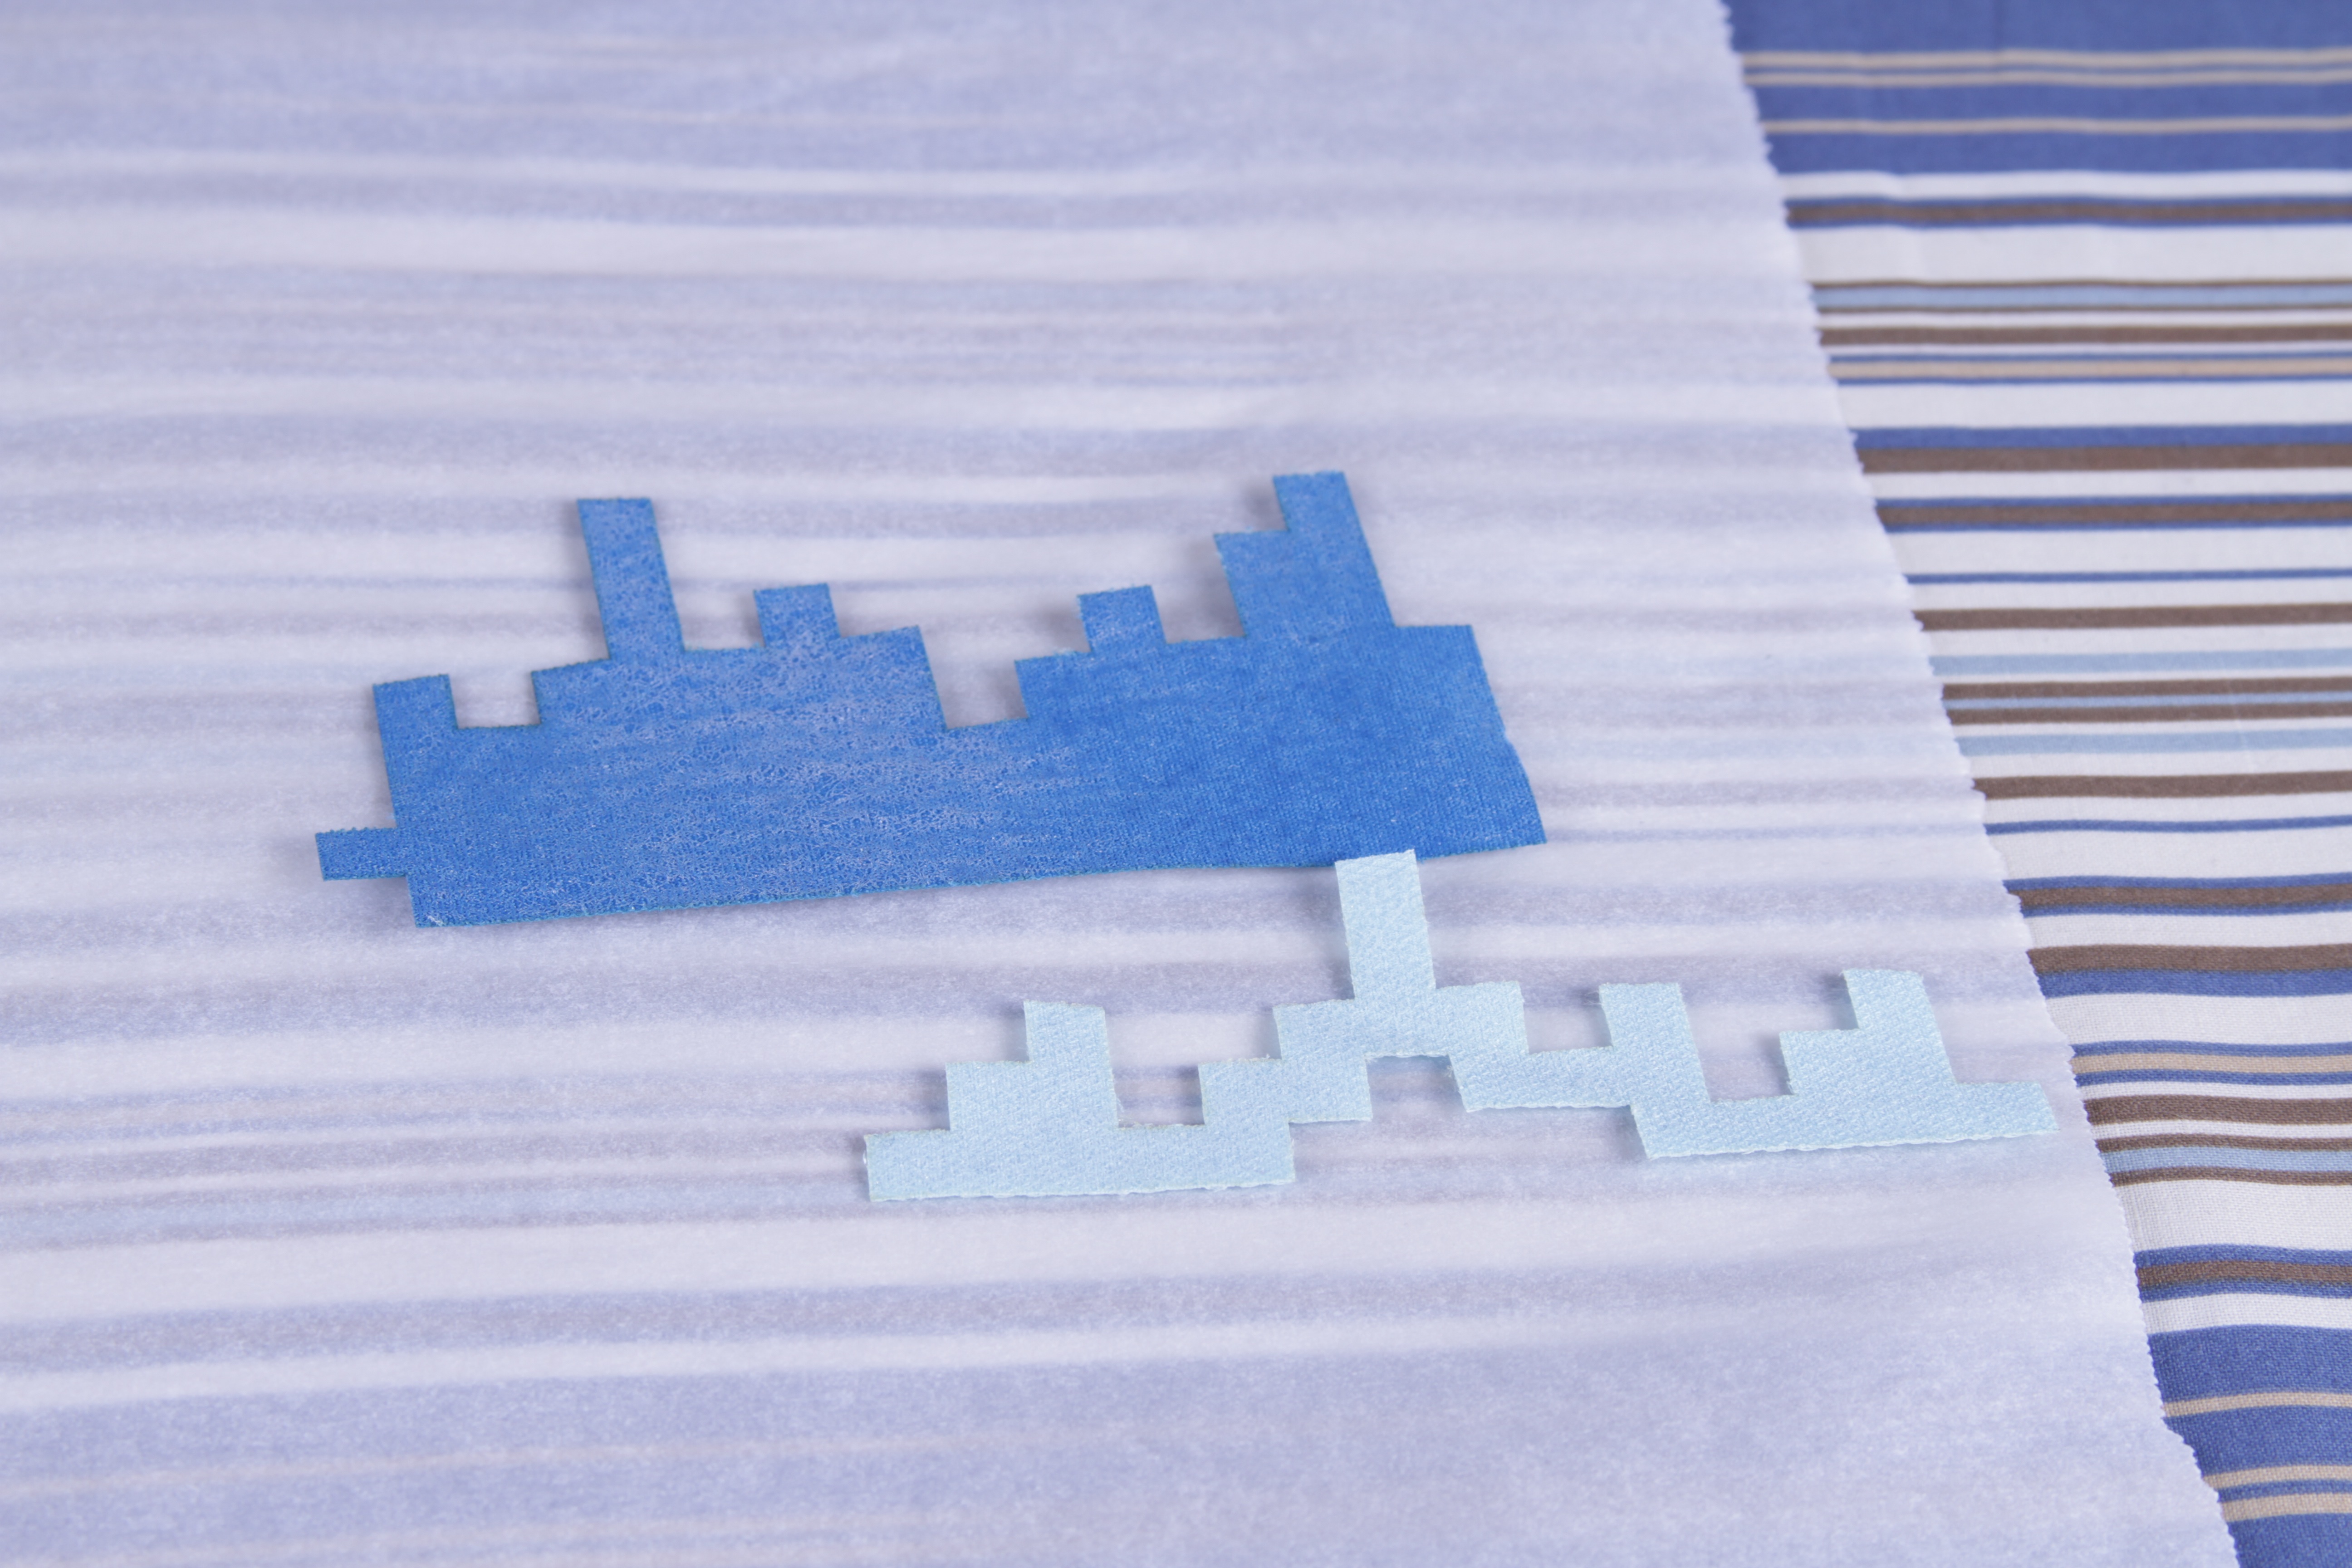 Here are the cut out pieces–custom iron-ons now–with the fusible webbing already seared in place, shown sitting on top of a piece of parchment paper.
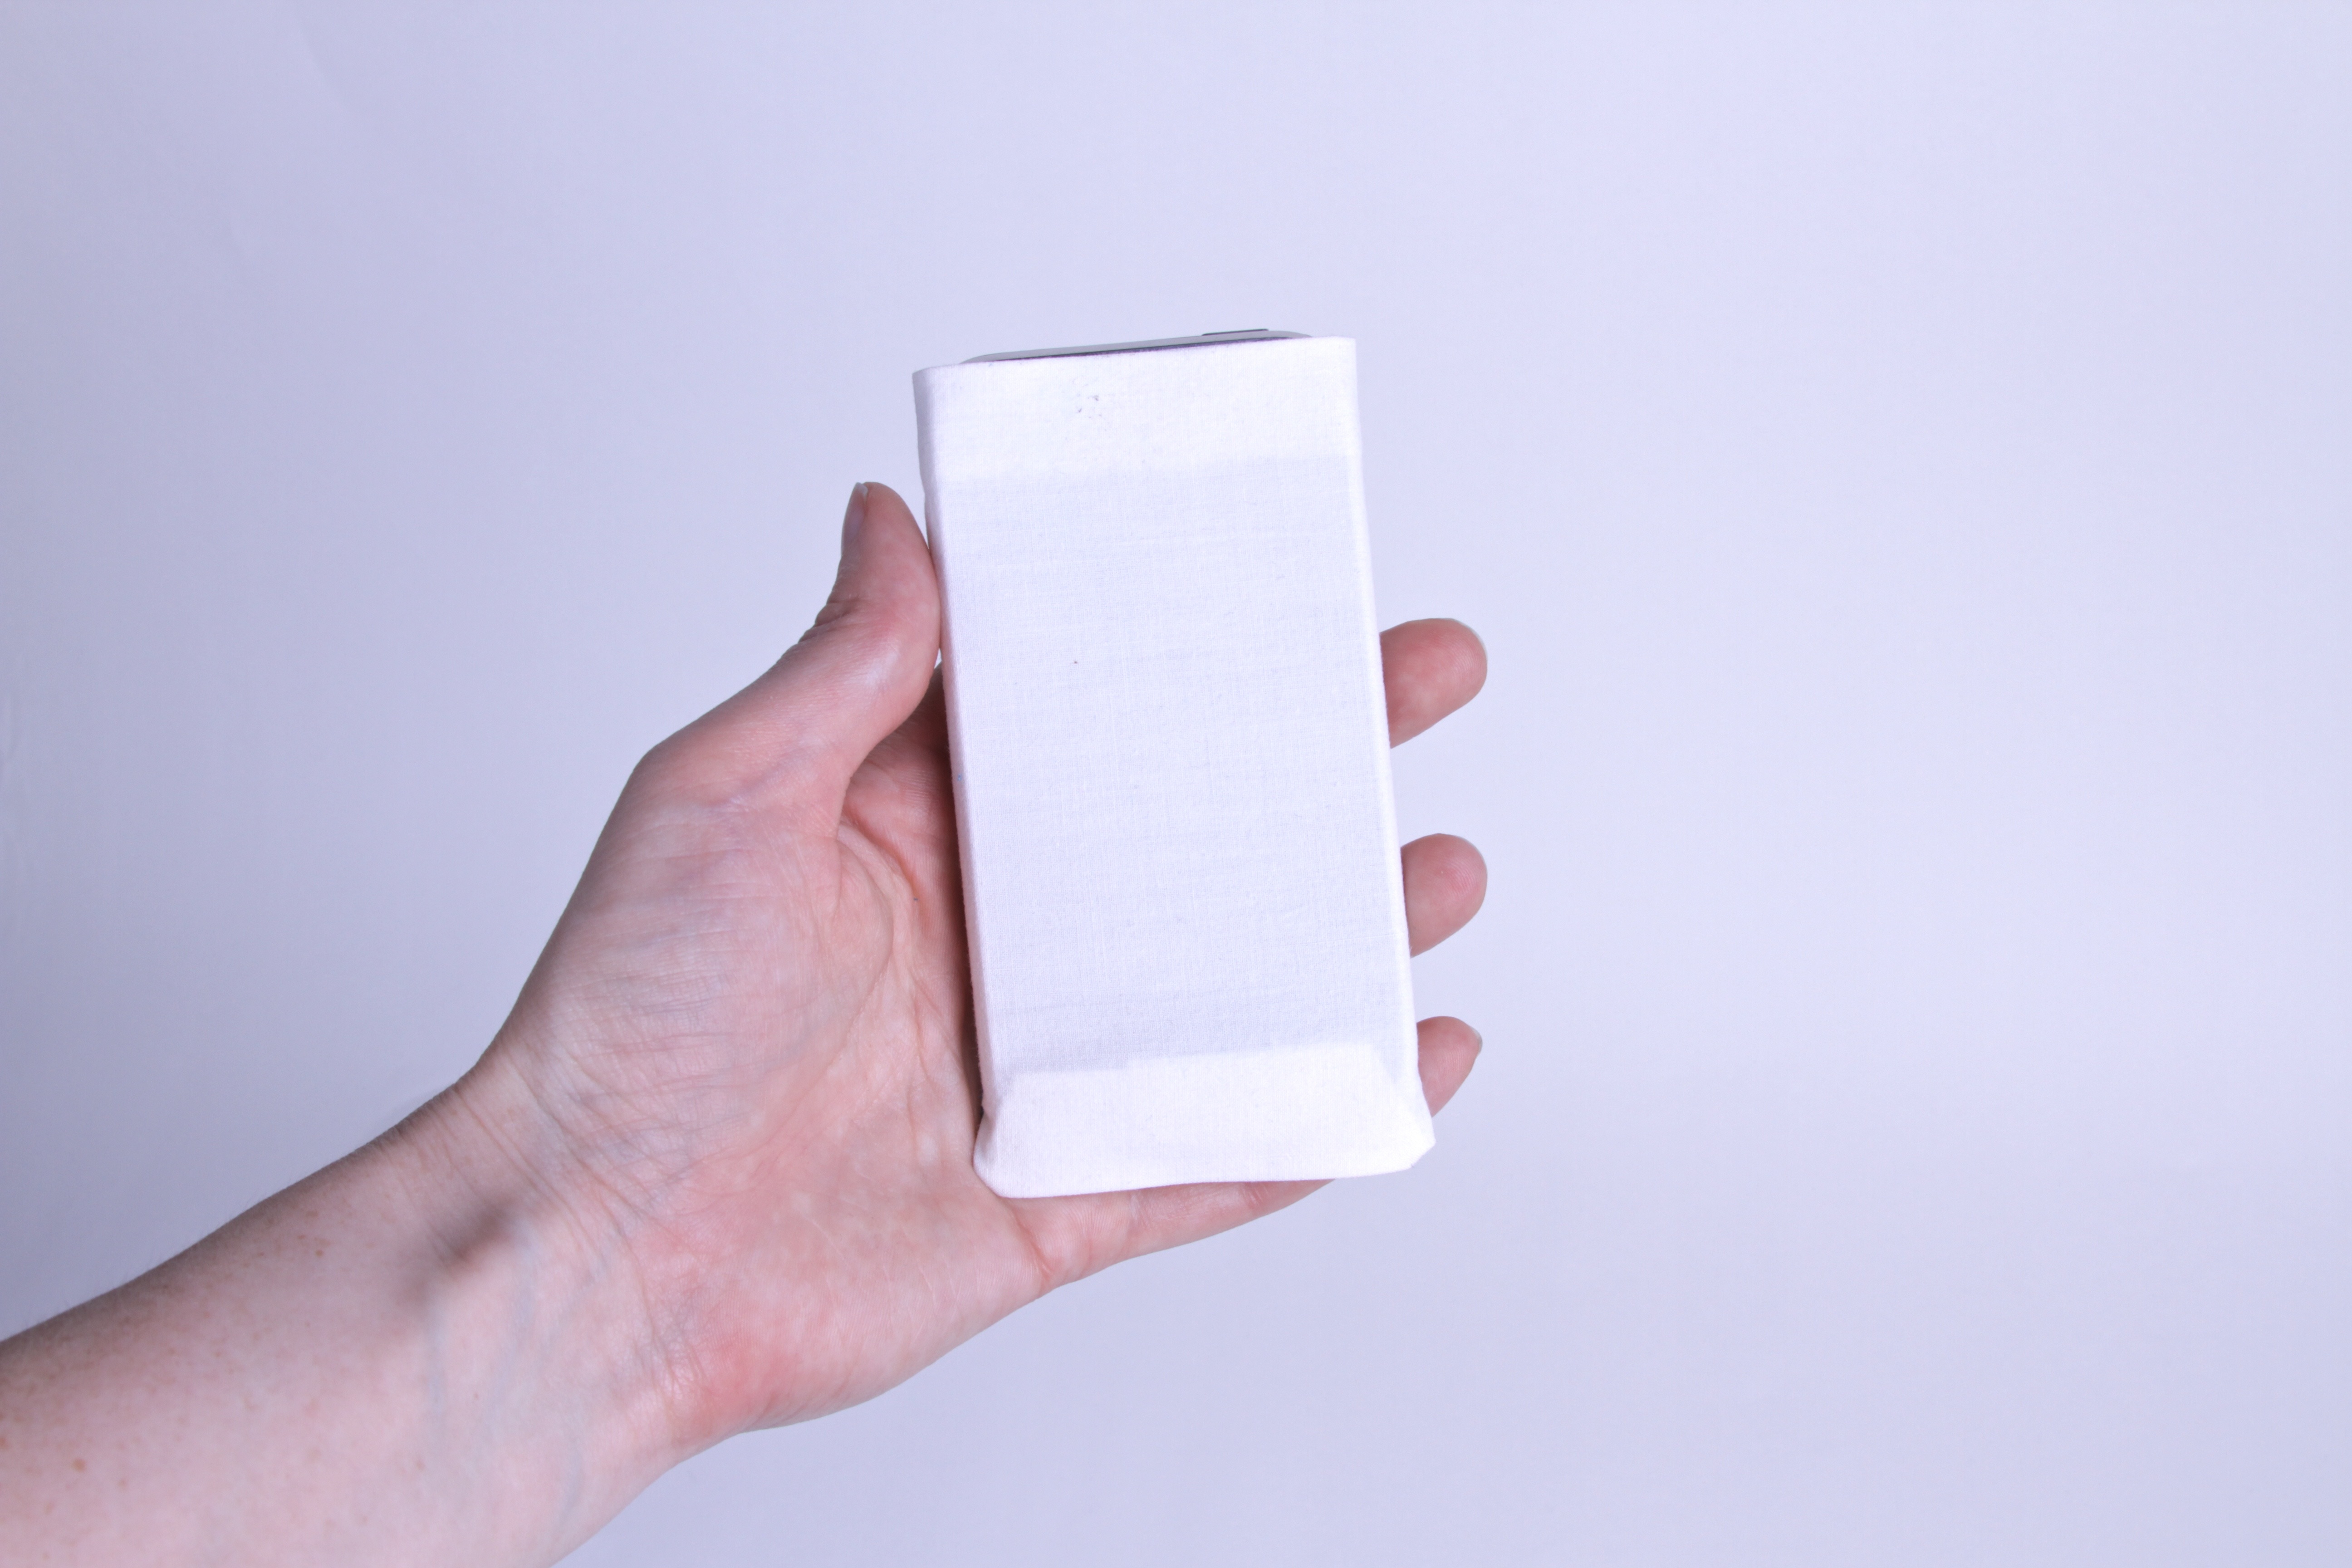 After cutting out decorative pieces, put them on your iPhone cozy. One note if you have an older iPhone: I suggest folding and fusing the extra flap of fabric toward the front of the cozy rather than the back to help protect against the corners of the phone cutting new holes.
We use this same method of fuse and cut for making the numbers for our d12 and d20 handbags. The precision is staggering and it makes it very practical to have custom printed iron-on numbers even in small quantity. Without this, you’re normally stuck having to buy ugly, expensive commercially made iron on numbers. This would also be beneficial for making mixed message shirts. If I were doing the Missile Command Skirt over, I would certainly put my cities and missiles on with fusible webbing, just for the simplicity of it, even if I decided to stitch them down later for additional resiliency. We’ve also heard from readers who use a Cricut machine for cutting custom fusible shapes, and while the edges don’t get fused, the cost to get started with one is much lower than a laser cutter.
Case 2: Free-hand cutting
Machine cut fabric is fantastic and allows precision that would otherwise take an amazing amount of patience and skill, but sometimes you just want to improvise. Fusible webbing can help with that, too.
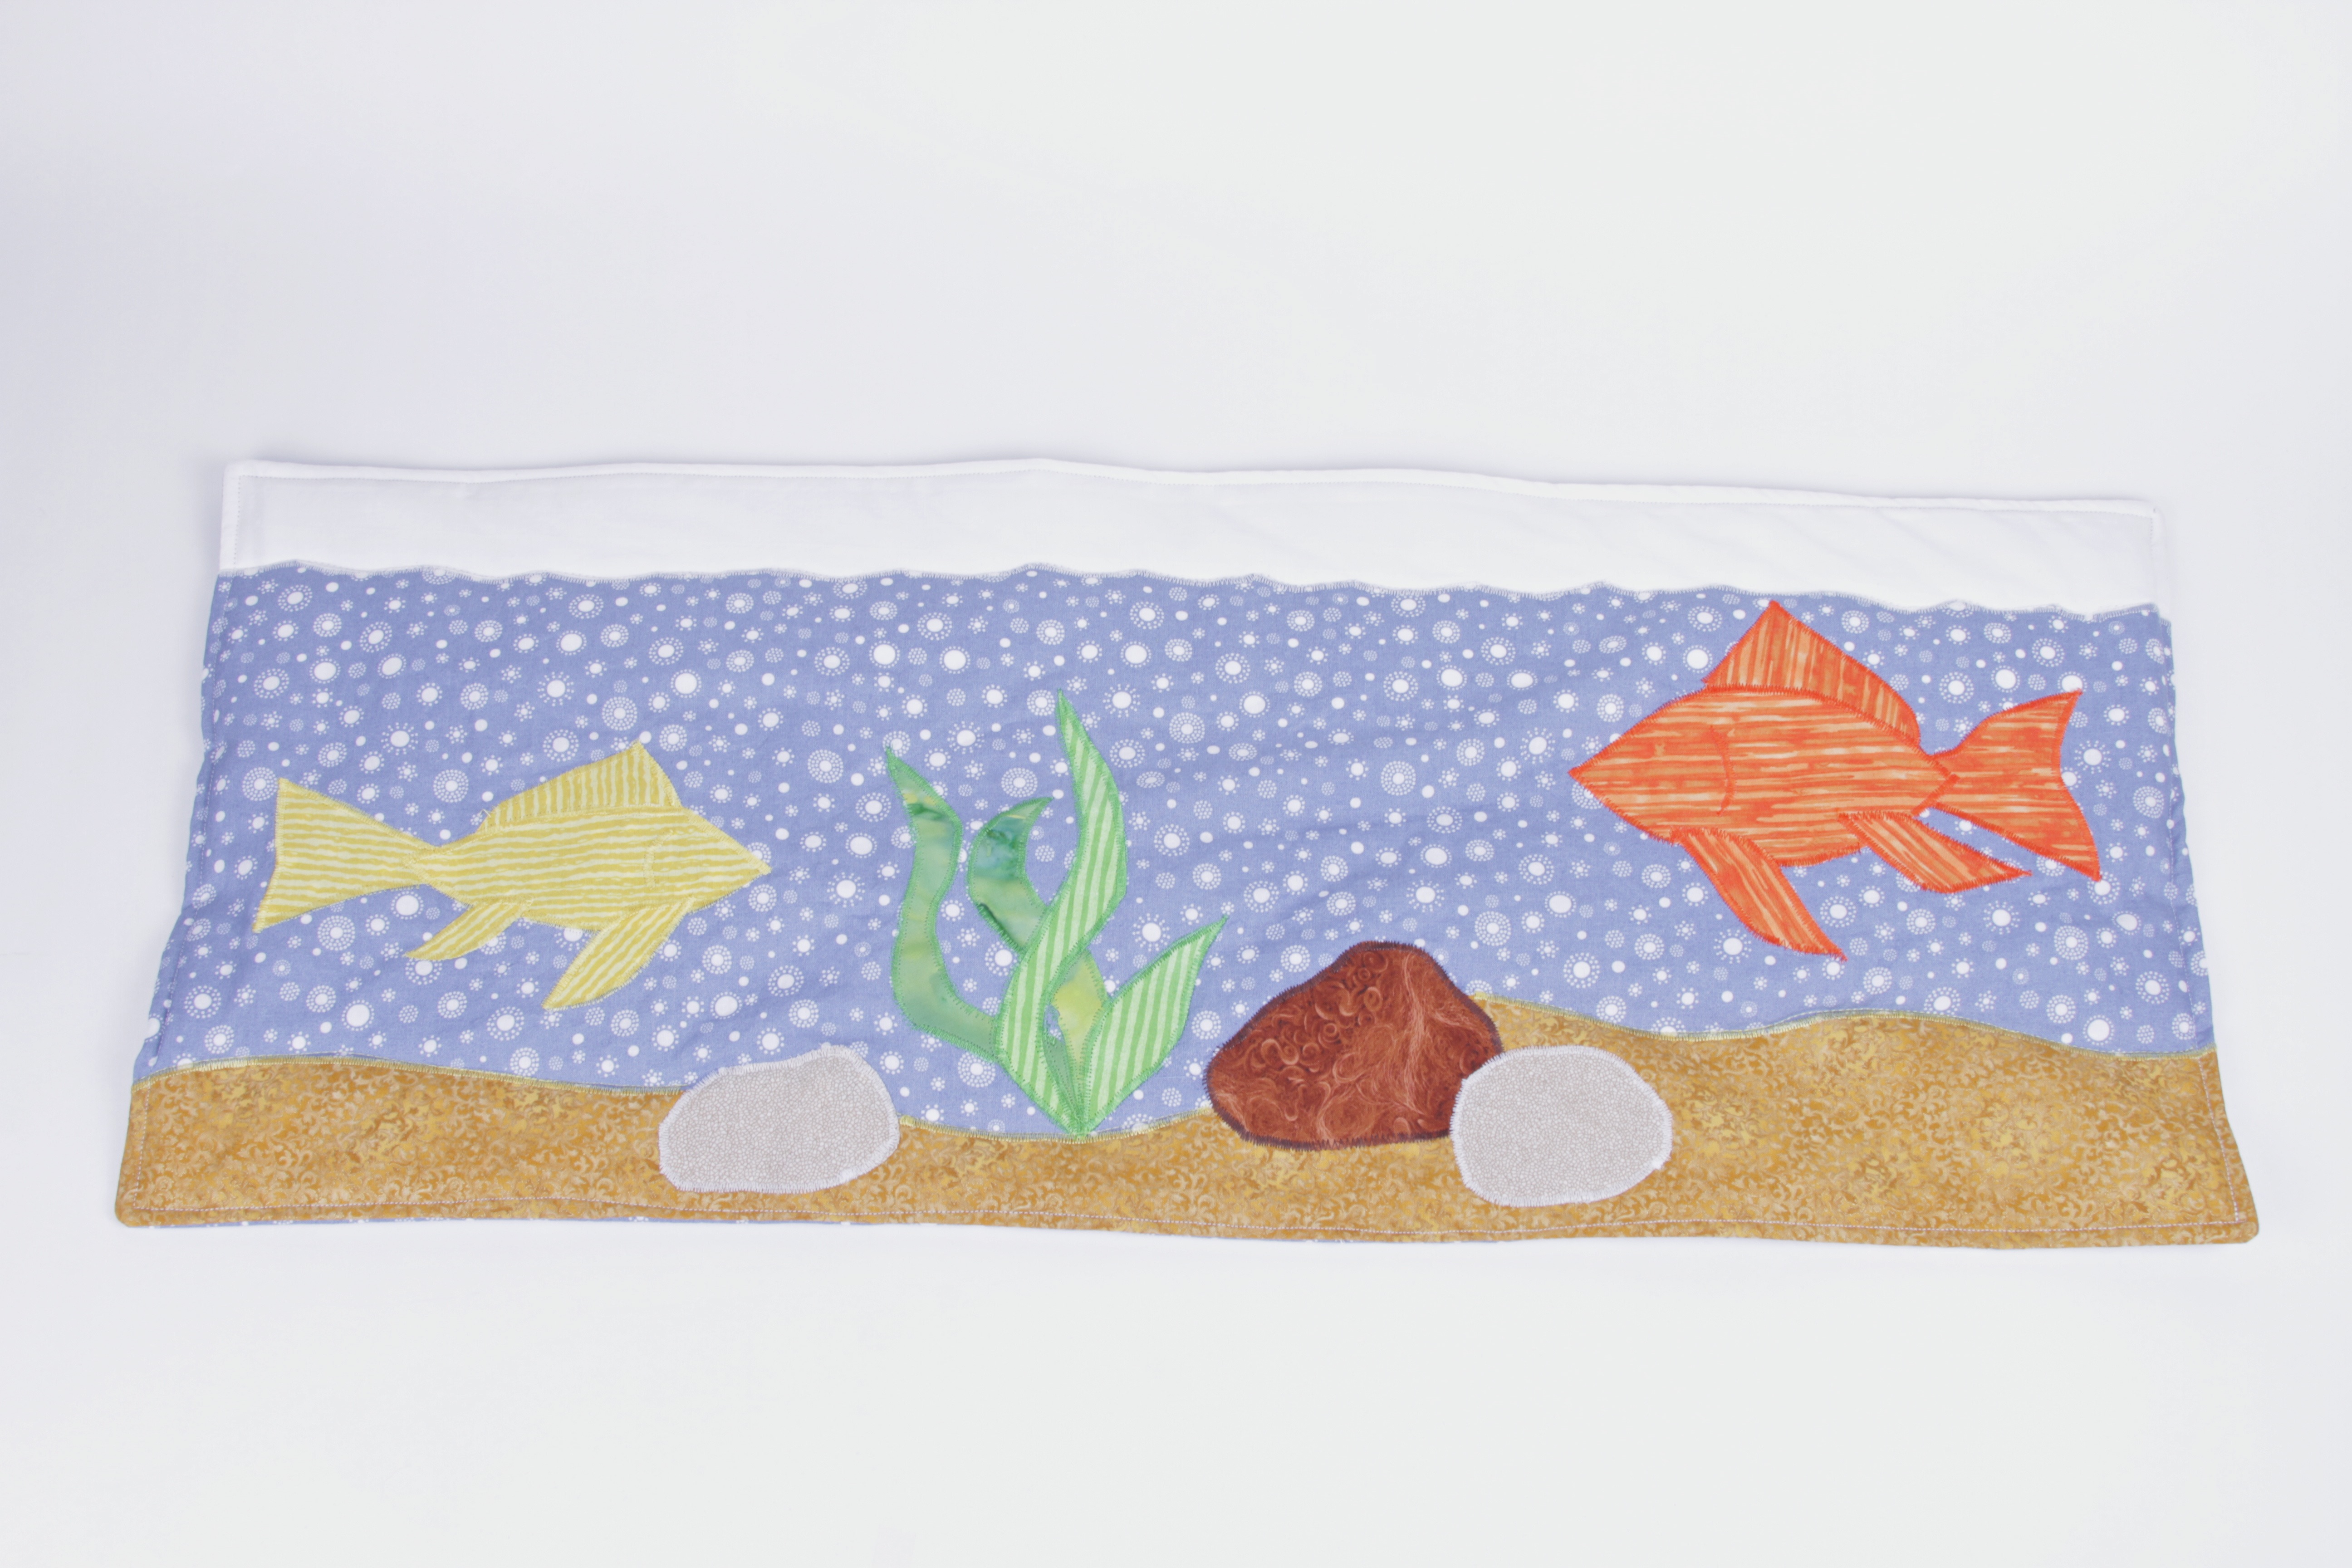
Recently we needed a cat quilt for a rectangular bookshelf. An aquarium to match our earlier fishbowl cat quilt seemed like it would be a good fit. The fishbowl cat quilt had straight seams sewn between the gravel, water, and air portions of the quilt for simplicity. Fusible webbing makes a little more creativity possible here without the tediousness of traditional applique.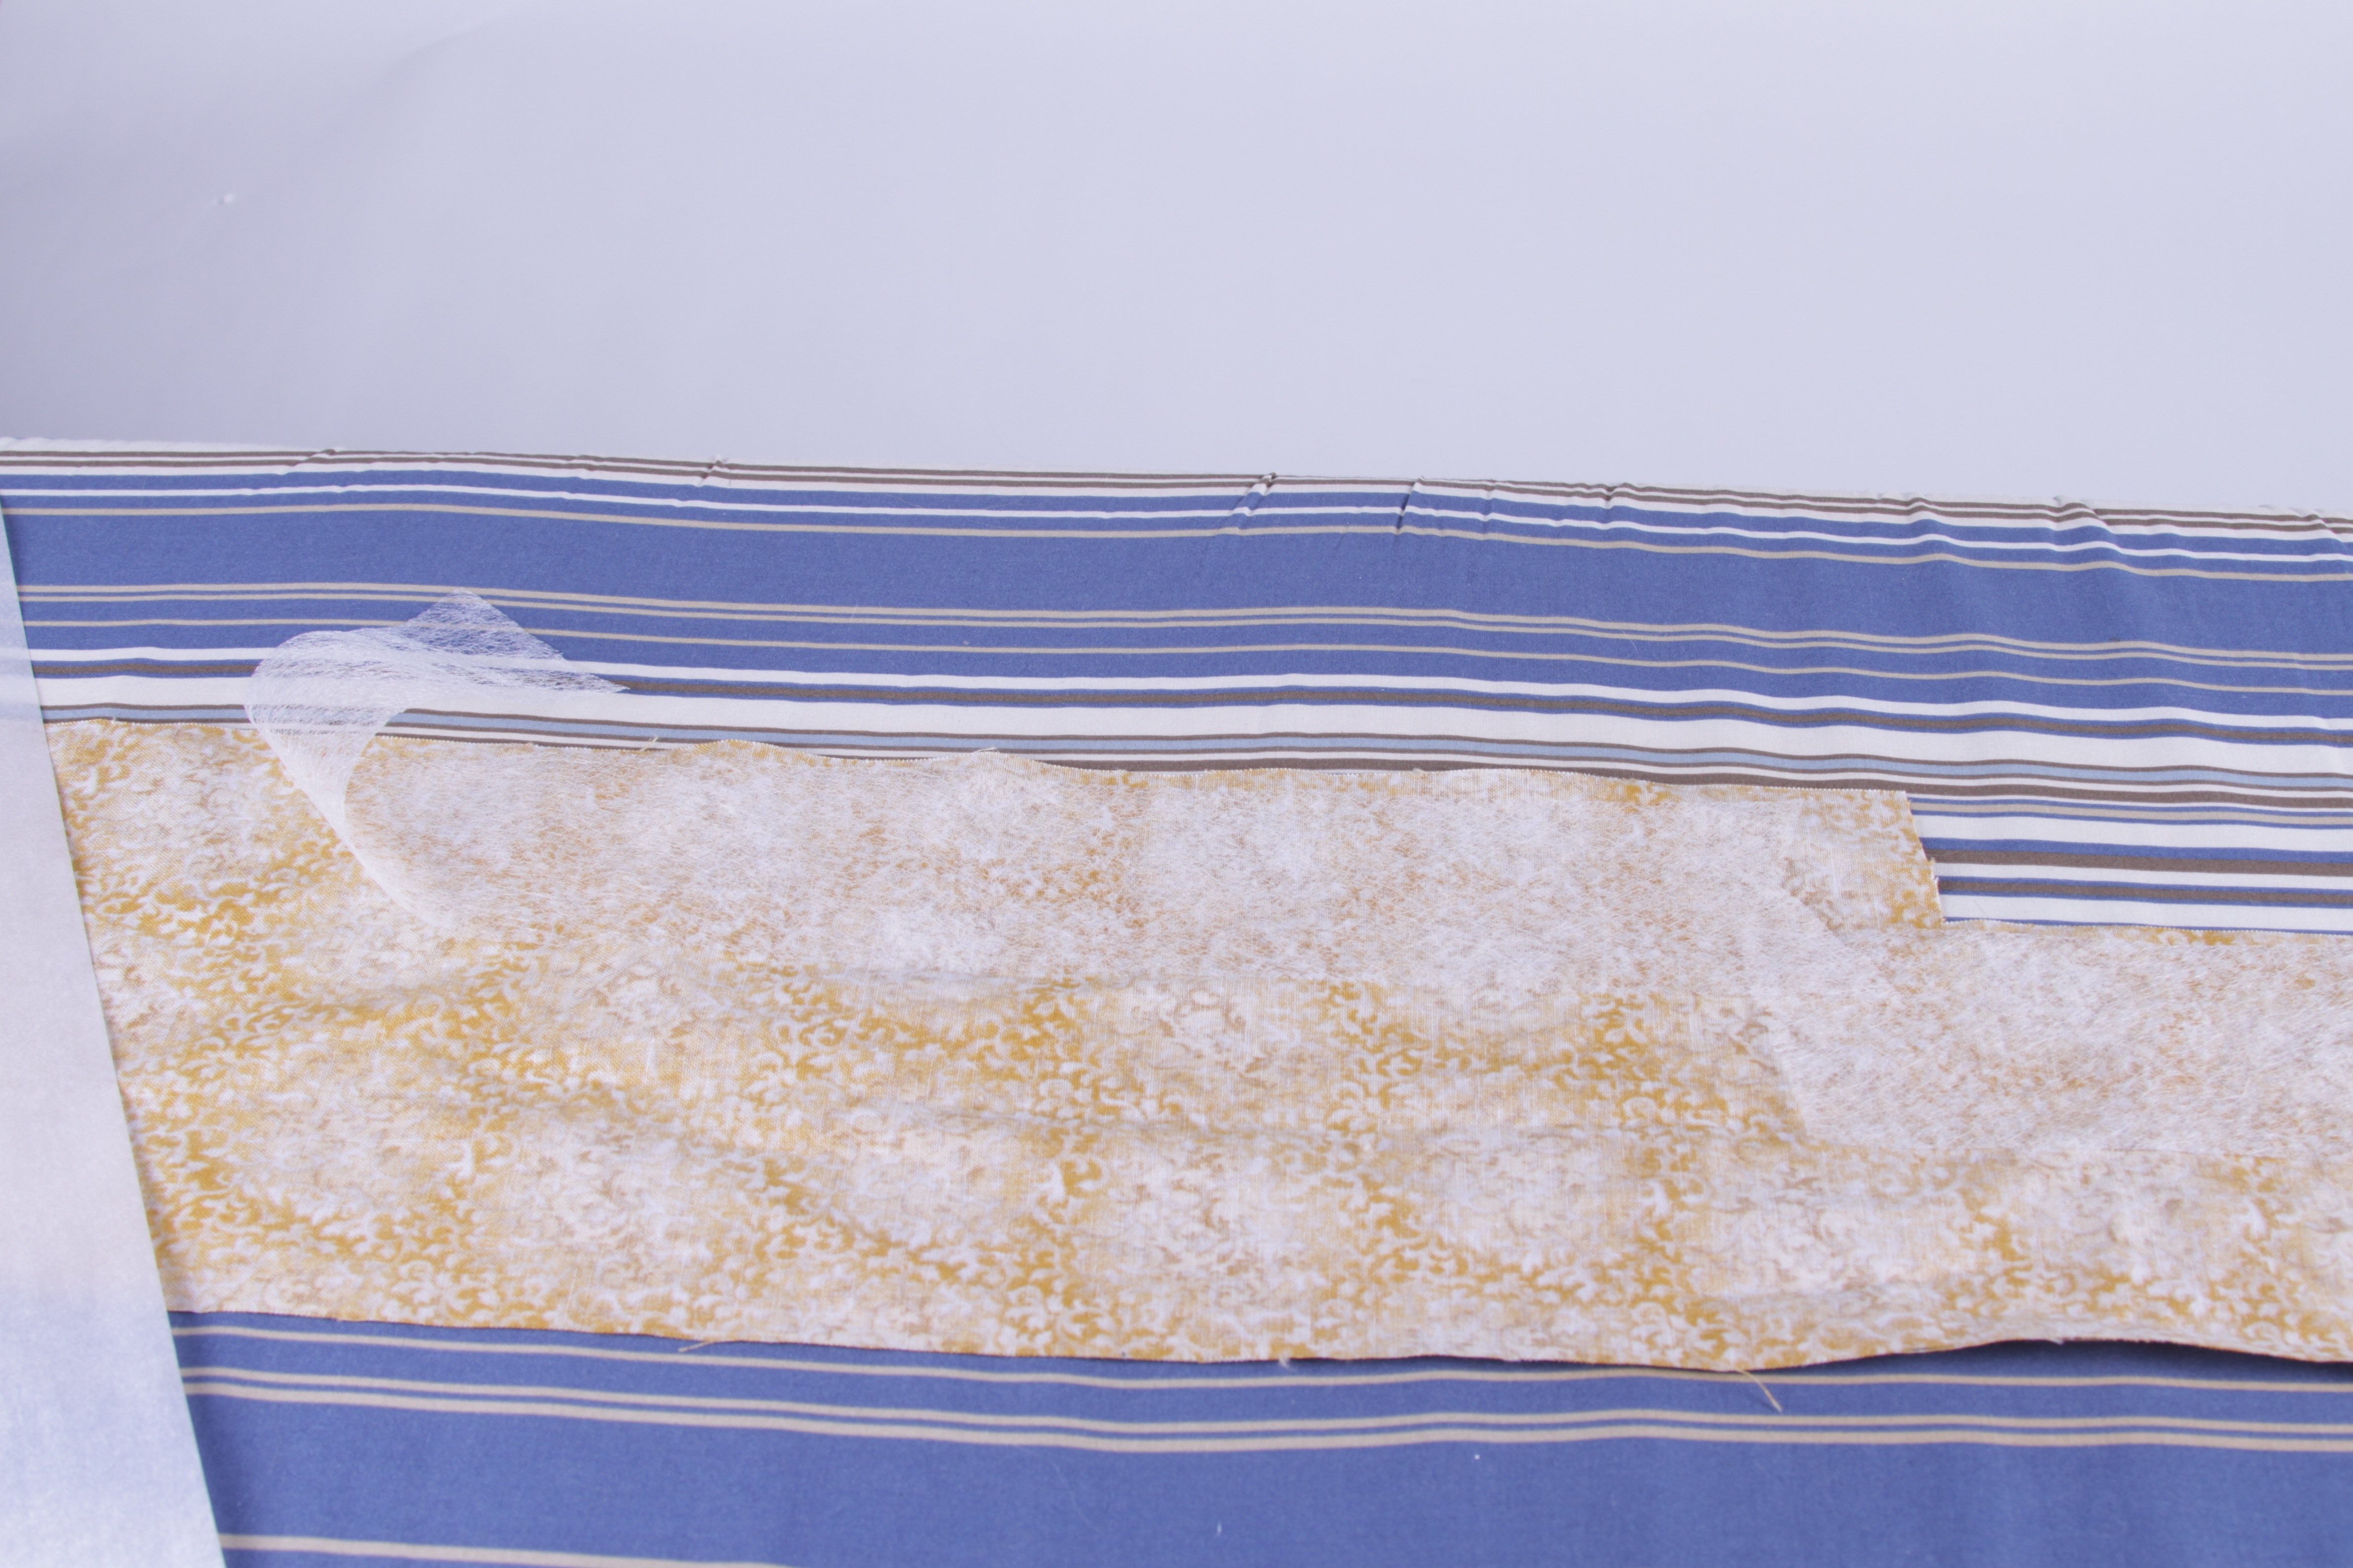 First fuse a strip of webbing to the edge fabric.
 Next cut a creative border through the webbing area, in this case bumps in the gravel or ripples in the surface of the water.
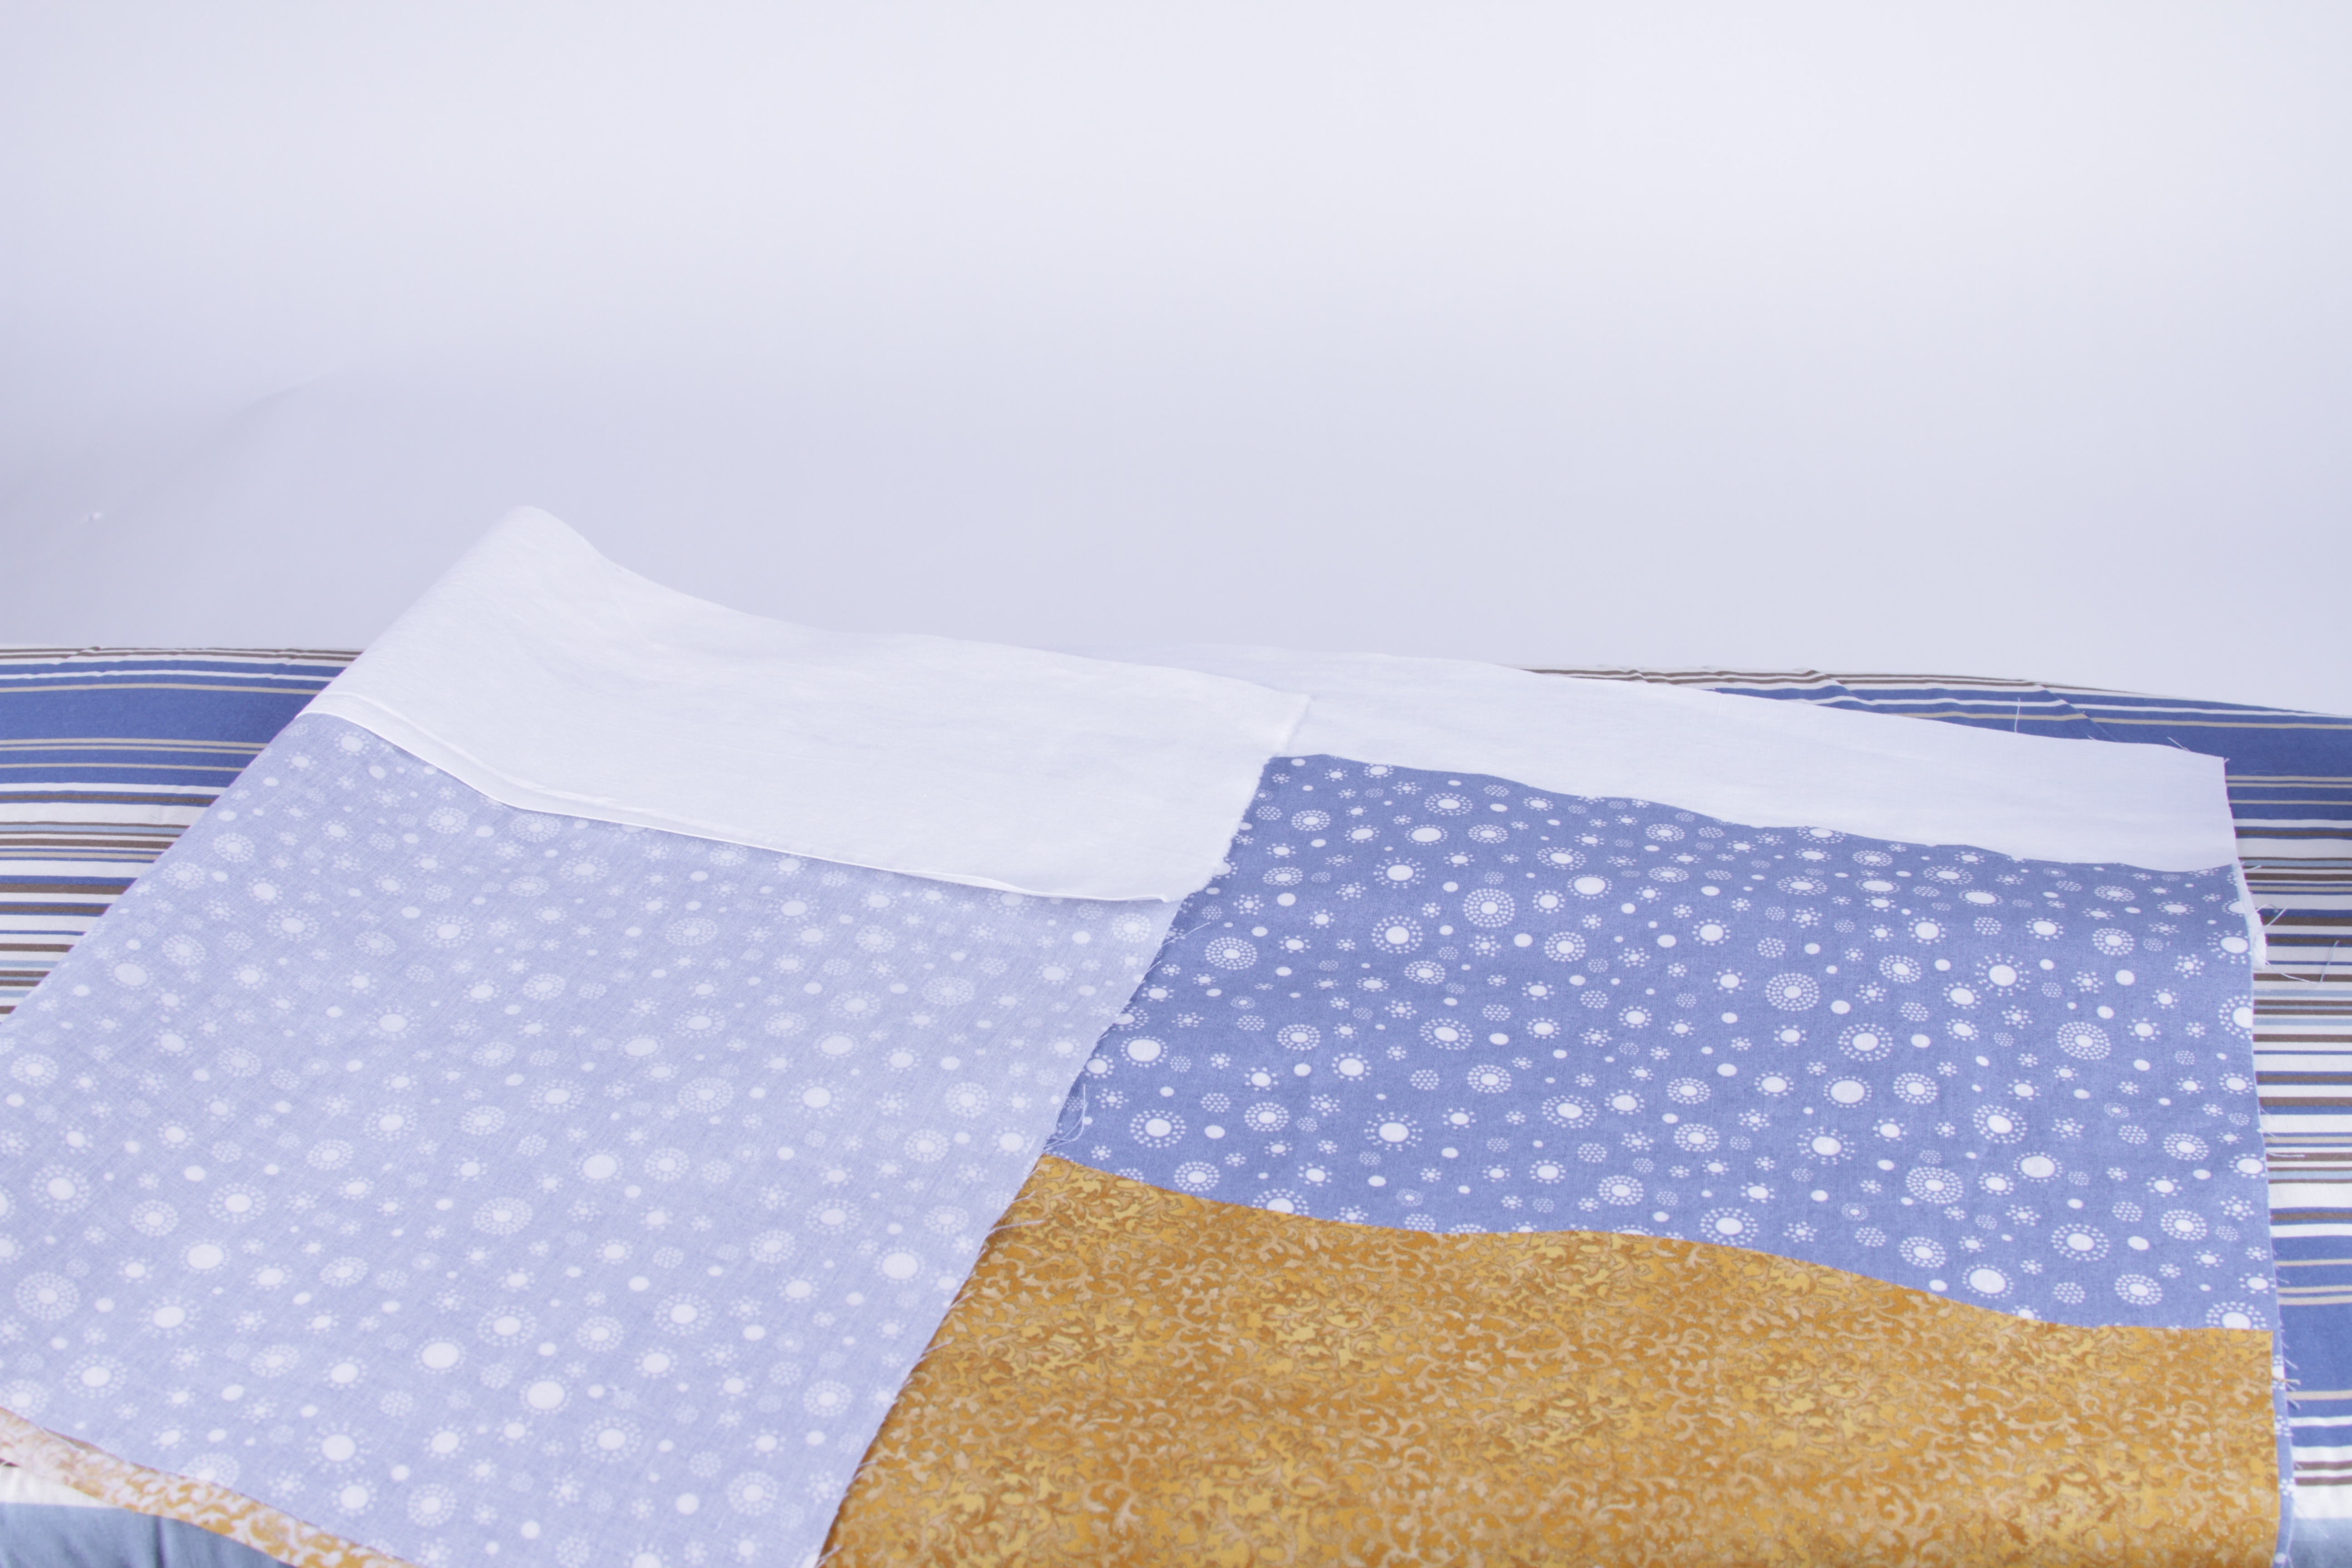 Iron the layers together, first the water over the white strip at the top representing the air at the top of the aquarium, then the gravel over the water.
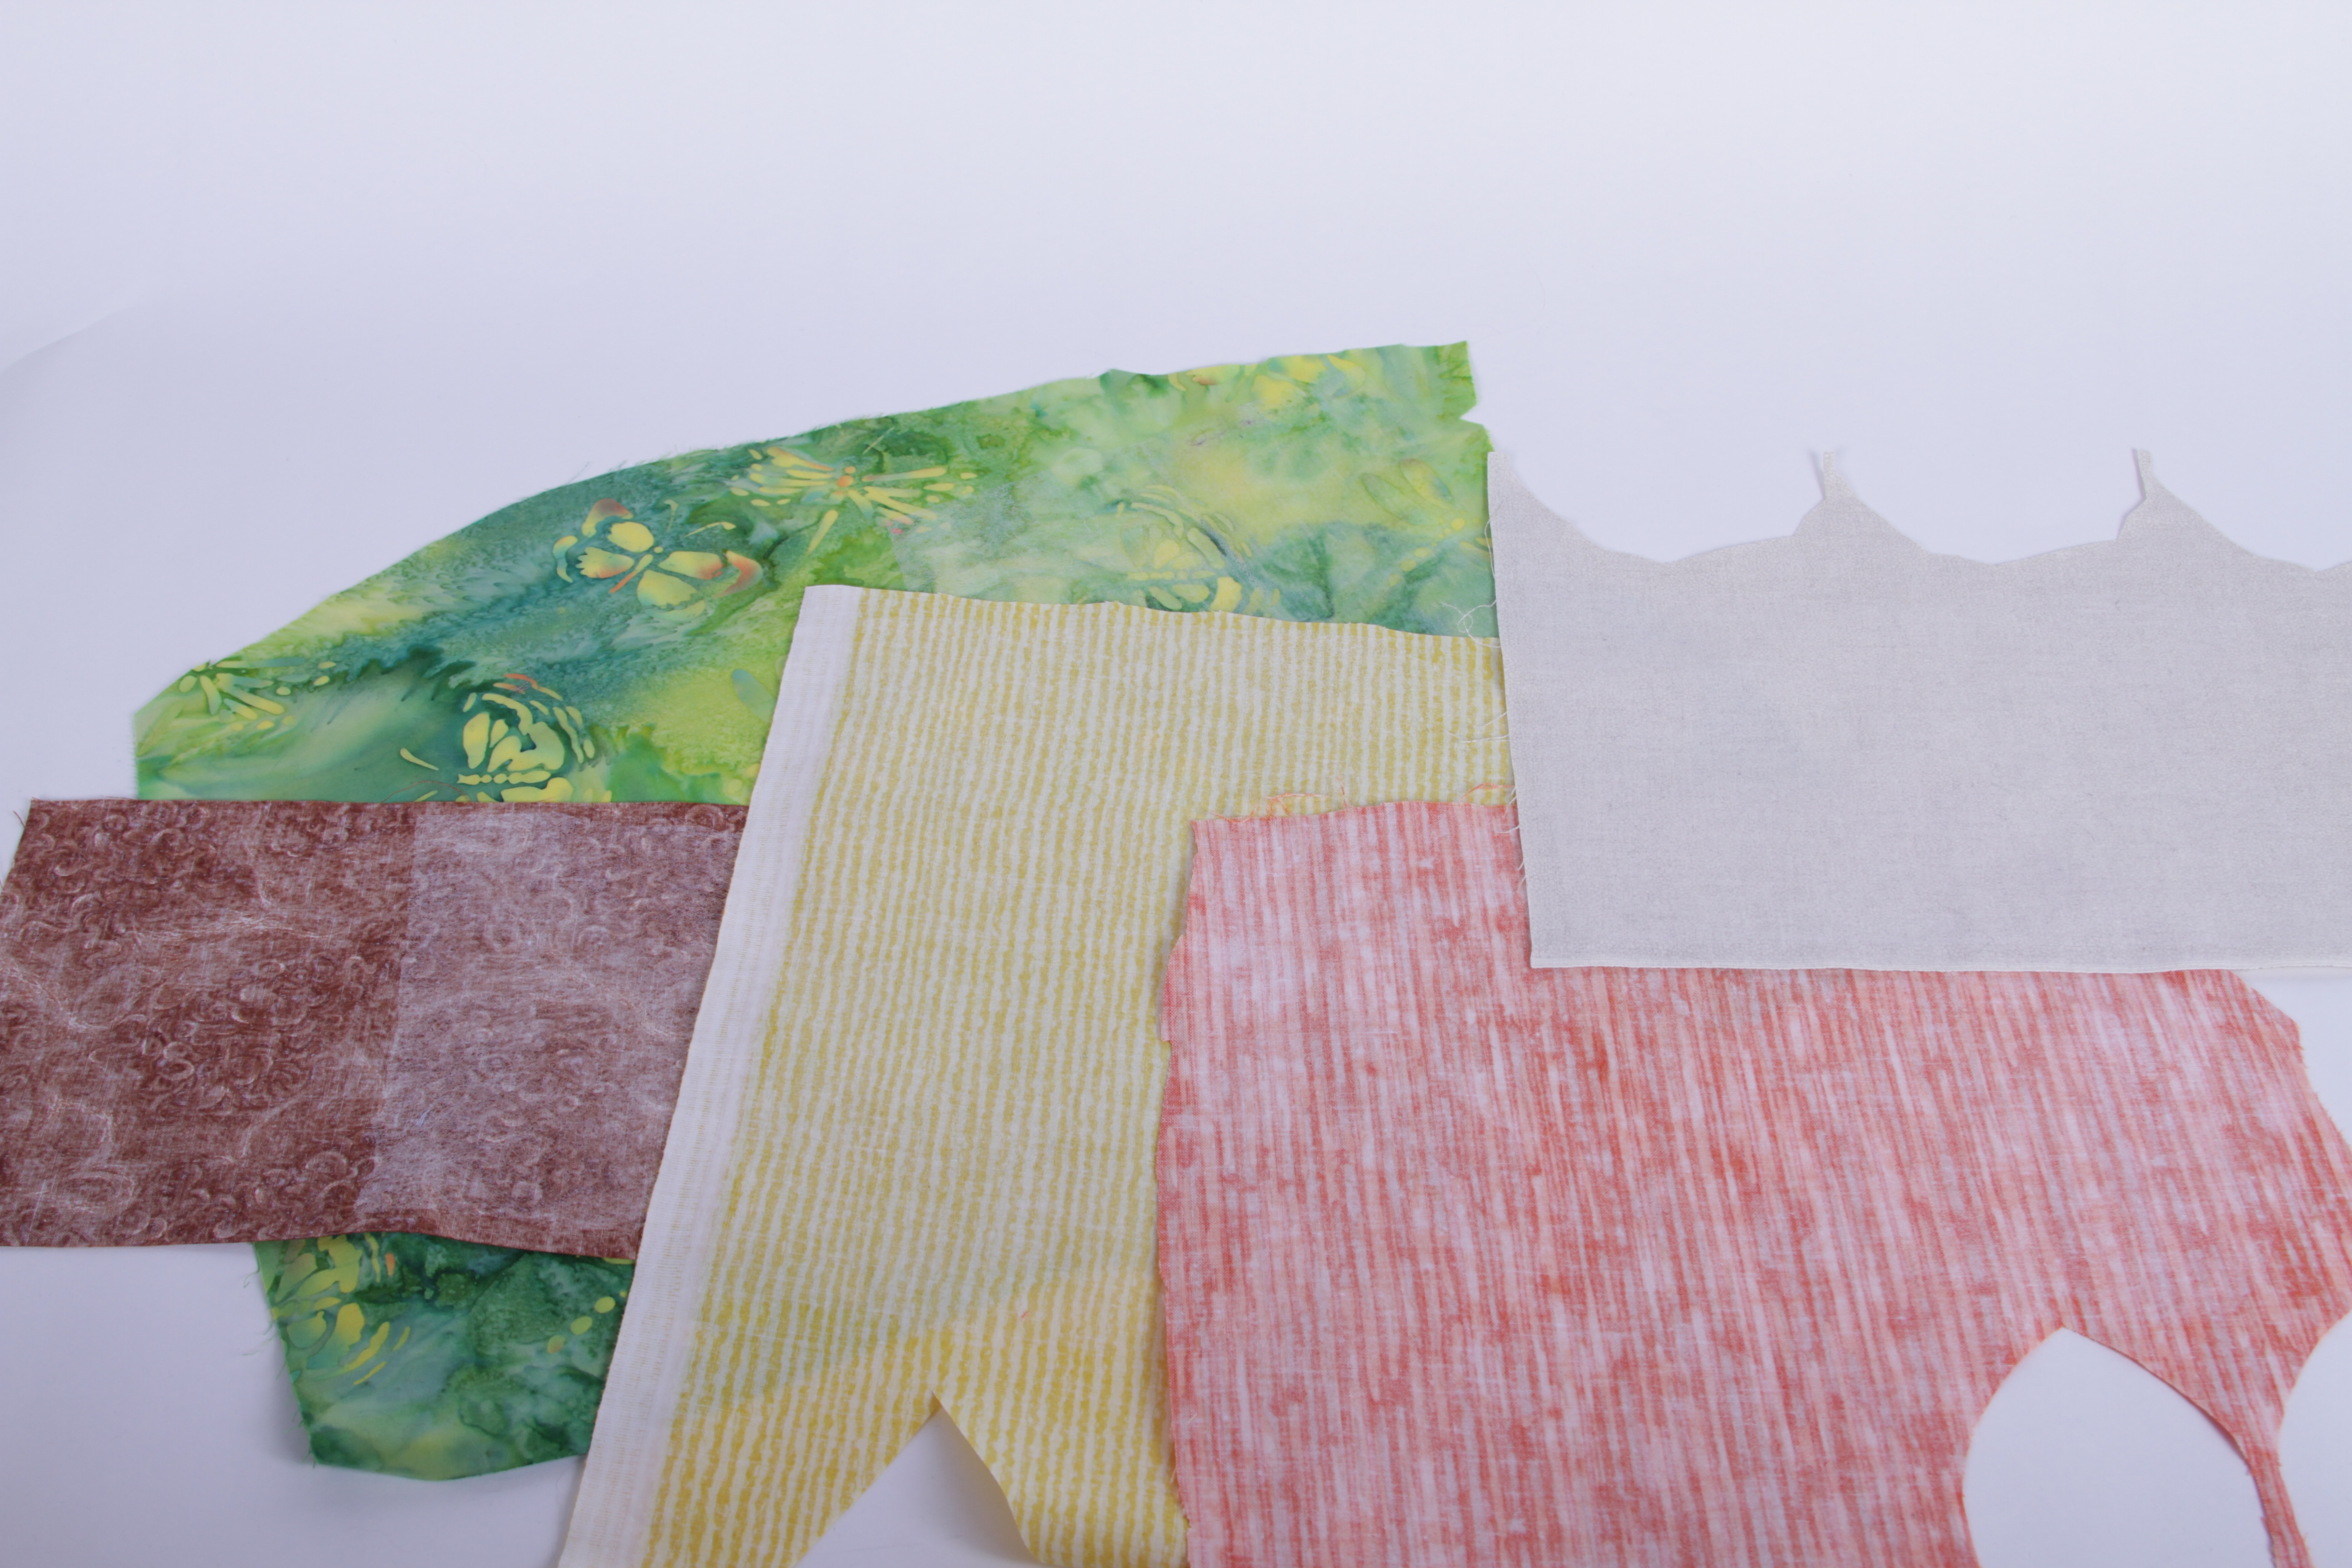 This is a good opportunity to use up some scrap fabric. Take a bunch of colors and patterns of scrap material and put webbing on the back. Cut out your desired shapes, making sure the entire back is coated with webbing.
 After getting fish, fins, rocks and seaweed ready, lay everything out on the ironing board. (Aquarium castle and bubbling treasure chest optional.)
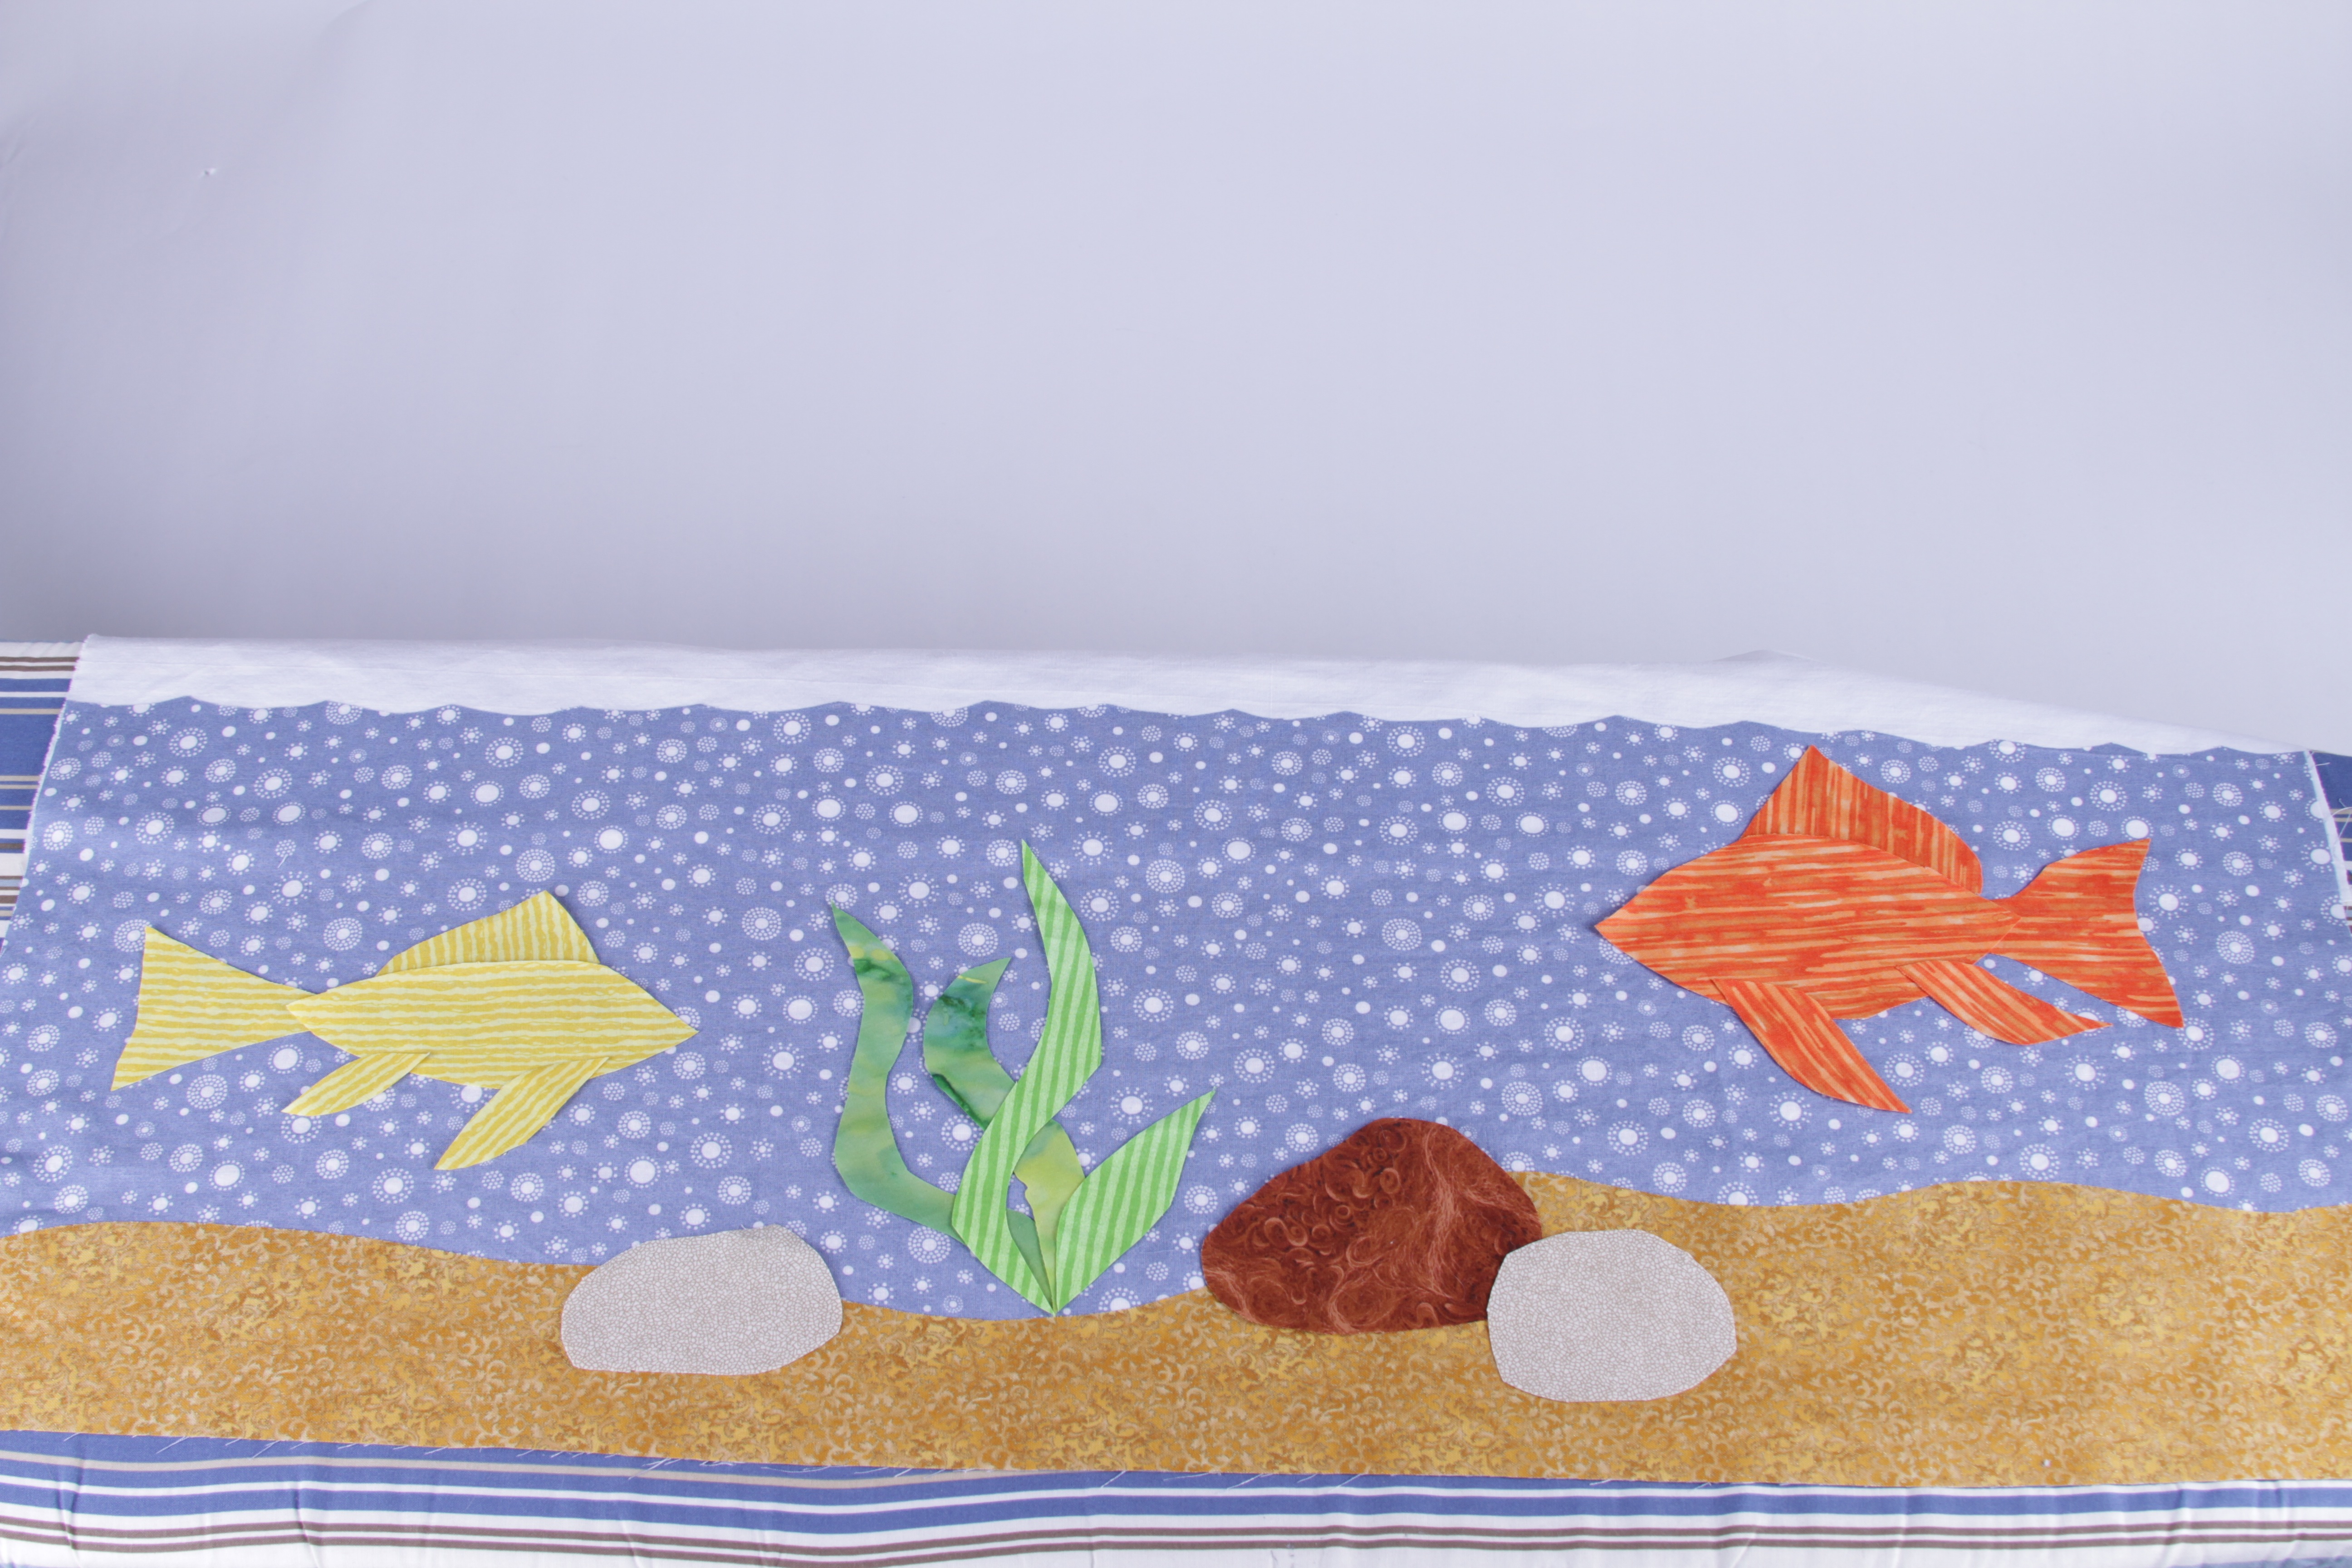
 Iron everything down. Some people recommend that you not slide the iron around while fusing fabric, and that seems like good advice. Especially when I’m doing small pieces, I’ll carefully put the iron over the area, count to ten and then lift off carefully. The recommended method is to dampen an ironing cloth and press until dry, but counting to ten seems to work in most cases.
 The embroidered details came out well on the fishbowl quilt, so I went ahead and outlined everything (including the gills!) on the quilt top with a zig-zag stitch. Having the fabric fixed in place made this genuinely easy. The zig-zag will keep the edges from peeling up during the heavy use the quilt will get. However, it’s not entirely necessary, and should something come up a bit, it can always be tacked back down with the iron.
I sewed the backing piece and padding on a little over three quarters of the way around, trimmed the corners, and turned it inside out. Skewers are a useful tool to help to poke the corners out to square. I gave it a row of stitching about 1/4″ in from the edge (aquarium glass is about 1/4″ thick, right?) and did a couple of rows of what would be stitch in the ditch (stitch in the ditch is quilter speak for quilting along a seam–but there’s not a stitched seam there to create a “ditch” to stitch in) along the water surface and top of the gravel to keep everything held together.
The finished area is about 11″ x 29″. The only problem with it at this point is that there are two blind cave fish on the quilt.
The embroidered details came out well on the fishbowl quilt, so I went ahead and outlined everything (including the gills!) on the quilt top with a zig-zag stitch. Having the fabric fixed in place made this genuinely easy. The zig-zag will keep the edges from peeling up during the heavy use the quilt will get. However, it’s not entirely necessary, and should something come up a bit, it can always be tacked back down with the iron.
I sewed the backing piece and padding on a little over three quarters of the way around, trimmed the corners, and turned it inside out. Skewers are a useful tool to help to poke the corners out to square. I gave it a row of stitching about 1/4″ in from the edge (aquarium glass is about 1/4″ thick, right?) and did a couple of rows of what would be stitch in the ditch (stitch in the ditch is quilter speak for quilting along a seam–but there’s not a stitched seam there to create a “ditch” to stitch in) along the water surface and top of the gravel to keep everything held together.
The finished area is about 11″ x 29″. The only problem with it at this point is that there are two blind cave fish on the quilt.
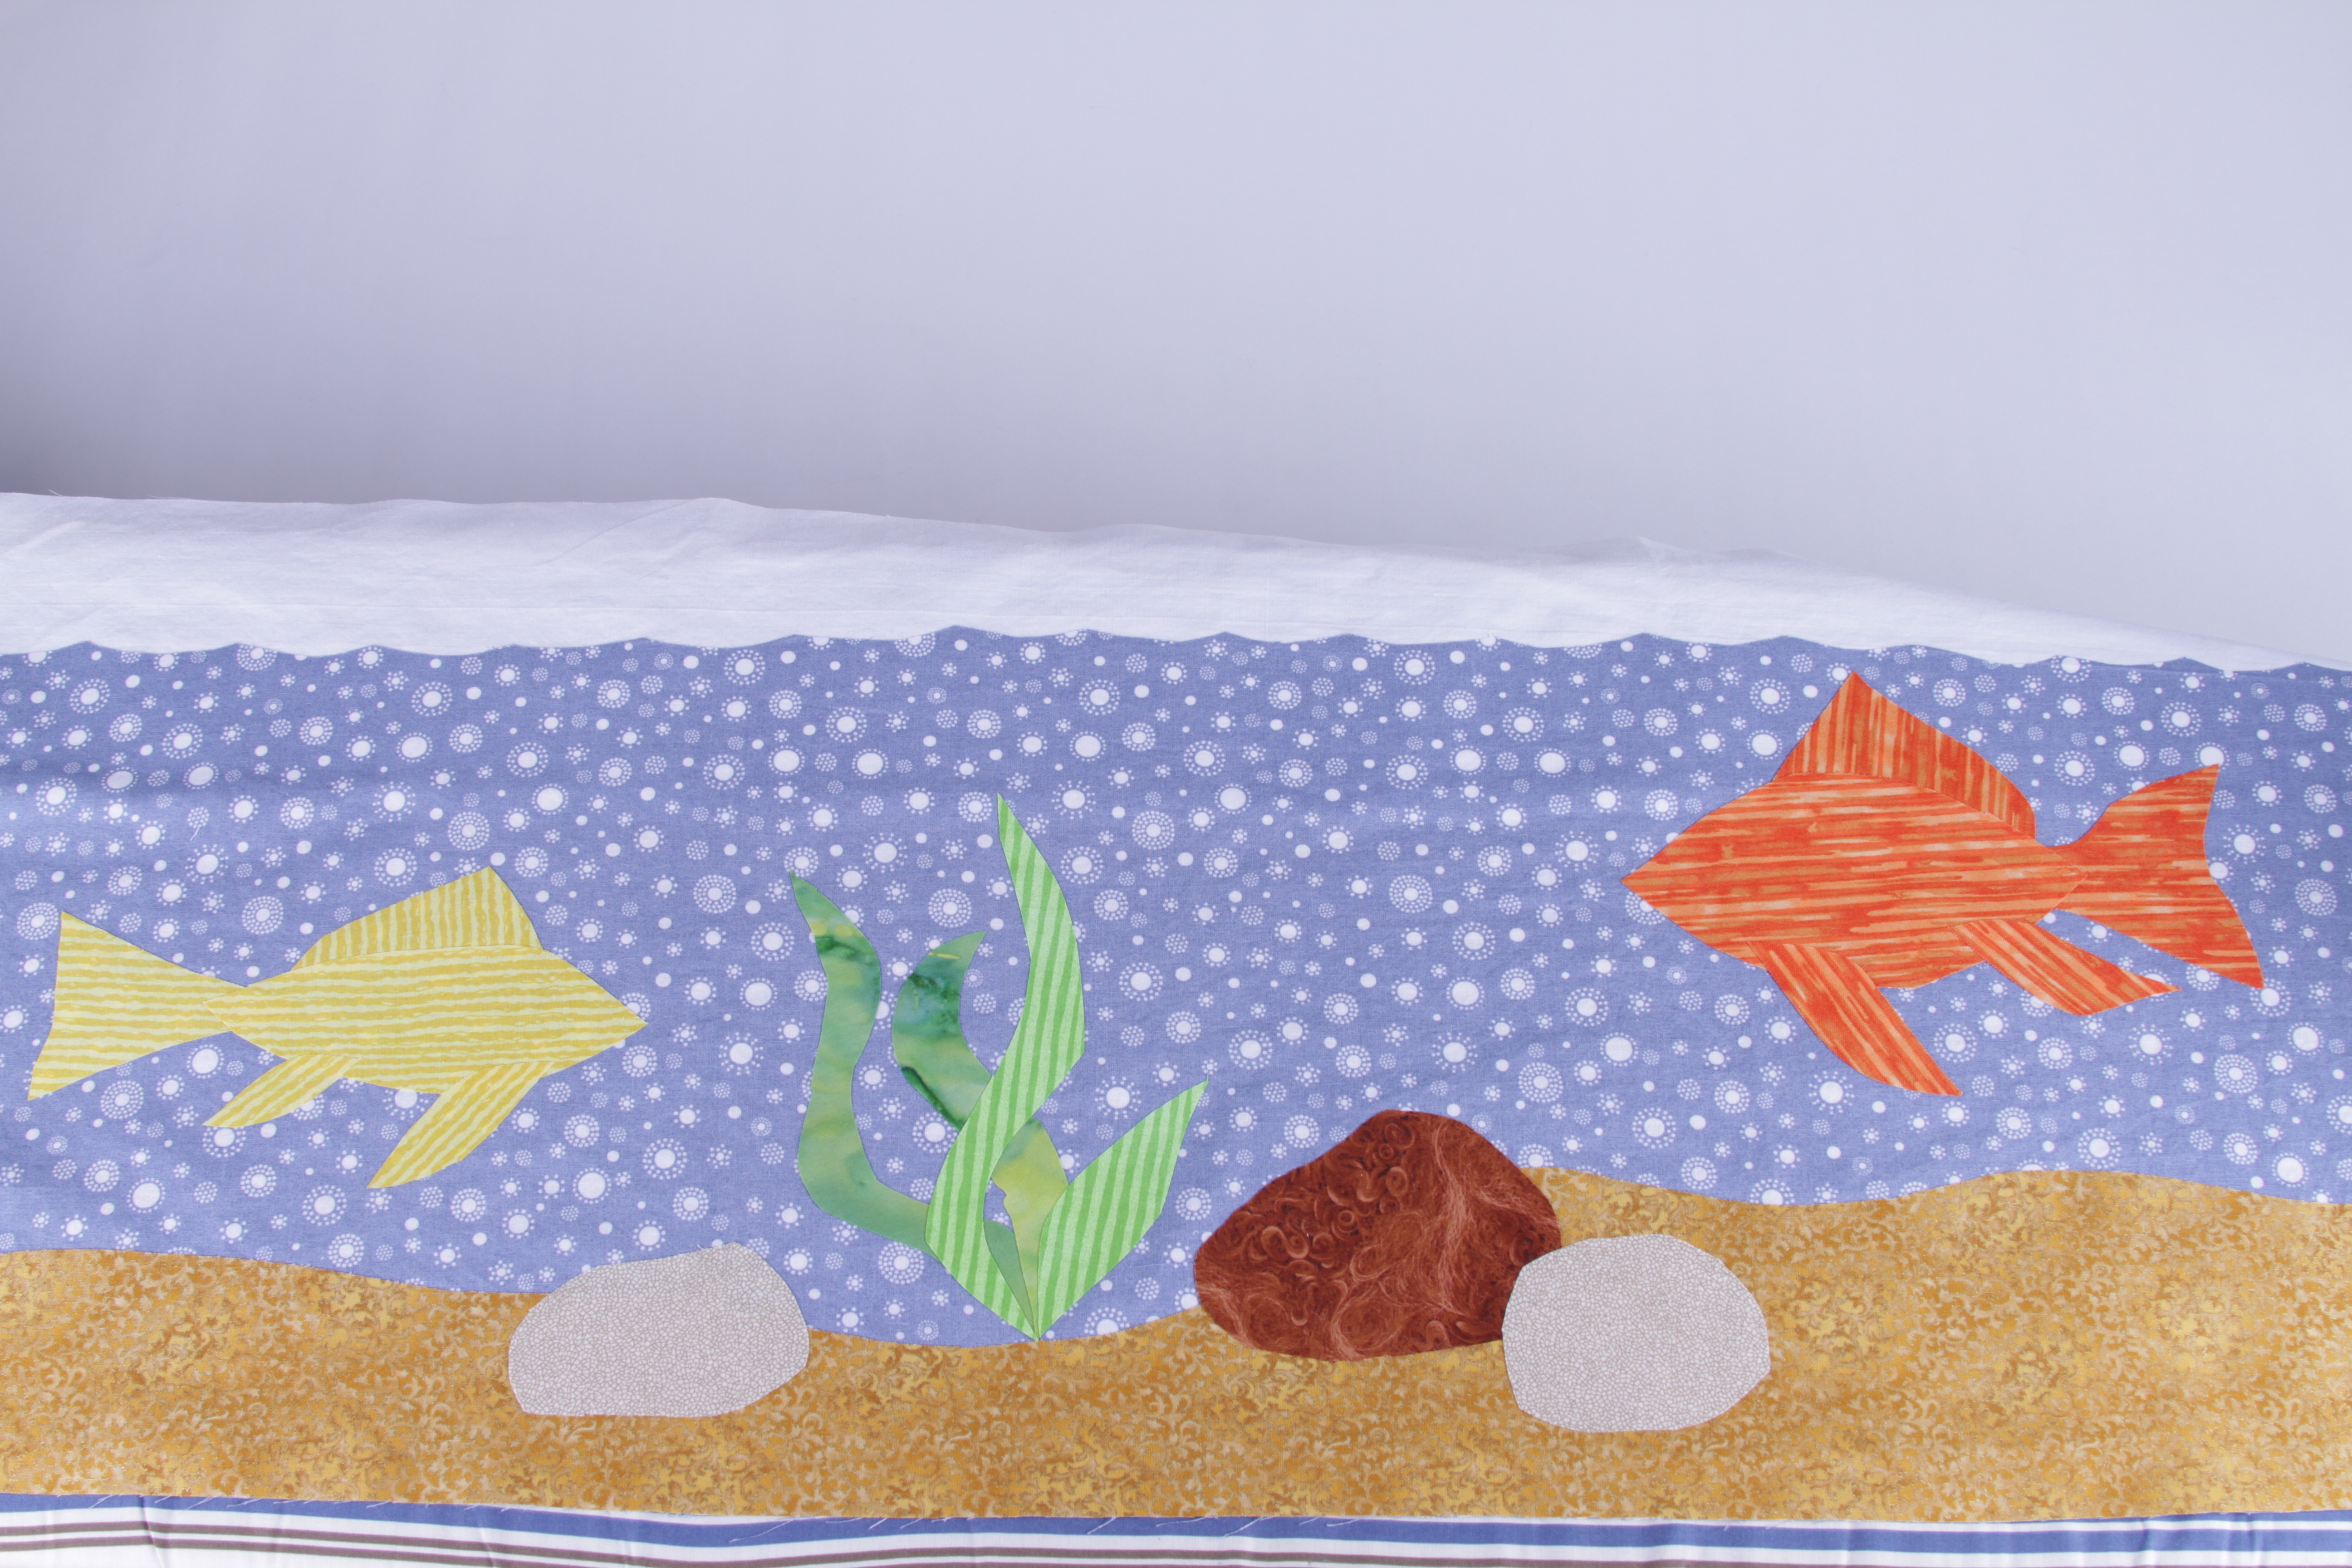
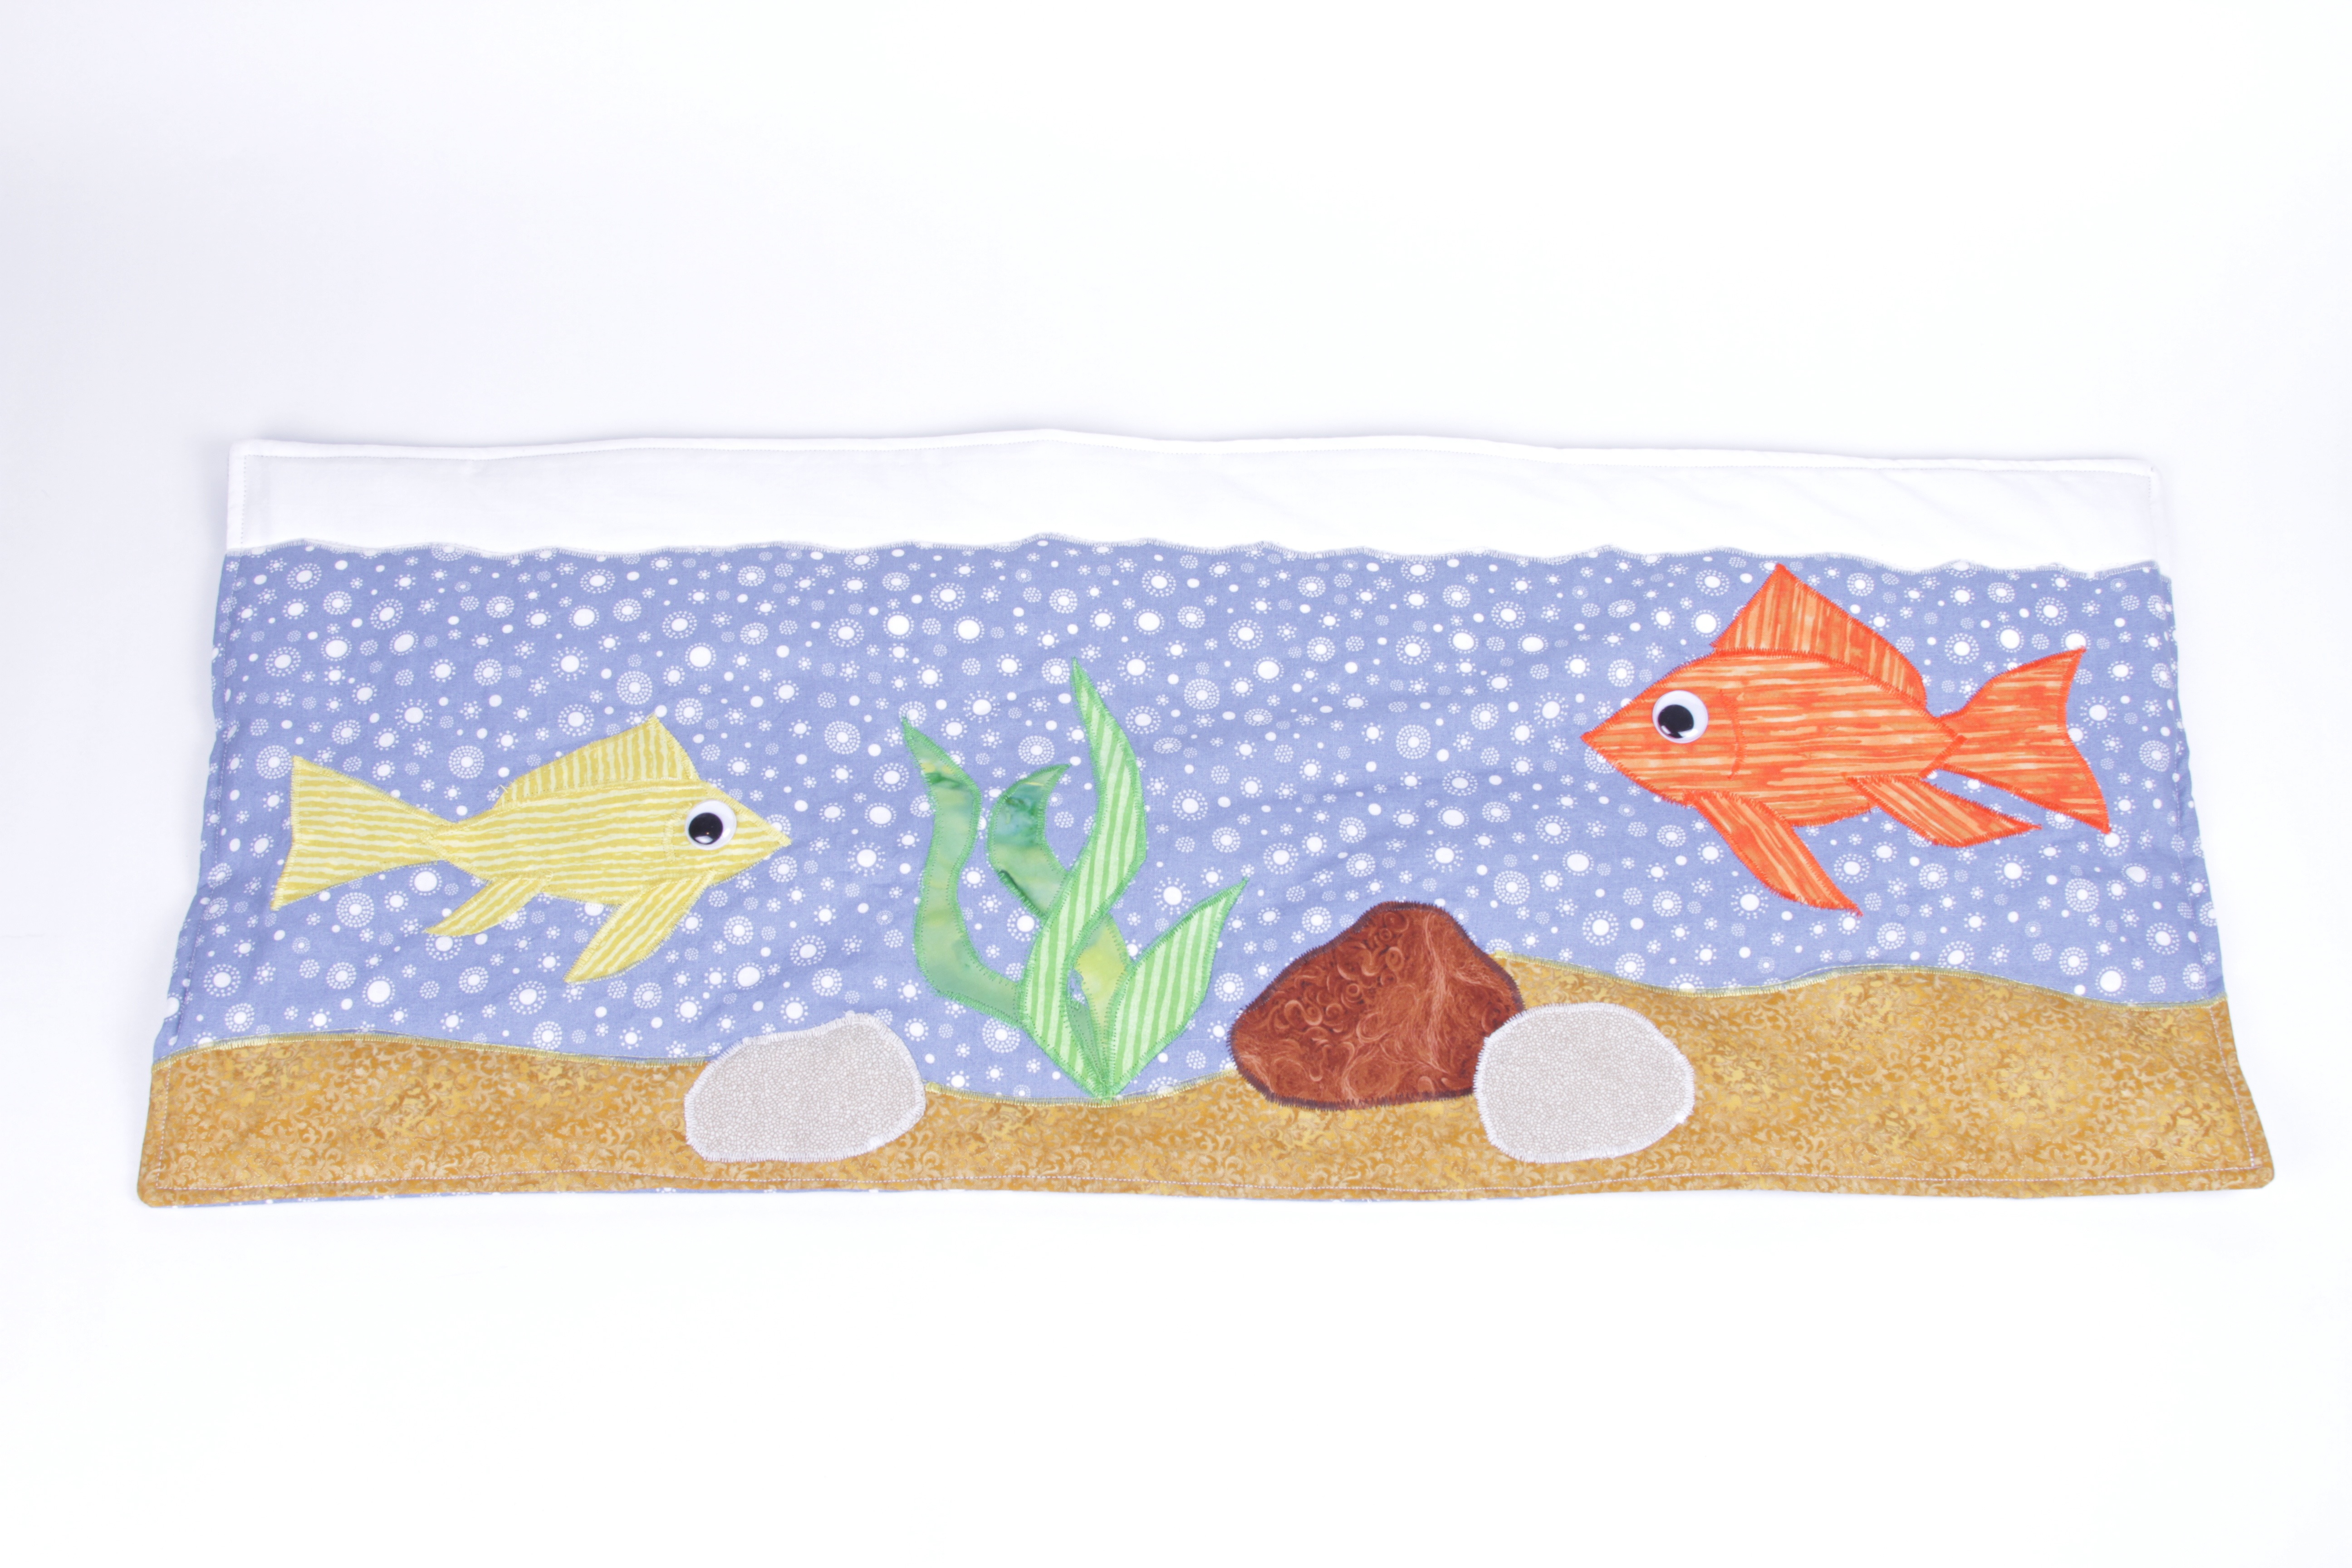 Googly eyes make everything better! We also tried leaving the fish blind and putting the googly eyes on one of the rocks. That looked pretty good, too.
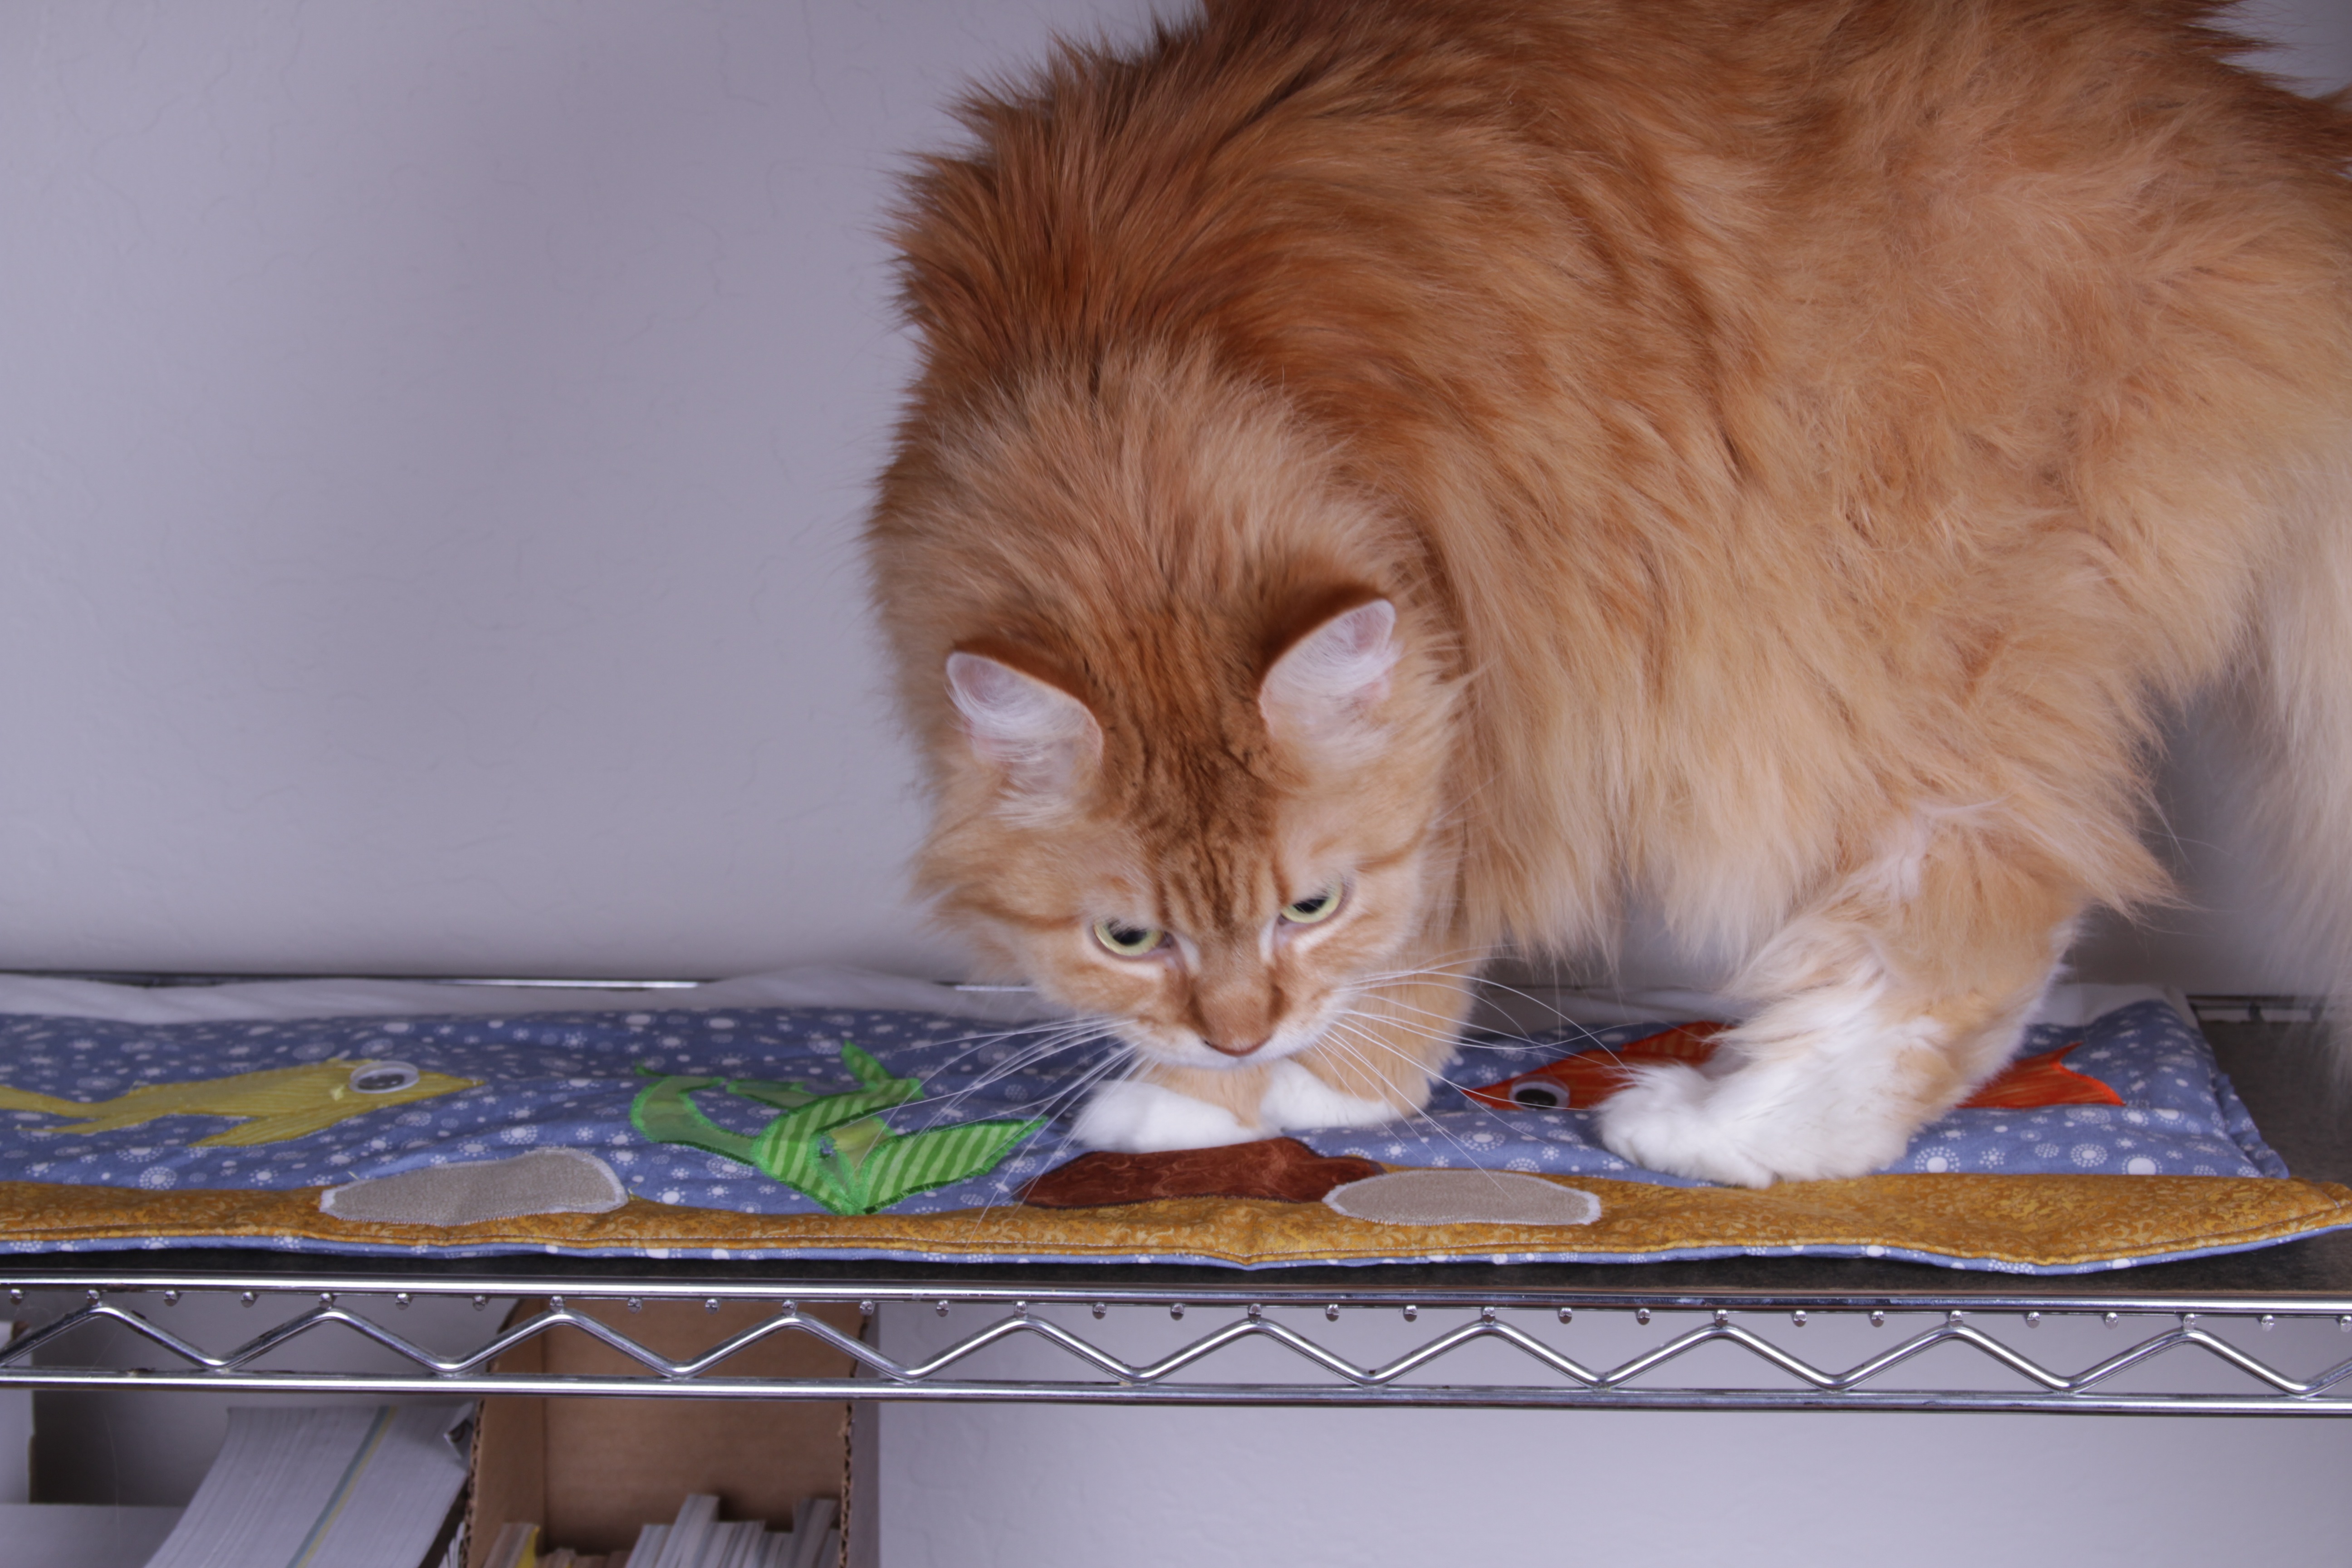 Jellybean was skeptical at first.
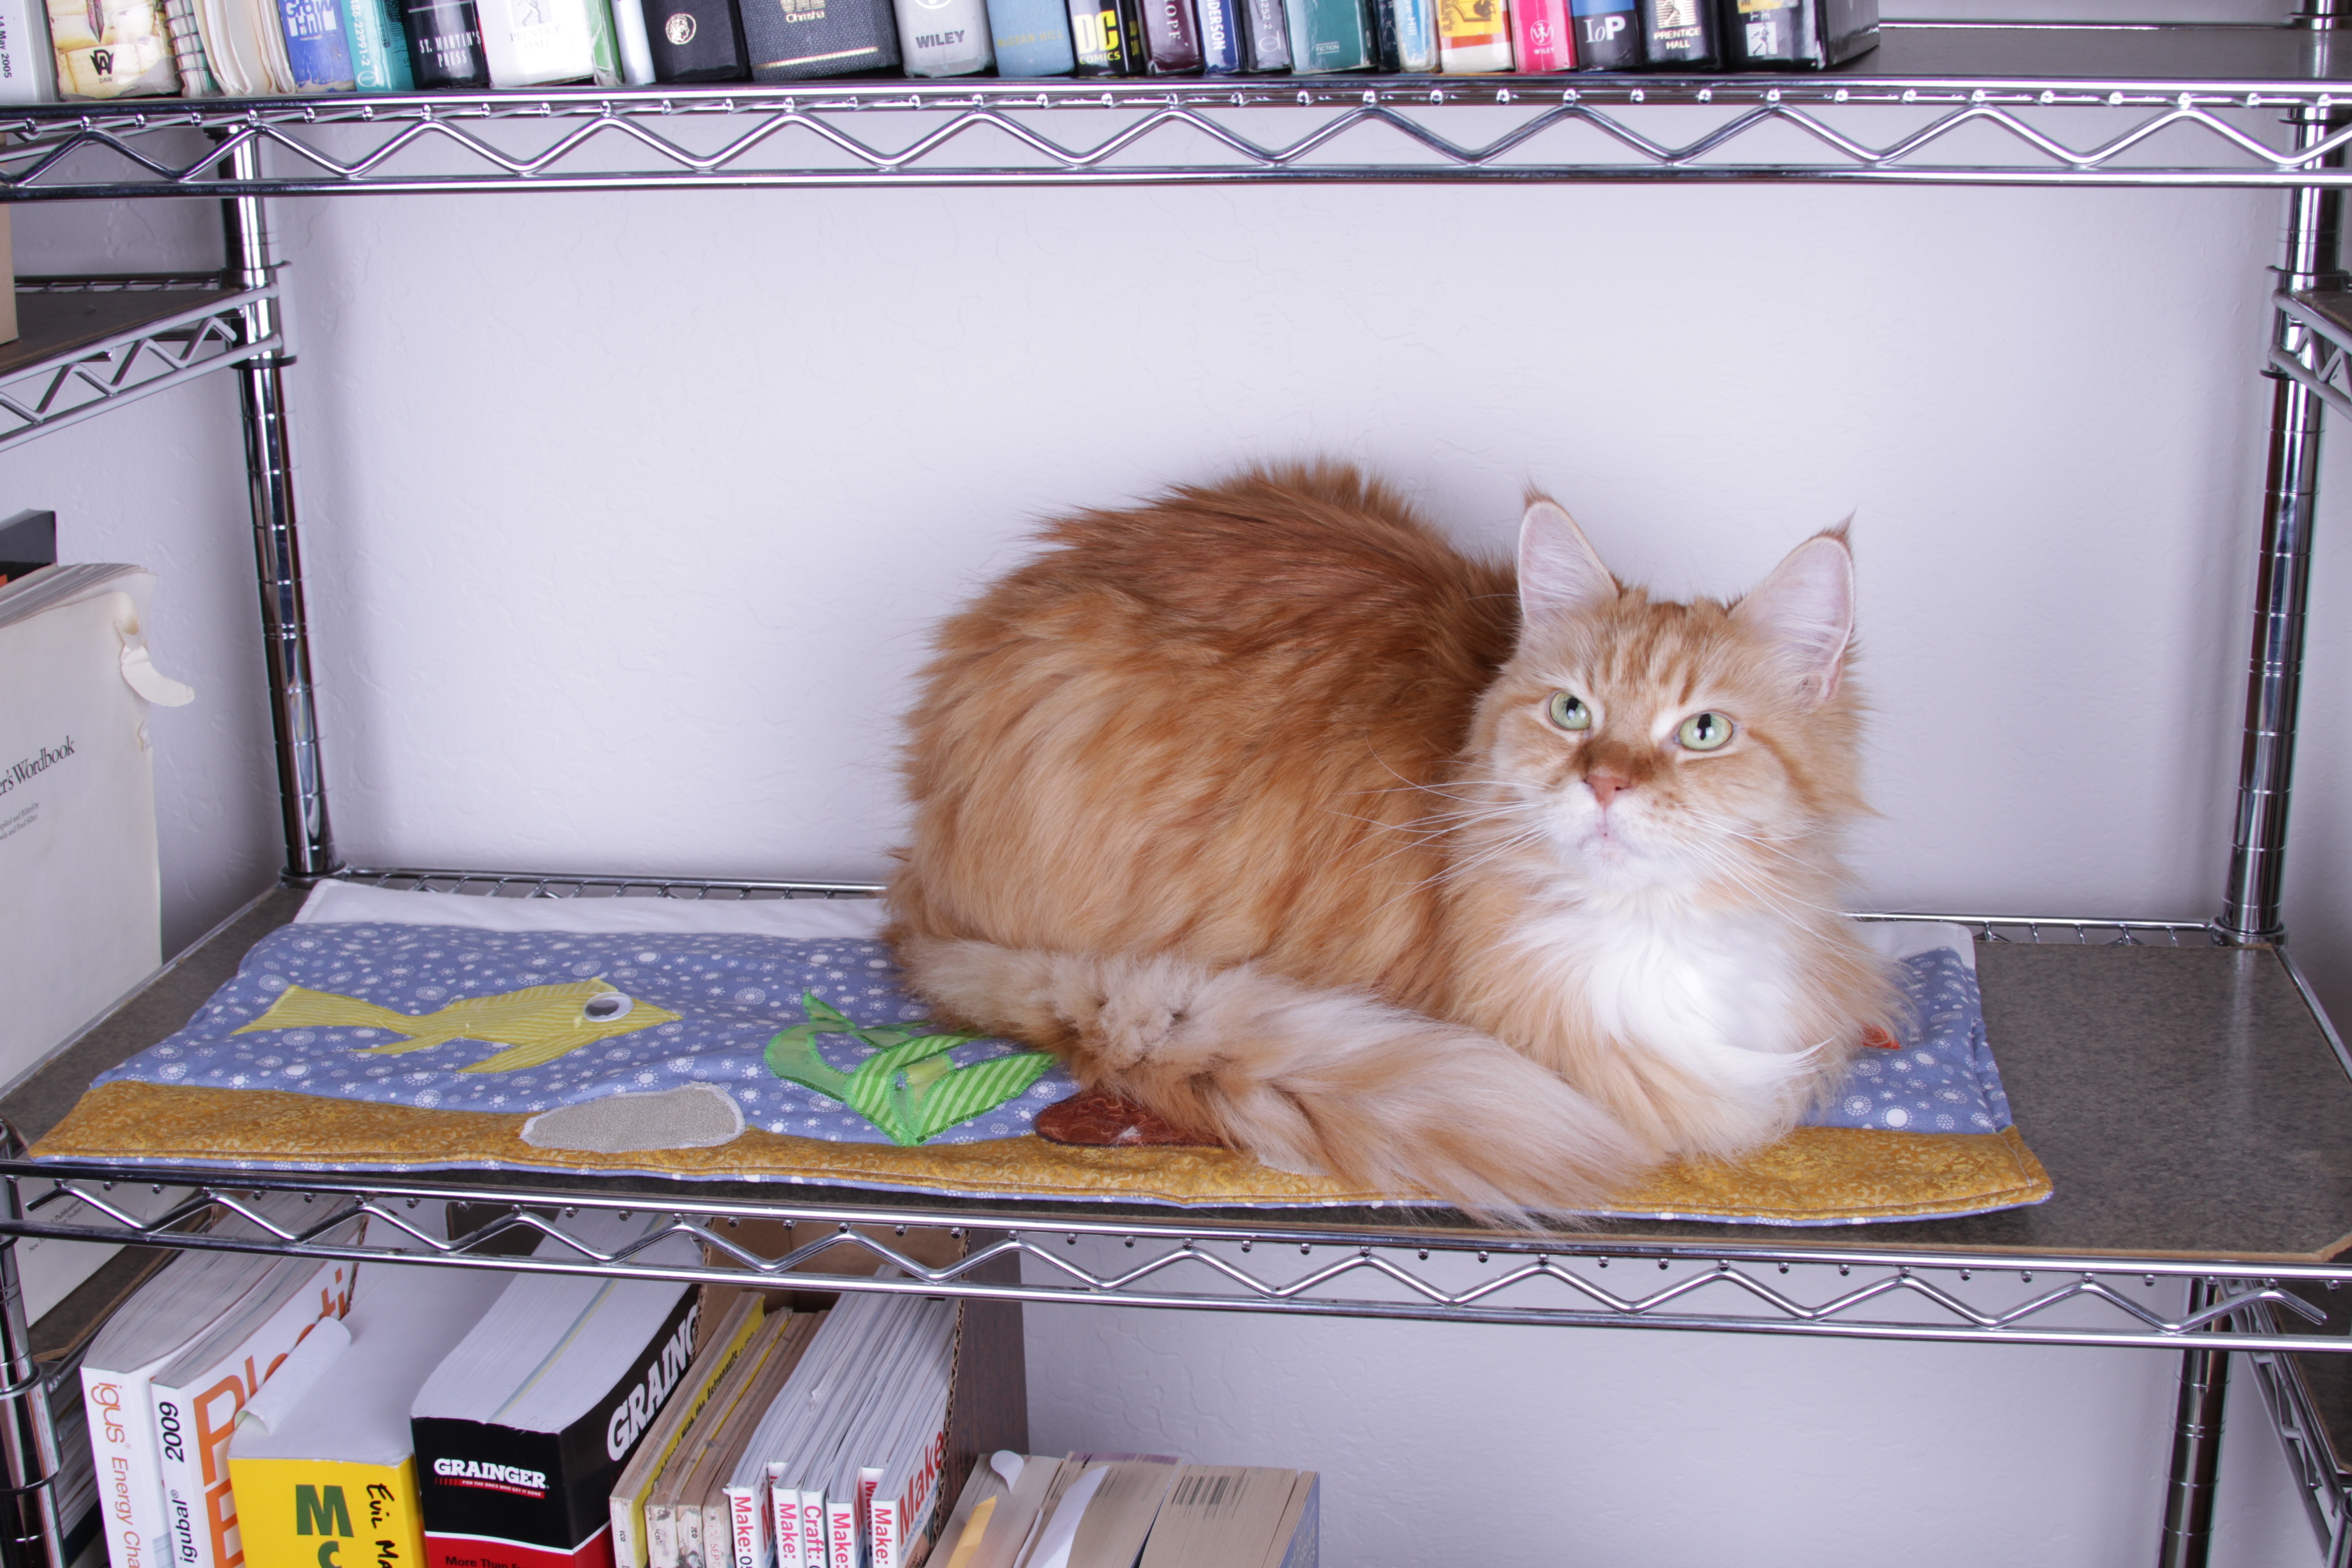 But the quilt has been accepted.
Excellent post!
Fusible webbing was how we made the details on our ugly doll project:
http://www.flickr.com/photos/oceaneer99/4111021329/
On some of them, we went over the edges with a zig-zag stitch.
Hmm, wonder if you could use iron-on as a way to make captive wires for wearable circuits.