


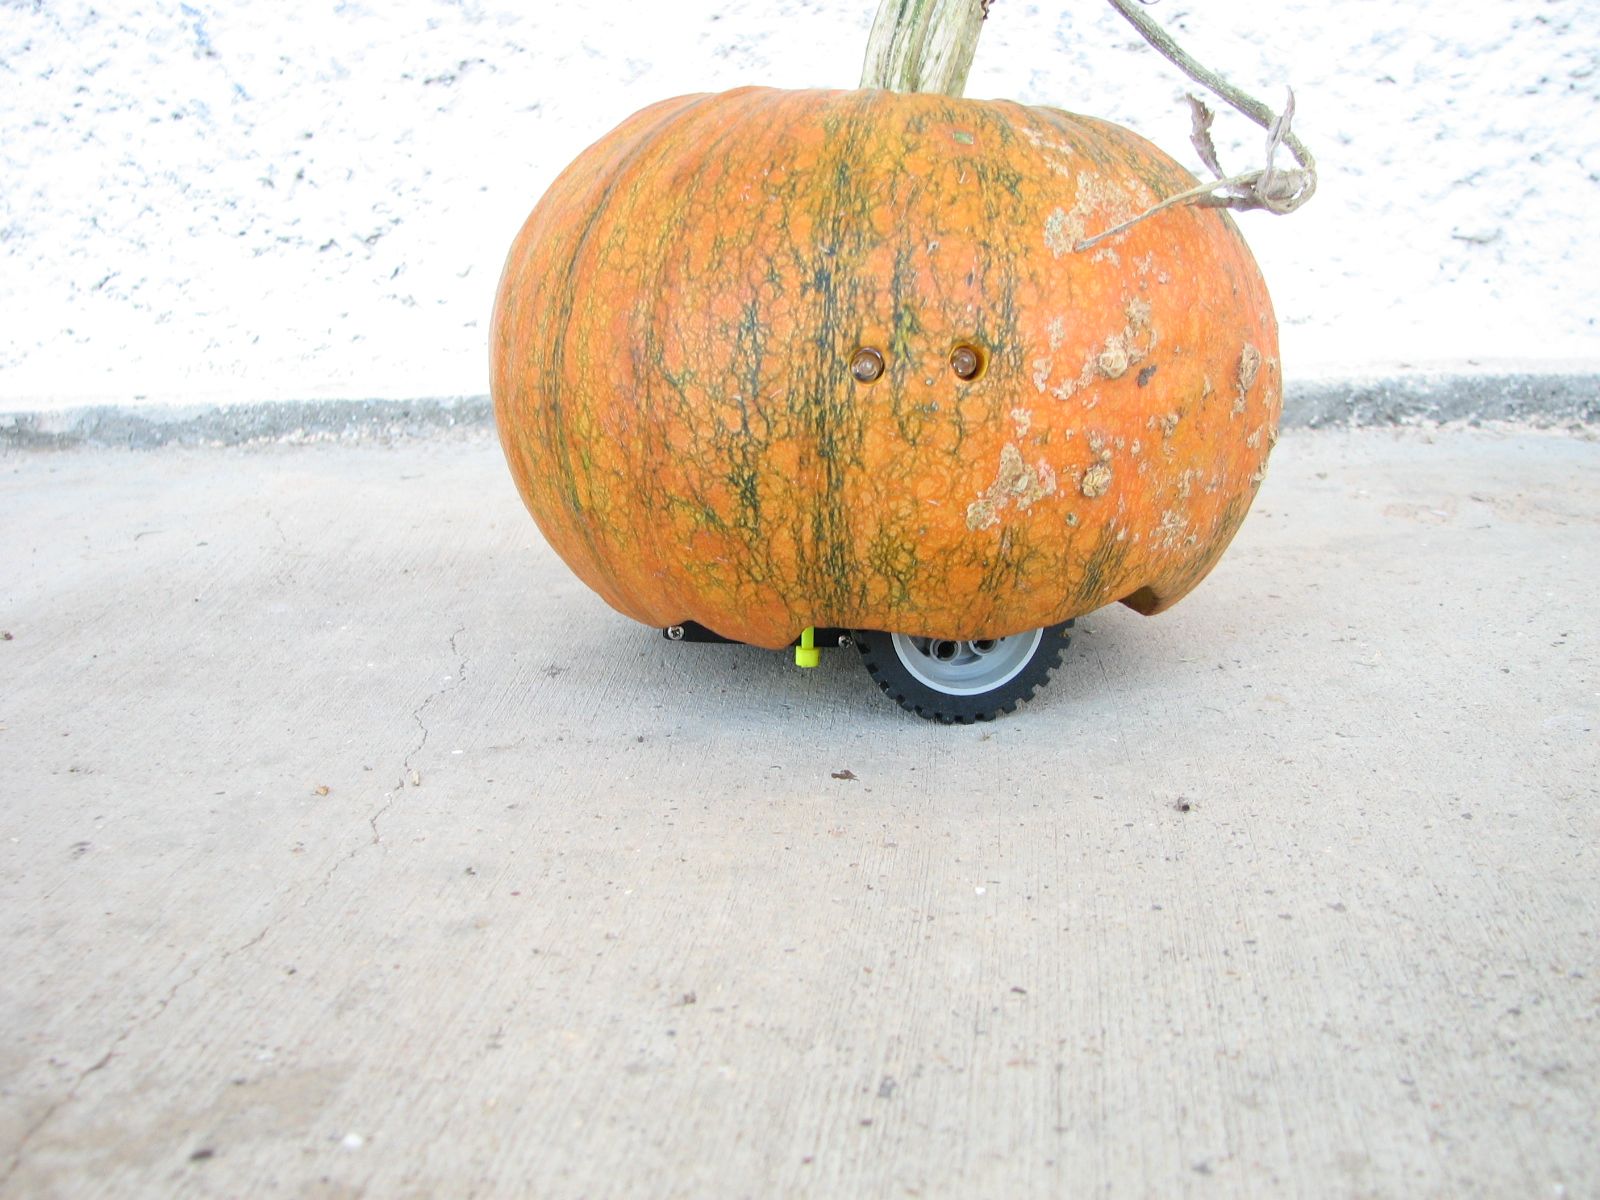
The Rovin’ Pumpkin’ is a simple robotic pumpkin, and a close cousin of the Snap-O-Lantern. Silently, it sits on your porch– camouflaged amongst the humble squashes.
After a minute, its green eyes start to glow, and it creeps… moving about one foot to the left… and stops. The eyes go dark again. It fades into the darkness. And it waits.
After several minutes and several steps, it reverses direction, and begins to creep the other way. Hopefully before it falls off of your porch.
Practical? Heck no– it’s a halloween robot, and a perishable one at that. Its sense of direction is terrible, and who knows where it would end up if you let it loose in a park. Adult supervision and regular course corrections are suggested.
On the bright side, it looks very cool, especially at night, and it’s a relatively easy project (especially compared to some of our other robots). Also, and for better or worse, it can indeed scare the beeping bleep out of unsuspecting individuals who visit your darkened front porch.
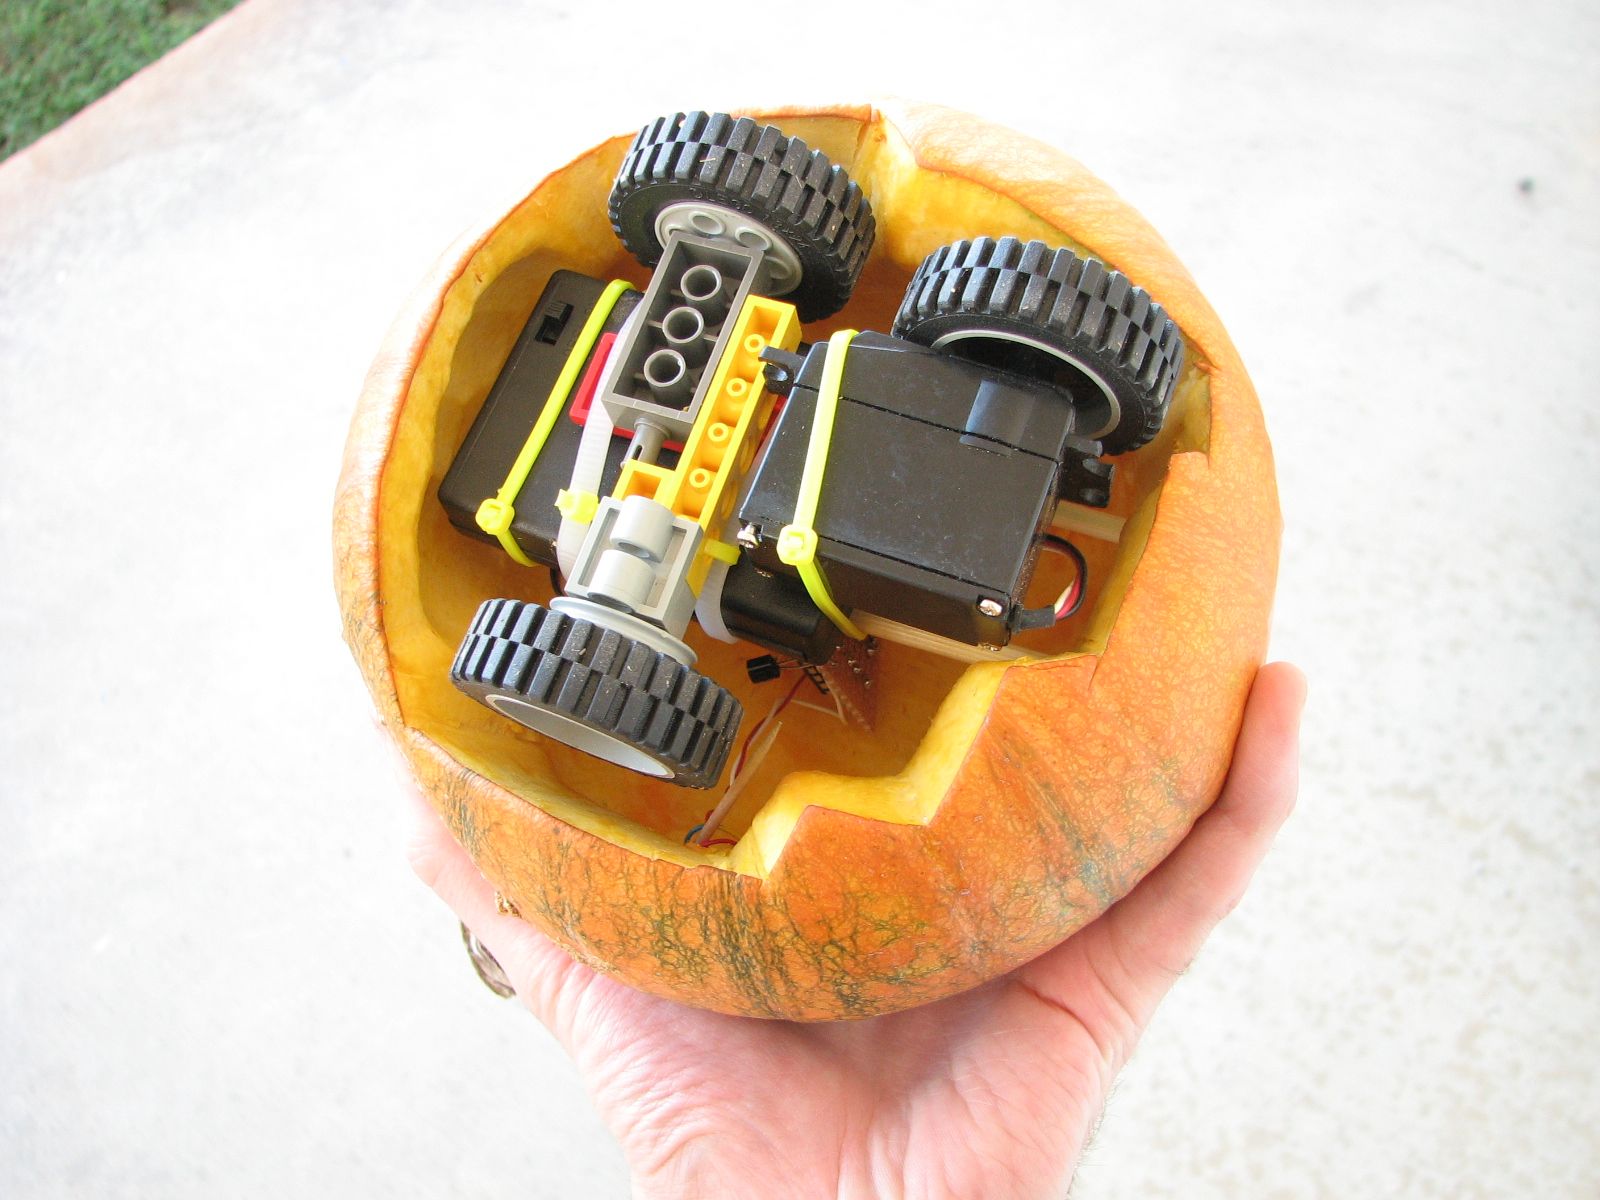
The Rovin’ Pumpkin’ started out as a particularly attractive green-veined pie pumpkin. We carefully carved it out from the bottom to leave a shell that could sit on top of our robot platform.
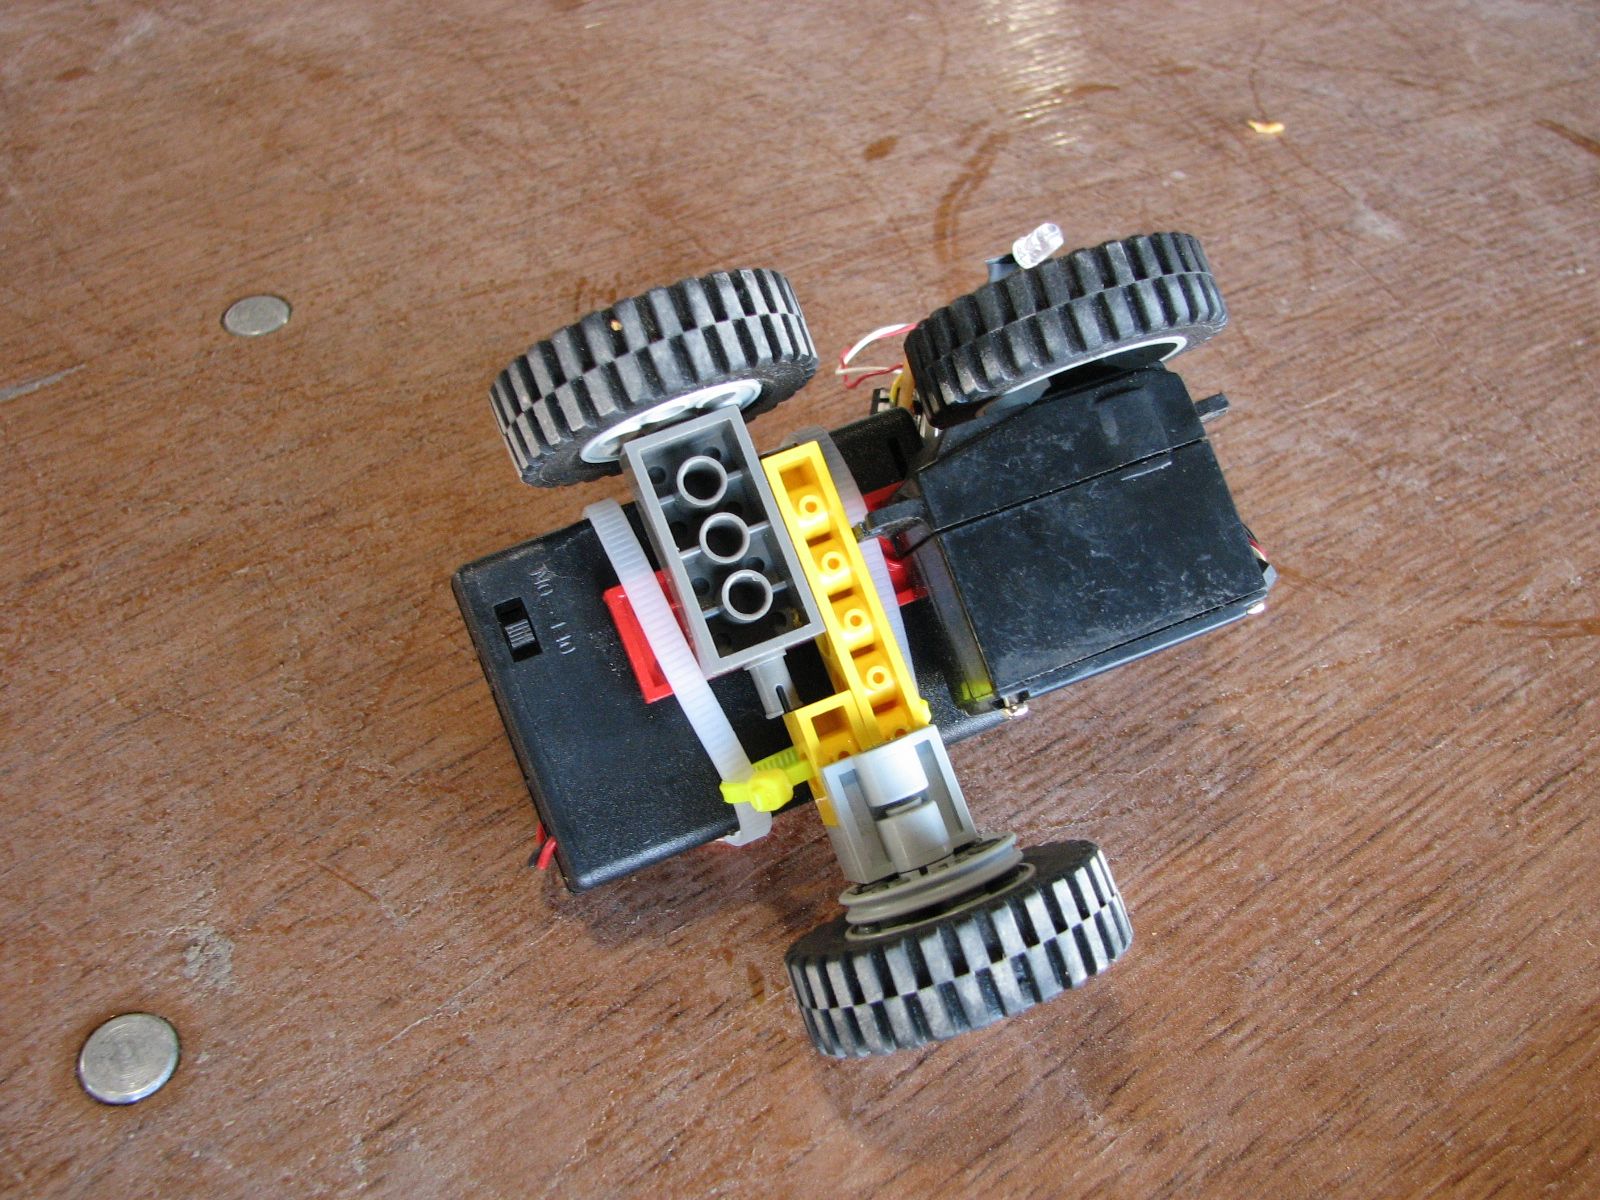
The platform itself was built from three Lego wheels and one standard size servo motor, modified for continuous rotation.
Some cable ties and superglue were used to hold it together with a 3xAA battery box.
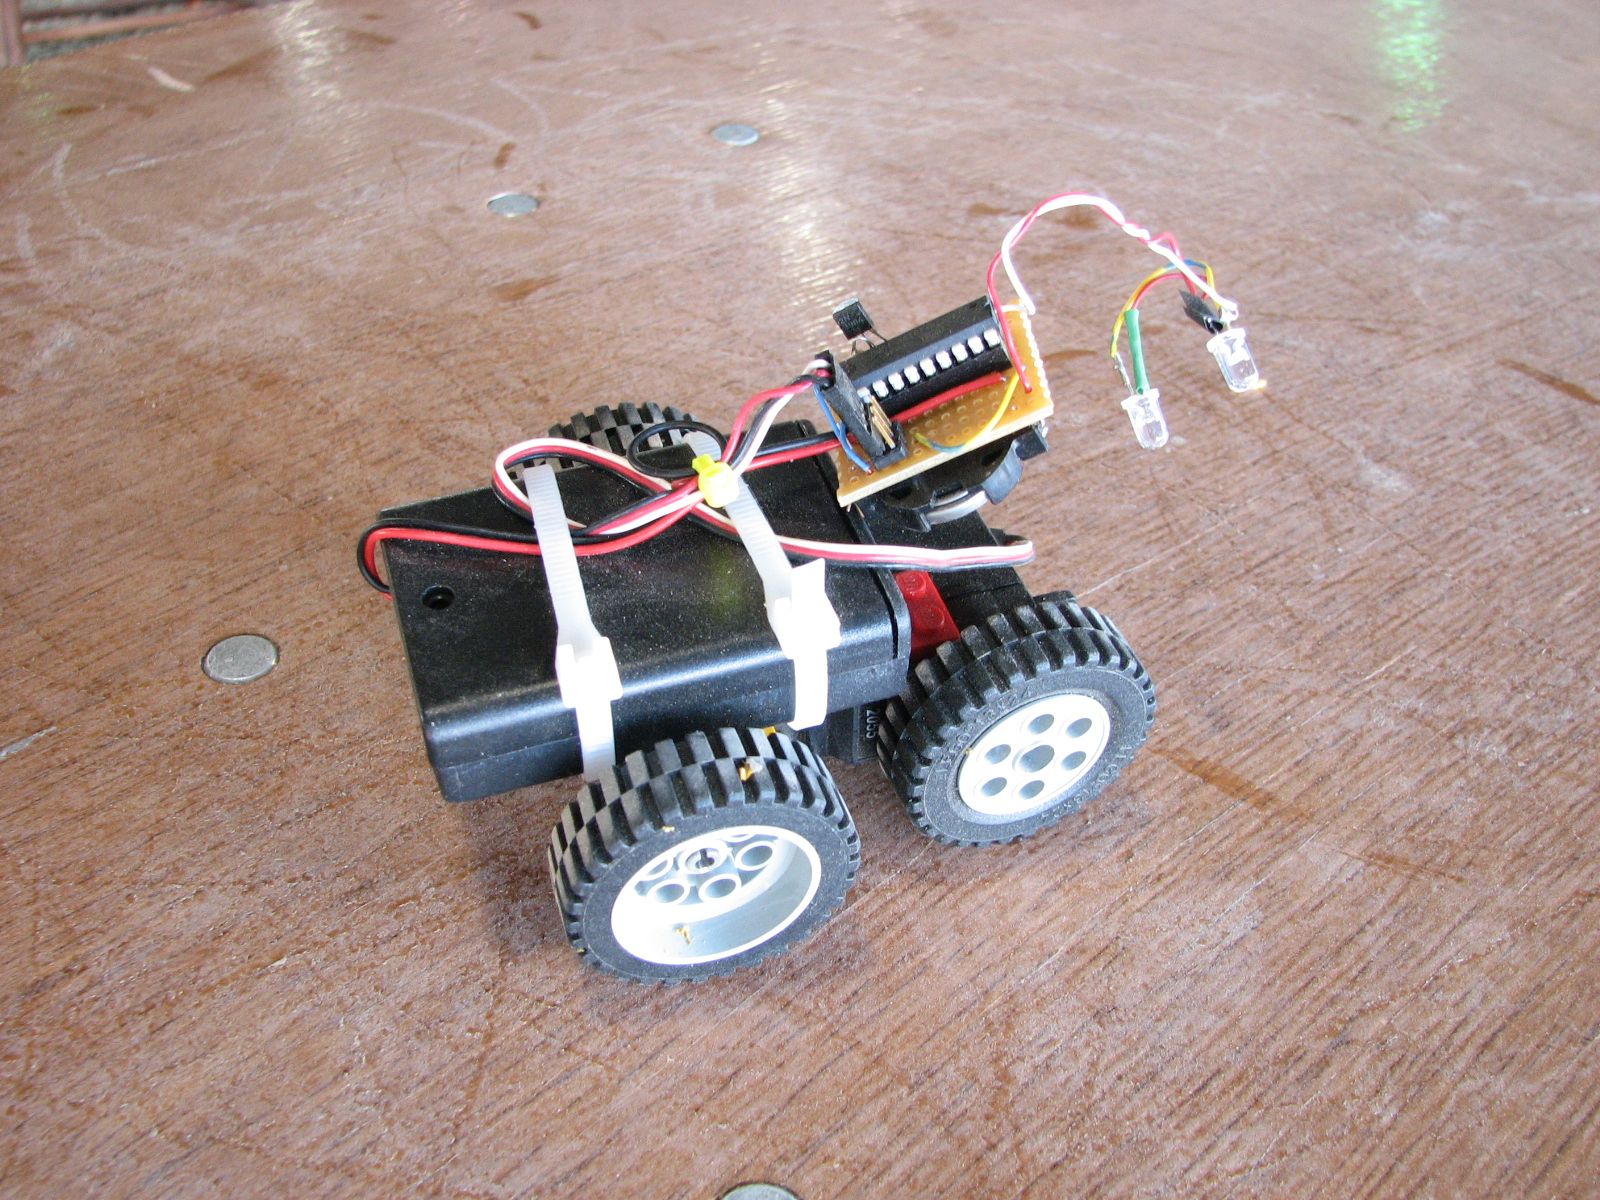
Deep inside and on top of the battery box is the tiny circuit board with an ATtiny2313 microcontroller and leads going to two LEDs for the eyes. The circuit is the same one used in our Snap-O-Lantern project, with the exceptions that (1) this one has a standard size servo motor and (2) a transistor was (unnecessarily) used to drive the two LEDs. If we were to start this over, we’d probably try to save some wiring time by using our ‘2313 target boards.
A very short video follows, embedded below, or you can click through to see it on flickr.

Not that you could tell from this video taken in the daylight, but the LED eyes are painfully bright green. ;)
The source code for this project is available for download
here (4 kB .zip file). It’s designed for use with AVR-GCC and an AVR ISP programmer. If you’re new to AVR programming, you might want to start by looking at our list of resources for getting started with AVR microcontrollers.
You can find more pumpkin projects in our Halloween Project Archive.
That is SO fabulous! I could see that being an endless source of entertainment if you lived on a street with foot traffic. Bravo!
I have a little bit of arduino experience; but so far, nothing that is outside of that environment (on the atmel chips).
would this firmware work as-is on a 168 or 328 chip?
at some point, I would like to learn how to go ‘outside’ the ard environ but I’m just not at that point, yet.
/bryan
The parts of the code that access the hardware features– I/O pins, timers, and so forth –are quite device specific, and would need to be changed to work on the ‘168. It would be a straightforward change to make.
On the other hand, it’s possible to use an Arduino as an ISP programmer (using the MegaISP software) to program other AVR devices including the ‘2313– you might consider this a good opportunity to learn.
—
Windell H. Oskay
drwho(at)evilmadscientist.com
http://www.evilmadscientist.com/
What sort of servo would you recommend for this? I know very little about them, or where to get one.
What you are looking for is called a "standard hobby servo," or "standard RC servo" and costs about $10 new. Consider getting them from Trossen Robotics, Tower Hobbies, or Pololu. You can also get ones that are pre-modified for continuous rotation.
—
Windell H. Oskay
drwho(at)evilmadscientist.com
http://www.evilmadscientist.com/
Great work! I’m sure you get some good scares out off this one.
Do you have a picture / some info on how you have mounted the LEGO wheel to the servo? I was wondering how you did that. Thanks.
Regards, Michael
It was glued to a round servo horn, kinda like the ones in this photo: http://www.flickr.com/photos/oskay/278993366/
—
Windell H. Oskay
drwho(at)evilmadscientist.com
http://www.evilmadscientist.com/
thats awsome must be cool for halloween could you explain how you wired it or biuld it a little that would be awsome i want to know what process u went through to biuld this thanks :)
thats awsome must be cool for halloween could you explain how you wired it or biuld it a little that would be awsome i want to know what process u went through to biuld this thanks :)
If you’ll read a little more closely, you’ll see that we linked to the wiring diagram and posted the source code, too.
—
Windell H. Oskay
drwho(at)evilmadscientist.com
http://www.evilmadscientist.com/
Bumpkin. Call it Bumpkin.
;D
Marcel
I made one! thanks for the idea Windell! I made it with a Lego power functions kit and a small pumpkin and 4 Lego wheels and i carved two holes for Lego lights and a jackolantern face.
PORTB = 0;
DDRB = 63U;
I’m playing with this project and ran across this code. Can someone point me in the right direction for what this means? I’m used to binary and hexadecimal; what’s the U?
(I’m new to C)
The U suffix is used to explicitly indicate an unsigned number. In this particular case, it’s not actually needed, and is probably there by habit alone. Try substituting just a 63 (not a 63U) and see that there isn’t a difference.
Windell H. Oskay
drwho(at)evilmadscientist.com
http://www.evilmadscientist.com/