


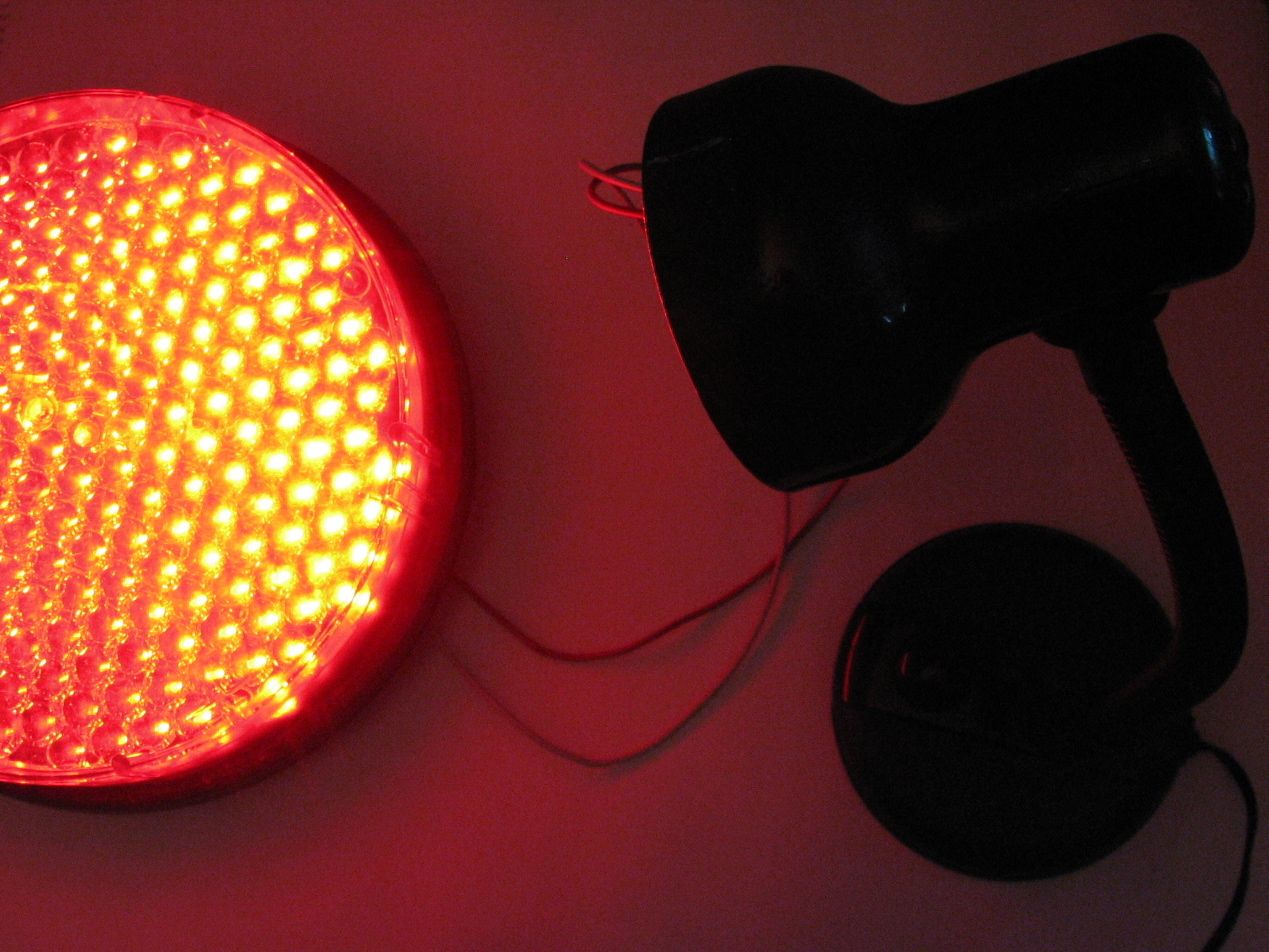
Many cities are switching to LEDs for their traffic signals, and is it any wonder? The energy savings are tremendous, never mind not having to change burnt-out bulbs all the time. Luckily for us, LED traffic signals are finally ubiquitous enough to show up at the surplus stores. Our local junk shop had a couple of big barrels of LED stoplights and turn signals of various sizes. We picked one out that still had the connector attached for screwing it into a regular light bulb socket.
Of course, after we made sure it worked, we promptly took it apart. It is a fabulous object, designed to be used, abused, taken apart, and maybe even fixed, though there is not much to go wrong. Click through for more gory photos and delightful design details.
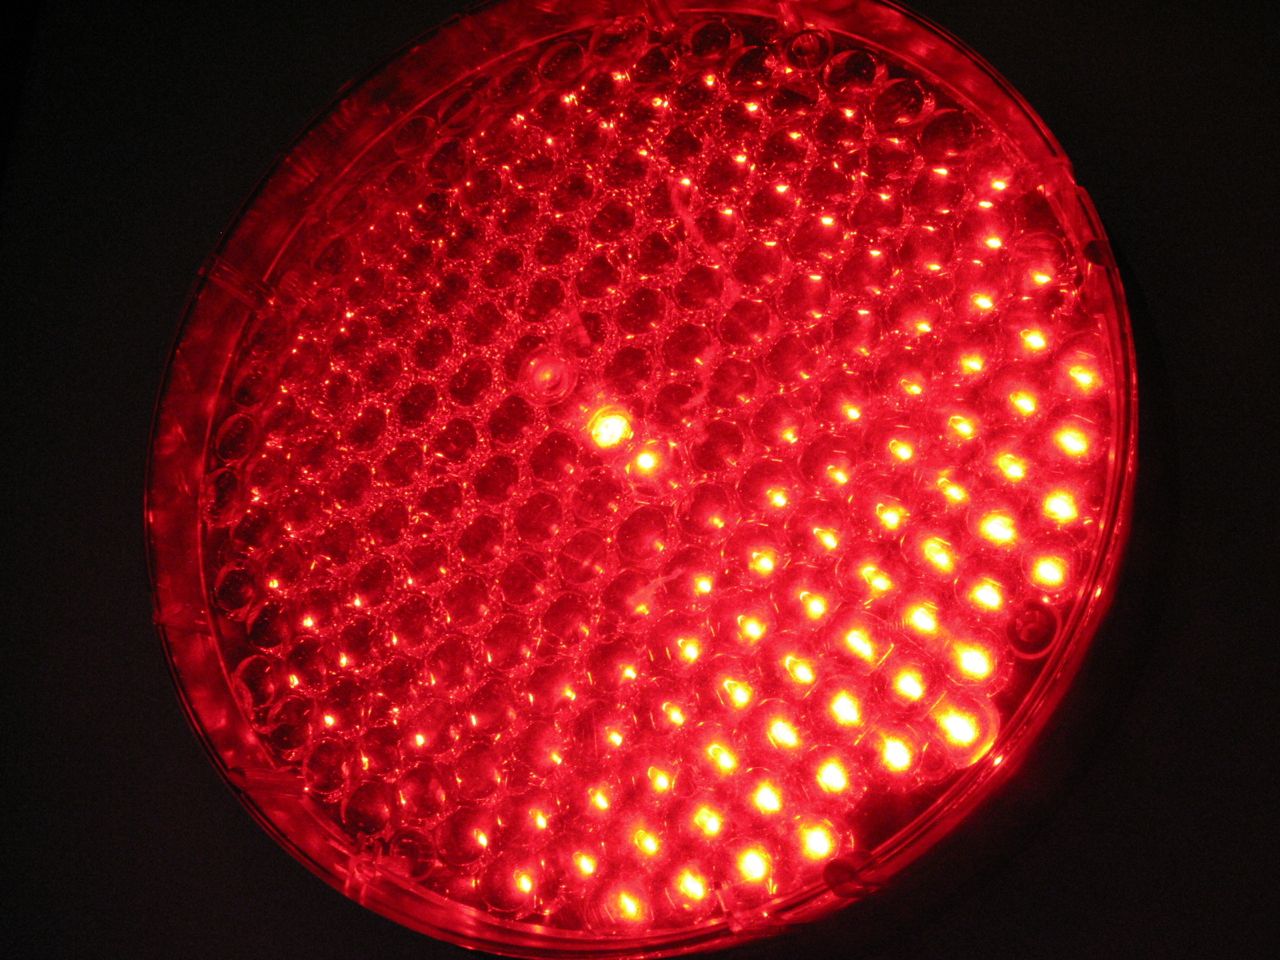
Of course, the first thing we did was screw it into a lamp to see how bright it was. Since it is only a 14 watt device it can be used in just about any fixture. It is very strange to see a couple of wires coming out of a lamp, but it is even stranger to turn the lamp on and see the light come from elsewhere. So how bright is it? So bright it is hard to look at, and everything seemed extremely green for a long time after we turned it off. Okay, so that’s a pretty subjective measurement, but it really is extremely bright. My eyes hurt thinking about it.
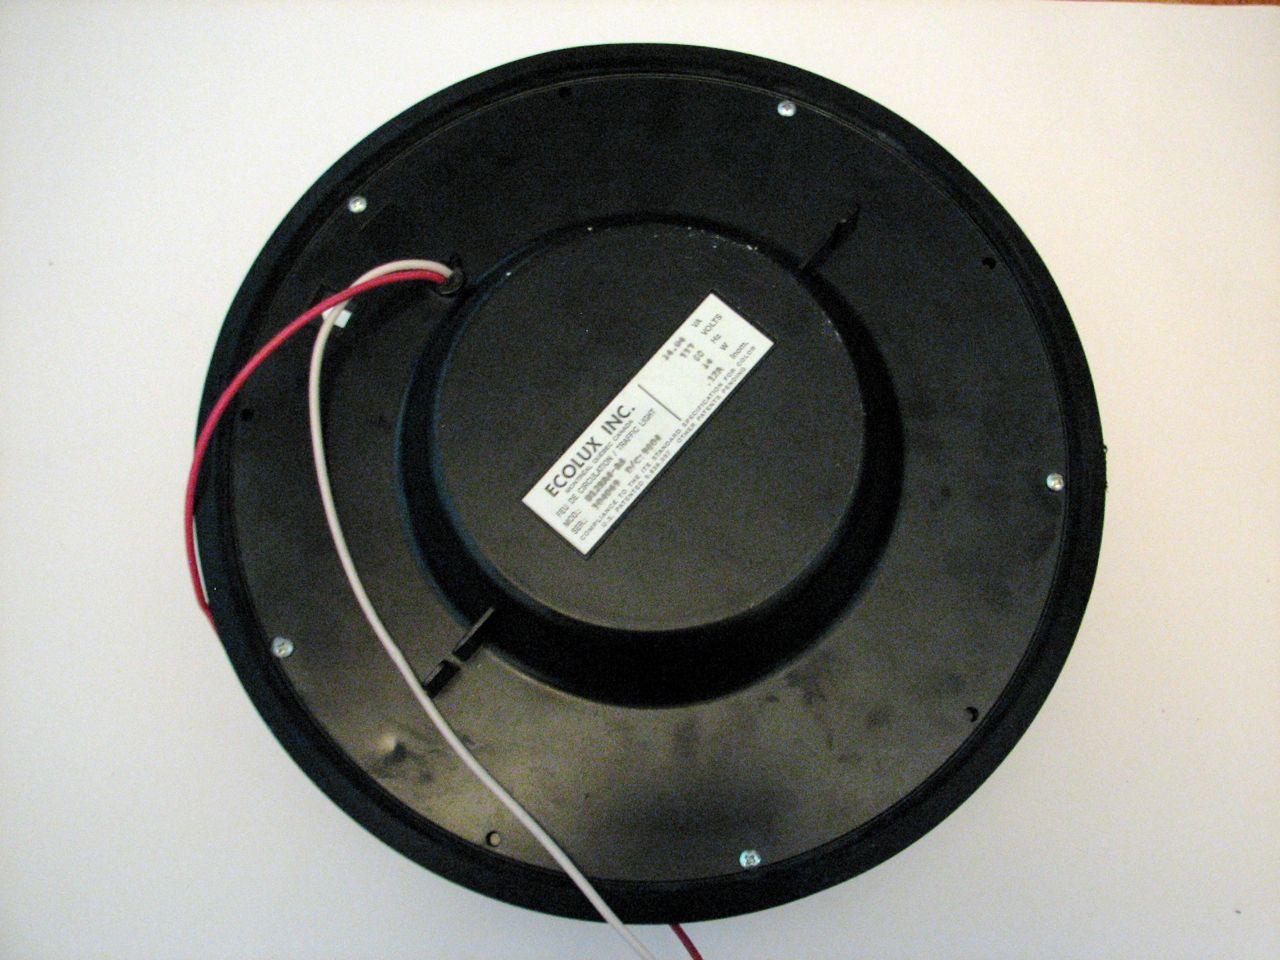
From the back you can see five screws just under the edge of a rubber gasket. The gasket pops off, and the phillips head screws are easily accessible. Interestingly, there are ten holes, and there is also a handy reference arrow to help you determine which way is up.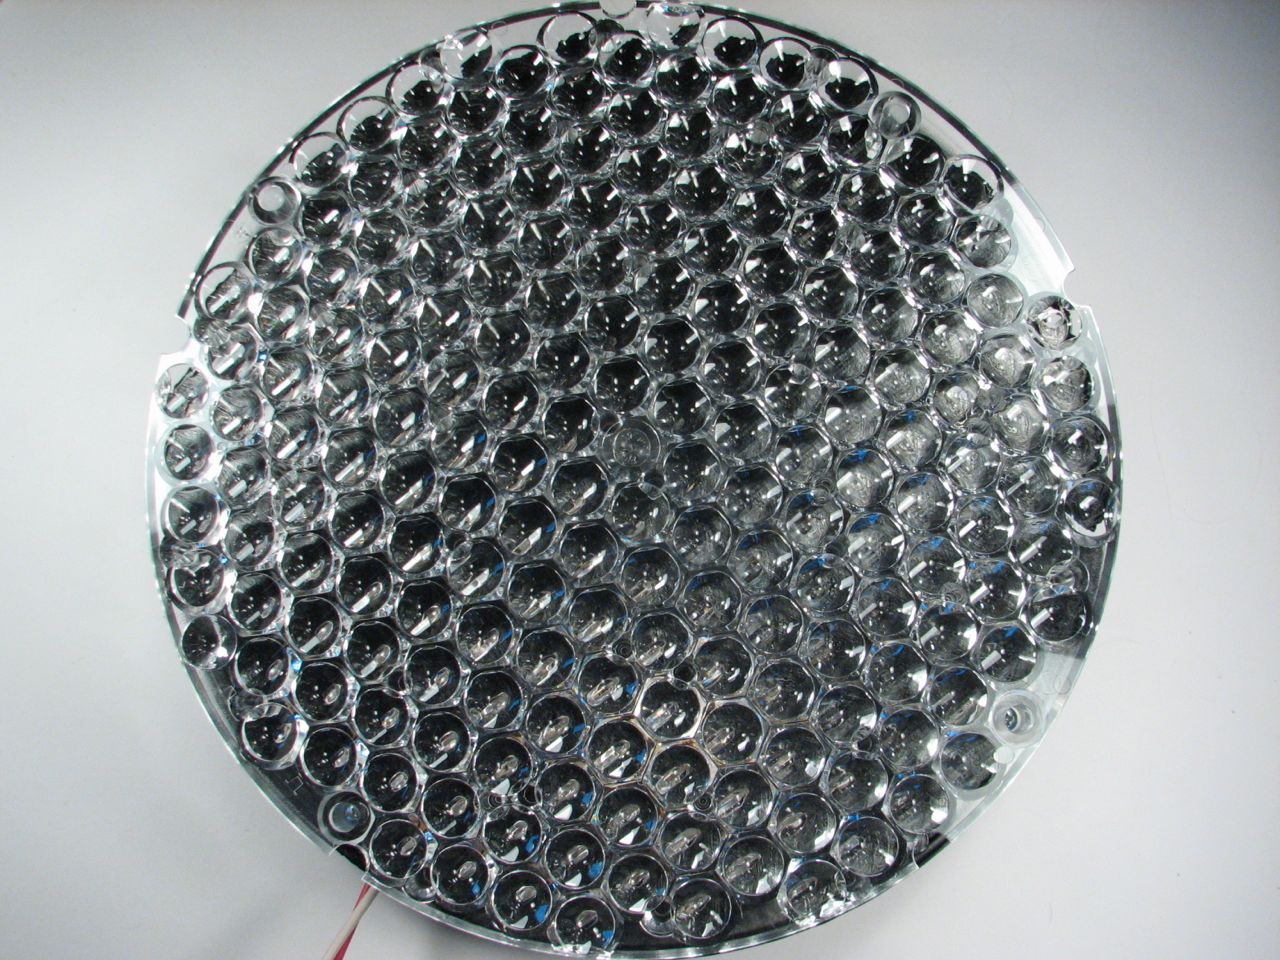
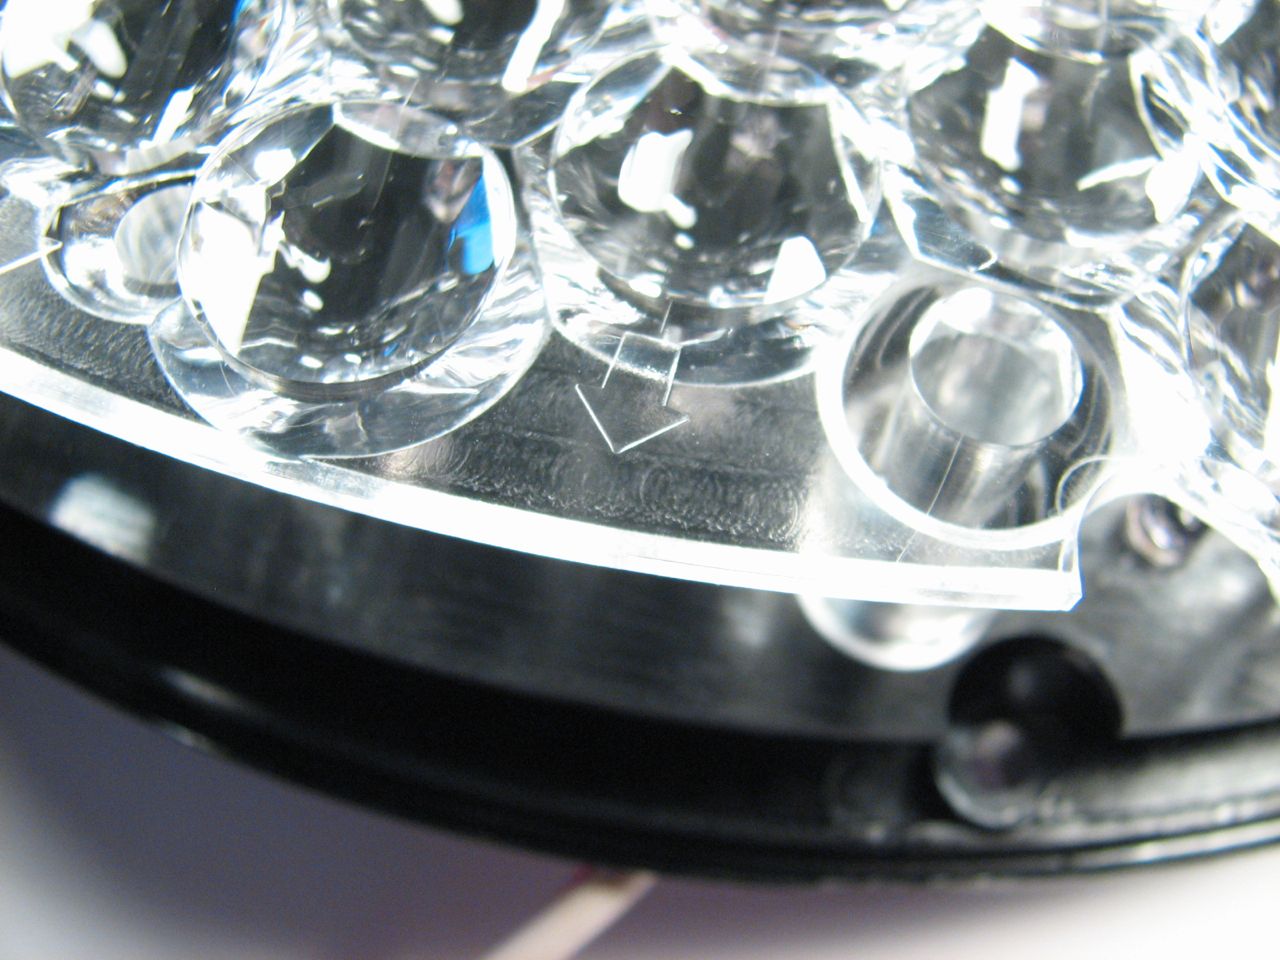
With the first set of screws out, the red plastic cover comes off and you can see the sheet of lenses which is fixed over the LEDs. This also has a reference arrow, which was helpful during reassembly. There is another set of screws going through the legs for the lenses to the back cover.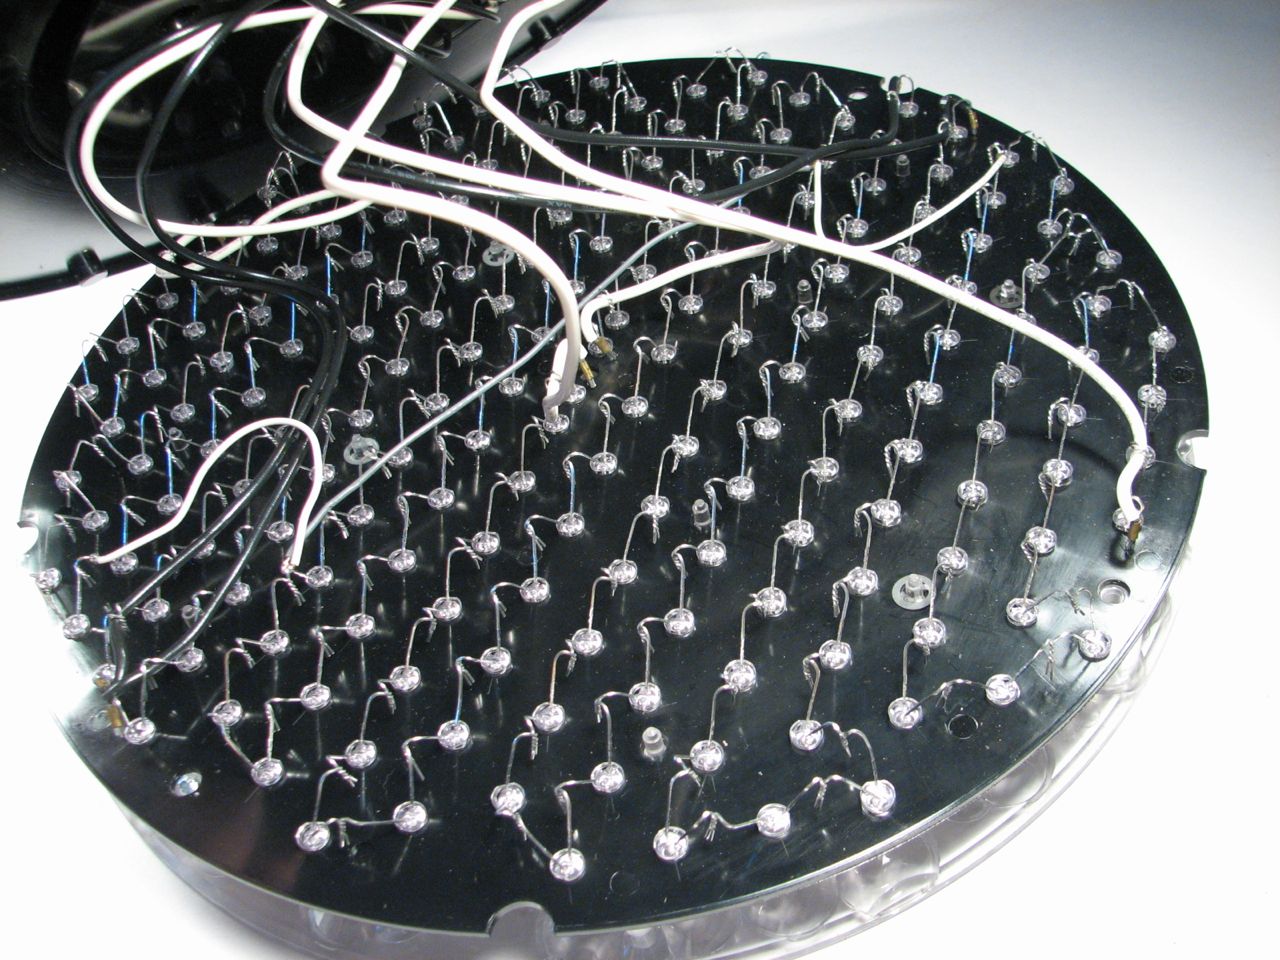
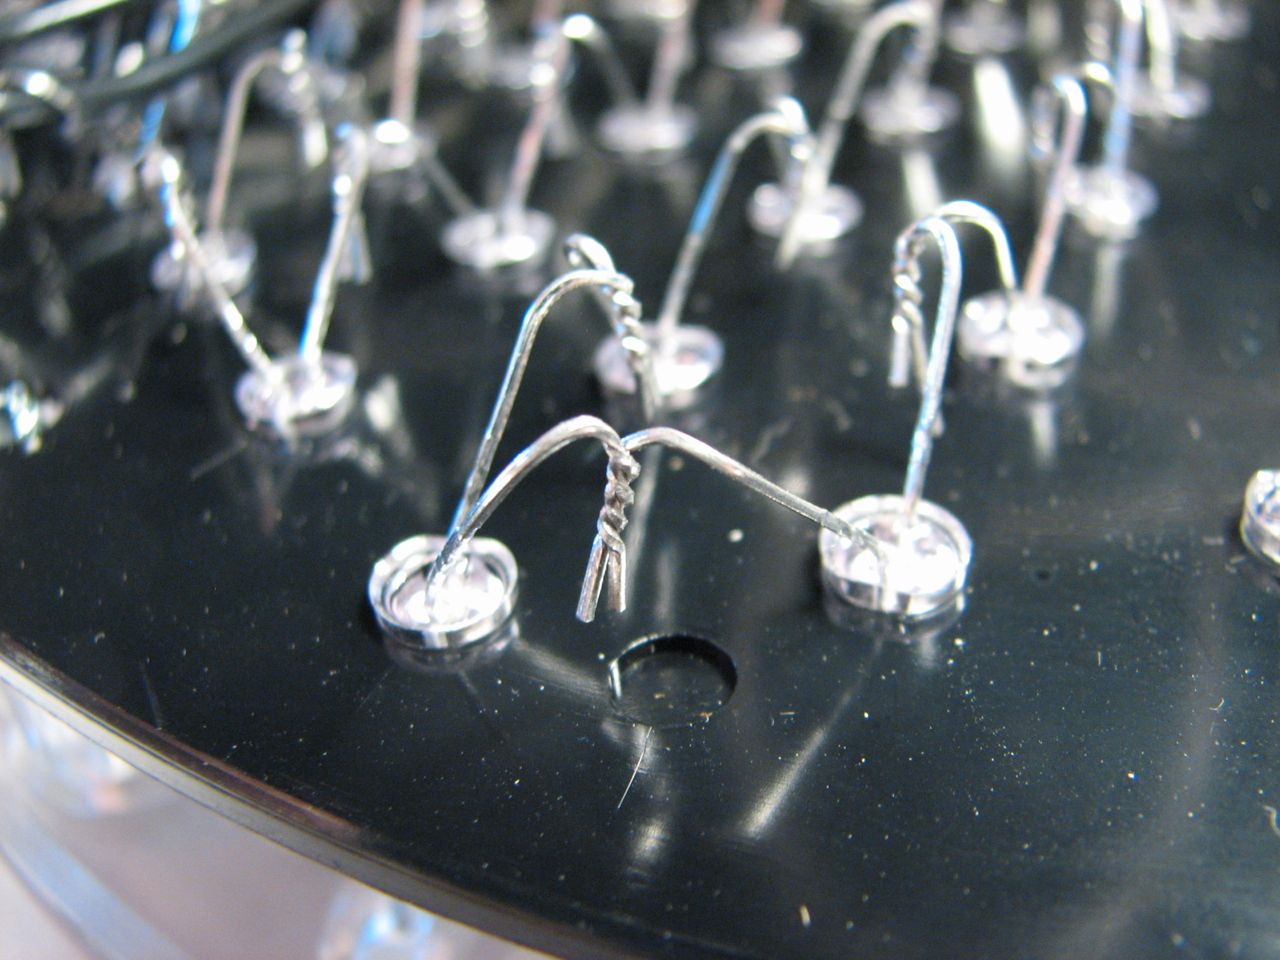
Once that set is unscrewed, the back cover can be pulled away, and the array of LED leads can be seen. Fascinatingly, the LEDs are not soldered to a circuit board, but are placed in a plastic grid. They are not soldered together, but are instead joined mechanically in series by twisting the leads together. After twisting, the leads are bent over.
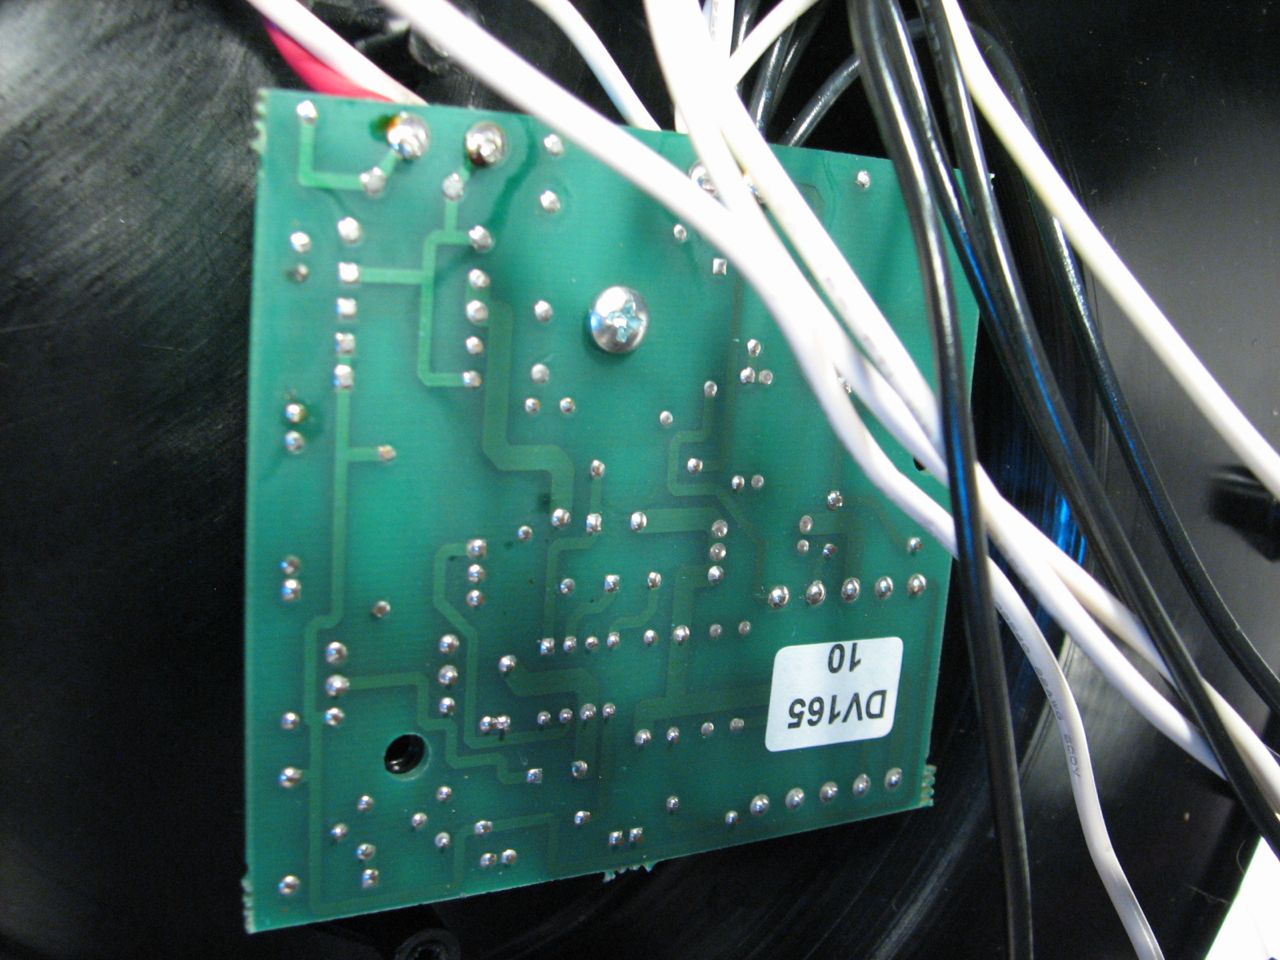
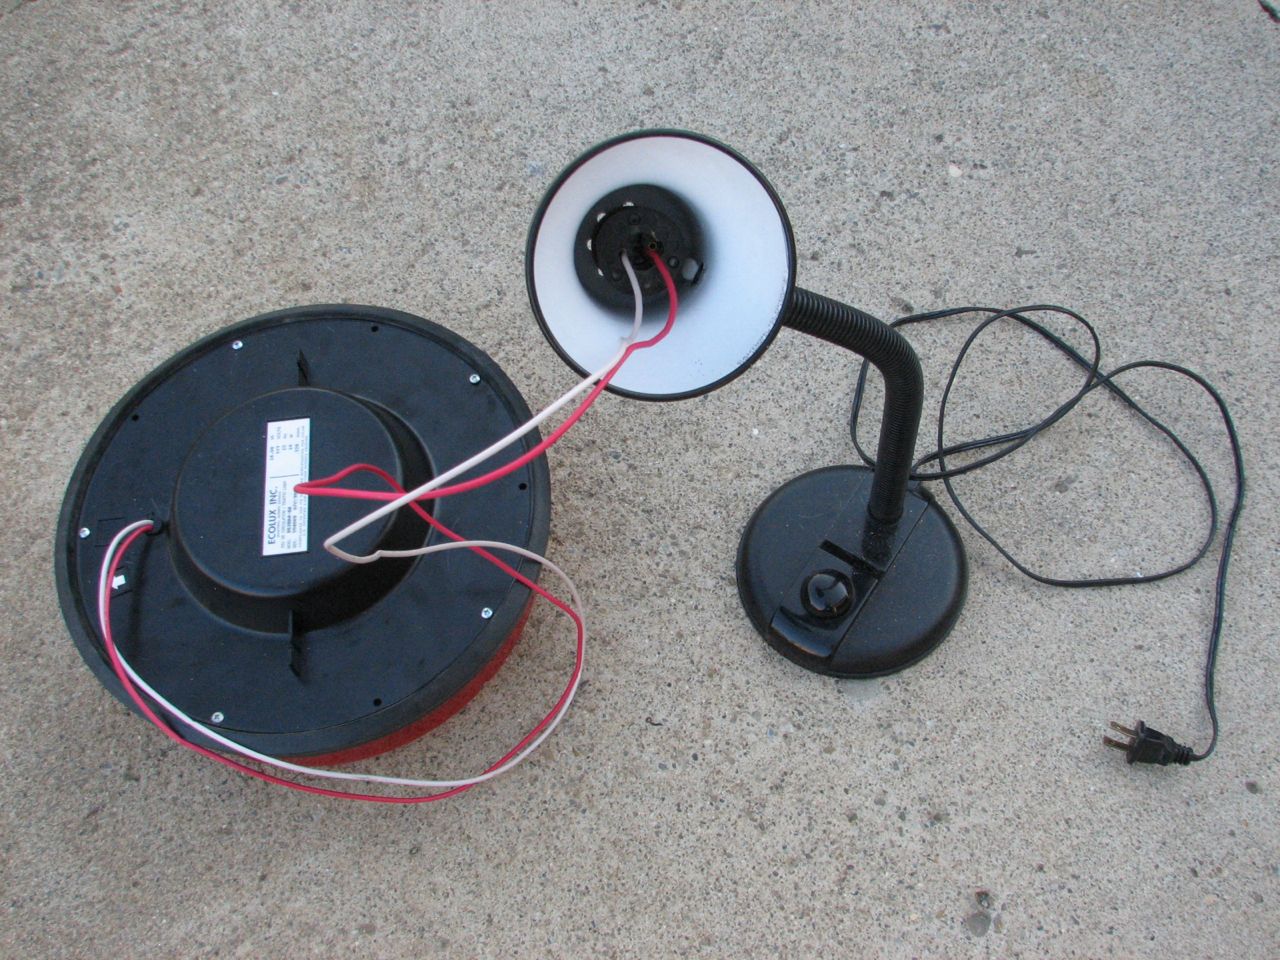
A couple more screws allow removal of a small plastic panel protecting the circuit board from the LED leads.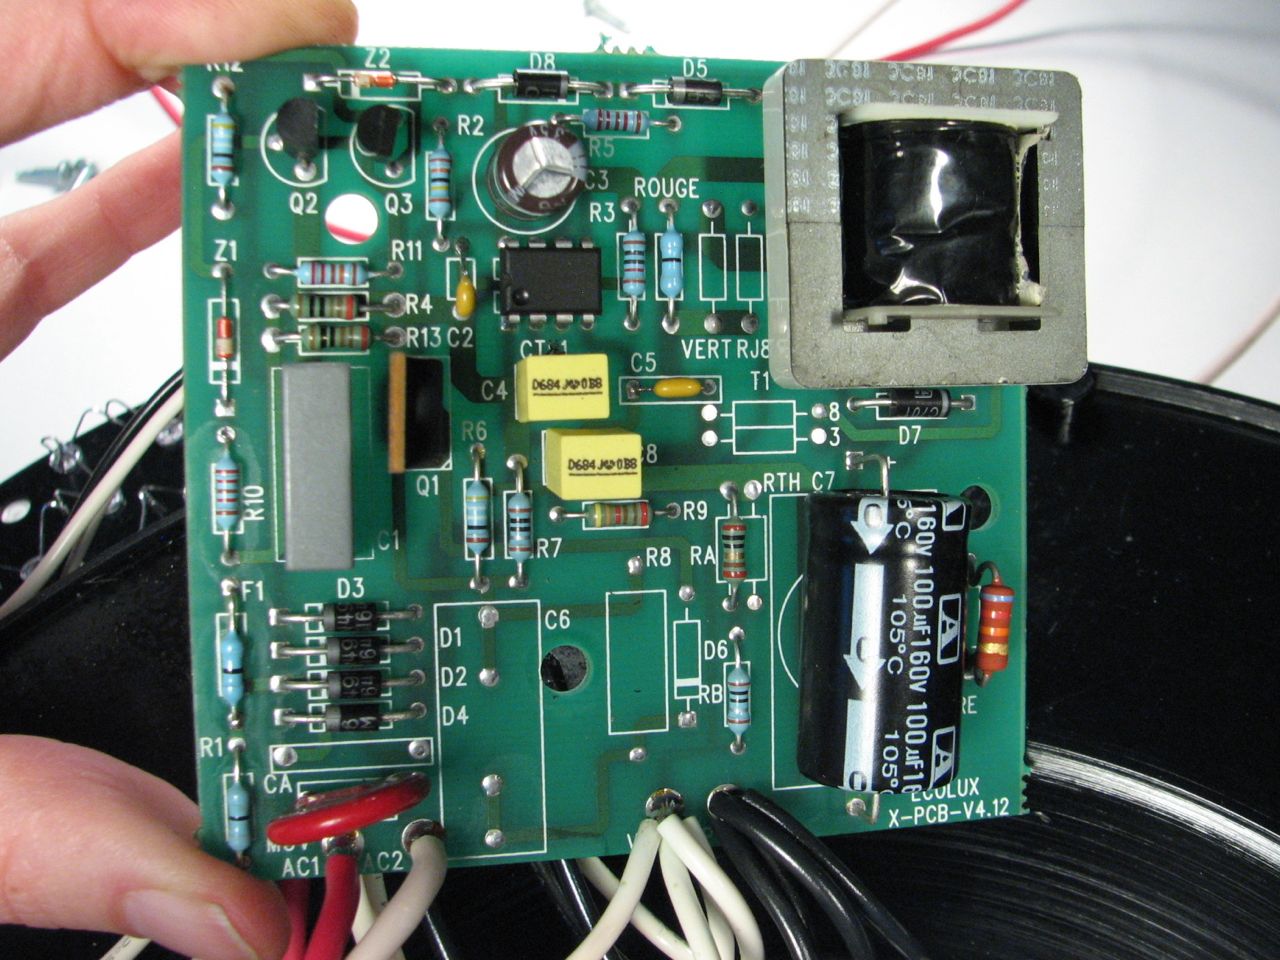
Removing the screw holding the circuit board to the back panel is the last step. From there you can see the meat of the board. I love that since this is a Canadian light, the board is printed in French. I also like that they use the same board for both the red and green lights, just changing which resistors are placed for the different LED colors. I really dig the high-power zero-ohm jumpers. We use zerohms all the time; they are the handiest little guys to have around, but the blue ones are much prettier than our little brown ones.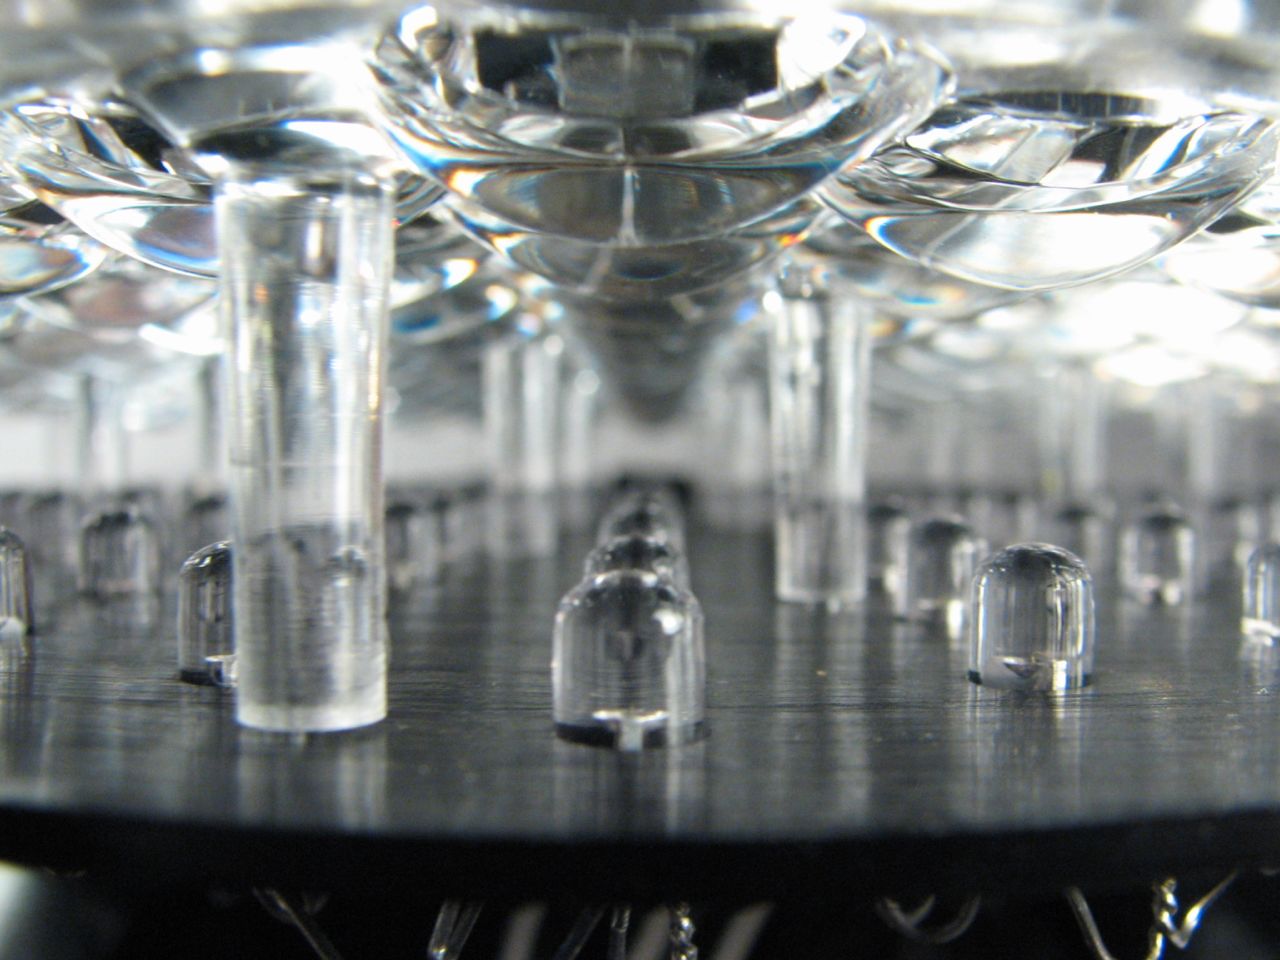
The LEDs are not quite your standard 5 mm package; they have a slightly different lens than we are used to seeing. The placement in the plastic grid allows them to be precisely located under the sheet of lenses, which has several feet resting on the plastic and a couple of feet protruding through and secured in place on the back.
Unlike the pedometer we recently took apart, all of the screws were the same, making reassembly easy. Everything went back together smoothly (thanks to those reference arrows) and we once again have a surplus of red light.
One of these would make an excellent party light. Recommended installation: flush against the ceiling with a disco ball suspended beneath.
Add some blue LEDs and you could use it as a grow light. (I think the off the shelf versions are something like a 4/1 red/blue ratio and absurdly expensive).
Hmmm…year-round fresh basil.
Do you mean that all 100-200 LEDs with their twisted-lead technology are connected in one big series circuit, or that the individual strings (of 25 or so, looking at the picture) are in series but that those are paralleled? I would personally not have the confidence that one of over a hundred non-soldered connections would not let go and bring the whole array down, myself.
When the thing is on, how hot does it feel? Can you put your hand on it or is that uncomfortable?
It looks like it is separated into four sections of LEDs. However, I would not be concerned about any of the connections. In this picture you can see the quality of the connection. They are clearly twisted by machine in a very reliable way.
There is very little heat from this at all. One of the main reasons for the jump in efficiency between LEDs and incandescents (14 watts vs. 150 watts!) is that LEDs don’t generate waste heat the way incandescents do. I didn’t even think about heat as an issue when picking it up while it was on.
Looking at the PCB you can see 4+4 wires coming off the board.
Then checking the back of the device, I see about ~7 LED strings run in parallel.
I notice in Australia amoung the rare few that fail. It’s usually a string of LEDs in a wiggly line that die, with the rest of it still lit.
-wehn
You can get slightly smaller ones online at Skycraft. (This one came from Weirdstuff.)
—
Windell H. Oskay
drwho(at)evilmadscientist.com
http://www.evilmadscientist.com/
I saw those last time I was at Weirdstuff but didn’t realize they were LEDs. How cool!
I must say that the macro photography is beautiful. Great work!
I have a couple of much smaller ones from a traffic sign, and they are BRIGHT. The nice thing about the ones I have are that they are three colours (reg, green, and yellow), with a separate driving line for each, integrated into a single fixture. They definitely make for nice party lights when driven with a batch of 555 chips.
Of course, it’s possible to make your own LED arrays. I have a nice 6×6 array made with infrared LEDs.
Dave
P.S. What’s it for? Well, you have to think EVILy! ;-)
Hmm, I wonder if I can use it to turn off my TV while I’m a mile away from it?
Good evening,
Thoses lights are pretty common in Quebec. They are use almost everywhere by local or provincial govs. They are either run by mechanical (…), industrial (Allen-Bradley and the likes) or electronical (555, MC68HC…) systems and are very unsubject to failure. I’ve try to get some defective for spare LEDs a couple months ago and I’m still waiting for. So simple and reliable that the controler is failling before the lights.
CalTrans spec dominates North American traffic electronics.
They require a maximum of 5% of the LED’s allowed dark on failure of one LED.
For a head with 200 LED’s, you might find 20 series strings of 10 each.
A more typical head uses circuit board and 140 LED’s with seven in each series.
Old heads may be replaced because they have reduced light output
(yes LED’s do "wear out") or may flicker at startup especially in cold weater.
LED’s in hot climates will "wear out" sooner. In 5-10 years there should be
a surplus bonanza from traffic signal and changeable message applications.
Just wanted to say the close-up photo of the LEDs in their array under the lens is gorgeous.