


So, you’ve disassembled hard drives, taken the magnets out, made wind chimes out of the platters, and so on. One thing that you might have left over is a set of printed circuit boards. Funny shaped printed circuit boards, with holes in them. Here’s how to turn those leftover PCBs into fabulous geek-chic picture frames.
Gather your materials. Older hard drives had larger circuit boards with larger holes in them. Smaller PCBs will work as well, but your picture will need to be that much smaller. The two large ones here are from Seagate 5 1/4″ drives (circa 1986), and the smaller is from a Conner 3 1/2″ drive. The pictures themselves are held in place by extremely cheap ($1.50) picture frames from Target. These are simply a folded piece of acrylic with a magnet on the back. Other types of picture frames (i.e., nicer ones) will work as well, but try to pick thin ones.
Besides these ingredients, you’ll also need a hot glue gun, a pen or pencil, and (optionally) some strong little magnets. (The ones from the hard drive itself will work nicely.)
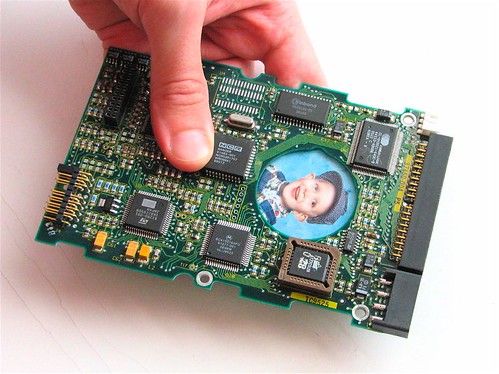
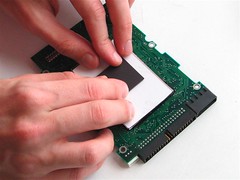
To see the basic technique, let’s first attach a small photo frame to the 3 1/2″ hard drive PCB. Since the hole on this PCB is pretty small, I’m using a small (2 inch x 3 inch) photo frame.
The PCB has an “interesting” side and a smooth side. We want to attach the frame to the smooth side. Slip a photo in the frame and place it approximately where it will be attached.


Holding the picture frame and the PCB together, turn them over. Look at where the picture will actually show up and adjust it to your taste.
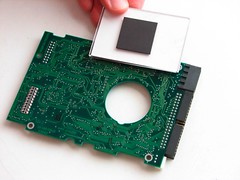
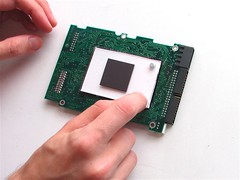
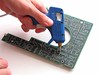
Then, holding the two parts together, set them down. Trace around the outline of the frame to mark its position.
Remove the picture frame and apply some hot glue to the area inside your traced outline.
Be just a little bit careful with the glue: if the glue is too close to the hole or the edge, it may interfere with seeing the picture or with changing pictures.
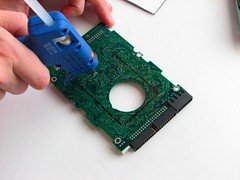
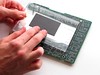
Put the picture frame back in its marked location. Push it down firmly to squish the glue into place.
The magnet on the back of the picture frame may, or may not, be strong enough to support the assembled PCB picture frame. In this case, it wasn’t.
Quick and easy fix: Use hot glue to attach a couple of itty-bitty supermagnets to the back of the assembled PCB picture frame. You can extract magnets like this from kid’s toys or buy them (cheaply) from a number of surplus magnet sources. Bonus points: Use the magnets that you extracted from the hard drives themselves.
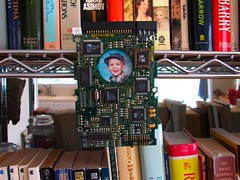
It’s done! Stick a fork in it! Hang it on something ferromagnetic!
Here’s a completed picture frame, hanging on a wire bookshelf.
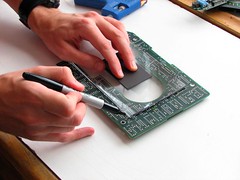
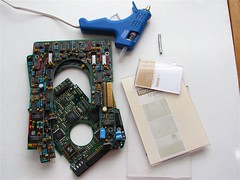
Working with a larger circuit board and picture frame is quite similar. For this PCB from the larger Seagate drive, I used a 4 x 6 picture frame. Again, determine where the picture needs to go in the frame and then trace around it.
As before, apply glue to the larger PCB and firmly seat the picture frame into place. It’s important to be quick with this stage, because there’s a lot more area to cover with glue, and of course the glue looses its tack as it cools.
The magnets on the larger frames turned out to be strong enough to stick to the fridge, so no additional magnets were needed.
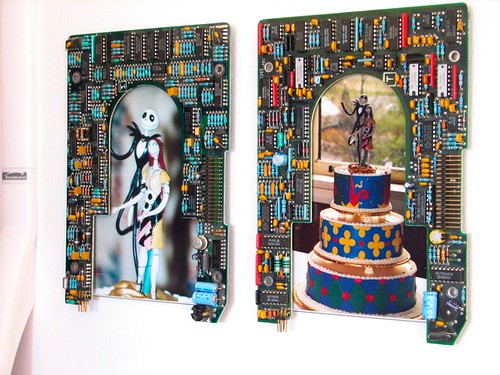
These two PCBs are a nearly-matched set; the one on the right is a slightly newer revision. You can see that a number of the passive components on the left board have been replaced by inline multi-component packages.

Can we go to even smaller PCBs? Sure! Shown here are smaller circuit boards from smaller hard drives. The two on the left are from modern-form-factor laptop drives, circa 1995. The one of the left is from a Quantum drive, and in the middle is a Toshiba drive PCB. The tiny PCB on the right was taken from a 10 GB iPod; it was made by Toshiba. The holes in these are starting to get quite small, and your picture will have to get smaller to compensate. (While I haven’t disassembled one, I suspect that the drive PCB from an iPod mini would make a good a necklace locket.)
One good thing to do with the small PCBs would be to make a miniature digital picture frame. Here’s my simple implementation: I took a (last generation) digital camera, and put the PCB over the the display LCD.
A better version would hack the camera apart and just use the LCD, but I’m not quite ready to disassemble the old camera yet.
Enjoy your new picture frames!
