


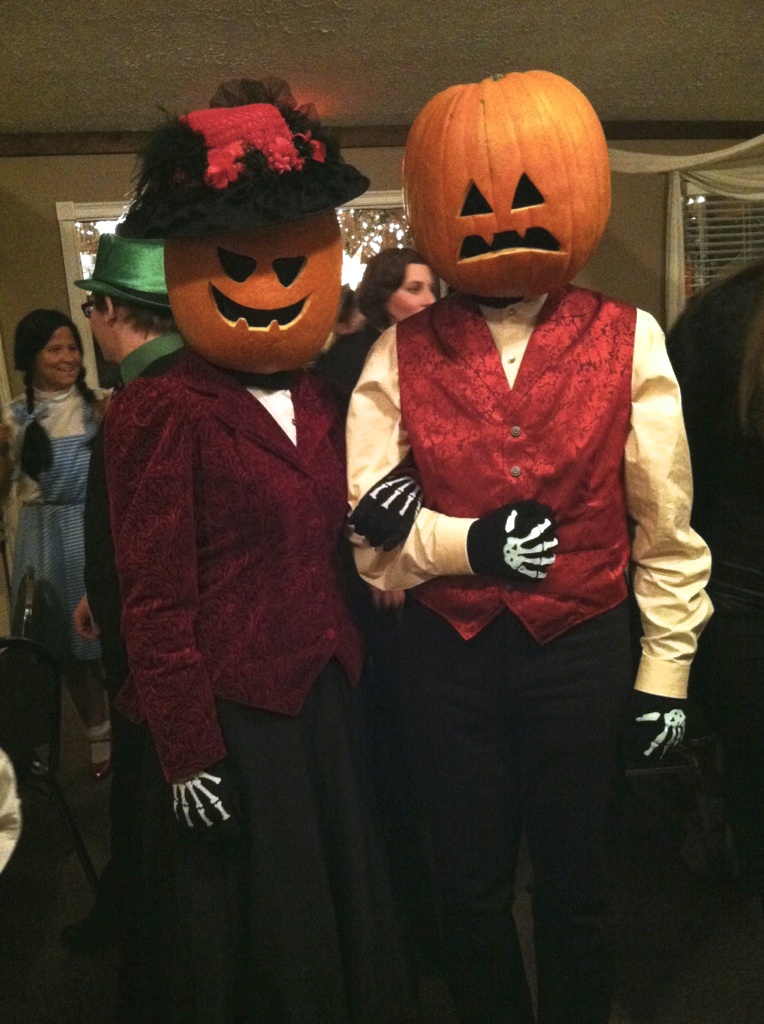
Here is what we heard, over and over last night:
“Whoa, is that a real— Holy crap, those are real pumpkins!”
Yep.
Not as easy as we thought it would be, either. Nor as light. But here’s how to do it.
First, the shopping.
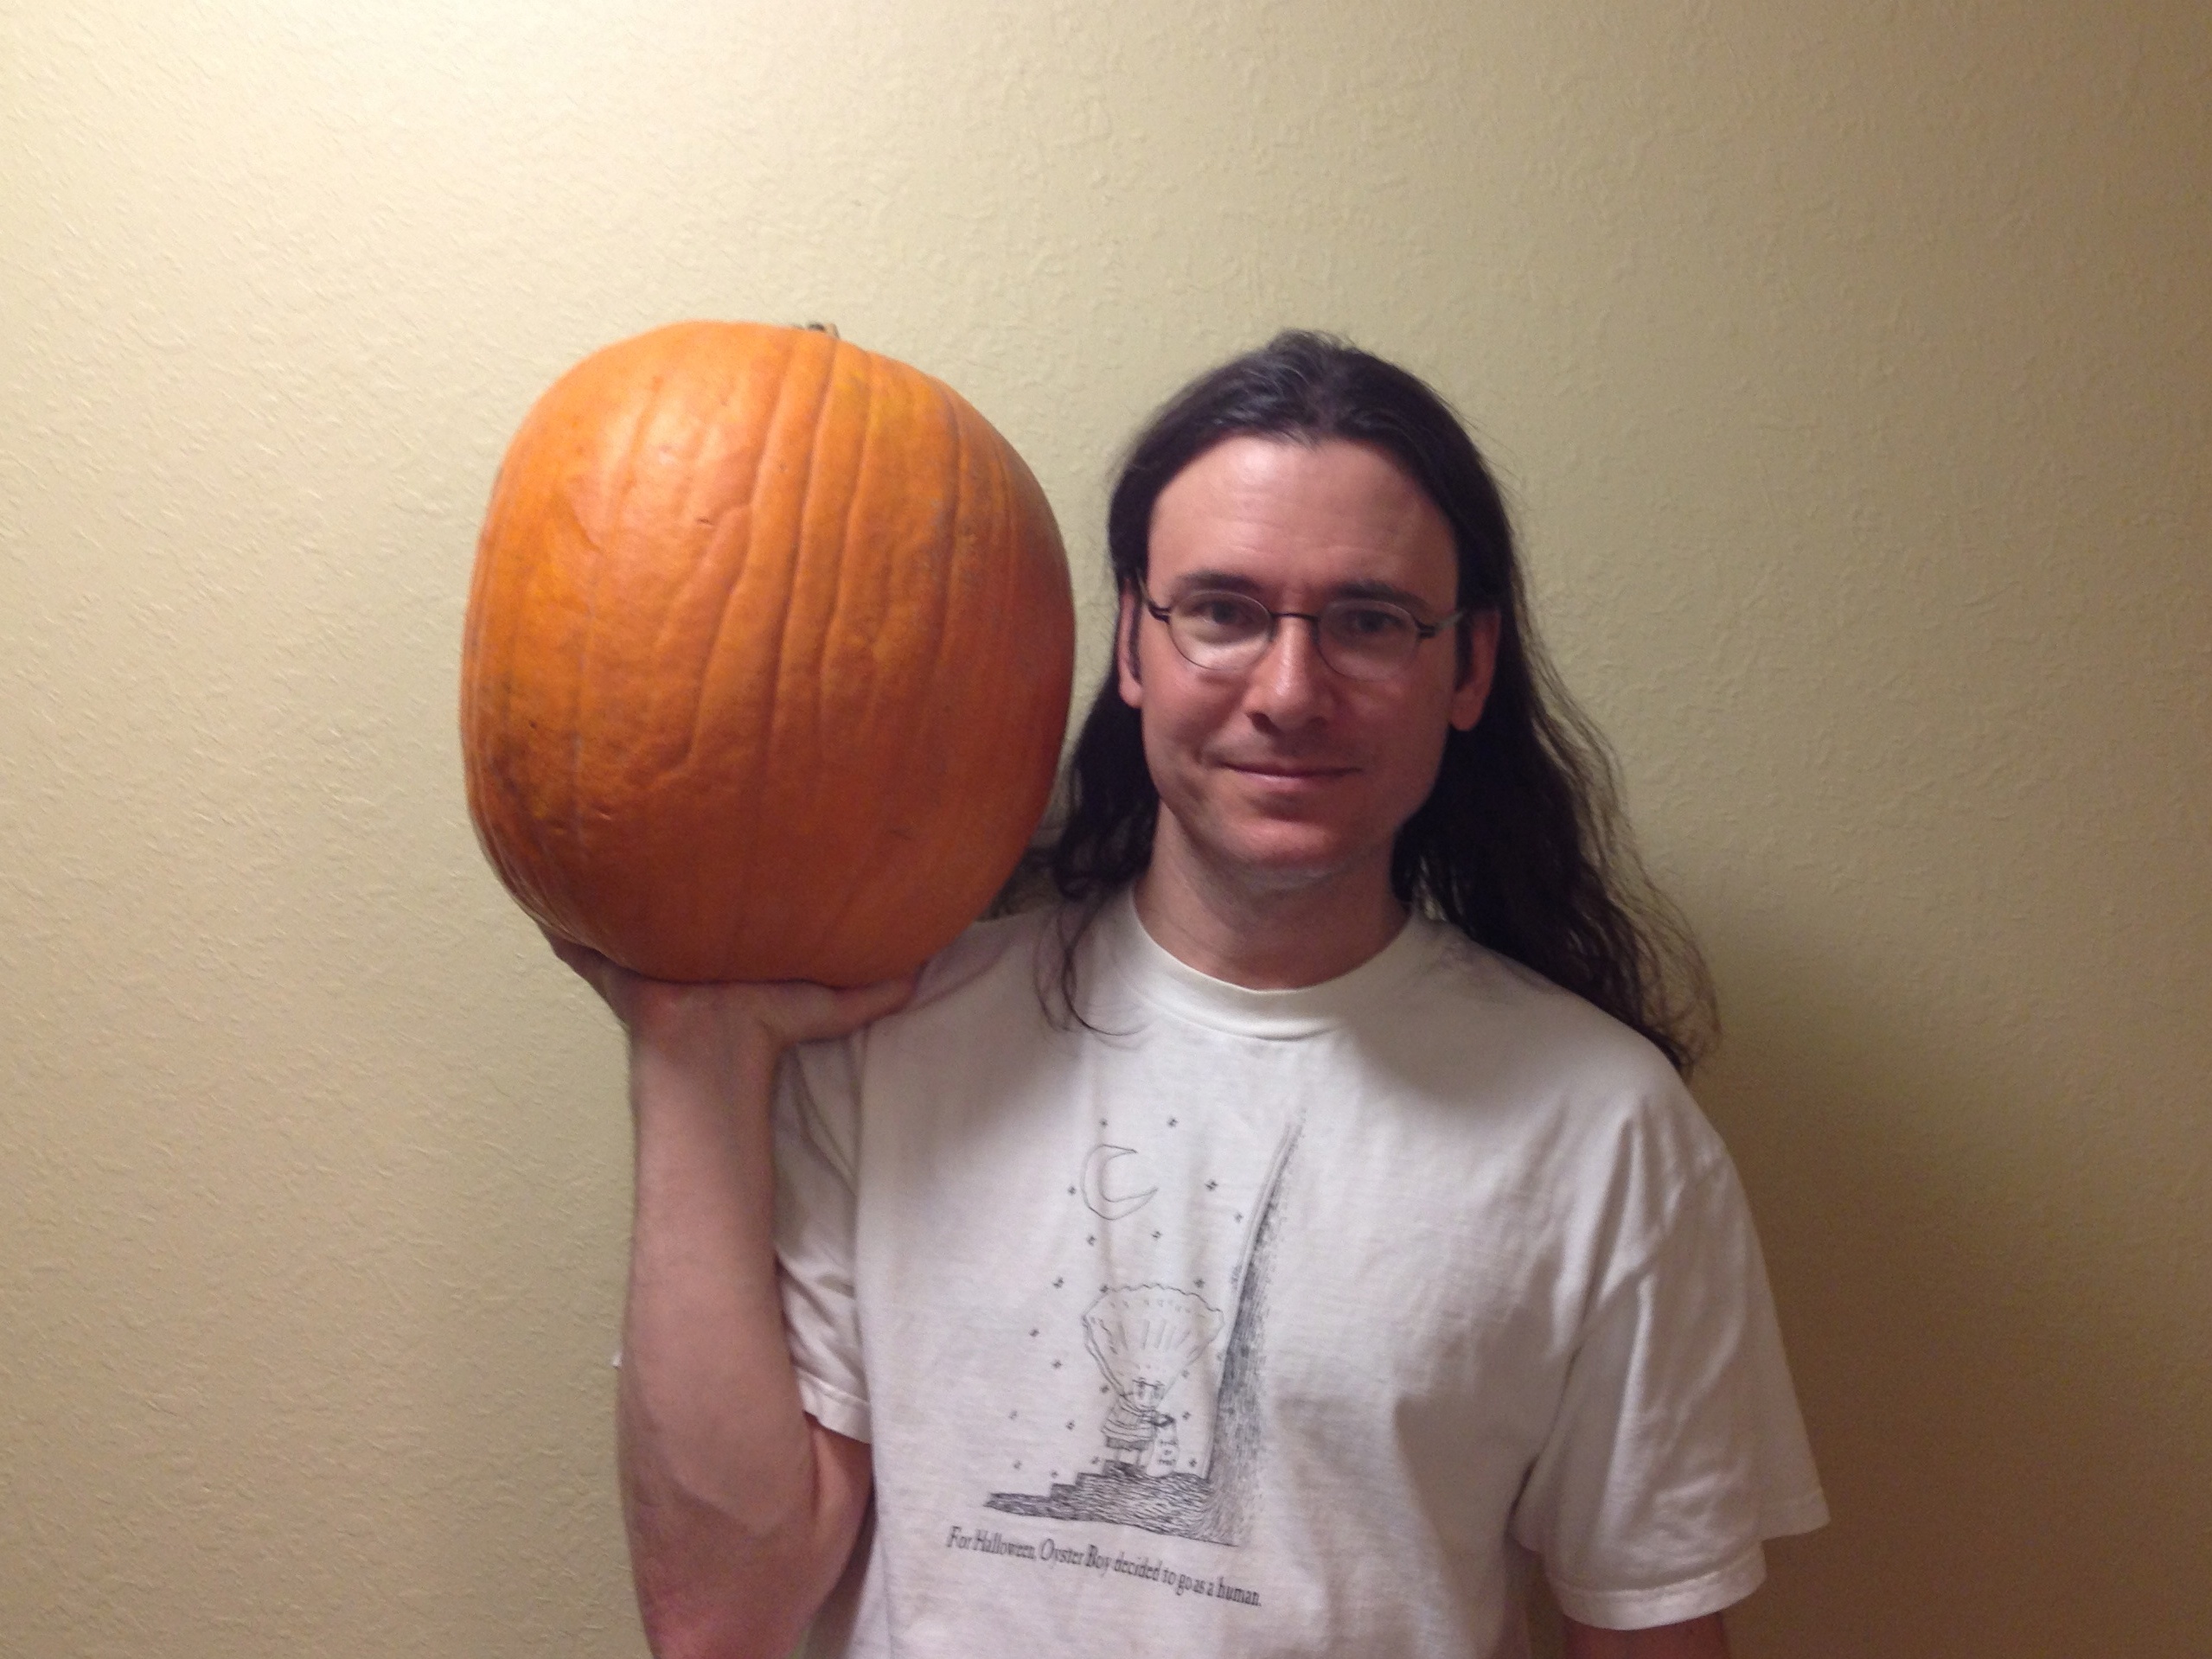
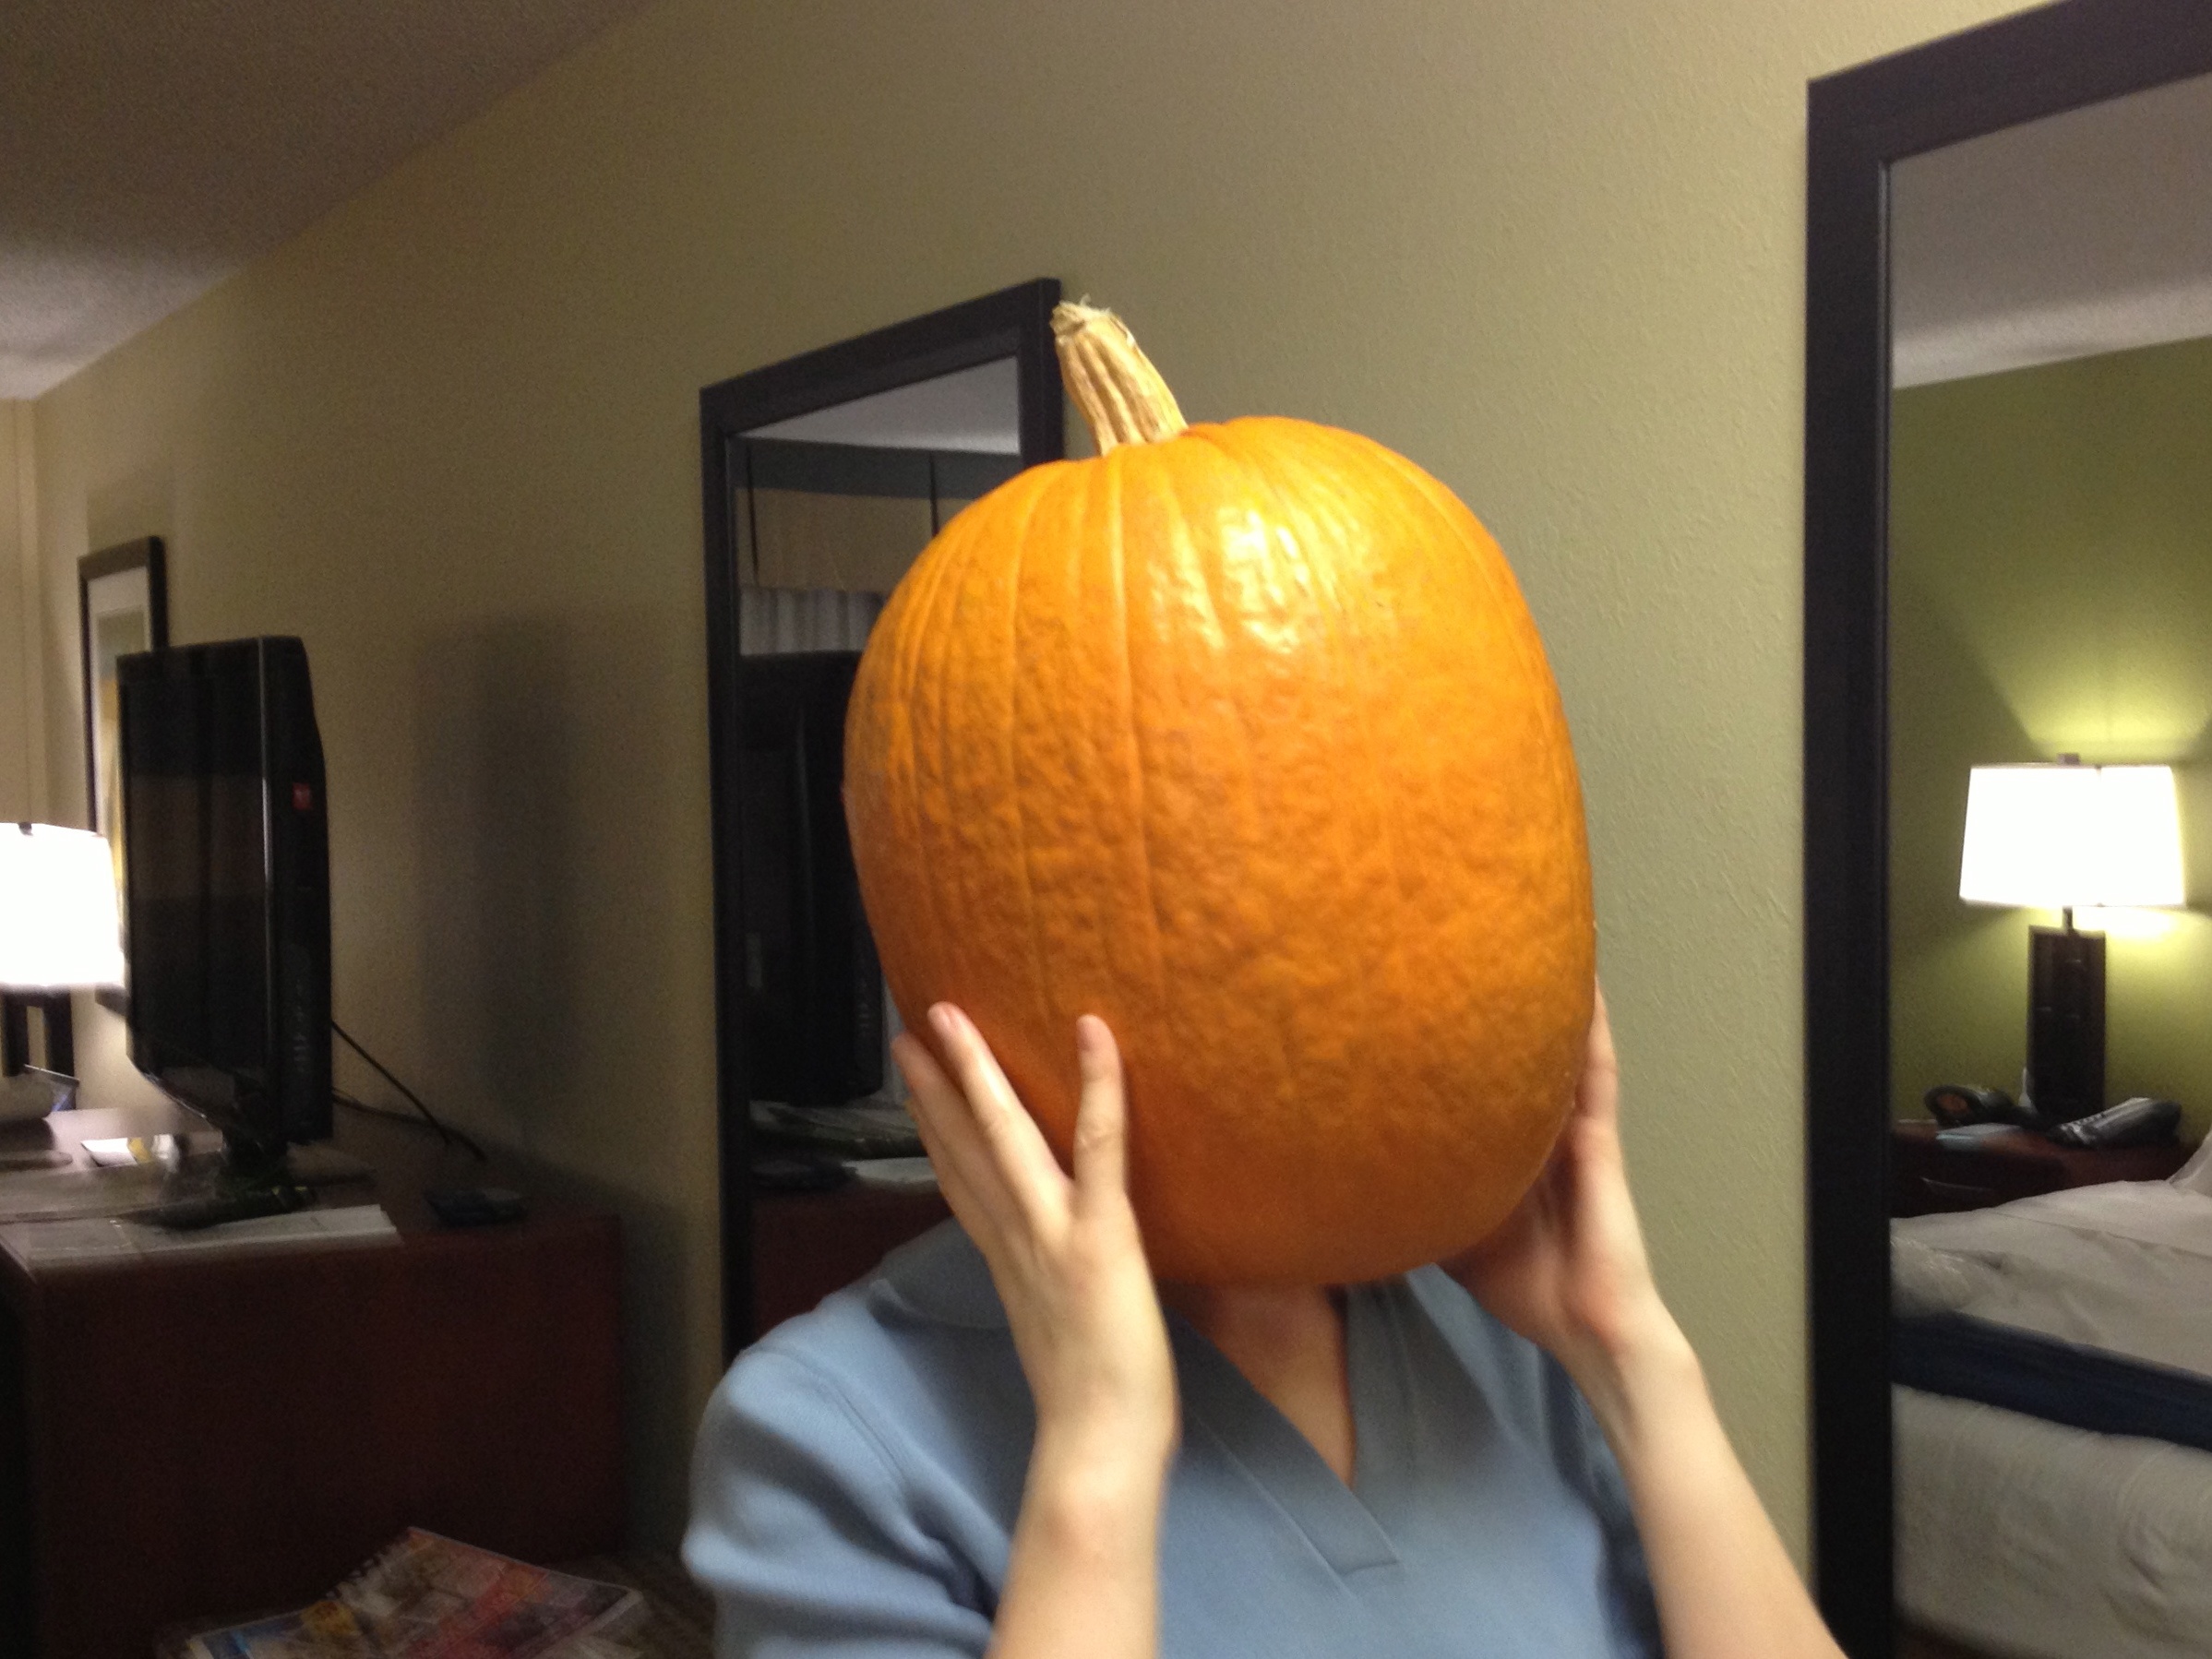
This costume works best with some degree of advance planning. At the most obvious level, you need to find a pumpkin that fits over your head. That means that (1) it needs to be bigger than your head— actually quite a bit bigger —and (2) have an aspect ratio that’s somewhat similar to your head shape. For most people, that means that it needs to be a fair bit taller than it is wide. On the other hand, big pumpkins are heavy. Really heavy. So, for you to be able to wear the costume for an extended period of time, it’s optimal to get a pumpkin that’s only just big enough.
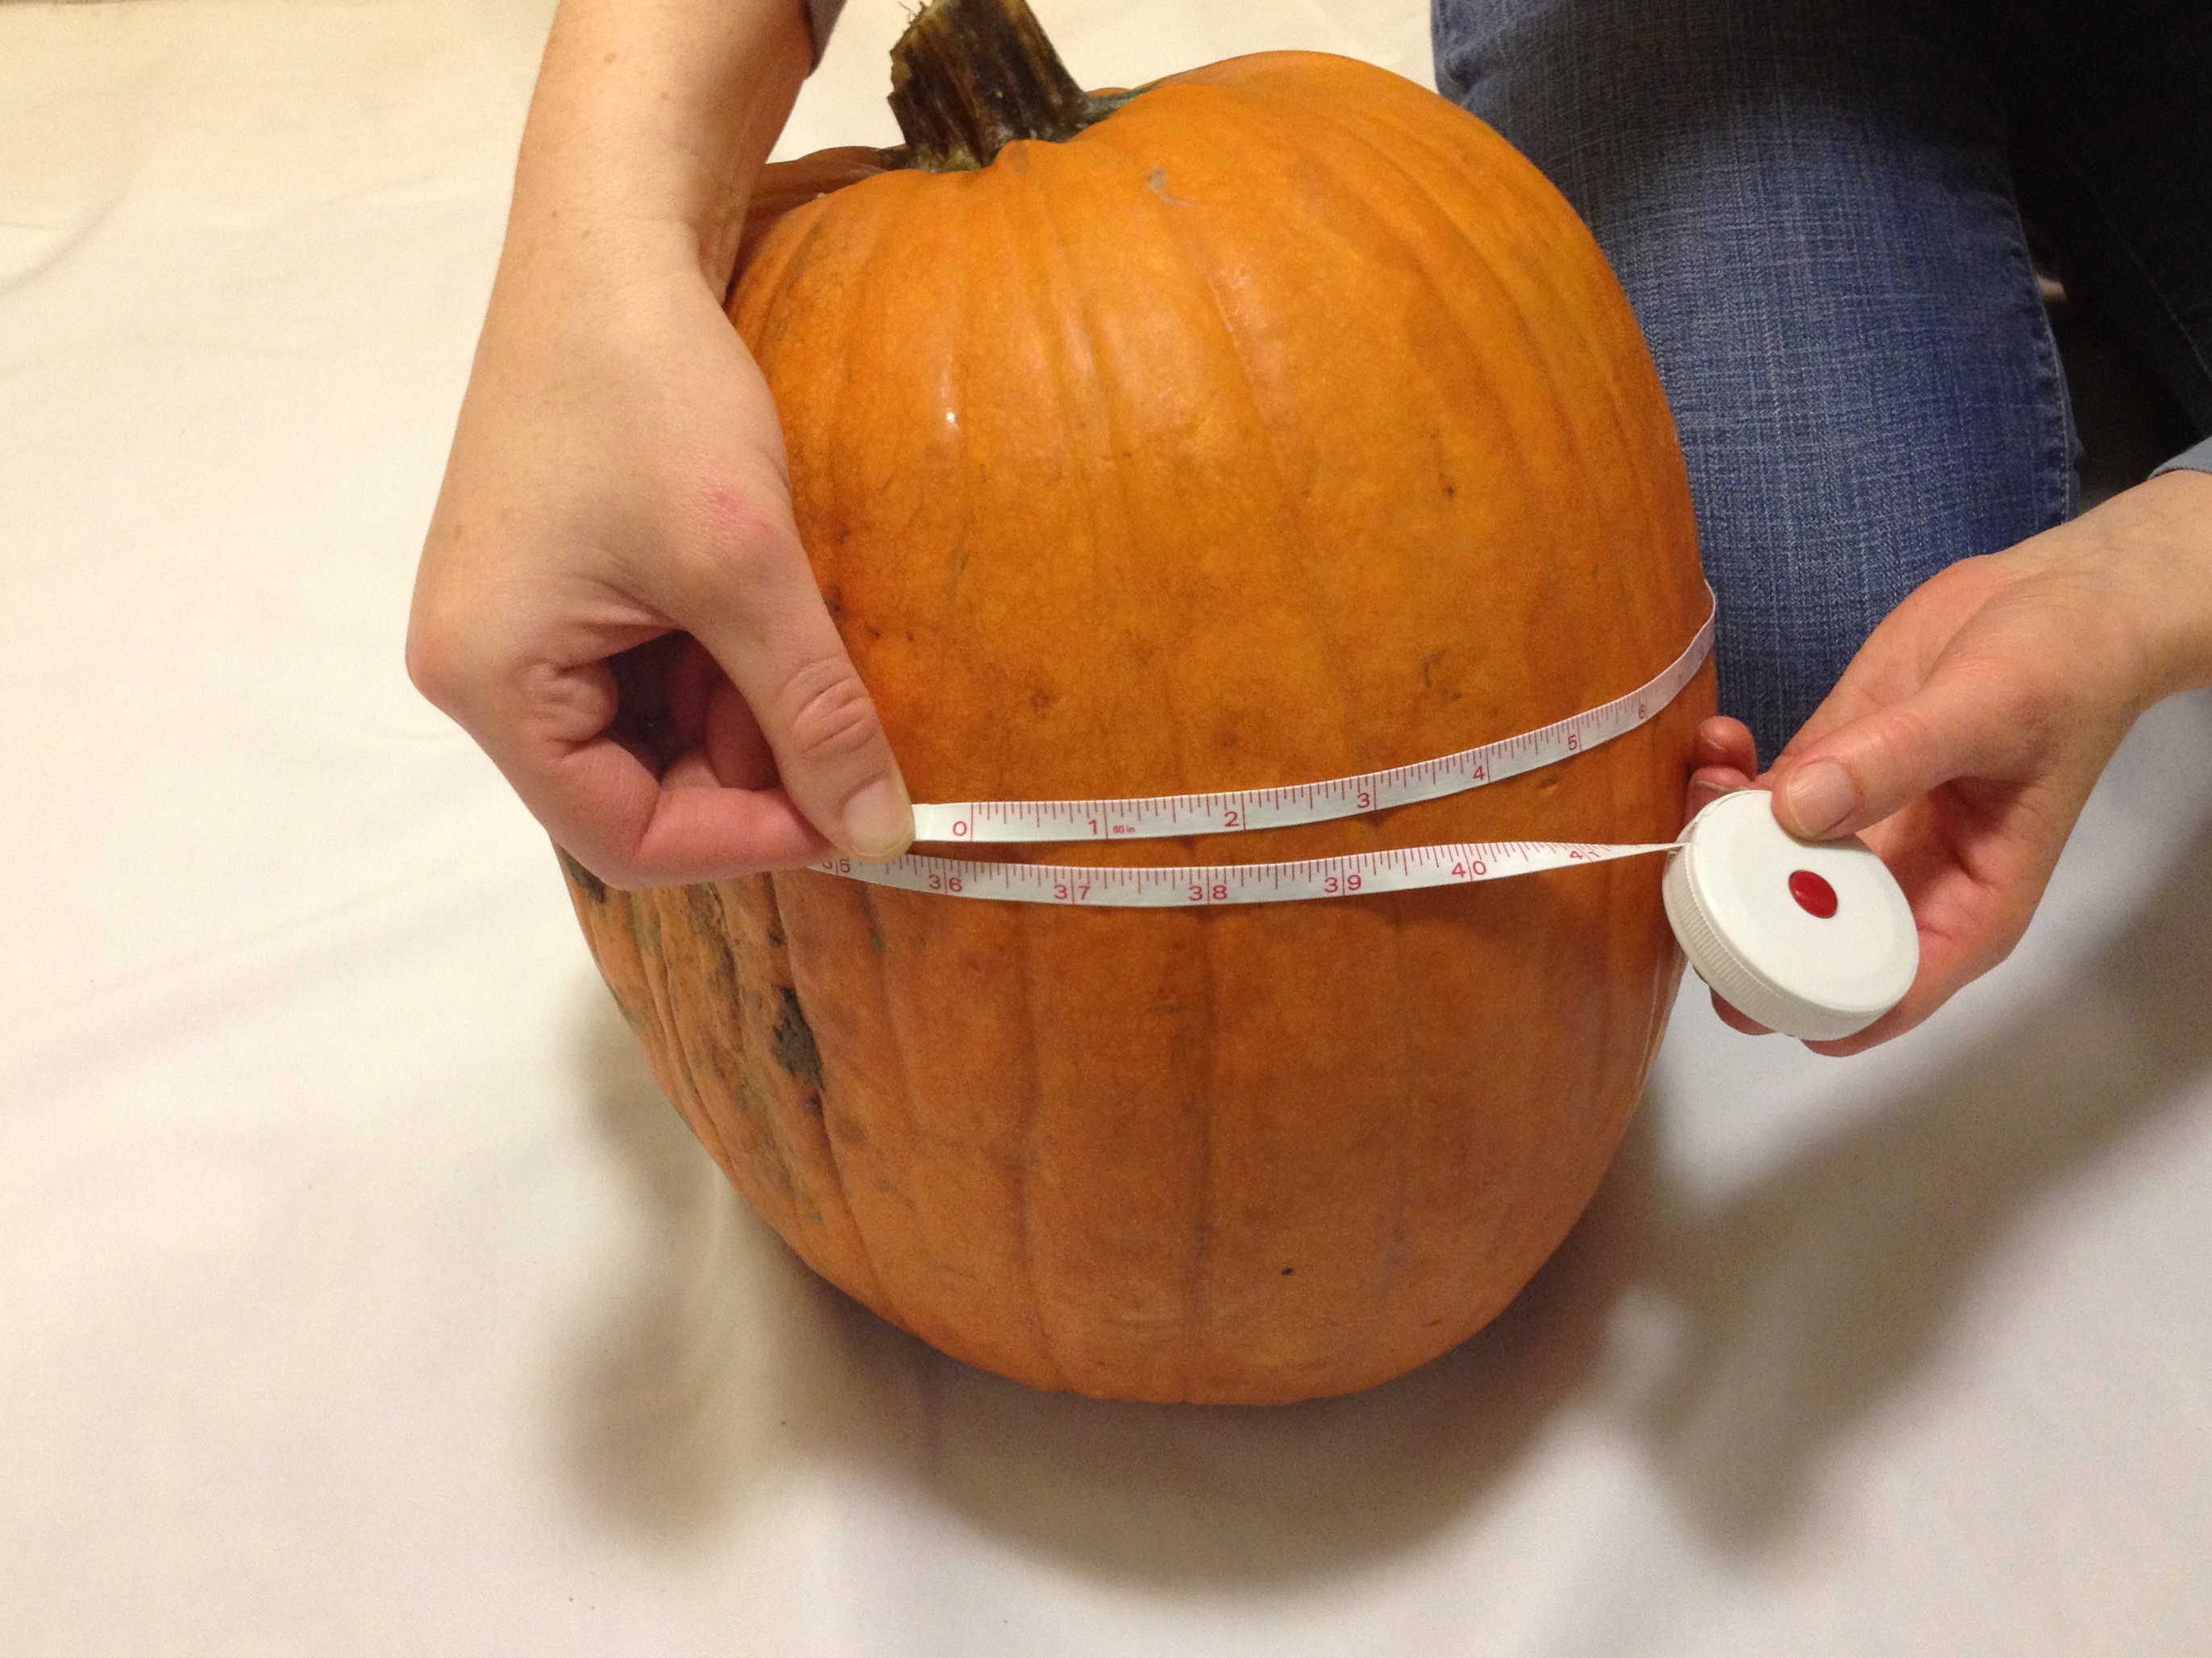
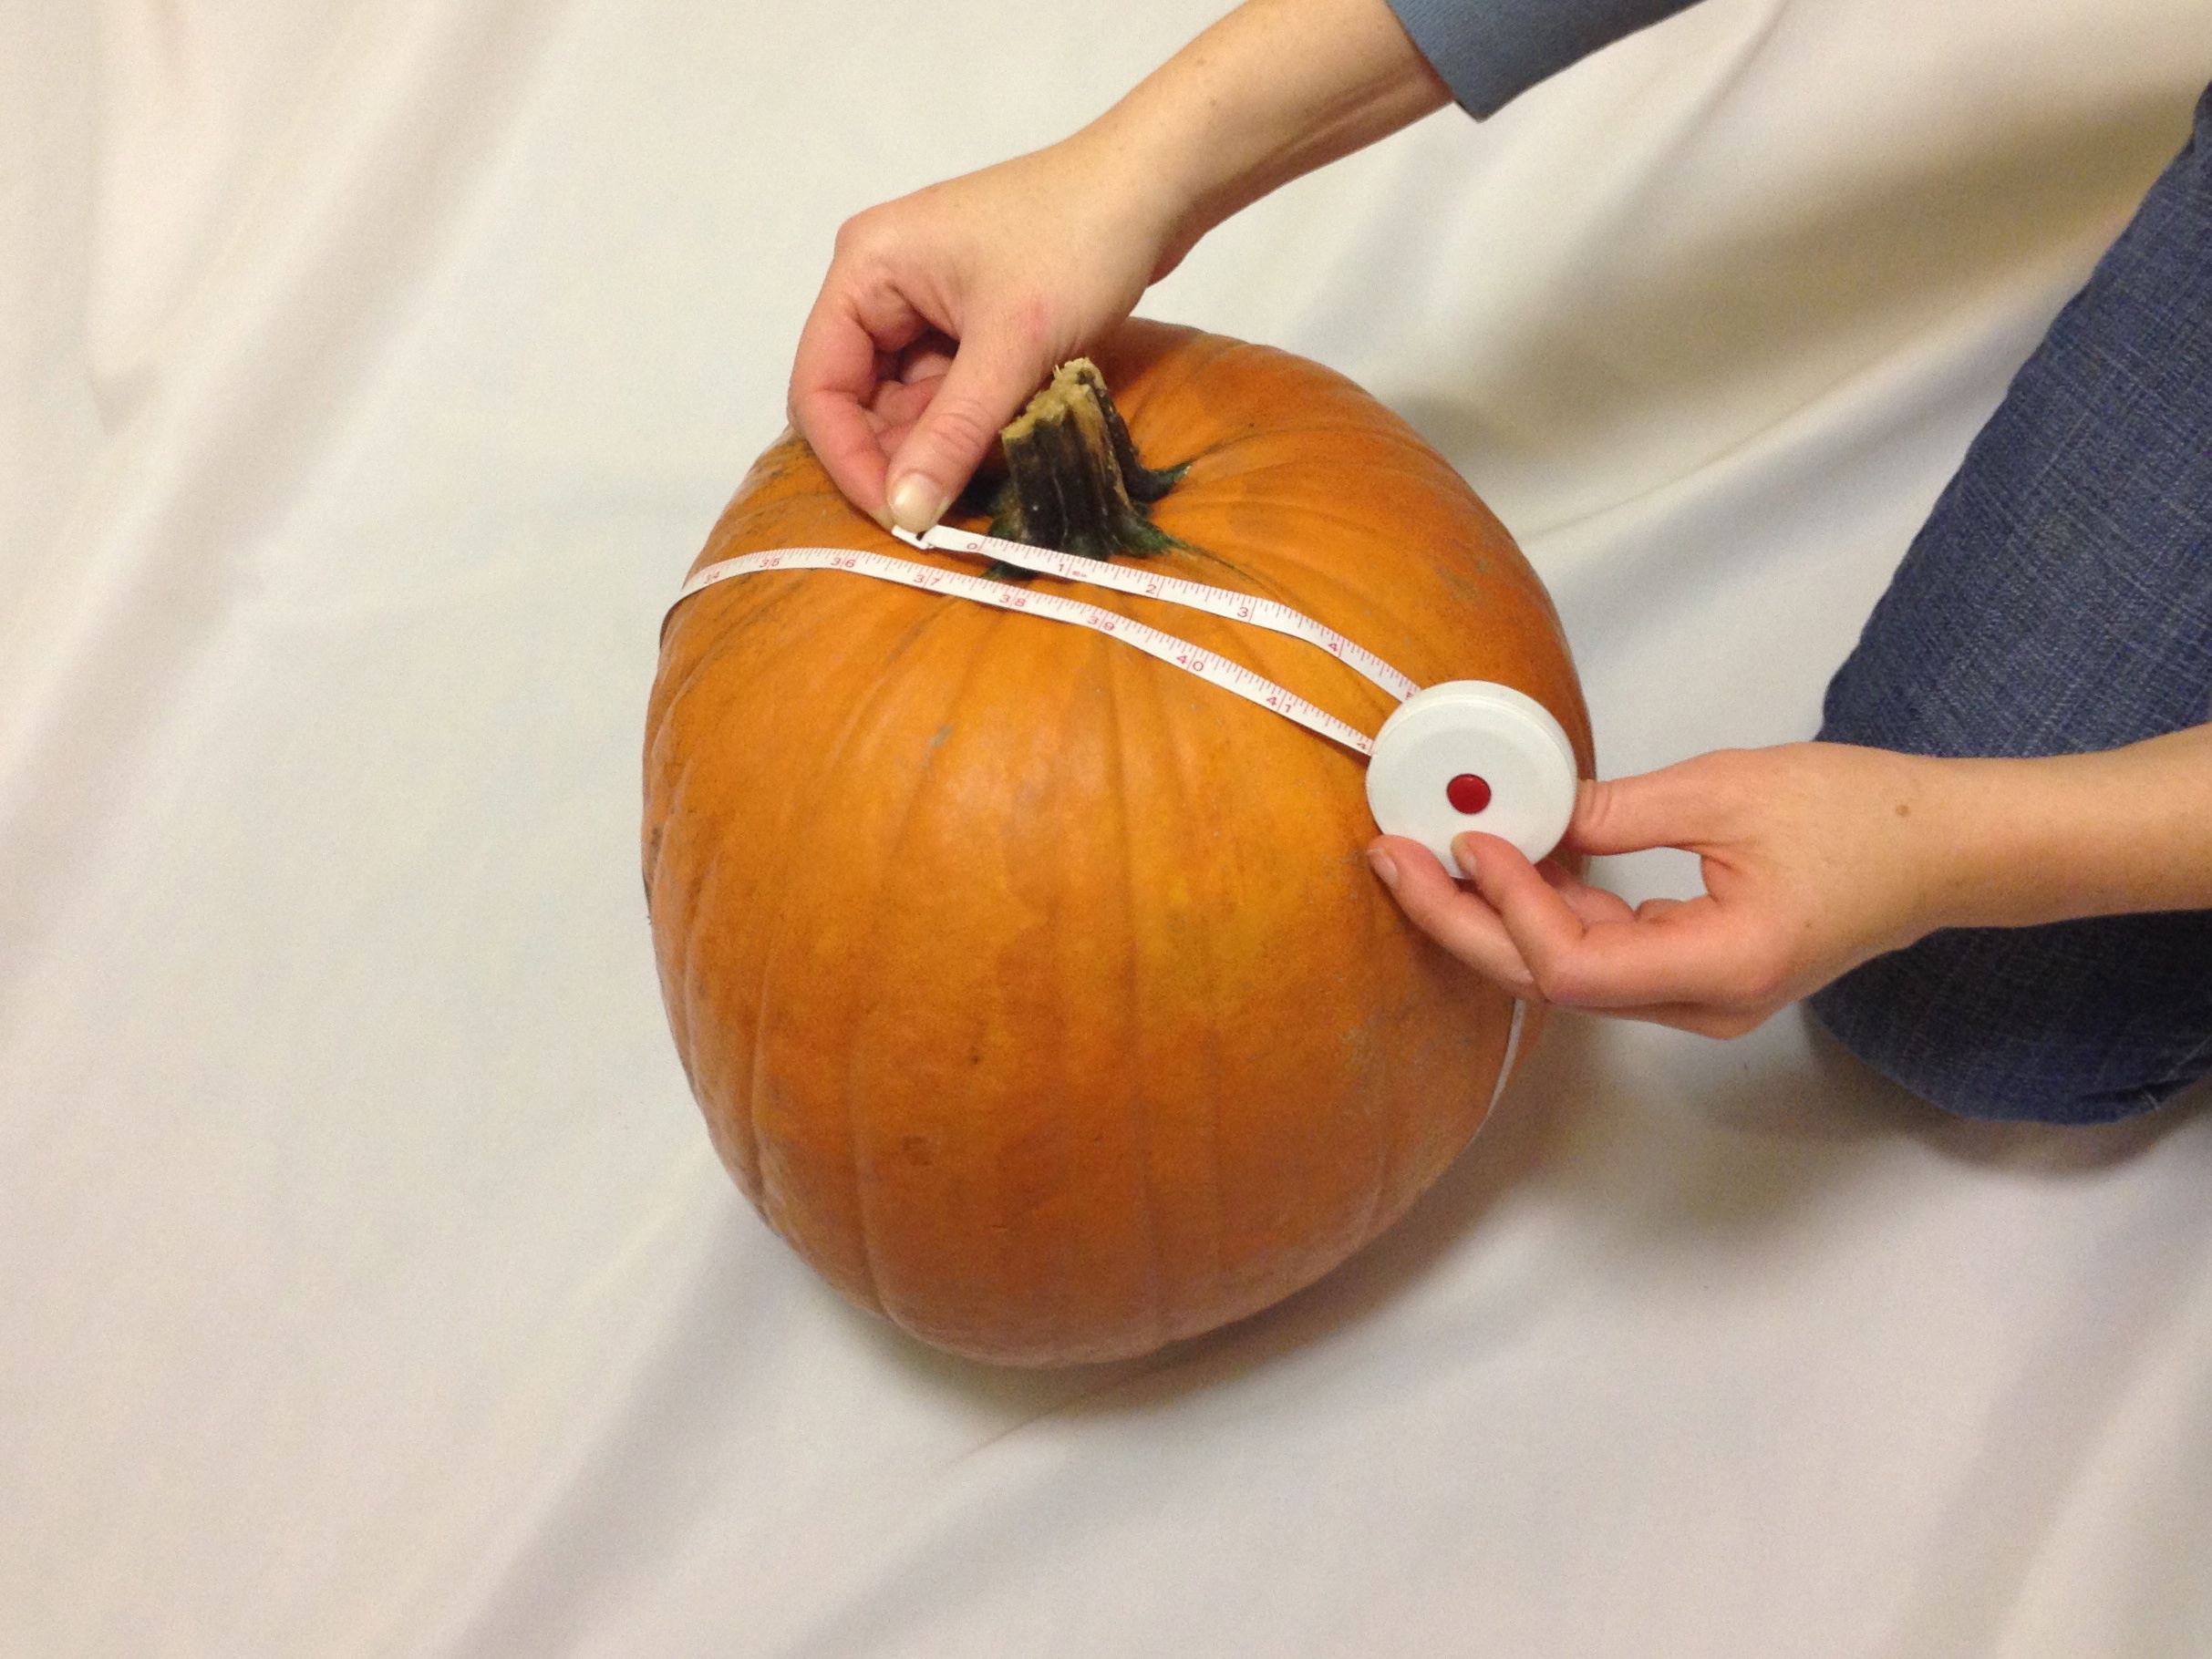
The perfect pumpkin will be roughly head-shaped: somewhat taller than it is wide. You can use a cloth measuring tape to estimate how big of a pumpkin you need. As a rule of thumb, measure the circumference around your head (tip of your nose around back of your head) and add 12 inches to get a good starting point. (That’s essentially accounting for the width of your head plus two inches of pumpkin shell thickness.)
Once you have your estimates, take your cloth measuring tape with you when you go shopping. Finding the perfect pumpkin may require visits to more than one pumpkin vendor, and should be done when jack-o-lantern selection is still good; waiting until the last minute before Halloween will risk there not being any appropriate pumpkins available for sale. Another thing to keep in mind is that pumpkins aren’t all exactly the same inside, either. You need pumpkins that are fresh (not rotten or mushy), and hopefully are on the lighter-weight side of those available. It’s also a good idea to consider getting a few good candidate pumpkins to work with. We carved more pumpkins than we needed, and were grateful to have additional choices of which pumpkin was the best fit for each of us.
For our own heads, we found that the minimum equatorial circumference needed was about 36 inches. The pole-to-pole circumference needs to be at least few inches larger in most cases— about 40 inches worked well for us. Your head size may vary, of course.
Next, the carving.
There are actually two stages to the carving: hollowing out the shell, and cutting the features into the face. Ideally, start your carving— and complete the hollowing stage —the night before you will be wearing the costume, so that your pumpkin will have some time to air out before you wear it. The face can be added at the last minute, so that the features will appear fresh and sharp.
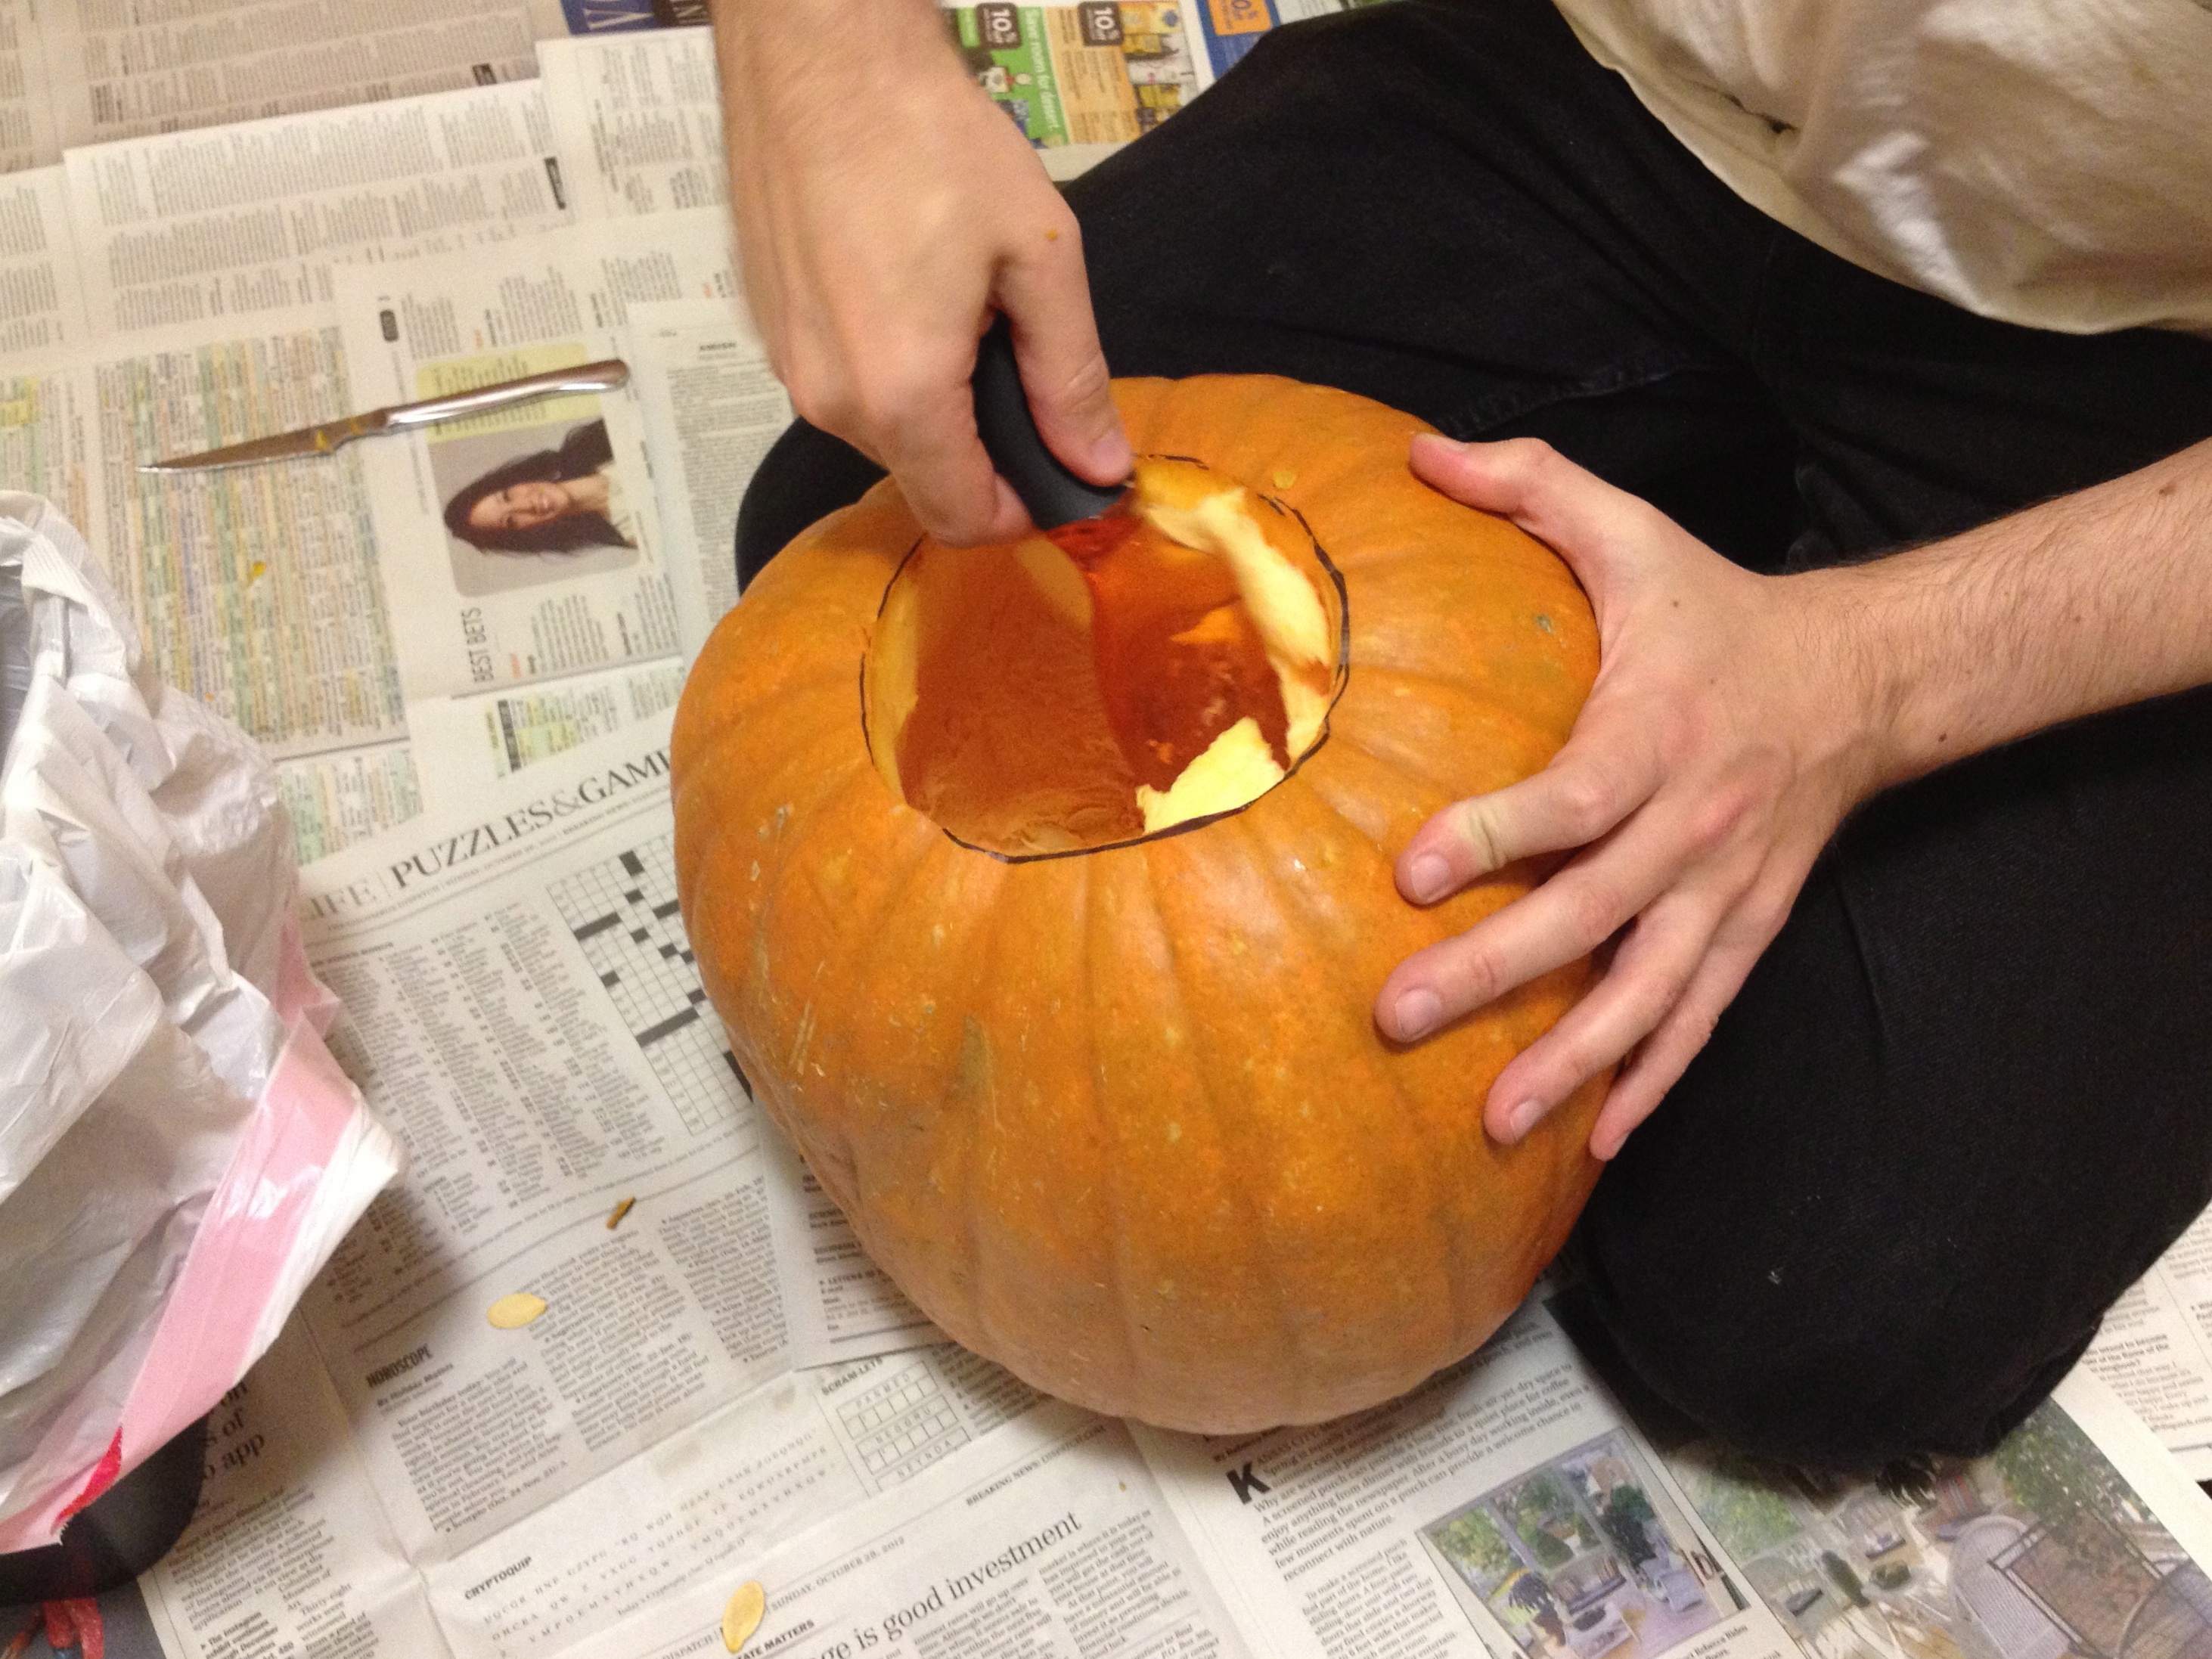
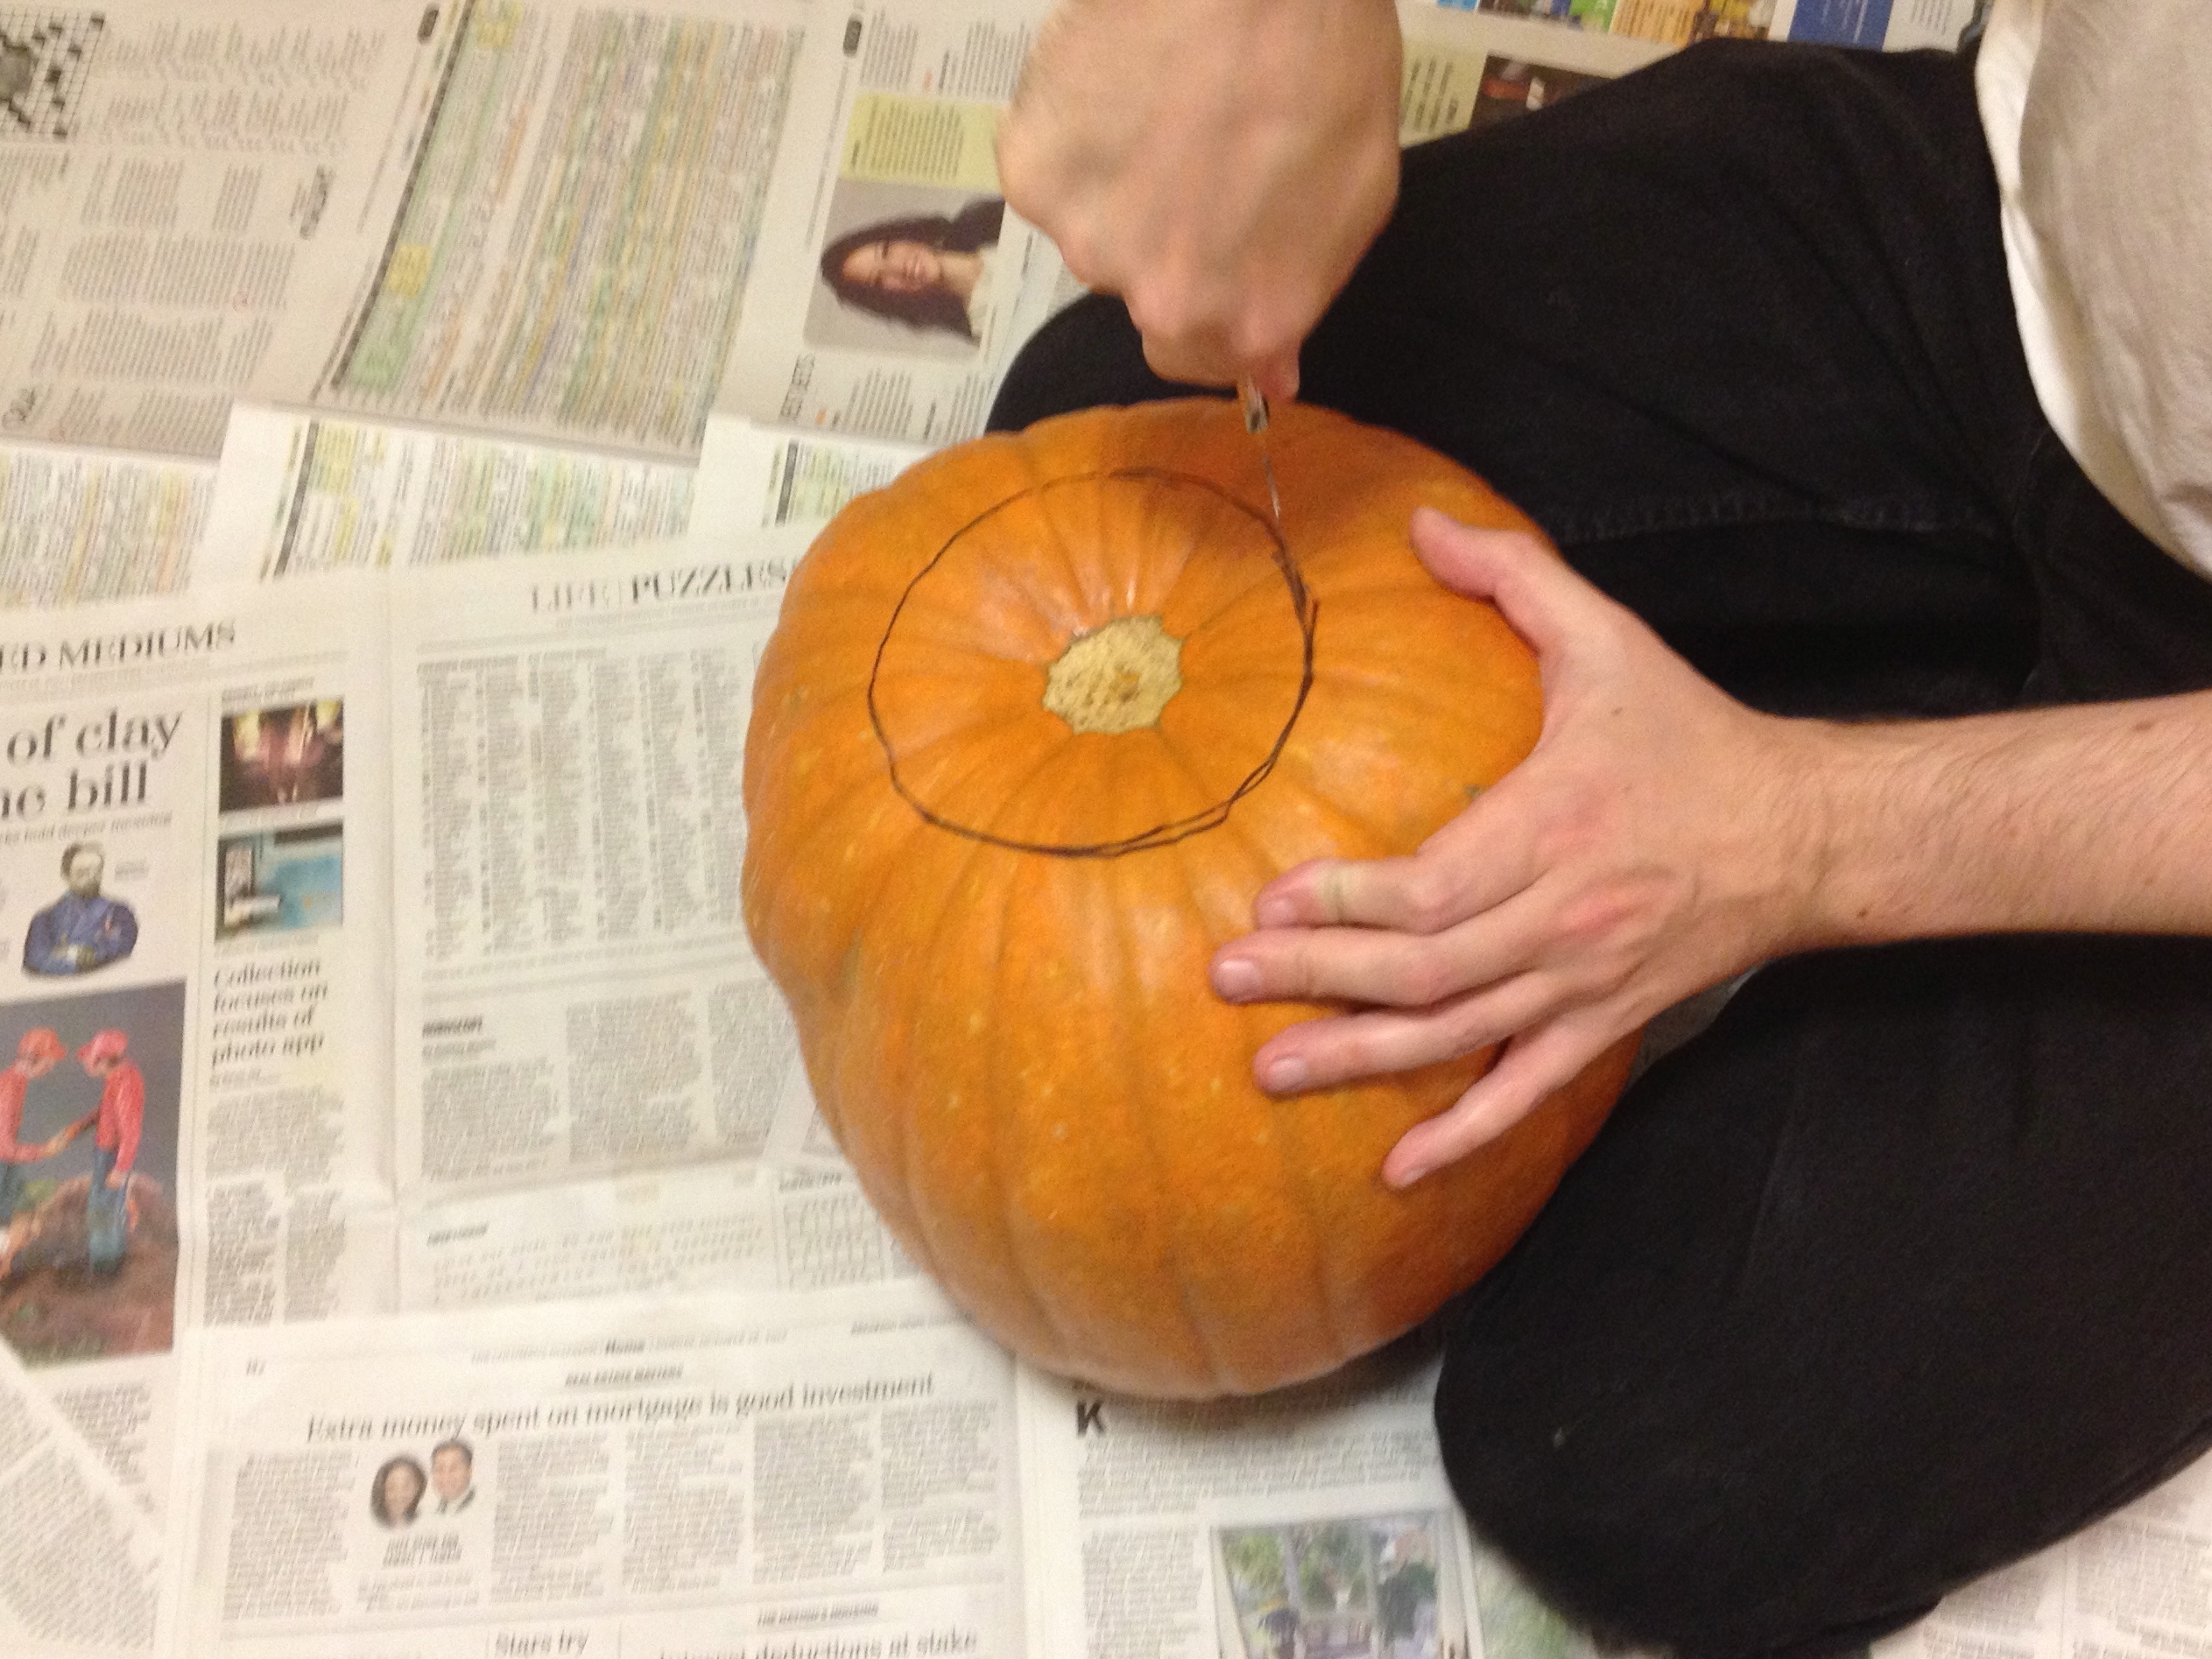
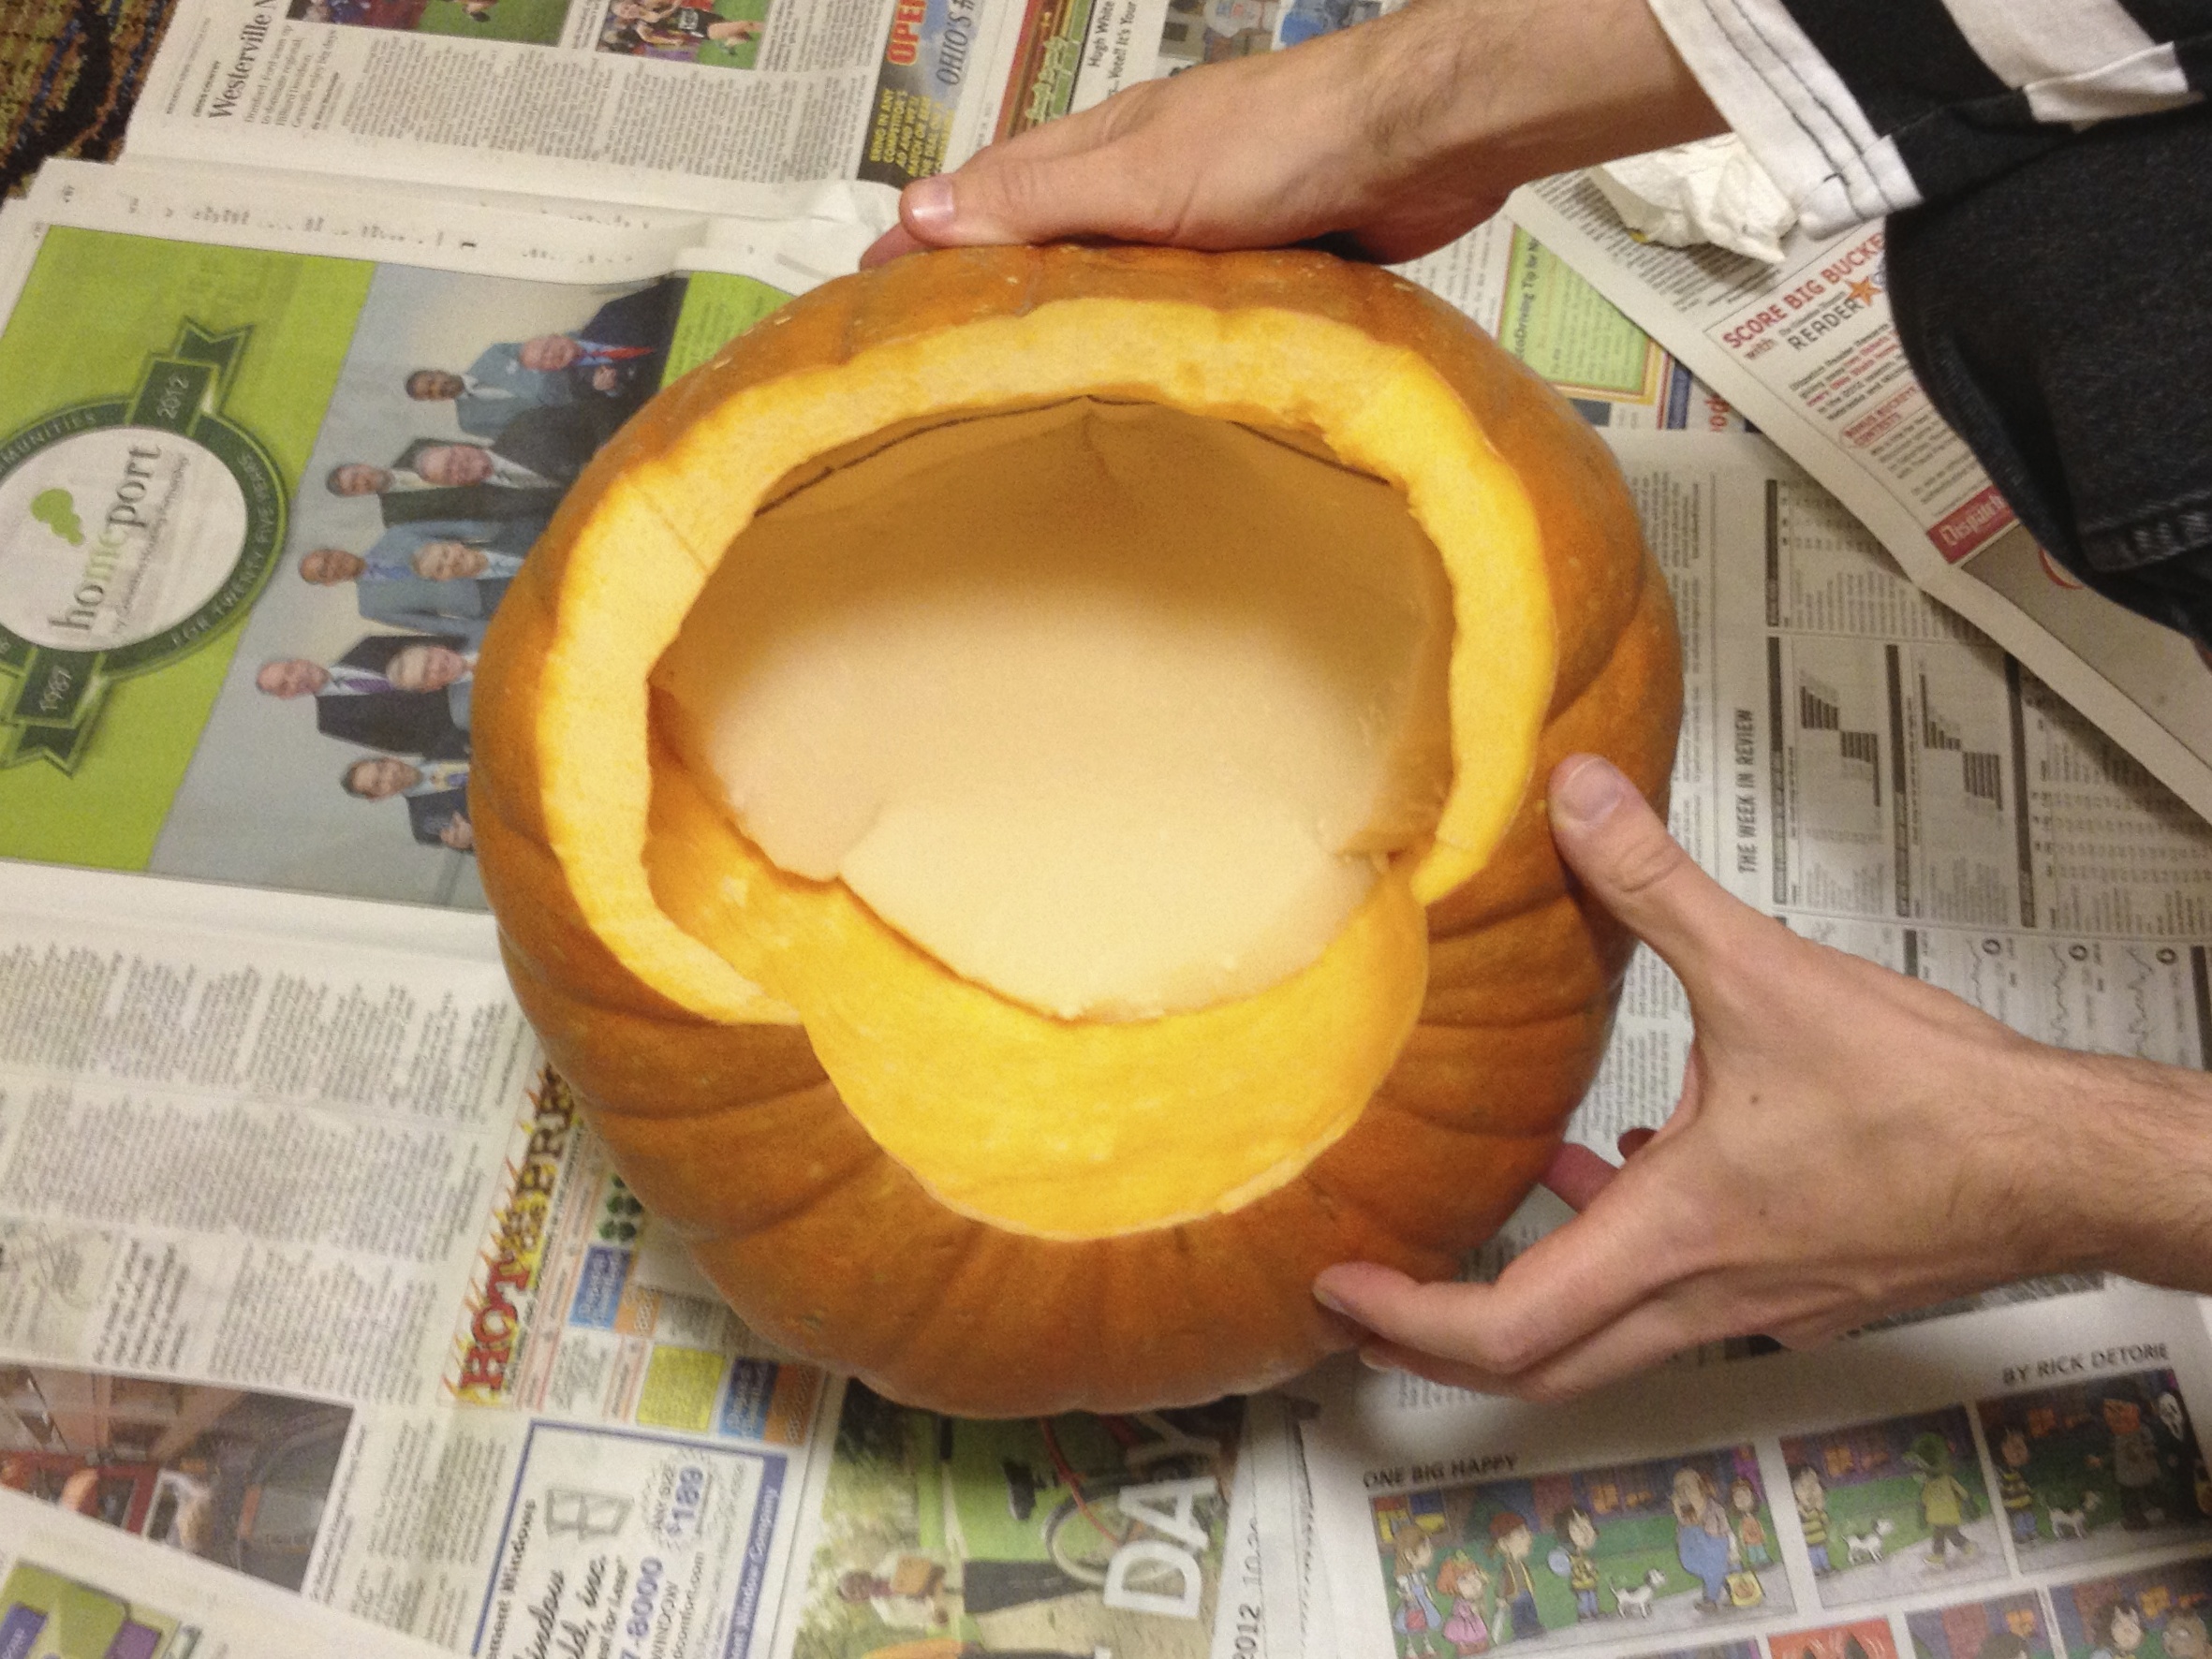
To begin hollowing, mark a circle slightly larger than the size of your neck on the base of the pumpkin, and cut that area away. Serrated steak knives are fantastic for this part. Scoop out the bulk of the pumpkin “guts” from your opening in the bottom.
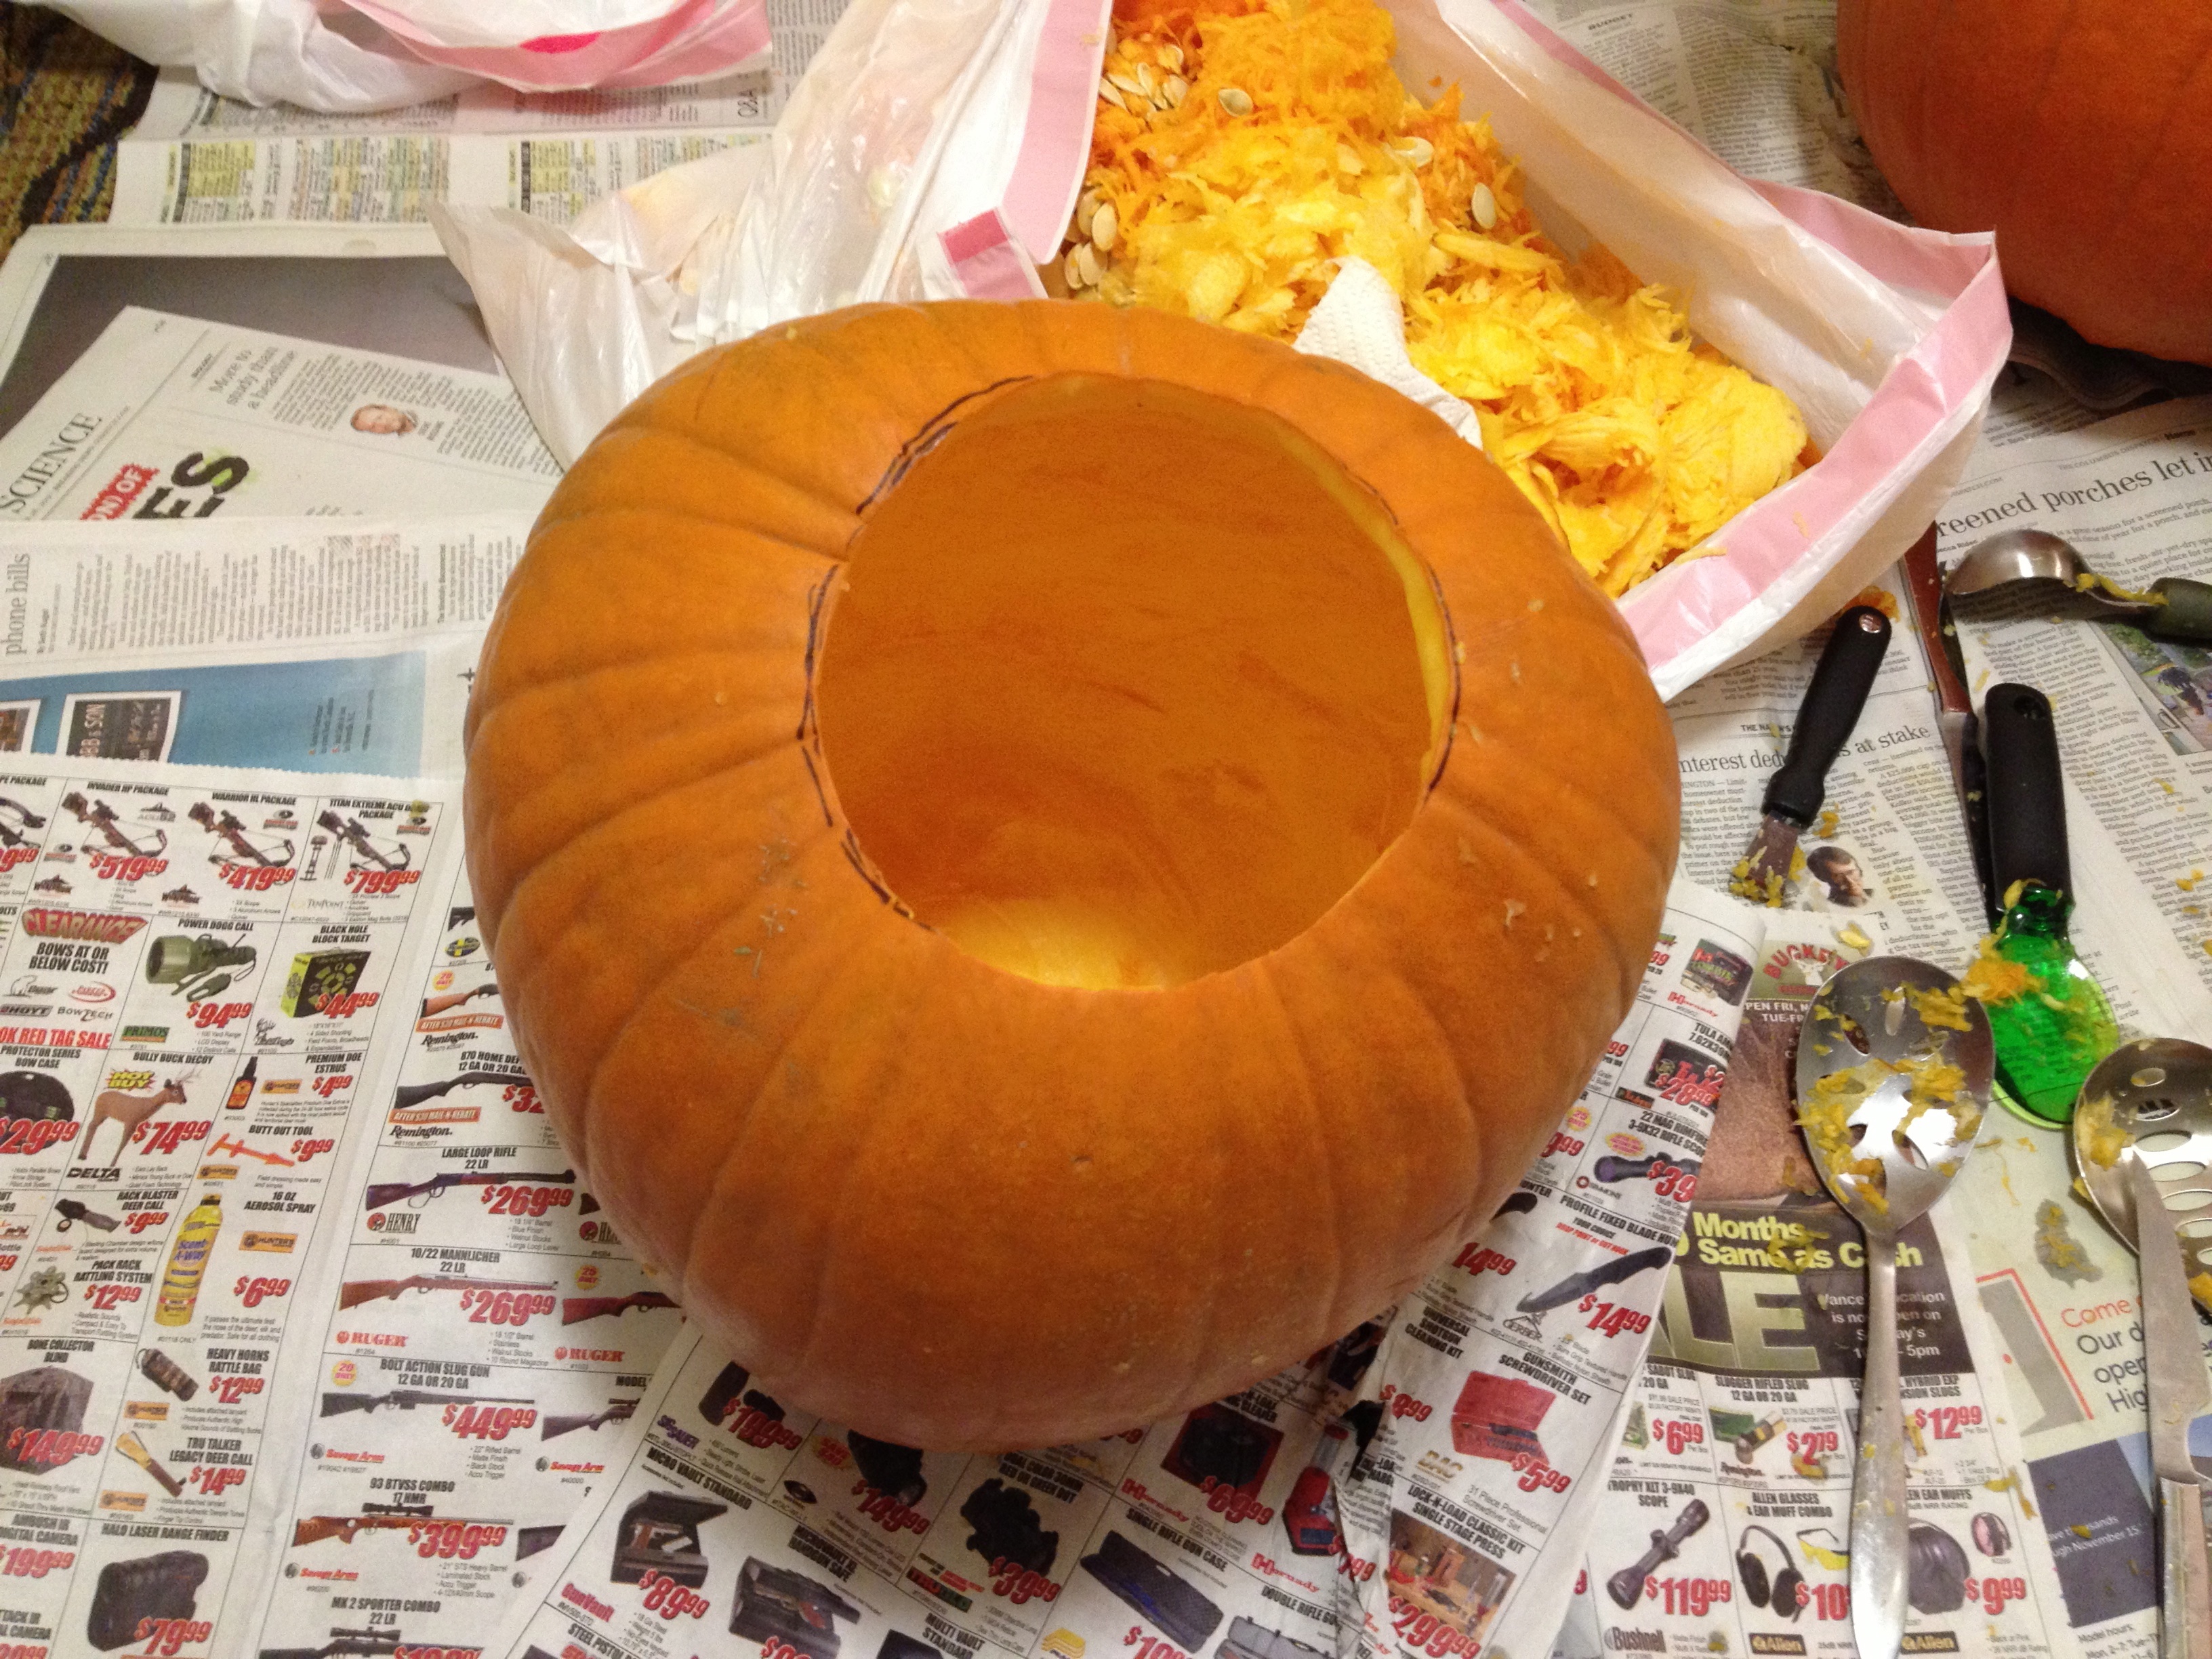
Now, the tricky and important part: Thin the shell of the pumpkin to reduce the weight and increase the headroom (pun intended) inside.
Many tools can be used this, from rigid spoons to knives and melon ballers. A great tool for making smooth inside cuts is this type of melon scoop. And, the best two tools that we have found for doing the final thinning of the inside walls are butter curlers and this particular ice cream scoop, which is made of rigid steel and curls up strips of inner pumpkin shell like, well, butter.
You should be able to get most of the shell down to about ¾ – 1″ thick. Don’t forget that you also need to also thin the inside-top of the pumpkin. If it still seems heavy after this stage, go ahead and go thinner to about ½ – ¾” thick around the walls.
Making the cutout.
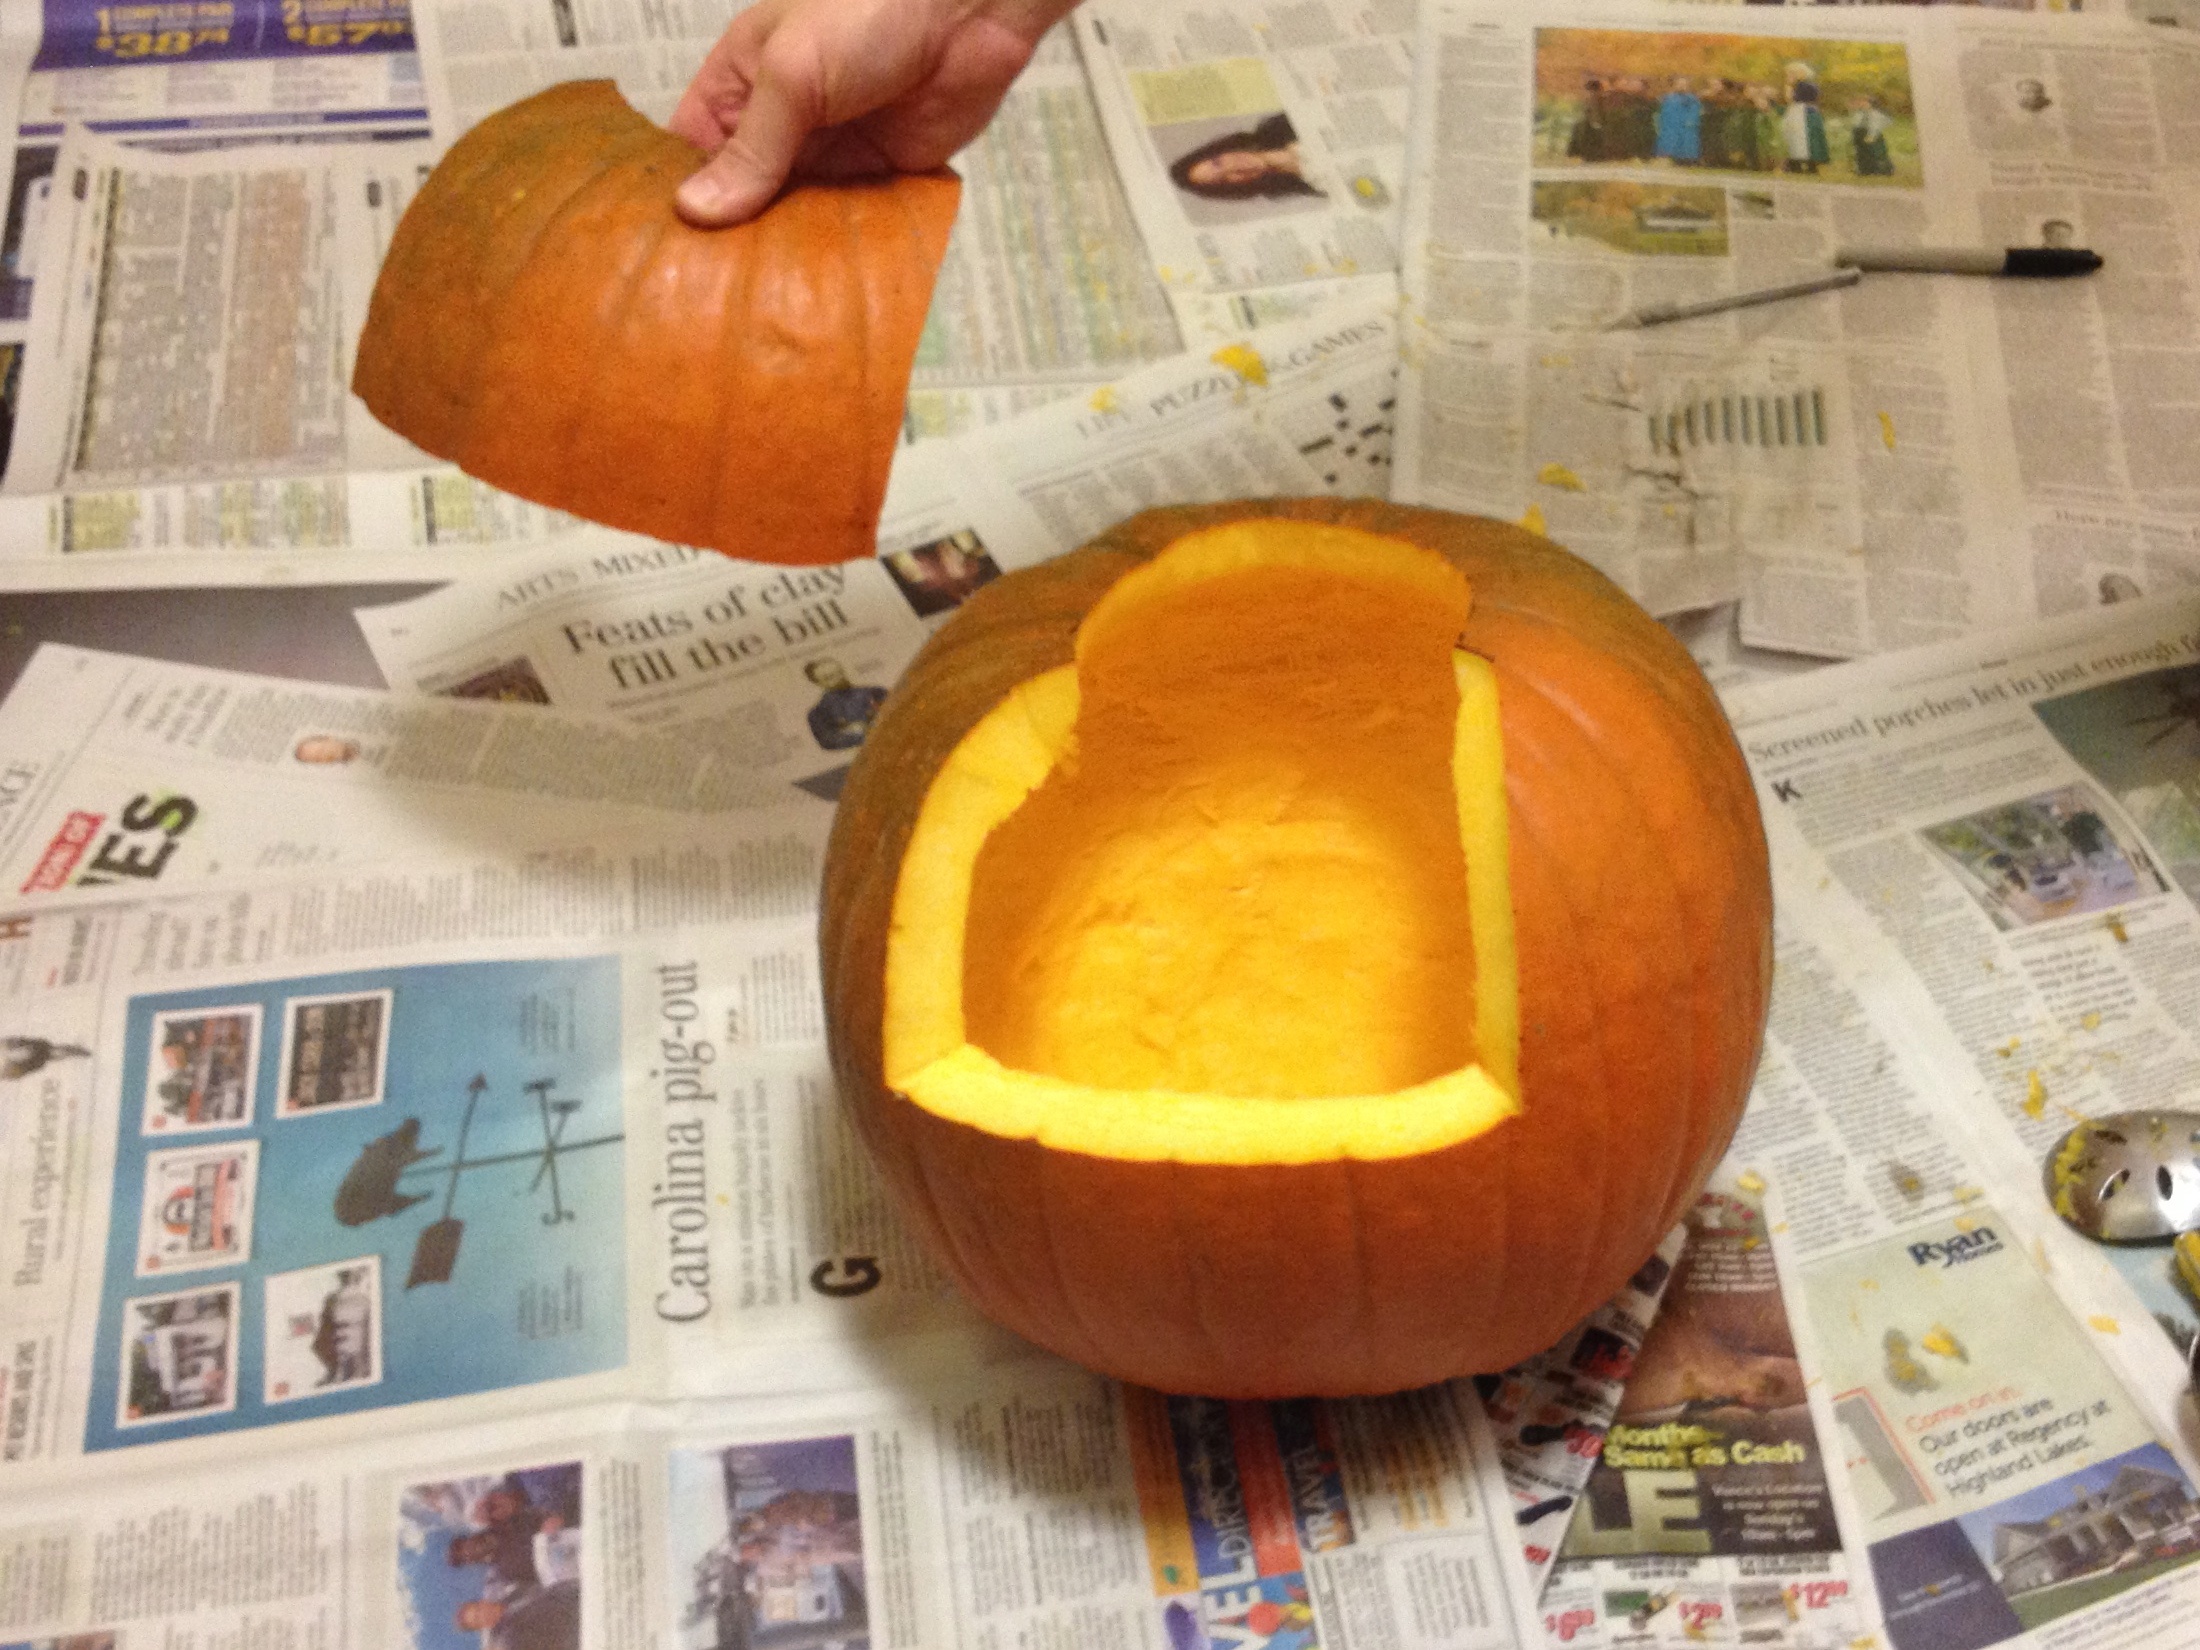
In order to actually fit your head inside, you’ll need to cut away a portion of the lower back quadrant of the pumpkin. You can either cut this away and discard this part, or save it such that you can re-attach it (once the pumpkin is on your head), for example with bamboo skewers.
In order to cut away part of the “back,” you’ll implicitly need to decide which sides are going to be the front and back. Generally, the flattened or bumpy side of the pumpkin that faced the ground while it was growing makes a pretty good back side.
After selecting the front side of the pumpkin, mark out the back section: just wide enough to fit your head through. Make clean straight cuts so that there is a wide surface for later reattachment.
Next, the test fit.
The inside of your pumpkin can be pretty wet at this stage, so you may want to use some towels or paper towels to blot any excess moisture from the pumpkin surfaces. You may also want to use a shower cap or a plastic bag over your hair (not over your entire head) to protect your (hairy and/or bald) head from direct contact.
Putting a tight shell over your head is a potential safety hazard, so approach this stage with care. Go slowly, and be ready to back out at the first sign that you won’t fit or that you won’t be able to breathe in there. And, importantly, have another human being present to help you if anything should go wrong.
It may take a few pumpkins to find a good fit, and your pumpkin will likely need some additional smoothing or thinning in places to make it more comfortable. Make sure that your neck has enough room to move, that there is adequate ventilation, and that your jaw can move freely as well.
Padding the inside.
You will need some padding inside to protect the top of your head where the pumpkin rests on it. We considered some rather complicated interior liners to provide a moisture barrier and secure the pumpkin in place, but it turned out that a simple foam pad was more than sufficient.
Cut out a piece of foam rubber, such as egg-crate style mattress topper. Tuck it into the top of the pumpkin and test fit again. If it isn’t quite enough padding (heavier pumpkins may need more padding) add another piece.
At this point, remove the padding and (if present) the back piece of the pumpkin. Set both pieces aside, and allow your pumpkin to dry out for a few of hours, and ideally overnight, before you plan to wear it.
Final carving.
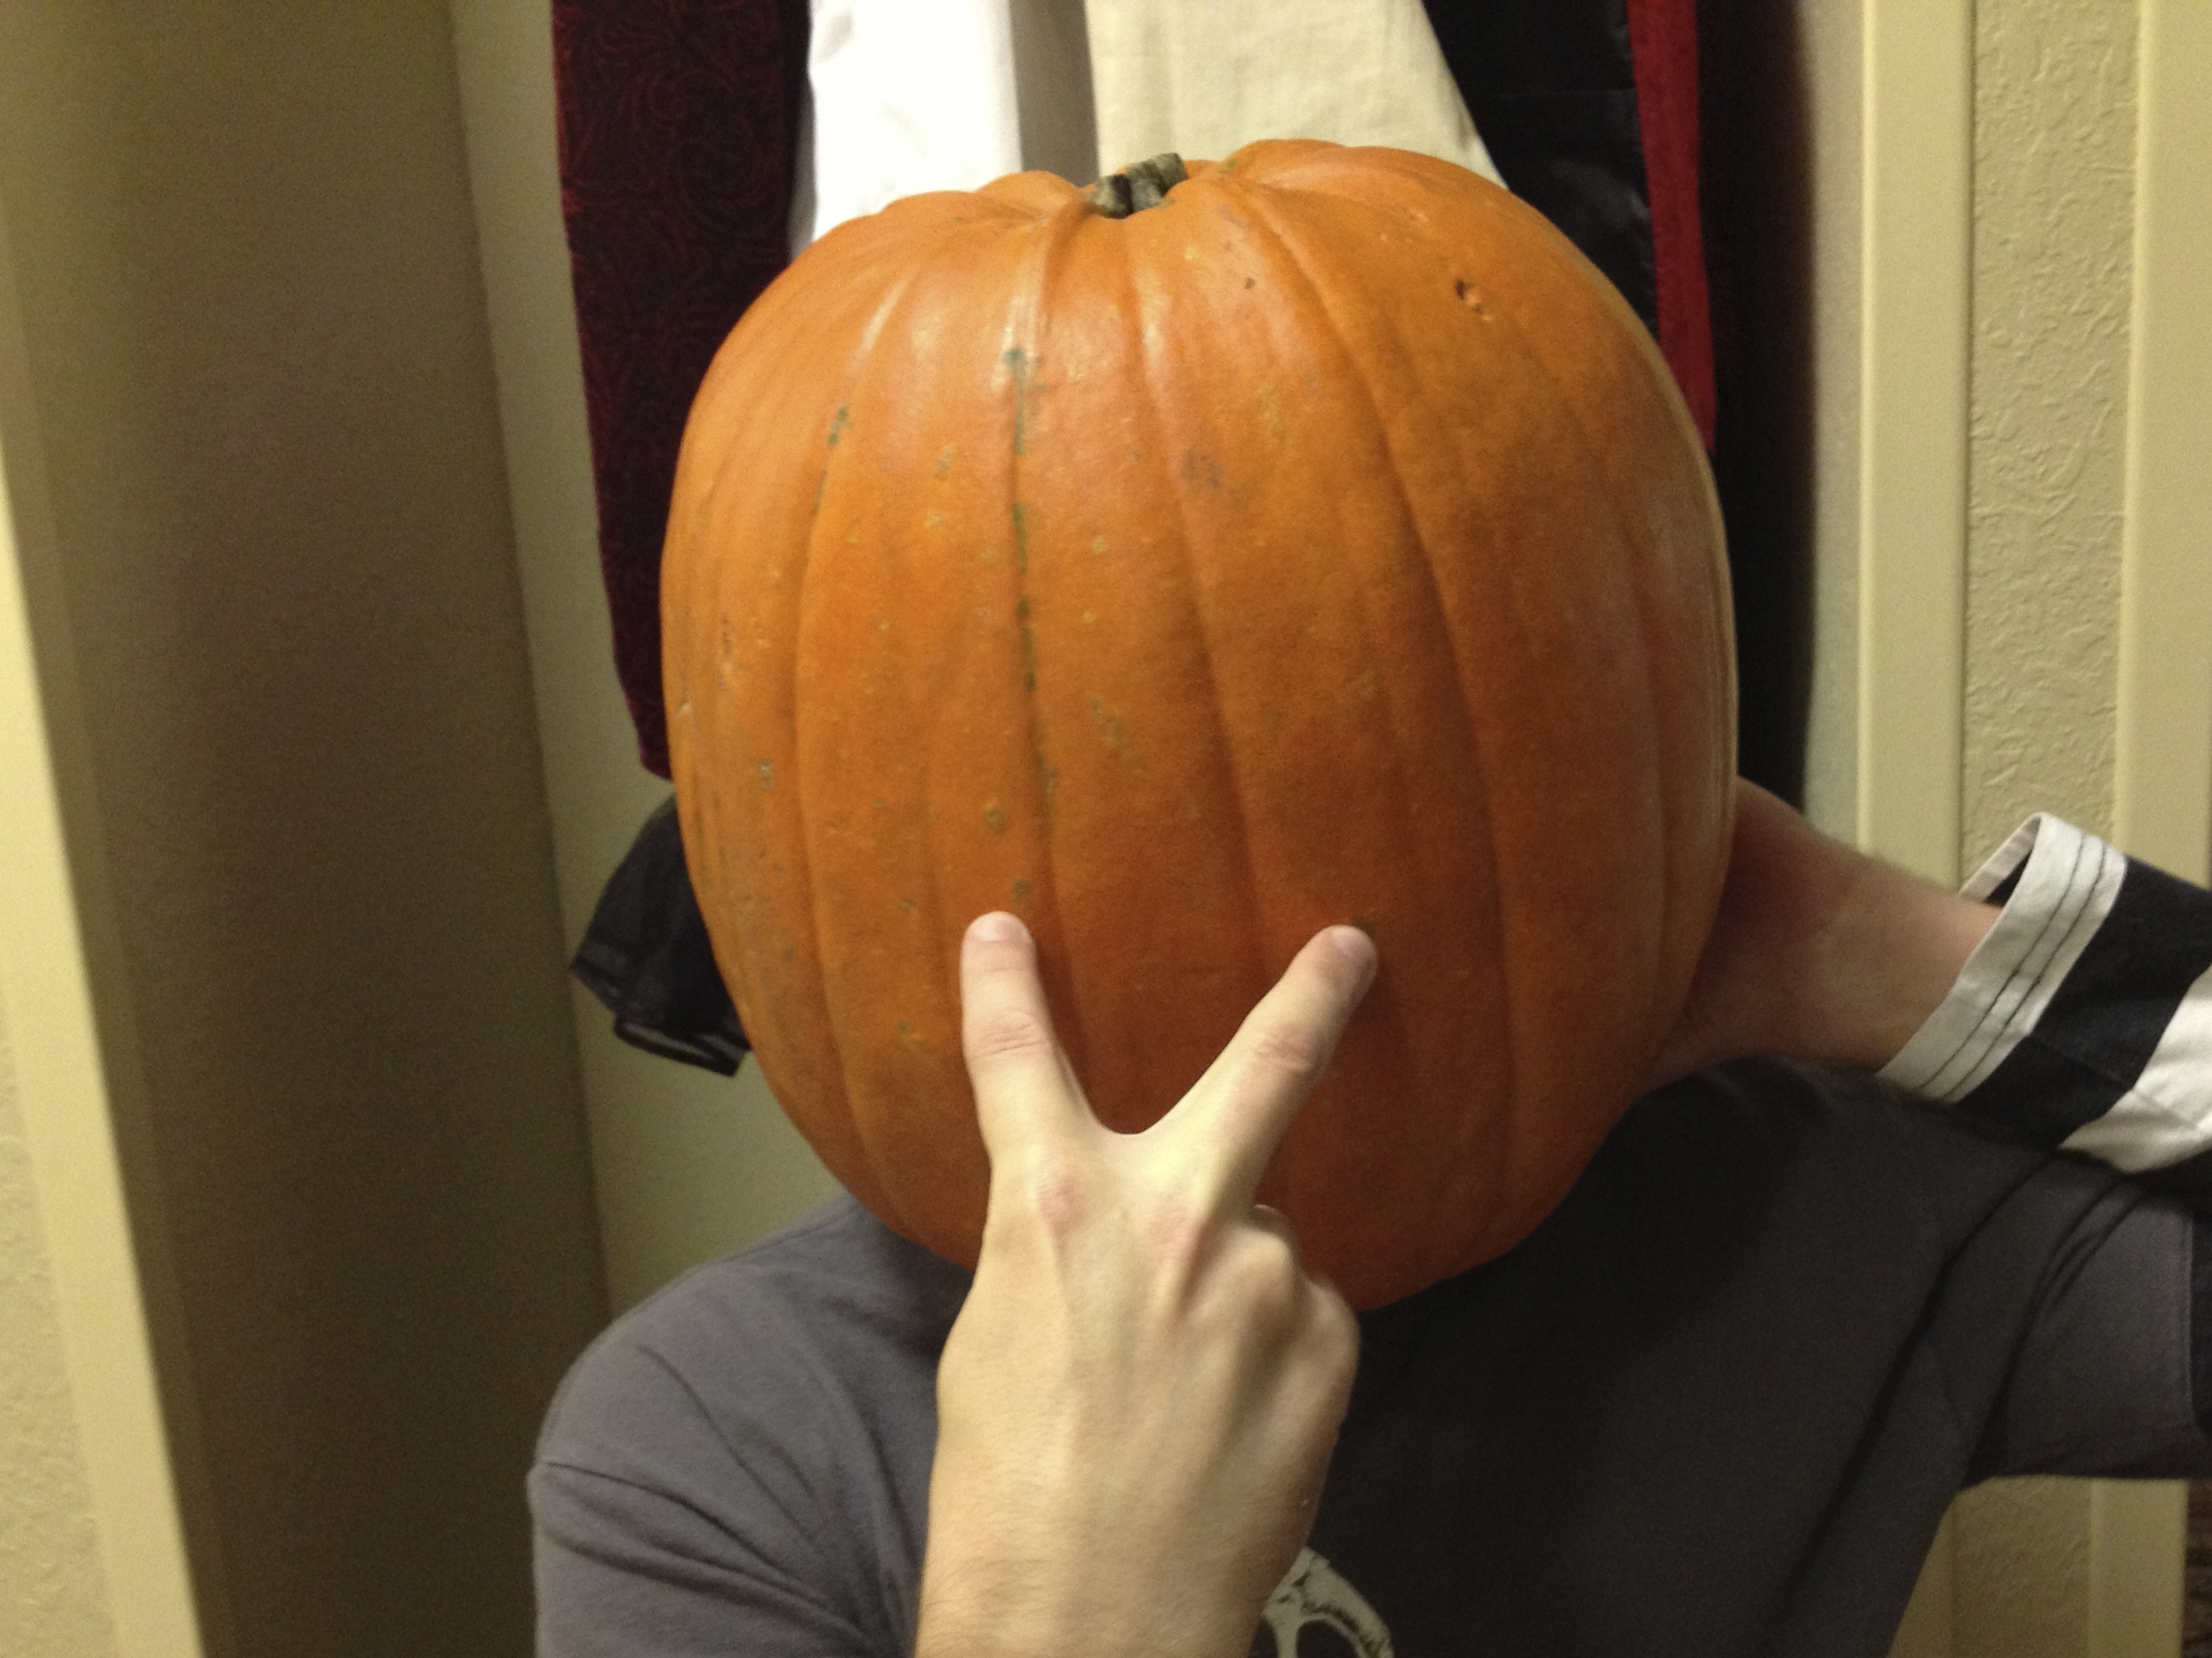
The final carving can be done just before you plan to wear the costume. Replace the padding, put the pumpkin on your head and (if using it) hold the back piece in place so you can locate where your eye holes will go. You can indicate where they should be fairly reliably by aiming your fingers at your eyes from outside the pumpkin. (It turns out that you can do this pretty well, even if you have a funny thing on your head.) Have your friend (the one who is there to make sure that you don’t suffocate) mark the locations with a marker dot. Repeat a few times to get a range of marks for best results.
You can use a knife or apple corer to make initial holes in the eye locations to check if you need any fine-tuning. After you’ve done a test fit with you initial eye holes, sketch your jack-o-lantern face and carve the final details.
If you are planning to use the back shell of the pumpkin, put the back piece of the pumpkin on and insert bamboo skewers at several places to hold it in place. Slide them most of the way out so that they’ll be ready to insert once you put it on your head.
Blacking it out.
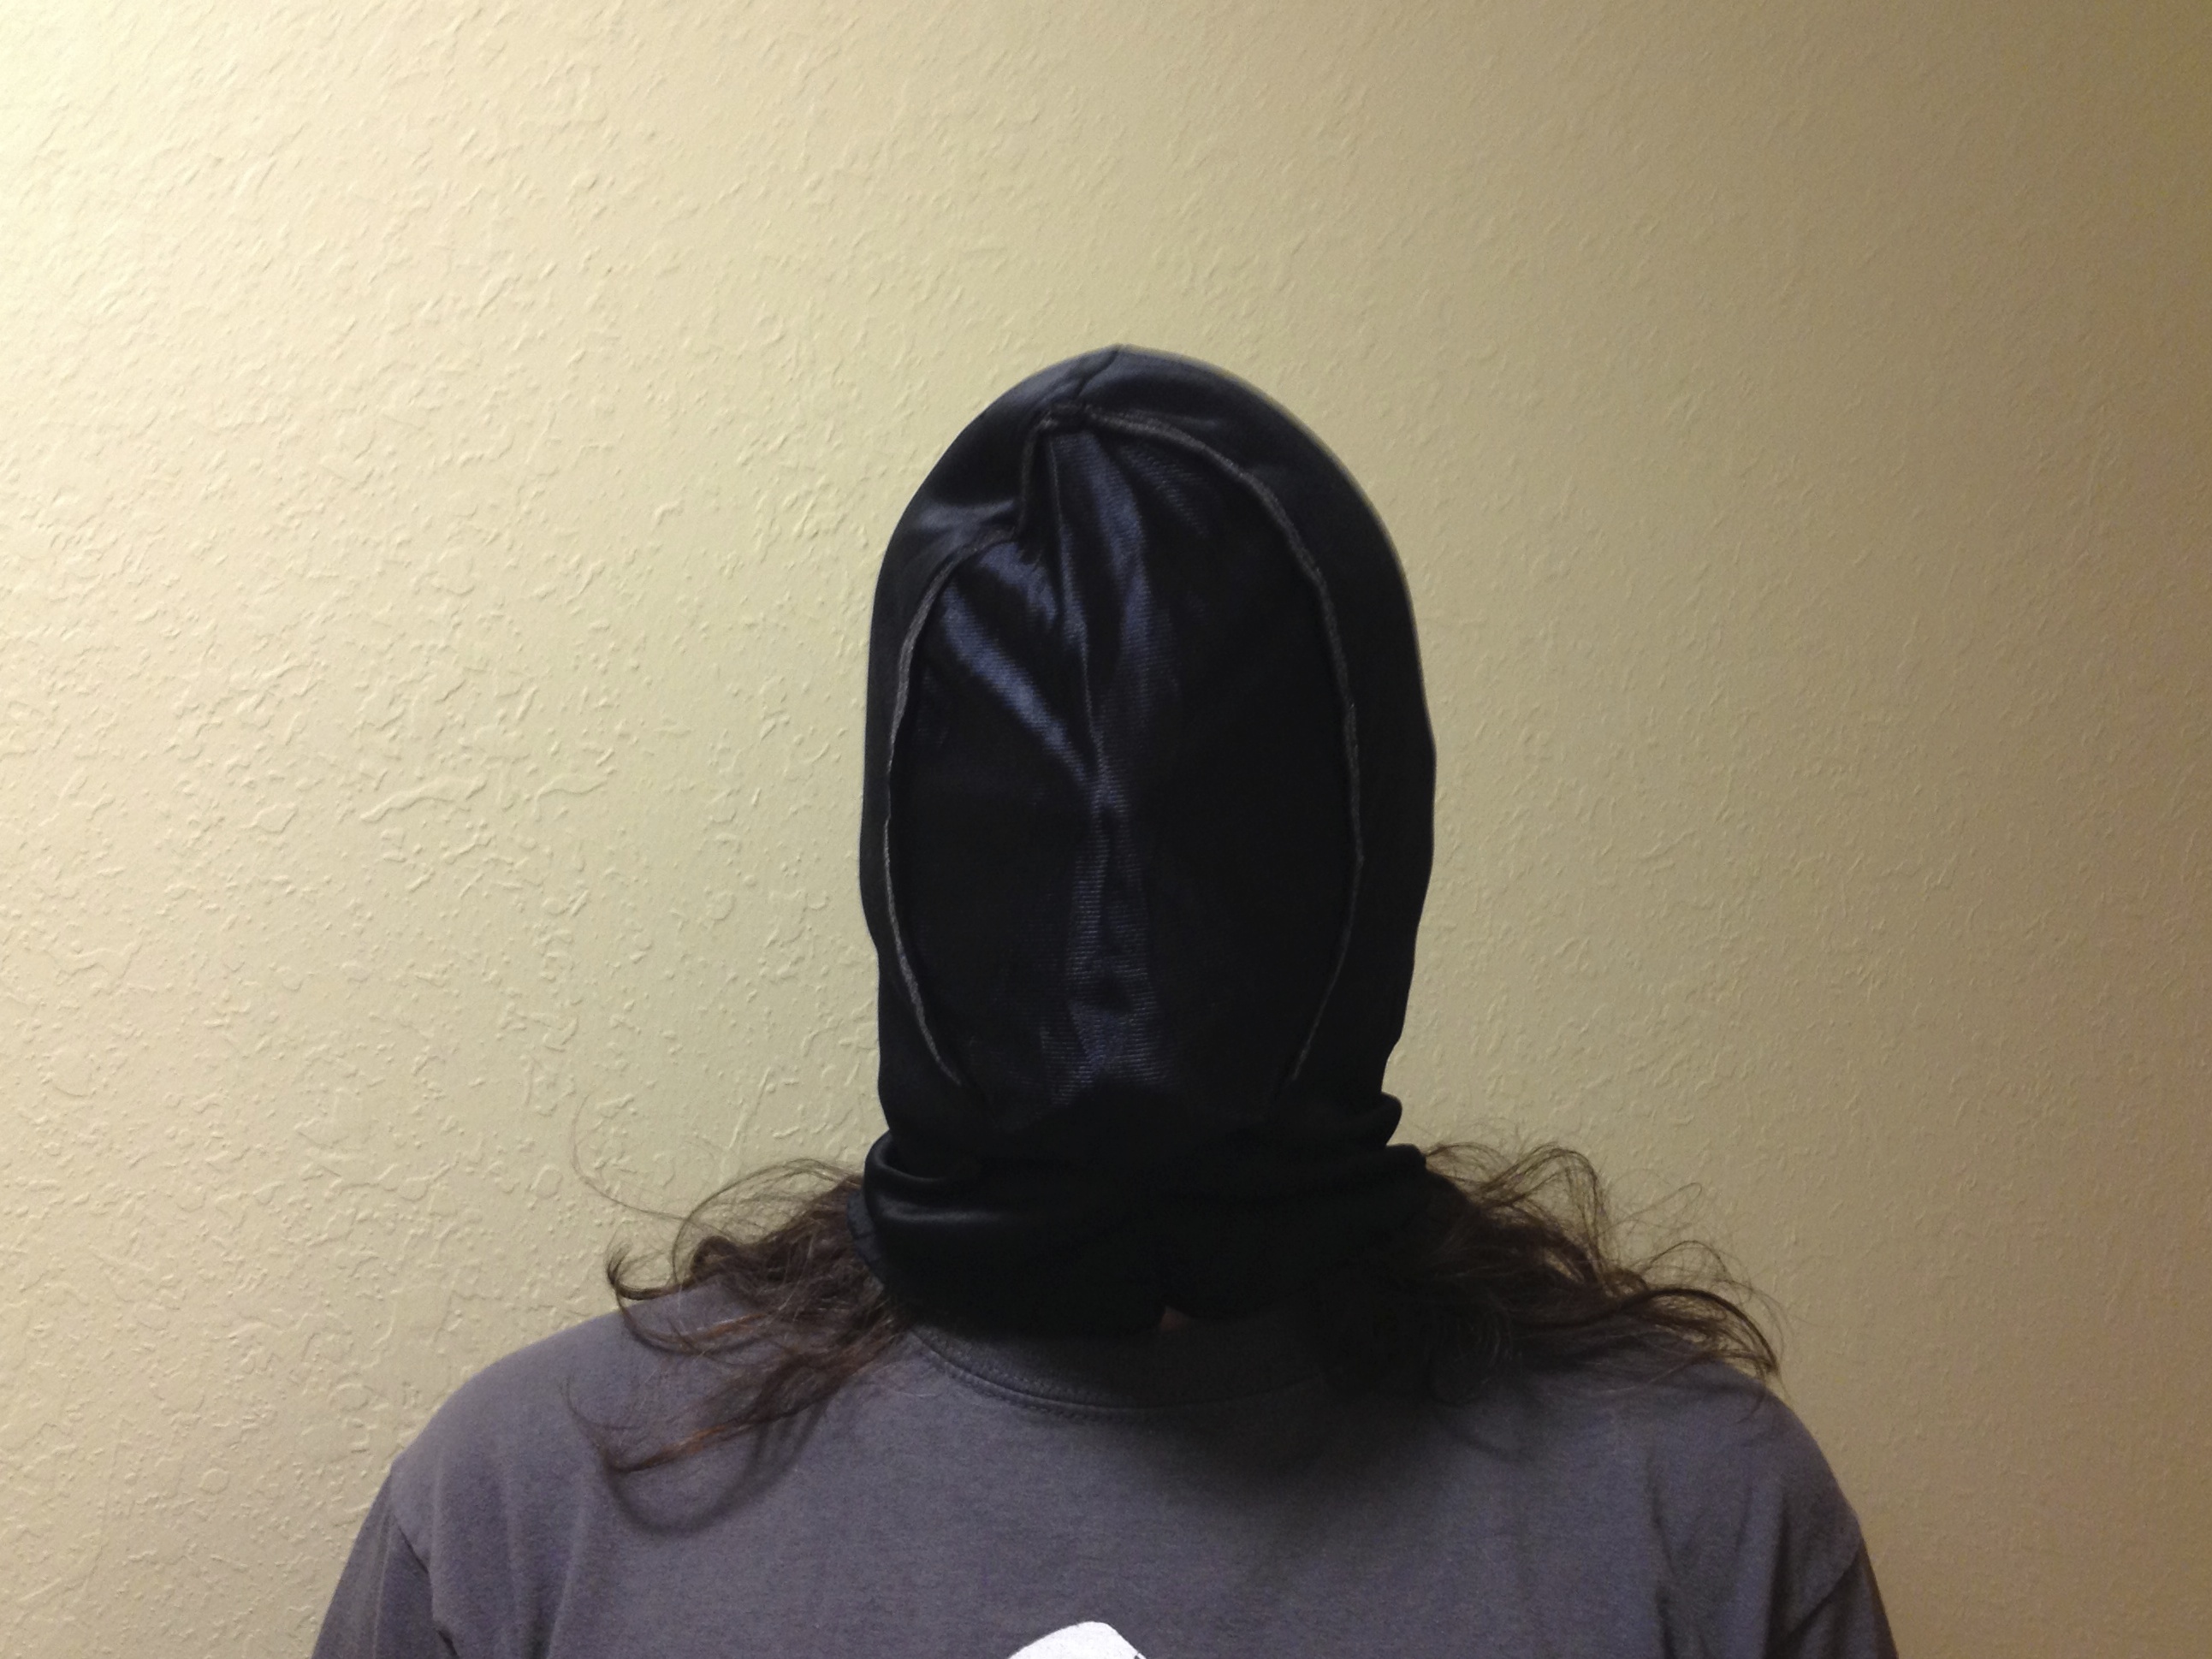
Any good “monster” costume is made much creepier by having no human skin showing. Most Halloween costume stores have a black “invisible” mask, which is a hood with a black mesh screen you can see through. They tend to be a little too short to fully cover the neck.
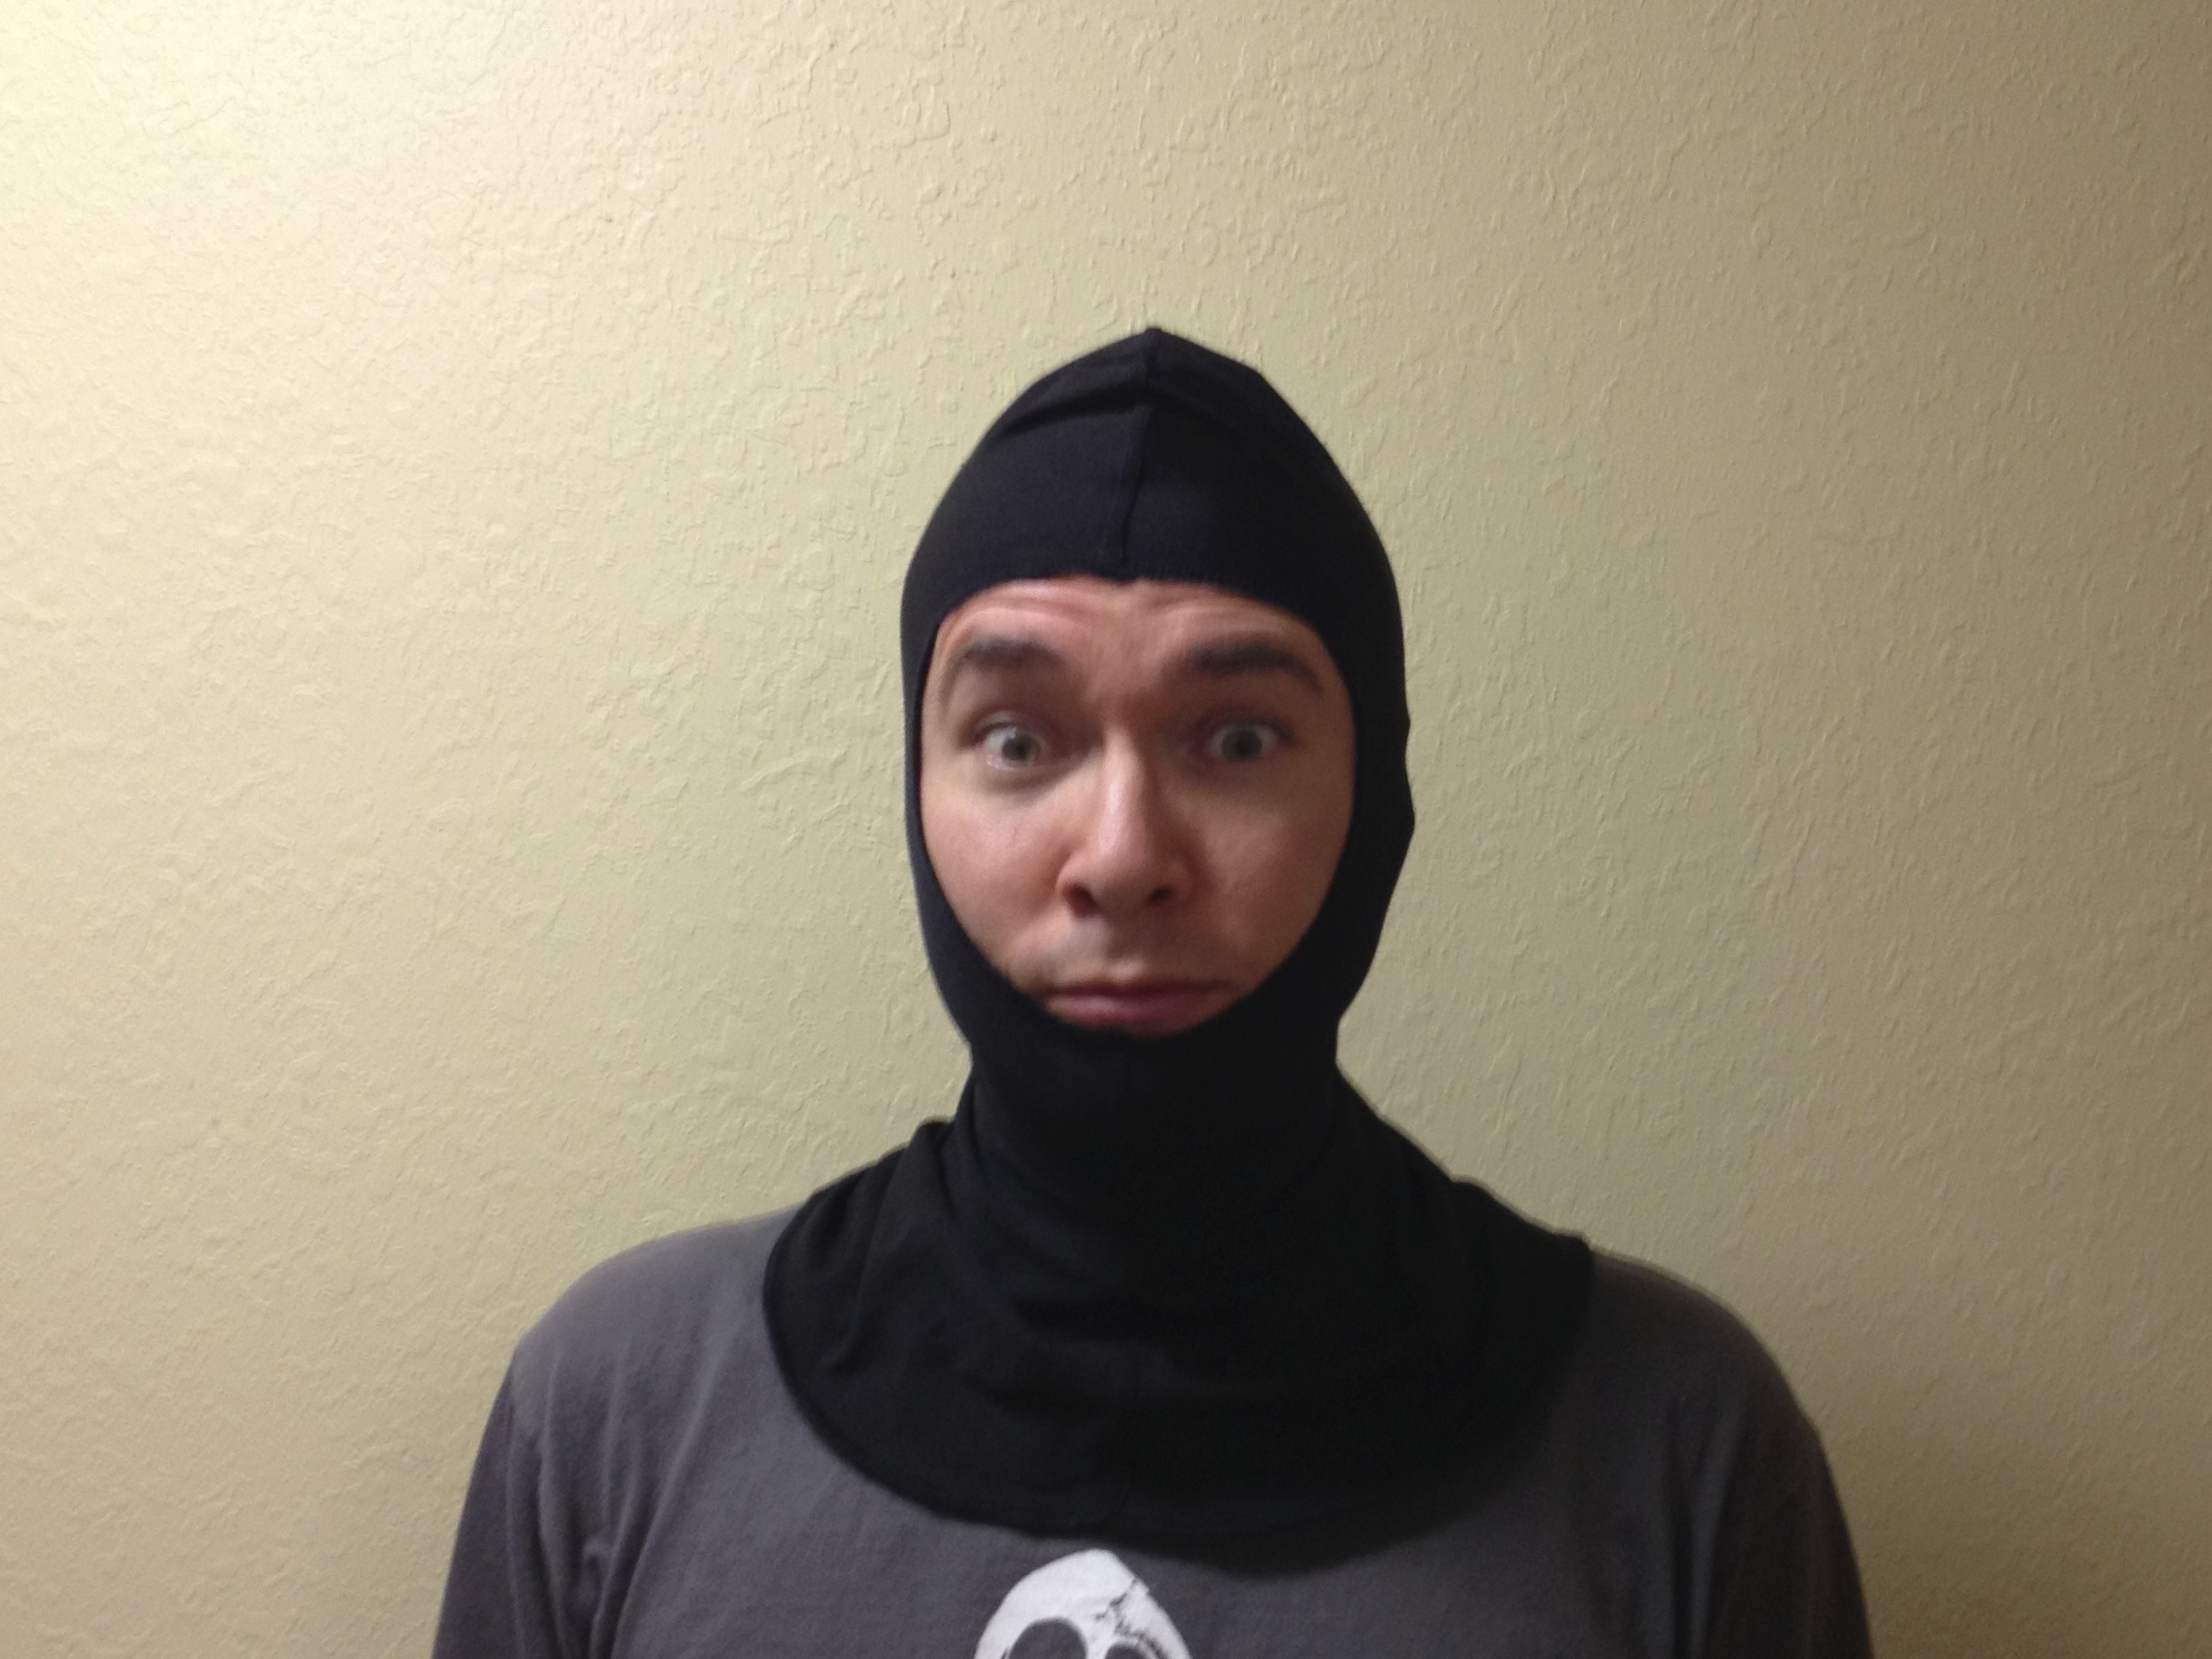
This lycra hood, sold at scuba shops, solved the neck problem.
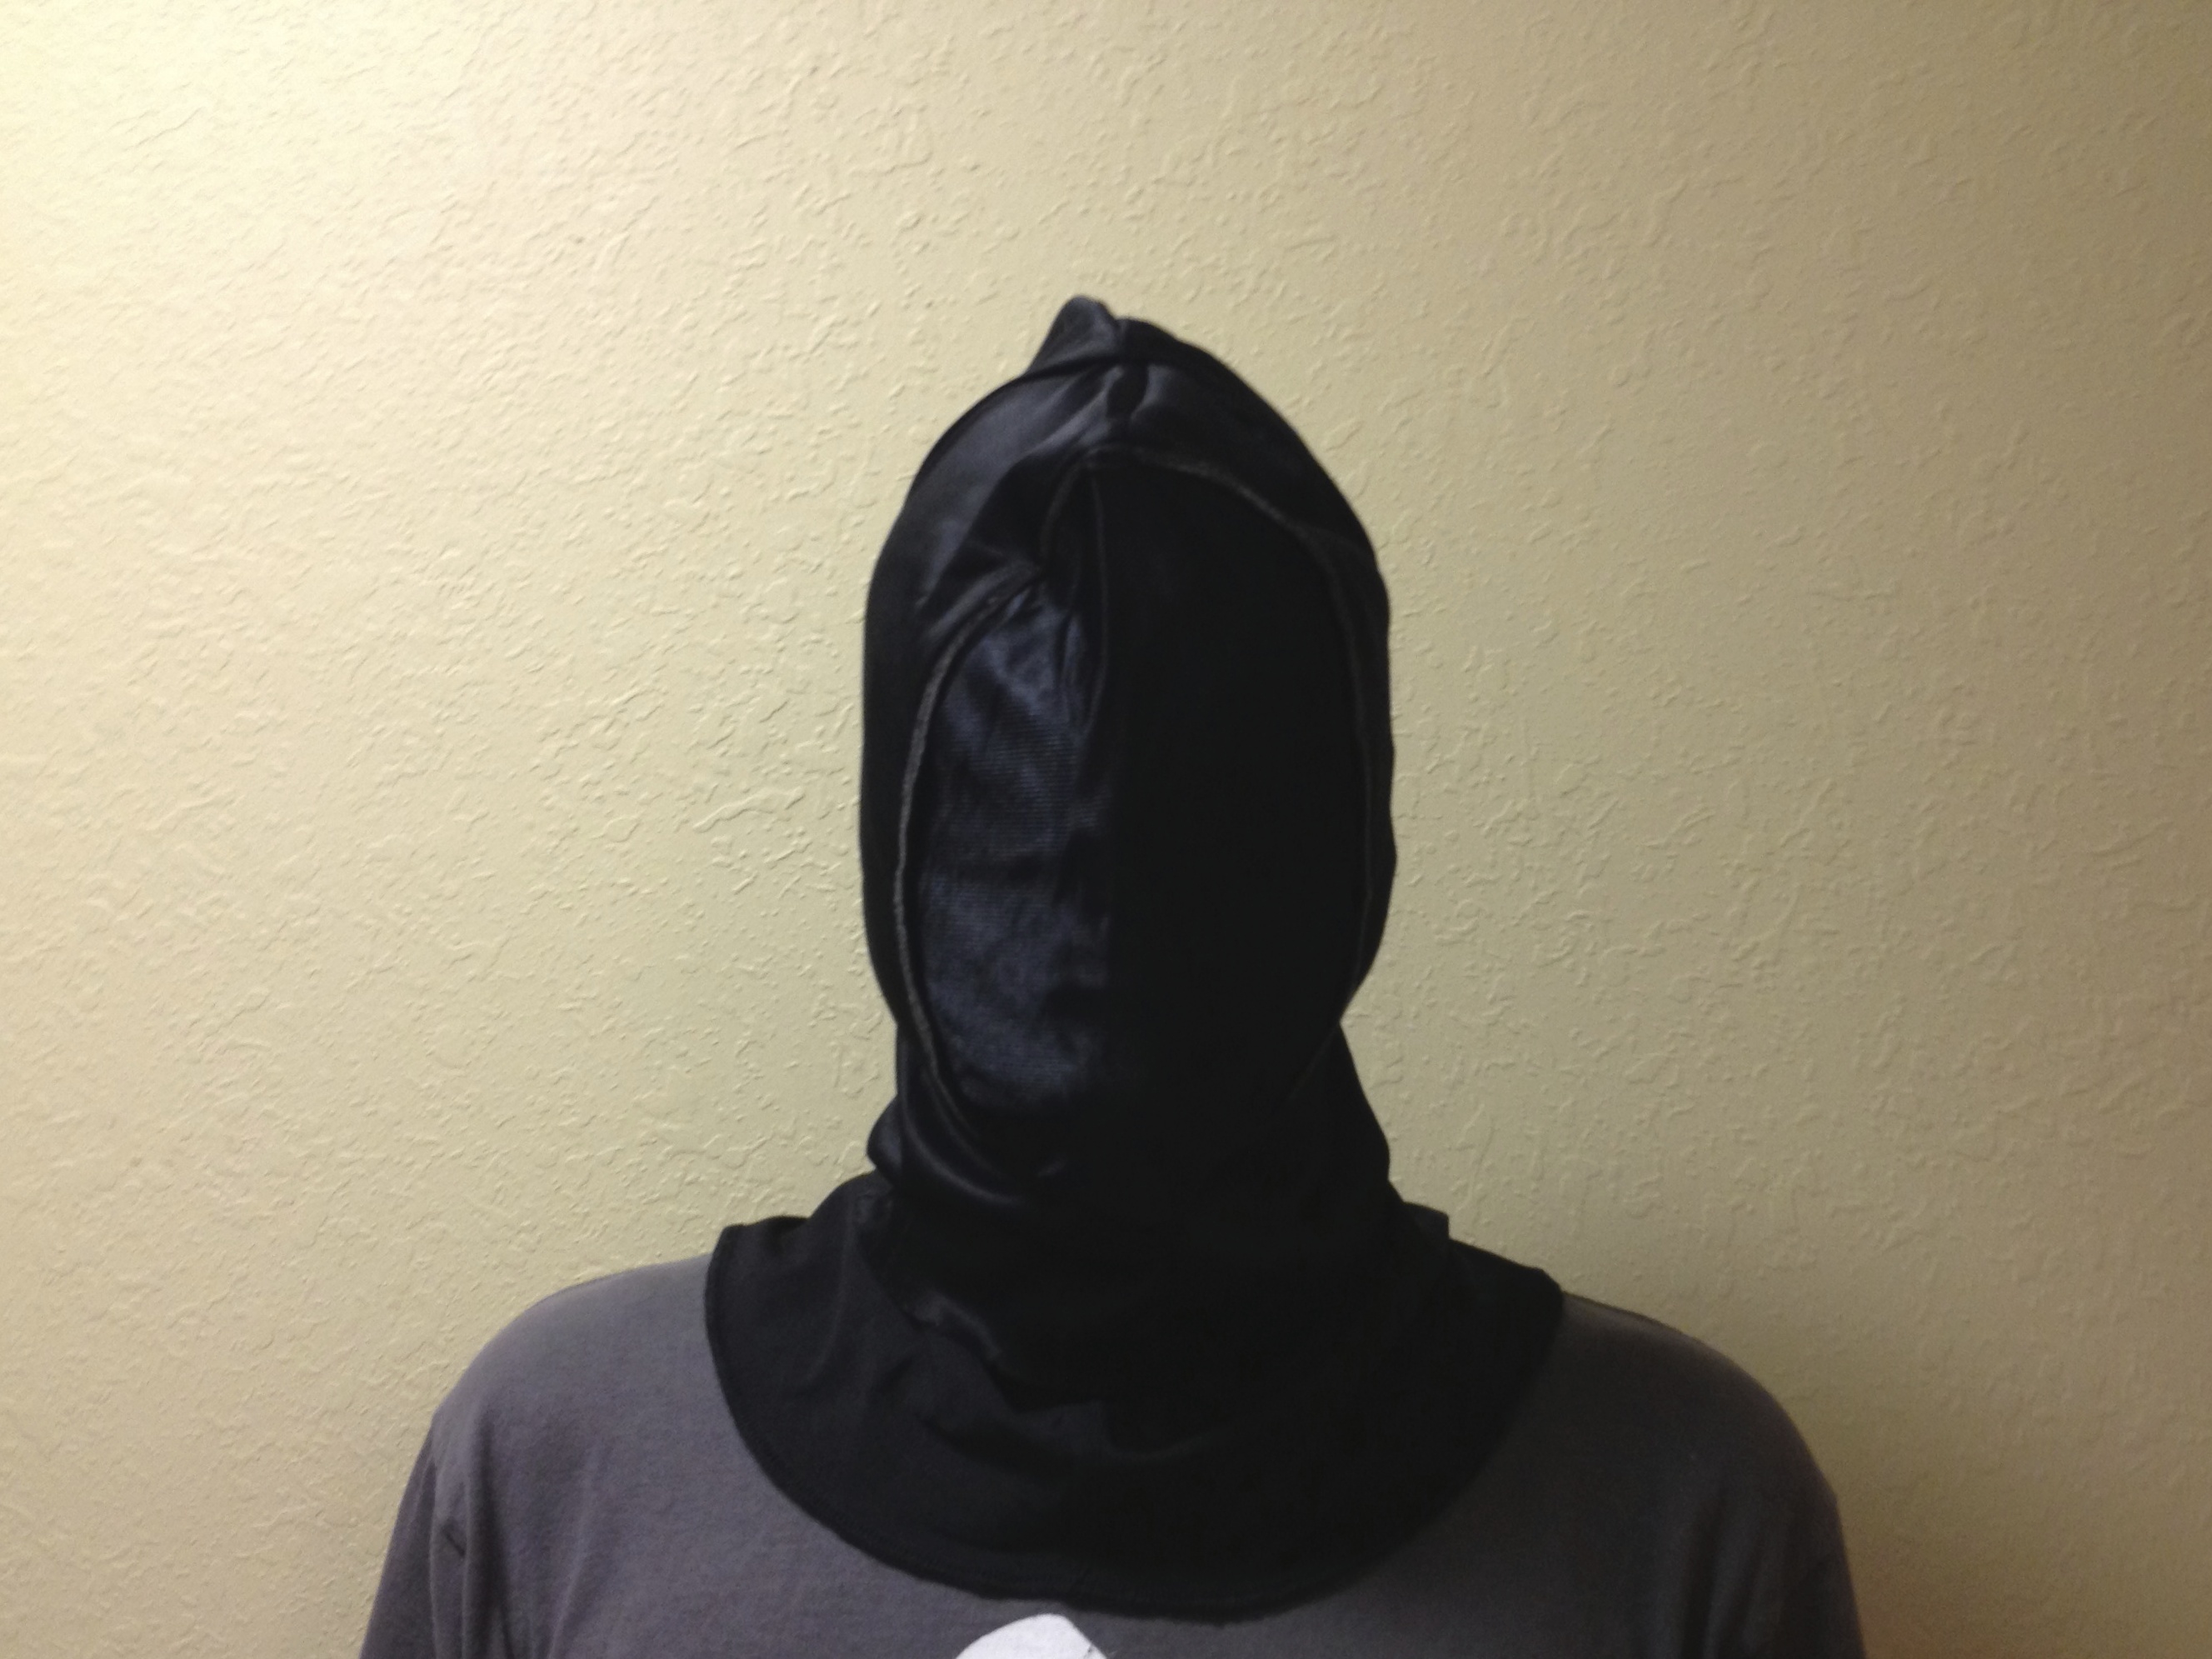
Combined with the hood, it gave full neck coverage to fit under any collar, and face coverage to make the human invisible under the jack-o-lantern. A slit cut in the mask by the chin also allows access for a straw, making it possible to drink milkshakes while in costume.
Black “opera” gloves are also easy to come by and give that same inhuman touch to your hands.
Put the carved pumpkin on your head over the hood, and (if using) affix the back section in place with the bamboo skewers.
Final details.
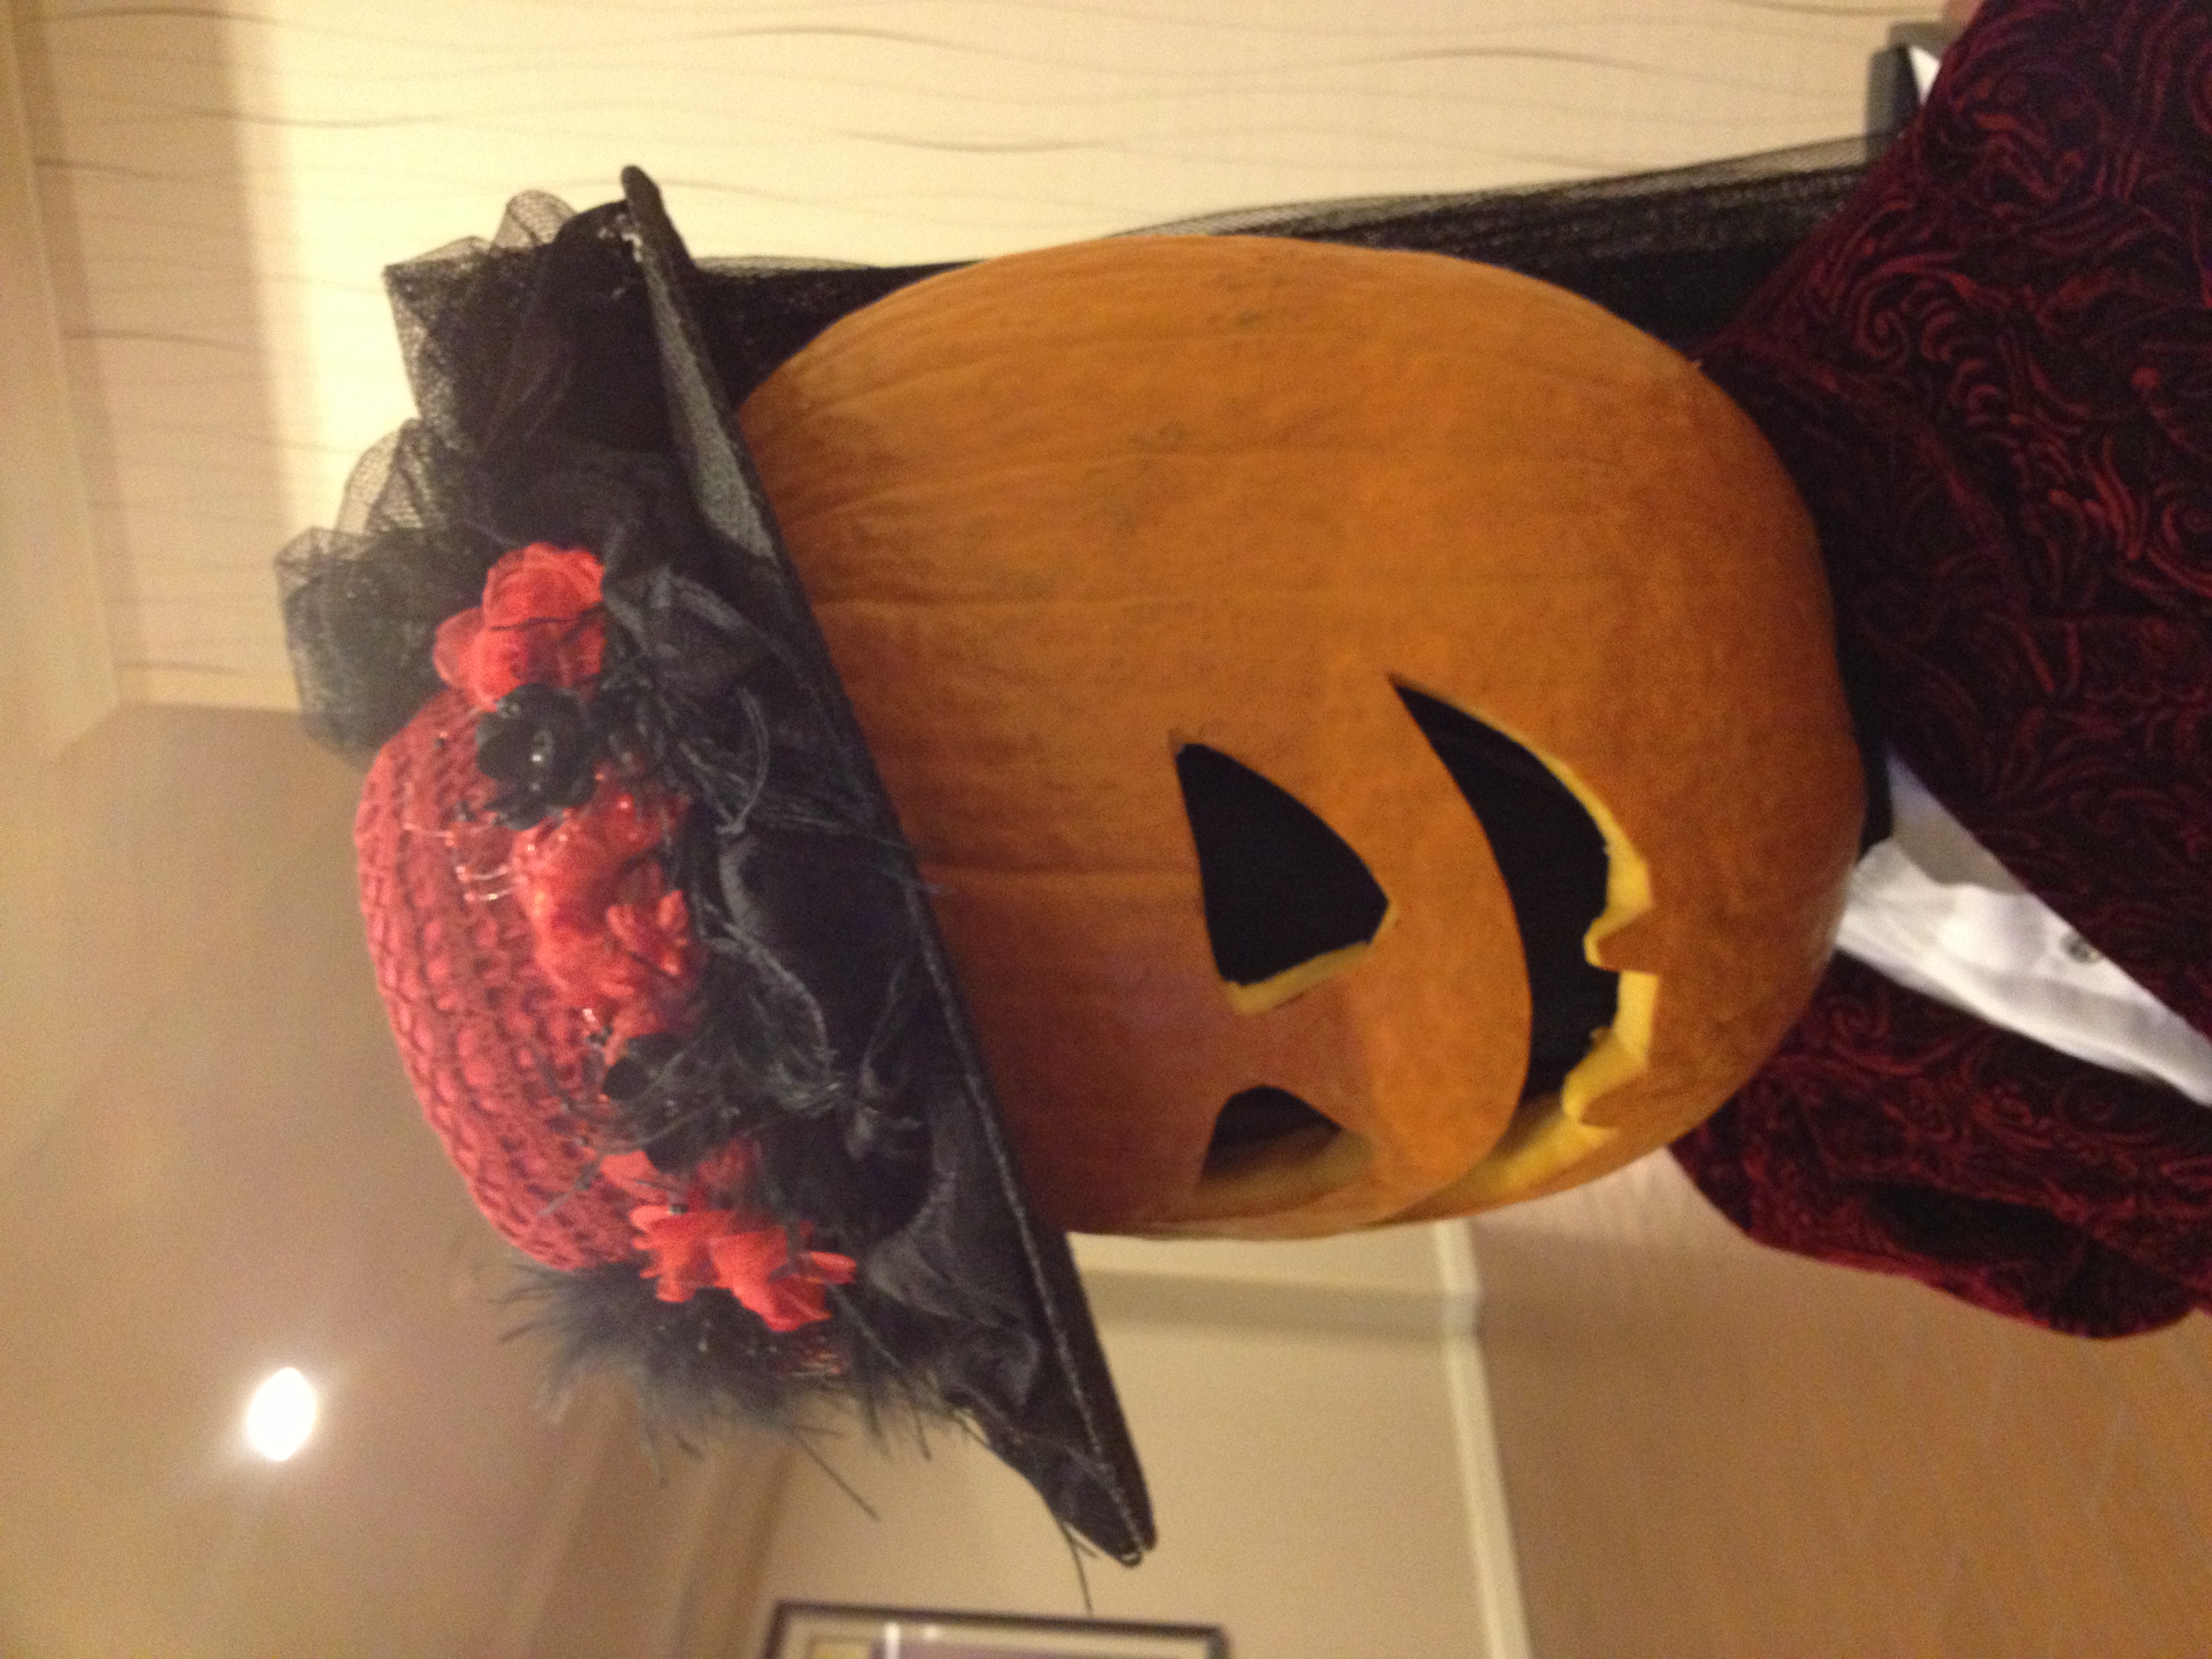
We opted for two very different faces on our two pumpkins– one devious but happy, and one slightly more menacing face. A little touch like a hat can work amazingly well at conveying gender or status. A hat can be held in place with hat-pins, skewers, or staples. A staple gun works remarkably well on the exterior of a pumpkin.
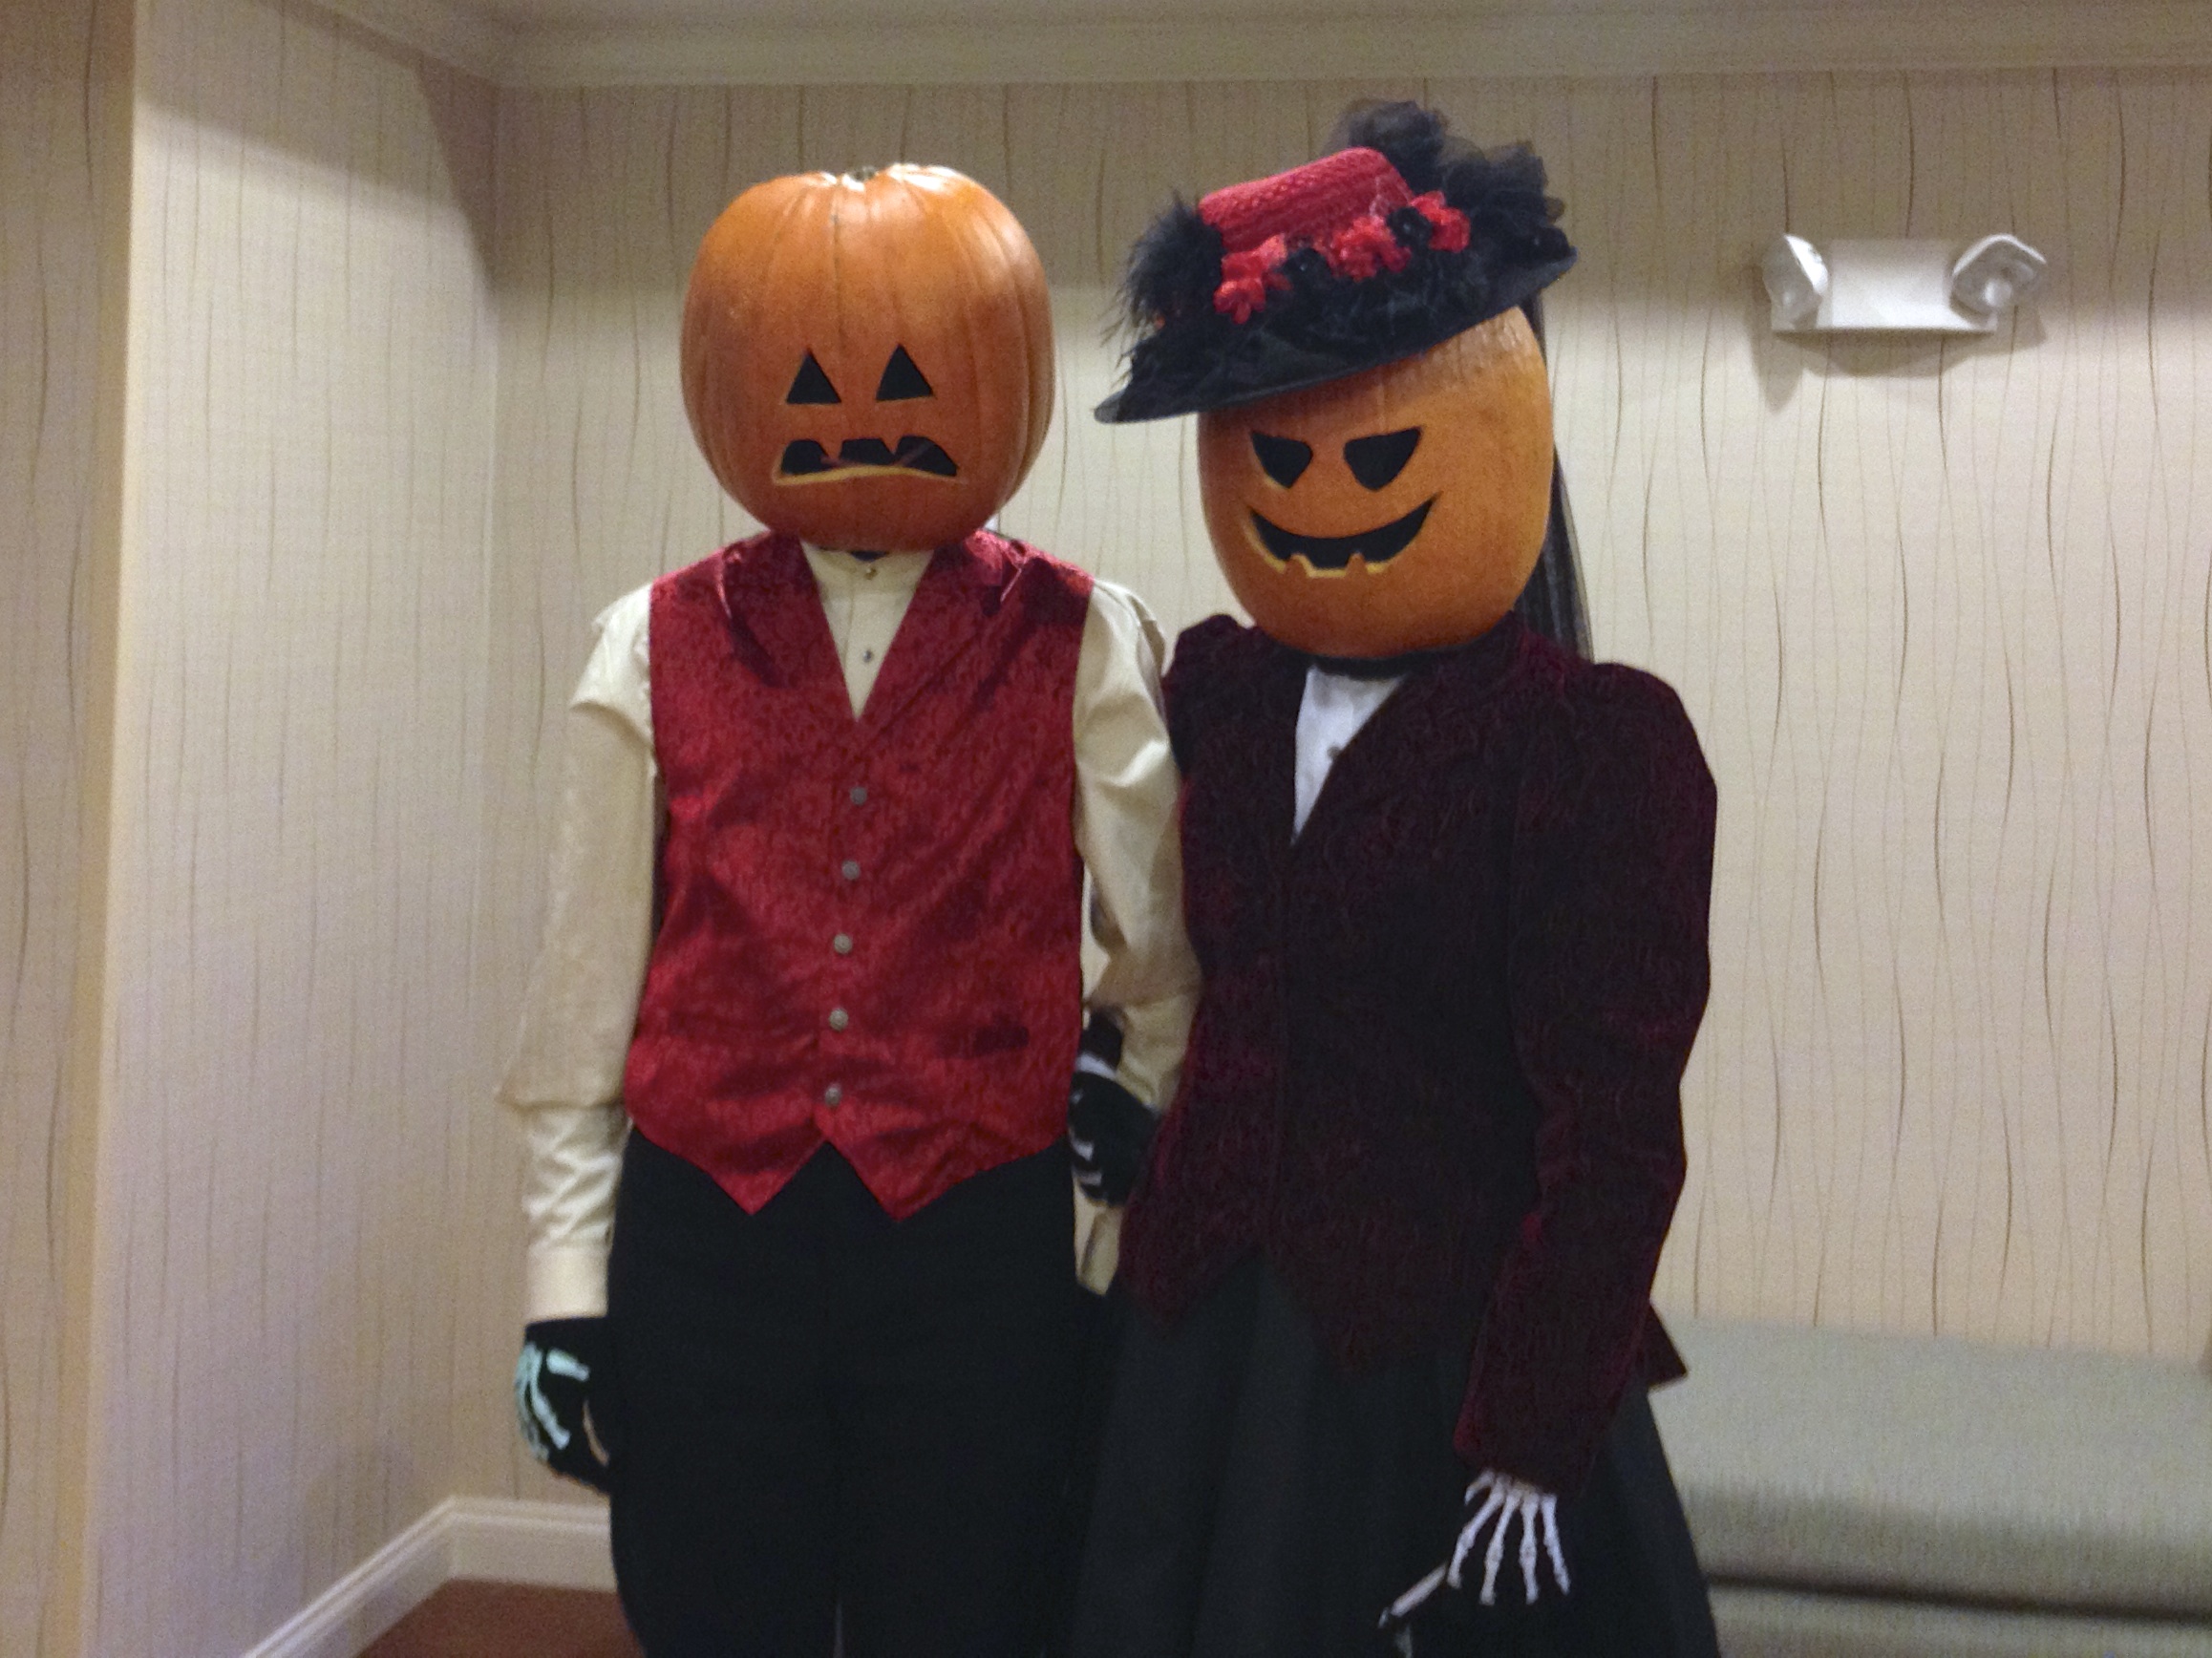
Finally, vintage-styled clothing finishes out the costume, with fingerless “skeleton” gloves for a ghoulish touch.
You can find more costume projects in our Halloween Project Archive.
Sweet costumes and an interesting write up!
The blackout hoods really make these – although I was waiting for the red LEDs in the eyes!
I did this when I was 15 (15 years ago), and I used a very big pumpkin so I could just put my head straight into the bottom, your method looks a lot better. I just wore a ski mask under mine, and it was heavy, I cut a little to much off otherwise I could have just had it sit on my shoulders instead of the top of my head. I had to take it off between houses to let my head rest, there was a lump on the top that made the top of my head hurt.
Next time after scooping out the innards you could try adding rock-salt inside to help dry it overnight (5Lbs for about $5). Just roll it around every few hours AFTER getting as much wet stuff out.
Interesting idea, but it really didn’t need anything extra–after airing out overnight it was not wet at all.
A fast (but messy) way to get the shell as thin as you wish is to use a medium wire brush on a (cordless or otherwise waterproof) power drill.