…this week we’d like to bring you profiles on women who are roboticists, artists, designers, programmers, and makers of all kinds over the next few days, and we’ll be making an effort to make sure that the women in the maker movement get their fair share of the spotlight as we build our maker community in the future.
In our annoucement article about the EggBot Electro-Kistka — the hot wax dispenser for the EggBot — we noted that it can be challenging to reposition an egg after taking it out to dye the egg between wax layers.
As an alternative suggestion, reader Dan commented:
Could you leave the egg in the EggBot and paint on the first layer(s) of dye with a brush? Then dip the egg for the last layer to get the ends covered.
We just stumbled across a post from last year by WidgetNinja about using our post about CNC halftones to make Tie Fighter ASCII art using his CNC router. He used two-tone plastic mounted on plywood and carved it with a 60 degree v-carving bit. It looks great!
In looking around for examples of great open source hardware projects, we came across an unexpected number of projects and products labeled as open source hardware that, upon closer inspection, actually turn out not to meet the definition. Often, they’re using an inappropriate license— typically a “non-commercial license,” which is not only unenforceable but explicitly incompatible with open source values. Sometimes, they haven’t released the design files. Sometimes, a person has apparently misused the term “open source” to mean “closed and proprietary.” And sometimes you might see the open hardware logo used without any substance to back it up.
But what (if anything) can or should be done about it? We’d like to solicit your input as to the best ways to approach this problem. Perhaps there are not any easy answers.
As a baseline, we think that it’s important to address the problem, and to do so earlier rather than later. To mislabel a product for sale as open source hardware may constitute false advertising, illegal in the US under state and federal law. In noncommercial projects where nothing is for sale, misusing the terms may help to set precedent that can damage the community’s understanding of open source. For instance, if enough people see non-commercial licenses on things labeled as be open source, they may assume that it is acceptable.
If you happen to know someone behind the project, you might consider contacting them directly to start a dialog about what it means for something to be “open source.” Or, you could (hint hint hint) send them a link to this article, letting them know that you found it interesting!
But, what if you don’t have any personal connections to the people involved? It’s certainly not as easy. Sometimes you can initiate a dialog with a company, perhaps by asking about their design files or licenses. At the other end of the spectrum, people sometimes bring up options like public shaming. In our view, shaming is harmful to the open source community, and should be considered a last resort akin to violence. Rather, we as a community need to work towards positive ways to nudge people toward doing the right thing.
Please let us know what you think: what should you do when you come across a project mislabeled as open source hardware?
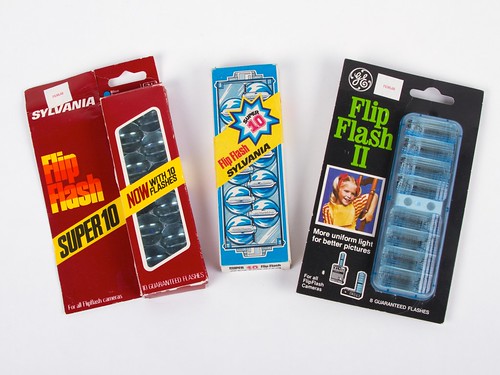
Once upon a time, cameras did not come with LED illumination or even xenon strobes, but rather with a socket that could fire a one-time-use flashbulb.
An advance from this was the “flip flash” cartridge which held 8 or 10 flash bulbs, ganged up so that you could take one photo after another, without pausing to swap bulbs. Each time that you took a picture (exposing actual film!), the next flashbulb in the cartridge would fire.
But you might ask a tricky question here: How does it know which bulb to fire next?
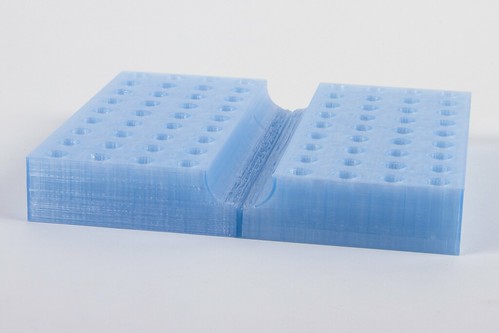
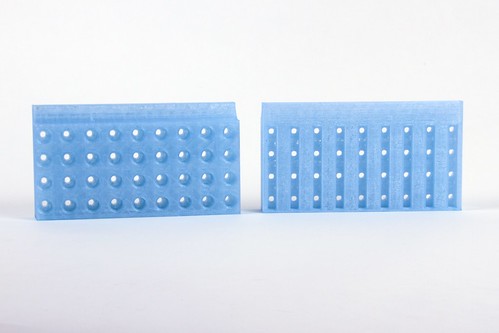
One of the common reactions that people have when they first see our Three Fives kit is to joke “Now all I need is a giant breadboard!” Well, Michael Pechner actually designed and made one, and put the files up on Thingiverse. He built the design in Fusion 360 with a little help from Michael Gregg and printed it out in PLA ABS on his 3D printer.
Thus far, the design is “plastic only,” without the metal inserts that one would find in a real electronic breadboard — but that’s okay, since the aluminum legs on the Three Fives kit are also decorative rather than functional. But, there are holes in the tops and slots in the bottom in case someone would like to add them.
“We Are with You, Mirror” is a piece by Brady Marks from VIVO Media Arts Centre that was shown at the Vancouver Mini Maker Faire. It is a 3D persistence of vision volumetric display that acts as a mirror, using four spinning Peggy 2 boards to reflect visitors movements in low resolution 3D LED glory.
Inspired by the global hackerspace movement and (software) hack days, Kids Hack Day is a 1-day event held in various locations around the world, where children and adults come together to “hack” and make new uses of every day items.
This incredibly charming video from the Kids Hack Day kickoff event in Moscow on May 25 shows you what it’s all about. (And, we are tickled to see our own WaterColorBot and EggBot making little appearances as well.)
I loved this little piece by Bryan Kennedy titled “It’s just wood.” A concise philosophical statement about the freedoms that come along with knowing how to make things.
The same approach applies in so many different contexts. Sometimes, it’s just aluminum, just software, or just silicon. It also reminds me of what a physics professor of mine used to say when explaining how simple something was: “It’s just math.”
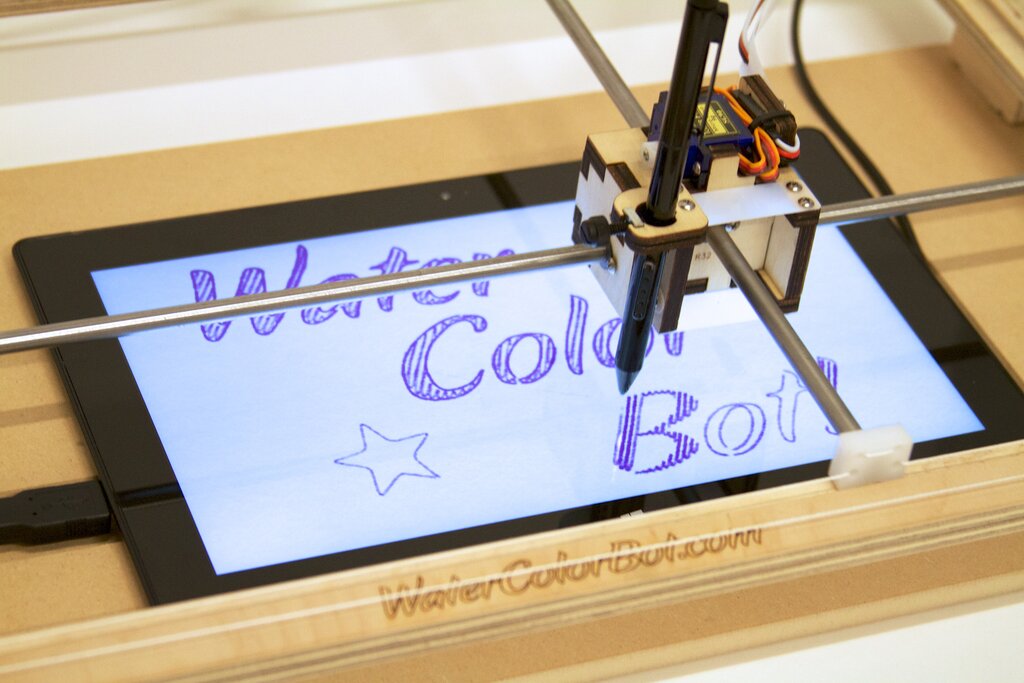
About a year ago, I started working on a project that used robotics to control a Surface Pro tablet. Not long after I started, I got my first glimpse at the the WaterColorBot on display at Maker Faire Bay Area 2013. The WaterColorBot is designed to carry a paintbrush over a piece of paper, raising and lowering it as needed to paint a picture. The movement and software control is similar to CNC router with special design modifications to make it lighter, cheaper and easier to control. A CNC router has to move heavyweight cutting bit with friction so needs expensive motors, rails, and belts. The WaterColorBot, on the other hand, needs only to move a paintbrush in a low friction environment.
I was instantly sold on the idea of using a WaterColorBot to control the Surface. I backed the Kickstarter, waited for my bot to arrive, and started working on software. When the WaterColorBot arrived, I was not disappointed. The assembly was quick and I was robotically painting in no time.
With the big mechanical and electronic solutions solved, my attention turned to the tablet. The Surface Pro is rare among tablets in that it uses a digitizer that allows extremely precise tracking with a stylus along with “hover” and “right-click” functionality. It does not need to be electrically grounded like a stylus for a screen that only supports capacitive touch. I was certain that the Surface Pro was the way to go, but not quite how it was going to be held together. The project was about to take a another serendipitous turn.
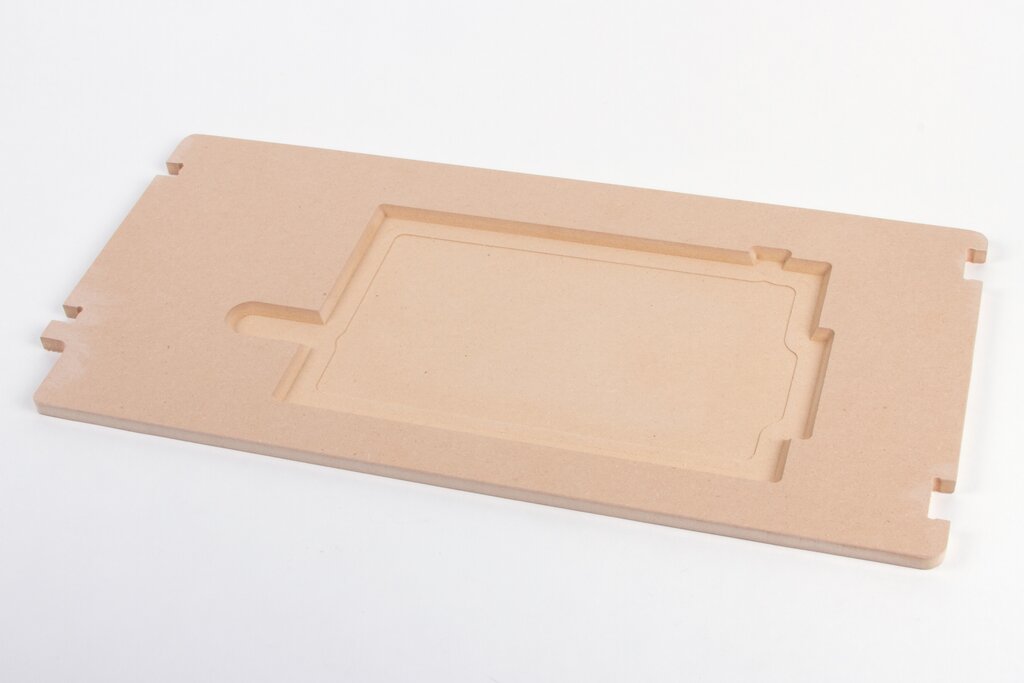
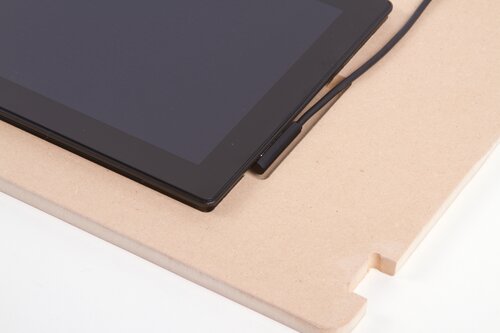
The custom-cut spoilboard
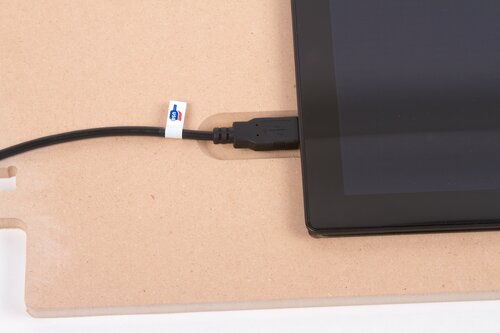
At this point, I shared my enthusiasm with Windell and Lenore of Evil Mad Scientist and they gave me a unique offer: Stop by the Evil Mad Scientist shop and together we would make a custom cut spoilboard (lower deck) fitted to mount the Surface Pro 2. Wielding digital calipers and other measurement and software tools, Windell came up with a design that held the tablet firmly and had extra space cut out for the charger, power button, and USB cable.
The area beneath the tablet has a lip and a lower recessed area. This design reduces wobble and makes it look even better. On the topic of machining – I got a few lessons in how larger CNC machines work. Windell showed me some design considerations in software and gave me a safety briefing about the CNC router itself. This thing can cut fast.
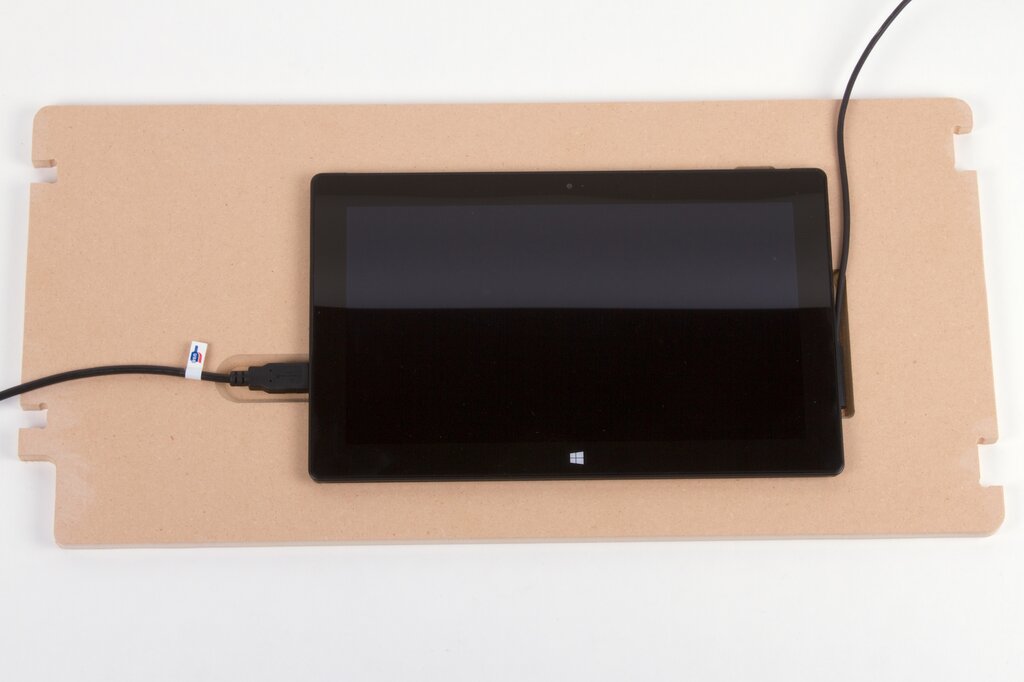
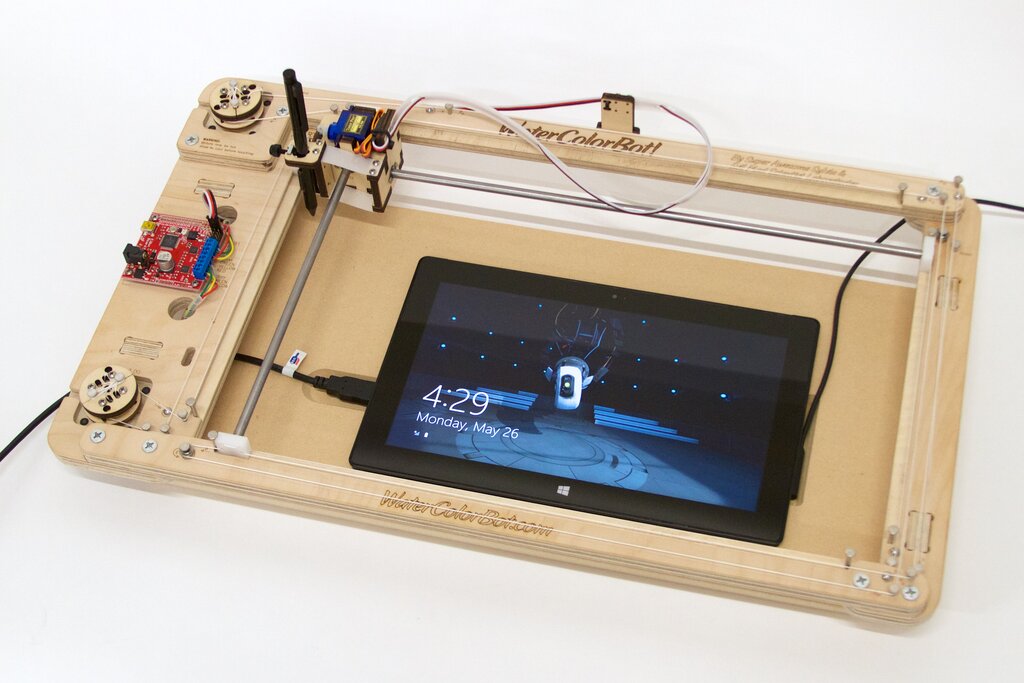
After a little sanding, we fitted the tablet, spoilboard, and WaterColorBot together. Having the co-creators of the WaterColorBot with me on this journey was priceless, as we can see from the final assembly. The first spoilboard we cut matched perfectly and the tablet is held firmly in place.
With enthusiasm fueled by seeing it all fit together, we decided to tell the WaterColorBot to do some painting. Windell loaded up an example sketch in Inkscape and, with only a minute to calibrate the stylus height, we were drawing!
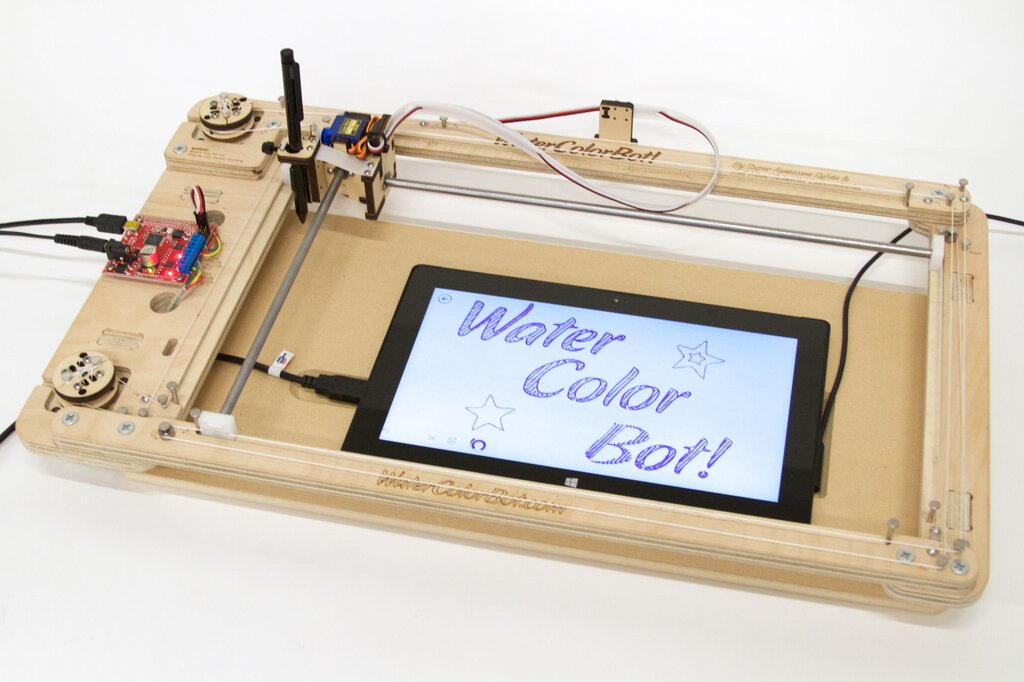
The software running on the Surface Pro is called FreshPaint and we chose a simple marker tool. In the video, you’ll hear a laughter break where the Surface picked up the floating toolbar in the app and dragged it around the screen.
Given a little time, we could have taught the WaterColorBot to change brushes and colors in FreshPaint, but our goals for the day were met. The light weight and low friction of the Surface stylus is perfectly matched for use on the WaterColorBot. A custom fitted spoilboard means the Surface will always be at the exact same place on the X/Y plane, greatly simplifying future software development. Next project: Teaching the robot how to see!
(Full disclosure: My day job is Systems Operations with Yammer, a Microsoft company. This project and use of the Surface Pro 2 is not affiliated with Microsoft in any way nor did they influence the project with sponsorship or exercise any editorial control. If they had, I’d try to talk them into contributing a Surface Pro 3! “Surface” is a trademark of Microsoft Corporation.)