


You have one drywall screw, one 1.5 V alkaline cell, six inches of plain copper wire, one small neodymium disk magnet, and no other tools or supplies. You have 30 seconds to make an electric motor running in excess of ten thousand RPM. Can you do it? Surprisingly enough, you can.
Let’s take a step back. The most common type of electric motor is the brushed dc electric motor. This is the kind that you’ll find inside essentially everything that moves (or shakes) and runs on batteries. This type of motor attracts an electromagnet towards a permanent magnet. When the two are close enough,the polarity of the current through the electromagnet is reversed, so that it now repels the permanent magnet, and thus keeps turning. It’s quite easy to build a working model; Christian built this example for his third-grade science project.
A simpler yet motor (sometimes sold as the sold as the “world’s simplest motor“) just switches off the current for half of the cycle, letting the angular momentum of the spinning motor armature carry it through. In Make Magazine Volume 1, the Howtoons comic shows how to make an electric motor that works that way.
None of these is really the simplest motor. The real champion is the homopolar motor.
Ready to build one? Let’s get started:
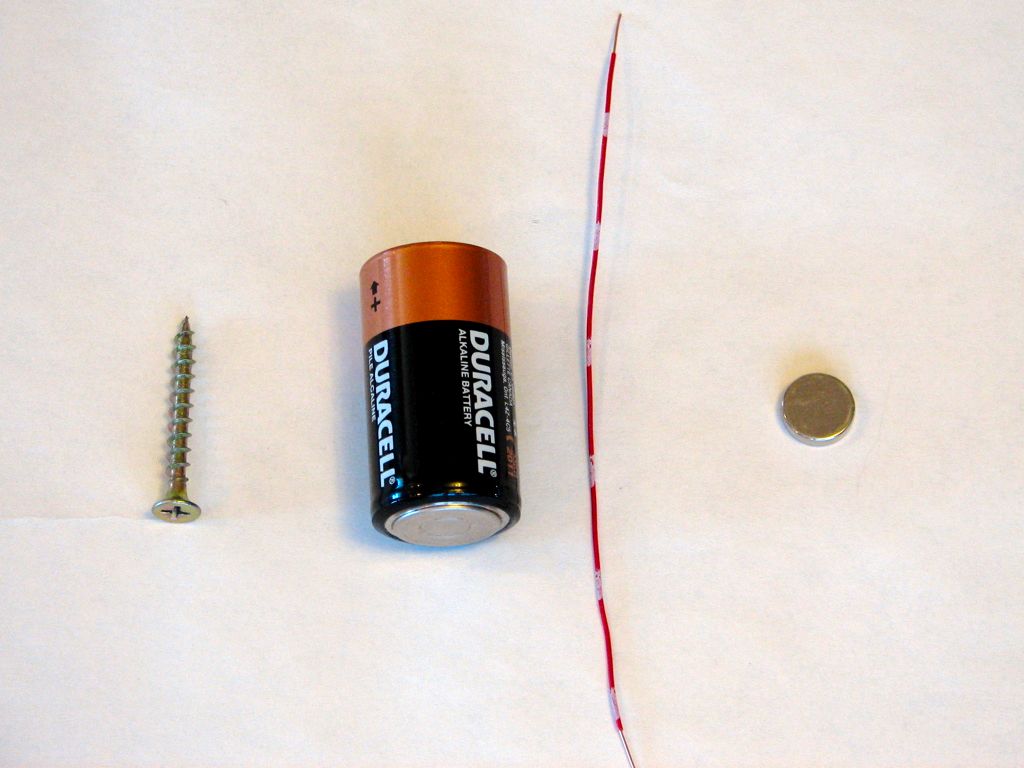
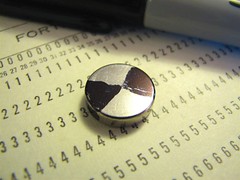
The ingredients (L-R): One ferromagnetic screw, one battery cell, a few inches of copper wire, and a neodymium disk magnet.I used a drywall screw both because it has a flat head and because it’s easy to tell when it’s turning. You can use a nail instead. The battery needn’t be any particular type; an alkaline C-cell works fine and is easy to hold. Just about any copper wire will work fine for this application. I used some wire with partially stripped (and partially striped) red insulation that is easy to see in the photos. Bare copper will work just as well.
The magnet came from an LED throwie with a dead battery. The best magnets for this job are neodymium disc magnets with a conductive plating. You can get them from plastic toys or buy them from a number of magnet discount and surplus shops.
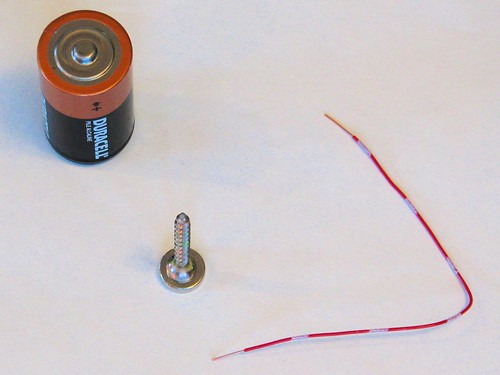
Set the screw on the magnet, bend the wire.

Attach the magnet to one end of the battery. The weak, single-point contact that you are making serves as an low-friction bearing. I like to attach it to the button end, but the other end will work as well. (If you do so, the motor will spin the opposite direction. You can also reverse the direction by flipping the magnet up side down.)
(Note to physics geeks: The heavier your magnet plus screw system is, the lower the friction will be, right up to the point that magnet isn’t strong enough to hold them any more. This is because the friction force is proportional to the normal force. In other words, a bigger magnet is usually better.)
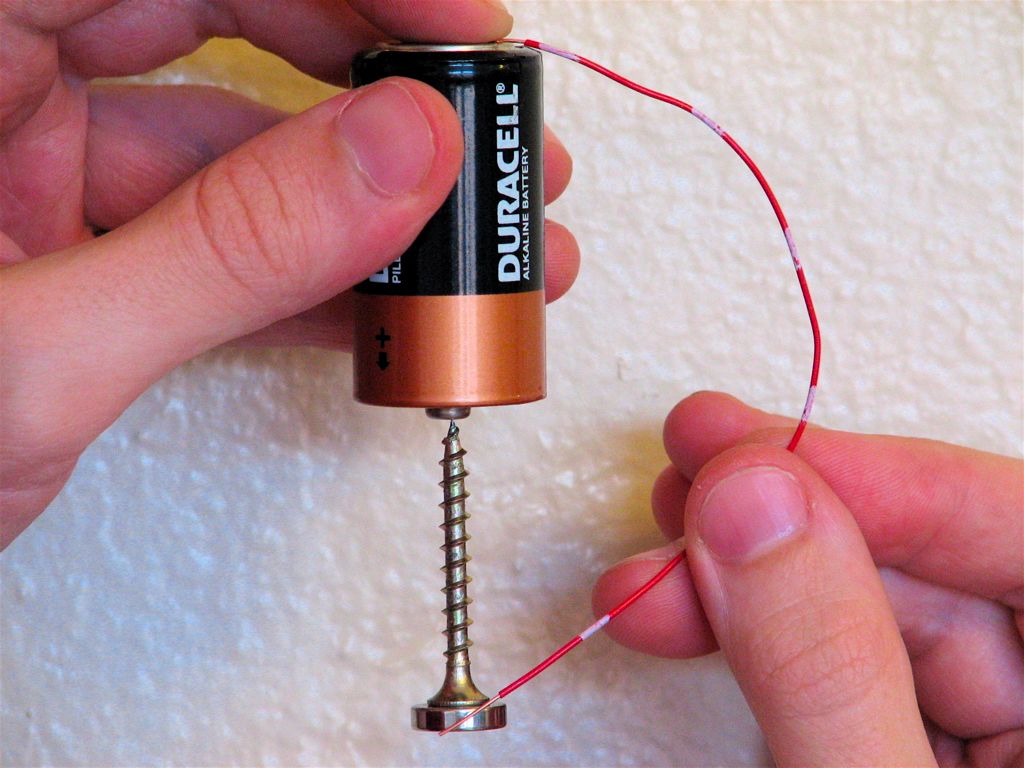
Press and hold the top end of the wire to the top end of the battery, making an electrical connection from the top battery end to the wire.
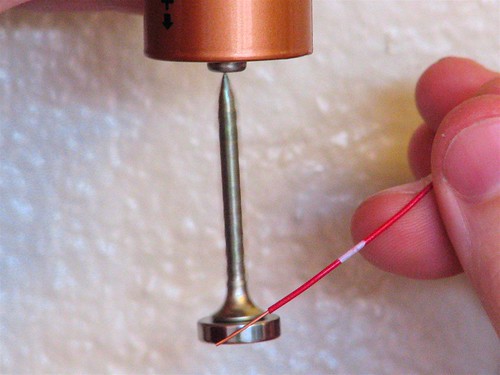
Here we go: Lightly touch the free end of the wire to the sideof the magnet. The magnet and screw start to spin immediately. We can get ours up to 10,000 RPM in about fifteen seconds.Watch out: The screw and magnet can easily fly out of control, and you do not want that screw ending up in your eye. Also note that some of the components, like the wire, can get very warm while you’re doing this. Wear safety glasses and use common sense!
Short movie (25 s): spinning up the motor (embedded below, or click through to YouTube)
Wondering what to try next? You may also like this project, which is about building a similar sort of motor that spins water instead of a magnet.
How does this work?
When you touch the wire to the side of the magnet, you complete an electric circuit. Current flows out of the battery, down the screw, sideways through the magnet to the wire, and through the wire to the other end of the battery. The magnetic field from the magnet is oriented through its flat faces, so it is parallel to the magnet’s axis of symmetry. Electric current flows through the magnet (on average) in the direction from the center of the magnet to the edge, so it flows in the radial direction, perpendicular to the magnet’s axis of symmetry. If you took physics at some point, it’s possible that you’ll remember the effect that a magnetic field has on moving electric charges: they experience a force that is perpendicular to both their direction of movement and the magnetic field. Since the field is along the symmetry axis of the magnet and the charges are moving radially outward from that axis, the force is in the tangential direction, and so the magnet begins to spin. Neat! For a slightly more thorough explanation, have a look at the end of this article, which is about a magnetohydrodynamic homopolar motor.
It’s called a homopolar motor because you never need to reverse the polarity of any motor component during operation, unlike the other types of motors that we’ve described. I first learned about this type of motor in an article by David Kagan, in the magazine The Physics Teacher, February 2005. It turns out that it’s been around longer than that: it was invented in 1821 by Michael Faraday. Somewhat surprisingly, this is more than just a curiosity: motors of this design are currently being developed for quiet, high-power applications.
Final note: How do we measure the rotational speed of the motor?
You can get an optical tachometer for $20 or less, intended for use with model airplanes. I have model LXPT31 from Tower Hobbies, which is expecting to see an airplane propellor with two blades. I added two wide black stripes to the magnet with a Sharpie, which allow the tachometer to read the rotational speed of the motor. Pointing the tachometer at the magnet and spinning up the motor, we were able to clock a speed above 10,000 RPM after spinning up for about fifteen seconds. Spiffy.

this is a wonderful article, windell. i don’t have neodymium magnets, what can be used to substitute them? what appliances can they be found in? i would really appreciate it if u can inbox me on seyiogunjuyigbe@yahoo.ca
A great source of magnet for this motor is a ‘shaker torch’ or ‘forever flashlight’. I have also attached a small fischertechnik fan blade to the other end of the magnet that keeps me cool in summer!!! ;-) This motor draws 3 to 4 Amps with a new battery (alkaline or NiMH). Most AA NiMH batteries would last around 30 minutes at this current. C and D size alkaline batteries should last longer than this.
home depot and lowes both sell packs of neodymium magnets. ask the employee for th rare earth magnets and they should be able to get you to the right aisle.
How long will this motor run for it you just leave the wire touching?
do you know how to turn a wagon into a motor car? or how to attach a motoor to a wagon to make the wagon move?
how to make electro magnet by screw + coppers wires + three battery
well someways it is a motor because it somewhat turns electric energy into a mechanical movement but actually, It’s more like a radiator because besides spinning the nail around, the battery is also heating it up strongly.
All motors generate heat, and most radiators do not have moving parts. It’s pretty clear which category this fits into.
Windell H. Oskay
drwho(at)evilmadscientist.com
http://www.evilmadscientist.com/
The ga.com link in the section "How does this work?" has been moved to http://atg.ga.com/EM/transportation/electric-motors/index.php
I tried this and it wouldn’t work. Can any kind soul tell me the reasons why?What are the possible reasons that causes it NOT to work?:/ The battery I used is 1.5V and the magnet I used is conductive. I had tried fridge magnet, bar magnet,horseshoe shaped magnet and U shaped magnet but none of this work.>< Can anybody tell me why?:3
You need a rare earth magnet, preferably NdFeB, with magnetization through the thickness and a conductive coating.
Windell H. Oskay
drwho(at)evilmadscientist.com
http://www.evilmadscientist.com/
Err.__. I don’t really understand what are you talking about;b Can you explain a little bit? And where can i buy these things?
I just did this motor experiment with a car battery. Foil wrapping makes magnets electrically conductive. Be careful arc welding is more than interesting with high current and high power magnets.
You aren’t the inventor of the English language, and you’re using it. Not cool. You should give credit. You’re not the inventor of the computer that you’re using. Not cool. You should give credit. You’re not the inventor of the internet. Not cool. You should give credit. Wow. Actually, this page is cool because it is educational. That’s the bottom line.
Your welcome!
I love it! Looking @ it.
Now build a robot that uses propulsion