
Picards_Flute posted about recreating the Digi-Comp II in Minecraft:
I have replaced the rolling balls with 1 tick redstone pulses, and the switches with T flip-flops. It operates exactly like the original.


Picards_Flute posted about recreating the Digi-Comp II in Minecraft:
I have replaced the rolling balls with 1 tick redstone pulses, and the switches with T flip-flops. It operates exactly like the original.
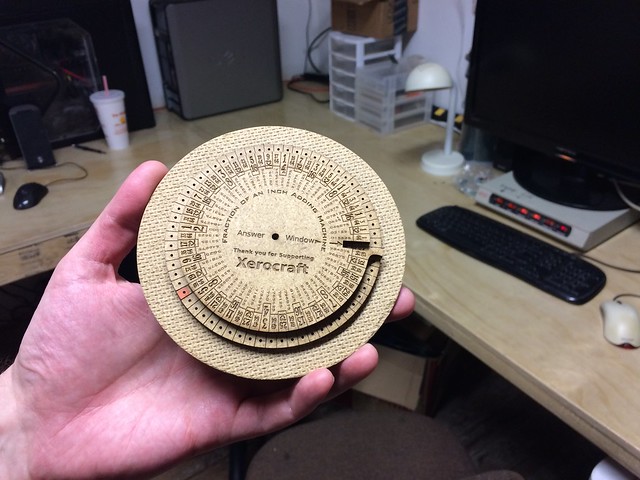
We found a remake from our project Make your own 1952 Fraction-of-an-inch Adding Machine on display at Xerocraft, a hackerspace in Tucson. They cut and engraved the calculator out of hardboard using their laser cutter. It’s sturdier than papercraft and it looks great!

Our two “dis-integrated circuit” kits are the Three Fives Discrete 555 Timer, and the XL741 Discrete Op-Amp. These two kits are functional, transistor-level replicas of the original NE555 and ?A741 (respectively), which are two of the most popular integrated circuits of all time.
Last year, we wrote up a detailed educational supplement for the Three Fives kit, that works through its circuit diagram and discusses its principles of operation down to the transistor level. Today, we are doing the same for the XL741 kit, and releasing an educational supplement that explains how a ‘741 op-amp IC works internally, down to its bare transistors and resistors:
")
This ability to peek inside the circuit makes the XL741 a unique educational tool. In what follows, we’ll work through the circuit diagram, discuss the theory of operation of the ‘741 op-amp, and present some opportunities for experiments and further exploration.
You can download the supplement here: XL741 Principles of Operation (1.1 MB PDF)
Additional Resources:
I’m excited to be included in an article on retro tech style in the New York Times today, titled Nintendo 64s and Vintage PlayStations as Home Décor.
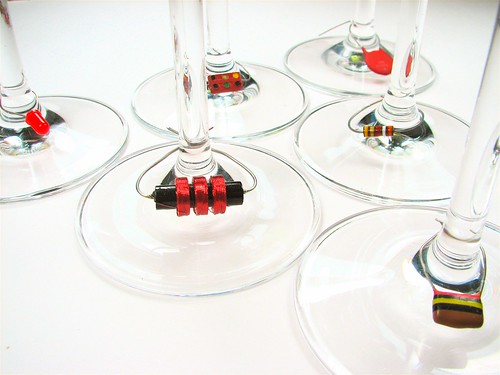
Not surprisingly, these techie hobbyists share their passion in online communities. One of the more popular forums is a D.I.Y. tech blog run by Evil Mad Scientist Laboratories, a family company in Sunnyvale, Calif., that produces open-source hardware. The site features tutorials on making earrings out of linear regulator chips, wine charms from capacitors and a wooden footstool in the shape of a classic 555 integrated circuit chip from the ’70s.

The newest in my collection of geeky jewelry: glass hard drive platter earrings.
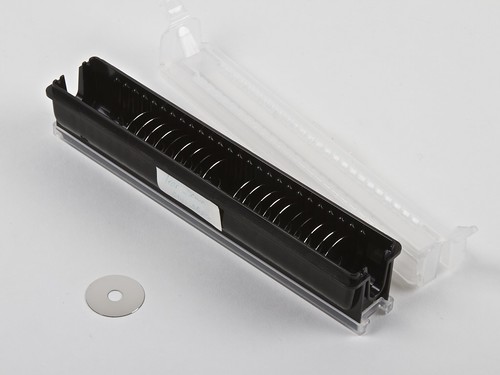
We picked up a tray of tiny glass platters at a local surplus shop some time ago, marked “Tear Down Qty: 25 pcs.”
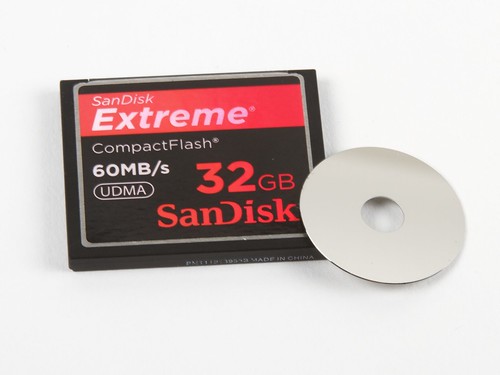
These one inch platters were used in Microdrives, which were designed to fit into CompactFlash card slots. (Shown with CompactFlash card above for scale.) They were used in (among other things) the iPod mini. After 2006, CF cards outpaced the capacity of the fragile Microdrives, and they’re no longer manufactured.
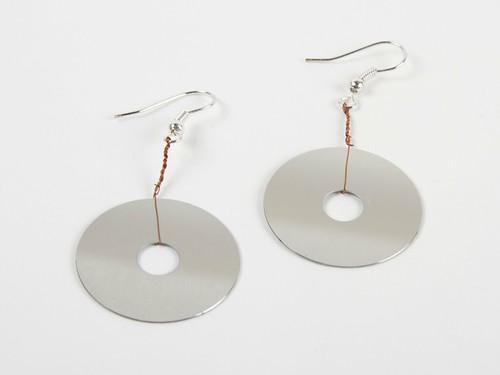
The platters are attached to the earring hooks with magnet wire. They’re incredibly reflective, and everywhere I wear them, spots of light are dancing around me.
Related: Hard Drive Wind Chimes

Our friend Rick stopped by to show us his latest project, which he calls Podtique: a podcast player built into an antique radio cabinet. Using the original knobs, you tune in on “stations” which play different podcasts, with realistically generated static in between.

The whole thing is run on a BeagleBone Black, and uses NeoPixel backlighting behind the dial. He’s written up the build on his blog, posted his code on github, and shared a heap of build photos in an album on flickr.

Leigh Klotz, author of Ham Radio for Arduino and PICAXE, gave us this interesting chip from the 80’s to play with: a UM3482A “Multi Instrument Melody Generator” IC. While not quite rare, it is a bit of a vintage curiosity these days, and we wired one up to see what exactly it does.
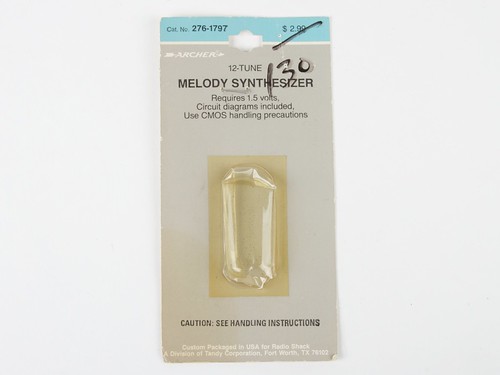
The vintage Radio Shack Archer package it came in was minimalist (though not quite this minimalist as it came to us– imagine that the chip were still there in the bubble). It promises not just 12 tunes, but circuit diagrams as well.
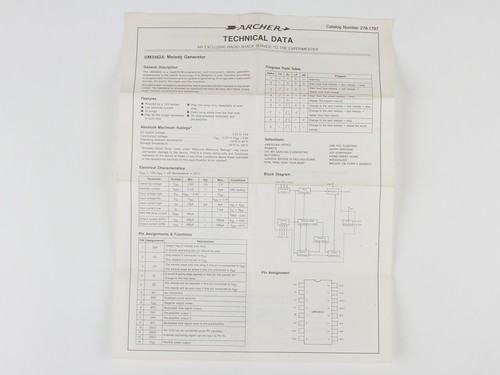
This Archer-branded datasheet (including the promised circuit diagrams) came stapled to the back. You can download a readable copy of the manufacturer’s original datasheet here.
“A mask-ROM-programmed multi-instrument melody generator, implemented in CMOS technology. It is designed to play the melody according to the previously programmed information and is capable of generating 12 songs with 3 different effects: piano, organ, and mandolin.”
Amongst the twelve musical selections are London Bridge, Row Row Row Your Boat, Oh My Darling Clementine, and (of course) Happy Birthday. Suggested applications included toys, door bells, music boxes, and telephones. (File under: Customized ringtones of the 80’s?)
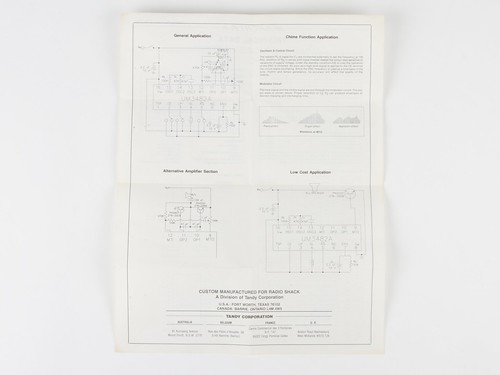
The three little graphs in the upper right show the three different timbres (the “instruments,” in the phrase “multi-instrument”) in terms of amplitude versus time. The other diagrams show how to wire it up to a speaker and how to configure the various inputs to select which song to play and so forth.
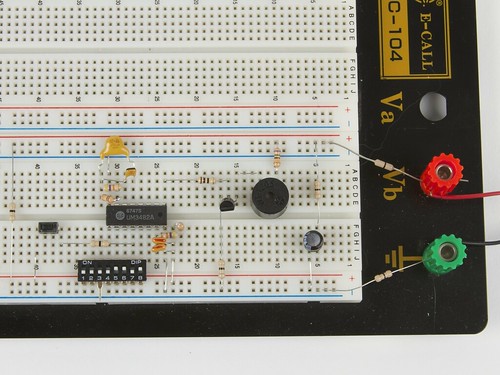
We breadboarded up a sample circuit from the datasheet, substituting with parts we had on hand, including a little magnetic buzzer as the speaker. A 2xAA battery holder is connected up to the power and ground rails. There is a momentary button switch to select the next melody in the set, and a row of DIP switches to set the configuration options.
And sure enough, it plays melodies.

Karen wrote in to say:
Thanks so much for the 2007 article on Make your own 1952 Fraction-of-an-inch Adding Machine. I inherited one of these and was delighted to find information about it on your web site. Now that I have explored your web site a bit, I am adding it to my favorites!
After seeing our Larson Scanner kit, Martin shared this LED metronome project with us. Martin says:
It was designed as a “Visual Metronome” So a learning music student could help see the timing by watching the green light. There was to be an optional clicking sound by using a small solenoid for the ticking – I chose that in place of a speaker for a more authentic sound.
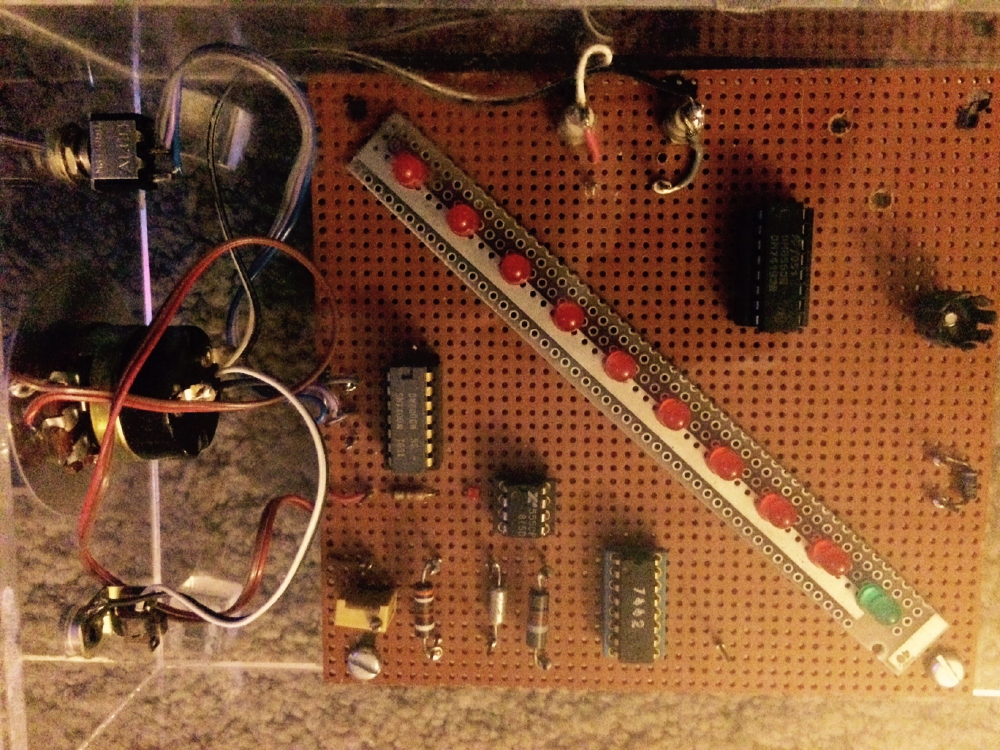
The timing is a standard 555 timer which is fed to 7442 BCD to DECIMAL counter. Next chip is a 74193 UP/DOWN counter. When the count hits the last number, it sends a pulse to reverse the count or start over – depending on the toggle switch on the side.

There is also a pot on the 555 to control the speed. All this was made in one night while I was working the graveyard shift.

The entire LED display was hand wired using a manual wire-wrap tool.
The chip pin labels on the back of the perf board are a particularly awesome relic of a different era of electronics assembly. Thanks for sharing your project photos and video with us!
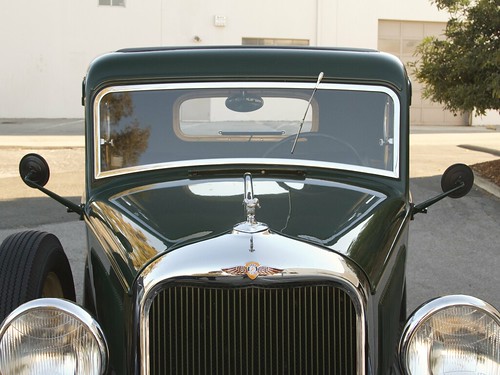
Last year, I wrote about a case of 3D printed parts being used for a vintage car. This year, another fine example of modern manufacturing and prototyping techniques being used for a vintage vehicle showed up on my doorstep when my parents stopped by during a road trip in my dad’s 1934 Dodge Brothers pickup
Passenger side mirrors on cars and trucks used to be a luxury, add-on, or aftermarket item— if they were even available at all. My dad’s truck never had one. In the intervening years, many states have made side mirrors a requirement, and having them makes safely driving a vintage vehicle much easier. So how did he get the matching one you see in the picture above?

He did what pretty much anyone can do these days: he had the driver side one 3D scanned, had a CAD model made up from the scan and then mirrored it. The model was then 3D printed and sand cast in aluminum. After some finishing work and paint, it looks fantastic.
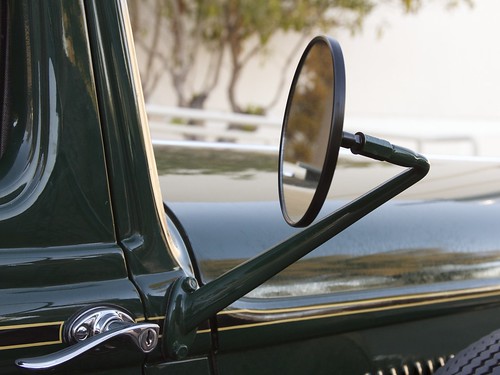
However, geometry reared its head: it turns out that because the driver sits on one side of the car, a perfectly mirrored mirror mount doesn’t put the mirror in quite the right place. As a temporary fix, he added a standoff to correct the position of the mirror. After returning from the road trip, he’ll adjust the CAD model and have a new one printed and cast. Since the world of vintage cars is a close-knit one, he has already had requests for additional units from friends in the community, and making more will be straightforward from the digital master.
He’s had a few other components made using scanning and digital manufacturing techniques, including a laser cut insulation board for between the engine compartment and the cab. These techniques are a perfect fit for a community with low-volume needs for custom, unavailable, or never before made parts.
