Category Archives: EMSL Projects

Linkdump: January 2021

CMYK embroidery

The AxiDraw MiniKit 2

AxiDraw MiniKit 2

Today we are introducing a major refresh of the smallest member of the AxiDraw family of pen plotters: the new AxiDraw MiniKit 2. The AxiDraw MiniKit 2 is our special compact DIY-kit version of the AxiDraw lineup.

AxiDraw MiniKit 2

Versus the original AxiDraw MiniKit, the MiniKit 2 has been redesigned for easier assembly, better precision, and higher performance. The key change is that the long linear rail that forms the base of the machine — a custom aluminum extrusion in the original — has been replaced with a solid bar of 6061-T6 aluminum, machined in the same precision process as our top-of-the-line AxiDraw SE/A3, and then anodized to a satin-silver finish. This change simplifies a number of the assembly steps, but more importantly has a cleaner overall look and tighter manufacturing tolerances for improved precision.

AxiDraw MiniKit
In addition to be being “Mini”, the MiniKit 2 is also still a kit.

Unlike other models of the AxiDraw family like AxiDraw V3 and AxiDraw SE/A3 (which come assembled, tested, and ready to use), the AxiDraw MiniKit 2 is a machine that you assemble yourself.

We’ve taken great care in designing a kit that is rewarding to build, own, and use.

AxiDraw MiniKit

The new version is also heavier than the old one, which helps it to stay stable on your desk at higher speeds and gives it a small boost in effective speed, in addition to the upgrades in precision. Small but sturdy, The MiniKit 2 is built with machined parts, just one custom aluminum extrusion now, attention to detail, and care.

Halloween Project Archive

Array of Halloween Projects

This year’s Halloween may be a little different from years past. But maybe you’re doing a Zoom costume contest? Want some spooky snacks? Or want to get in the mood with seasonal decor? Is it not Halloween for you if there isn’t pumpkin carving? Head over to the Halloween Project Archives for inspiration and ideas.

Halloween is one of our favorite holidays, and … we’ve organized dozens of our Halloween projects into categories: costumespumpkinsdecor and food.

Lemon Plum Jam Revisited

Jars of jam

It has been a great season for plums, so I’ve updated the lemon plum jam recipe that I’ve been gradually refining over the years. The new basic recipe is below along with other tips I’ve gathered.

Ingredients:

  • 8 cups cut up pieces of plums, pits removed, skins left on, fresh or frozen
  • 3 lemons, (optionally peeled) cut into small pieces, seeds removed
  • juice from 3 more lemons
  • 6 cups sugar

Lemon and plum pieces in a pot

Procedure:

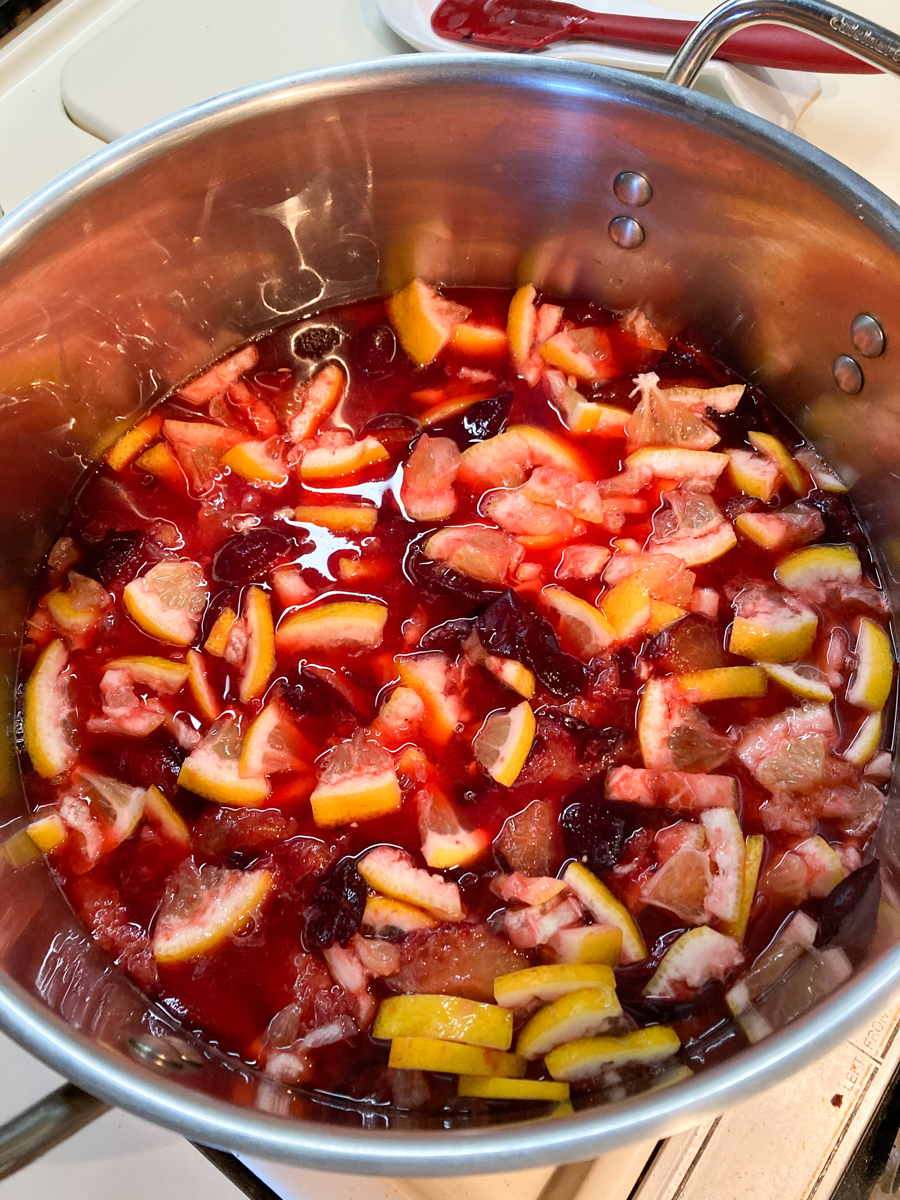
Put the plums, lemon pieces and lemon juice in a sauce pot and cook, stirring occasionally, until the fruit starts to soften. At this point, you can use a potato masher to crush the fruit pieces for a more even consistency.

Holding potato masher above fruit cooking in pot

Add sugar and cook, stirring regularly, until it thickens. You can test the consistency for doneness by putting a spoonful in a cold dish in the fridge for a few minutes. After chilling, it’s ready if it holds its shape a bit when you move a spoon or finger through it. You can also follow your favorite canning procedure for longer term storage. Makes about 4-5 pints.

Tips and techniques:

For cutting up the fruit, I like to put a small cutting board inside a baking sheet. This catches the juice much better than any cutting board with a moat that I’ve ever used. It makes cleanup much easier, and you can pour the juice from the baking sheet into the cooking pot.

Most jam recipes call for approximately equal quantities of sugar and fruit. I prefer my jam a little more tart, so I’ve revised down the sugar.

I’ve stopped adding water to my preserves. It cooks a little faster without as much liquid, and there’s enough liquid in the lemon juice to get it started cooking even if the fruit isn’t covered.

I also often leave the lemon peel out for the preserves I make (other than marmalade). The peel gives it a stronger lemon flavor, but keeps the jam from gelling as well. If you want a thicker consistency that gels a little earlier, you can leave the peel out. If you want zingier lemon flavor, leave the peel on and cook a little longer.

During fruit season, I try to preserve as much as I can by making jams and chutneys, but I usually run out of time and end up cutting up the last of the crop and freezing it. Using frozen fruit for jams seems to work just as well as fresh. I measure out 8 cups and store it in a one gallon freezer bag. Then it’s ready to pull out start a batch of jam. I also recently revised my Plum Chutney recipe, and it starts with 8 cups of fruit as well.

An EggBot Brunch Party

Eggs in basket
Photo by Raka Mitra

Heather Seeba wrote in to let us know about a gathering she has hosted around the EggBot.

EggBot set up for Brunch
EggBot set up for Brunch: Photo by Heather Seeba

The EggBot brunches have been big hits with my friends. Seeing the fascination and excitement showing new people my EggBot has to be my favorite part of playing with it. The inspiration came when I took the ‘bot to my (engineering) office so colleagues could make eggs for their kids: people were skeptical then couldn’t stay away. Thus for an EggBot brunch, invite awesome nerdy people over, feed them, and gather round the EggBot.

Heather told us about her events earlier this year, before the advent of physical distancing. Many of her suggestions can be adapted for family groups living together and we’ve added some suggestions for remote attendees as well.

Egg with flowers
Photo by Raka Mitra
Flower pots as backdrops
Photobooths for Eggs: photo by Heather Seeba

Some recommendations for an EggBot brunch include:

  • Print outs of suggested (speedy) designs will engage interest quickly.
  • For in-person attendees, buffet and easy lap food works better than a sit-down meal so the focus can be on the drawing.
  • For remote attendees, have a camera set up pointing at the EggBot so they can see their design being drawn.
  • Print some outline designs in advance and let folks color eggs if they like.
  • Make a photo shoot station for guests’ creations. Flower pots with herbs and blossoms are a great example.
Eggs in the herbs
Photo by Raka Mitra
Eggs in grass
Photo by Heather Seeba

The photo booths can be used even for eggs decorated without the EggBot!

The AxiDraw MiniKit

AxiDraw MiniKit

Today we are introducing a brand new member of the AxiDraw family of pen plotters: the AxiDraw MiniKit.

AxiDraw MiniKit
The AxiDraw MiniKit is a special compact addition to the AxiDraw lineup.

Designed for lighter-duty applications, It takes up less desk space and less storage space. With a plotting area of just 6 × 4 inches (150 × 100 mm), it’s small enough to take with you, or to fit into places where bigger machines can’t.

AxiDraw MiniKit
In addition to be being “Mini”, it is also a kit.

Unlike other models of the AxiDraw family like AxiDraw V3 and AxiDraw SE/A3 (which come assembled, tested, and ready to use), the AxiDraw MiniKit is a machine that you assemble yourself.

We’ve taken great care in designing a kit that is rewarding to build and to own.

AxiDraw MiniKit

And of course, it’s an AxiDraw, and performs like one. Small but sturdy, it’s built with custom aluminum extrusions, machined parts, attention to detail, and care.

The 555SE and 741SE surface-mount soldering kits

555SE and 741SE kits

Today we are pleased to announce the release of two new soldering kits: the 555SE discrete 555 timer and the 741SE discrete op-amp.

Both of these new kits are surface mount soldering kits — our first surface mount soldering kits — and we think that you’re going to love them.

555 kits, big and small

You might be familiar with our Three Fives discrete 555 timer and XL741 discrete op-amp kits. Both are easy soldering kits that let you build working transistor-scale replicas of the classic 555 timer chip and the famous µA741 op-amp. Those two are constructed with traditional through-hole soldering techniques and are styled to like “DIP” packaged (through-hole) integrated circuits.

Our new 555SE and 741SE kits implement the same circuits, now with surface mount components, and are styled to look like smaller “SOIC” packaged (surface mount) integrated circuits, complete with a heavy-gauge aluminum leadframe stand. Side by side with their through-hole siblings, the new kits are exactly to scale, with half the lead pitch and a lower profile.

555SE kit for scale

The 555SE and 741SE kits each come with eight (tiny) color-coded thumbscrew binding posts that you can use to hook up wires and other connections.

You can also probe anywhere that you like in these circuits — something that you generally can’t do with the integrated circuit versions.

741SE kit close up

The new 555SE and 741SE circuit boards are black in color, with a gold finish and clear solder mask so that you can see the wiring traces between individual components. There are a few other neat details here and there, such as countersunk holes for mounting the board to the leadframe.

The surface mount components are relatively large, with 1206-sized resistors and SOT-23 sized transistors, and assembly is straightforward with our clear and comprehensive instructions. These kits are designed to be a joy to build, whether you’re an old hand at surface mount soldering, want some practice before tackling a project, or are introducing someone to it for the first time.

Family portrait

And here is the new family: XL741, the Three Fives, along with the new 741SE and 555SE.

You can find the datasheets and assembly instructions for these kits, as well as links to additional documentation, on their respective product pages.

Both new kits are part of our ongoing collaboration with Eric Schlaepfer, who we have worked with on a number of dis-integrated circuit projects including the four kits here and the MOnSter 6502.