Junior Evil Mad Scientist Chris came to us for help with what turned out to be a funny little (well, huge) cosplay prop project. The kind of project that starts off with a conversation that goes like this:
“You want to build what?”
“A giant sword for my costume for FanimeCon!”
“And when do you need it by?”
“Uh… tomorrow?”
So, we got to help make a 64″ long replica sword, one of several from the flash game Epic Battle Fantasy 3 (which we had admittedly never heard of before), in what turned out to be kind of an interesting (if quick) project.
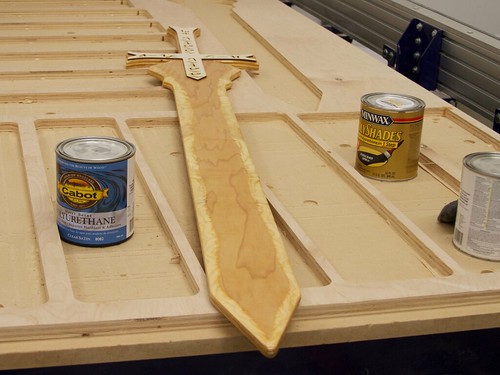
Chris drew up the outline for the sword in Inkscape, by tracing the outline of a bitmap drawing of the sword in a larger collection (where you can find this one in the top row, one third of the way from the left). We cut the outline on our CNC router from lightweight 3/4″ hardwood plywood— strong enough to not be floppy, yet light enough to be carried — and sanded the sides until it could be handled without creating splinters. We also sanded a slight bevel around the edges of the blade, so as to create the illusion of a sharpened edge without actually thinning it much around the edges.
Next, we needed to paint the sword silver. We had some silver spray paint on hand (left over from our 555 Footstool project!), but if you directly spray paint lightweight plywood, it tends to soak into the wood unevenly, dry slowly, and leave a finish that awkwardly highlights the grain of the underlying wood. Instead, we coated the sword with a fast-drying sanding sealer and allowed it to dry for two hours before getting out the spray paint.
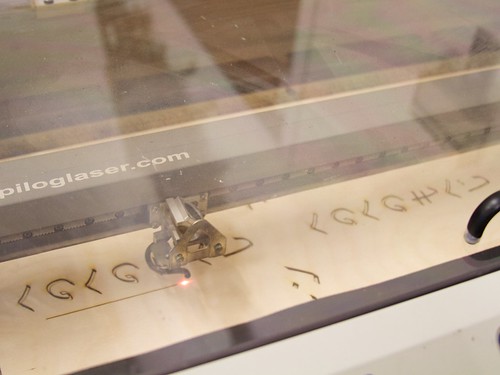
In the mean time, we made the hilt details— what might count as greebles —by laser cutting two sheets of thin 1/8″ thick plywood on each side, in a shape slightly inset from the outline of the thicker plywood. There are two of these, one to go on each side of the hilt.
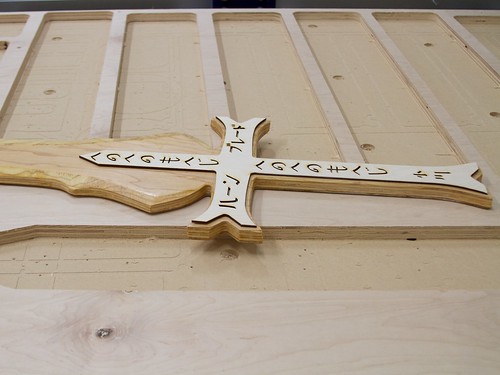
Once the sanding sealer had dried enough to gently sand, we test-fit the parts together. The photo above shows how the parts look after laser cutting and with the slick, yellowish finish that the sanding sealer gives to the plywood.
Next, we spray painted the body of the sword. Primer gray for the hilt section and metallic silver for the blade section, and allowed it to dry overnight.
Separately, we painted the laser-cut overlays black with black one-part polyurethane finish (the same type that we used for our ASCII art Tie Fighter project), and allowed them to dry separately.

In the morning, a little superglue attaches the newly-black hilt details, an old leather belt becomes some lashing details, with the help of a staple gun, and… it’s off to the show.
In case you’re interested, you can download a copy of Chris’s sword design here, as an Inkscape SVG file.
You can find more costume projects in our Halloween Project Archive.


