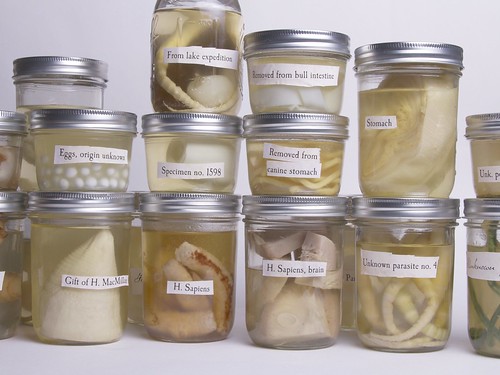
Sweet or savory– and slightly terrifying –these specimen jars are fun to make and will give your dinner guests something to chew on. Continue reading Halloween Cuisine: Sweet or Savory Specimen Jars


Sweet or savory– and slightly terrifying –these specimen jars are fun to make and will give your dinner guests something to chew on. Continue reading Halloween Cuisine: Sweet or Savory Specimen Jars
The Great Evil Mad Scientist Laboratories Halloween Project Archive!
Halloween is one of our favorite holidays, and our collection of Halloween projects continues to grow. Every fall we update it to include our latest projects for the season. In the list that follows, we’ve organized dozens of our Halloween projects into categories: costumes, pumpkins, decor and food.
Last updated: 10/2019.
Continue reading Halloween Projects from Evil Mad Scientist Laboratories
Microwave ovens are curious beasts. A super convenient method of warming up certain foods, for boiling a cup of water, melting a little butter, or reheating frozen leftovers. But all too often, those frozen leftovers end up scorching in places and rock-hard frozen in others. Is this just random? Is it really the case that microwaves cook the food from the inside out or left to right or back to front? Well, no, but the way that microwaves work can be mighty counter-intuitive.
Our own microwave oven is definitely one of those that likes to produce scalding yet frozen output. That isn’t necessarily such a big deal if you have patience to reposition a dish several dozen times in the course of a five minute warm up. But we recently (and quite unintentionally) came across a situation– while cooking, of all things –where the radiation pattern became clear as day.
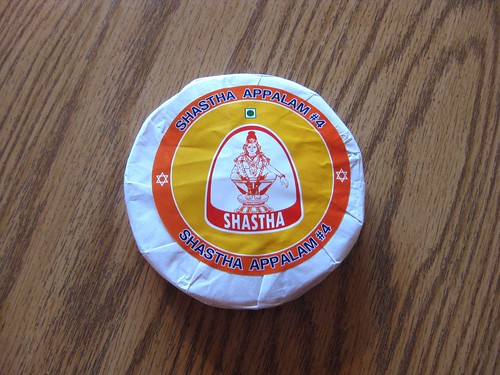
As we have written about, we enjoy roasting papadums (a type of Indian cracker) on the stovetop. Appalams are a closely related cracker made with rice flour in addition to the usual lentil flour that can be cooked in the same ways, but just happen to be significantly more flammable.
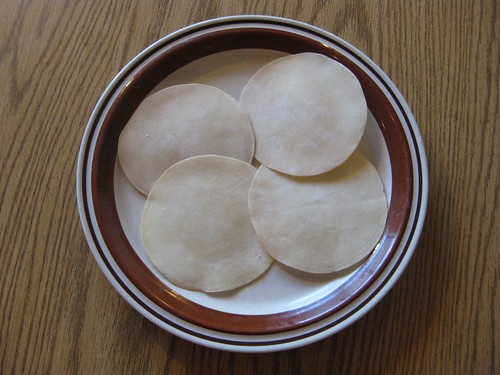
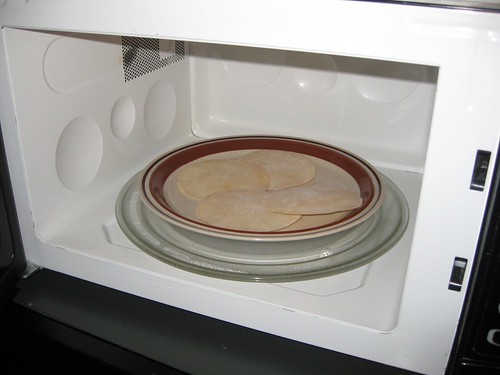
So, while you can (with great care and a nearby fire extinguisher) roast appalams on the stovetop, we decided to try out the microwave method. We put several of the appalams on a plate. They start out as plasticky brittle wafers like you see above.
And then, after 30 seconds in the microwave, here is what we saw:
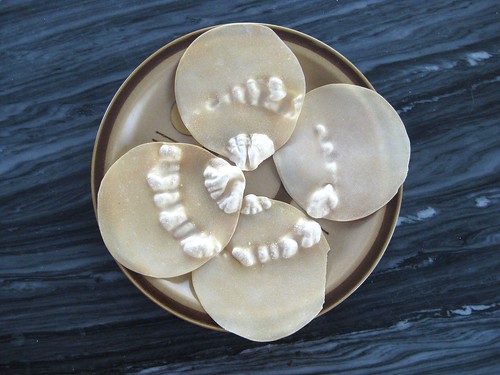
Holy crap!
As an area of the cracker cooks, it bubbles up in just a few seconds, leaving clear marks as to where there is microwave power and where there isn’t. For this particular microwave, Saturn-shaped objects will cook evenly.
Obviously what is happening is that there are two hotspots in this microwave: one in the center, and one offset from center which traces out a circle thanks to the rotating plate in the bottom.
We have access to four other microwave ovens. Are they all this bad? Continue reading Microwave Oven Diagnostics with Indian Snack Food

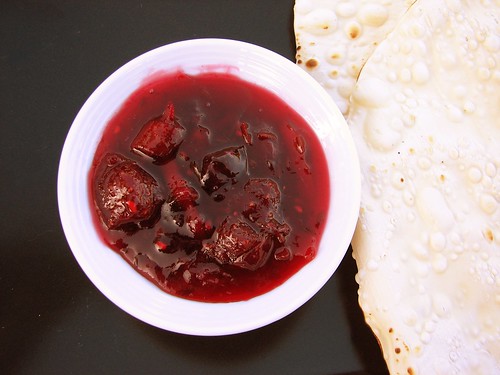
This sweet and spicy fruit spread takes advantage of an overabundance of berries and takes the flavor beyond basic jams and jellies. It’s related to our Plum Chutney and our Lemon Marmalade, perfect for toast, papadums, sandwiches, or whatever needs a little zing of flavor.
A guest project by Dan Newman, contributing Evil Mad Scientist.

For my Eggbot plotting, I’ve had two seemingly exclusive goals: to execute
designs with food safe inks, and to use pens capable of producing fine, crisp
lines. Now, thanks to Lenore’s recent investigation of food safe markers combined with a simple five minute pen modification, it’s possible to achieve both goals with the same pen. Yes, I can have my eggs and eat them too!
Continue reading How to make precision fine line edible ink pens
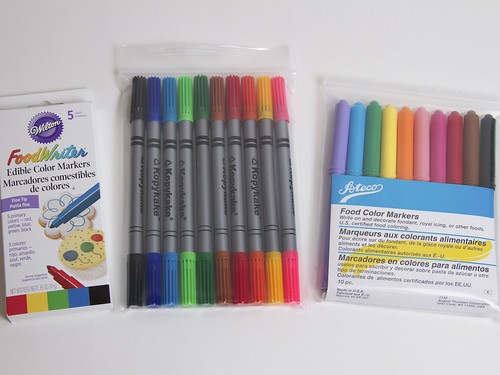
We have, at a number of different times, come across situations where it was desirable to use a food safe marker. One example is our custom message hearts project, another is in the course of making circuitry snacks. The topic came up again recently in discussions of Dan Newman’s Nutrition Information and Omelet Recipe eggs, where commenters were debating whether or not one should eat an egg after it has been written on.
There are three types of food safe markers readily available in the US. We tested all three in an Eggbot and just for kicks, by hand on a bit of rolled out fondant.
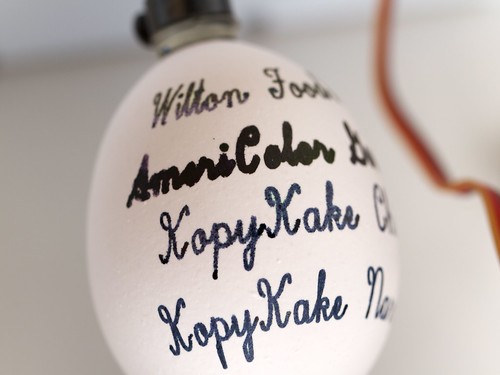
The primary differences between the markers were in the shades of the red and black, the ink flow rates, and the texture and shape of the nibs. Colors like blue, green and yellow didn’t show significant differences, although it should be noted that the blues in all cases (no matter what color the plastic was) were closer to a sky blue.

A guest project by Rich Faulhaber, contributing Evil Mad Scientist.
“Infusing unsuspecting whole fruit with gaseous CO2 in the entire Tri-State Area!”
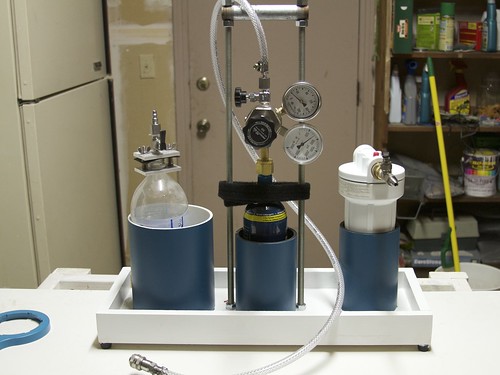
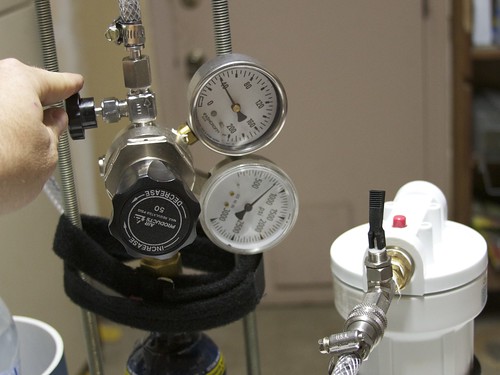
In an effort to make fruit fun for the kids, I built a carbon dioxide injector from parts in my garage with the purpose of carbonating whole fruit! With a common house water filter housing, a 16 Oz paintball CO2 canister, an old gas regulator, and some miscellaneous valves and fittings, I was able to bring this fizz fruit apparatus to life, and the kids love the results.
The principle
Carbon dioxide dissolves well in water, hence the reason you find it as the source of fizz in all your favorite soda drinks. When you open your soda and let it sit out on the counter you will find that after some period of time the soda loses its fizz and becomes “flat.” The rate at which the drink loses its fizz depends on pressure, temperature and the surface area of the liquid and the environment. Skipping the thermodynamics lecture, let me just tell you that the process works in reverse as well. To reverse this process, one needs only to have a high pressure CO2 environment, a medium to infuse (i.e., the fruit) and enough time to let the gas diffuse across the fruit skin and dissolve into the water inside. Refrigerating the fruit helps tremendously in the process as well.
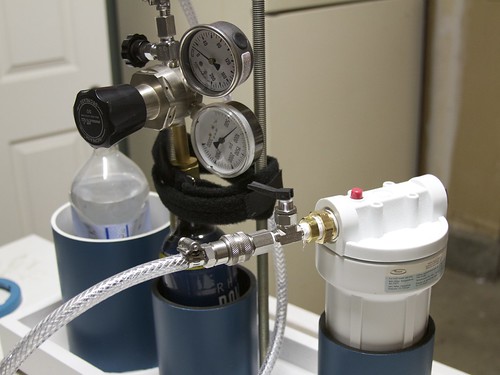
Parts list
This type of water filter housing is designed to withstand water pressures in excess of 100 psi, and it comes with two ports and an o-ring seal. These can be bought for about ten dollars at Lowes or Home Depot. Its ports are standard 3/4-inch type. Use Teflon tape (plumbers tape) on all the threads. Thread in a plug on one side and a valve on the other. I used a toggle valve with a quick disconnect to make everything easier. The hose can by any standard type rated for at least 100 psi. Small bundles are available in the plumbing section of your hardware store.
For gas handling I used an old single stage regulator. These can be quite expensive new but often times you can find deals at garage sales or in surplus stores. You don’t need anything fancy, just something to step down the pressure to something manageable– well below 100 psi. My CO2 source is a standard-issue paintball cylinder.
Procedure:
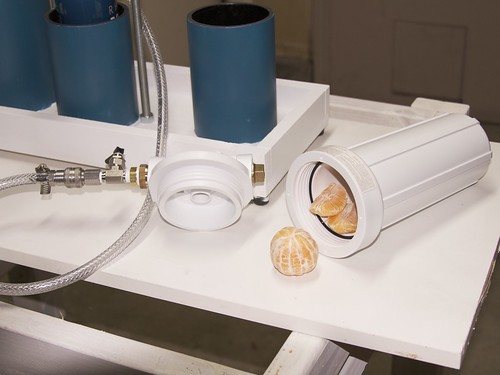
And of course, the kids love the “poppy fizz” inside the fizzy fruit.
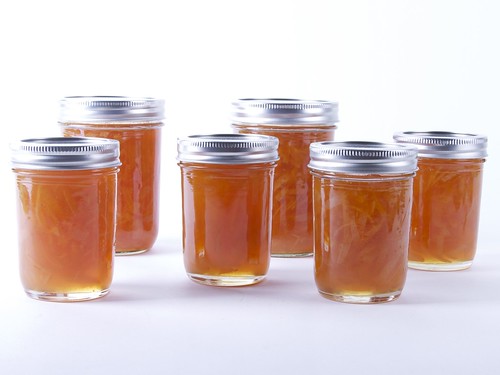
It’s lemon season again, and that means more marmalade!
Last year we showed how incredibly easy it is to make a simple marmalade. That kind was more of the bitter, opaque variety–which might be your favorite–but here’s how to take that to the next step and make a light and sweet marmalade.
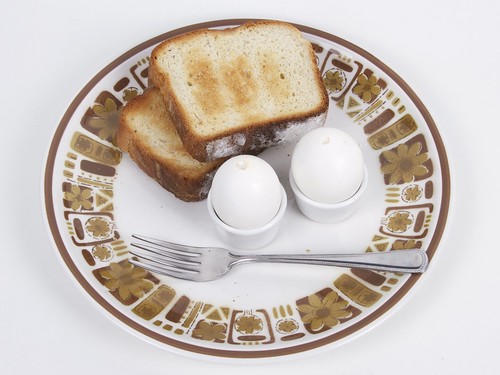
While it may not be possible to make omelettes without breaking eggs, it turns out that you actually can get pretty close.
In what follows, we demonstrate some methods of making omelettes inside of eggshells. Perhaps a culinary equivalent of the ship in a bottle. Continue reading Making omelettes inside of eggshells