Today we have an update on our Peggy 2.0 Light Emitting Pegboard project, with (1) a new and improved version of the Peggy2 Arduino library, (2) links to several awesome examples of Peggy hacks– including a full-motion video hack, and (3) a new GUI application example that lets you display an image on the Peggy without writing a single line of code.
Continue reading The Peggy Strikes Back
Category Archives: Engineering
20 millicenturies of Evil Mad Scientist Laboratories
Happy birthday to us! Evil Mad Scientist Laboratories is now two years of age. Collected below is a “Best of Evil Mad Scientist” for the past year: Some of our favorite projects that we’ve published over the last twelve months. Here’s to the next year!
Quick projects:
Rubberbands made from old bicycle innertubes.
Light tent made from a lampshade.
Spool spinner from an old fan.
The $1.00 C to D adapter
Electronics projects
How to make a Joule Thief from Make: Weekend Projects.
How to make a dark-detecting LED night light.
The Great Internet Migratory Box of Electronic Junk
How to make a Sawed-off USB Key
AVR microcontroller projects
Using an ADXL330 accelerometer with an AVR microcontroller
Kit Projects
Crafty Projects
Food Hacking
CandyFab
Printing complex shapes: Sugar Chain
Candyfab improvements: higher resolution and edible output
Papercraft:
Rotary Fraction Adding Machine
Observations & silly projects:
Lego Projects:
Forbidden Lego review & build
Reviews:
Lee Valley & Veritas Catalog Review
Teardowns:
Easy high-power LED blinking circuit
Often times when people get started in electronics, they want to blink LEDs. This is this a great idea, and we really like blinking LEDs, so we’re happy to help. In the last year or two there’s also a growing chorus of people that want to drive high powered LEDs. That’s not always as easy, but it can be done.
Now by the time that you start talking about blinking the high power LEDs– you shouldn’t be surprised if people start whipping out the heavy artillery: 555 timer chips, transistors, boost converters, microcontrollers, solid state relays, and/or dedicated LED driver chips. While each of those does have its place, sometimes it’s nice to have a simpler and much less expensive alternative.
Here we describe what is possibly the simplest and cheapest circuit for driving and blinking high-power LEDs. The secret ingredient? Our good old friend the blinking incandescent light bulb.
Epic take-apart: HP Color LaserJet 2600n
On the bench today: an HP Color LaserJet 2600n, a modern compact color laser printer.
This printer is a curious beast. To an end user, how it works is pretty straightforward– you plug in an ethernet or USB cable and install the driver. But it’s really a technological marvel– a remarkably compact and precise “black box” that wields lasers, high voltage, motors, heaters, sensors, gears, and esoteric electromagnetic properties of specially formulated powders to produce photorealistic images on a sheet of paper.
From an economic perspective, it’s even more of a mystery. Brand new printers like this one are often on sale for about $300, complete with a set of full toner cartridges. You can also buy a set of replacement toner cartridges for it, for about $330. Thus from a crude economic perspective (that is, ignoring the extreme environmental irresponsibility of the remainder of this thought) it could possibly make more sense to just go ahead and buy a new printer when you run out of ink. Certainly, loss-leader printers have been the standard for some time in low end inkjets– is that what’s going on here, only at a higher scale? Maybe, but it’s not an open-and-shut case: the initial set of toner cartridges will last for years for infrequent home users, so it’s hard to imagine that HP would make money on every sale if they had to rely on many cartridges to be sold for every printer.
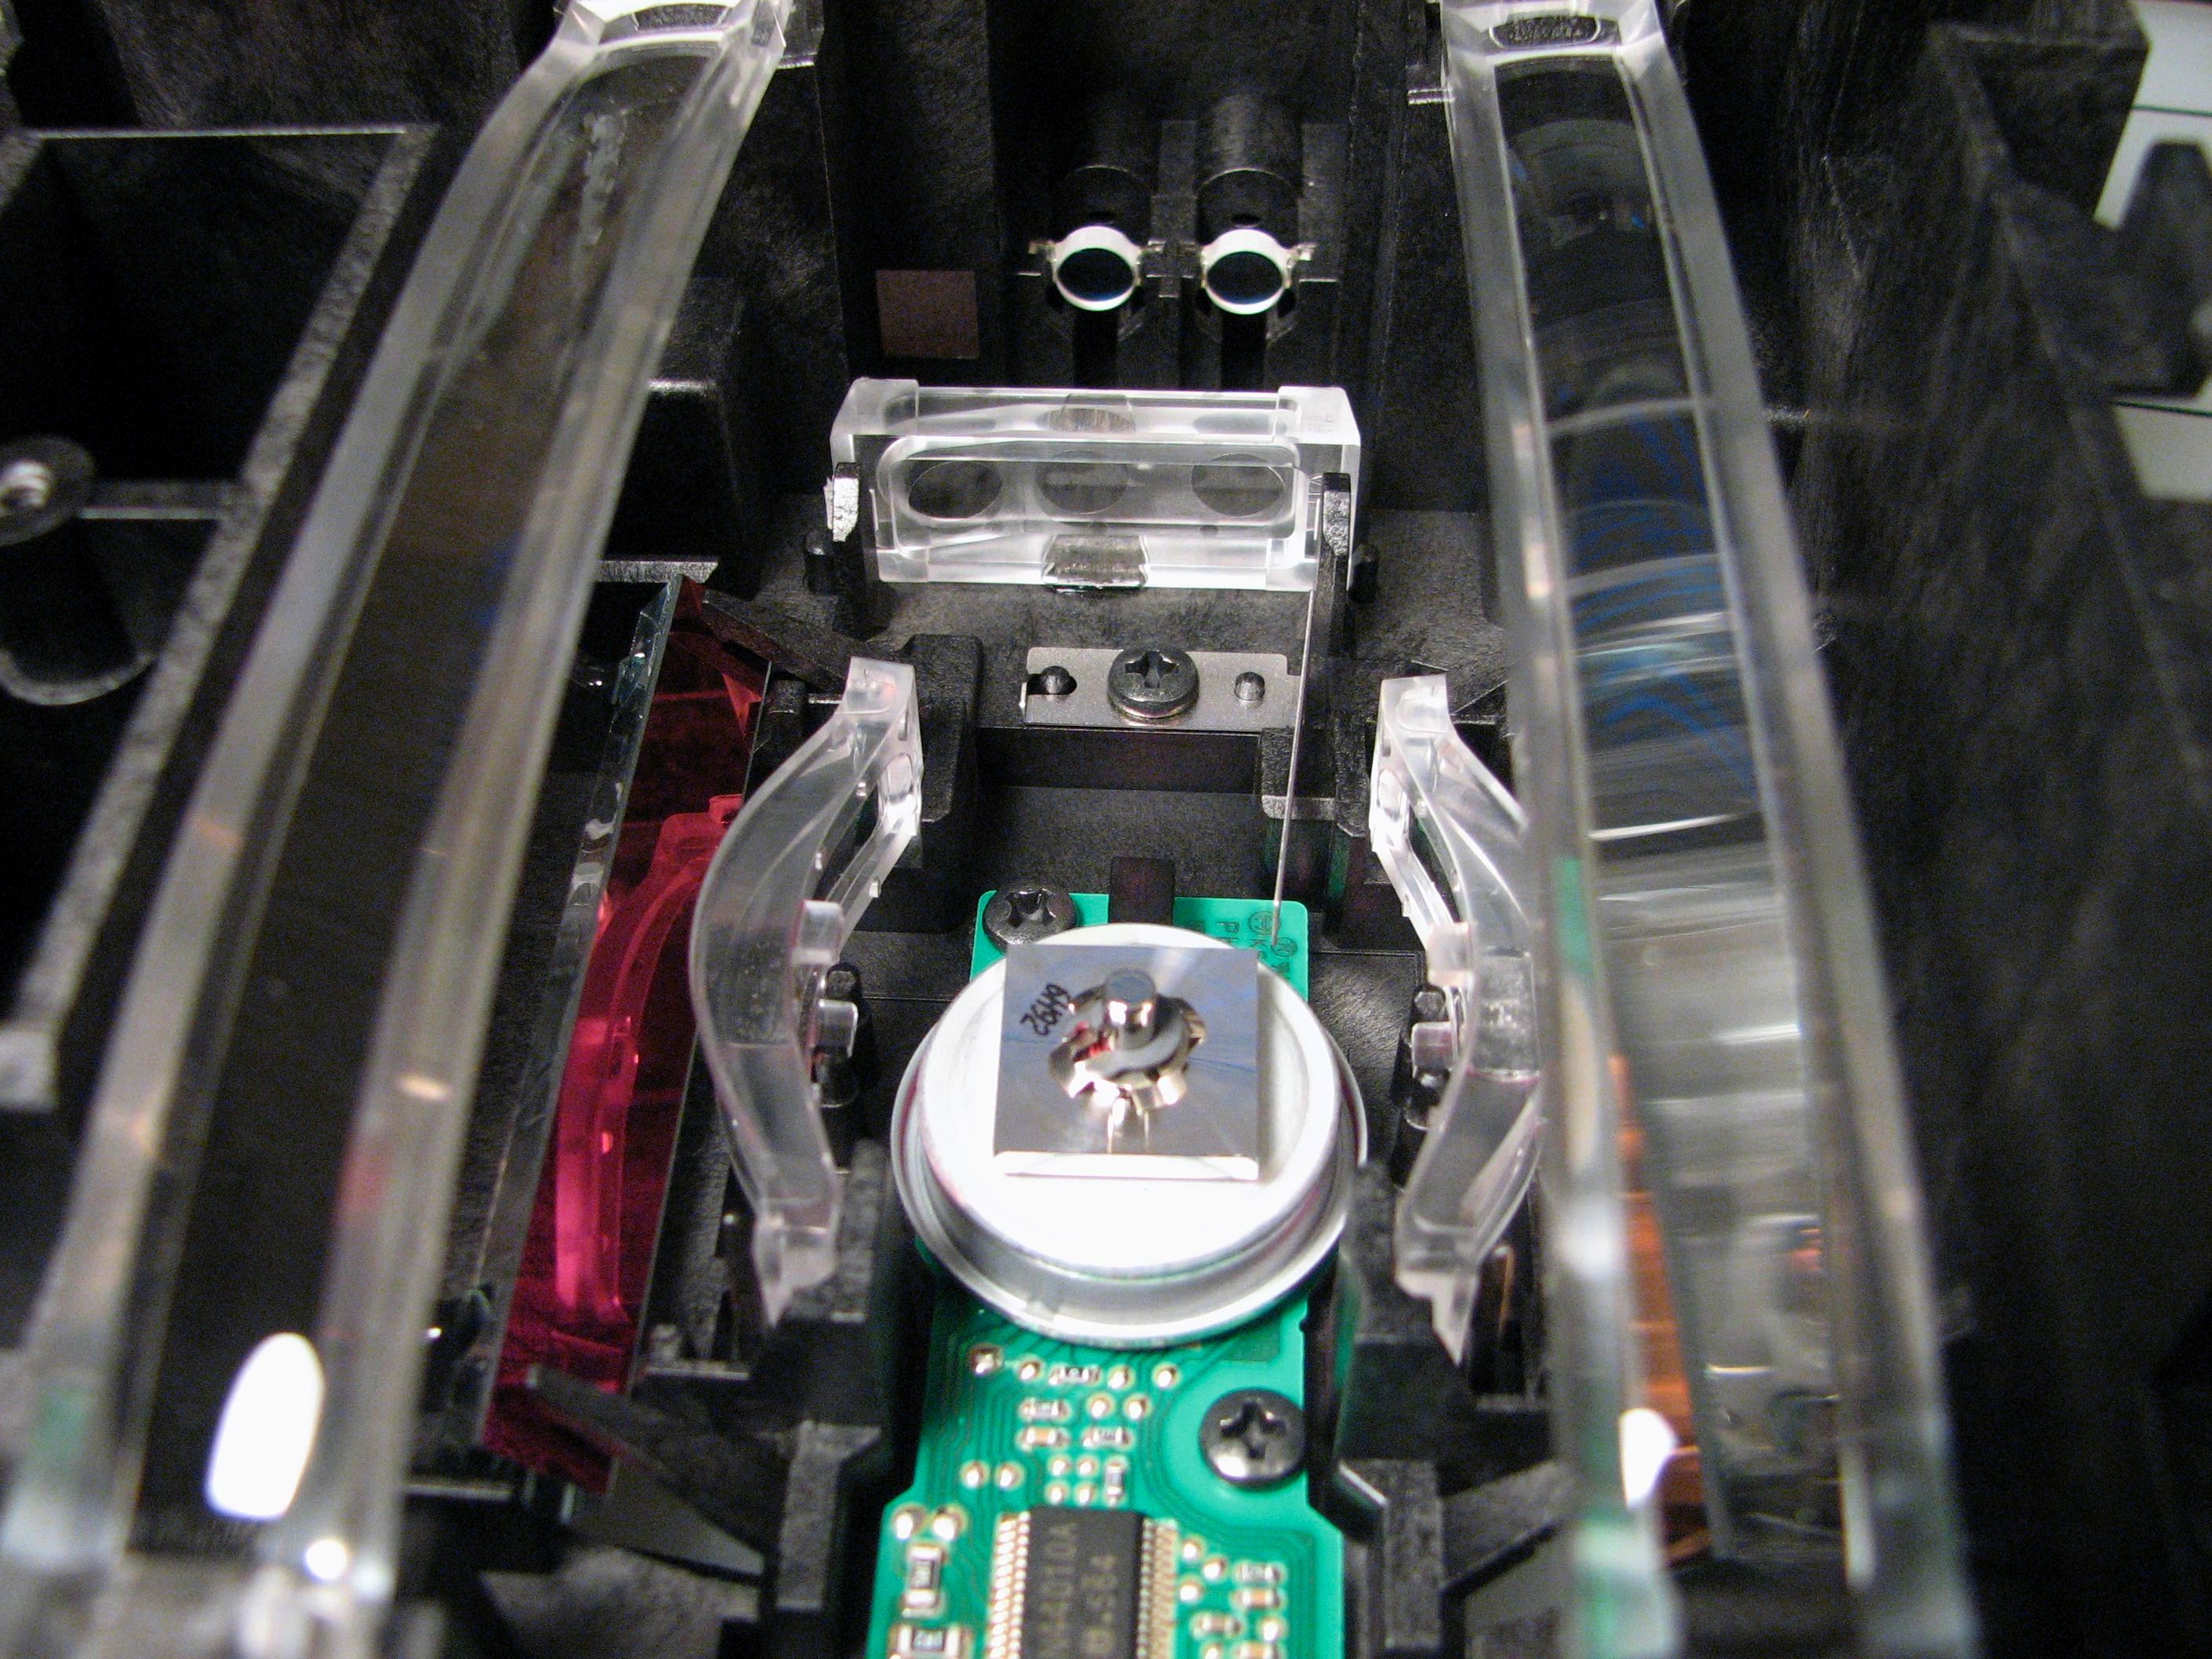
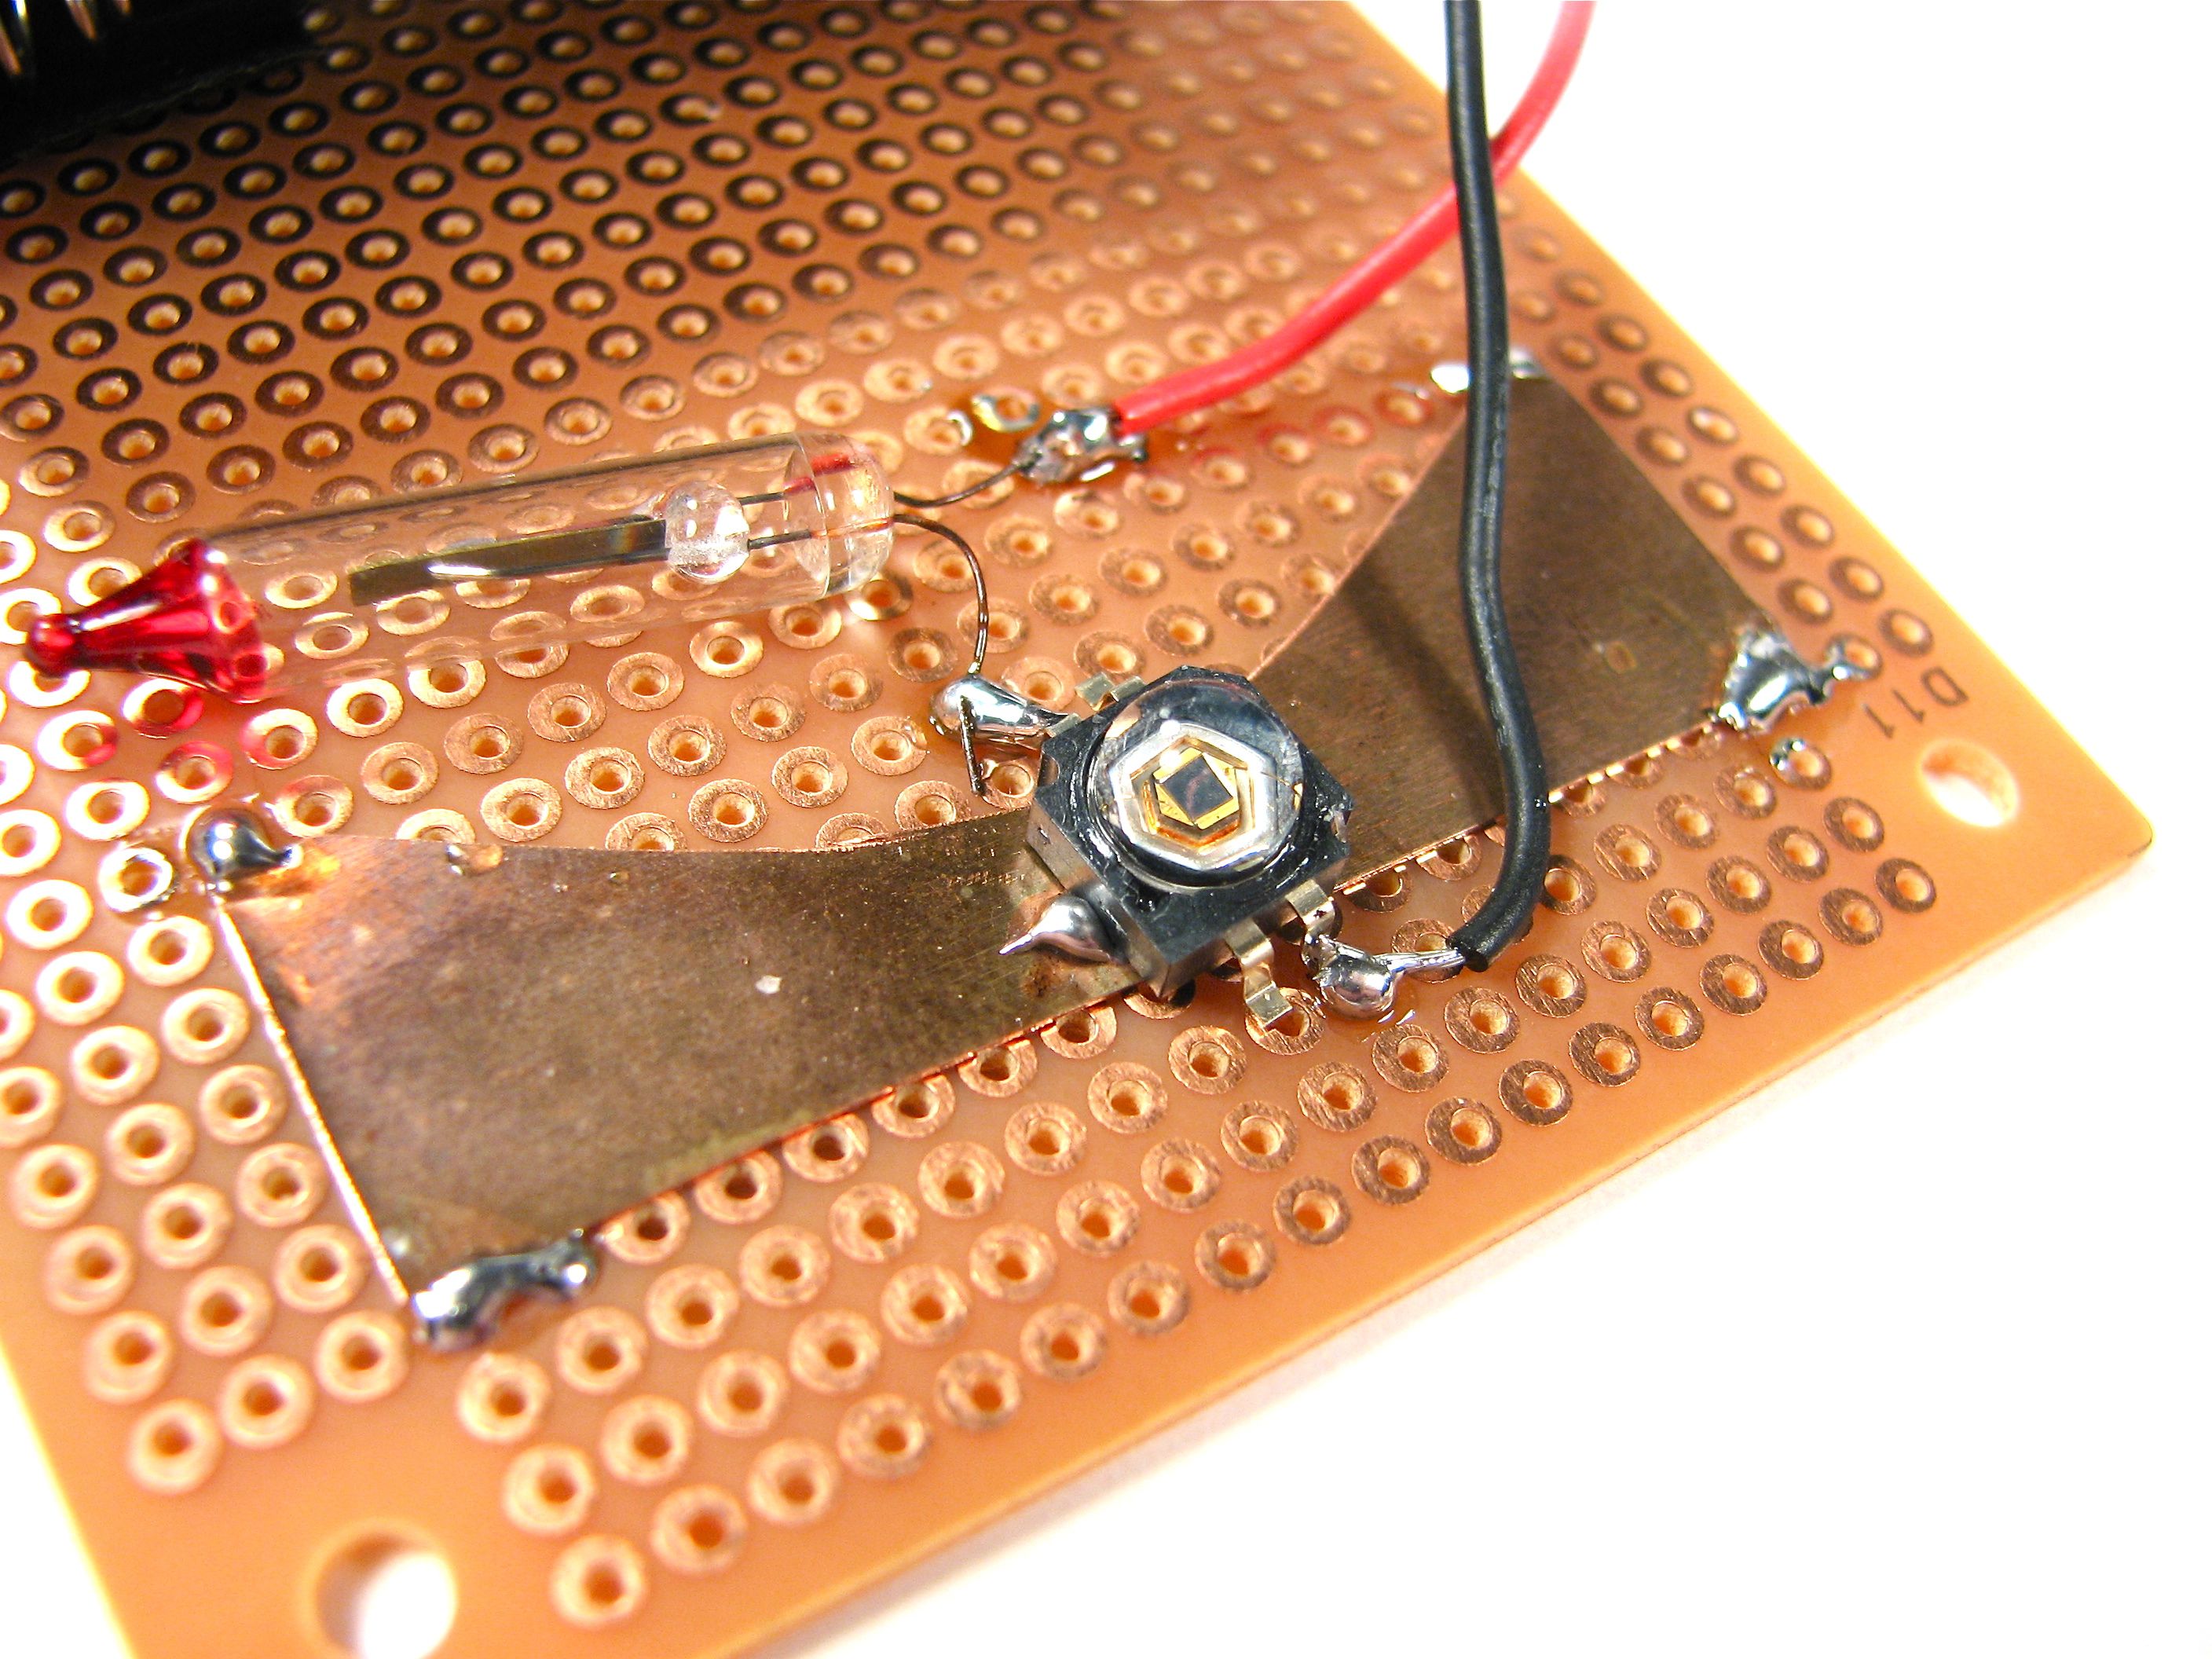
The printer on the bench today has served us well, but its time has finally come. In taking it apart, we’ll take a look at the design and see what interesting components are inside that might be reusable for other projects. (Hint: lots.) We’ll also see some of the very interesting guts in much more detail than your average teardown. We set out to make a photo essay of this, but at well over 200 photos (exchanged at the standard rate) this actually turns out to be less of an essay than an epic novel.
Continue reading Epic take-apart: HP Color LaserJet 2600n
Peggy version 2.0
Today we’re releasing an update to our “Peggy” open-source LED Pegboard project. Peggy version 2 has been redesigned from the ground up. And it looks… almost exactly the same. The changes under the hood are substantial, though, and we think that it’s a big improvement in many ways.
First and foremost, Peggy 2.0 still does the same darn thing: it provides efficient power to a 25 x 25 array of LED locations. Peggy is designed to take some of the sting, complexity, and mess out of playing with LEDs. It’s a versatile and powerful light-emitting pegboard that lets you efficiently drive hundreds of LEDs in whatever configuration you like, without so much as calculating a single load resistor. You can install anywhere from one to 625 LEDs, and Peggy will light them up for you.
Peggy can optionally be reprogrammed to do much more, of course. The biggest change is that the Peggy 2.0 hardware now supports simple animation capability with individually addressable LED locations. Besides the microcontroller, there are now four support chips that help to drive the rows and columns of the display. Now, we’re not talking live video feeds or long movies here (speed and memory considerations will spoil that party), but you might be surprised how much you can do with a little AVR microcontroller.
The second improvement has to do with the programming interfaces. As before, Peggy supports programming through a regular AVR ISP (in-system programming) connection, such as the USBtinyISP. However Peggy 2.0 is now also Arduino compatible: it supports programming through a USB-TTL cable, using the popular Arduino software environment. (This is the same programming arrangement that you’ll find on some of the popular Arduino-compatible boards such as the Boarduino and Bare Bones Boards.)
Continue reading Peggy version 2.0
Maker Faire Update
We’re having a great time at Maker Faire! We’ve been pretty darned swamped, but did have a little time to get a few pictures. Some of them are in my flickr set, like the one above from early this morning at our display area. We were lucky to have John Maushammer, the maker of the Pong Watch, hang out with us.
One highlight of the day was when the editor of Make: Japan dropped by and brought us a copy with the CandyFab article in it! We also got copies of the brand new Maker’s notebook to play with. There are lots of Maker Faire pictures up on flickr now– check ’em out!.
Evil Mad Scientist Laboratories and CandyFab at MakerFaire!
Attention SF Bay Area folks: Evil Mad Scientist Laboratories and CandyFab are coming to Maker Faire! Space-time coordinates: San Mateo, CA, May 3-4, 2008.
We’ll be there in force with (amongst other things) a tabletop BristleBot Arena and great progress to show off on a lot of our upcoming projects: Next generation interactive LED coffee table panels, the debut of Peggy 2.0, and the brand new design for the CandyFab 5000, all of which we’ll be writing much more about this summer. Find us in the south hall, past the Tesla coils.
Great things are coming to Maker Faire, and you can come visit, get a sneak preview and chat.
- Just a few choice picks:
- Learn how to hack thingswith microcontrollers
- Learn about Smart LEDs
- Chocolate
- Art Golf
- The Laser Harp
- The Pong Watch, now with Asteroids!!!
- Restored Pinball Machines
- Orb Swarm
- The Art of Motion Control
- The Heather Gold Show
- Nixie Clocks
- Bleep Labs
- MacGyver’s dad, Lee Zlotoff
- Mod your brand new Maker’s Notebooks
- Lego Art Car
- NYC ResistorWorkshop
- Lee Krasnow and his amazing puzzles
- The Incredible Marble Machine!
- BlinkyBugs, and
- The World’s Biggest Pez DispenserYeah!
We’ll sure hope to see you there. Advance tickets are on sale at a discount through Friday April 25.
Classic Phone Mod: Wireless Headset and Handset Lifter
A detailed hacking how-to guide: Modify a classic 80’s desk phone for use with a modern wireless handset and build in an integrated handset lifter.
[This is a guest project contributed by HiTek LoLife; all-around great guy, friend, neighbor, and reader of Evil Mad Scientist Laboratories.
A small bit of his handiwork has actually made an appearance here before and his fine stock ’94 Toyota shortbed has been known to transport the CandyFab 4000 from time to time.
Big thanks for submitting this great project and special bonus points for his fine graphic that reminds you exactly where your world is being delivered! –Windell ]
Continue reading Classic Phone Mod: Wireless Headset and Handset Lifter
Paper Circuitry at Home: Electric Origami
This little LED-lit cube is much more than just a paper lantern: It’s a translucent and flexible thin-film electronic circuit that hooks up a battery to an LED, limber enough to be folded into an origami box. And the coolest thing about circuits like these? You can make them at home.
Continue reading Paper Circuitry at Home: Electric Origami
On the Bench: LED Traffic Signal Light
Many cities are switching to LEDs for their traffic signals, and is it any wonder? The energy savings are tremendous, never mind not having to change burnt-out bulbs all the time. Luckily for us, LED traffic signals are finally ubiquitous enough to show up at the surplus stores. Our local junk shop had a couple of big barrels of LED stoplights and turn signals of various sizes. We picked one out that still had the connector attached for screwing it into a regular light bulb socket.
Of course, after we made sure it worked, we promptly took it apart. It is a fabulous object, designed to be used, abused, taken apart, and maybe even fixed, though there is not much to go wrong. Click through for more gory photos and delightful design details.